
Welcome to the first installment of the Soumak Pouch Weave Along!
I hope that you are going to have a wonderful time, weaving one of a kind pouches for your business cards and cellphone, or using it in any way that appeals to you.
If you would like to join in the conversation, you can leave comments here on this blog,
as well as on the Mirrix facebook page LINK and the Mirrix Ravelry page: LINK
")
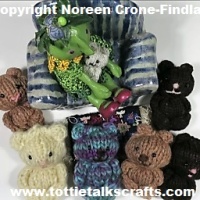
copyright Noreen Crone-Findlay
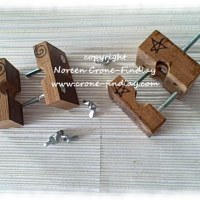
I will be demonstrating on the Mirrix 12 inch, 8 inch and 5 inch Mini, which is a totally magical little loom.
Because of the small (but oh so perfect) size of the Mini, I have had to come up with some fairly ‘outside the box’ ways of working with it for the weave along- which certainly add to the functionality of this delightful little loom!
Several people have asked me if they can participate in the Weave Along, even though they don’t have Mirrix looms.
Yes, you can- in the first video, I have shown how to attach the cartoon to a Cricket Rigid Heddle loom.
If you have a tapestry loom that won’t accept the extra rods for the ‘no warp ends’ technique, then just warp it up in the normal way.
You won’t have the ‘no warp ends’ technique that the weave along is based on, but you can just finish your ends in the way you usually do.
HOW WILL THE WEAVE ALONG WORK?
I have made six video tutorials and one slide show (so far) for the Weave Along.
I will be posting installments of the Weave Along every Sunday and Wednesday from September 2, 2012 to September 23, 2012.
BUT… you don’t have to keep up with this pace…. you can follow along at your own speed, as the blog posts are going to be here for as long as Tottie still Talks Crafts! 😀
I have covered a TON of information, and some of the videos are very long.
To make them as user friendly as possible, I have made chapter headings for each segment of the videos.
This means that you can stop the video and move back or forward to review anything you want to, at any time in the video.
Here’s what the chapter headings look like:
")
copyright Noreen Crone-Findlay
So, without further ado, lets get started!
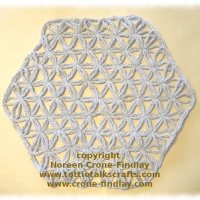
Here is the pattern for the Soumak Pouch:

copyright Noreen Crone-Findlay
Print the pattern so that it is 3 inches wide and 10 inches long.
Print several copies.
One of the Weave Along participants, Penny from Boulder, Co, made a pdf of the pattern, and Elena posted it to the Mirrix site.
Here’s the link to that, if you are having trouble figuring out how to print a copy of the pattern: LINK
And, now, for the video tutorial: (hope you enjoy it!)


Pingback: Mirrix Loom Weave Along Soumak Pouch- All the links | Tottie Talks Crafts Blog
Pingback: Soumak Pouch Weave Along Part 2-Design Notes | Tottie Talks Crafts Blog
I want to increase the size of the soumak pouch to 4″ wide after removing from mirrix loom. I know you added a black and white border that would help do this. If I use S hooks and washers how do I figure out how many to put on the bars top and bottom to increase the width. I ordered the kit and will be using the Navajo warping material. Do I need to double this the S hooks?
LikeLike
Hi Victoria
There are 8 ends per inch, so when you want to make the pouch 1 inch wider, you will need to add 8 more warp ends. This means that you will need to add 2 more ‘s’ hooks to each side of the pouch, at both the top and the bottom.
When you are drawing your cartoon, simply add 1/2 inch at each side. Happy weaving!
🙂 Noreen
LikeLike
Pingback: Soumak Pouch Weave Along #8 Part Two: Design Notes |
Pingback: Mirrix Looms Weave Along #8 Soumak Pouch-ALL the links |