Tag Archives: how to

How to weave inkle bands on the Mirrix loom part two

This is the second stage of the video tutorials that I made on how to weave inkle bands on the Mirrix loom.

copyright Noreen Crone-Findlay

There are two bands on the loom, because in this video, I am working on the 16 inch loom.

When you work on the 8 inch loom, it’s okay to just weave one band at a time, as the warping bar doesn’t flop around.

But, on the 16 inch loom, you do need to either warp up 2 bands, or secure the other end of the warping bar with a cord so it will stay perfectly horizontal.

I tried weaving 3 bands at once on the 16 inch loom, and didn’t like it, as the center knobs on the shedding device got in the way.

Two bands are just great though.

AND…. if you want to weave longer bands, and have either a 12 inch or 16 inch Mirrix loom then the loom extenders will be your friend 🙂


I use a crochet hook and a weaving stick to make the heddling process go quick like a bunny.

Here’s the video tutorial:

Start by placing a piece of cardboard between the layers at the front of the loom and the back so you can’t see the warp strands at the back of the loom.

copyright Noreen Crone-Findlay

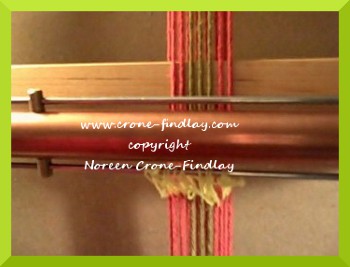
Place the shed changing device into the brackets.  Unscrew the little knob that holds the heddle rod in place.

Pull the heddle rod back so it’s about half way along the warp strands.

copyright Noreen Crone-Findlay

Place the heddles onto the fingers of your non dominant hand.

copyright Noreen Crone-Findlay

Look down at the warp strands that are at the lower edge of the front of the loom.

There’s a gap between the strands that have gone in front of the warping bar and behind it.

Slip your fingers into the gap and scoot them up to the shedding device.

Slide a shed stick into the gap.

Voila! (which is how ‘walla’ is really spelled 🙂  )

You have shed one ready to heddle!

copyright Noreen Crone-Findlay

Now, slip the crochet hook behind the first warp strand, pluck a heddle off your fingers, and pull it forward.

Catch the other end of the heddle loop and place both loops on the heddle rod.

Go slowly, and be sure that both ends of the heddle loop stay politely on the heddle rod.

copyright Noreen Crone-Findlay

When you have all of the warp strands heddled, slide the heddle bar into position in the knobs, and tighten the lock nut.

Repeat the heddling process on the second set of warp strands for your other band.

copyright Noreen Crone-Findlay

Push the first set of heddles down as you rotate the shedding device.

copyright Noreen Crone-Findlay

Leave the shed stick in place, and use the crochet hook to pick up the warp strands for the other shed.

Take the warp strand from the back to the right of the one in front, and onto the hook,

take the hook over the front strand, and pick up the next strand and carry on across.

copyright Noreen Crone-Findlay

Slide the weaving stick out of the first shed, and slip it along the crochet hook to transfer the warp strands from the crochet hook to the weaving stick.

copyright Noreen Crone-Findlay

Turn the weaving stick on it’s side, and then pick up the warp strands one at a time and capture them with the heddles just as you did for the first set of warp strands.

copyright Noreen Crone-Findlay

Repeat this process for the second band.

Check your heddles carefully to make sure that they are opening the sheds properly.

Ahhhhh! a warped loom is a thing of beauty!

copyright Noreen Crone-Findlay

Attach the handle to the shedding device and adjust the tension by turning the thumbscrews.

Open the first shed, and insert a craft stick, then open the second shed and insert another craft stick.

Squish the warp strands together to establish the width of your band.

copyright Noreen Crone-Findlay

Weave one row, leaving a 6 inch/15 cm tail.

Change sheds, and weave the next row.

Pull up firmly on the tail end and weave it through the same shed.

Repeat several times until the tail end is woven in, and the band is established.

Next video: The fun part! Wheeeeeee…. weaving…… 🙂


Leave a comment

Filed under Loom & looms & small loom weaving, Mirrix loom, tutorial & how to, video tutorial, weaving & handwoven

How to make Edward Bear’s foot

A lady on Ravelry is having trouble making Edward Bear’s foot, so I am going to show some step by steps on how to do it:

copyright Noreen Crone-Findlay

Here is Edward Bear with his head and one leg stuffed.

His foot is turned up and the stitching is started along one side of the foot.

copyright Noreen Crone-Findlay

Here’s a closeup of measuring the foot- Stitch the edges together around the fold to stitch the foot to the leg- around the sides of the foot and across the top of the foot.

copyright Noreen Crone-Findlay

Hope this helps! 😀

7 Comments

Filed under knitting, tutorial & how to

4 panel blanket woven on the triangle loom

I love geometry, and am intrigued by sacred geometry. I think that’s why I like working with looms that are different geometric shapes.

Last autumn, my nephew and his bride asked me to weave them a blanket as a wedding present.

Hmm- there were so many options on how to weave the blanket.

I settled on using my triangle loom that had recently arrived from Dewberry Ridge looms.  Link

I set it up to the 5 foot configuration and started weaving:

copyright Noreen Crone-Findlay

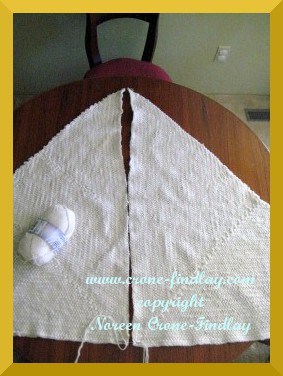
I decided that 4 triangles on the 5 foot configuration of the loom, stitched together with the hypotenuse of the triangles forming the outside edge of the blanket, would work best.

I wanted to try giving it a bit more texture and interest than just plain weave, so I went with Over 2/Under 2, and loved it.

copyright Noreen Crone-Findlay

The yarn is gorgeous Kertzer wool that has been discontinued. It took 12 balls of

Kertzer Rejuvenation, 100% wool, 100 gm/3.5 oz, 200 m/220 yds, color # 8006 to make the blanket.

I used  2 strands of yarn held together to weave the triangles for the blanket.

copyright Noreen Crone-Findlay

To stitch the 4 triangles together, I laid them on the dining room table and stitched 2 triangles together (remembering to have the hypotenuse on the outside, and not stitched), then stitched the other 2 triangles together.

Then, I stitched the long center seam together.

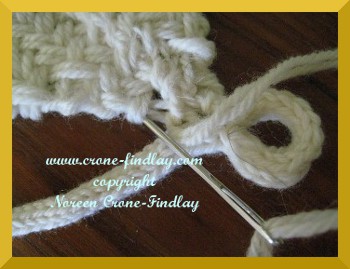
I used the ‘V’ or ‘Baseball’ stitch to do the stitching.

This video shows how to do it:

After I stitched the 4 triangles together,  I spool knitted about 21 feet of spool knitted cord for the outside edges.

I stitched it onto the blanket edges….

Here’s a video that shows how to do that:

copyright Noreen Crone-Findlay

I thought that loops at the corner would be pretty, so I added them

copyright Noreen Crone-Findlay

It was a crazy amount of work to make the blanket.

The weaving took 12 or 13 days of full days at the loom, and  the spool knitting, fulling, stitching etc added several more days.

So, this is NOT a quick and easy project.

copyright Noreen Crone-Findlay

I hope that my nephew and his bride like it, and if they don’t, I gave them my permission to give it away, so that someone else can enjoy it.

No point in having it fill up a cupboard and not be used, so hopefully, it is keeping someone warm and cozy!

copyright Noreen Crone-Findlay


23 Comments

Filed under knitting, Loom & looms & small loom weaving, spool knitter & spoolknitter & spool knitting & spool knitting, Triangle loom weaving, tutorial & how to, weaving & handwoven

Video tutorial for NOT chained finish for woven squares

My favorite method to weave on looms that have pegs or nails, like the Potholder loom, or  Lil Weaver looms from Dewberry Ridge (LINK), is to weave with the continuous Potholder loom weaving method.

Usually, when you weave a square on the potholder loom, or other small loom, using the potholder loom method, you will need to chain the edge to finish it.

BUT… that can really affect the finished size of tiny squares, when working on the little 2 or 3 1/2 or 4 inch size looms.

So! I have come up with a way of finishing the edges of the squares, while you weave them.  Voila! No need to chain the edge!

Why would anyone want to weave on such tiny looms?

Well… they are so portable, you can take them anywhere,

AND… because weaving miniatures is so much fun :o)

Wee-woven-monster-and-kitty (c) Norteen Crone-Findlay

The Wee Woven monster in the photo above was woven using the Kitty pattern from my book: WEAVAGARUMI LINK

You can see the difference in size- The Weavagarumi Kitty is woven on the potholder loom (also from Dewberry Ridge POTHOLDER LOOM link )

and the Wee Woven Monster is woven on the 2 inch Lil Weaver.  Fun!

Here’s the youtube video with the tutorial on how to make some ‘edge magic’!

2 Comments

Filed under Loom & looms & small loom weaving, potholder loom, tutorial & how to, weaving & handwoven

3 new video tutorials about spool knitting and potholder loom techniques

I took time away from blogging over the Christmas holidays, but I have been a busy bunny making video tutorials.

Here’s a video tutorial on how to stitch spool knitted cords to woven or other finished edges:

And, another how to on stitching things together- this time, it’s how to stitch potholder loom squares and motifs together

Here’s a video tutorial on how to spool knit  with the Martha Stewart loom:

https://www.youtube.com/watch?v=TWoYAs-L3yM

How to spool knit on your fingers:

 https://www.youtube.com/watch?v=r-nEfmge_Ygvi

And, there are lots more spool knitting video tutorials on my youtube channel: LINK

So there you have it Lotsa video tutorials…. hope they are helpful!

1 Comment

Filed under Loom & looms & small loom weaving, potholder loom, spool knitter & spoolknitter & spool knitting & spool knitting, tutorial & how to, weaving & handwoven

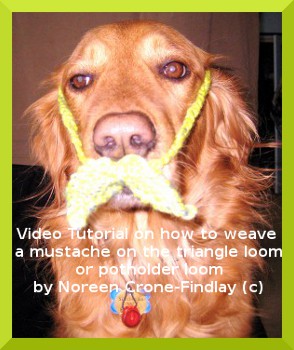
Video Tutorial on how to weave a mustache on the triangle loom or potholder loom by Noreen Crone-Findlay (c)

We all need a little bit of silliness once in awhile, right?

Video Tutorial on how to weave a mustache by Noreen Crone-Findlay (c)

I was weaving with my tiny 3 1/2 inch triangle loom from Dewberry Ridge Looms, LINK and I discovered that you can weave an oh so cute mustache with them….

So, my silly gift to you is a video tutorial on how to weave a mustache on a little triangle loom (or a slightly larger mustache on a potholder loom).

Our very good natured dog, who is used to modelling for my daughter in law and me, posed so prettily with one of the mustaches,

Video Tutorial on how to weave a mustache by Noreen Crone-Findlay (c)

And, so did my teddy bear….

Video Tutorial on how to weave a mustache by Noreen Crone-Findlay (c)

And, bless her heart, so did my darlin’ daughter in law, who spun the gorgeous Shetland wool that I used to make her mustache with.

Here’s the video on how to weave yourself an oh so stylish mustachio!

Happy Weaving, and have fun! 😀

Leave a comment

Filed under Loom & looms & small loom weaving, potholder loom, Triangle loom weaving, tutorial & how to

Video Tutorial of how to wind a center pull yarn ball on nostepinne

One of life’s great pleasures is to be found in mastering techniques that  may be simple, but take practice.

copyright Noreen Crone-Findlay

One of those very useful and satisfying skills is winding a center pull ball of yarn on the nostepinne.

I like to wind a ball of yarn on the nostepinne in 2 stages.

Here’s a little video that I made, showing how to wind lovely flat, stackable flat balls of yarn.

The nostepinne is contemplative and portable, and to be honest, I much prefer it to my ball winder.

Here’s the link to the video: LINK


18 Comments

Filed under tutorial & how to