All over the world, red is a color of celebration, so to celebrate all the ways we as humans enjoy the turning of the seasons and the connection to the Divine, Lily Doll has a new red Celebration dress.
The links on the Mirrix site to order the kit are:
I just noticed that the background screen has a white loop that looks like it’s part of the cape sticking out of Lily Doll’s ear. Sigh…. not at all. I could go and re-shoot the photo or I could tell you that I didn’t notice it until now, which is what I have opted to do instead of the sensible solution of re-shooting the photo. Ah well…. and, perhaps you didn’t notice, but now you have.
And, if you did notice and thought that I did something odd, well you were right… I placed Lily Doll in just the wrong spot. Haven’t you ever placed yourself or something in an odd place? It happens.
Mercy on us all!
I weave all the dolls and bears and toys and clothes for the Lily Doll Project on the 5 inch wide Mirrix Chloe loom, which I am madly in love with. It’s a wonderful little sturdy, delightfully adjustable little miracle of excellent design.
Yup. Love it and highly recommend it. I keep having ‘Aha’ and ‘Oh Wow’ moments with it.
My apologies to the 8 inch Chloe loom, which is also a lovely loom, but I am totally smitten by the 5 inch Chloe.
Yes, I am lucky enough to have both, but it is the 5 inch Chloe that is my ‘go to’ loom).
Once upon this time there is a darling 3 year old, (named Lily) who inspired me to create the Lily Doll Project- a year long celebration of delight, joy and creativity.
When Lily’s Mamma, Elena Kawachi, posted pics of little Miss Lily taking her first steps into the world of ballet, I couldn’t resist designing a tutu for Lily Doll, woven on the Mirrix Chloe loom.
And because ballerinas need to stay warm after class, I designed a wee shrug for Lily Doll, too. The kit for the shrug and tutu are available at LINK
The Shrug also looks great with the Pinafore Pocket Dress (kit also available on the Lily Doll page LINK)
Here’s to the joy of woven dolls and imagination! Hope you’ll join us in the delightful, healing art of dollmaking and make your own, unique version of Lily Doll and her friends! <3
I am designing a whole lot of really fun projects using the Mirrix Chloe Loom and they all are woven using Tabby weaving.
There are a few things that I do when weaving tabby on the Chloe loom that I wanted to share with people, so I have made a video about these tips.
Here’s the link to the video. Oh my…. I had a whalloping huge learning curve to build the video, as the program that I was using is no longer in existence…. sigh…. challenges!
I hope that these hints and tips and hacks are helpful!
Other things that are needed for the ‘Imagine’ banner:
Yarn: Less than an ounce of each of the following colors: white, grey, black, pale blue, brown, beige
Embroidery floss: 1 skein of navy or dark blue
2 small black ‘e’ beads for the eyes and needle and thread to sew them on
Scissors
cardboard
a plastic page protector
a ruler
transparent tape
felting needles,
6 rubber bands
paper
long straight pins
permanent felt tip pen
plastic or metal ring to hang the banner
1 Weaving Needle (5 1/2 inches or 6 inches long with a blunt tip)
1 Shed Stick: a second weaving needle or 6 inch Paddle style bamboo Cocktail Skewer or a short dpn knitting needle
1 craft needle (short metal tapestry needle approximately 2 3/4 inches long)
-1 crochet hook: 4.5 mm crochet hook works just fine
PART ONE:
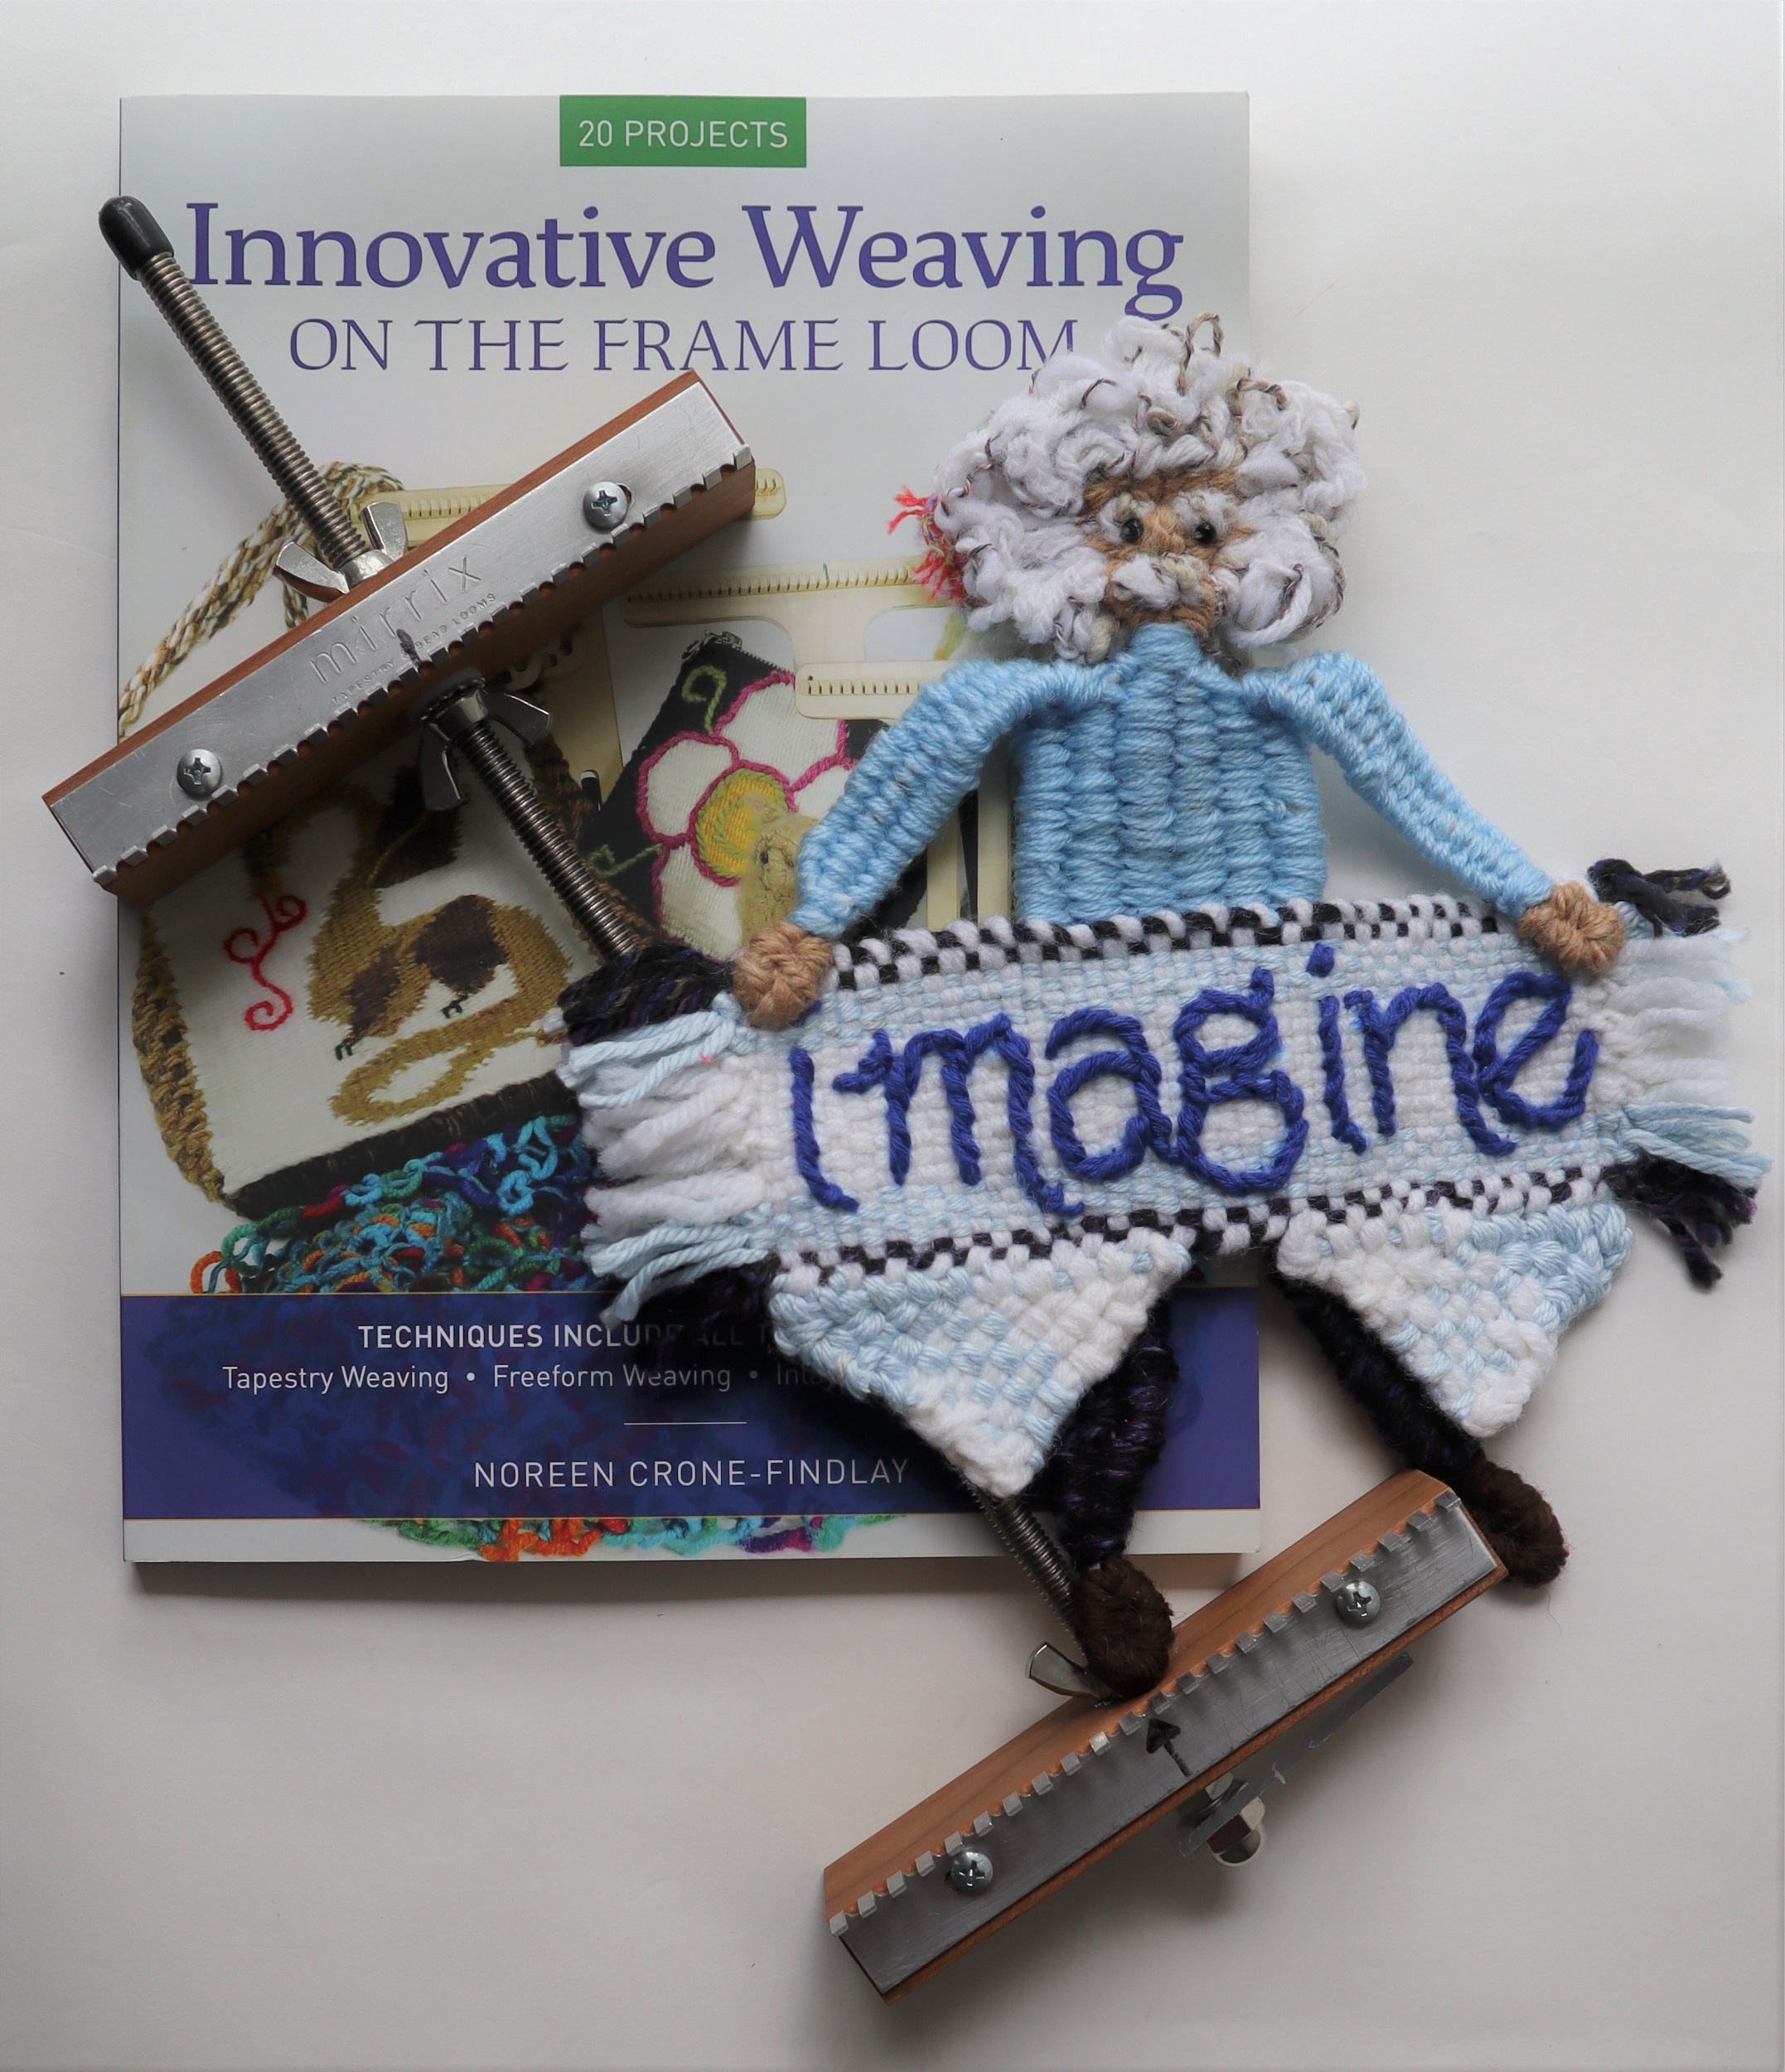
THE WOVEN AND EMBROIDERED NARROW BAND:
The narrow band in Albert Einstein’s hands is woven (with a couple of small modifications) following the instructions on page 171 of “Innovative Weaving on the Frame Loom” for the Alpaca Blanket. While it’s still on the loom, the word, ‘Imagine’, is embroidered using a simple running stitch.
INSTRUCTIONS:
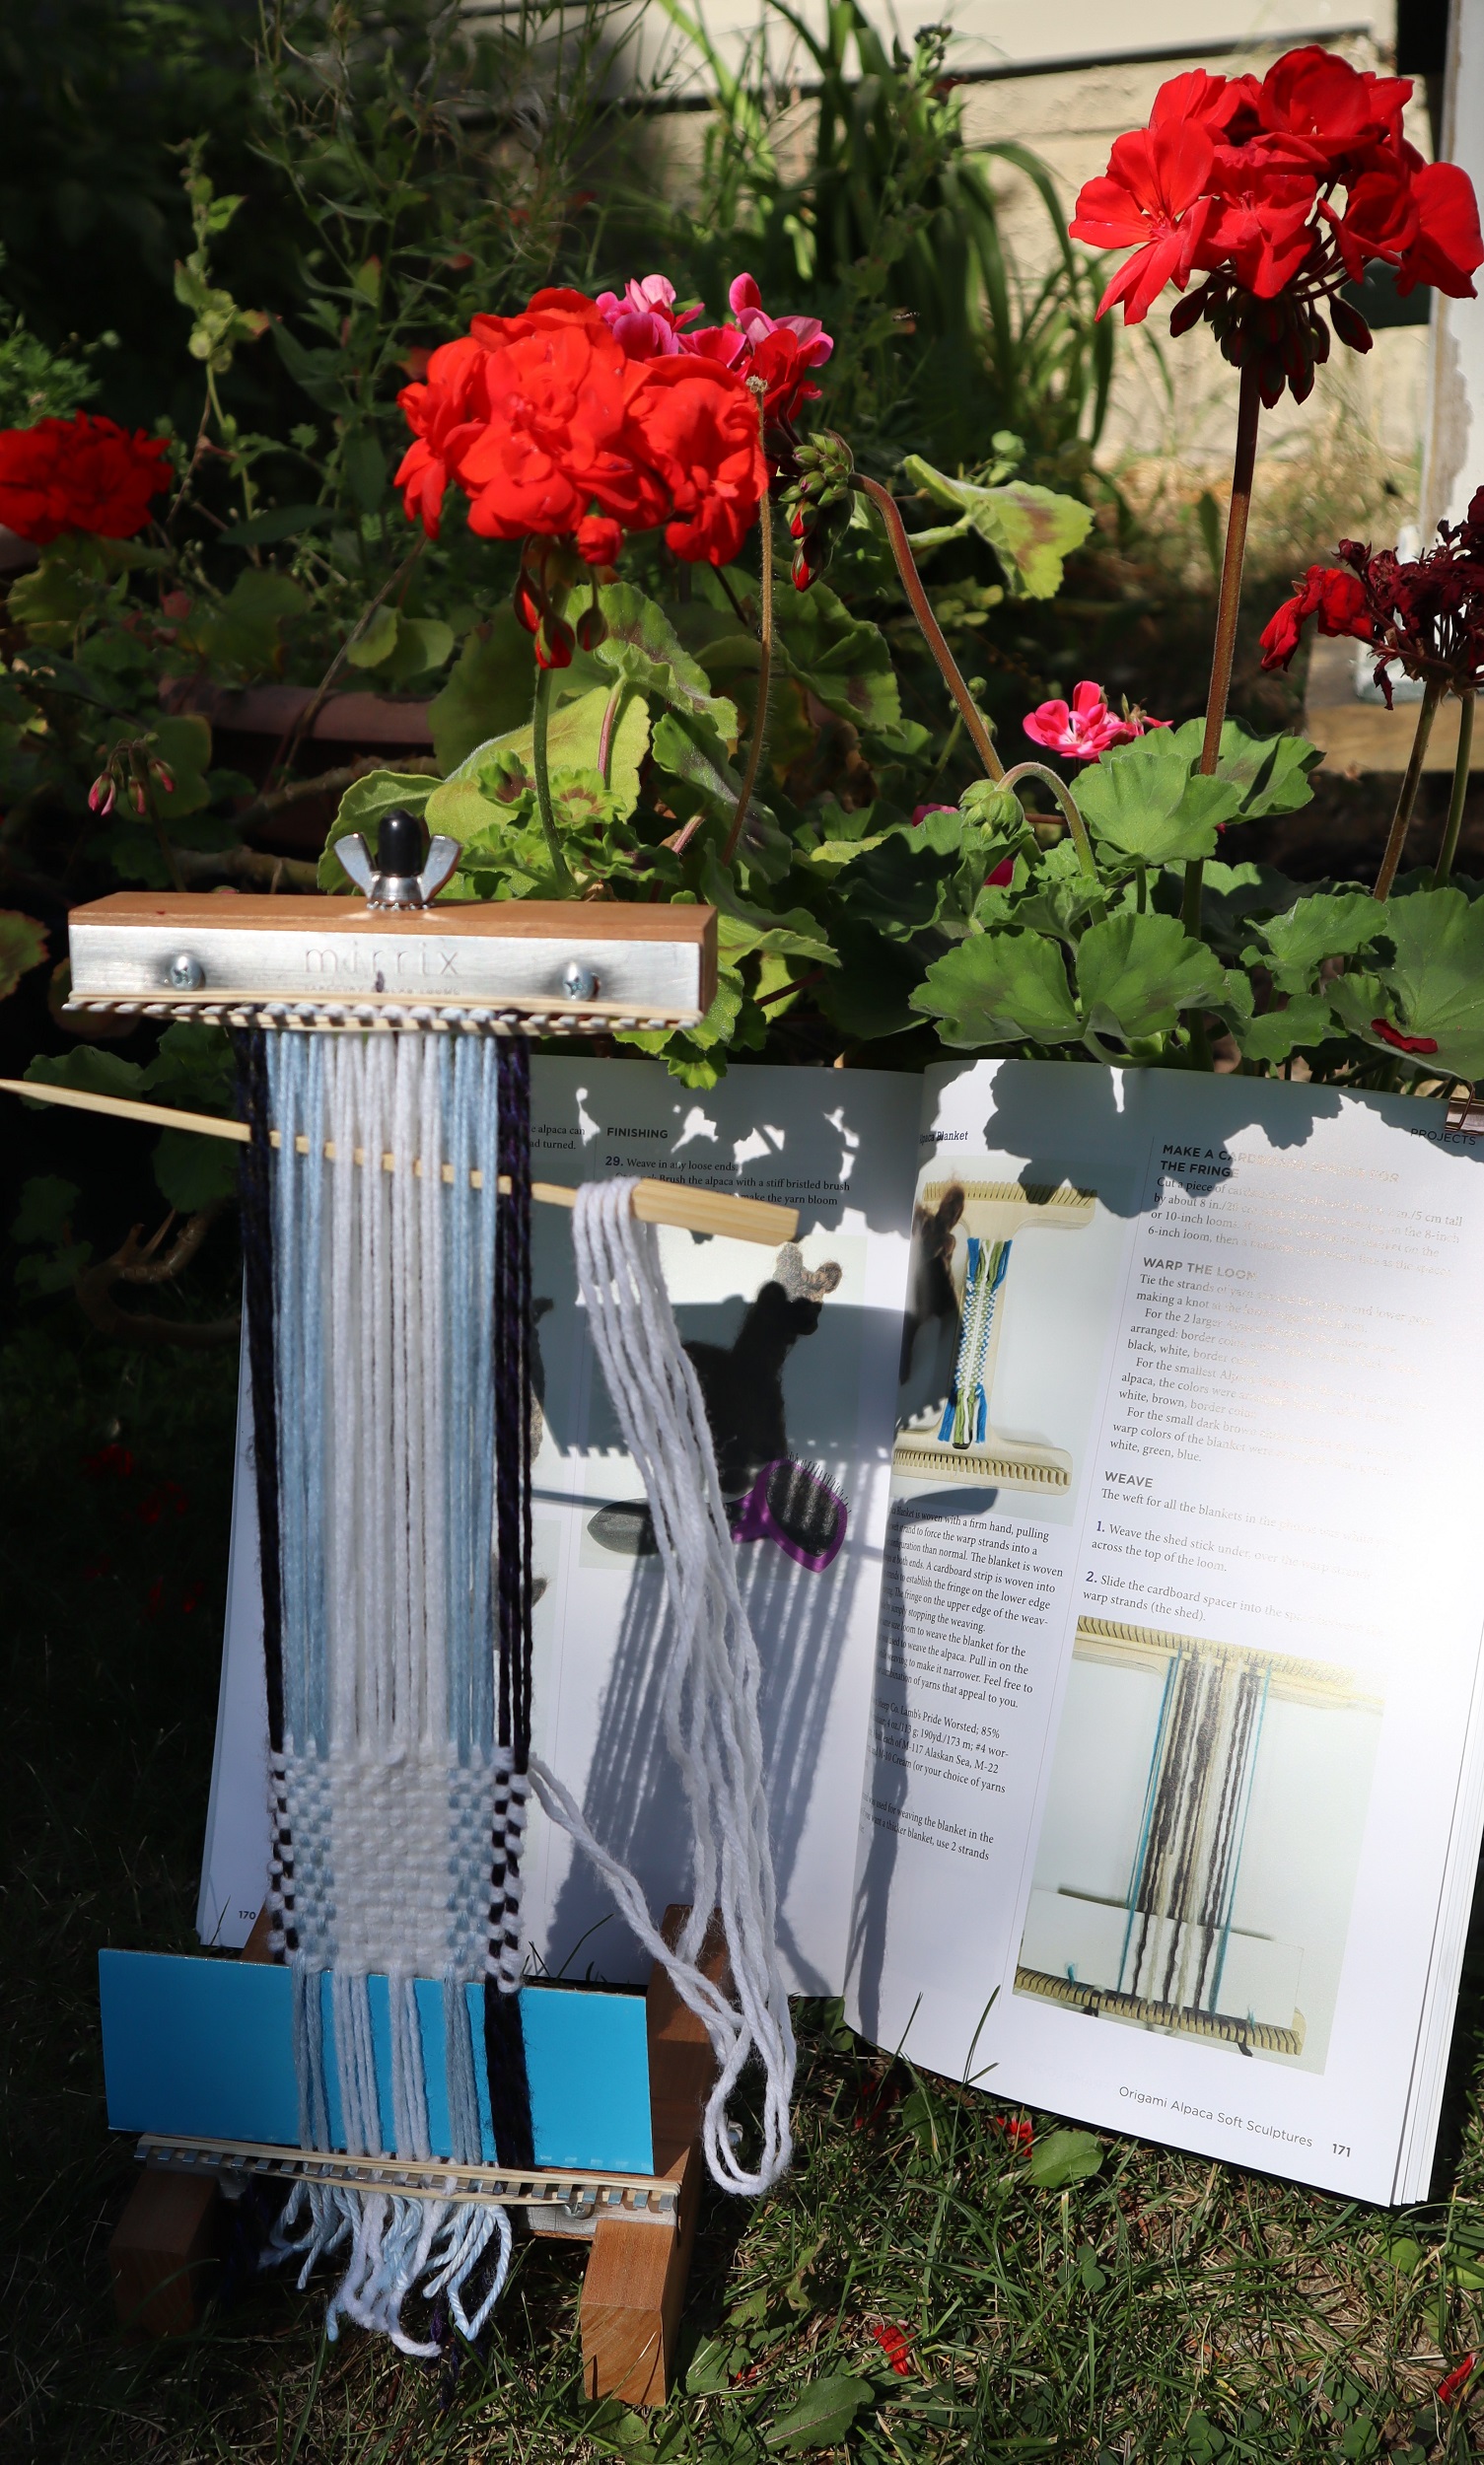
1: SET UP THE LOOM so it is 11 1/2 inches / 29 cm from the lower set of pegs to the upper set. Lock it into the ‘Sandy Stand’.
2: WARP THE LOOM: Following the instructions for the Alpaca Blanket on page 171 of ‘Innovative Weaving on the Frame Loom’, put on 10 sets of warp strands.
Use 2 strands of #4 Medium weight (Worsted or Sport weight) yarn held together as if it is a single strand.
Skip 6 pegs at each side of the loom and warp the following colors, or your choice of colors:
NOTE: A ‘set’ of warp strands in this case means tying around one peg from bottom to top of loom and snipping it after tying the knot at the lower edge. The 2 strands of warp yarn are held together while warping the loom.
1 set of warp strands Black
2 sets Light Blue
4 sets White
2 sets Light Blue
1 set Black
3: Slide 3 rubber bands over the lower set of pegs and 3 rubber bands over the upper set of pegs to help keep the warp strands from jumping off.
4: Cut 2 pieces of cardboard that are 2 inches/5 cm tall. The piece that will go into the lower edge of the warp strands should be 5 1/2 or 6 inches/15 cm wide. The piece that will go into the upper edge of the weaving once it’s done can be just 3 inches/7.5 cm wide.
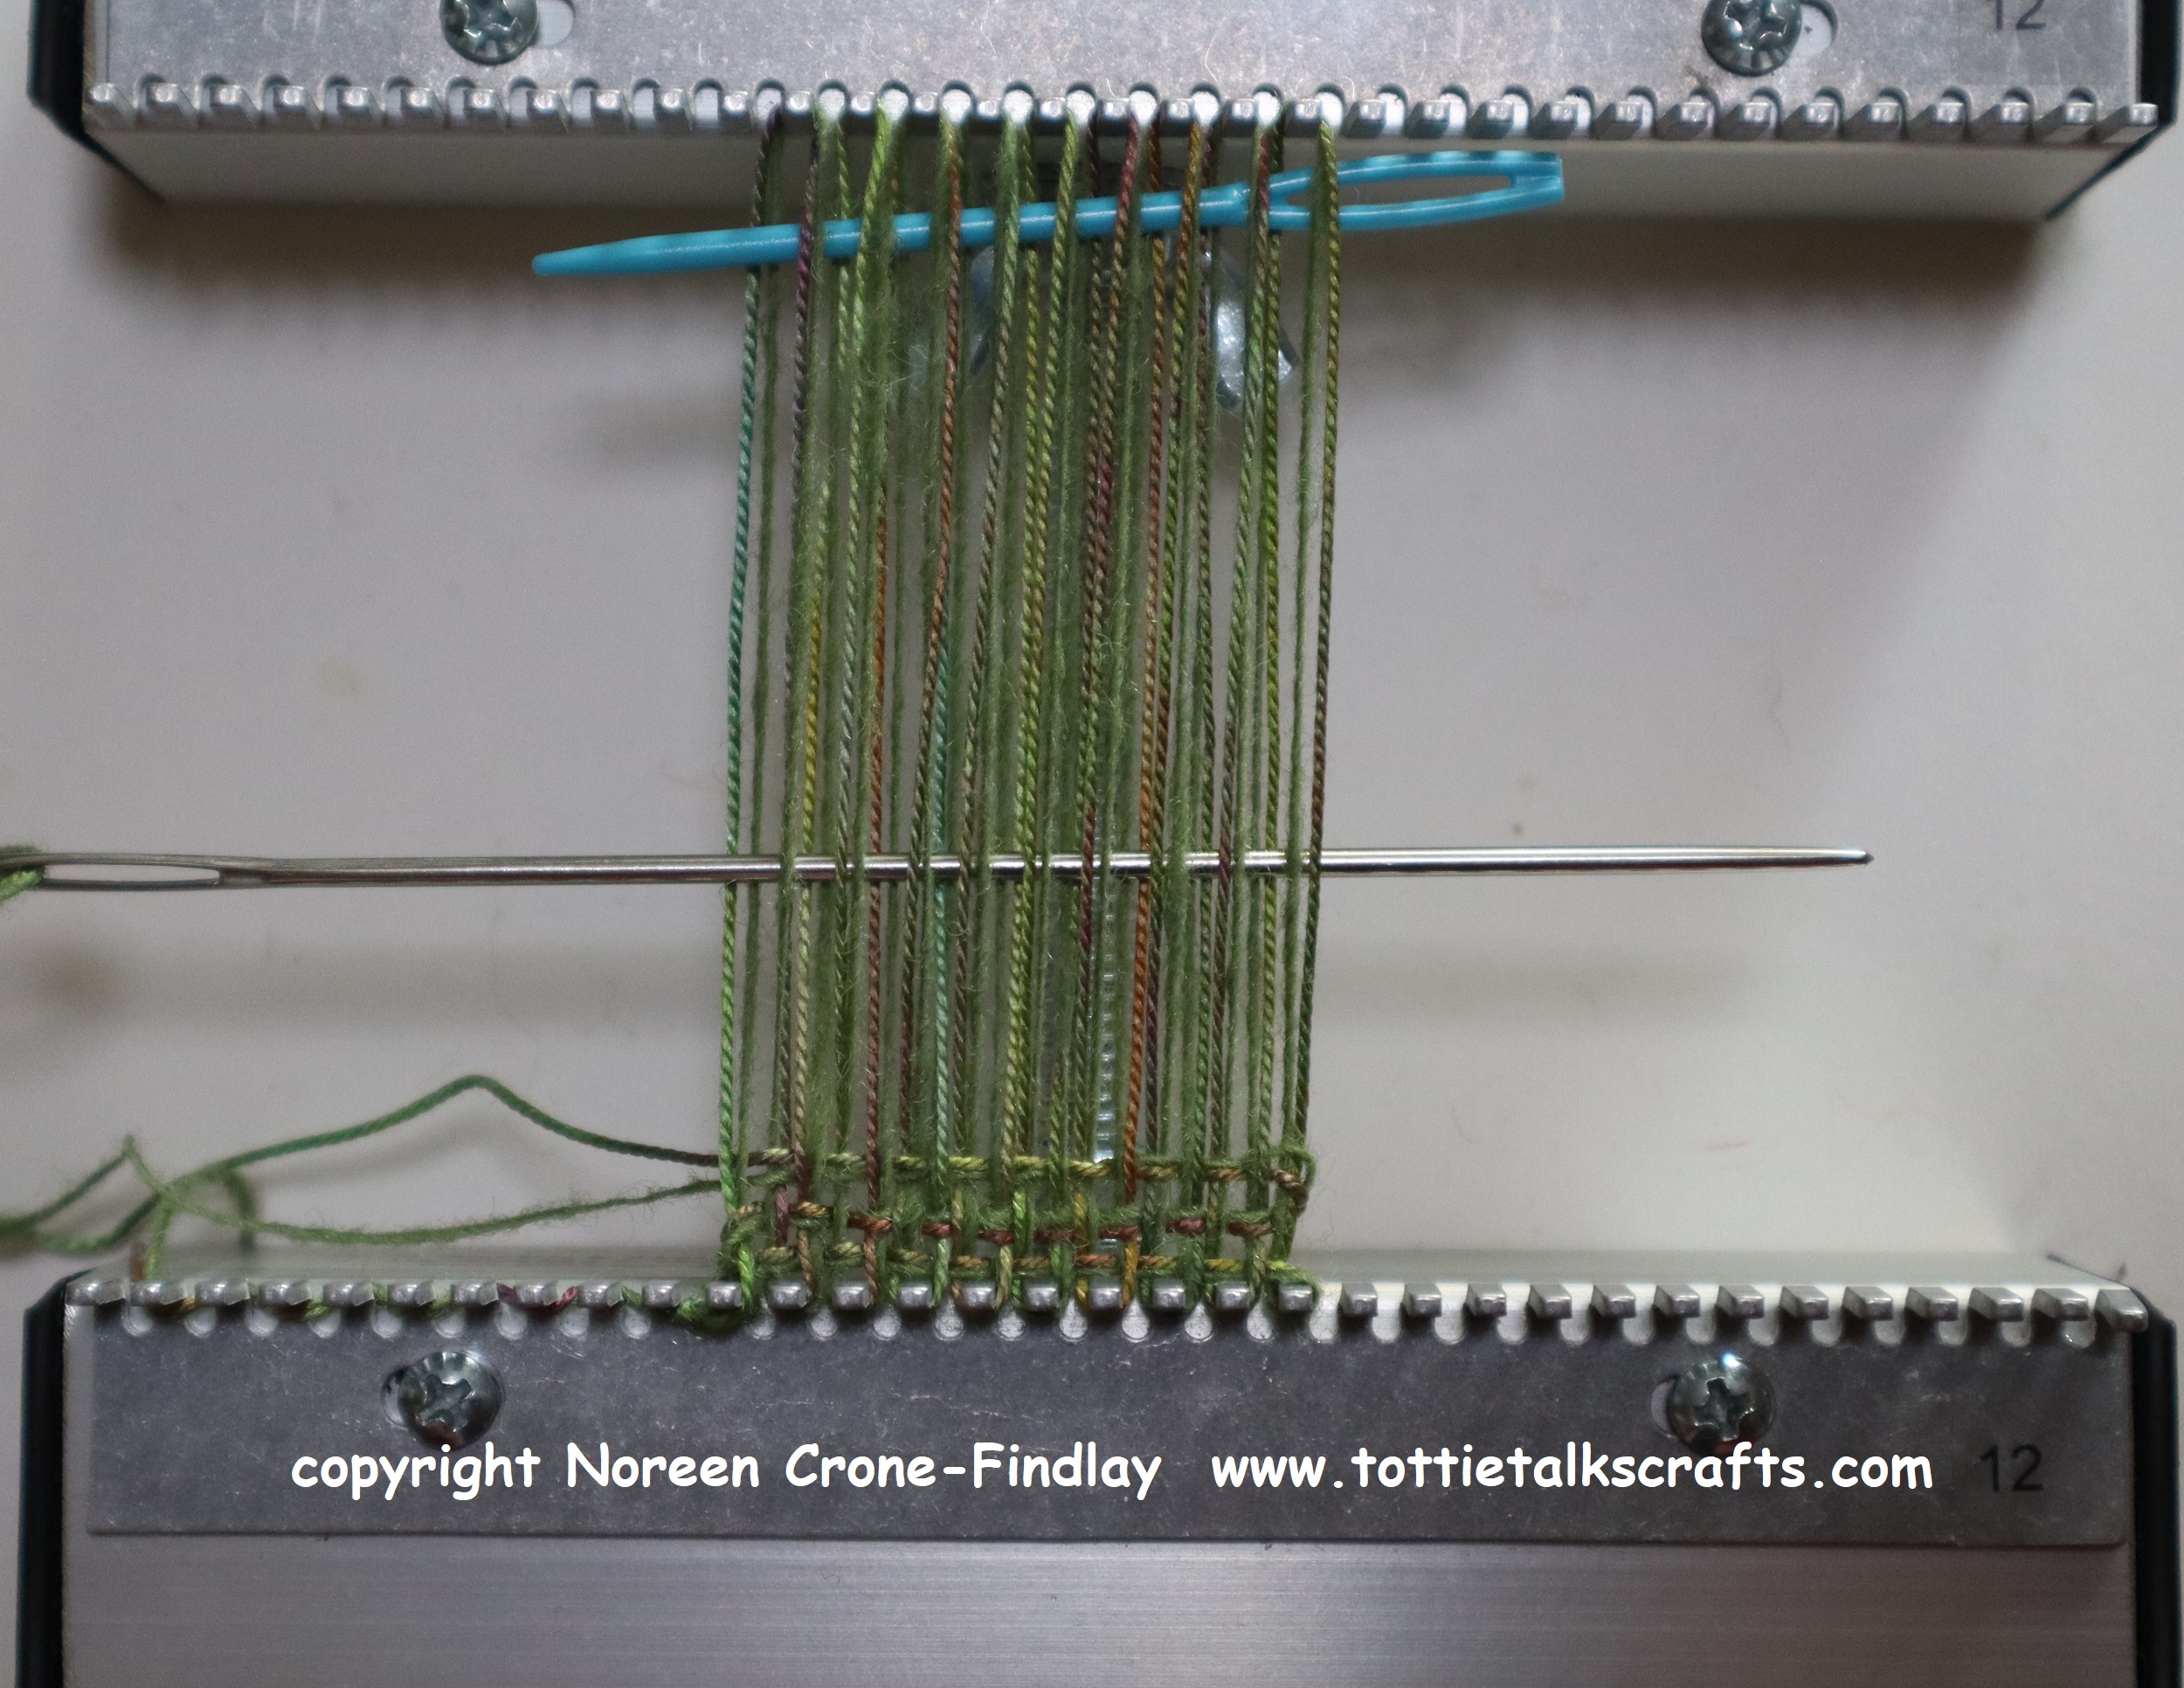
5: Weave the shed stick under 2/over 2 across the warp strands at the top of the loom.
6: Weave the longer piece of cardboard into the warp strands – slide it into the shed formed by the shed stick and push it down to the lower edge of the loom. This will make the warp fringe at the first end.
7: WEAVING:
NOTE: The instructions in the book say to pull in on the weft strands while weaving. When using the Saffron loom, that is not necessary.
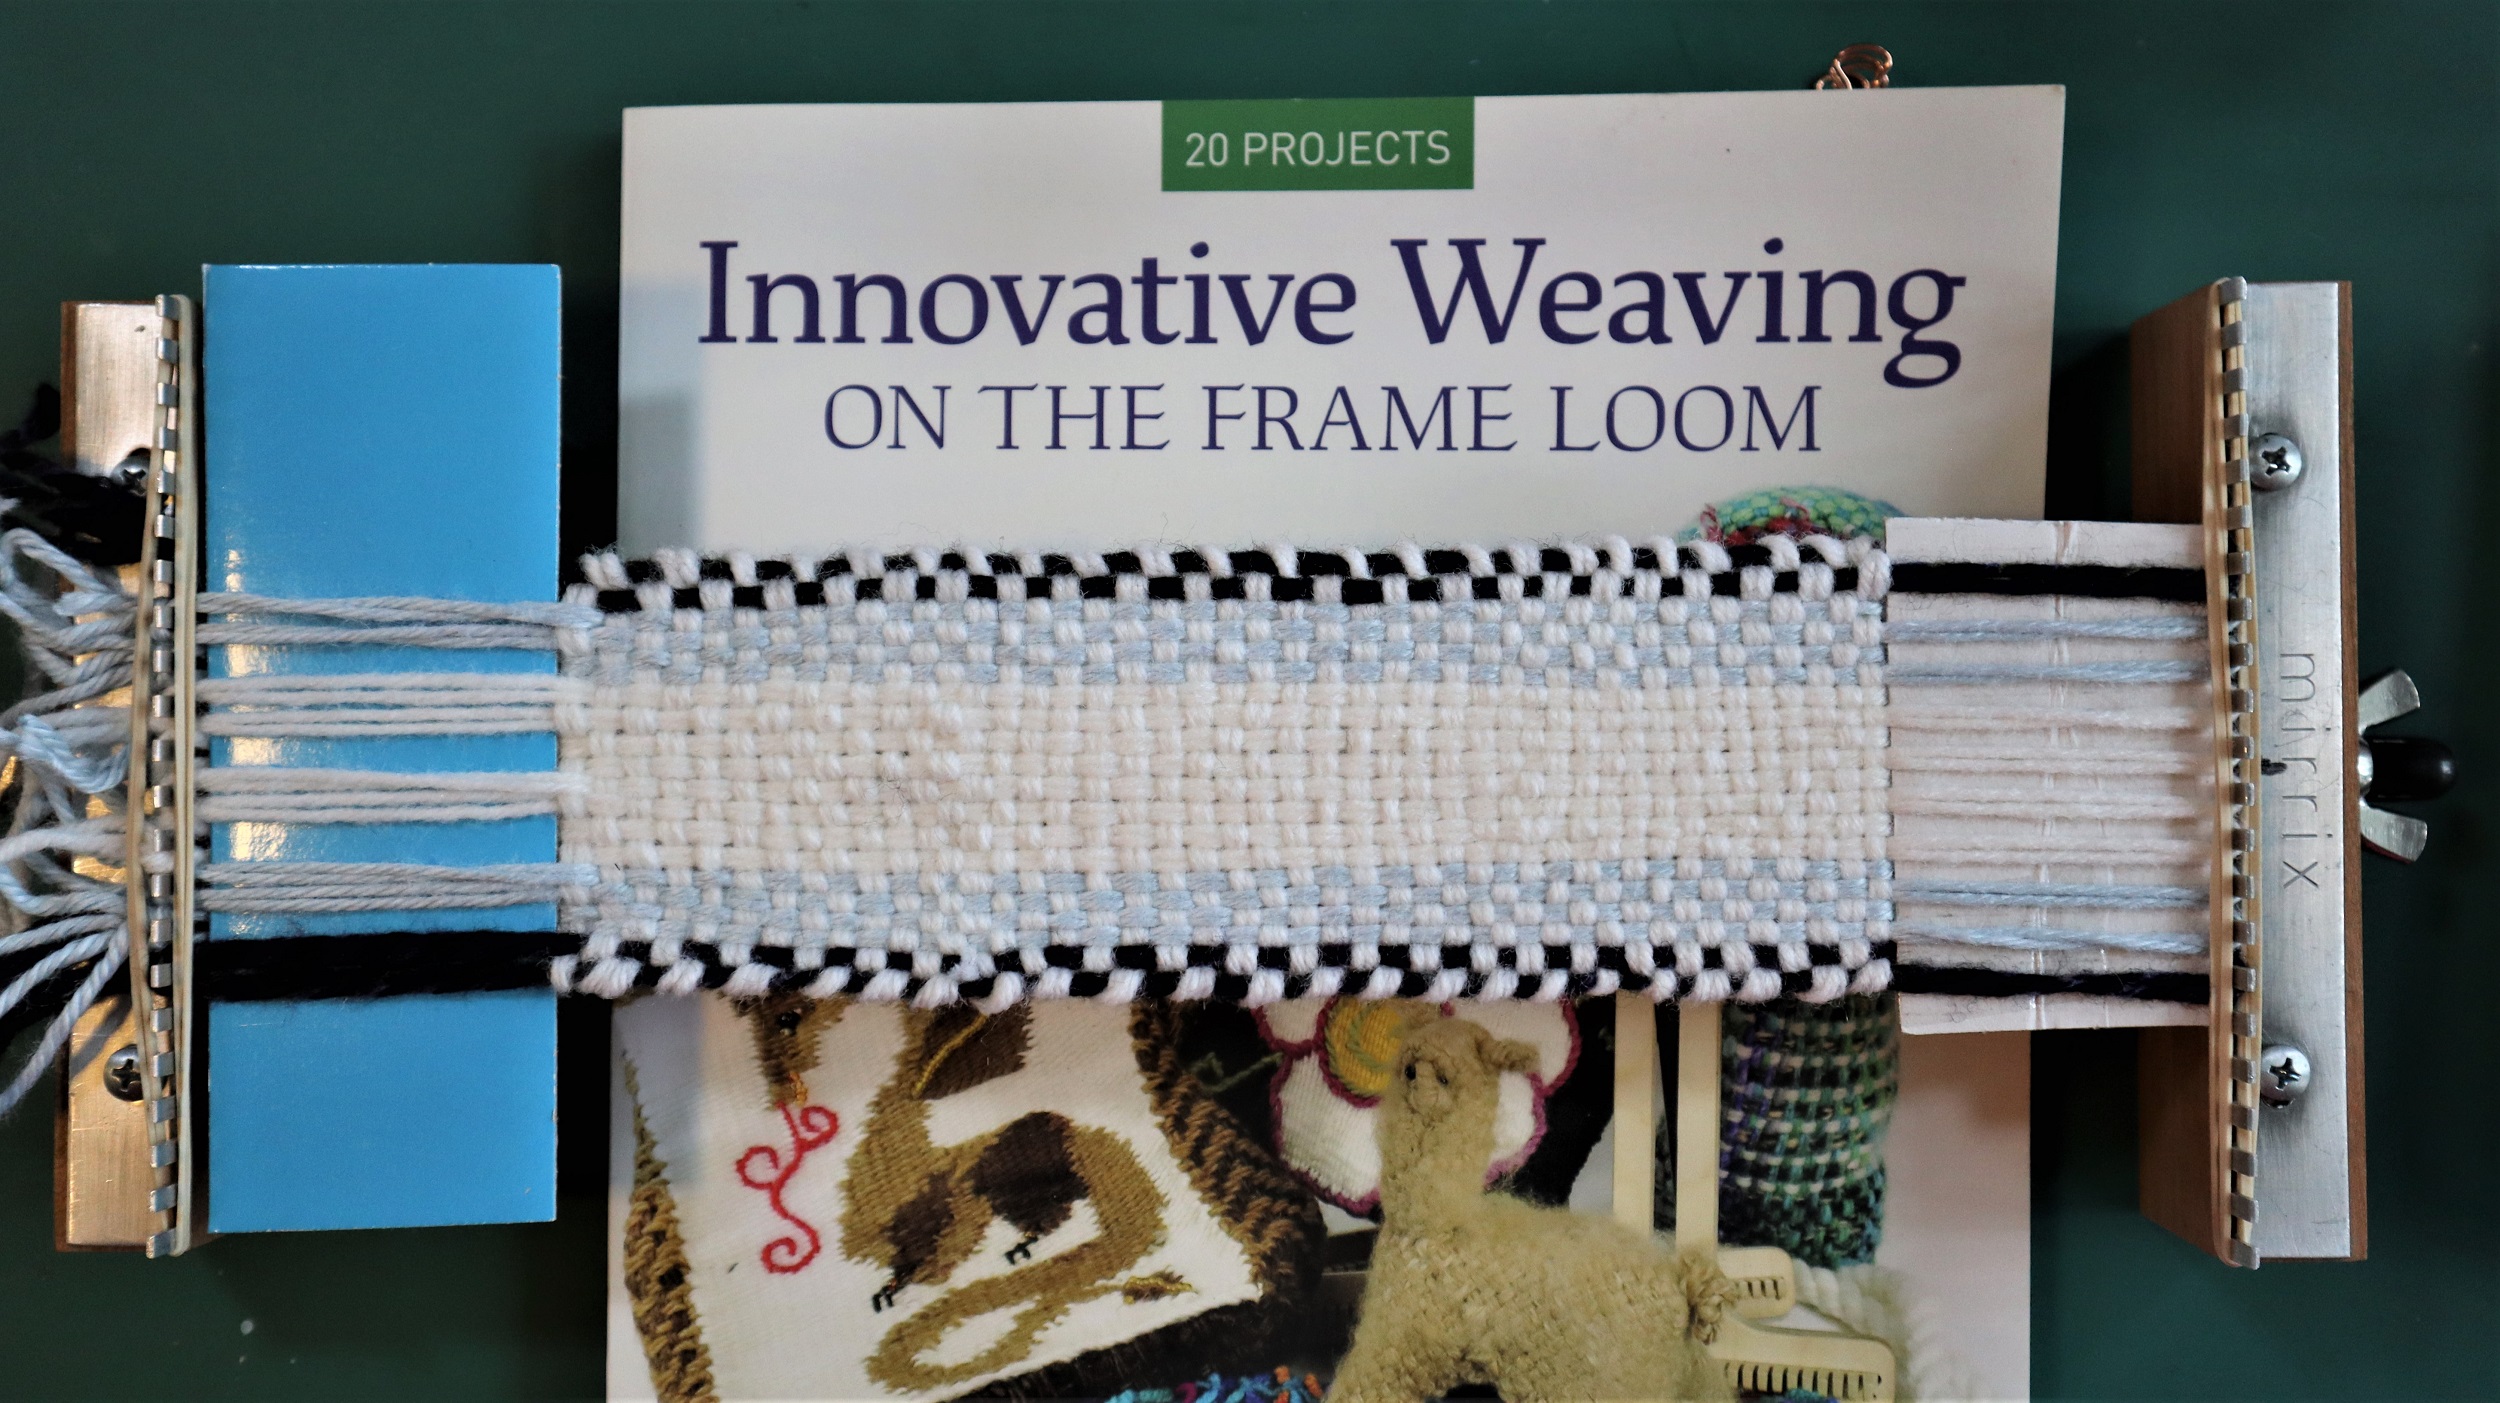
With 2 strands of white yarn and a weaving needle, following the instructions in the book, weave until the weaving is 7 1/2 inches/ 19 cm tall.
Fold the shorter piece of cardboard in half lengthwise and weave it into the warp strands, then open it up. This will keep the weaving taut while you embroider the word, ‘imagine’.
The 2 pieces of cardboard – 1 at each end of the weaving are essential to keep the weaving in place while embroidering the letters.
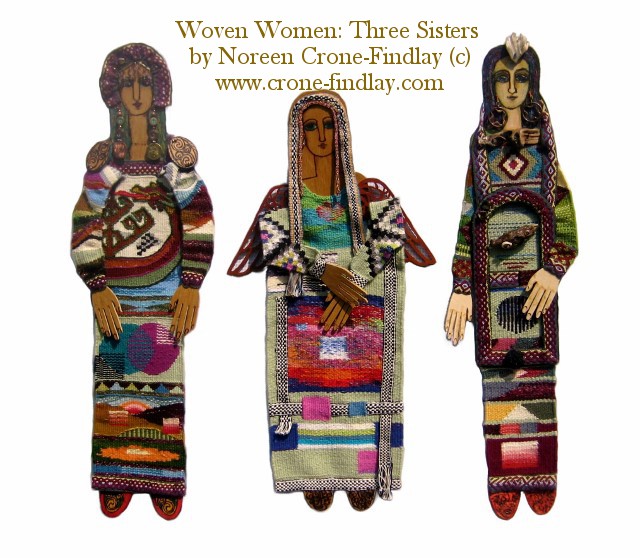
On the left: Woven Women- Asking for Miracles 36 inches tall
Center: Woven Women- Edith’s Song (no regrets) 31 inches tall
On the right: Woven Women- Small Bird Sang and All Was Forgiven 36 inches tall
Woven on my Mirrix tapestry looms (16 inch wide loom and 8 inch wide loom).
I hate wasting yarn… so I really don’t like loom waste – who wants to toss their yarn in the trash? Really 🙂
That’s why I love Claudia Chase’s ‘No Warp Ends’ technique for the Mirrix looms.
copyright Noreen Crone-Findlay
The one thing that I wasn’t keen on was using paper clips to be the holders for the yarn ends, so I thought about it and mulled it over.
Hmmmm…. I use ‘S’ hooks all the time to hang things and connect them, but I have never used them on a loom.
This called for some experimenting.
I don’t know about you…. but, I have a tendency to start with a really complicated plan, and have to do a lot of trial and errors to get to the elegant and simple final version.
I was thinking about all kinds of ways of making harnesses to hold the bars for the ‘s’ hooks…. oh my!
I also figured that I wanted to use both sides of the loom while setting up for this technique.
I had woven two affinity bracelets at the same time- one on the front of the loom, and one on the back, so this seemed to stick in my mind as ‘the way to go’.
Well… I twiddled and fiddled, and threw away the whole overly elaborate harness idea, and ended up using 4 loops of double sided velcro to hold the bars to the upper and lower edges of the loom.
That was a big breakthrough- talk about a simple way to do this! Yay!~
And, I am really pleased with the final method that I came up with- it really works for me!
copyright Noreen Crone-Findlay
Here is the video, showing how I warp the Mirrix Lani using the ‘No Warp Ends’ technique, with ‘S’ hooks:


")
 2")


