
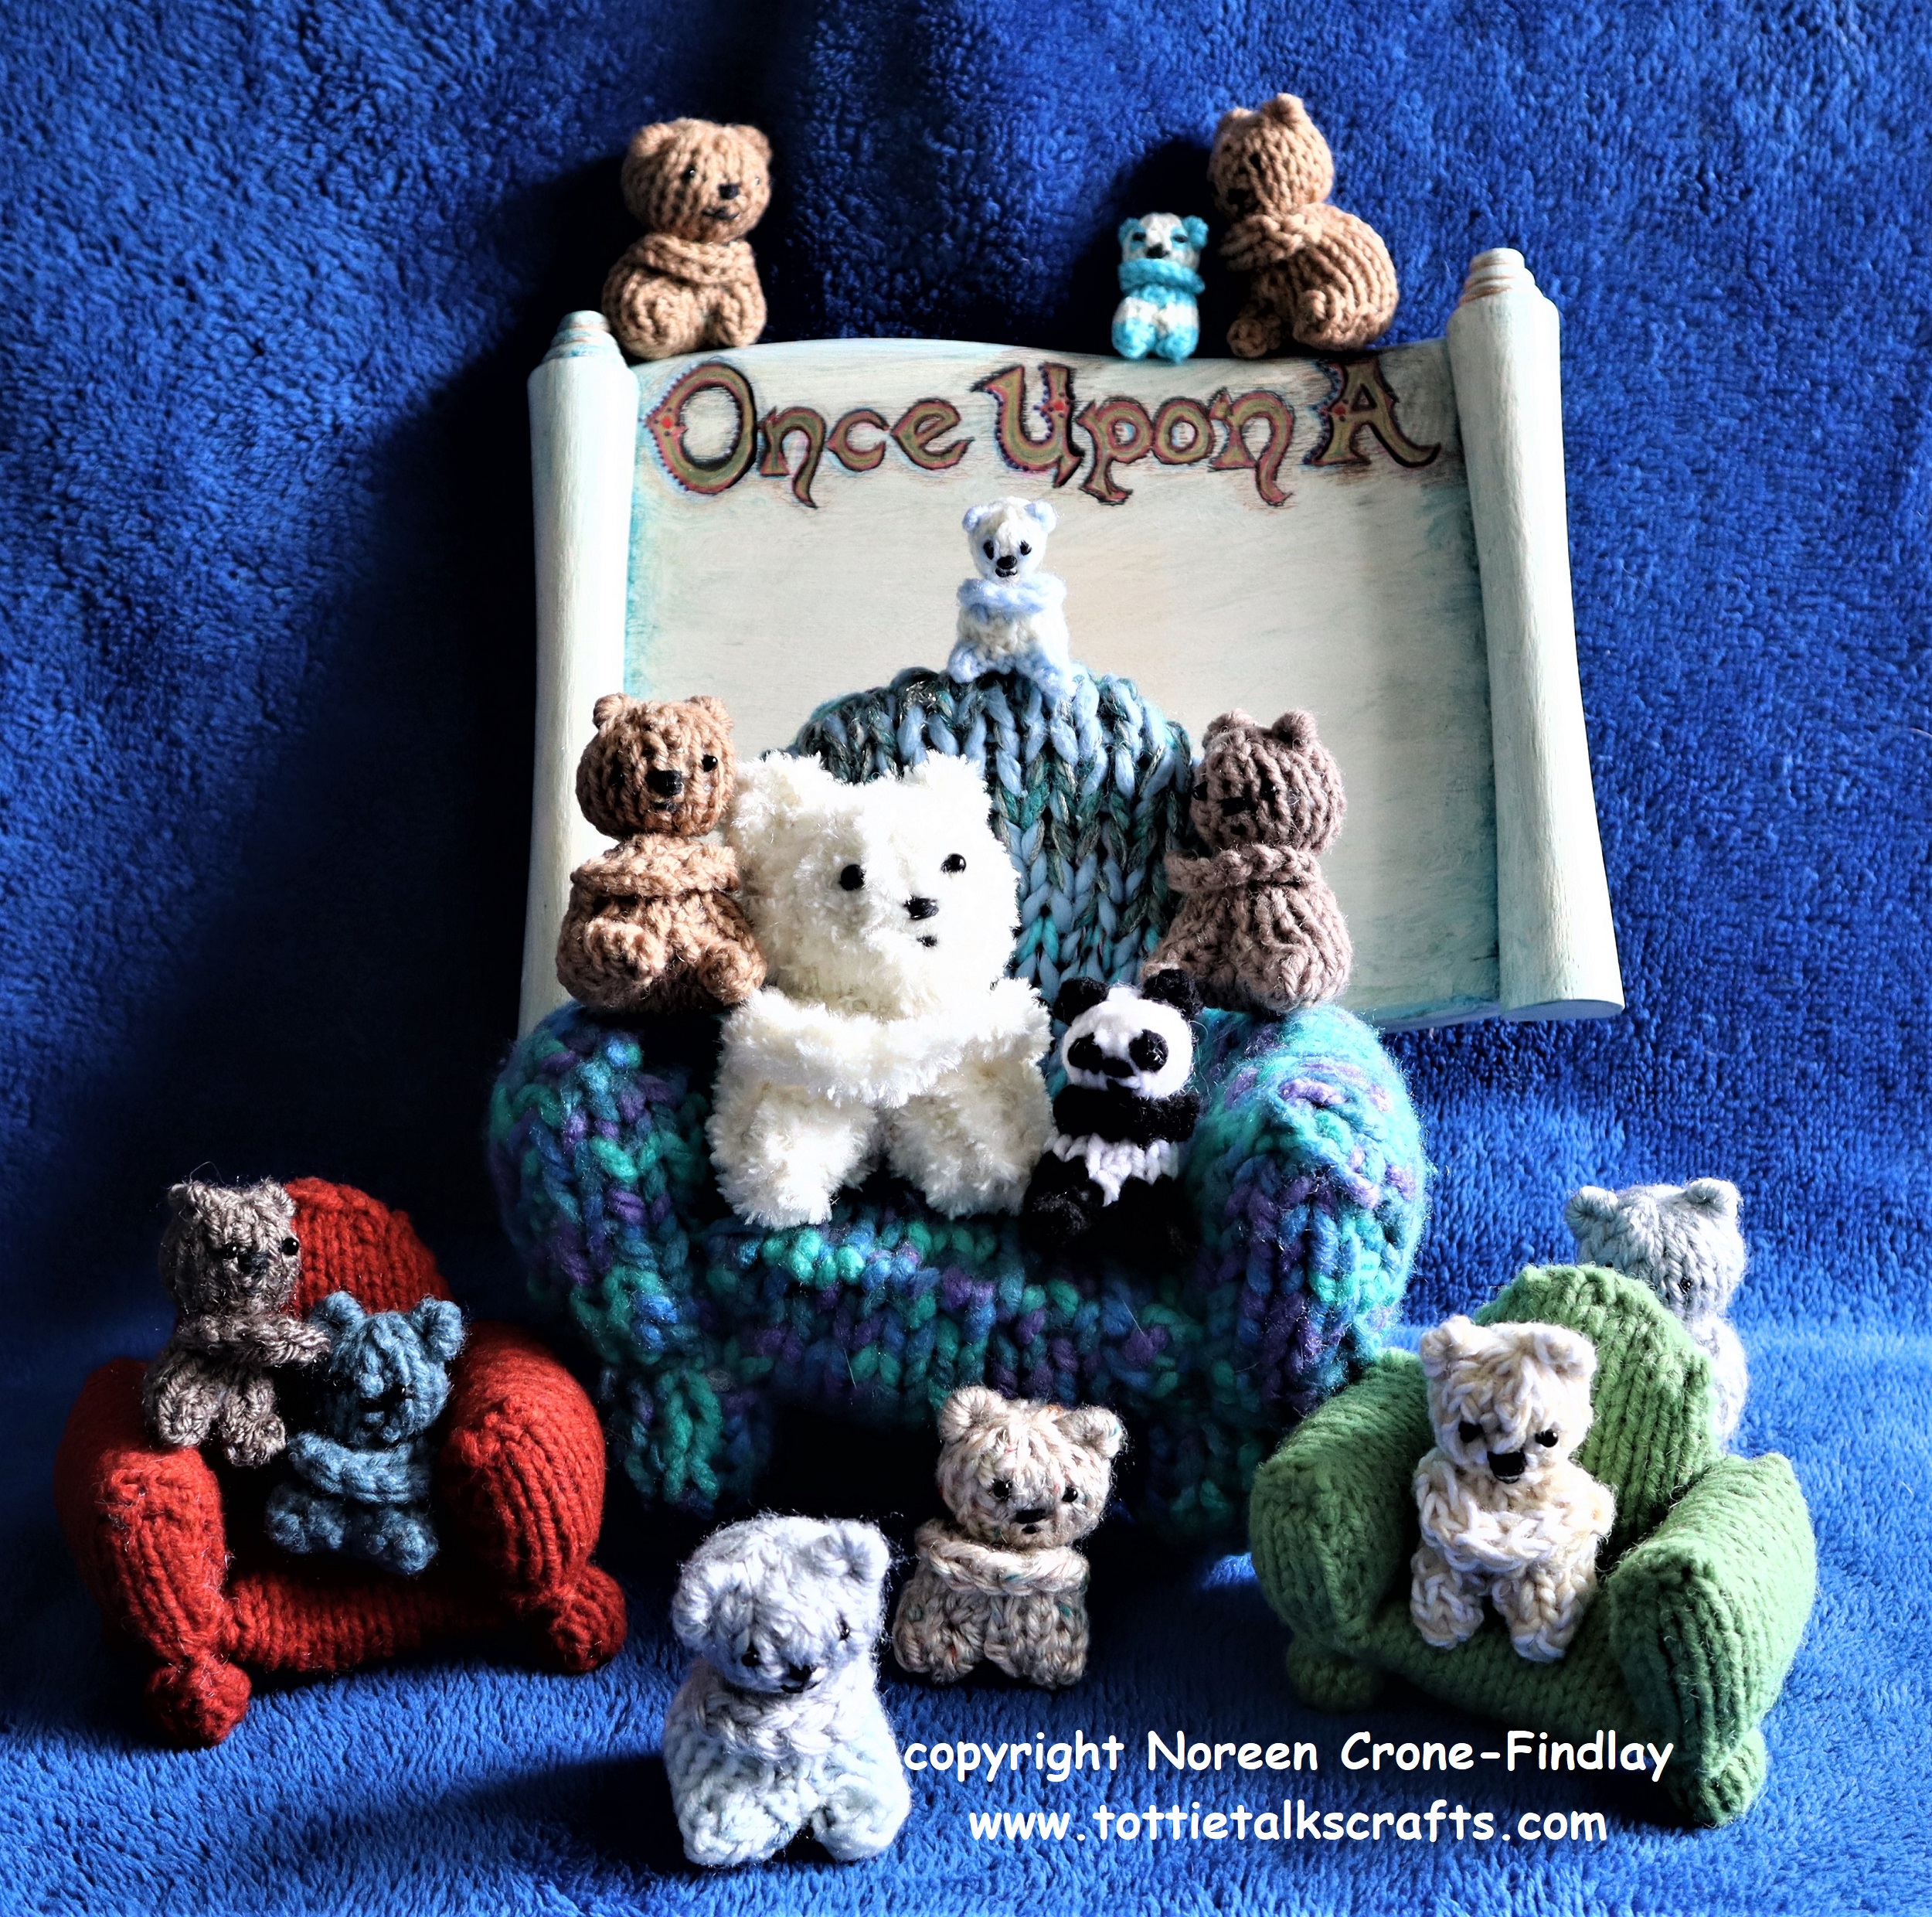
KNITTING PATTERN FOR THE CLANCY COMFORT BEAR
by Noreen Crone-Findlay (c)
The knitted Clancy Comfort Bear is my latest design for comfort bears.
I designed it in honor of my beloved son in law who died last year.
Clancy was kindness incarnate and always kept several Comfort Bears in his pocket to offer to people who were having a difficult time. So, the Clancy Bear is a living legacy to keep his kindness unfolding in the world. With love in every stitch……
THE ‘HOW TO’ VIDEO FOR THE CLANCY COMFORT BEAR IS AT:
NOTE: The finished size of the Clancy Bear is determined by the thickness of yarn and size of knitting needles that you use.
WHAT YOU NEED:
Knitting Needles in a size that is appropriate for the thickness of your yarn,
Yarn: Less than an ounce for each Clancy Comfort Bear
A crochet hook that is appropriate for the thickness of your yarn.
Black 6/0 glass beads for eyes, Stuffing,
Black sewing thread and a needle that is small enough to sew on the beads, Tapestry or darning needle
Sewing machine thread in a color that matches your yarn (optional)
Felting needle, Tape measure, Row Counter, 4 small safety pins, Scissors or thread snip
INSTRUCTIONS: Beginning at the feet:
Cast on 11 stitches.
Rows 1- 16: Work in st st (knit one row, purl the next)
Place one of the little safety pins at each end of Row 6 and then 1 more pin at each end of Row 10.
At the end of Row 16, cut the yarn, leaving a 42 inch/105 cm long tail
Thread the tail end into a darning or tapestry needle and lift all the stitches off the needle.
Pull up to gather the top of the head.
Take the needle through the stitches one more time to secure them.
HEAD:
Sew the centre front seam using the Baseball stitch to the first set of safety pins. (see video for how to).
Take a couple stitches to secure the head. Remove the 2 safety pins.
Stuff the head.
Wrap the yarn tightly around the neck 2 times then stitch over the wraps to secure them.
EARS:
Take the yarn up to the side of the head at the top of the head and stitch over the knitting needle or crochet hook twice.
Stitch over these loops several times to make the first ear.
Repeat for the 2nd ear.
Take the needle back down and out at the ‘shoulder’ to be used to make the arms.
TUMMY SEAM:
Thread another strand of yarn or the sewing machine thread into a needle and stitch the center front down to the next set of safety pins.
Stuff the body.
LEGS:
Fold the cast on edge in half to find the midpoint.
Take the needle through it and stitch it to the end of the tummy seam.
Stitch in place a couple of times to secure it.
Squeeze and fold the edges of the front to meet the cast on edge, forming the leg with the corner point becoming the toe. It’s a bit like origami.
Stitch the leg inseam together, pulling up tightly.
Stitch the second leg inseam.
Secure at the middle.
Take the needle through the body to the back, and snip.
ARMS:
Take the crochet hook through the stitch at the shoulder where the yarn came out.
Yarn over, pull up a loop through the stitch on the body.
Chain by taking the yarn over the hook and pulling it through the loop on the hook.
Do this 7 to 9 times, depending on the thickness of your yarn.
Take the crochet hook through the shoulder on the other side of the body and pull up a loop.
Thread the yarn end into the tapestry needle and stitch the loop to the body.
Take the hook through the first chain stitch at the shoulder, and make a slip stitch in it by pulling up a loop through the chain stitch.
Repeat this for all the chain stitches, ending at the first shoulder.
Stitch the end into the body and use the felting needle to secure the arms to the shoulders and to bury the yarn end.
NOSE:
Take the black thread through the head, coming out at the center of the face.
Secure it with a couple of tiny stitches.
Make several horizontal stitches for the nose.
MOUTH:
Move down and take a couple of shorter horizontal stitches for the mouth.
EYES:
Take the needle up slightly above and to one side of the nose and sew on the bead for one eye,
then the other.
Secure the stitches by going back down to the nose and taking a couple of tiny stitches at the corner of the nose, then taking the needle back through the head. Snip the ends.
PANDA:
INSTRUCTIONS: Beginning at the feet:
Cast on 11 stitches with black yarn.
Rows 1- 6: Work in st st (knit one row, purl the next)
Place one of the little safety pins at each end of Row 6
Rows 7 & 8: Join white yarn and work in st st
Rows 9 & 10: Drop white yarn and work in black yarn.
Place 1 more pin at each end of Row 10.
Cut the black yarn, leaving a tail of 42 inches/105 cm.
Rows 11- 16: Work in white yarn.
At the end of Row 16, cut the yarn, leaving a 20 inch/50 cm long tail
Thread the white yarn end into a darning or tapestry needle and lift all the stitches off the needle.
Pull up to gather the top of the head.
Take the needle through the stitches one more time to secure them.
Stitch the center front seam of the head with the white yarn.
Stuff the head and wrap and secure the neck.
Take the black tail end out through to the shoulder and leave it there for now.
Work the rest of the Panda body, legs and arms the same way as the Basic Clancy Bear.
EARS:
After working the Arms, take the black yarn up to the top of the head and make the ears.
EYE PATCHES:
Take 3 small vertical stitches for each eye patch.
NOSE:
Take 2 horizontal stitches for the nose.
MOUTH:
Take 1 smaller horizontal stitch for the mouth. Secure the yarn by stitching through to the back of the neck and stitching in place the burying the yarn in the body.
EYES:
Sew the eye beads to the center of the patches. Secure the thread ends in the eye patches.


Thanks very much, Noreen. I’m having a good time making comfort bears. As someone who is relatively new to knitting anything other than a rectangular scarf or afghan I’m finding that each one is looking a bit better than the one before. They are definitely unique. Your video is so helpful!
When I showed my first one to my 36 year old son who is going through a rough time right now, he put it on his finger, and asked if he could have it with a big smile on his face.
I especially appreciate that the pattern is fairly simple to memorize. I look forward to making them when I’m traveling, ‘watching’ TV…. and giving them to others who need to be reminded that they are not alone.
Take care! I’ve been thinking about you a lot and sending my virtual hugs as you grieve the sudden loss of your son-in-law. Hope to meet you some day.
Judy Meintzer
LikeLiked by 1 person
Oh, Judy, I am so touched by your experience with your son! I hope that the Comfort Bear will bring him peace and soothe his suffering as he navigates the difficulties in his life! Thank you so much for making him one, and for making more to give to people… I keep learning about how Comfort Bears have touched people’s lives, and it makes me so very deeply happy! Blessings and hugs and may the Clancy Comfort Bears be a source of sweetness in your life, too!
LikeLike
Pingback: Simple Little Things That Make Me Happy- A Bee and A Bear in a Plum Tree | Tottie Talks Crafts Blog
Thank you very much for the Clancy pattern. I hardly knitted, but when I saw the previous bear, and knew it purpose, I knew I had to learn with the LORD’s help, I watched you on the video so so many times, lots of errors. finally one could see they were bears, always some better than others. The bears have brought so much joy to all I have giving, and my joy has been tripled.
right now I cannot do much of anything, because I had rotor cuff, and muscle repair surgery on April 11th. I hope June 1st I get this sling that is strapped to me. Even now, Ican only peck with a finger.What I find funny, when I used two hands,I did not look at the keyboard, now I have to hunt a little bit for the key I want.
Not complaining, and the bright side of this, is one of the things I can not do is dishes.
I have thought and said prayers for your family over your loss.
Thank you again.
Nancy
LikeLiked by 1 person
I hope that your surgery heals quickly and that the pain is soon just a distant memory, Nancy! Thank you for the effort that it took to type one finger at a time to leave me this lovely message! And, thank you so much for embracing the Clancy Bears. I hope that you will soon be able to pick up your knitting and begin again with the pleasure of knitting the Clancy Comfort Bears! Thanks so much for all your kindess- I appreciate it so much and am very grateful to you!
LikeLike
Pingback: Comfort or Blessing or Pocket or Prayer Bears- Crocheted Knitted and Woven | Tottie Talks Crafts Blog