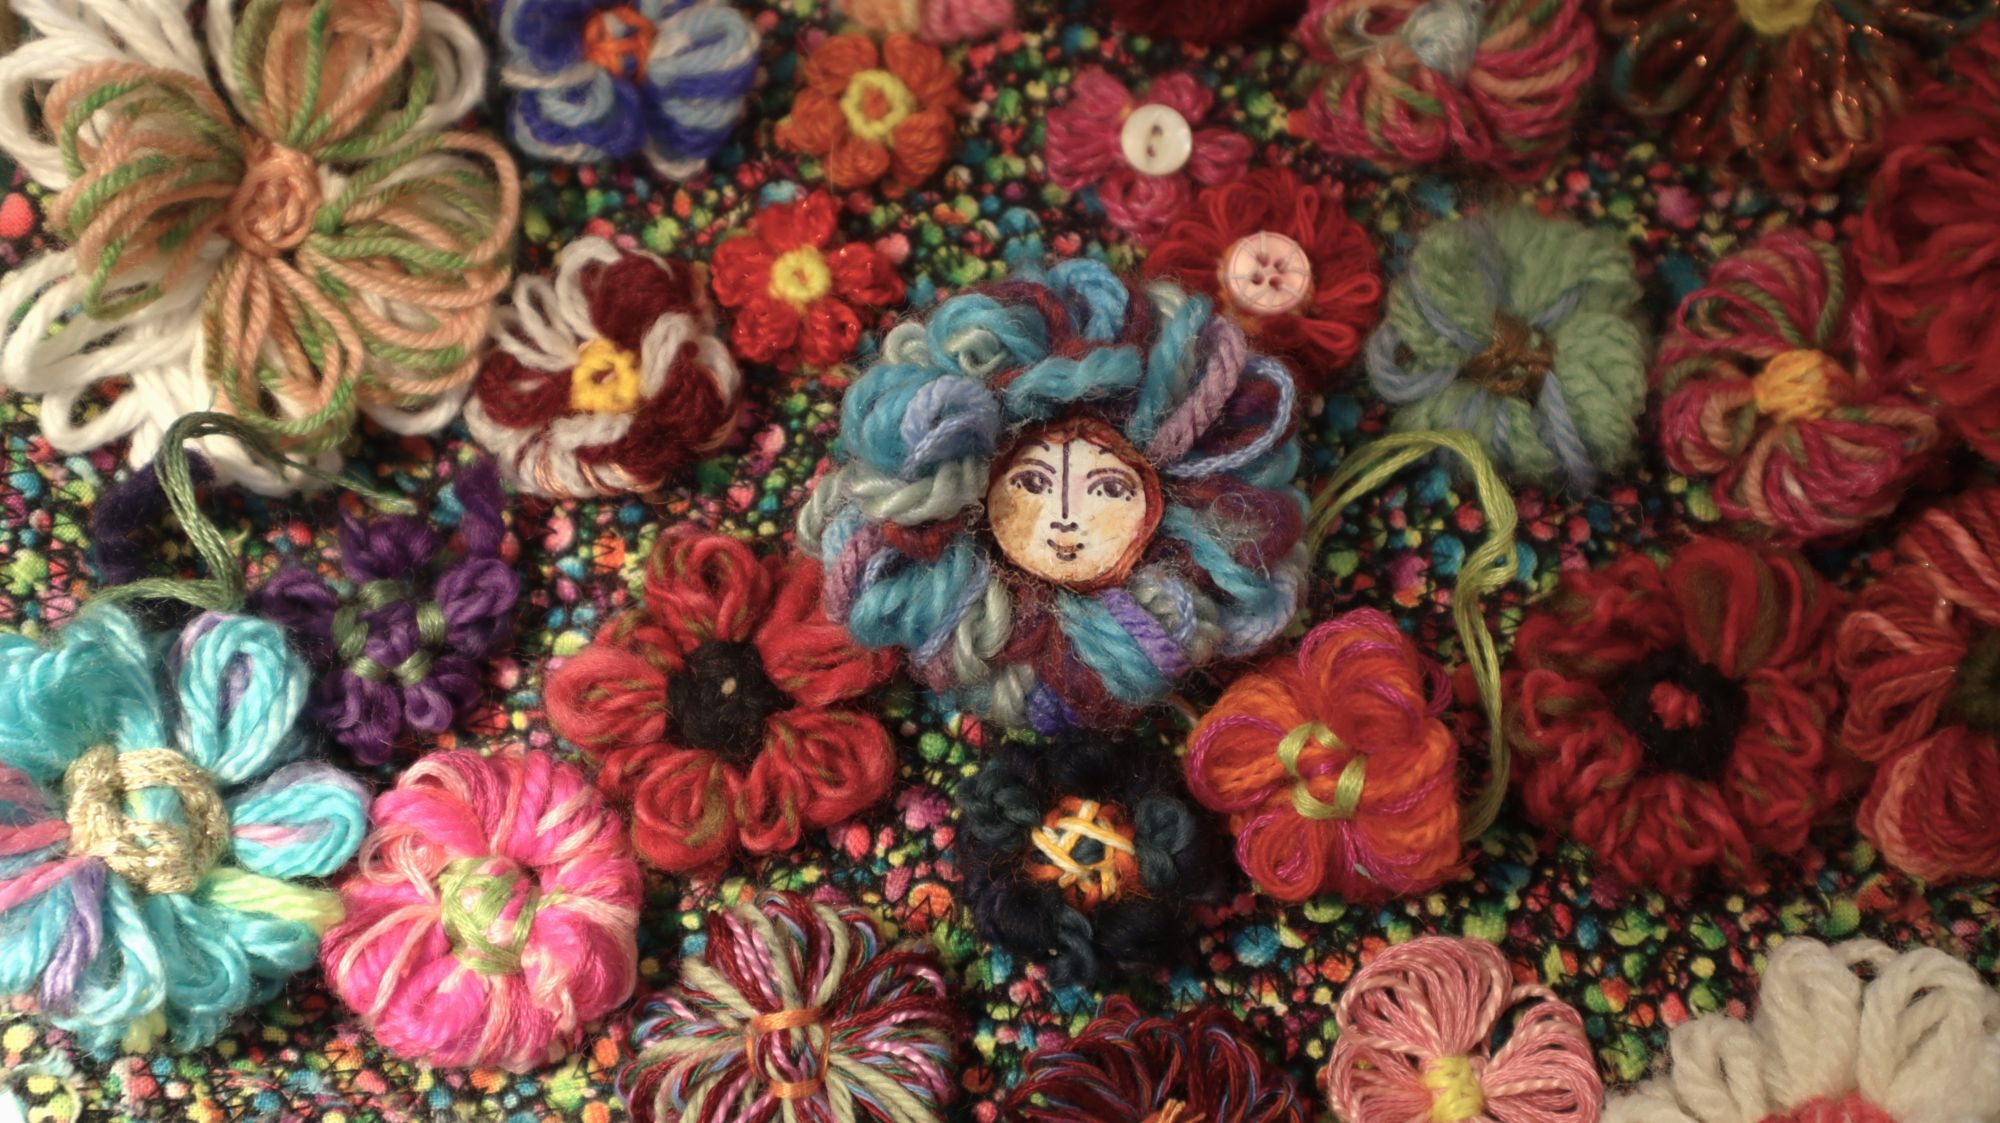
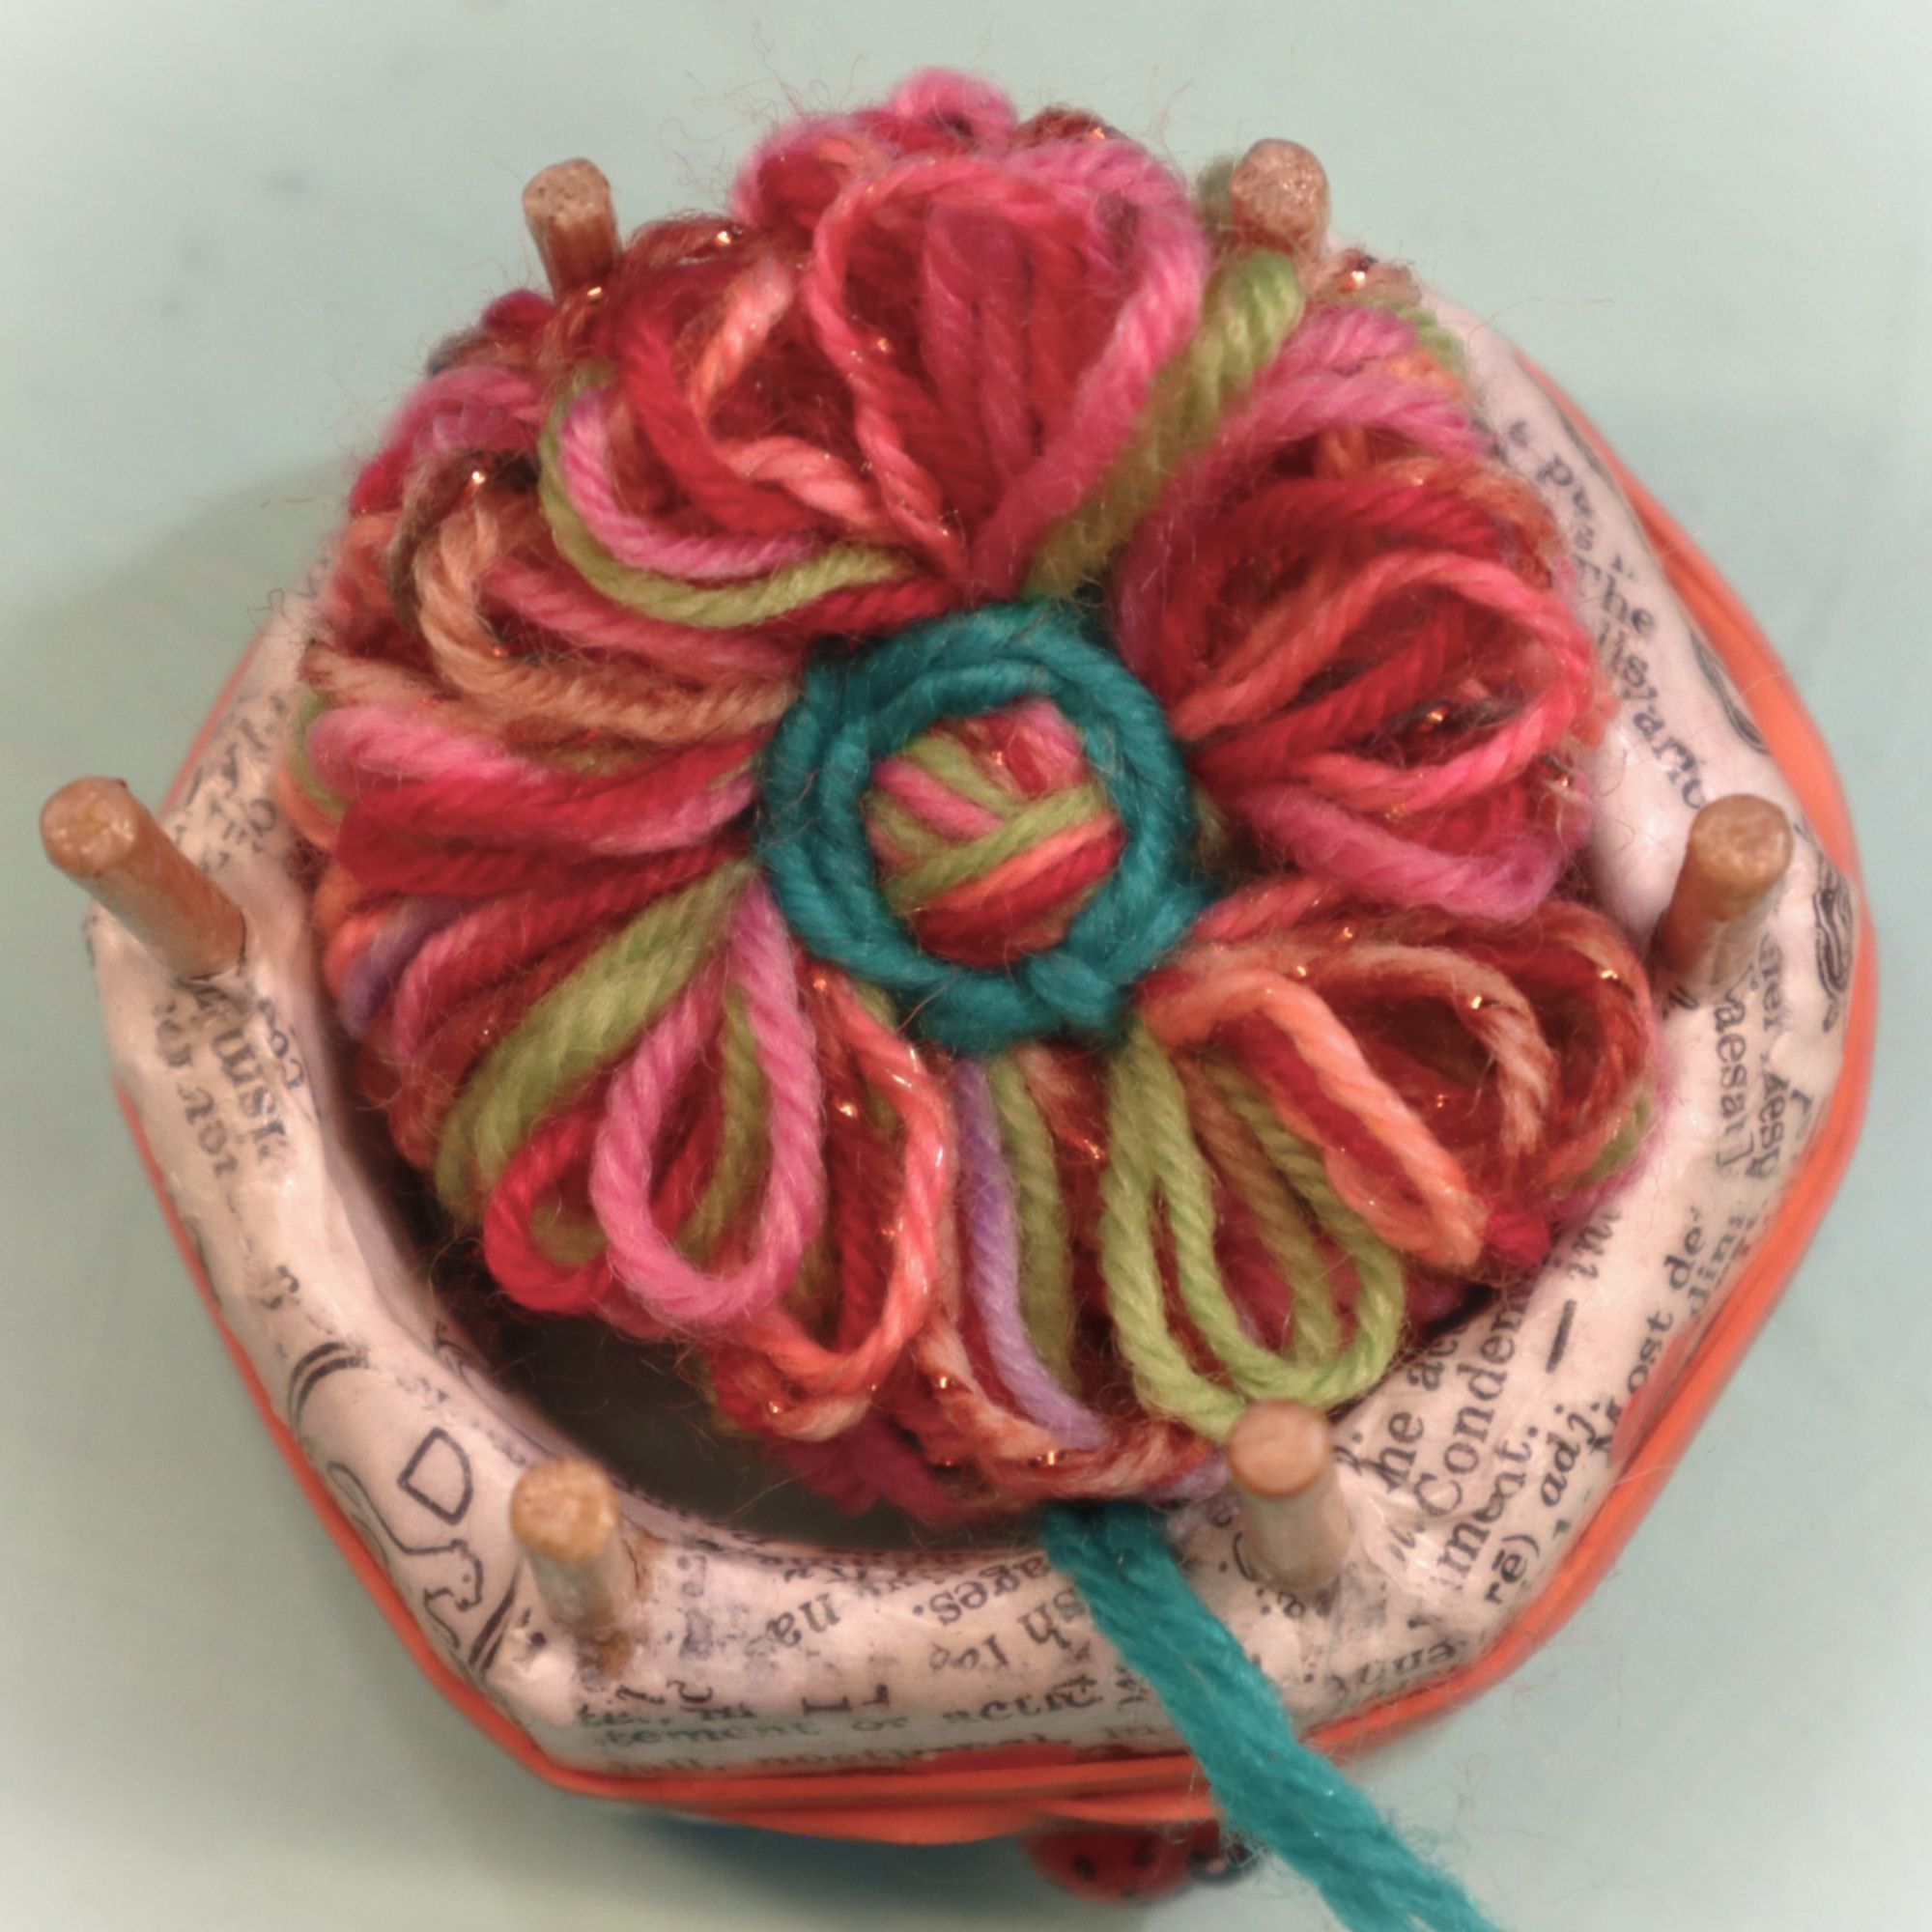
I’ve just made a 2nd video tutorial showing how to use a Spool Knitter as a Flower Loom to make super simple flowers from small amounts of yarn.
These flowers are fluffy and freeform.
The flowers can be used as pins, patches, bookmarks or crocheted or stitched together to make tiaras, flower crowns, scarves, shawls, vests, dolls or toys, or whatever you imagine.
If you type ‘spool knitter’ in the categories box a ton of great links will open up.
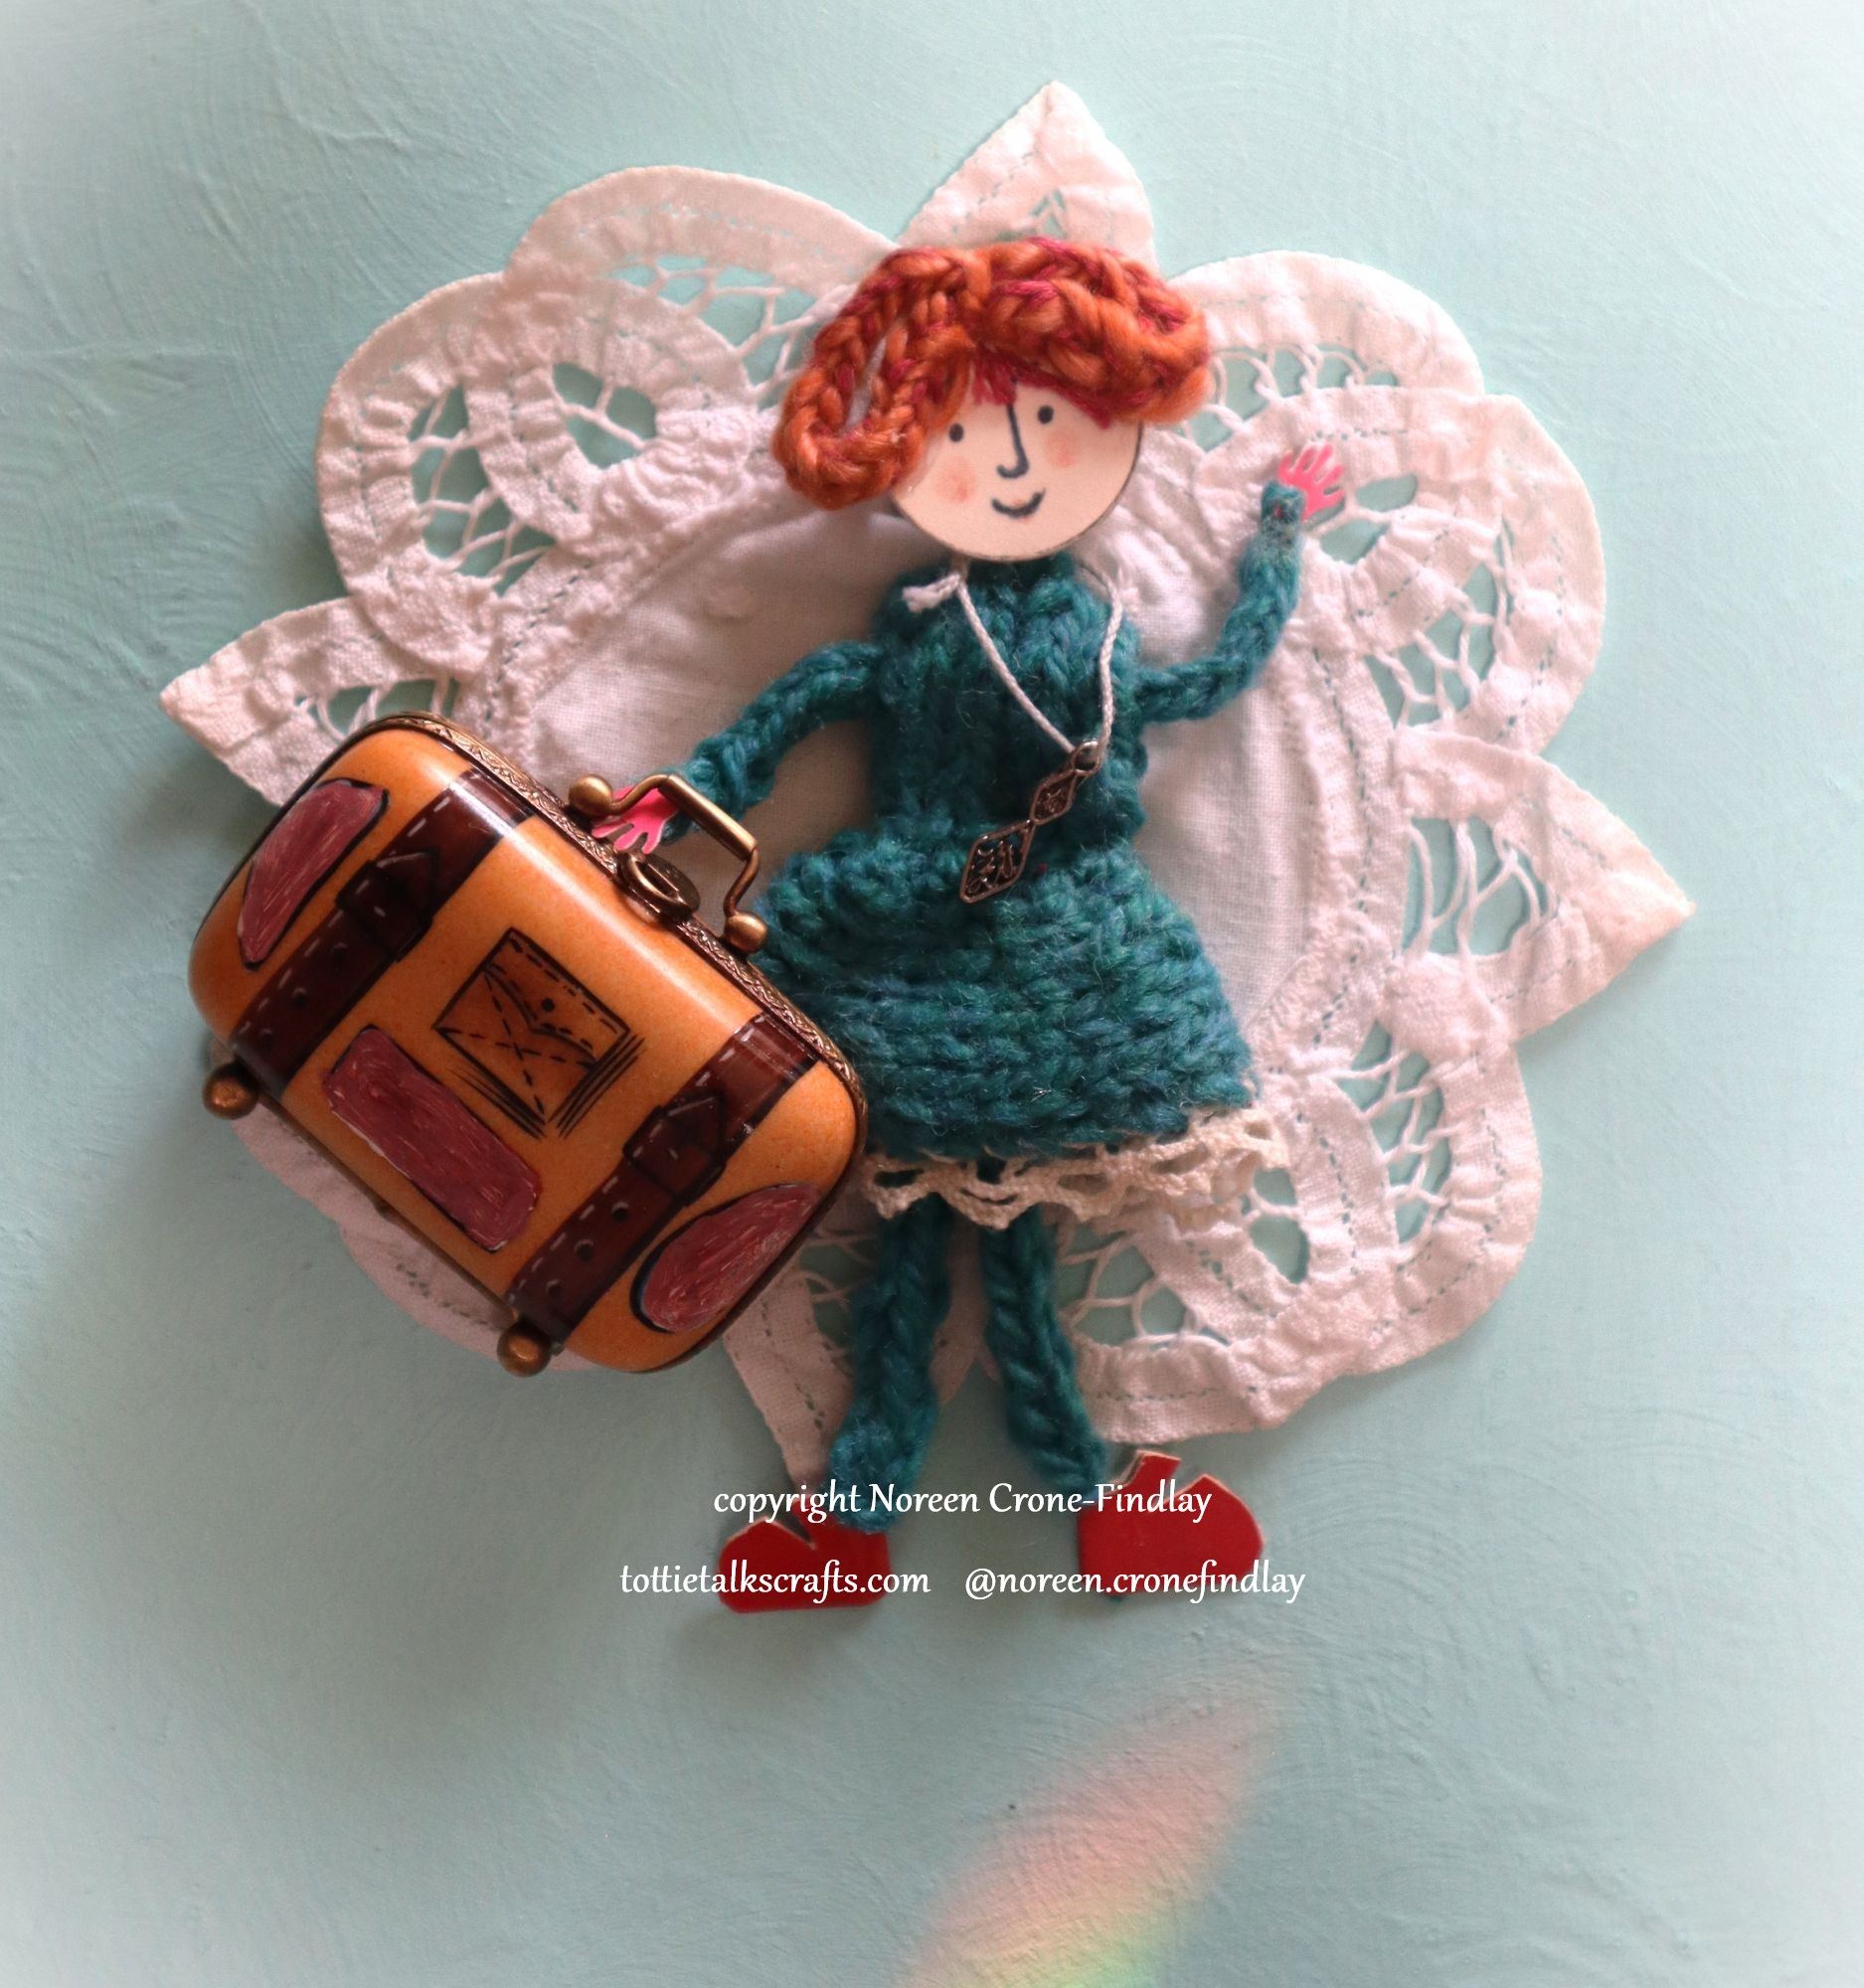
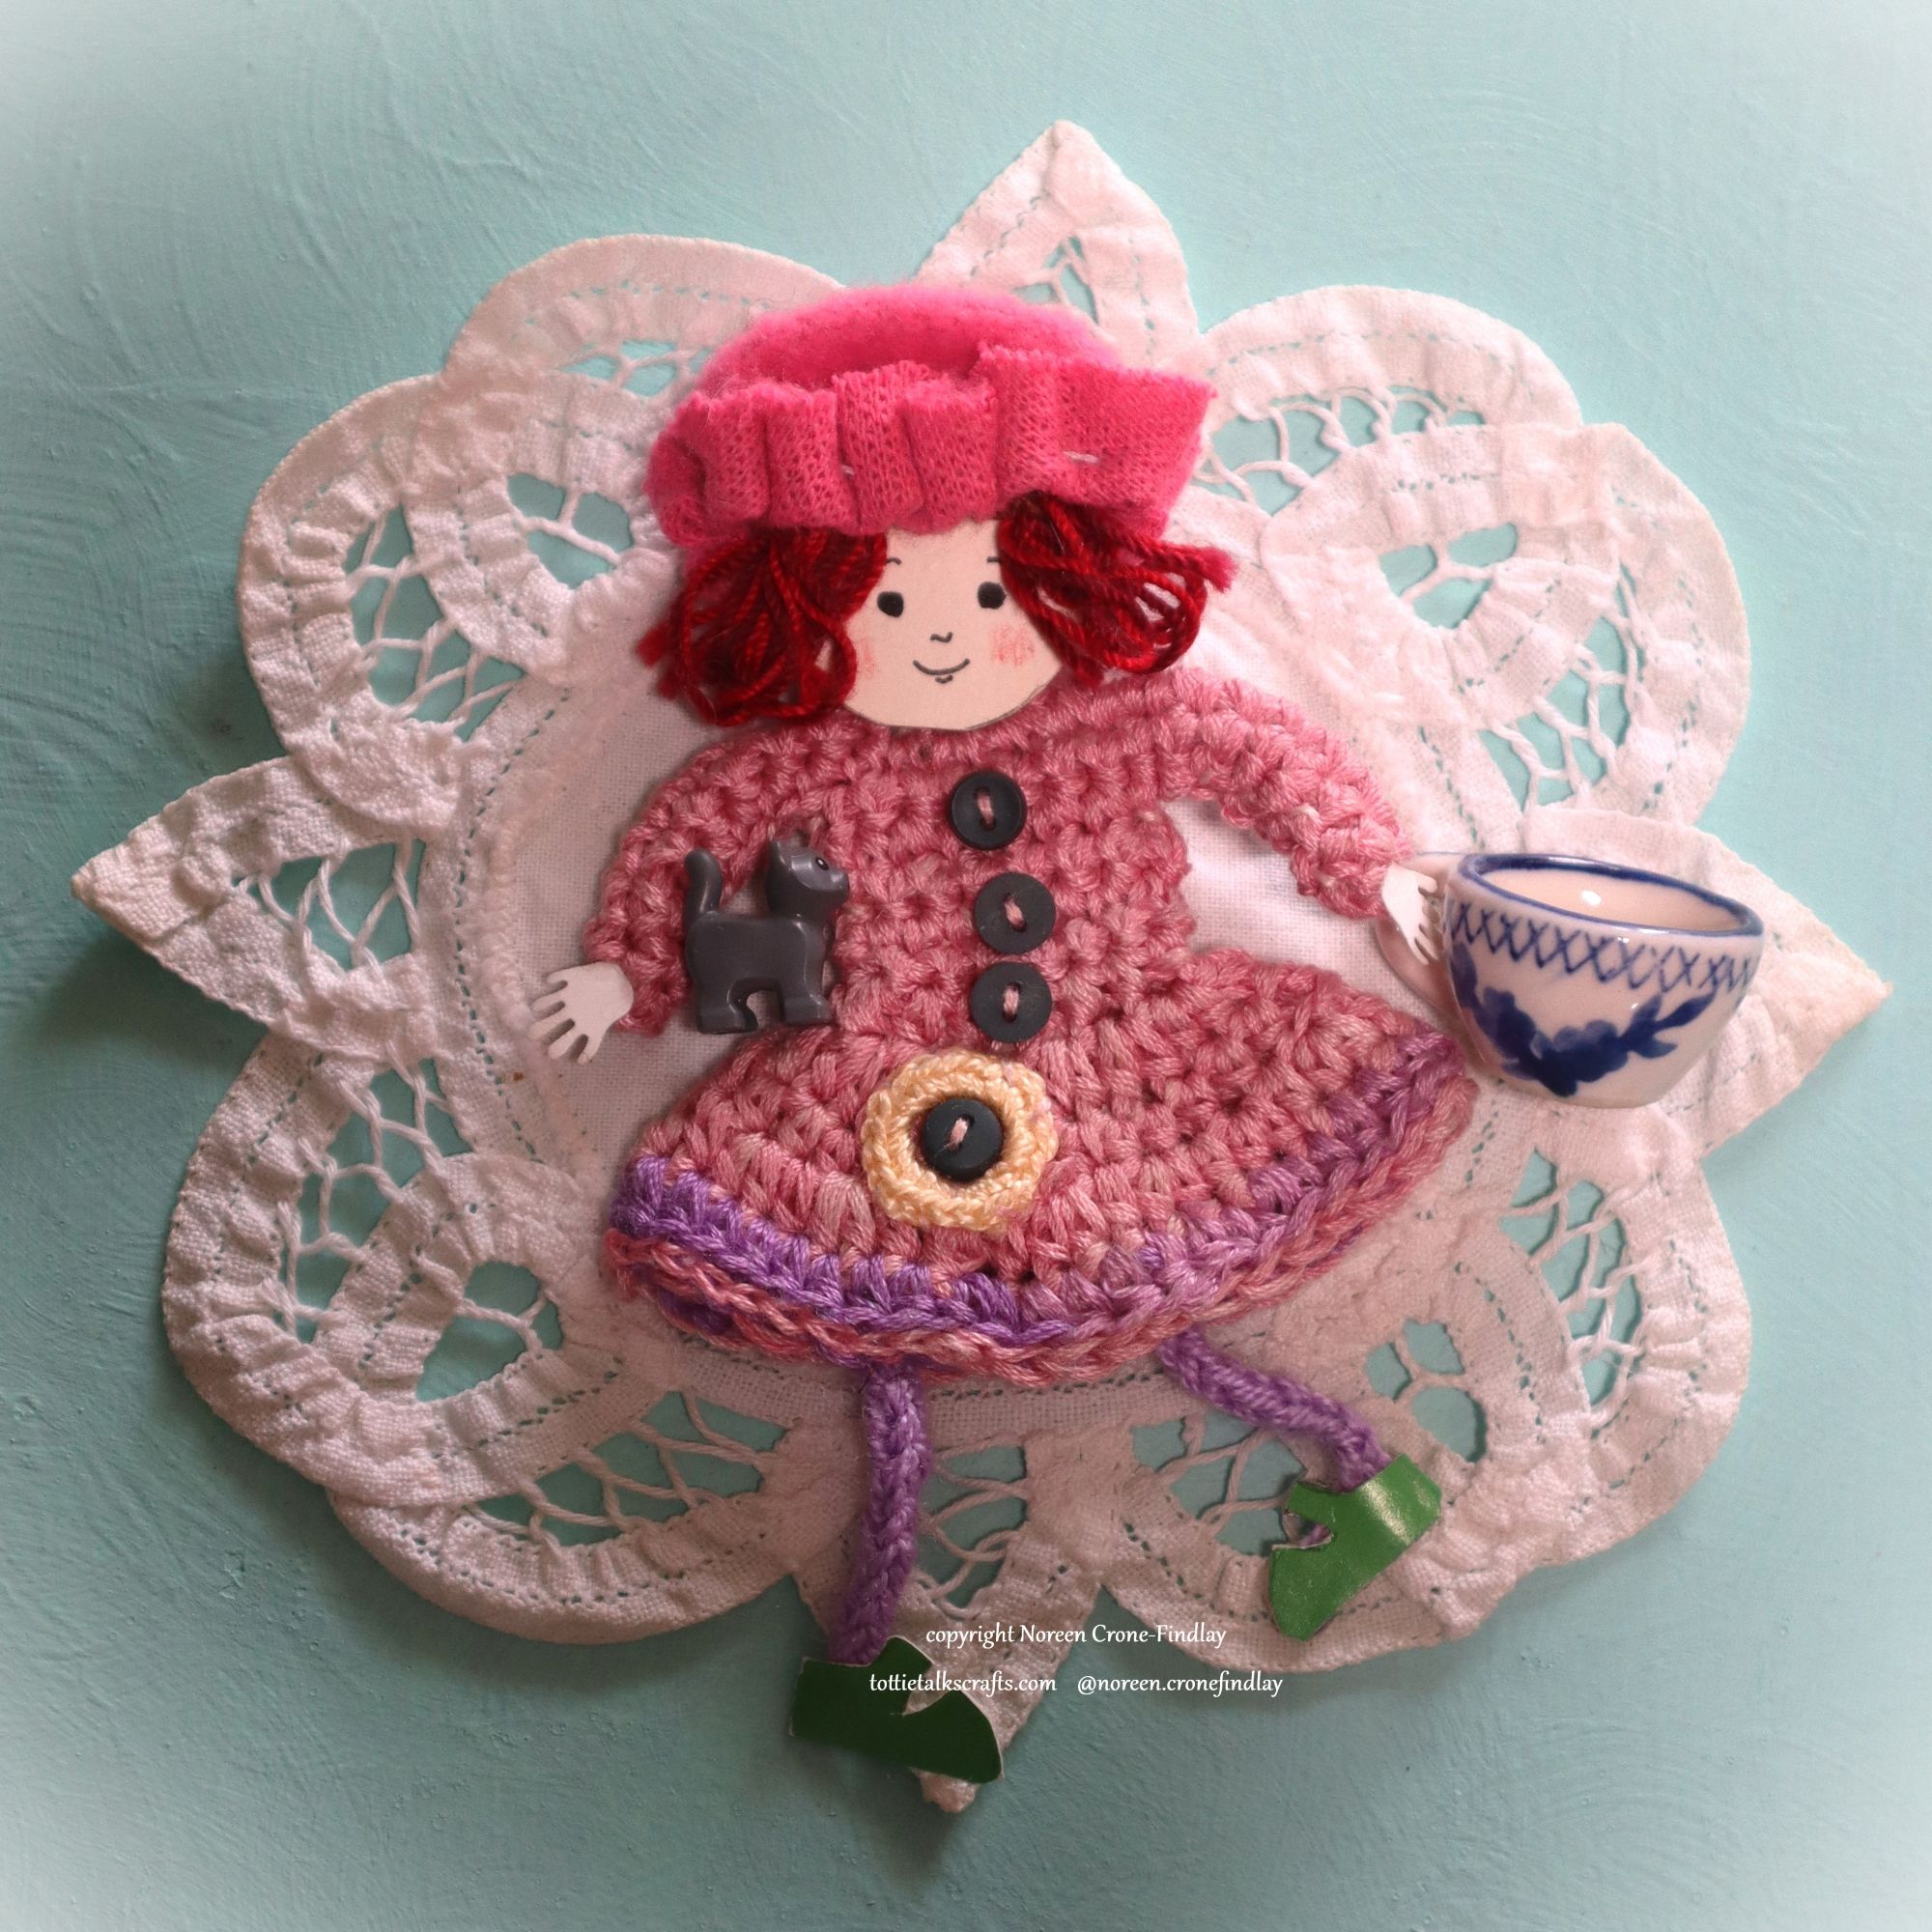
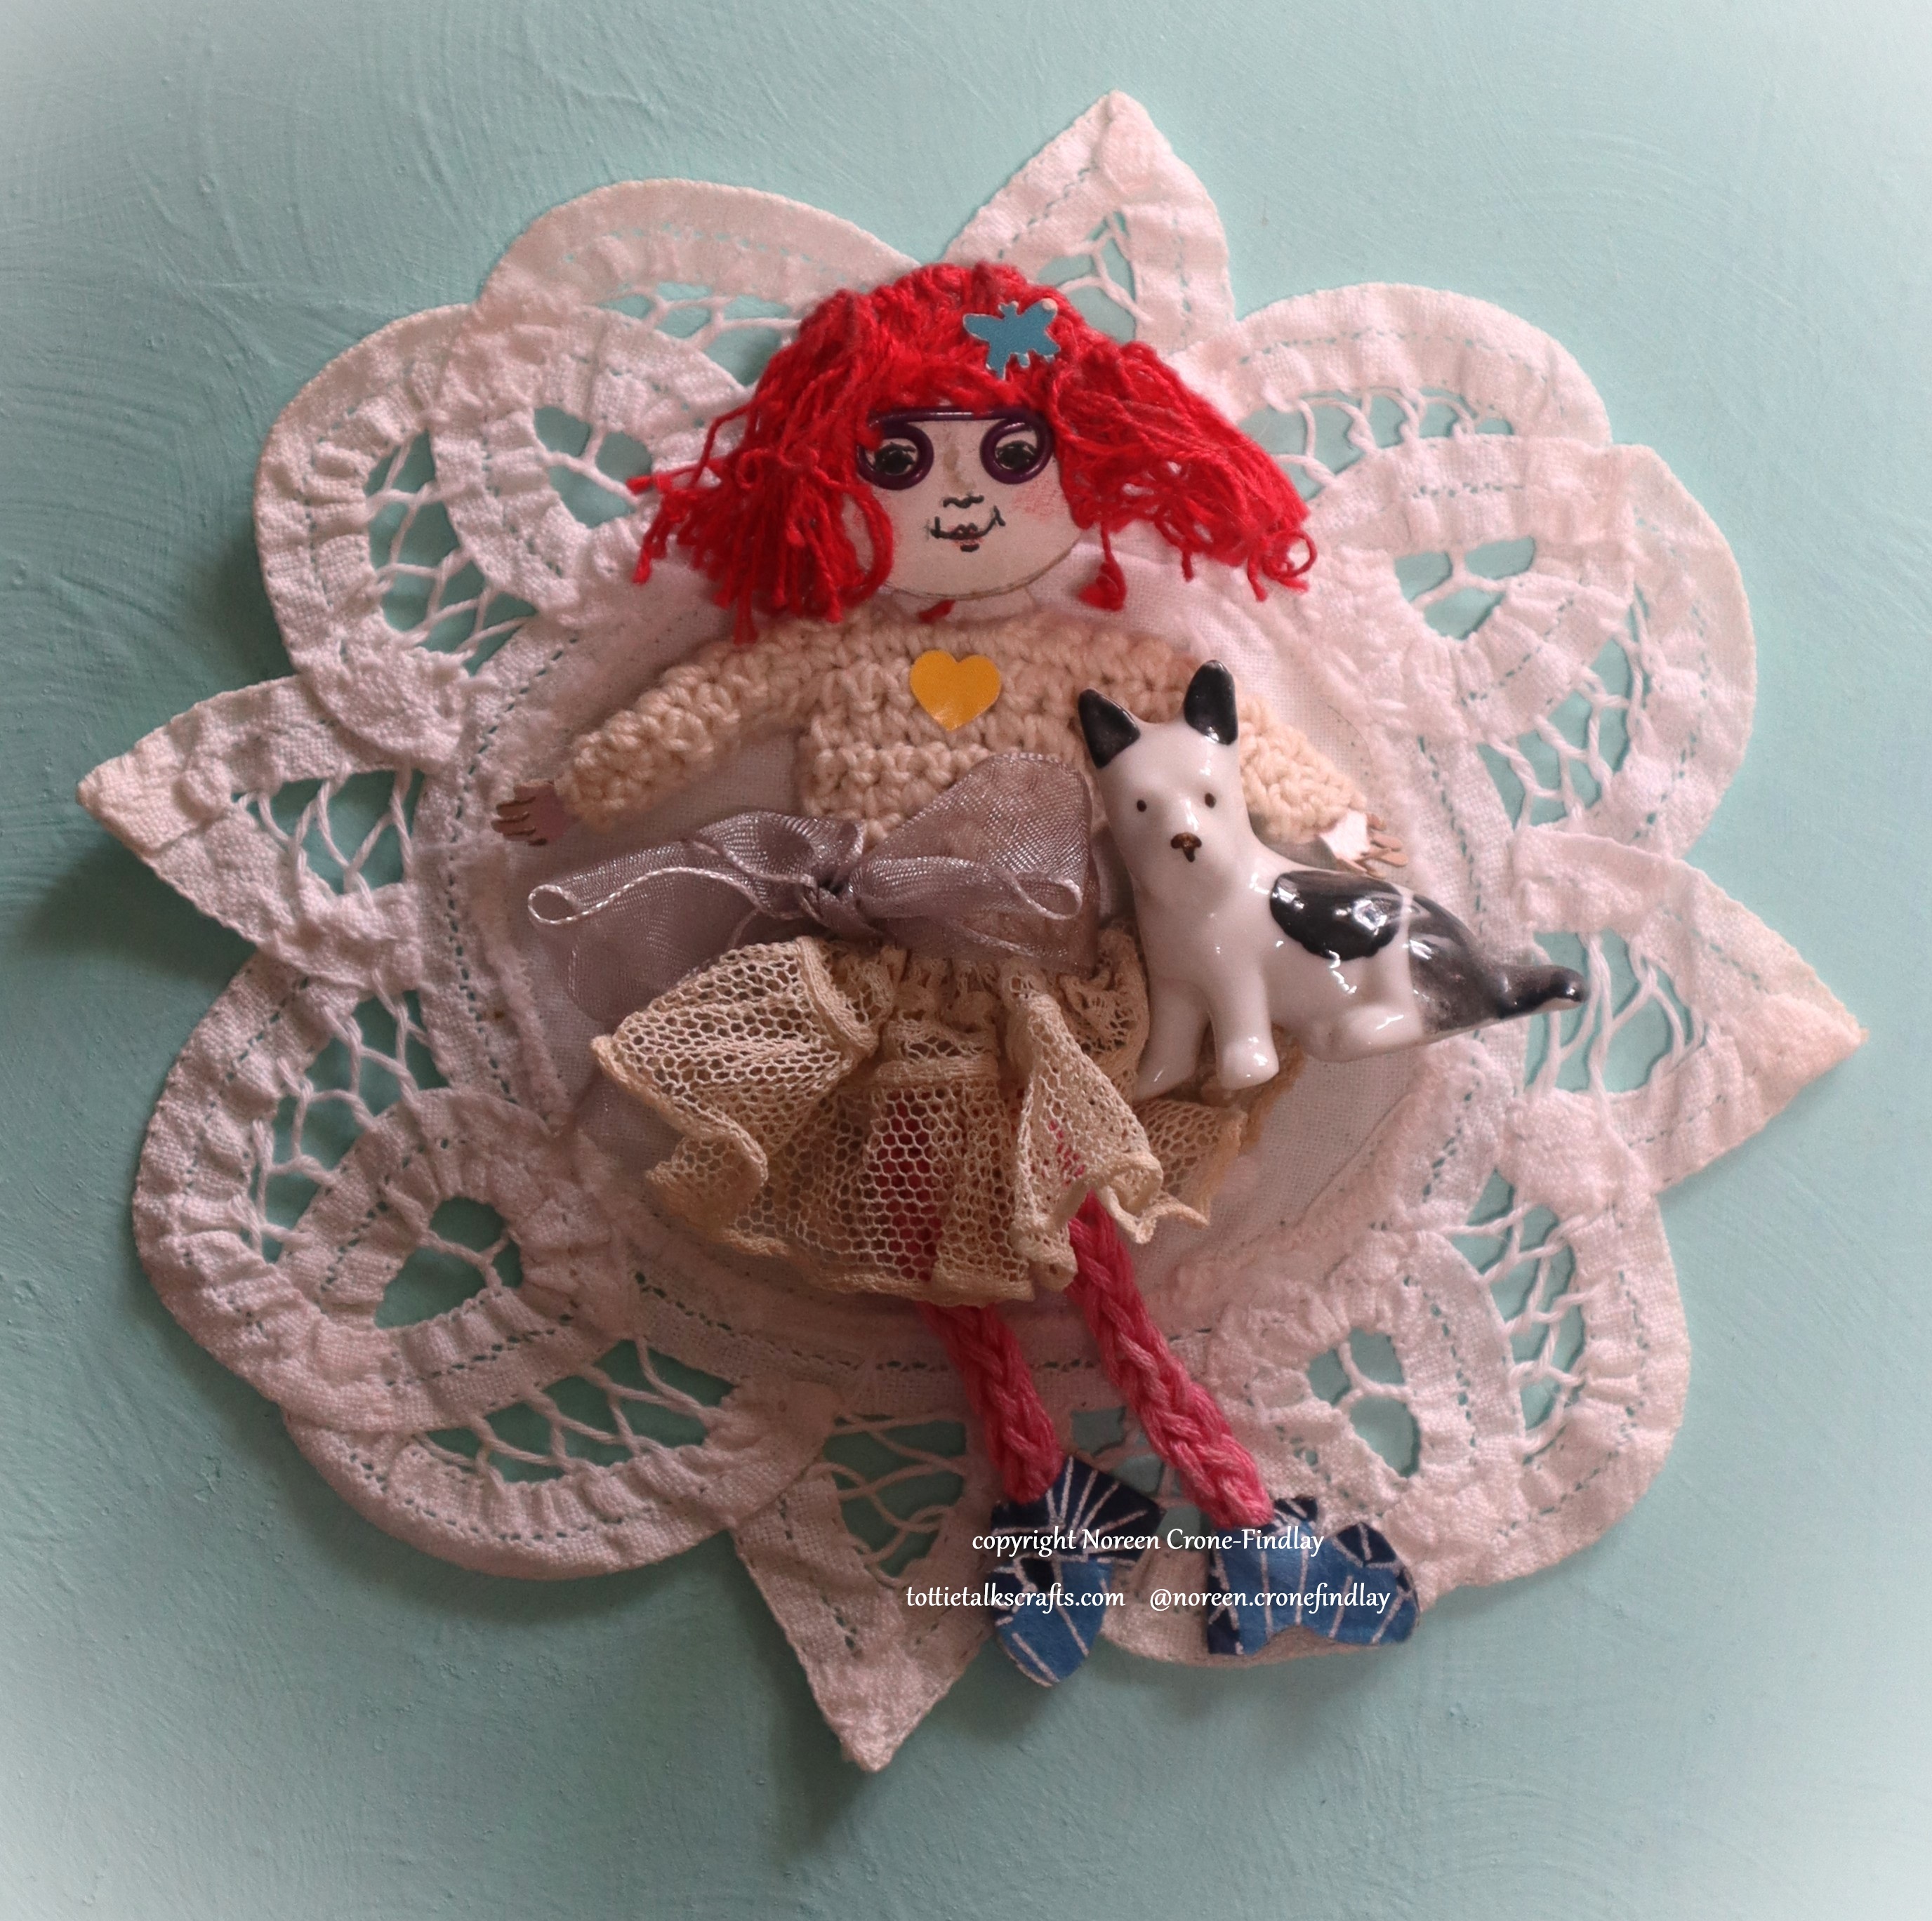
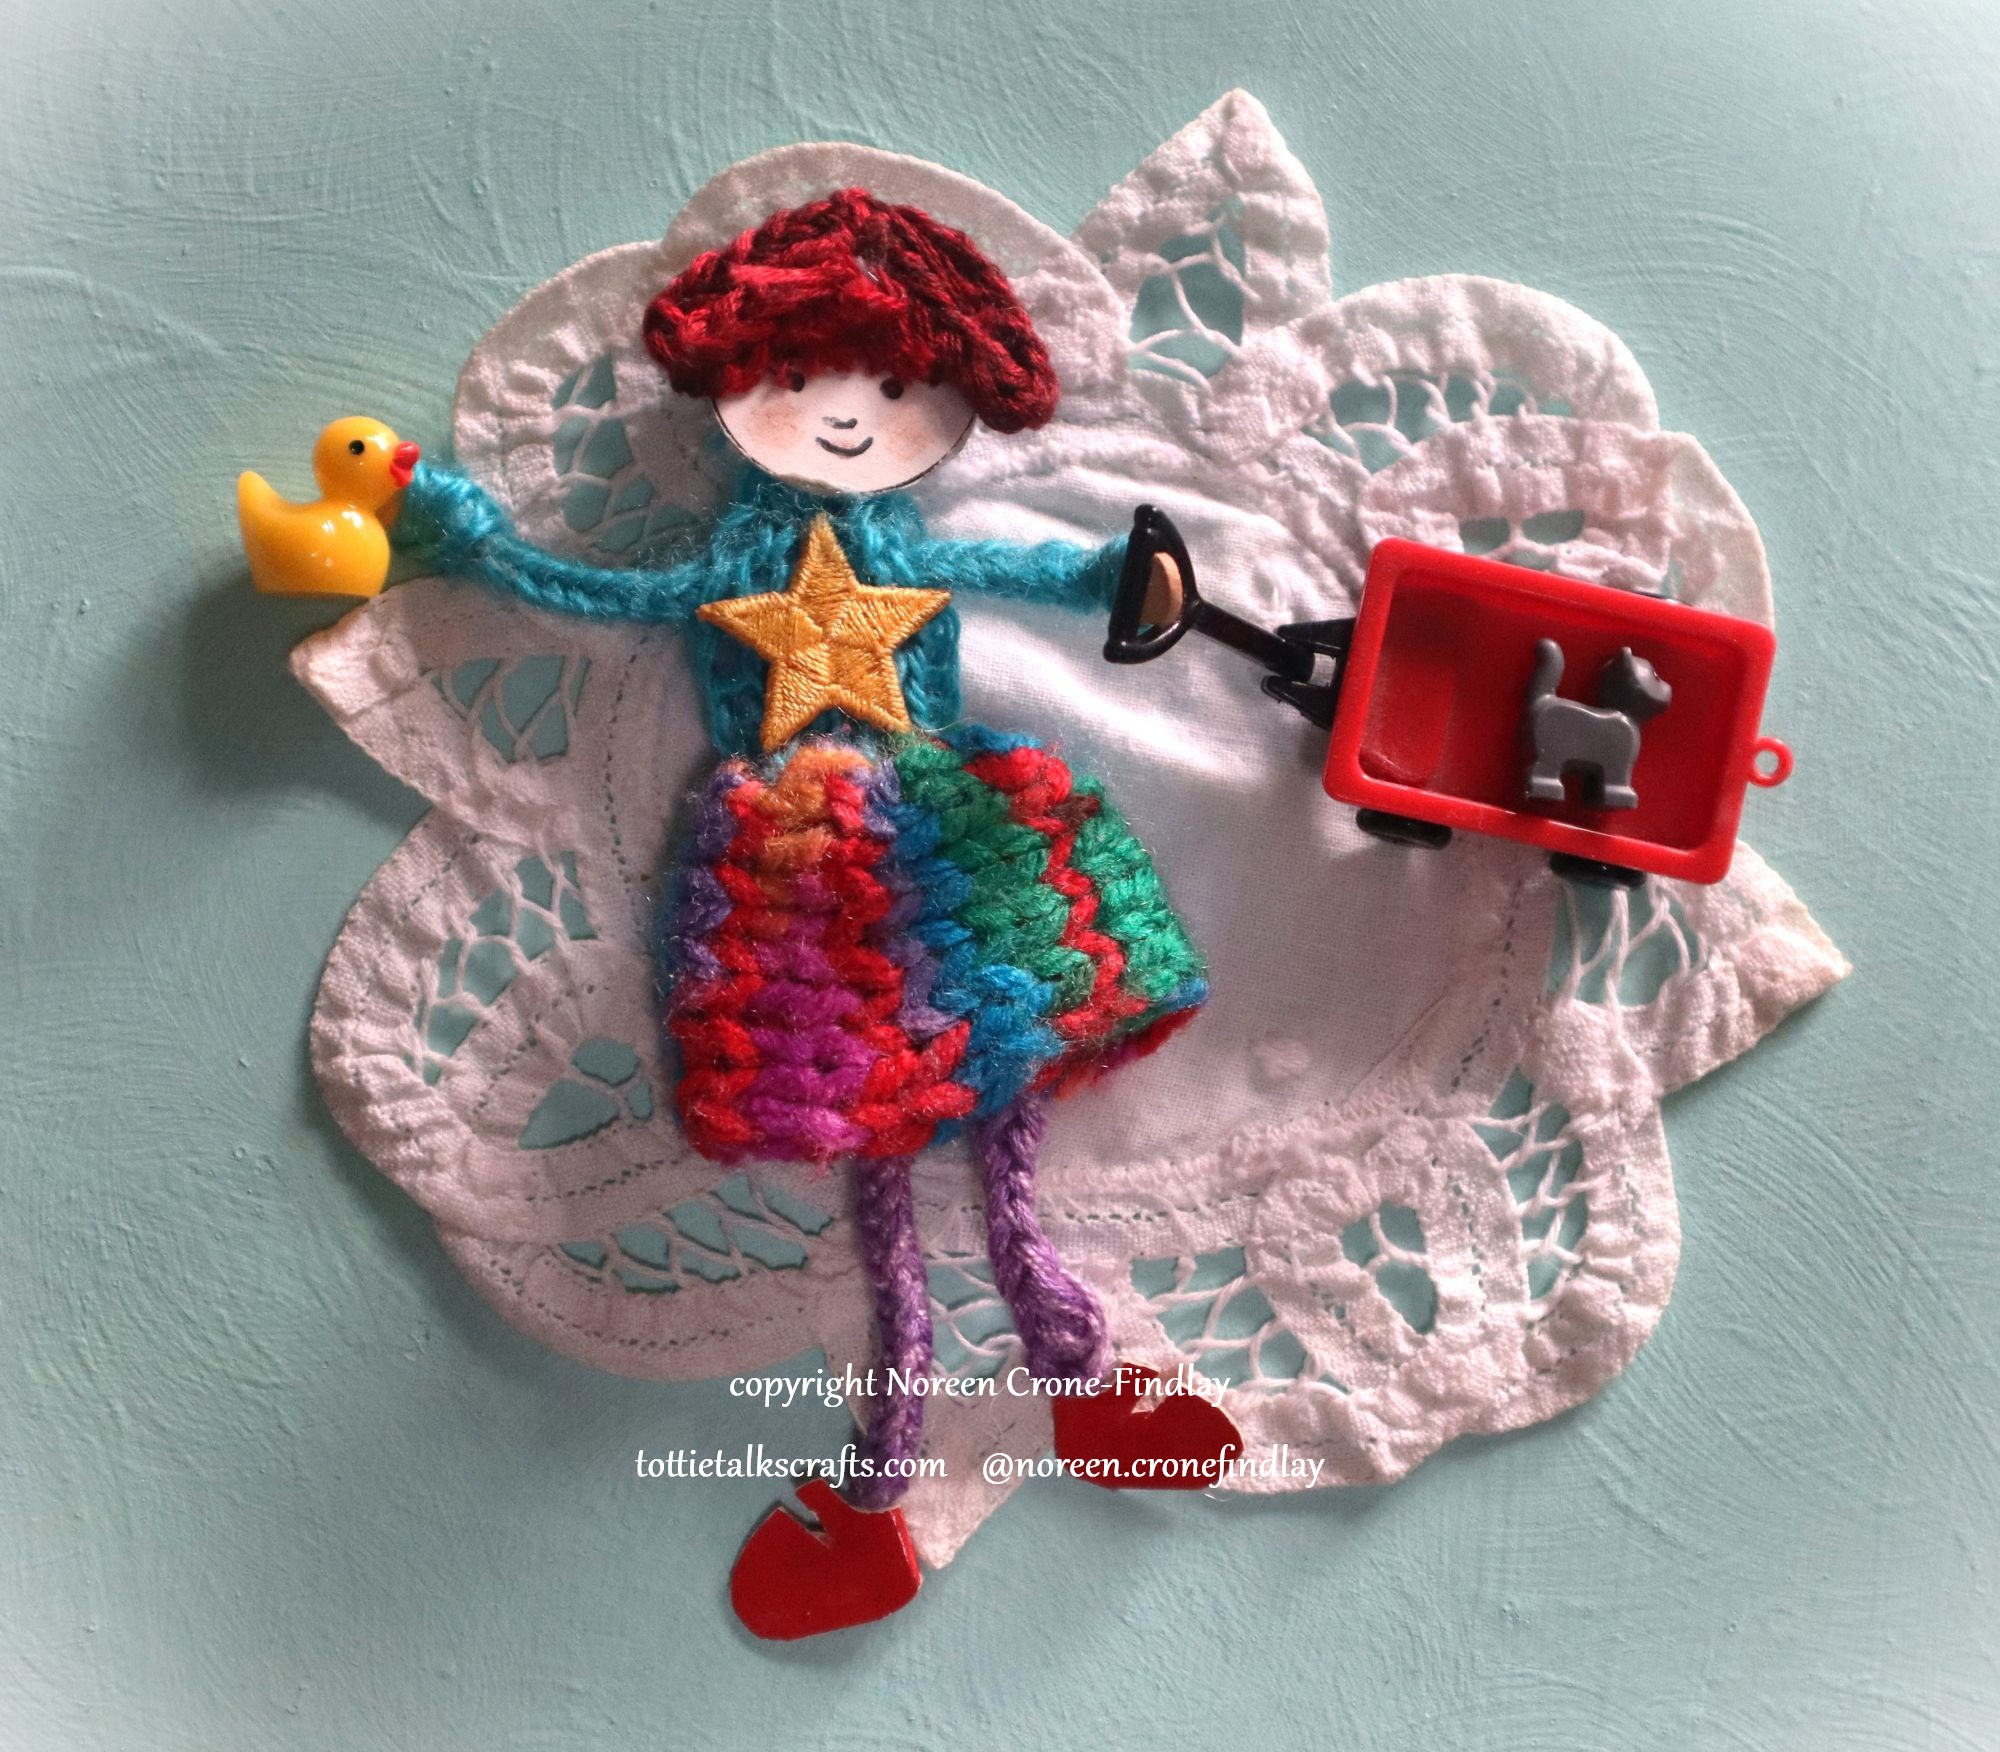
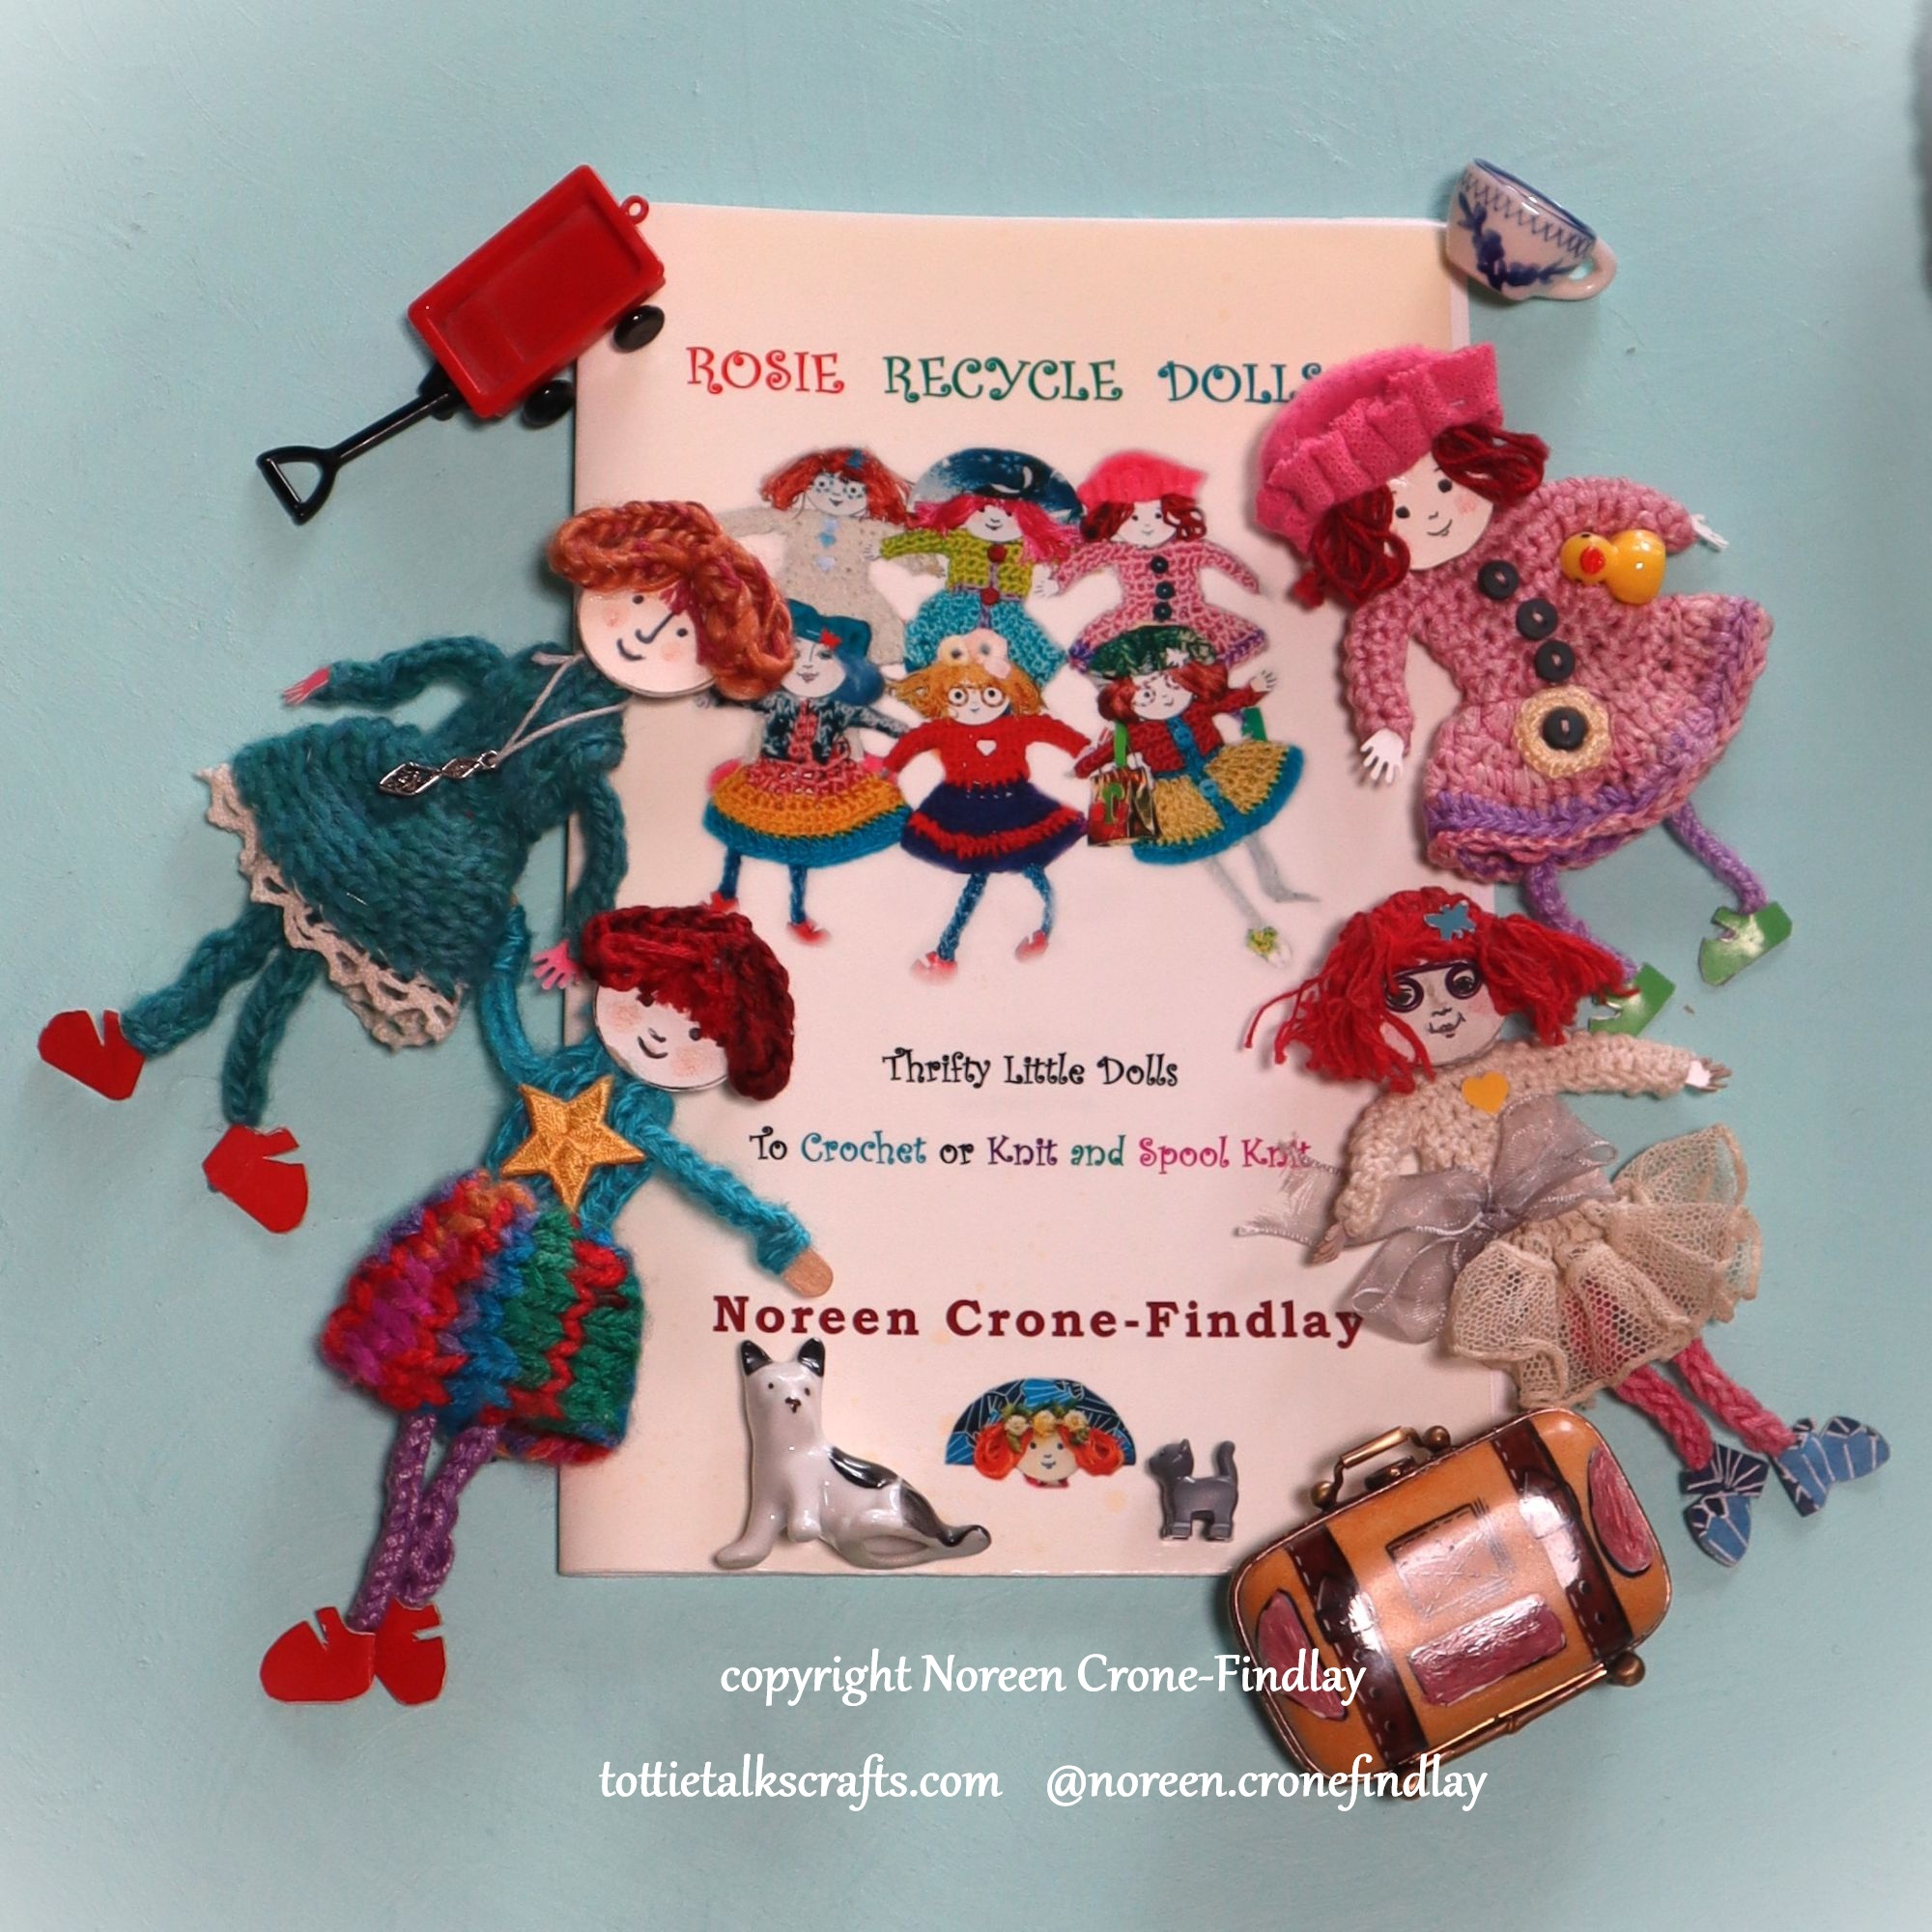
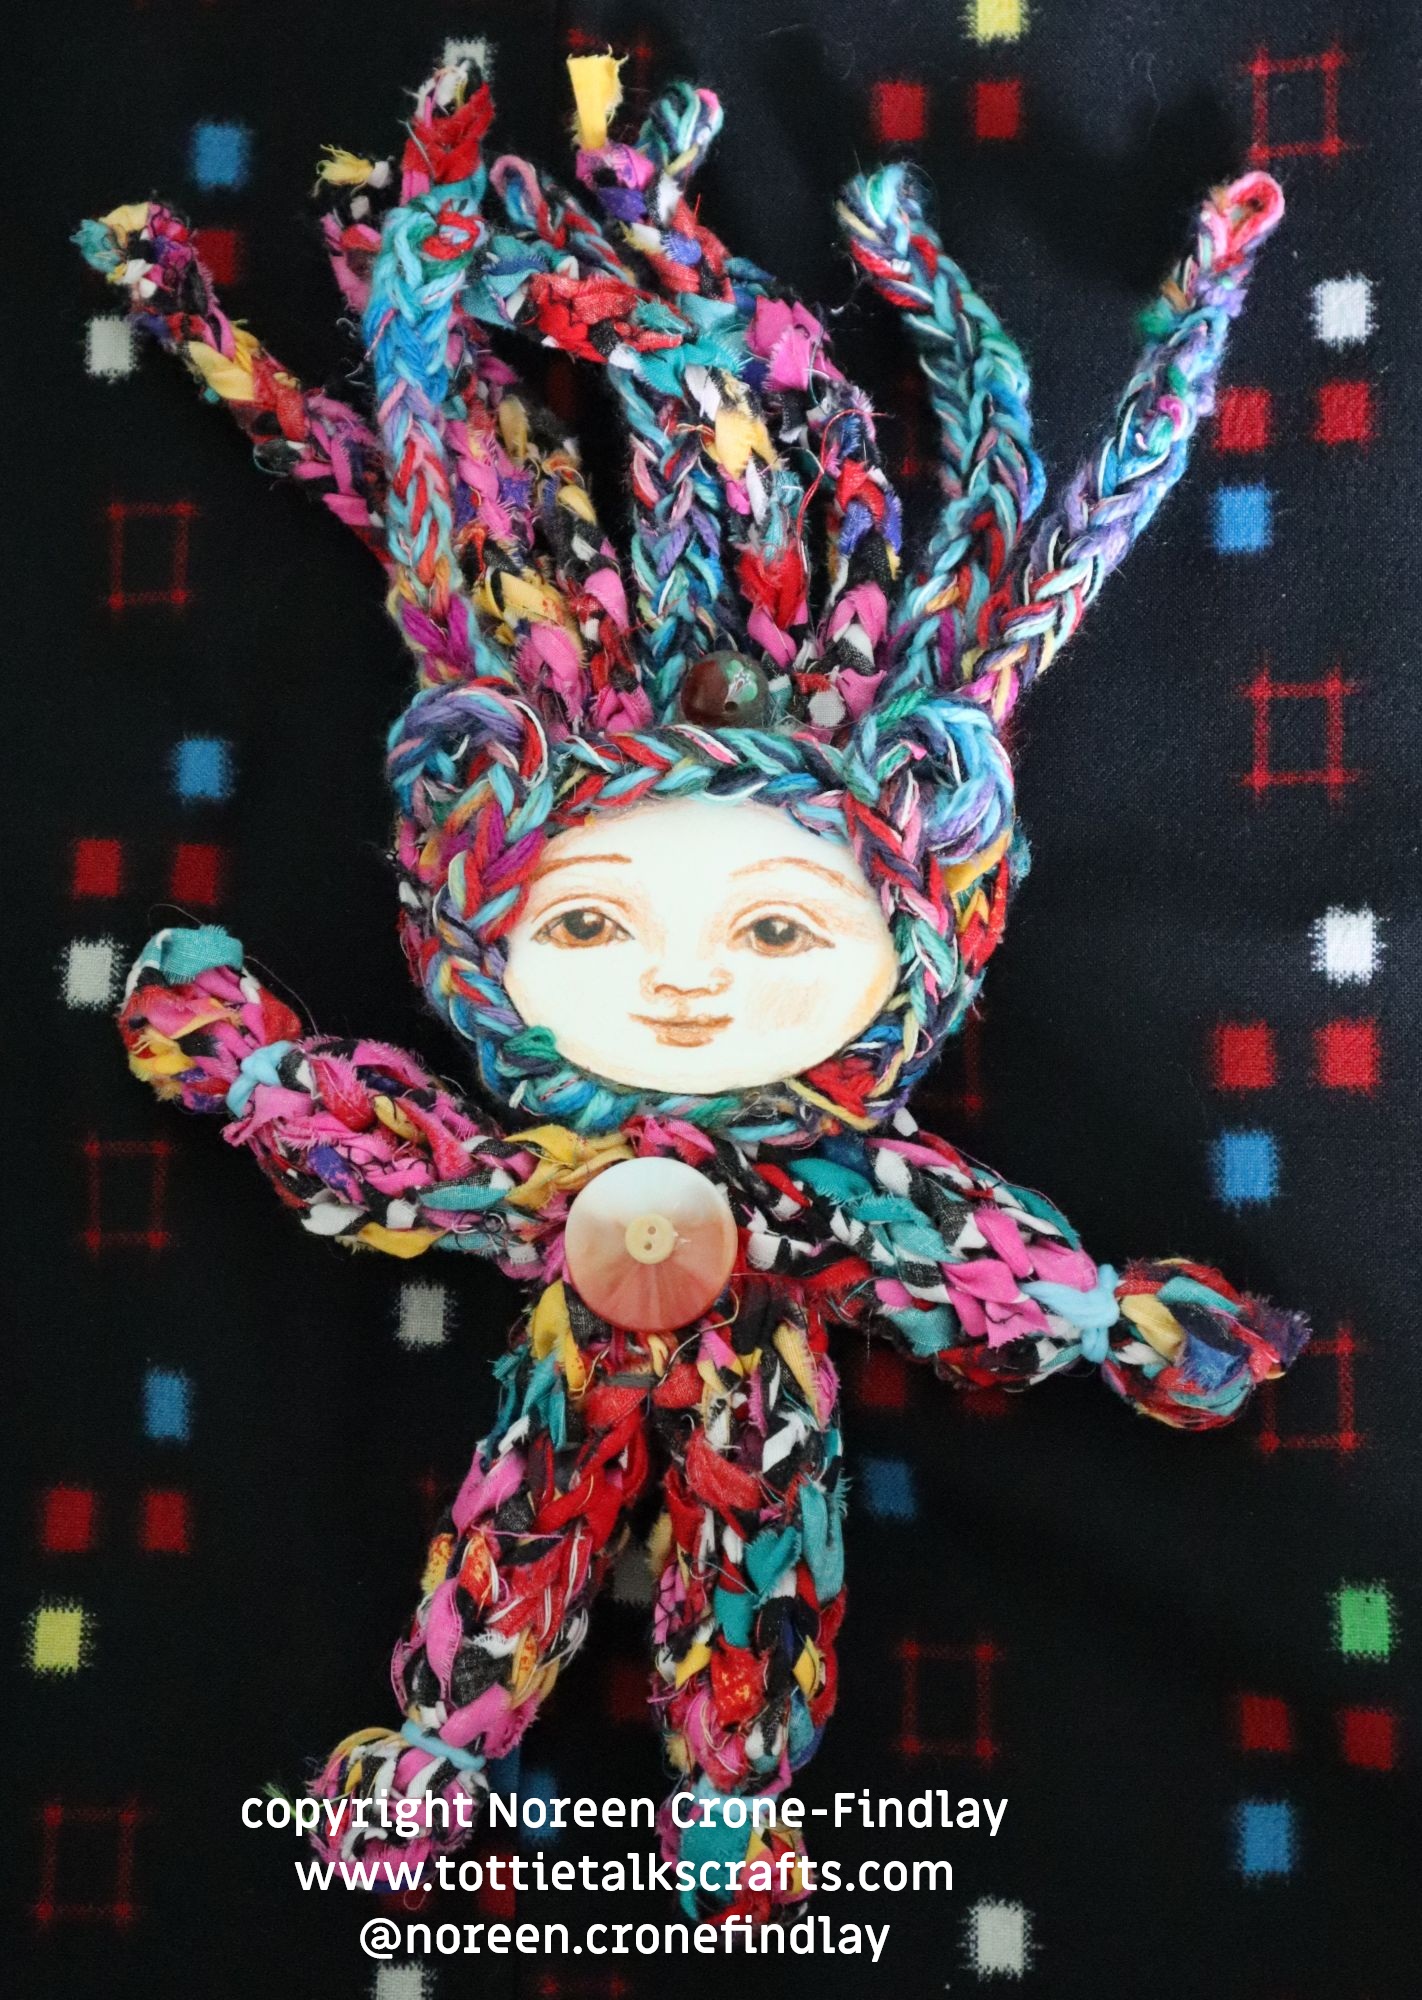
Day 72 of #100daysofspoolknittersandlittlelooms- I have always loved making dolls.
I am a dyed in the wool upcycler, so using upcycled things in my doll making is really important to me.
My ‘Rosie Recycle’ dolls are ‘pin dolls’ that have pins on the backs of their heads so they can be hung on a curtain, worn on a lapel or hat, or pinned to bag or backpack.
Their bodies are jointed from the neck so they ‘dance’.
I love them 🙂 They are so much fun to make!
When I wrote the instructions, I didn’t include lucet cords, but the Rosie Recycle dolls can definitely be made with lucet cords as well as spool knitters.
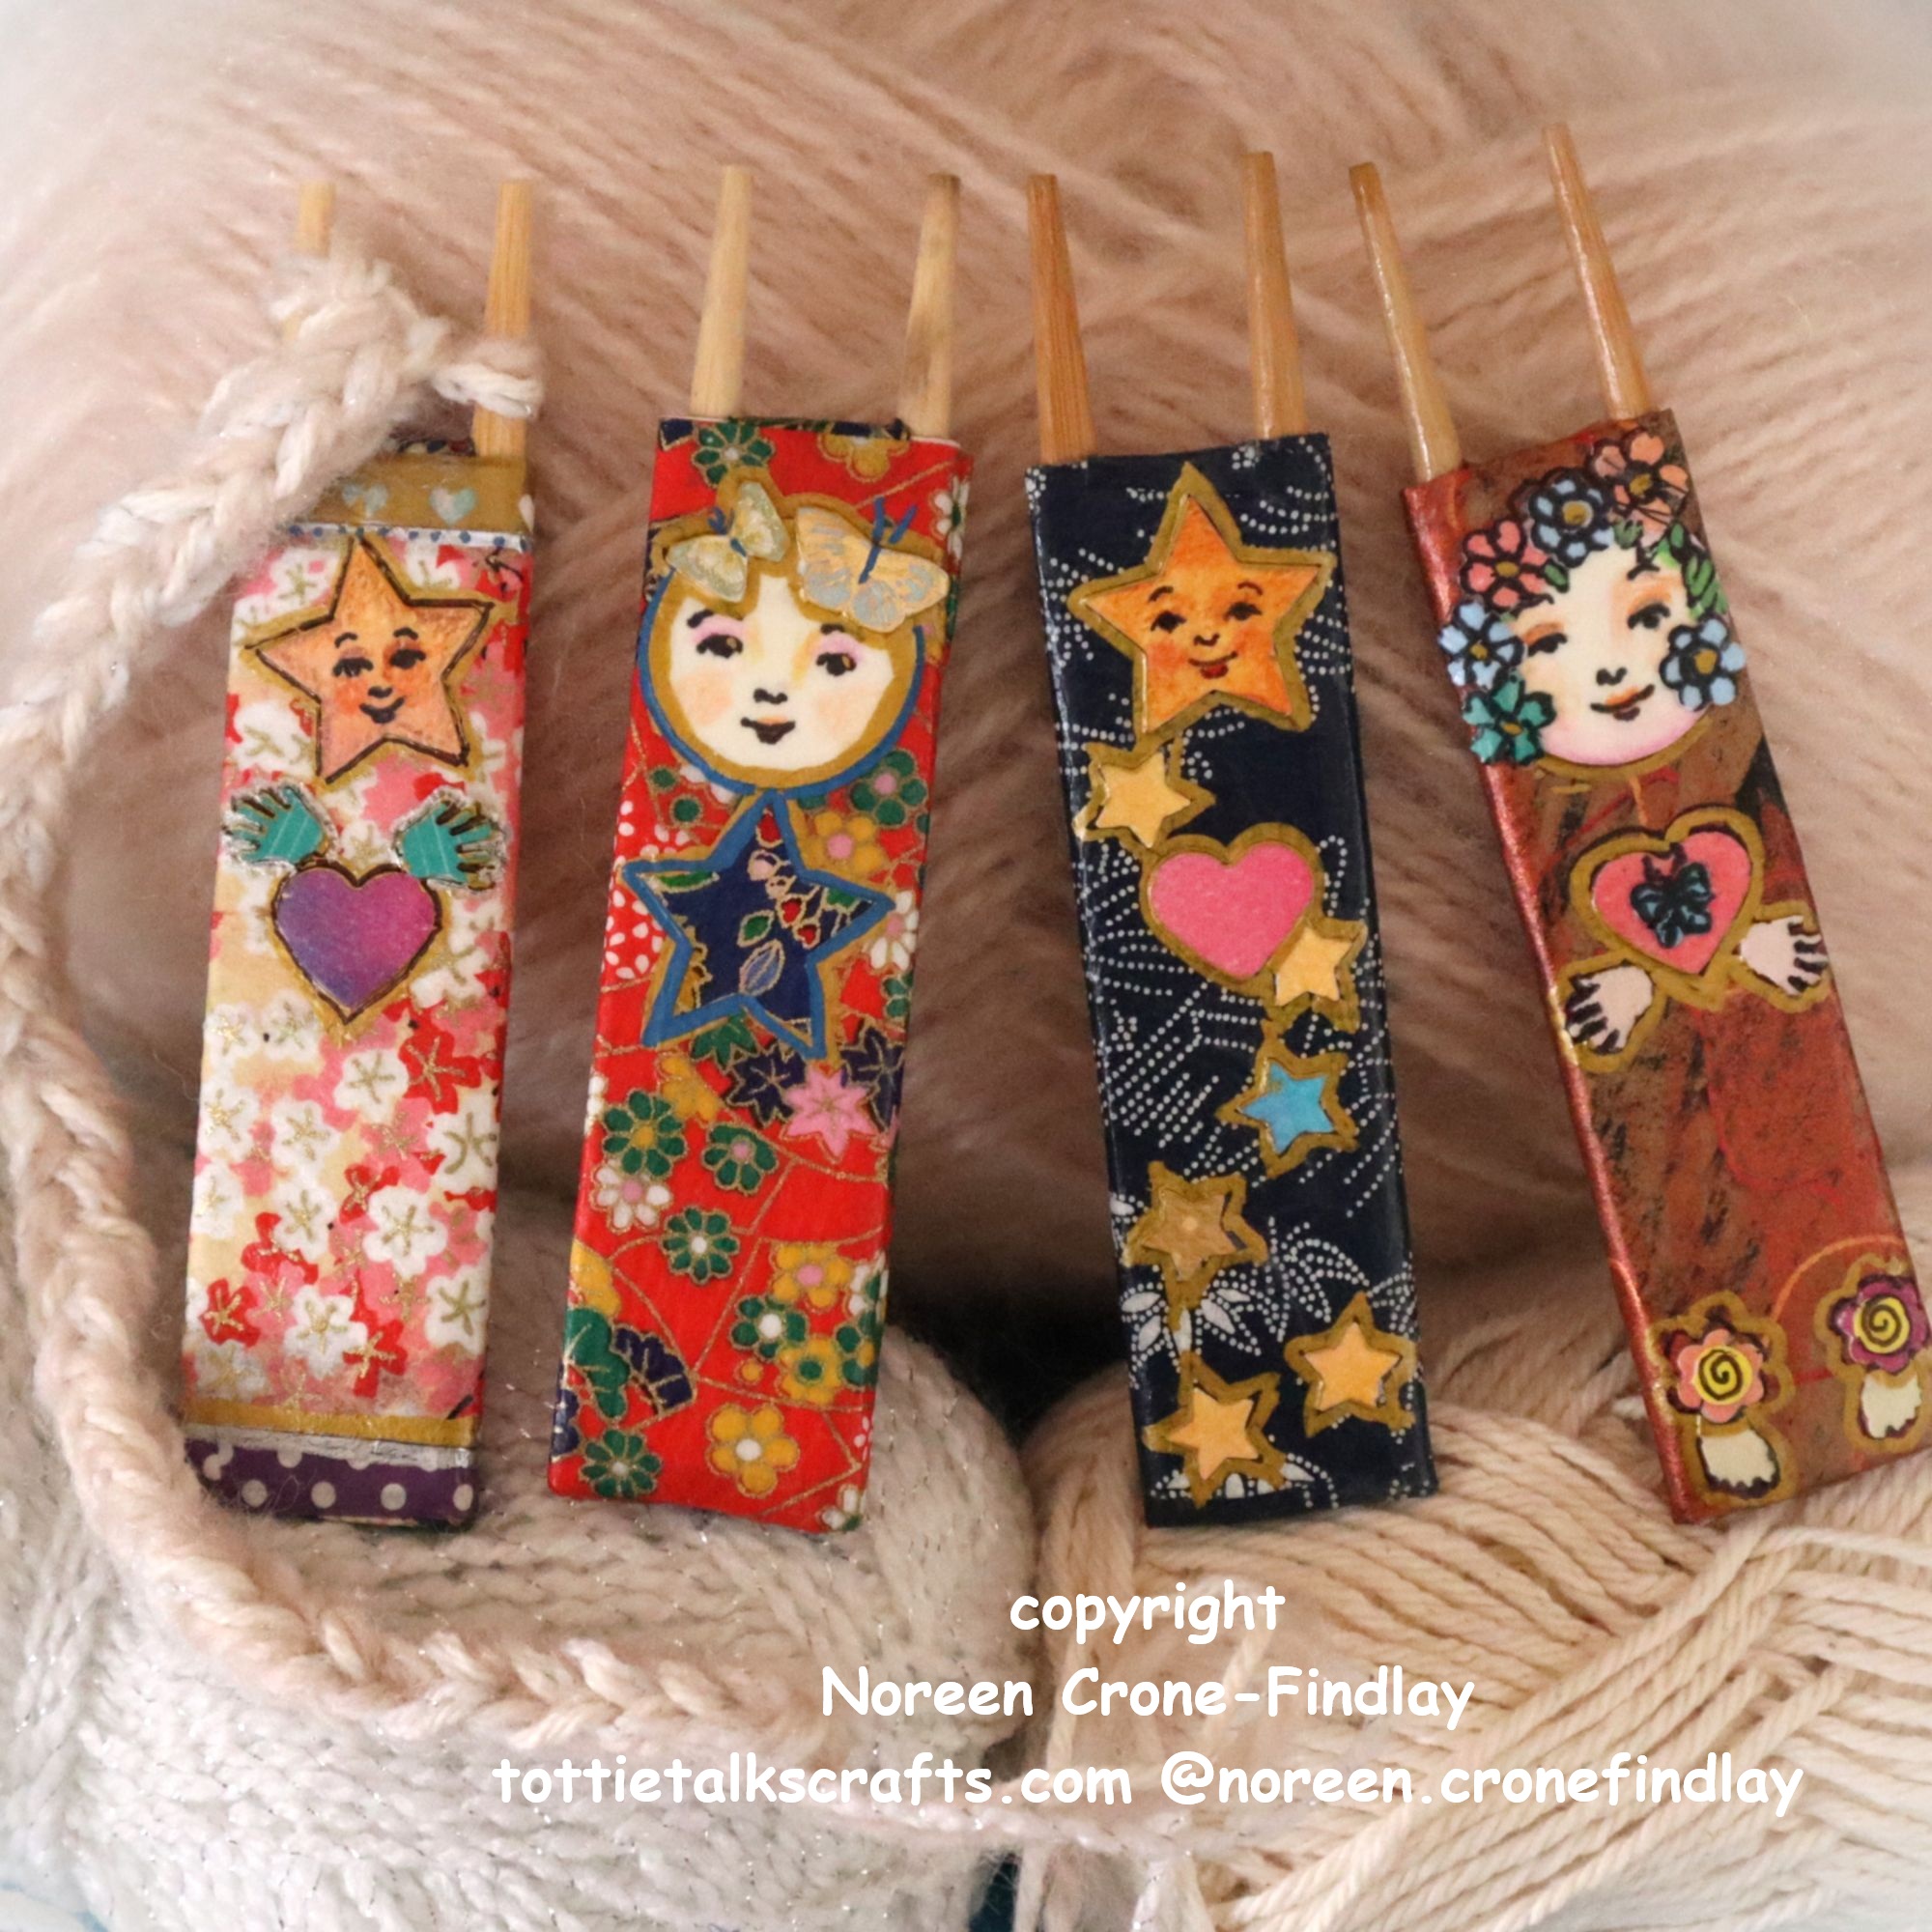
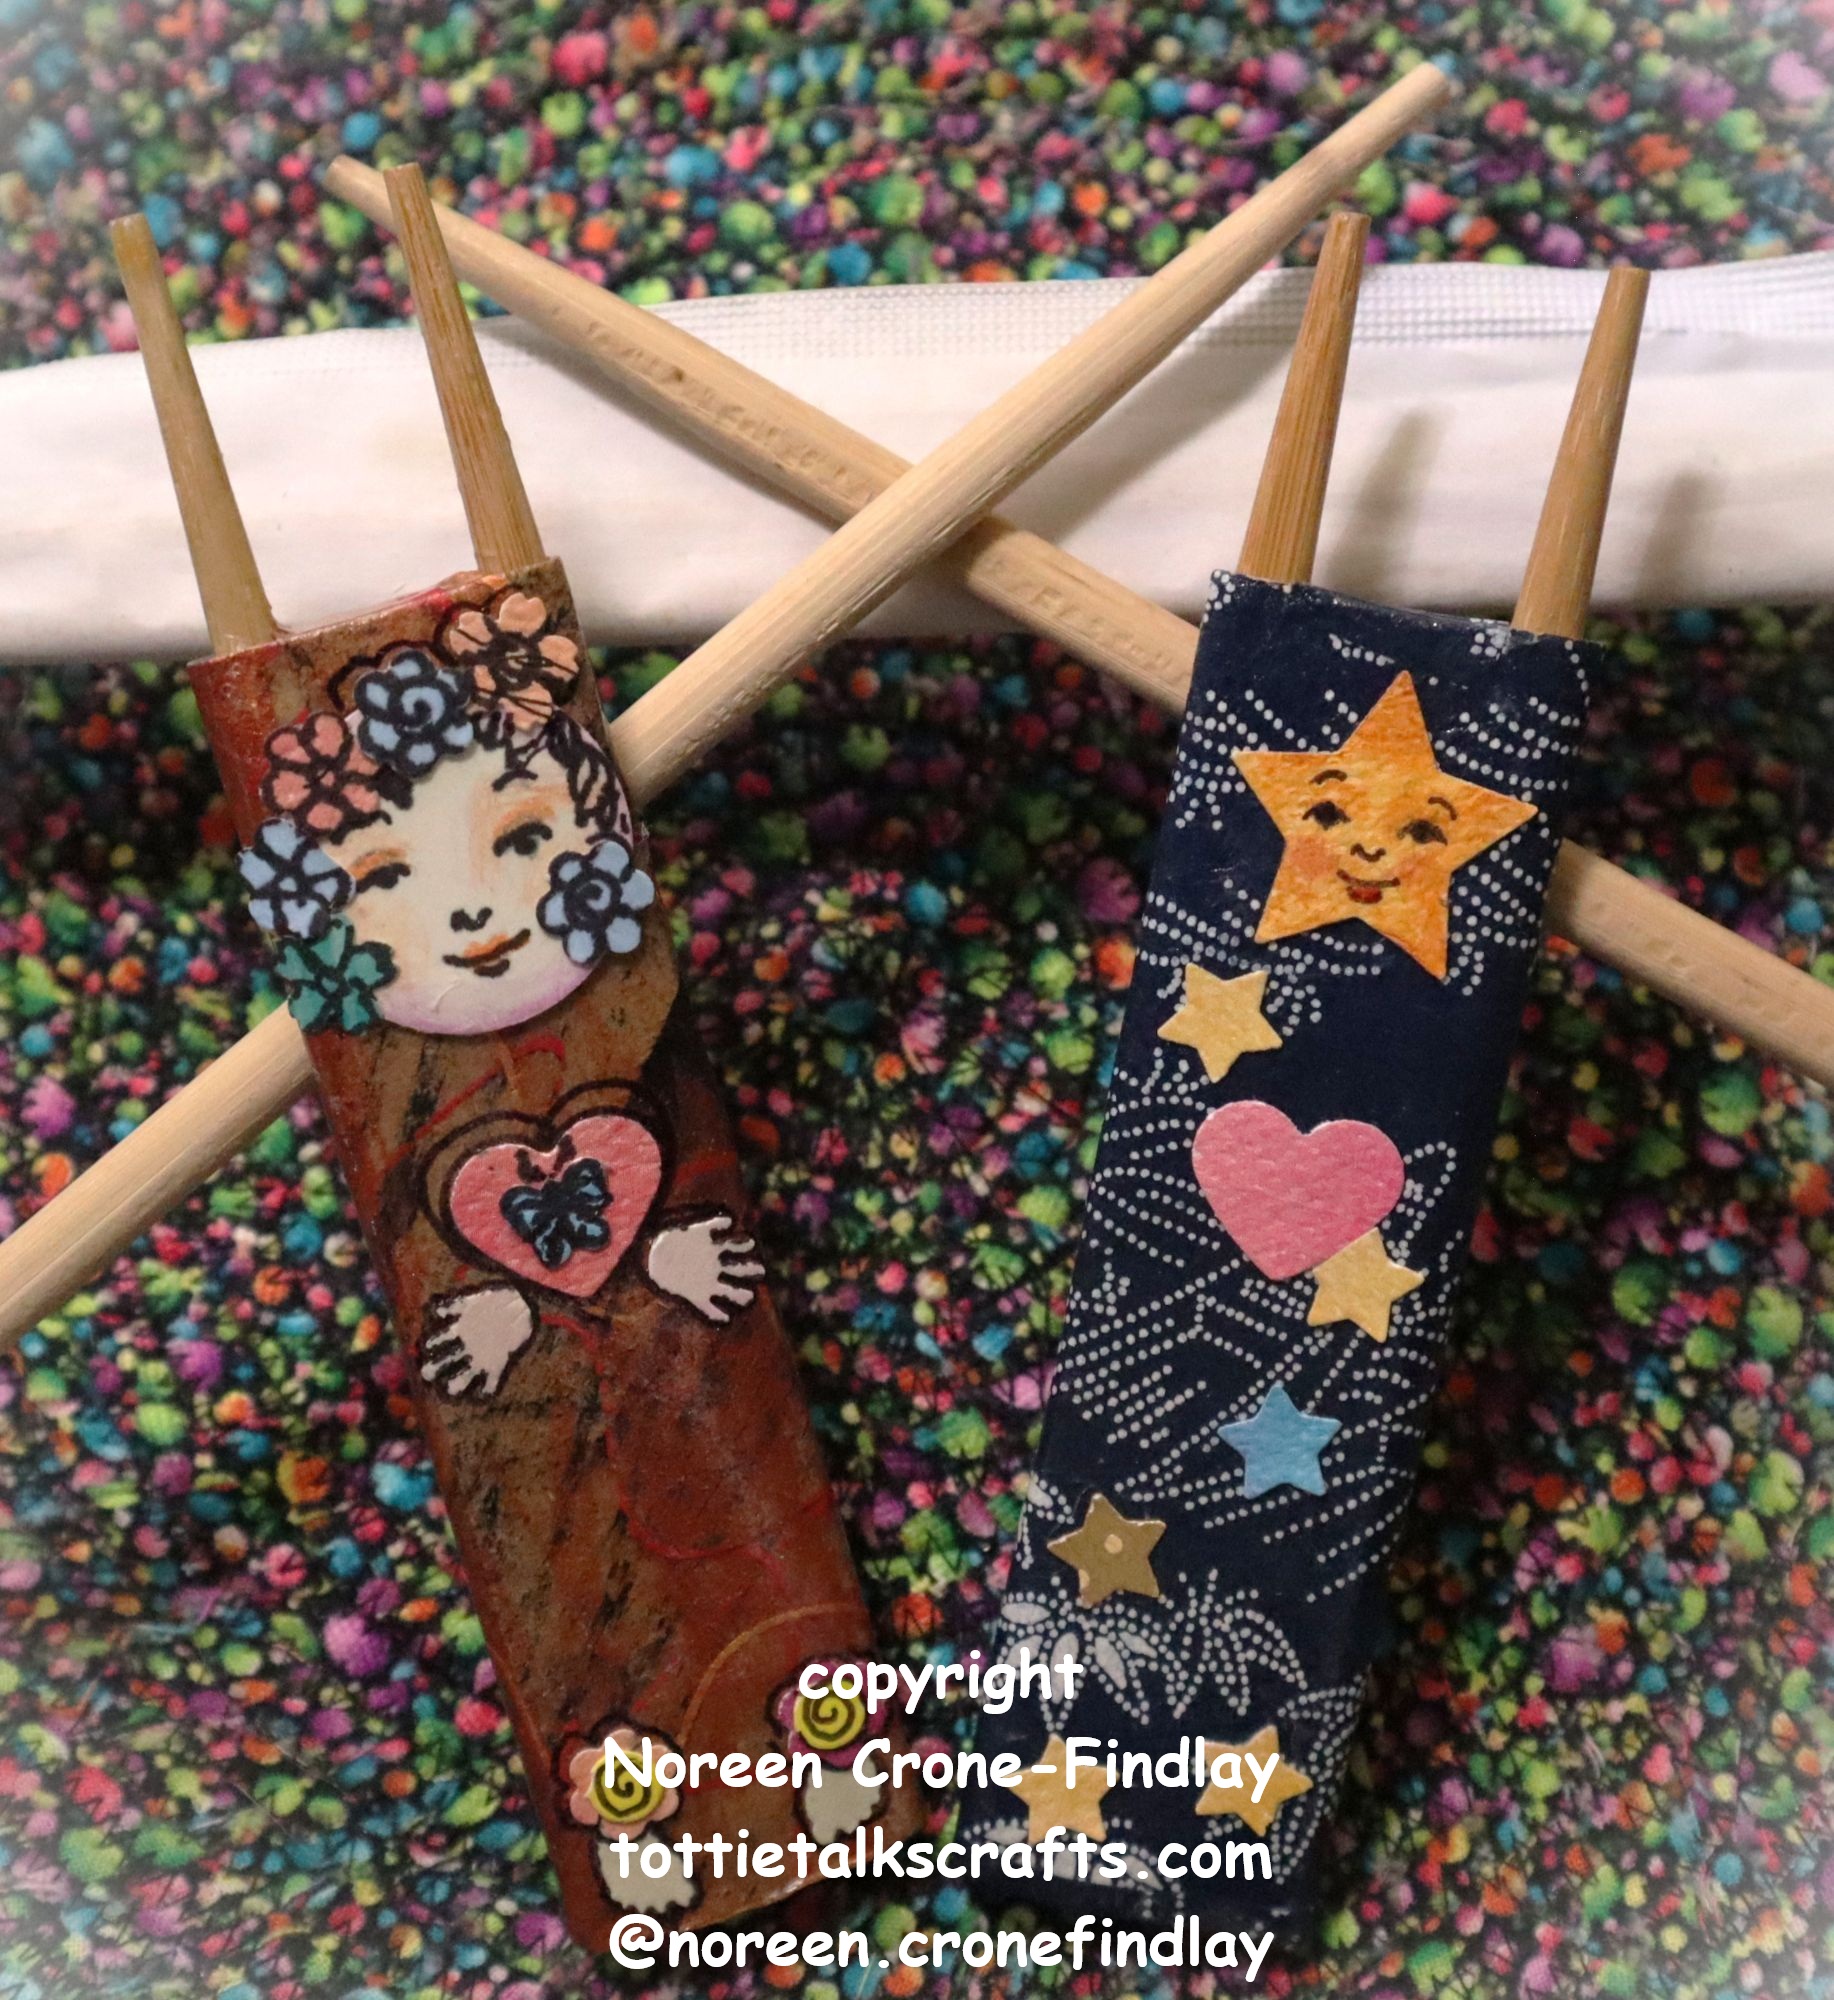
Day 42 of #100daysofspoolknittersandlittlelooms- How to Make a Lucet from Upcycled Chopsticks and How to Make Lucet Cord with it
One of the unexpected bonuses of doing the 100 Day Project is that it reminds me of things that I have designed and then set aside and forgotten.
One of those things is the delightful Lucet Cord maker (Lucets are flat 2 peg spool knitters) that I use upcycled chopsticks to make. They are such a pleasure to work with and I love making cord with them.
Day 41 of #100daysofspoolknittersandlittlelooms- Kindness Loom woven Butterflies for Springtime and Easter
If you would like to make some quick and easy little Easter and Springtime gifts – here’s a link to a free video tutorial that shows how to makeTiny Butterflies woven on the Kindness Loom. They are part of my ‘Weaving Kindness Project’.
All the links for how to get the instructions for weaving little projects that are the epitome of kindness, hope and delight., from making the loom to a ton of delightful little Weaving Kindness projectss are here:
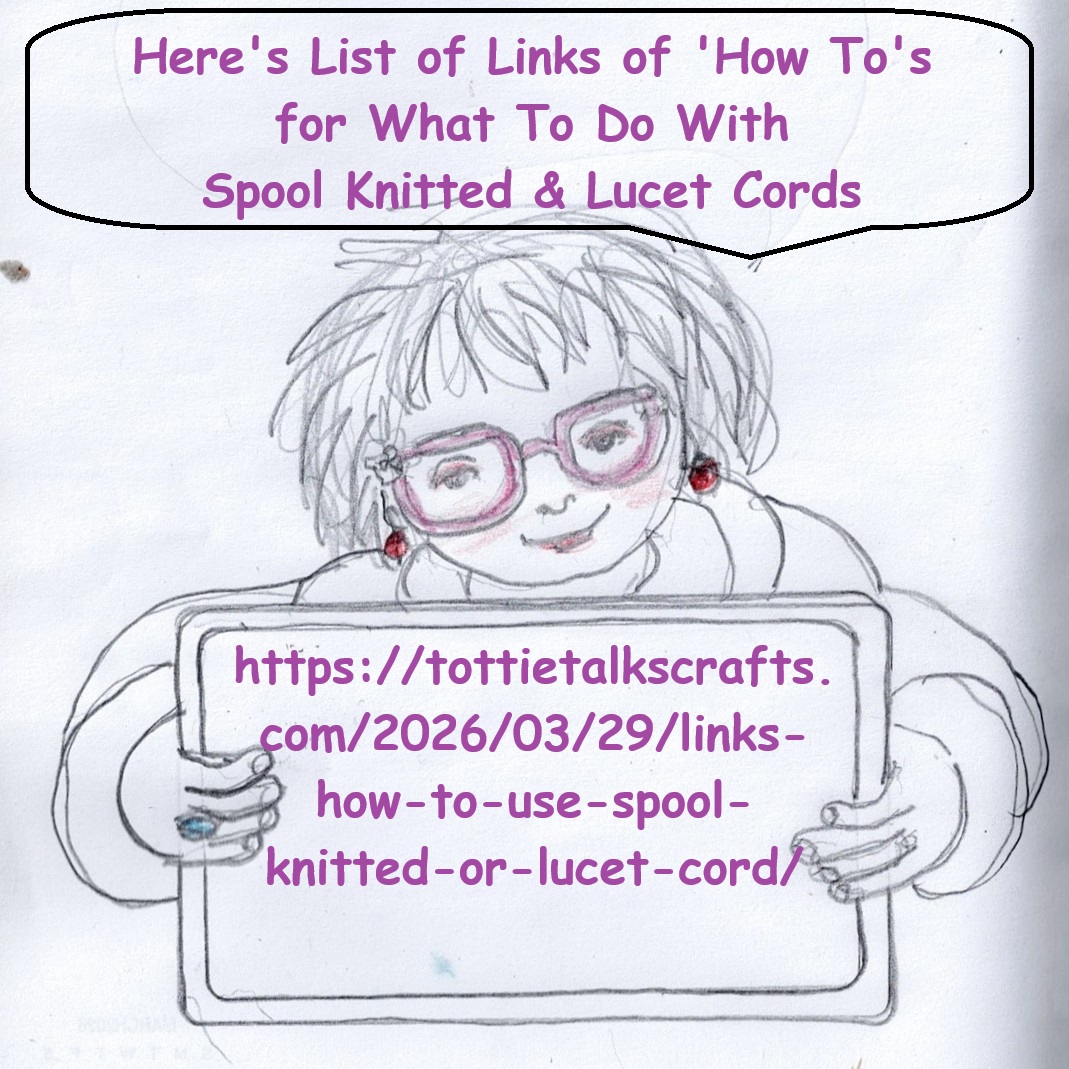
Day 35 of #100daysofspoolknittersandlittlelooms- Lots of Links for How To Use Spool Knitted or Lucet Cord
Spool knitting and using lucets to make lovely cord is relaxing, meditative, contemplative and just plain fun. But, people often ask me: What do you do with all those cords after you’ve made them?
Here’s a list of useful links to videos that I have made about ways of using spool knitted and luceted cord. (Lucets are flat 2 peg spool knitters))
Go to my Etsy shop to buy pdf patterns for fun spool knitted projects:
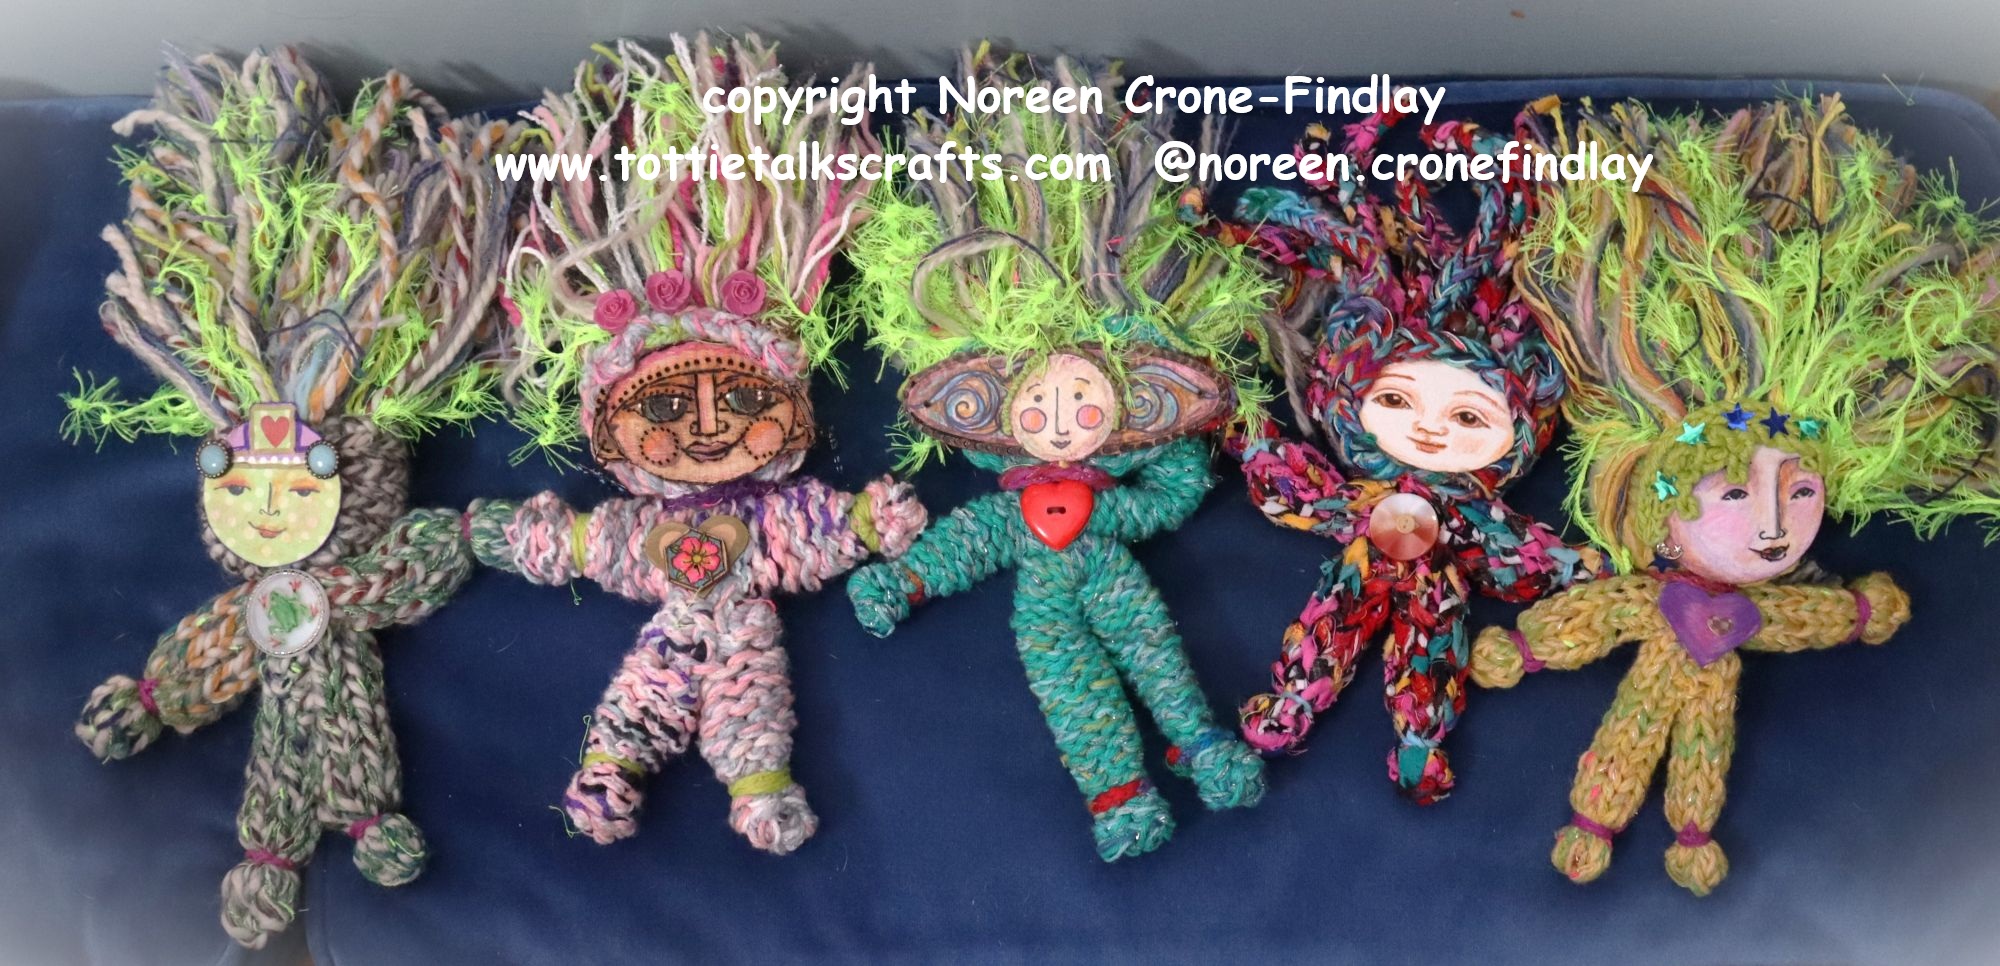
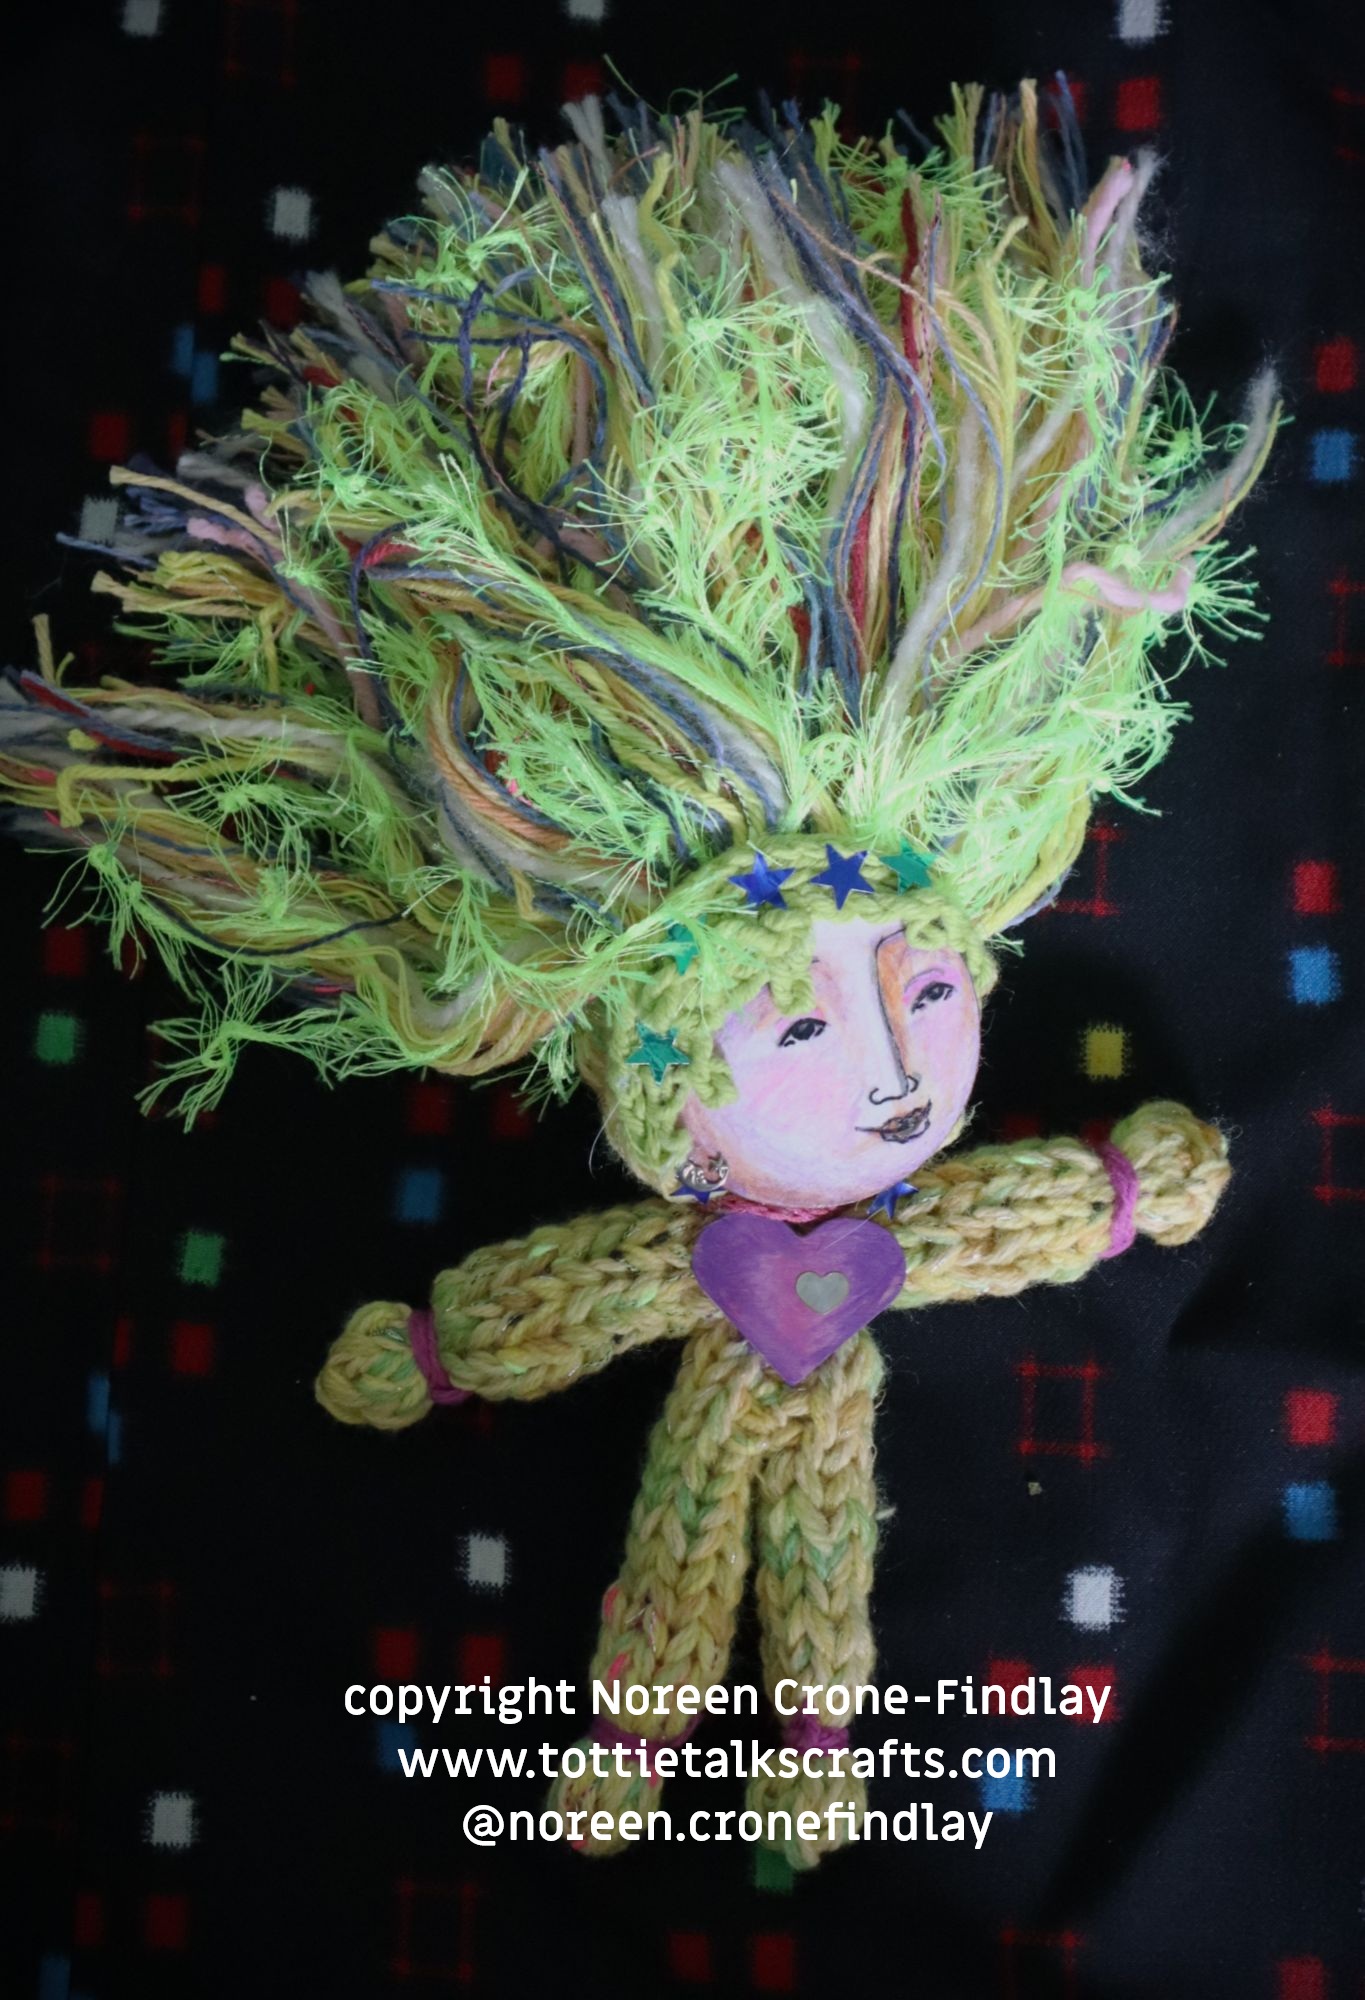
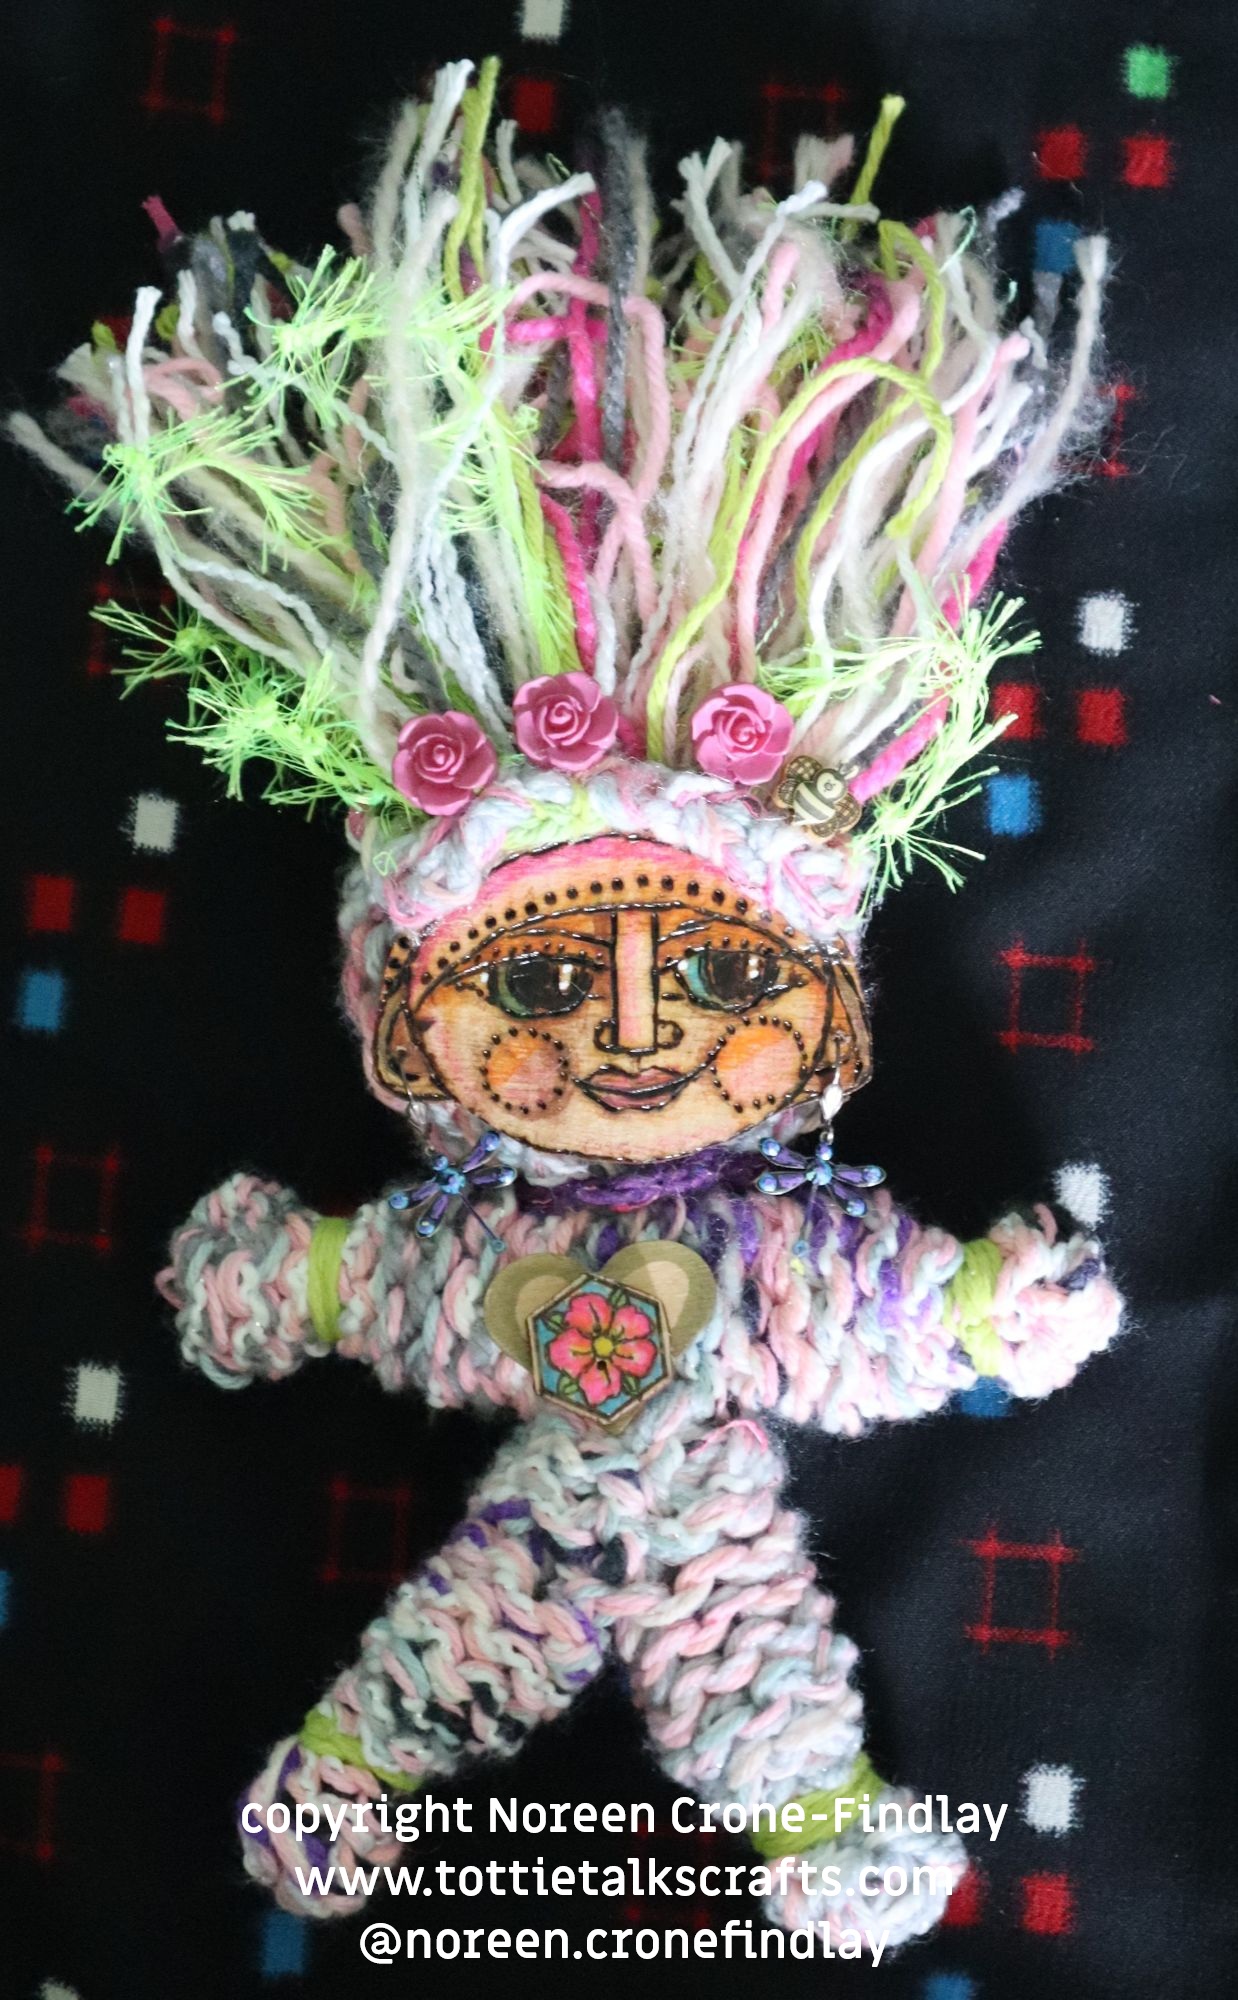
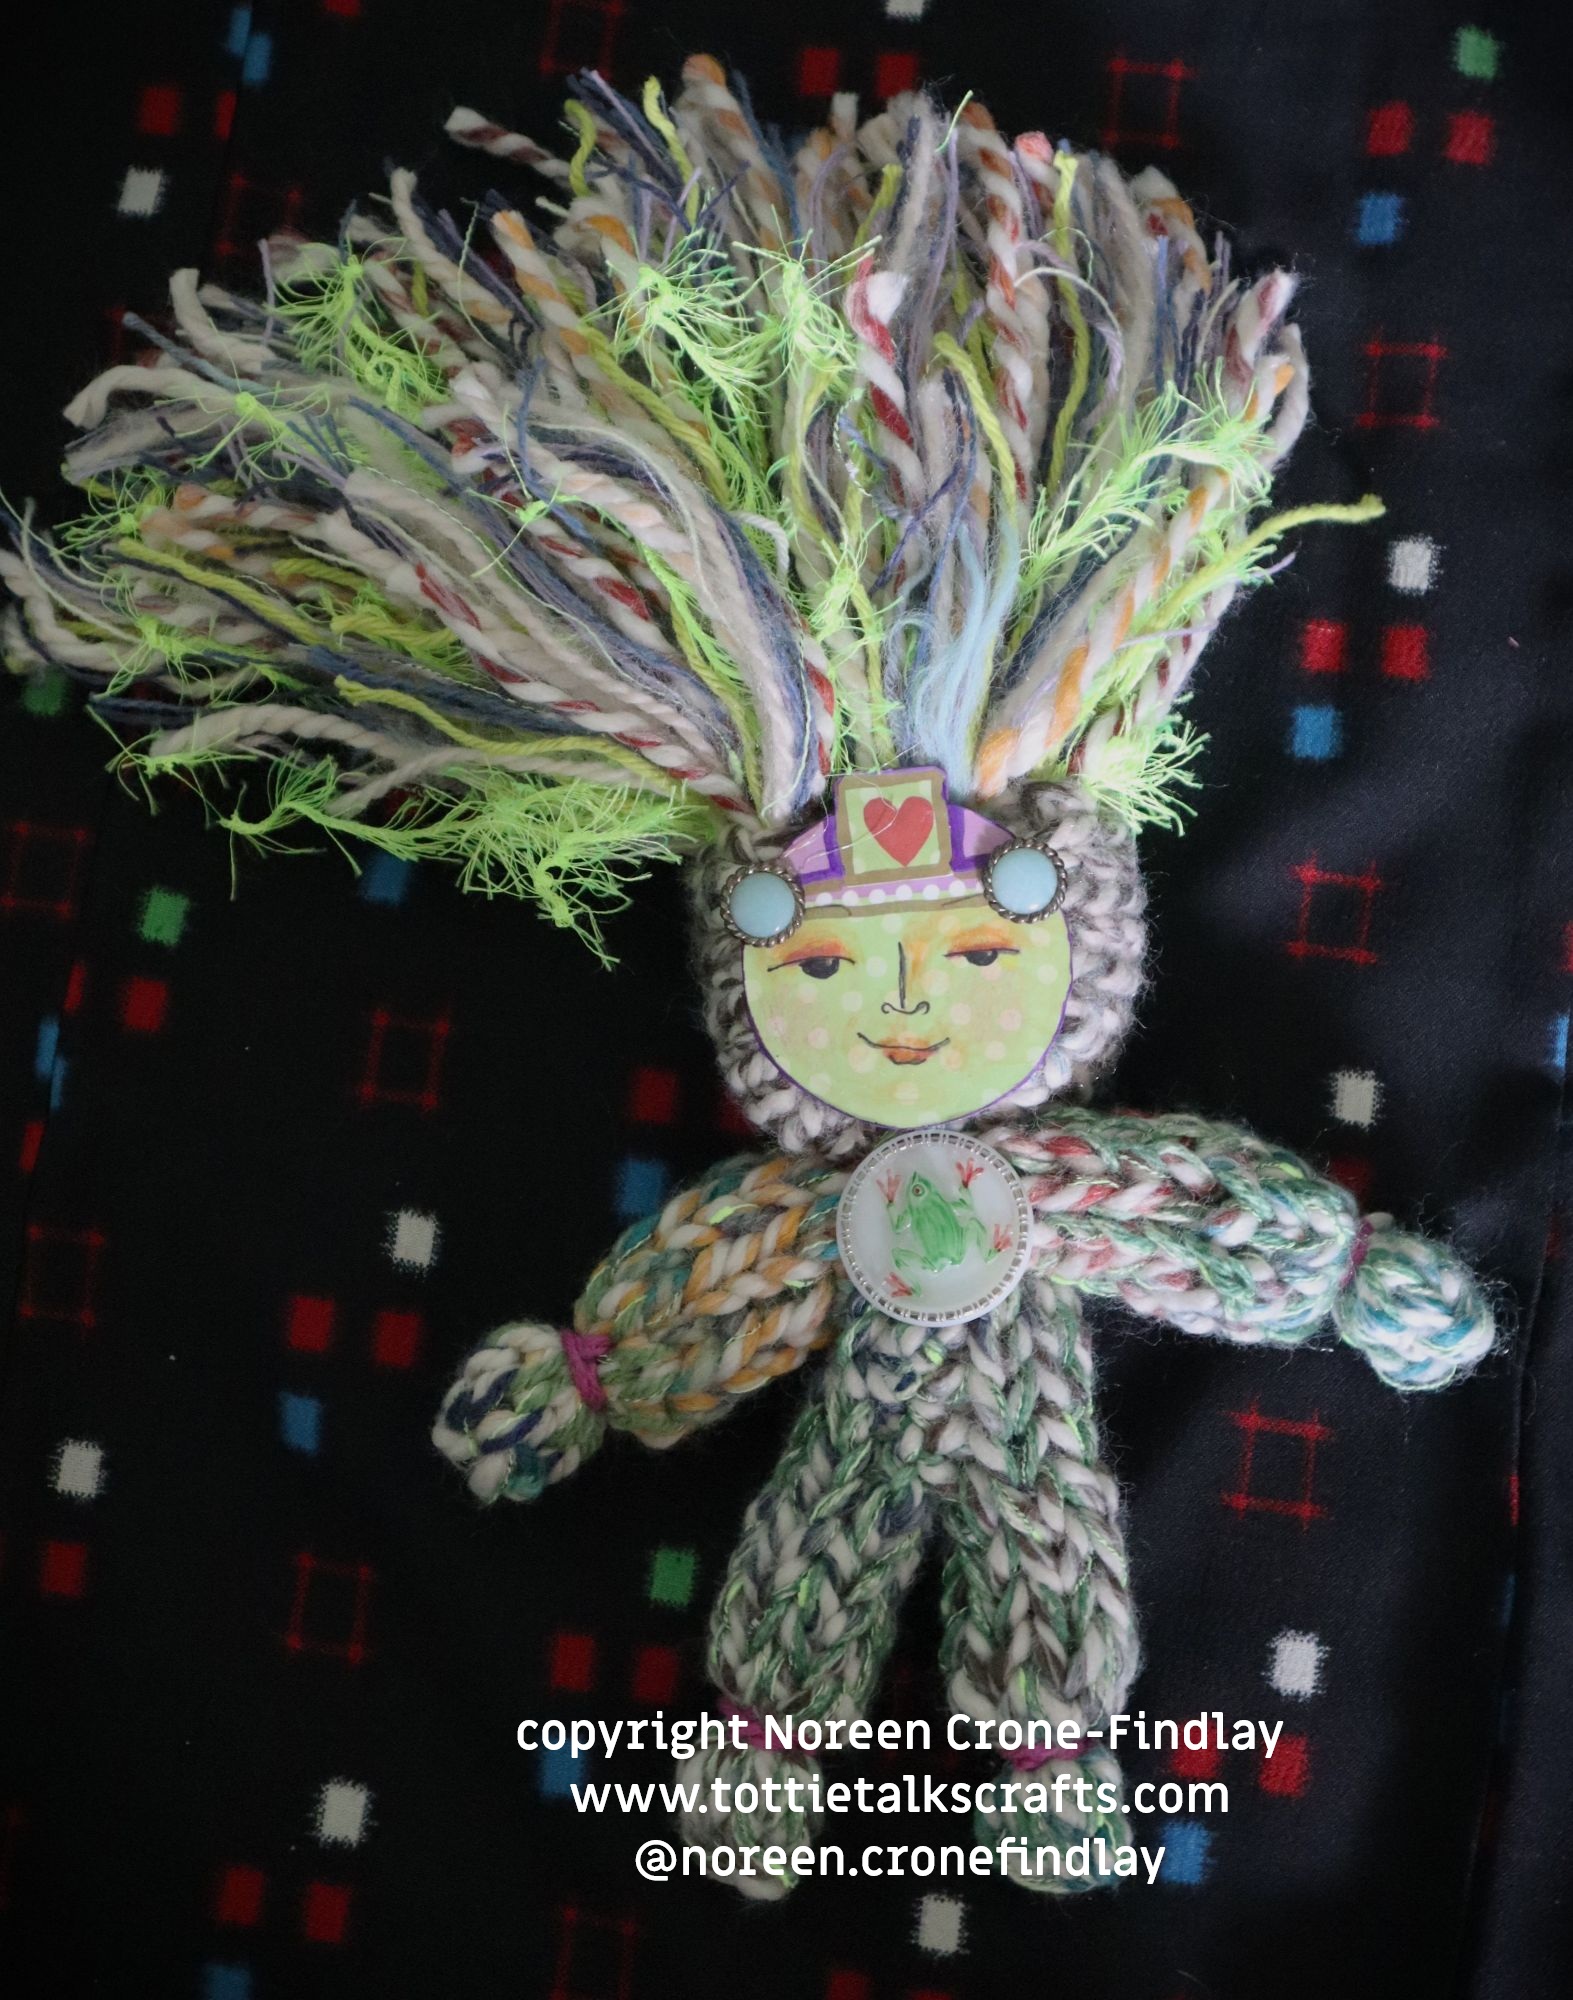
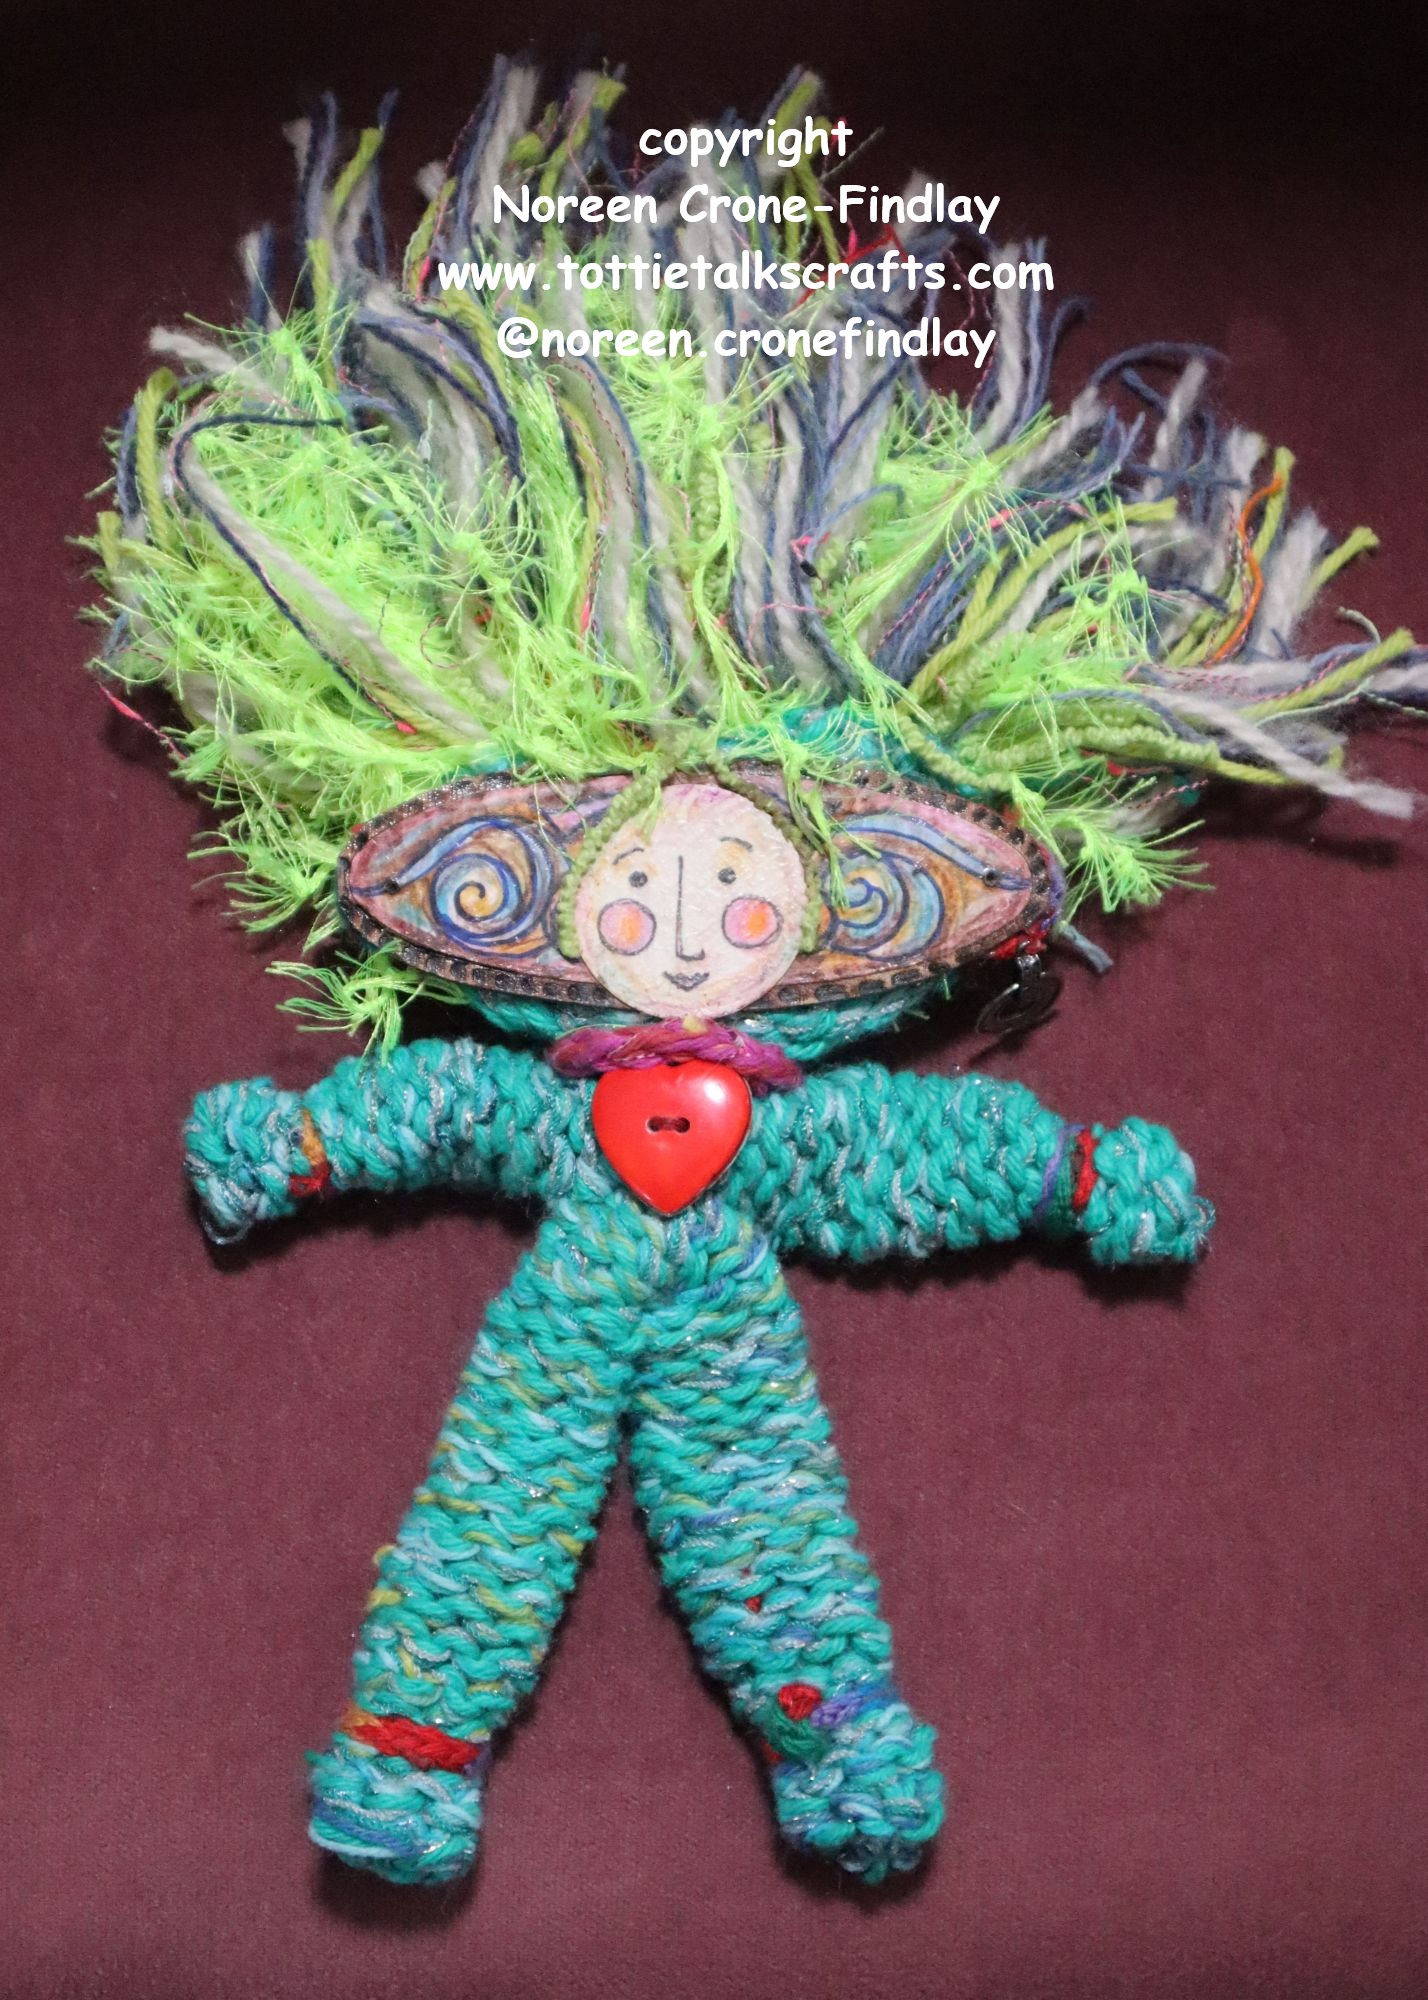
Day 24 of #100daysofspoolknittersandlittlelooms- Well Well Well Spool Knitted Dolls
I designed the Well Well Well Spool Knitted Dolls as a wish that everyone, everywhere, would feel well, and that our precious planet would feel well, and that anyone who makes these dolls will feel well, and happy, and safe and hopeful and live in peace, and equanimity.
As I made them, I asked myself: What does JOY look like today? What does peace and safety look like today? What does this doll want me to know? How can this doll feel like hope or sweetness today?
I invite the doll makers to play with drawing their own unique, one of a kind faces for their Well Well Well dolls and have made a video tutorial to help them do this.
I hope that these joyful, playful, happy dolls will bring all good things to the people who make them, and if the Well Well Well dolls are meant as a gift that they will bring love, light, laughter and hope to those who receive them.
The pattern includes links to 3 video tutorials for how to make your own larger spool knitters as well as videos on how to spool knit in the round, and how to spool knit flat panels as well as spool knitting 2 peg/nail cords.
The pattern has complete step by step instructions for making the Well Well Well Spool Knitted Dolls with yarn and with fabric strips too.
Day 23 of #100daysofspoolknittersandlittlelooms- A video tutorial for making a tiny upcycled sketchbook and easy ways of drawing simple faces in it
I made a video tutorial that shows how to make an upcycled tiny sketch book and then how to draw simple faces in it as an ongoing daily practice.
That’s because I am going to be releasing a new pattern tomorrow for wonderful spool knitted dolls and I want people to be able to draw unique, one of a kind faces for their dolls.
I have found that using tiny upcycled sketchbooks to practice drawing faces is a lot like practising a musical instrument.
Daily drawing is the way to build creative stepping stones.
A little bit at a time, all the time.
Large gorgeous sketchbooks with expensive paper can be really hard to work with, but tiny ones that fit in a pocket and are humble paper make for carefree drawing.
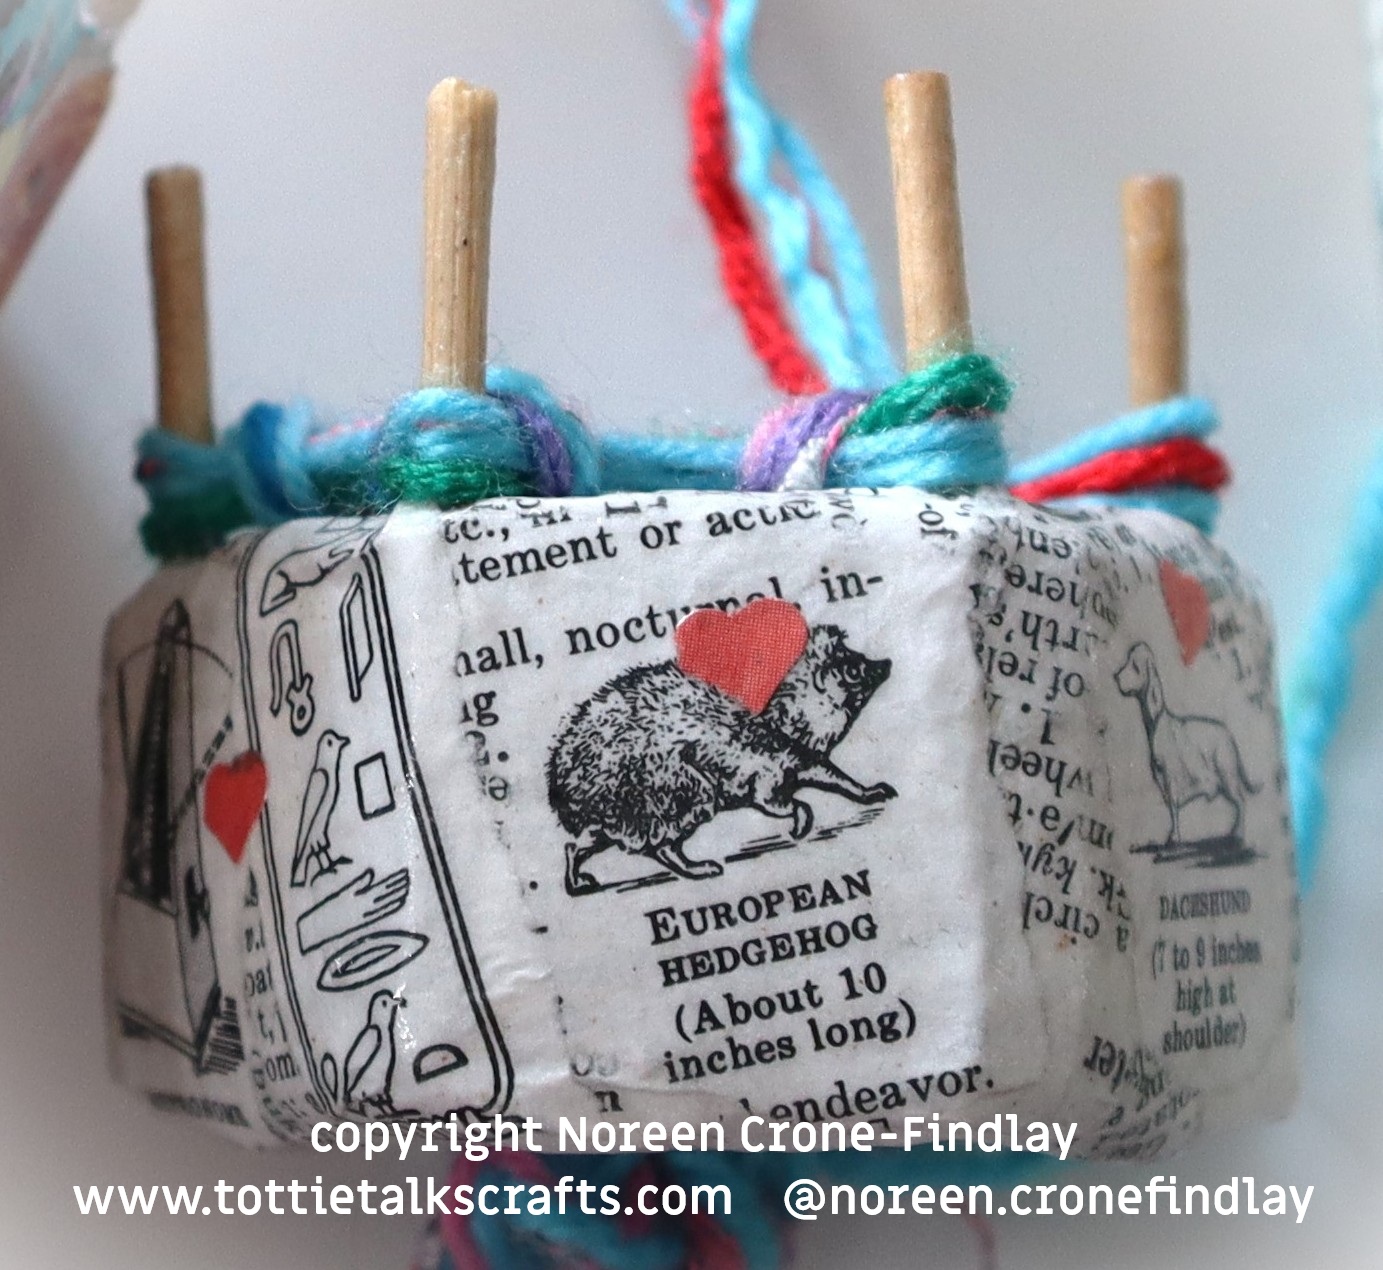
For Day 21 of #100daysofspoolknittersandlittlelooms- I made a video tutorial showing how to make a spool knitter from upcycled cardboard and bamboo skewers, finished with papier mache whimsy.
It’s a lovely and sturdy little spool knitter that is a delight to work with. For more information, please go to http://www.tottietalkscrafts.com
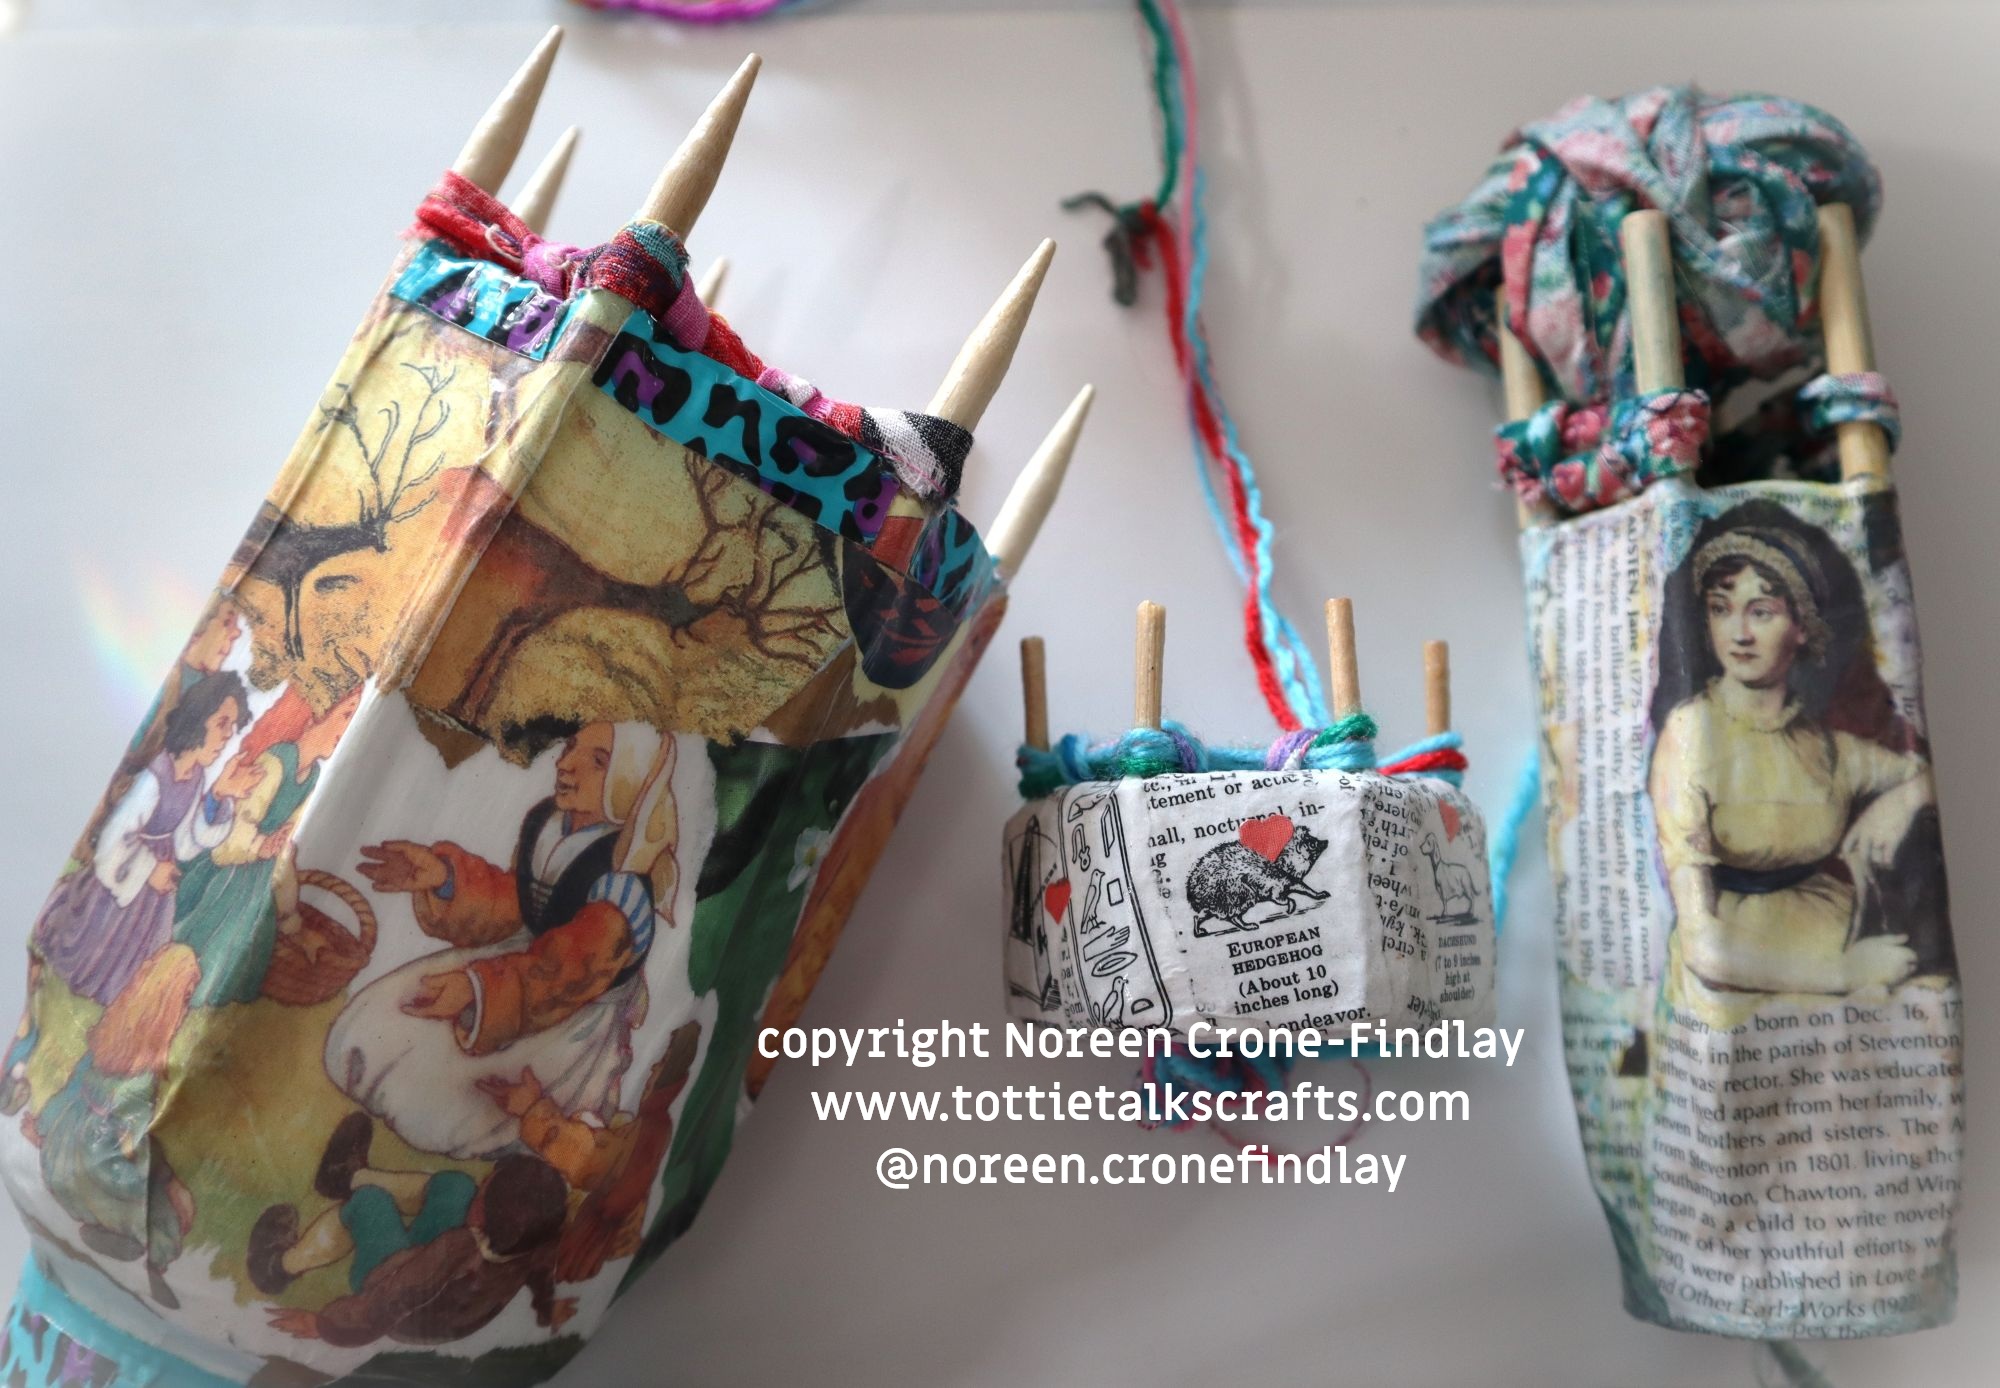
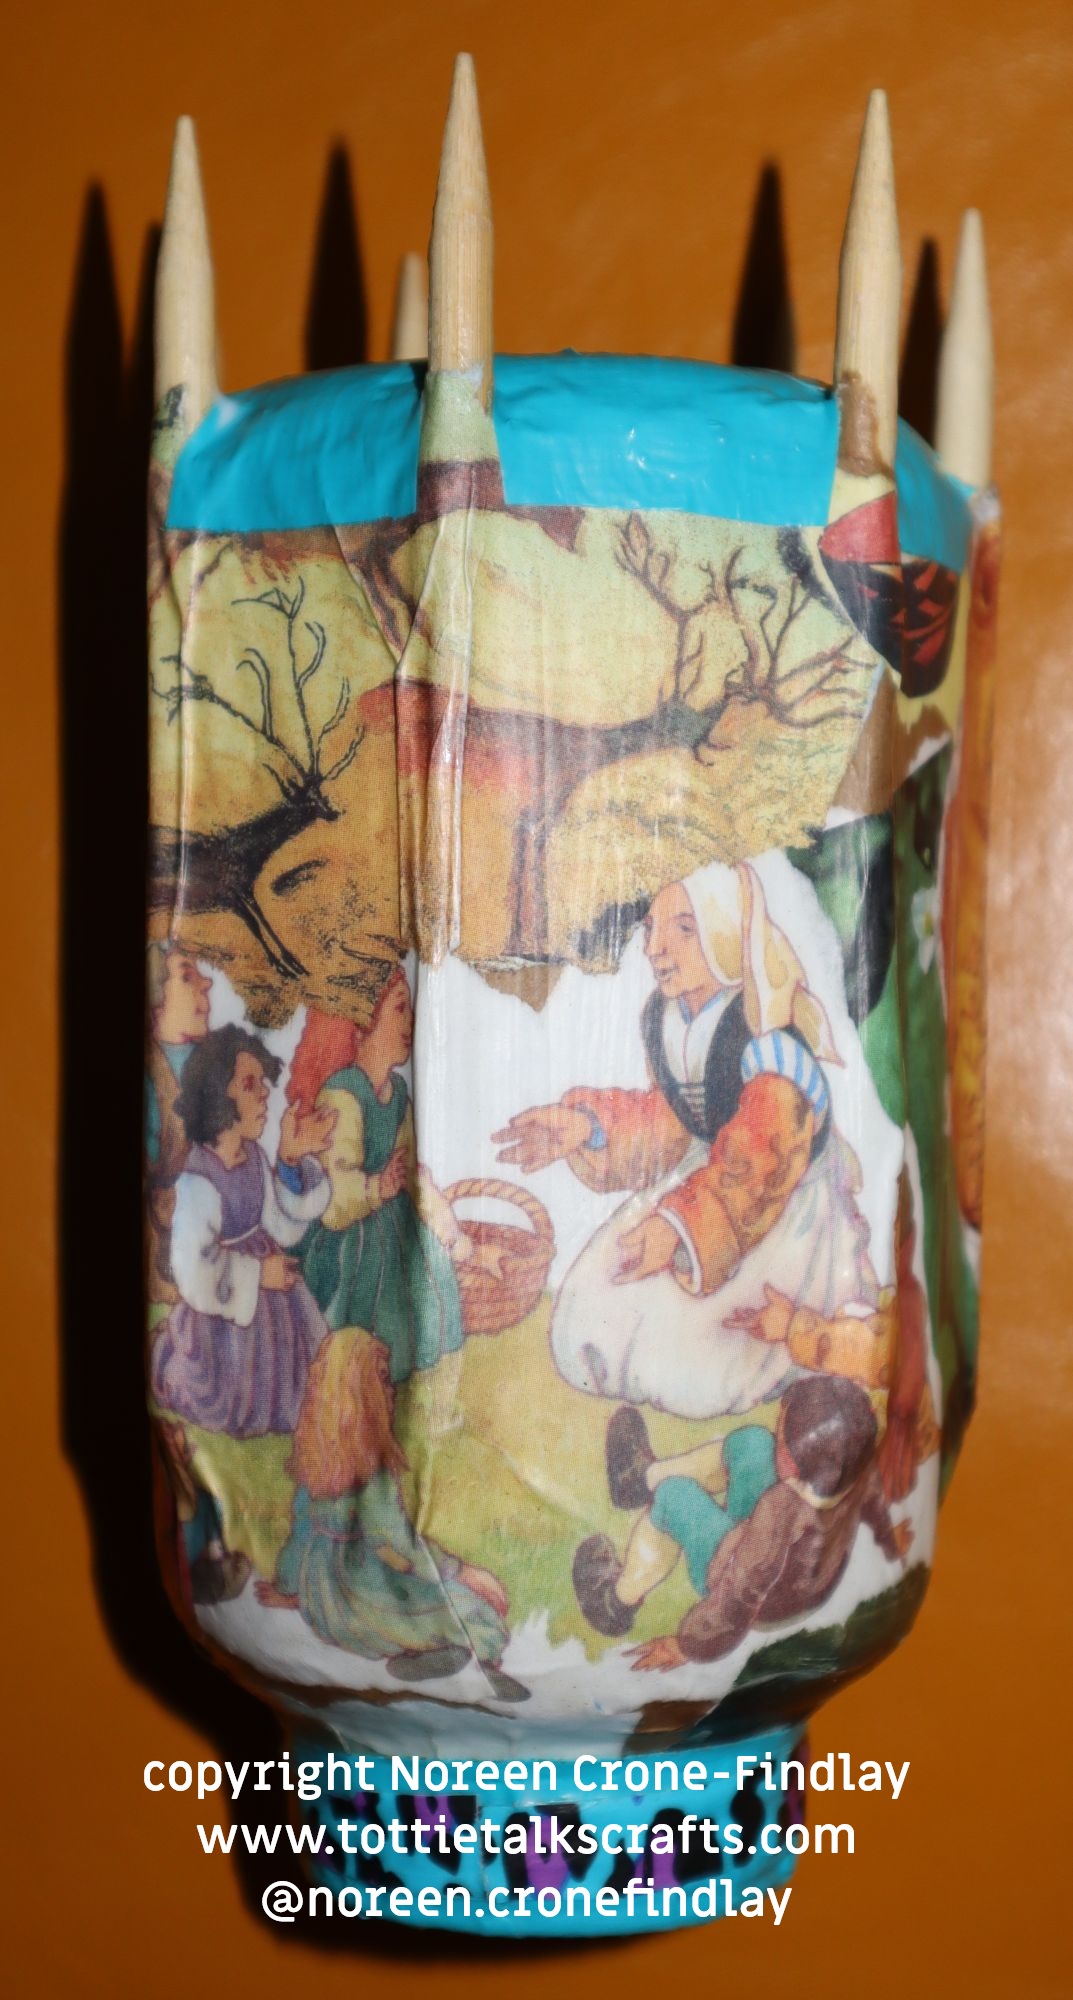
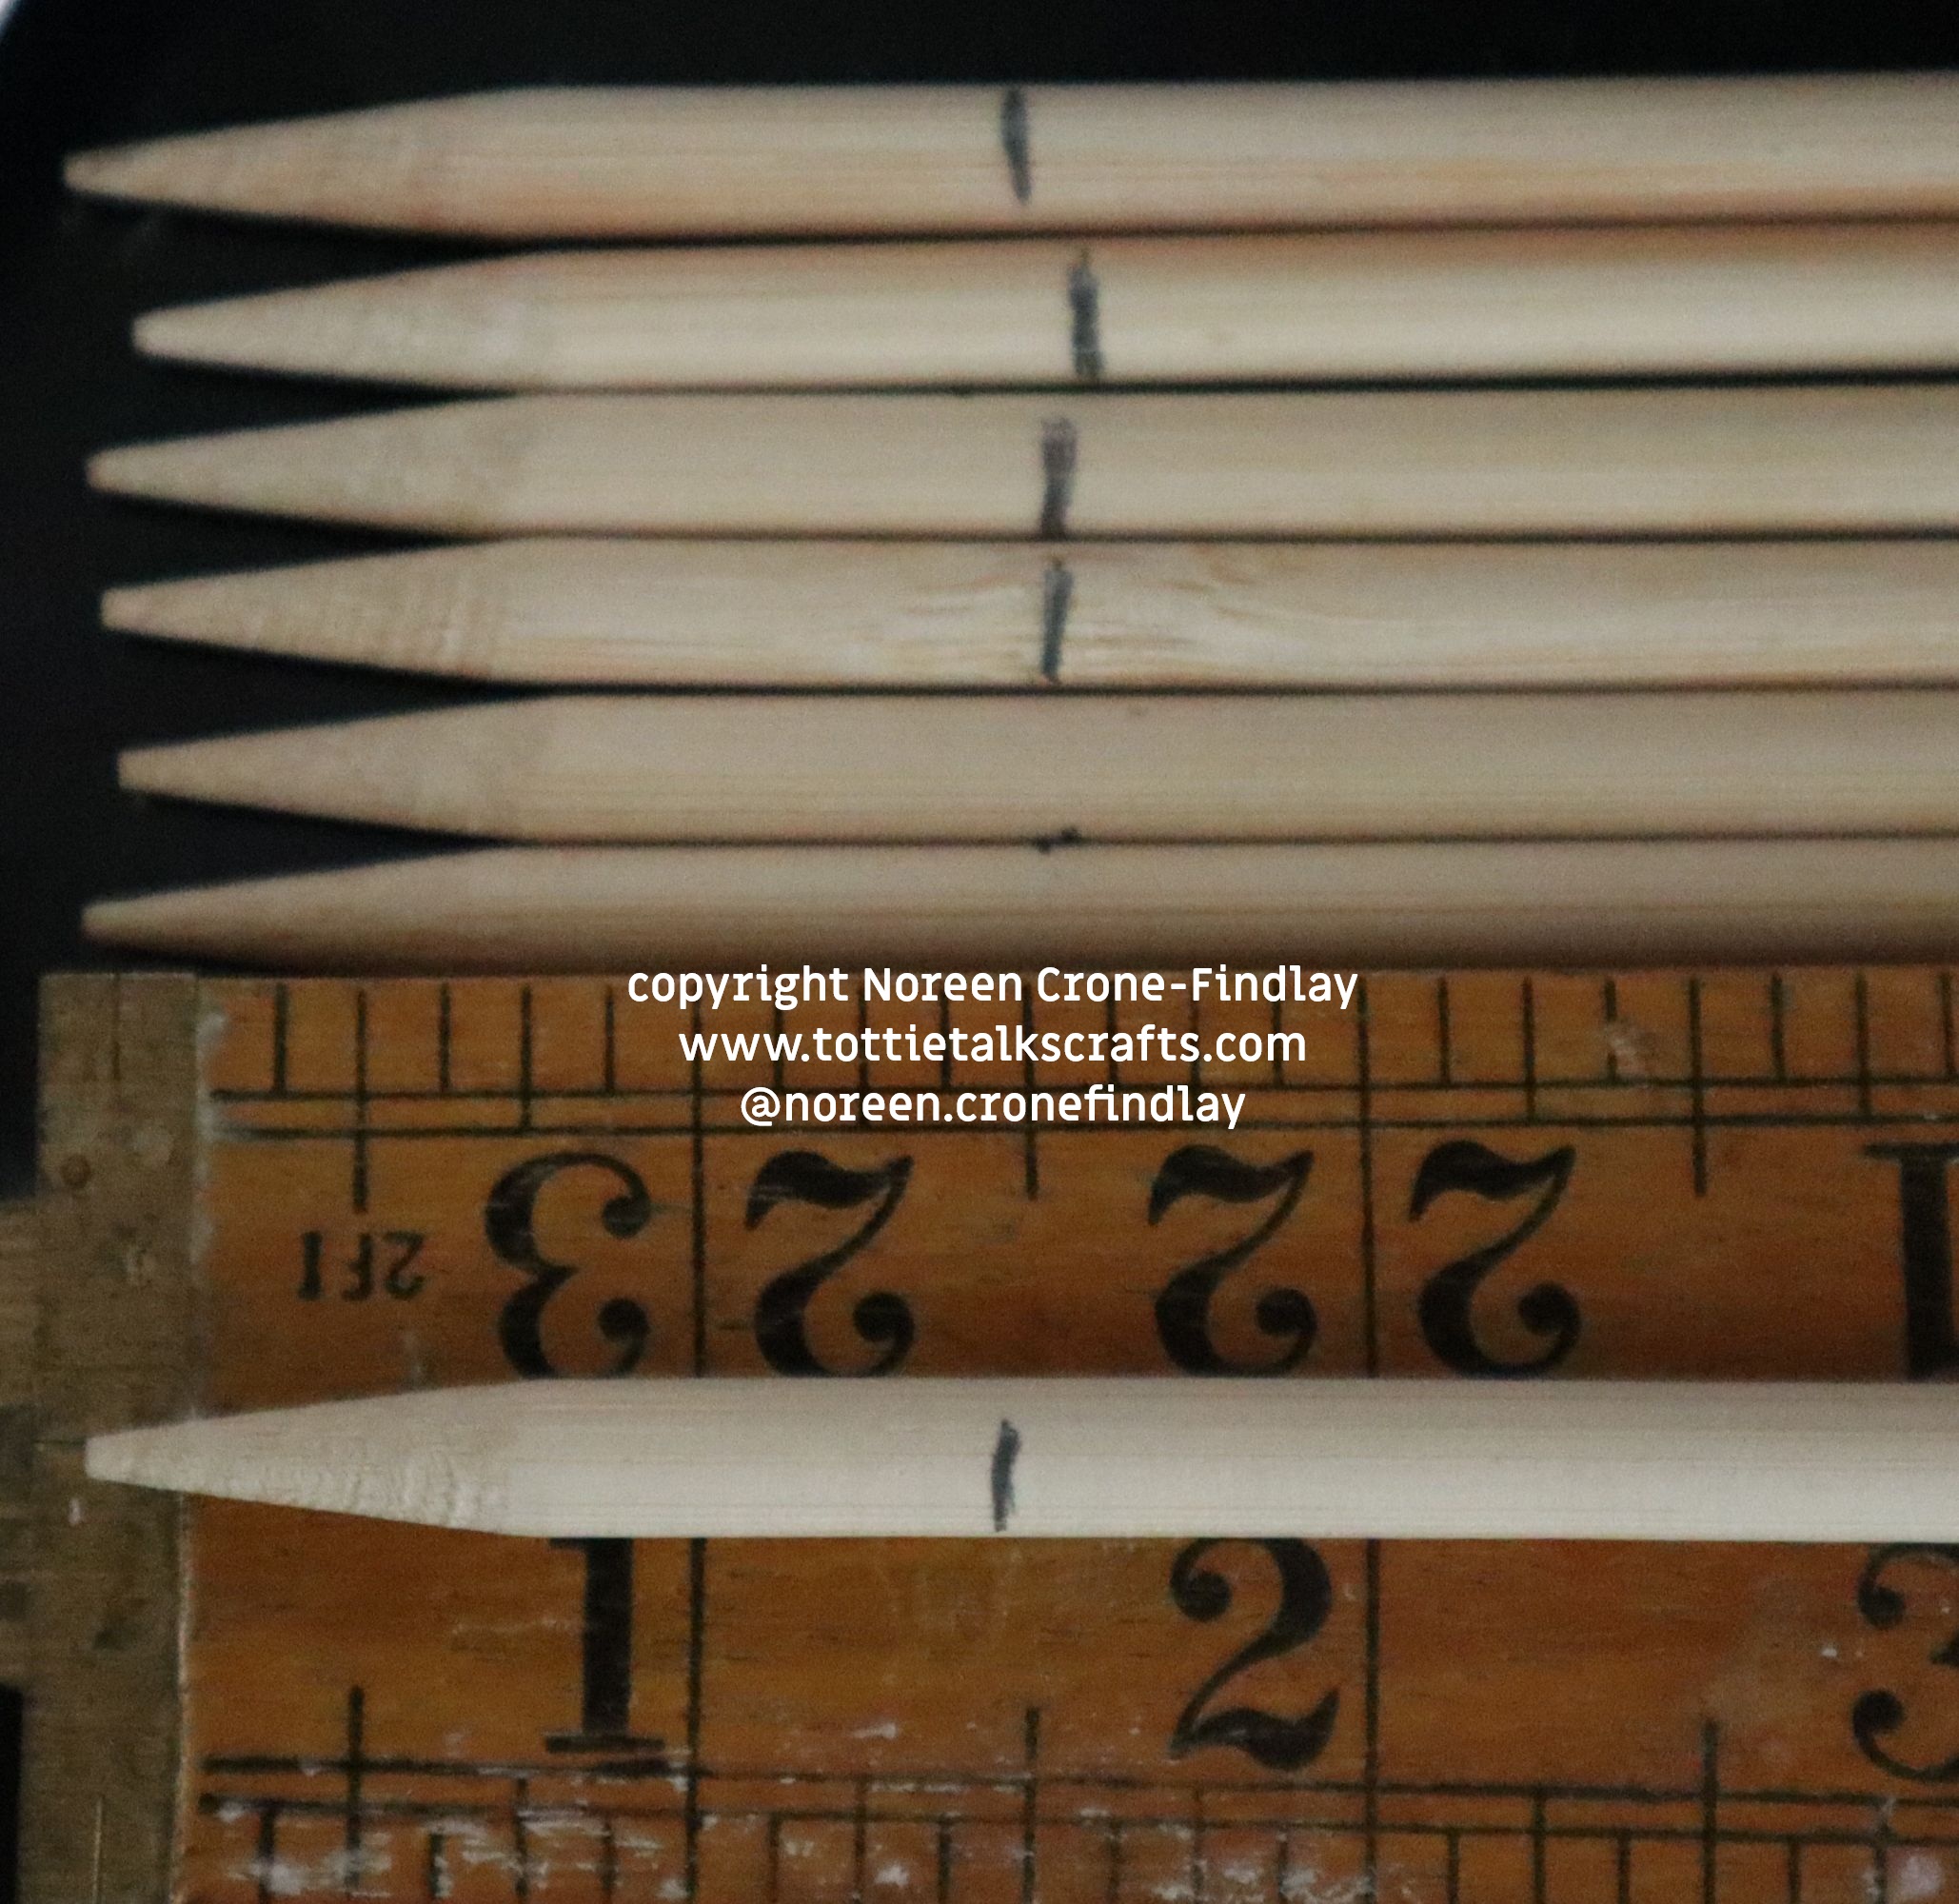
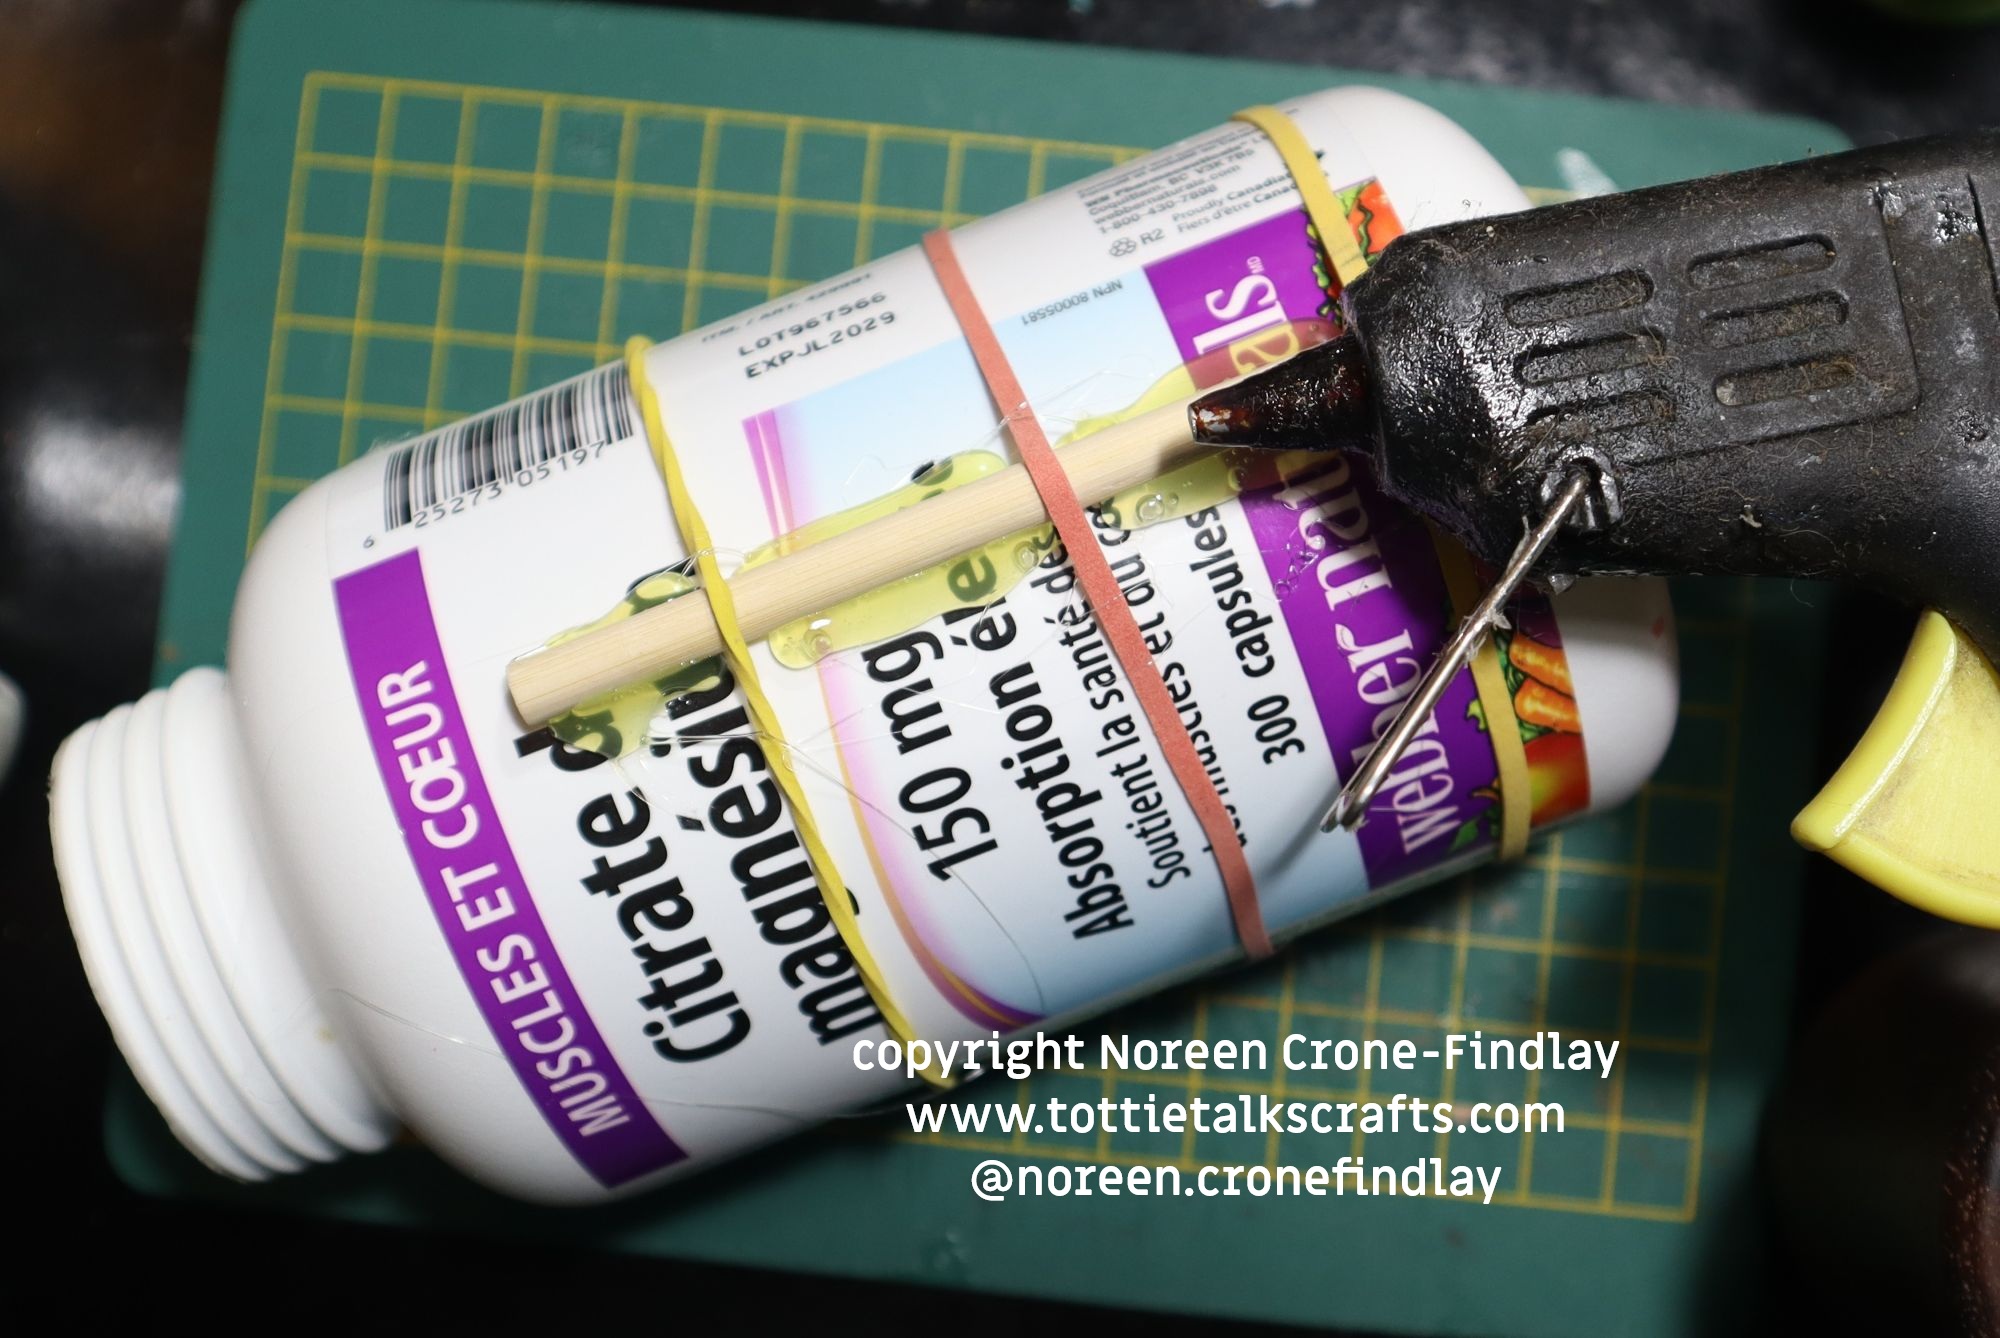
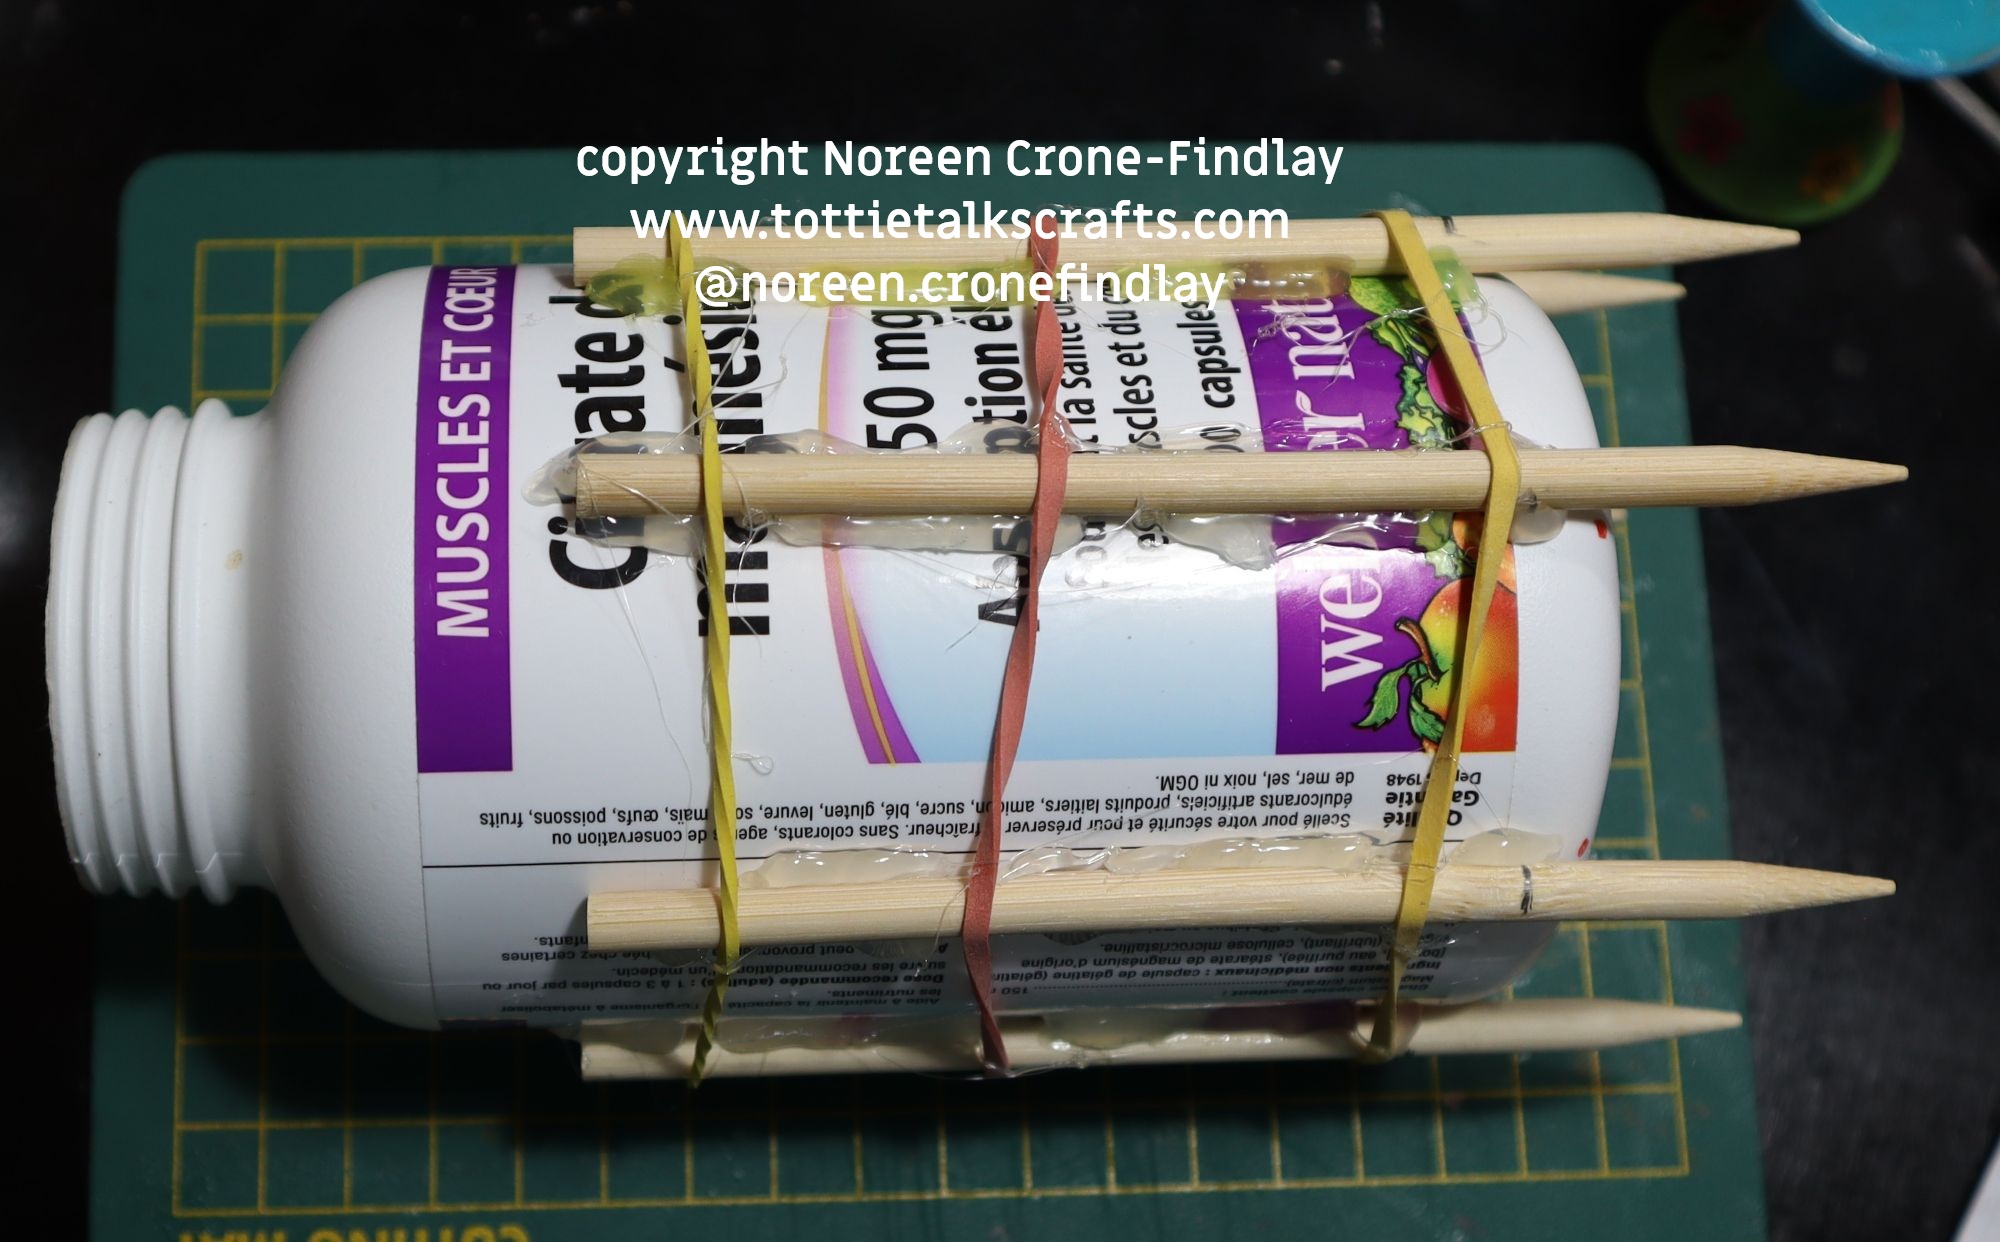
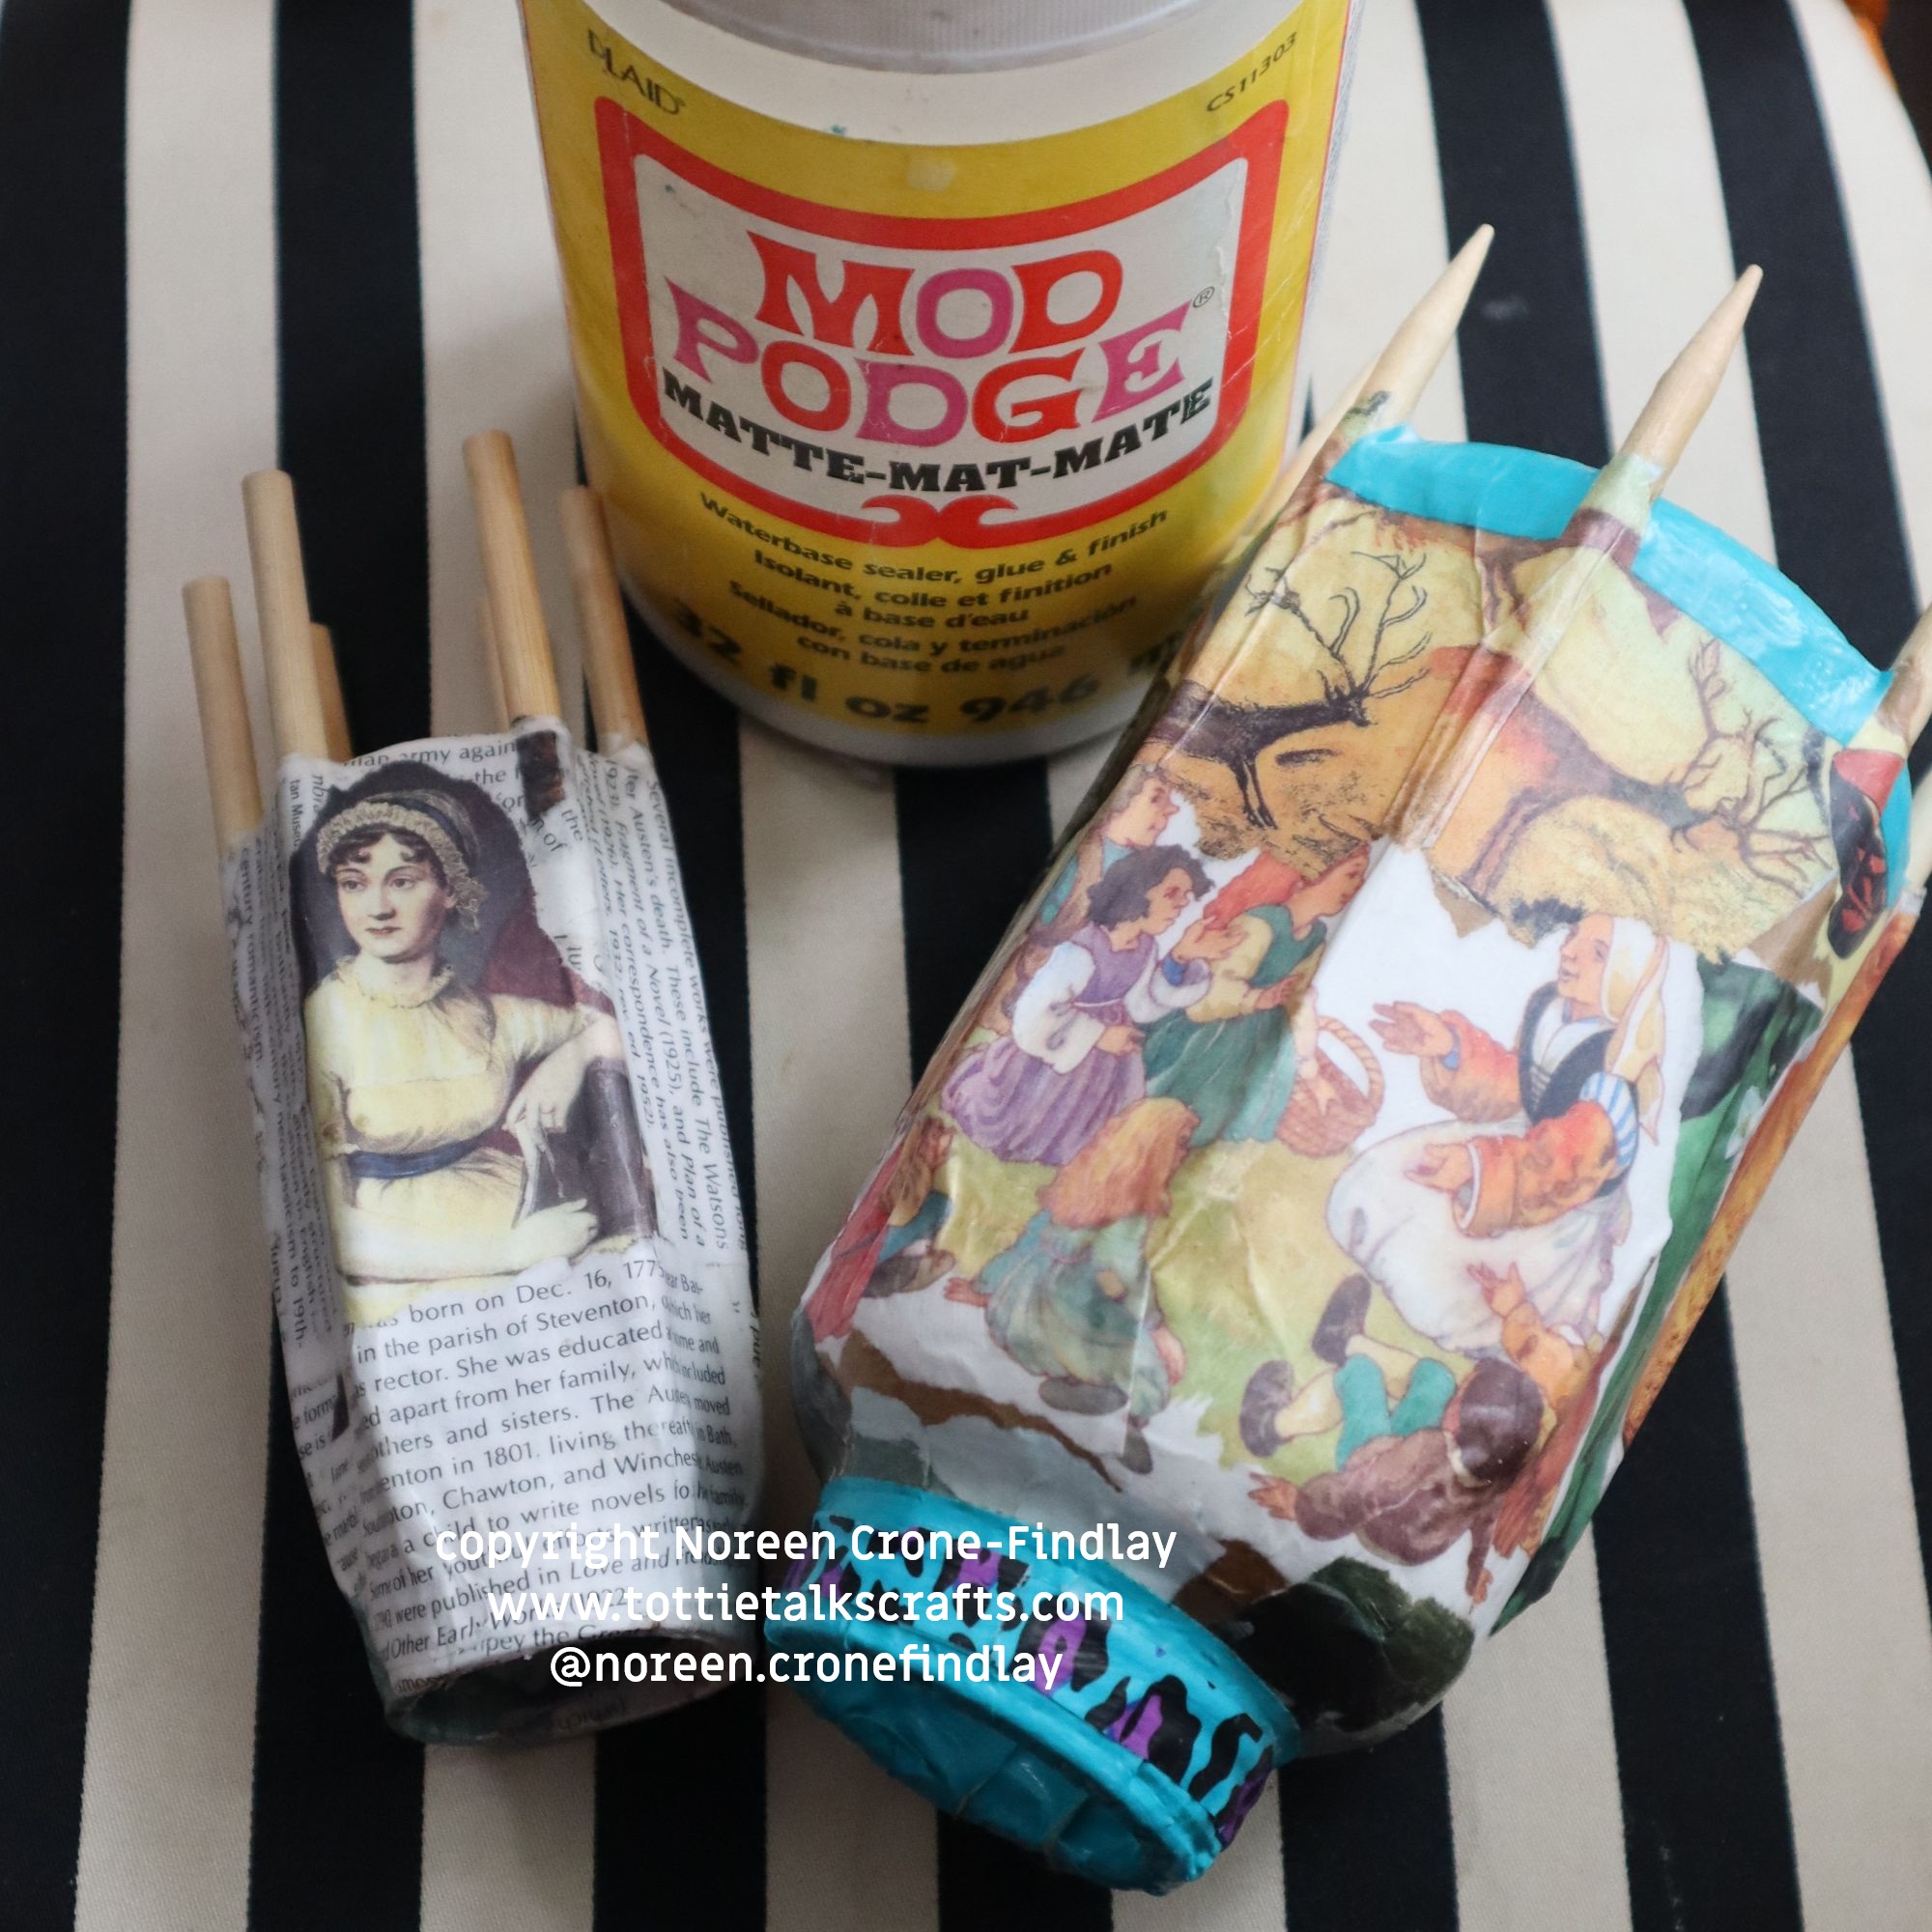
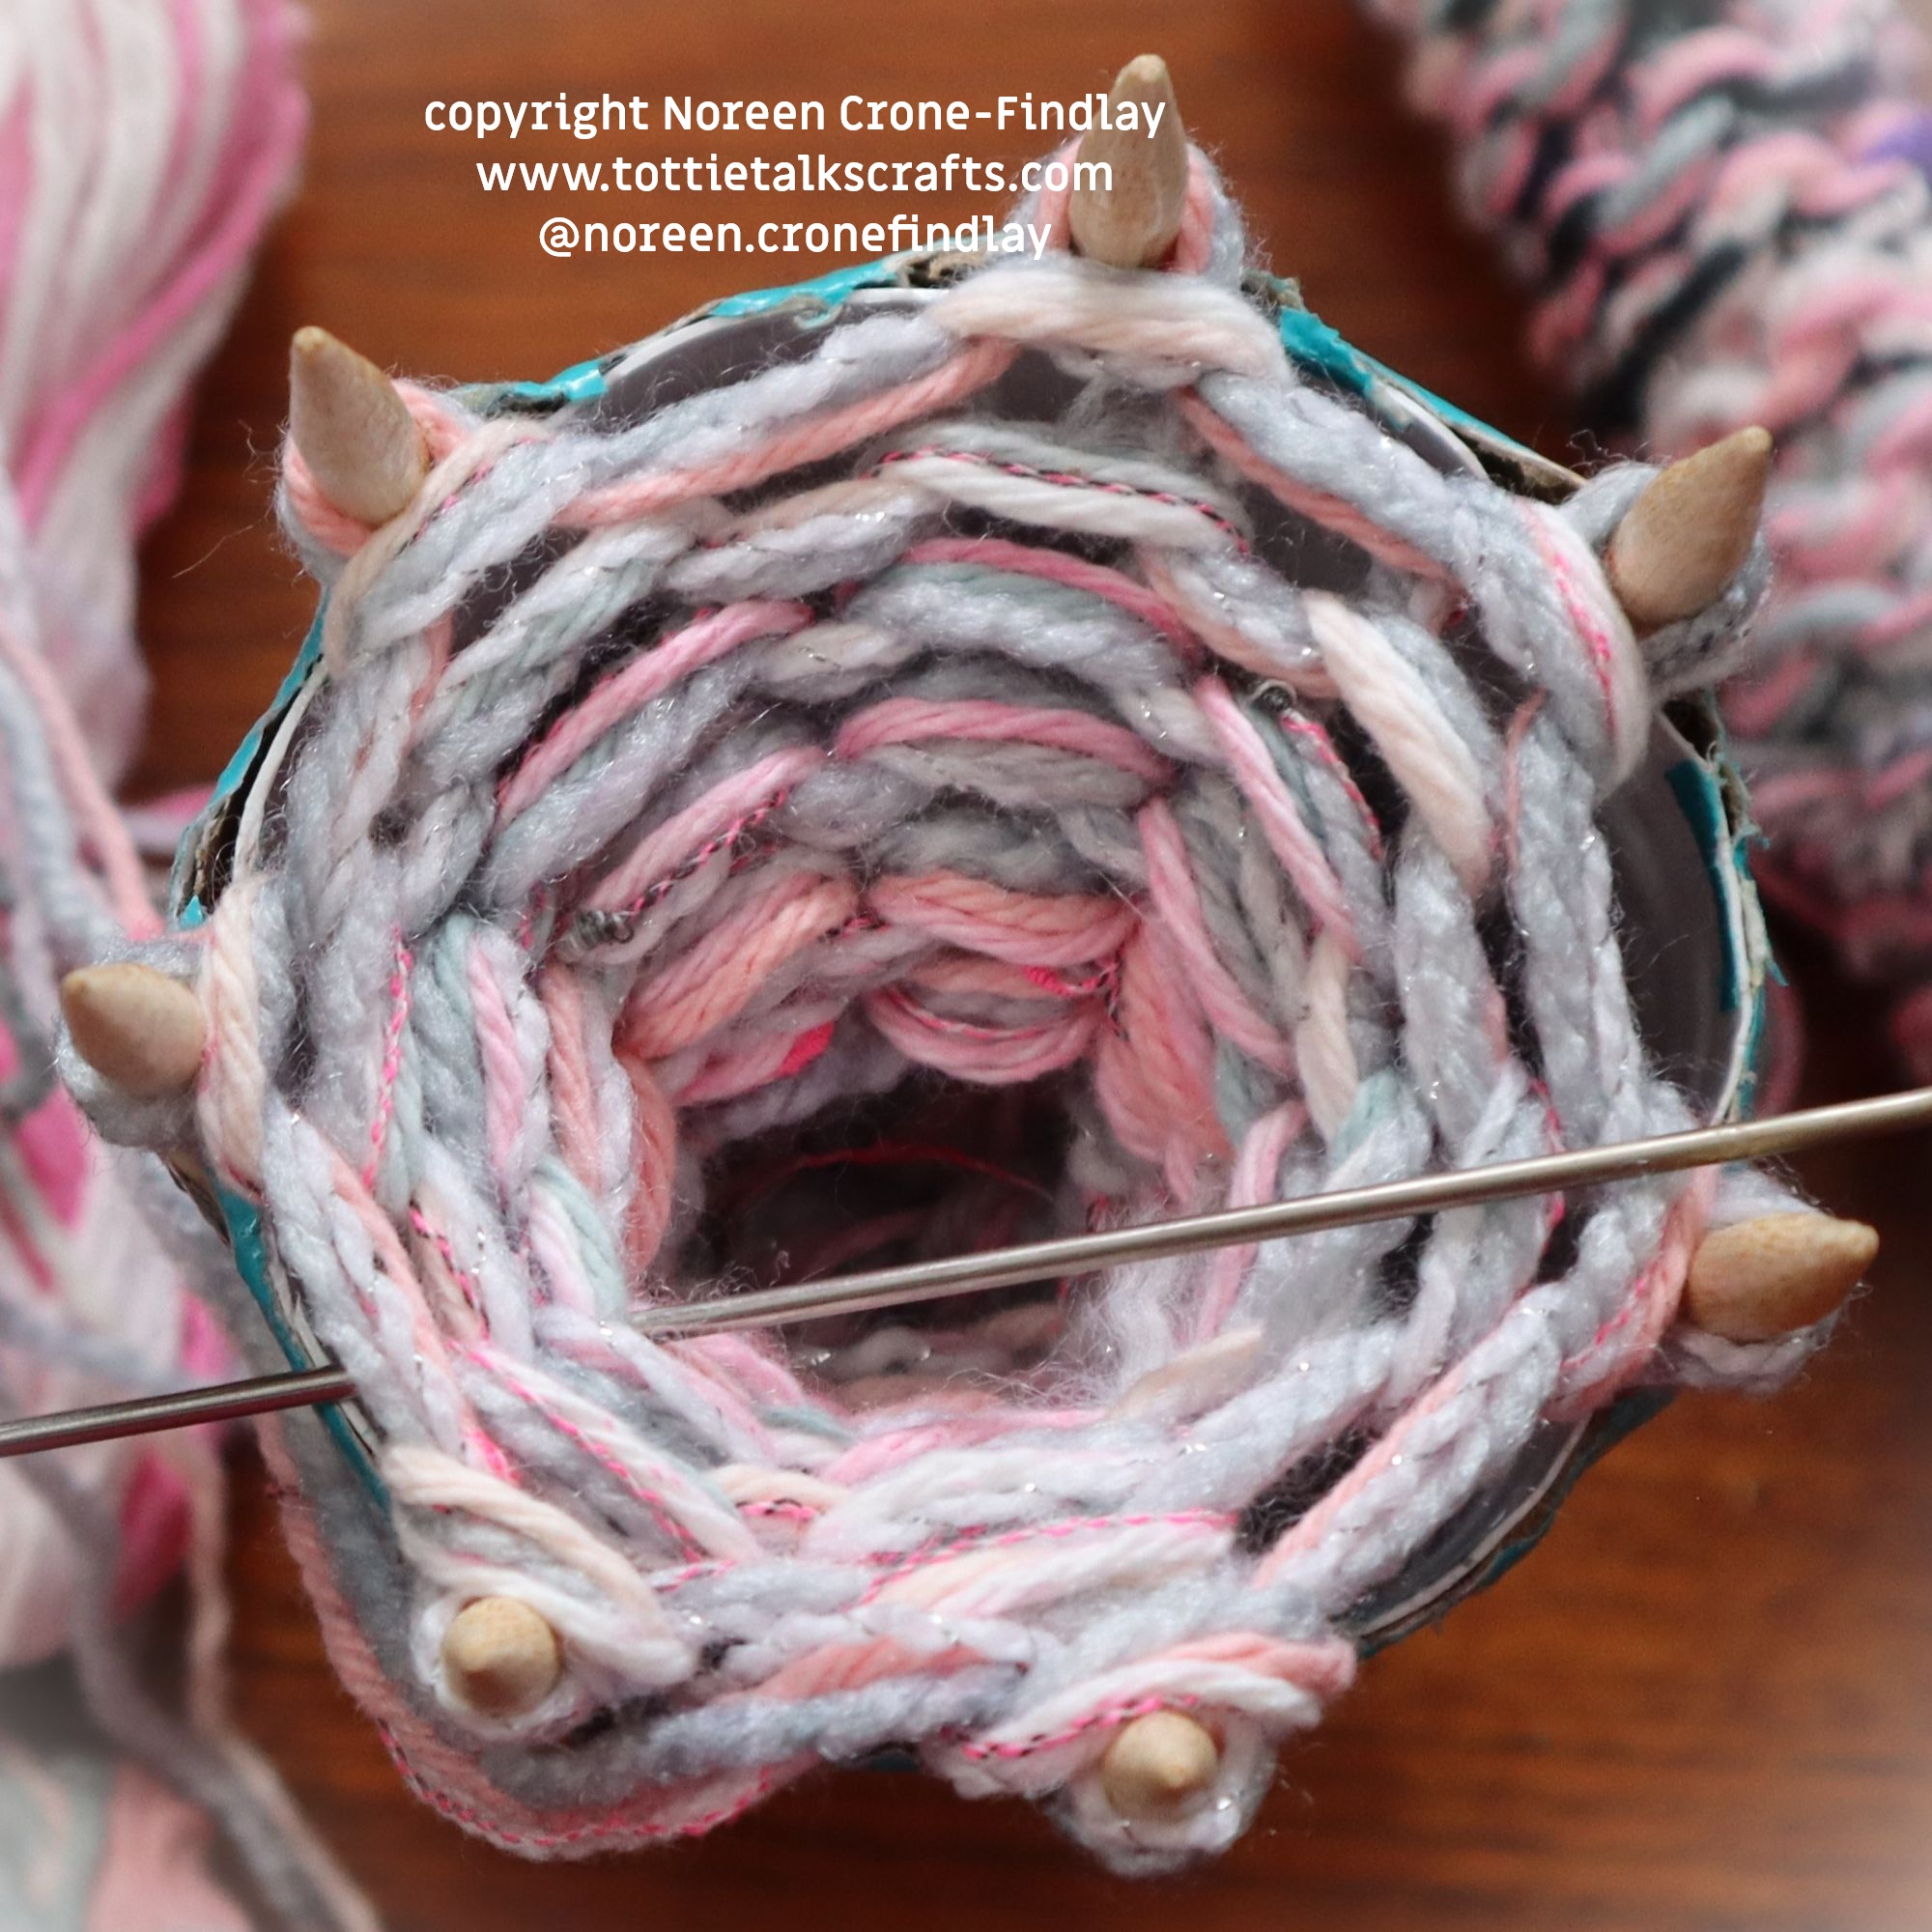
Day 11 of #100daysofspoolknittersandlittlelooms-Upcycling plastic bottles into spool knitters-The Storyteller Spool knitter
In my Day 9 post, I showed how I upcycled a sturdy cardboard tube into a spool knitter that I love as it’s an Homage to Jane Austen. At the same time that I was making the Jane Austen spool knitter, I was experimenting with upcyling a plastic bottle to see if I could make a reasonable spool knitter with it for my #100daysofspoolknittersandlittlelooms.
The bottle has to be fairly sturdy, so I chose an empty vitamin bottle.
I wanted to see if the sharpened end of 7 lolly pop sticks would work as the pegs.
They are okay, but I prefer the blunt ends, so I won’t use the sharp ends as pegs again.
I marked off 1 1/2 inches(4 cm) at the end of each.
Next- I put 3 rubber bands onto the bottle and one at a time, I slipped a lollypop stick into them
and hot glued them to the bottle.
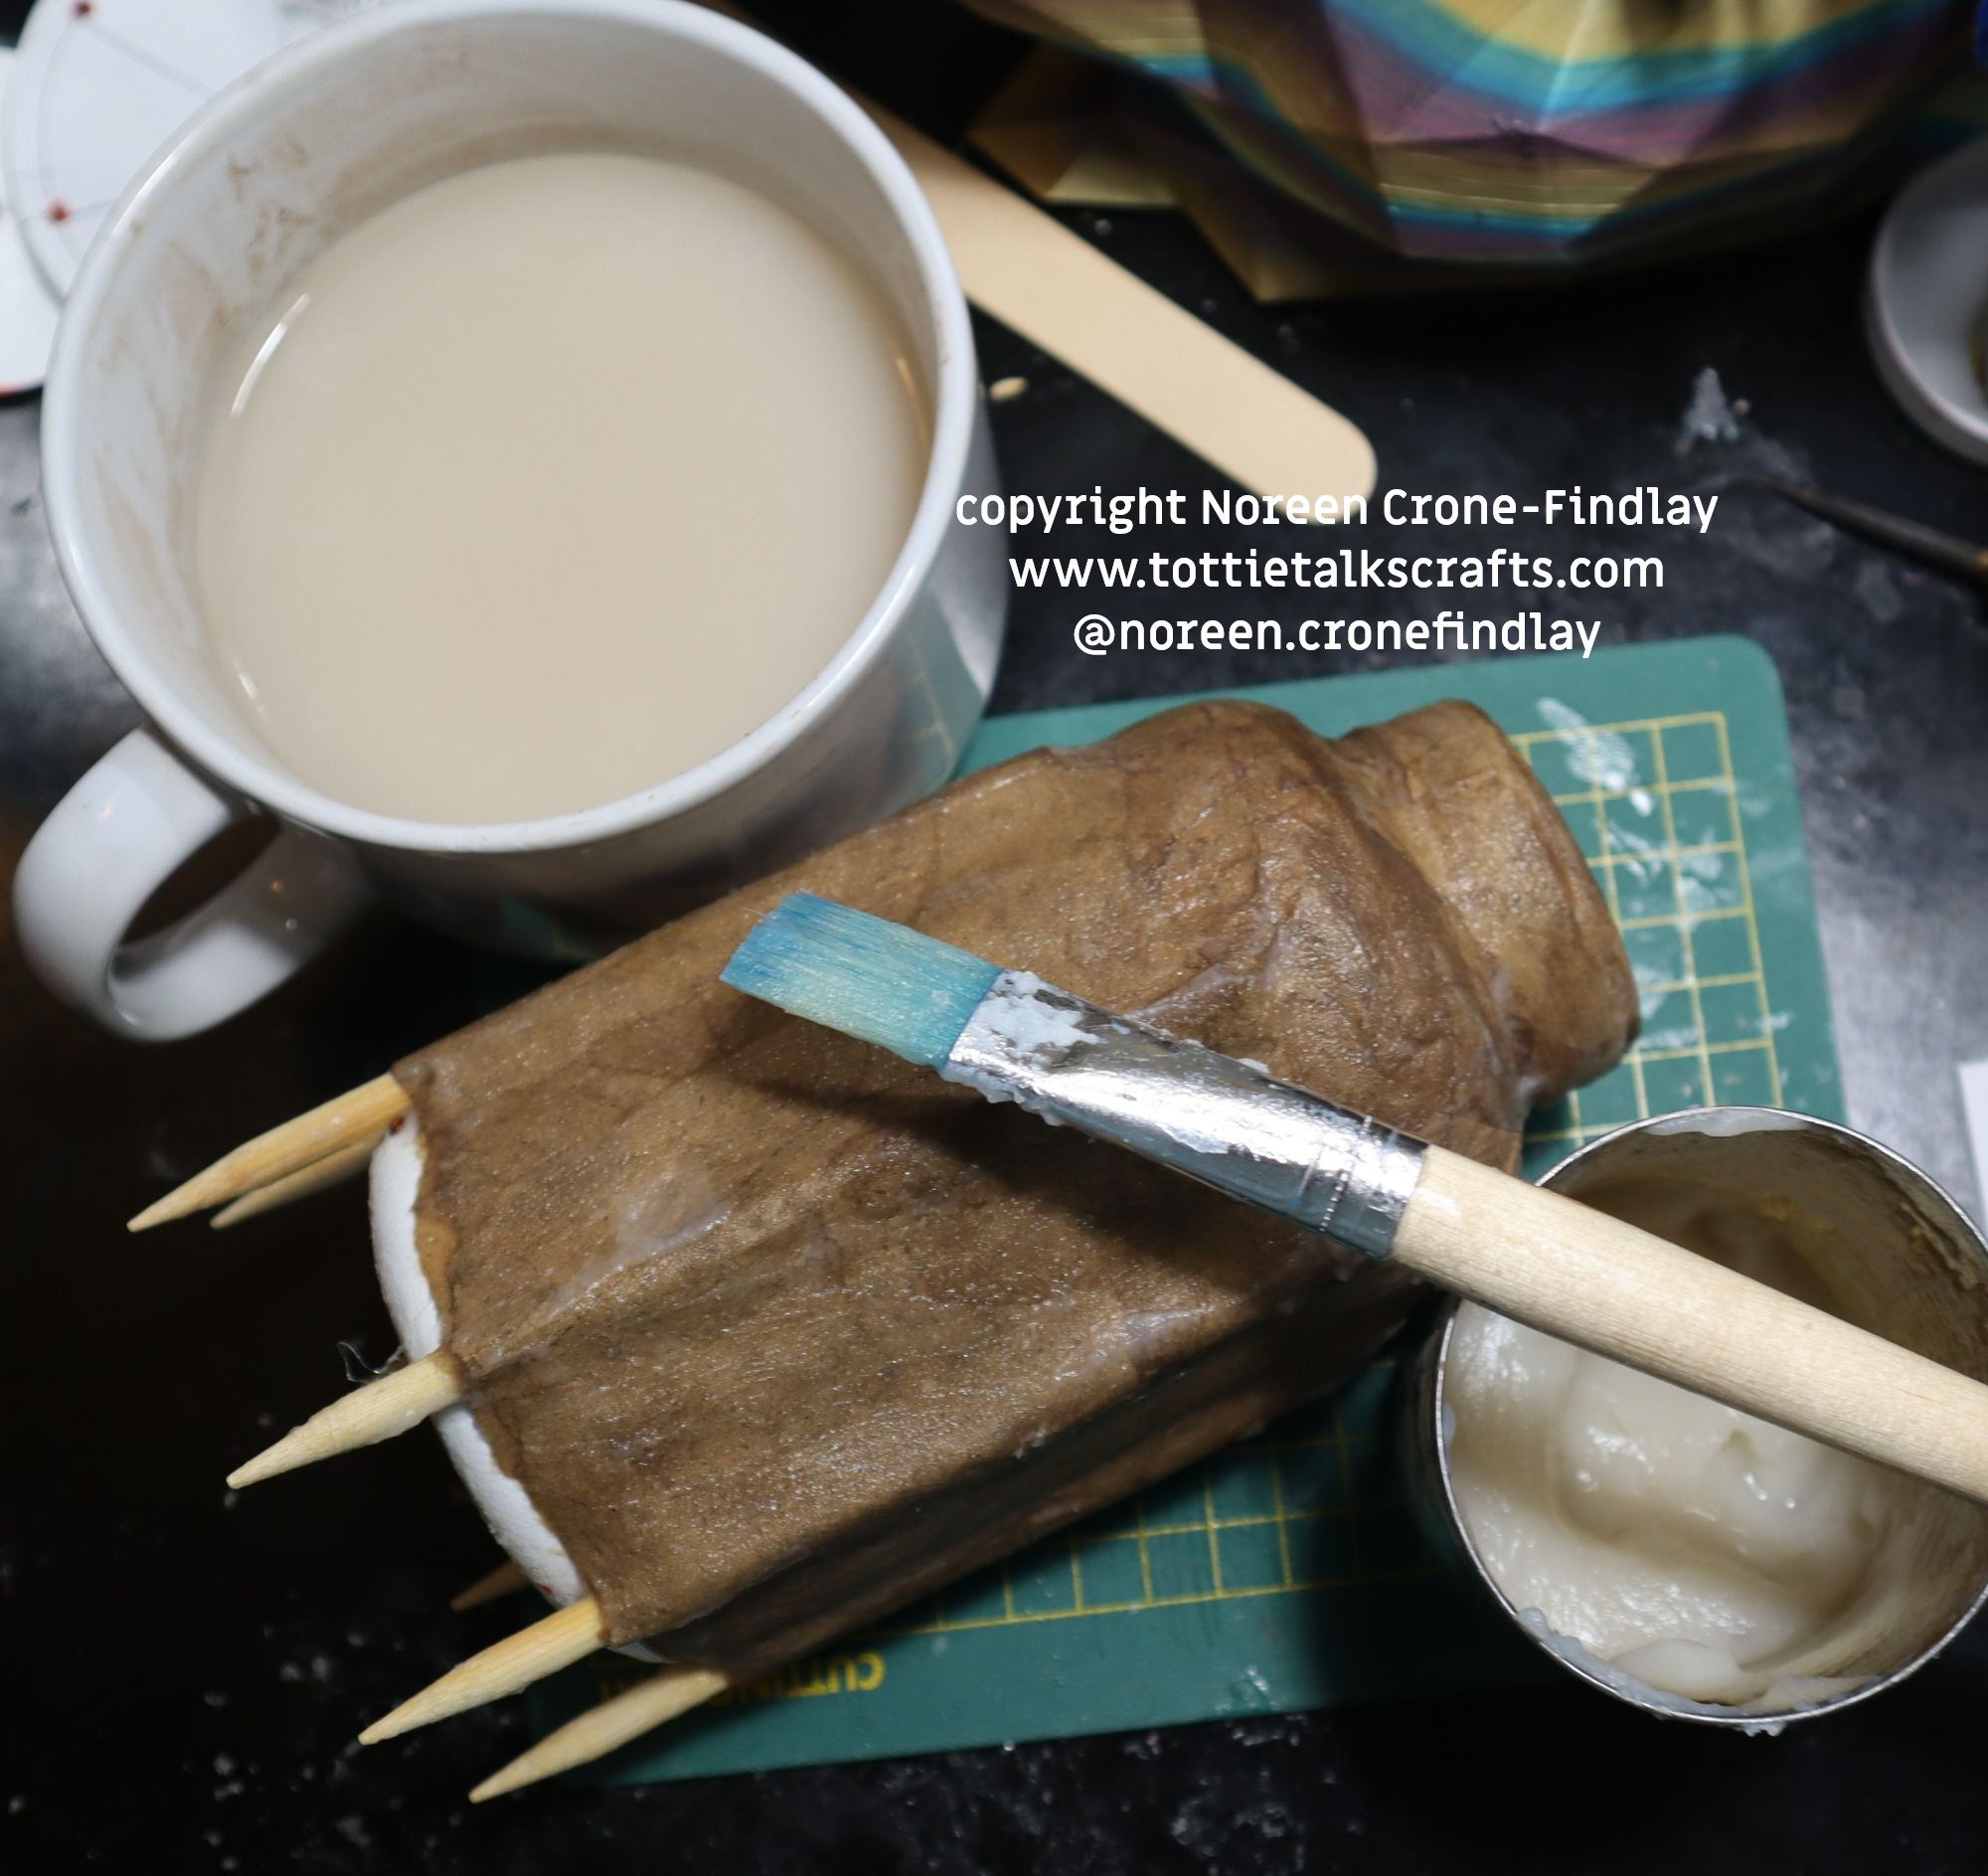
Then, layers of papier mache,
and decorative paper – I love that I found a delightful image of a storyteller with some bouncy kids and also a few goddess images, a few hippos and some almost invisible elephants.
Now mod podge to seal.
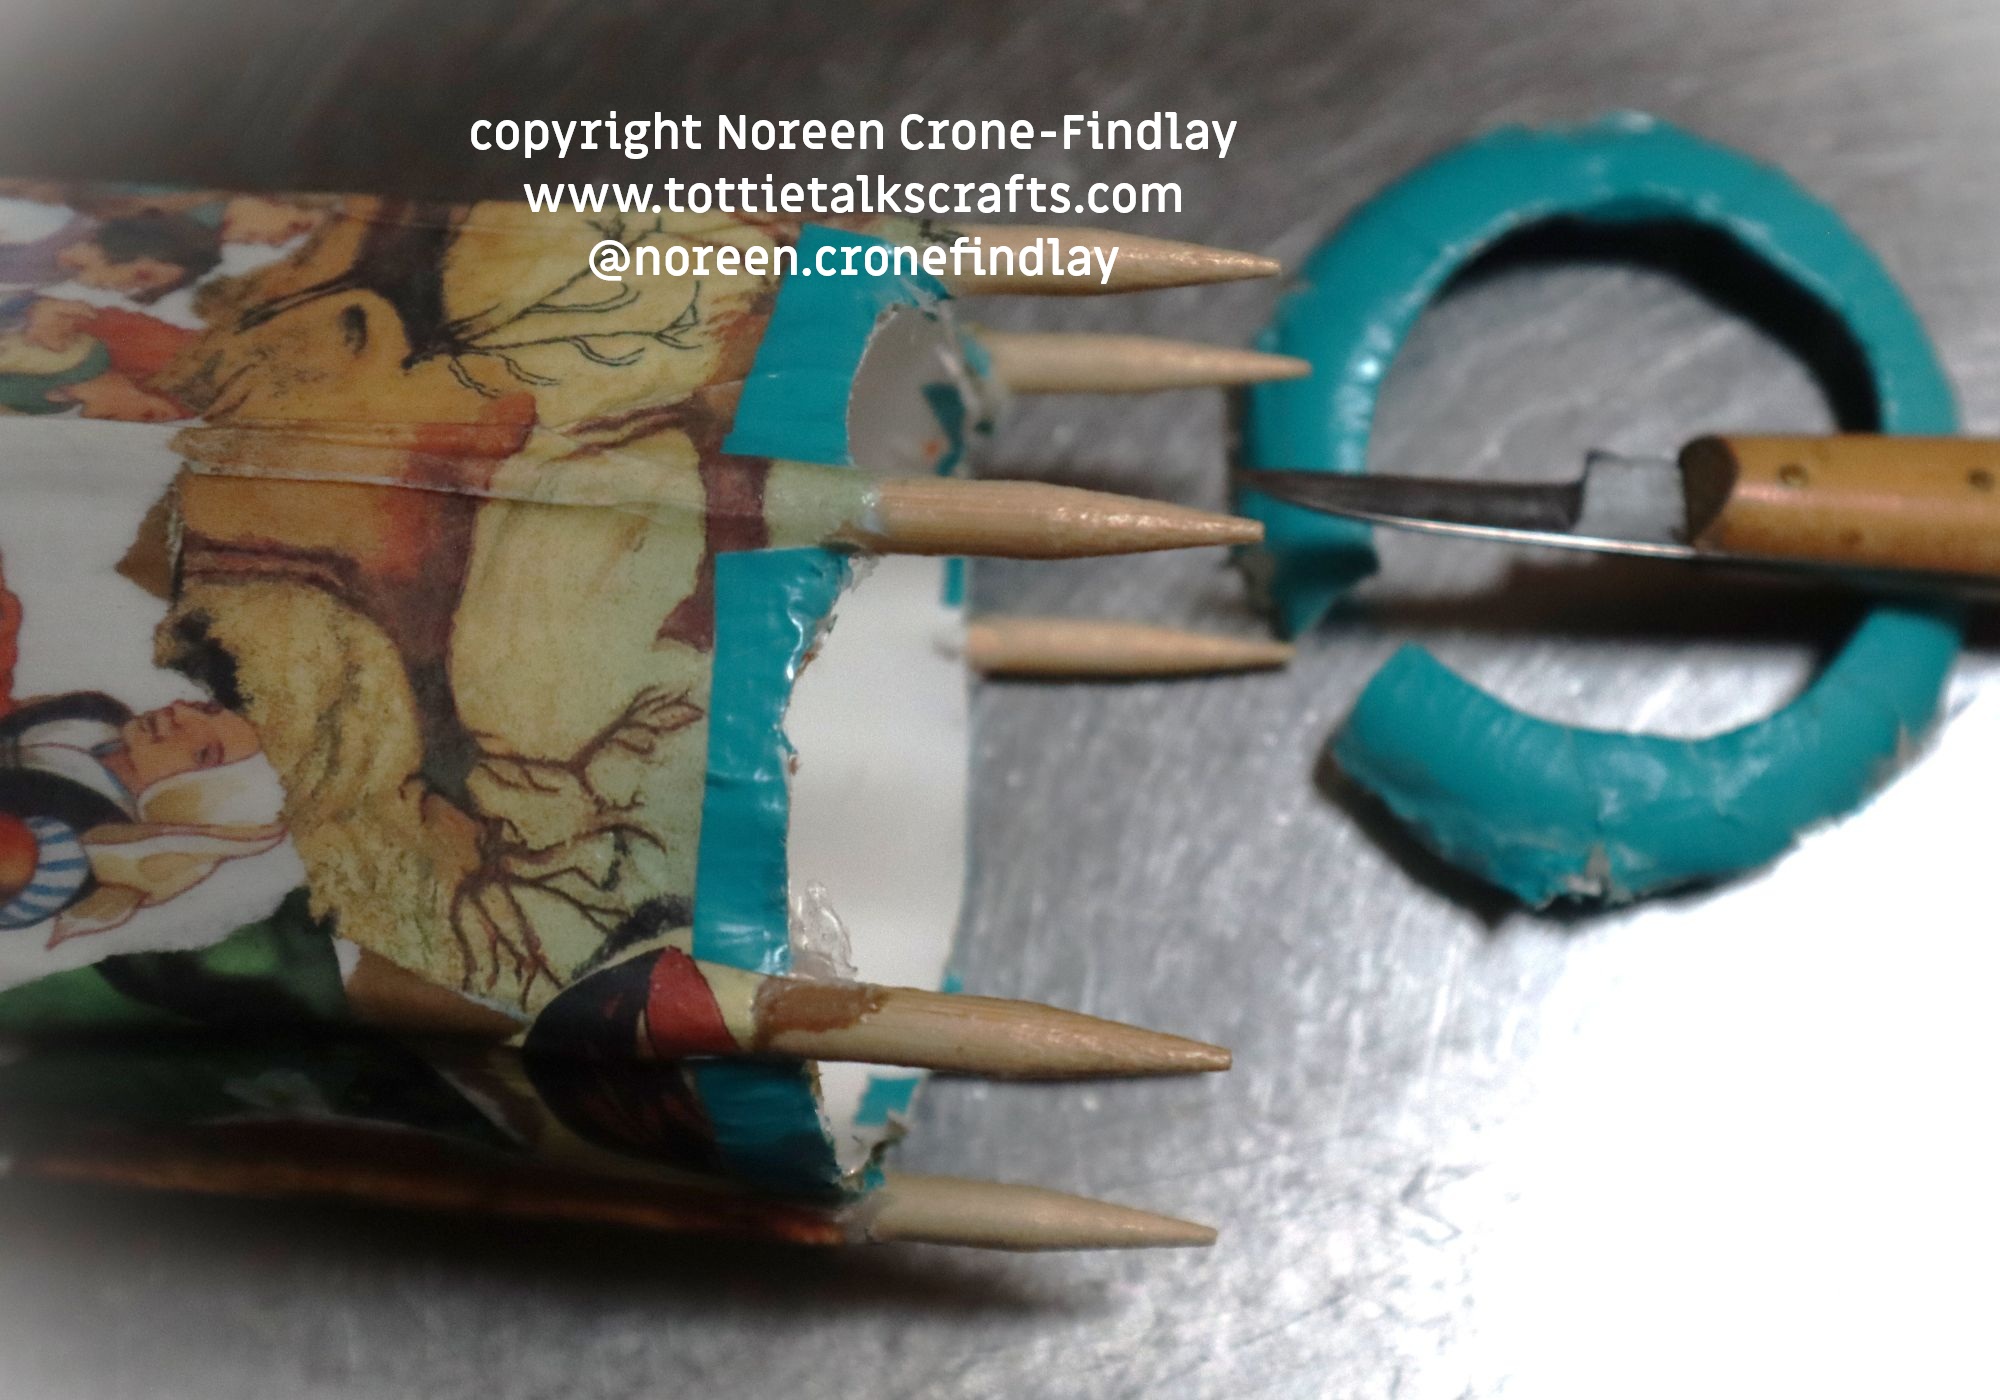
I had cut a too small hole in the end of the bottle, so I carefully cut the excess plastic away
and the Storyteller spool knitter works just fine!