Last month, when there was a spectacular Super Moon, we stepped outside to admire it.
The gigantic moon looked like it was suspended in the huge trees that line our street.
The image of the Great Tree Mother, rocking the Moon in her arms, rose up in my mind….
and I knew that I had to build one of my 6th Sense one of a kind art dolls.
Here she is:
Great Tree Mother Rocked The Moon in Her Arms:

While I was contemplating how to build the Great Tree Mother piece, my husband and our daughter took the dogs for a walk one morning.
Chloe came home with a wonderfully gnarly branch that had been pruned from someone’s tree and tossed into the alley.
She just knew I needed it…. even though, at that point, I hadn’t told her what I was mulling about 🙂
We have a very deep connection!
It is perfect.
So’s our daughter….
Anyhow…
The faces….
Years ago, my dear friend found a moose antler that had been shed and she asked me if I could use it.
I cut 3 faces from it, and carved them and painted them.
Two of them became part of this piece:

Tree Mother’s face.
She also has a ‘Hidden Face’ that is hidden inside the piece and will never be revealed.
Too bad I didn’t photograph it! Oops…
Here is Moon’s face:

I carved the hand from wood.
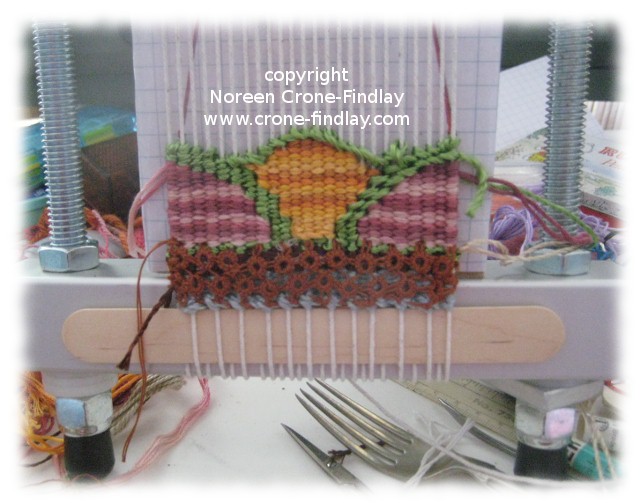
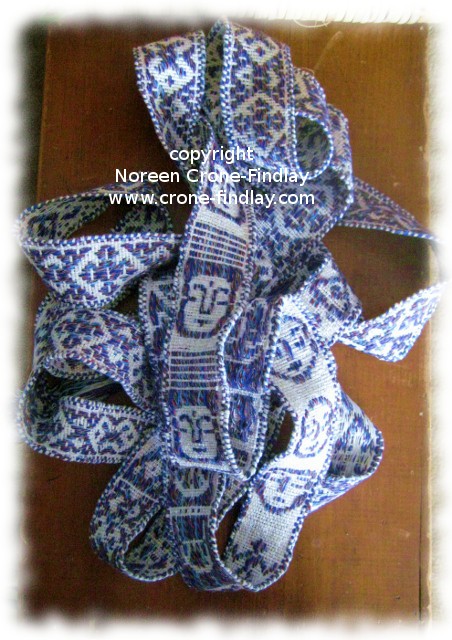
I wove the bands on 2 different looms and knitted the grey hand spun cloth of her robe.

All of the 6th Sense Woven Women have 6 pennies incorporated into them, as a metaphor for coming to our senses, and embracing intuition, intelligence and inspiration.

She is 29 inches/72.5 cm tall and the branch spreads out to 15 inches/37.5 cm wide.
She is not for sale.
By the way, she is also a celebration of creative adaptive re-use and upcycling. I love that.