For many months, I have been working really hard on new mixed media fiber art sculptures.
The 6th Sense is intuition/inspiration/imagination.
These one of a kind art dolls are based on dreams, memories, meditations and contemplations and are an invitation to embrace creativity, healing and wholeness.
They are a combination of tapestry weaving, narrow band weaving, lucet cords, tatting, knitting, wood work wire work and leather work.
Here’s a slide show video of my 6th Sense One of a Kind Art dolls.
Most of the 6th Sense One of a Kind Art Dolls in the video are for sale, but some of them have already sold and gone to live in their new homes.
Last month, when there was a spectacular Super Moon, we stepped outside to admire it.
The gigantic moon looked like it was suspended in the huge trees that line our street.
The image of the Great Tree Mother, rocking the Moon in her arms, rose up in my mind….
and I knew that I had to build one of my 6th Sense one of a kind art dolls.
Here she is:
Great Tree Mother Rocked The Moon in Her Arms:
While I was contemplating how to build the Great Tree Mother piece, my husband and our daughter took the dogs for a walk one morning.
Chloe came home with a wonderfully gnarly branch that had been pruned from someone’s tree and tossed into the alley.
She just knew I needed it…. even though, at that point, I hadn’t told her what I was mulling about 🙂
We have a very deep connection!
It is perfect.
So’s our daughter….
Anyhow…
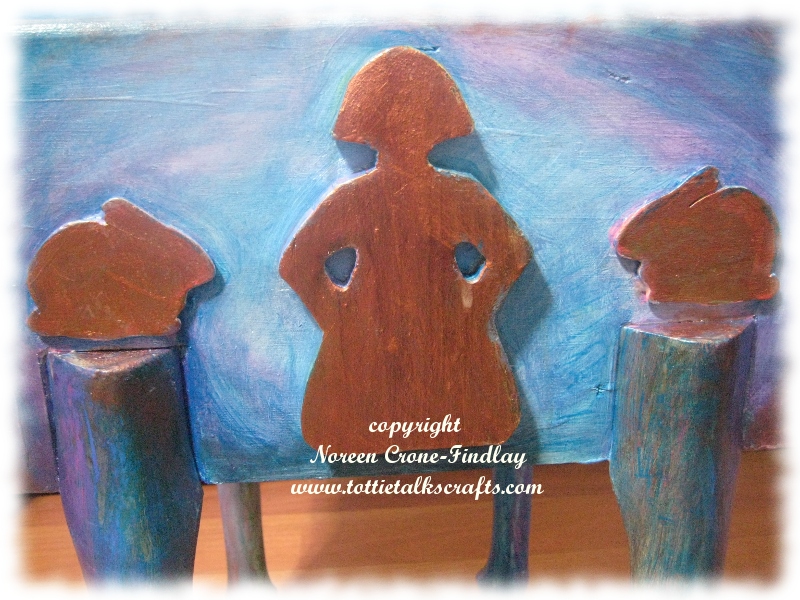
The faces….
Years ago, my dear friend found a moose antler that had been shed and she asked me if I could use it.
I cut 3 faces from it, and carved them and painted them.
Two of them became part of this piece:
Tree Mother’s face.
She also has a ‘Hidden Face’ that is hidden inside the piece and will never be revealed.
Too bad I didn’t photograph it! Oops…
Here is Moon’s face:
I carved the hand from wood.
I wove the bands on 2 different looms and knitted the grey hand spun cloth of her robe.
All of the 6th Sense Woven Women have 6 pennies incorporated into them, as a metaphor for coming to our senses, and embracing intuition, intelligence and inspiration.
She is 29 inches/72.5 cm tall and the branch spreads out to 15 inches/37.5 cm wide.
She is not for sale.
By the way, she is also a celebration of creative adaptive re-use and upcycling. I love that.
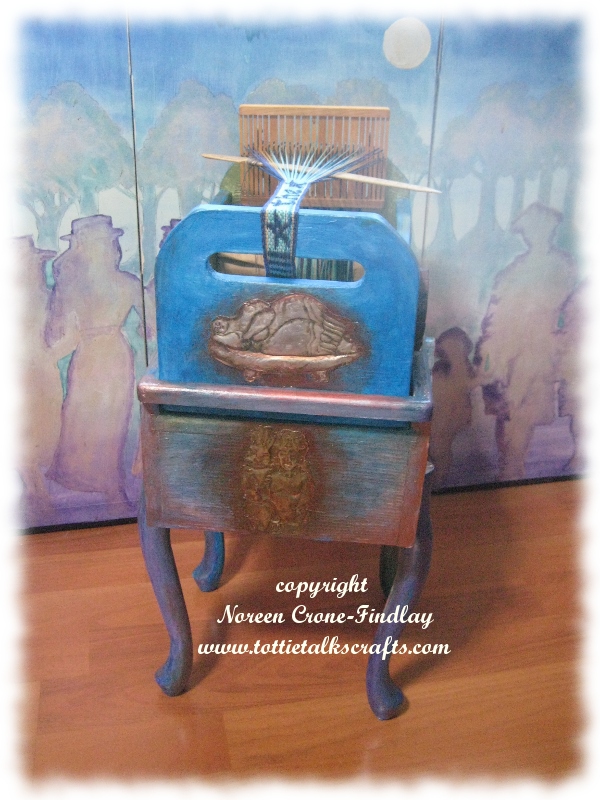
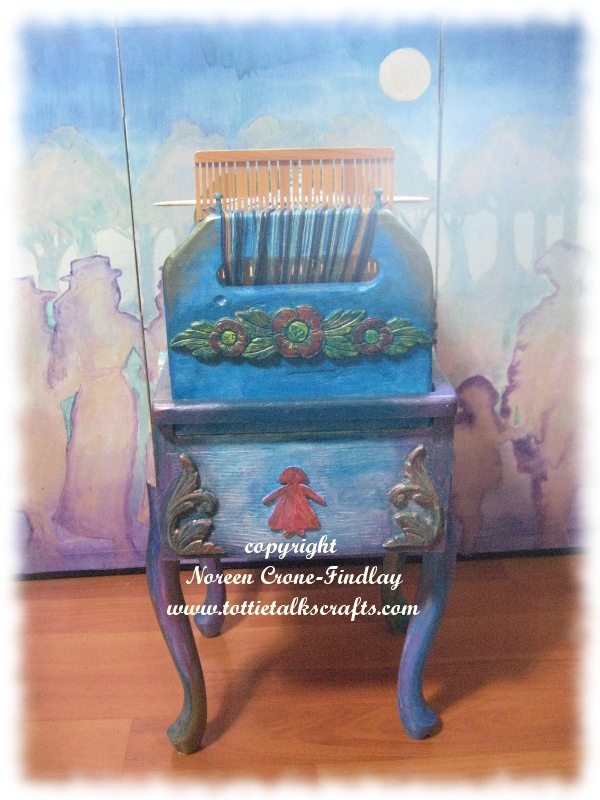
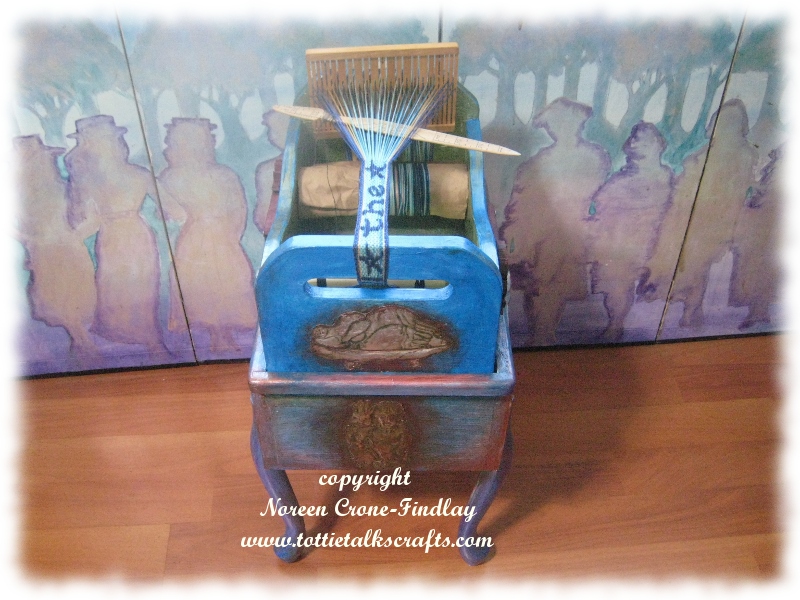
I made the ratchets and pawls from purpleheart wood, cut the ends and sides into the shapes I wanted, made the warp and cloth beams and started painting it.
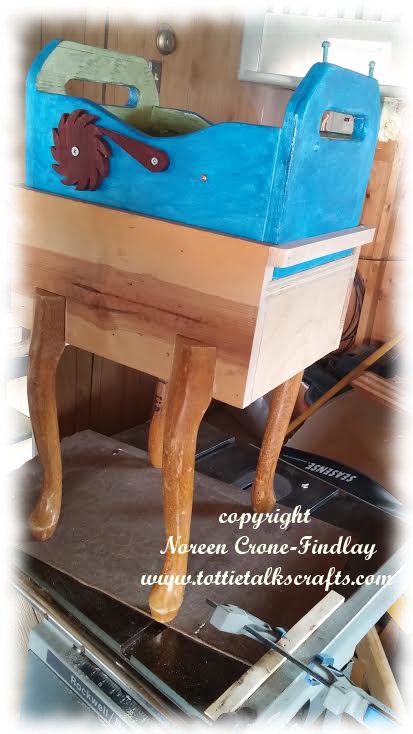
I loved it, but found it a bit too big to hold in my lap while weaving, and I didn’t have the perfect table to sit it on and weave comfortably.
So, I asked Angus to take some funky old legs that I had bought at a garage sale, and build a stand for the loom.
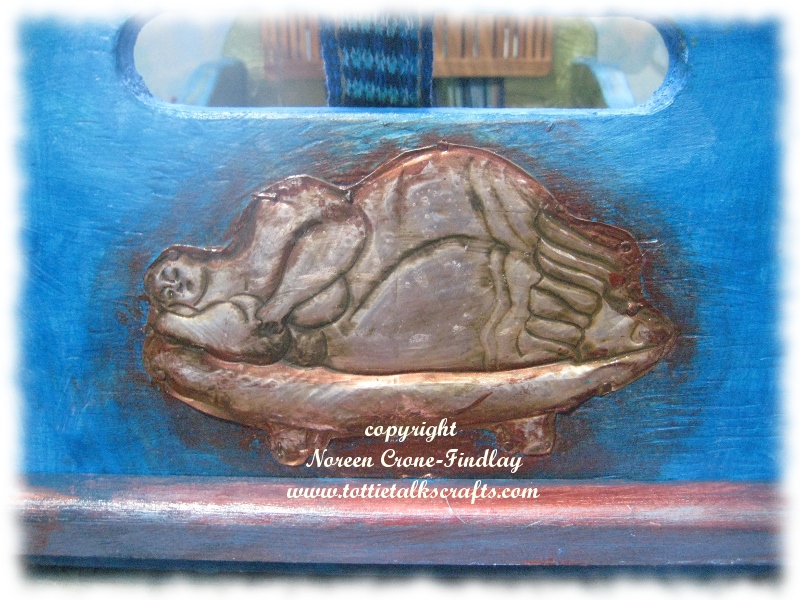
I made the metal image of the Dreaming Lady of Malta with sheet metal, using the repousse technique of pressing and shaping the metal from the back.
Because I work with my dreams and use them as one of the main sources in my art and artisanship, I felt that placing an image of the Beautiful Dreamer was a great metaphor.
I absolutely love weaving Scandinavian style woven bands, using different styles of rigid heddles.
A few weeks ago, as we were cleaning and clearing in preparation for our big move, we found some sweet little drawers that my father in law had made many decades ago.
He had reclaimed some tiny little wooden butter boxes and made wee drawers for his workshop with them:
I have made a small video that shows what I did to build this little charmer:
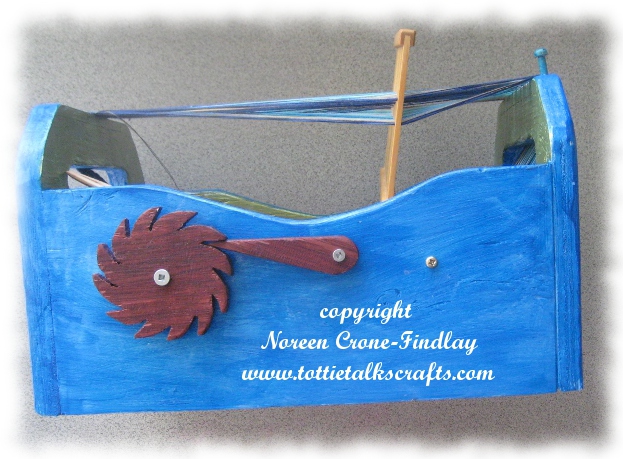
This is the ratchet and pawl that I designed for my loom.
I made them from a scrap of marine plywood, which allowed me to curve the pawl.
I am going to make the next one from a piece of purpleheart that we’ve been saving, so I am going to make the pawl straight, to make it stronger and not risk breaking it by cutting a curve against the grain.
If you are interested in learning more about weaving Scandinavian style narrow bands, definitely seek out the work of the marvelous weaver extraordinaire, Susan Foulkes:
When we went on holidays in July, I took along 4 small looms- My Norwegian Cradle loom, my 8 inch Mirrix tapestry loom, my wee copper pipe loom and my tiny peg loom.
I warped up my Norwegian Cradle loom with fine cotton to weave a narrow band, using my Swedish double slotted rigid heddle.
The heddle is actually too wide for the Cradle loom, but oddly enough, this worked well in a quirky way.
I wove and wove and wove and wove as we drove for many, many days, with the Norwegian Cradle loom in my lap:
The cotton thread in the narrow band is in the same colors that I was using to weave the sampler for Part 2 of the online tapestry course offered by Rebecca Mezoff.
I knew that I wanted to have narrow bands as part of the figure that I was weaving, using the sampler as the body.
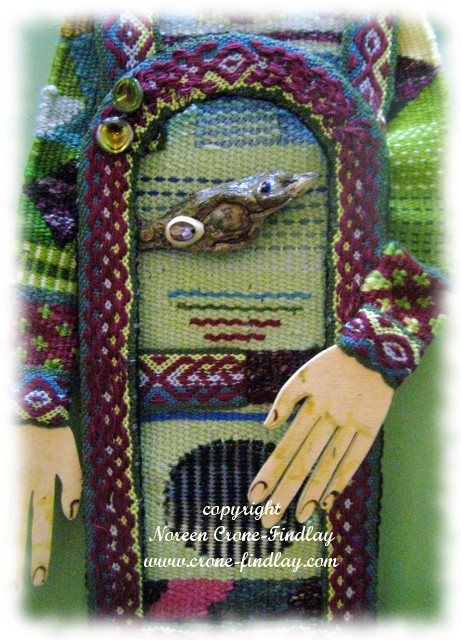
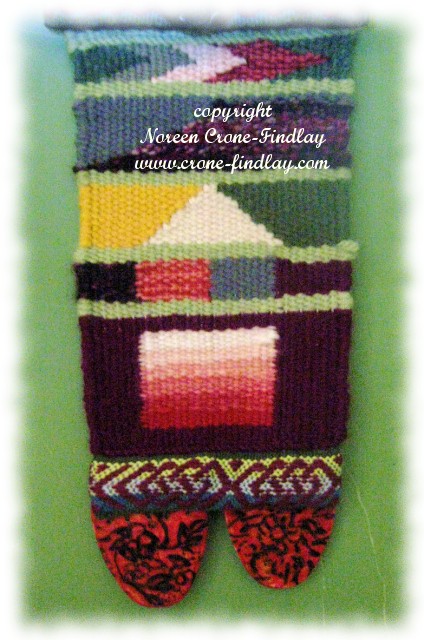
And here she is: Her name is:
“Small Bird Sang and All Was Forgiven”.
Her body is the sampler that includes the techniques that were covered in Part Two of the course.
I wove her arms separately, using techniques from Part 2 as well.
I have included driftwood from our beachcombing at the ocean, as well as found objects.
Her hands, head, feet and the archway panel are cut from Baltic birch plywood. (Lovely stuff!)
This is the fourth video tutorial about how to weave inkle bands on Mirrix looms.
copyright Noreen Crone-Findlay
A dear friend asked me: “Why are you spending all this time figuring out how to weave inkle bands on the Mirrix loom? You have inkle looms! ”
Yes, I do… an open sided one, a closed side one that my husband built me from upcycled pallet wood, and a mini.
And, I love them…. but, I find that the open side and mini inkle looms both kind of flop when I have one end on the desk edge and one end in my lap. This is the way that I like to weave with inkle looms, and I find the wobble/flop rather frustrating.
I really like how stable the Mirrix is when I have the lower edge in my lap and the upper edge against a workbench, table or desk.
Also, I love the precision of the tensioning on the Mirrix… those thumbscrews are sweet!
And, I also love the shedding device………. soooooooooo smooth. 😀
Besides, the Mirrix takes up sooooooooooooo little room to store it- inkle looms do take up a chunk of space in the studio!
That’s four good reasons that have made this rather challenging learning curve worthy of the time I have invested.
Here’s the video for the finishing process of weaving inkle bands on the Mirrix loom:
When you have woven your bands to the point that the warping rod is sitting on top of the loom, you will need to remove the spring:
copyright Noreen Crone-Findlay
Loosen the tension up a lot….
copyright Noreen Crone-Findlay
Lift the spring rod out of the spring.
Release the ends of the springs from the knobs.
Gently, ease the spring out of the warp strands by spreading the warp strands out slightly and pushing on the spring to disengage it.
Continue weaving until the shuttle almost can’t make it through the shed.
copyright Noreen Crone-Findlay
Weave one row.
Keep the shuttle in the shed, and place a darning or tapestry needle in the shed with the point pointing in the direction that the shuttle exits the shed.
Weave the next row, and repeat with a second darning needle.
The needles now point in opposite directions.
Weave one more row.
Cut the weft strand, and thread it into the first needle.
Pull it through, and remove the needle.
Thread the weft strand into the remaining needle and pull it through.
La de dah! you have finished your inkle band!
Wheee! 😀
I always weave the tail end in a little bit more before I trim it off.
Loosen the tension wayyyyyyyyyyyyyyyyyy off, and slide the warping rod out of the loops.
Trim the ends, and pull them through the heddles.
Congratulations, you’ve woven some scrumptious new inkle bands! 🙂
Part 3 of the video tutorial series on how to weave inkle bands on Mirrix looms is about the weaving process:
copyright Noreen Crone-Findlay
Something that I learned as I trundled up my ever so steep learning curve with figuring out how to weave inkle bands on the Mirrix loom:
I started out by weaving one row on one band, putting it’s shuttle down, then picking up the second shuttle and weaving one row on the other band.
Sounds slow and clunky, doesn’t it? Well, you’re right.
The most efficient way to weave 2 bands at once is to weave as far as you can on one band, then set that shuttle aside, and weave away on the second band.
Oh… speaking of shuttles, here’s the tracing of my most favorite inkle shuttle:
copyright Noreen Crone-Findlay
I designed this one several years ago, and I love it. Works like a charm.
Here’s the video that shows the weaving process:
copyright Noreen Crone-Findlay
When you need to advance the warp, loosen the tension quite a lot.
Support the spring as you gently ooze the warp rod around and up the back of the loom.
Pat the warp strands back into the channel, and tighten up the tension again.
Remember, you do not need to have the tension as tight as when you are weaving a tapestry or beading.
You’ll find the perfect tension that suits you best.
Keep on weaving until the warp rod is sitting on top of the loom, and then check into the 4 th video in the series:
This is the second stage of the video tutorials that I made on how to weave inkle bands on the Mirrix loom.
copyright Noreen Crone-Findlay
There are two bands on the loom, because in this video, I am working on the 16 inch loom.
When you work on the 8 inch loom, it’s okay to just weave one band at a time, as the warping bar doesn’t flop around.
But, on the 16 inch loom, you do need to either warp up 2 bands, or secure the other end of the warping bar with a cord so it will stay perfectly horizontal.
I tried weaving 3 bands at once on the 16 inch loom, and didn’t like it, as the center knobs on the shedding device got in the way.
Two bands are just great though.
AND…. if you want to weave longer bands, and have either a 12 inch or 16 inch Mirrix loom then the loom extenders will be your friend 🙂
I use a crochet hook and a weaving stick to make the heddling process go quick like a bunny.
Here’s the video tutorial:
Start by placing a piece of cardboard between the layers at the front of the loom and the back so you can’t see the warp strands at the back of the loom.
copyright Noreen Crone-Findlay
Place the shed changing device into the brackets. Unscrew the little knob that holds the heddle rod in place.
Pull the heddle rod back so it’s about half way along the warp strands.
copyright Noreen Crone-Findlay
Place the heddles onto the fingers of your non dominant hand.
copyright Noreen Crone-Findlay
Look down at the warp strands that are at the lower edge of the front of the loom.
There’s a gap between the strands that have gone in front of the warping bar and behind it.
Slip your fingers into the gap and scoot them up to the shedding device.
Slide a shed stick into the gap.
Voila! (which is how ‘walla’ is really spelled 🙂 )
You have shed one ready to heddle!
copyright Noreen Crone-Findlay
Now, slip the crochet hook behind the first warp strand, pluck a heddle off your fingers, and pull it forward.
Catch the other end of the heddle loop and place both loops on the heddle rod.
Go slowly, and be sure that both ends of the heddle loop stay politely on the heddle rod.
copyright Noreen Crone-Findlay
When you have all of the warp strands heddled, slide the heddle bar into position in the knobs, and tighten the lock nut.
Repeat the heddling process on the second set of warp strands for your other band.
copyright Noreen Crone-Findlay
Push the first set of heddles down as you rotate the shedding device.
copyright Noreen Crone-Findlay
Leave the shed stick in place, and use the crochet hook to pick up the warp strands for the other shed.
Take the warp strand from the back to the right of the one in front, and onto the hook,
take the hook over the front strand, and pick up the next strand and carry on across.
copyright Noreen Crone-Findlay
Slide the weaving stick out of the first shed, and slip it along the crochet hook to transfer the warp strands from the crochet hook to the weaving stick.
copyright Noreen Crone-Findlay
Turn the weaving stick on it’s side, and then pick up the warp strands one at a time and capture them with the heddles just as you did for the first set of warp strands.
copyright Noreen Crone-Findlay
Repeat this process for the second band.
Check your heddles carefully to make sure that they are opening the sheds properly.
Ahhhhh! a warped loom is a thing of beauty!
copyright Noreen Crone-Findlay
Attach the handle to the shedding device and adjust the tension by turning the thumbscrews.
Open the first shed, and insert a craft stick, then open the second shed and insert another craft stick.
Squish the warp strands together to establish the width of your band.
copyright Noreen Crone-Findlay
Weave one row, leaving a 6 inch/15 cm tail.
Change sheds, and weave the next row.
Pull up firmly on the tail end and weave it through the same shed.
Repeat several times until the tail end is woven in, and the band is established.
Link to purchase pattern for Inkle dolls: Inkle Dolls
And, they are wonderful for trimming handwoven clothing:
copyright Noreen Crone-Findlay
Link to post that shows how to shape inkle bands to make a yoke or other shaped pieces of garments: Warp pulling
Over the years, I have also made hat bands, book marks, all kinds of jewelry, key fobs, vests, bags, bag handles, the garters for the men’s kilt hose for my son’s wedding, shawls, freeform pieces that combine inkle weaving, knitting, embroidery, spool knitting and crochet, as well as rugs.
Yep. I love inkle weaving.
So, as I have been exploring the possibilities of weaving with my Mirrix looms, I had to give inkle weaving a try.
I found that it was quite challenging at first. But, I don’t give up easily 🙂
I ended up spending waaaaaaaaaaaaaaay more hours than I should have, experimenting and obsessing over making inkle bands on the Mirrix.
Well… I finally succeeded.
Since it was so challenging, I figured that I should share what I have learned, so that other intrepid inkle weavers can leap right in, without all the trial, error and frogging that I went through!
There are definitely tricks to weaving inkle bands on the Mirrix looms, and I have made 4 videos to share those tricks.
Here’s part one of the video:
Here is the draft for the bands that I wove in the videos:
copyright Noreen Crone-Findlay
To read the draft: Each square represents one warp strand.
You can check your warping by looking at each shed to see that it has the same number of strands, in the order that they appear in the line.
You will be putting a total of 8 green strands on, followed by 4 orange strands, 3 sets of (1 orange, 1 green) for a total of 6 strands, then 4 orange strands and ending with 8 green strands.
At the top and bottom of the loom, you’ll see the full count of warp strands.
At the warping bar, the 2 sheds will be separated into their correct (we hope!) configuration for each shed.
The chart will give you bands like this:
copyright Noreen Crone-Findlay
The upper band is the band on the right hand side of the loom in videos 2 – 4.
I only used the center of the draft for it, without the green border strands.
The yarn is Lion Brand Cotton.
copyright Noreen Crone-Findlay
Setting up the loom for inkle bands is different than normal warping.
You need to have the warping bar at the front of the loom.
copyright Noreen Crone-Findlay
Tie the green yarn onto the warping bar and take it up and around the loom, just the same as if the warping bar was in the back.
copyright Noreen Crone-Findlay
You will need to cut the warp strand of color 1 to tie on color 2 at the warping bar, for EVERY color change.
WHAT?!?!?!
Yes. really.
It sounds insane, but this is the biggest key to making the whole inkle thing work on the Mirrix loom.
Trust me. You ~can~ twist your yarns around each other, and are welcome to, I’m sure, if that would make you happy….
BUT…. the quickest, easiest way to have problem free warping for inkle is to cut those little darlin’s and tie the knots between the colors.
copyright Noreen Crone-Findlay
Yay! Warped! Insert the spring rod into the spring to keep the warp strands locked into their notches.
This is sooooooooooo important! (yep… voice of ‘oops’ experience here 😦 )
And in Part 2…. it’s on to the heddles.
I have a nifty, super friendly way of using a crochet hook and weaving stick to make the heddling process go like a breeze.


")
")
")
")
")
")
")
")
")
")
")
")
")
")
")
")
")
")
")
")
")
")
")
")
")
")
")
")
")
")
")
")
")
")


