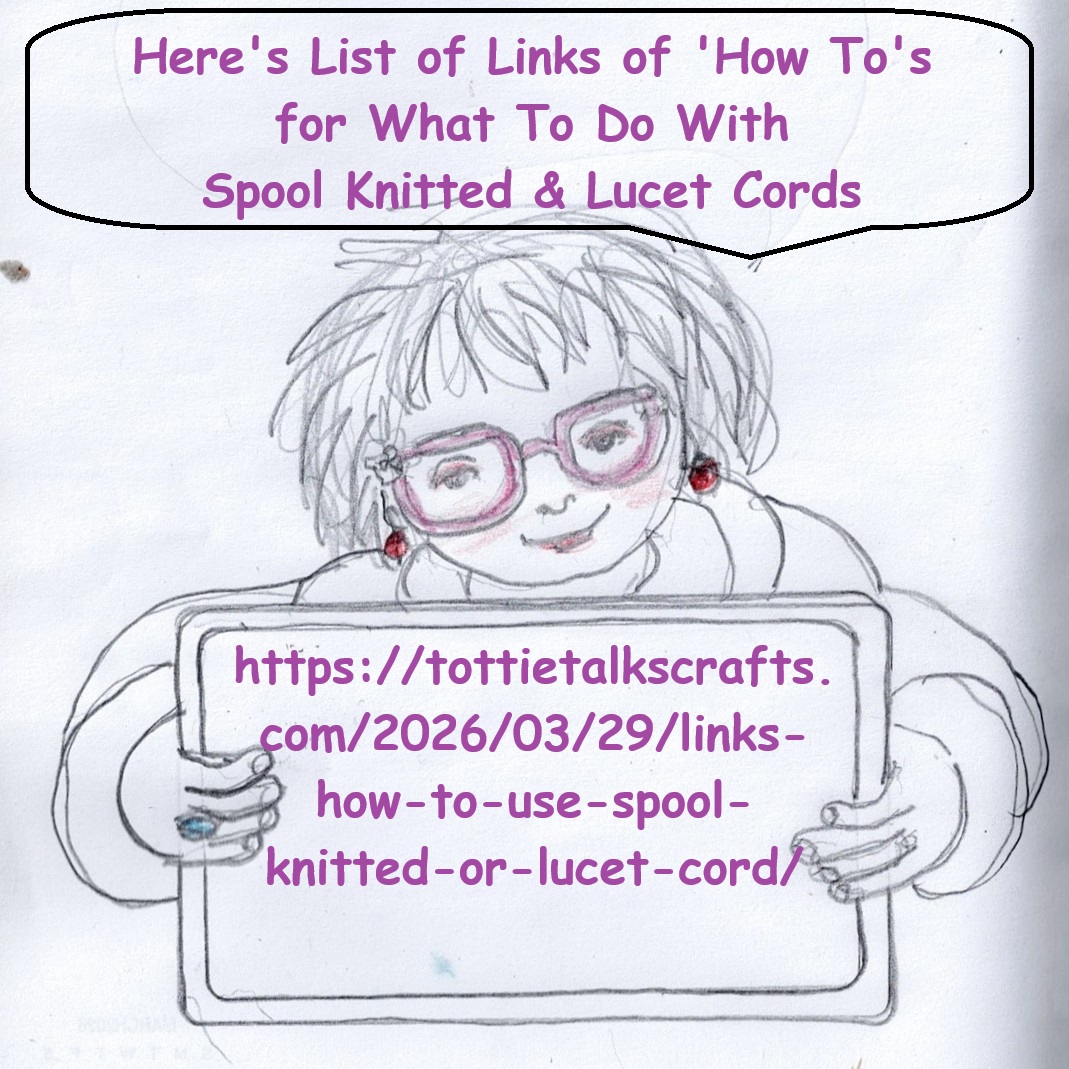
Day 35 of #100daysofspoolknittersandlittlelooms- Lots of Links for How To Use Spool Knitted or Lucet Cord
Spool knitting and using lucets to make lovely cord is relaxing, meditative, contemplative and just plain fun. But, people often ask me: What do you do with all those cords after you’ve made them?
Here’s a list of useful links to videos that I have made about ways of using spool knitted and luceted cord. (Lucets are flat 2 peg spool knitters))
Go to my Etsy shop to buy pdf patterns for fun spool knitted projects:
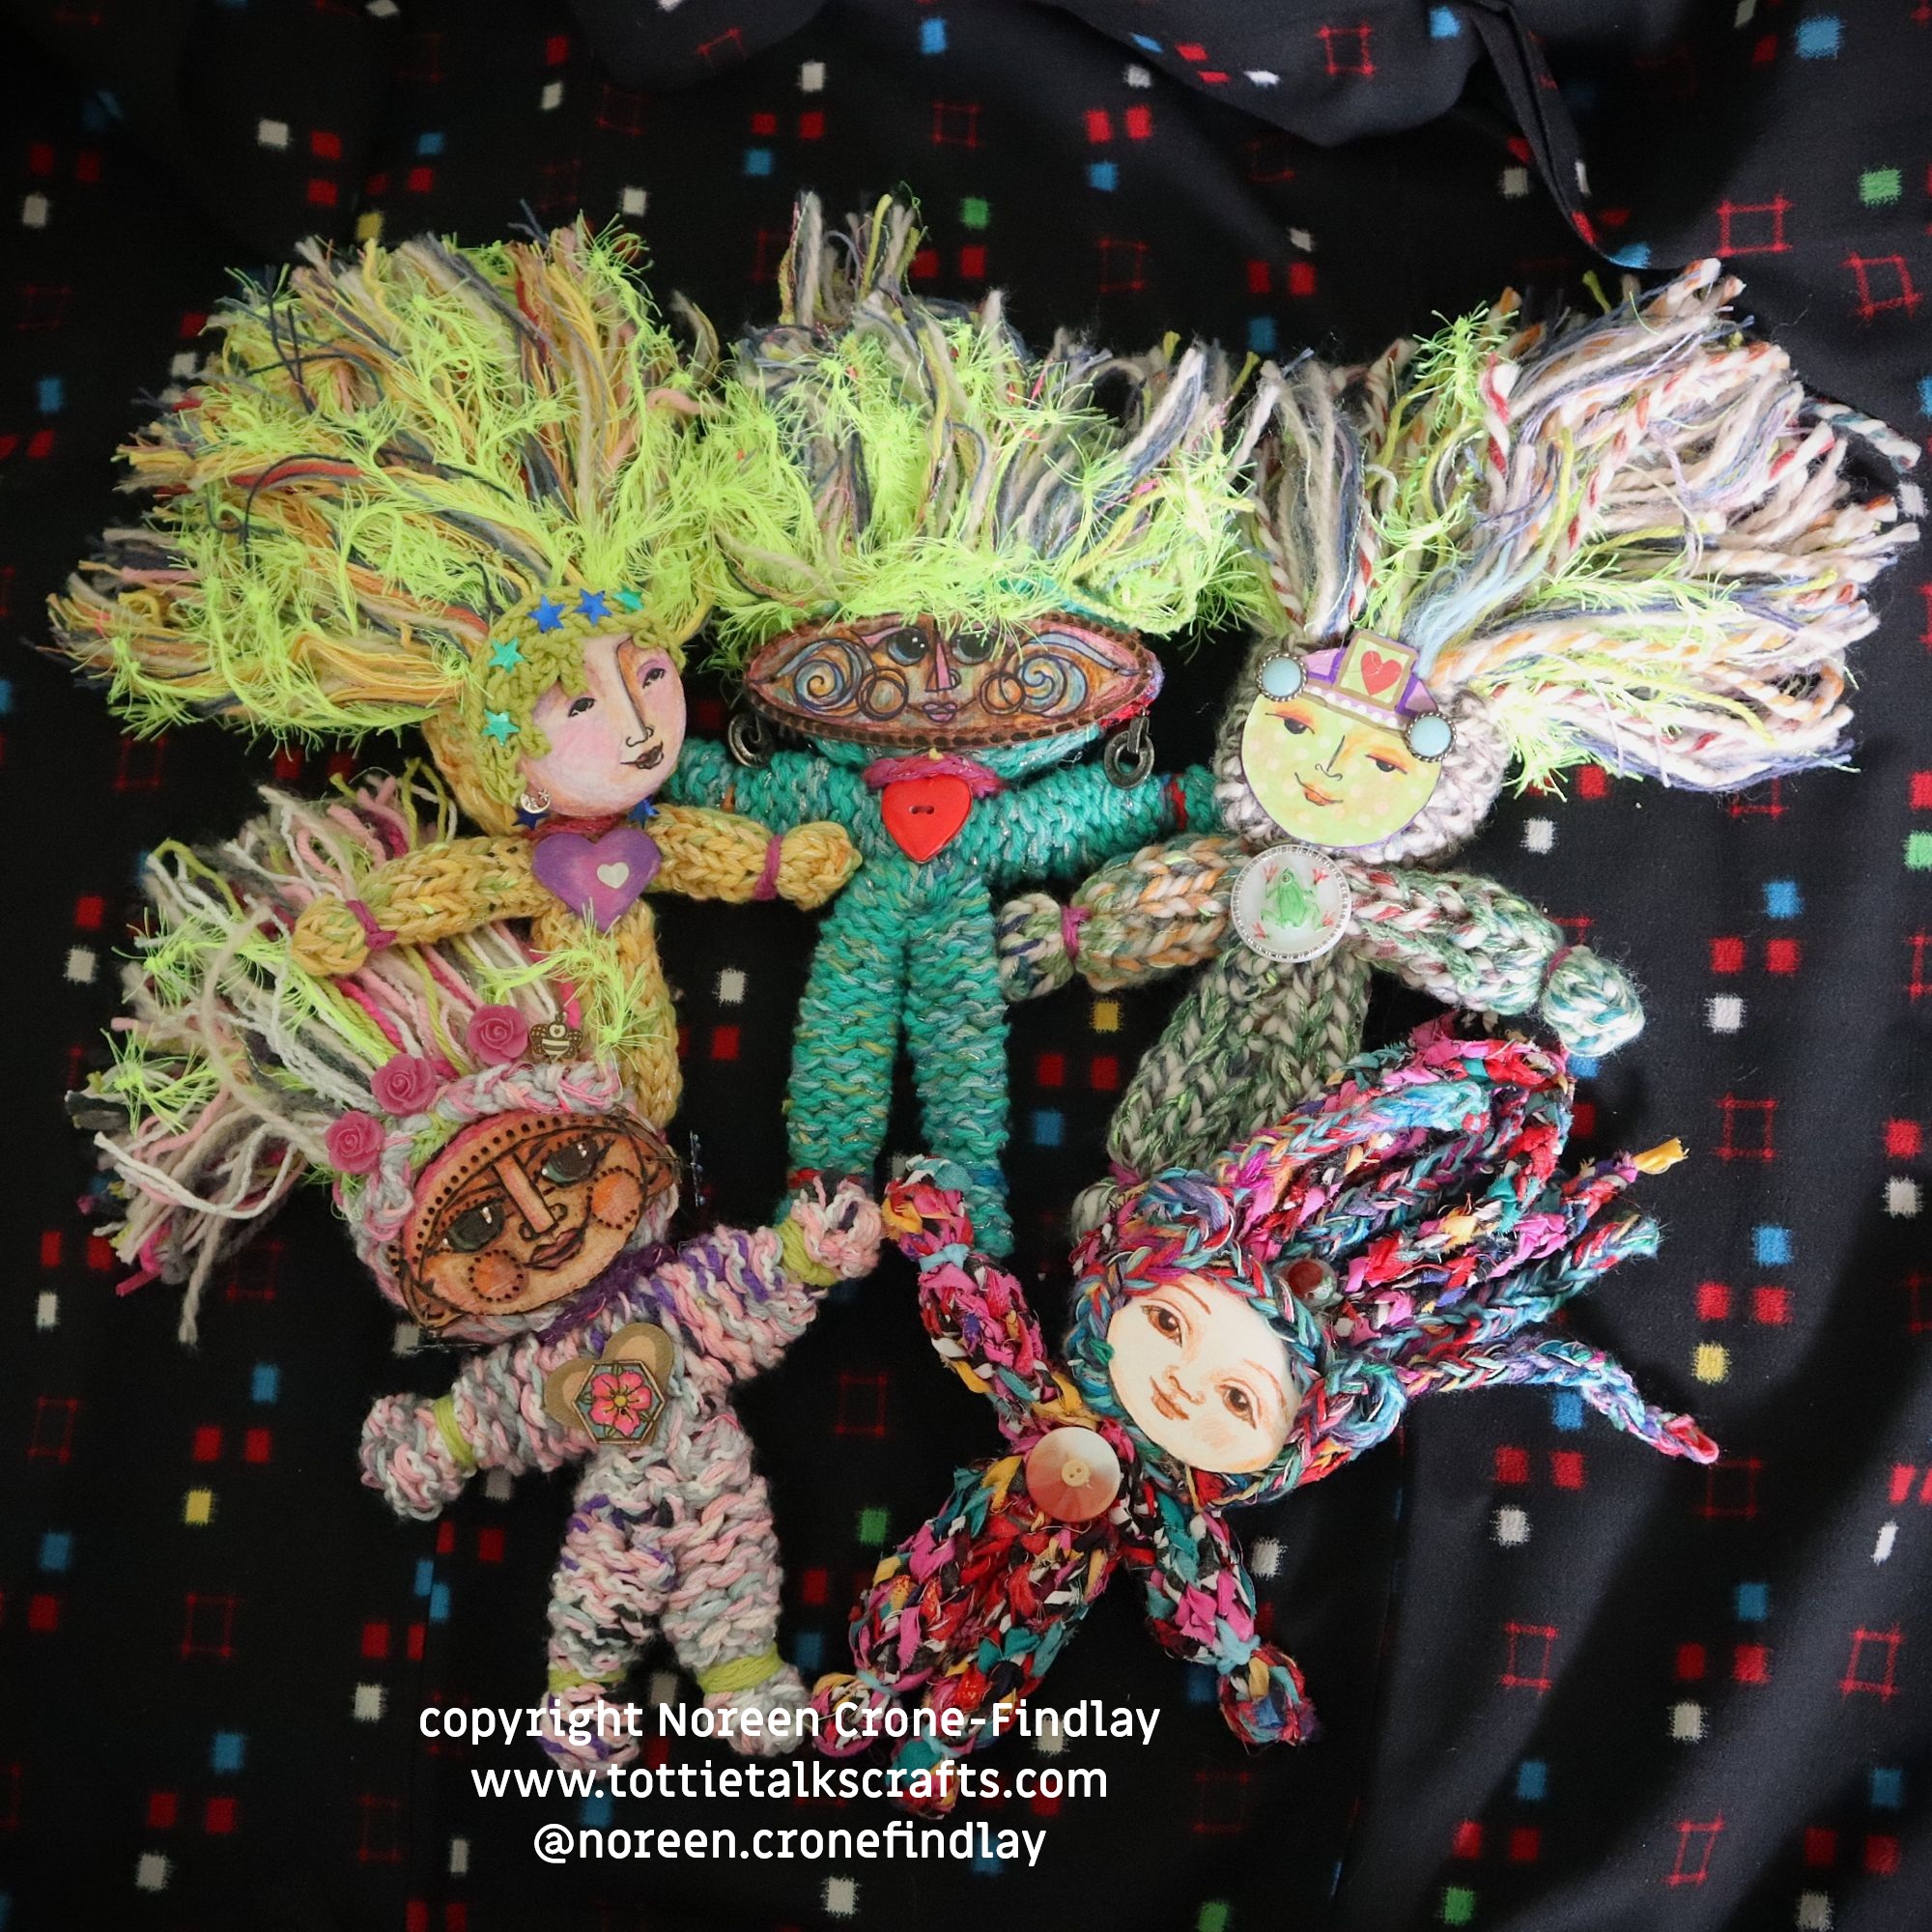
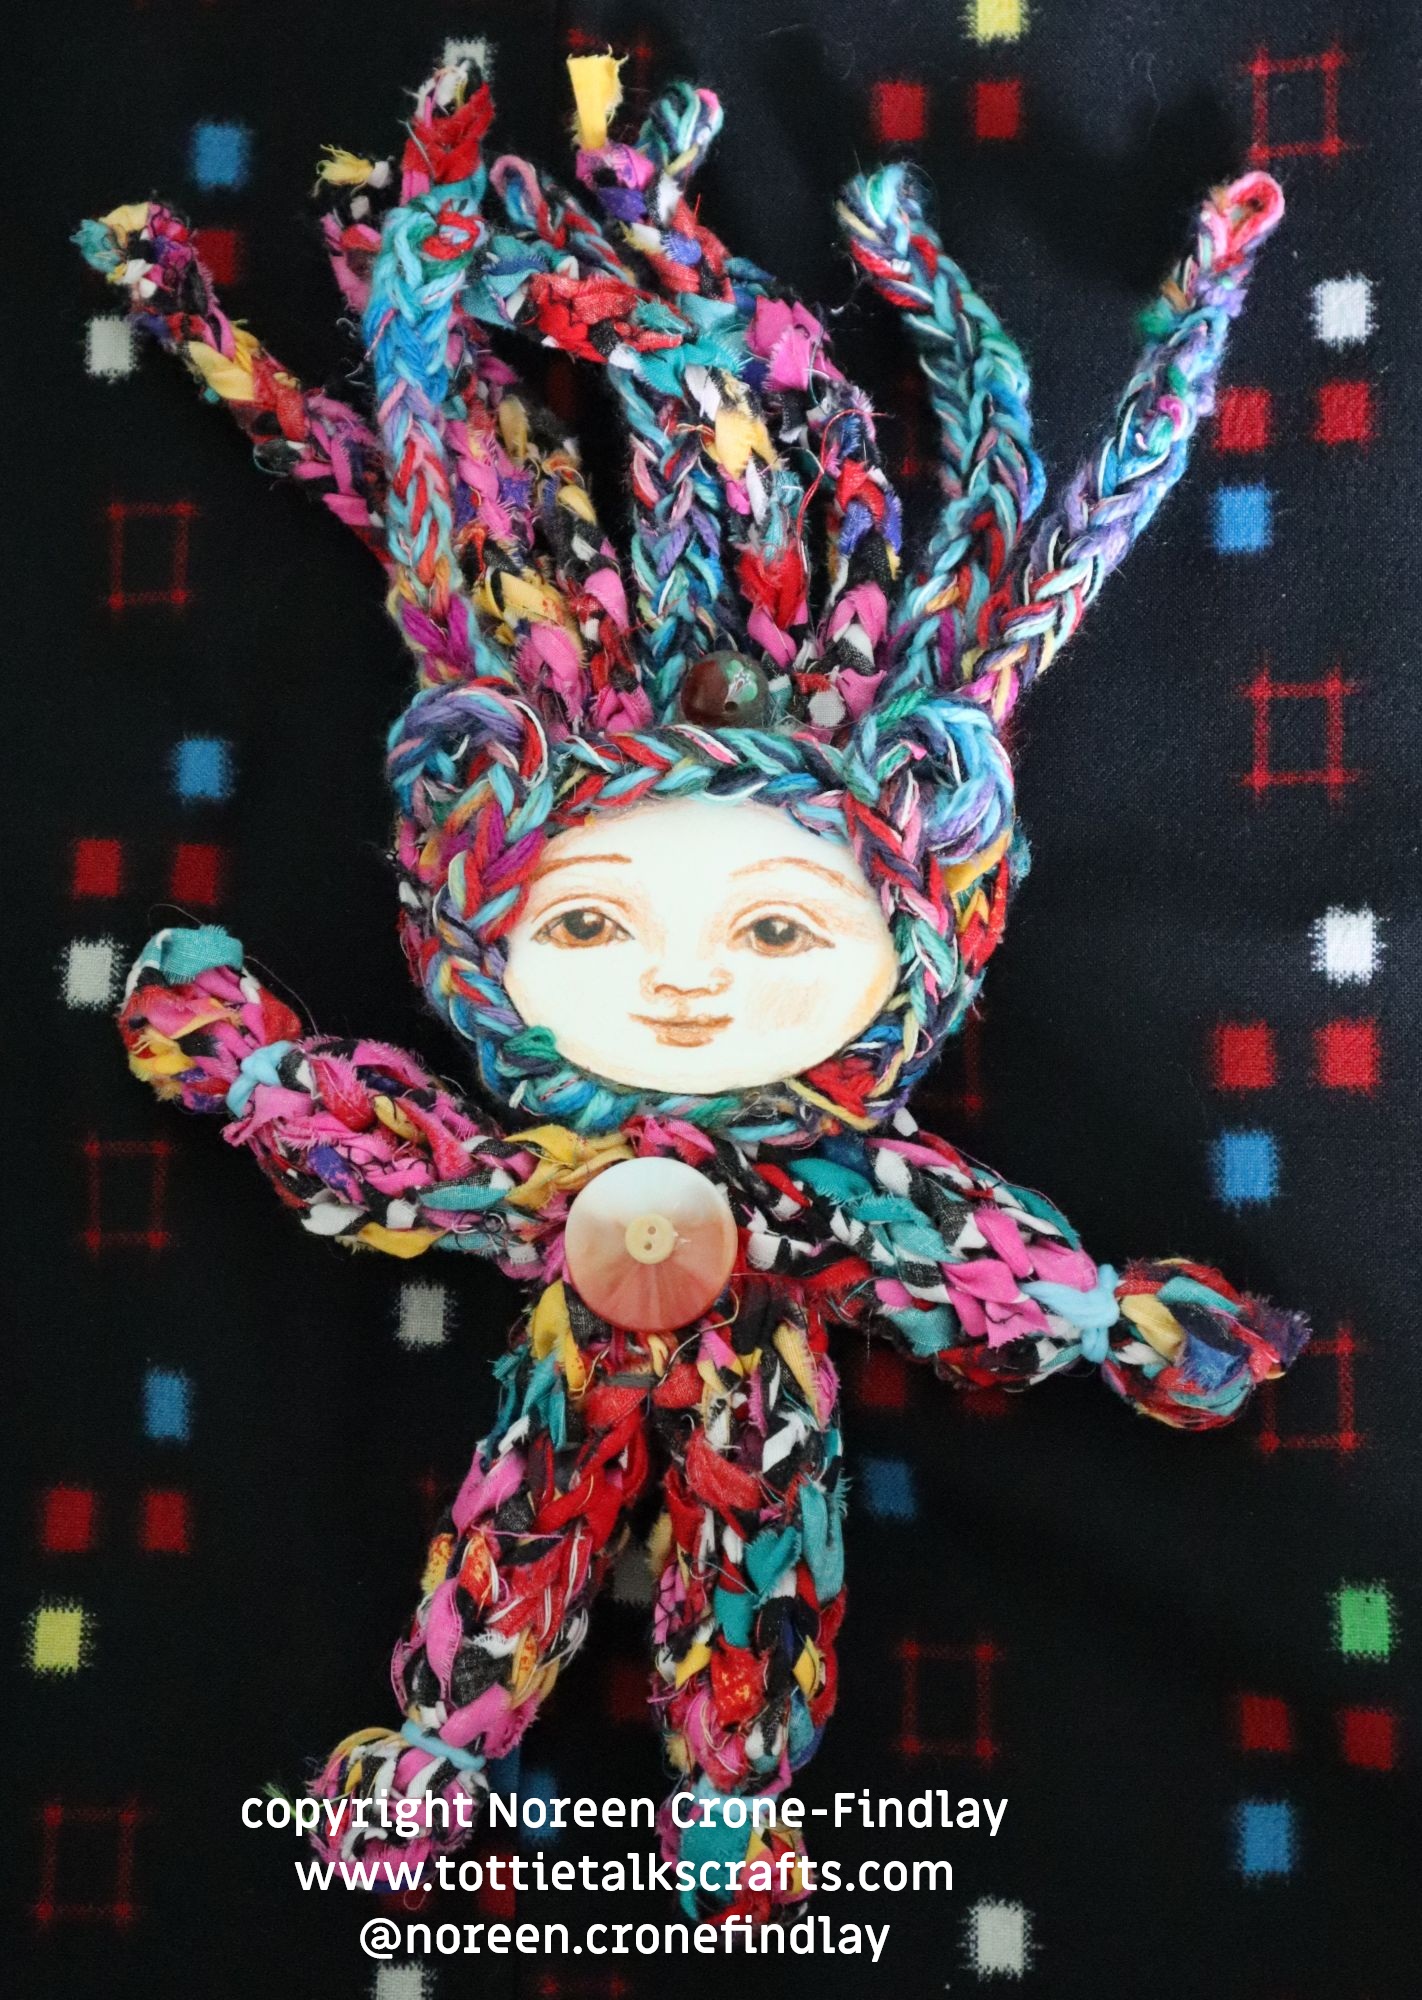
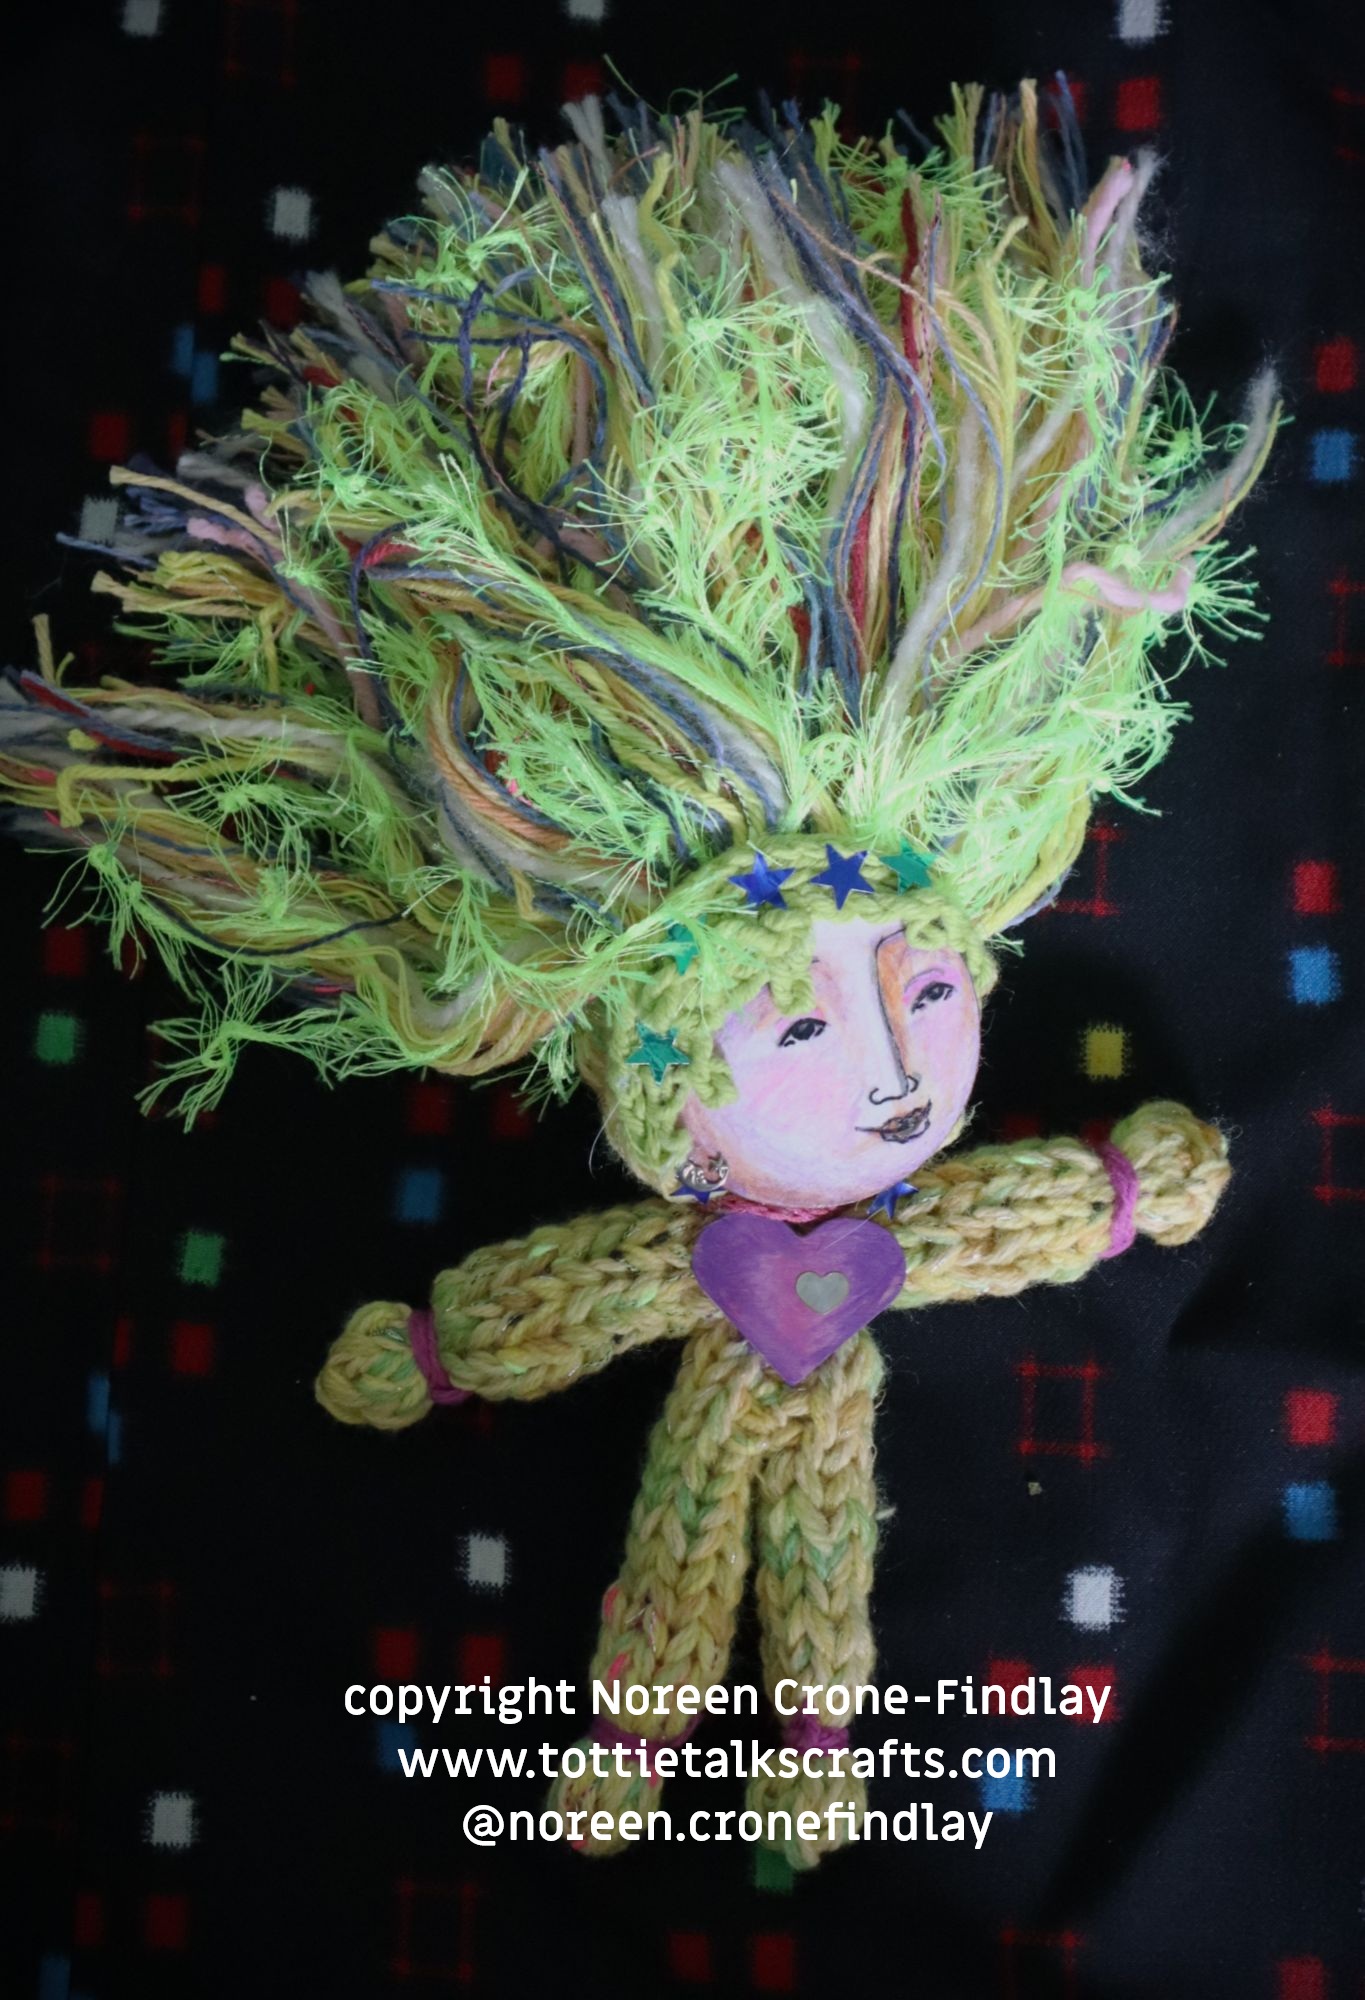
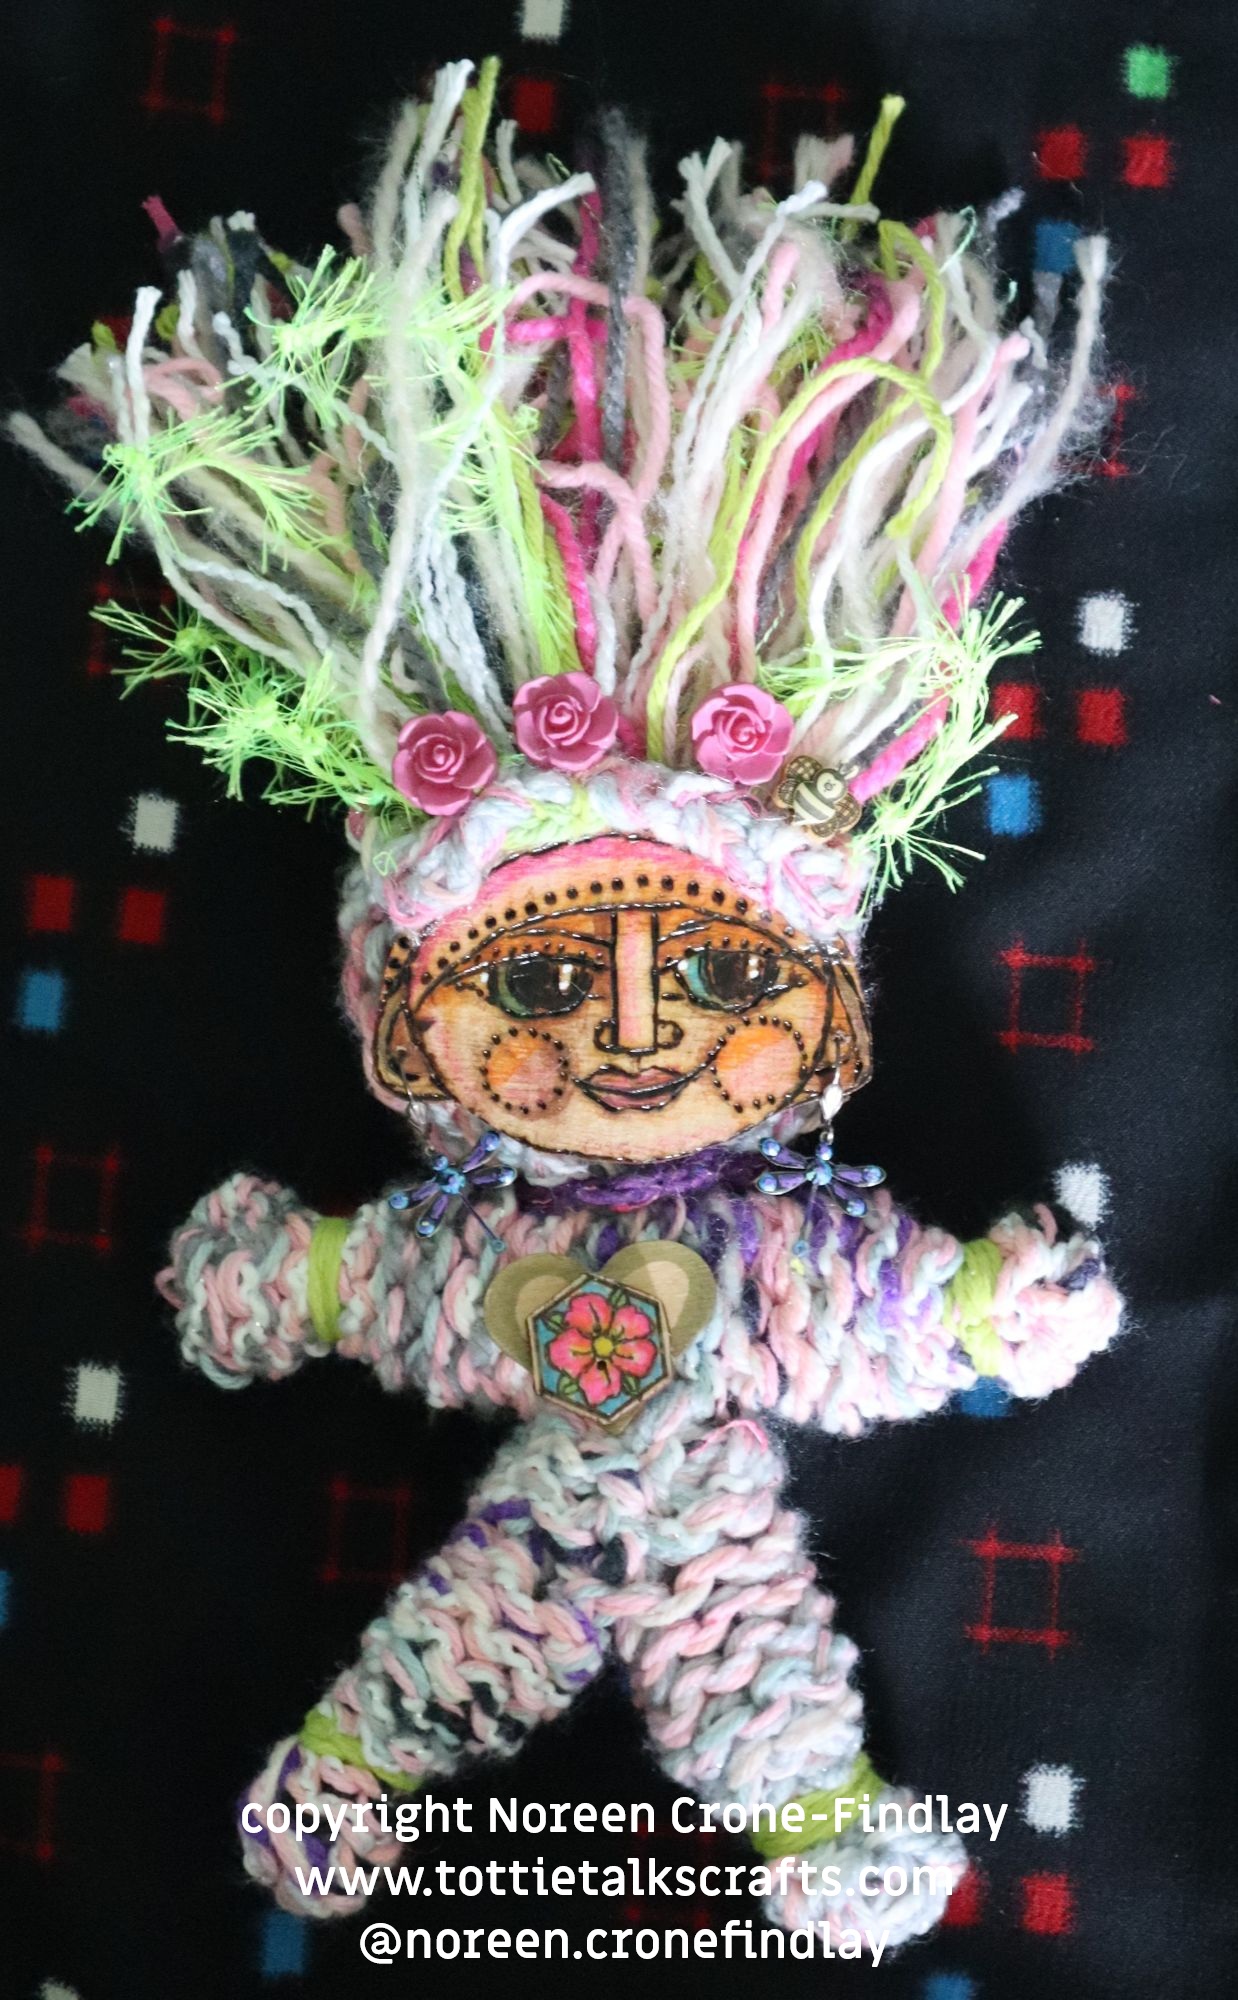
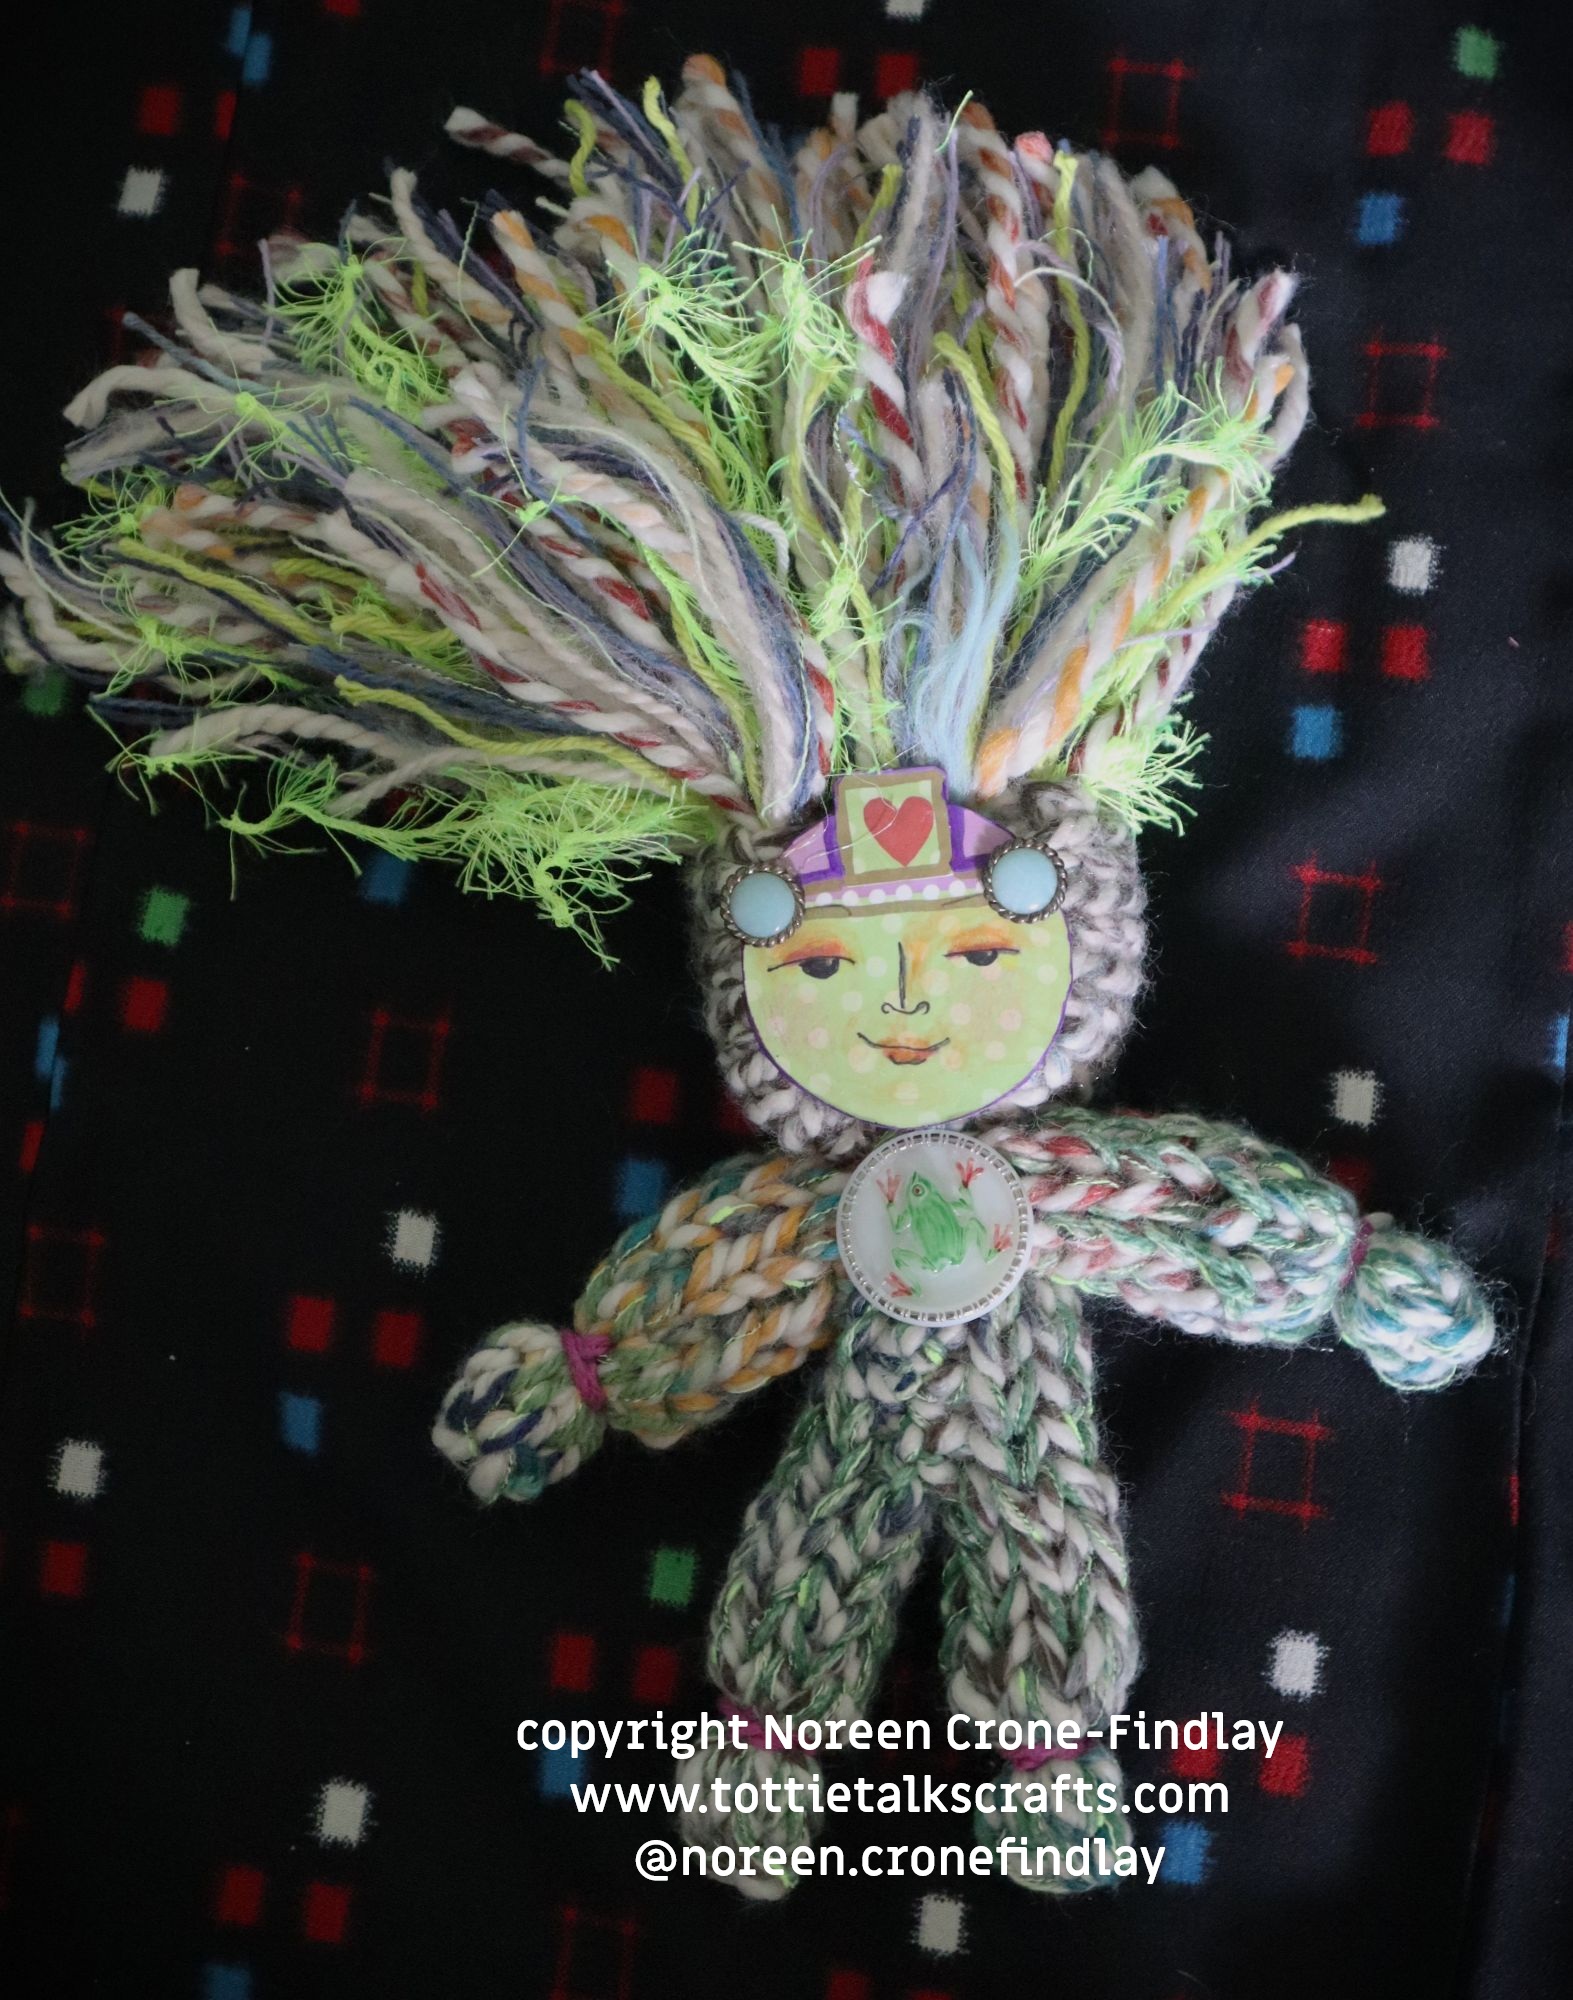
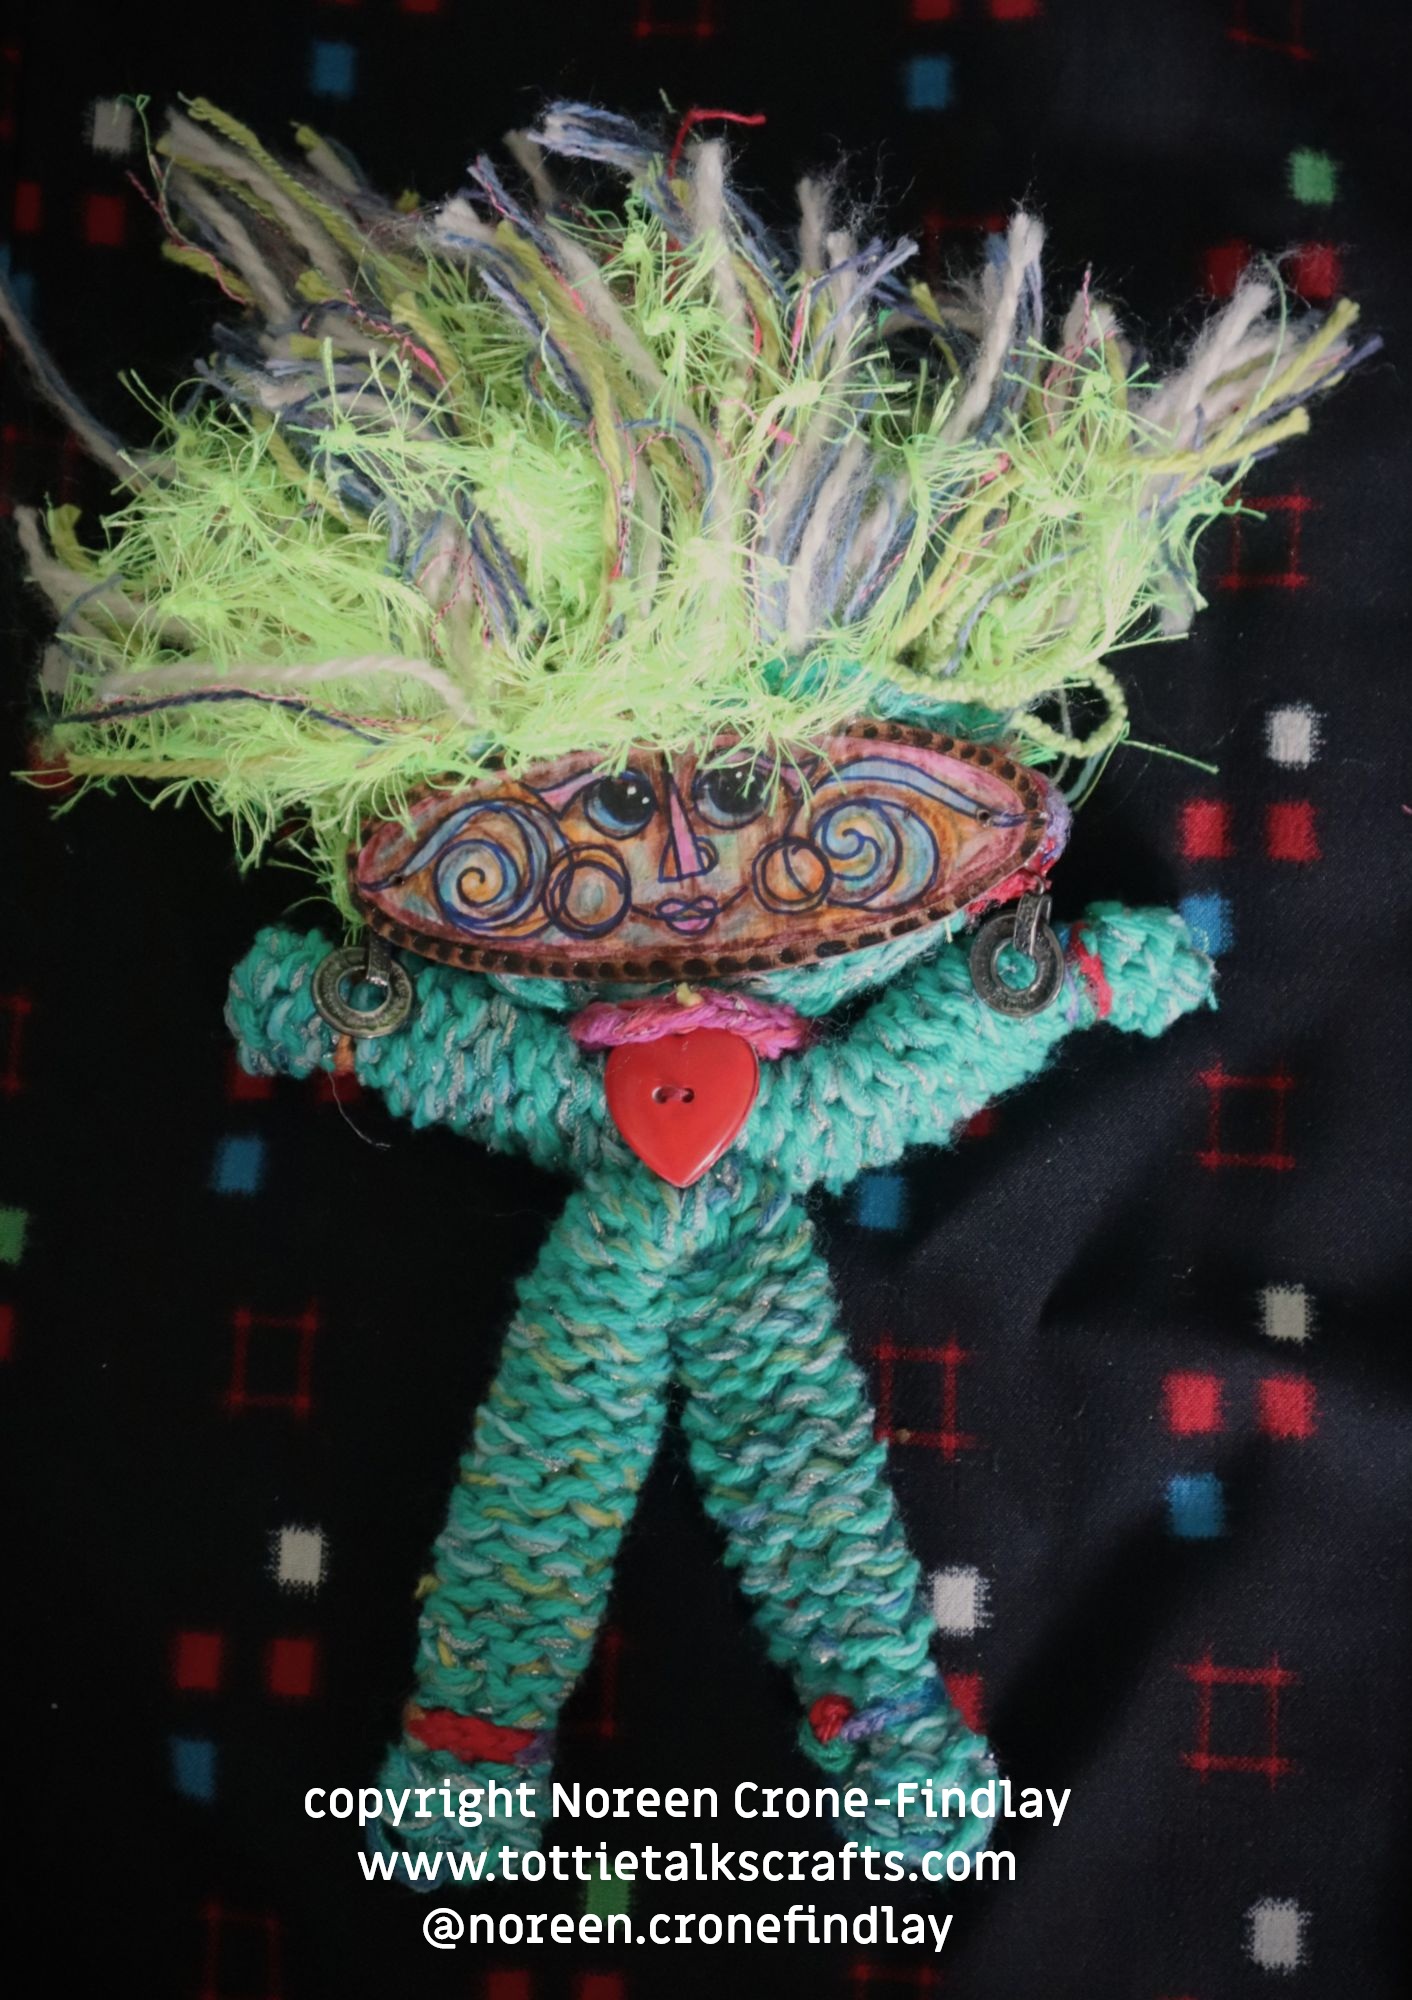
Day 24 of #100daysofspoolknittersandlittlelooms- Well Well Well Spool Knitted Dolls
I designed the Well Well Well Spool Knitted Dolls as a wish that everyone, everywhere, would feel well, and that our precious planet would feel well, and that anyone who makes these dolls will feel well, and happy, and safe and hopeful and live in peace, and equanimity.
As I made them, I asked myself: What does JOY look like today? What does peace and safety look like today? What does this doll want me to know? How can this doll feel like hope or sweetness today?
I invite the doll makers to play with drawing their own unique, one of a kind faces for their Well Well Well dolls and have made a video tutorial to help them do this.
I hope that these joyful, playful, happy dolls will bring all good things to the people who make them, and if the Well Well Well dolls are meant as a gift that they will bring love, light, laughter and hope to those who receive them.
The pattern includes links to 3 video tutorials for how to make your own larger spool knitters as well as videos on how to spool knit in the round, and how to spool knit flat panels as well as spool knitting 2 peg/nail cords.
The pattern has complete step by step instructions for making the Well Well Well Spool Knitted Dolls with yarn and with fabric strips too.
Day 23 of #100daysofspoolknittersandlittlelooms- A video tutorial for making a tiny upcycled sketchbook and easy ways of drawing simple faces in it
I made a video tutorial that shows how to make an upcycled tiny sketch book and then how to draw simple faces in it as an ongoing daily practice.
That’s because I am going to be releasing a new pattern tomorrow for wonderful spool knitted dolls and I want people to be able to draw unique, one of a kind faces for their dolls.
I have found that using tiny upcycled sketchbooks to practice drawing faces is a lot like practising a musical instrument.
Daily drawing is the way to build creative stepping stones.
A little bit at a time, all the time.
Large gorgeous sketchbooks with expensive paper can be really hard to work with, but tiny ones that fit in a pocket and are humble paper make for carefree drawing.
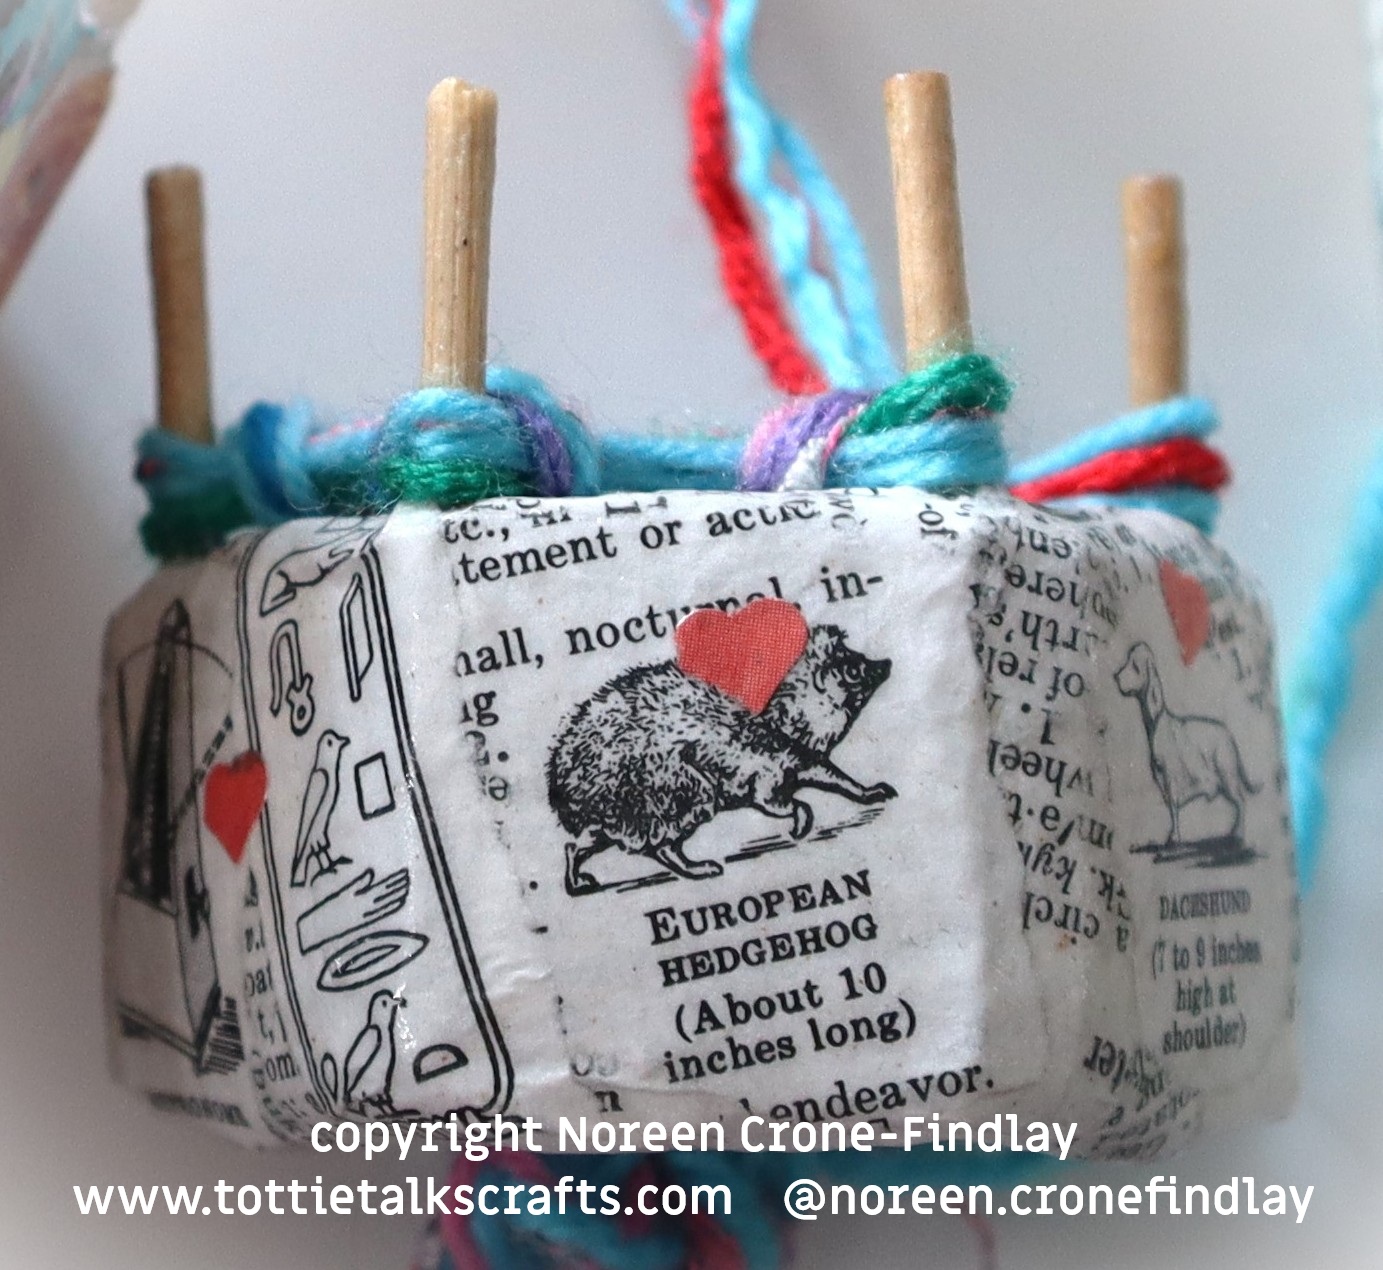
For Day 21 of #100daysofspoolknittersandlittlelooms- I made a video tutorial showing how to make a spool knitter from upcycled cardboard and bamboo skewers, finished with papier mache whimsy.
It’s a lovely and sturdy little spool knitter that is a delight to work with. For more information, please go to http://www.tottietalkscrafts.com
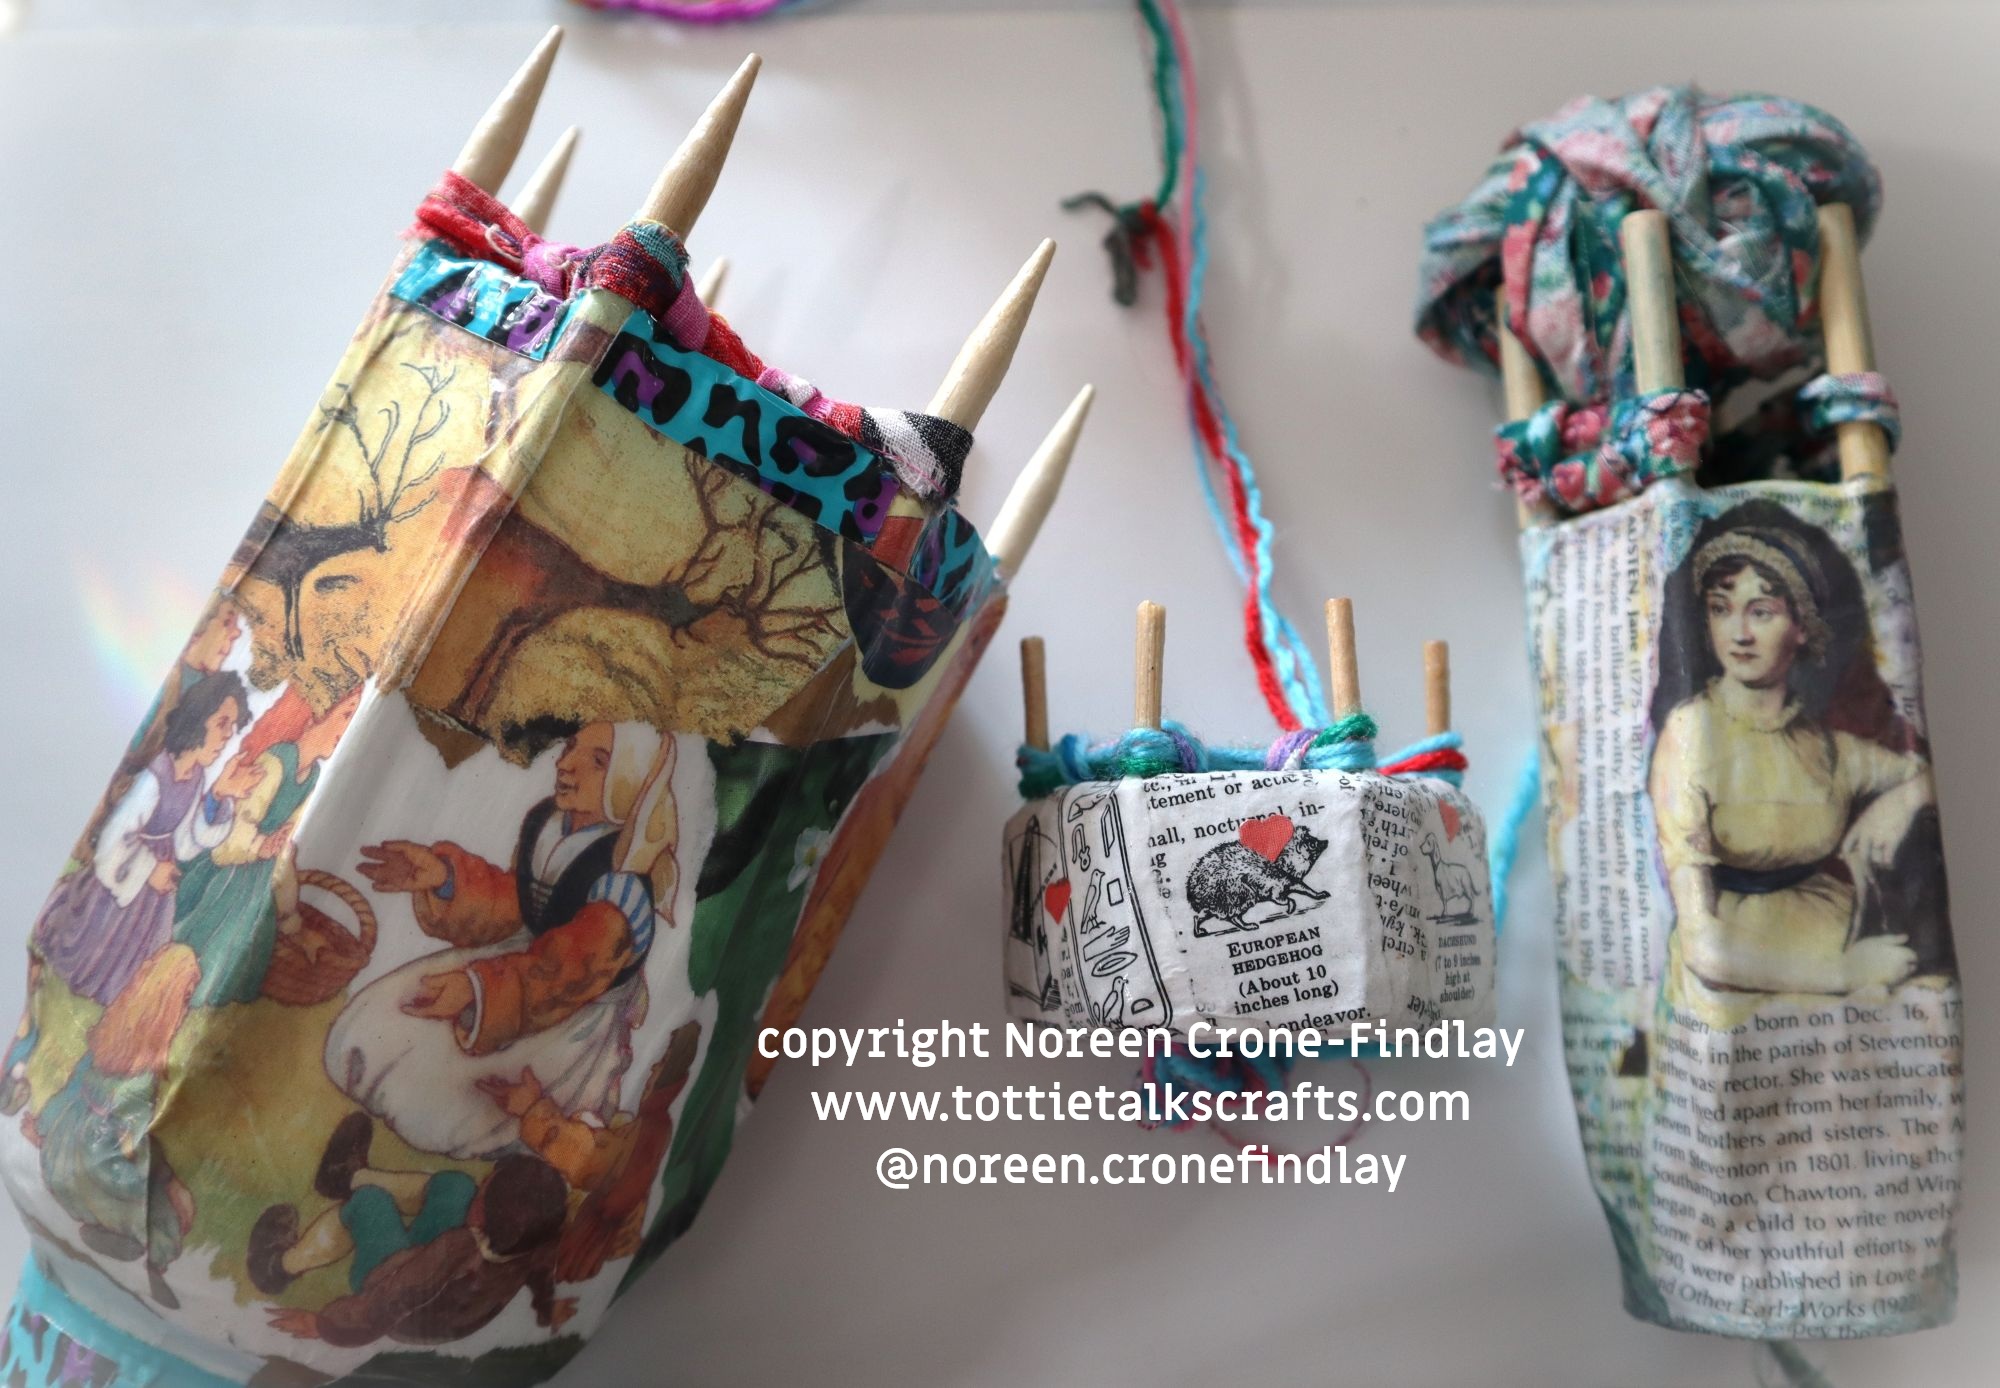
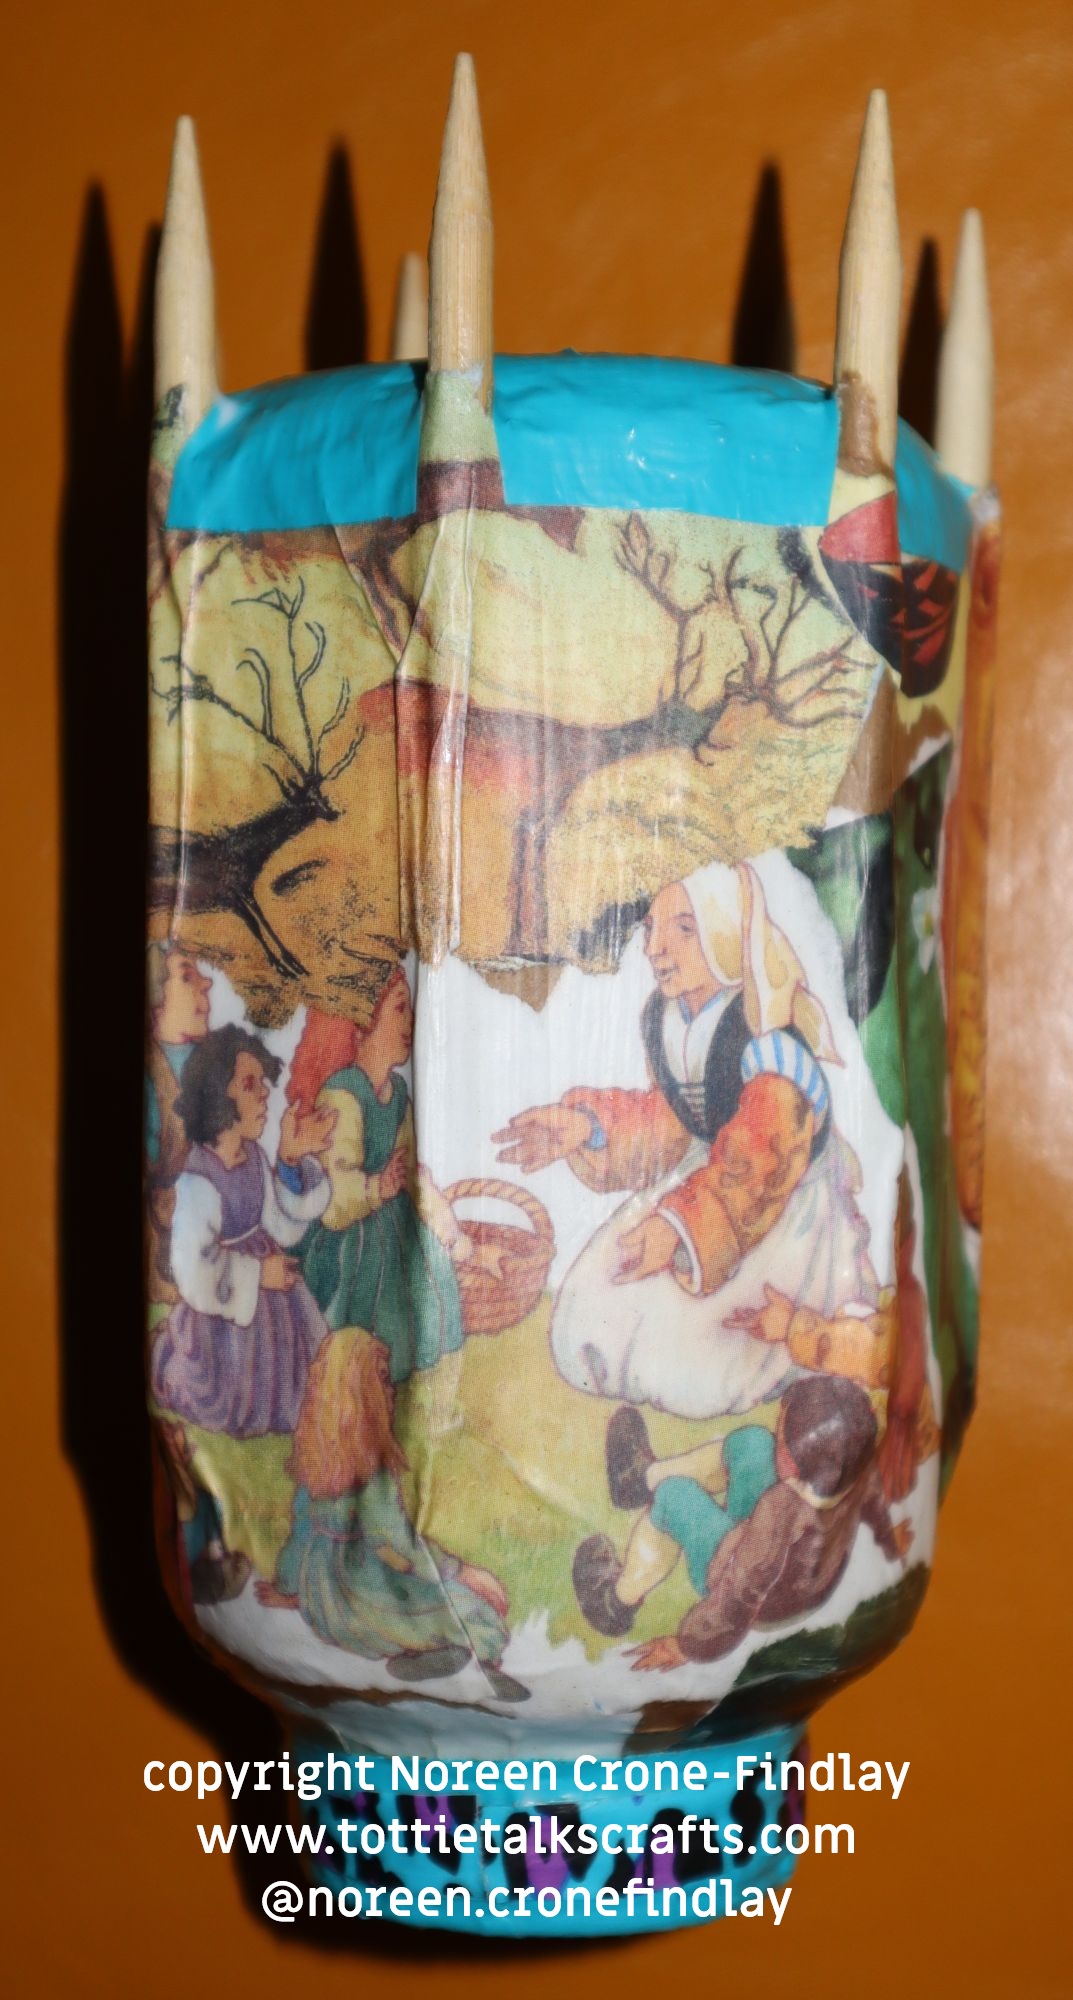
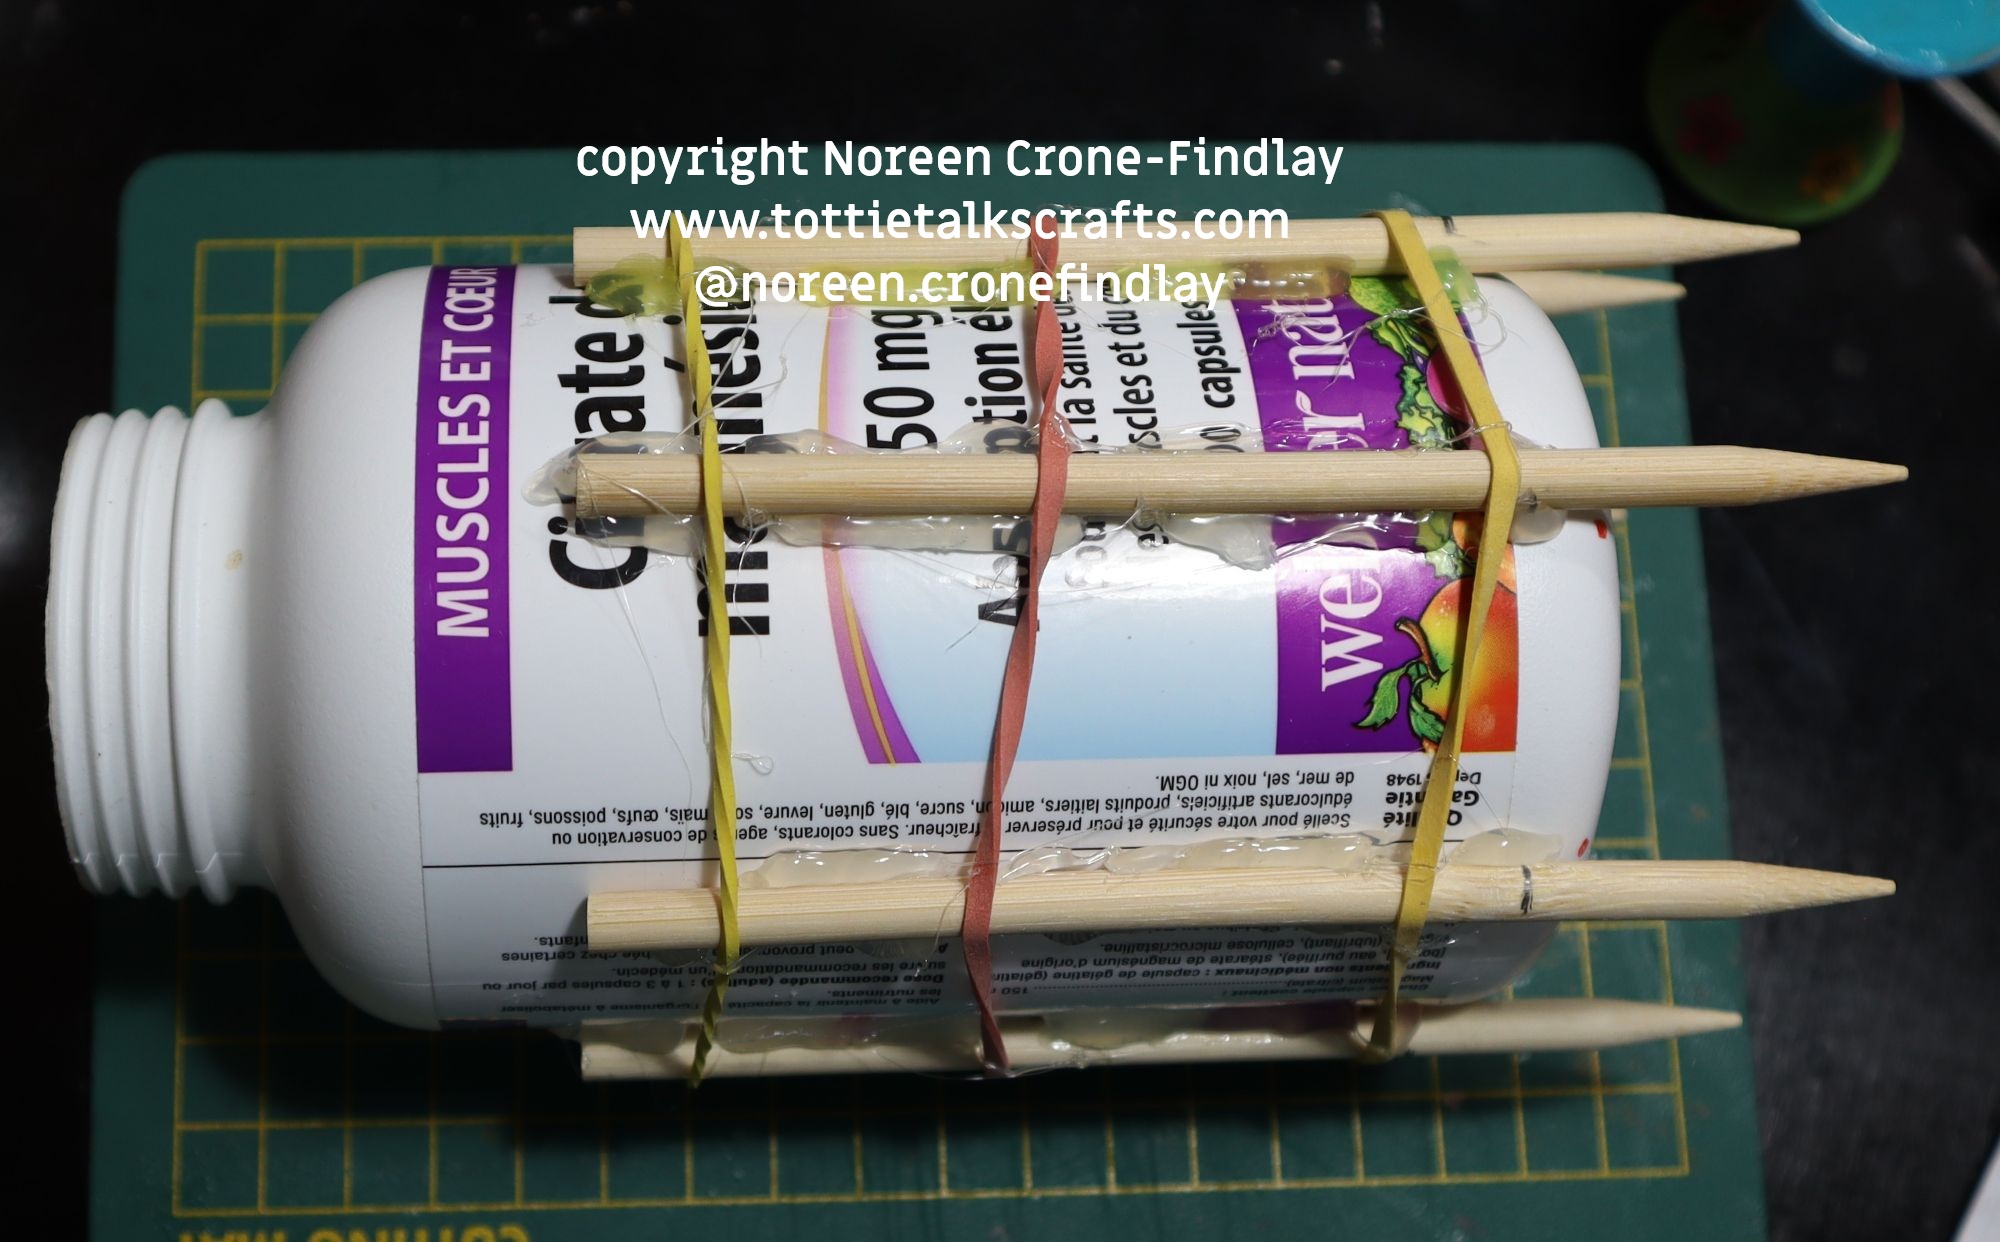
Day 11 of #100daysofspoolknittersandlittlelooms-Upcycling plastic bottles into spool knitters-The Storyteller Spool knitter
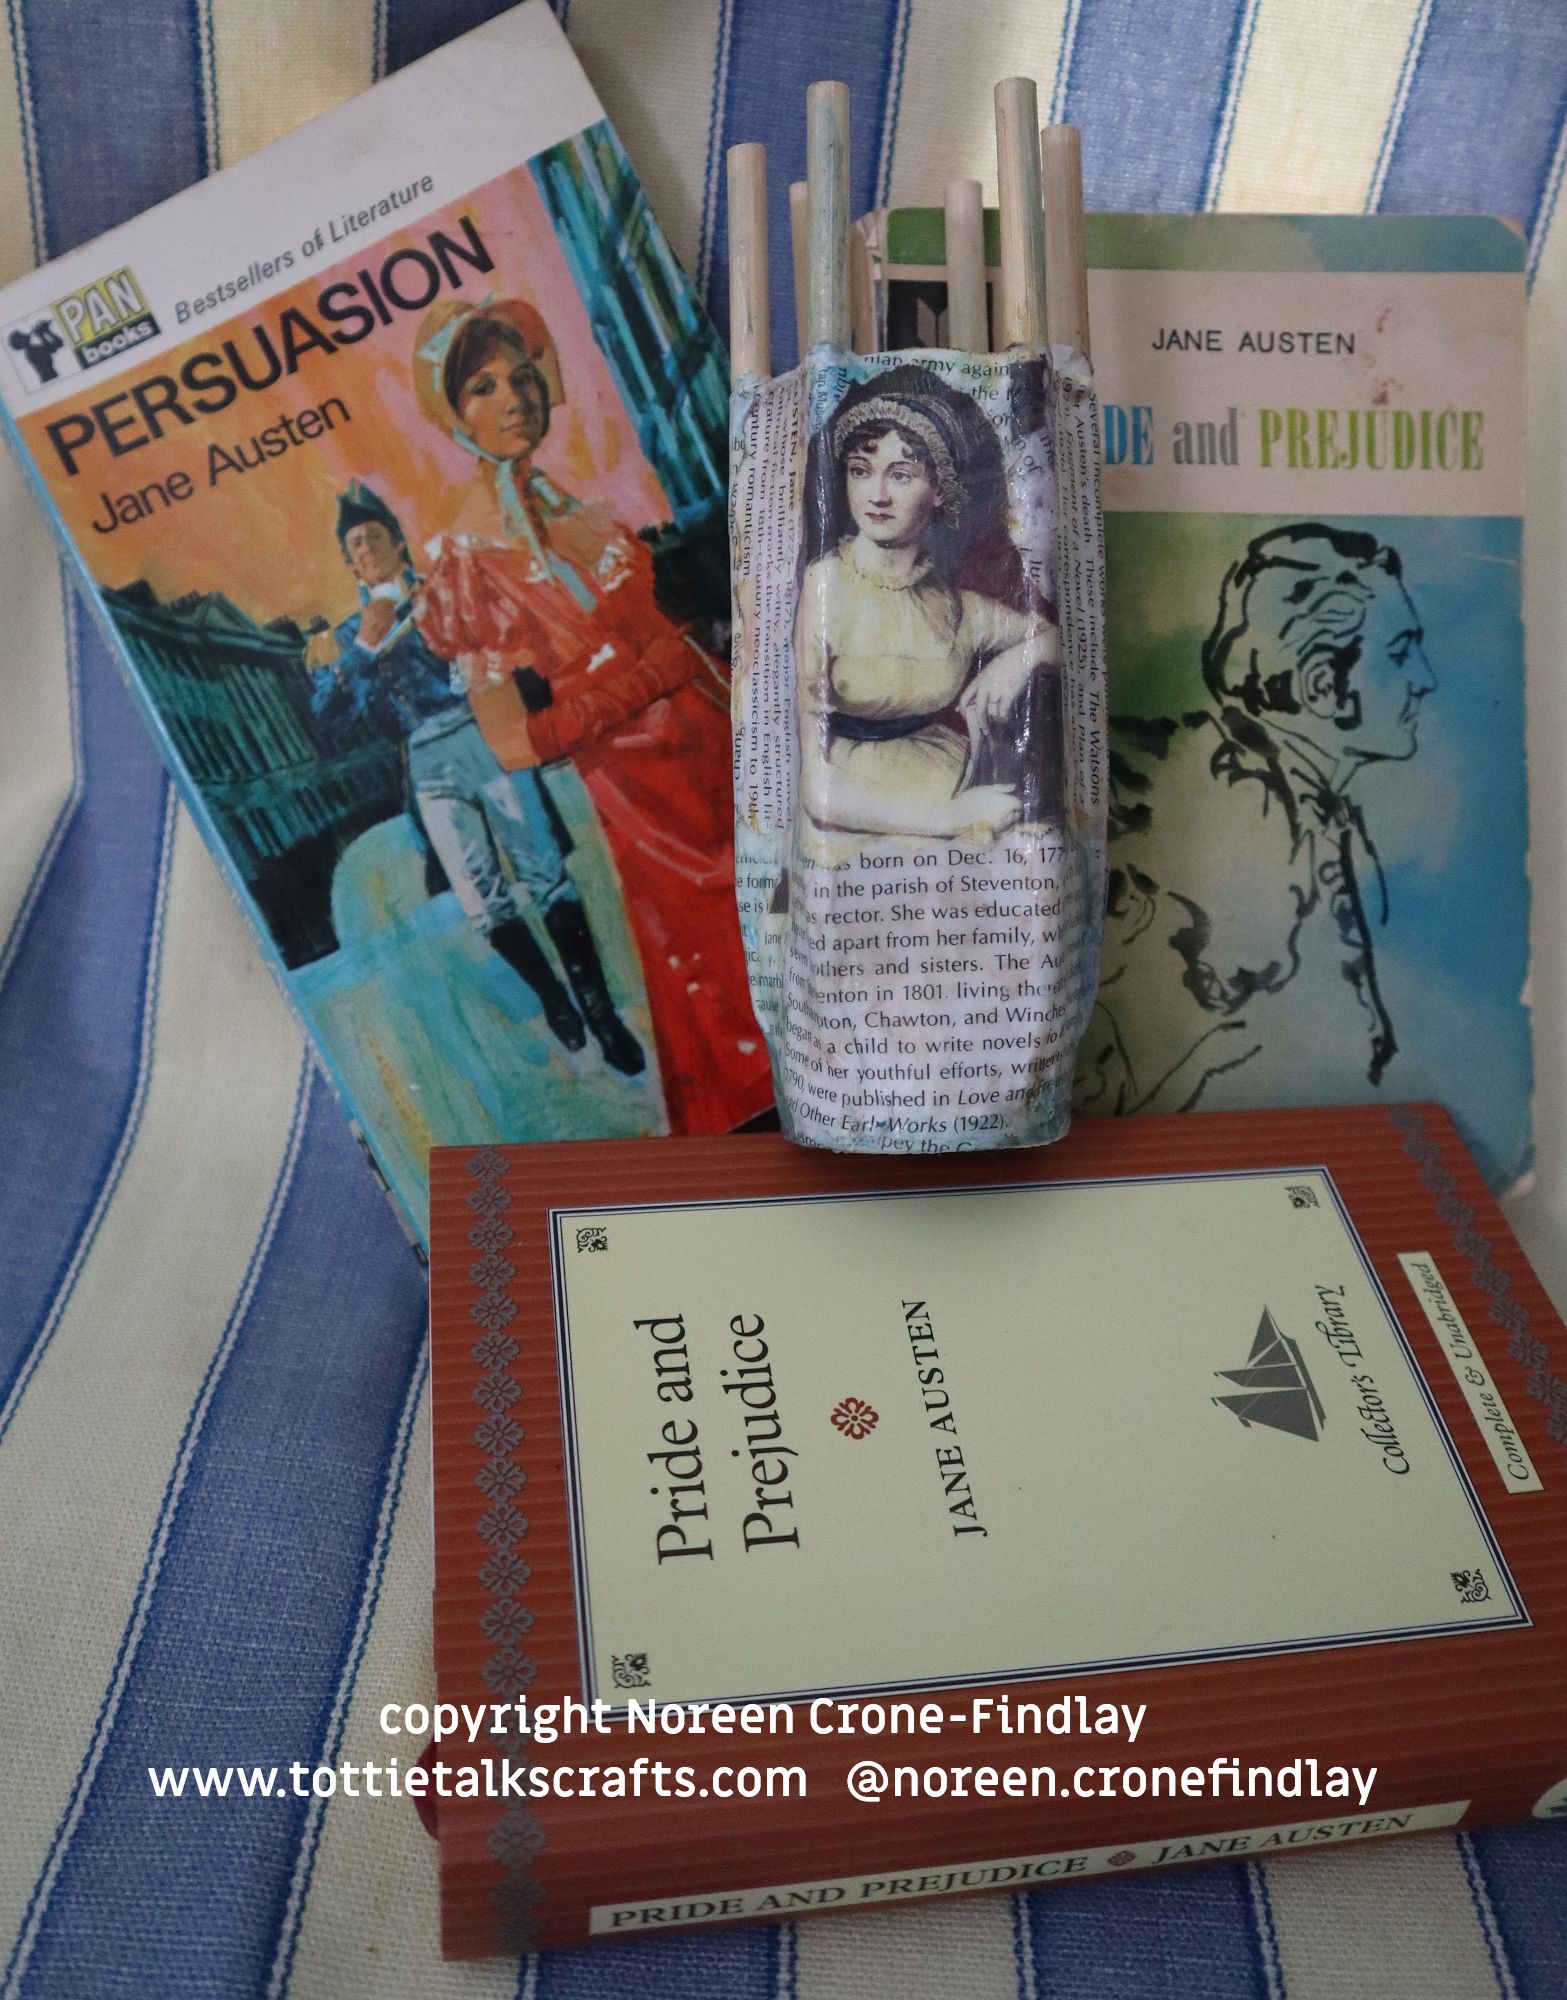
In my Day 9 post, I showed how I upcycled a sturdy cardboard tube into a spool knitter that I love as it’s an Homage to Jane Austen. At the same time that I was making the Jane Austen spool knitter, I was experimenting with upcyling a plastic bottle to see if I could make a reasonable spool knitter with it for my #100daysofspoolknittersandlittlelooms.
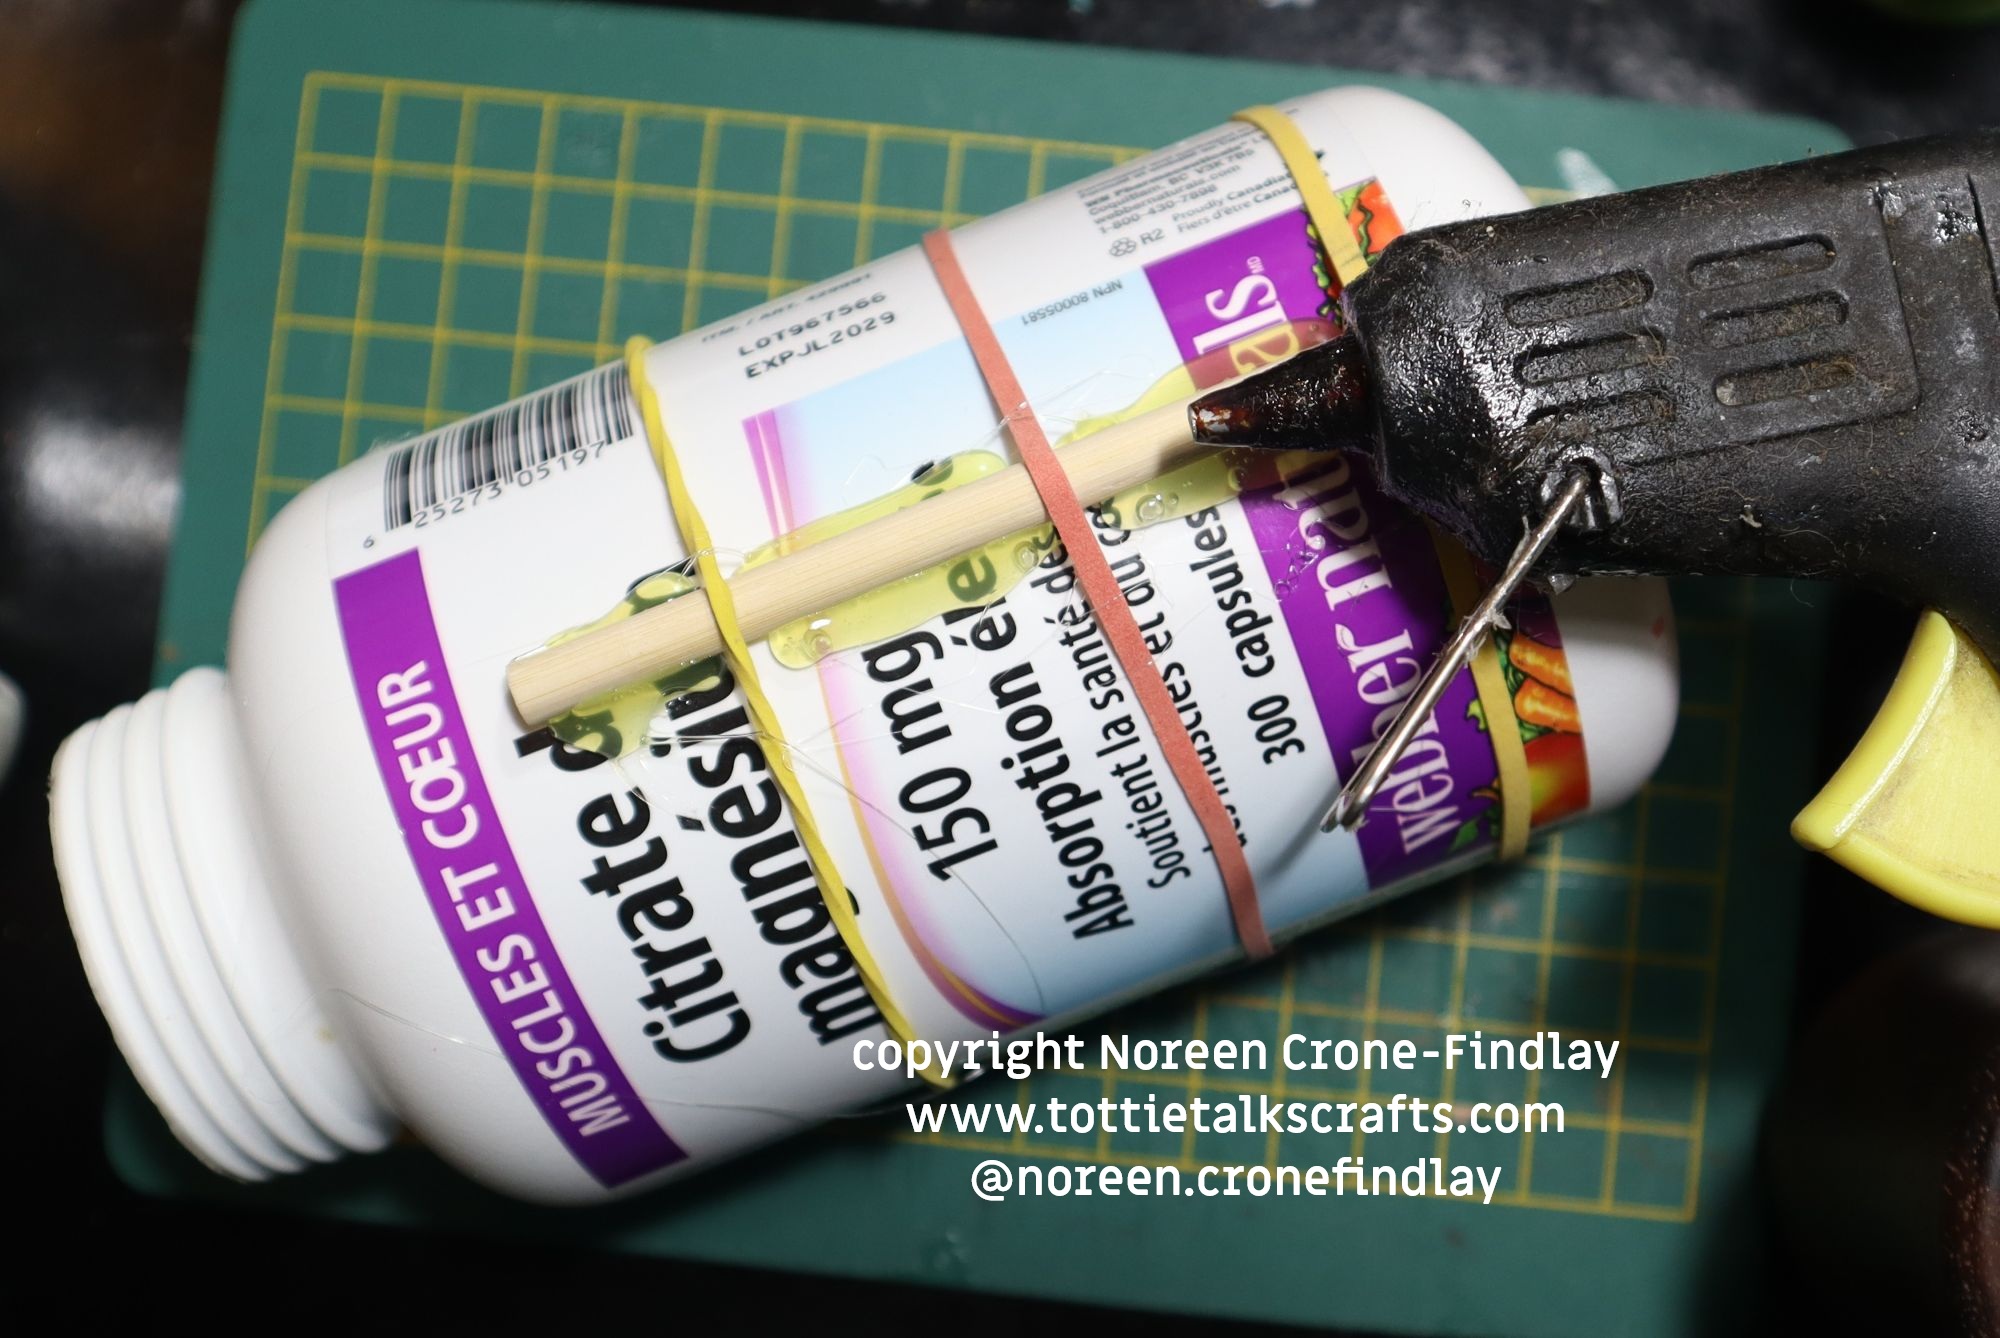
The bottle has to be fairly sturdy, so I chose an empty vitamin bottle.
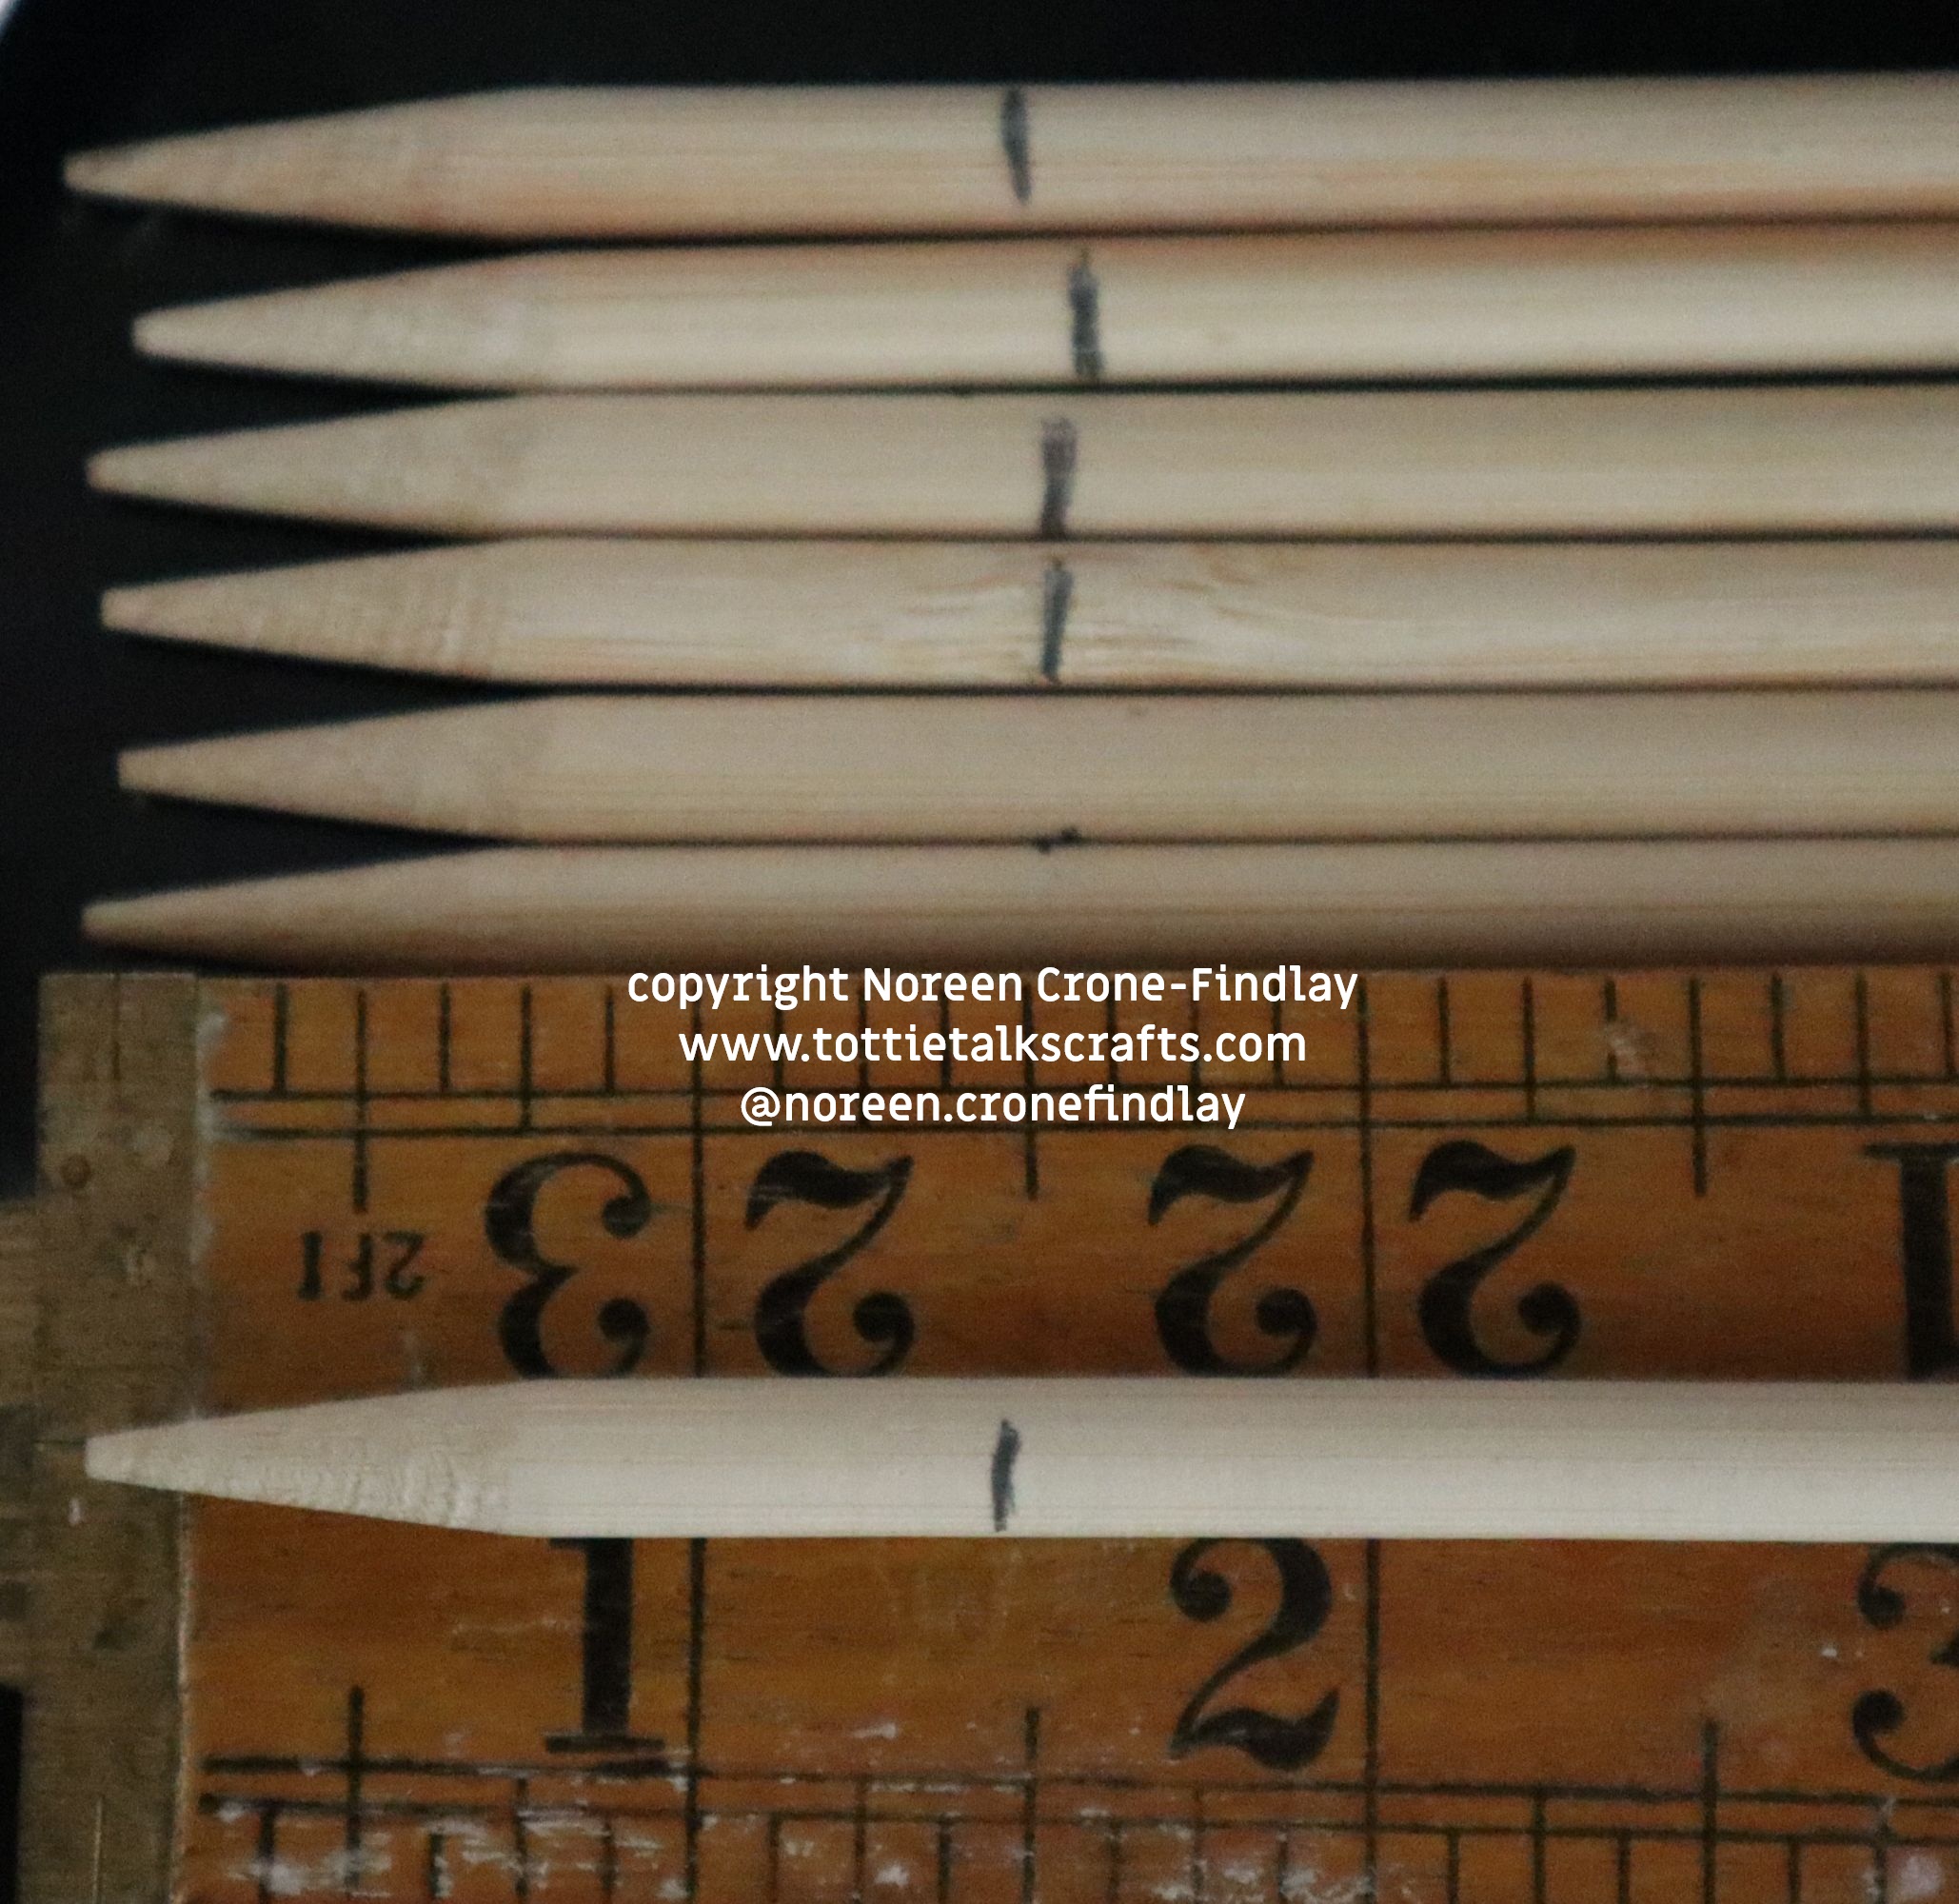
I wanted to see if the sharpened end of 7 lolly pop sticks would work as the pegs.
They are okay, but I prefer the blunt ends, so I won’t use the sharp ends as pegs again.
I marked off 1 1/2 inches(4 cm) at the end of each.
Next- I put 3 rubber bands onto the bottle and one at a time, I slipped a lollypop stick into them
and hot glued them to the bottle.
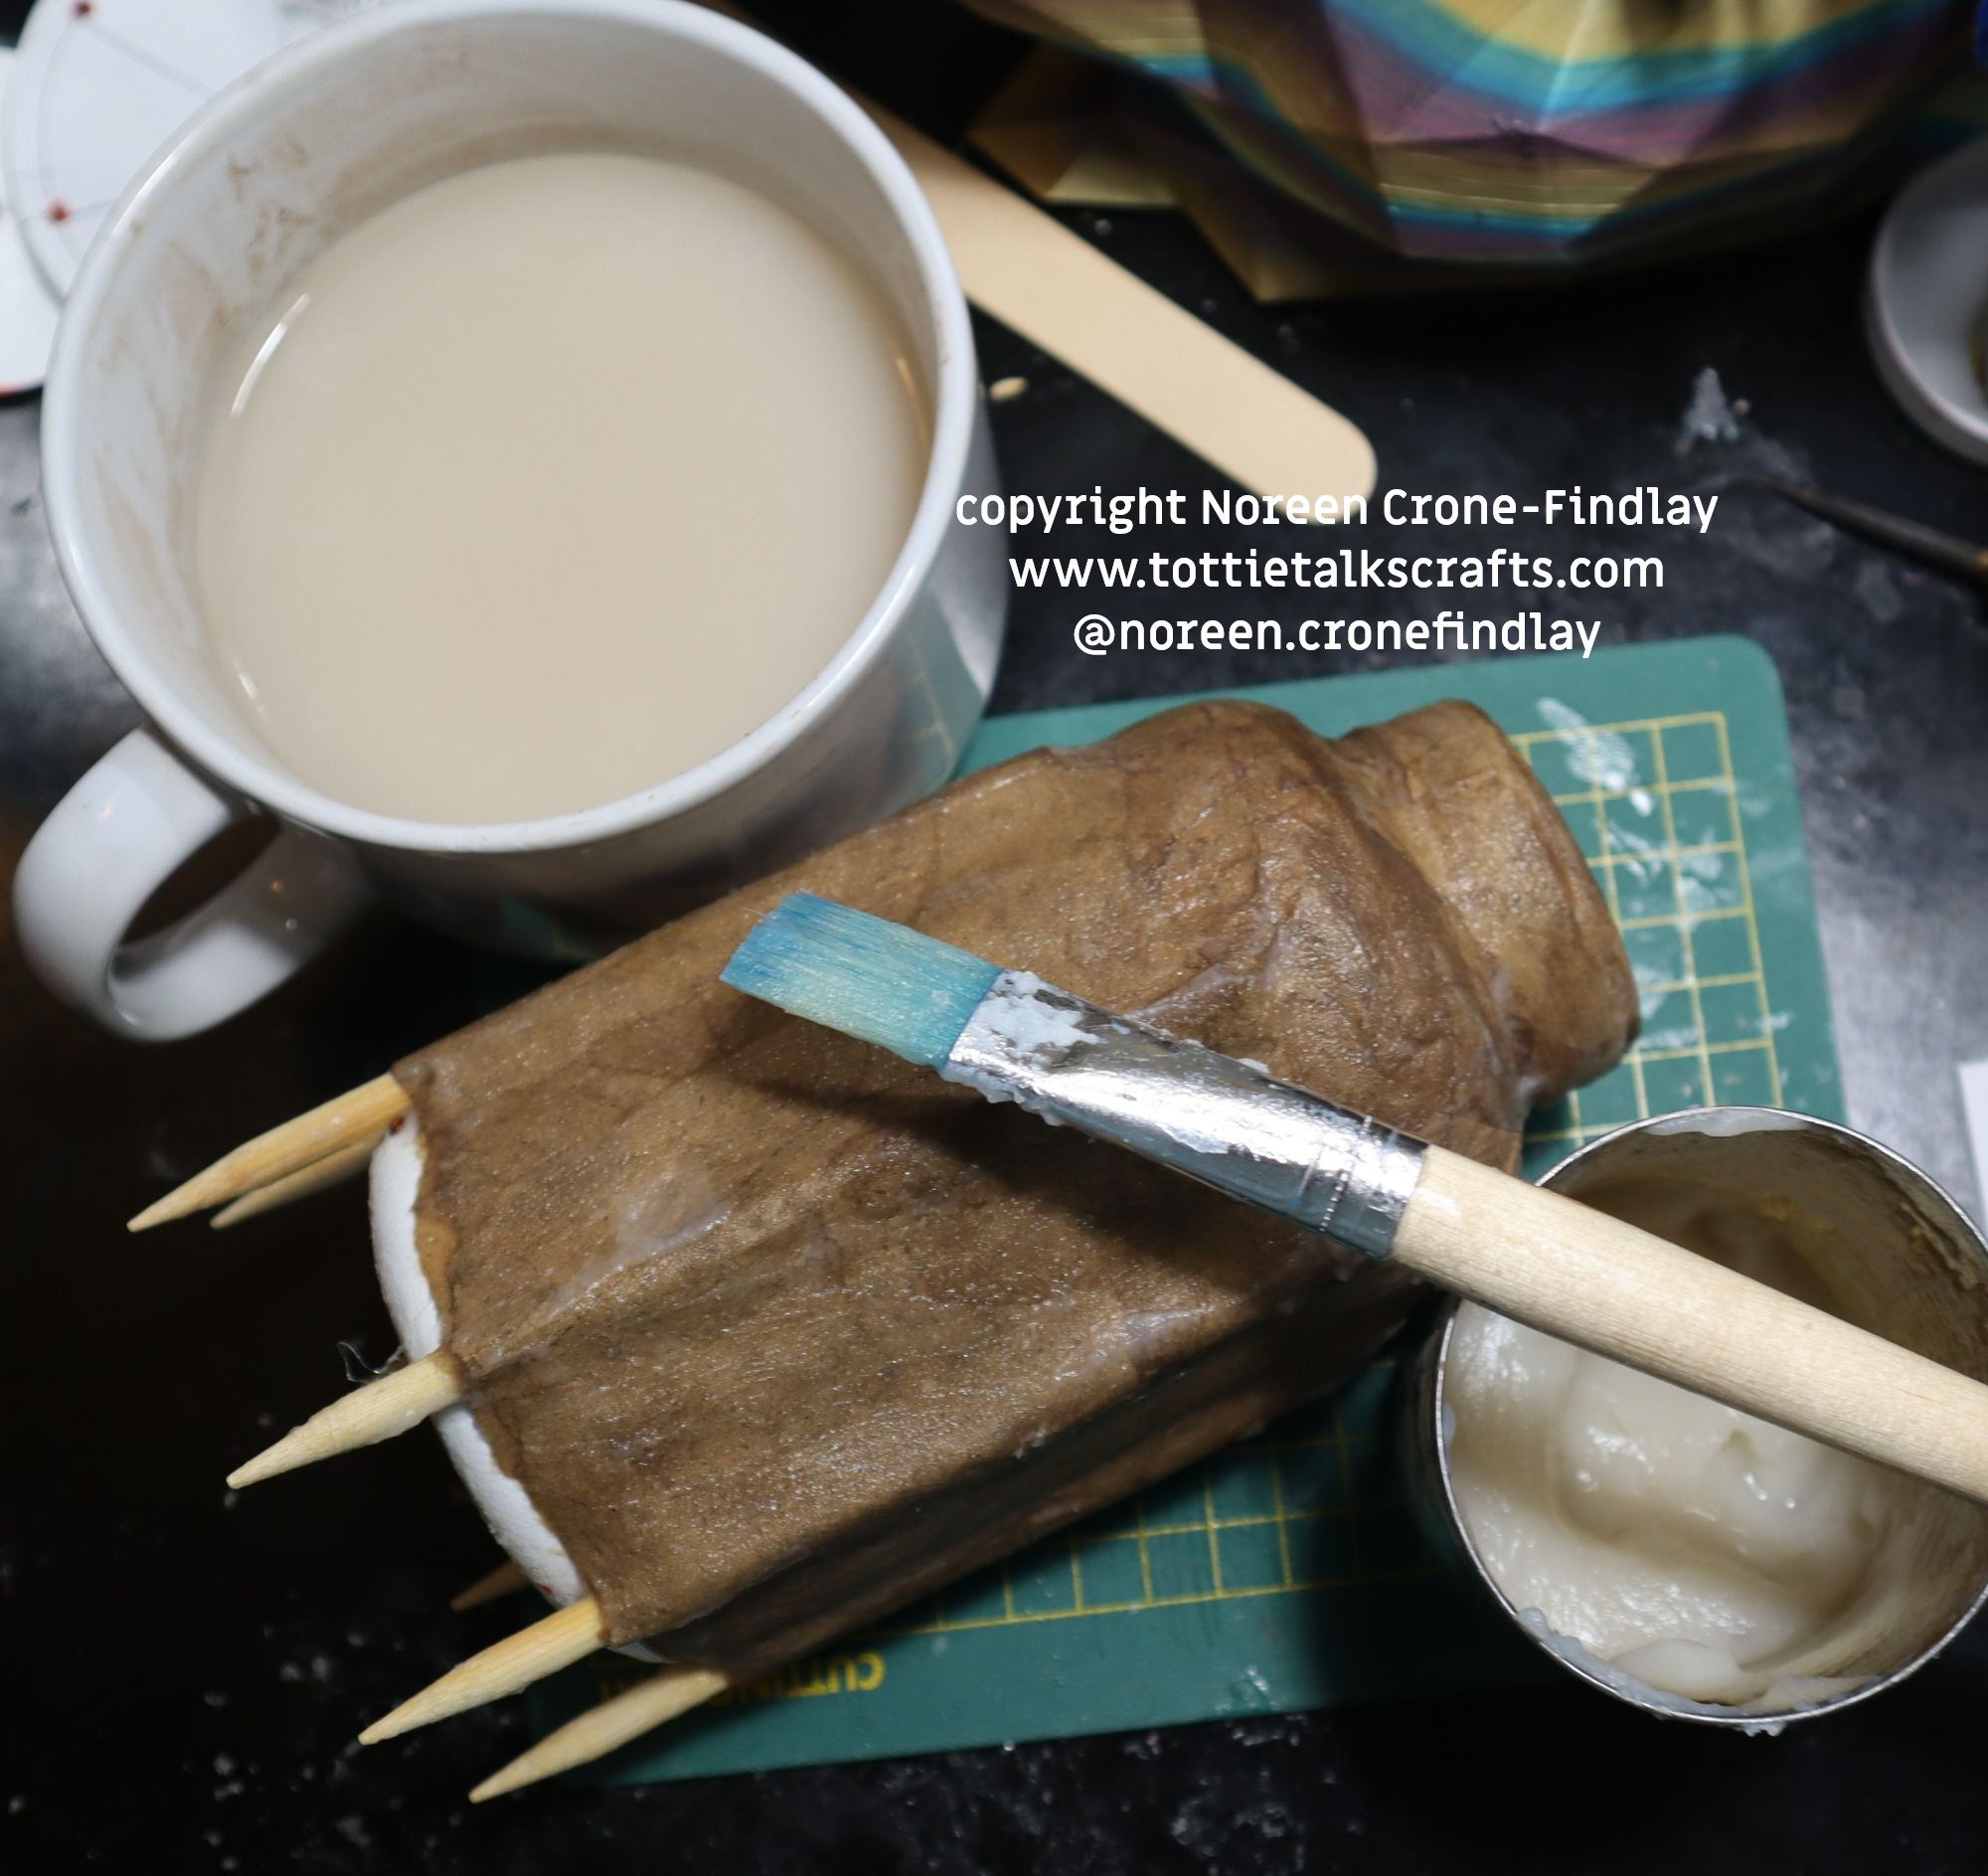
Then, layers of papier mache,
and decorative paper – I love that I found a delightful image of a storyteller with some bouncy kids and also a few goddess images, a few hippos and some almost invisible elephants.
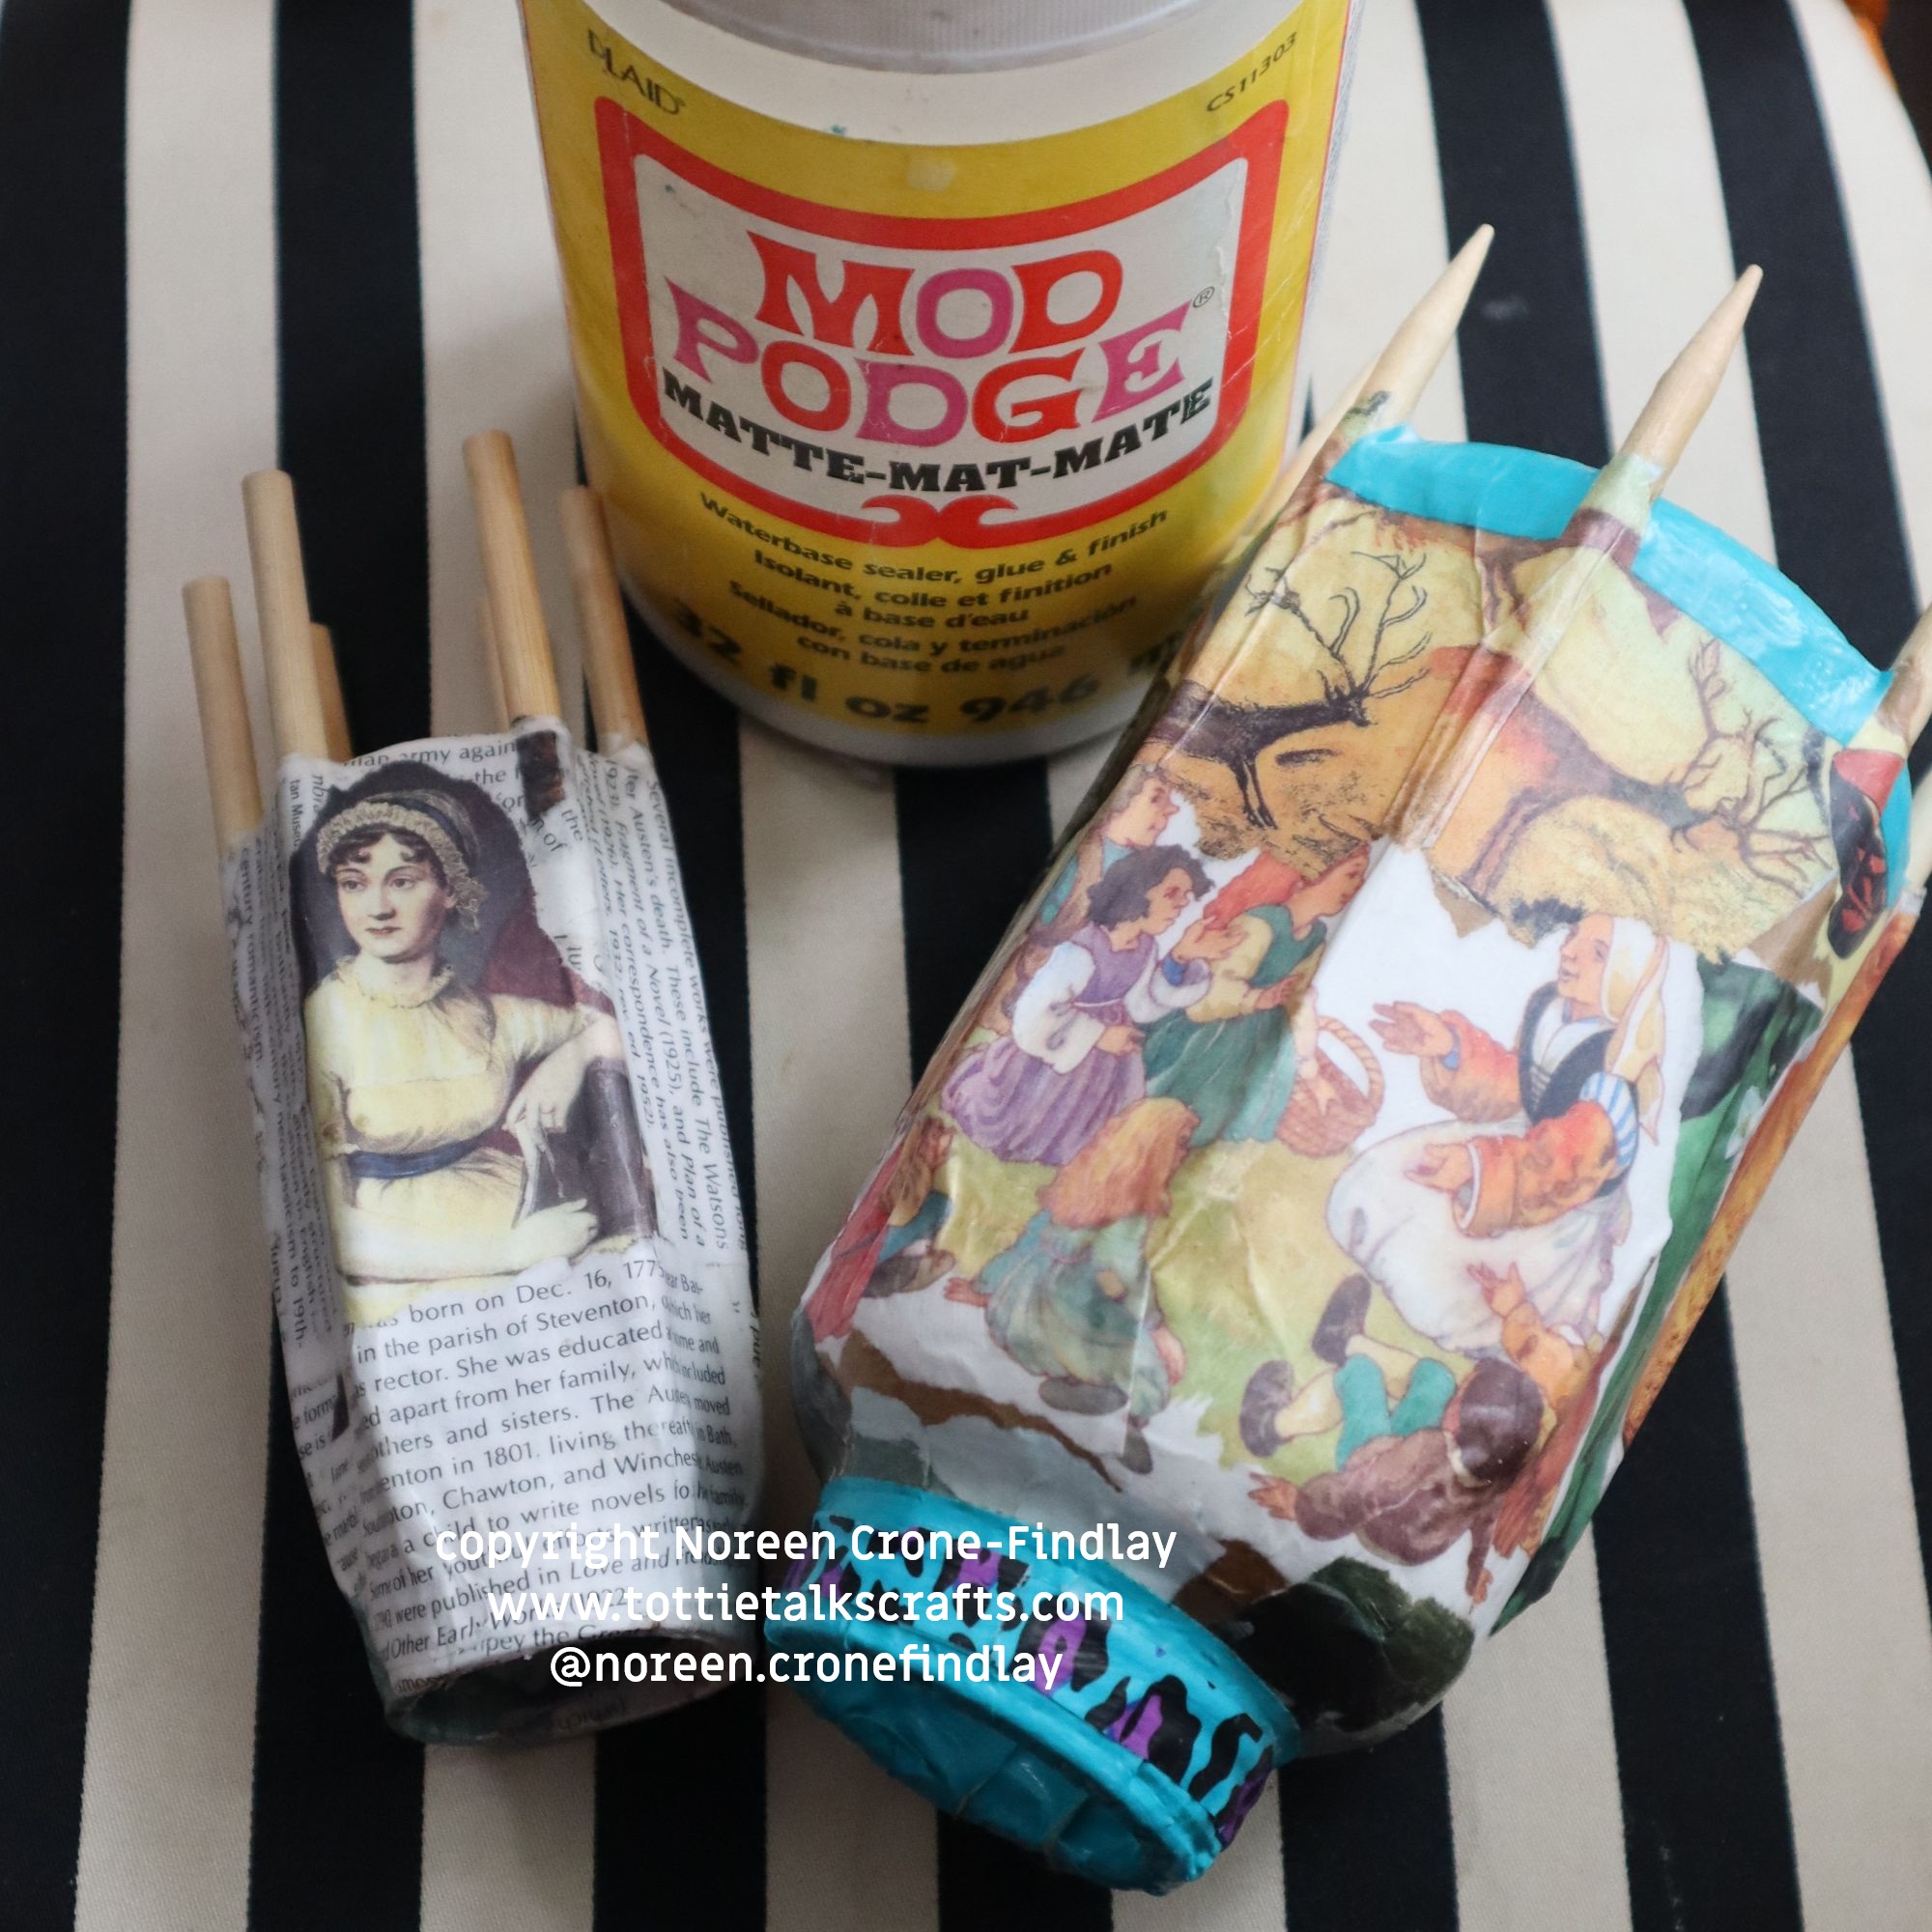
Now mod podge to seal.
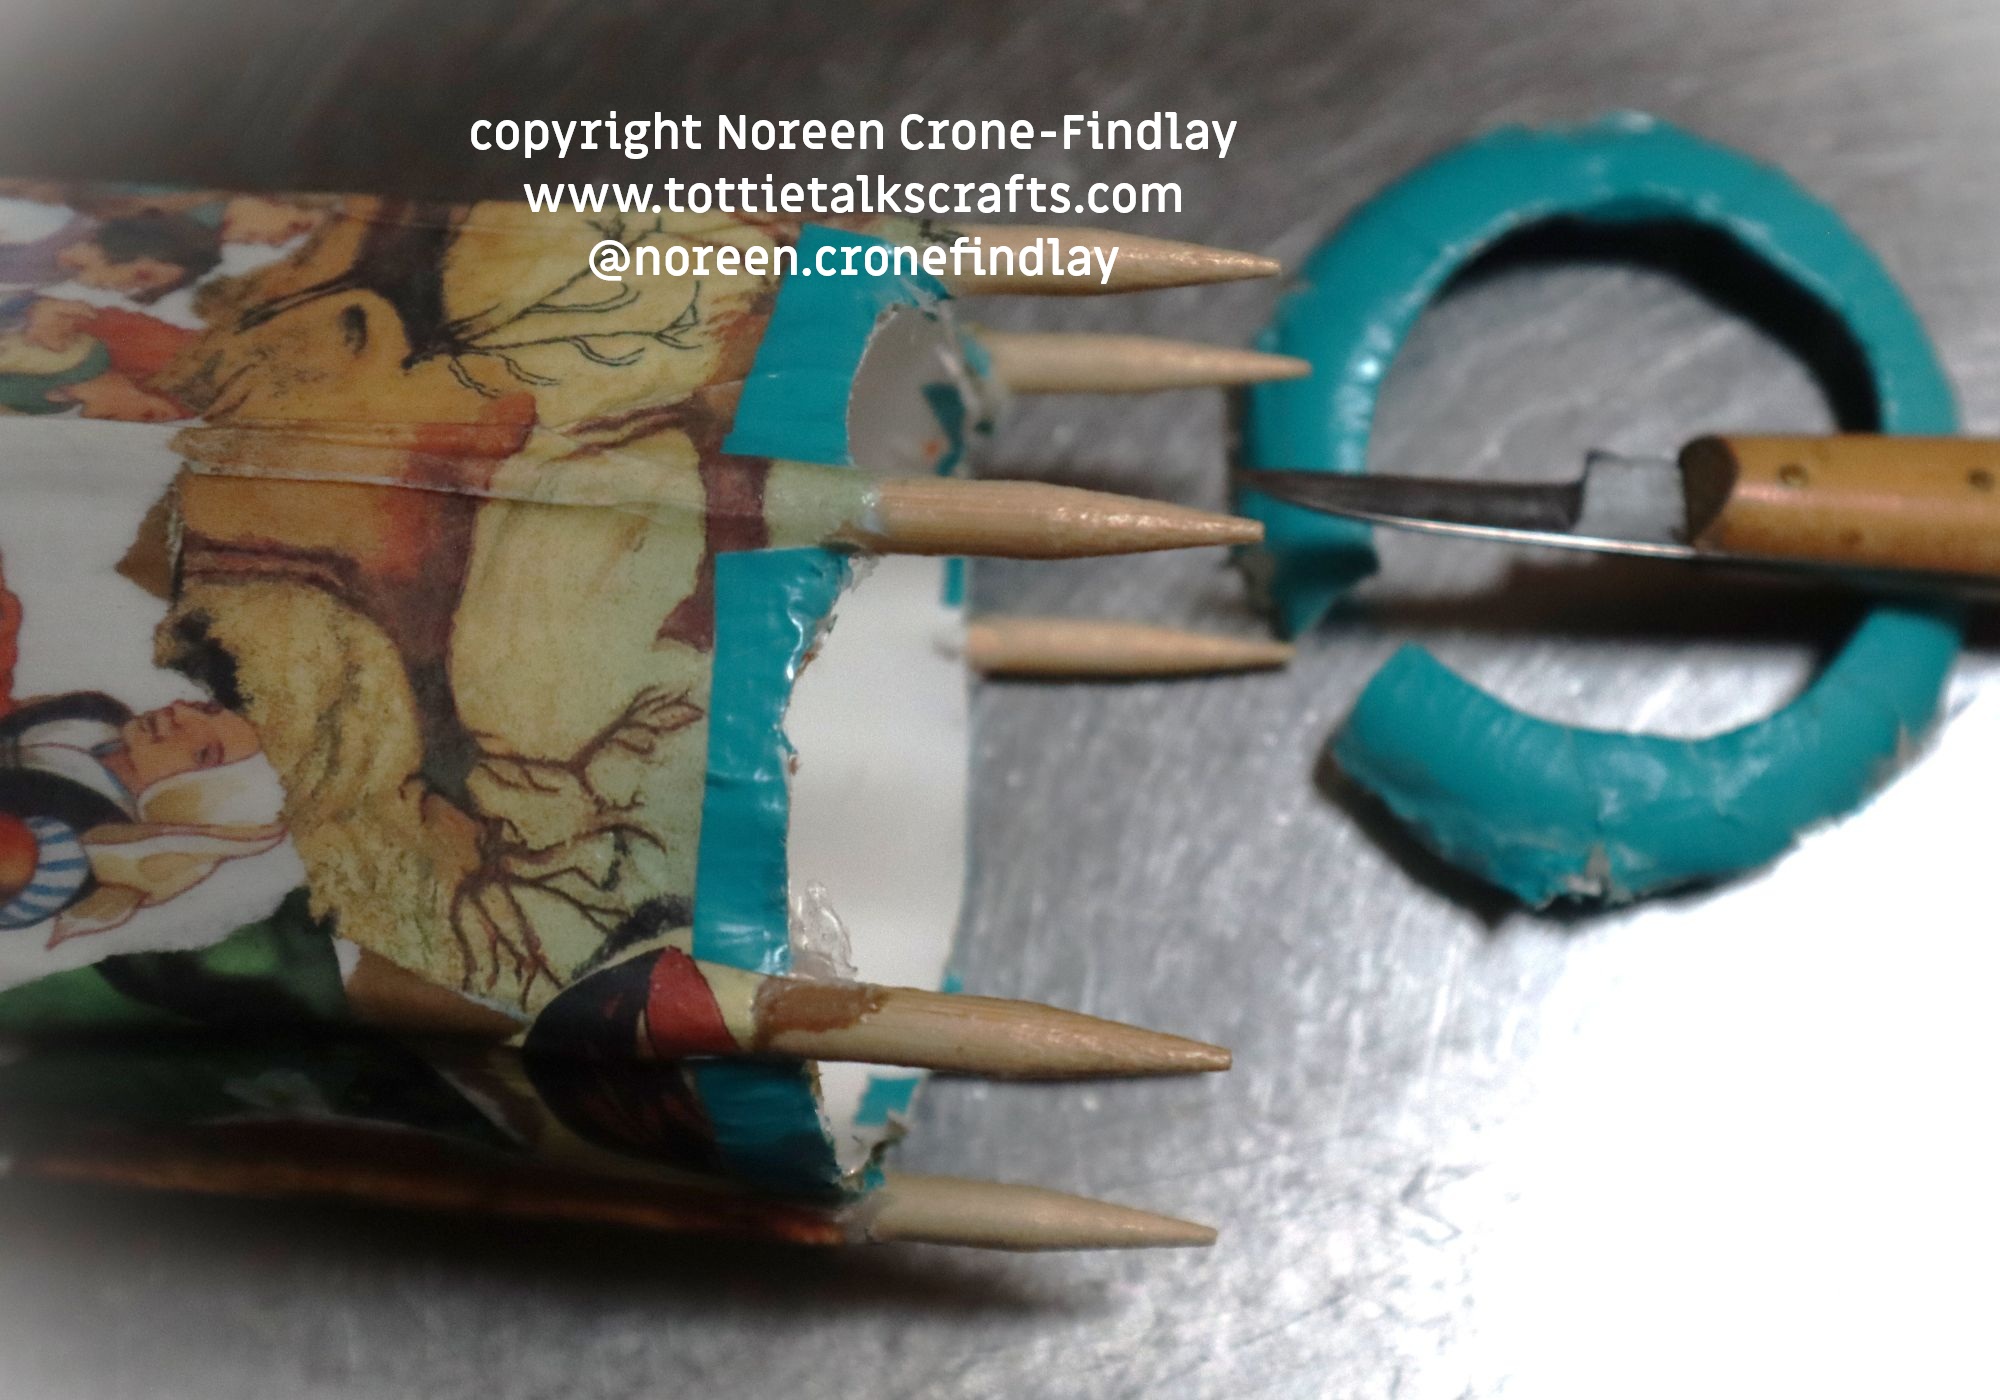
I had cut a too small hole in the end of the bottle, so I carefully cut the excess plastic away
and the Storyteller spool knitter works just fine!
If you’d like to make a large spool knitter without woodworking tools, and have a few crafting tools, then you can make yourself a spool knitter that is uniquely yours and pleasing to work with.
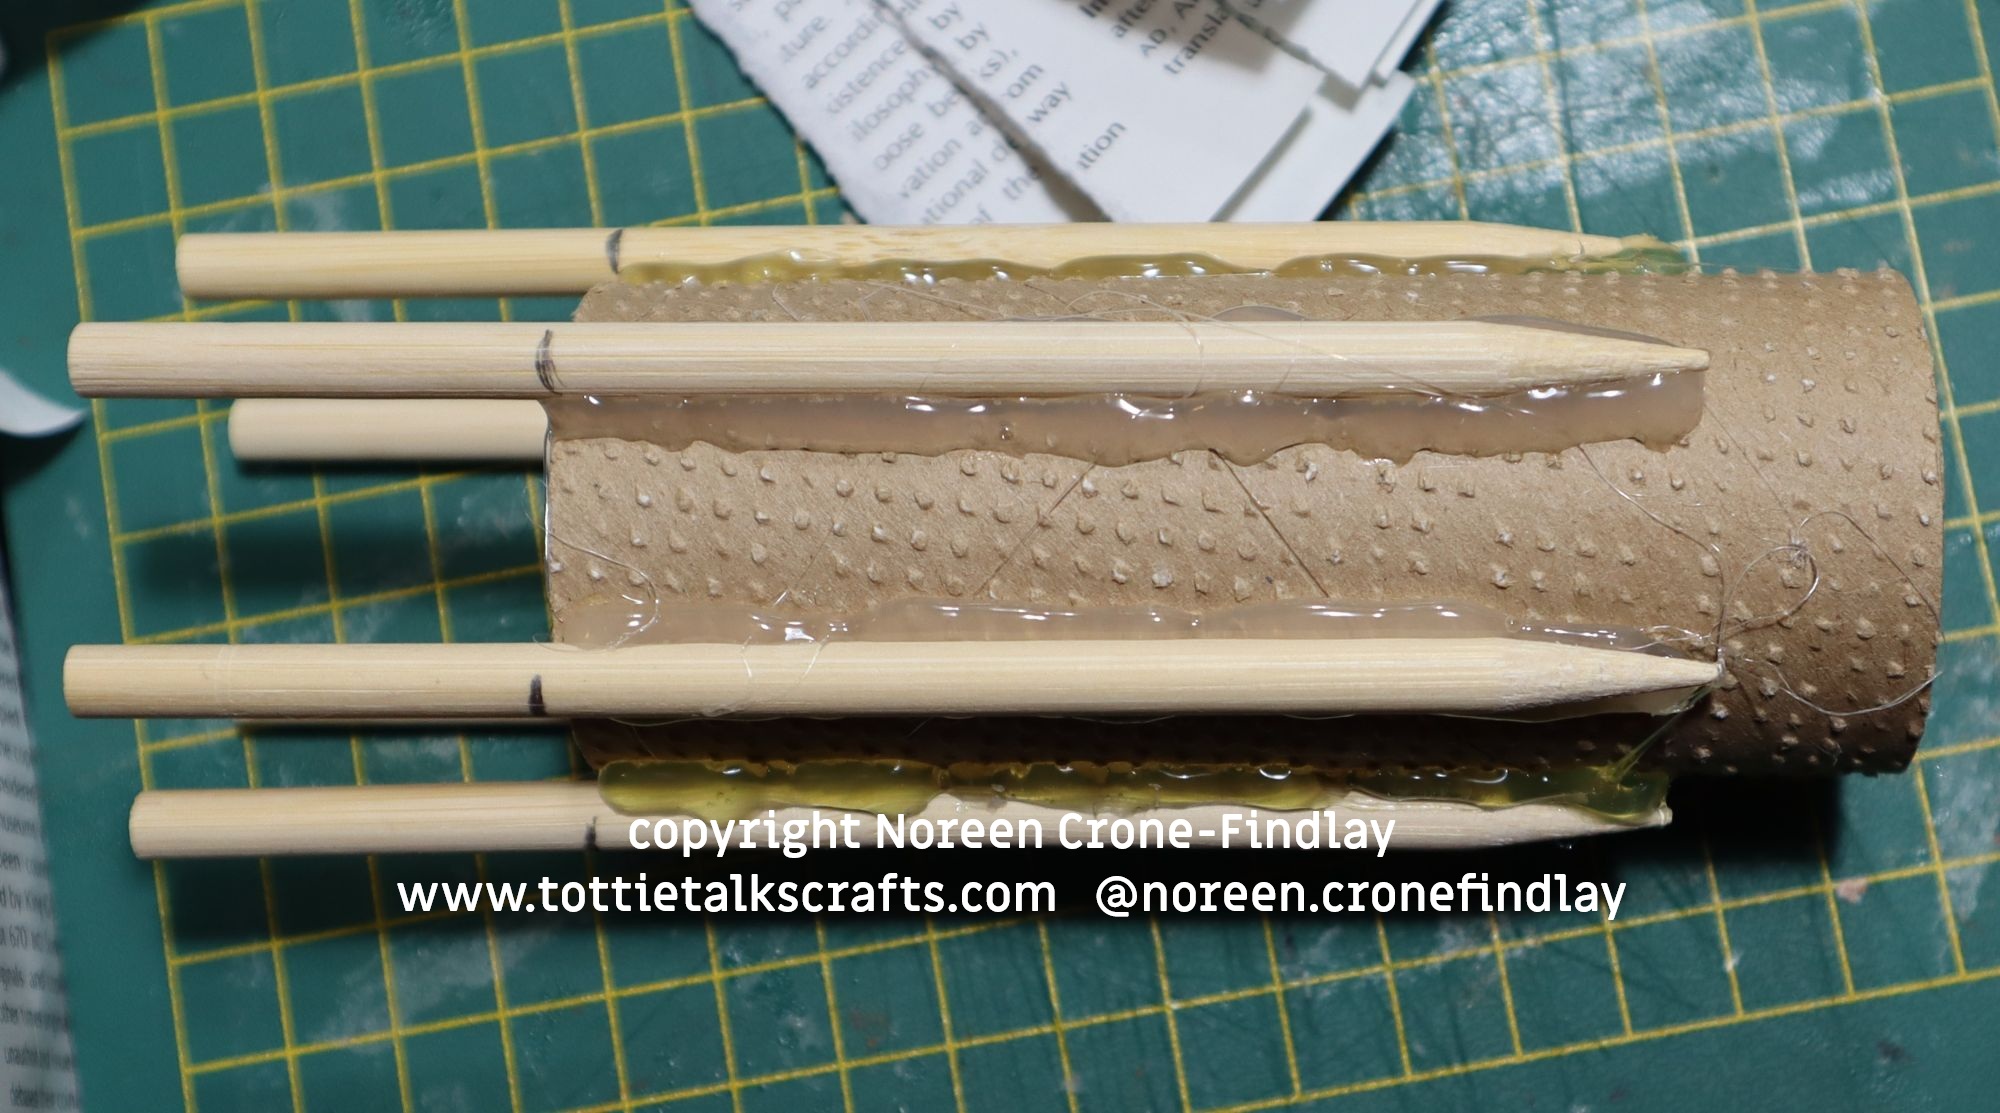
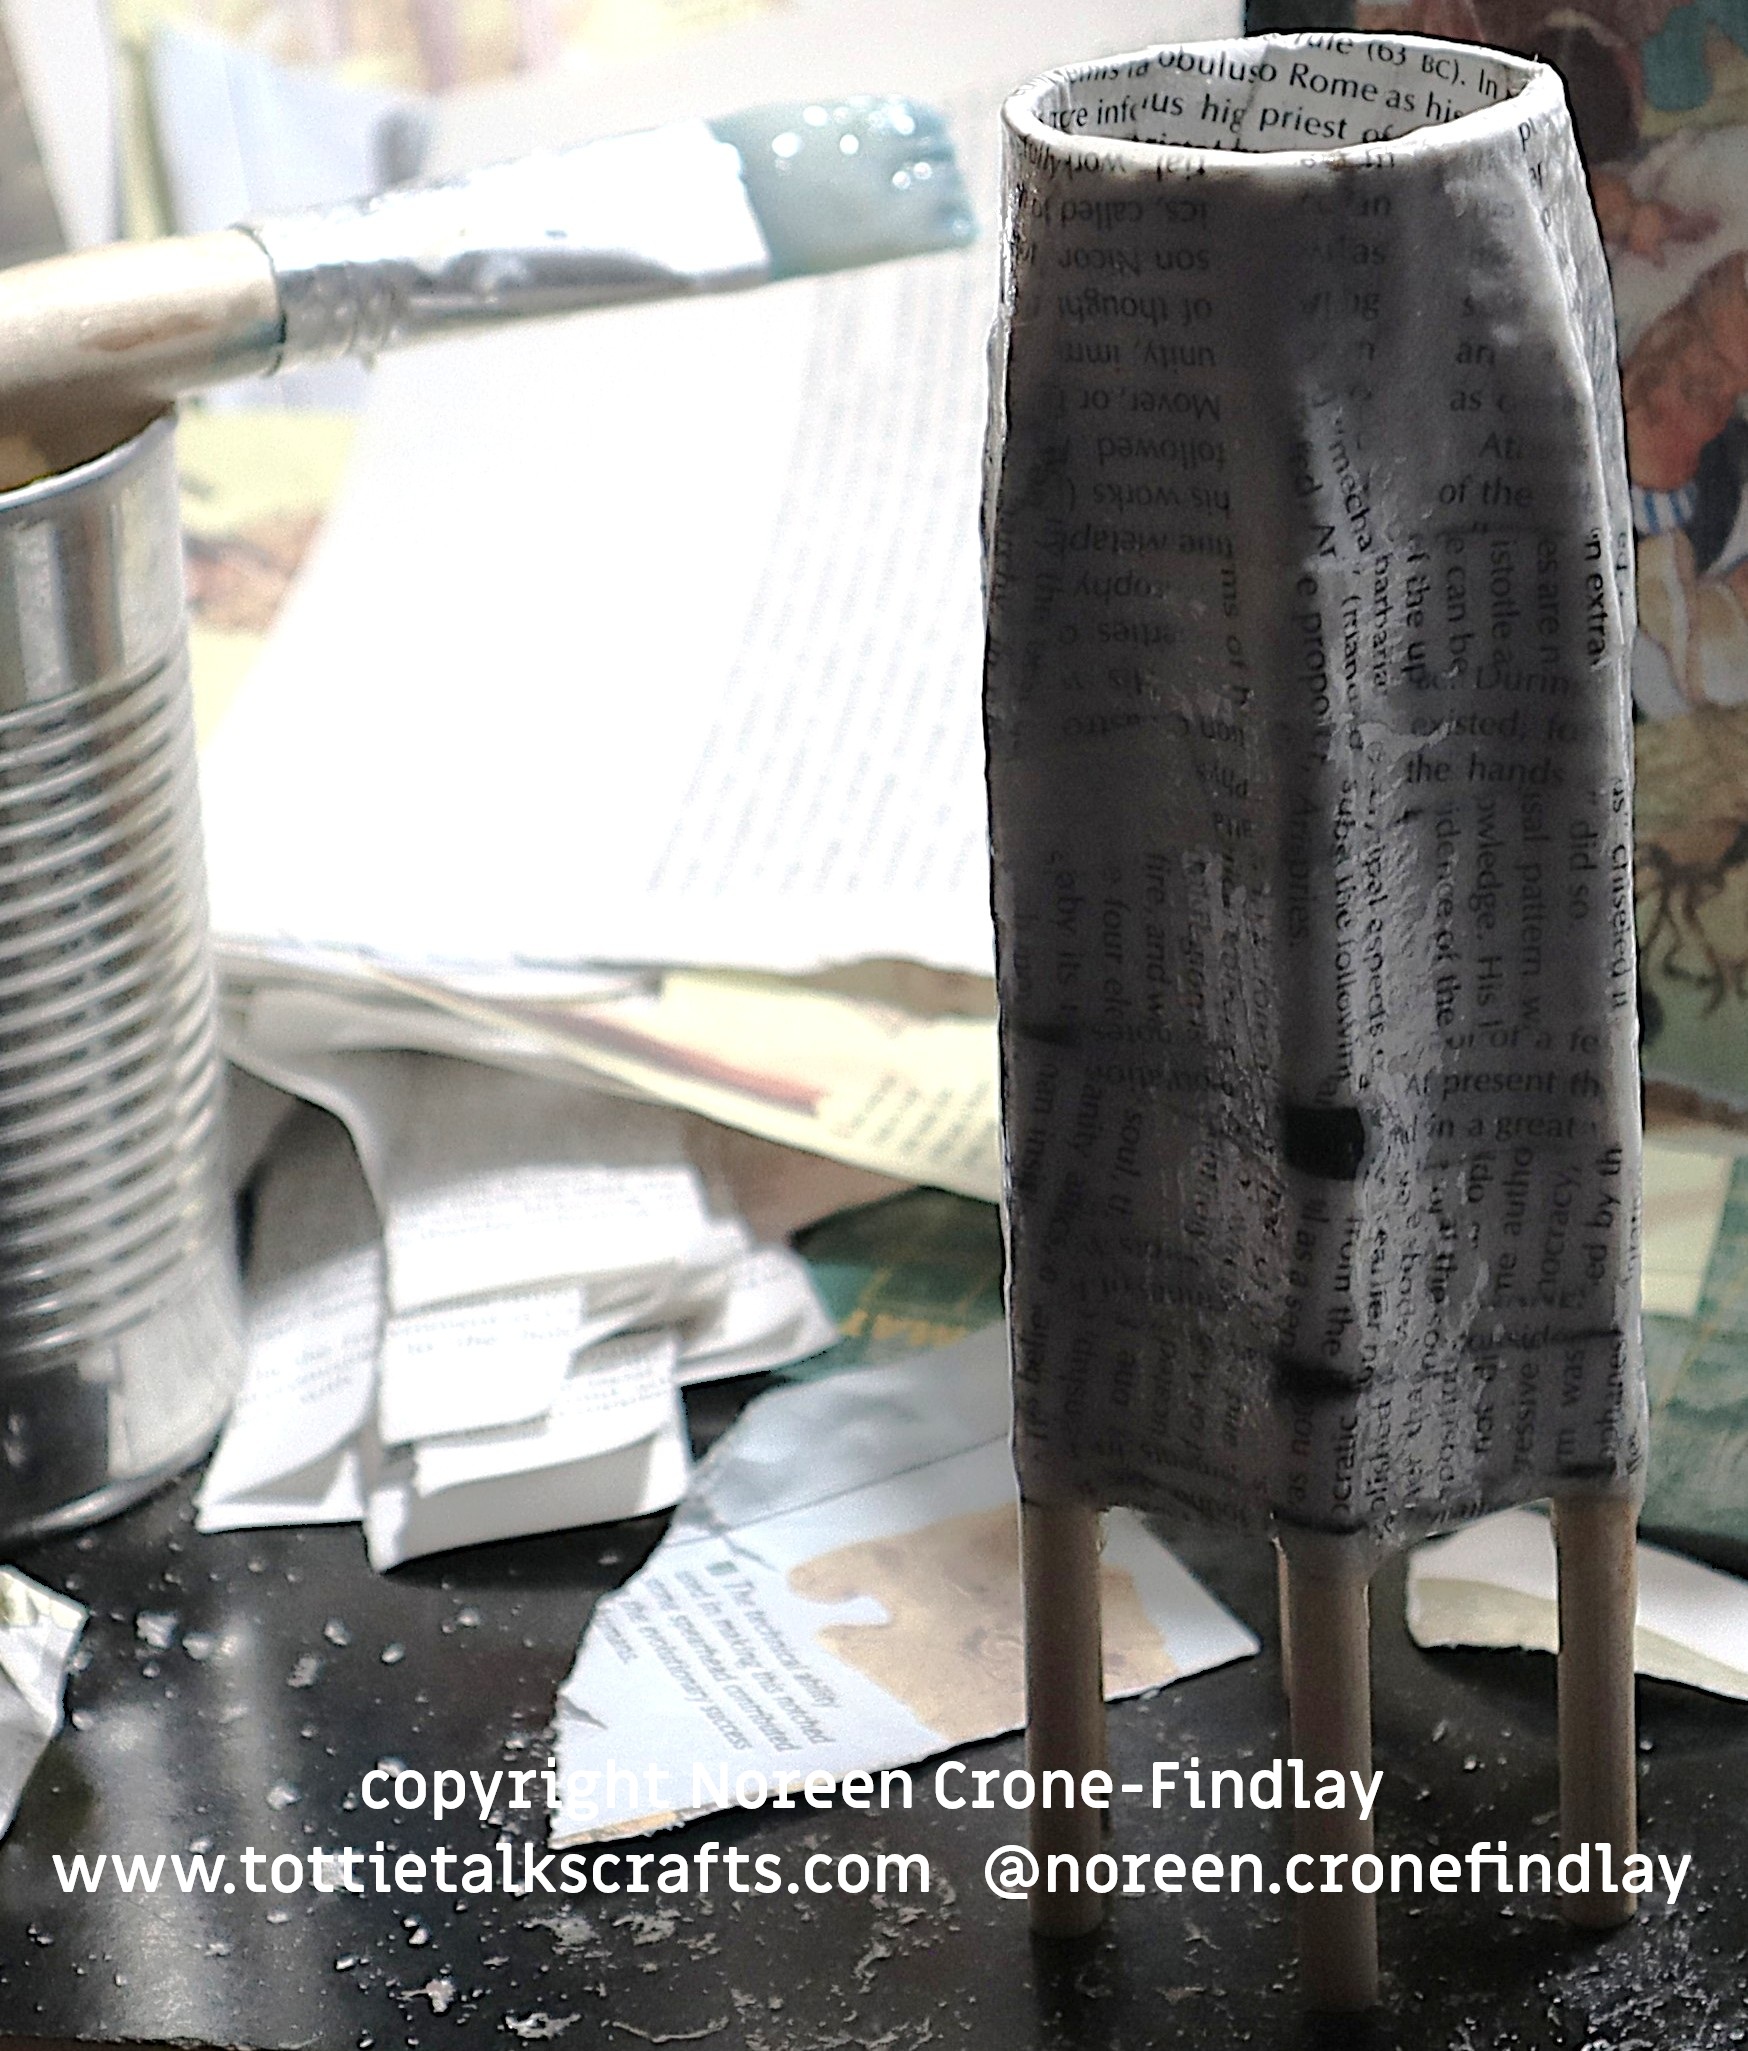
You need a sturdy core for the body of the spool knitter. I wound off some jute string onto a bobbin to free up a cardboard tube.
It’s 1 1/2 inches/4 cm in diameter (yours can be any diameter that you happen to have) and 4 1/4 inches/10.5 cm tall.
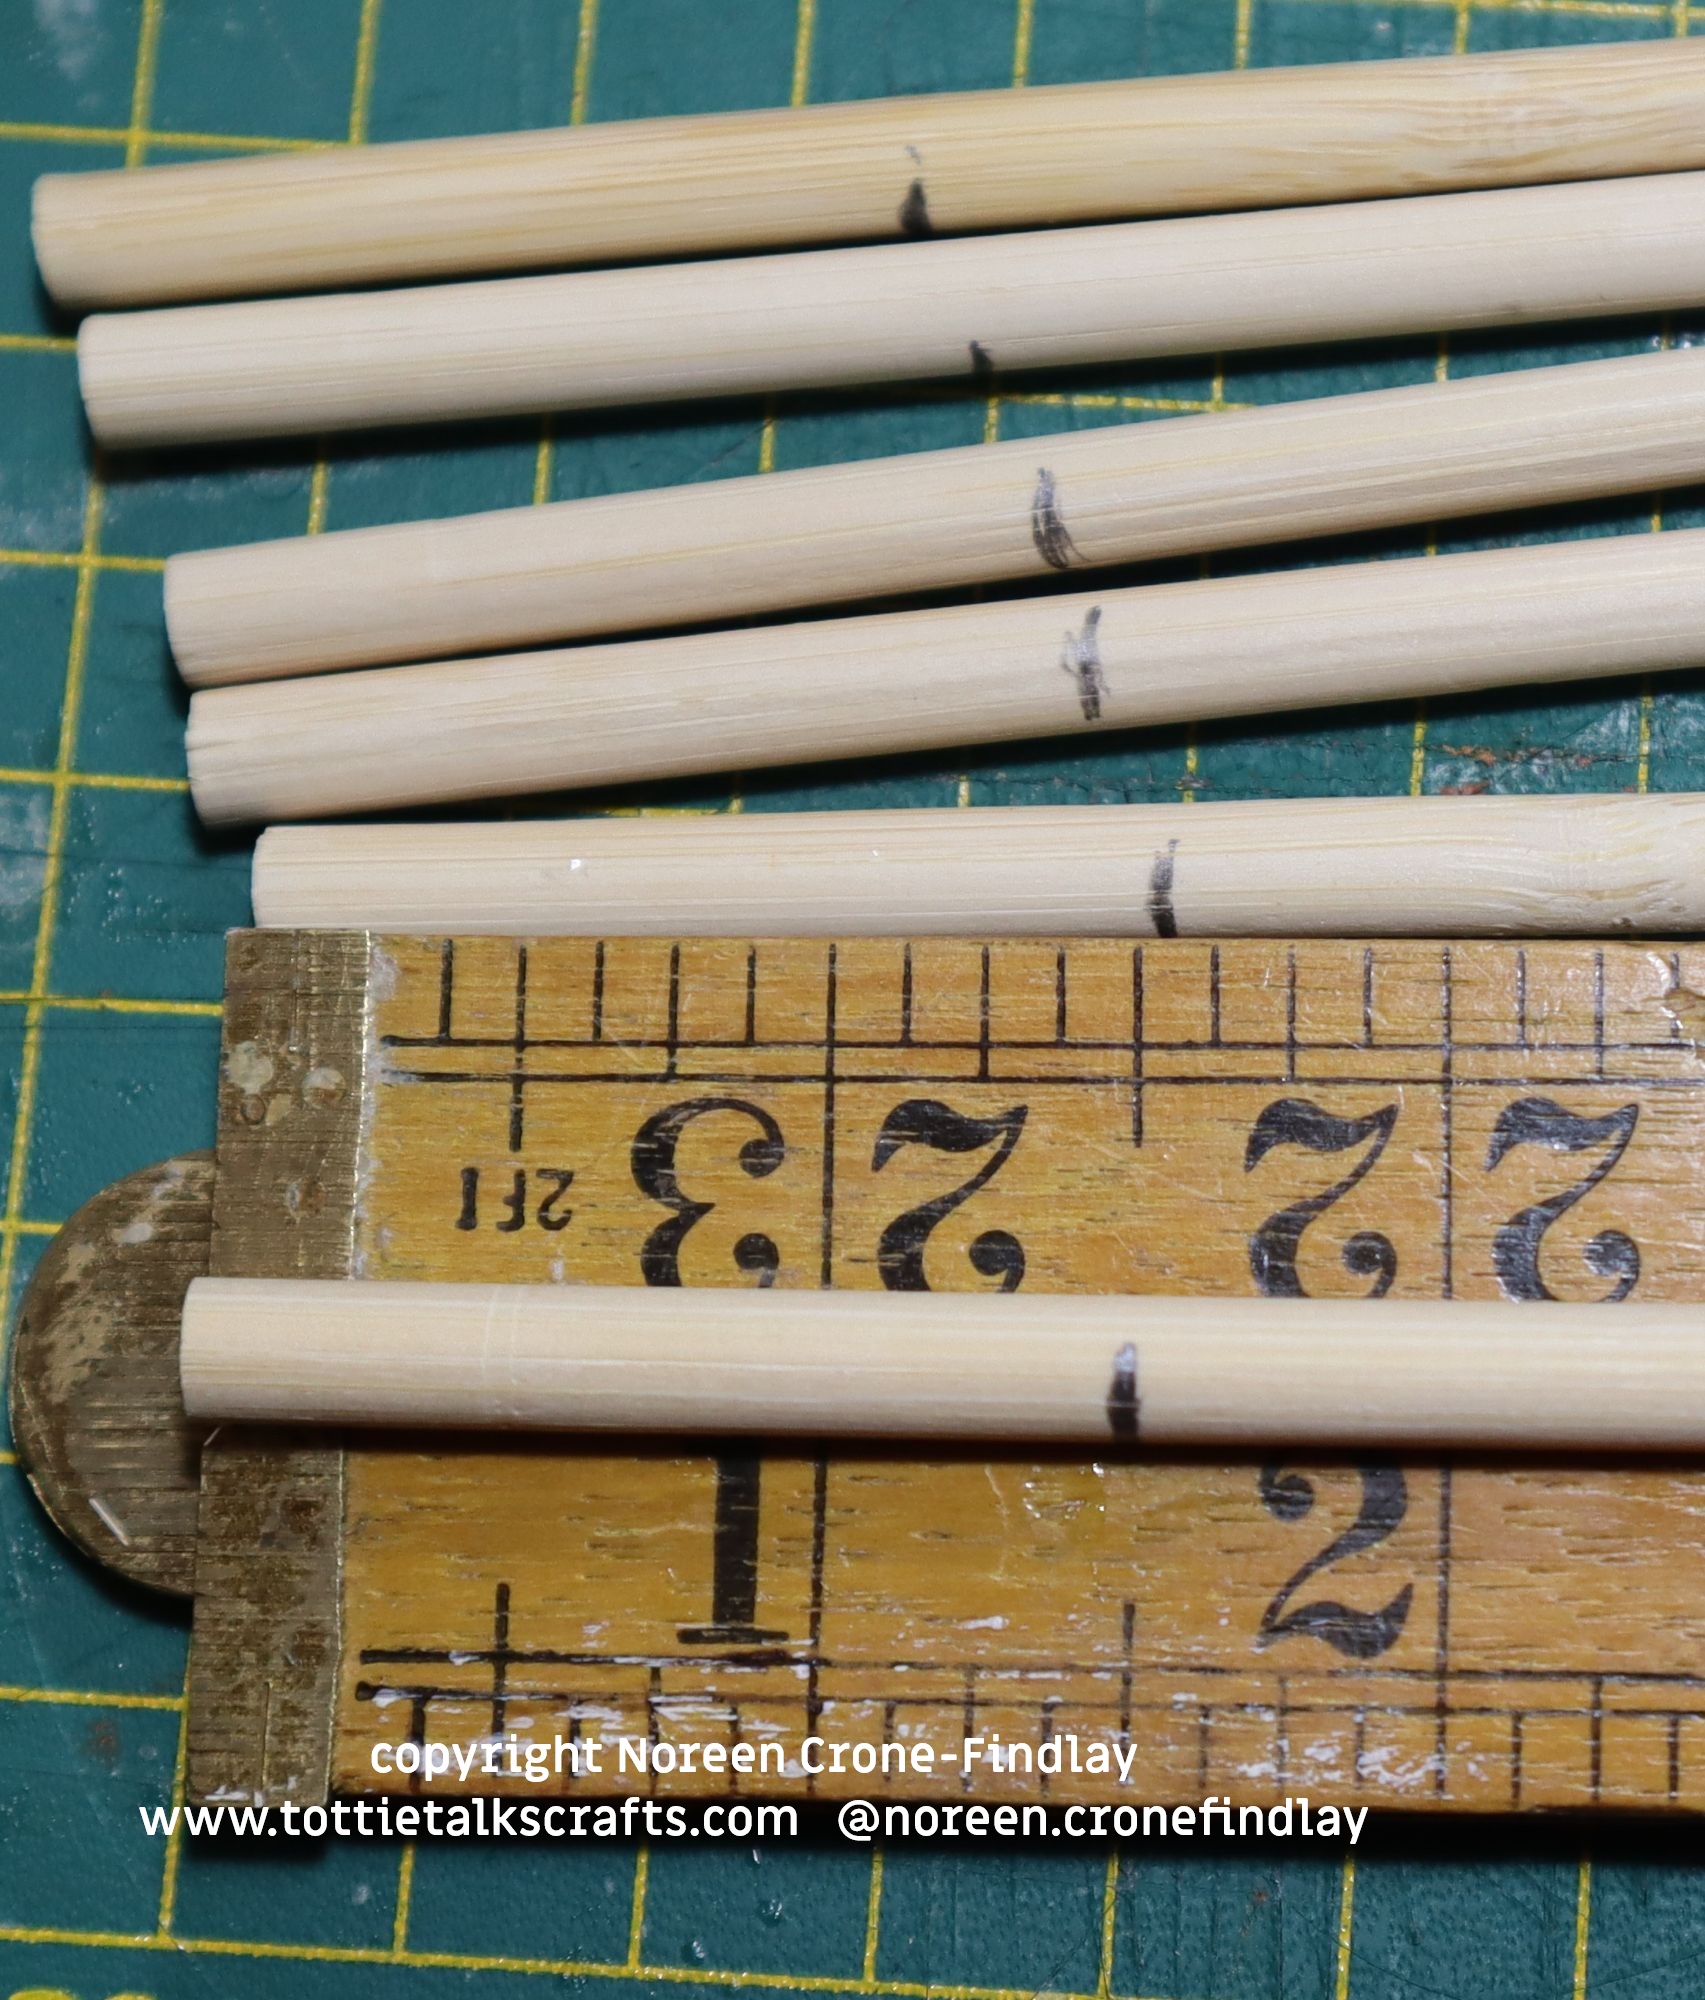
I bought a little bag of bamboo lolly pop sticks in the candy making aisle of the grocery store (craft stores sell them too). They’re 1/4 inches/.5 cm in diameter and 5 inches/25 cm tall.
Mark 1 1/2 inches (4 cm) from the end of 6 (or however many you want) of them.
Line up the marks so they stick out from the end of the tube.
Glue the dowels to the outside of the tube with hot glue.
Now, mix up some wallpaper glue or thin some white glue.
Tear up paper and glue layers of it to the spool knitter.
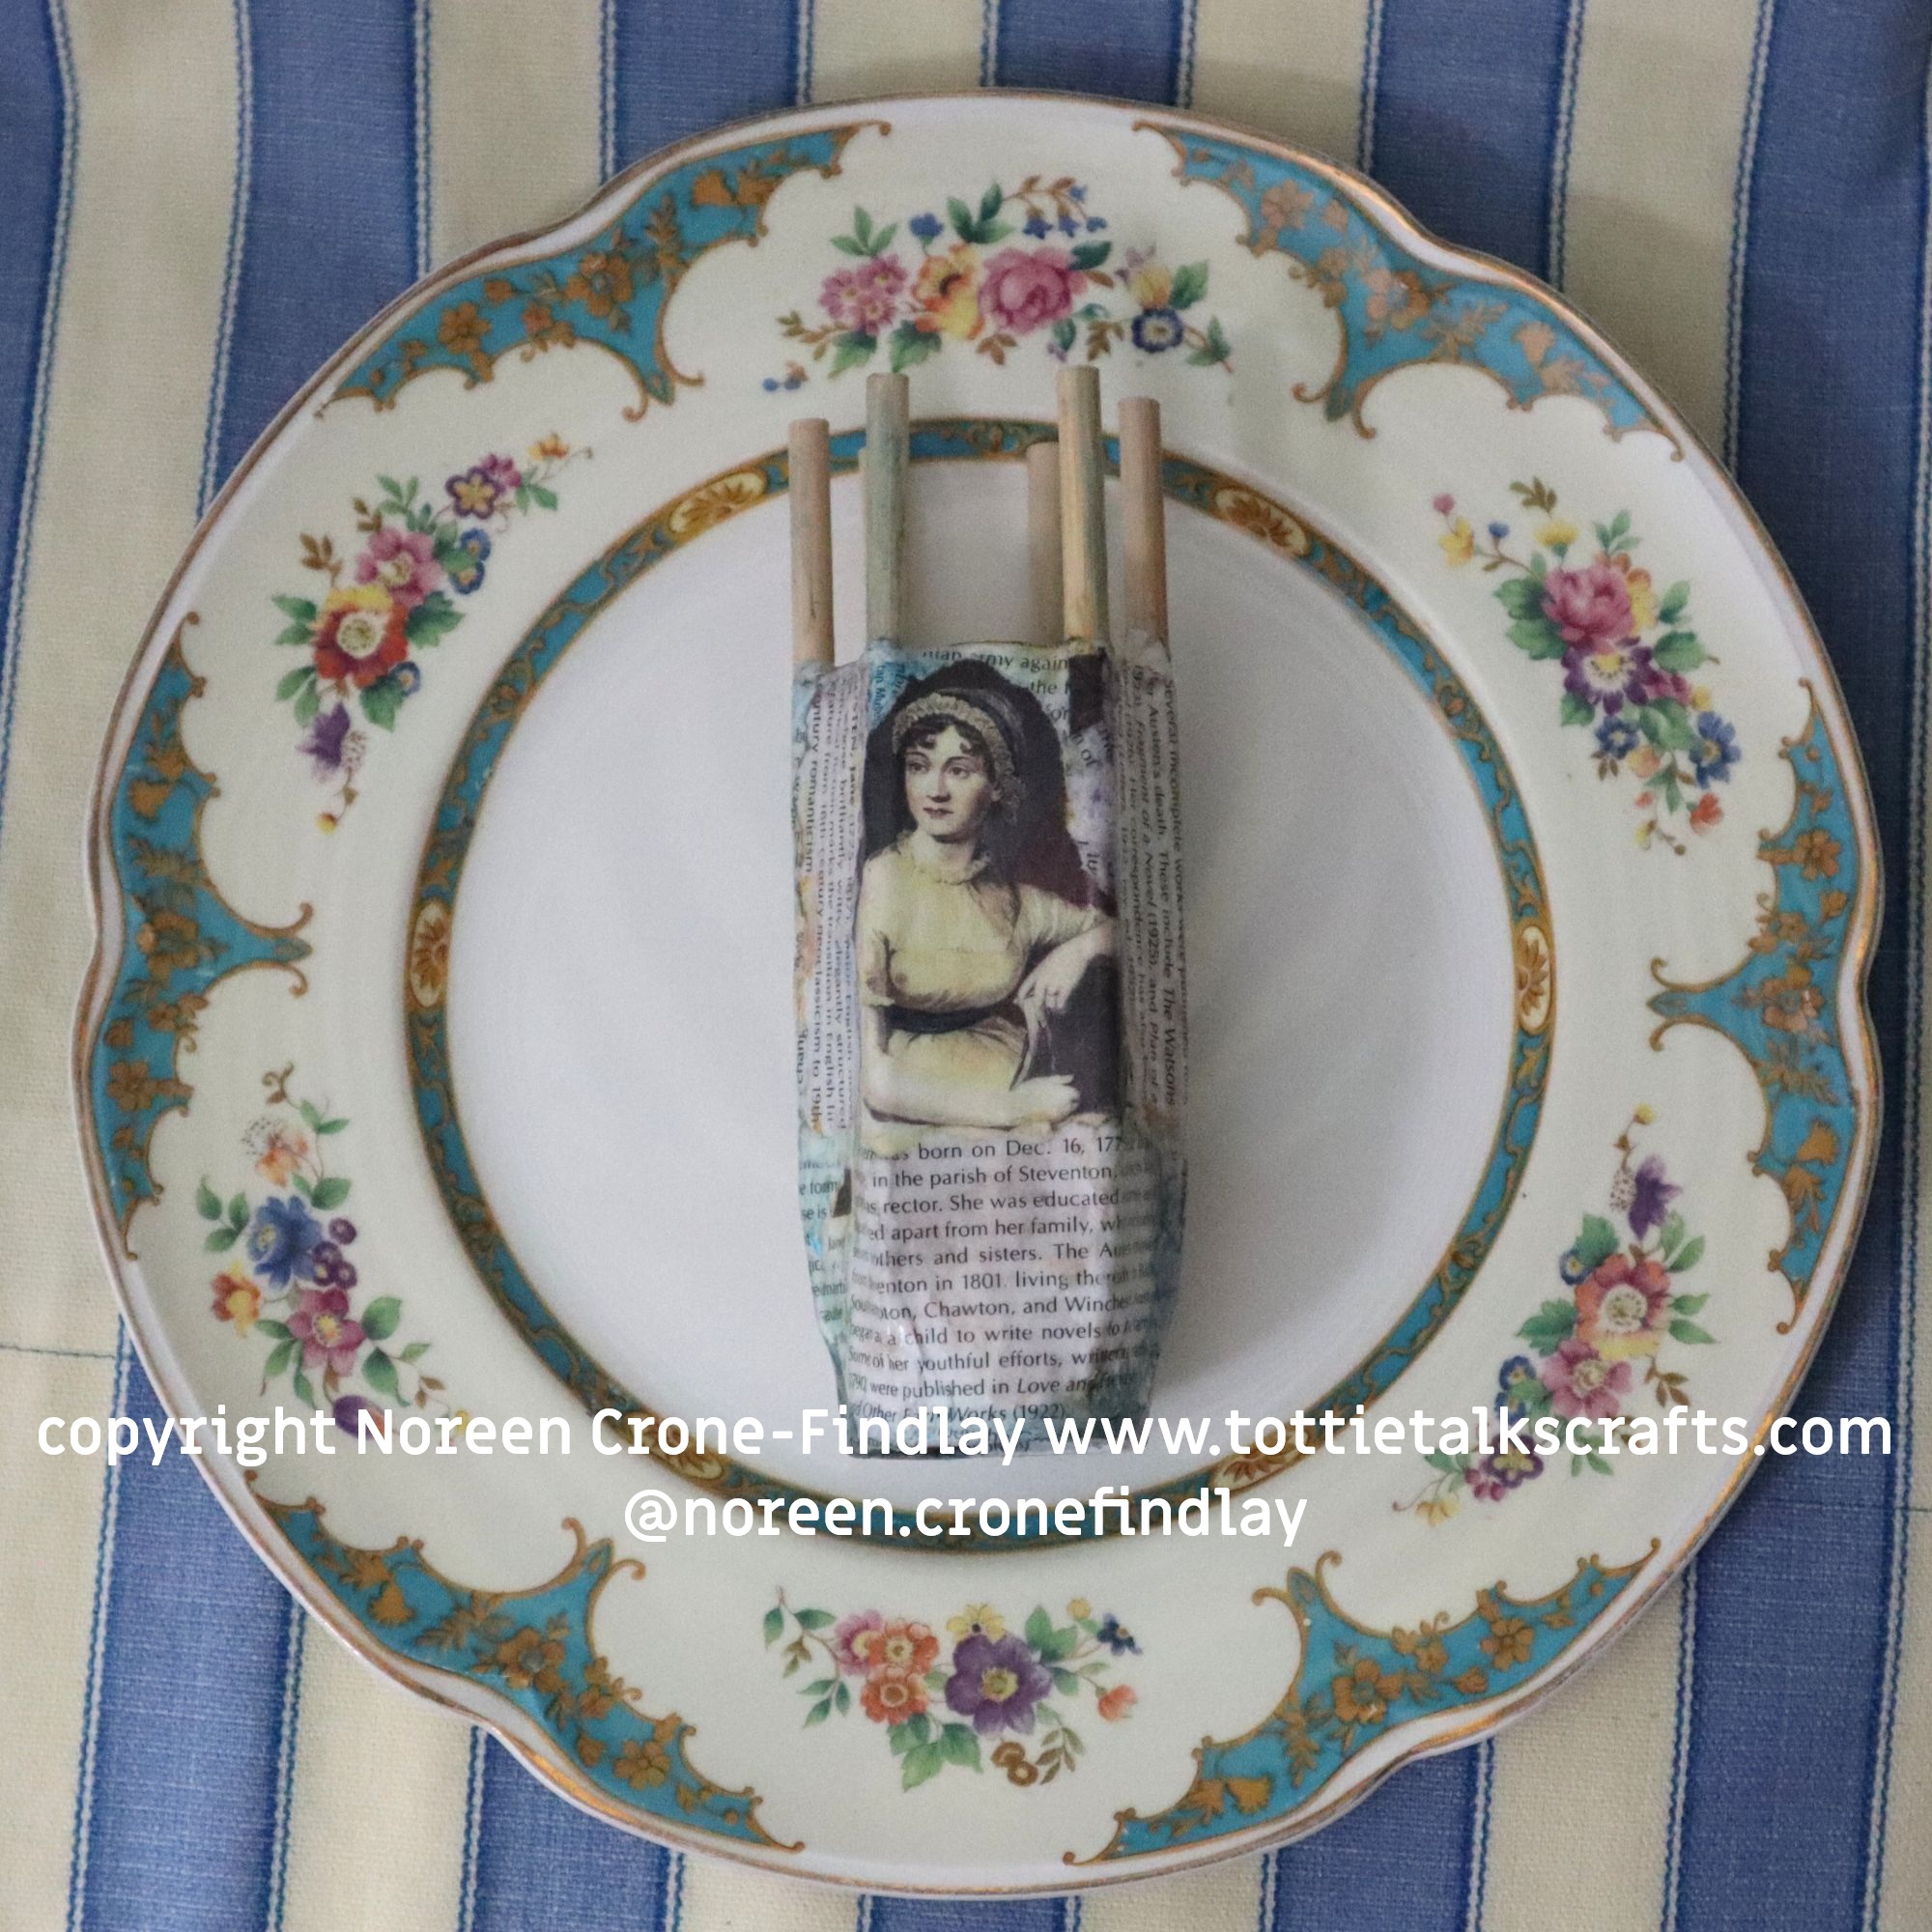
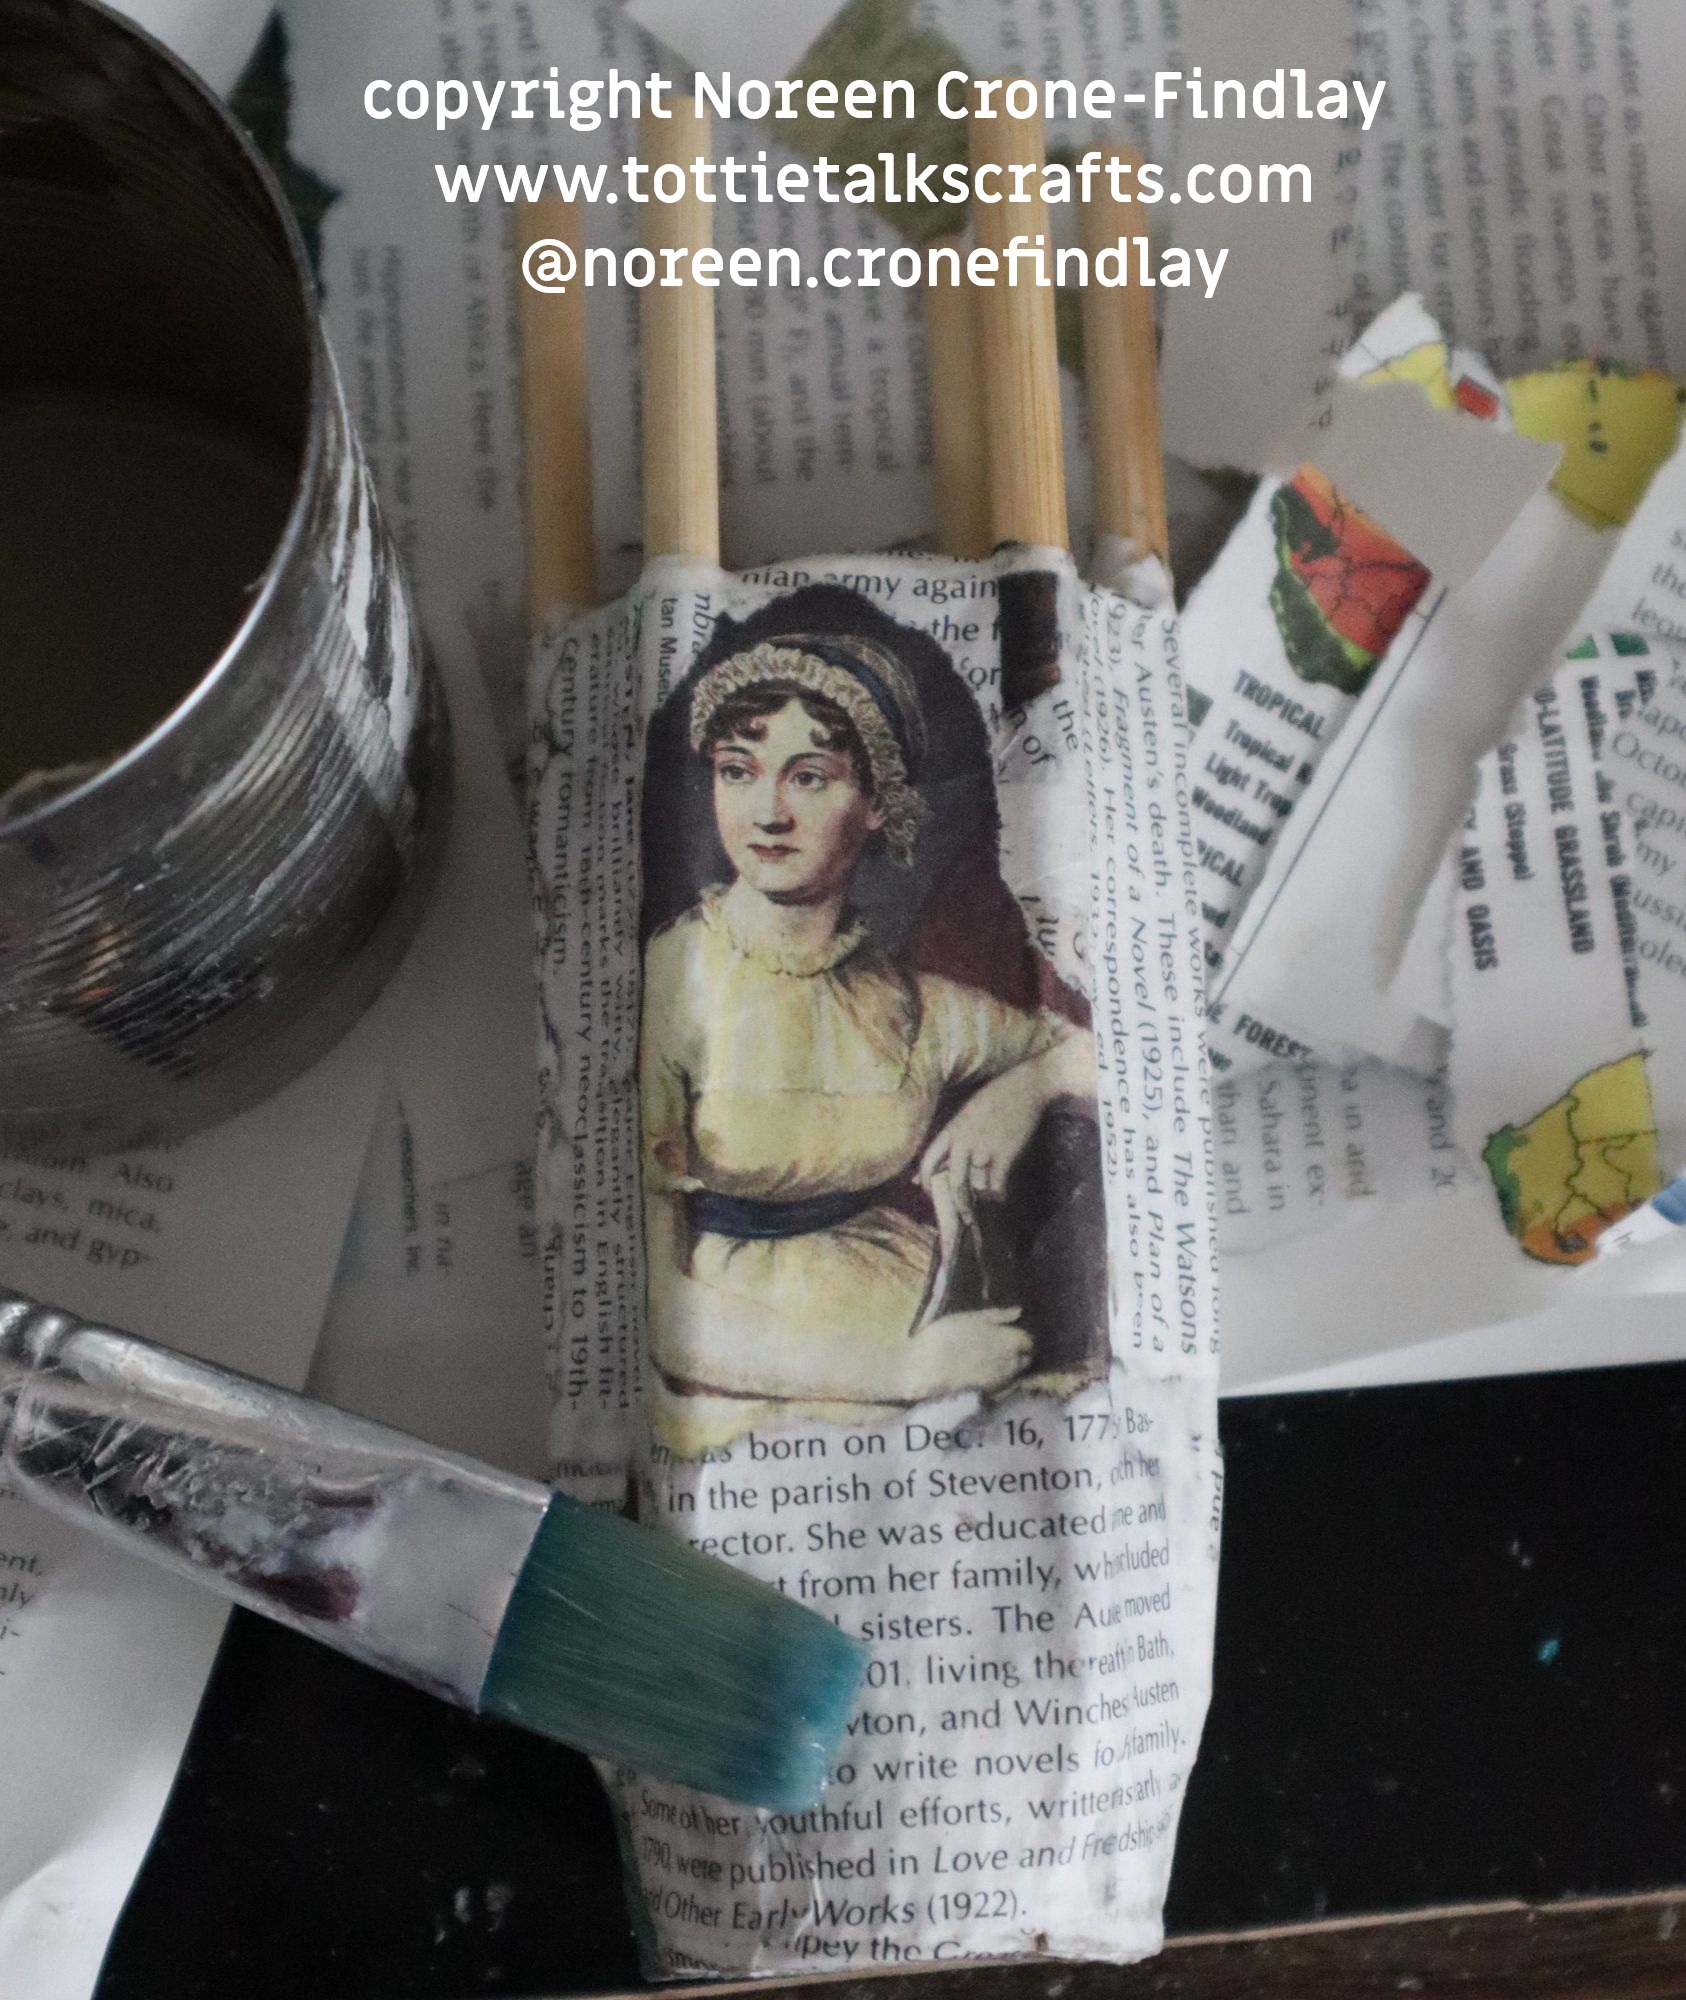
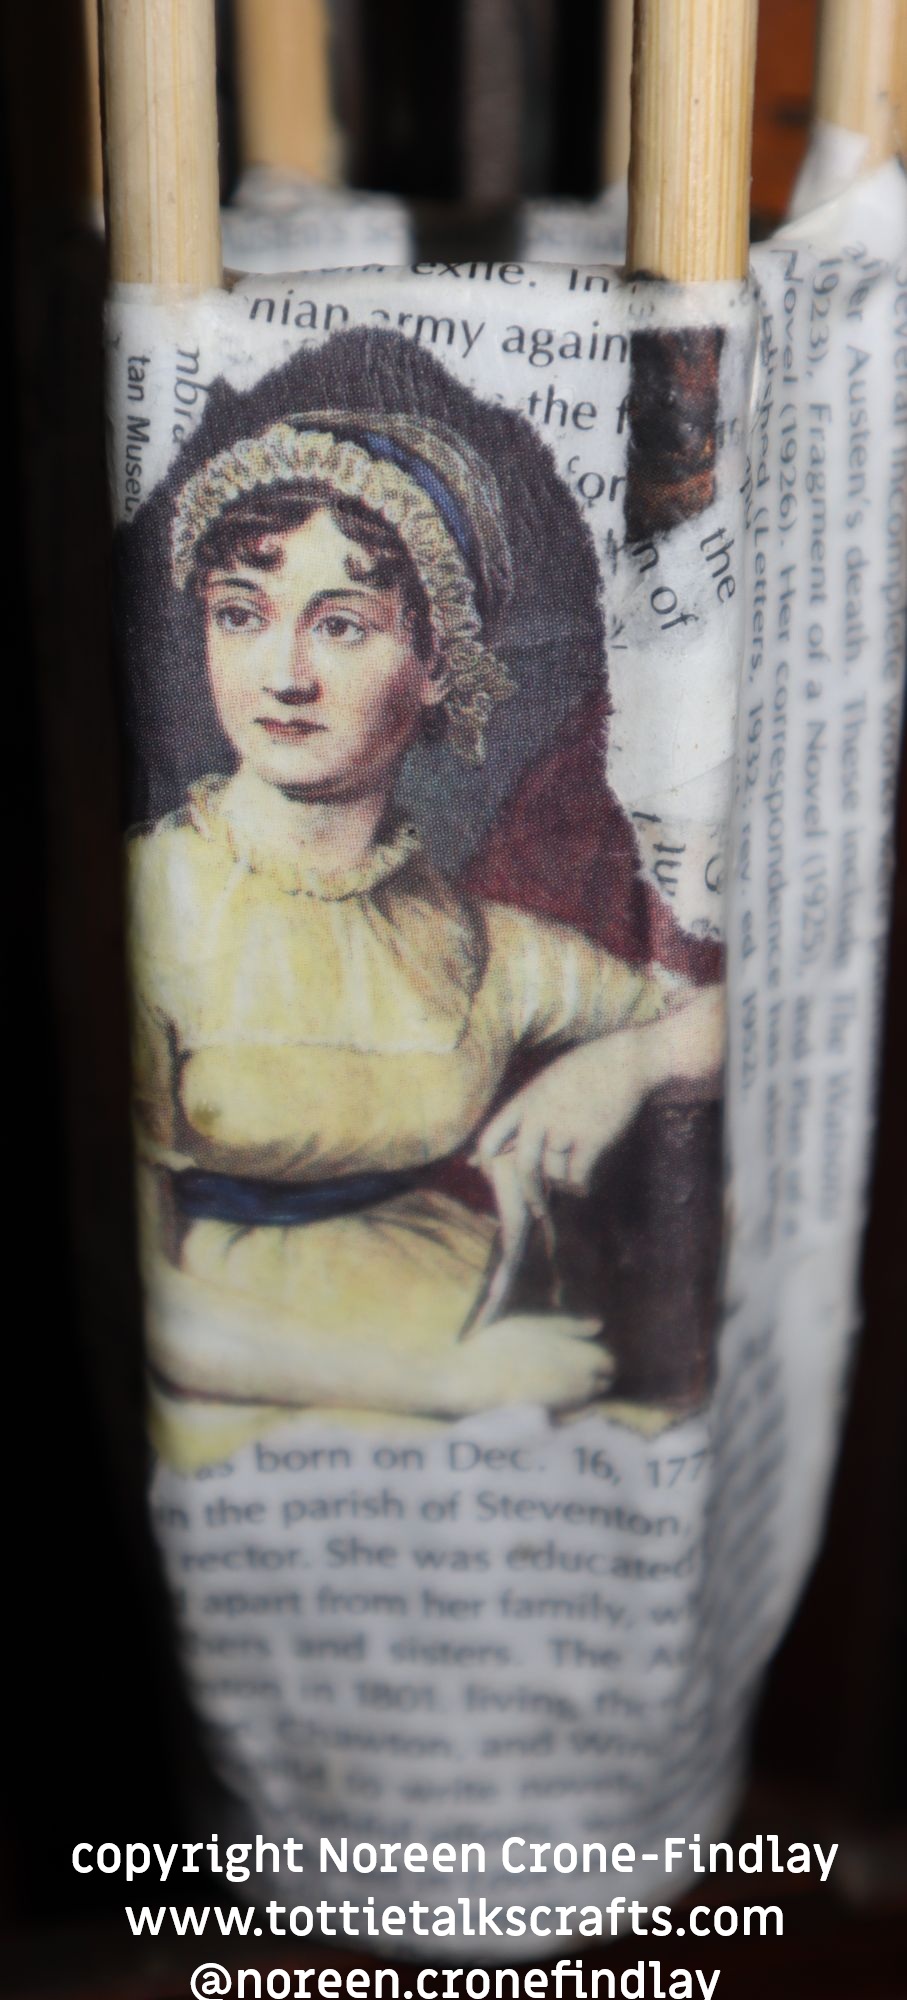
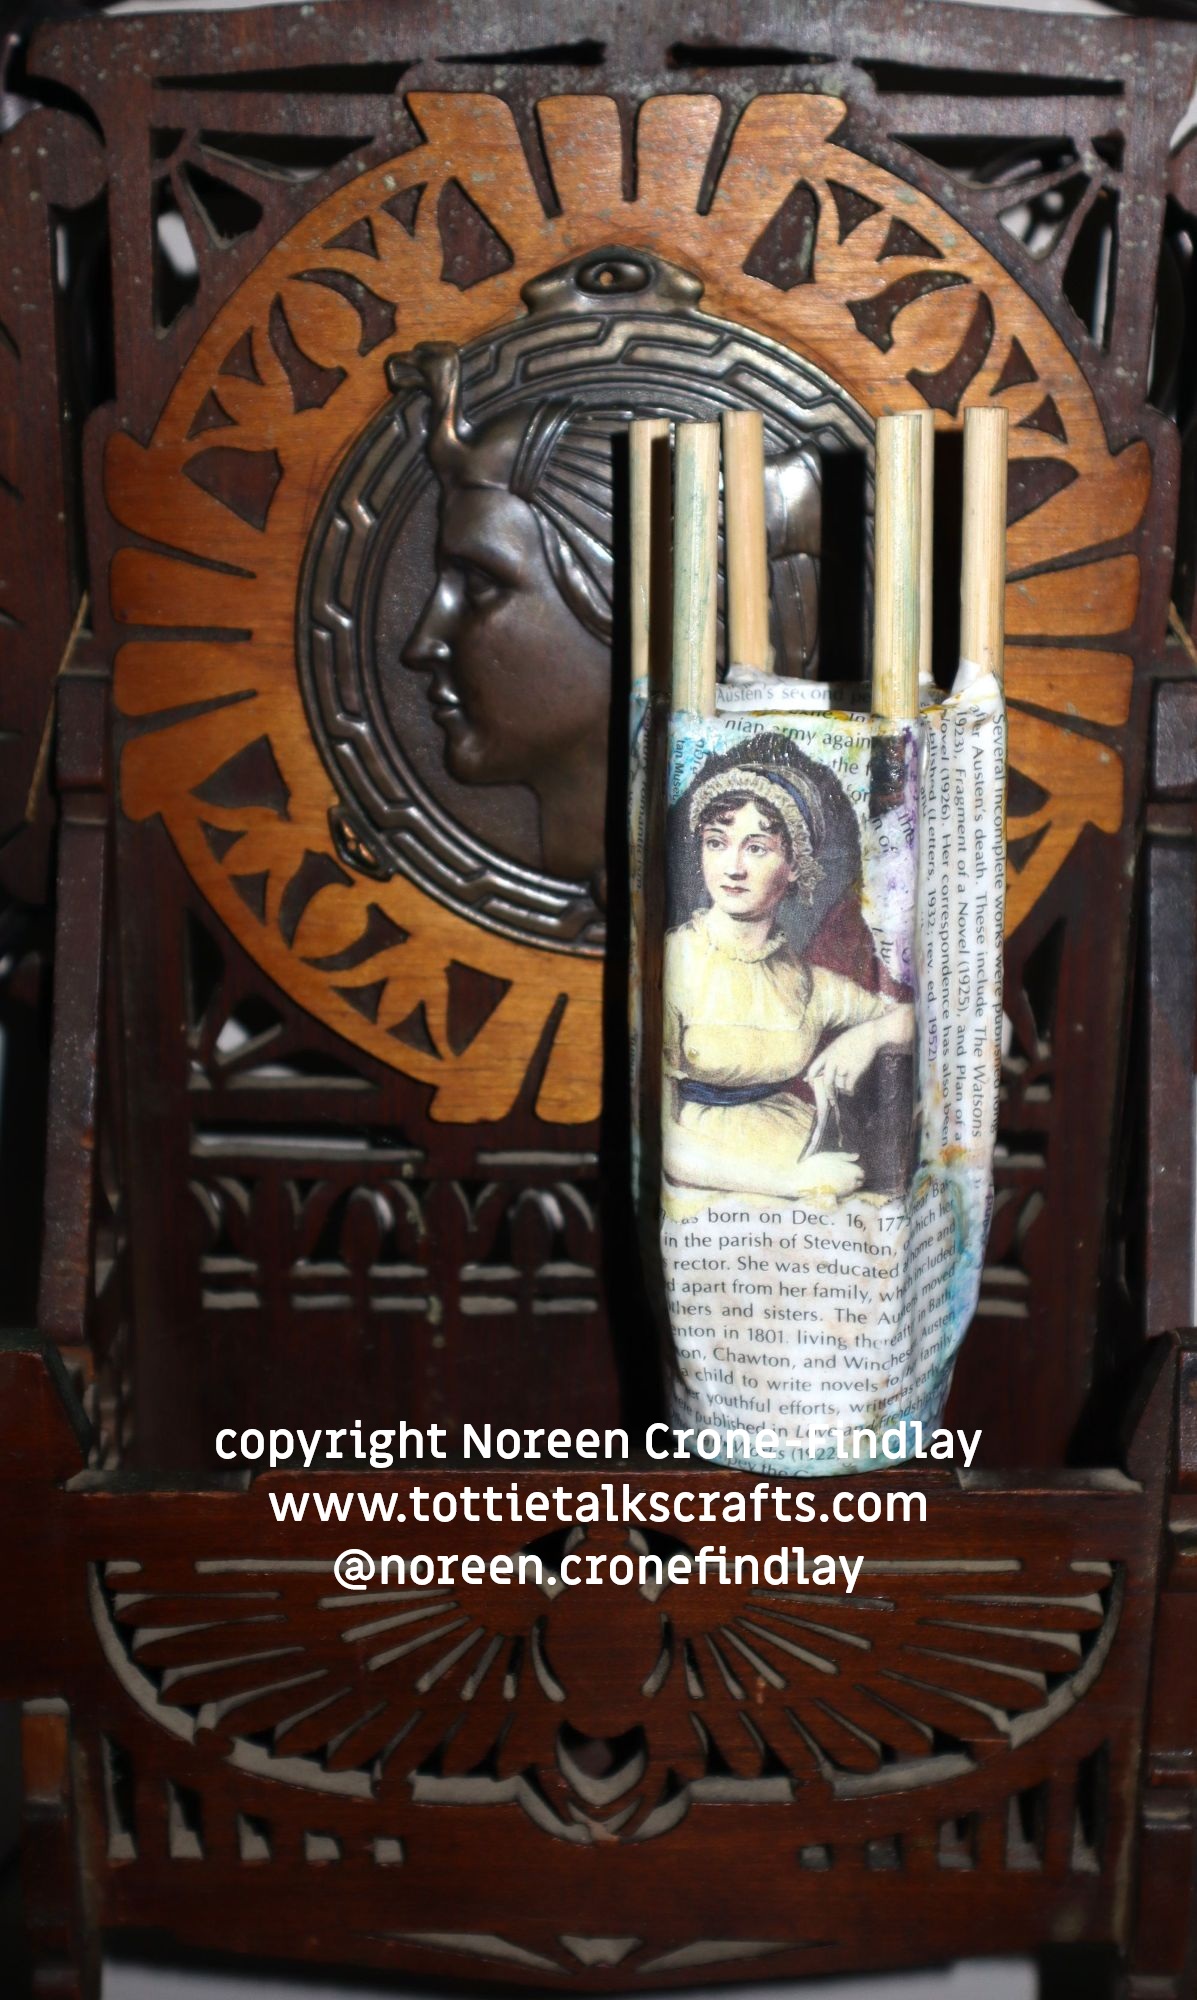
My Homage to Jane Austen spool knitter is one of the unexpected delights that has unfolded for me because of my project, the #100daysofspoolknittersandlittlelooms. A couple of weeks ago, I picked up 4 old encyclopedias at the Re Use centre to use in papier mache projects.
What a thrill to find an article about Jane Austen in one of them. I immediately pulled her pages out and carefully tore them into sizes and shapes to fit the spool knitter. Then, I gleefully glued them on.
I waited overnight for the papier mache to dry and then added a little bit of color with water color pencil crayons and Mod Podged it.
I am absolutely delighted with my Homage to Jane Austen spool knitter!
#100daysofspoolknittersandlittlelooms has given me a lovely gift!
BTW- there are benefits of working with ‘larger than usual’ spool knitters and I will be showing those in upcoming posts.
Day 6 of #100daysofspoolknittersandlittlelooms-Upcycling thrift shop bowls into spool knitters
I have been working on a whole bunch of things for #100daysofspoolknittersandlittlelooms all at once and have gotten all out of order on doing posts.
Back on Day 6 of #the100dayproject2026 I started working on a series of posts about upcycling to make spool knitters.
Last summer, when I was talking with my brother Jonathan (@distinctivewoodworking) about co-creating different sizes and shapes of spool knitters, I mentioned that I often make larger than what people usually expect spool knitters to be by upcycling thrift shop bowls.
He and his son, Kieran turn a LOT of gorgeous bowls on the lathe.
Sometimes, there are ‘oops’ and a bowl goes boink and gets tossed into the firewood box.
Jonathan said: Do you want some of those to make into spool knitters?
YES yes yes, I shrieked.
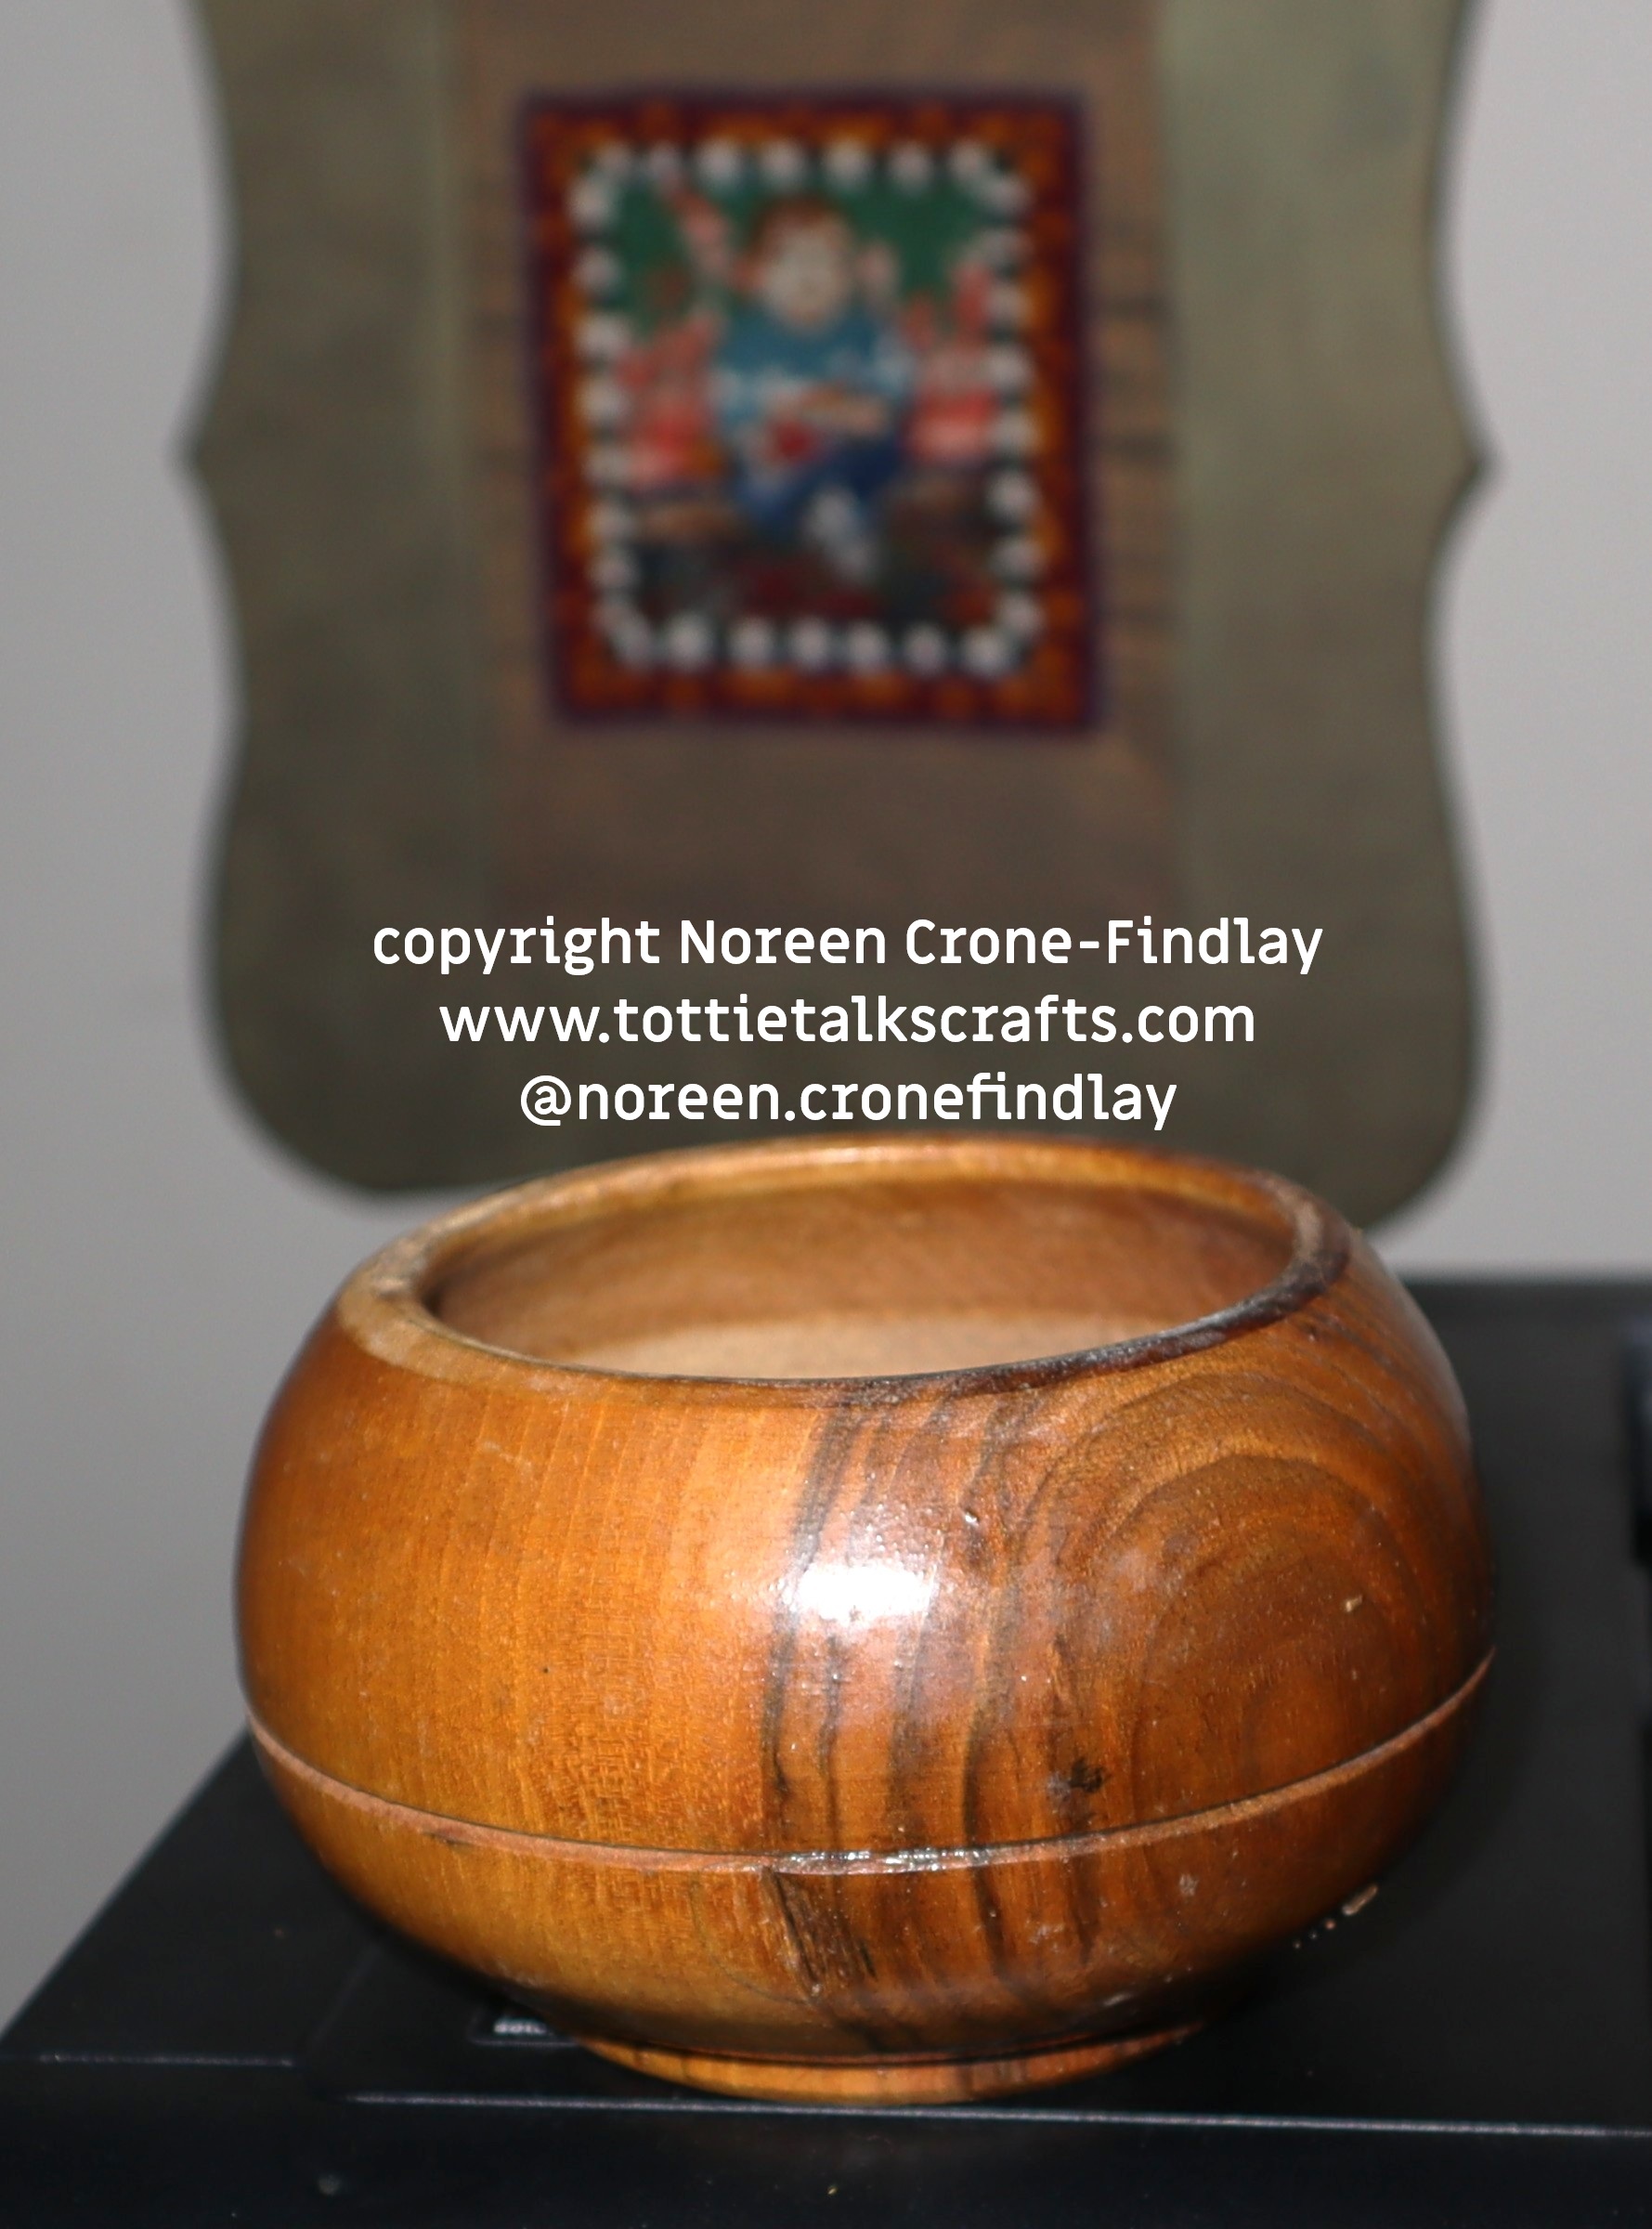
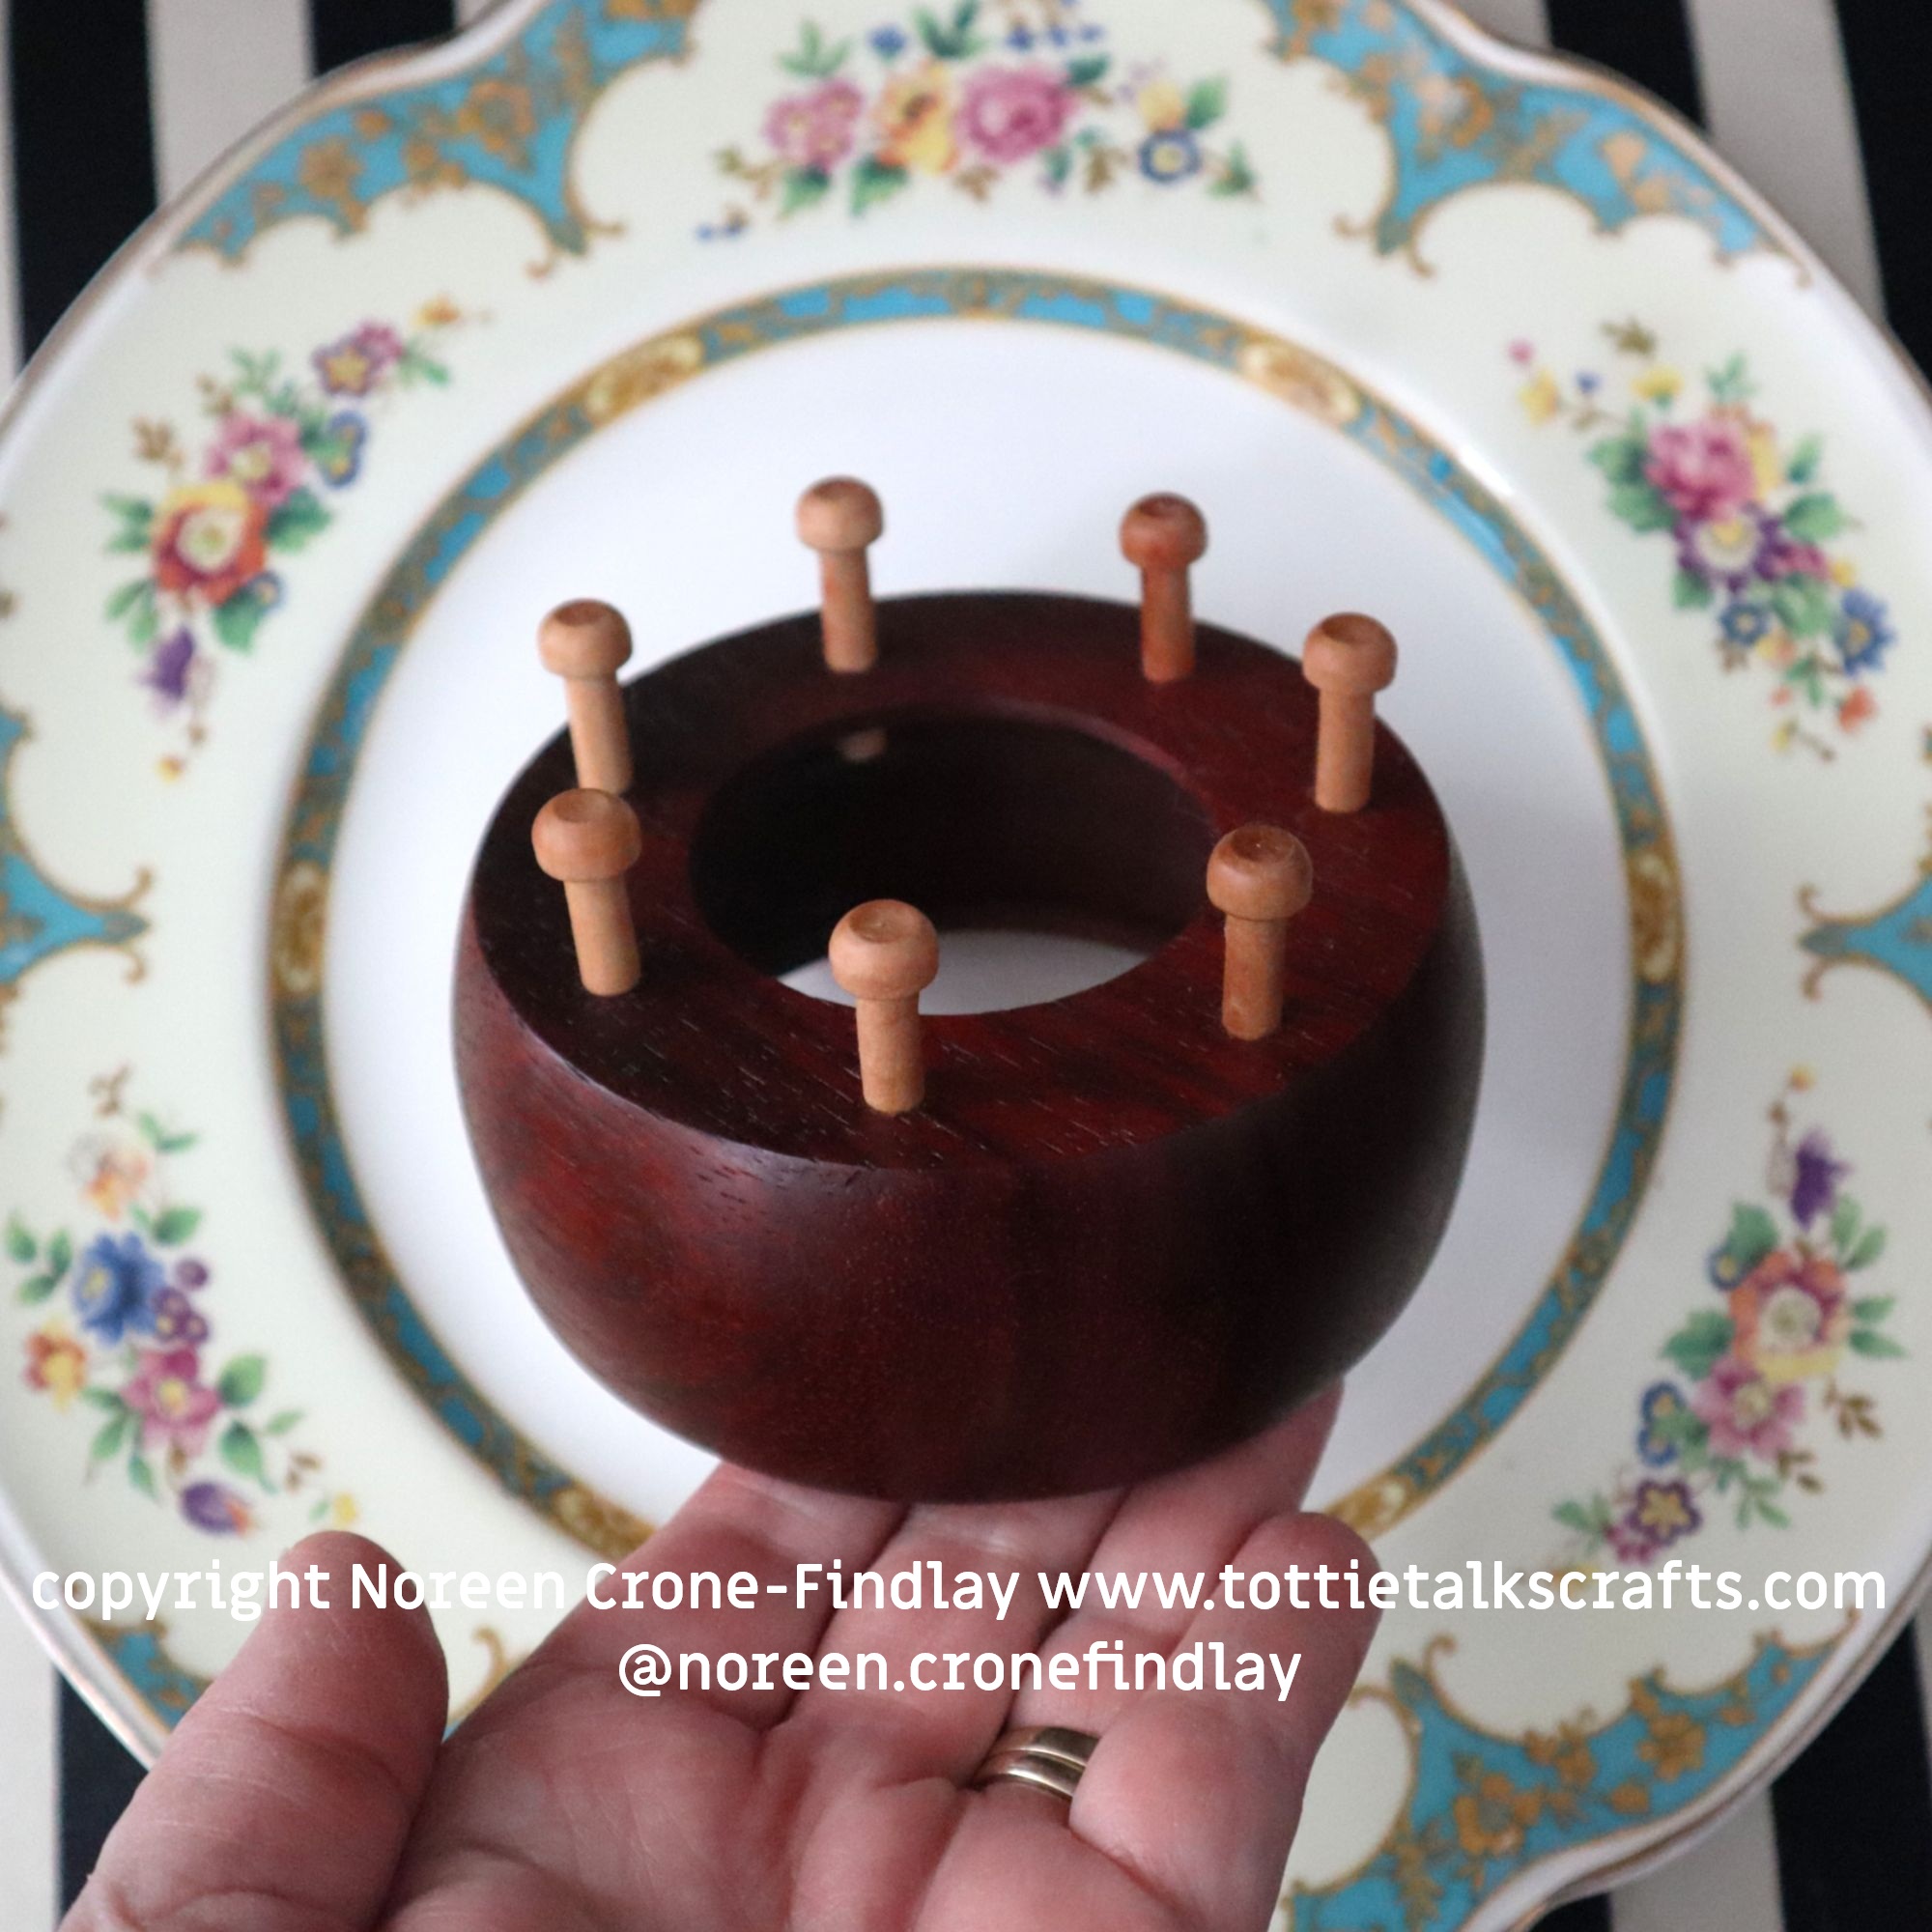
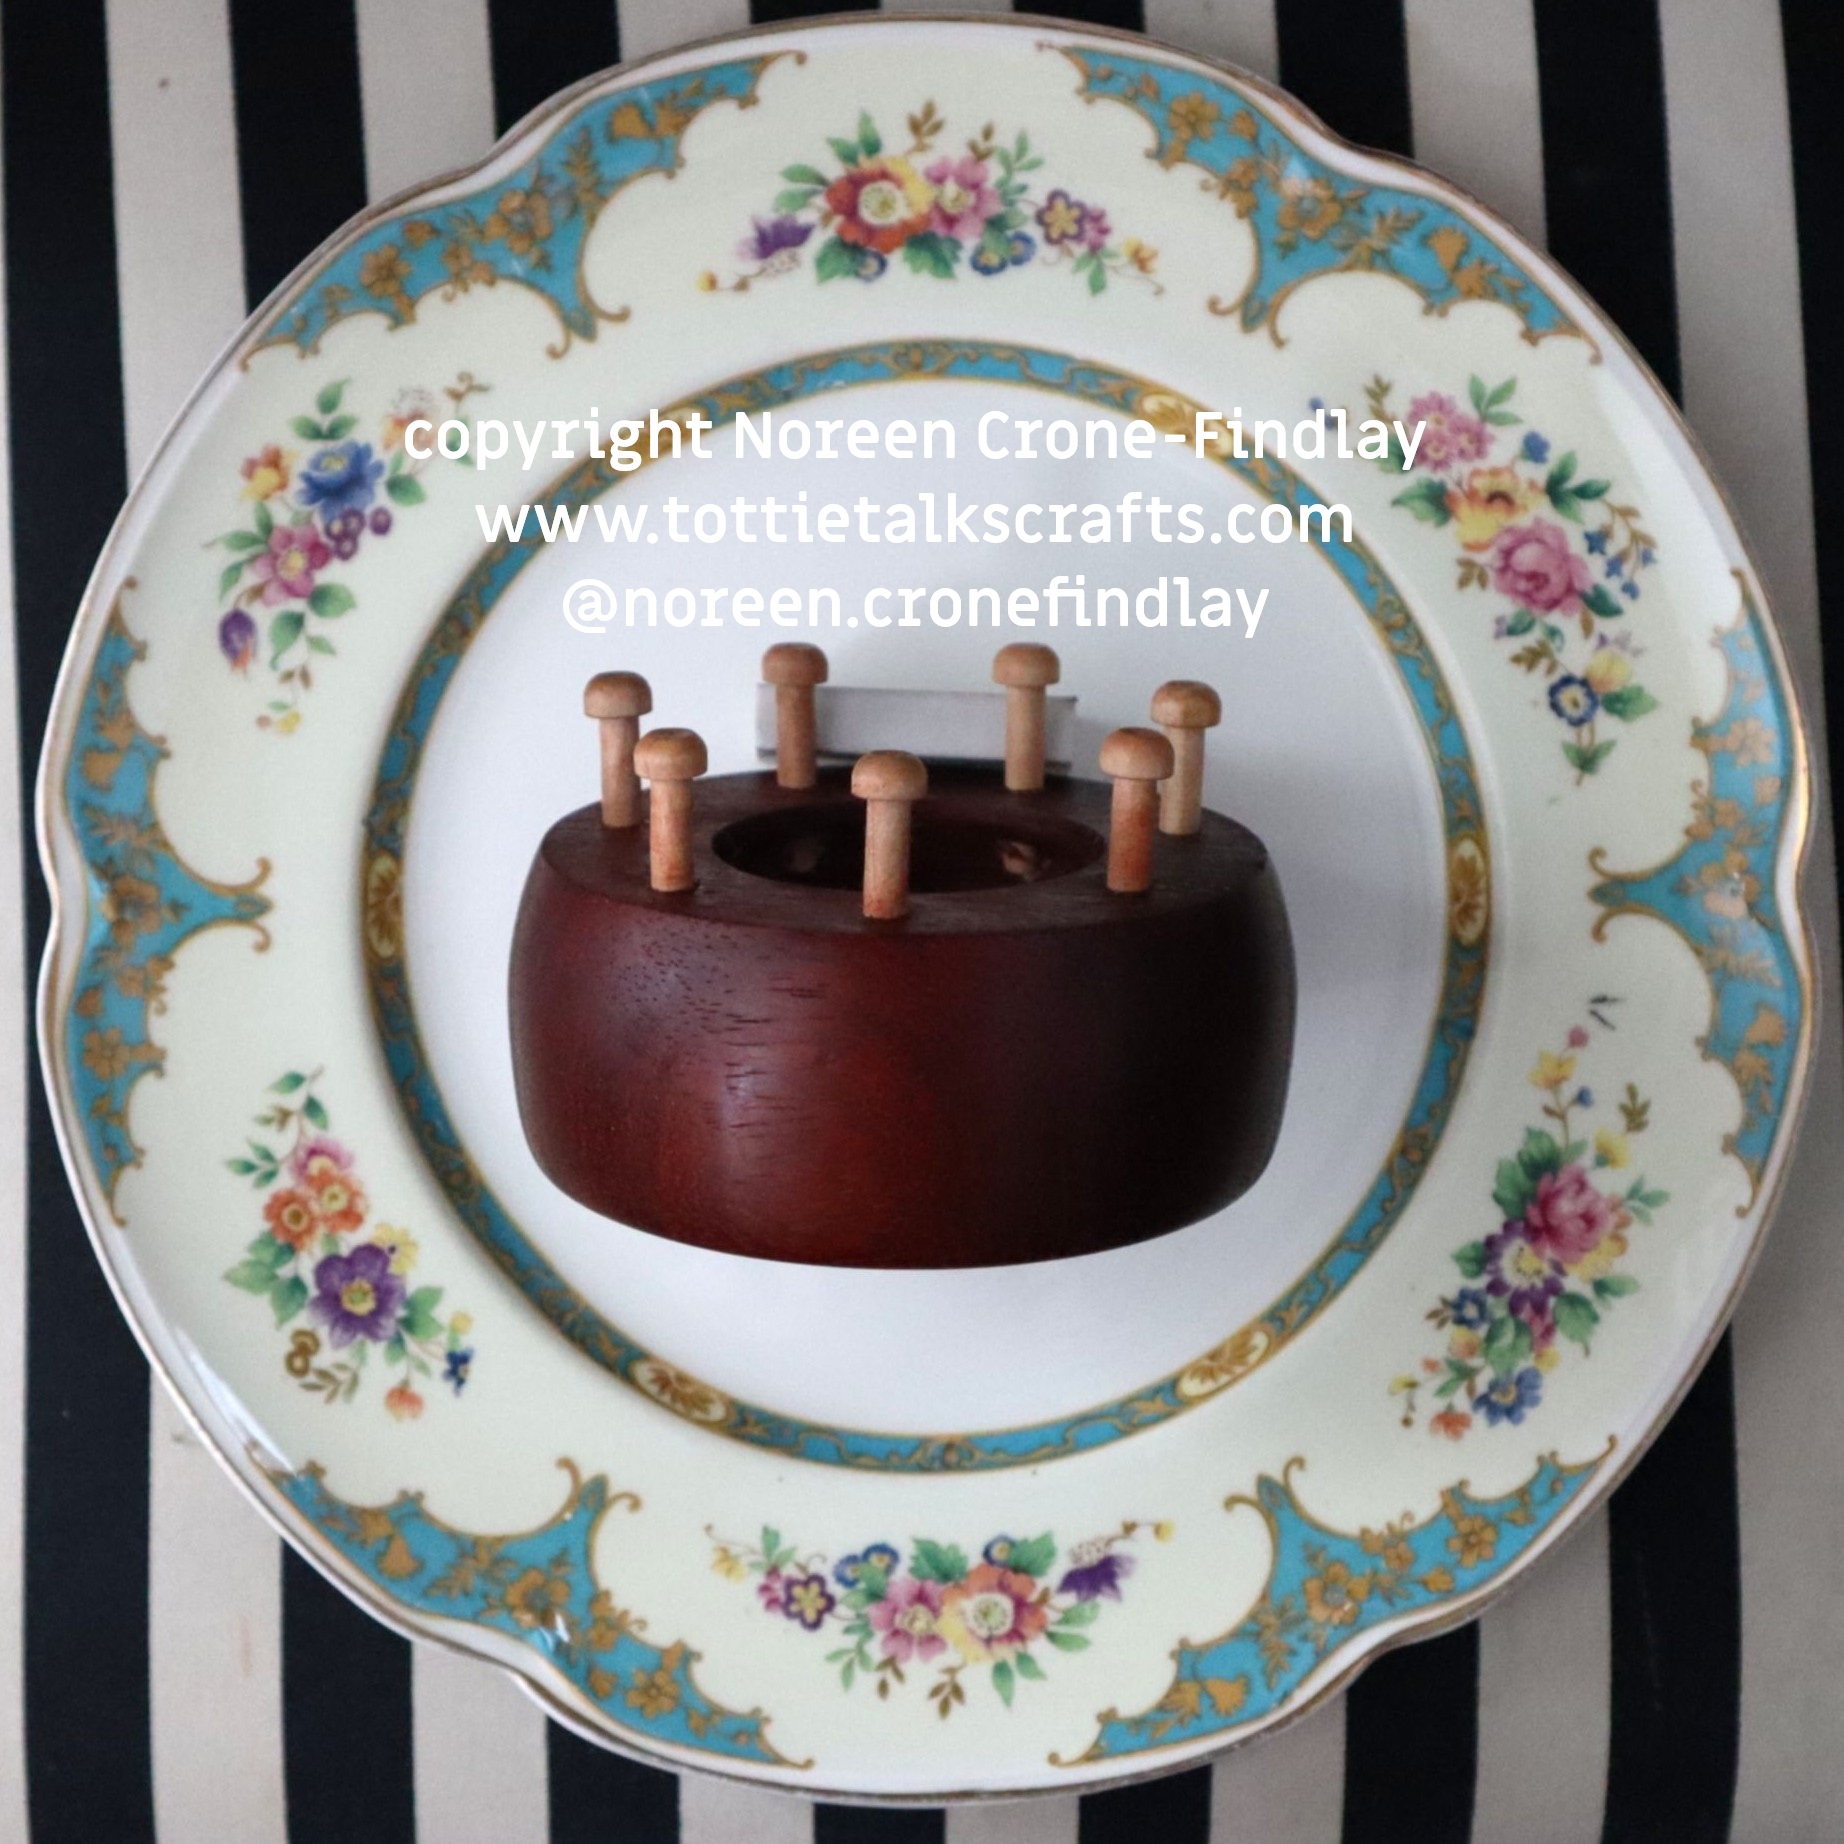
So I showed him how I take an unloved bowl from the thrift shop
and sand off the varnish (because usually, the varnish on thrift shop bowls is in tough shape).
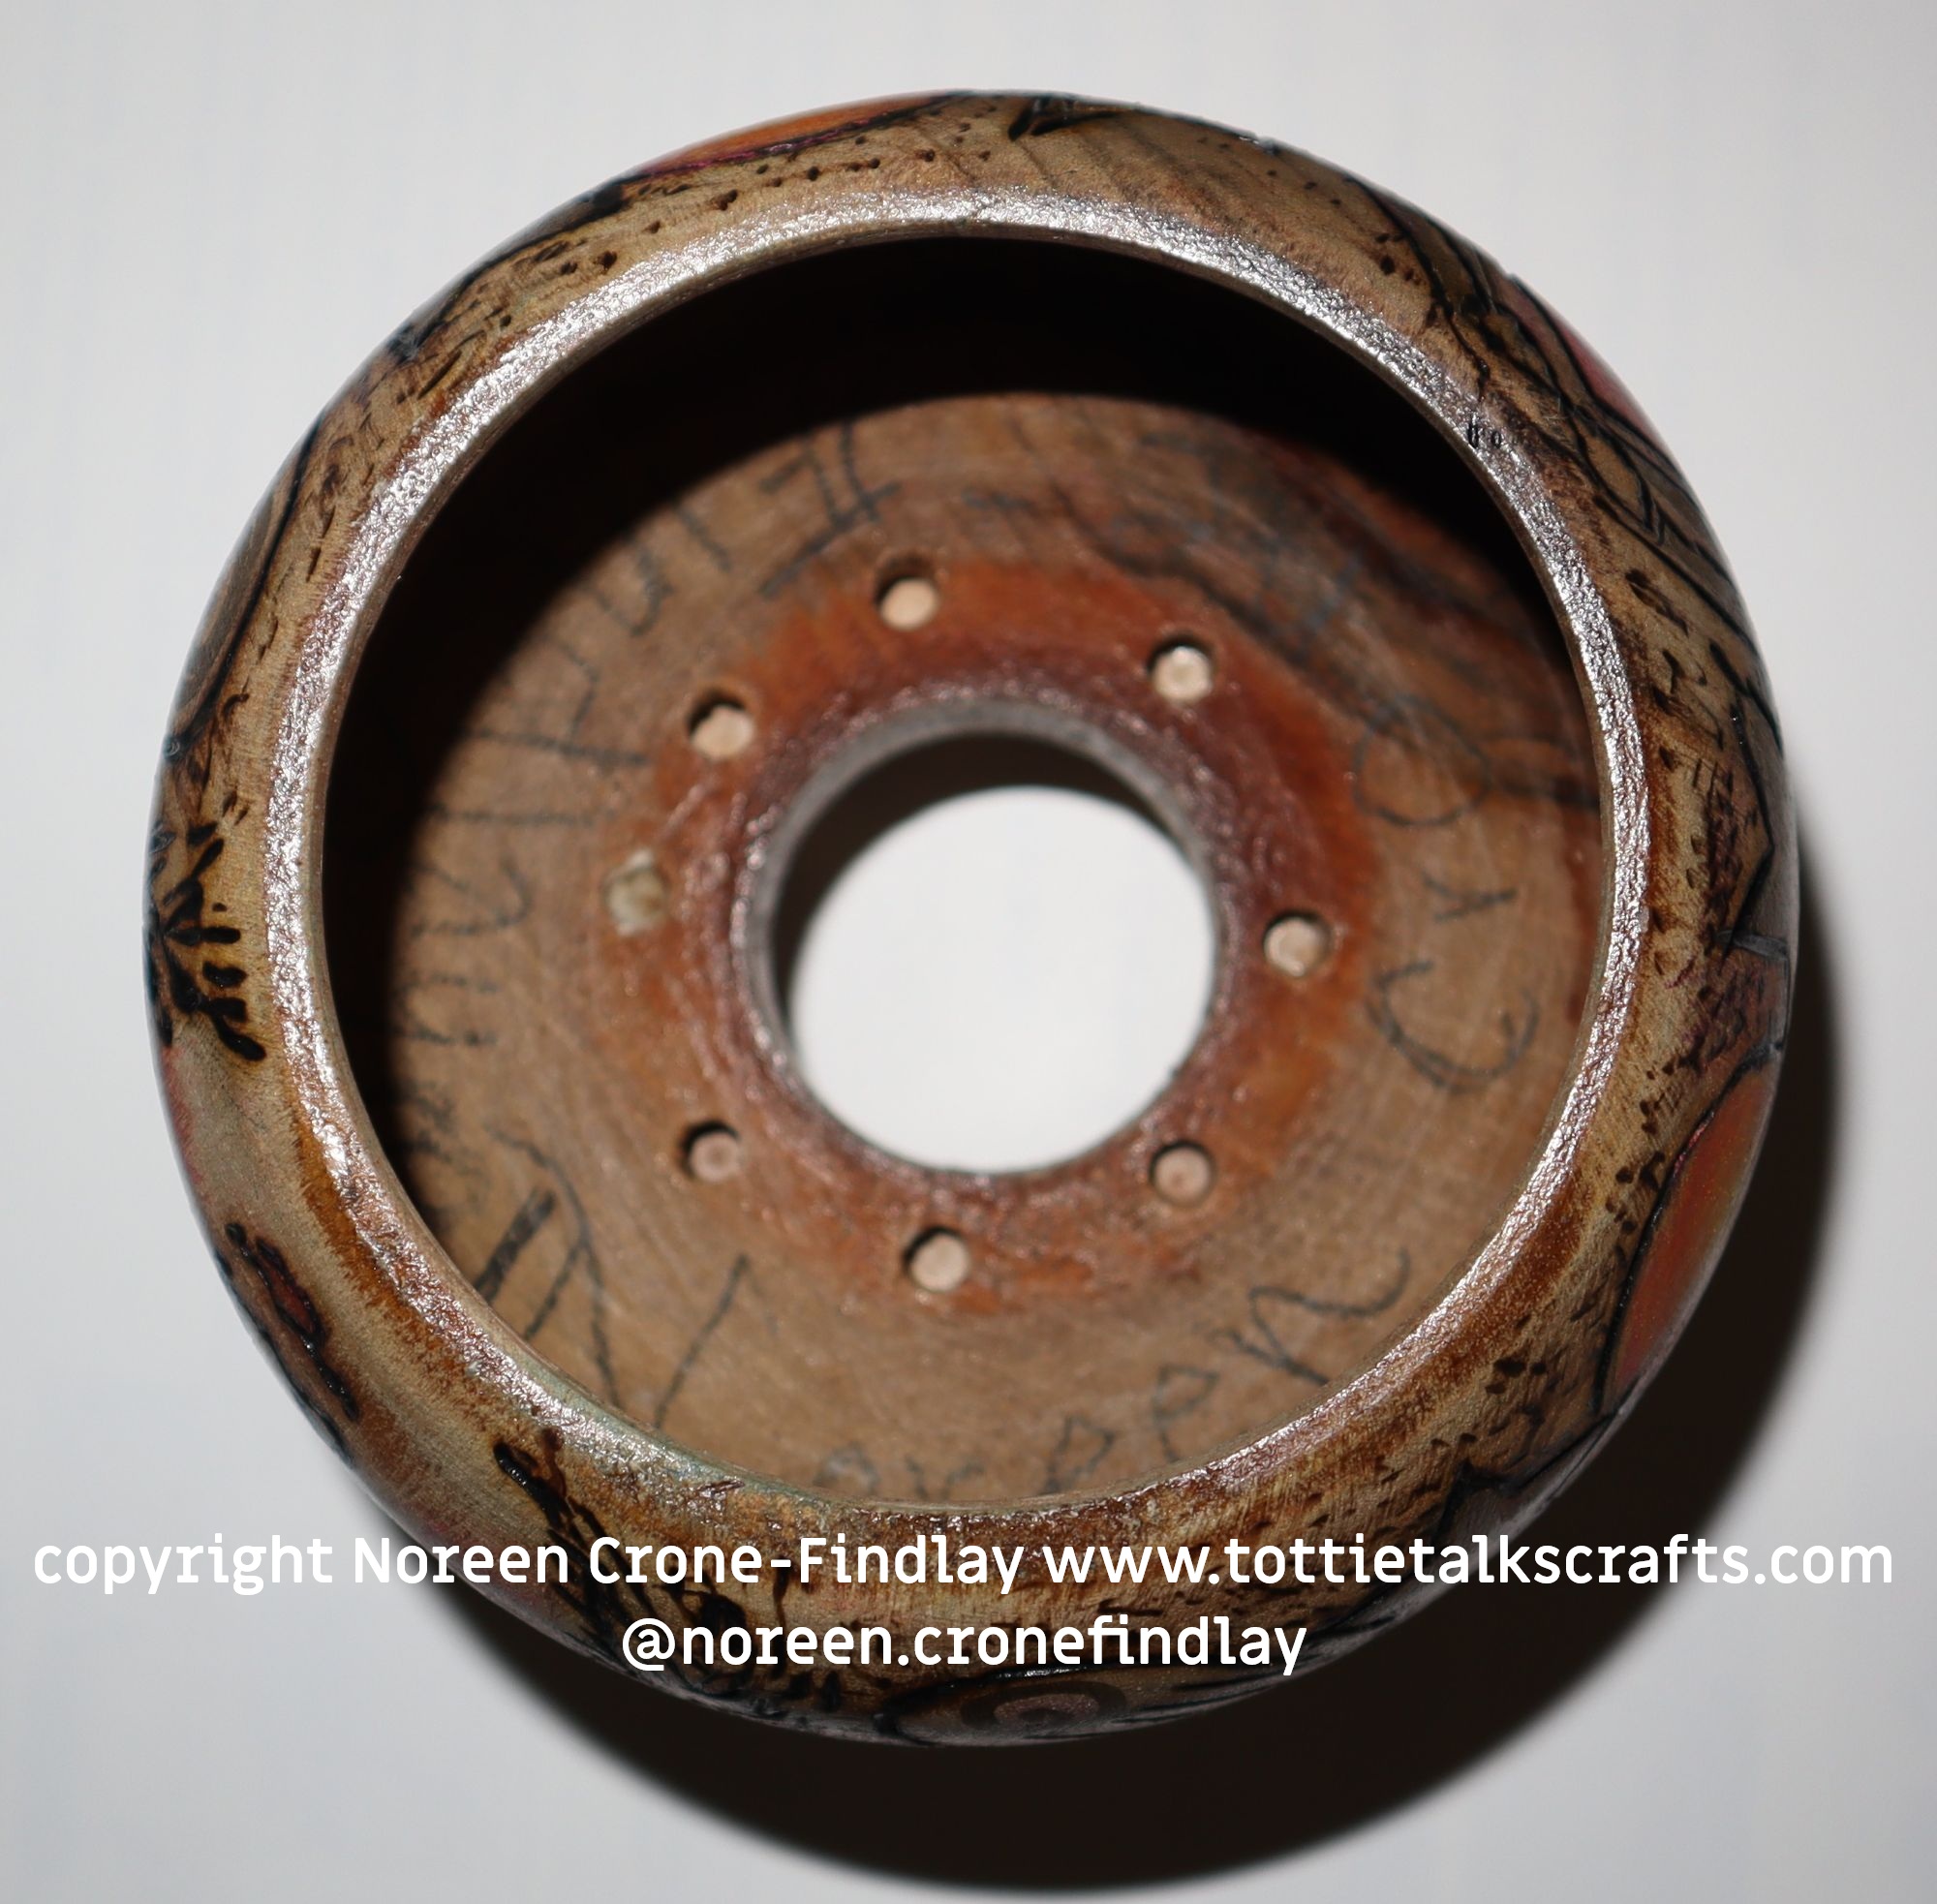
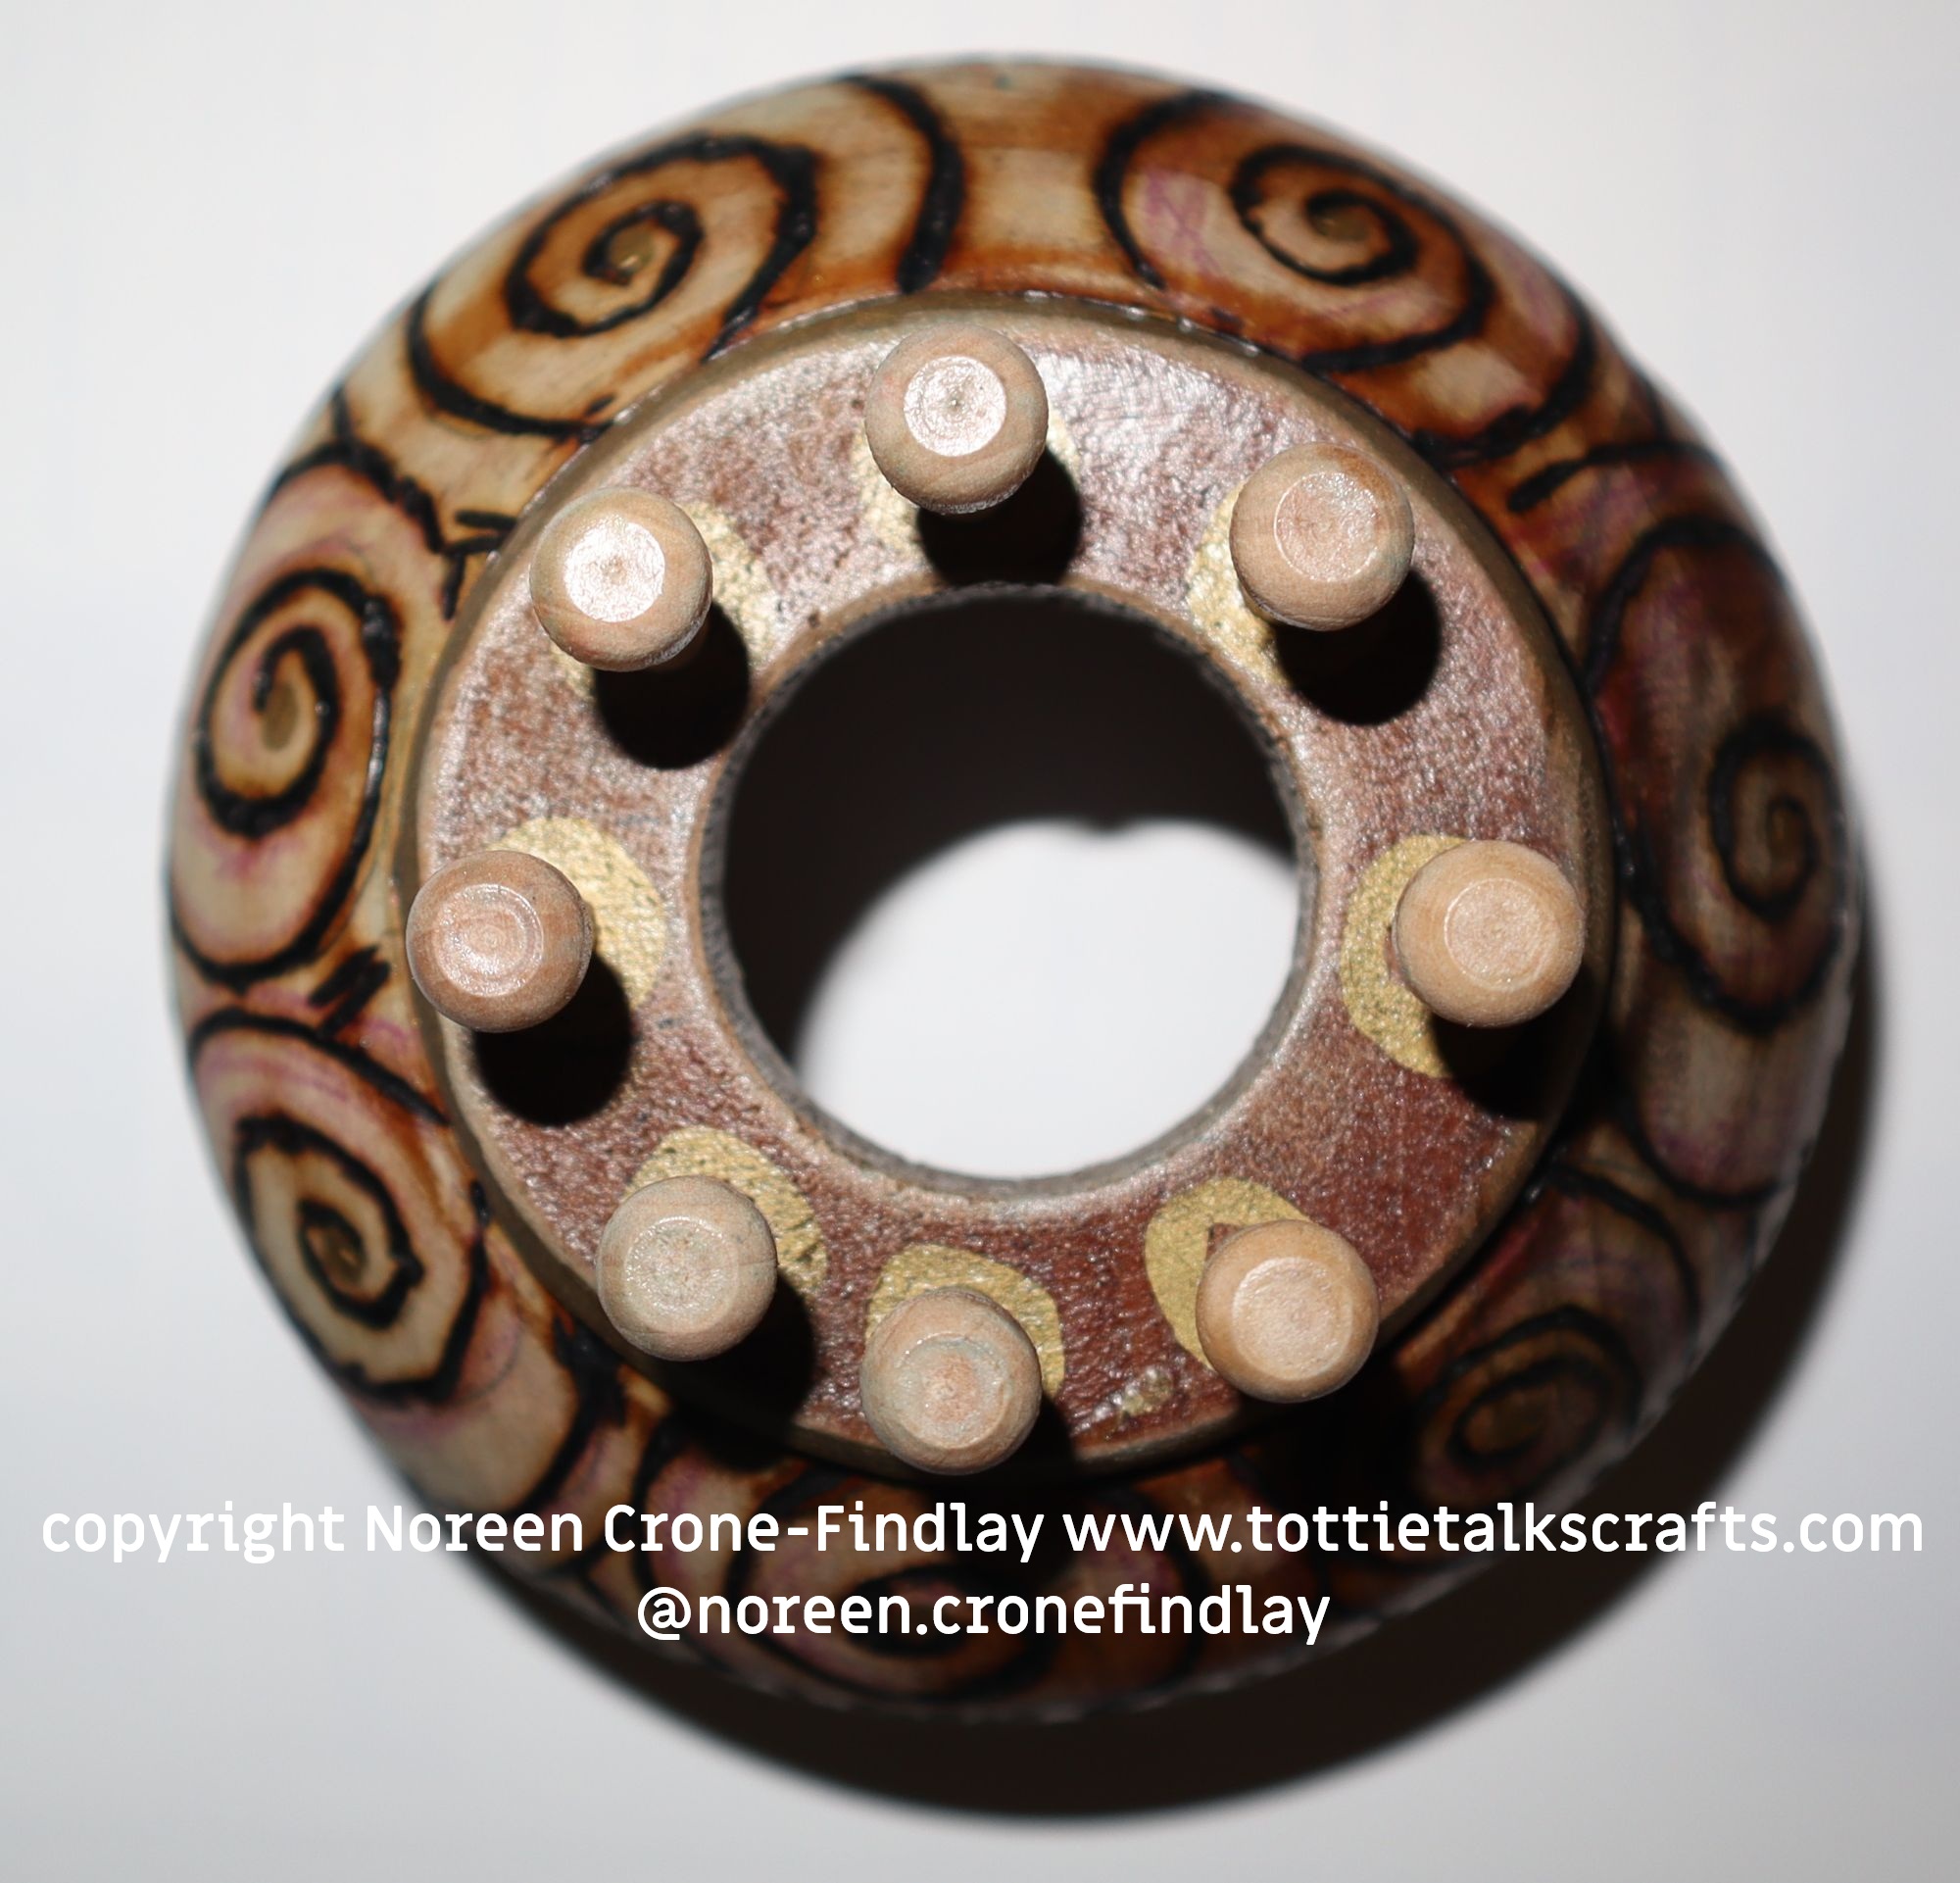
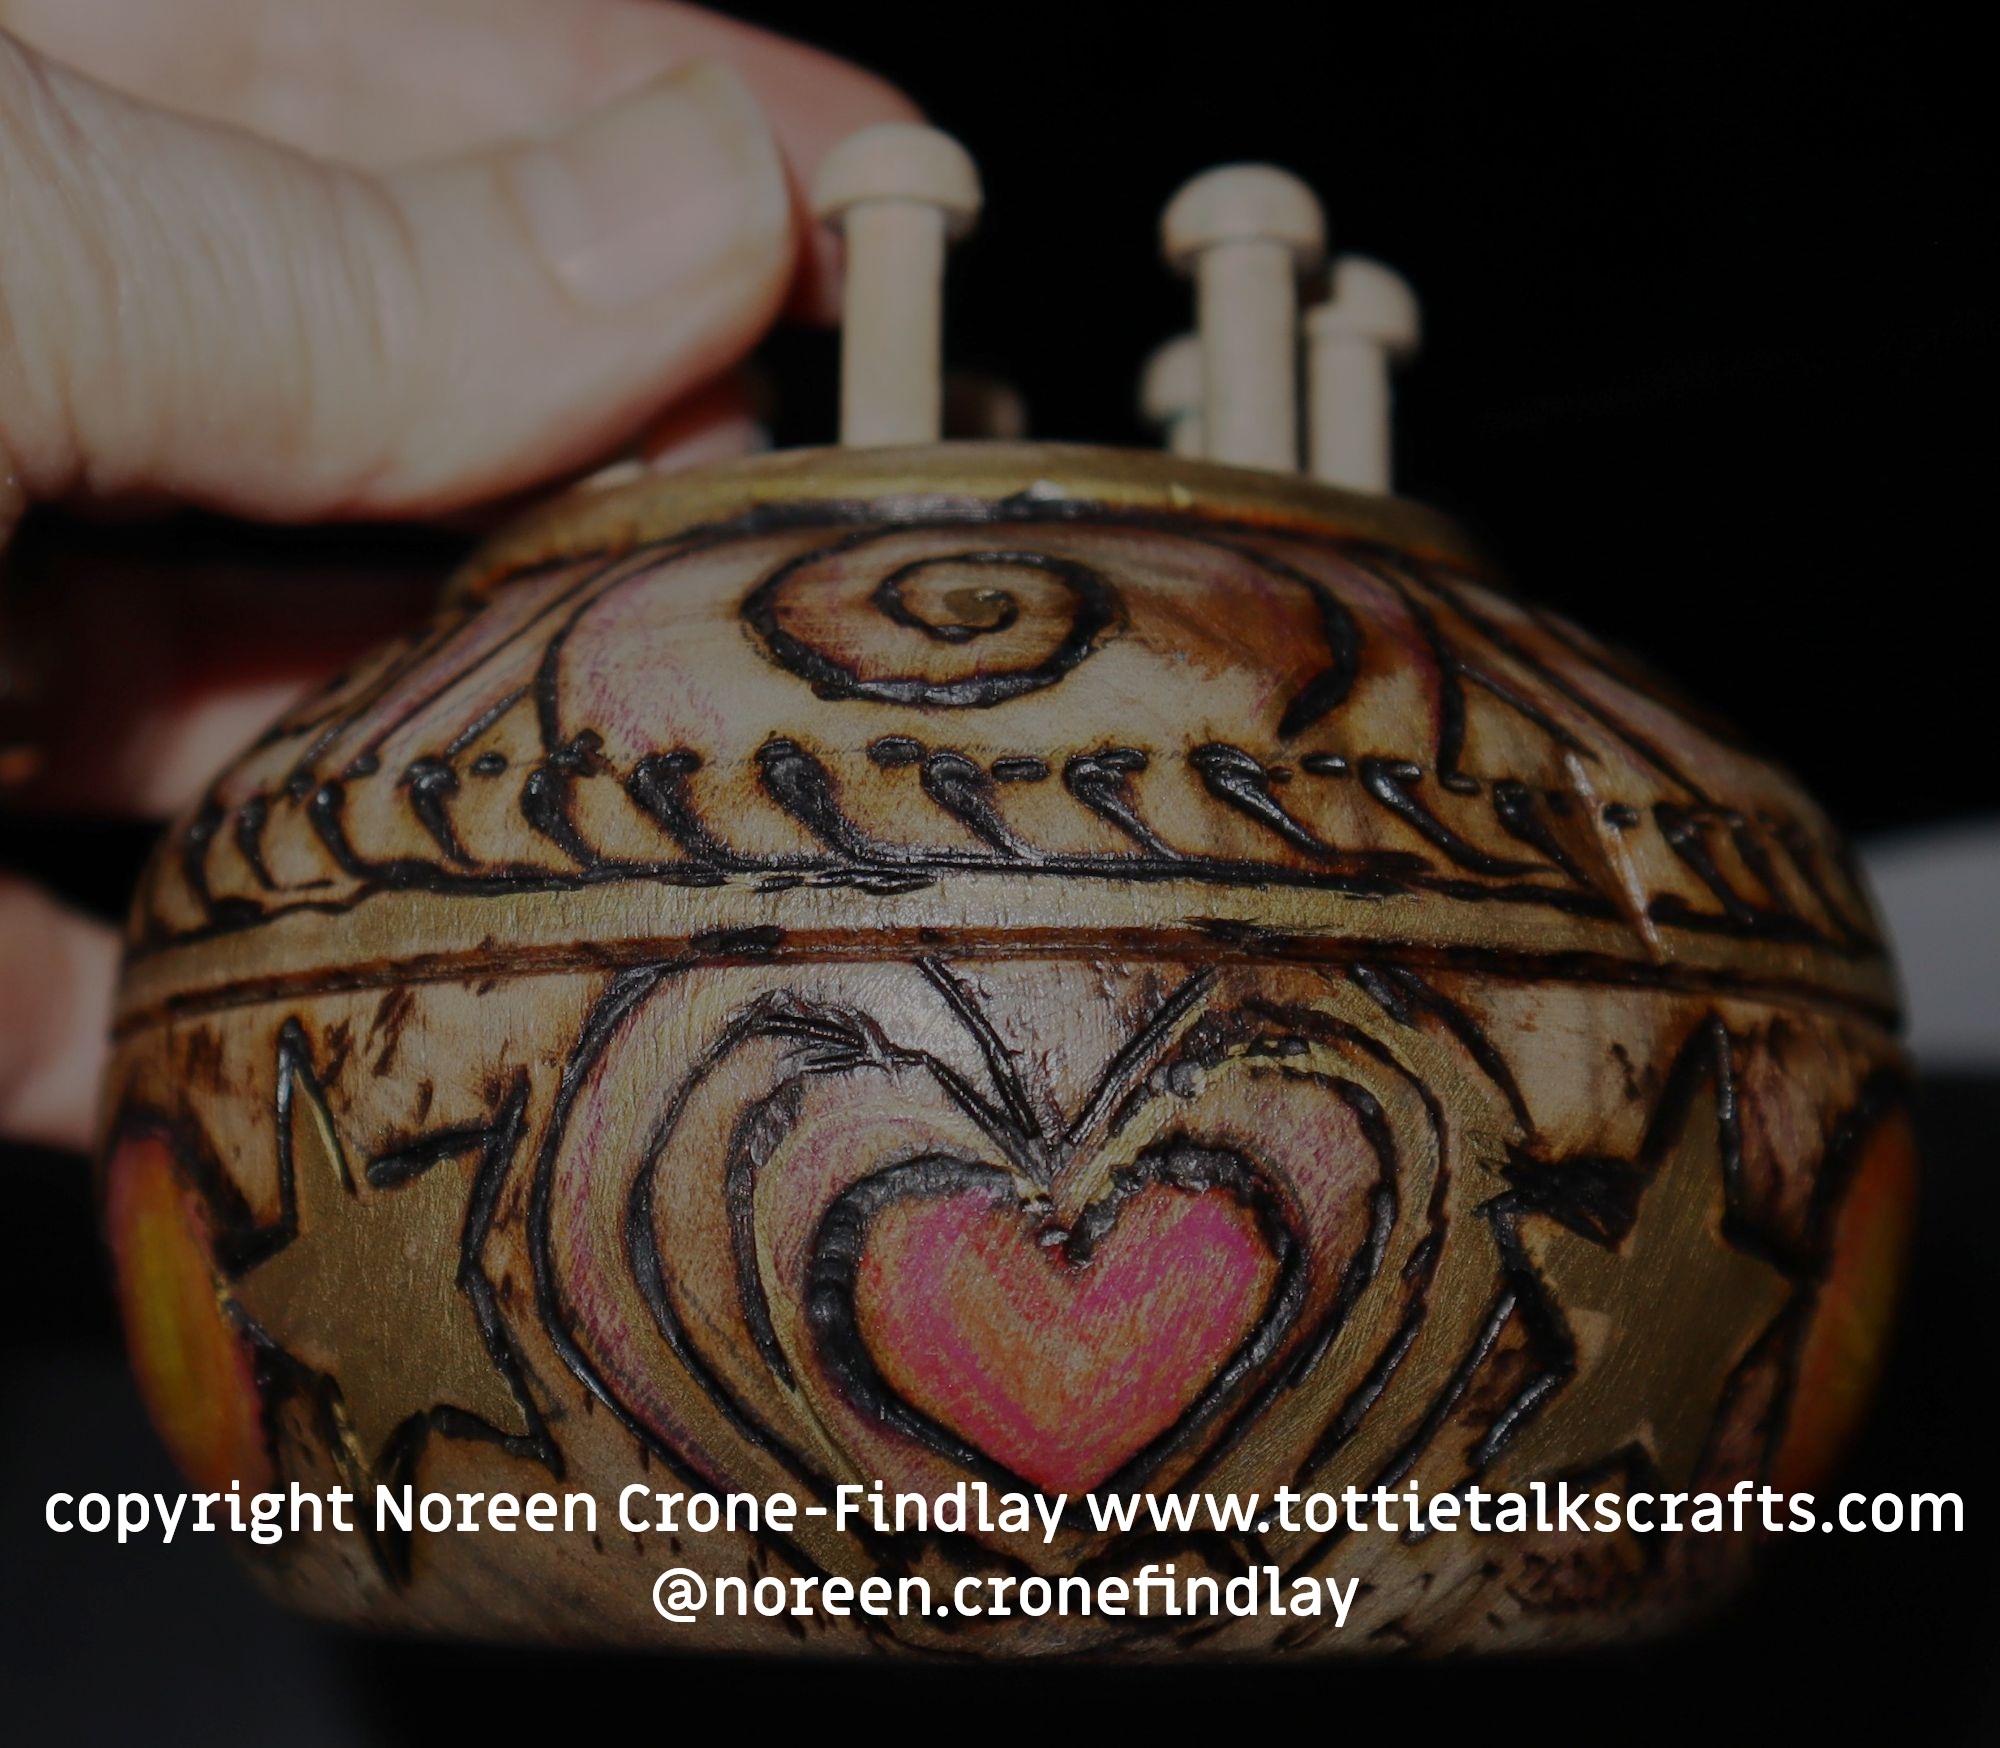
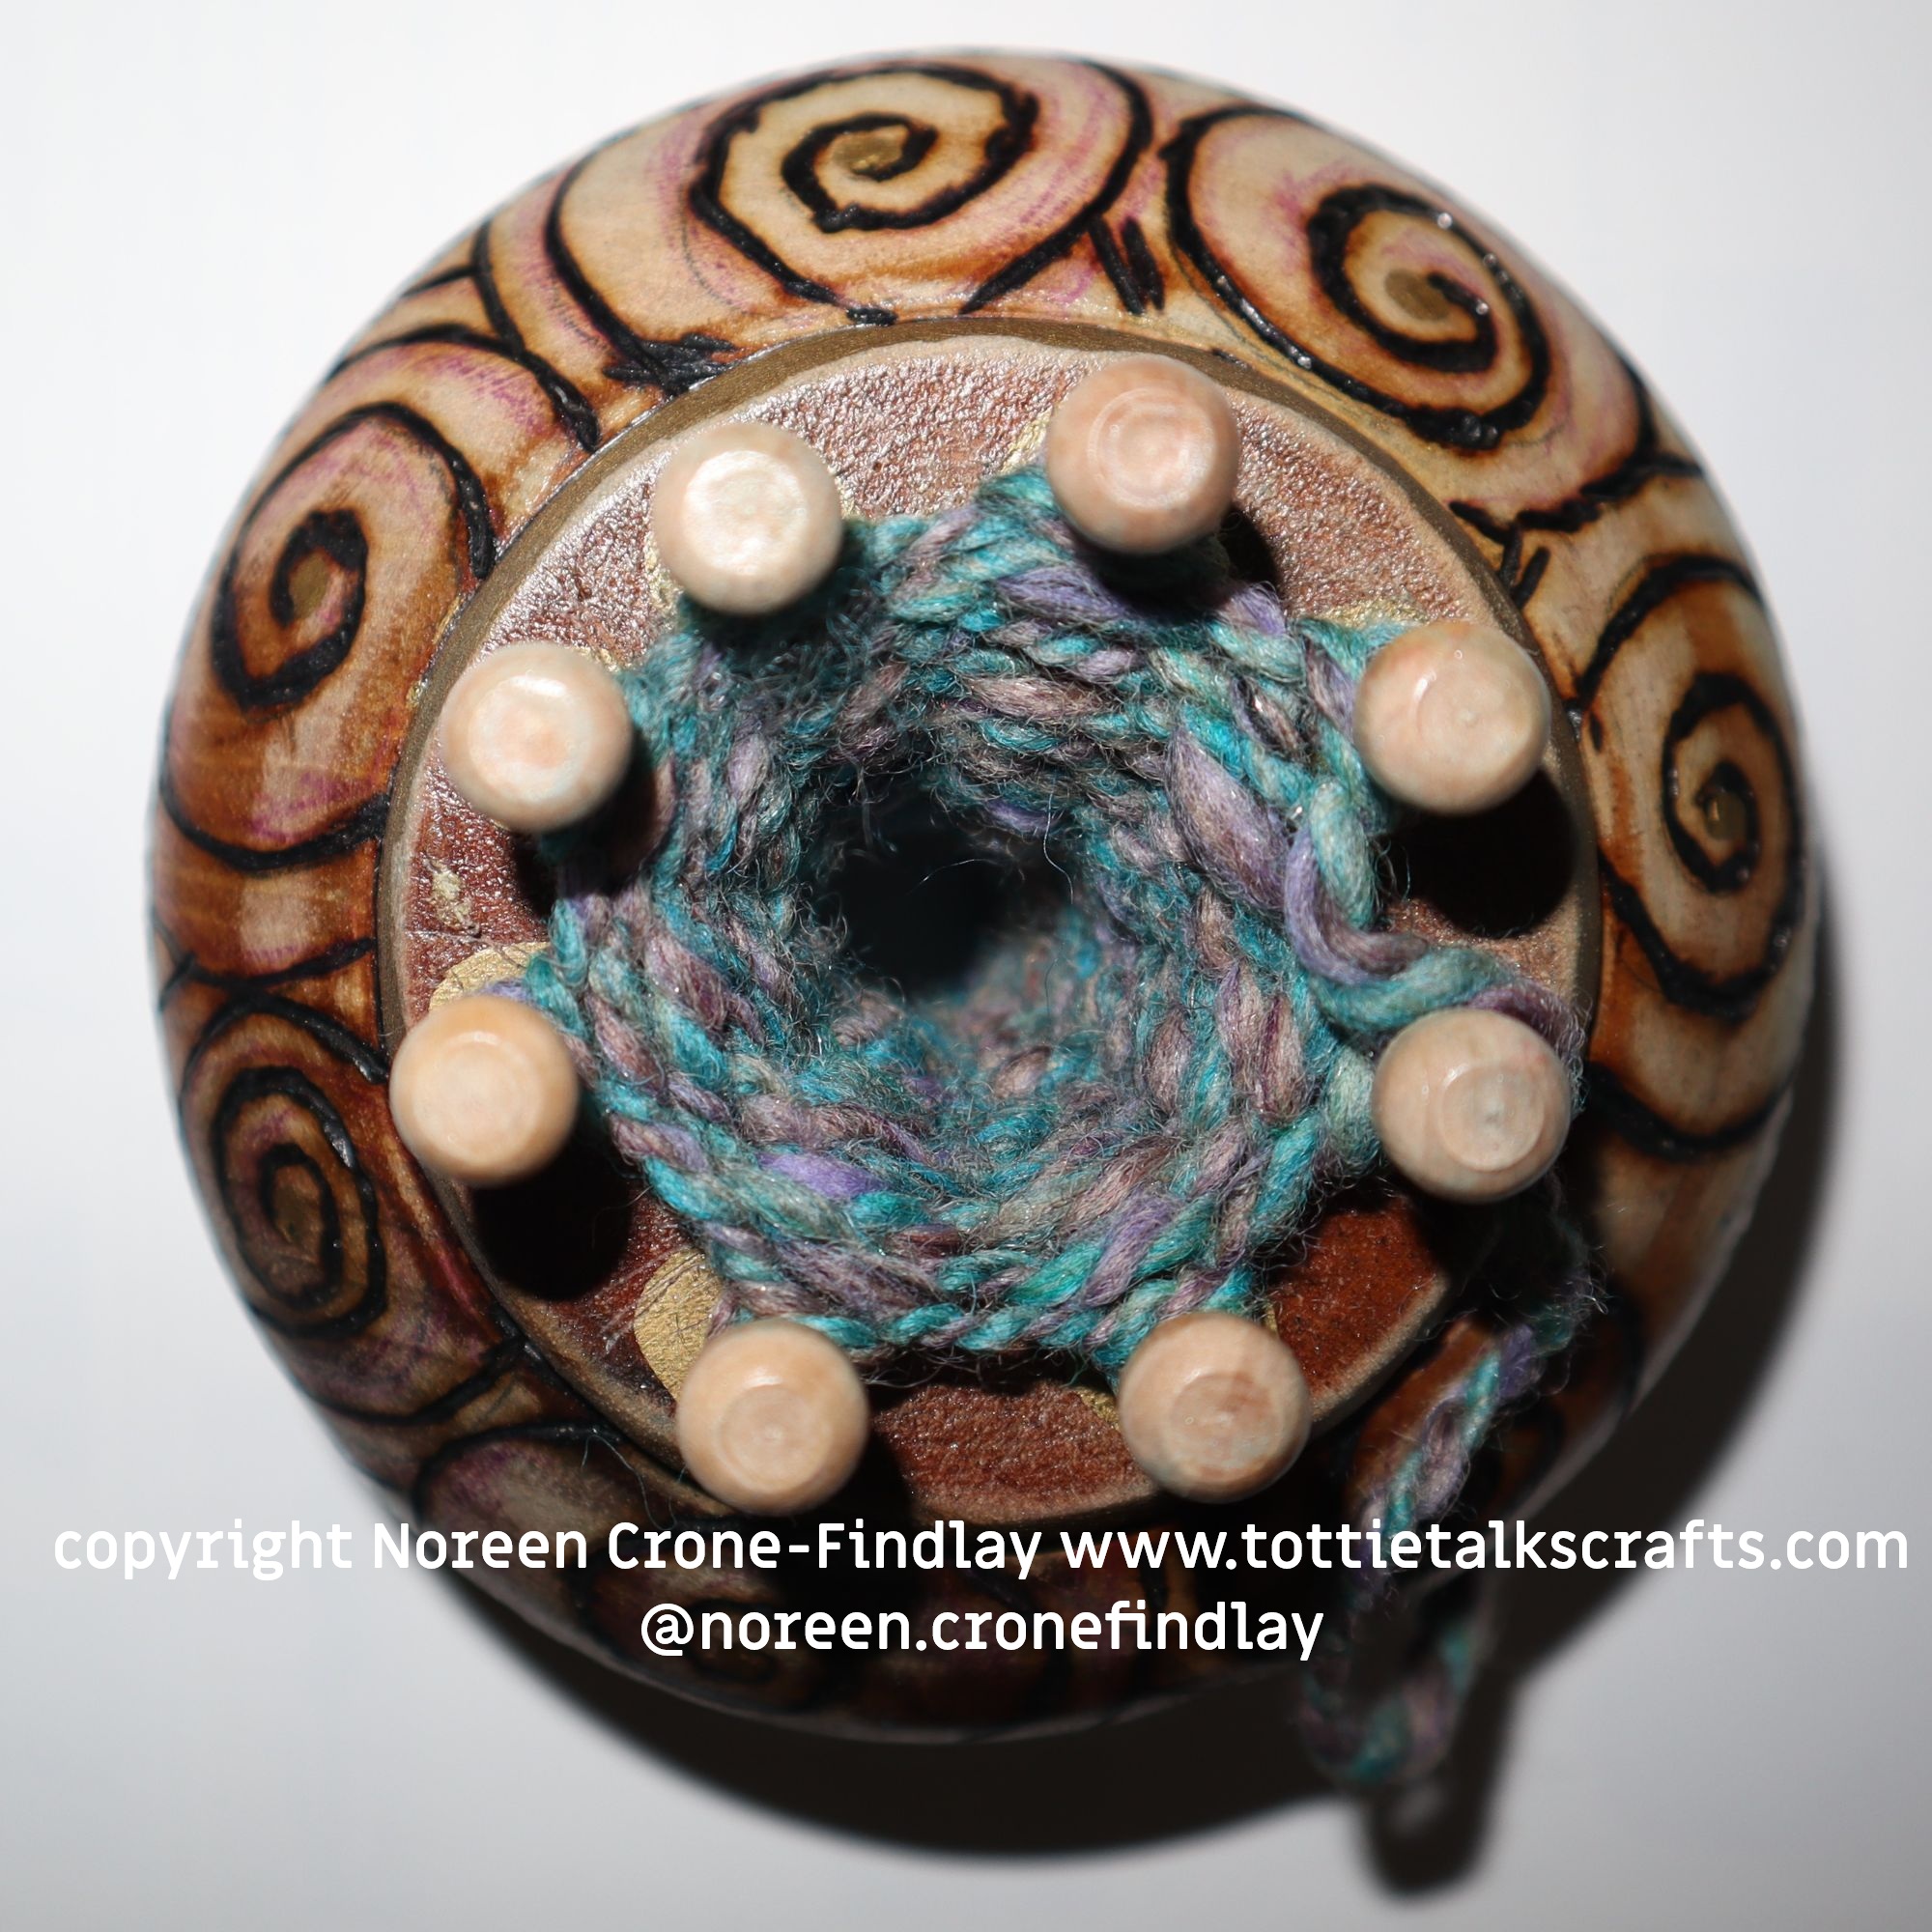
And, I drill a big hole in the base, then 6, 7 or 8 holes for pegs,
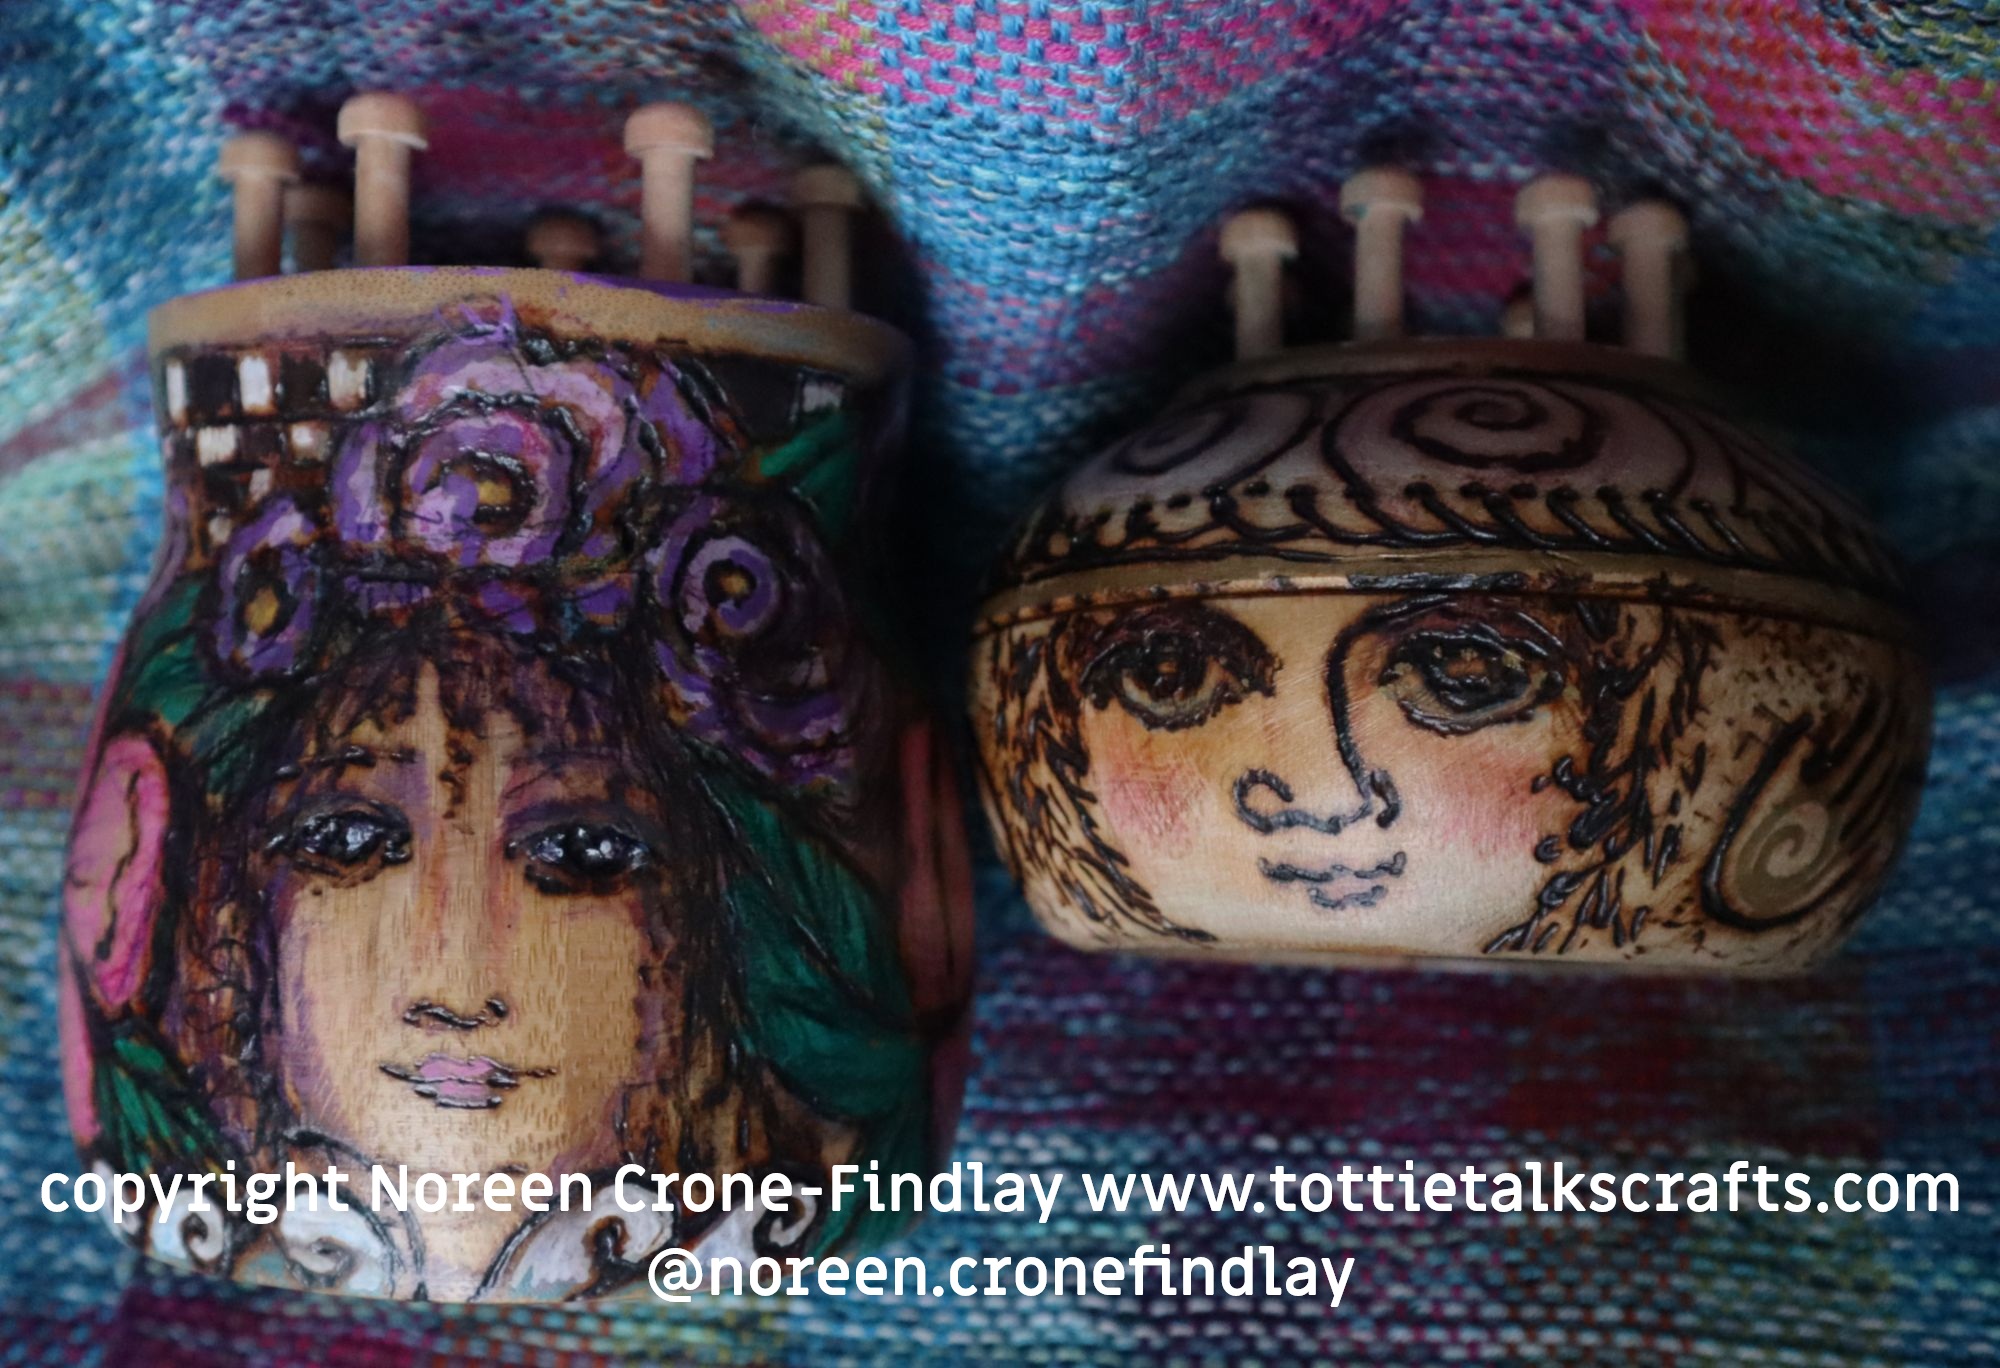
Then I glue in pegs and I draw & burn on it, paint it, varnish it and Voila!
Start spool knitting with it!
I remembered to take pics of the process with the first bowl, but doh, completely forgot to do that with the second one.
Hurrah for upcycling! I’ll be posting lots more about upcyling things to make spool knitters.
And, yes, lots of posts about what you can make with spool knitters. As I said to Jonathan today:
Context and content! Spool knitters are just shelf warmers if they don’t have a good project or 10 to inspire people to pick them up and start creating with them! So… yes…. lots of projects will be unfolding as I trundle forward with #100daysofspoolknittersandlittlelooms
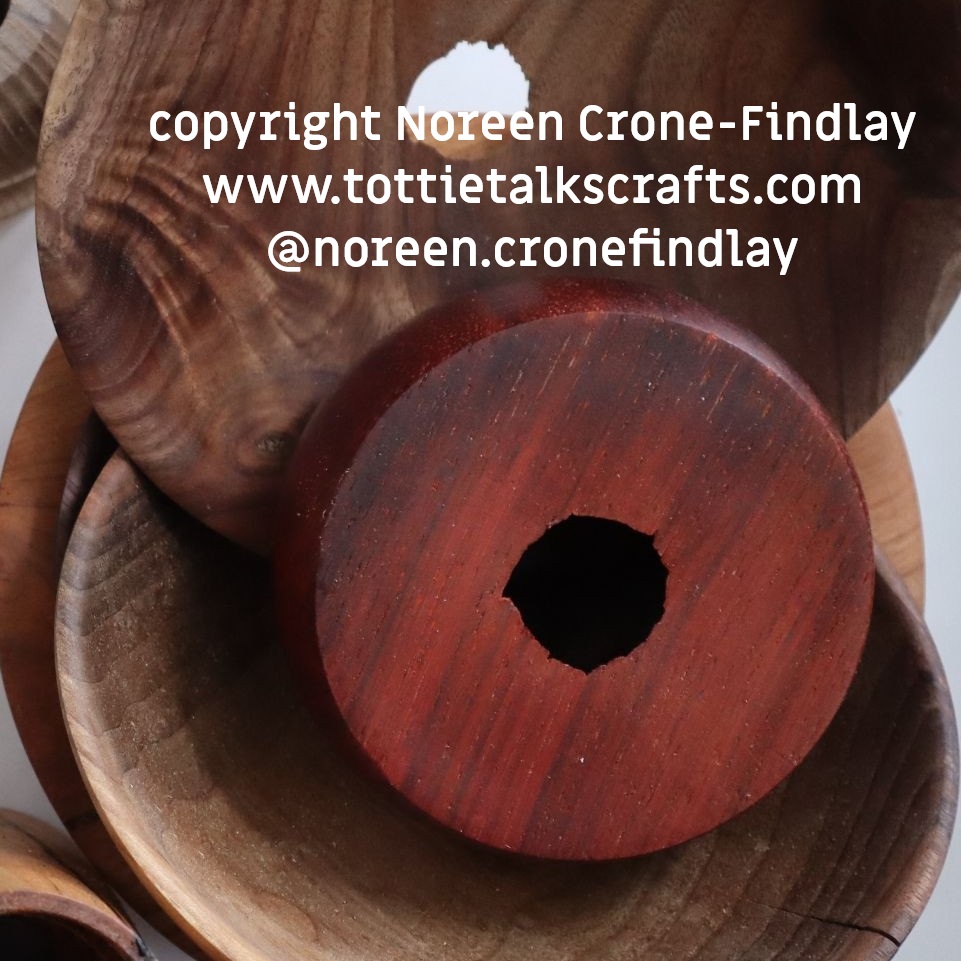
Day 7 of #100daysofspoolknittersandlittlelooms-Upcycling one of a kind bowls into spool knitters
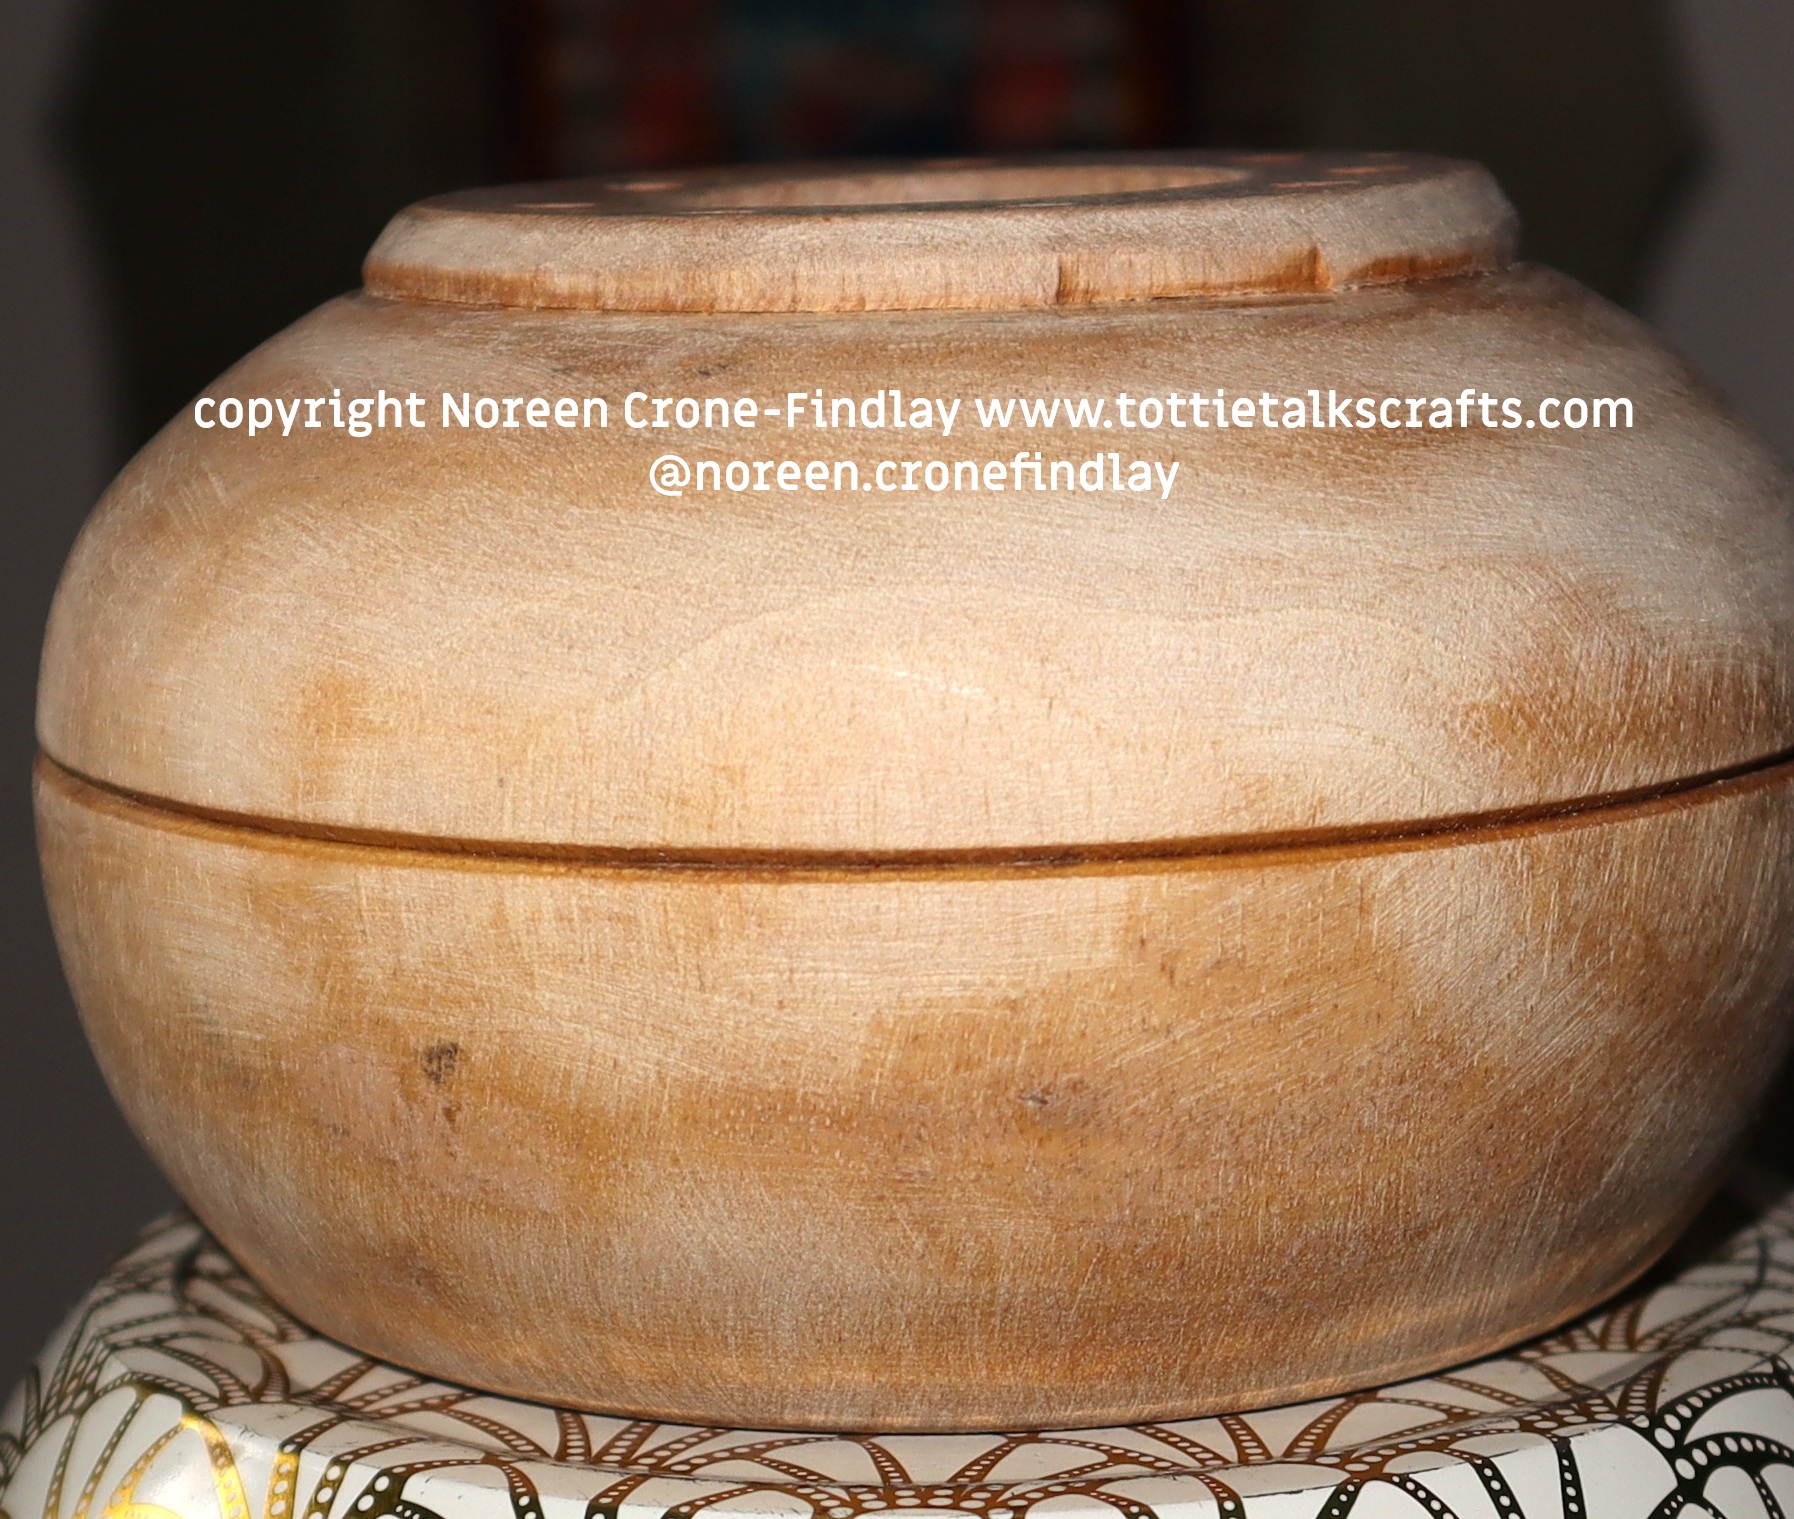
For the #100daysofspoolknittersandlittlelooms, Jonathan sent me a box of spool knitter blanks and some bowls that were damaged when he and his son Kieran turned them on the lathe.
A Paduak pot pourri bowl has been singing to me since I opened the box, and finally, today, I drilled a hole in the base that is larger than the rip out, then 7 holes for the pegs, and did a little sanding and glued in pegs.
I was utterly gobsmacked by how freaking gorgeous it is, and there is no way that I am going to I draw or burn on it! I put a light coat of walnut oil on it, so I have to let it dry over night before I can start spool knitting with it!
I tore over to the computer and fired off a ‘WHEEEEEEEEEEEEEEE’ message to Jonathan to tell him how I am absolutely swooning over this glorious spool knitter. Wow. Just wow….
I also informed Jonathan that he is a bad influence, because the two of us just keep whipping up more and more ideas and I can barely keep up! I love feeling inspired! and #100daysofspoolknittersandlittlelooms is definitely doing that for me!
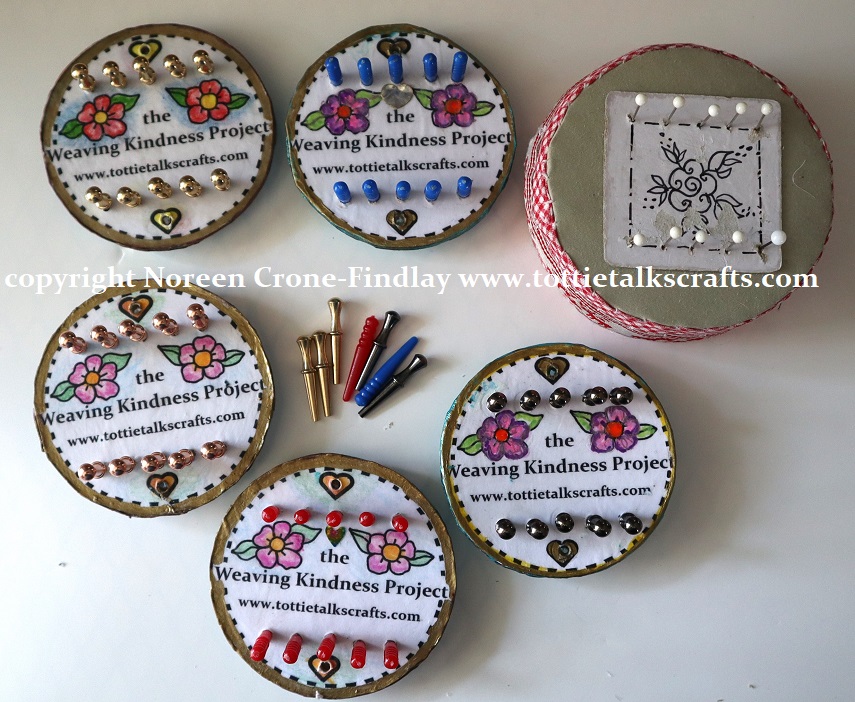
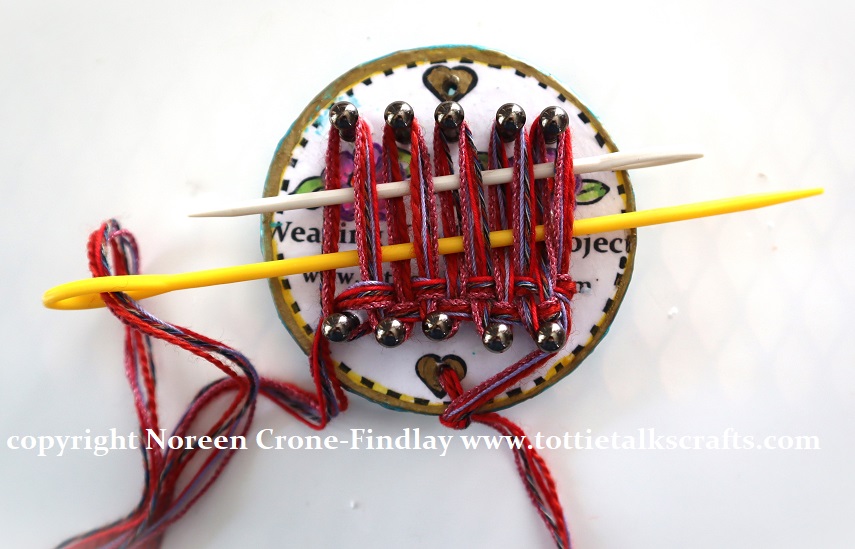
I have designed a 2nd way of making the small Kindness Loom for the Weaving Kindness Project.
The link to order the 2 PDFs of Step by Step Instructions for making both of the Kindness Looms is: LINK
The first PDF shows how to make a Kindness Loom using pins to weave on
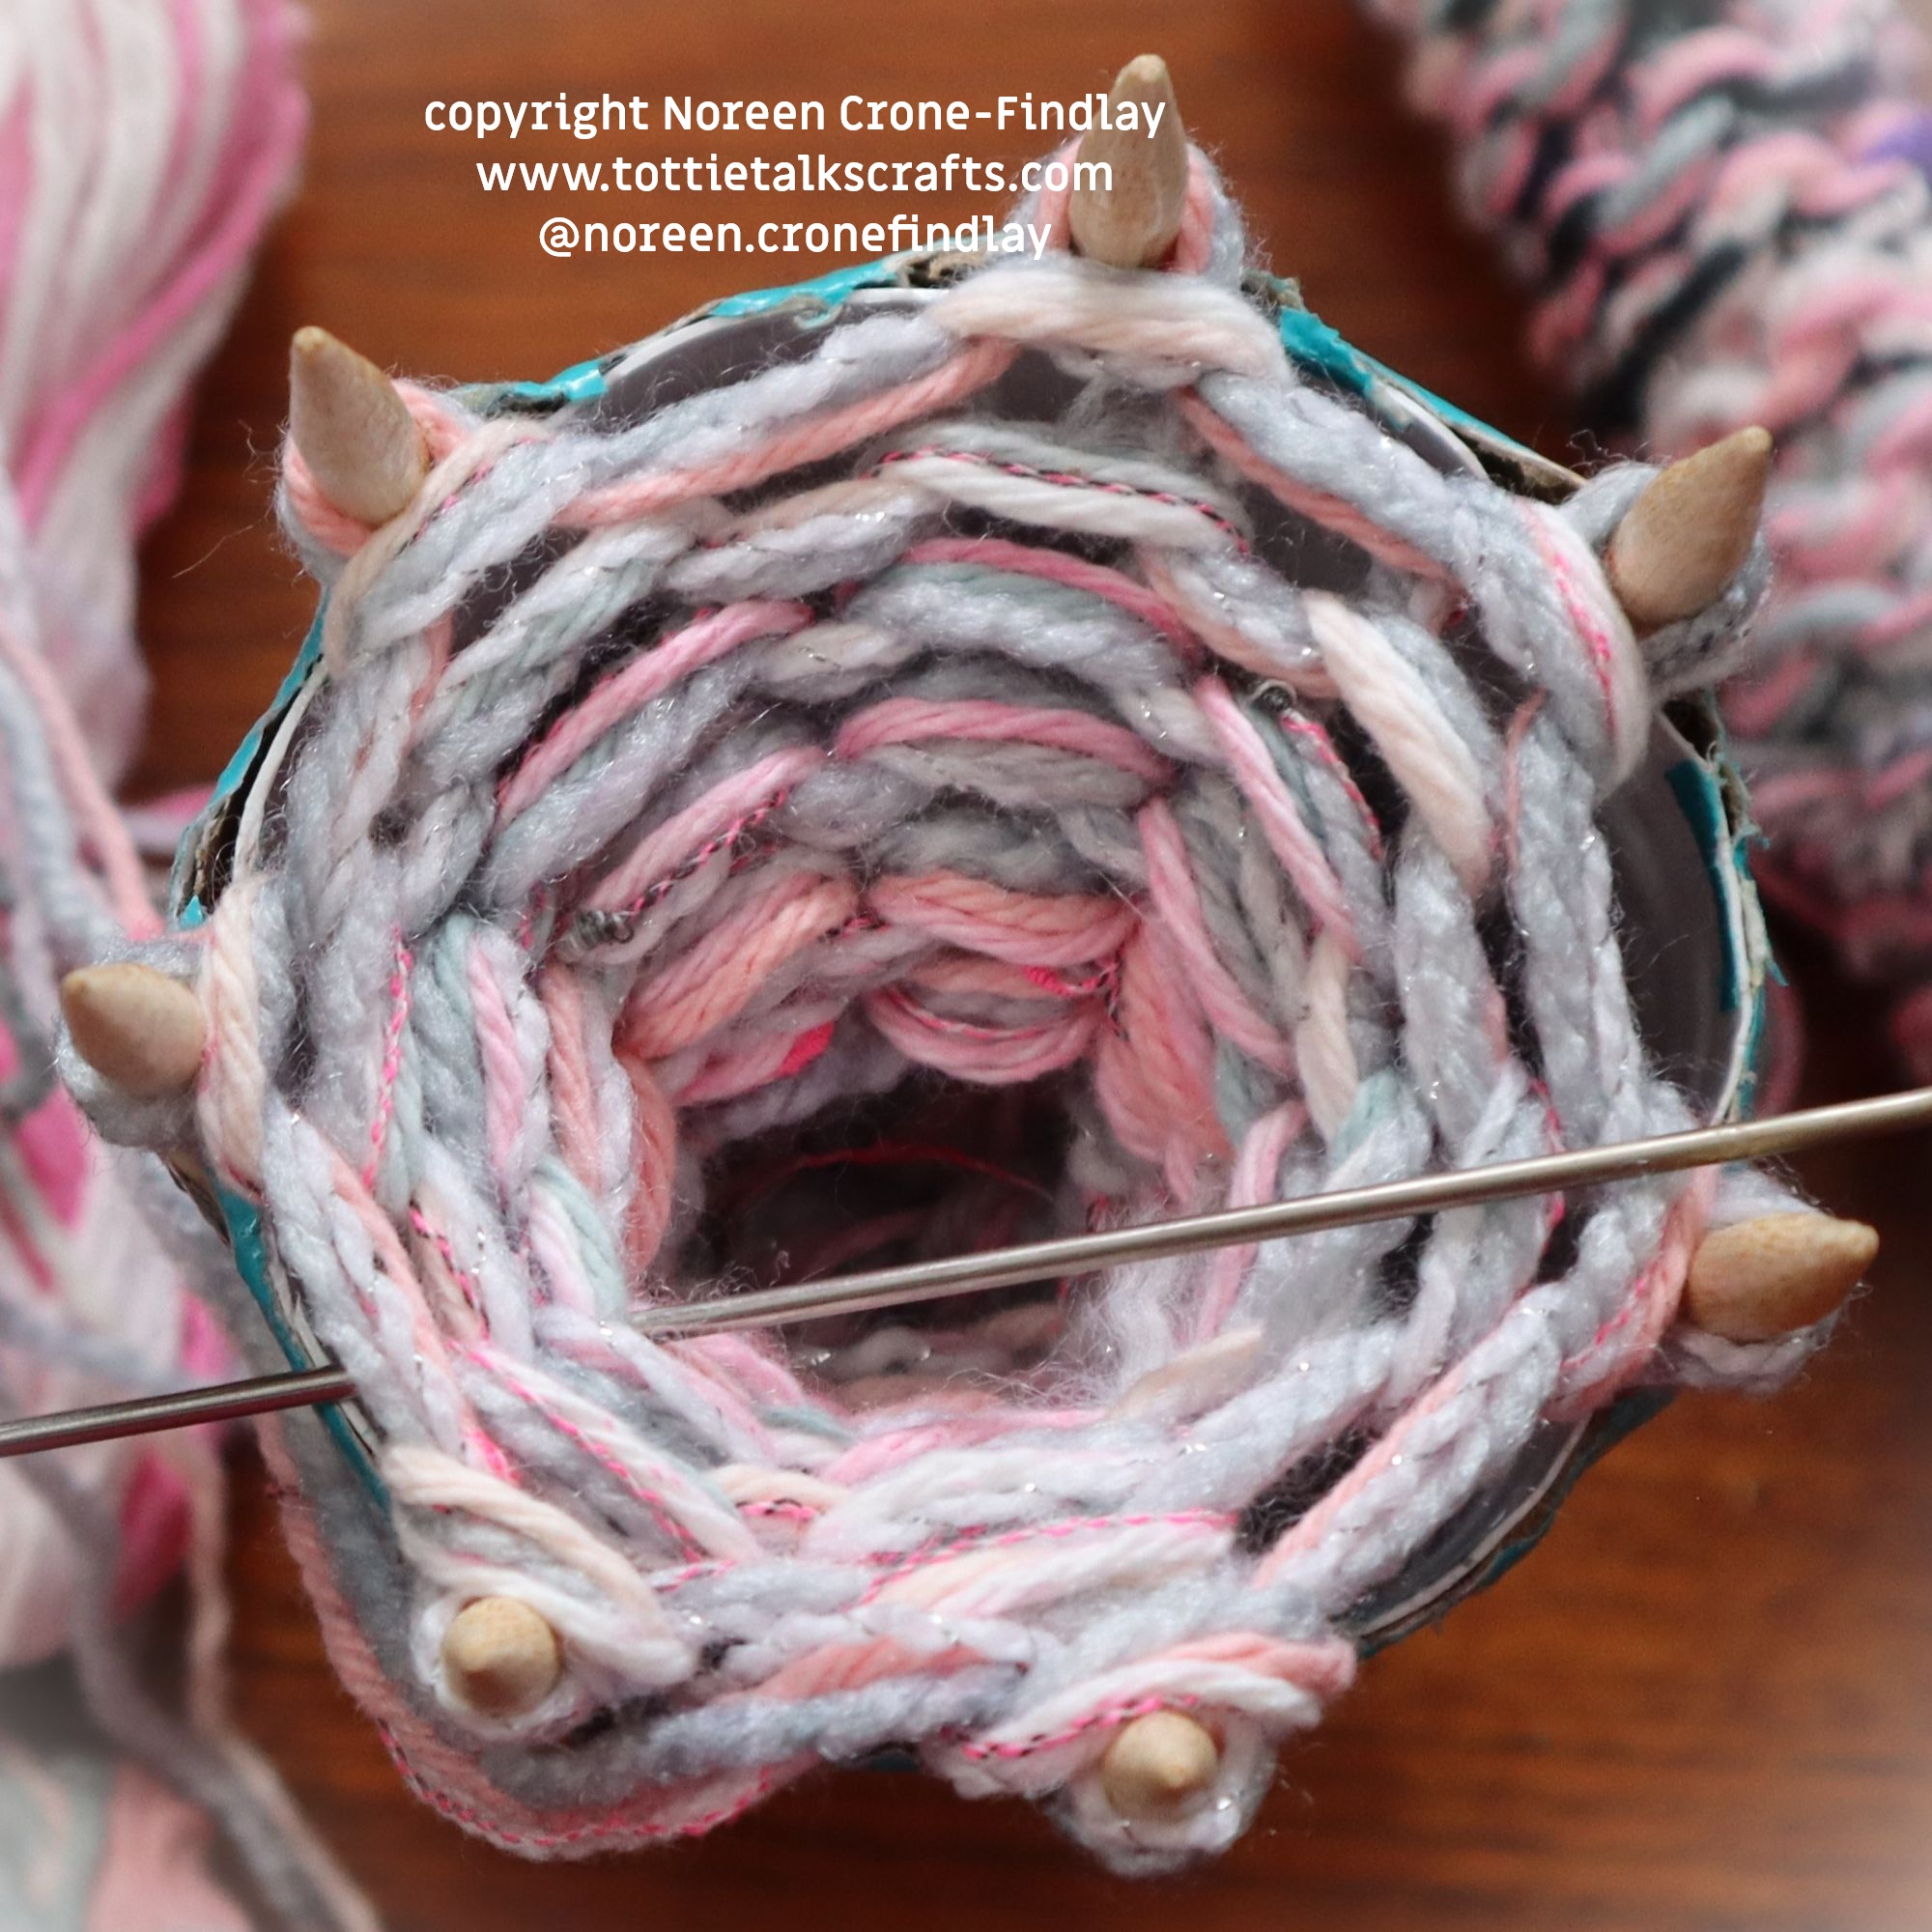
and the 2nd PDF shows how to make a Kindness Loom with mat board and cribbage pegs .
Both versions of the Kindness loom work equally well for all the projects I have designed for the Weaving Kindness Project.
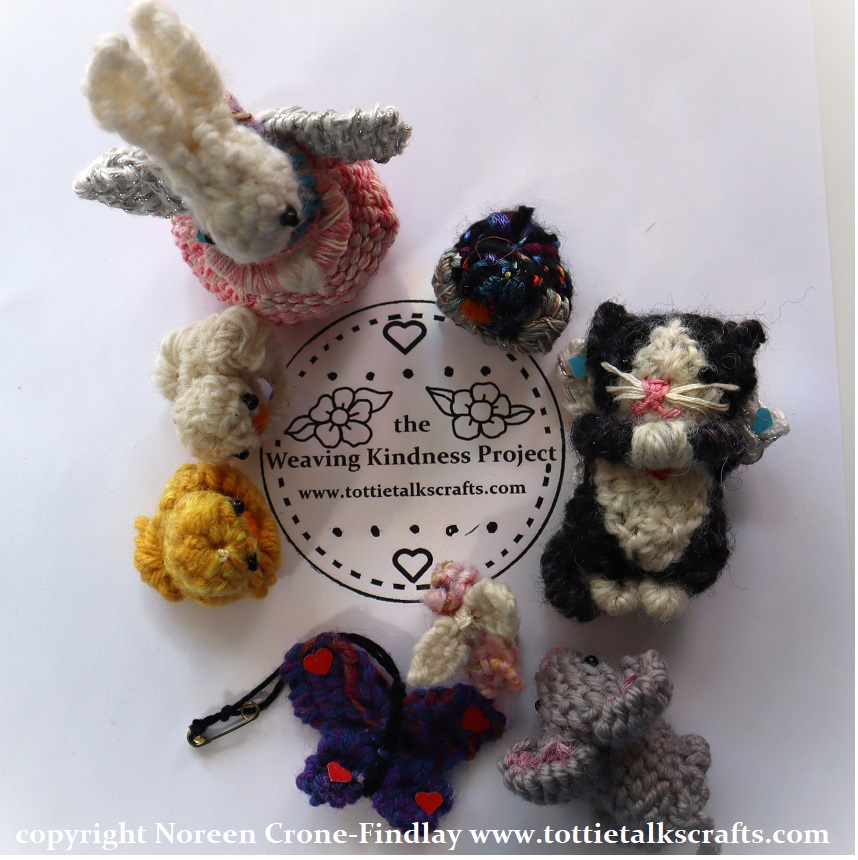
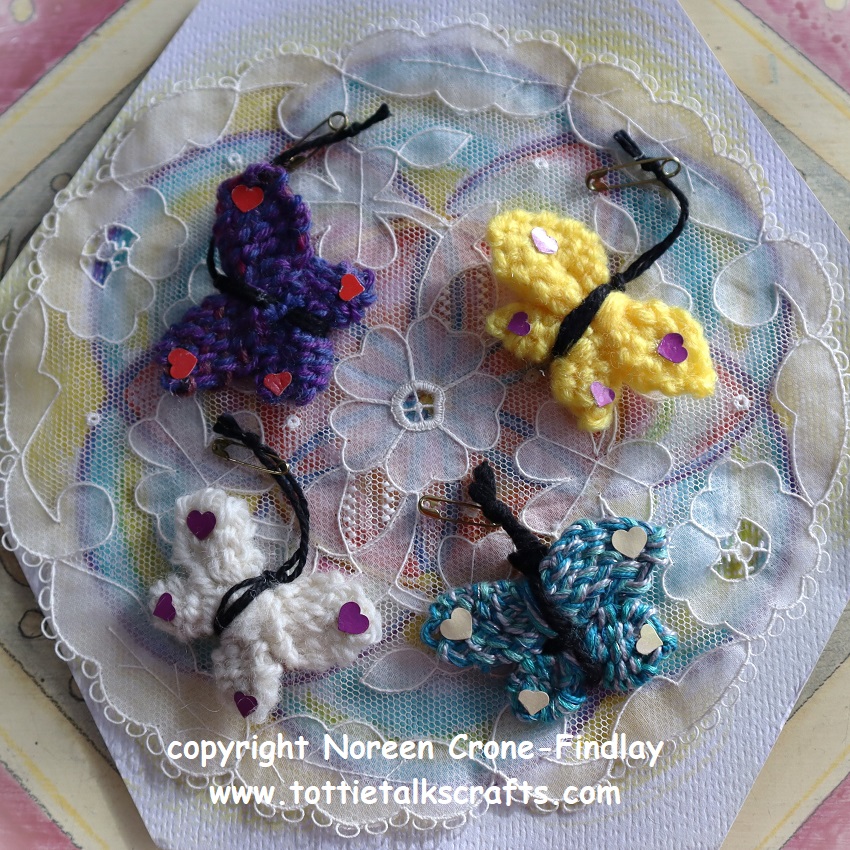
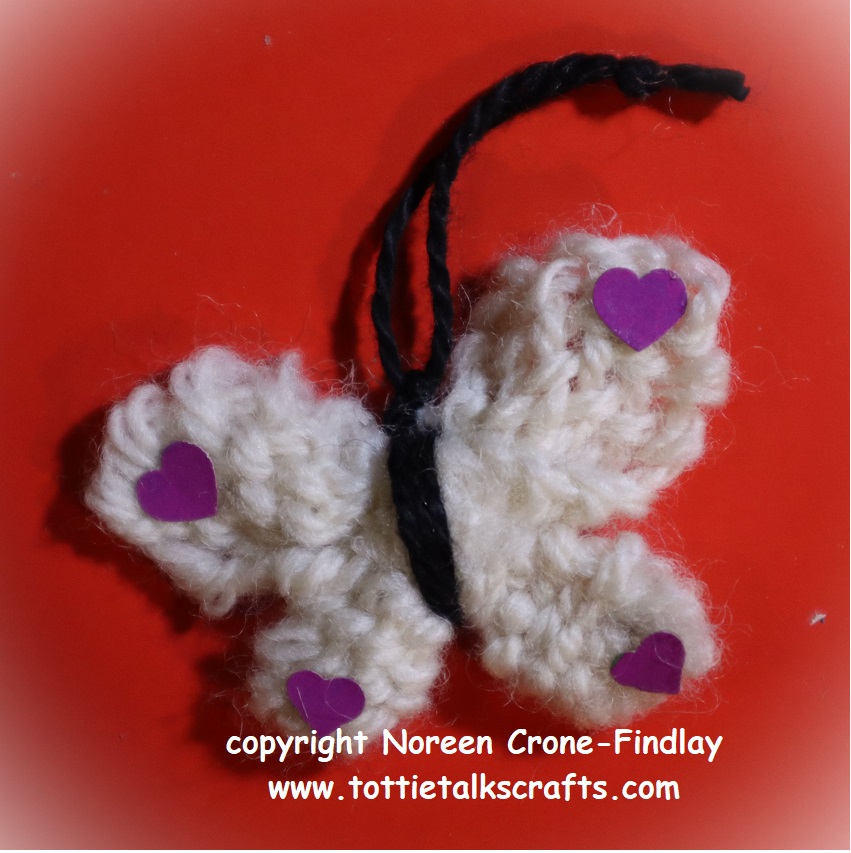
The Weaving Kindness Project is about weaving small tokens of caring, kindness, comfort, wishes for good luck, sweet peace and blessings!
To see photos of the Kindness projects that I have designed to weave on the Kindness Pin Loom and links to order the PDF instructions for making them, please go to: