Yikes- the stress of the insanity out in the world these days is causing me to have panic attacks in the night.
I have found that getting up and warping up my Kindness Loom really helps me to get myself regulated and able to sleep again.
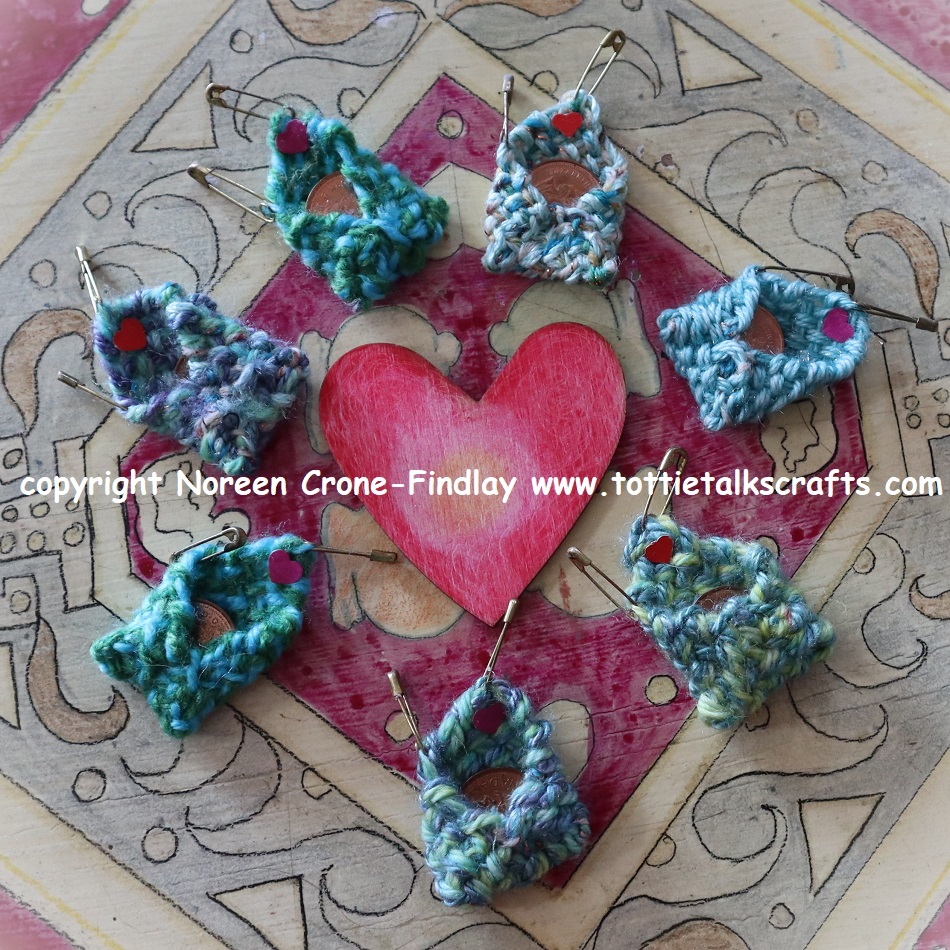
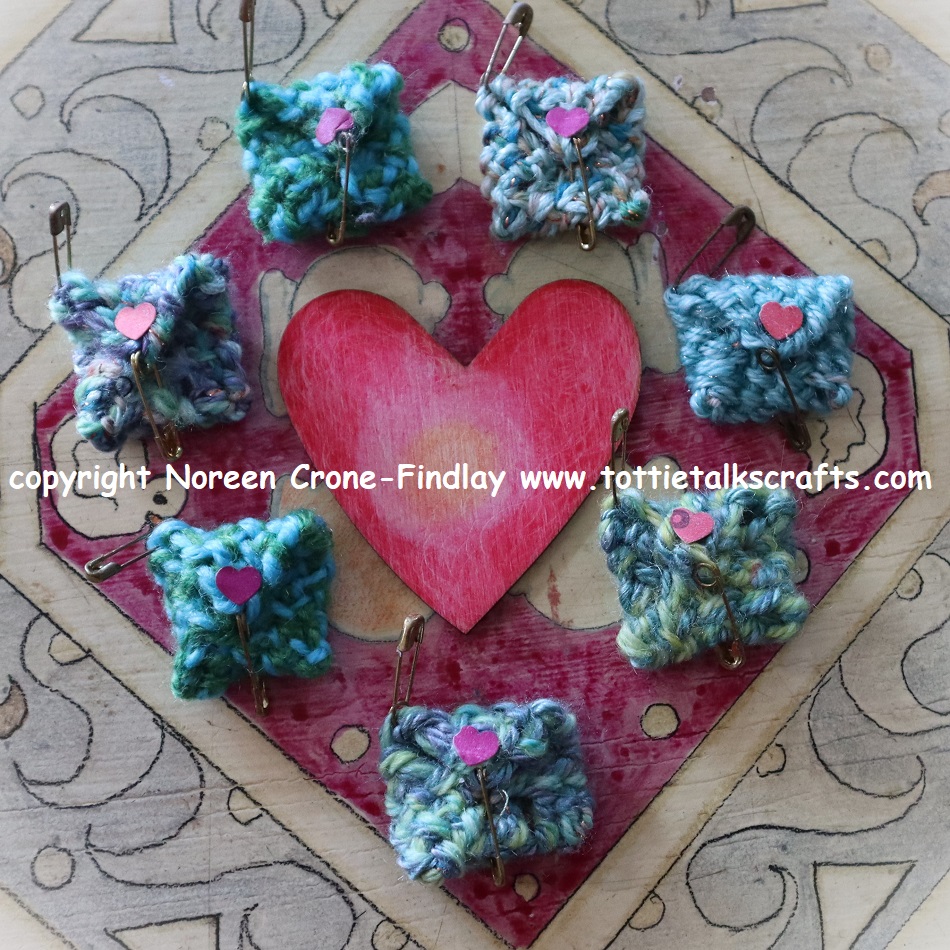
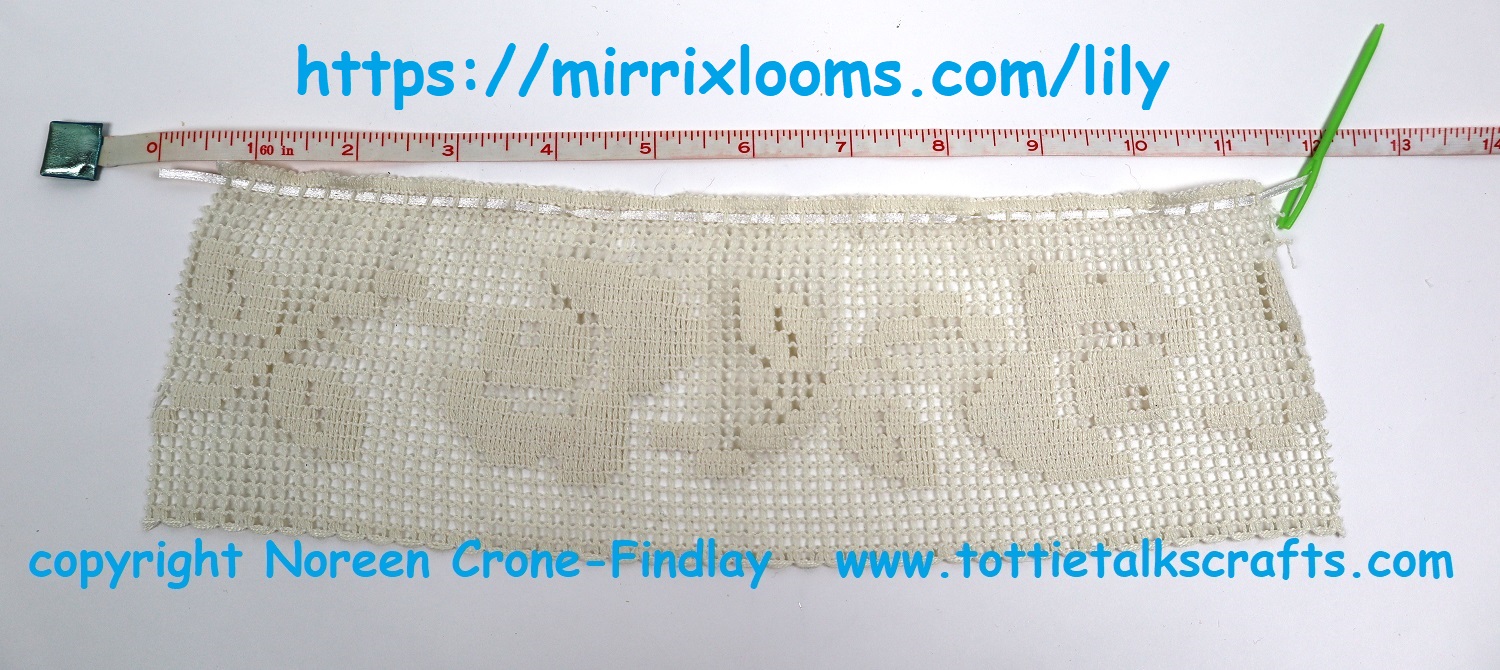
I have been working very hard on a new pattern for the Weaving Kindness project and hope to have it done soon so I can get it out into the world. But last night, I needed a break from ‘figuring it out’ so it was the Lucky Penny Pouches that called to me:
I find it so soothing to weave and stitch together the Lucky Penny Pouches…. these are going to be going to friends and family members that are dealing with challenges, and it made my heart happy to be weaving Kindness for them.
Sometimes, I get freaked out and think that my little bit of Kindness Weaving isn’t going to make any difference, but today I was re-assured by a post that Martha Beck wrote about using your art to calm down your amigdala as a way of healing your broken heart and thus healing the broken heart of the world.
That was so helpful! So, I will keep weaving threads of hope and healing, and hope that you will, too!
Big hugs ❤
I posted YouTube videos that show how to weave a square on the Kindness Loom and how to make a Lucky Penny Pouch. Those links are at: L I N K
Be well, be safe, be kind, take good care, get some sleep and WEAVE ON! ❤
When I was a little girl, I remember when my parents saw a penny on the ground, they would say:
“Find a Penny, Pick it Up, and on that day, you’ll have good luck!”
Then, they would offer it to someone, saying: “Here’s a Lucky Penny for you! Good Luck!”.
I love making little gifts to brighten the day of someone (friend, family. acquaintance or stranger) and
I decided to make a new little Kindness gift.
It seems to me that right now, everyone we know (and don’t know) all need to feel like some Good Luck will come their way,
so that’s why I have come up with the Lucky Penny Pouches.
I have made this step by step video tutorial to show how to weave and make a Lucky Penny Pouch (for good luck!) using the Kindness Loom that I designed for my ‘Weaving Kindness Project’.
The Lucky Penny Pouches turn ‘lost and found’ pennies into little Good Luck treasures that say to people: You matter! I wish you well! and Good Luck!
The Lucky Penny Pouches are quick and easy and fun to make and to give away. You’ll need the Kindness Loom and to weave one square on it. The video tutorial is available on my youtube channel.
When we offer a tiny handmade gift that shows another person that we care about them and that they matter, it is a small act but an essential one.
It’s so lovely to brighten another person’s day by delighting them with a tiny handmade comfort gift.
Amazingly enough, that makes your day so much better, too! What a good way to help to create connection, community and hope.
That is why I have designed a whole bunch of charming little woven ‘Kindness Gifts’ and a small simple, eco friendly pin loom, the Kindness loom, that people can make for themselves using just a few household tools and upcycled materials.
The Kindness looms are perfect for weaving all manner of petite, simple and sweet Kindness gifts that are easy to make. They are a lovely a way to say: “I wish you well”.
The Kindness Pin Loom is all about weaving small tokens of caring, kindness, comfort, wishes for good luck, sweet peace and blessings! From the tiniest flying pigs, Lucky Penny pouches, Comfort Bears, Vasilisa Dolls, Angels, Goddesses to ‘Portrait’ Dolls in homage to family and friends, the Kindness Pin Loom can weave them all, because I am designing them with love and best wishes!
Making things that embody joy and whimsy in small things can add up to great goodness, can’t it? Yup. ❤
As I make the pdf’s for the Kindness projects that I have designed to weave on the Kindness Loom and load them up to my etsy shop, where they will be for sale for a modest fee, I’ll post the links to an all links page LINK And, as I make youtube videos on how to weave on the Kindness Loom as well as some freebie projects, I’ll post those links on the same page, too.
PDF FOR STEP BY STEP INSTRUCTIONS SHOWING HOW TO MAKE A UNIQUE KINDNESS LOOM
This PDF of Step by Step Instructions shows how to make a Kindness Pin Loom. It’s the instructions for you to make the loom, not the finished loom. You’ll make your own unique one of a kind Kindness loom using these instructions purchased from my etsy shop.
3– Video tutorial: How to weave a square on the Kindness Loom by Noreen Crone-Findlay
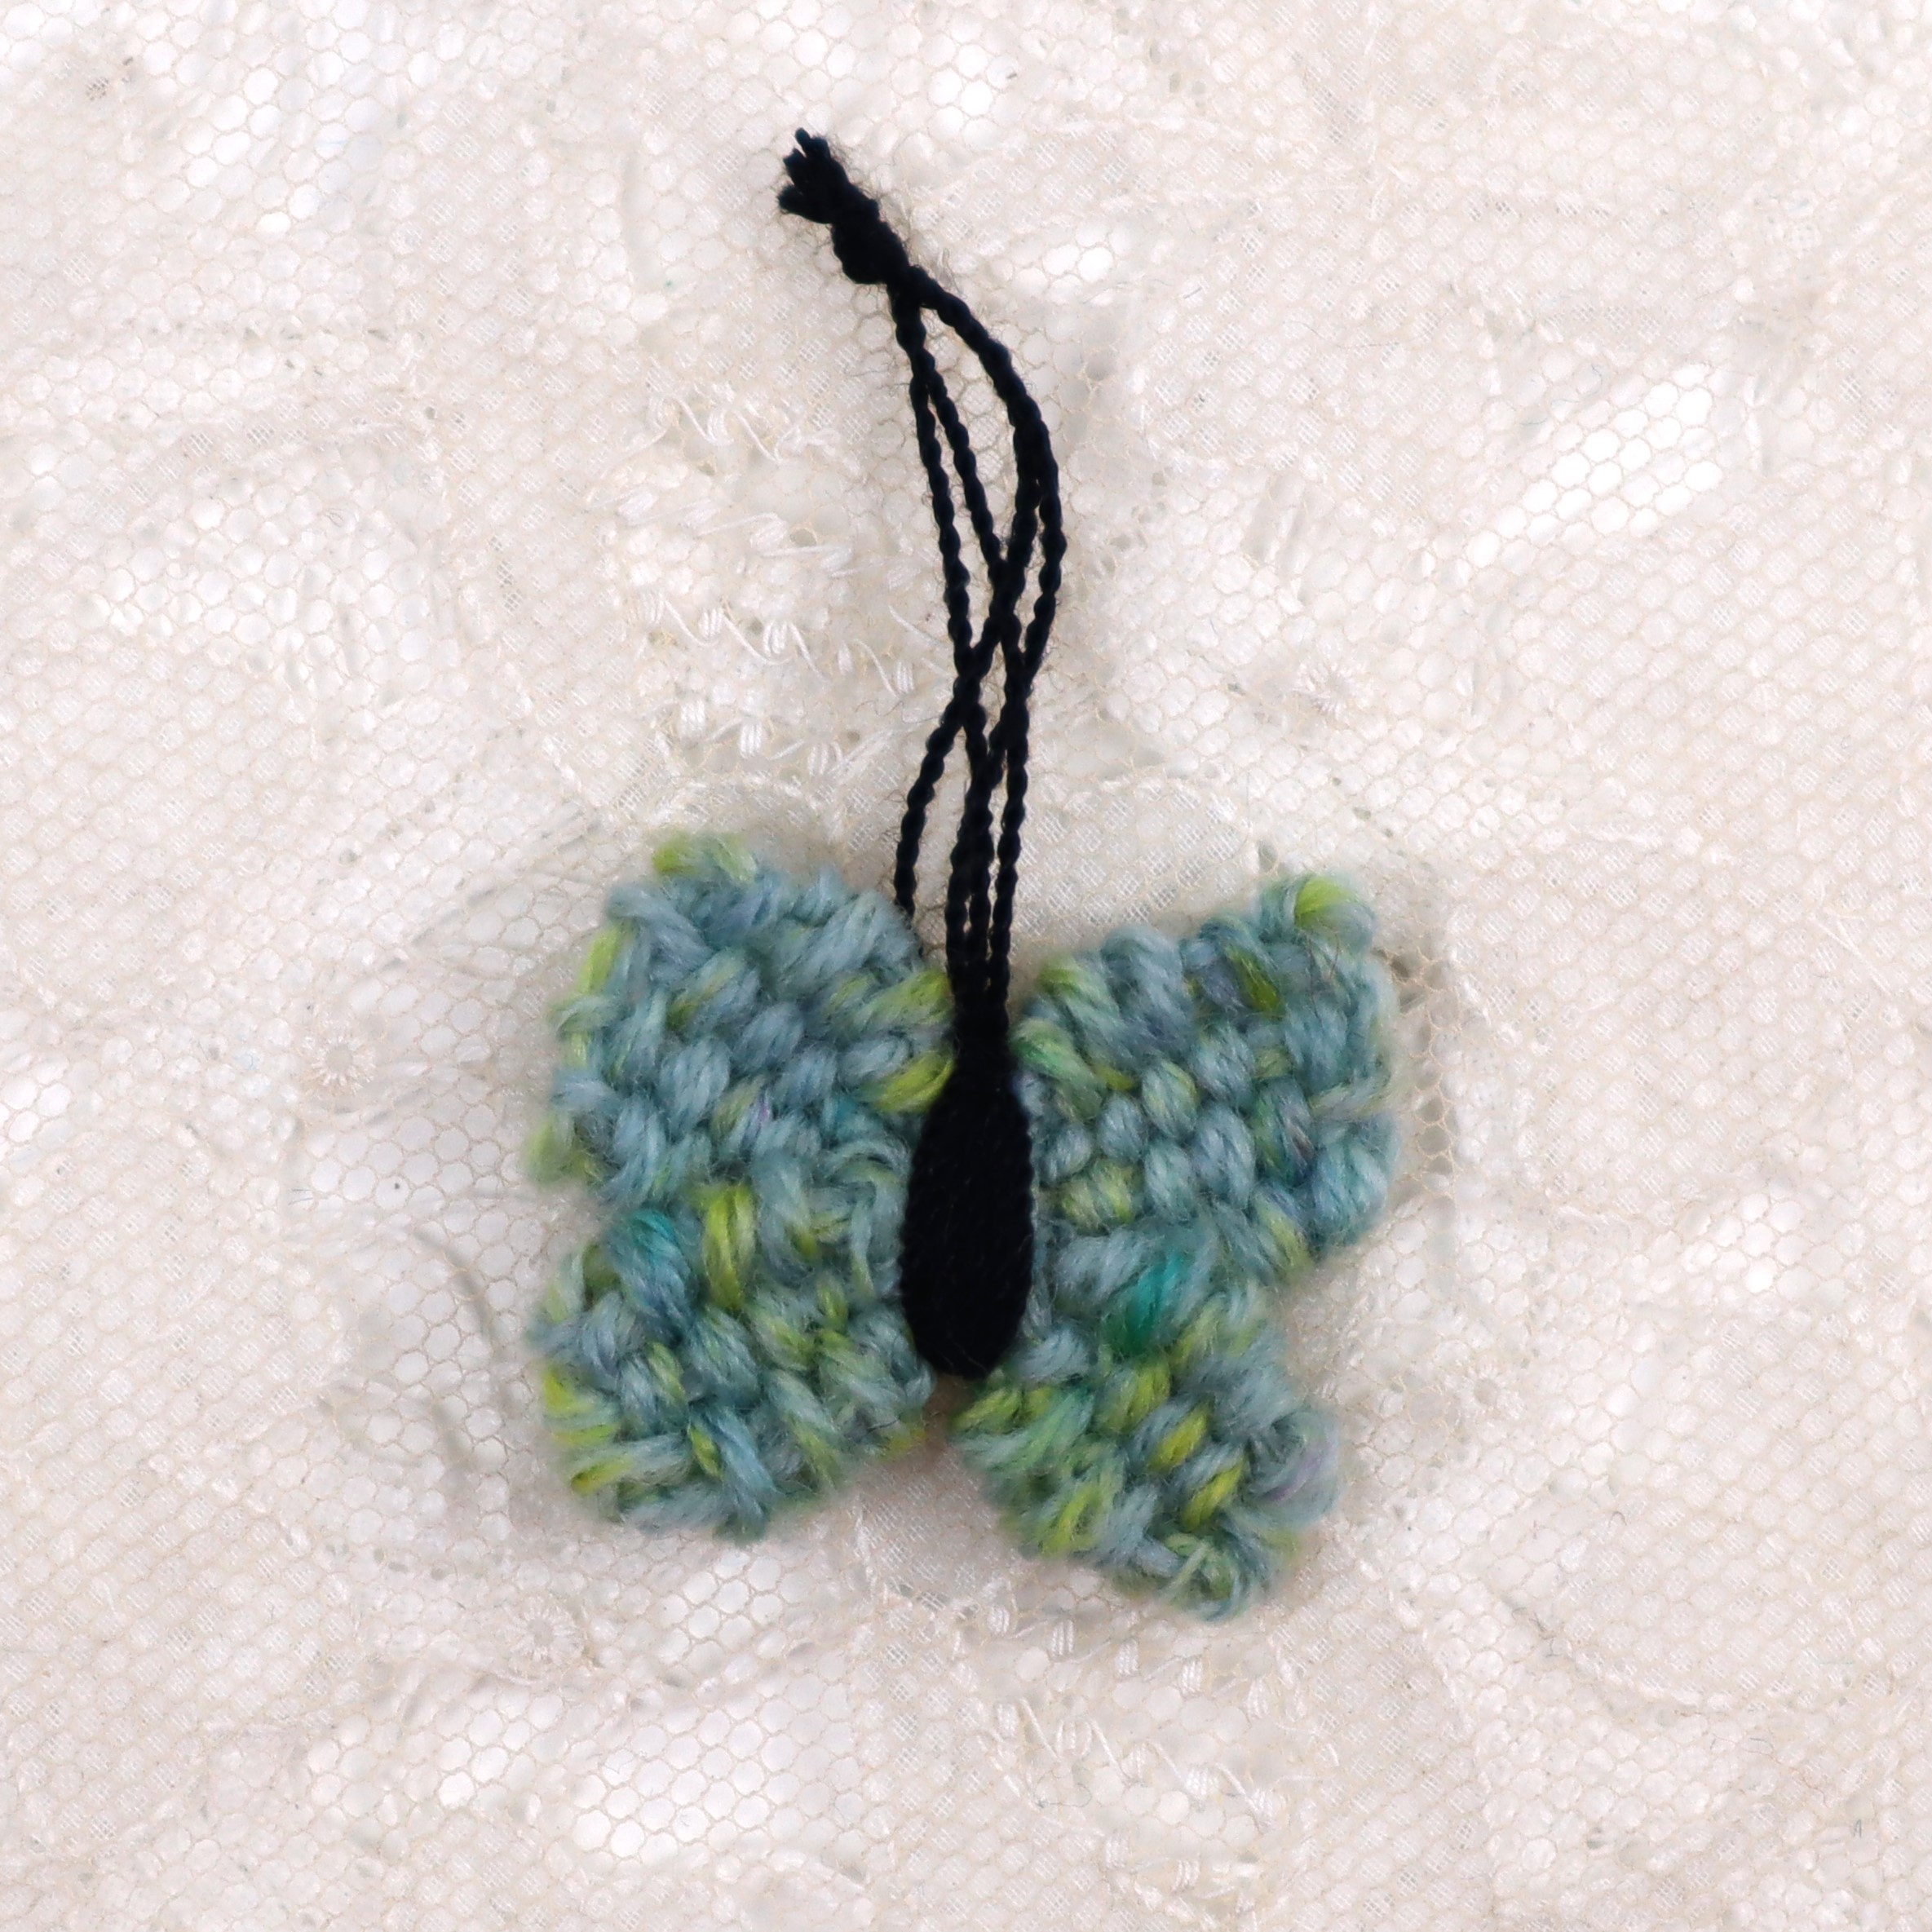
A couple of years ago, I made a youtube video on how to weave butterflies on the Mirrix Saffron loom. LINK
When I was chatting with Claudia and Elena on a webinar a few weeks ago, wonderful Sandy from Mirrix, mentioned about the tabby butterfly. This inspired the living daylights out of me, as I ‘aha-ed’ that I could weave smaller butterflies on the Chloe loom. (BTW, the butterfly woven on the Saffron loom can easily be woven on the Chloe loom, if you use the 8 epi combs.)
Why are small woven butterflies so exciting? For me, the most meaningful reason for weaving the Small Comfort Butterfly is to be able to offer kindness and comfort to people, whether I see them in person, or I mail one to them. People are worn to exhaustion nowadays with all the dreadfulness in the world, so even a tiny glimmer of hope in the form of a woven Comfort Butterflies is a lovely reminder to hold on and carry on, knowing that we are all in this together.
Also, the Comfort Butterflies can be appliqued onto to larger woven pieces or used for creative mending projects or worn as brooches, pins, zipper pulls or earrings.
They also hang happily in house plants to brighten a cloudy day.
And, for those who still enjoy books that are made of paper rather electrons, the small butterflies make lovely bookmarks.
Oh my goodness! I ended up weaving more than 30 prototype butterflies in order to get to this simple little butterfly! It was worth all the work to get there, as it’s now a delightful little butterfly!
I’ve made a video tutorial on youtube to show you, step by step, how to weave and assemble the Comfort Butterfly. I hope that you will enjoy weaving lots of them, and giving them away as a symbol of hope and transformation in these challenging times!
Happy Weaving! May weaving and giving the Small Comfort Butterflies bring you joy! ❤
I am designing a whole lot of really fun projects using the Mirrix Chloe Loom and they all are woven using Tabby weaving.
There are a few things that I do when weaving tabby on the Chloe loom that I wanted to share with people, so I have made a video about these tips.
Here’s the link to the video. Oh my…. I had a whalloping huge learning curve to build the video, as the program that I was using is no longer in existence…. sigh…. challenges!
I hope that these hints and tips and hacks are helpful!
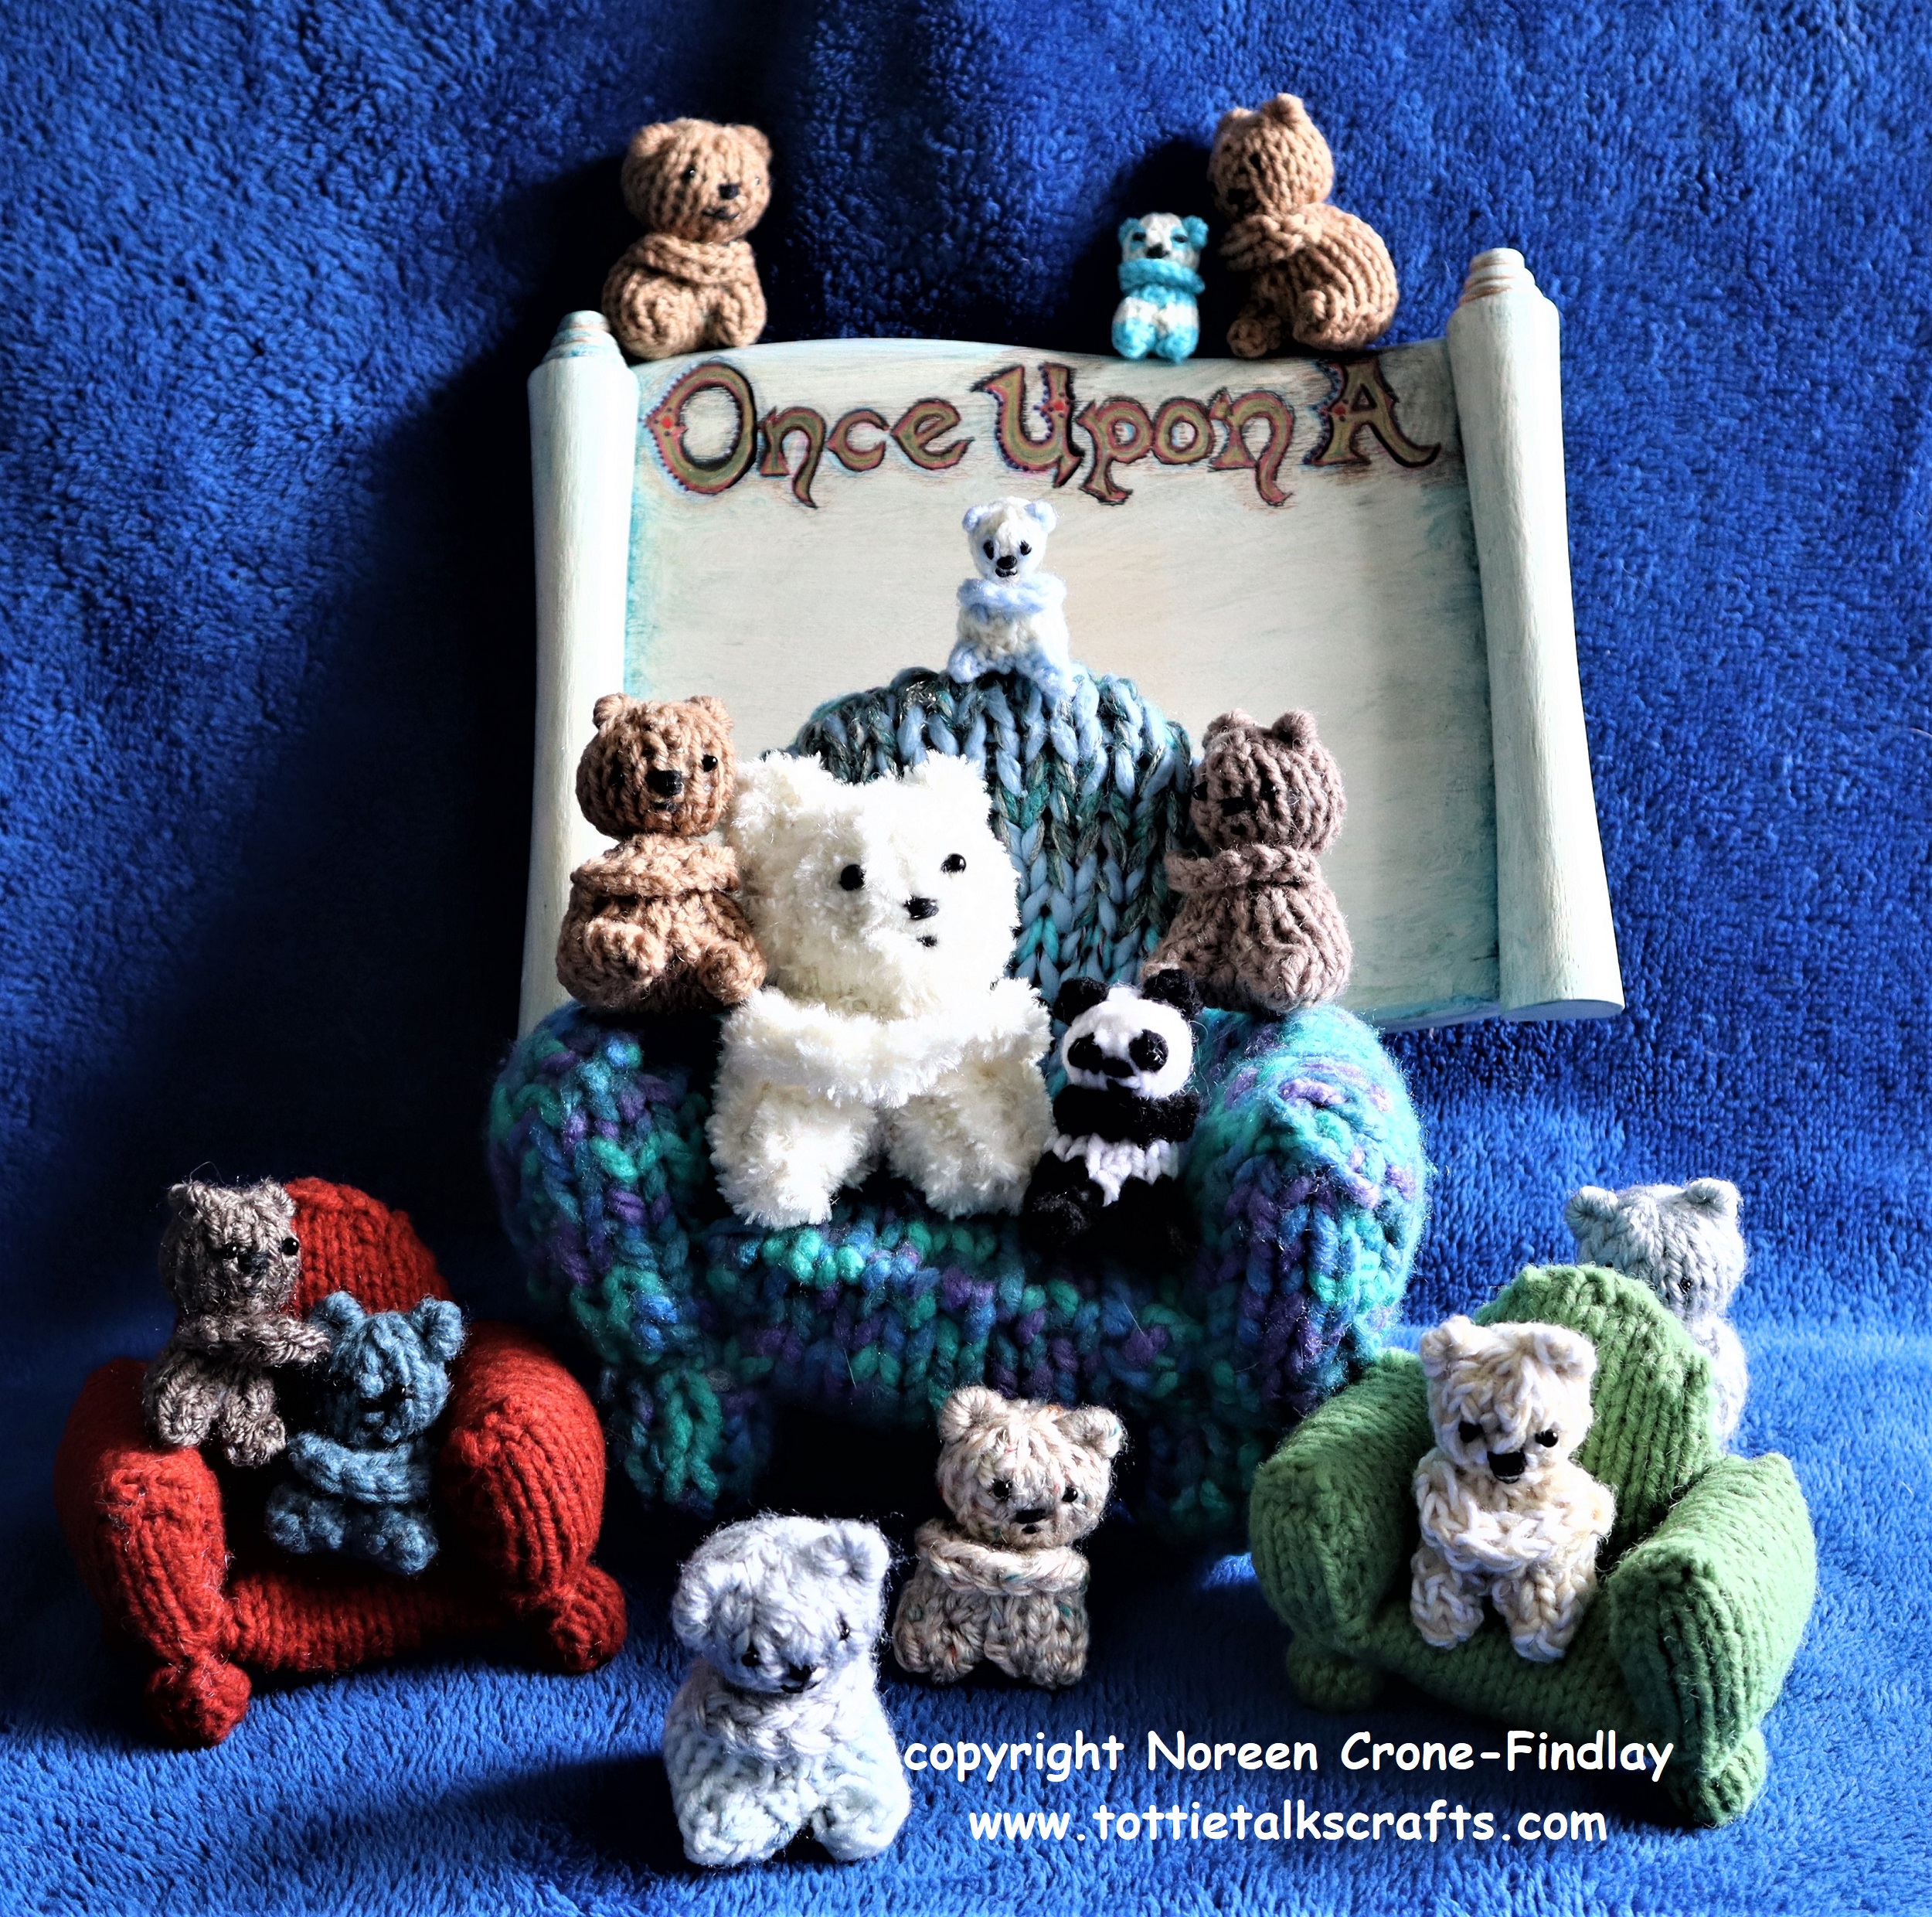
The knitted Clancy Comfort Bear is my latest design for comfort bears.
I designed it in honor of my beloved son in law who died last year.
Clancy was kindness incarnate and always kept several Comfort Bears in his pocket to offer to people who were having a difficult time. So, the Clancy Bear is a living legacy to keep his kindness unfolding in the world. With love in every stitch……
THE ‘HOW TO’ VIDEO FOR THE CLANCY COMFORT BEAR IS AT:
NOTE: The finished size of the Clancy Bear is determined by the thickness of yarn and size of knitting needles that you use.
WHAT YOU NEED:
Knitting Needles in a size that is appropriate for the thickness of your yarn,
Yarn: Less than an ounce for each Clancy Comfort Bear
A crochet hook that is appropriate for the thickness of your yarn.
Black 6/0 glass beads for eyes, Stuffing,
Black sewing thread and a needle that is small enough to sew on the beads, Tapestry or darning needle
Sewing machine thread in a color that matches your yarn (optional)
Felting needle, Tape measure, Row Counter, 4 small safety pins, Scissors or thread snip
INSTRUCTIONS: Beginning at the feet:
Cast on 11 stitches.
Rows 1- 16: Work in st st (knit one row, purl the next)
Place one of the little safety pins at each end of Row 6 and then 1 more pin at each end of Row 10.
At the end of Row 16, cut the yarn, leaving a 42 inch/105 cm long tail
Thread the tail end into a darning or tapestry needle and lift all the stitches off the needle.
Pull up to gather the top of the head.
Take the needle through the stitches one more time to secure them.
HEAD:
Sew the centre front seam using the Baseball stitch to the first set of safety pins. (see video for how to).
Take a couple stitches to secure the head. Remove the 2 safety pins.
Stuff the head.
Wrap the yarn tightly around the neck 2 times then stitch over the wraps to secure them.
EARS:
Take the yarn up to the side of the head at the top of the head and stitch over the knitting needle or crochet hook twice.
Stitch over these loops several times to make the first ear.
Repeat for the 2nd ear.
Take the needle back down and out at the ‘shoulder’ to be used to make the arms.
TUMMY SEAM:
Thread another strand of yarn or the sewing machine thread into a needle and stitch the center front down to the next set of safety pins.
Stuff the body.
LEGS:
Fold the cast on edge in half to find the midpoint.
Take the needle through it and stitch it to the end of the tummy seam.
Stitch in place a couple of times to secure it.
Squeeze and fold the edges of the front to meet the cast on edge, forming the leg with the corner point becoming the toe. It’s a bit like origami.
Stitch the leg inseam together, pulling up tightly.
Stitch the second leg inseam.
Secure at the middle.
Take the needle through the body to the back, and snip.
ARMS:
Take the crochet hook through the stitch at the shoulder where the yarn came out.
Yarn over, pull up a loop through the stitch on the body.
Chain by taking the yarn over the hook and pulling it through the loop on the hook.
Do this 7 to 9 times, depending on the thickness of your yarn.
Take the crochet hook through the shoulder on the other side of the body and pull up a loop.
Thread the yarn end into the tapestry needle and stitch the loop to the body.
Take the hook through the first chain stitch at the shoulder, and make a slip stitch in it by pulling up a loop through the chain stitch.
Repeat this for all the chain stitches, ending at the first shoulder.
Stitch the end into the body and use the felting needle to secure the arms to the shoulders and to bury the yarn end.
NOSE:
Take the black thread through the head, coming out at the center of the face.
Secure it with a couple of tiny stitches.
Make several horizontal stitches for the nose.
MOUTH:
Move down and take a couple of shorter horizontal stitches for the mouth.
EYES:
Take the needle up slightly above and to one side of the nose and sew on the bead for one eye,
then the other.
Secure the stitches by going back down to the nose and taking a couple of tiny stitches at the corner of the nose, then taking the needle back through the head. Snip the ends.
PANDA:
INSTRUCTIONS: Beginning at the feet:
Cast on 11 stitches with black yarn.
Rows 1- 6: Work in st st (knit one row, purl the next)
Place one of the little safety pins at each end of Row 6
Rows 7 & 8: Join white yarn and work in st st
Rows 9 & 10: Drop white yarn and work in black yarn.
Place 1 more pin at each end of Row 10.
Cut the black yarn, leaving a tail of 42 inches/105 cm.
Rows 11- 16: Work in white yarn.
At the end of Row 16, cut the yarn, leaving a 20 inch/50 cm long tail
Thread the white yarn end into a darning or tapestry needle and lift all the stitches off the needle.
Pull up to gather the top of the head.
Take the needle through the stitches one more time to secure them.
Stitch the center front seam of the head with the white yarn.
Stuff the head and wrap and secure the neck.
Take the black tail end out through to the shoulder and leave it there for now.
Work the rest of the Panda body, legs and arms the same way as the Basic Clancy Bear.
EARS:
After working the Arms, take the black yarn up to the top of the head and make the ears.
EYE PATCHES:
Take 3 small vertical stitches for each eye patch.
NOSE:
Take 2 horizontal stitches for the nose.
MOUTH:
Take 1 smaller horizontal stitch for the mouth. Secure the yarn by stitching through to the back of the neck and stitching in place the burying the yarn in the body.
EYES:
Sew the eye beads to the center of the patches. Secure the thread ends in the eye patches.