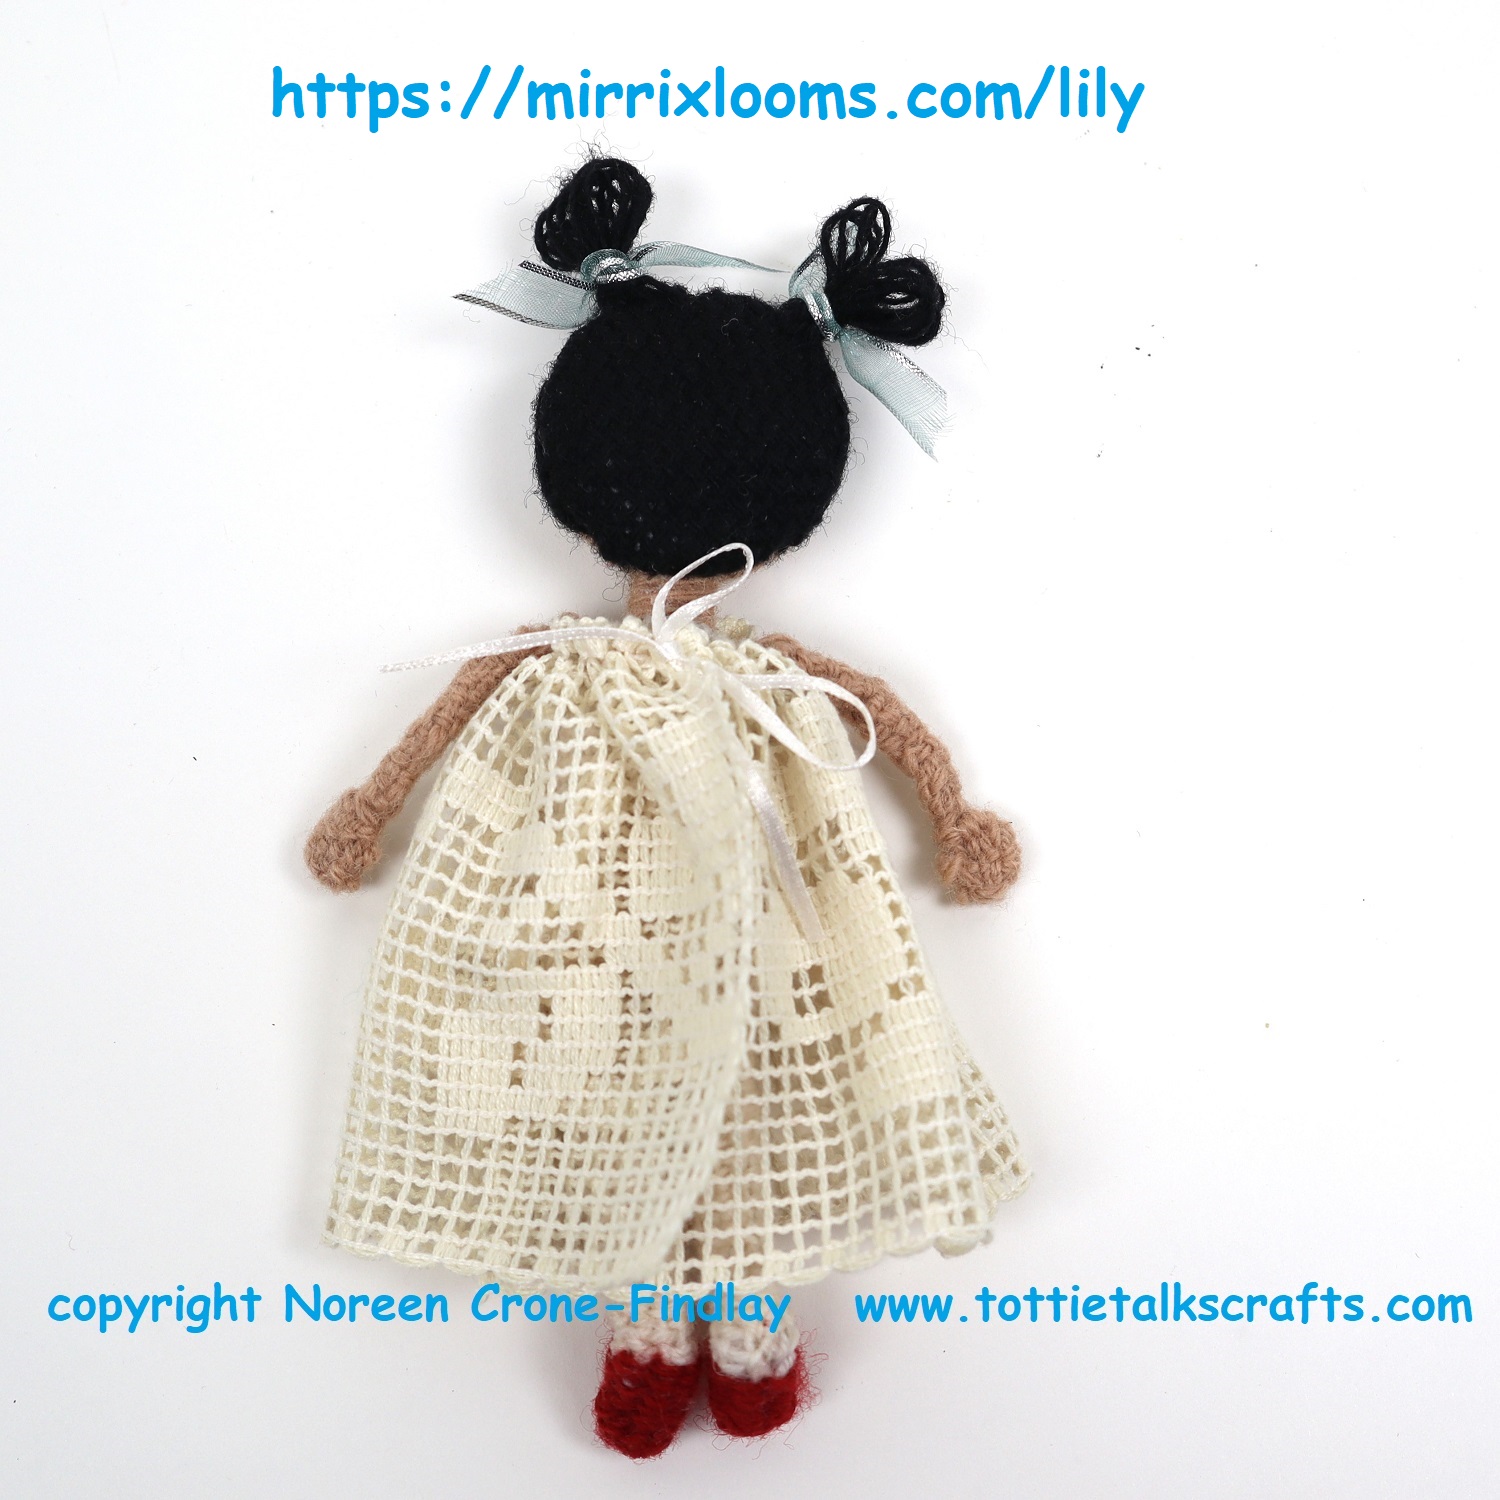
By the way, on the 15th of each month through 2024, we will be releasing a new kit for a design that I have made for the Lily Doll project. They’re all available at the mirrix website.
We’re planning some other fun things, too. I’ll post about them as they come up.
Hope 2024 is full of good things for you and yours: Blessings and hugs ❤ and happy weaving!
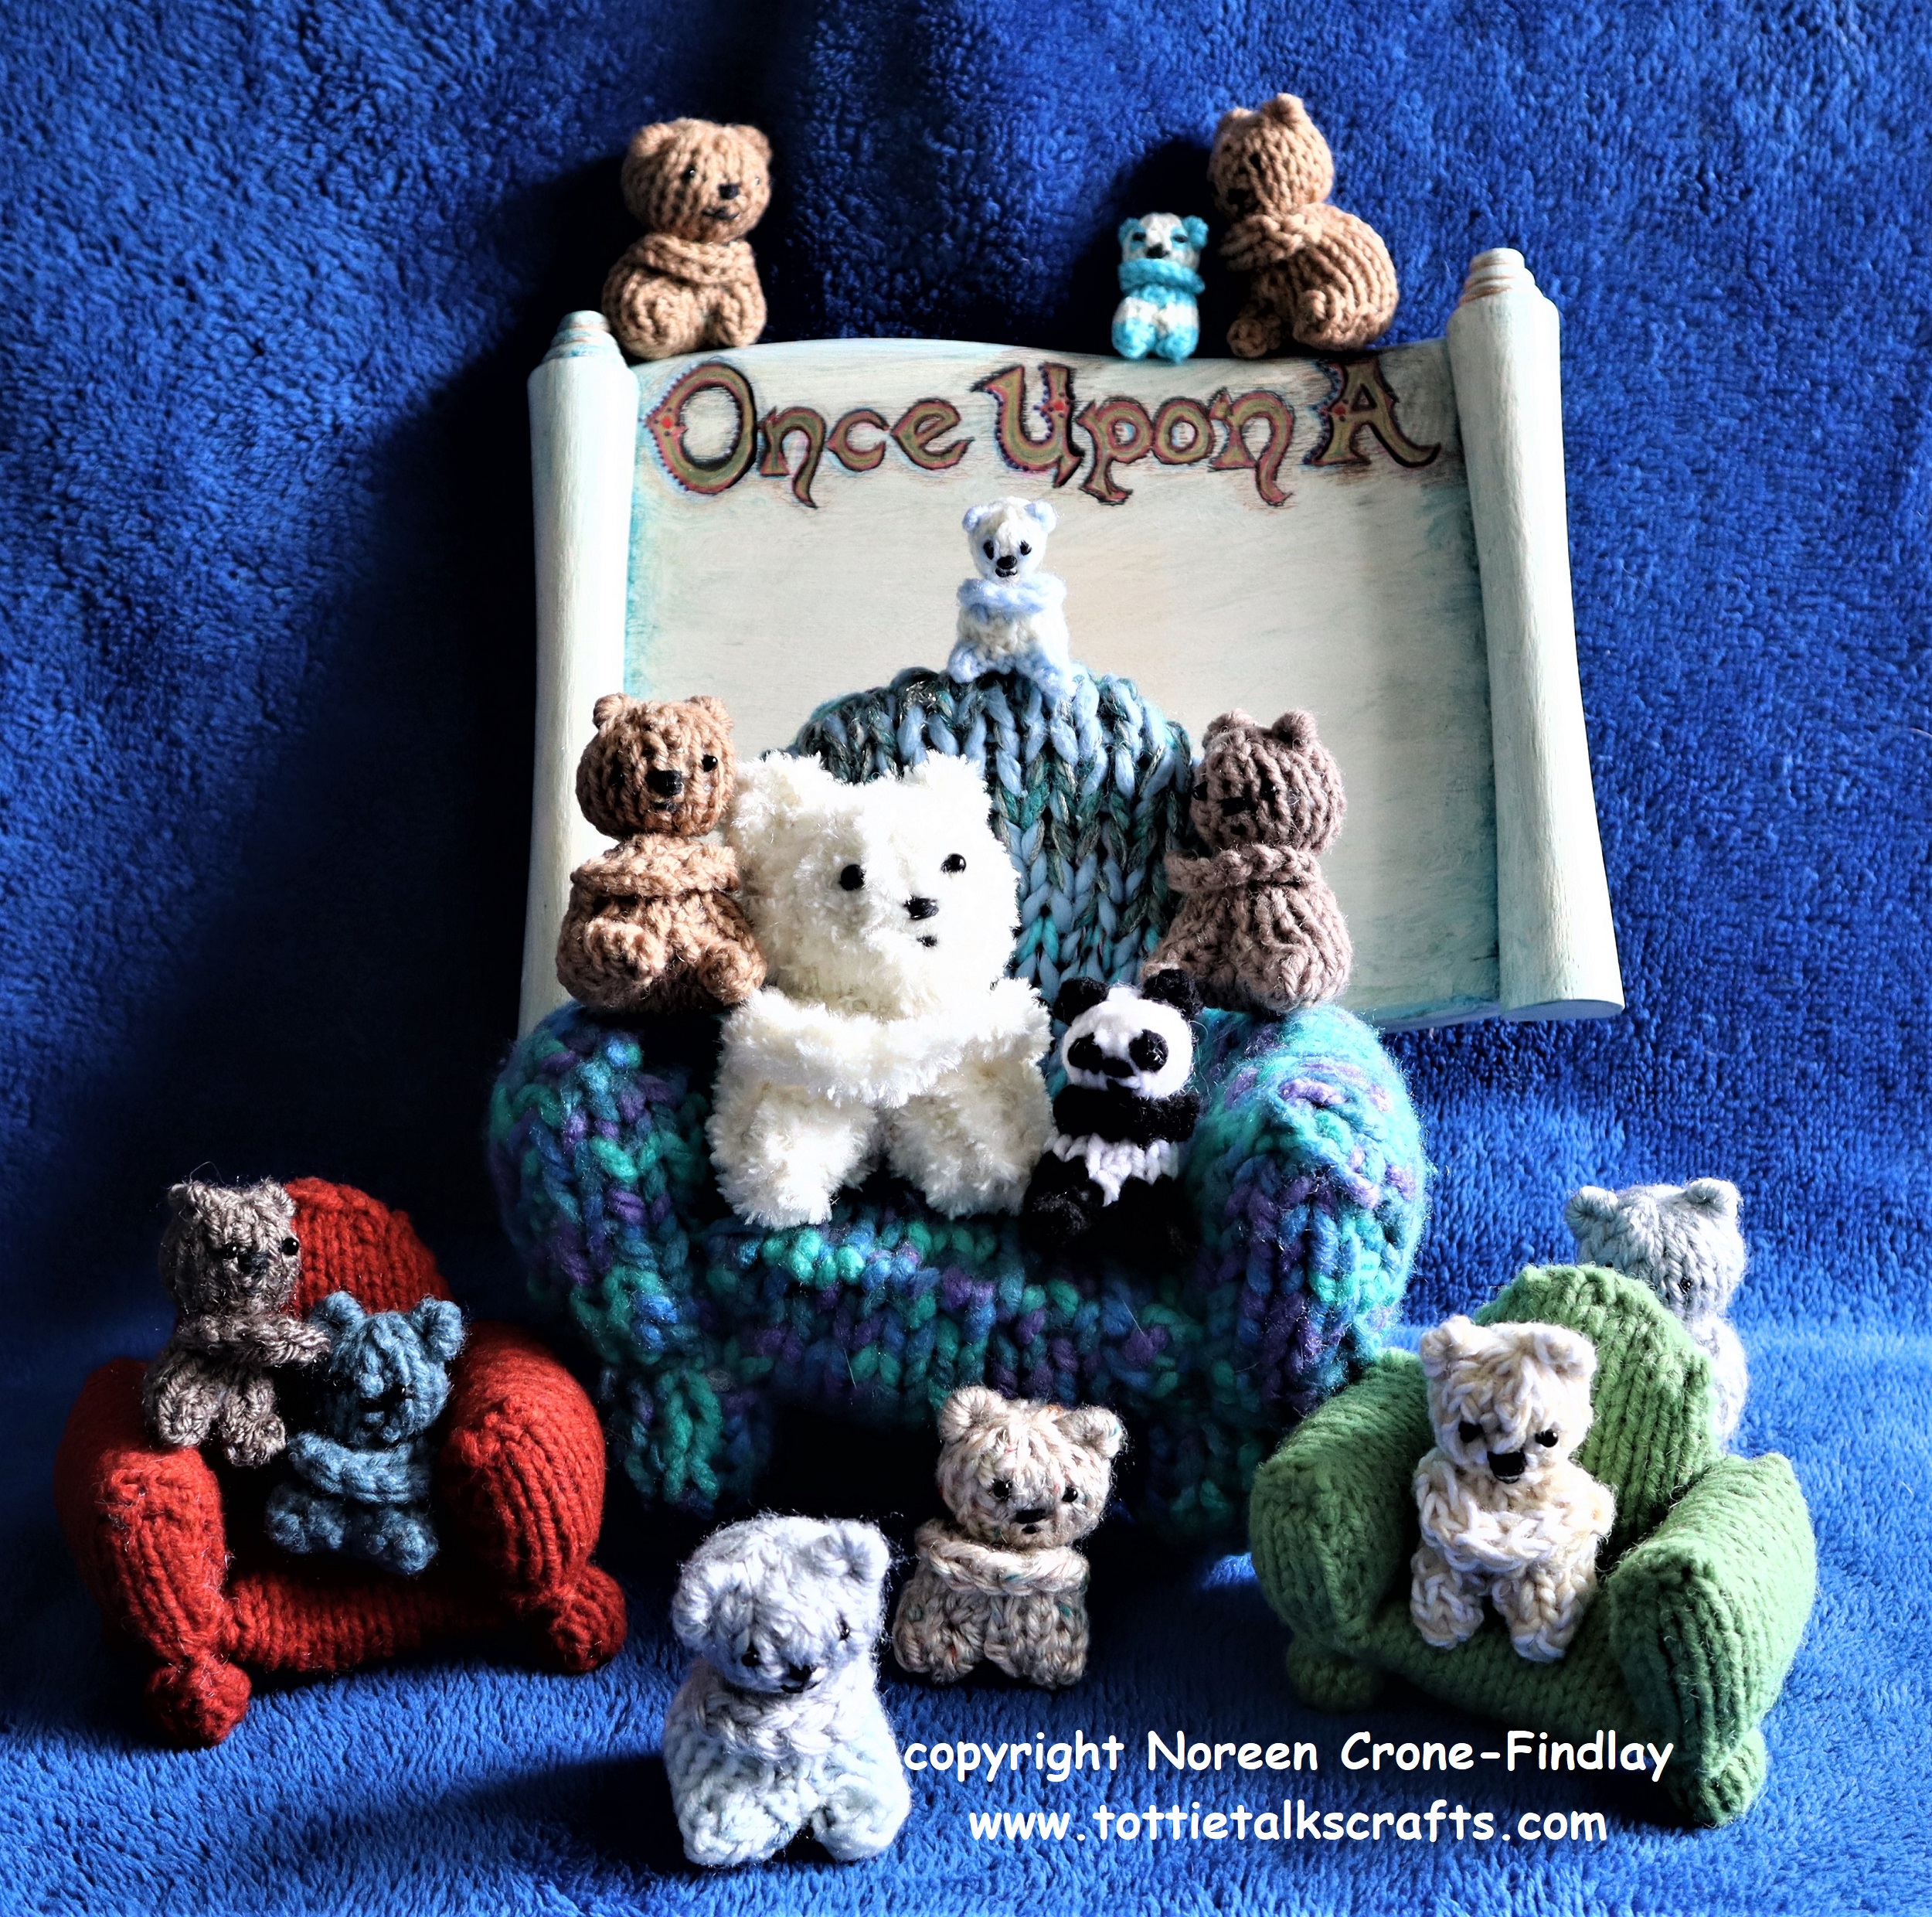
I wove one miniature panda, then another and another- I couldn’t resist weaving the tiny tiny pandas using the pattern that I designed for the wee teddy bears that are part of the Lily Doll Project that I created for Mirrix looms.
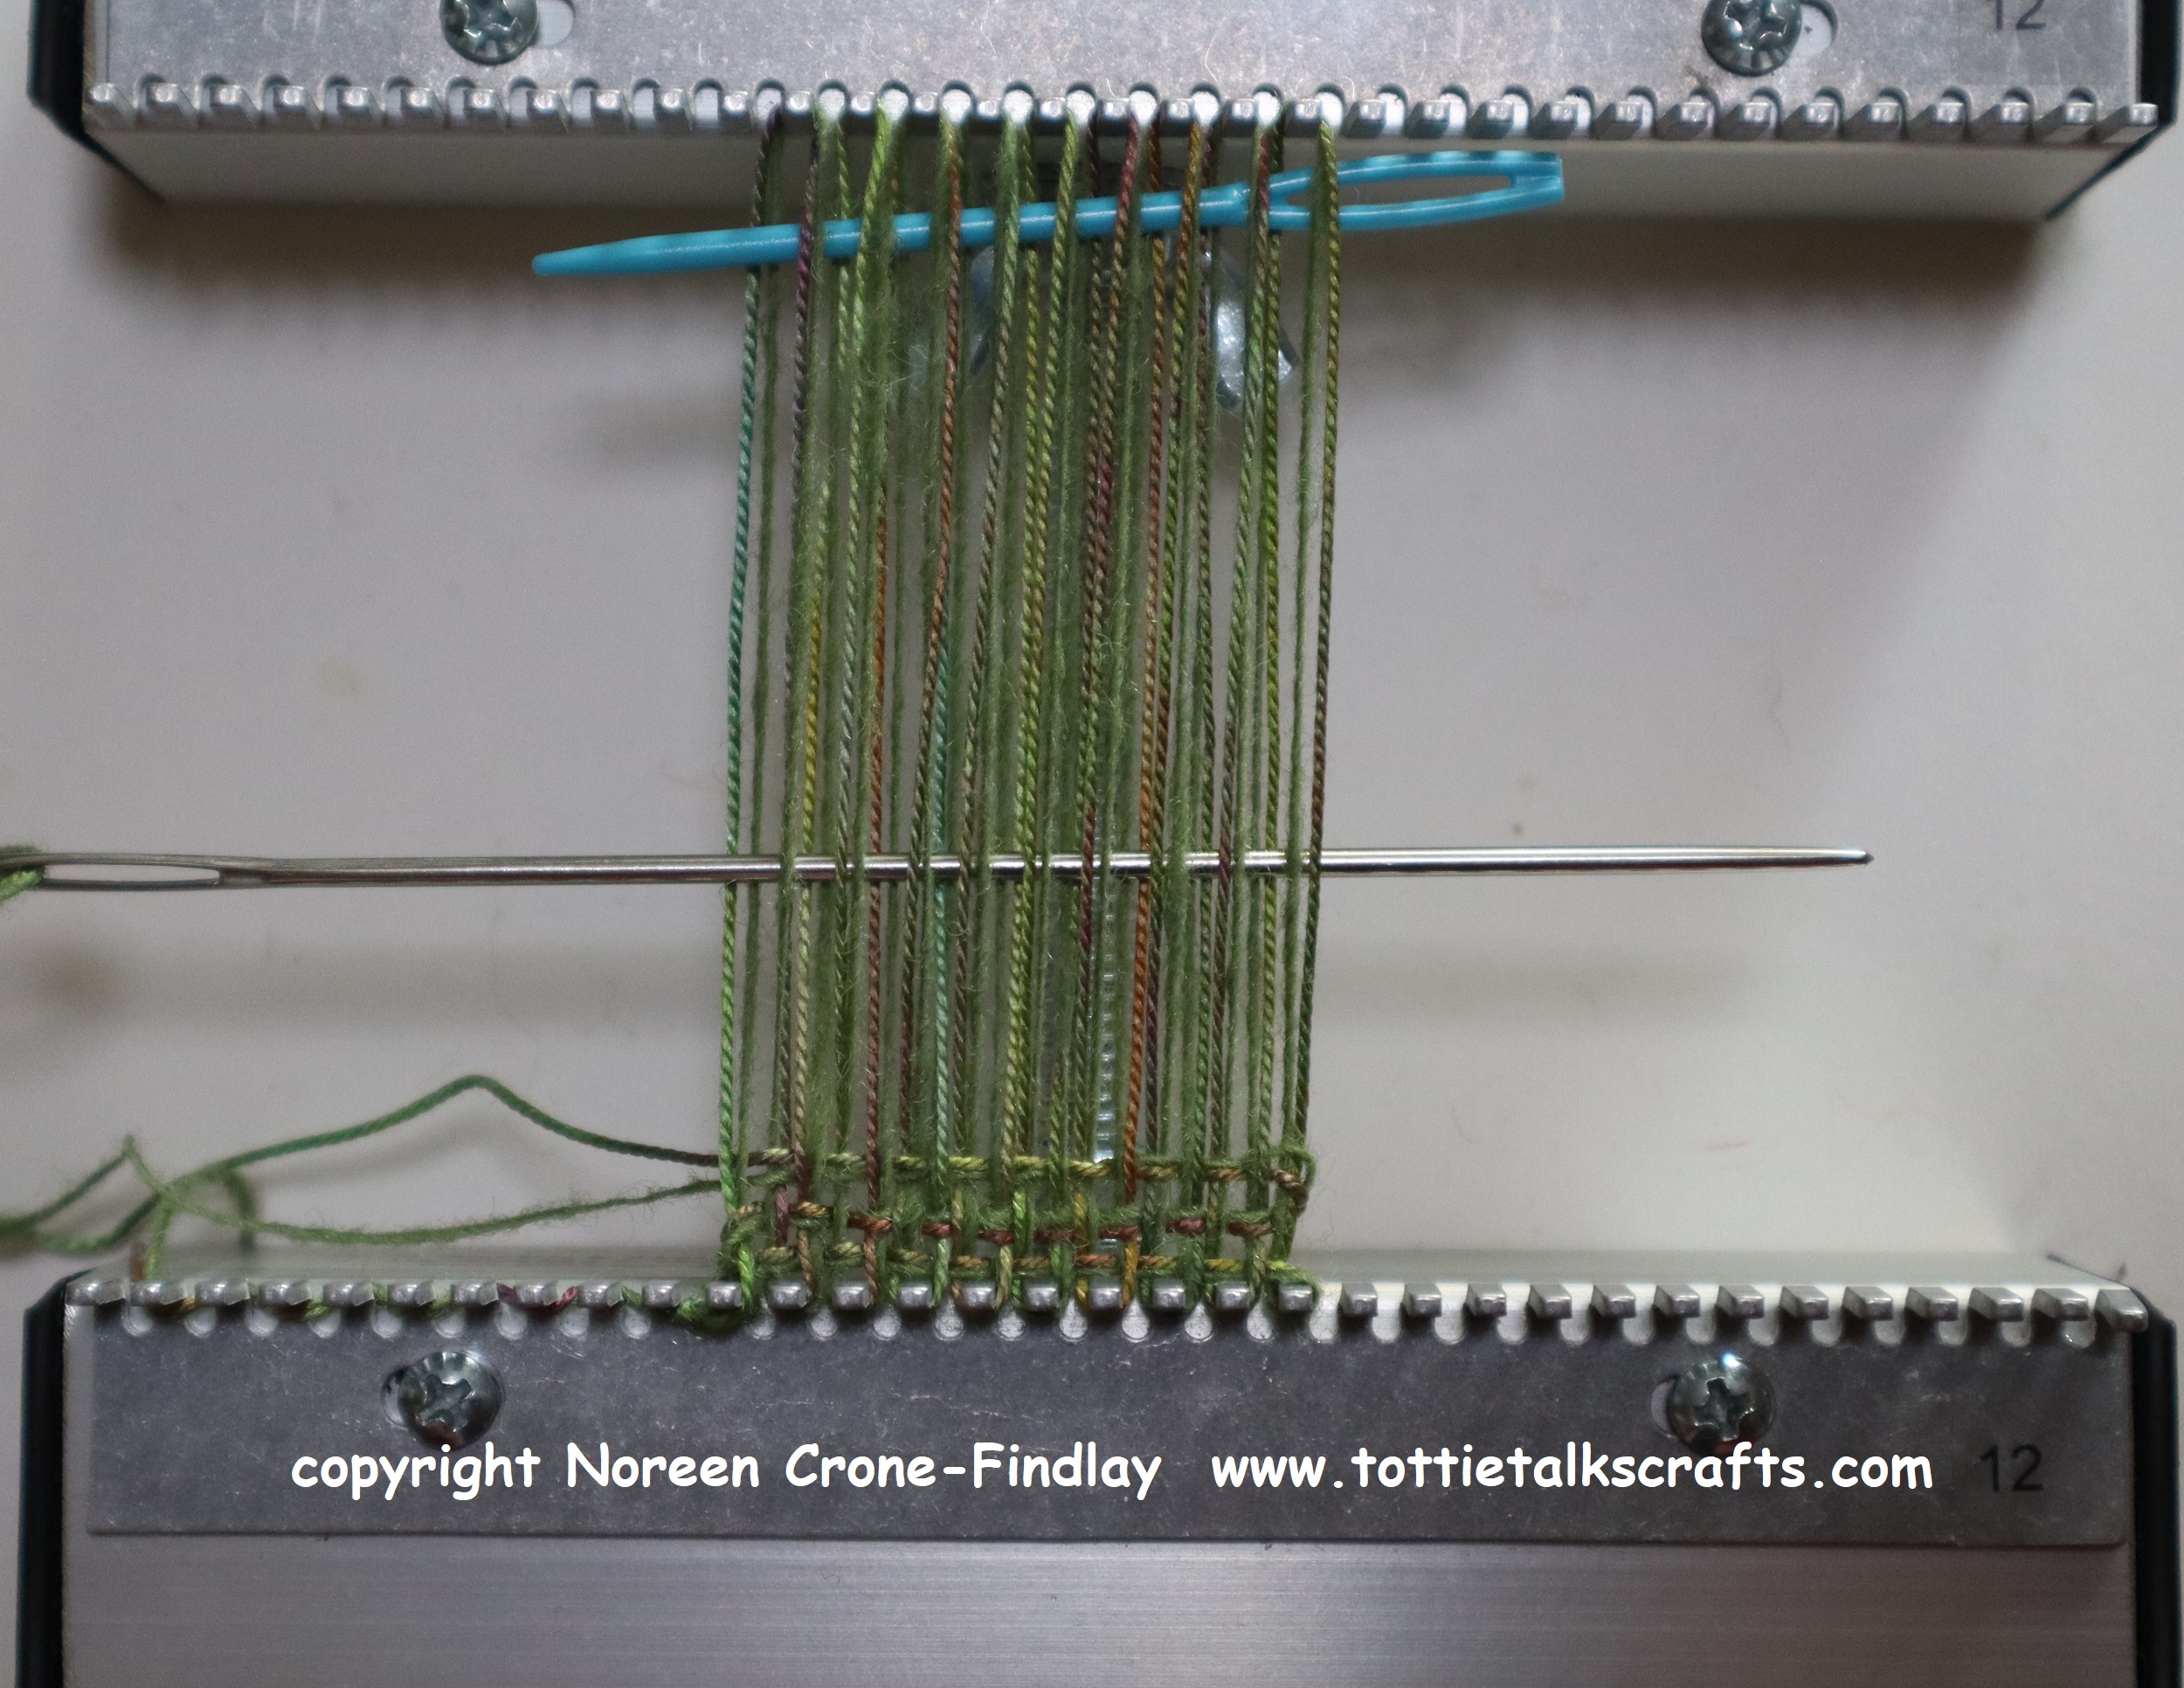
The pandas and bears are all woven on the Mirrix Chloe Loom.
The pandas are made the same way as the tiny teddy bears, except the ears, arms and legs are different color yarns, and a couple of little stitches are added to the face to make their face patches.
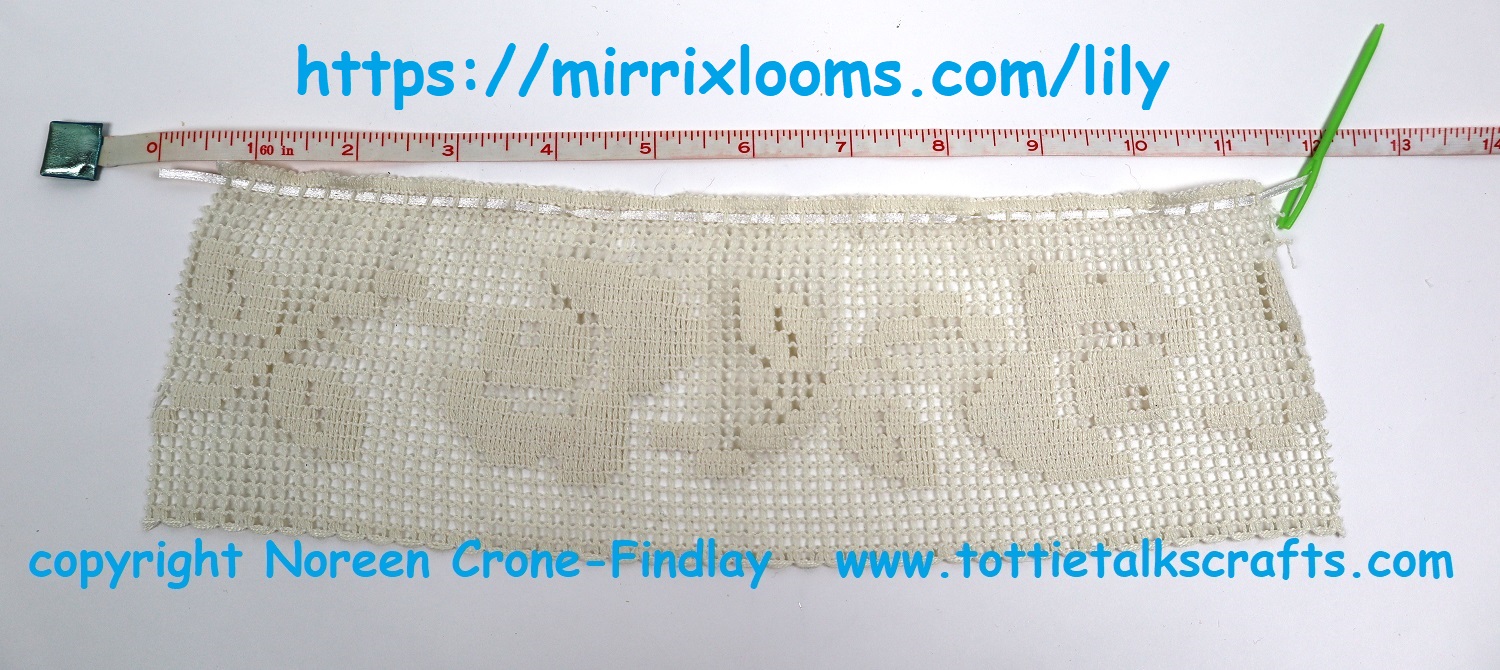
The Pixel People are quirky little woven wonderfuls that I designed for the Lily Doll Project.
They began as doodles on graph paper and were so delightful that I had to weave them right away! They are very small, so they are quick to weave and are great little stash busters. (they’re 1 1/2 inch or 3.75 cm square). I always put a ‘Lucky Penny’ and a paper heart inside to make them even more good natured.
They should probably come with a warning that they are so much fun to weave that it becomes quite addictive to weave them. This is really okay, as people love them so much that the Pixel People jump merrily into other people’s hands and hearts and pockets, too.
I find simple little things to be endearing. That’s how I feel about the woven Pixel People that are part of the Lily Doll Project.
I was inspired to design and weave the whimsical little Pixel People when I was sketching on graph paper (one of my most favorite design tools). I was doodling ‘inside the squares’ and started drawing cheerful little faces in the squares. I was captivated by their sweetness so one thing lead to another.
I warped up my Chloe loom and these quirky little darlings evolved from those simple sketches. I love them with their little circle hands and feet, but you can also play with other options, too. They have lucky pennies and good wishes hearts inside, so they have very good energy.
They are fun to carry in your pocket or attach jewelry findings and click them onto a zipper, bag or as a charm on a pouch, phone or other device.
Stitch a pin back on them to wear them as a pin. Glue a magnet to the back and they can live on the fridge or a lamp or other metal surface. These quirky little Pixel People are fun, easy and a delight to make!
I am a dyed in the wool Teddy Bear fanatic. I especially like very very small bears.
So, of course, when I was designing for the Lily Doll Project, the first friend I designed for her is an absolutely tiny Teddy Bear.
These tiny Teddy Bears have my ‘signature’ hugging arms so they can hug back and also hold onto things.
Because they are so little, they are fairly quick and easy to make, so they are a great choice as Pocket Bears, and as Comfort Bears to give to other people.
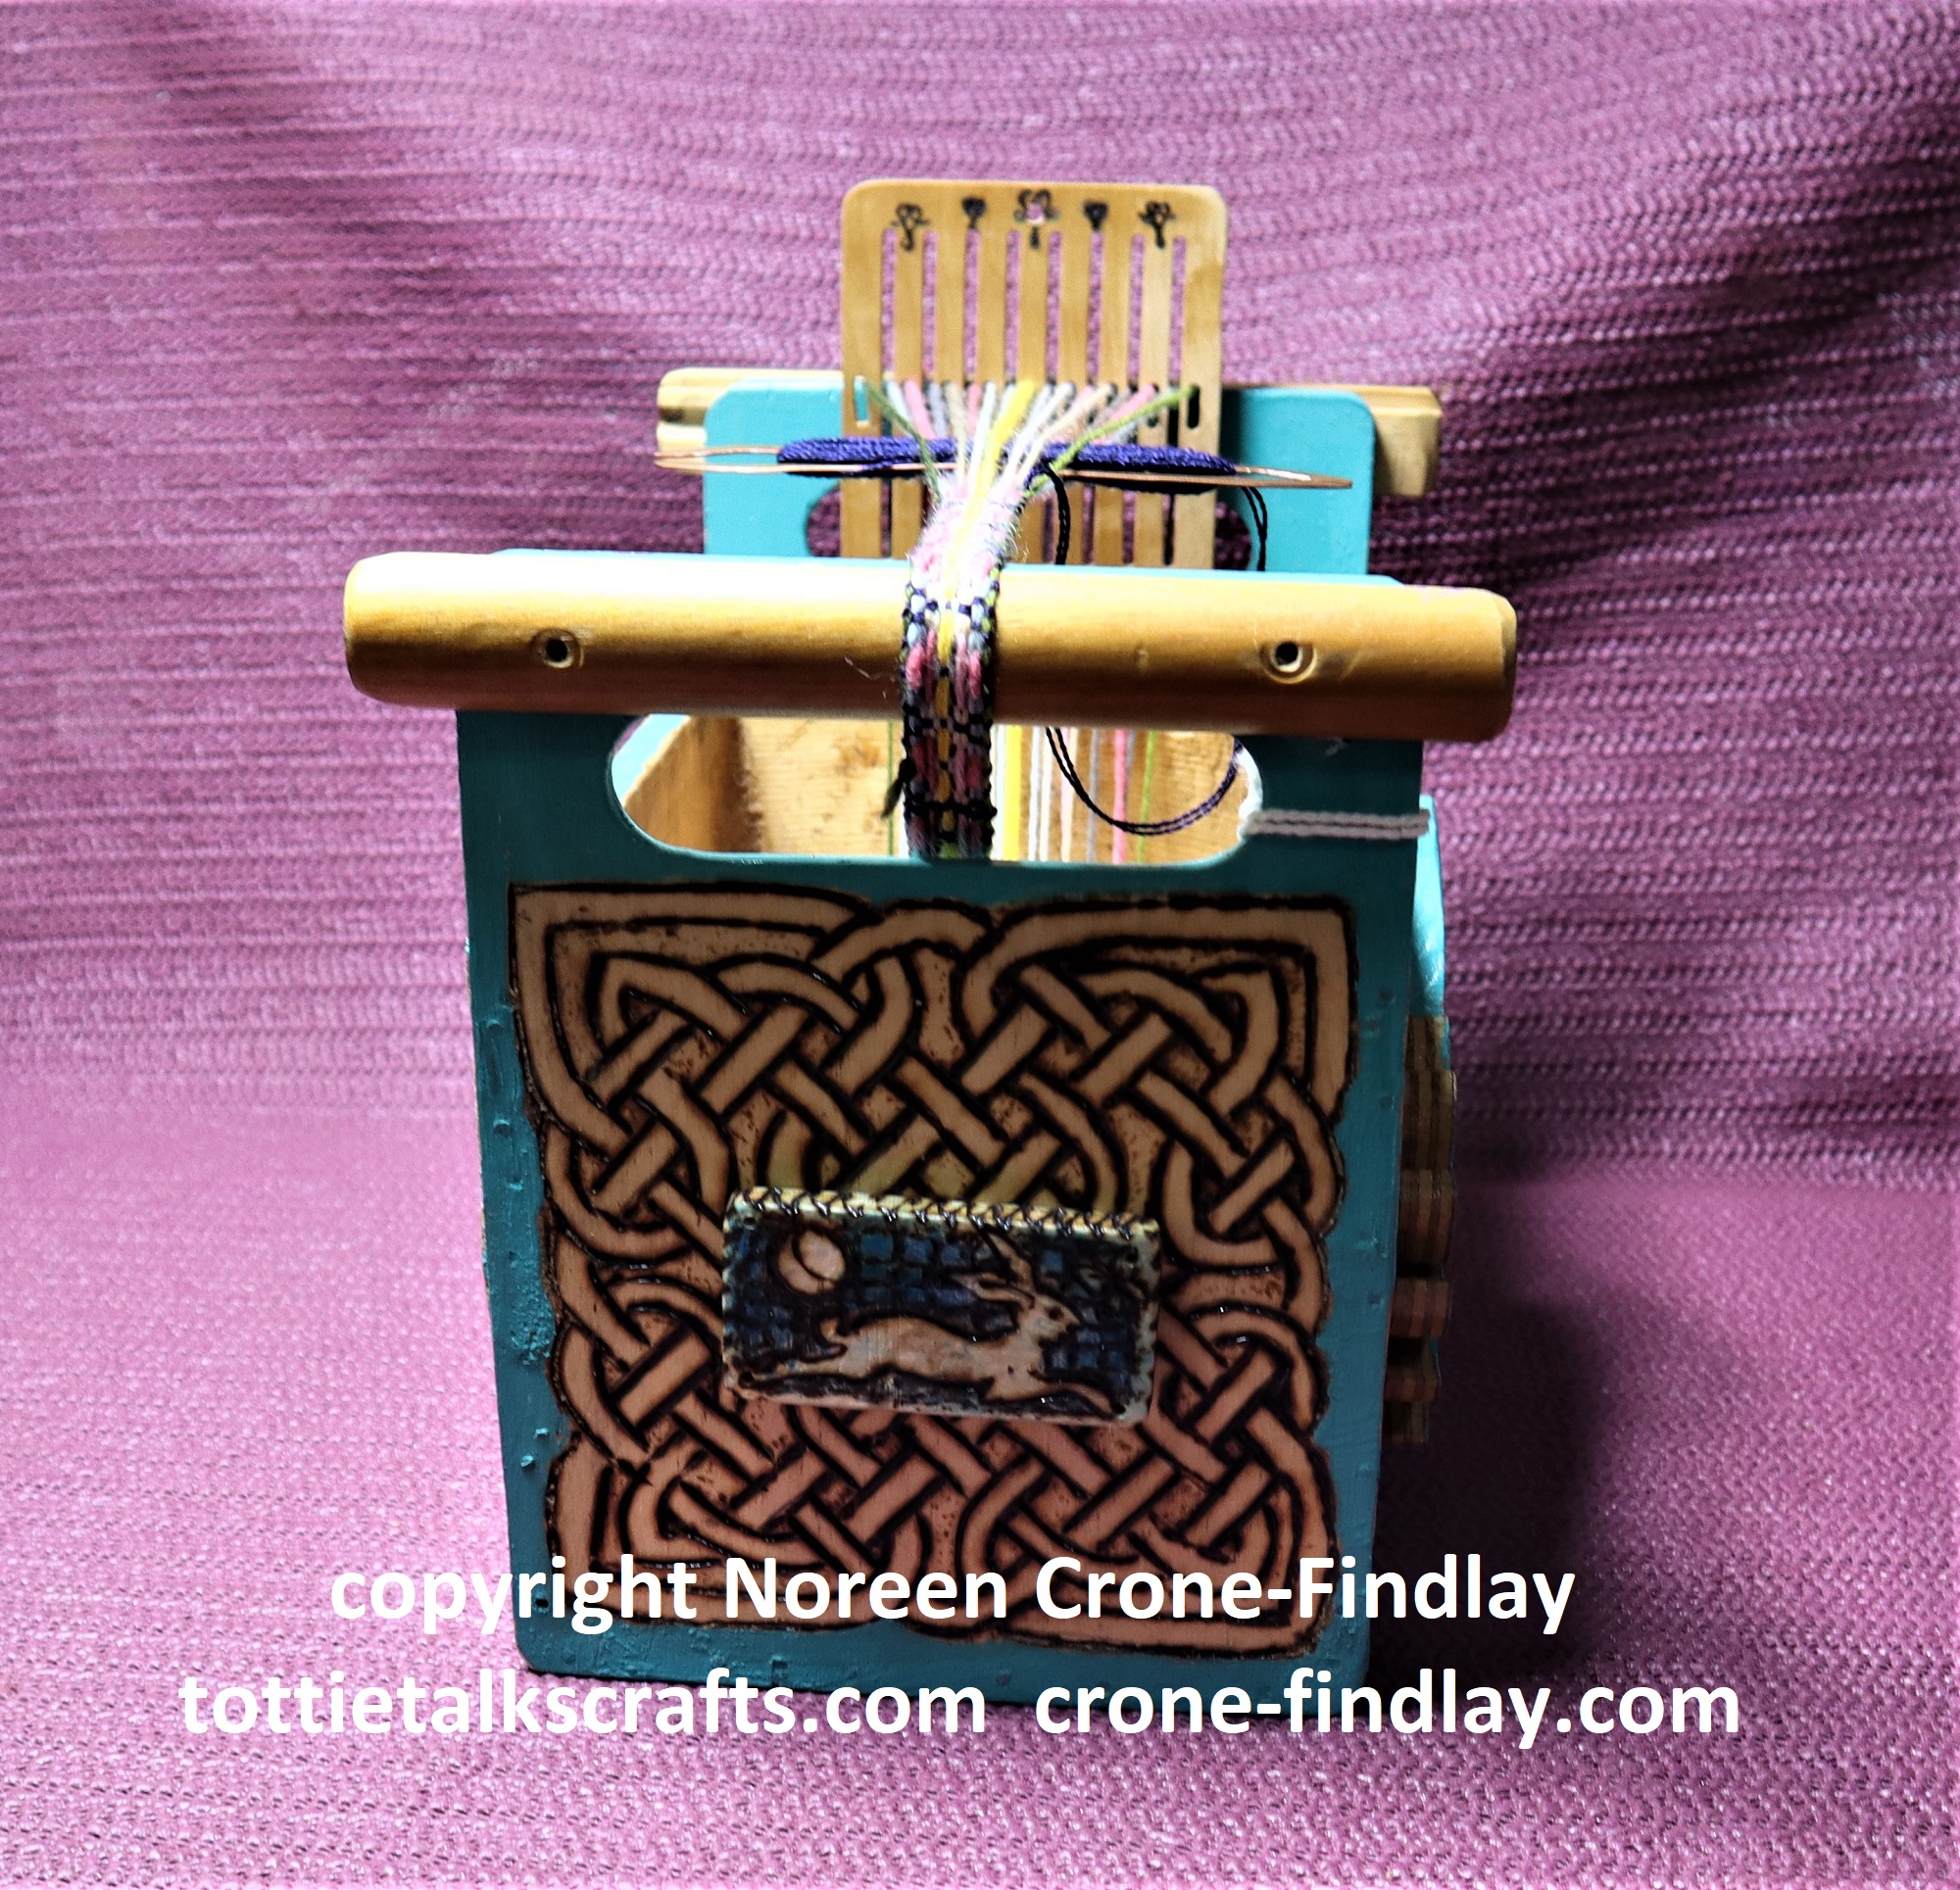
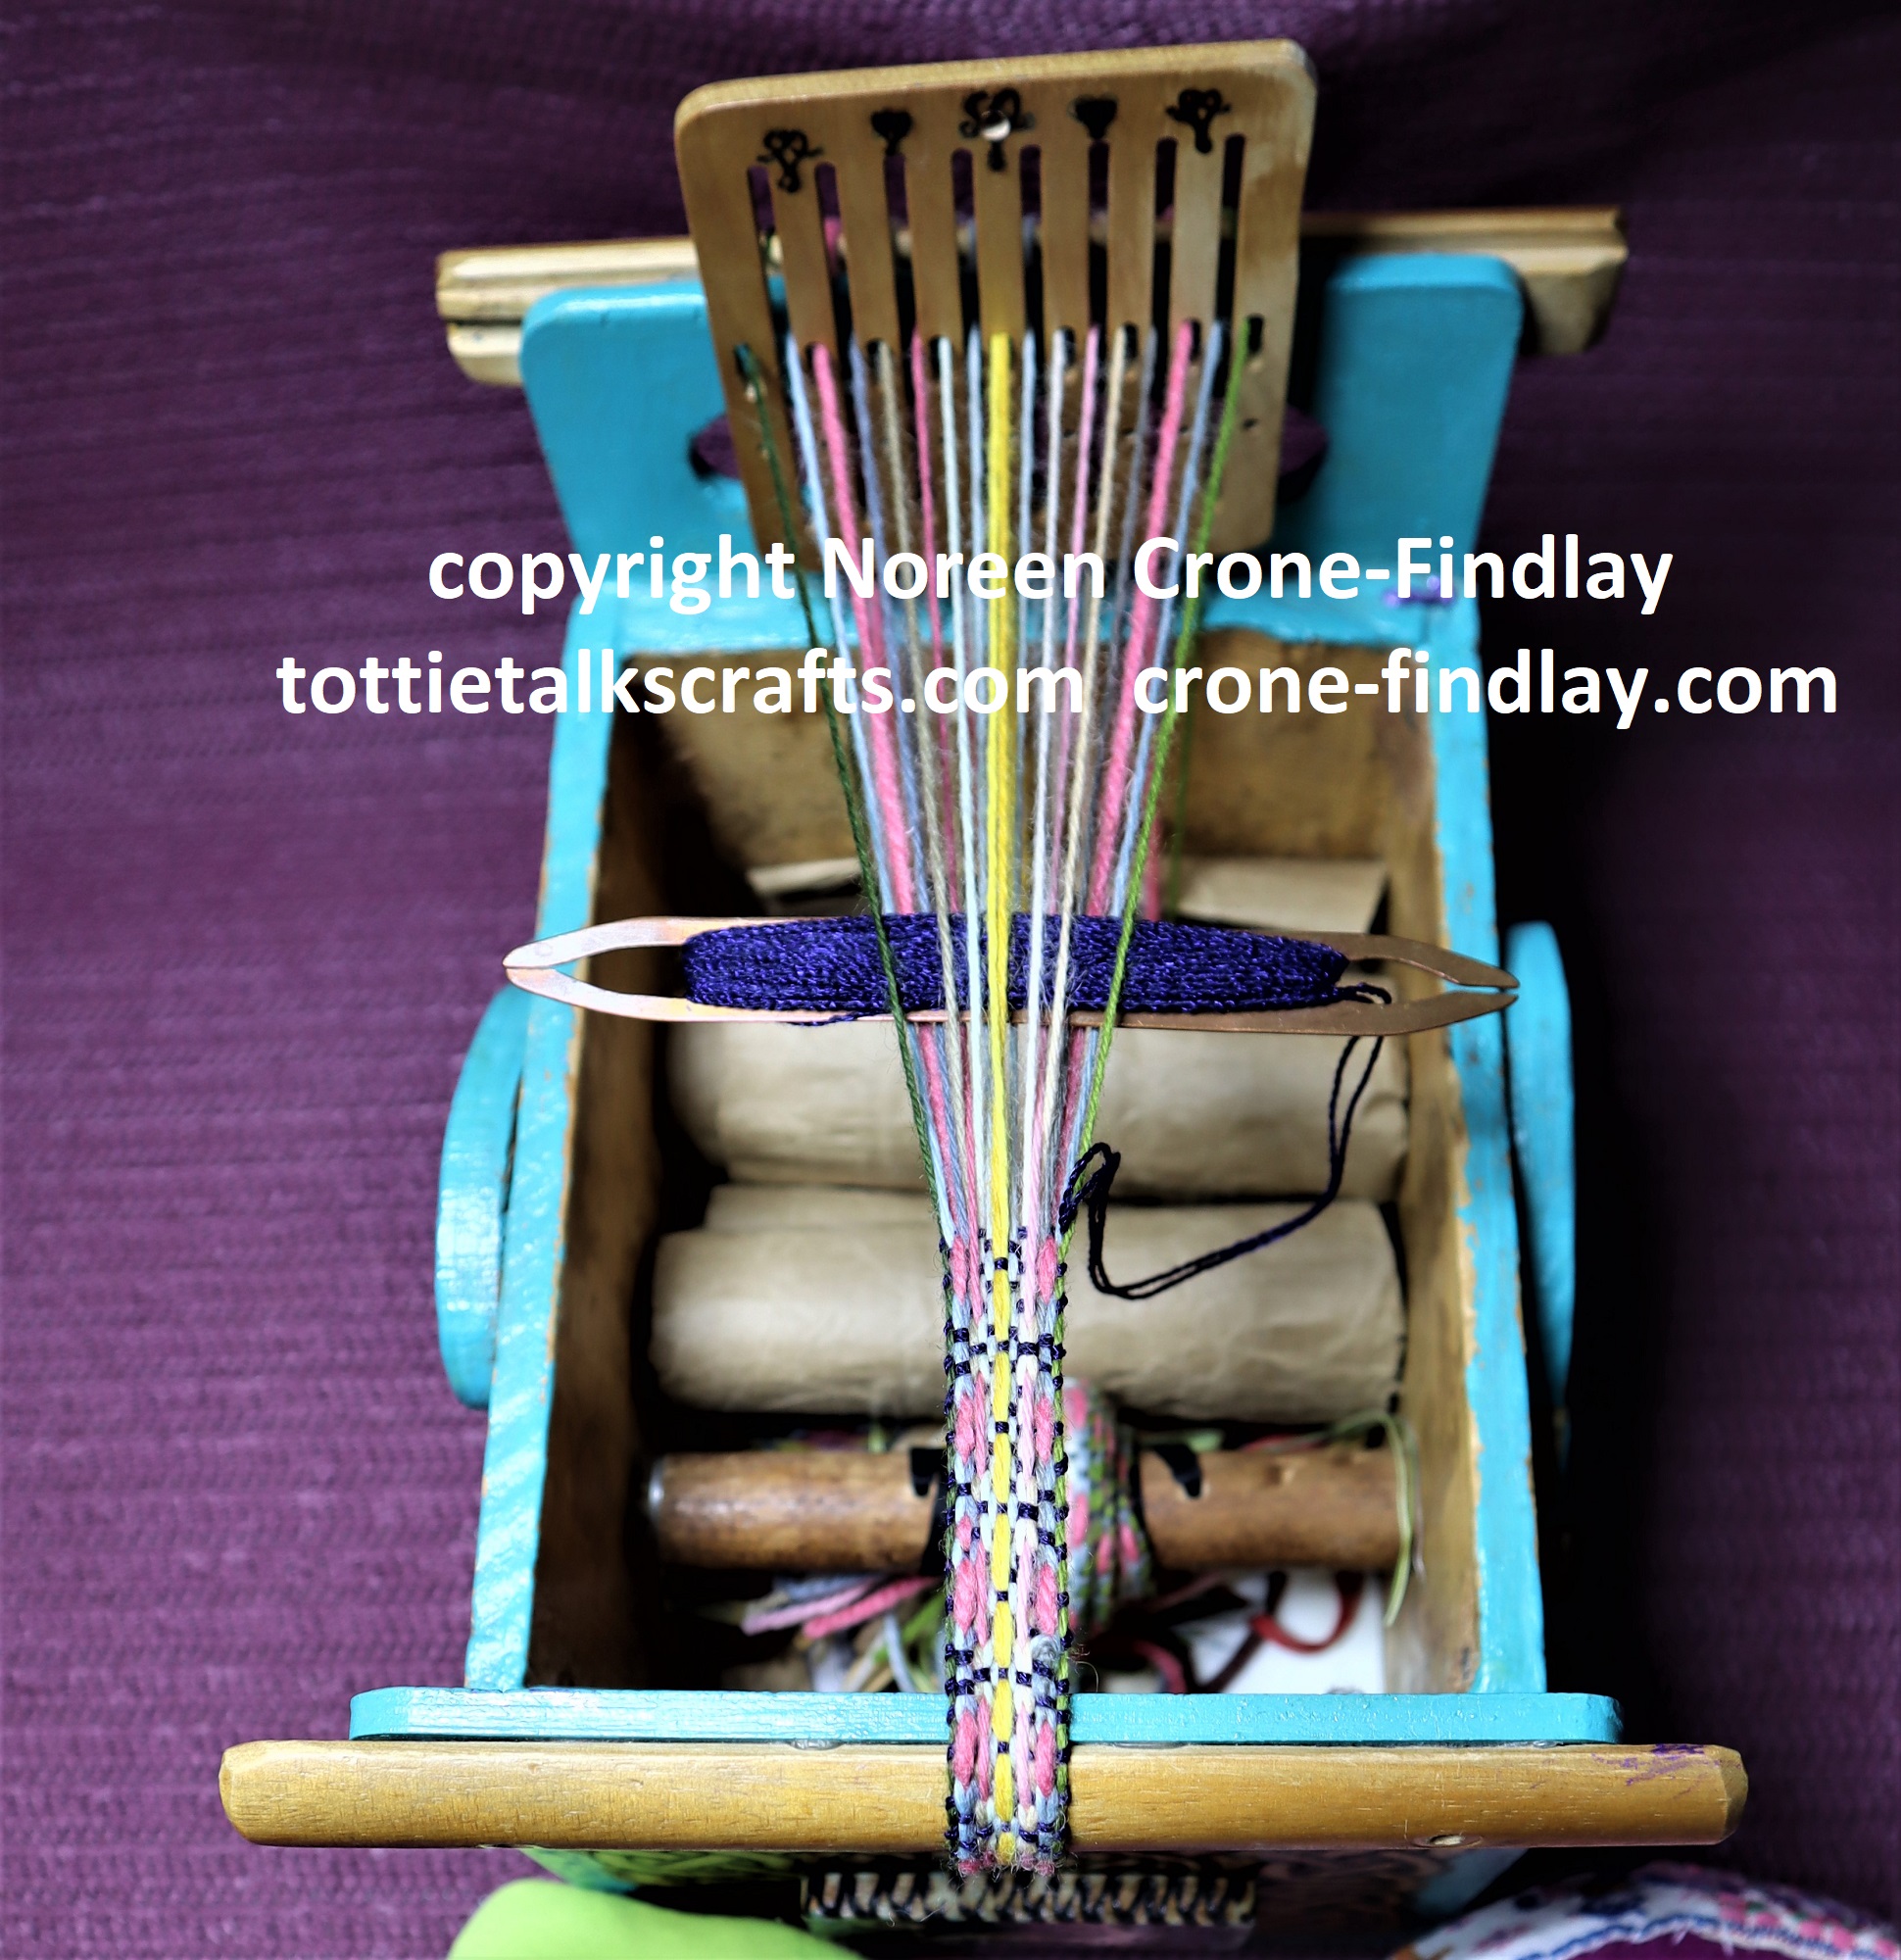
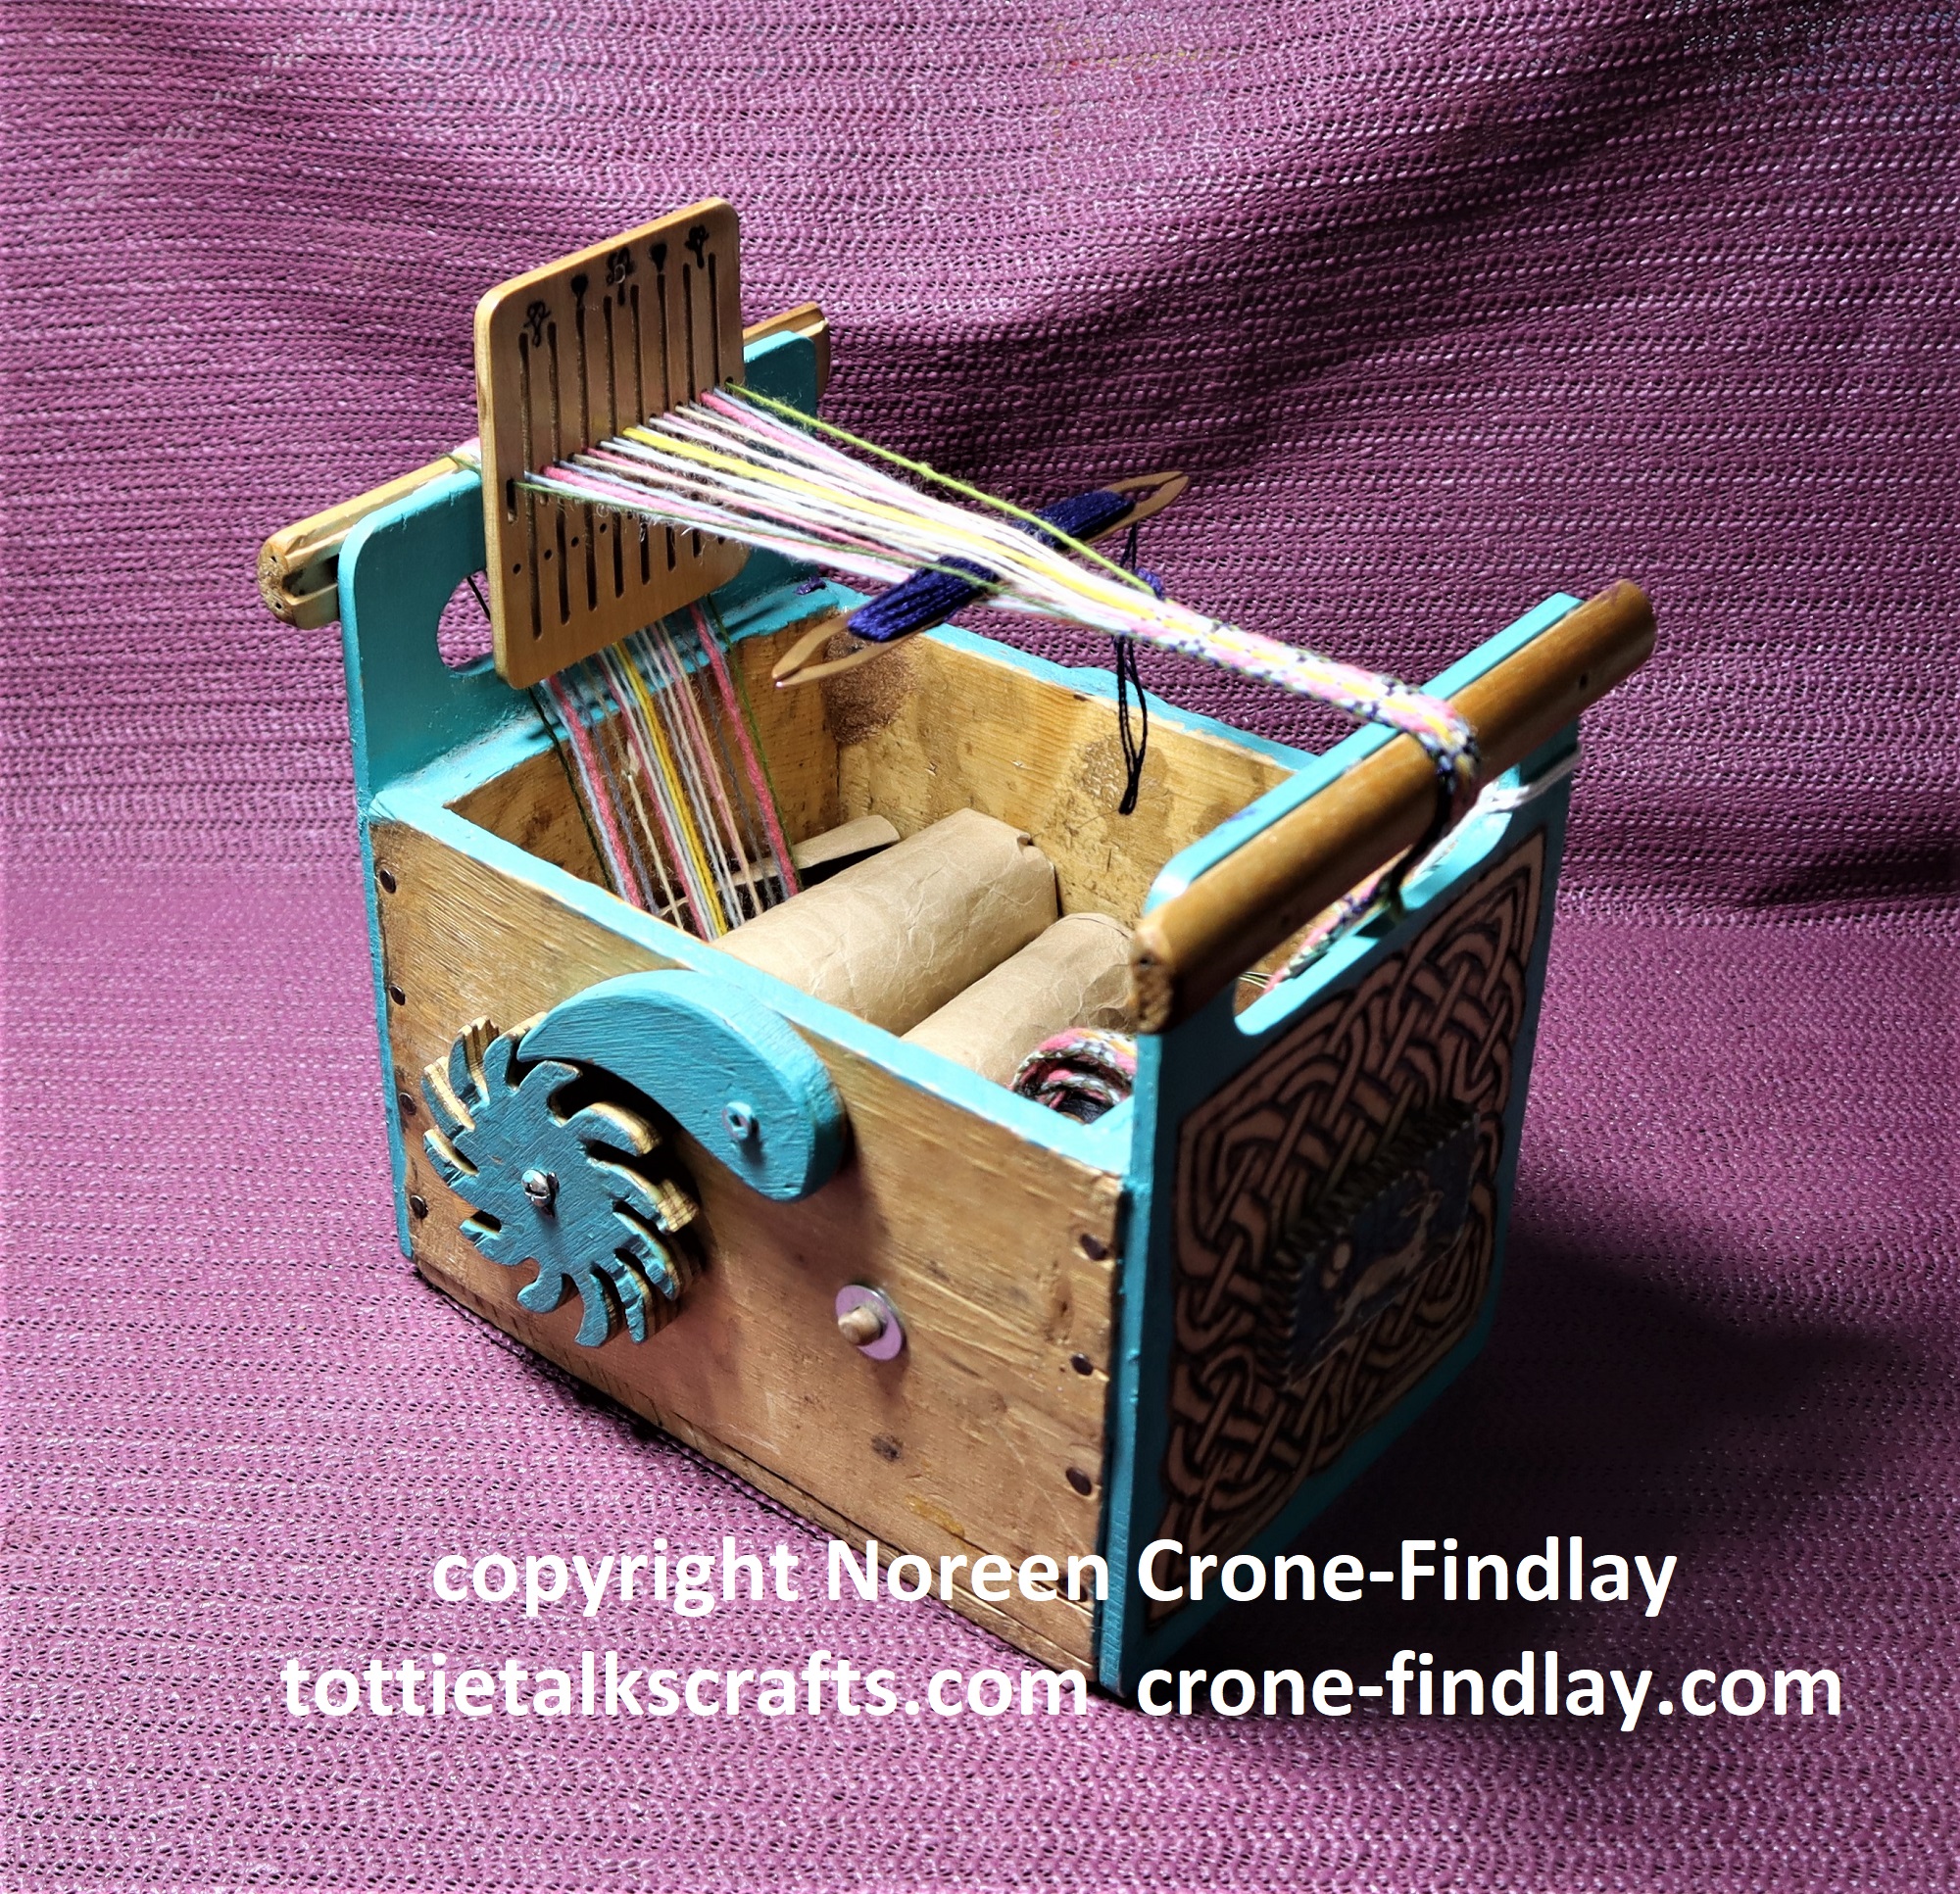
I am designing a whole lot of really fun projects using the Mirrix Chloe Loom and they all are woven using Tabby weaving.
There are a few things that I do when weaving tabby on the Chloe loom that I wanted to share with people, so I have made a video about these tips.
Here’s the link to the video. Oh my…. I had a whalloping huge learning curve to build the video, as the program that I was using is no longer in existence…. sigh…. challenges!
I hope that these hints and tips and hacks are helpful!
The knitted Clancy Comfort Bear is my latest design for comfort bears.
I designed it in honor of my beloved son in law who died last year.
Clancy was kindness incarnate and always kept several Comfort Bears in his pocket to offer to people who were having a difficult time. So, the Clancy Bear is a living legacy to keep his kindness unfolding in the world. With love in every stitch……
THE ‘HOW TO’ VIDEO FOR THE CLANCY COMFORT BEAR IS AT:
NOTE: The finished size of the Clancy Bear is determined by the thickness of yarn and size of knitting needles that you use.
WHAT YOU NEED:
Knitting Needles in a size that is appropriate for the thickness of your yarn,
Yarn: Less than an ounce for each Clancy Comfort Bear
A crochet hook that is appropriate for the thickness of your yarn.
Black 6/0 glass beads for eyes, Stuffing,
Black sewing thread and a needle that is small enough to sew on the beads, Tapestry or darning needle
Sewing machine thread in a color that matches your yarn (optional)
Felting needle, Tape measure, Row Counter, 4 small safety pins, Scissors or thread snip
INSTRUCTIONS: Beginning at the feet:
Cast on 11 stitches.
Rows 1- 16: Work in st st (knit one row, purl the next)
Place one of the little safety pins at each end of Row 6 and then 1 more pin at each end of Row 10.
At the end of Row 16, cut the yarn, leaving a 42 inch/105 cm long tail
Thread the tail end into a darning or tapestry needle and lift all the stitches off the needle.
Pull up to gather the top of the head.
Take the needle through the stitches one more time to secure them.
HEAD:
Sew the centre front seam using the Baseball stitch to the first set of safety pins. (see video for how to).
Take a couple stitches to secure the head. Remove the 2 safety pins.
Stuff the head.
Wrap the yarn tightly around the neck 2 times then stitch over the wraps to secure them.
EARS:
Take the yarn up to the side of the head at the top of the head and stitch over the knitting needle or crochet hook twice.
Stitch over these loops several times to make the first ear.
Repeat for the 2nd ear.
Take the needle back down and out at the ‘shoulder’ to be used to make the arms.
TUMMY SEAM:
Thread another strand of yarn or the sewing machine thread into a needle and stitch the center front down to the next set of safety pins.
Stuff the body.
LEGS:
Fold the cast on edge in half to find the midpoint.
Take the needle through it and stitch it to the end of the tummy seam.
Stitch in place a couple of times to secure it.
Squeeze and fold the edges of the front to meet the cast on edge, forming the leg with the corner point becoming the toe. It’s a bit like origami.
Stitch the leg inseam together, pulling up tightly.
Stitch the second leg inseam.
Secure at the middle.
Take the needle through the body to the back, and snip.
ARMS:
Take the crochet hook through the stitch at the shoulder where the yarn came out.
Yarn over, pull up a loop through the stitch on the body.
Chain by taking the yarn over the hook and pulling it through the loop on the hook.
Do this 7 to 9 times, depending on the thickness of your yarn.
Take the crochet hook through the shoulder on the other side of the body and pull up a loop.
Thread the yarn end into the tapestry needle and stitch the loop to the body.
Take the hook through the first chain stitch at the shoulder, and make a slip stitch in it by pulling up a loop through the chain stitch.
Repeat this for all the chain stitches, ending at the first shoulder.
Stitch the end into the body and use the felting needle to secure the arms to the shoulders and to bury the yarn end.
NOSE:
Take the black thread through the head, coming out at the center of the face.
Secure it with a couple of tiny stitches.
Make several horizontal stitches for the nose.
MOUTH:
Move down and take a couple of shorter horizontal stitches for the mouth.
EYES:
Take the needle up slightly above and to one side of the nose and sew on the bead for one eye,
then the other.
Secure the stitches by going back down to the nose and taking a couple of tiny stitches at the corner of the nose, then taking the needle back through the head. Snip the ends.
PANDA:
INSTRUCTIONS: Beginning at the feet:
Cast on 11 stitches with black yarn.
Rows 1- 6: Work in st st (knit one row, purl the next)
Place one of the little safety pins at each end of Row 6
Rows 7 & 8: Join white yarn and work in st st
Rows 9 & 10: Drop white yarn and work in black yarn.
Place 1 more pin at each end of Row 10.
Cut the black yarn, leaving a tail of 42 inches/105 cm.
Rows 11- 16: Work in white yarn.
At the end of Row 16, cut the yarn, leaving a 20 inch/50 cm long tail
Thread the white yarn end into a darning or tapestry needle and lift all the stitches off the needle.
Pull up to gather the top of the head.
Take the needle through the stitches one more time to secure them.
Stitch the center front seam of the head with the white yarn.
Stuff the head and wrap and secure the neck.
Take the black tail end out through to the shoulder and leave it there for now.
Work the rest of the Panda body, legs and arms the same way as the Basic Clancy Bear.
EARS:
After working the Arms, take the black yarn up to the top of the head and make the ears.
EYE PATCHES:
Take 3 small vertical stitches for each eye patch.
NOSE:
Take 2 horizontal stitches for the nose.
MOUTH:
Take 1 smaller horizontal stitch for the mouth. Secure the yarn by stitching through to the back of the neck and stitching in place the burying the yarn in the body.
EYES:
Sew the eye beads to the center of the patches. Secure the thread ends in the eye patches.
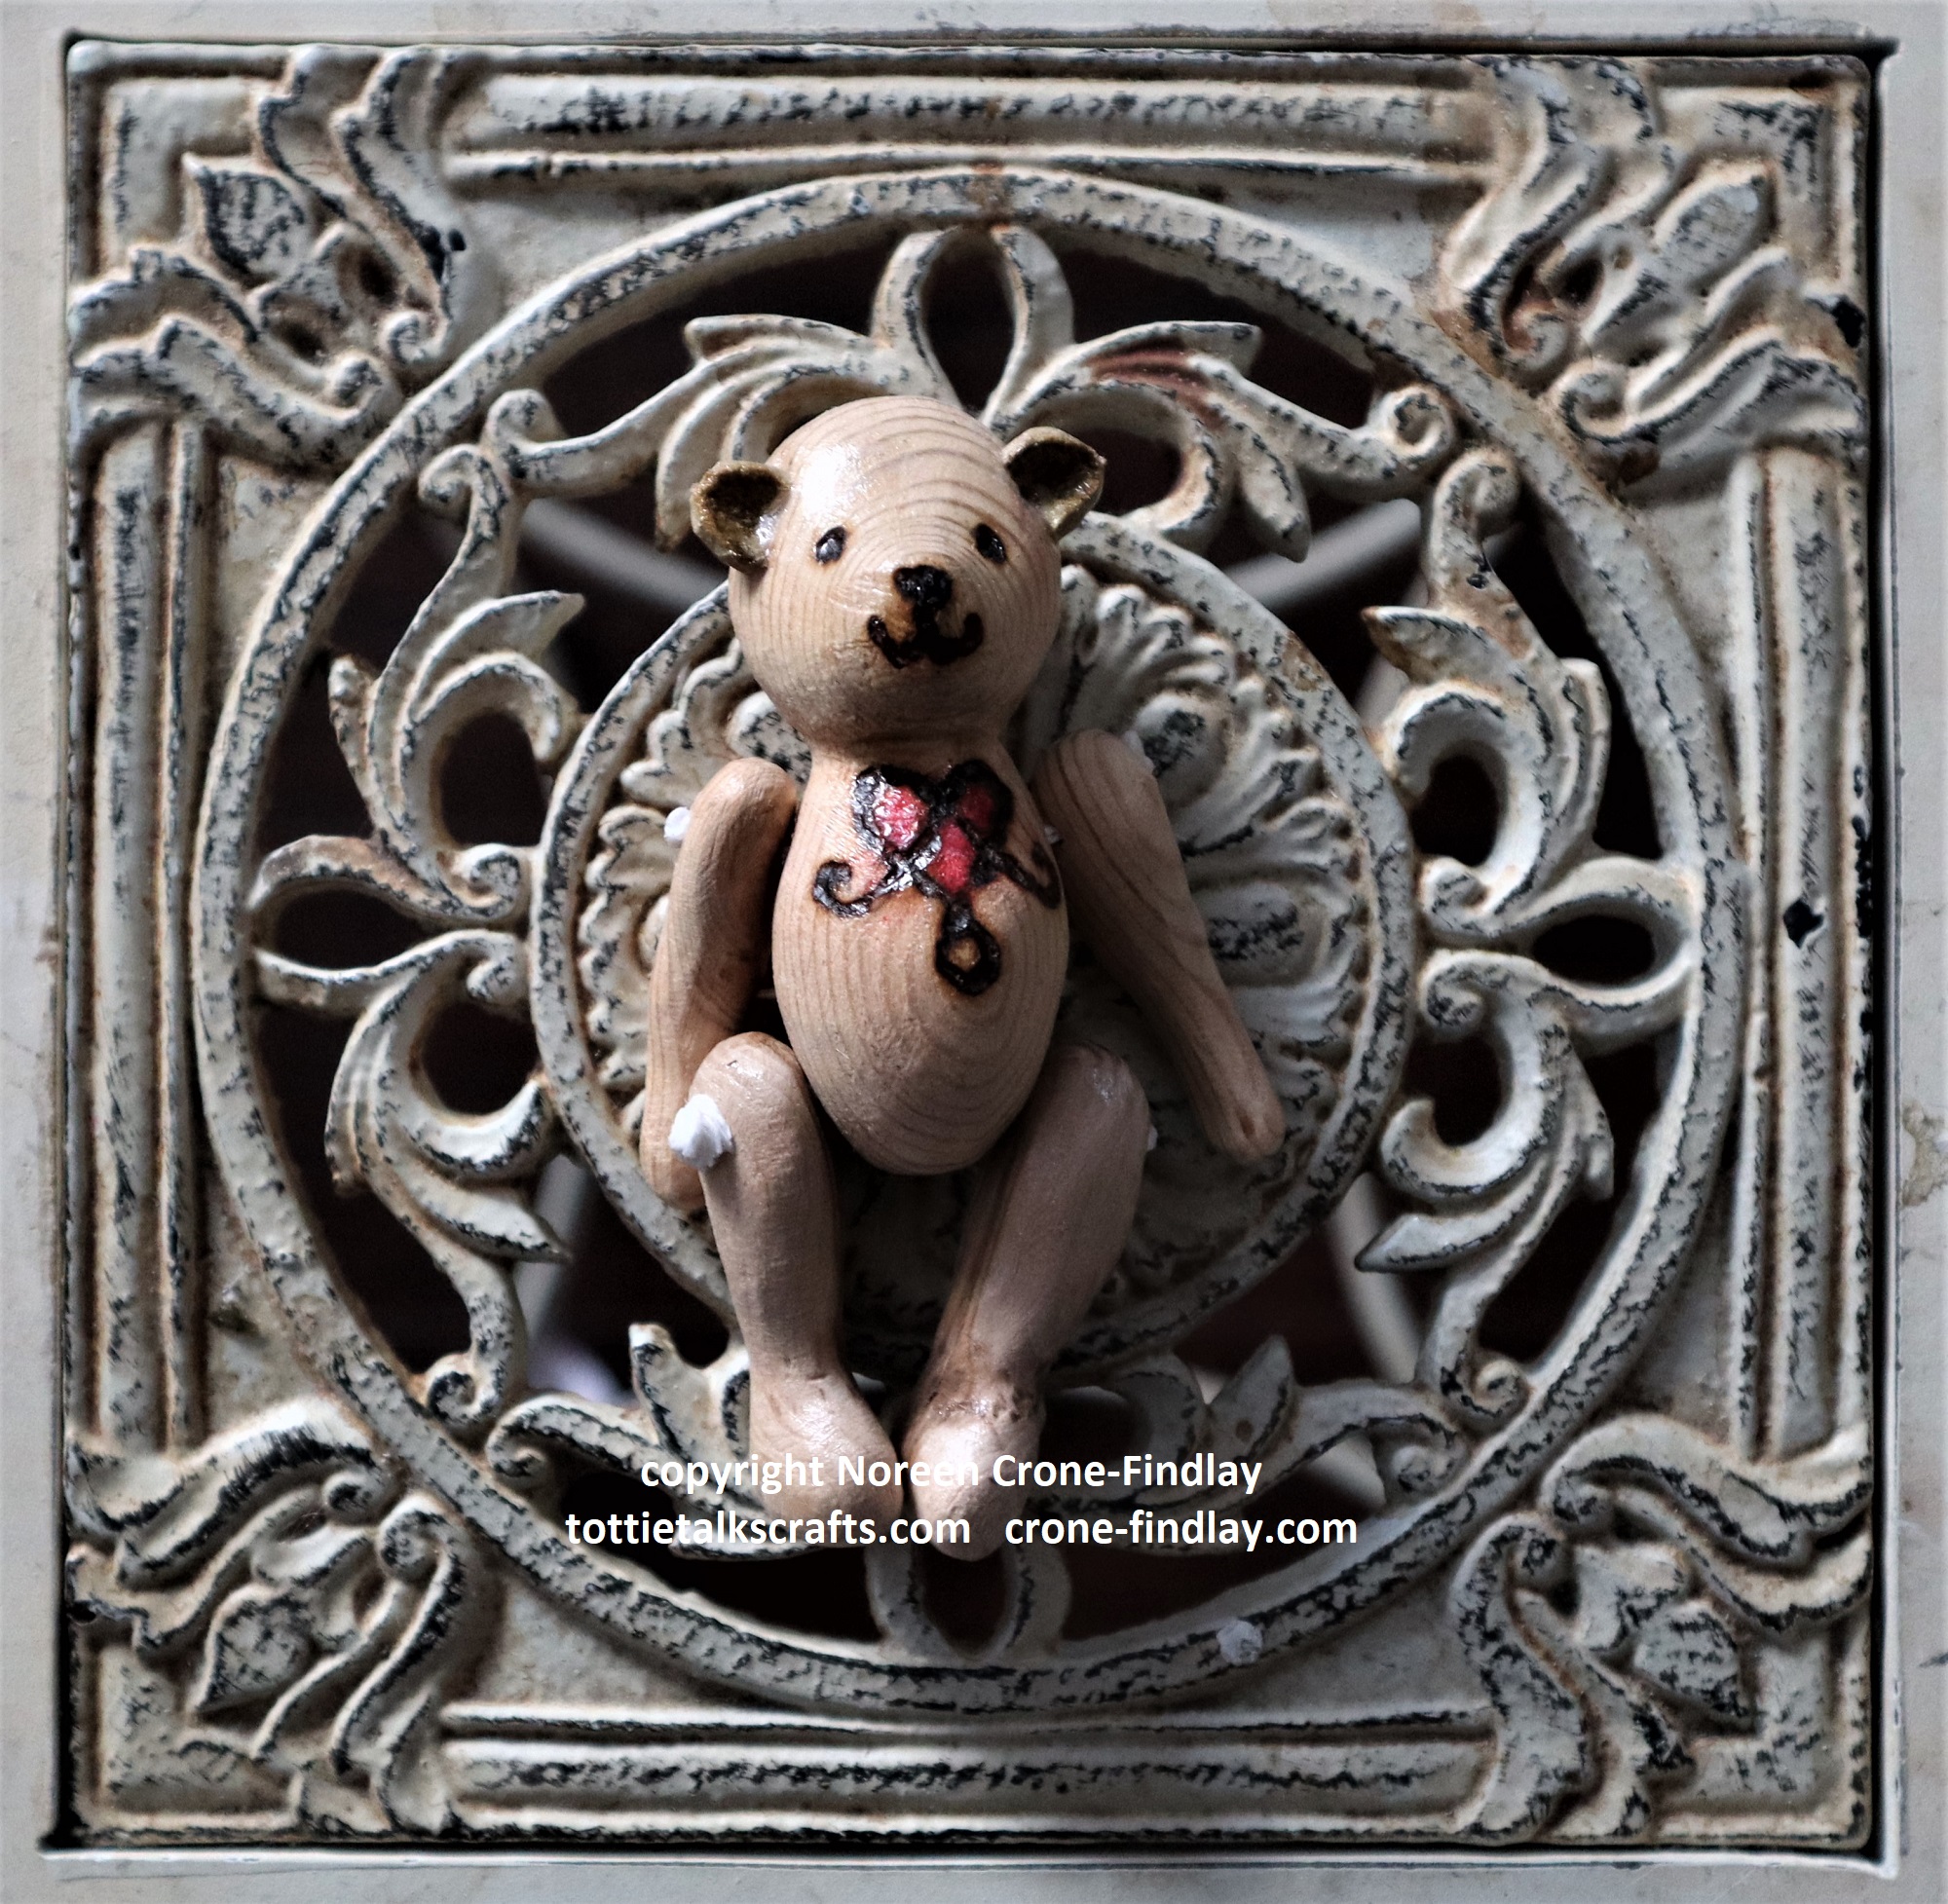
A couple of years ago, I had a wonderful time designing, carving and painting one of a kind wooden Teddy Bears and Pandas. Each one is unique.
They all have jointed arms and legs, so they can sit and move about.
I am not carving wood anymore, and won’t be making any more of the Wooden Teddy Bears or Pandas. These are the last of my series and are for sale.
Hand Carved WOODEN PANDAS
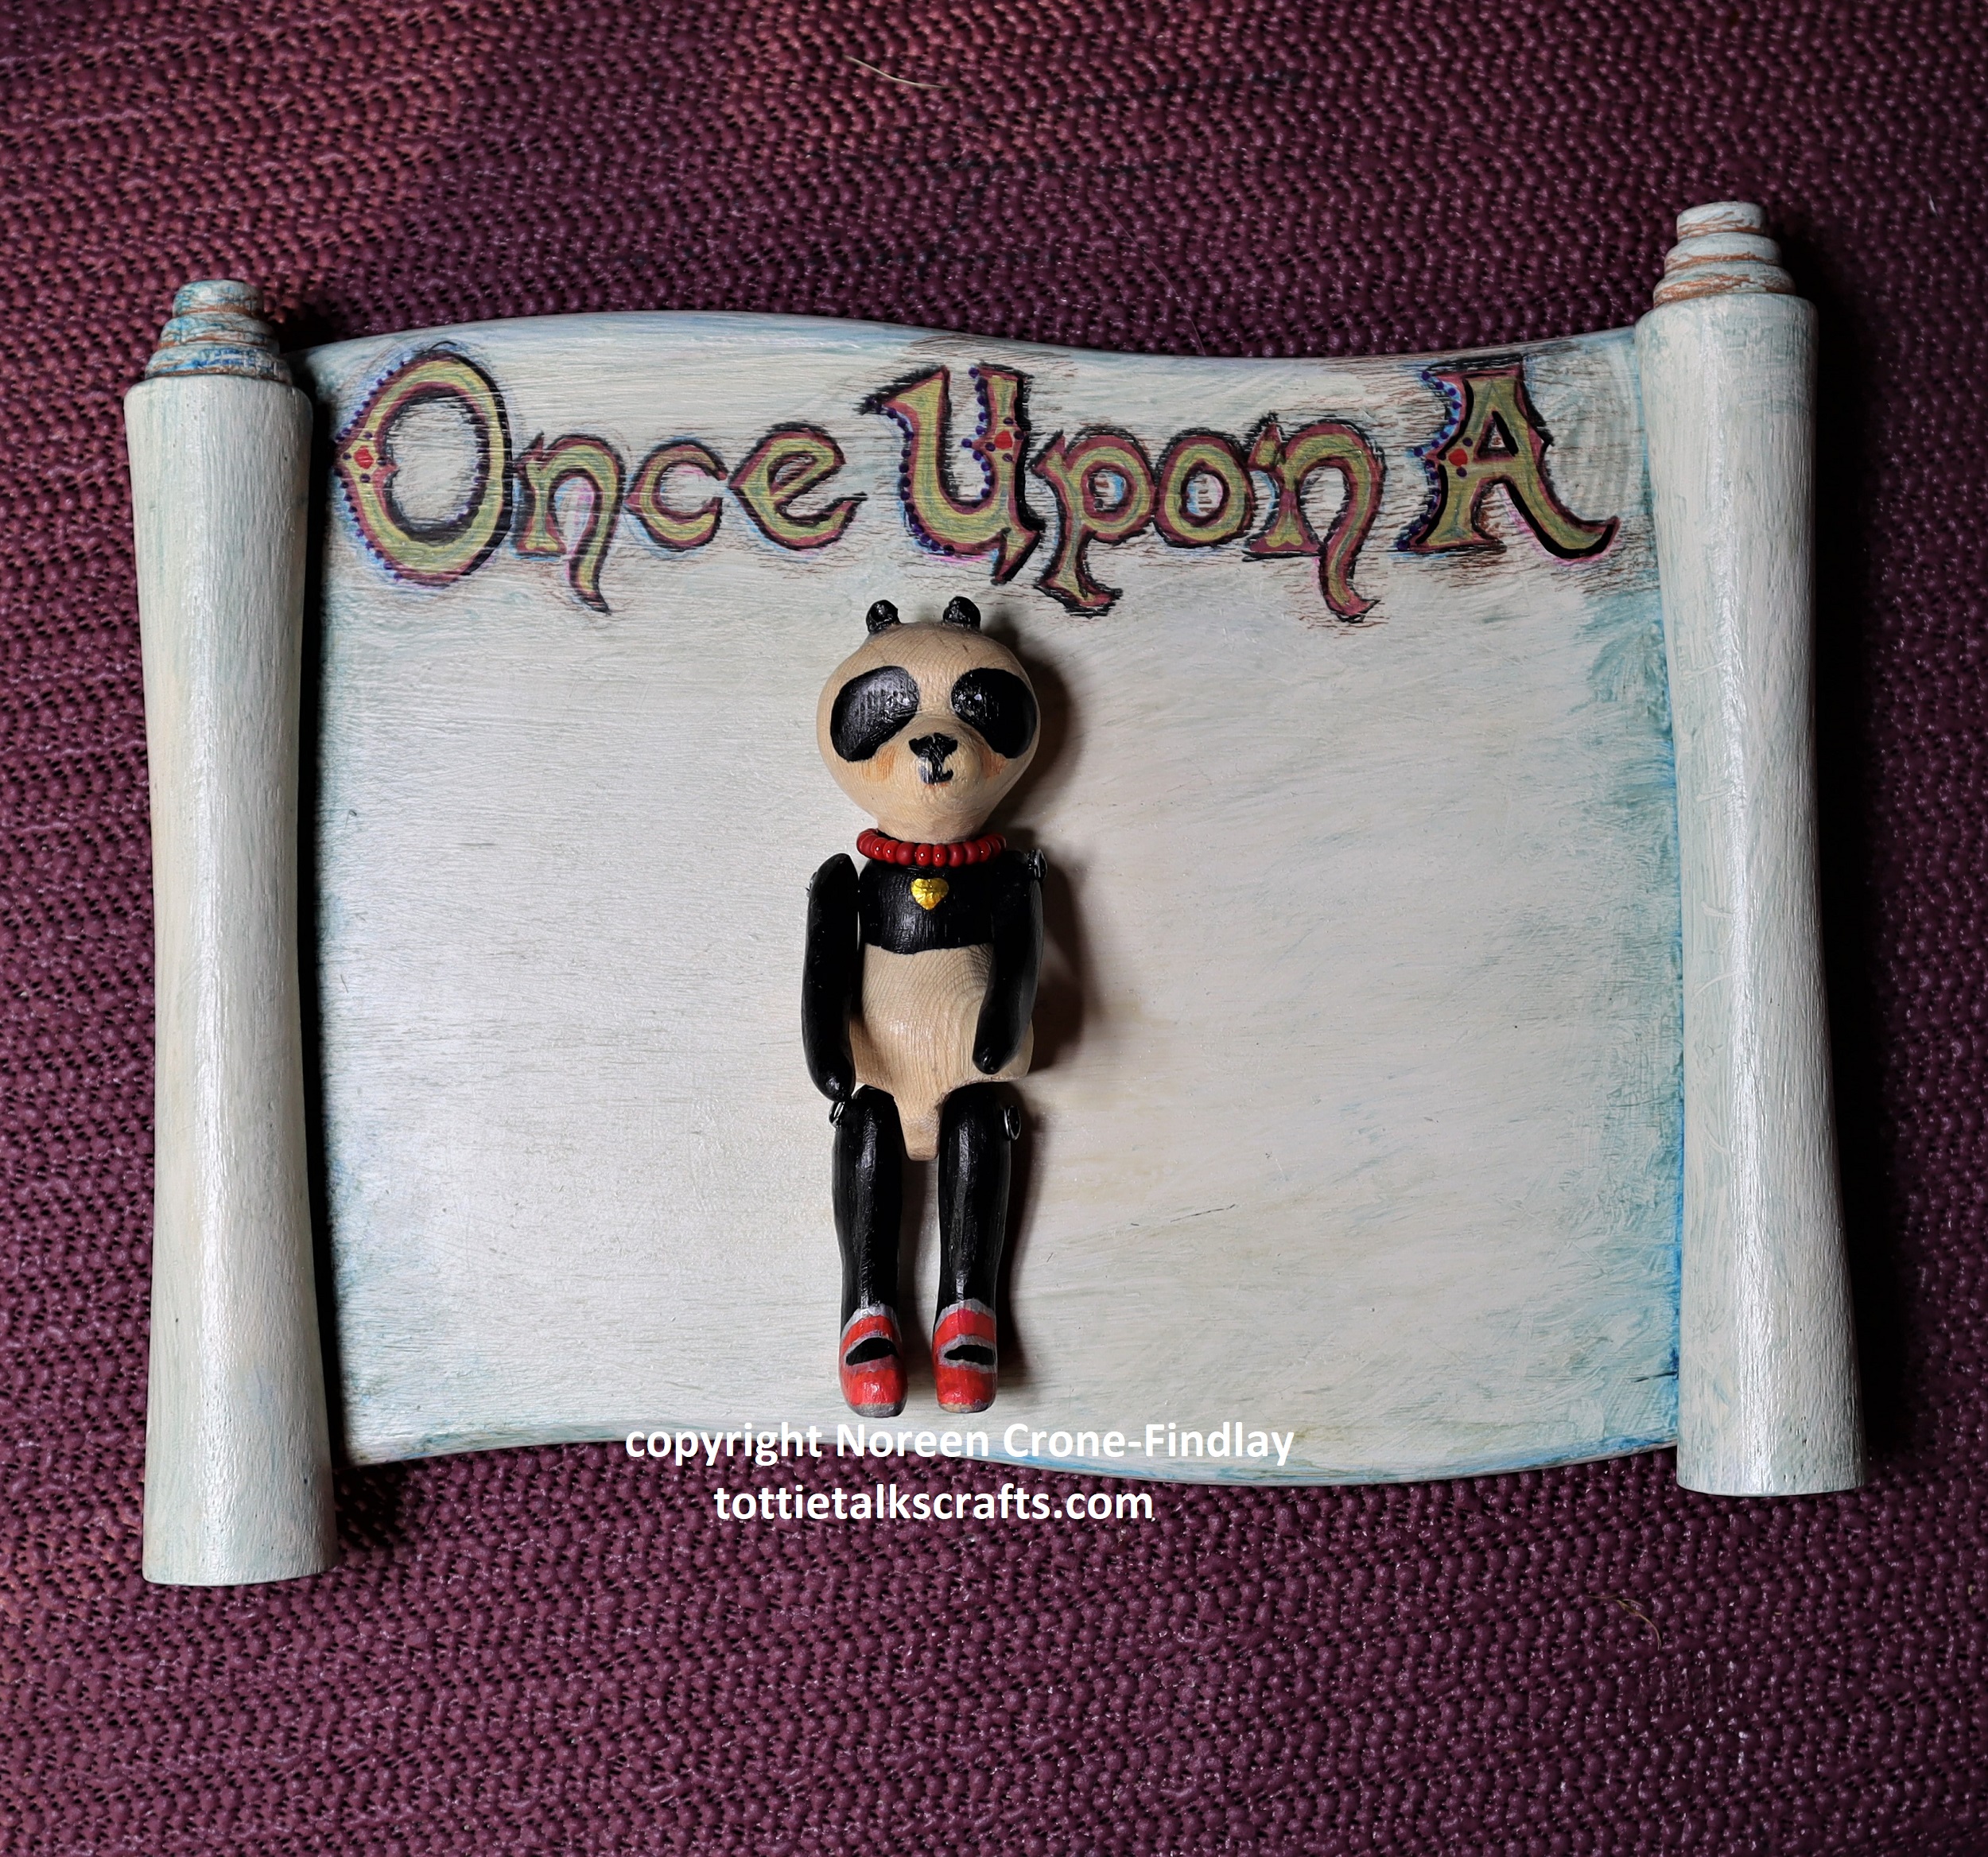
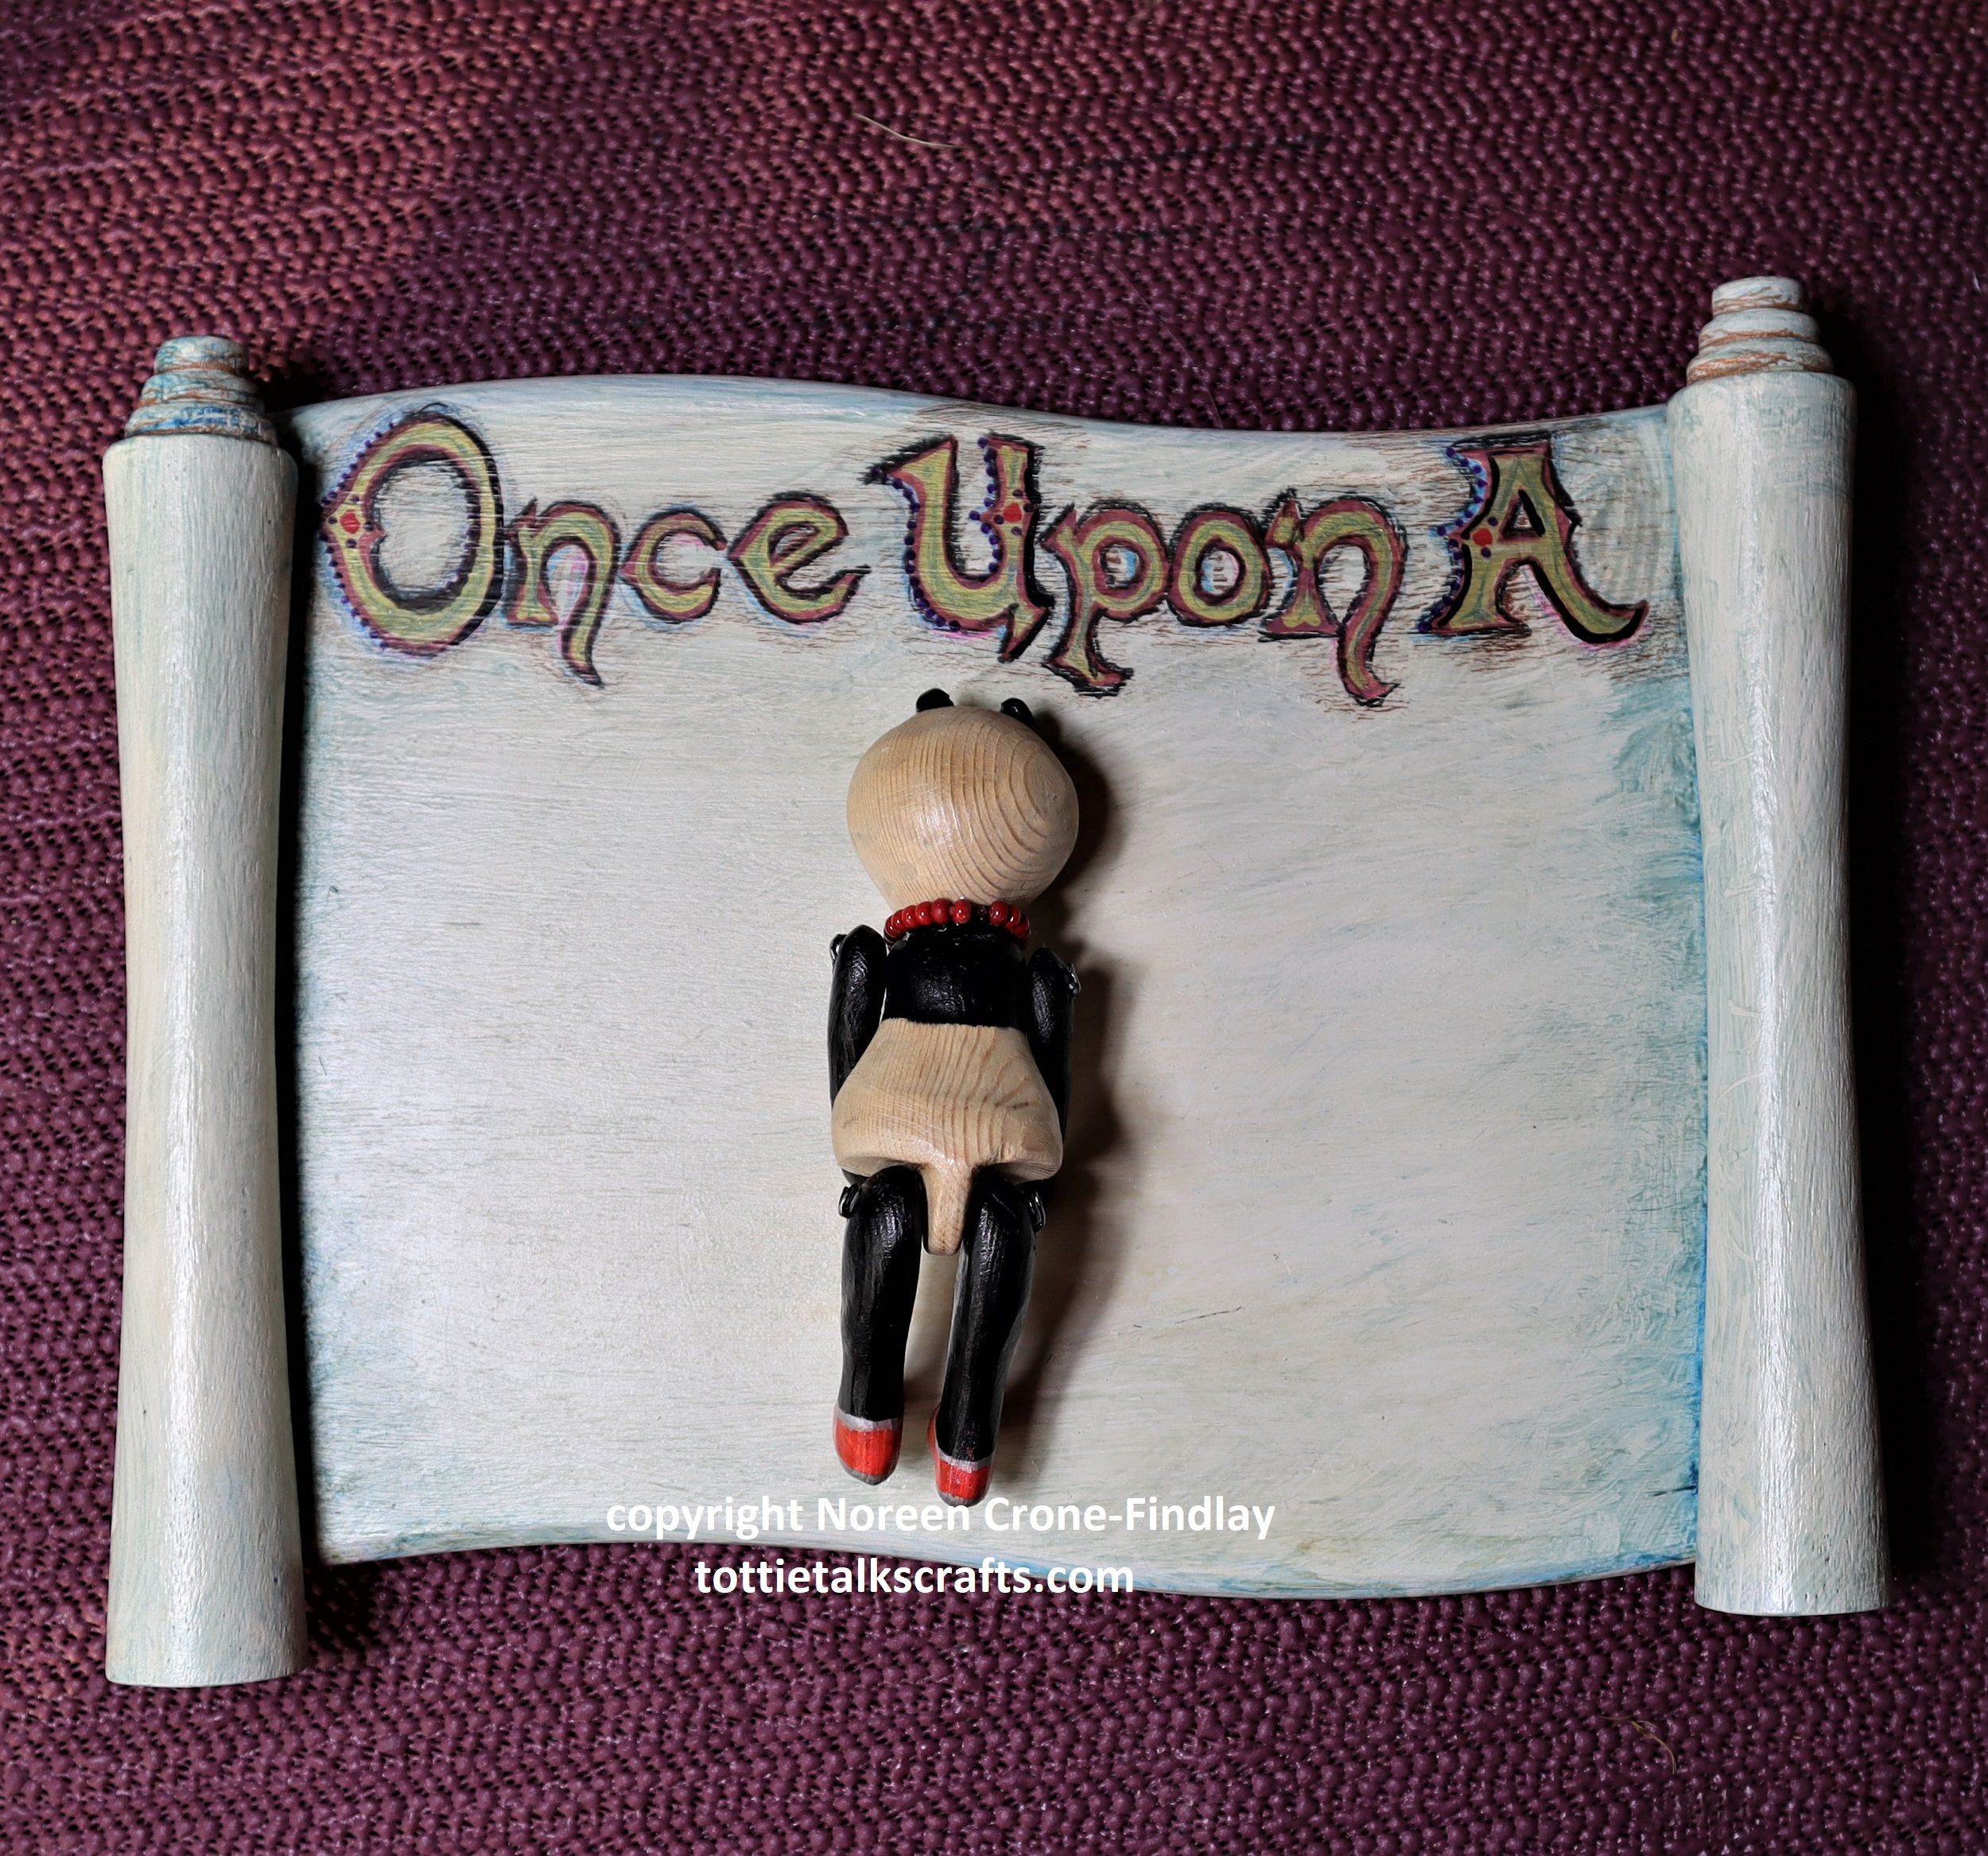
1- This Panda is approximately 6 1/2 inches (16.5 cm) tall $95 + shipping
Note: It has a beaded necklace that can be removed if you prefer them to not wear a necklace.
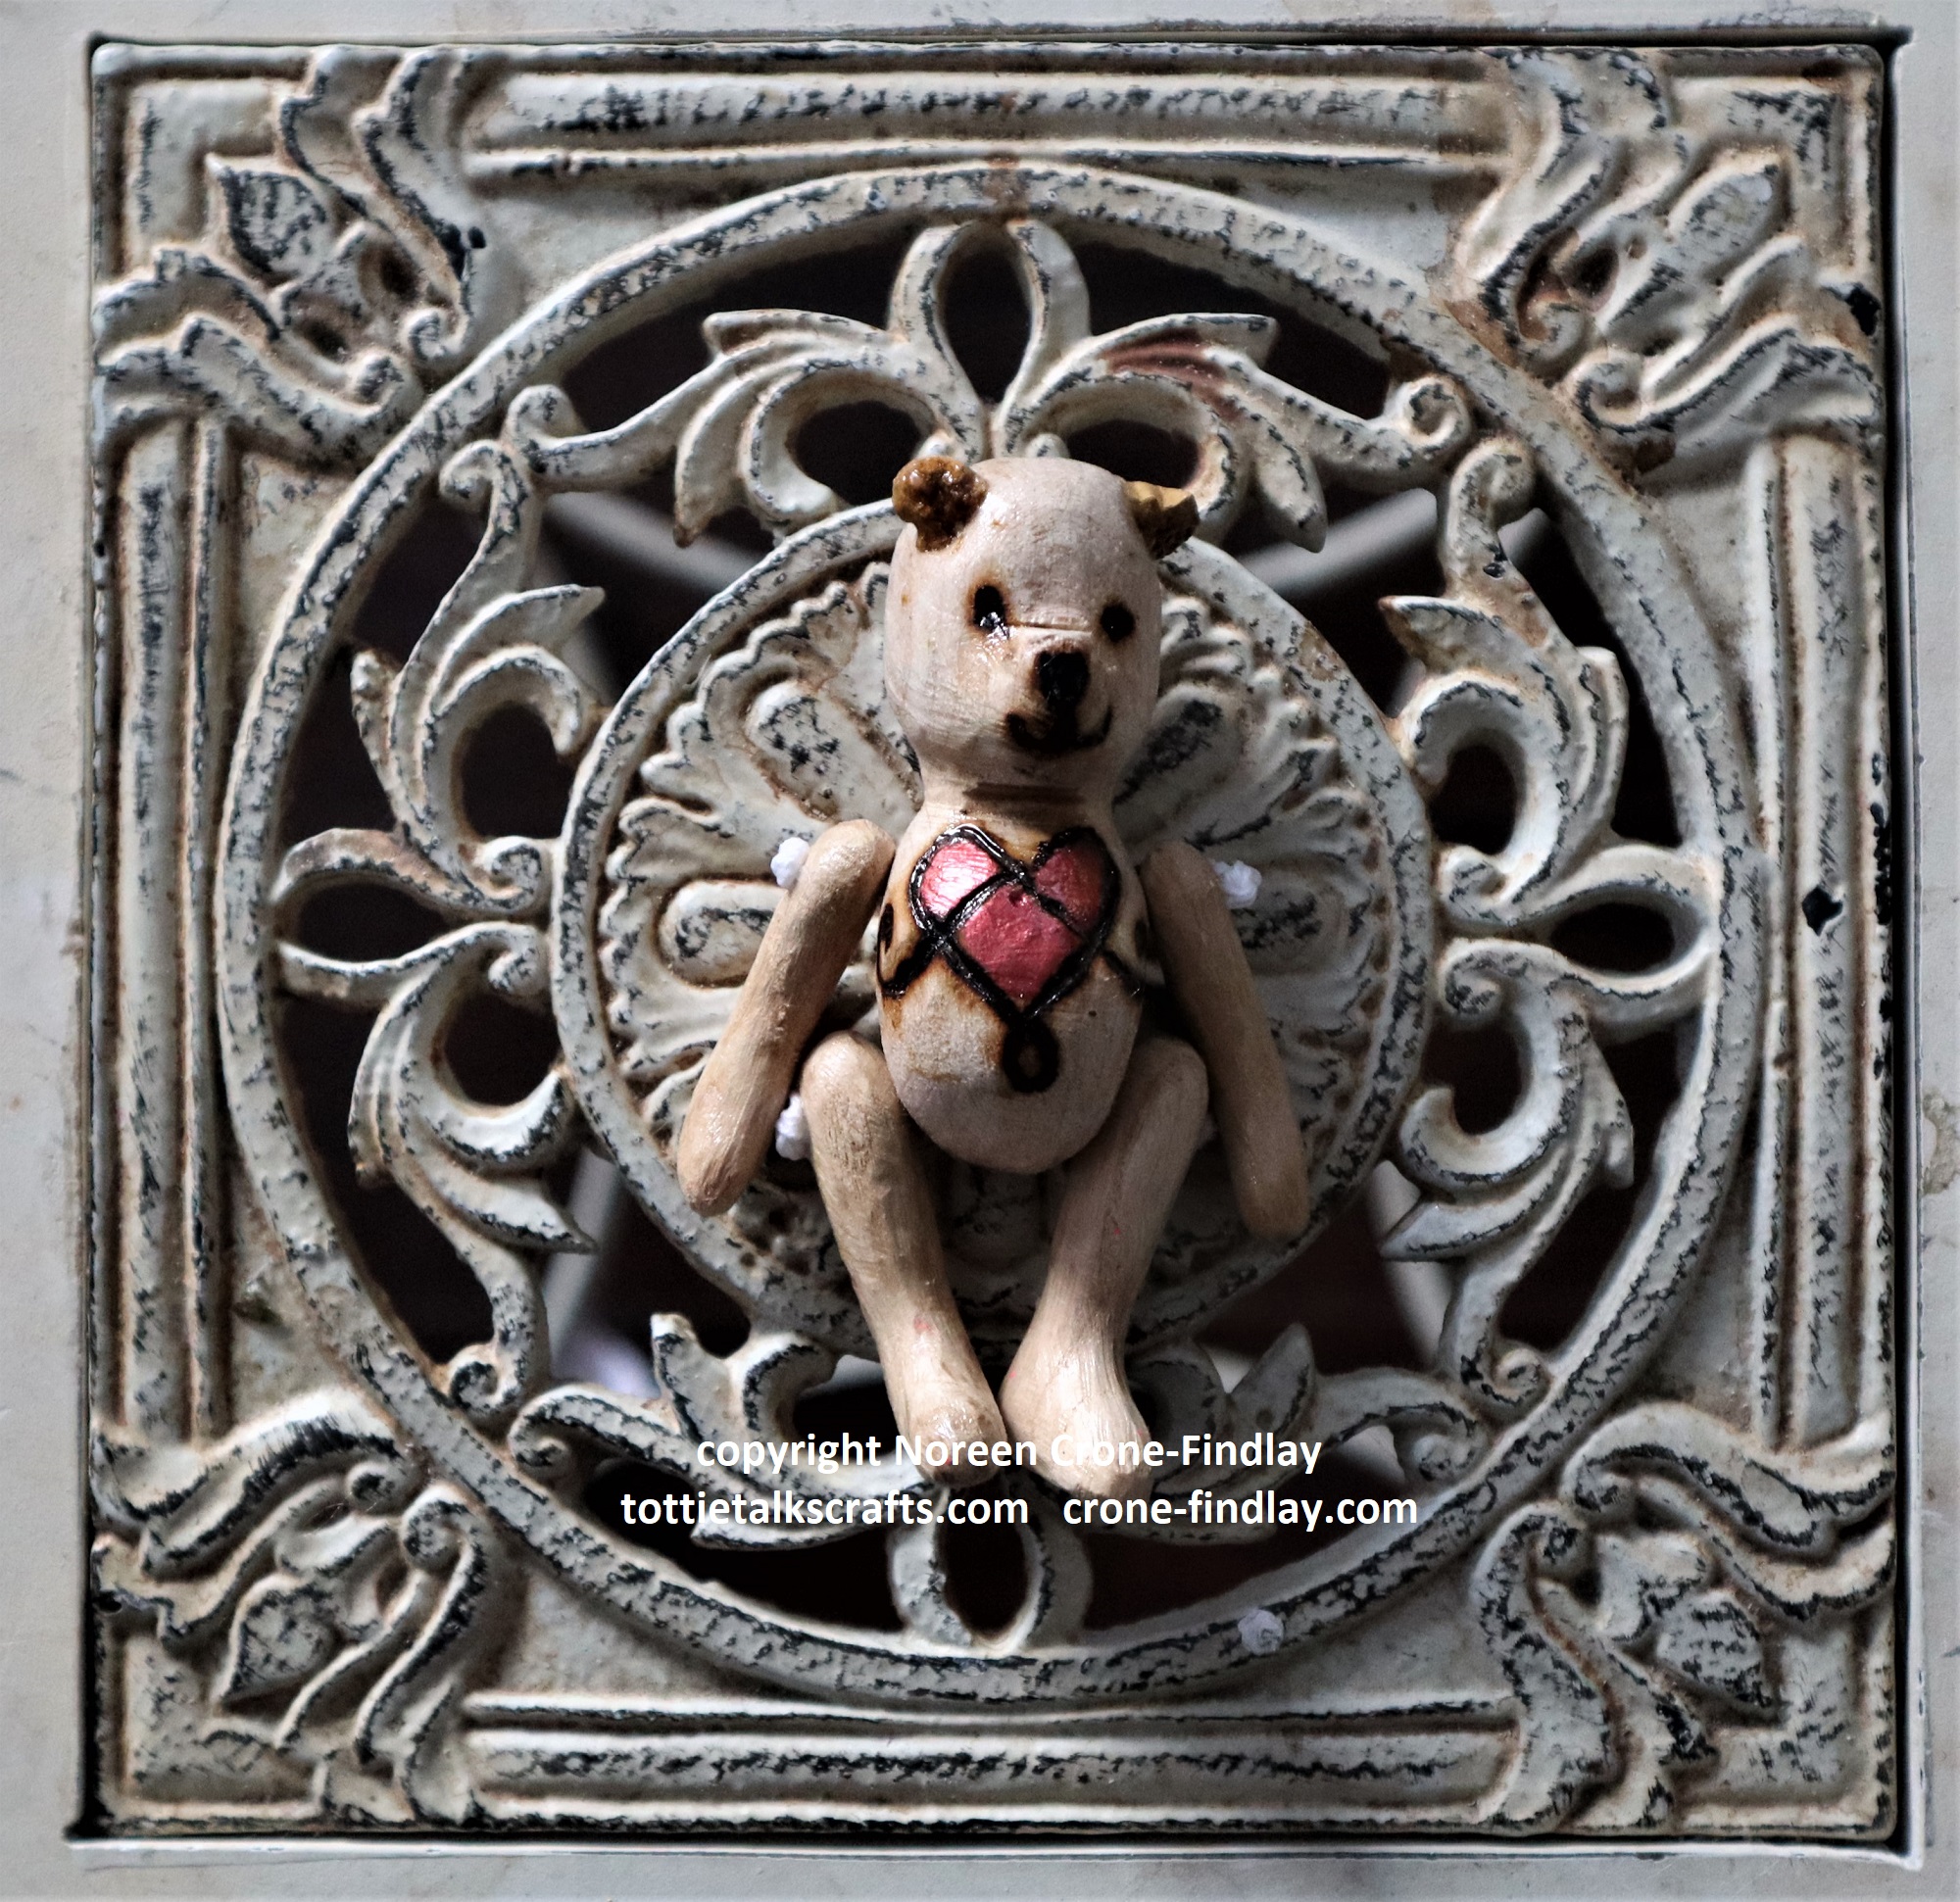
2– This little Panda has a gold heart, red bead necklace and red shoes and is approximately 5 1/2 inches (14 cm) tall $95 + shipping
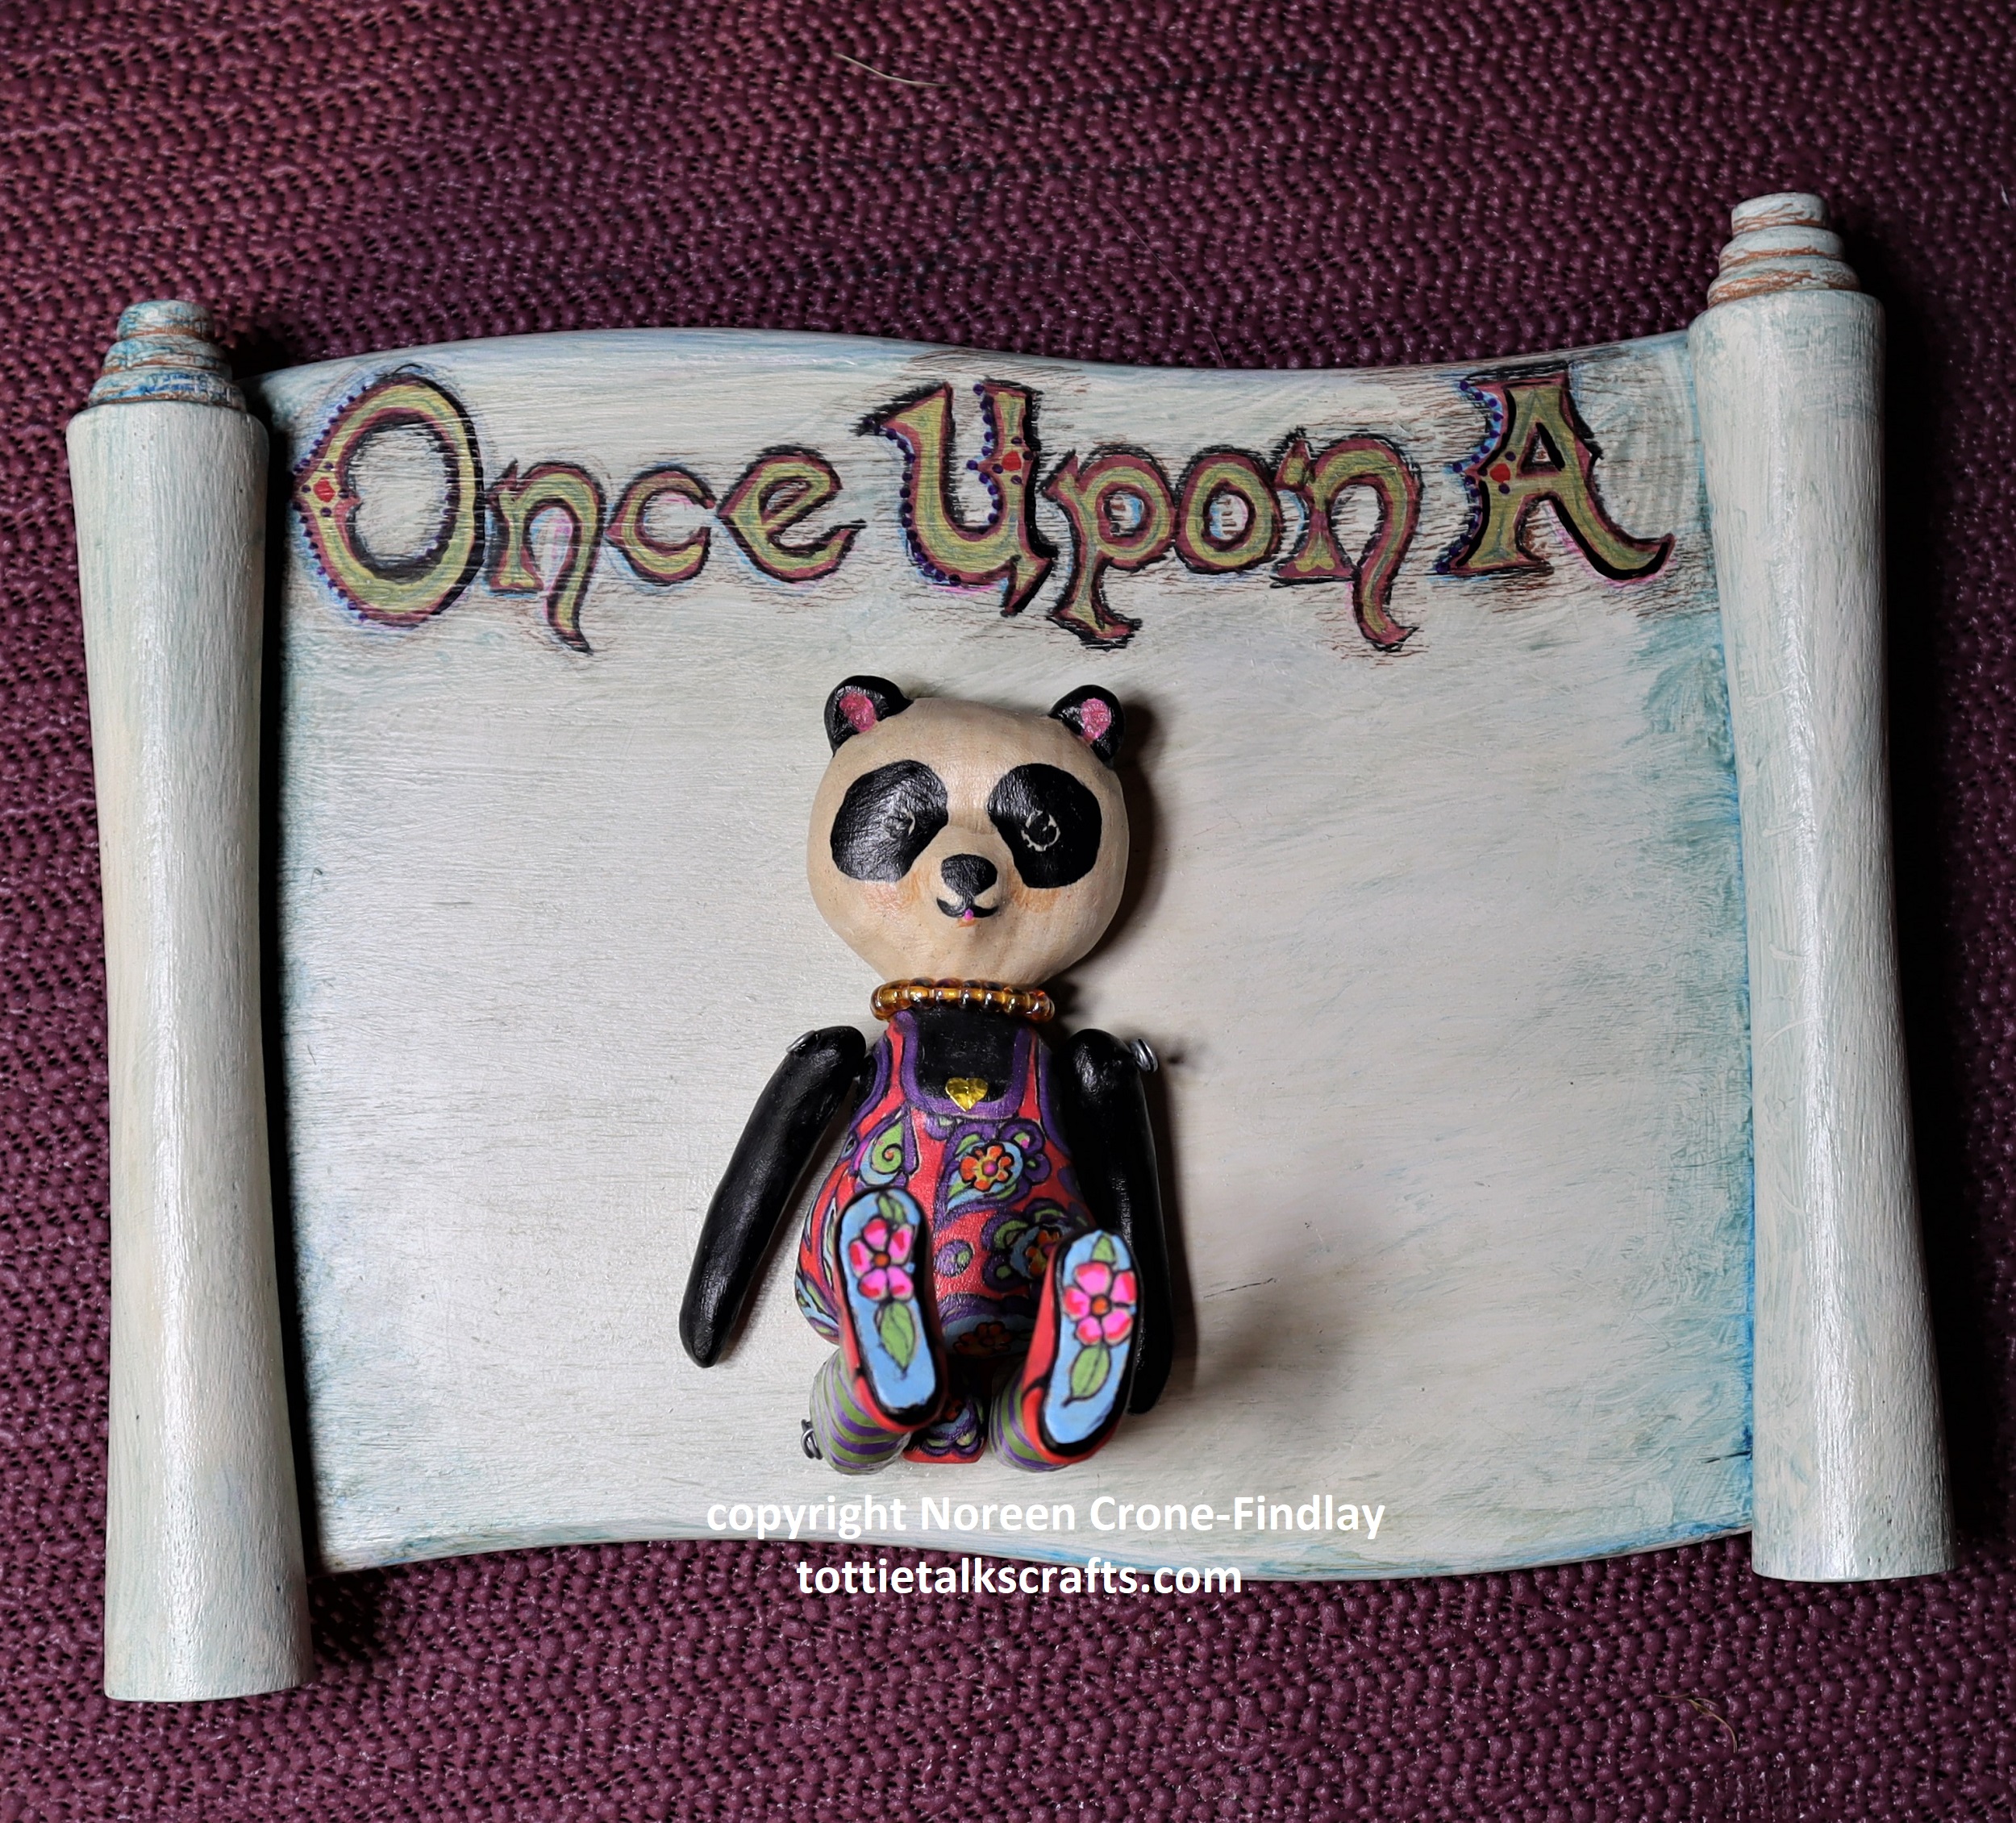
3- This Panda has a gold heart, a gold bead necklace, red shoes that have flowers on the soles, green and purple leggings and a flowered body suit and is approximately 7 1/2 inches (19 cm) tall
$95 + shipping
Hand Carved Wooden TEDDY BEARS THAT ARE ABOUT 7 1/2 Inches TALL:
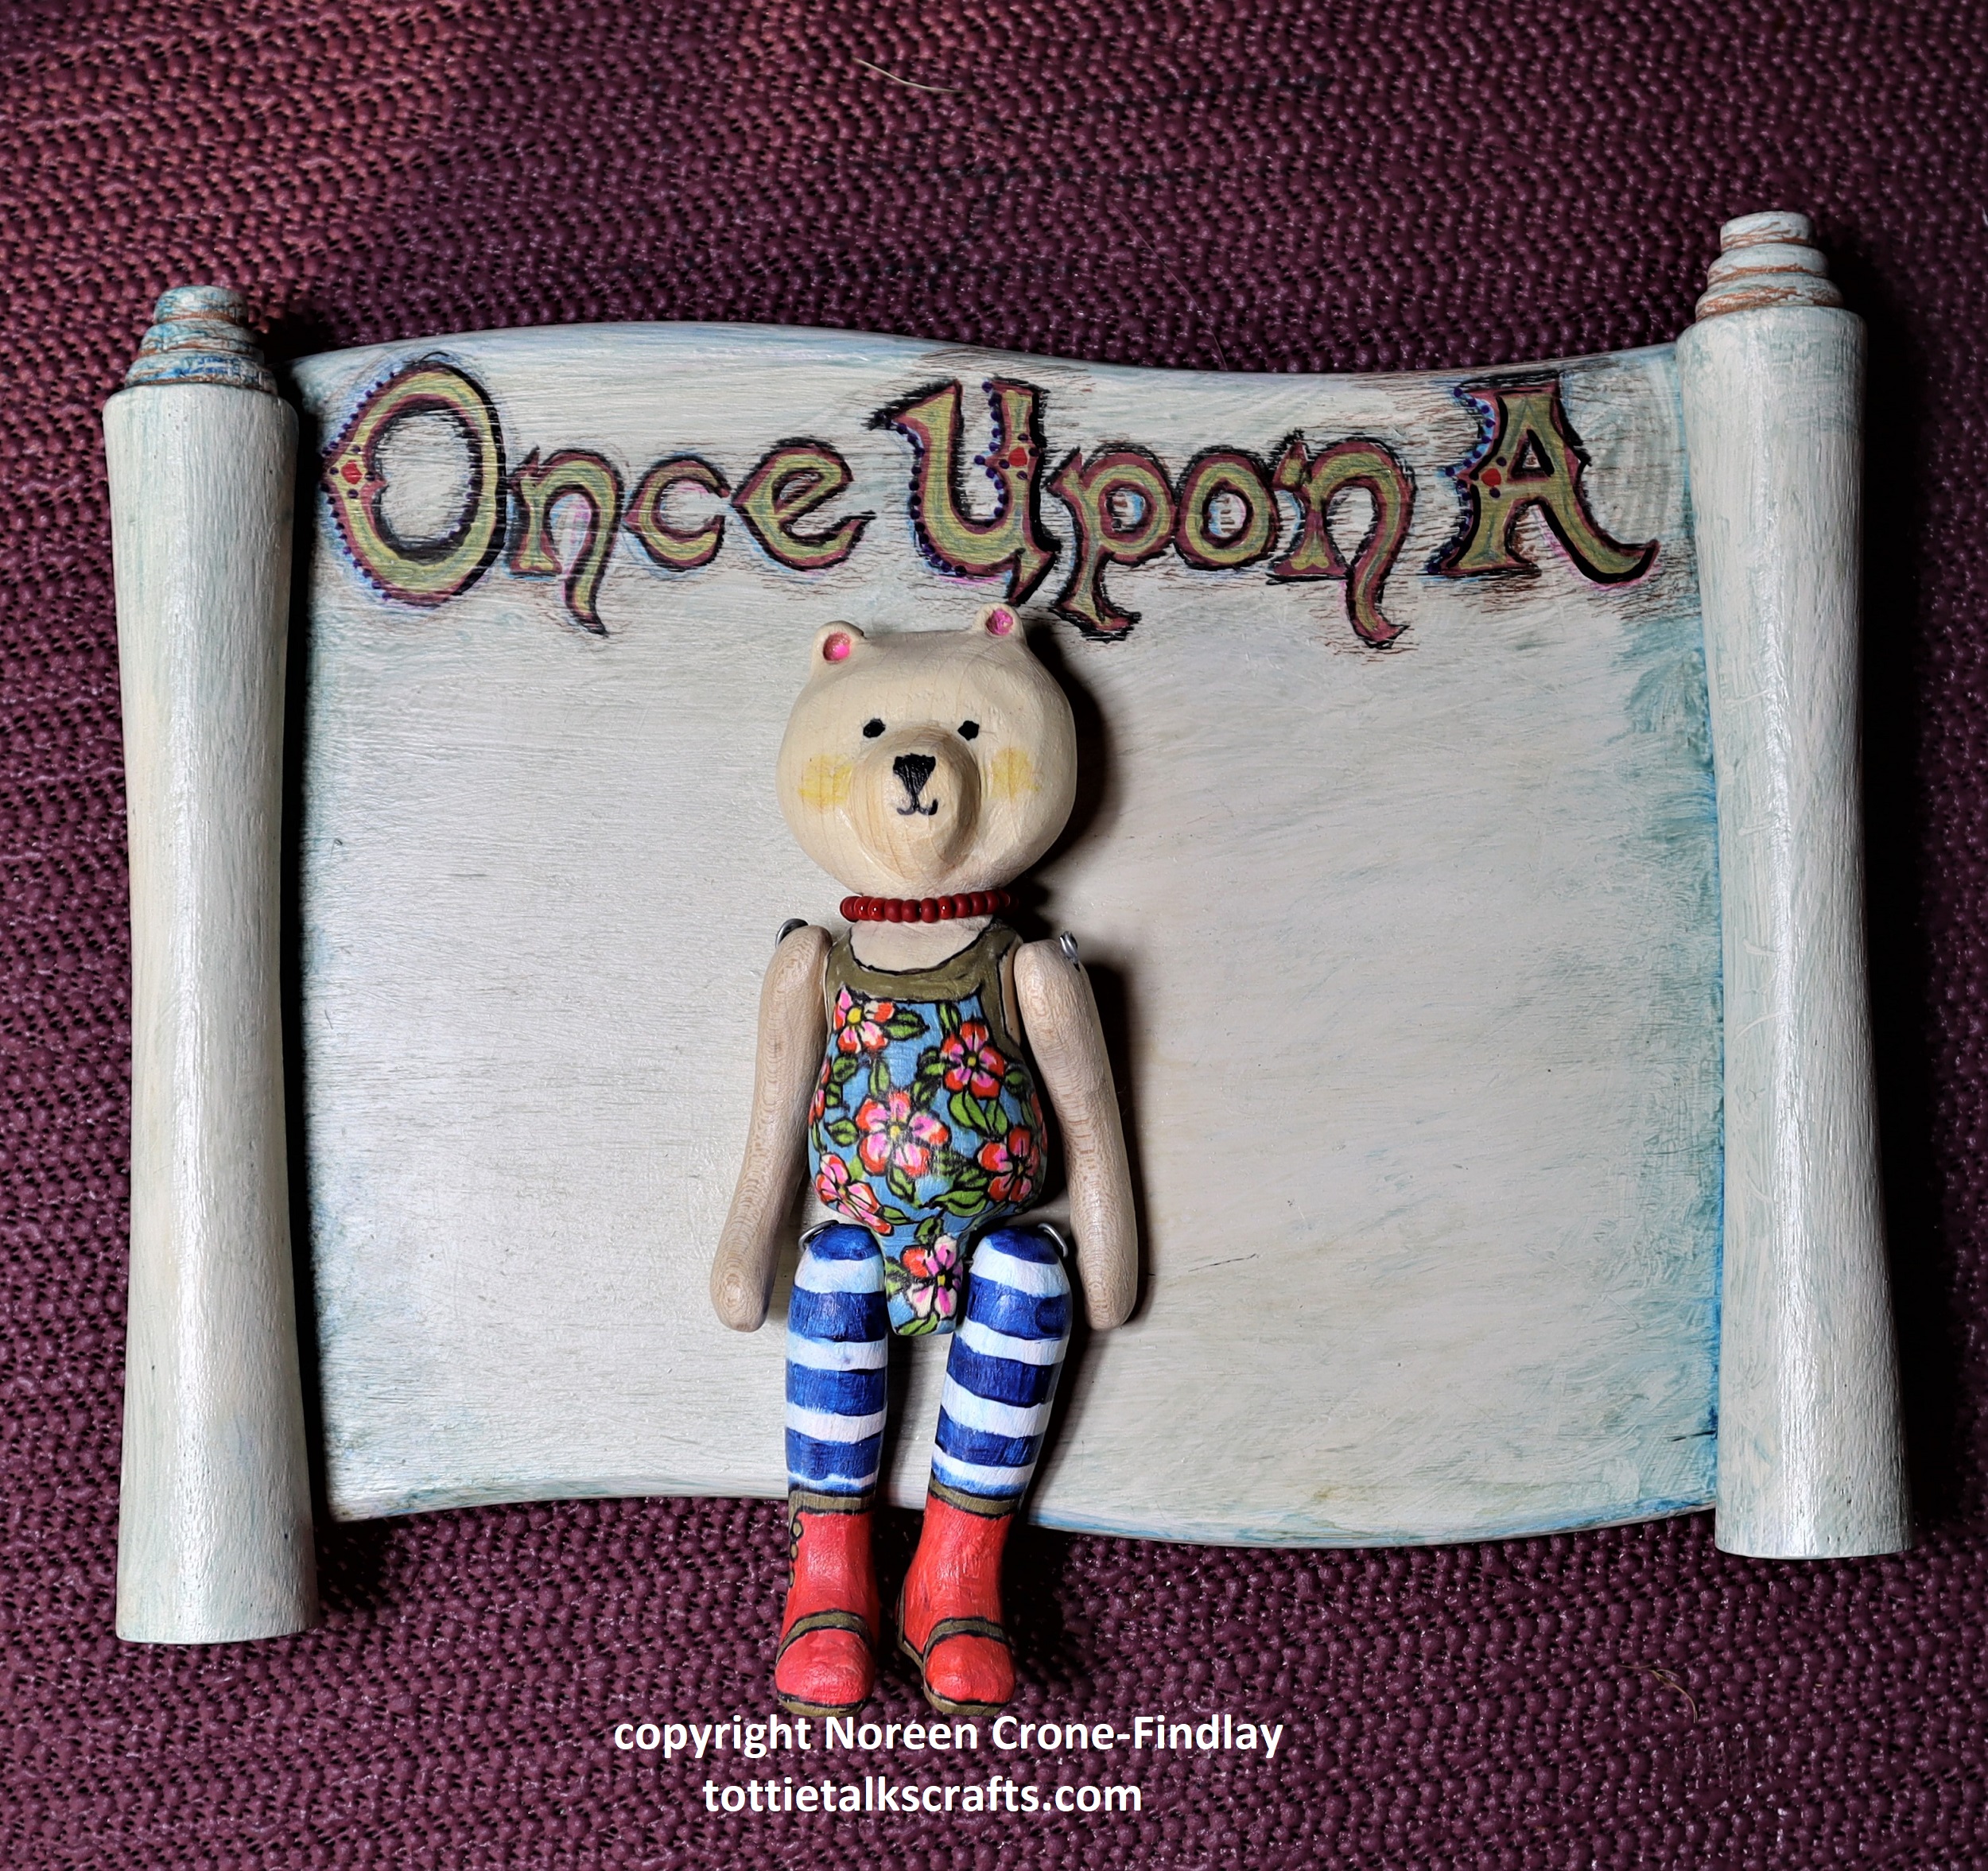
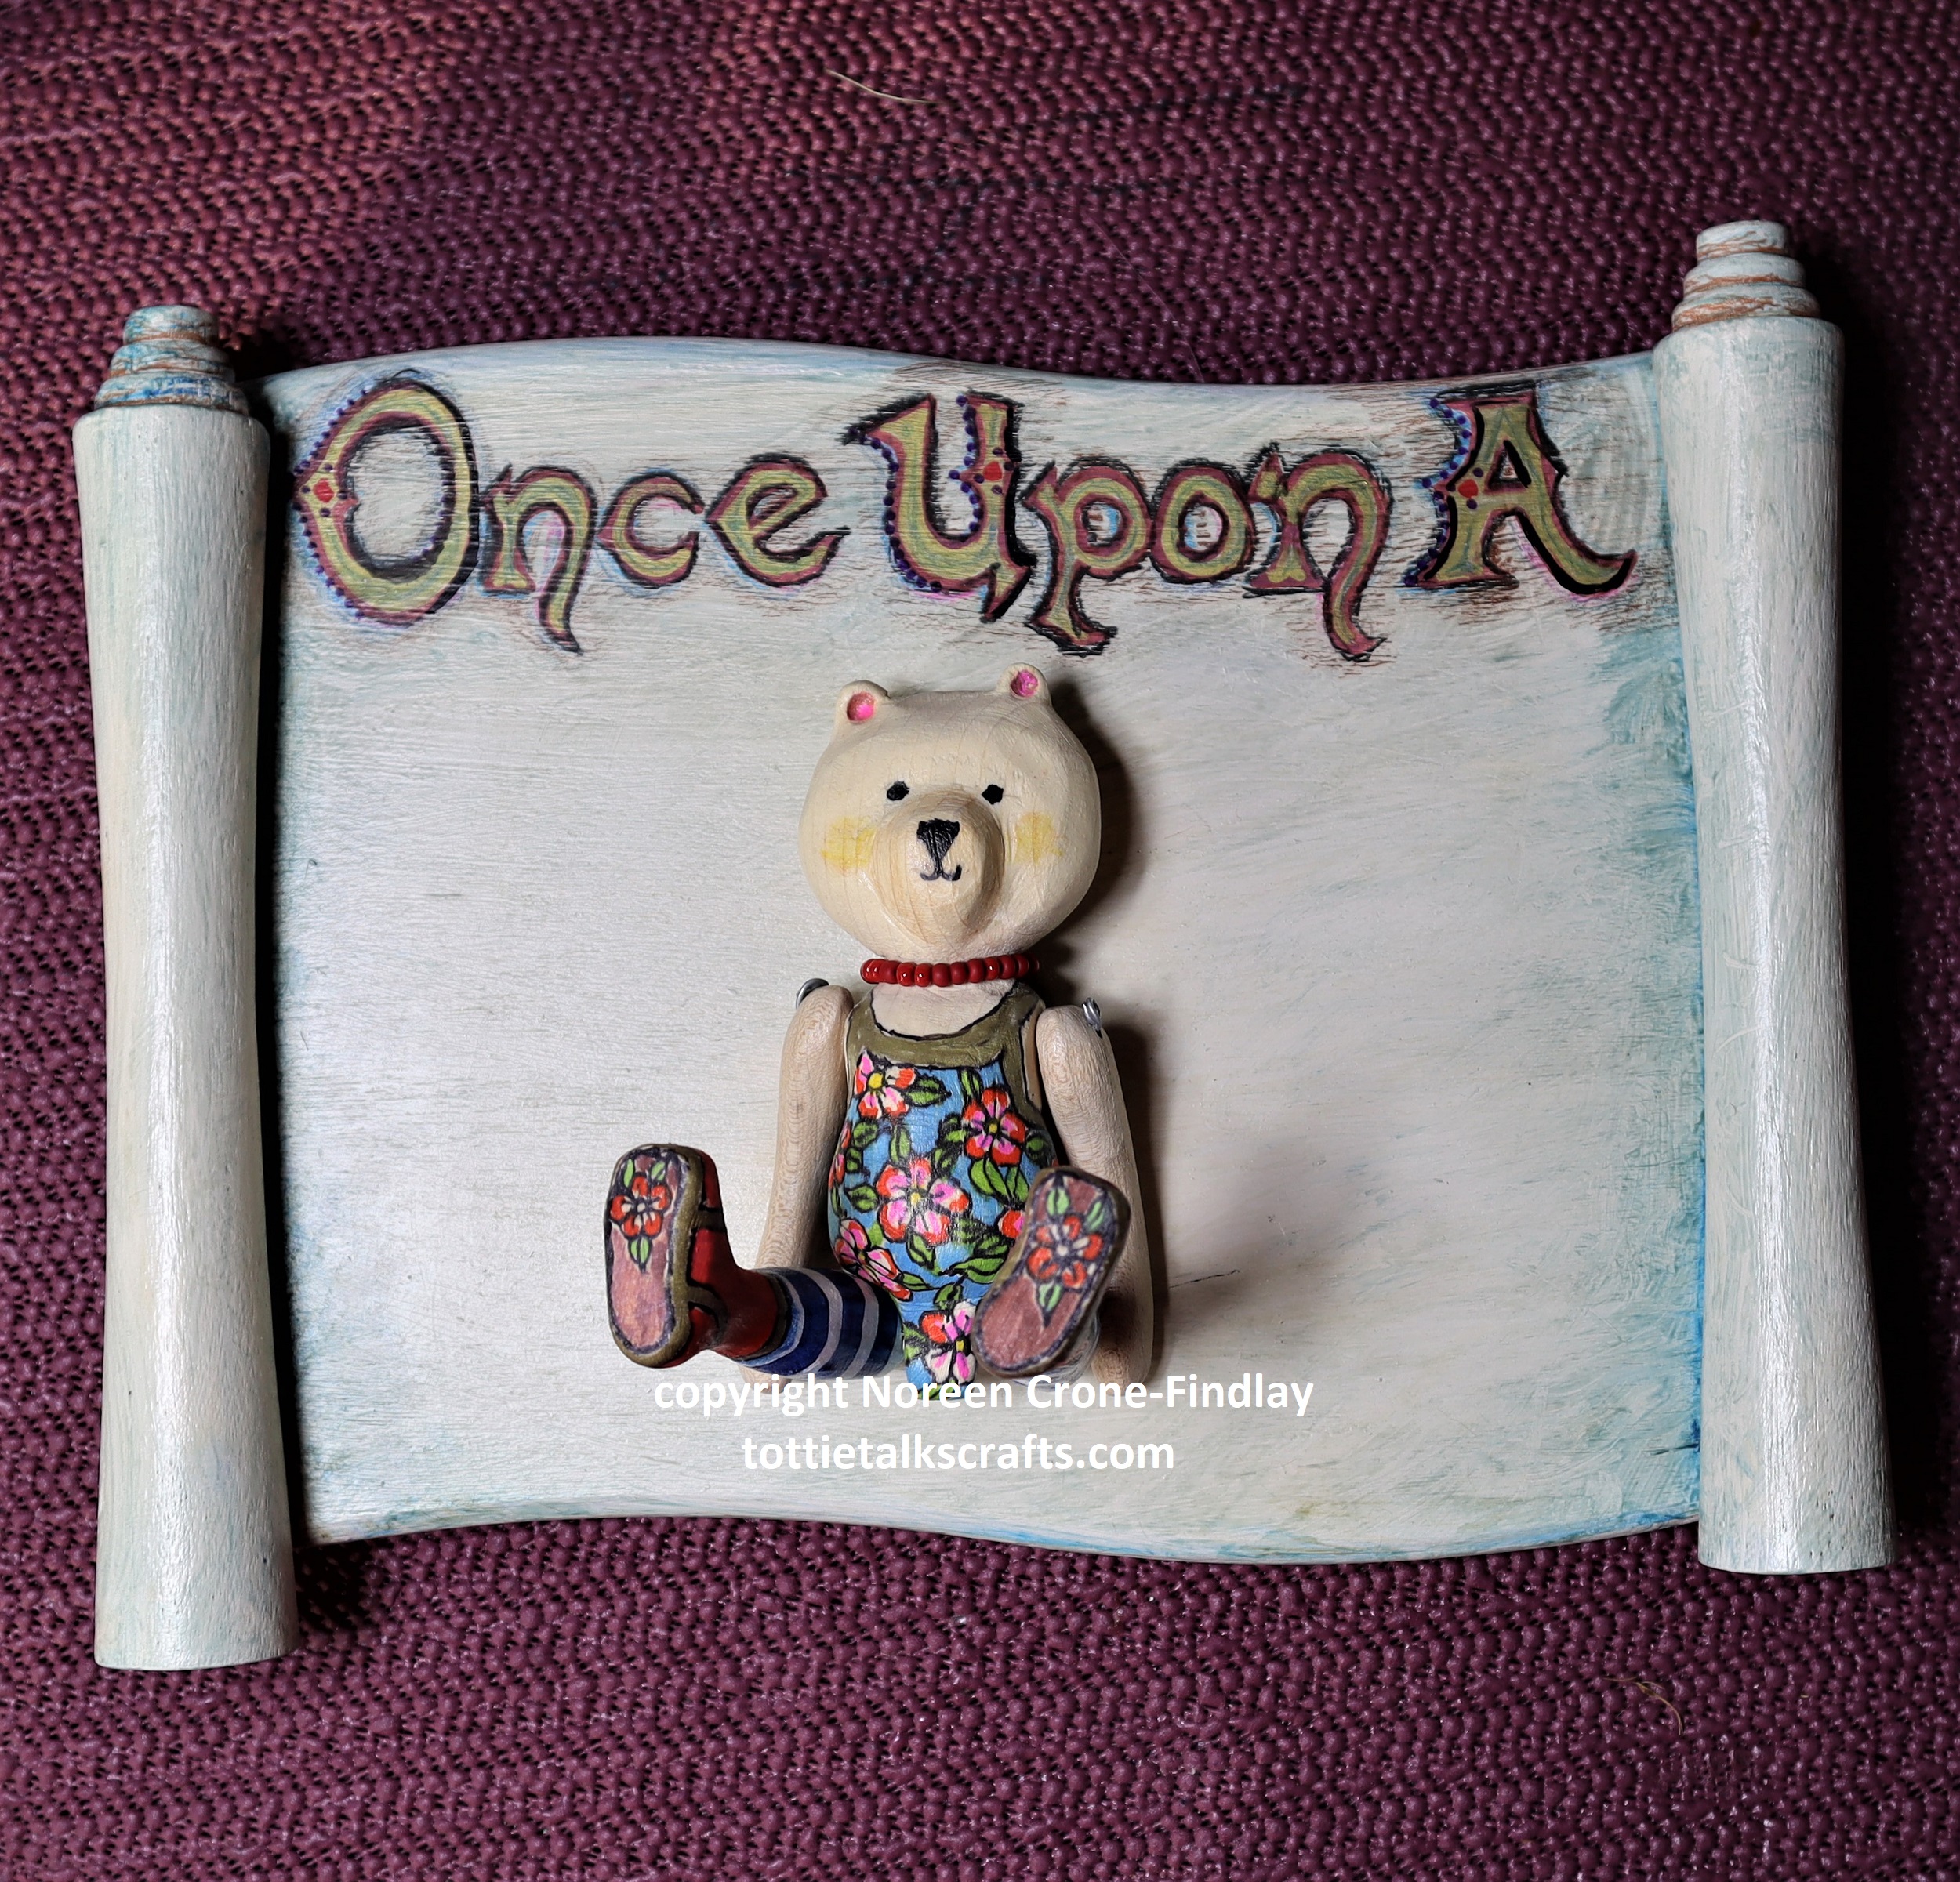
4-This Teddy Bear has red bead necklace, red boots with flowers on the soles, blue and white striped leggings and a flowered body suit and is approximately 7 1/2 inches (19 cm) tall $95 + shipping
4- This Teddy Bear is approximately 7 1/4 inches tall (18 cm) and has a pinkish gold necklace, pink and purple high top boots that have flowers on the soles, a floral body suit and leggings. $95 + shipping
I have made a couple of dresses that fit these Pandas and Larger Teddy Bears and are available, too….
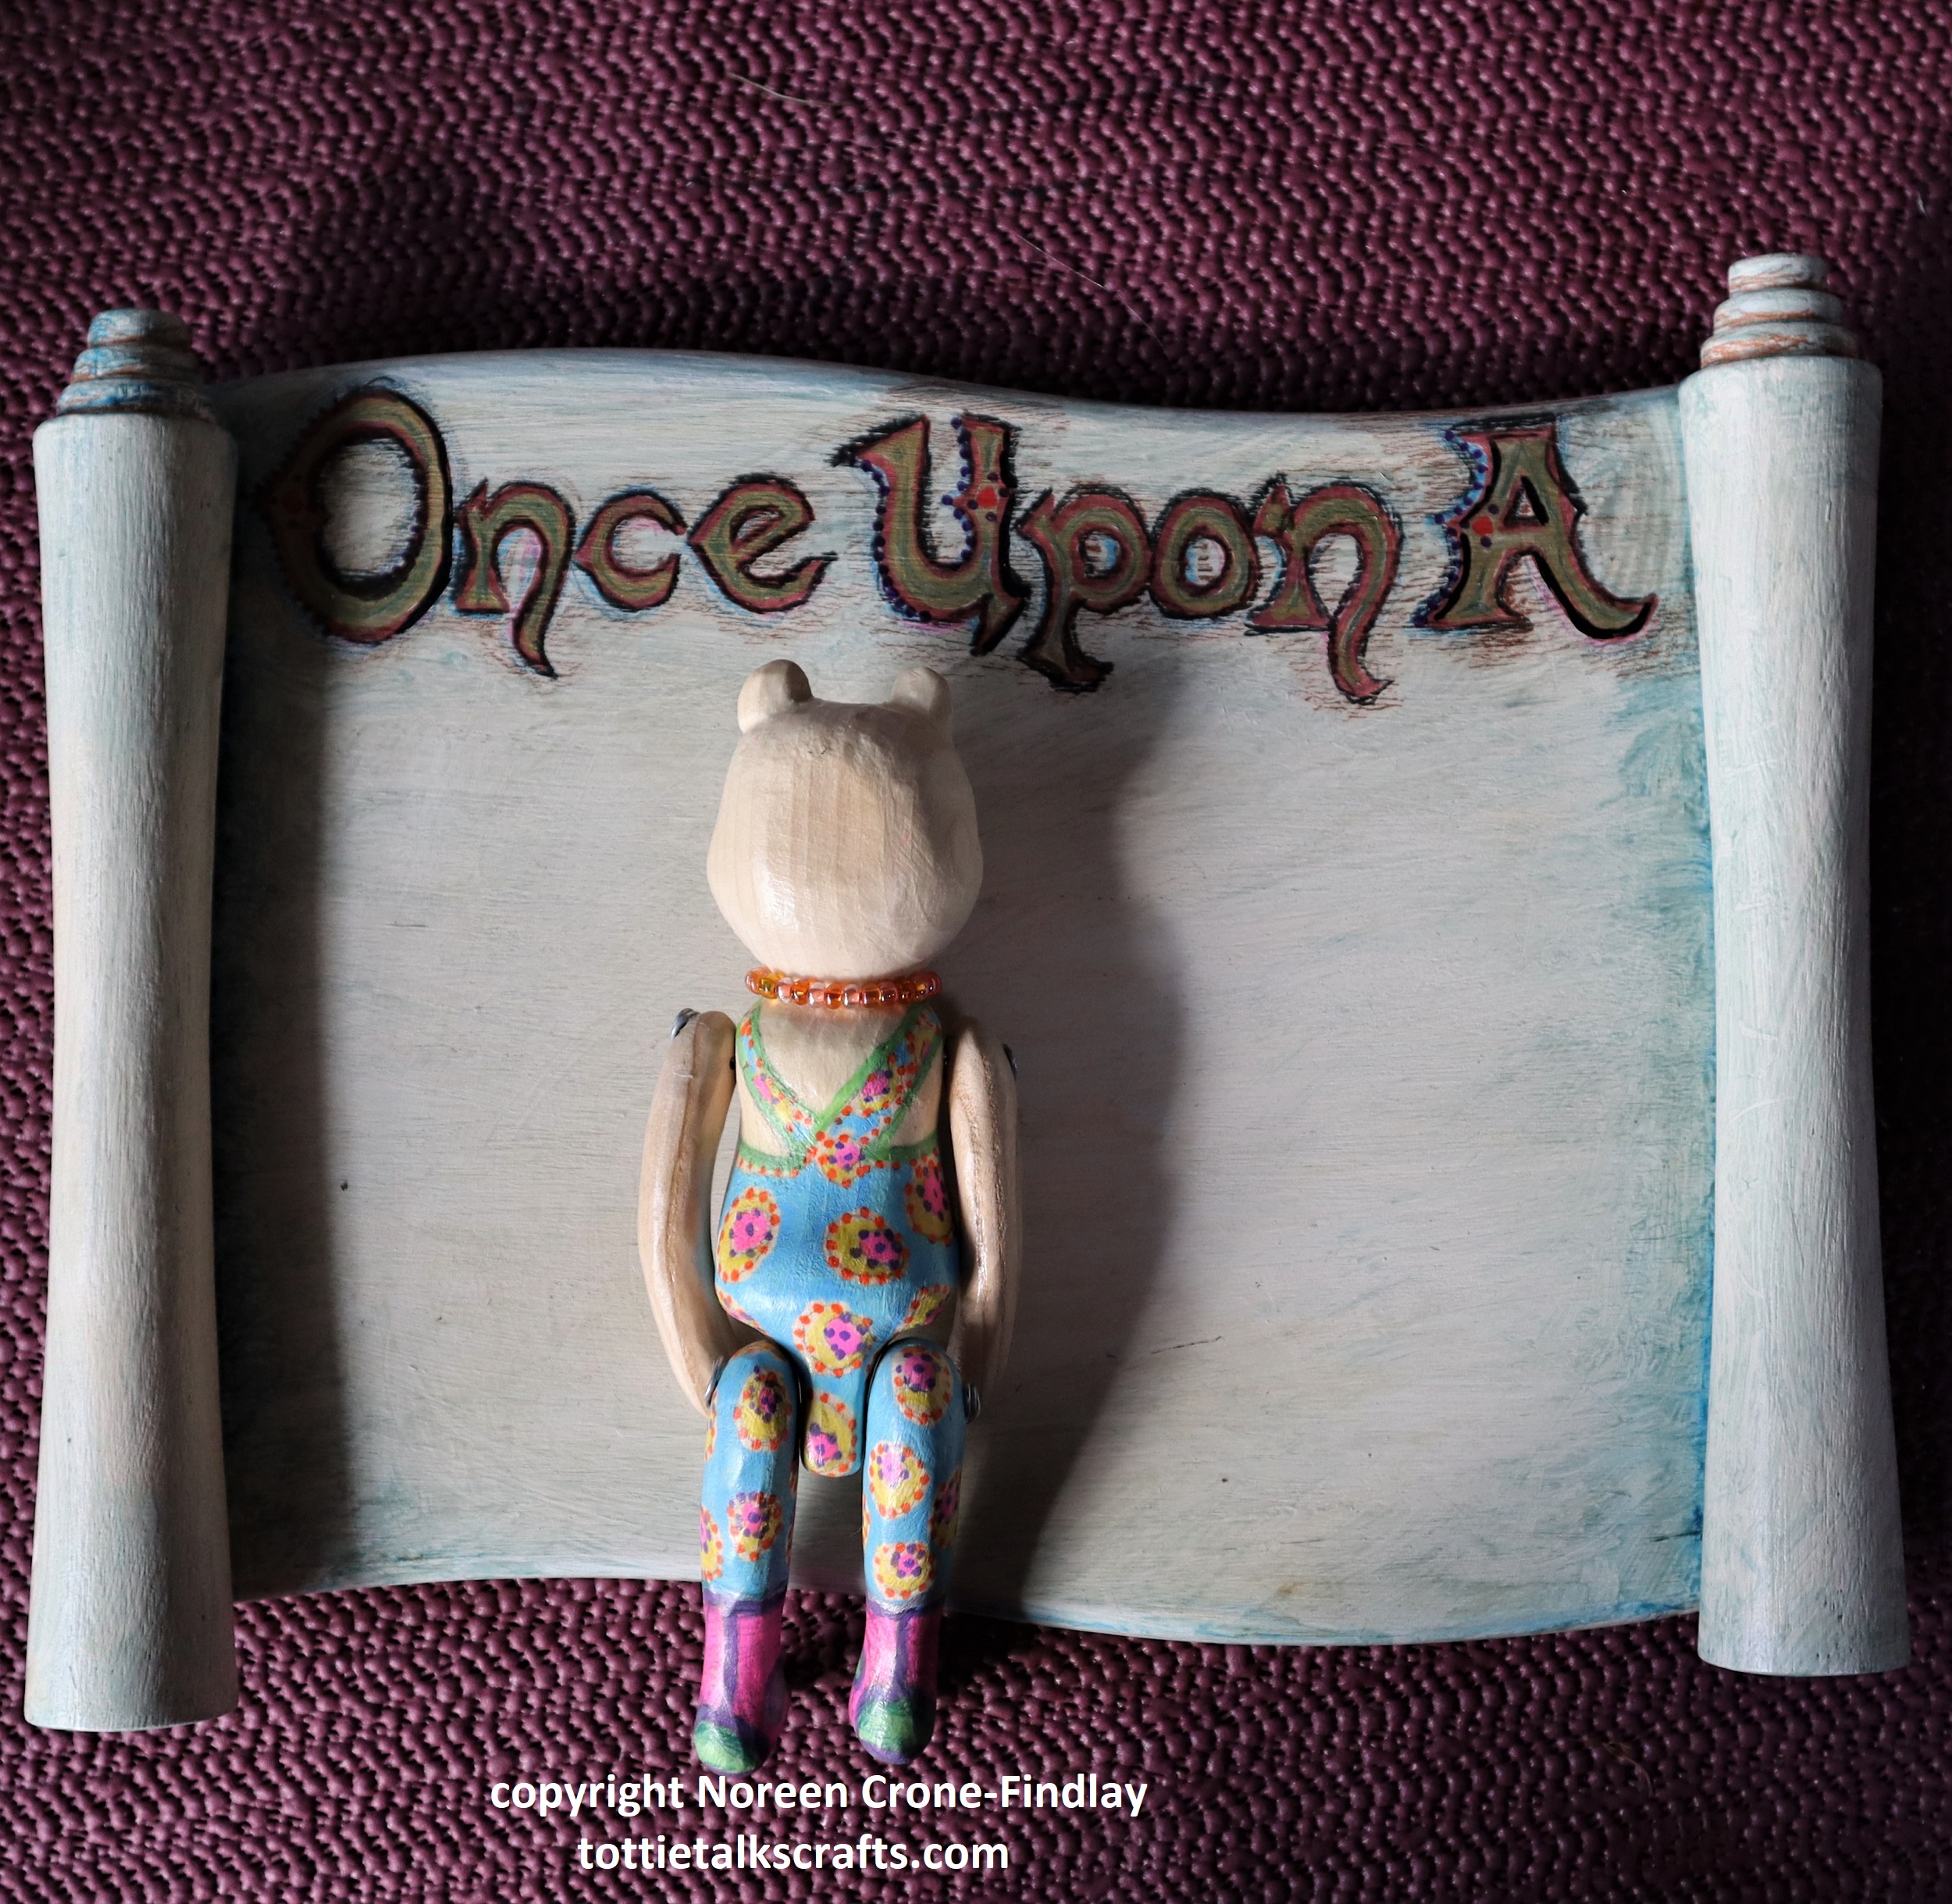
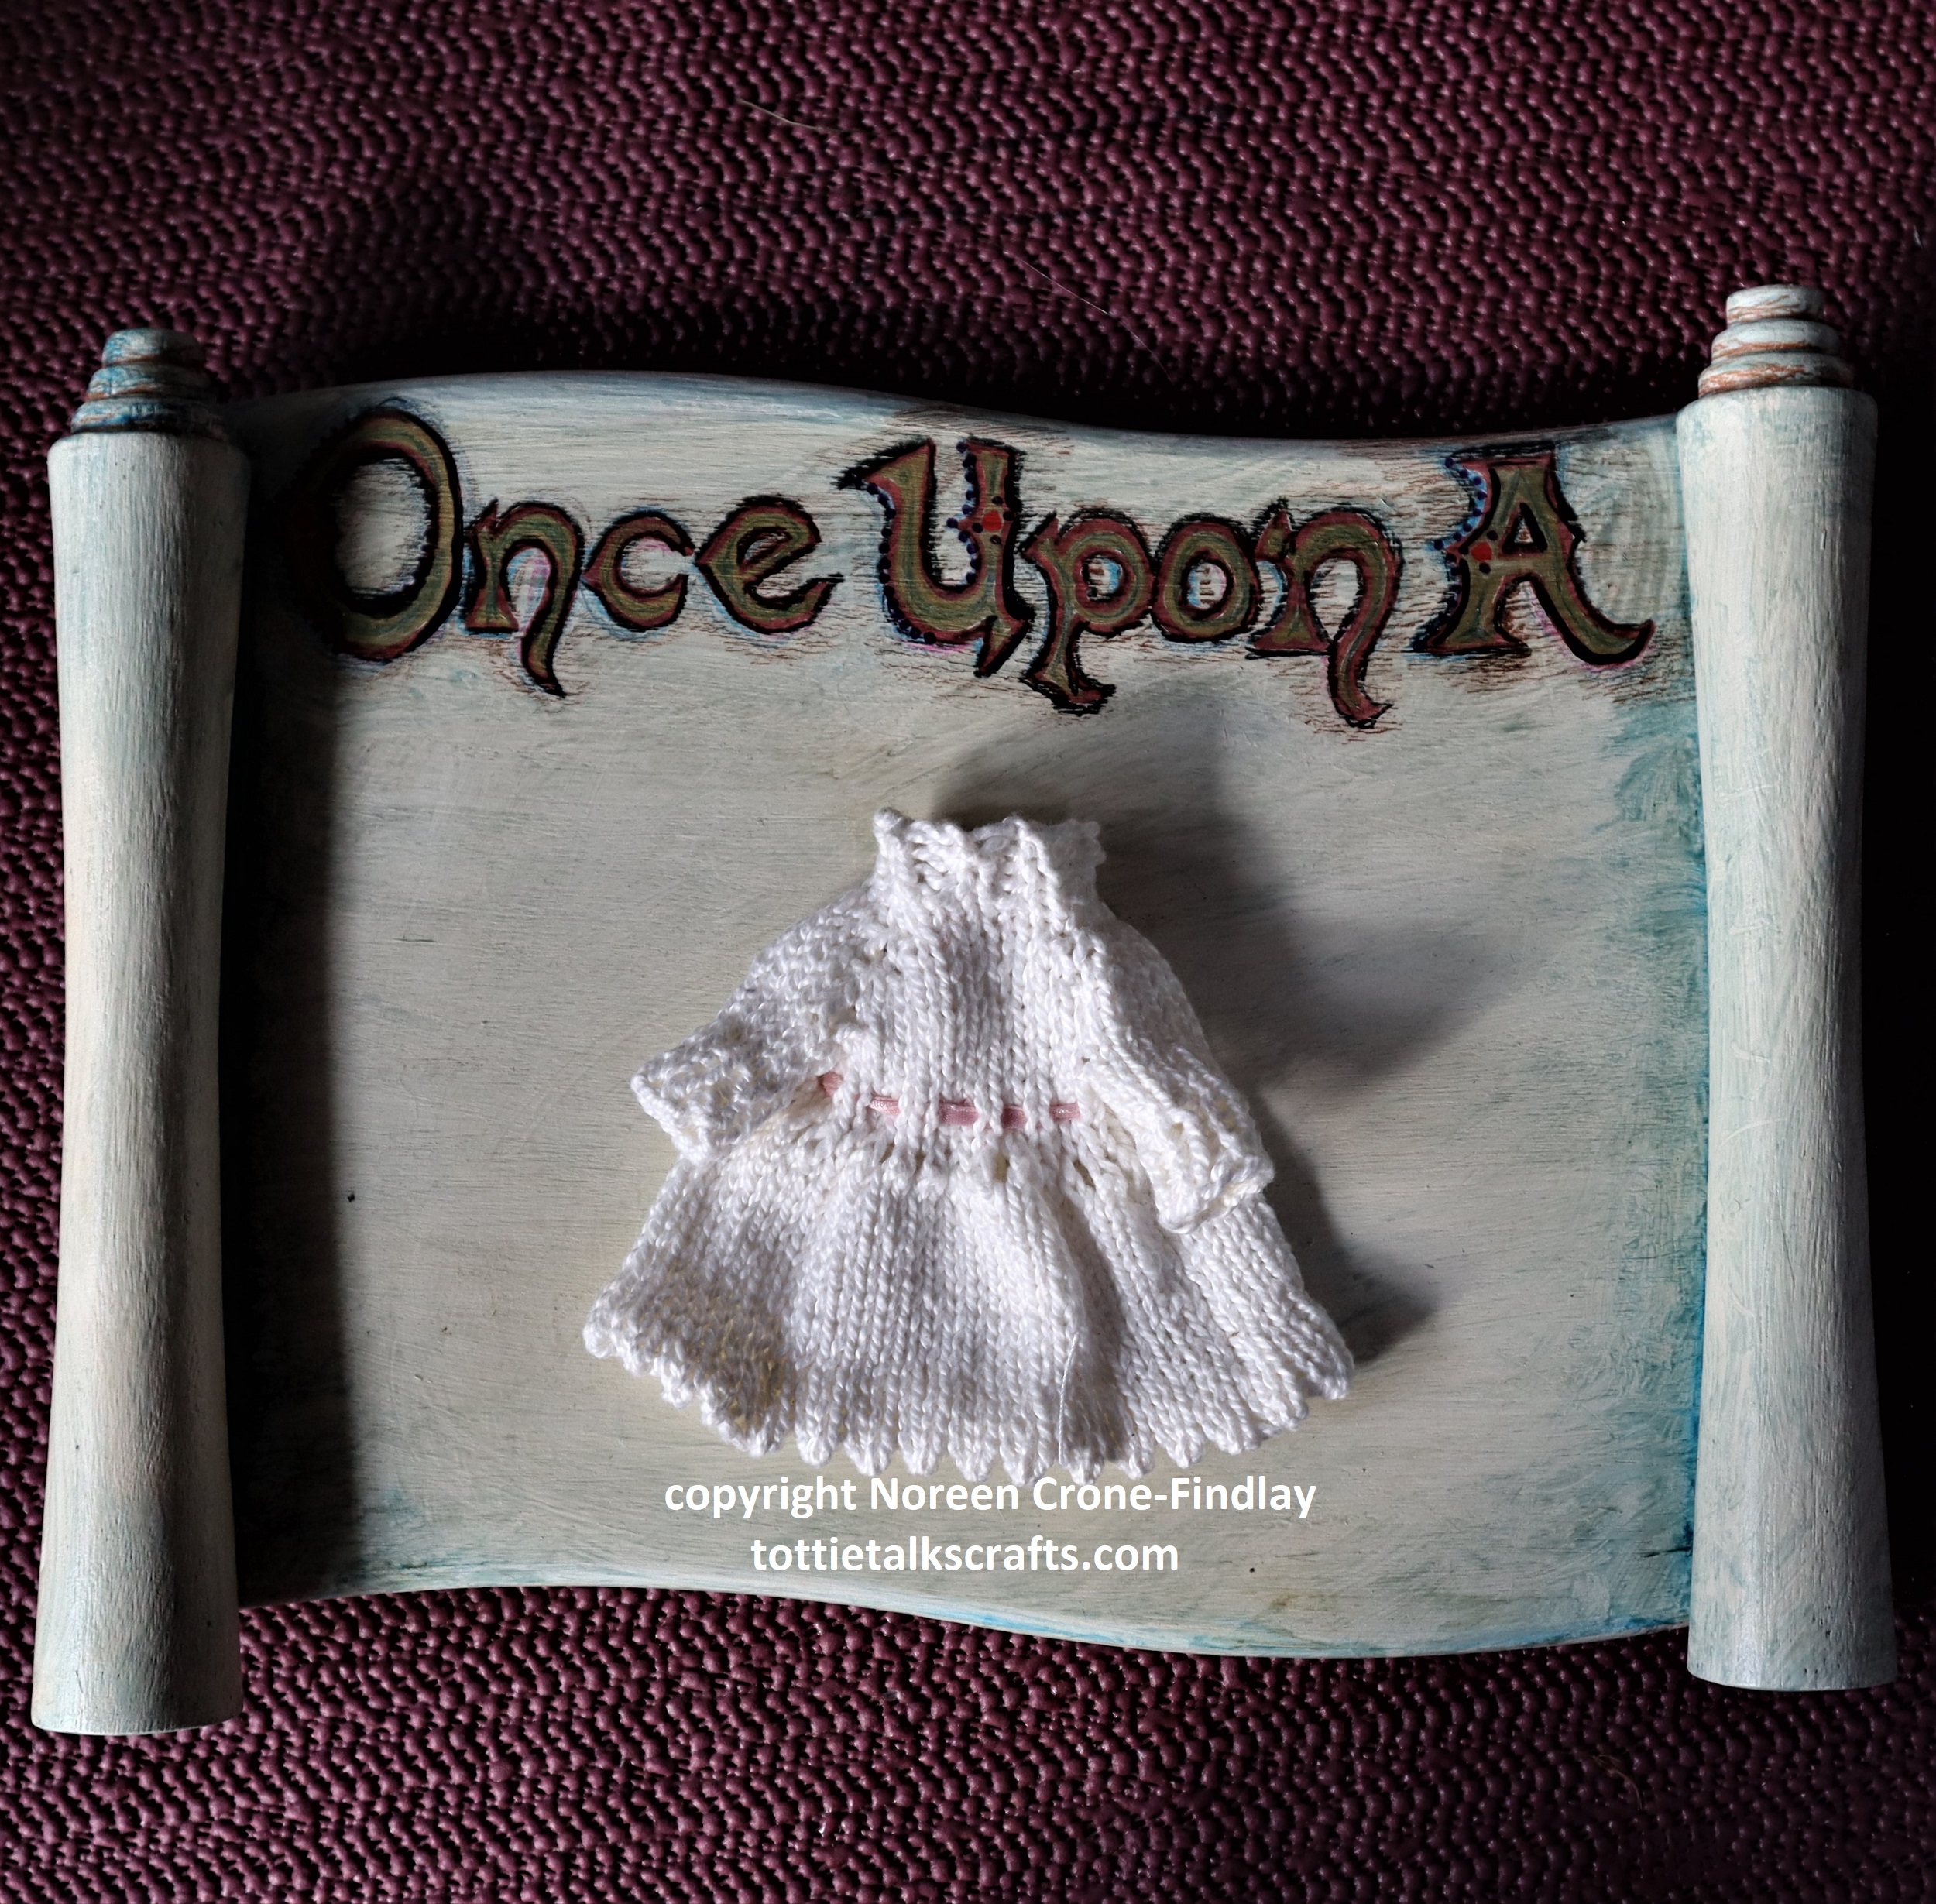
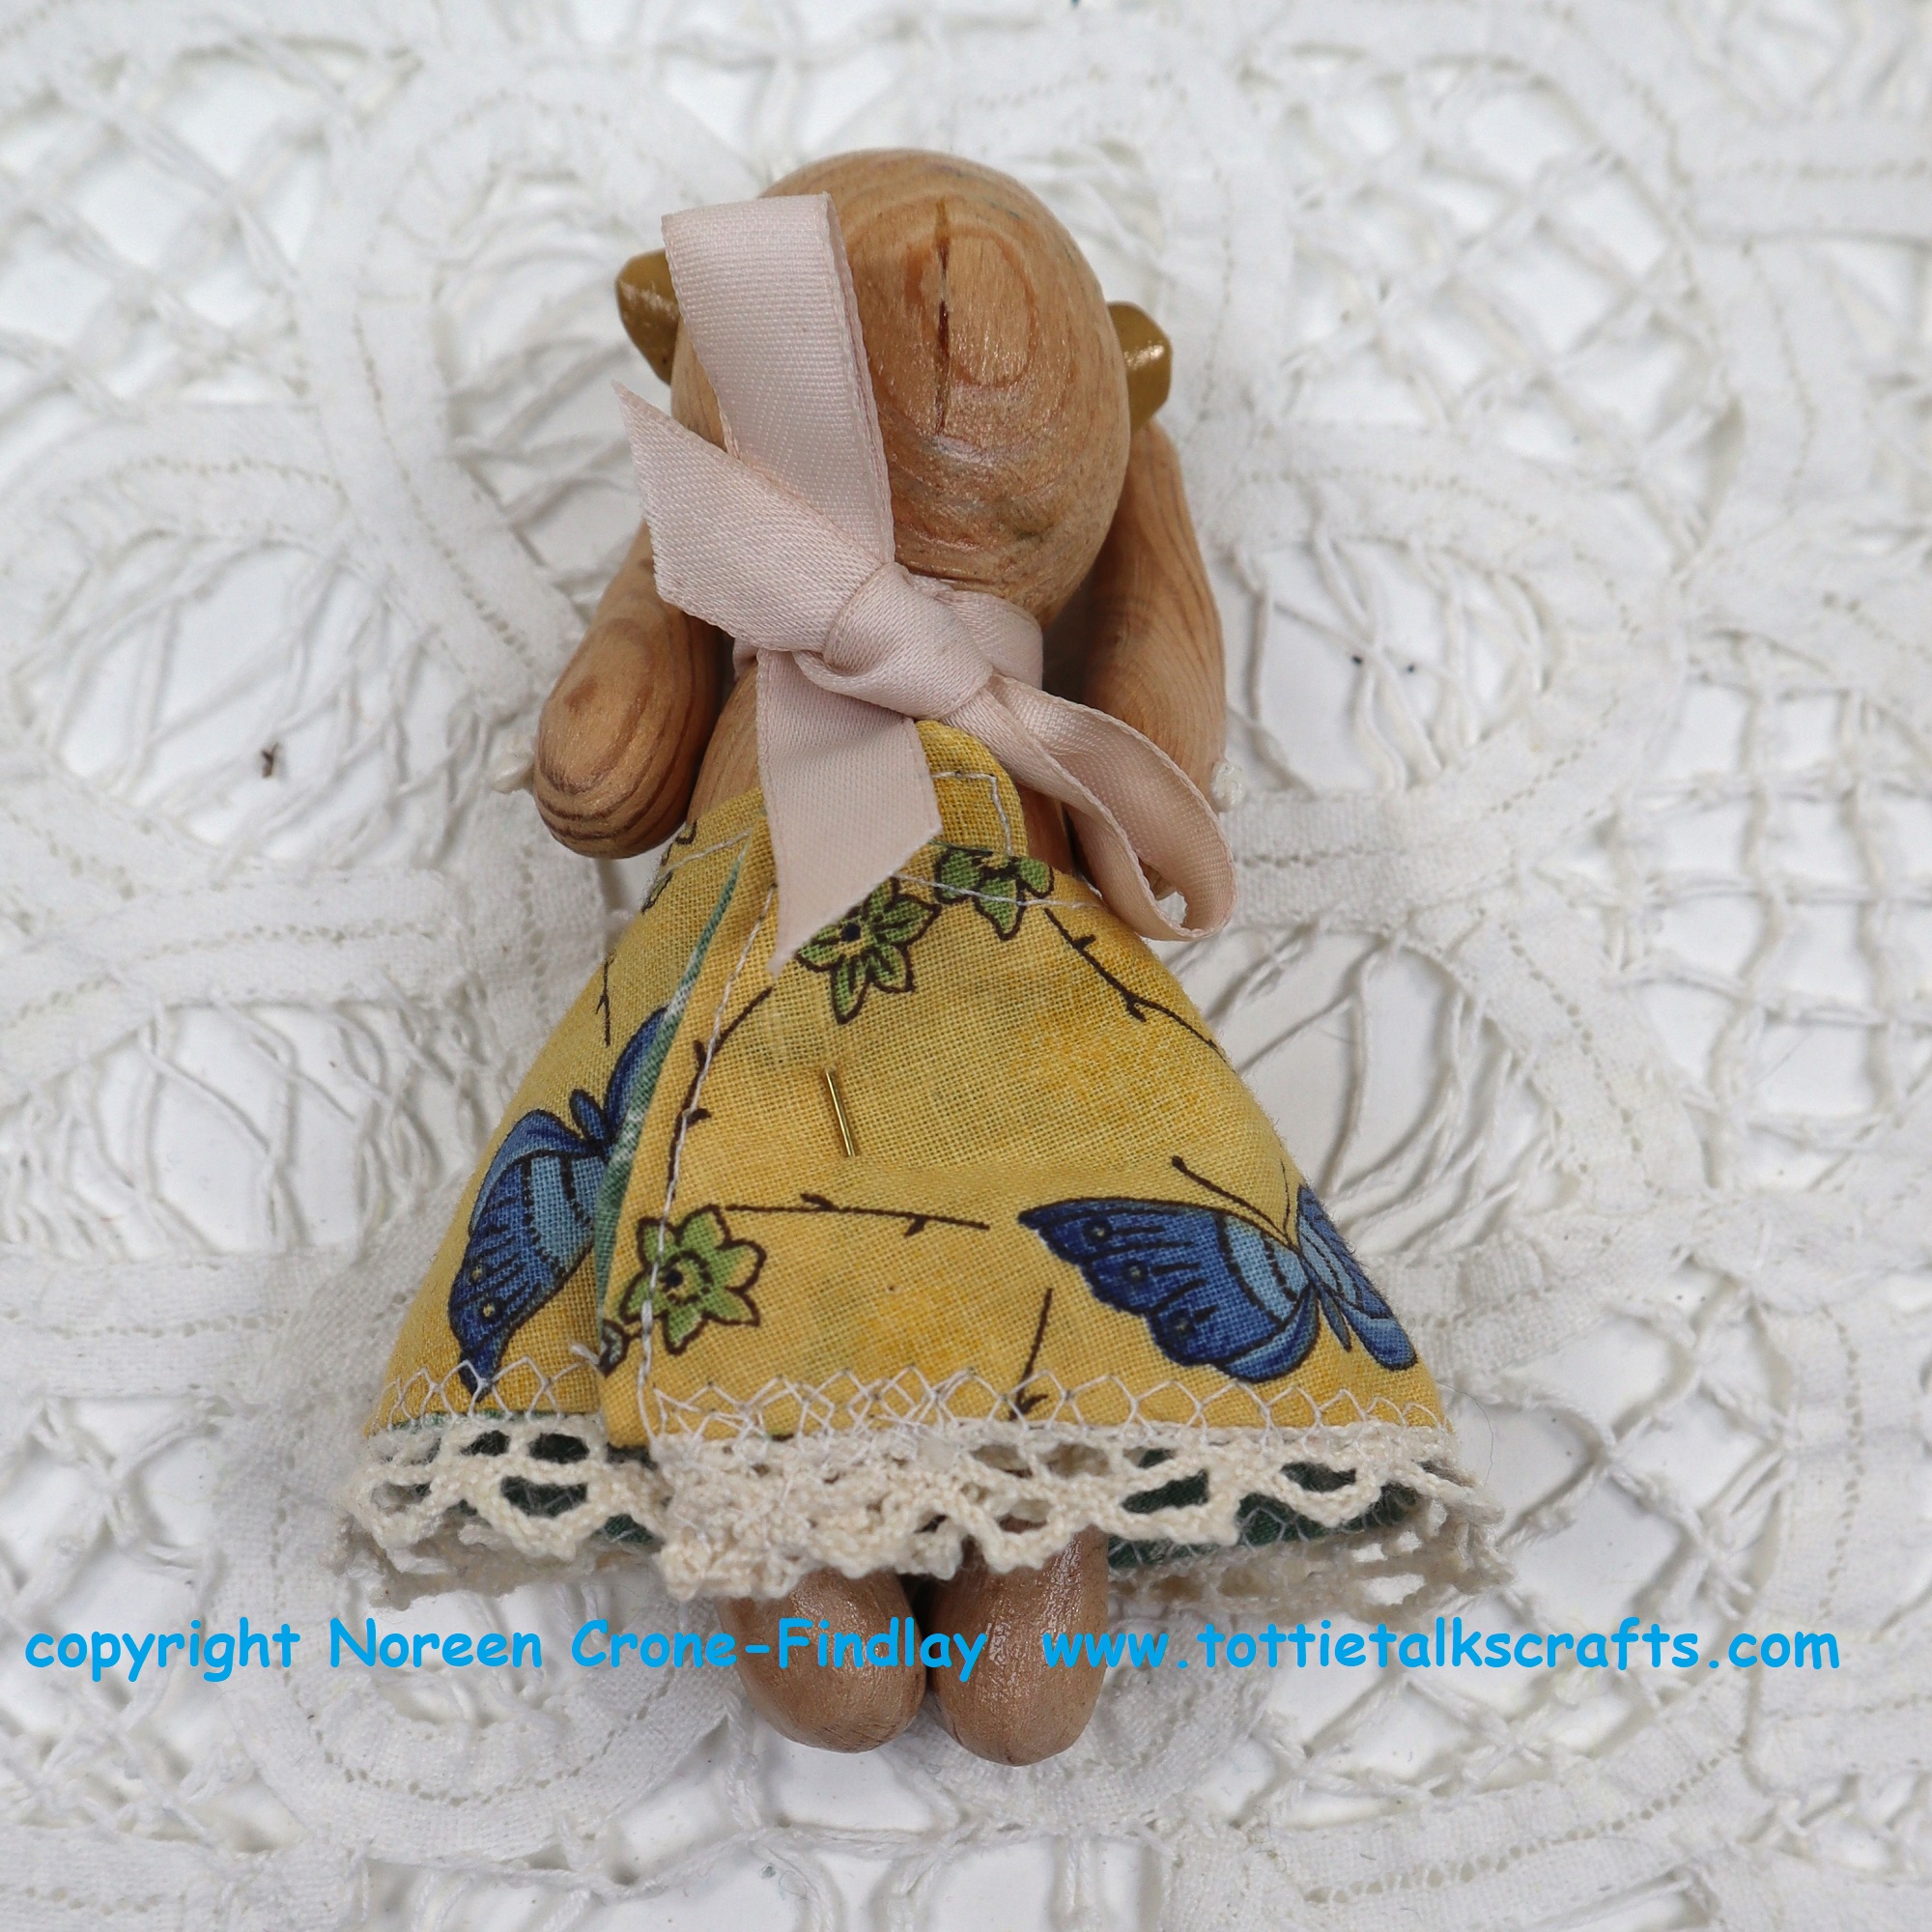
A hand knitted old fashioned looking dress: $35 + shipping
It fits the 7 1/2 inch bears but is too big for the 4 inch bears
This is what it looks like on the bears (the bear is not included in the purchase of the dress…. they are all sold separately)
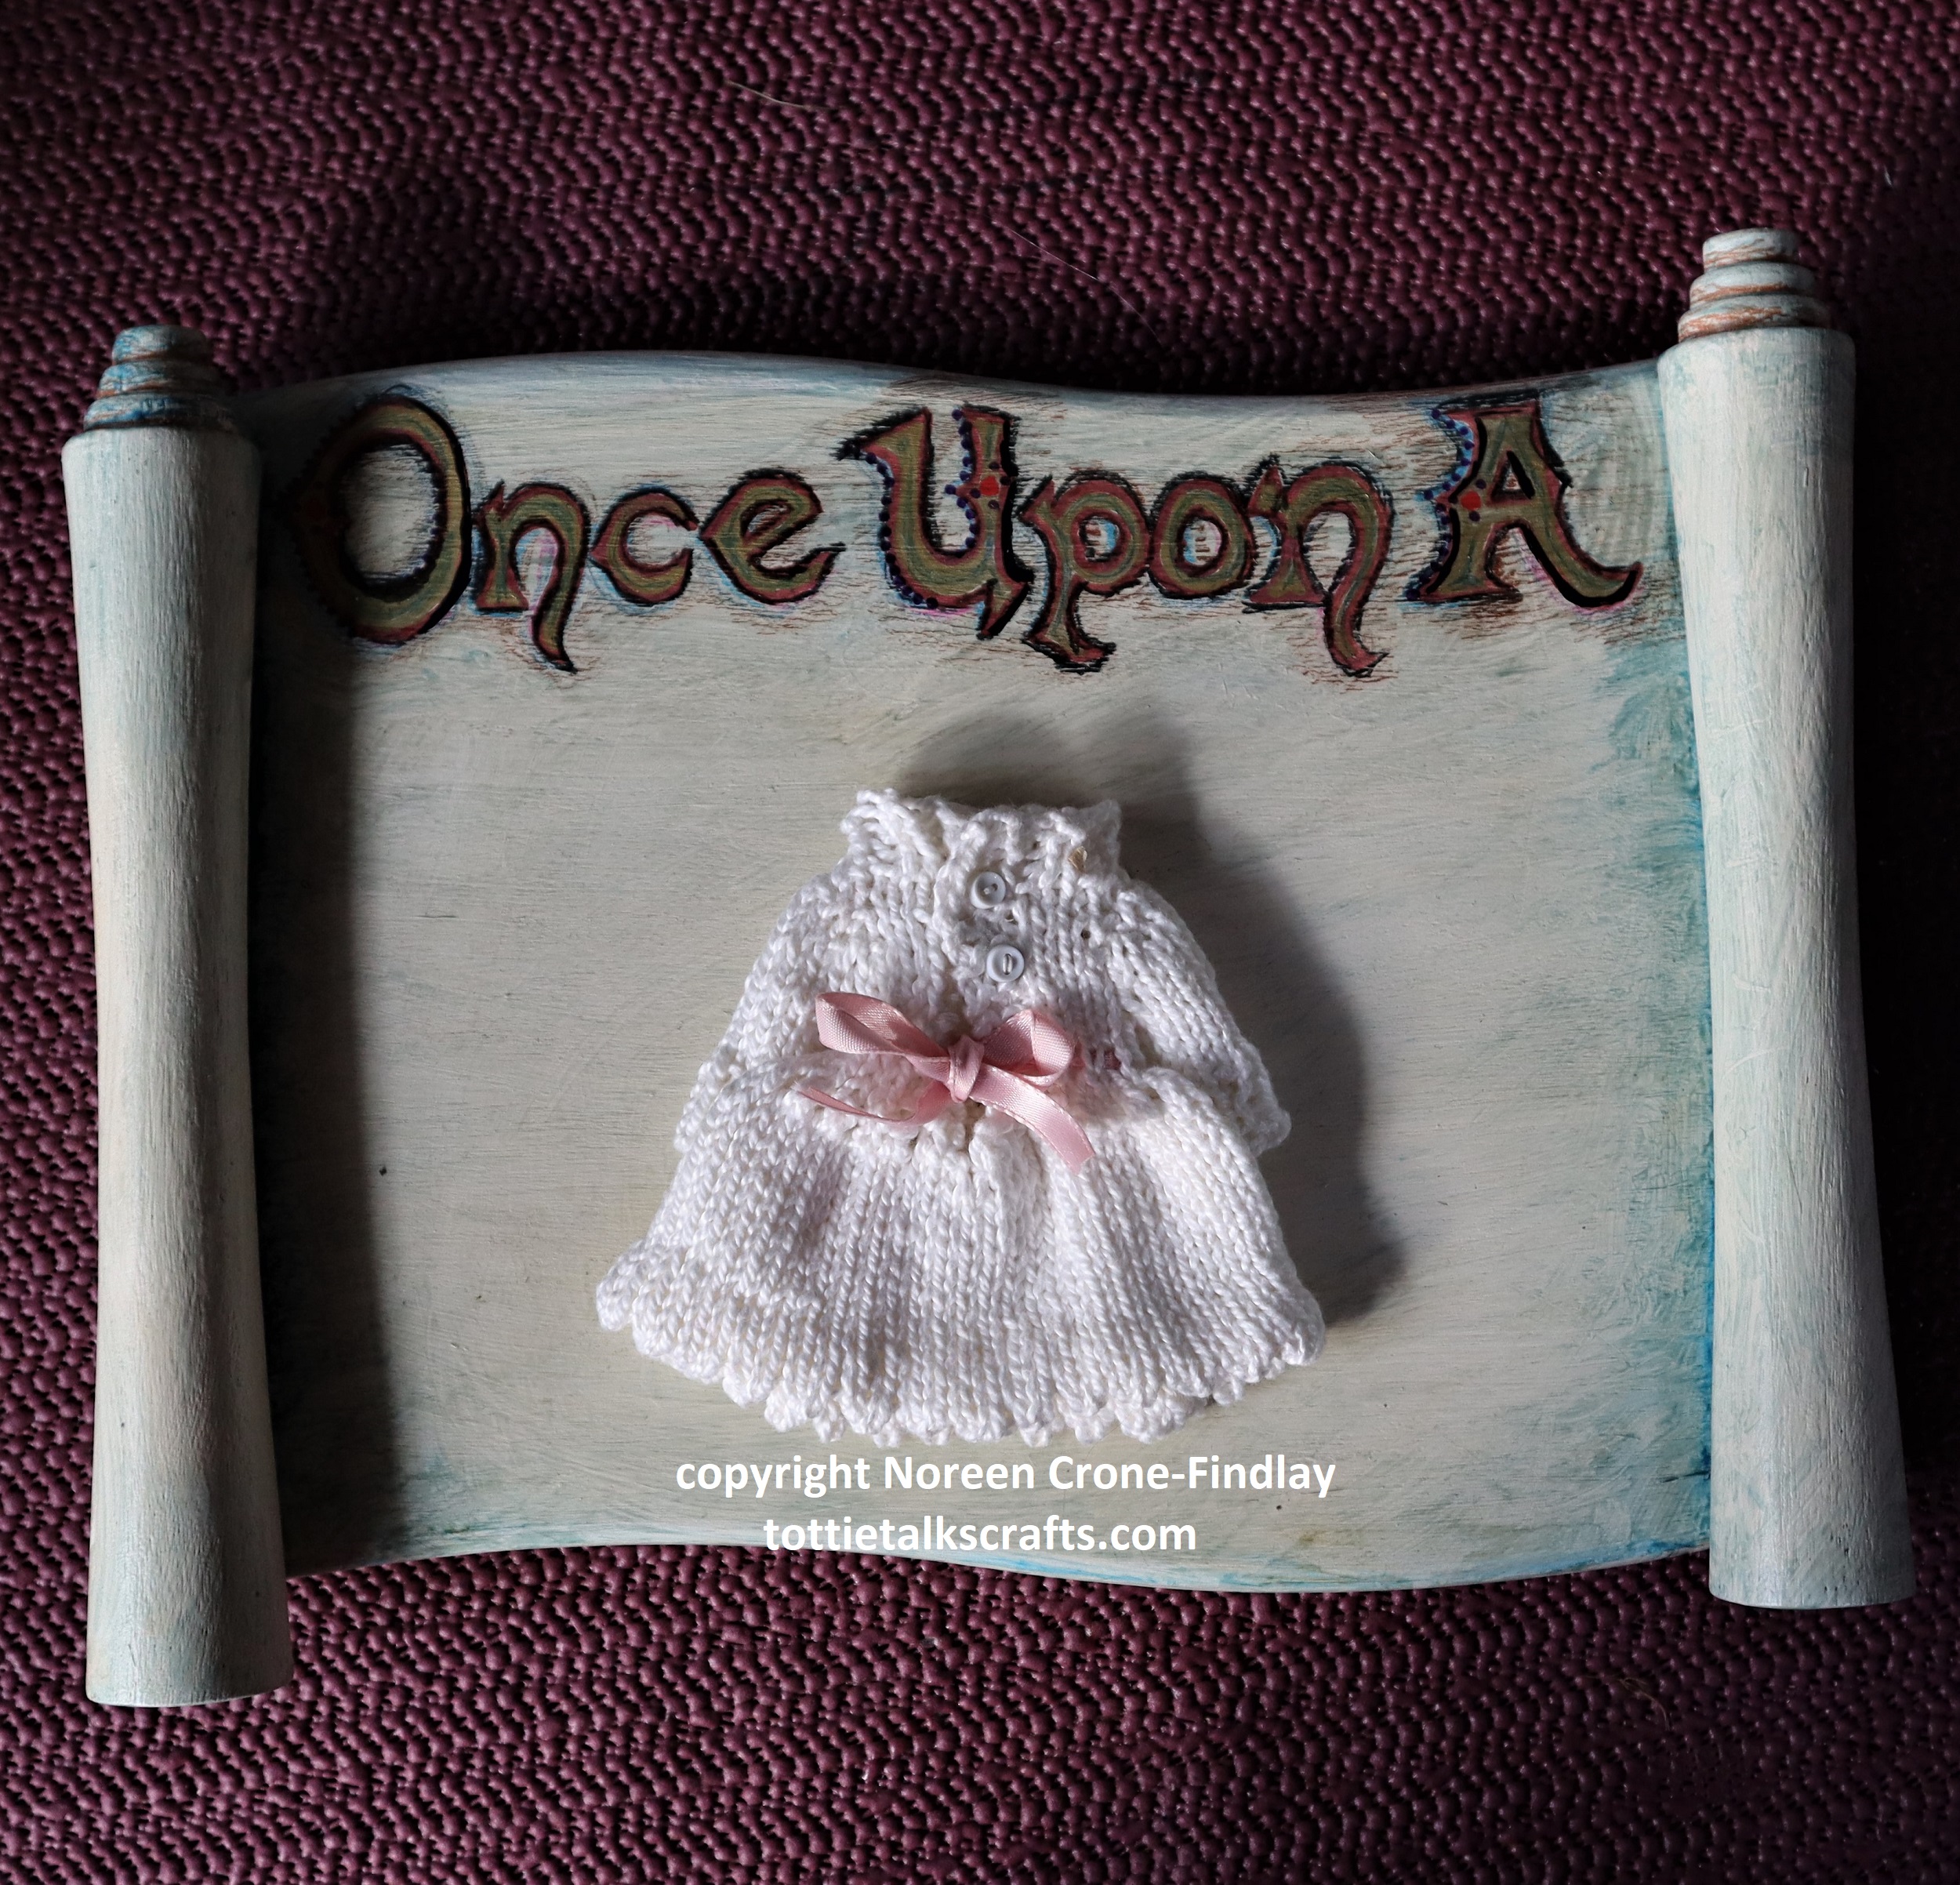
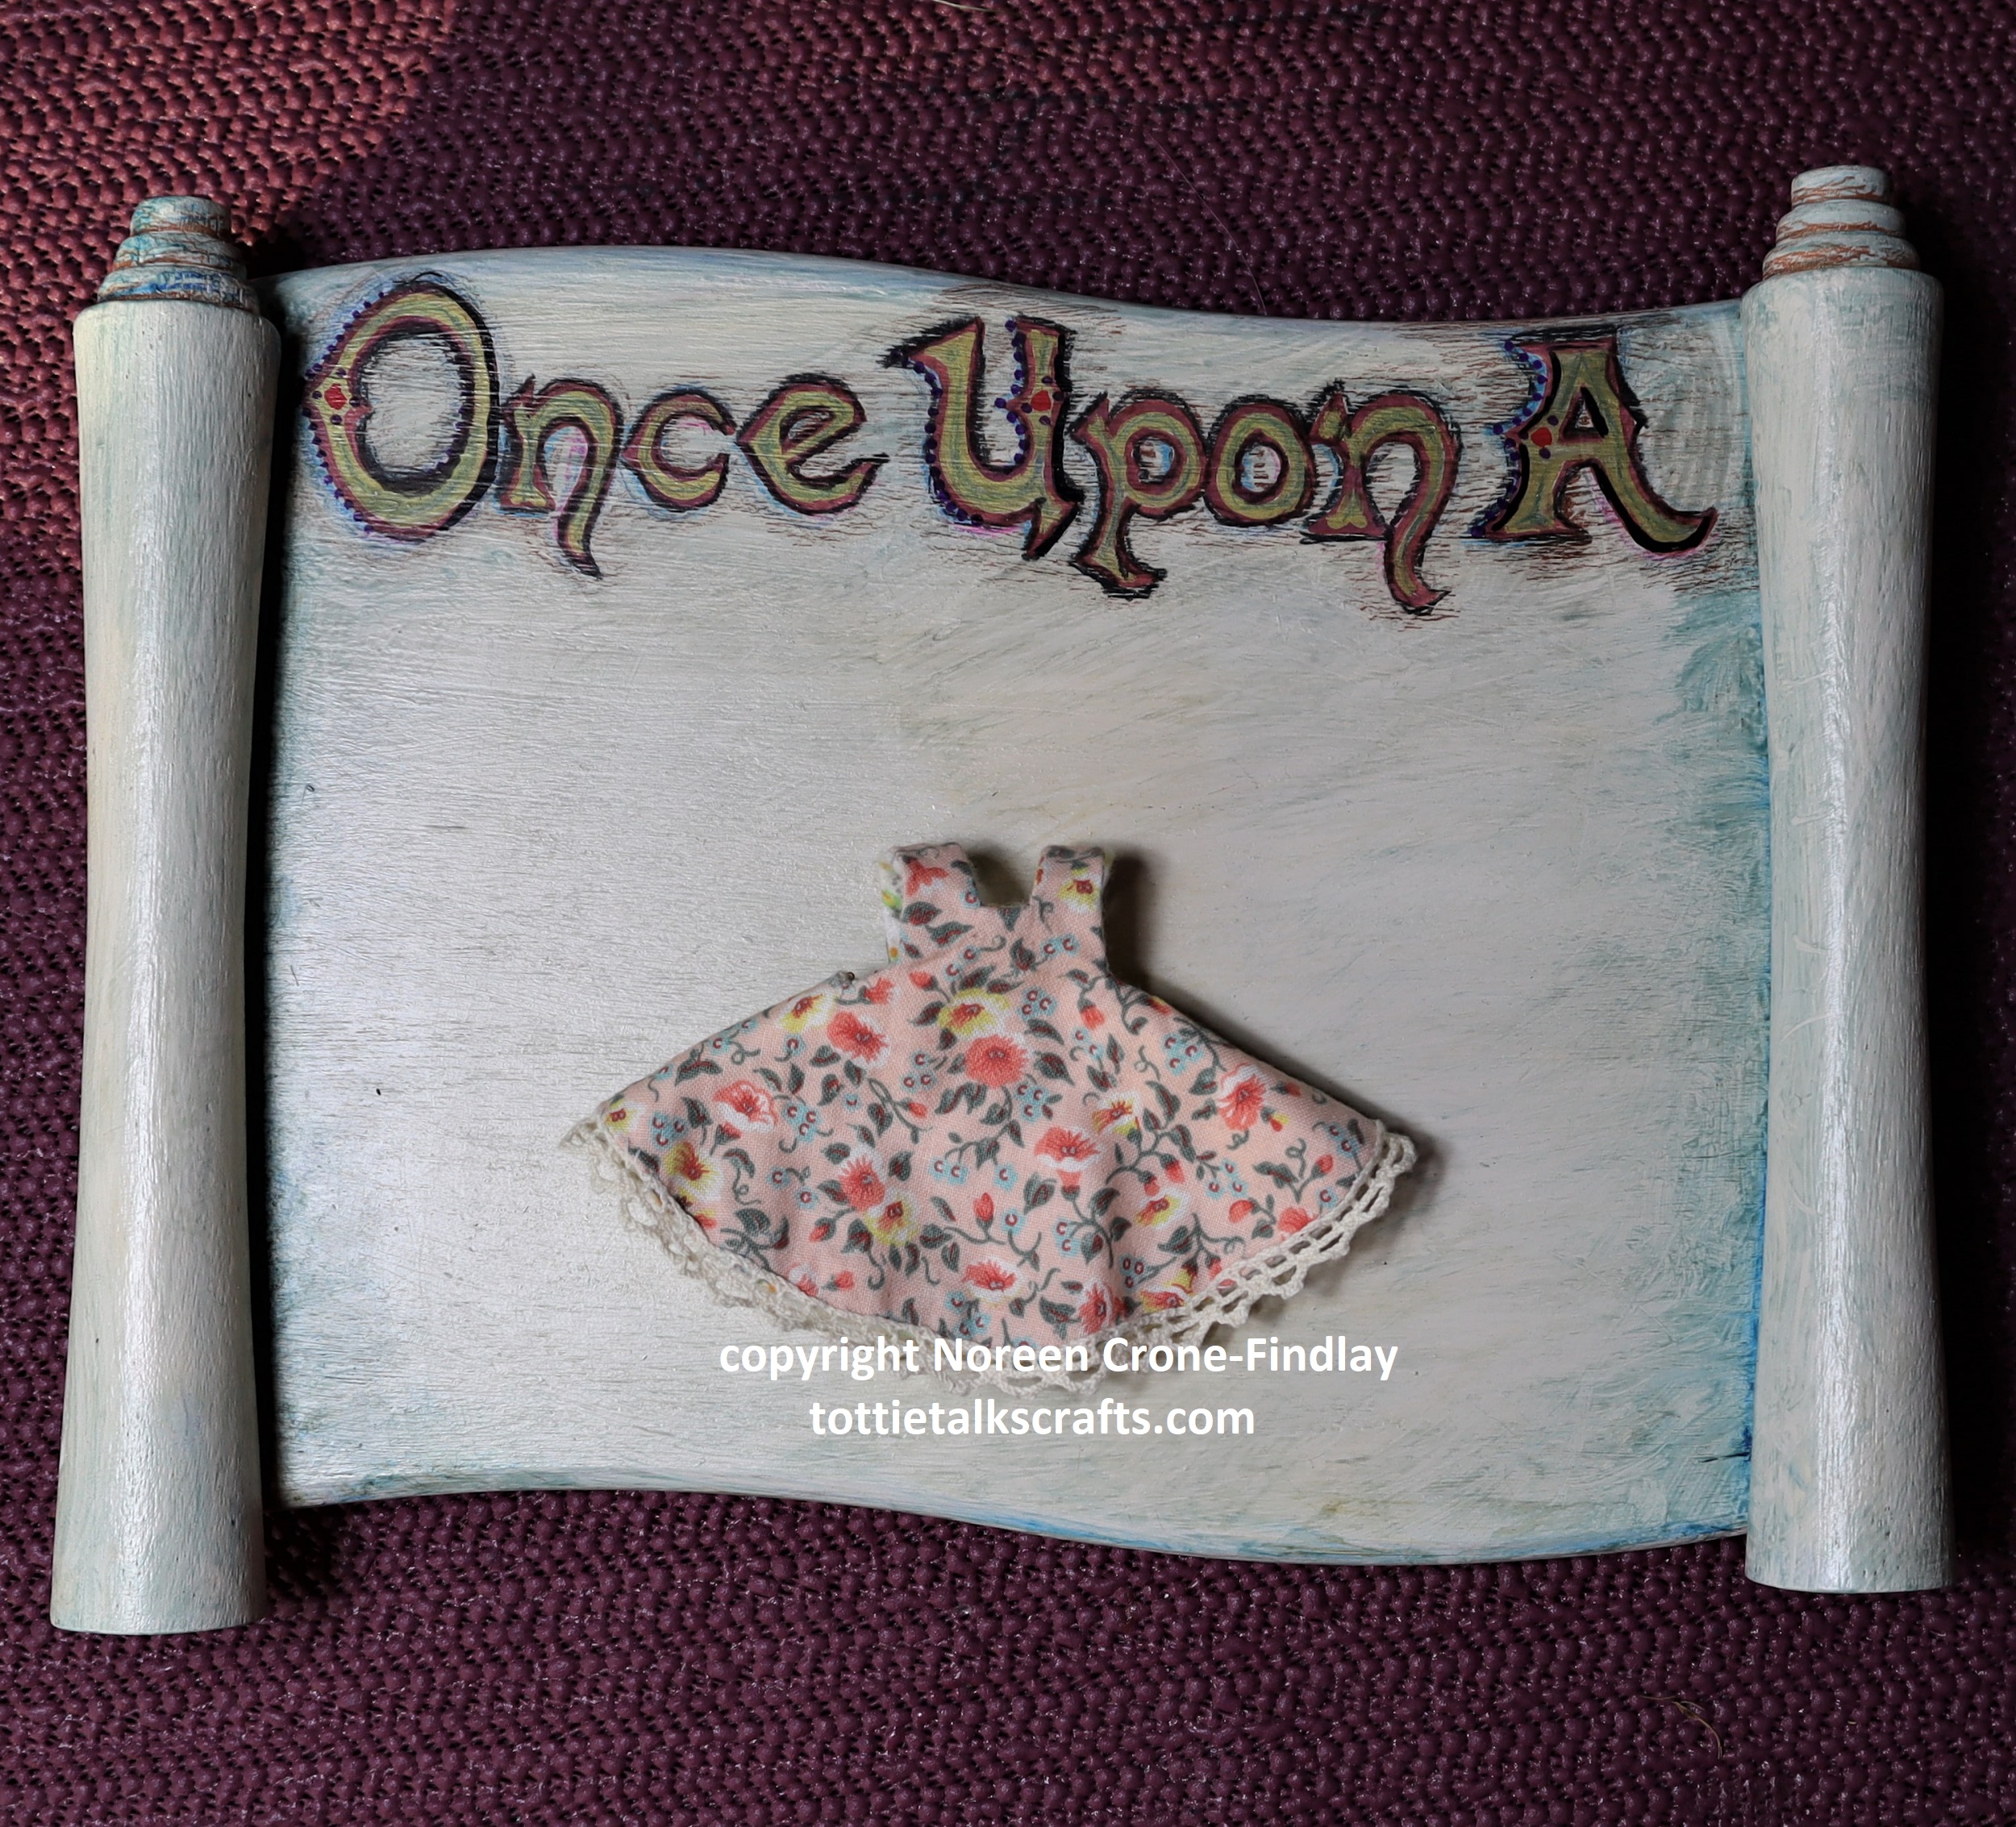
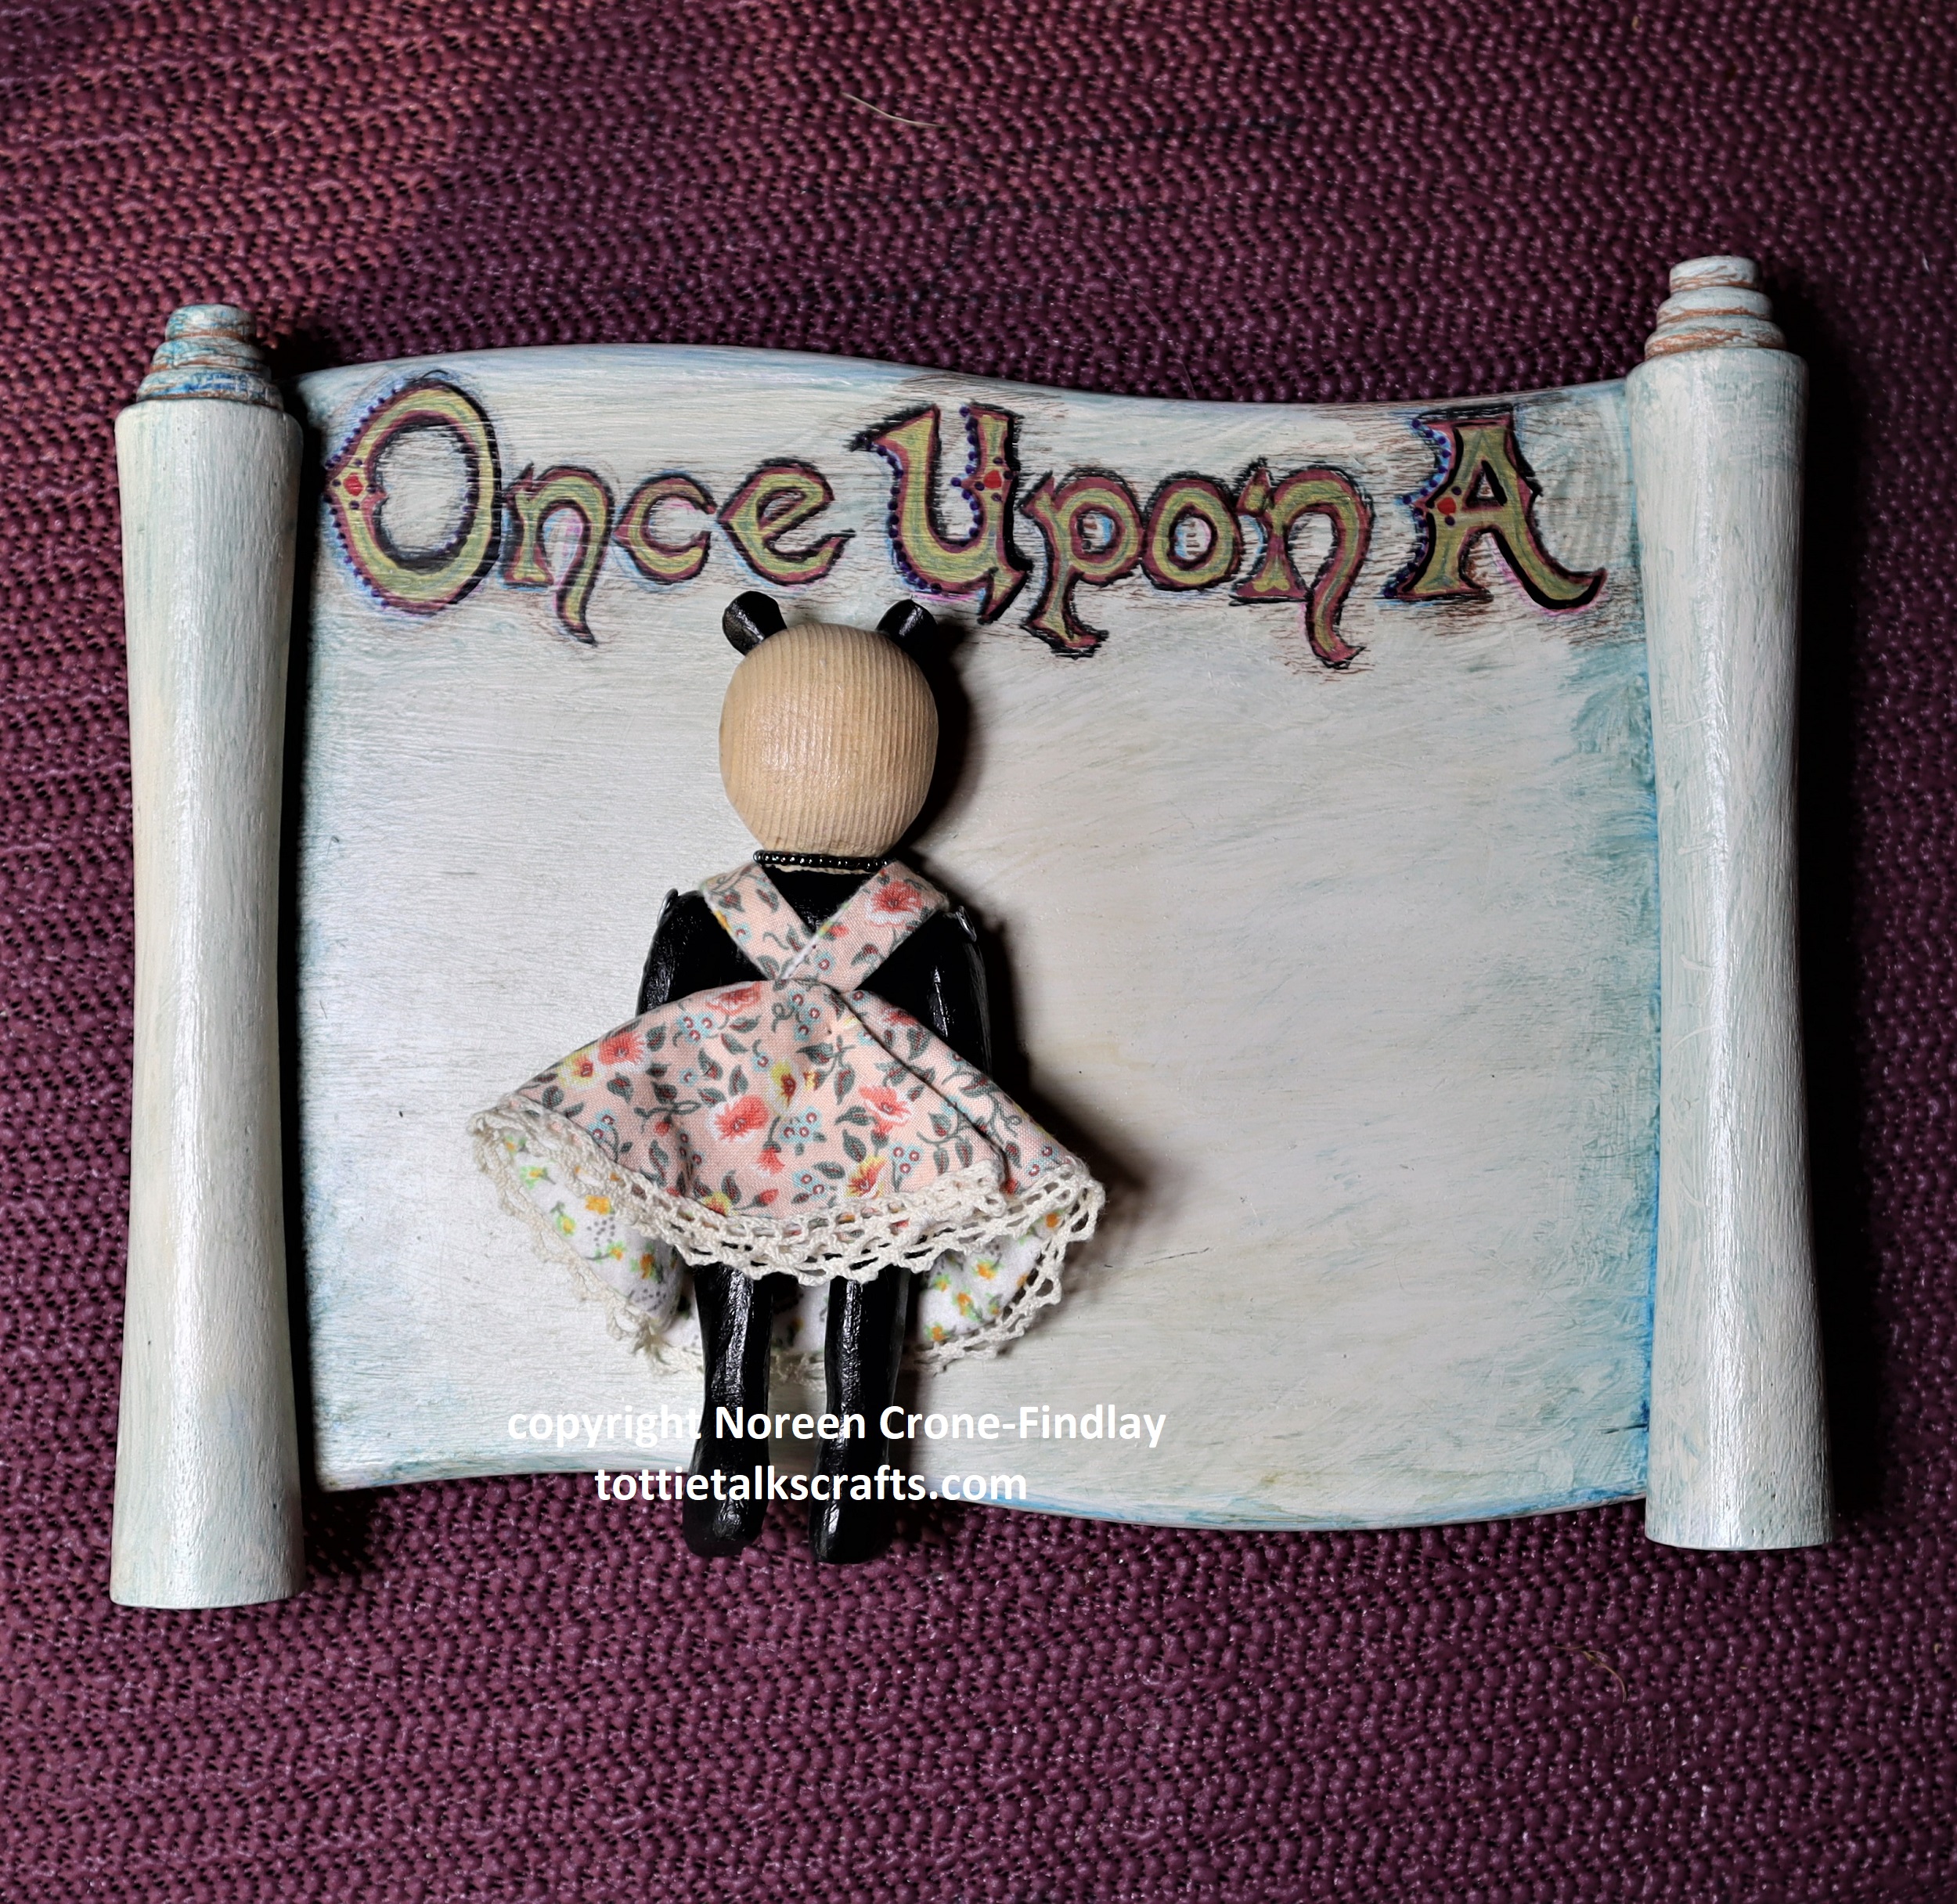
And here is a little sewn dress that is reversible. It fits all the bears. $20 +shipping
Here’s what the dress looks like on the bears (dress and bears sold separately)
4 inch tall Carved Wooden Teddy Bears
1a- 4 inch tall Hand Carved Wooden Teddy Bear in a Pinafore (the pinafore is included in the price) $95
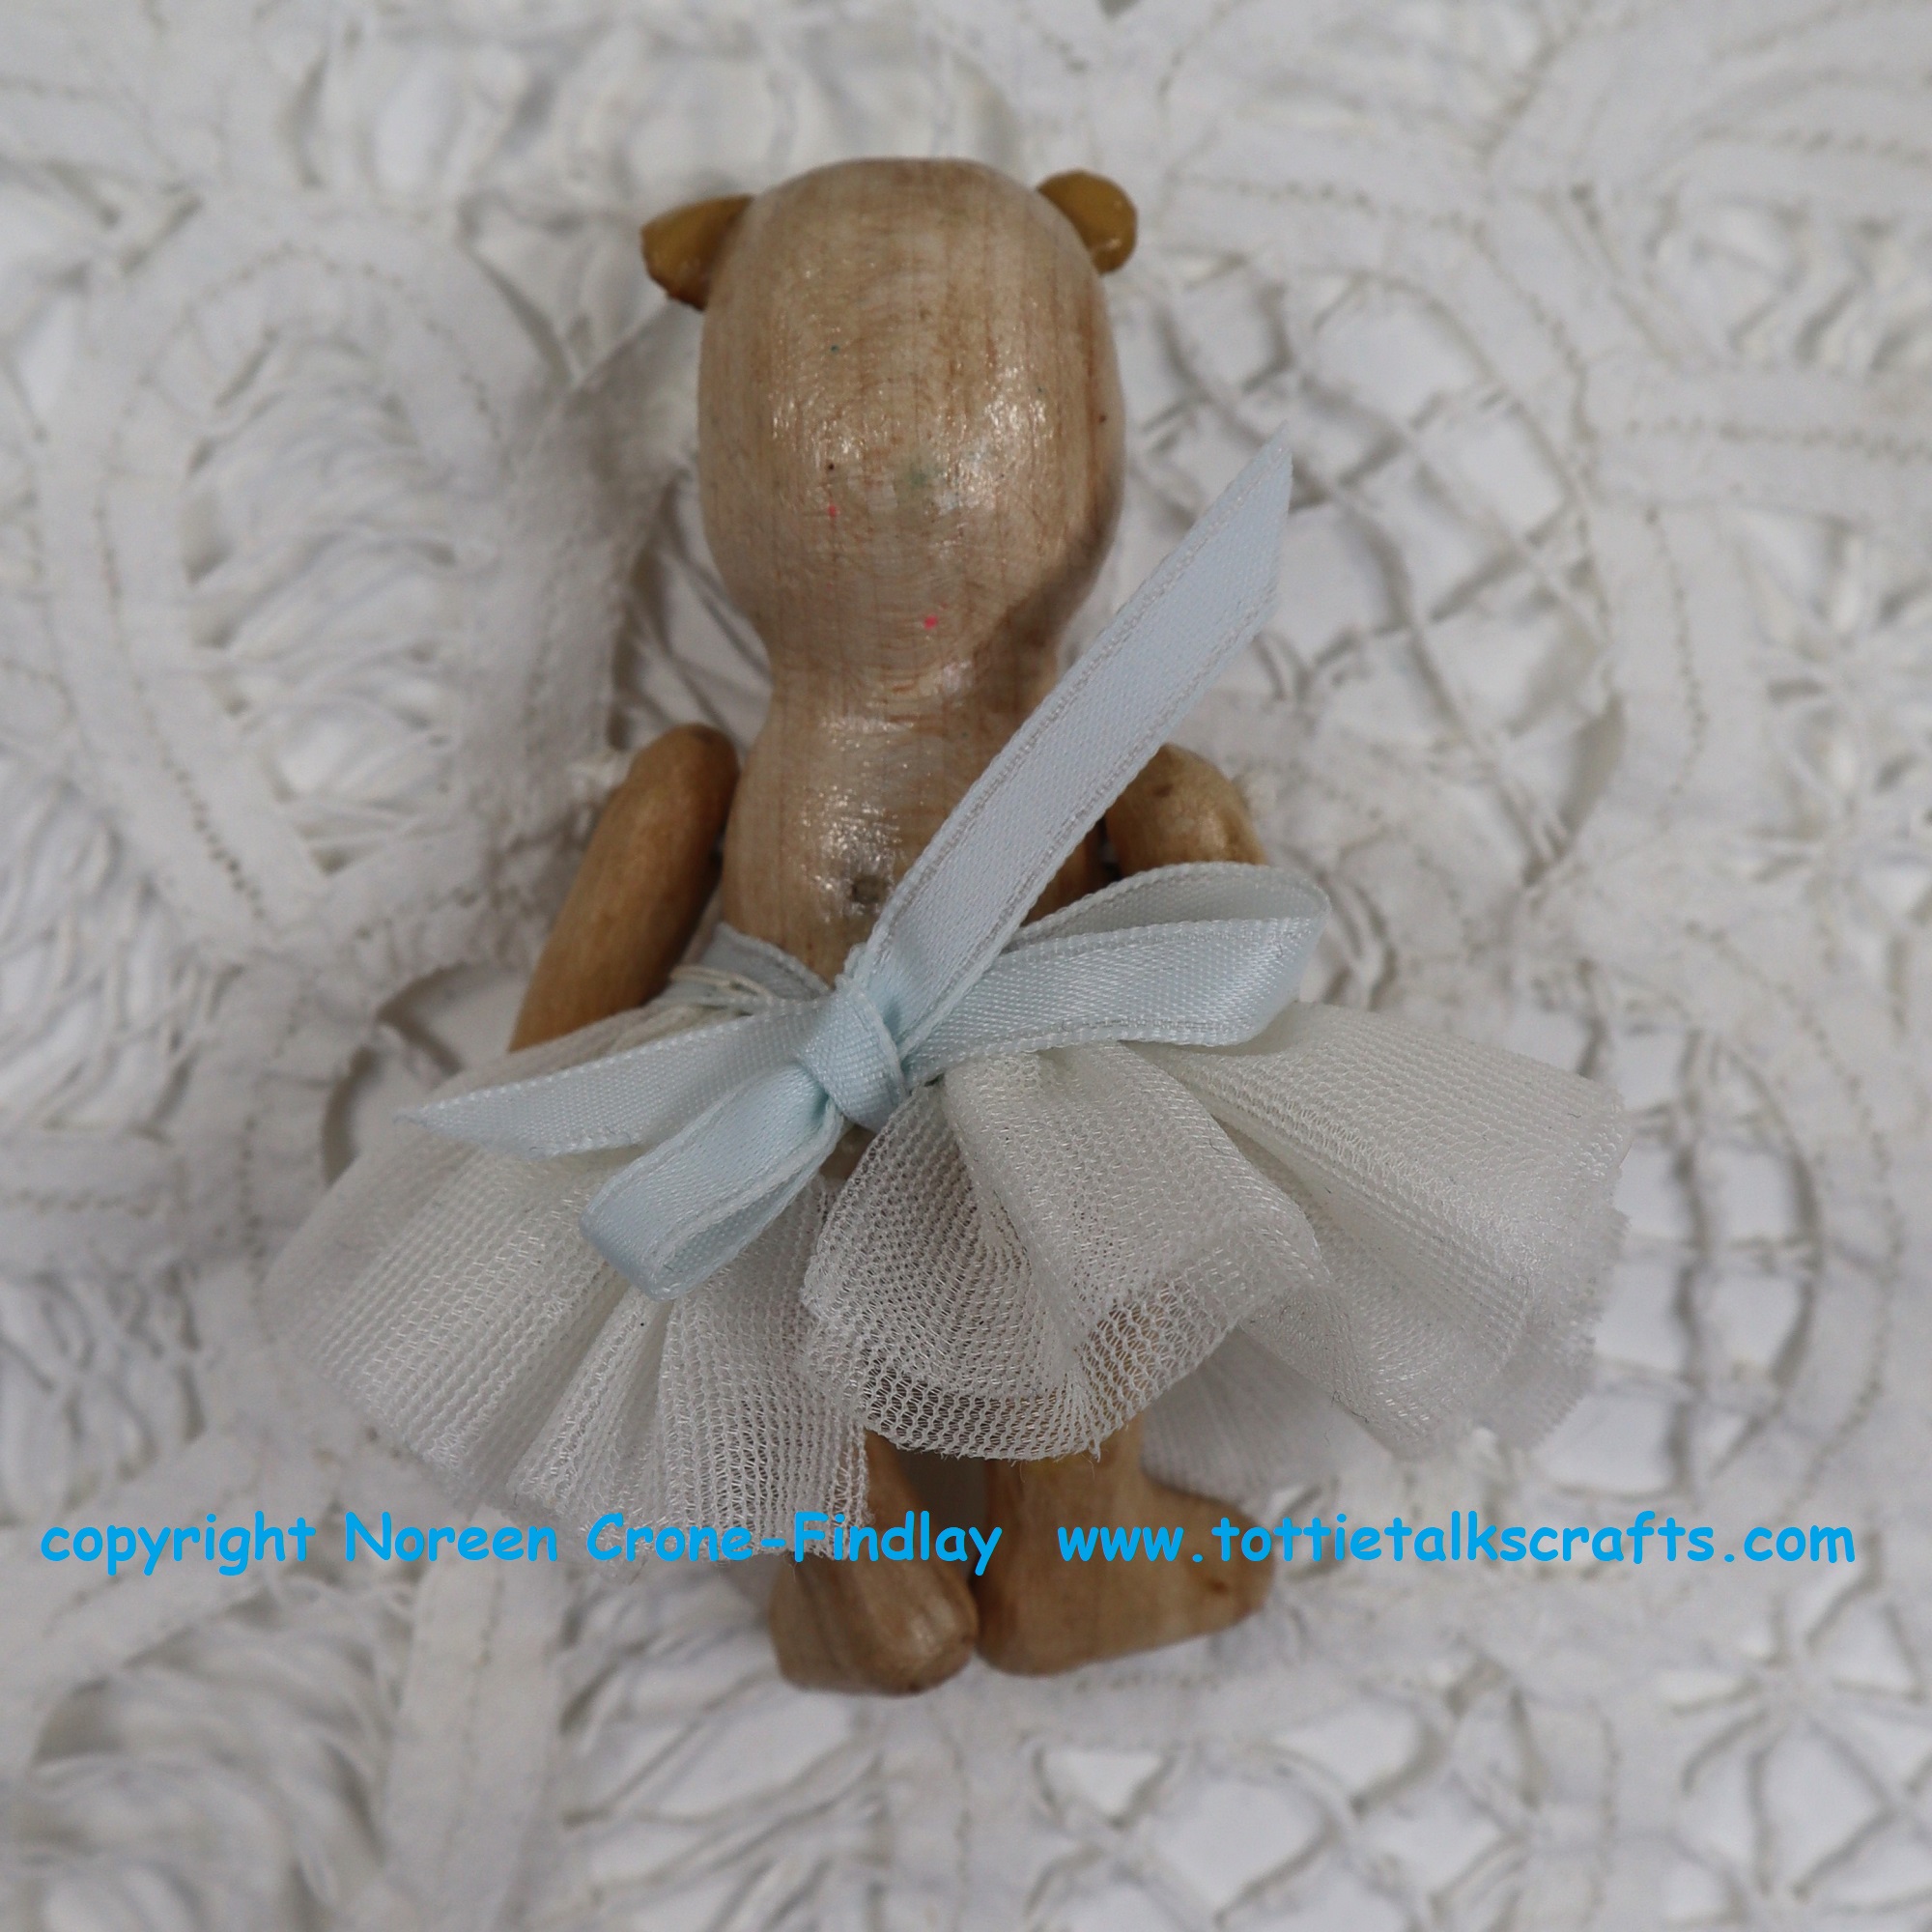
2a- 4 inch tall Hand Carved Wooden Teddy Bear in a Tutu (the tutu is included in the price) $95
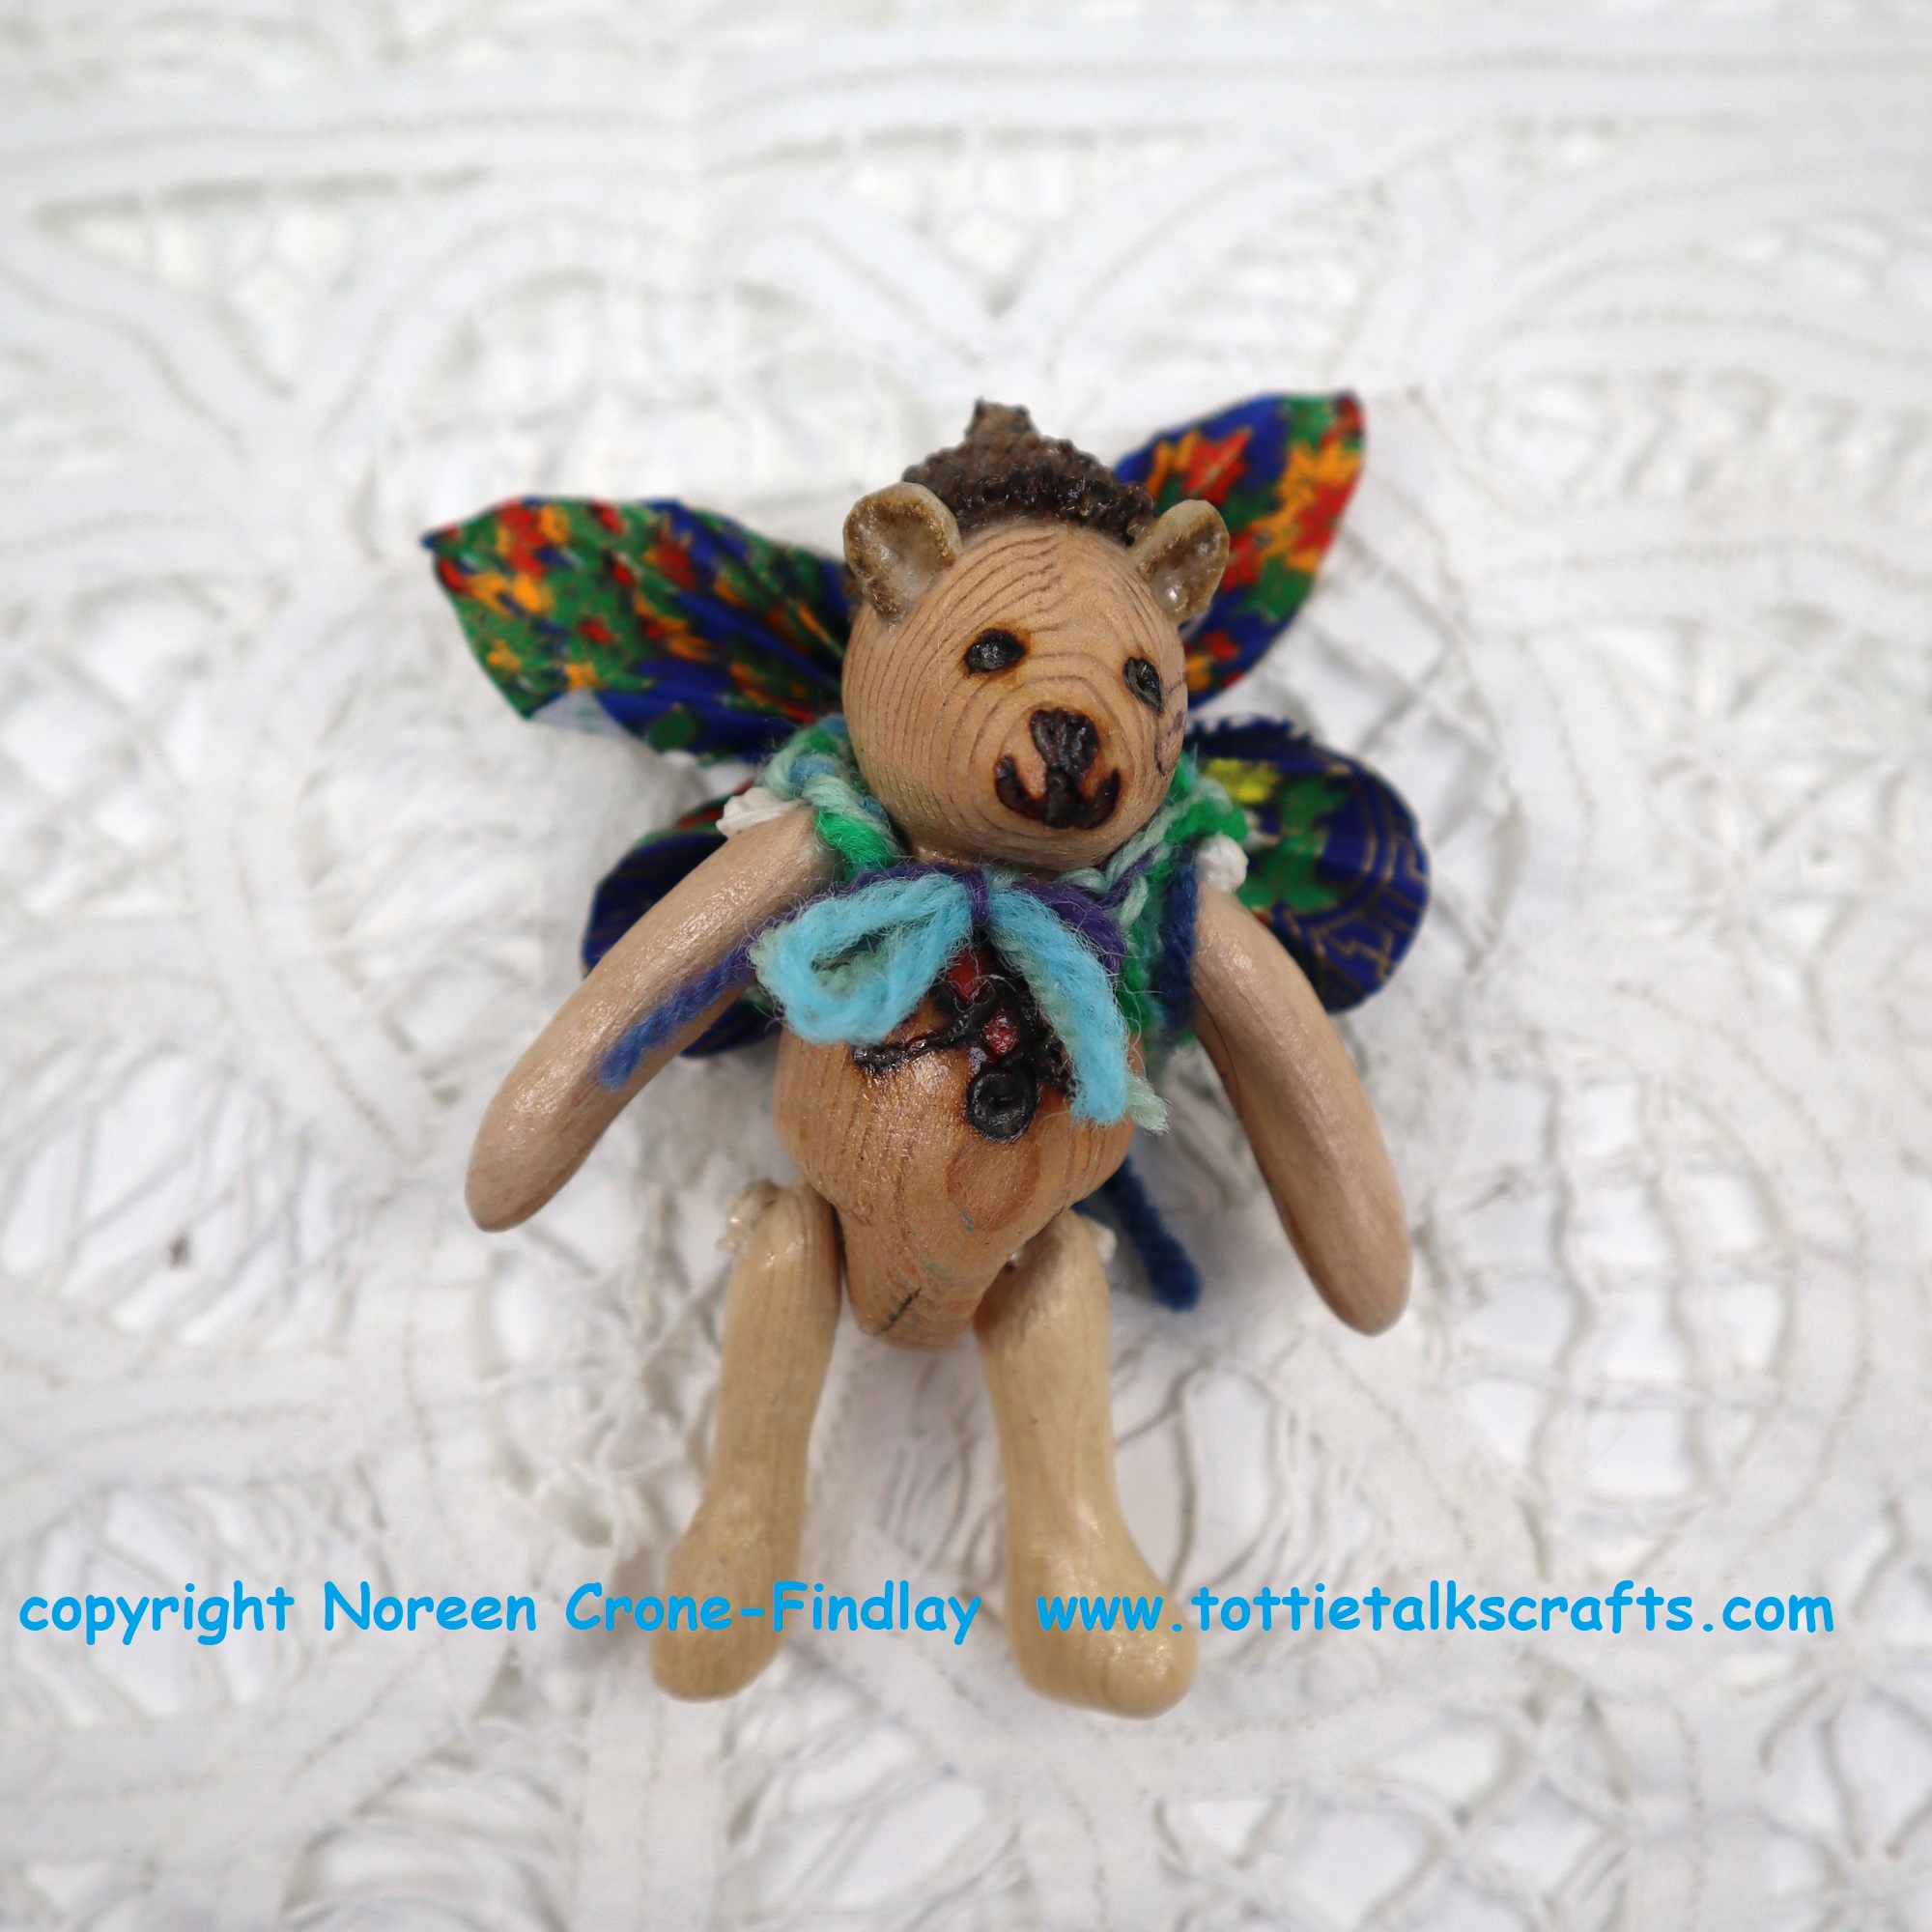
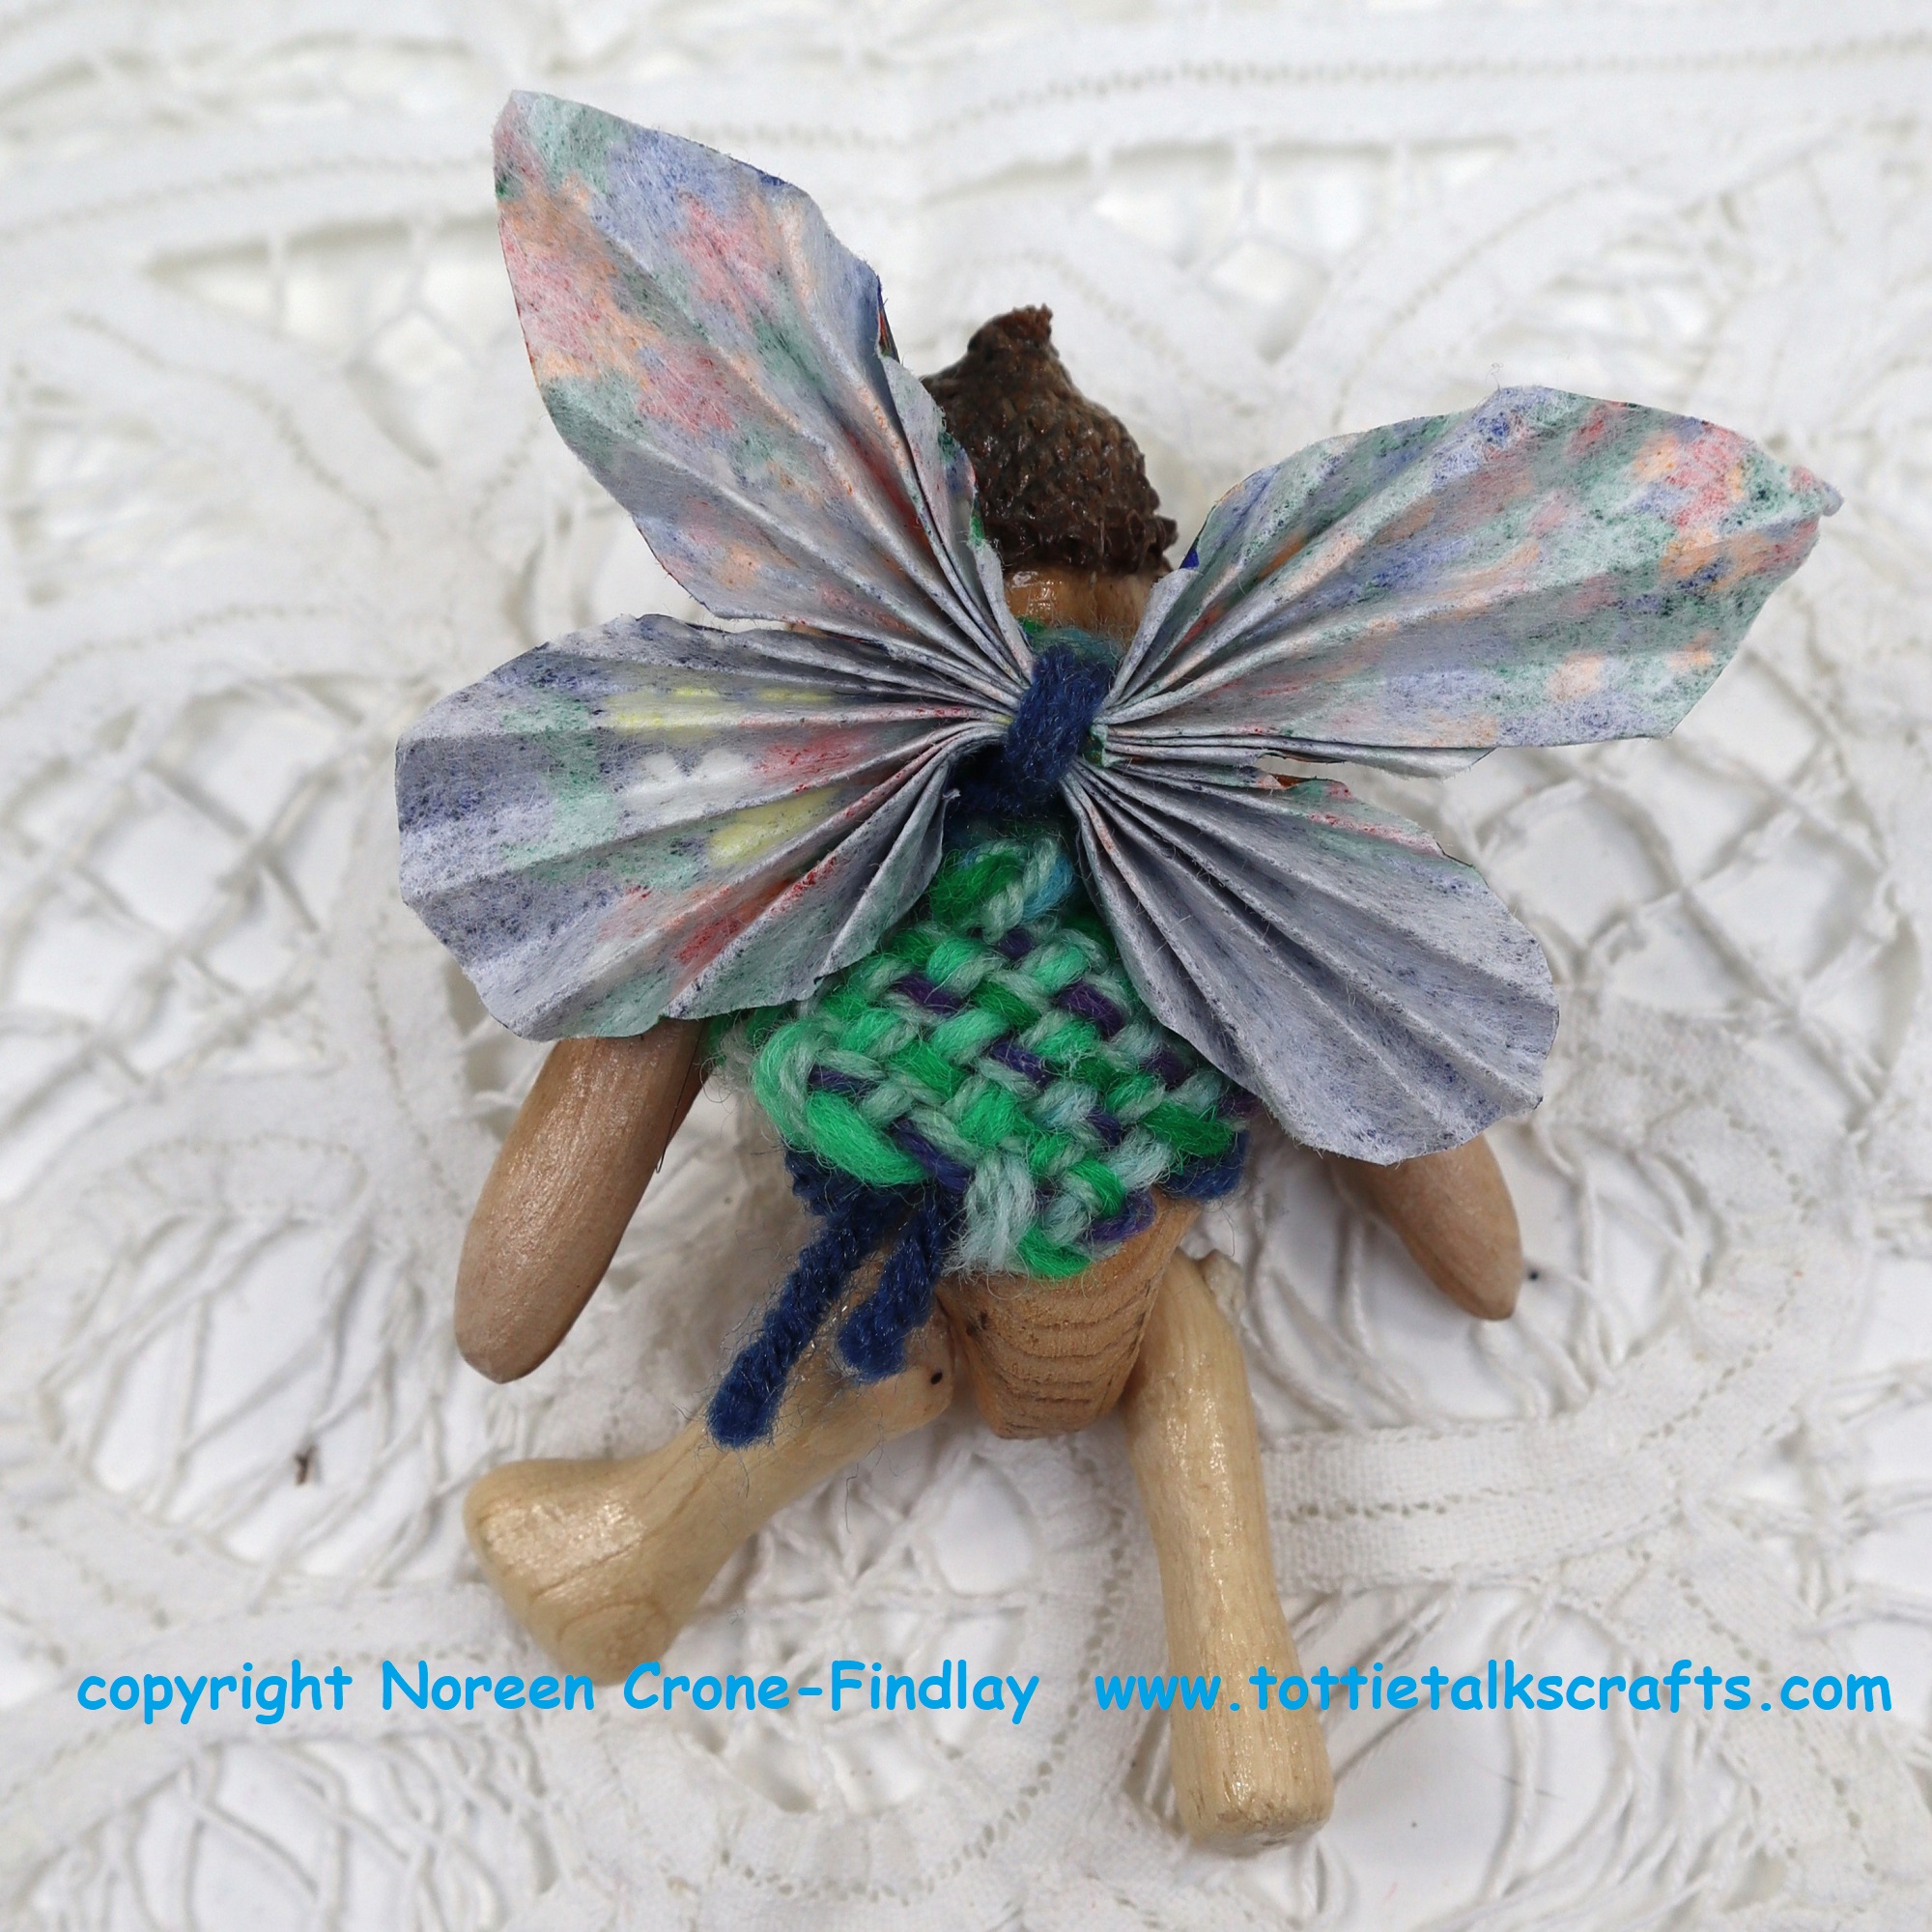
3a- 4 inch tall Hand Carved Wooden Teddy Bear with an Acorn Hat in a Vestwith removable wings (the hat is glued to the Teddy Bear’s head. The vest and wings are included in the price) $95
If you are interested in purchasing any of the bears, please drop me a note in the comments or send me an email and I will get back to you asap. ❤