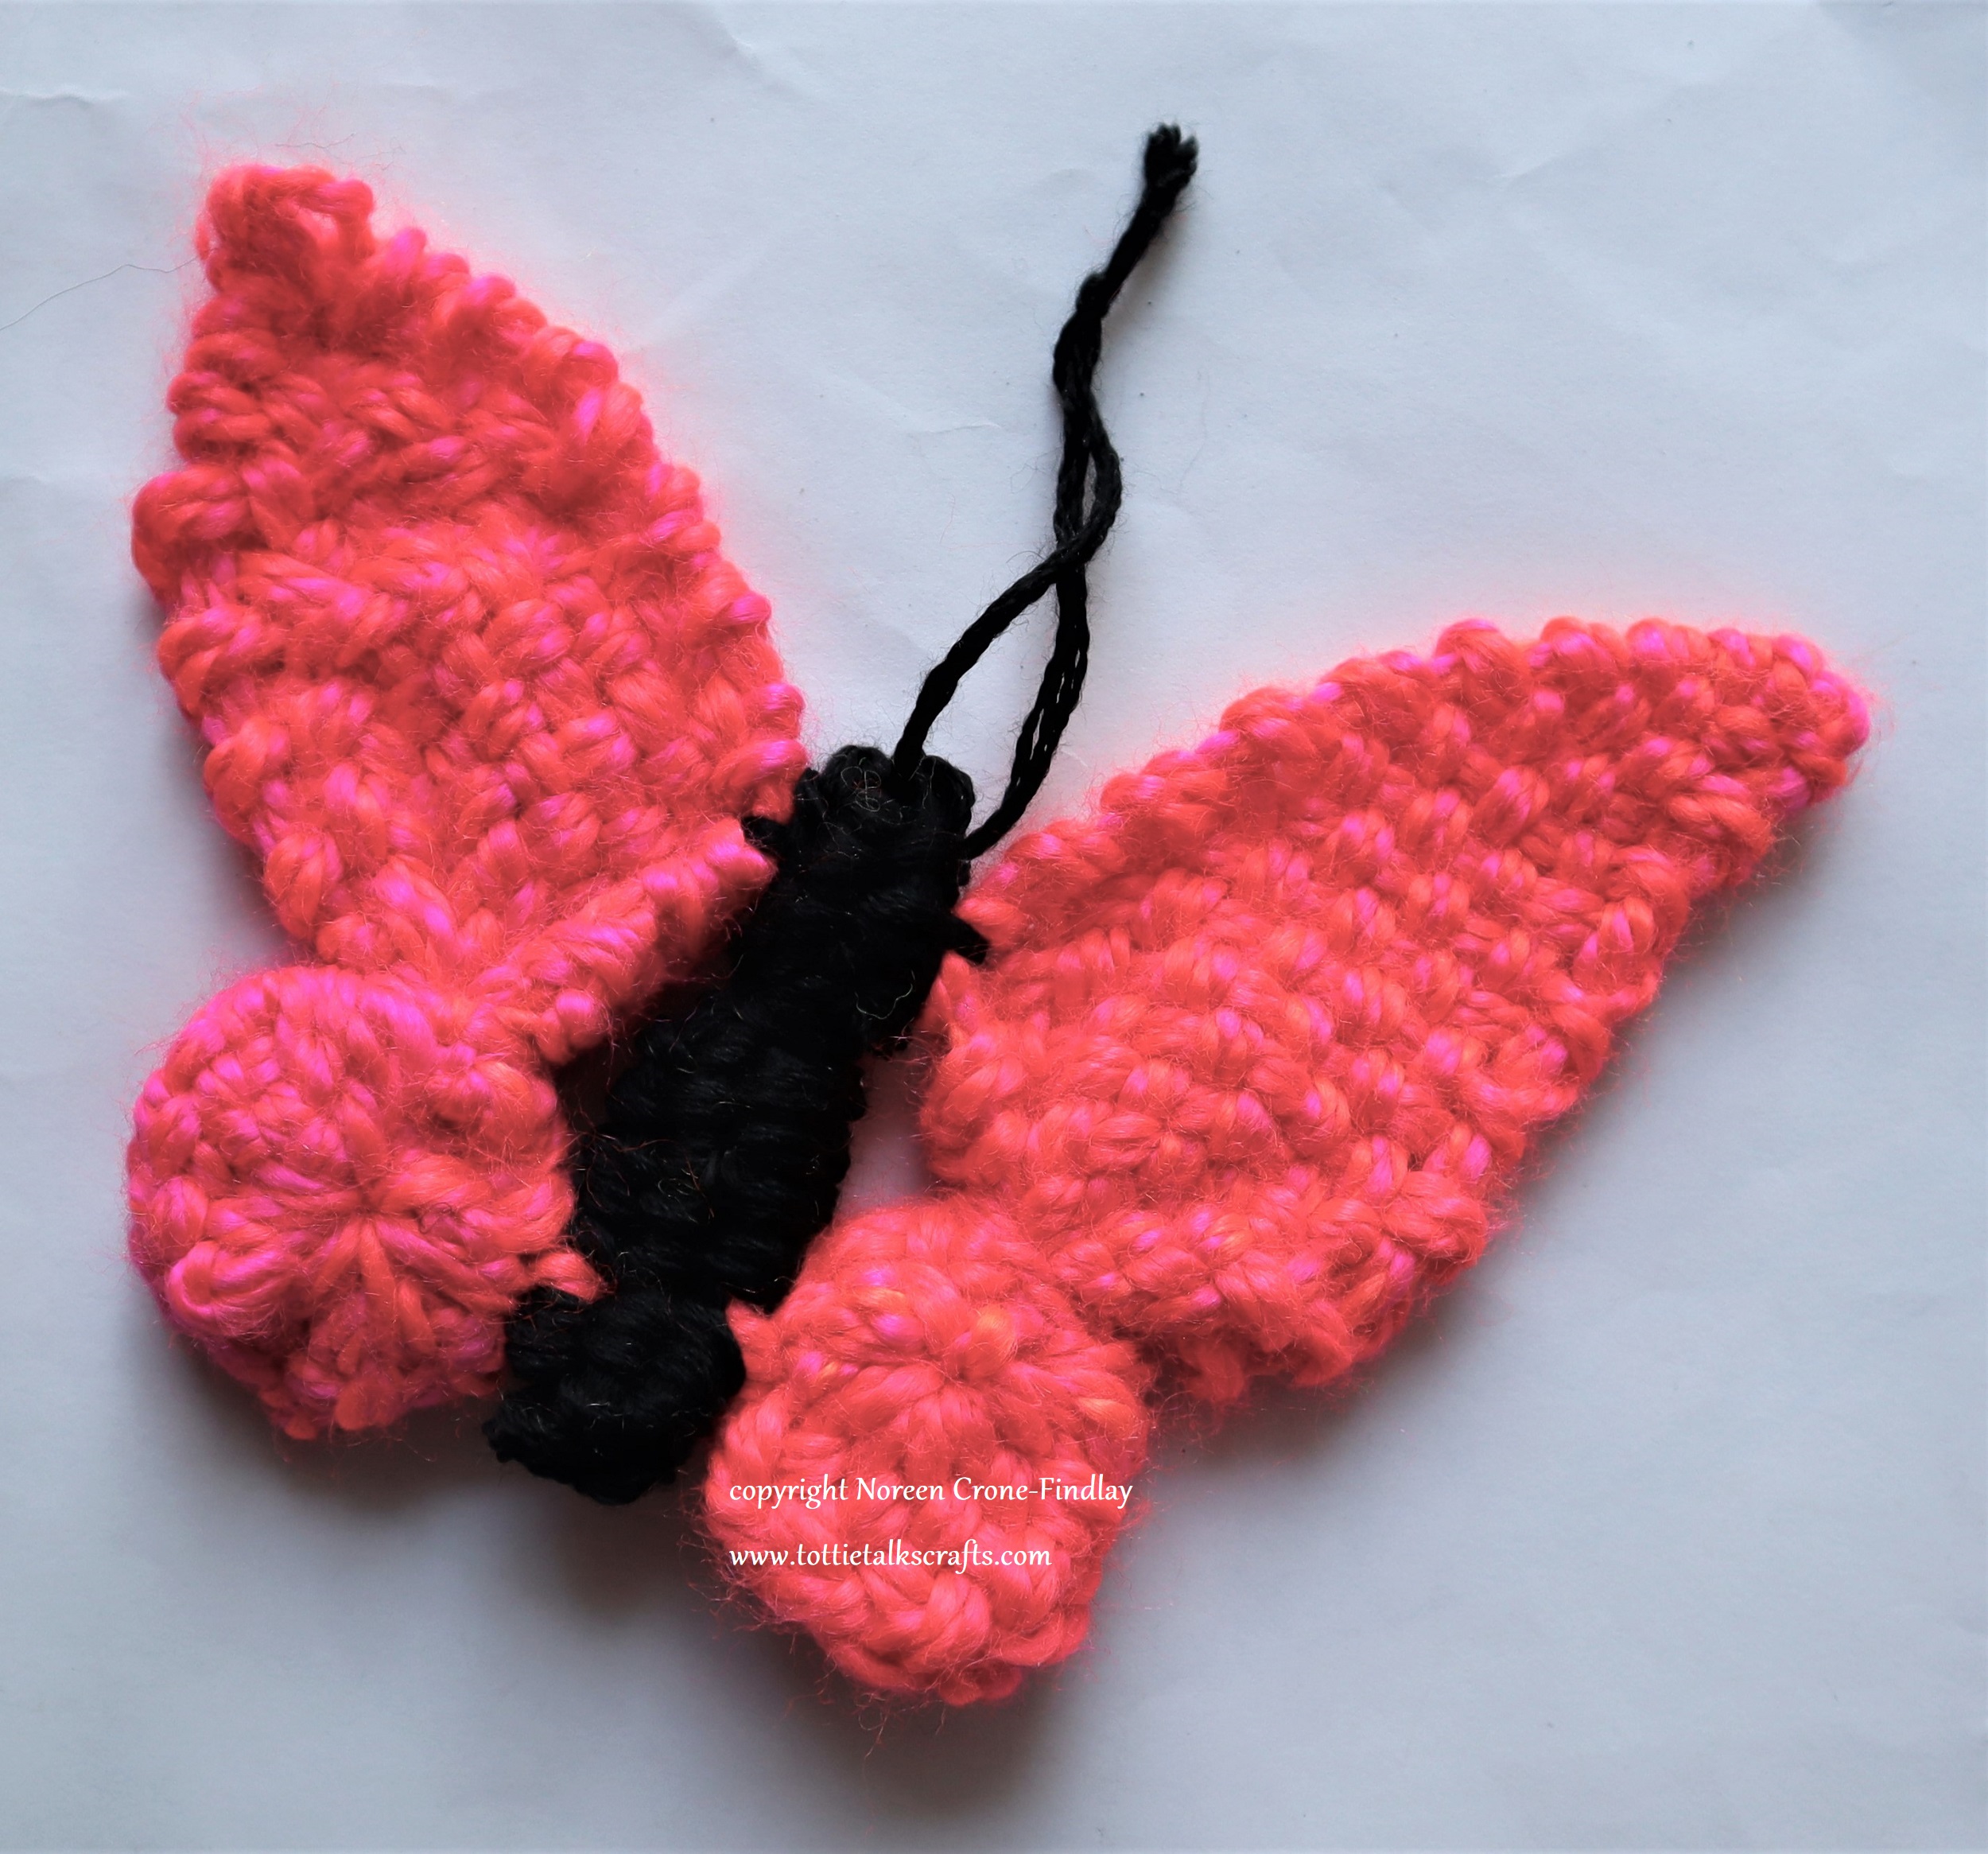
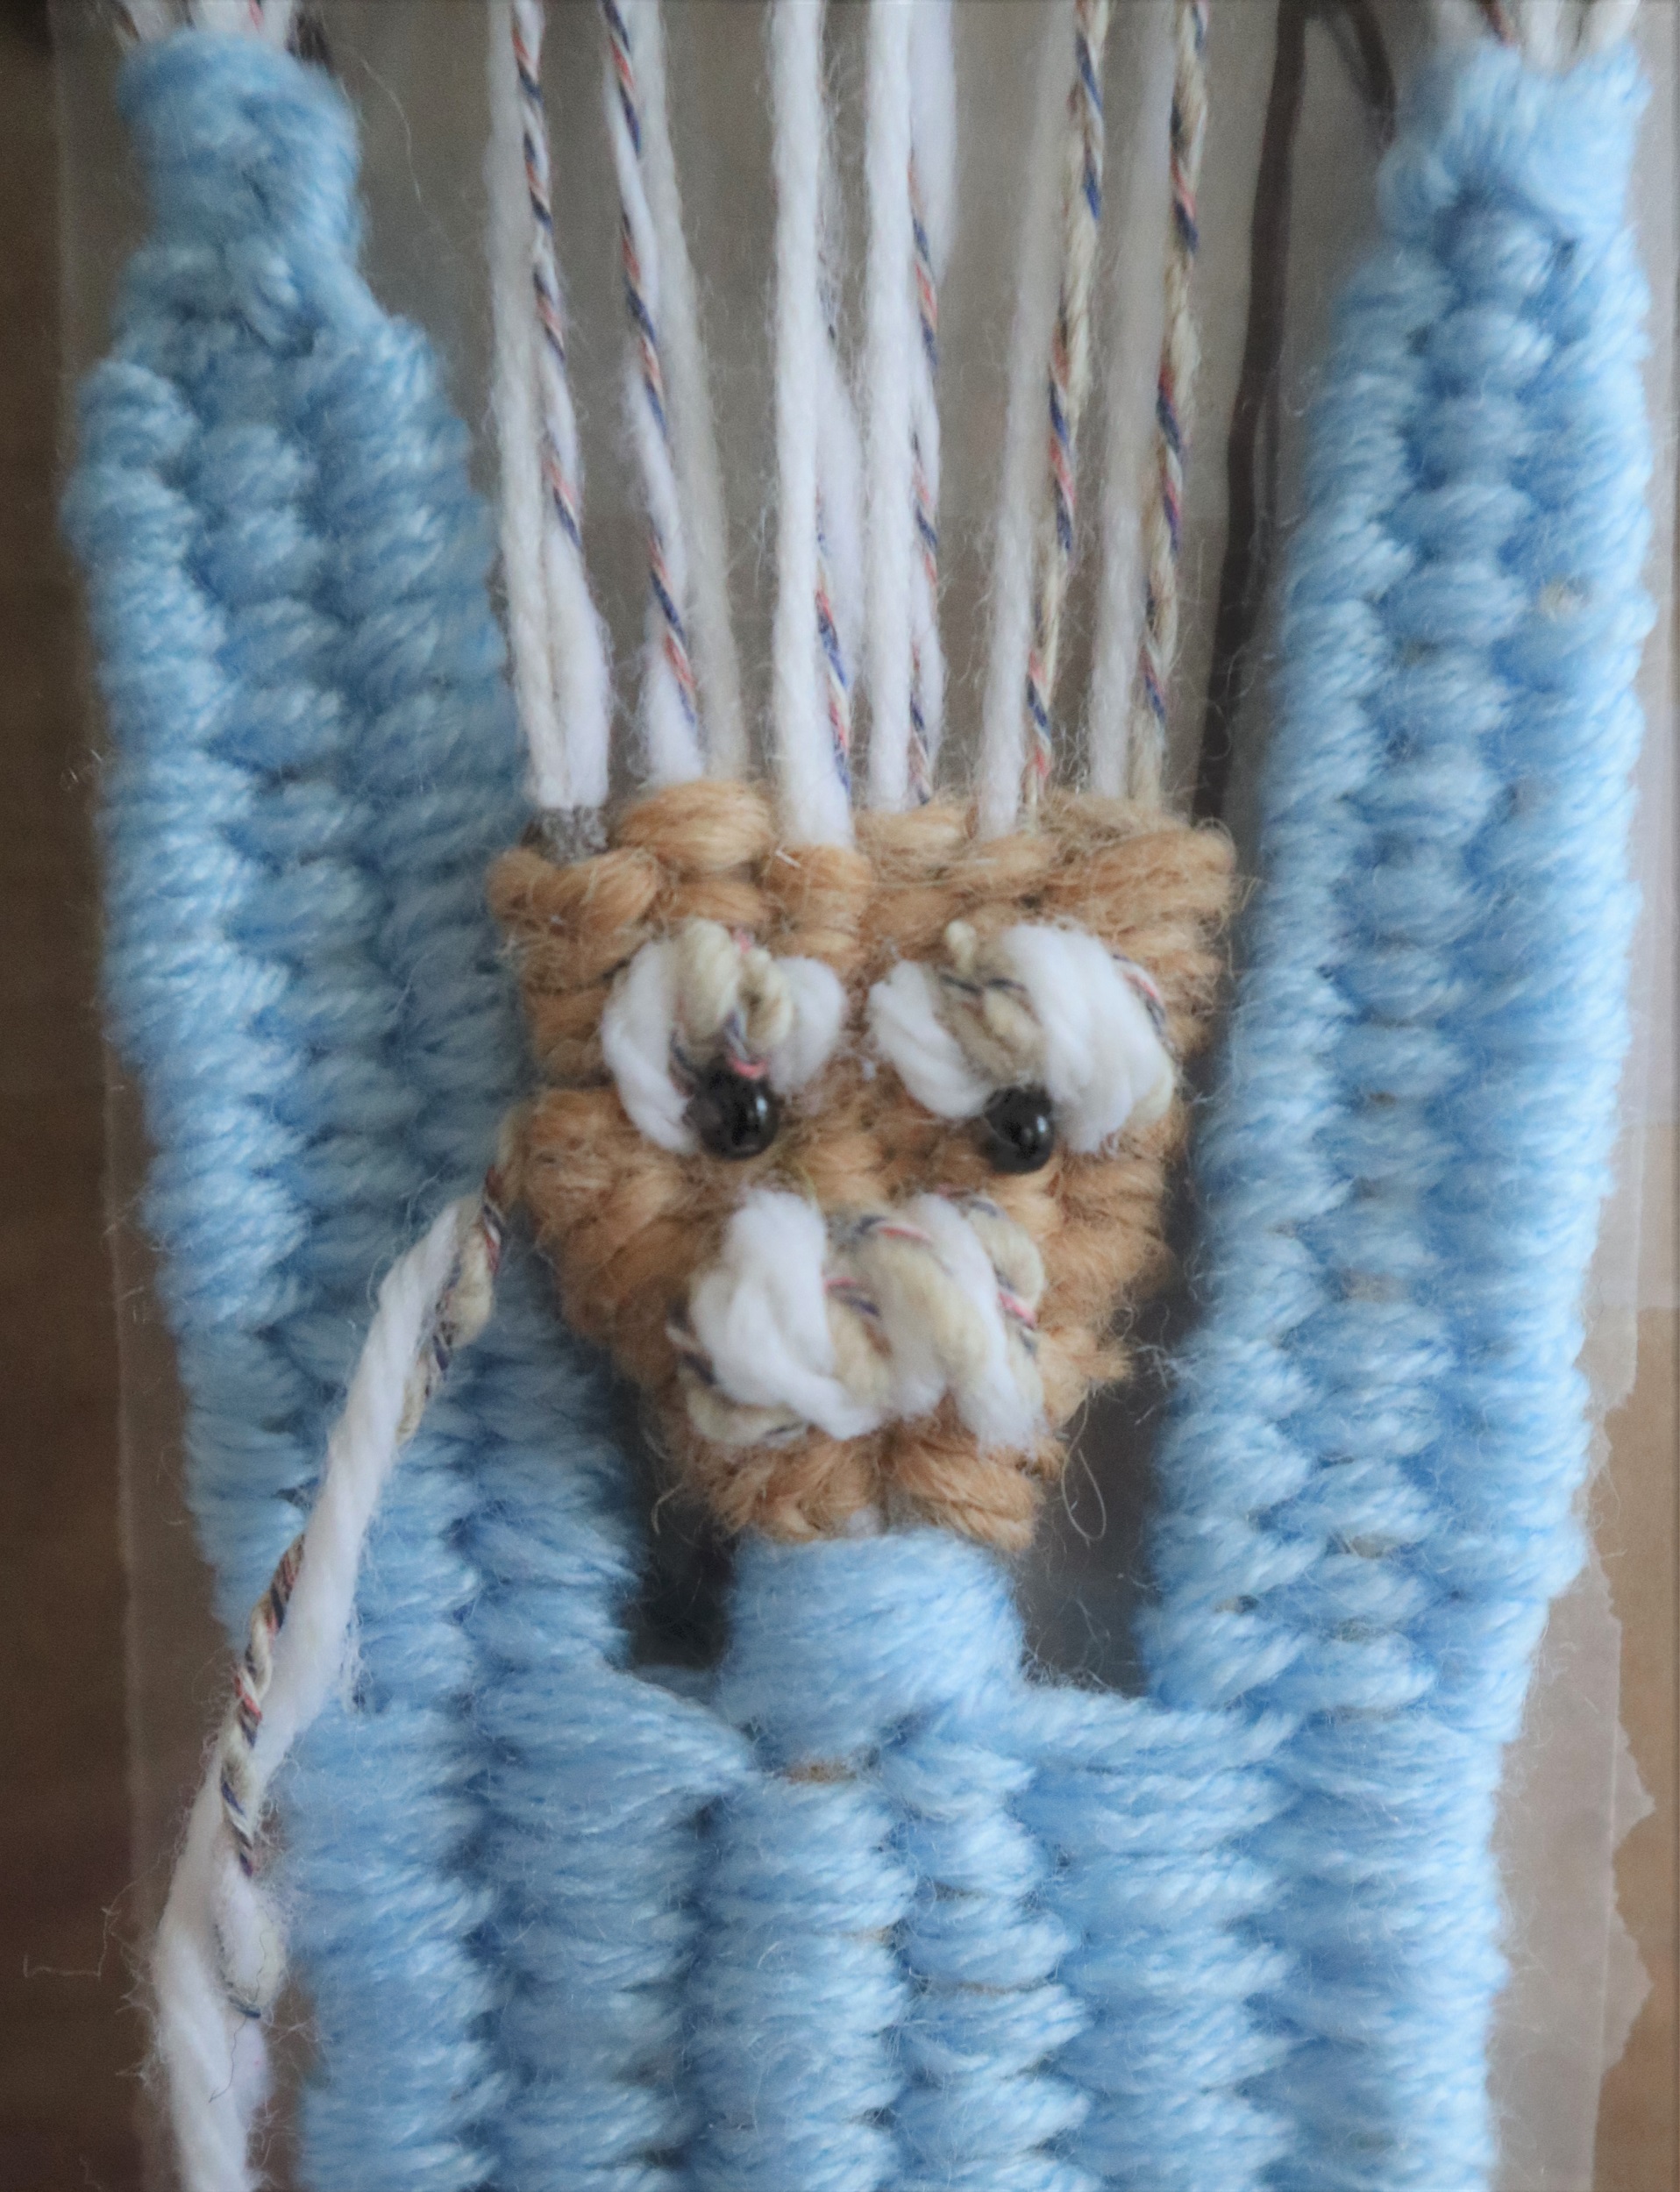
I have been weaving a lot of butterflies lately, as a metaphor of hope, transformation, healing, creativity, community, and so much more.
These butterflies are ones that I designed to weave on the Mirrix Saffron loom.
I love the way that I can set up the Saffron to the exact size that I want….
The pink butterfly is made by weaving a full size triangle on the Saffron (see instructions in my book: Innovative Weaving on the Frame Loom).
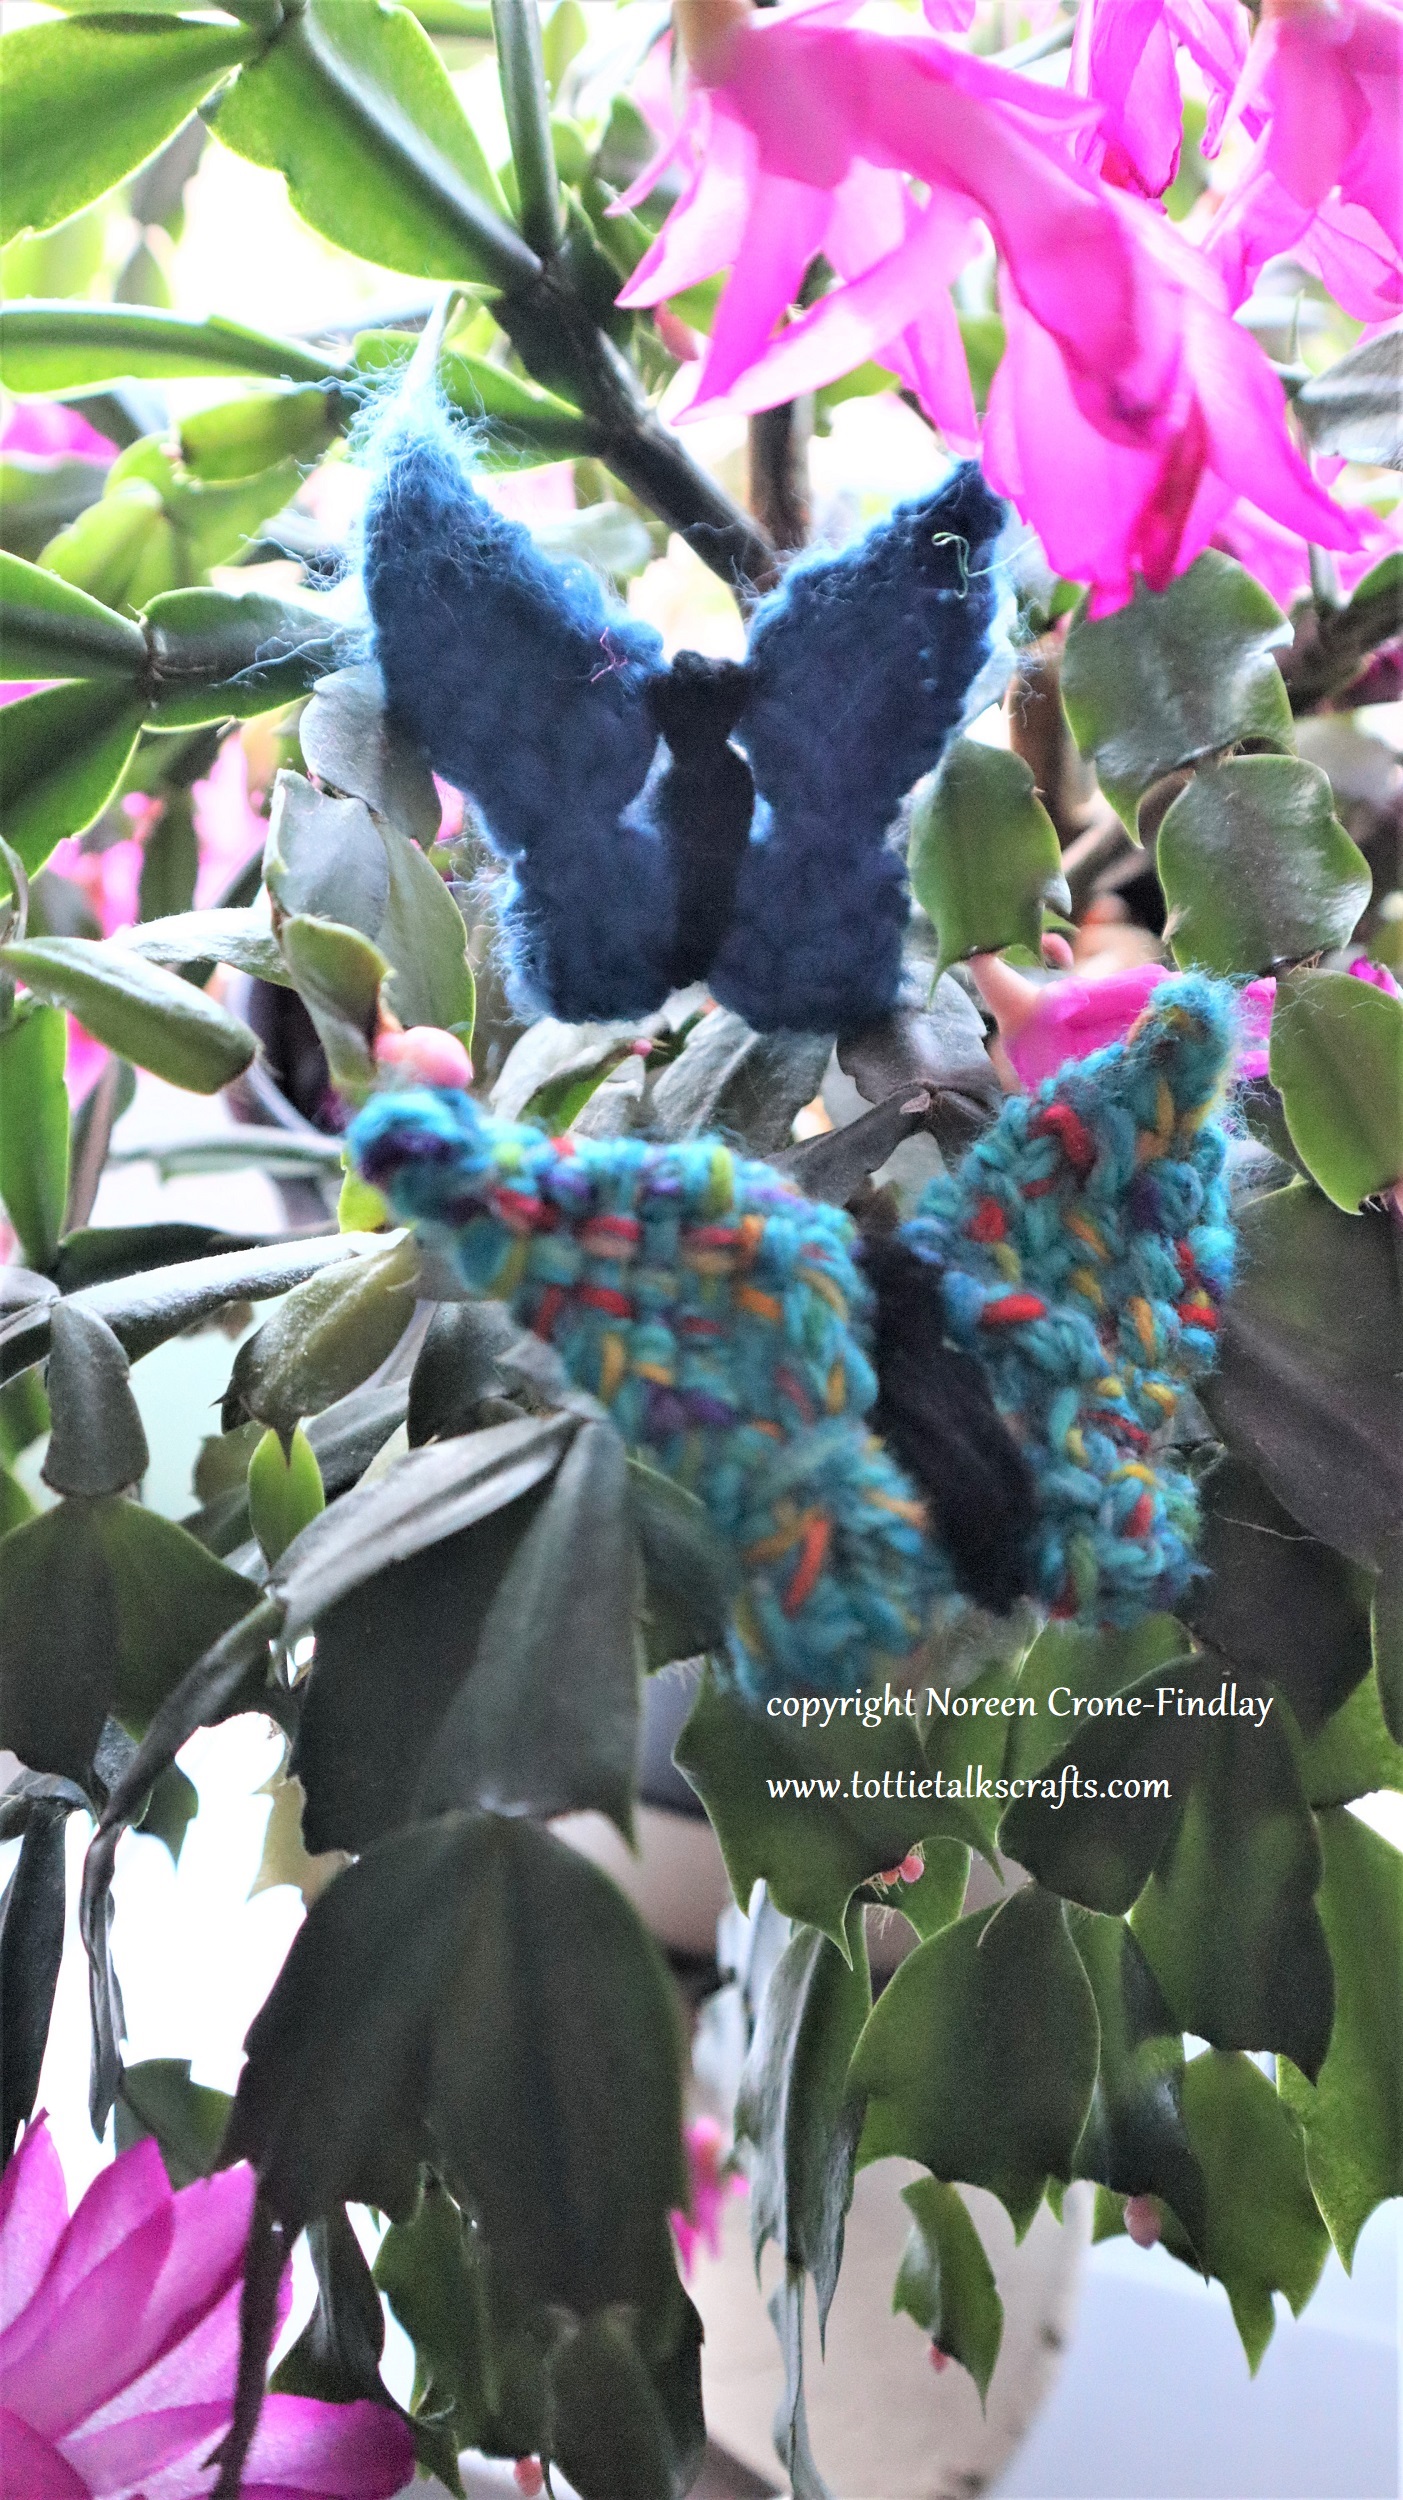
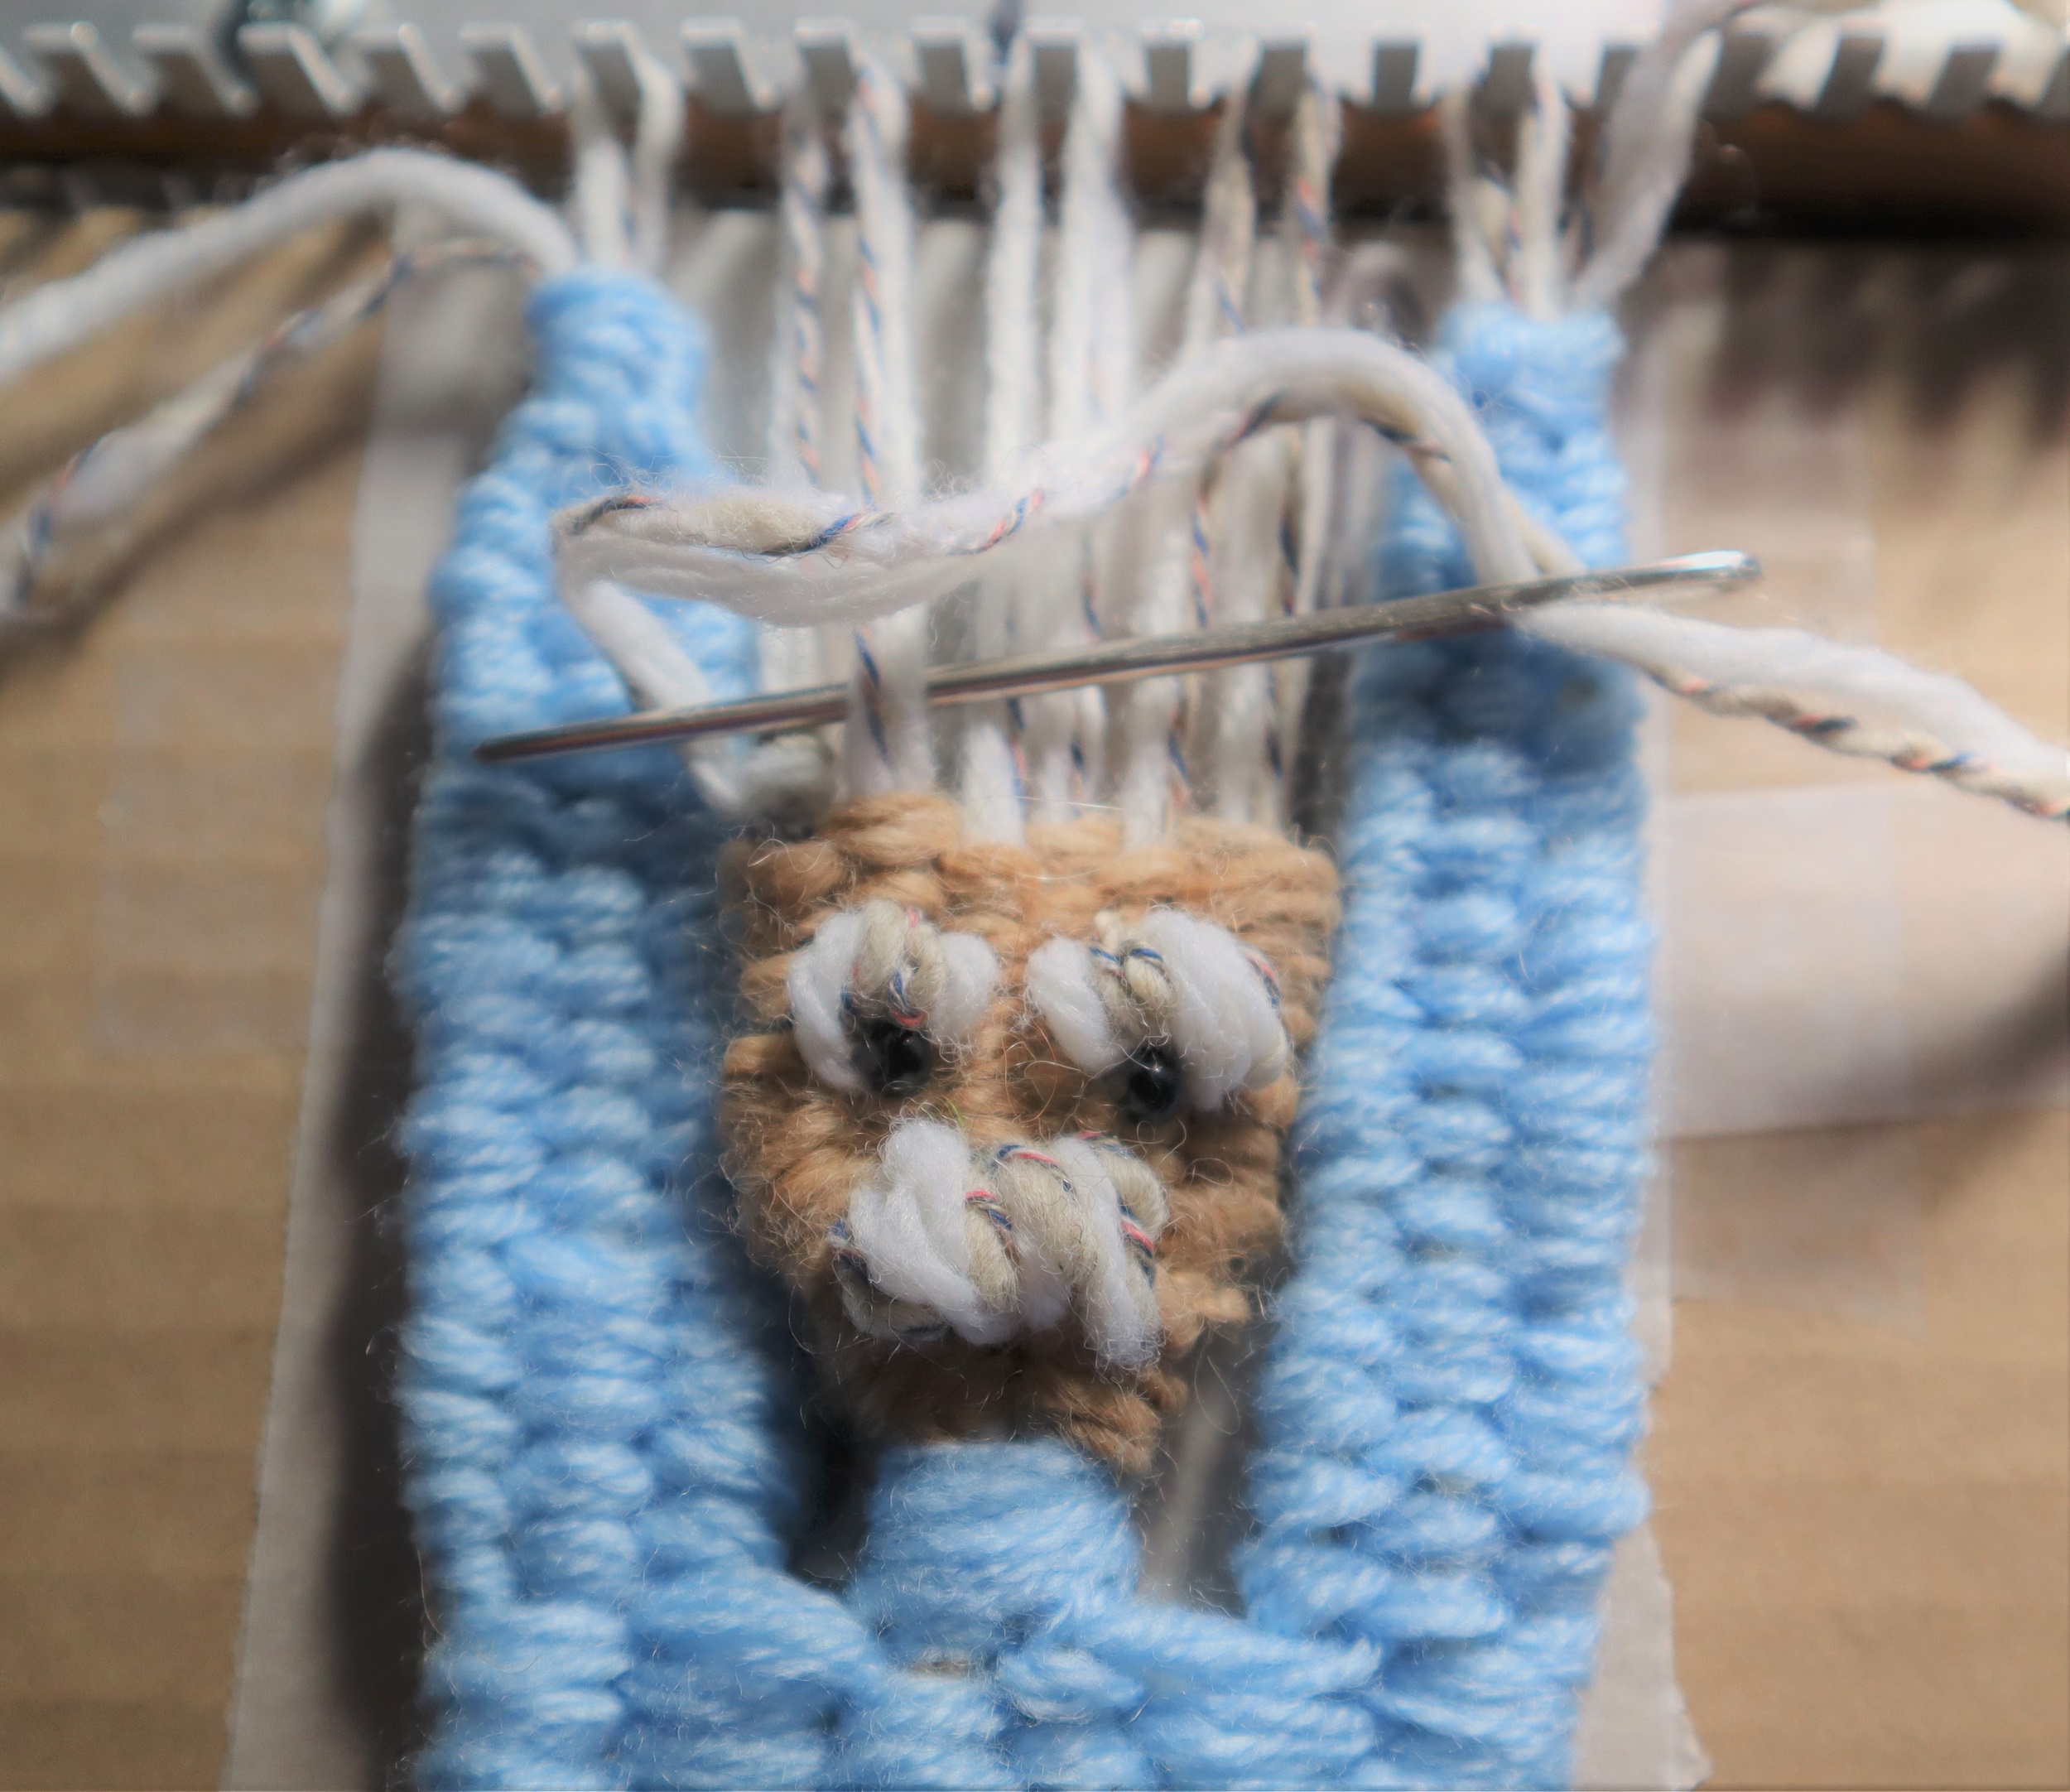
And, the blue butterflies are made by weaving half size triangles.
Because the smaller butterflies are woven using a variation on the technique that I developed for the book,
I have made a video showing how to weave them.
The bodies are made on the loom, using the same setup as the wings, so you can weave away without having to re-set the loom. Yay!
Here’s the link to the Video How to Tutorial:
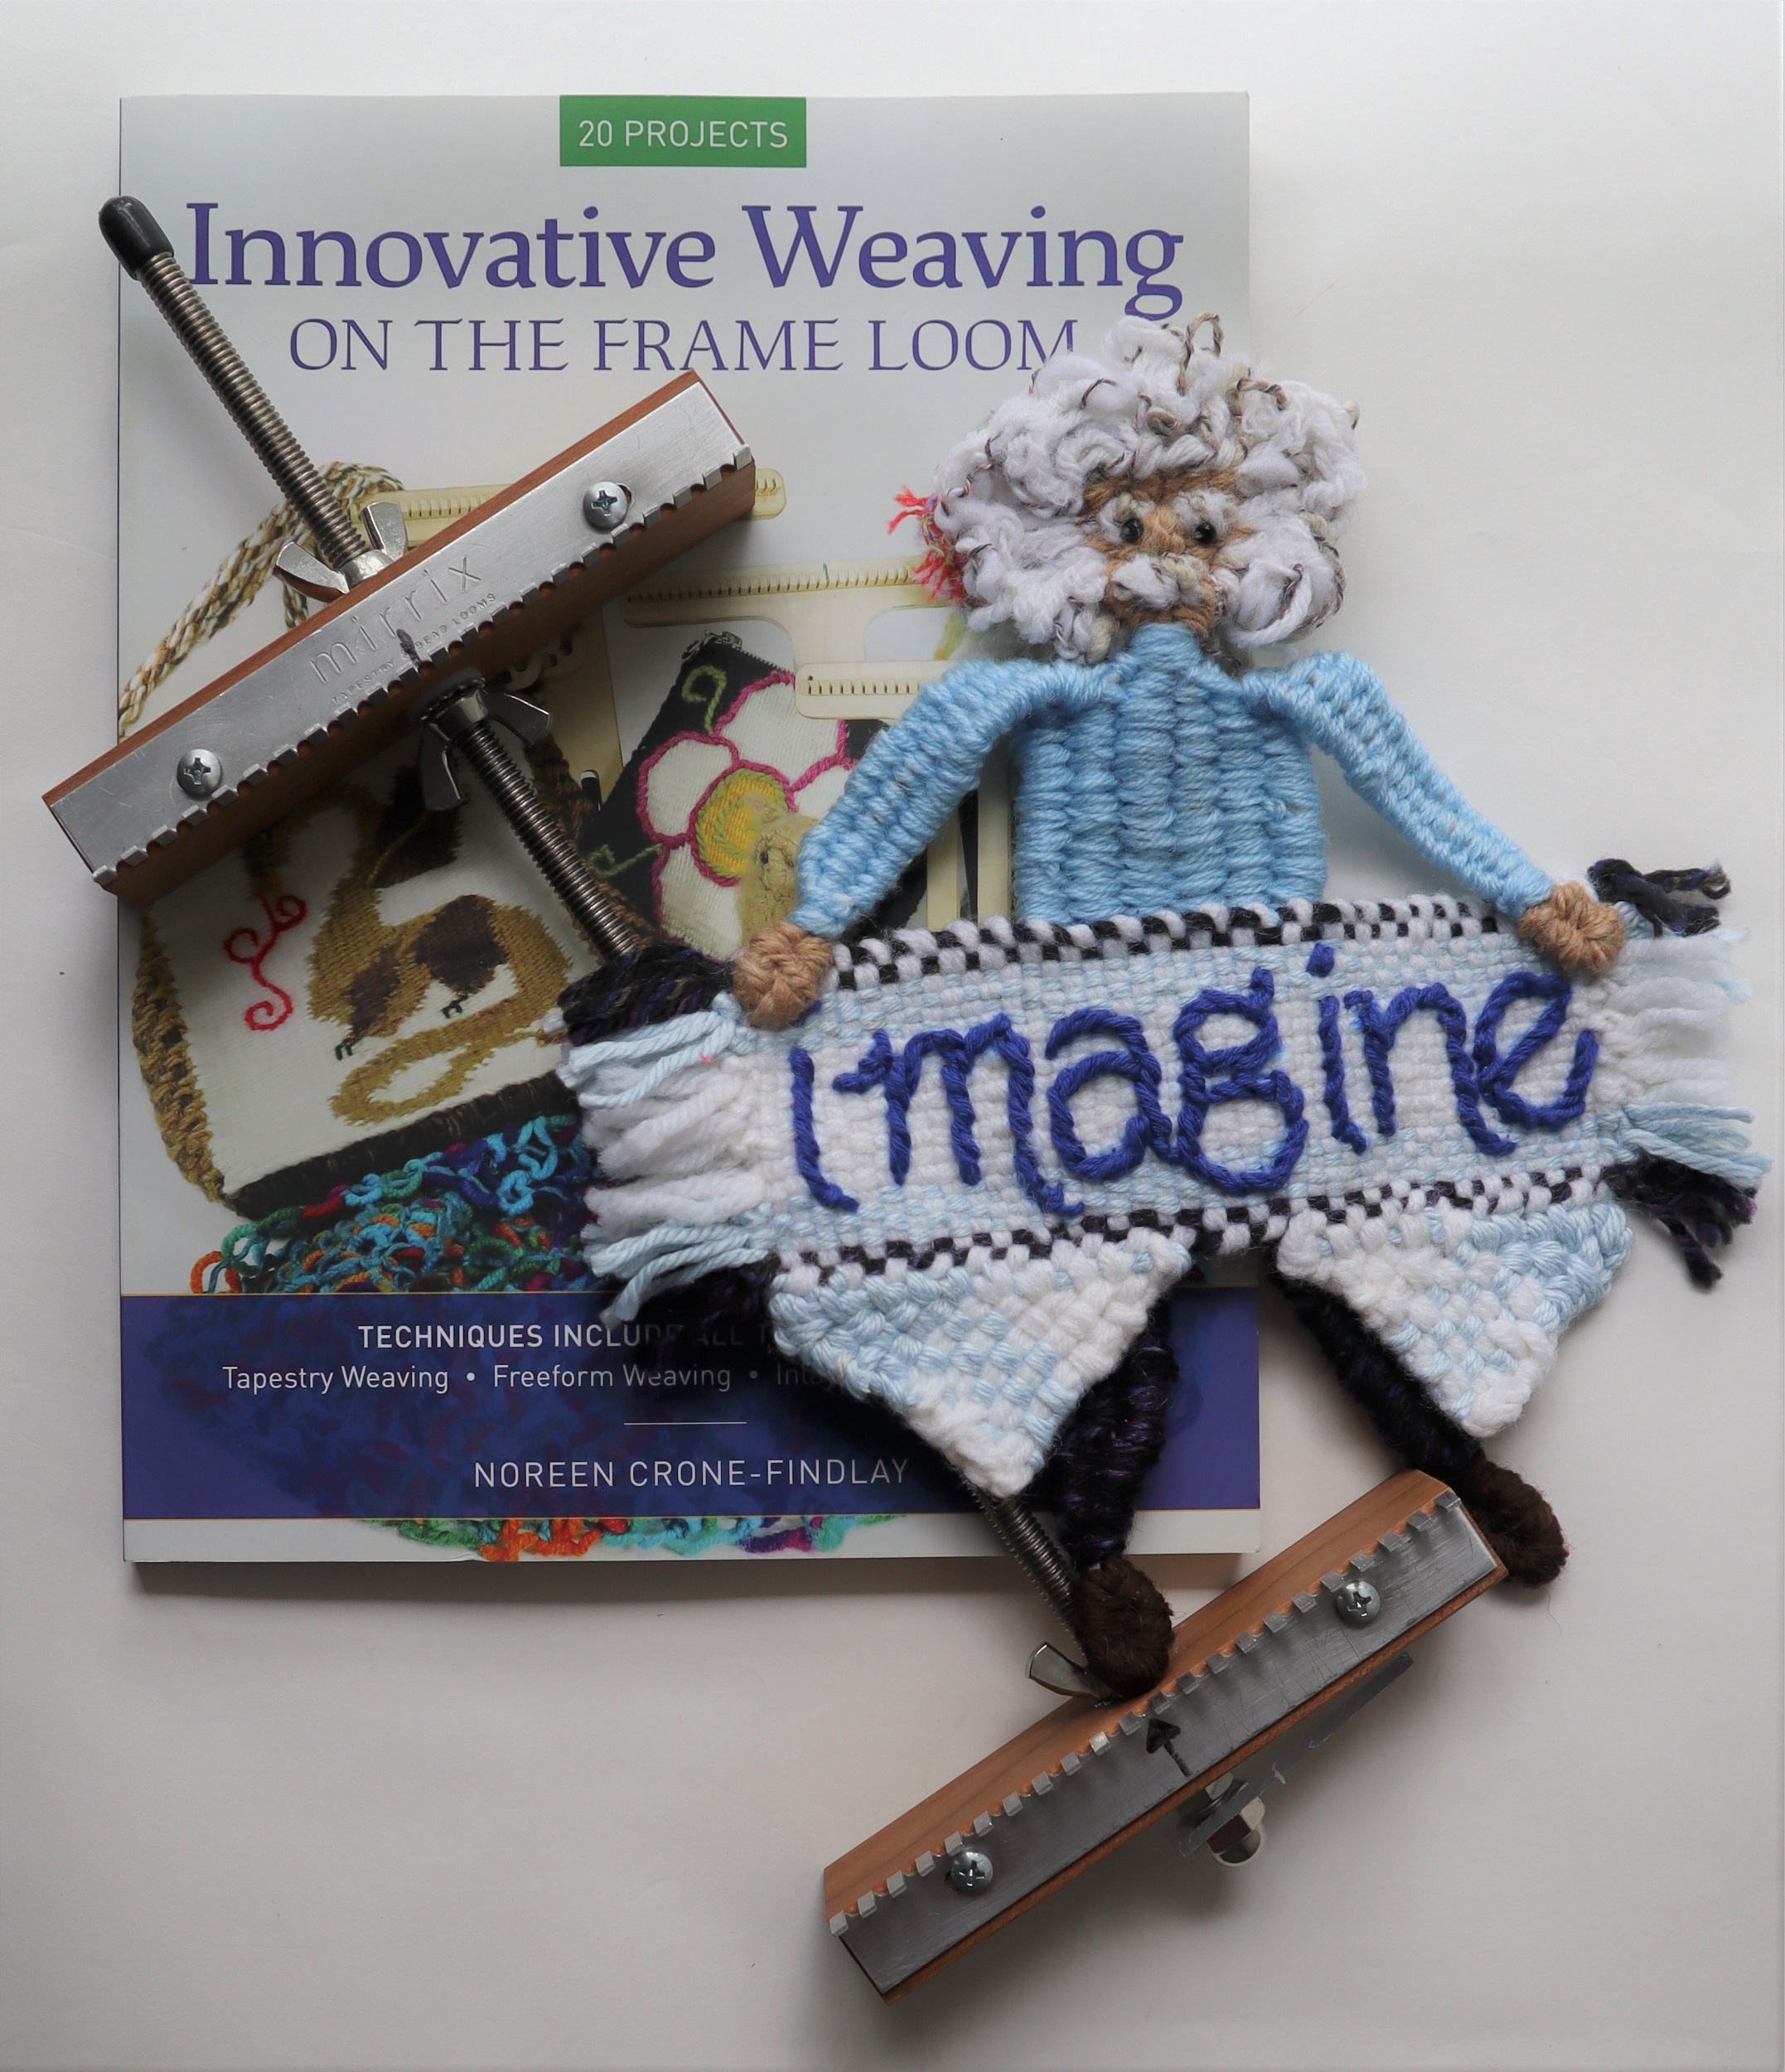
Mirrix looms are selling a wonderful kit that includes my book: Innovative Weaving on the Frame Loom, as well as the Saffron Loom and the Sandy Stand for it. It’s a great kit! Here’s the link for it:
To see all the links for the ‘How To’ posts for the “Imagine” Banner Weave along, please go to L I N K S
To order the loom, book and extras kit for the Weave Along from Mirrix, please go K I T
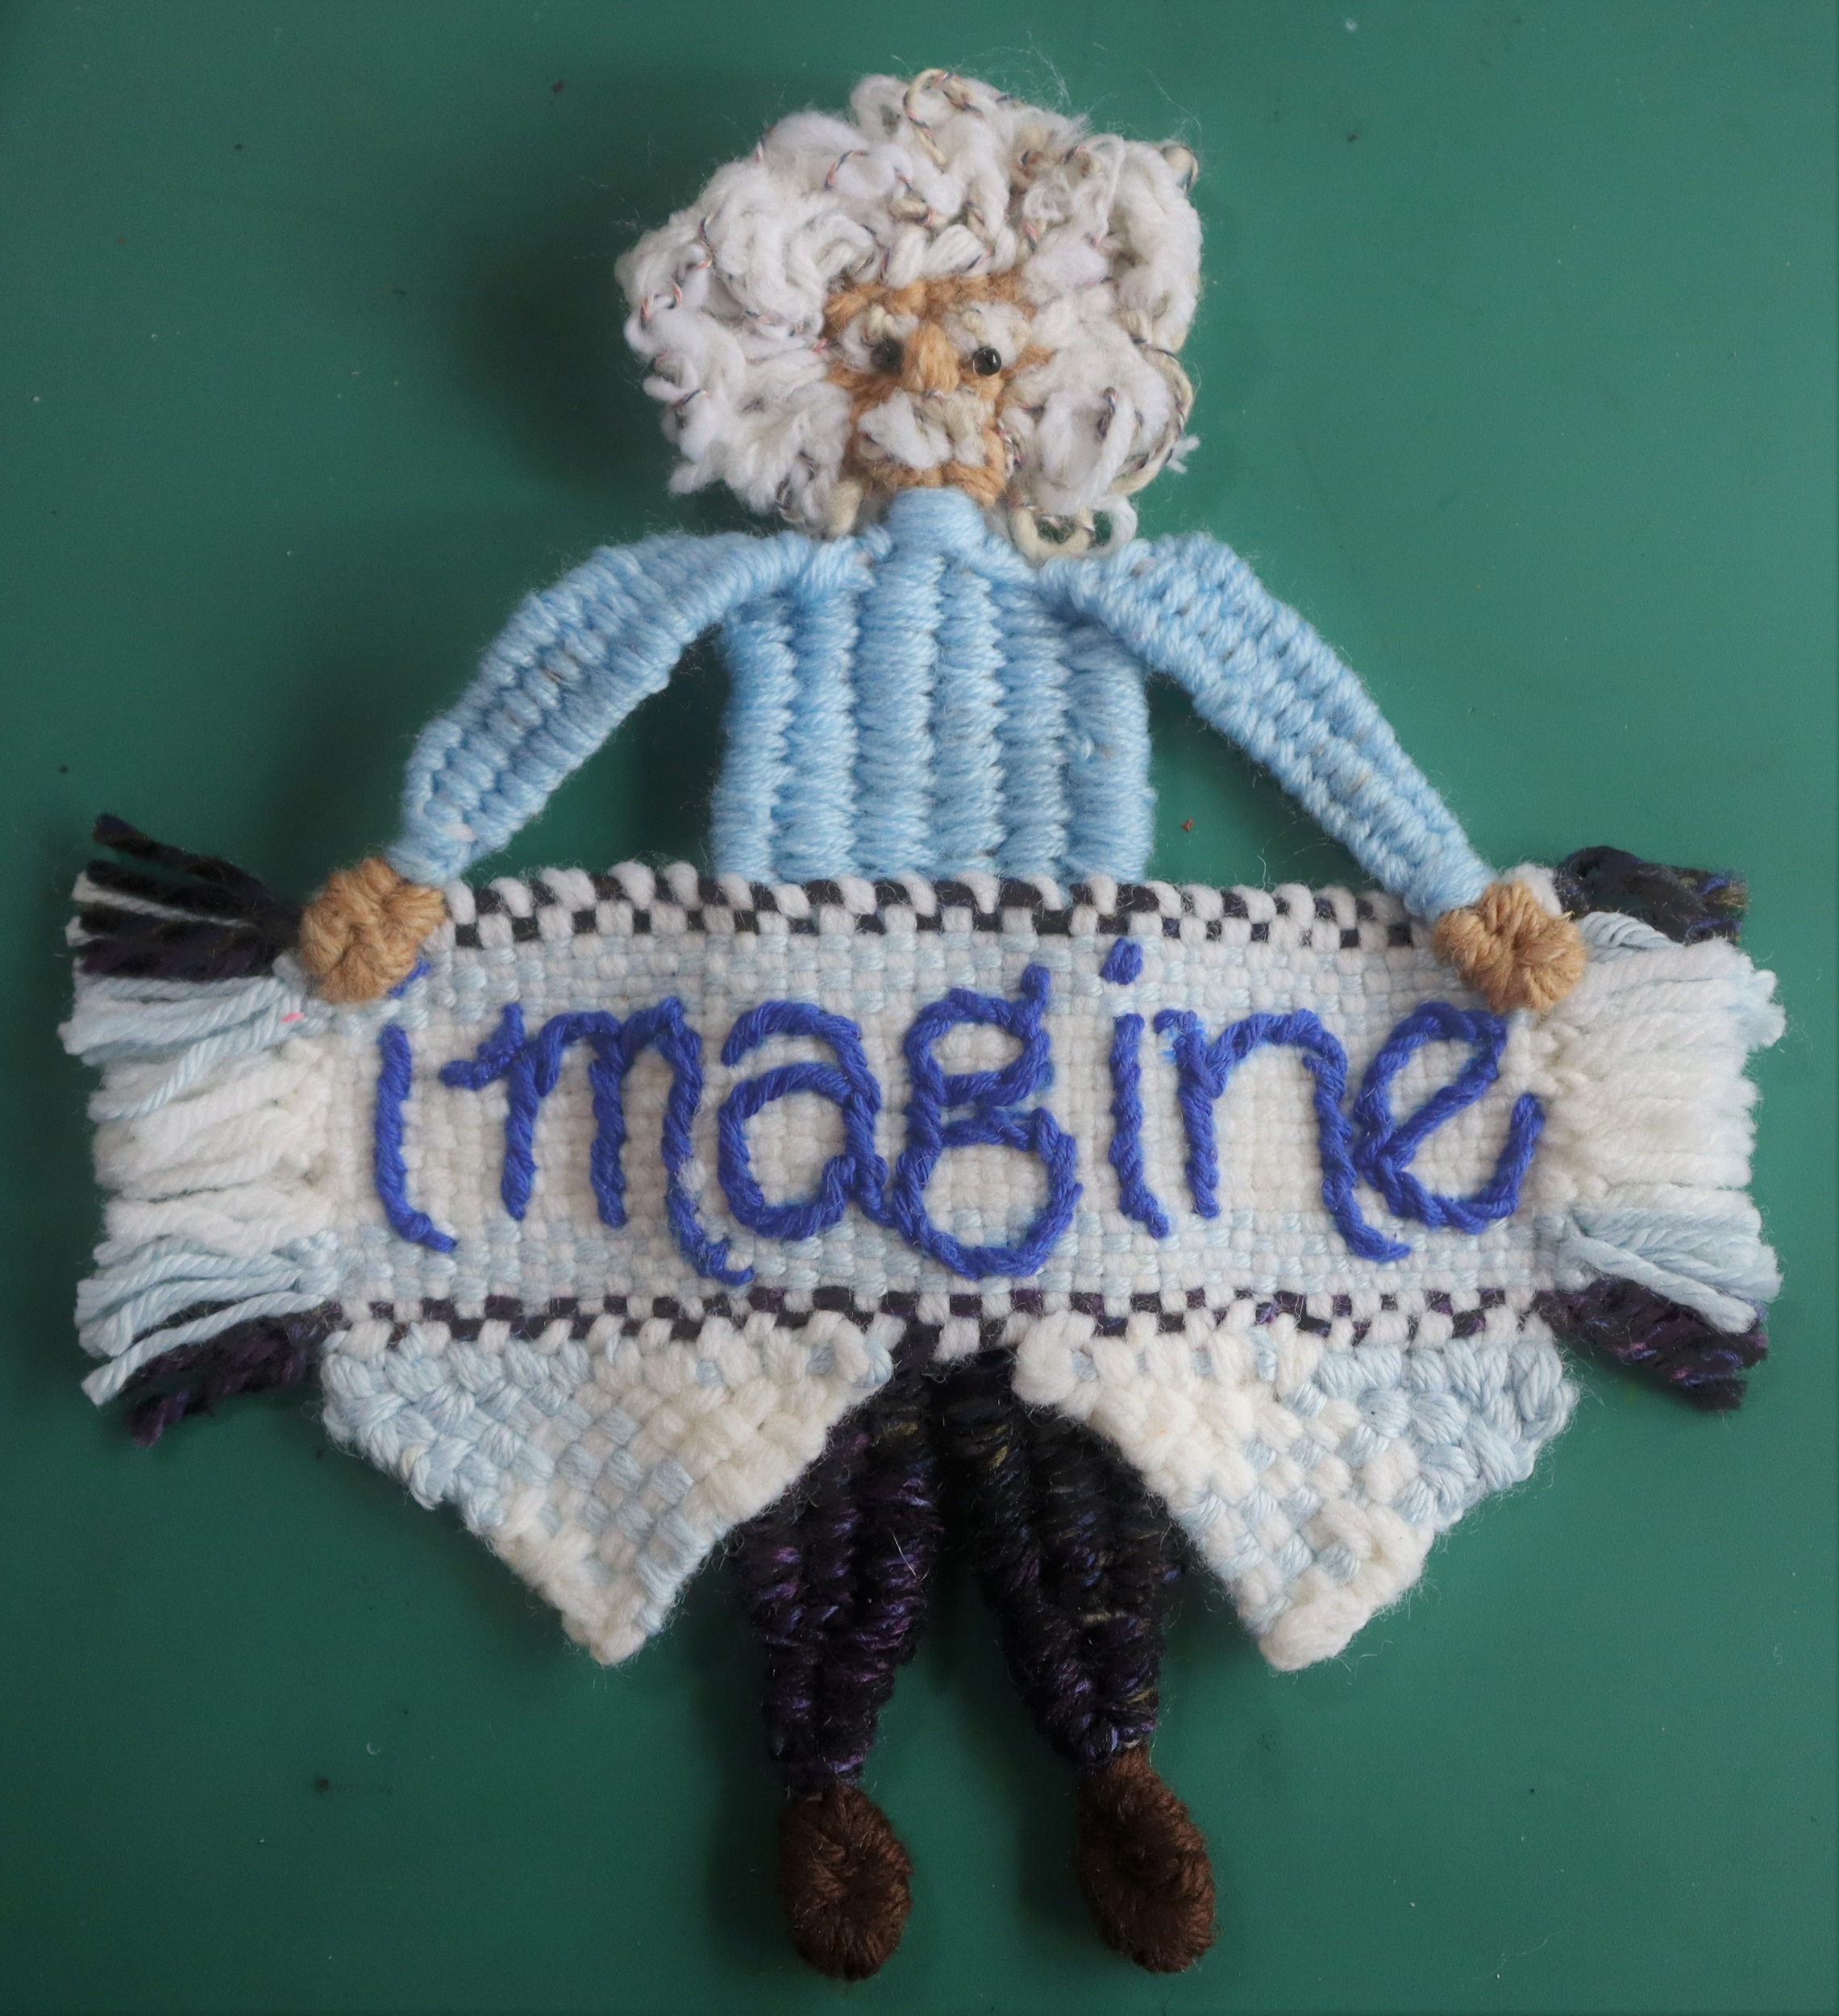
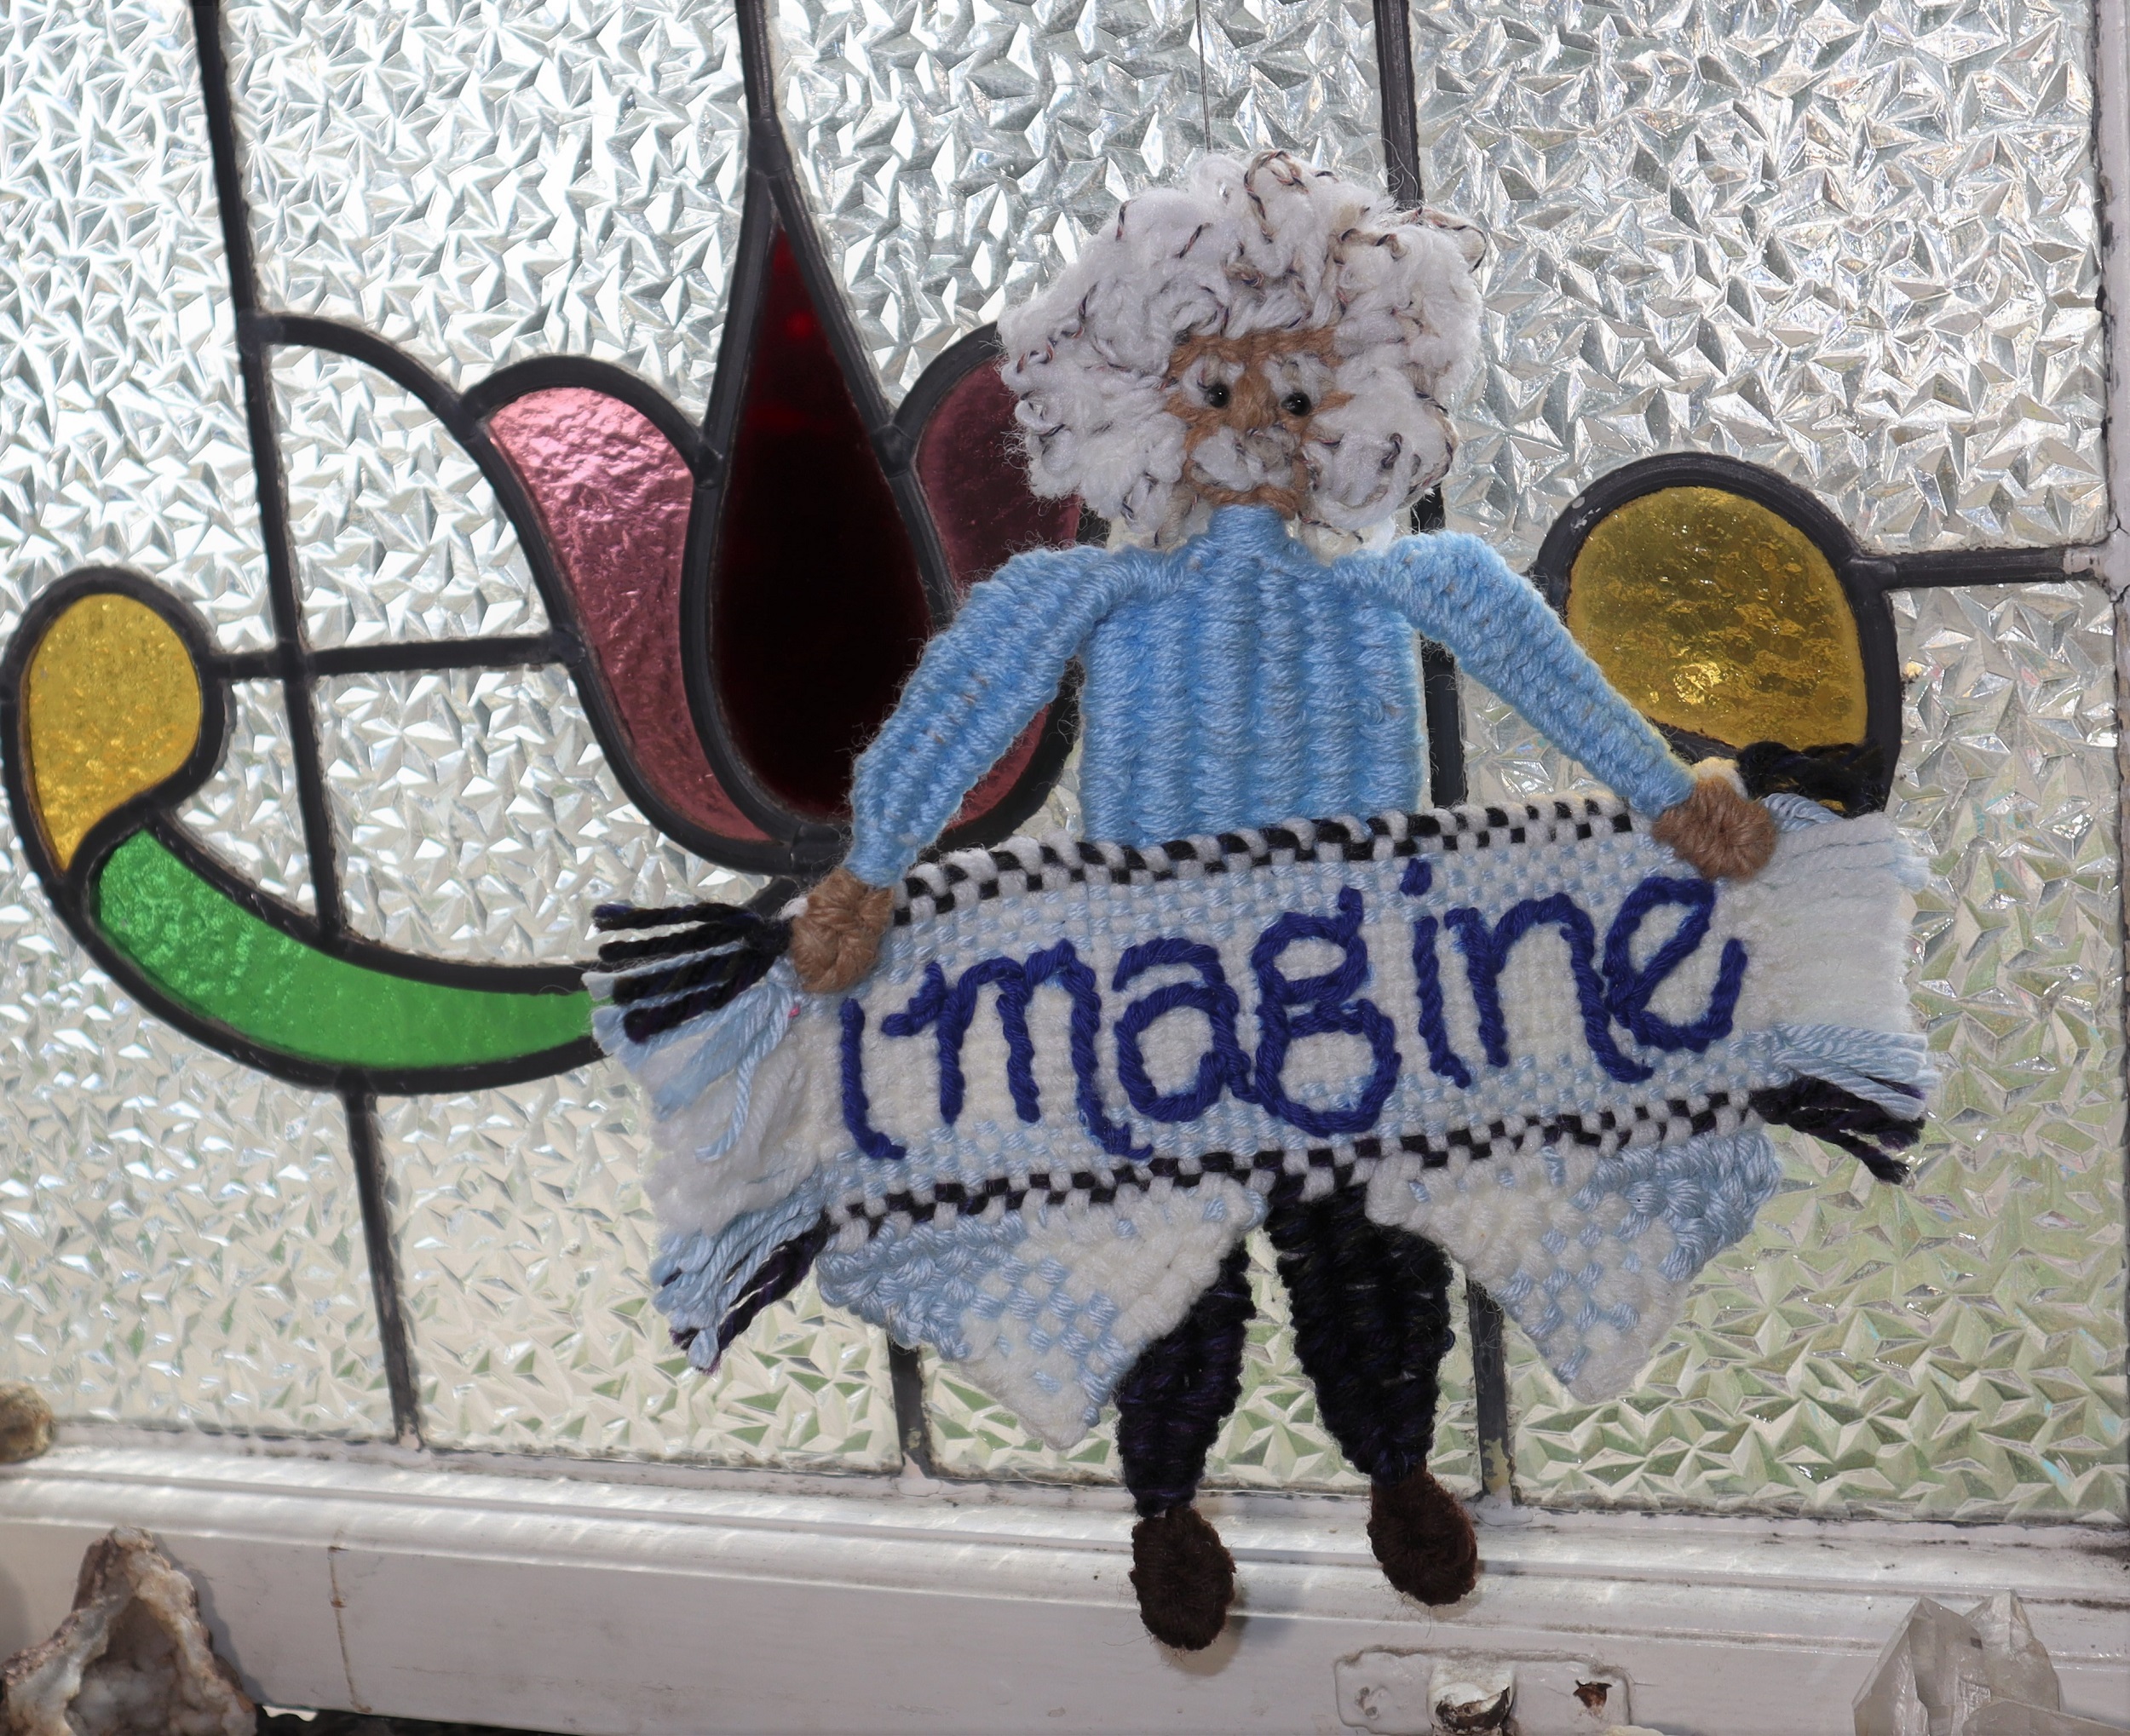
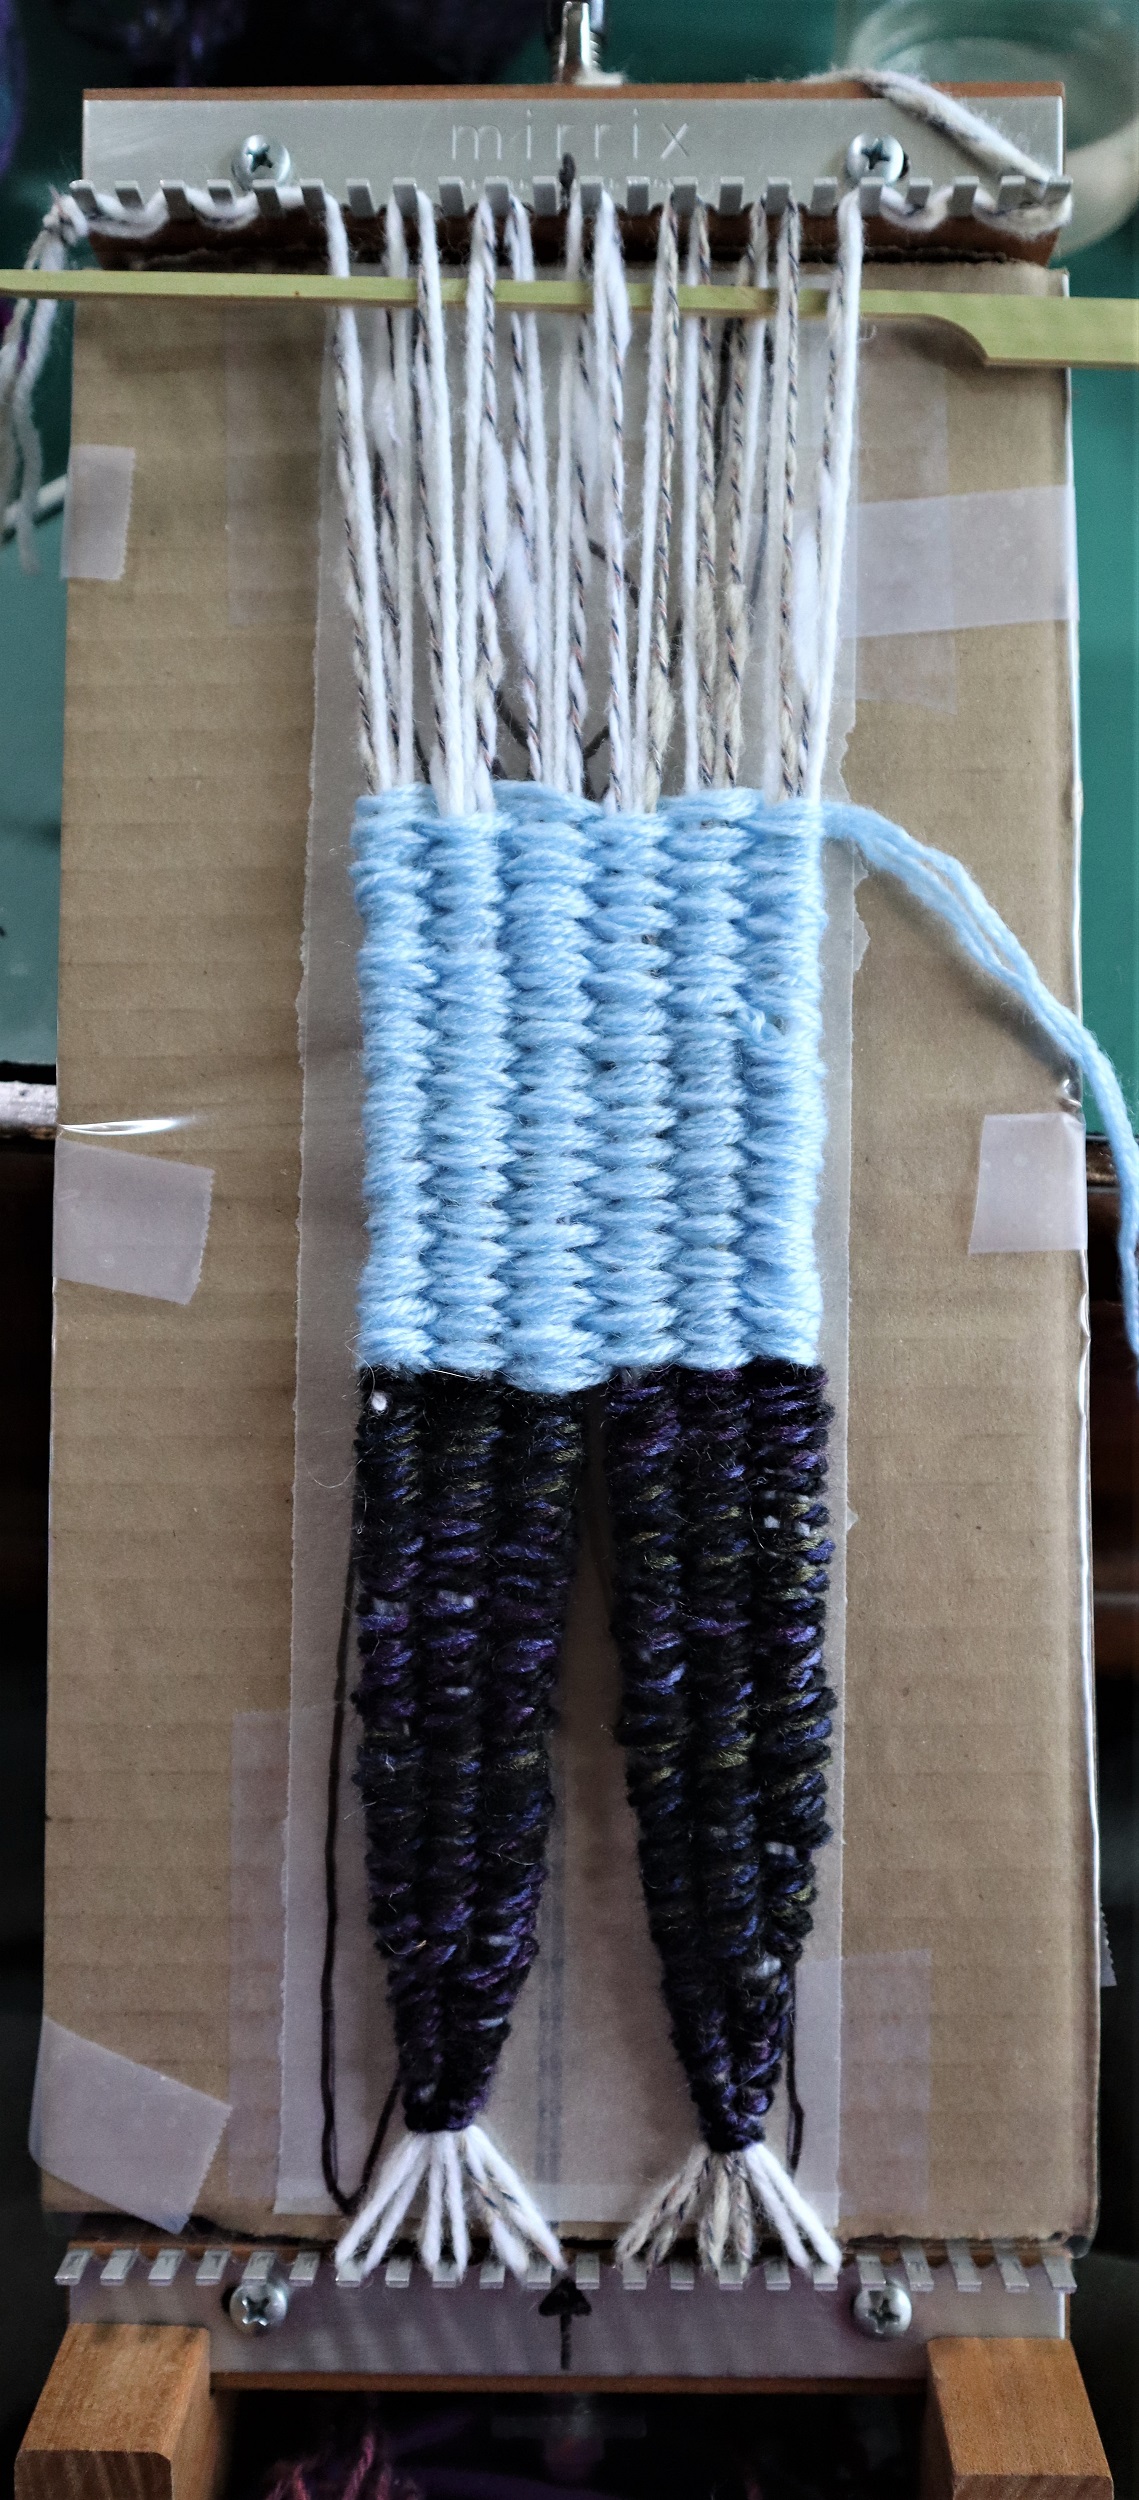
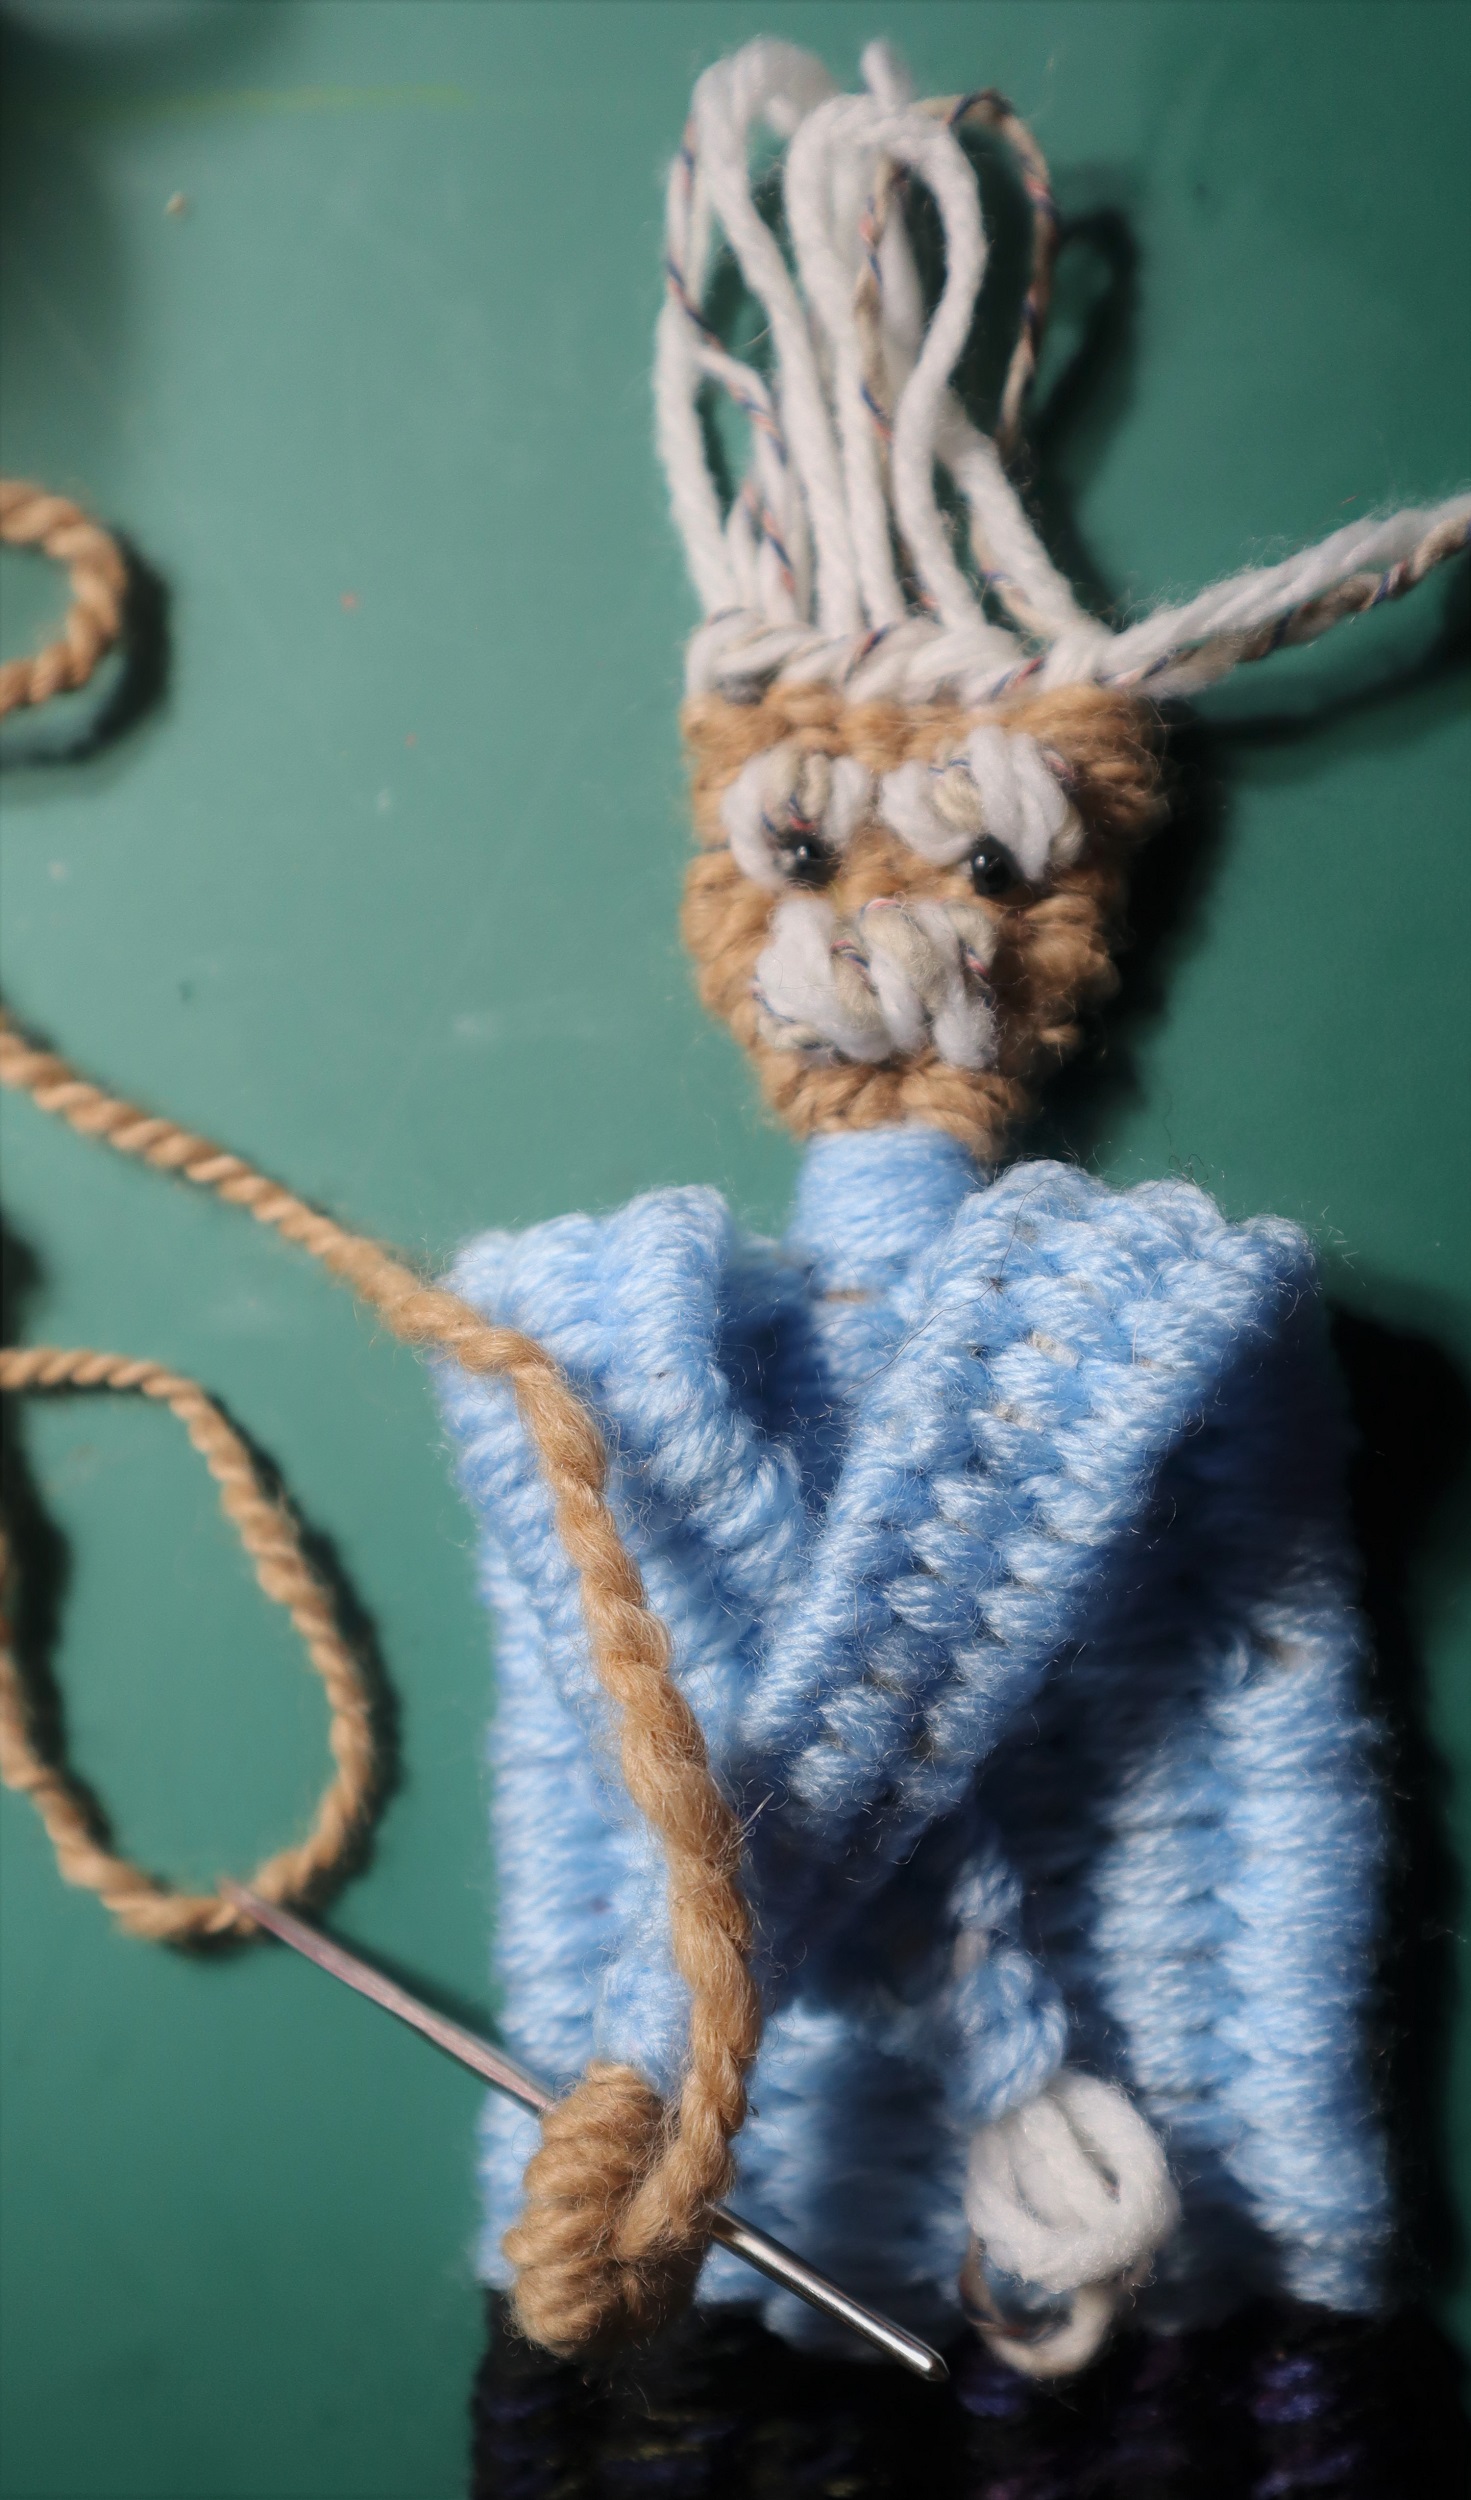
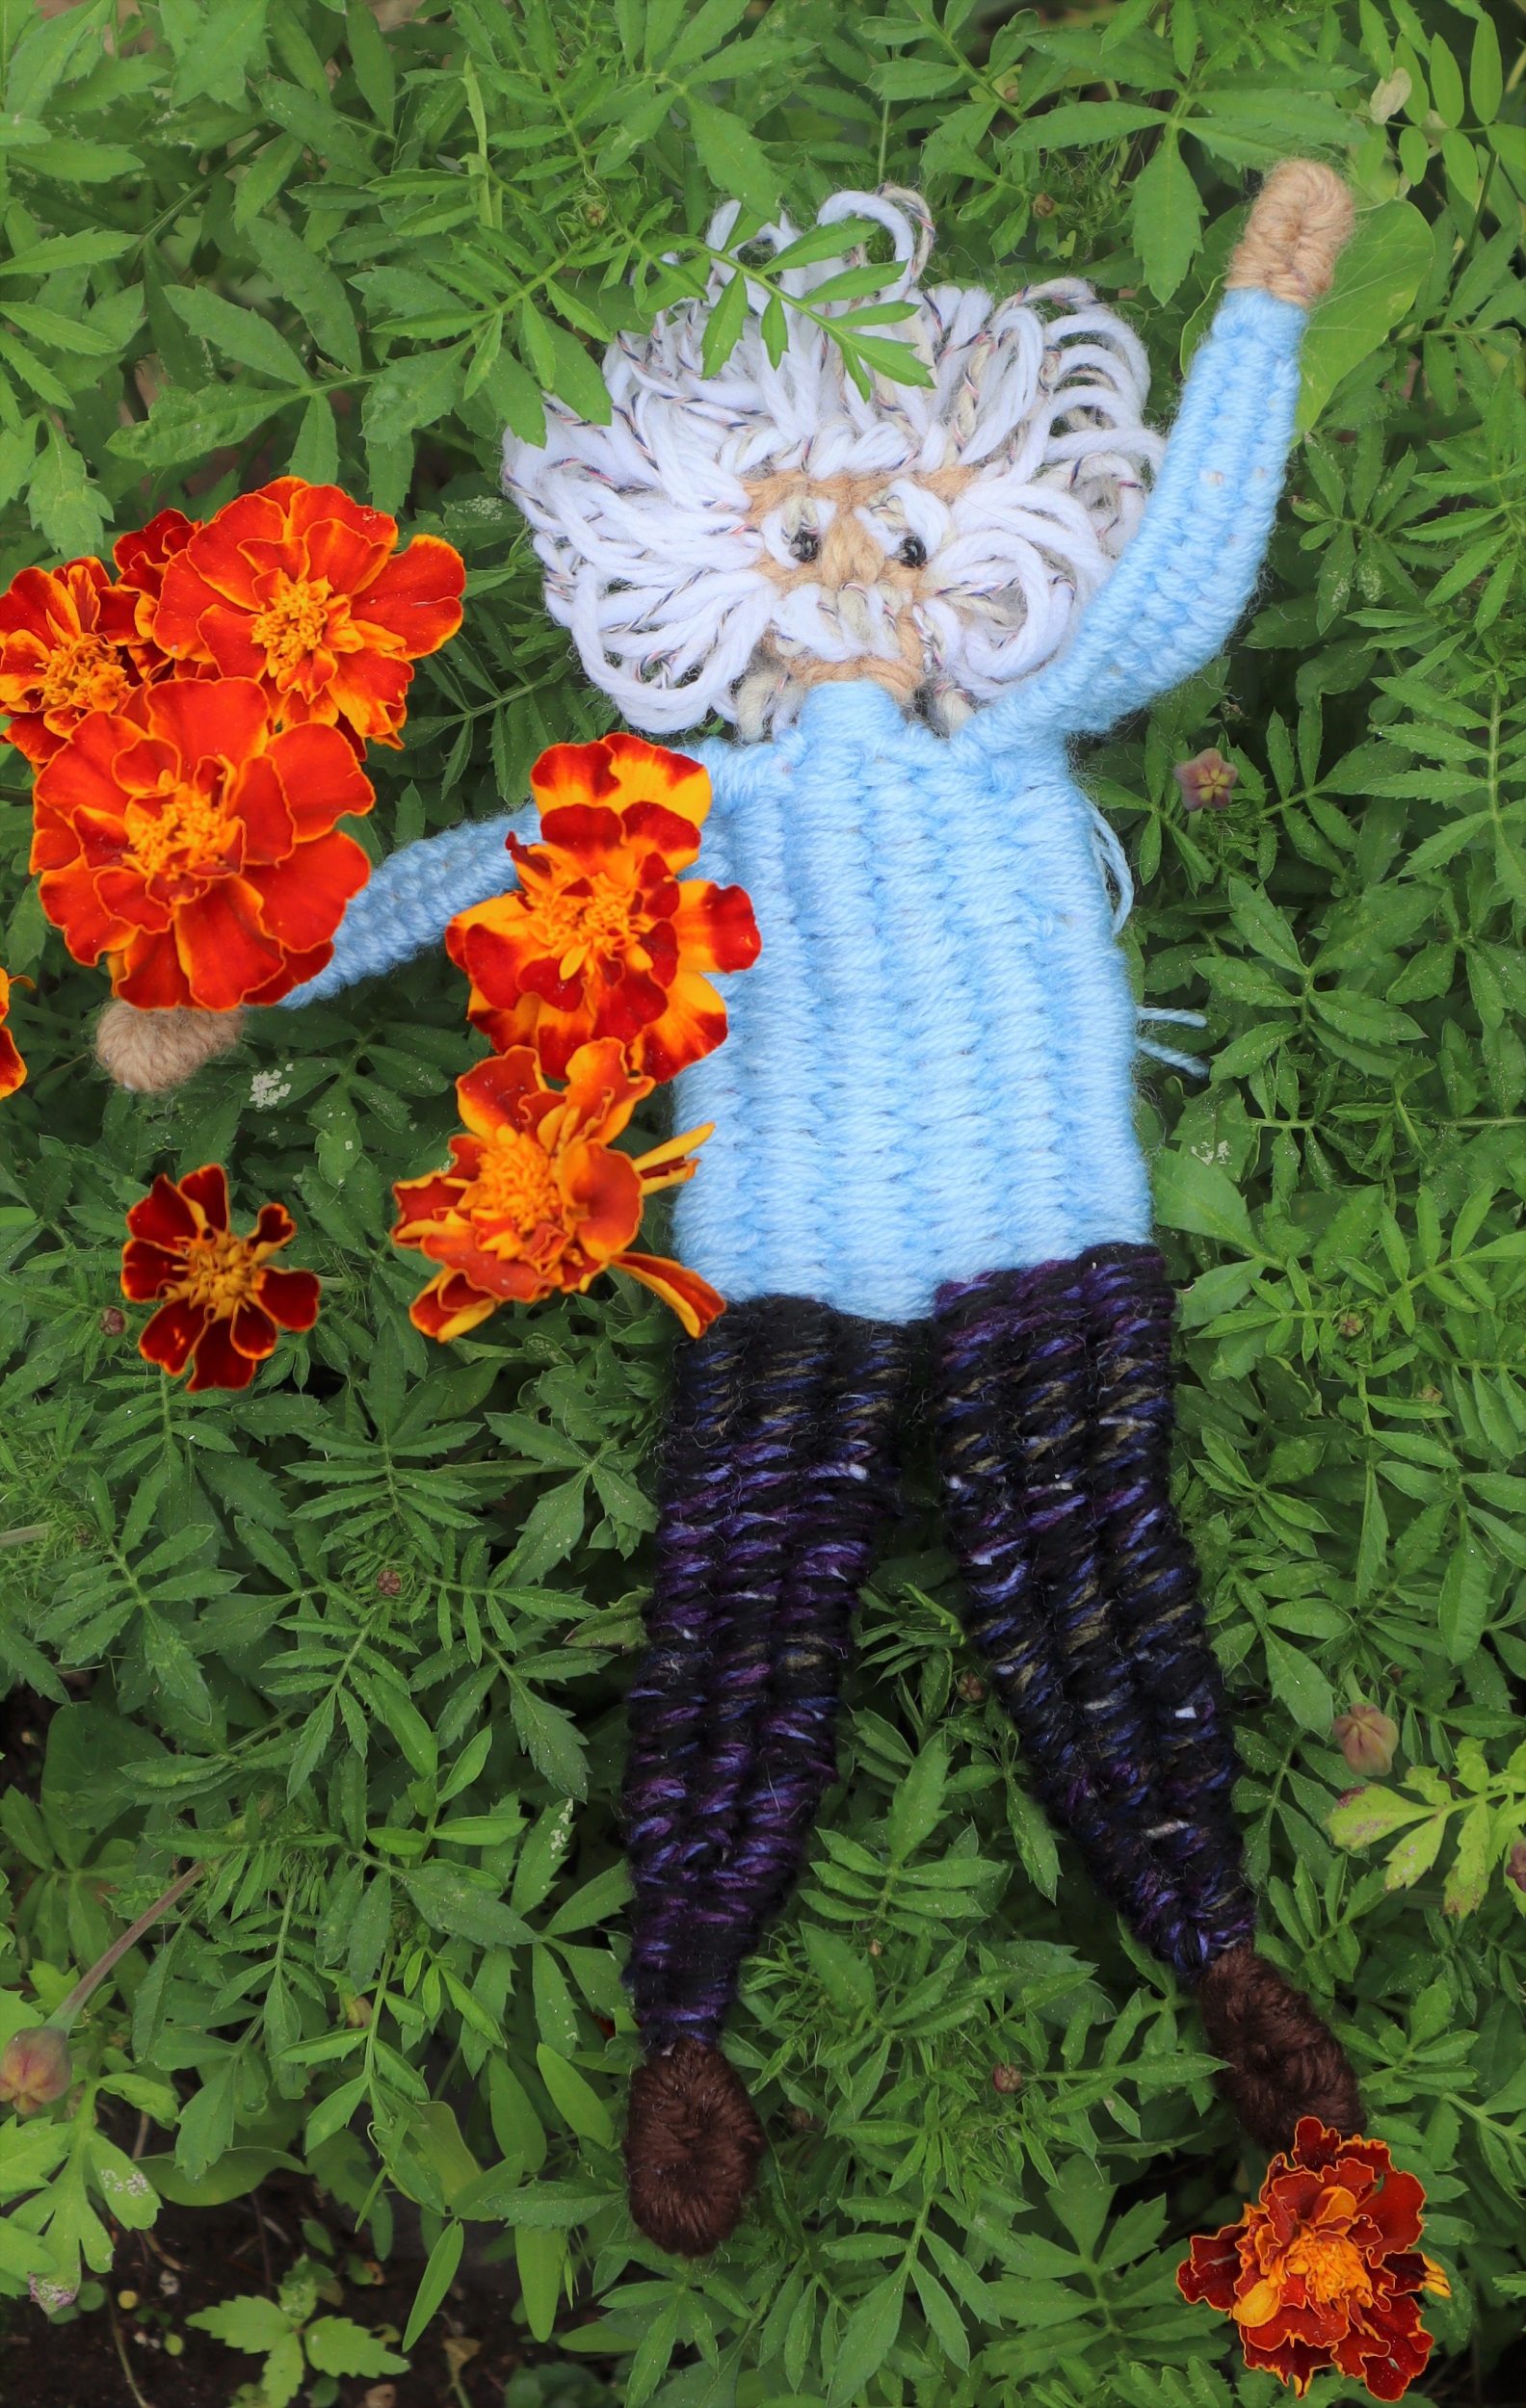
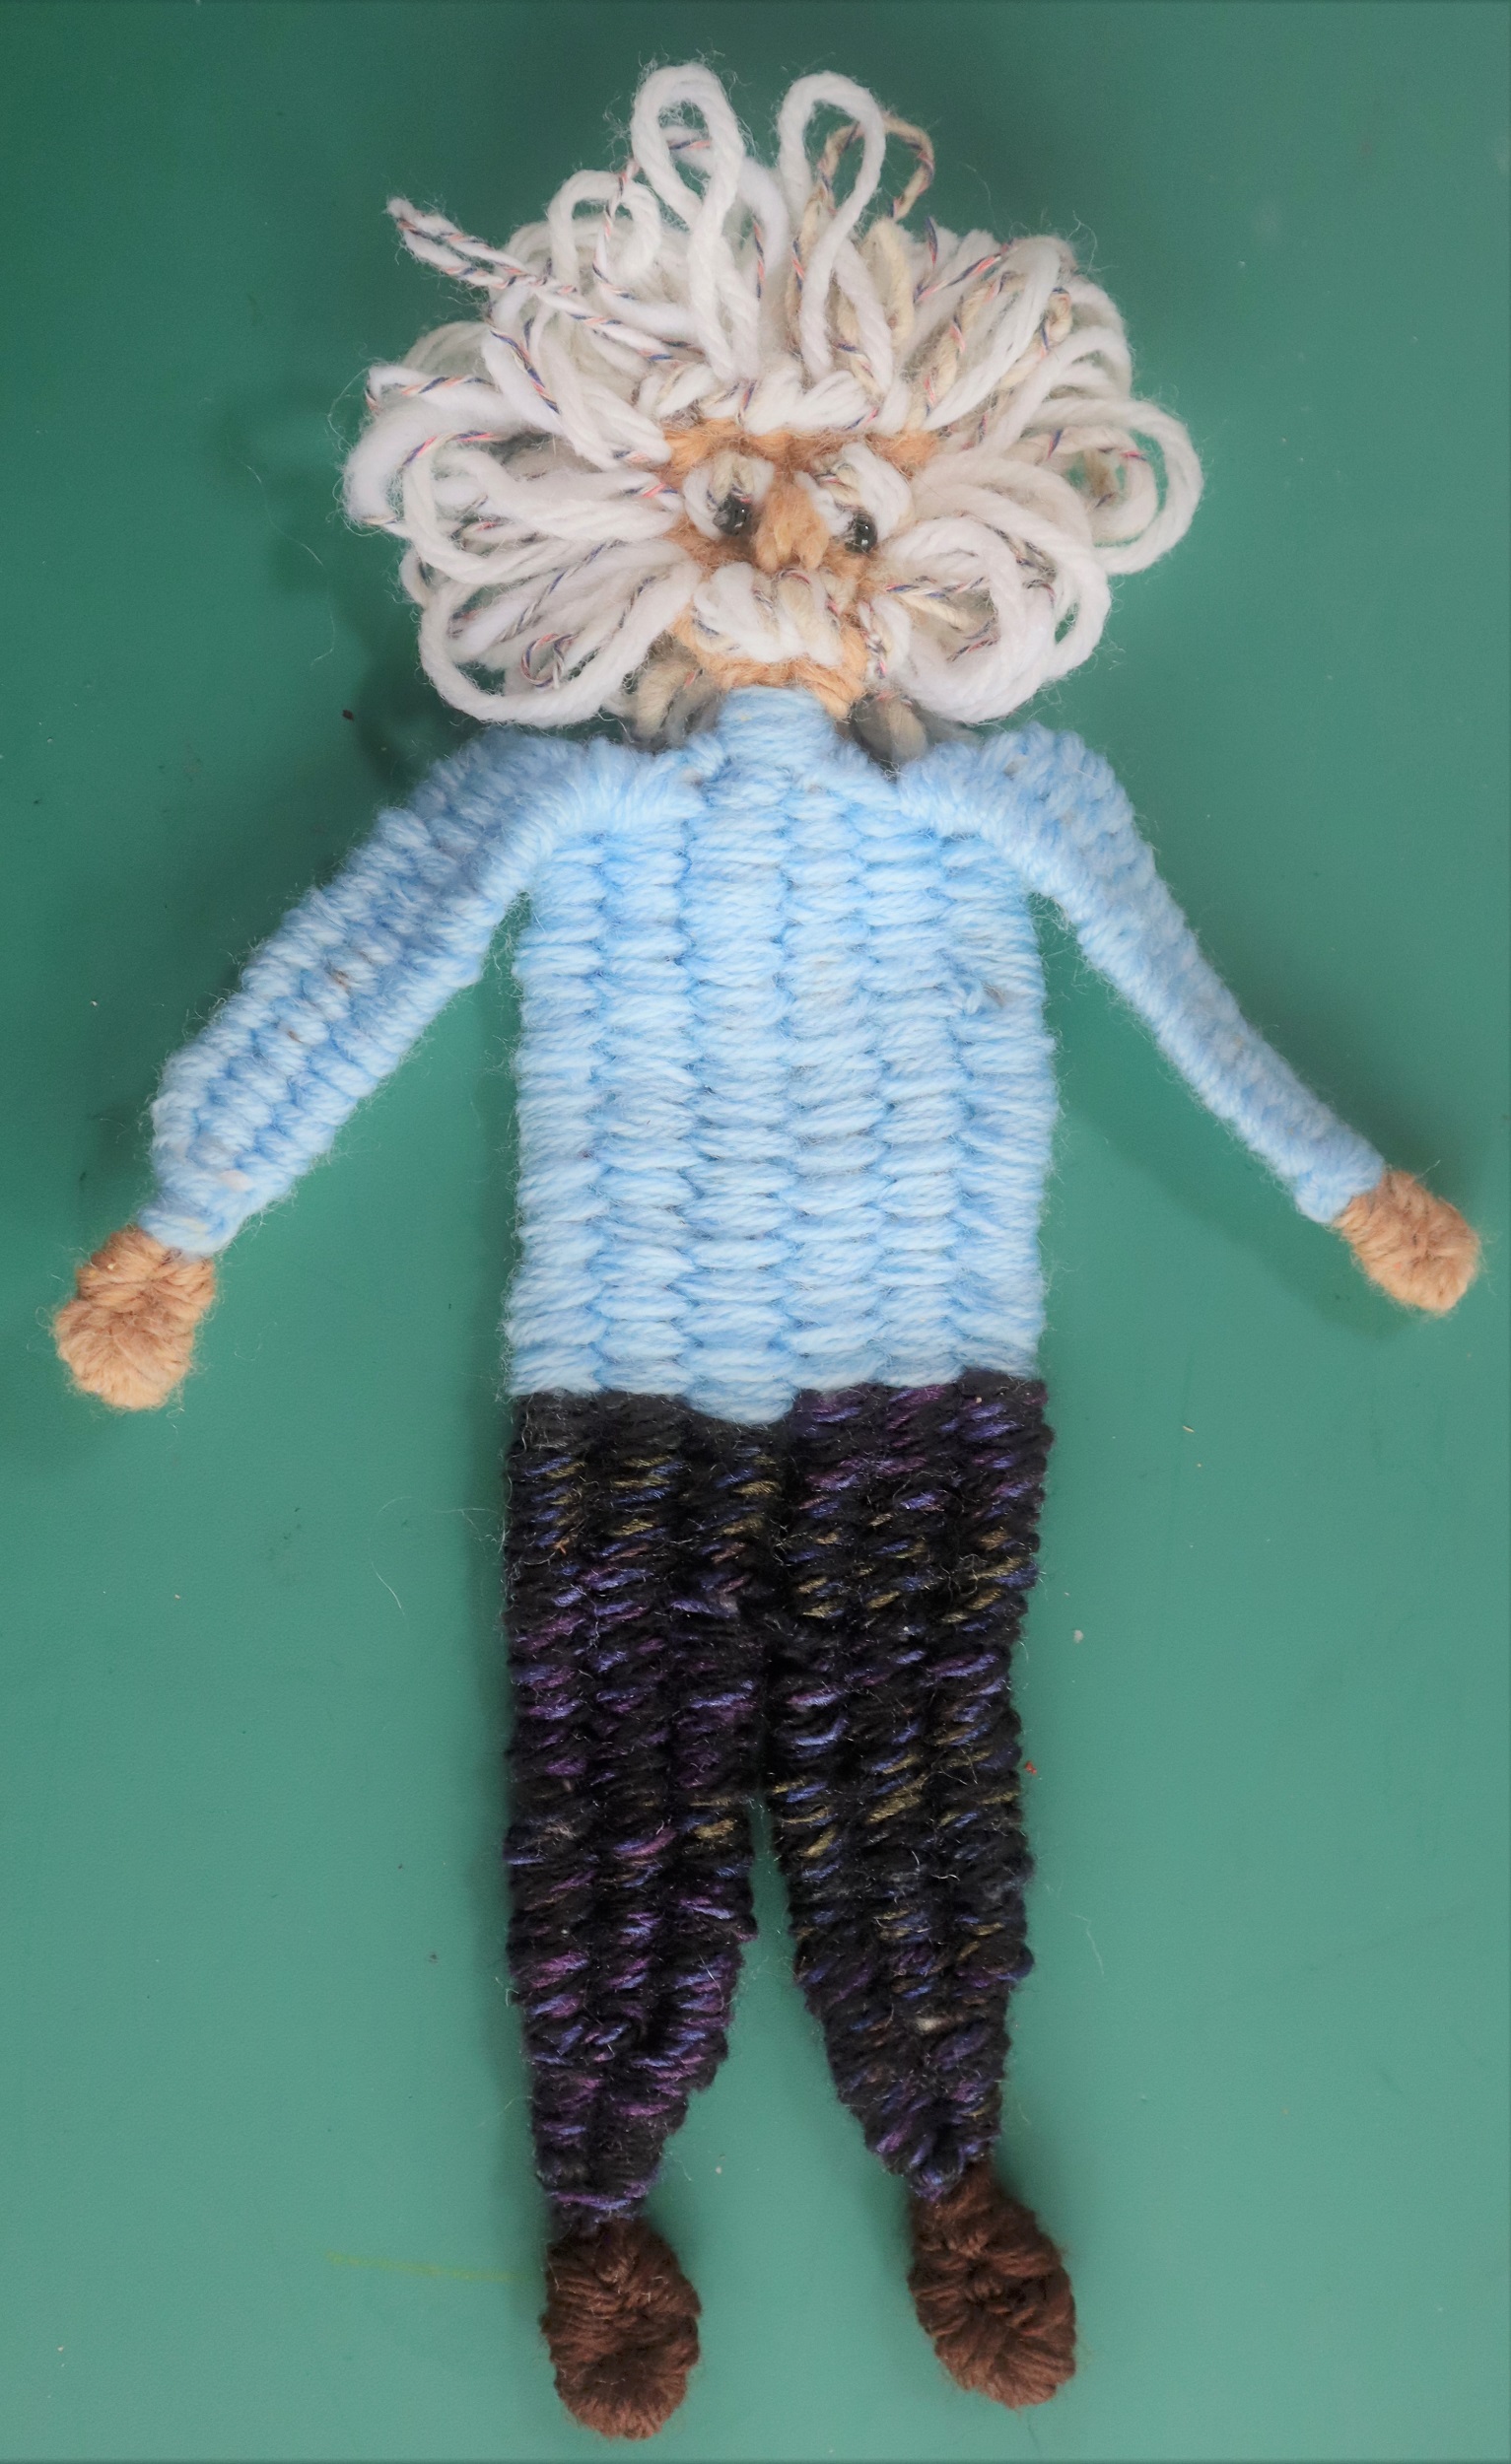
FREE FORM WEAVING: HOMAGE TO ALBERT EINSTEIN:
Albert Einstein is woven (with a few extrapolations and a slight adjustment to the waistline) following the instructions for the Woven Dancer on page 30 of “Innovative Weaving on the Frame Loom”.
In order to hold the pattern onto the loom, a backing board is needed. See: LINK
INSTRUCTIONS:
HOW TOWEAVE THE ALBERT EINSTEIN FIGURE:
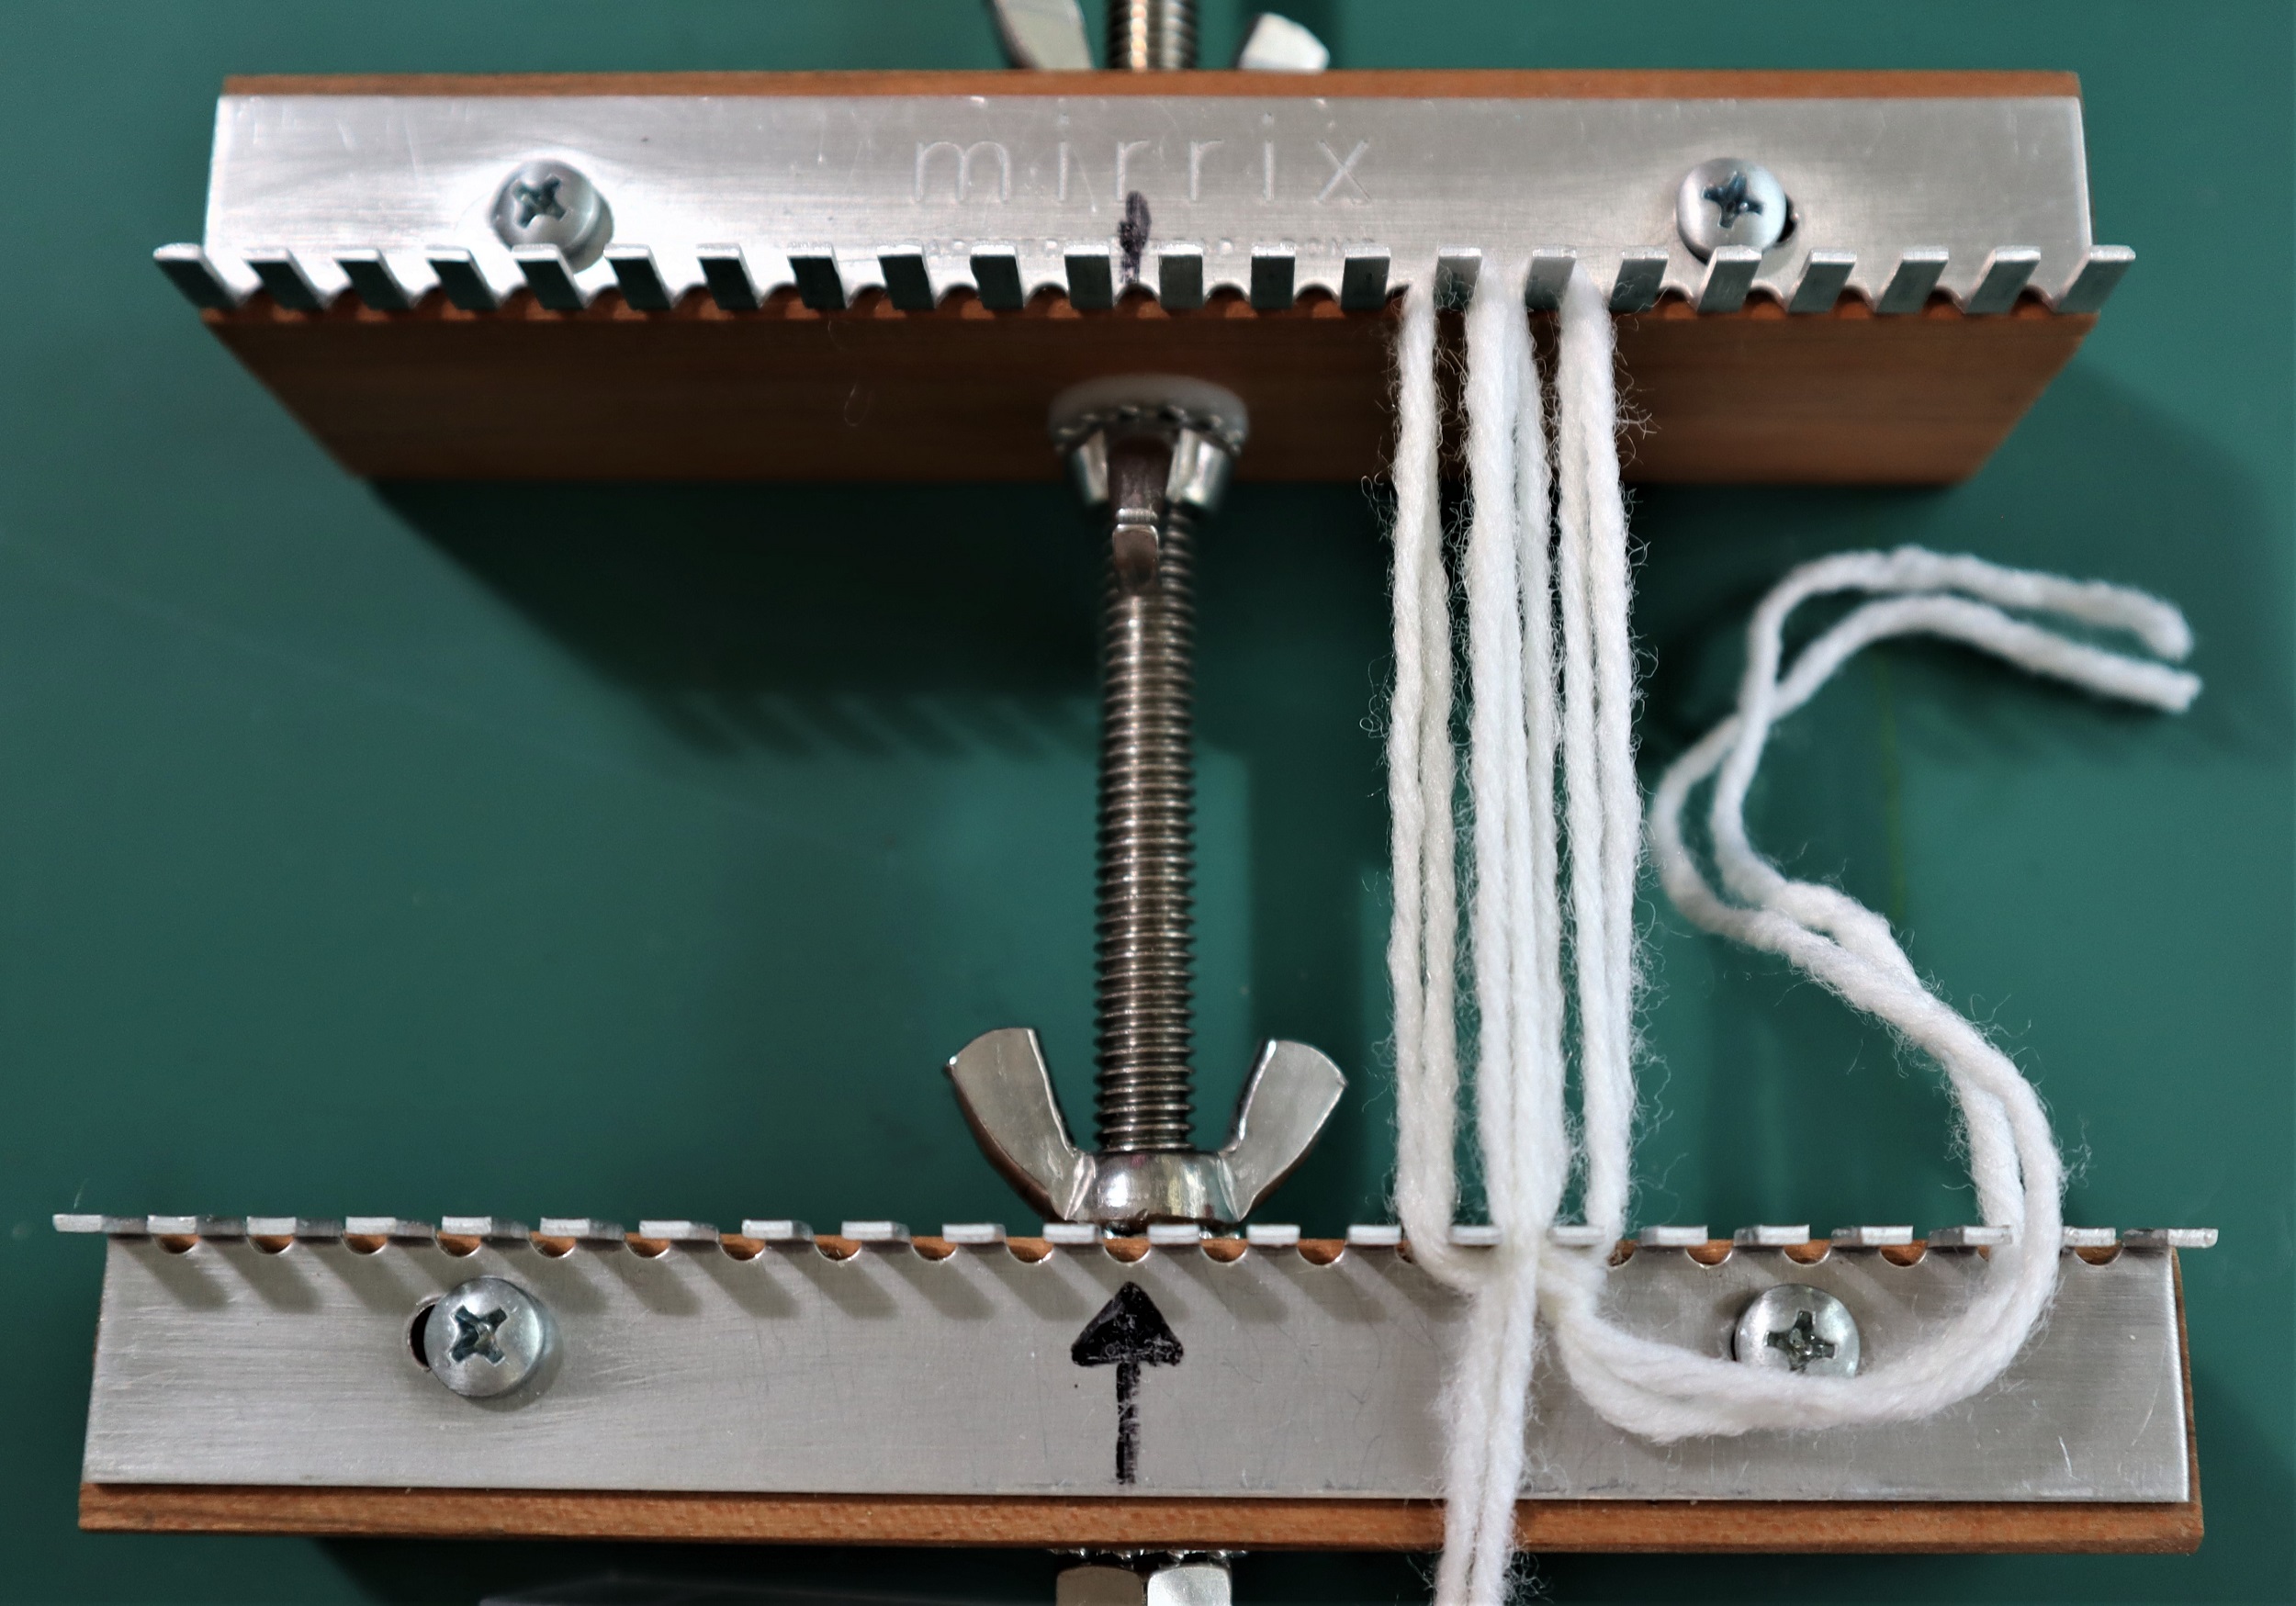
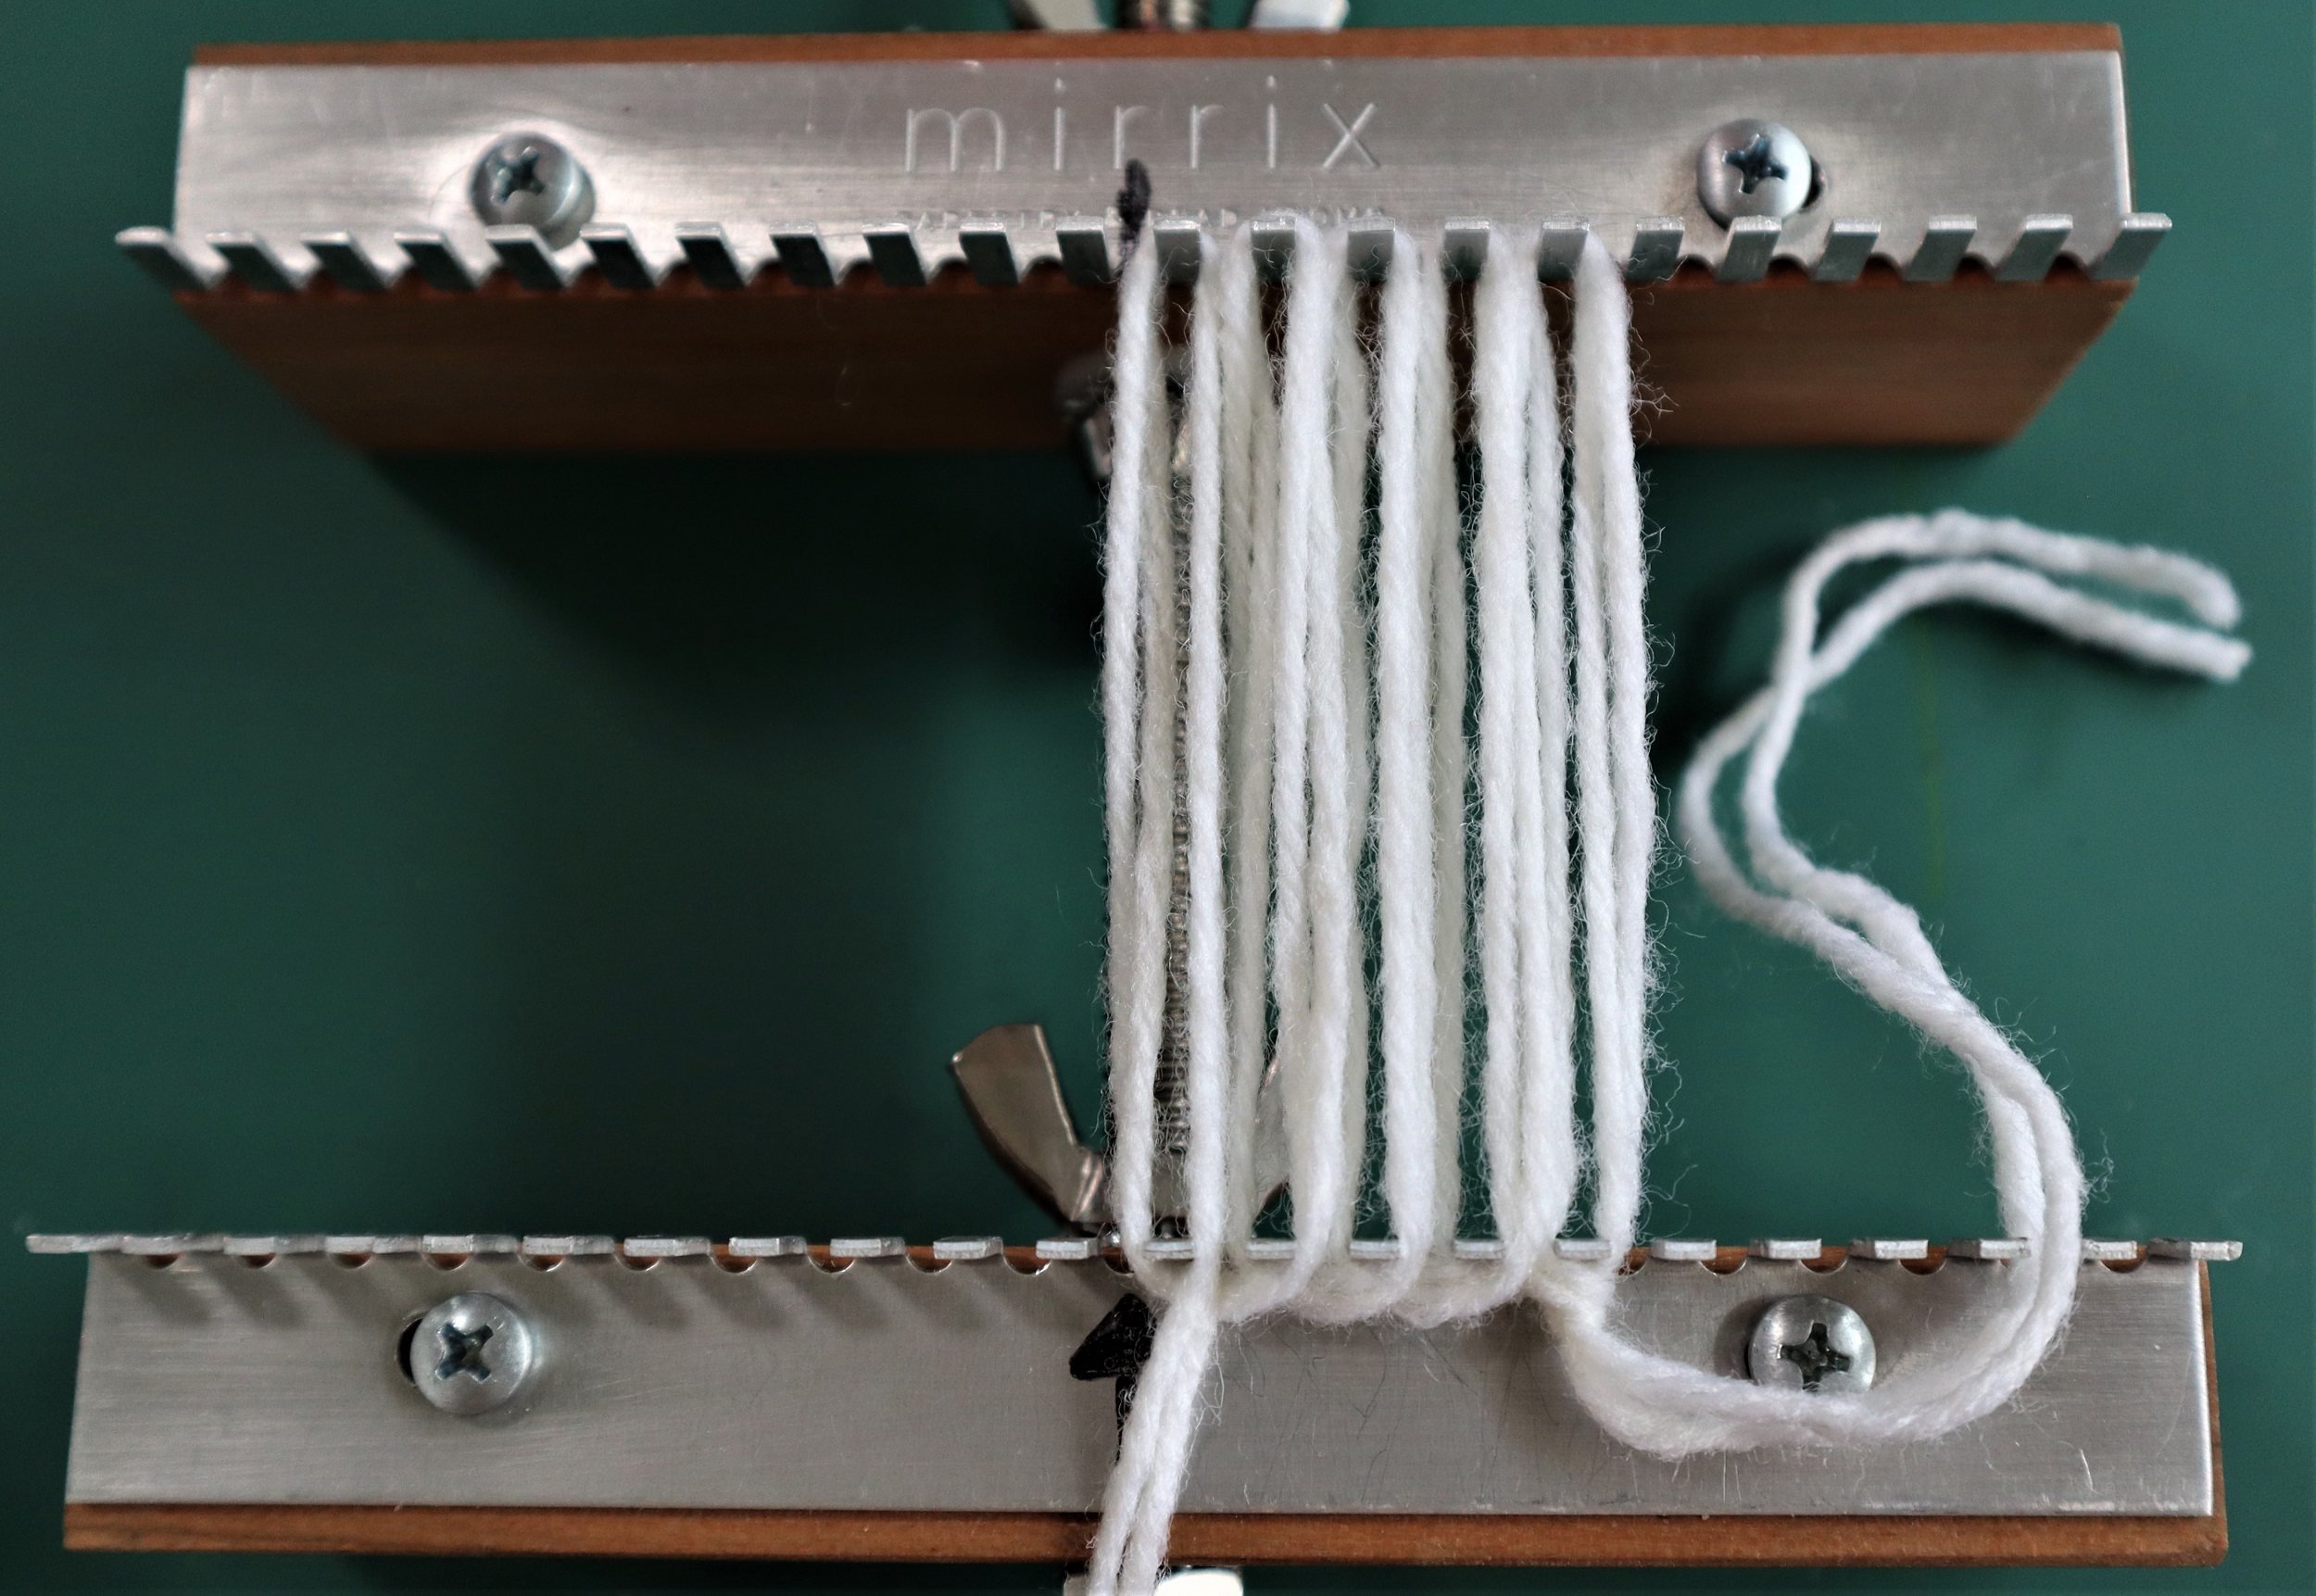
1: SET UP THE LOOM so it is 11 inches/27.5 cm) from the lower set of pegs to the upper set. Lock it into the ‘Sandy Stand’.
Fold the ends of the backing board to the back and slide it in place on the loom.
2: WARP THE LOOM: Following the instructions for the Woven Dancer on page 30 of ‘Innovative Weaving on the Frame Loom’, with 1 strand of #4 Medium weight (Worsted or Sport weight) yarn white and 1 strand grey held together as if they are a single strand:
Skip 6 pegs at each side of the loom and warp the loom, following the instructions in the book closely.
3: WEAVING:
LEGS:
Leaving only an inch or of a tail end rather than the long tail end listed in the instructions in the book, weave the legs with 2 strands of black yarn held together as if they are a single strand, and packing the weaving down closely to completely cover the warp strands. Follow the instructions in the book for weaving the legs, but noting that you will be beating the weft yarn in more densely than in the book.
SWEATER:
With 2 strands of light blue yarn held together as if they are a single strand, weave up to the neck. Beat the weft so it completely covers the warp strands.
DO NOT pull in the waistline as it is drawn in the book. Weave the sweater straight up to the shoulders.
Wrap the neck with the blue yarn and weave in the ends.
SLEEVES:
Weave the sleeves following the instructions for the arms, but, once again, beat the weft so it completely covers the warp strands.
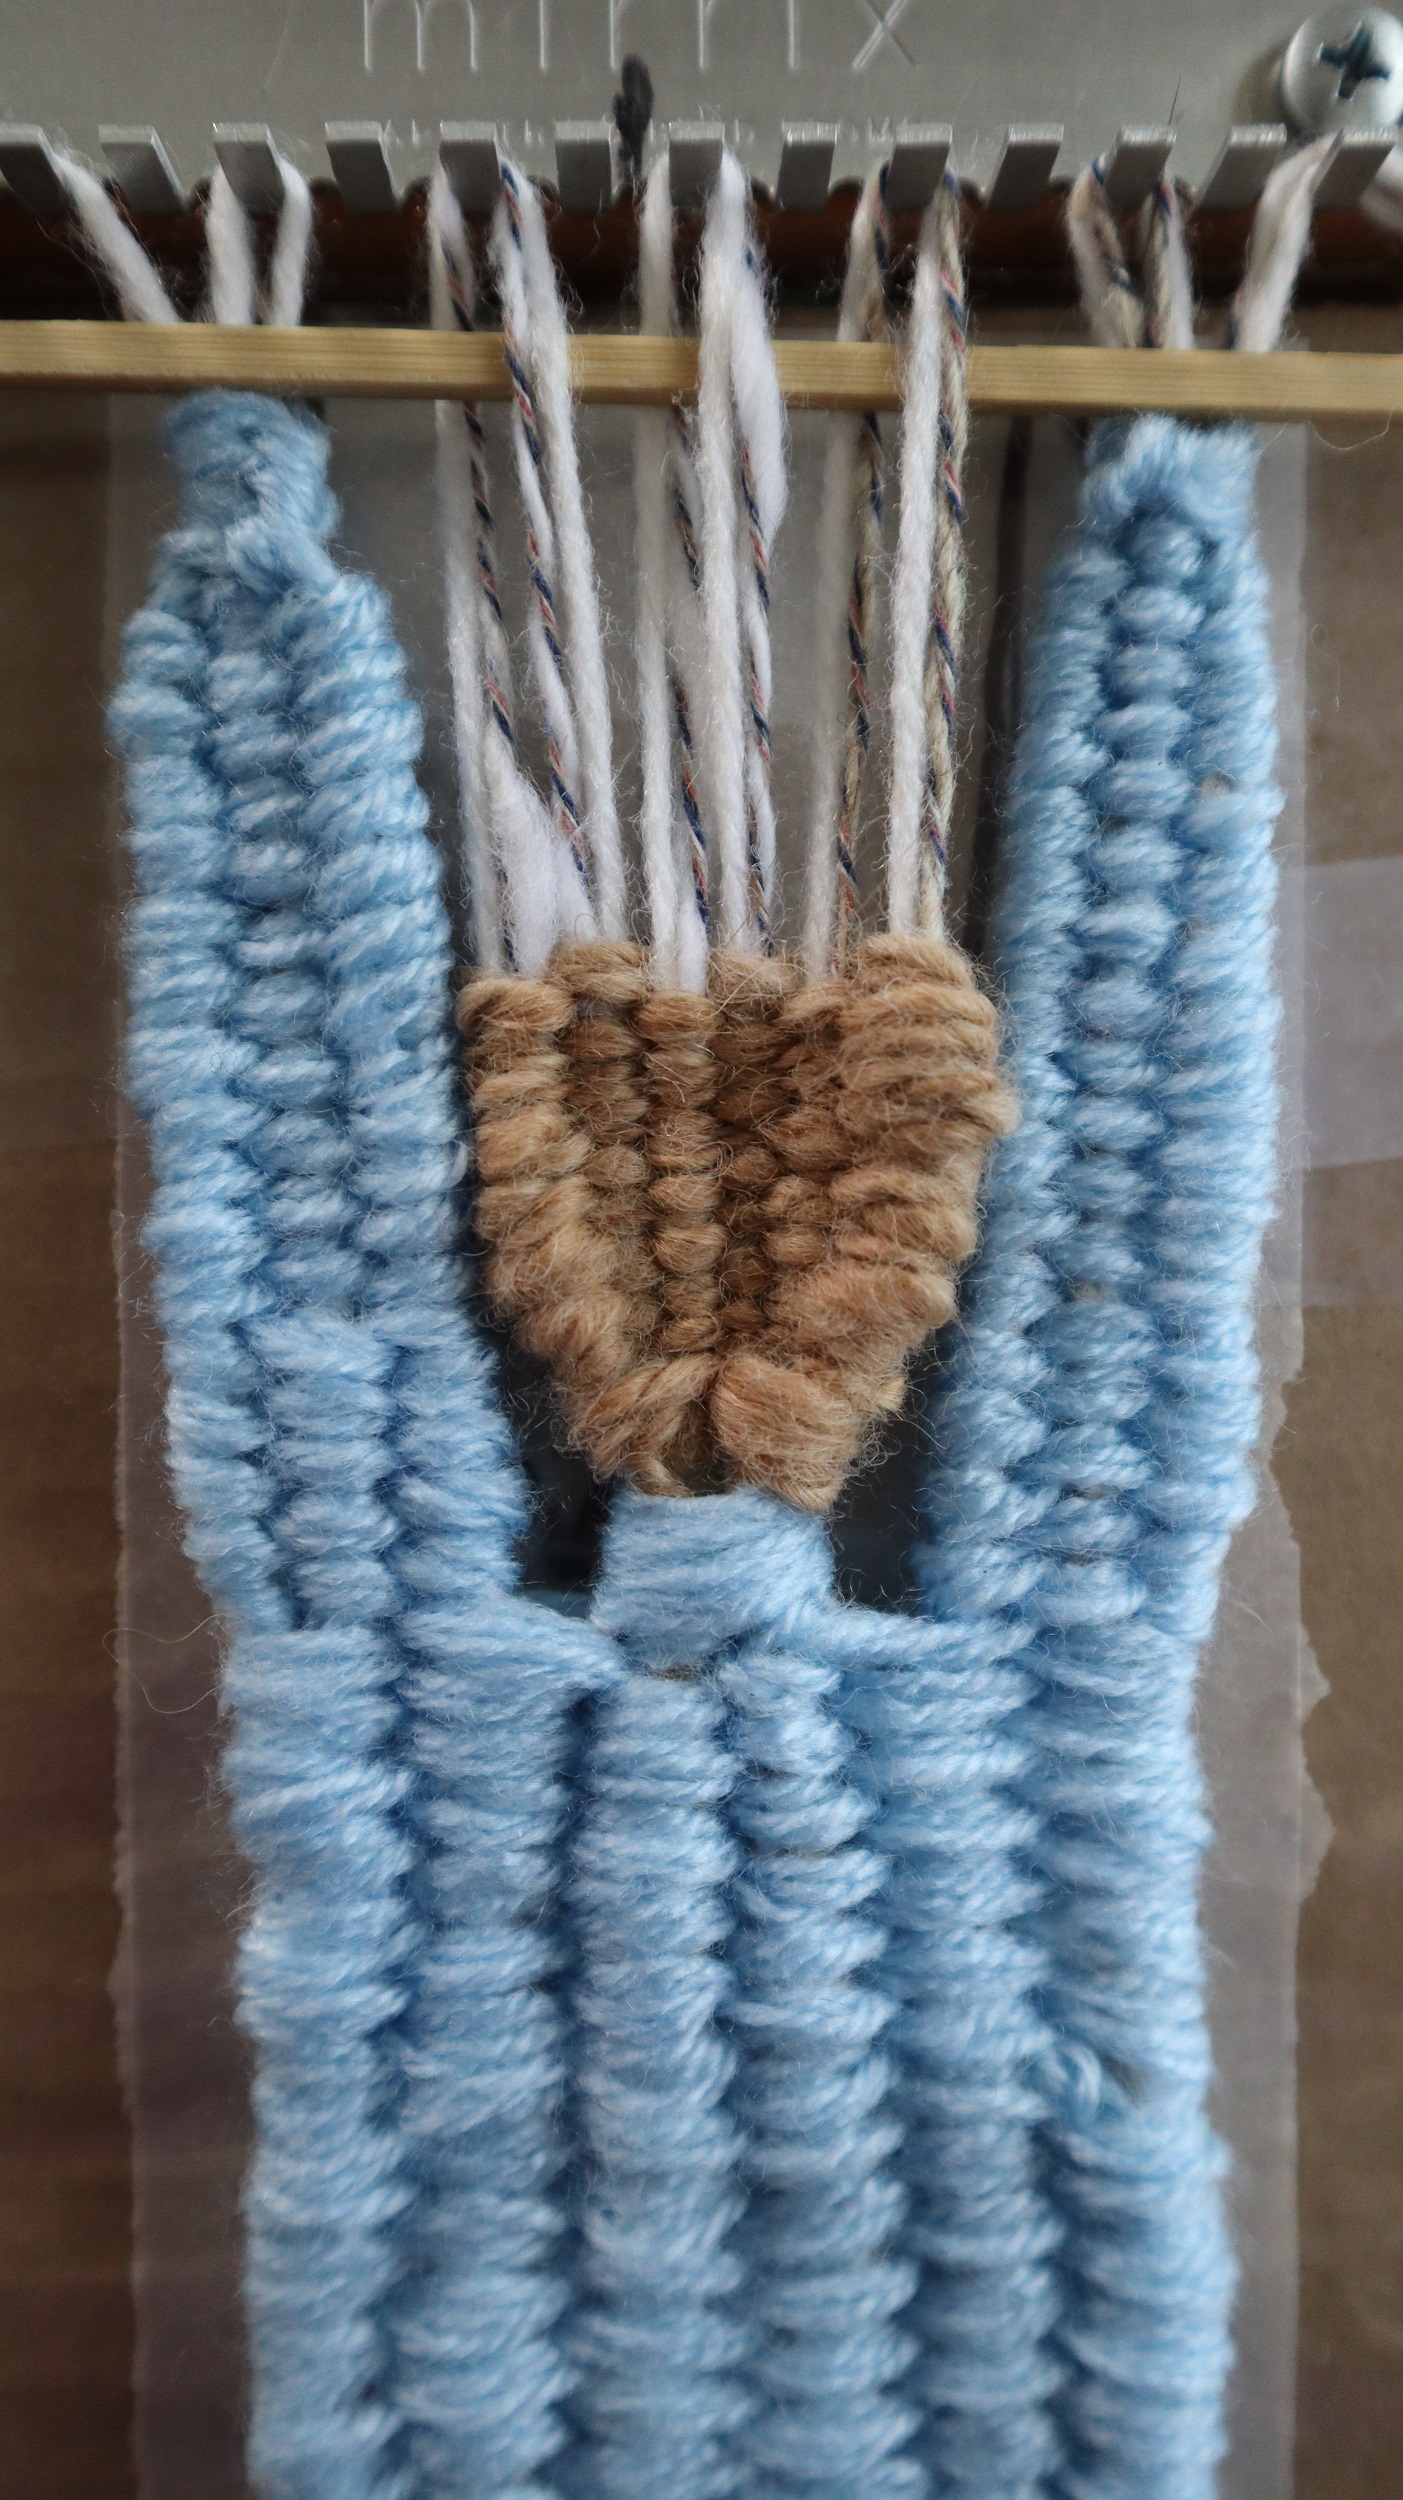
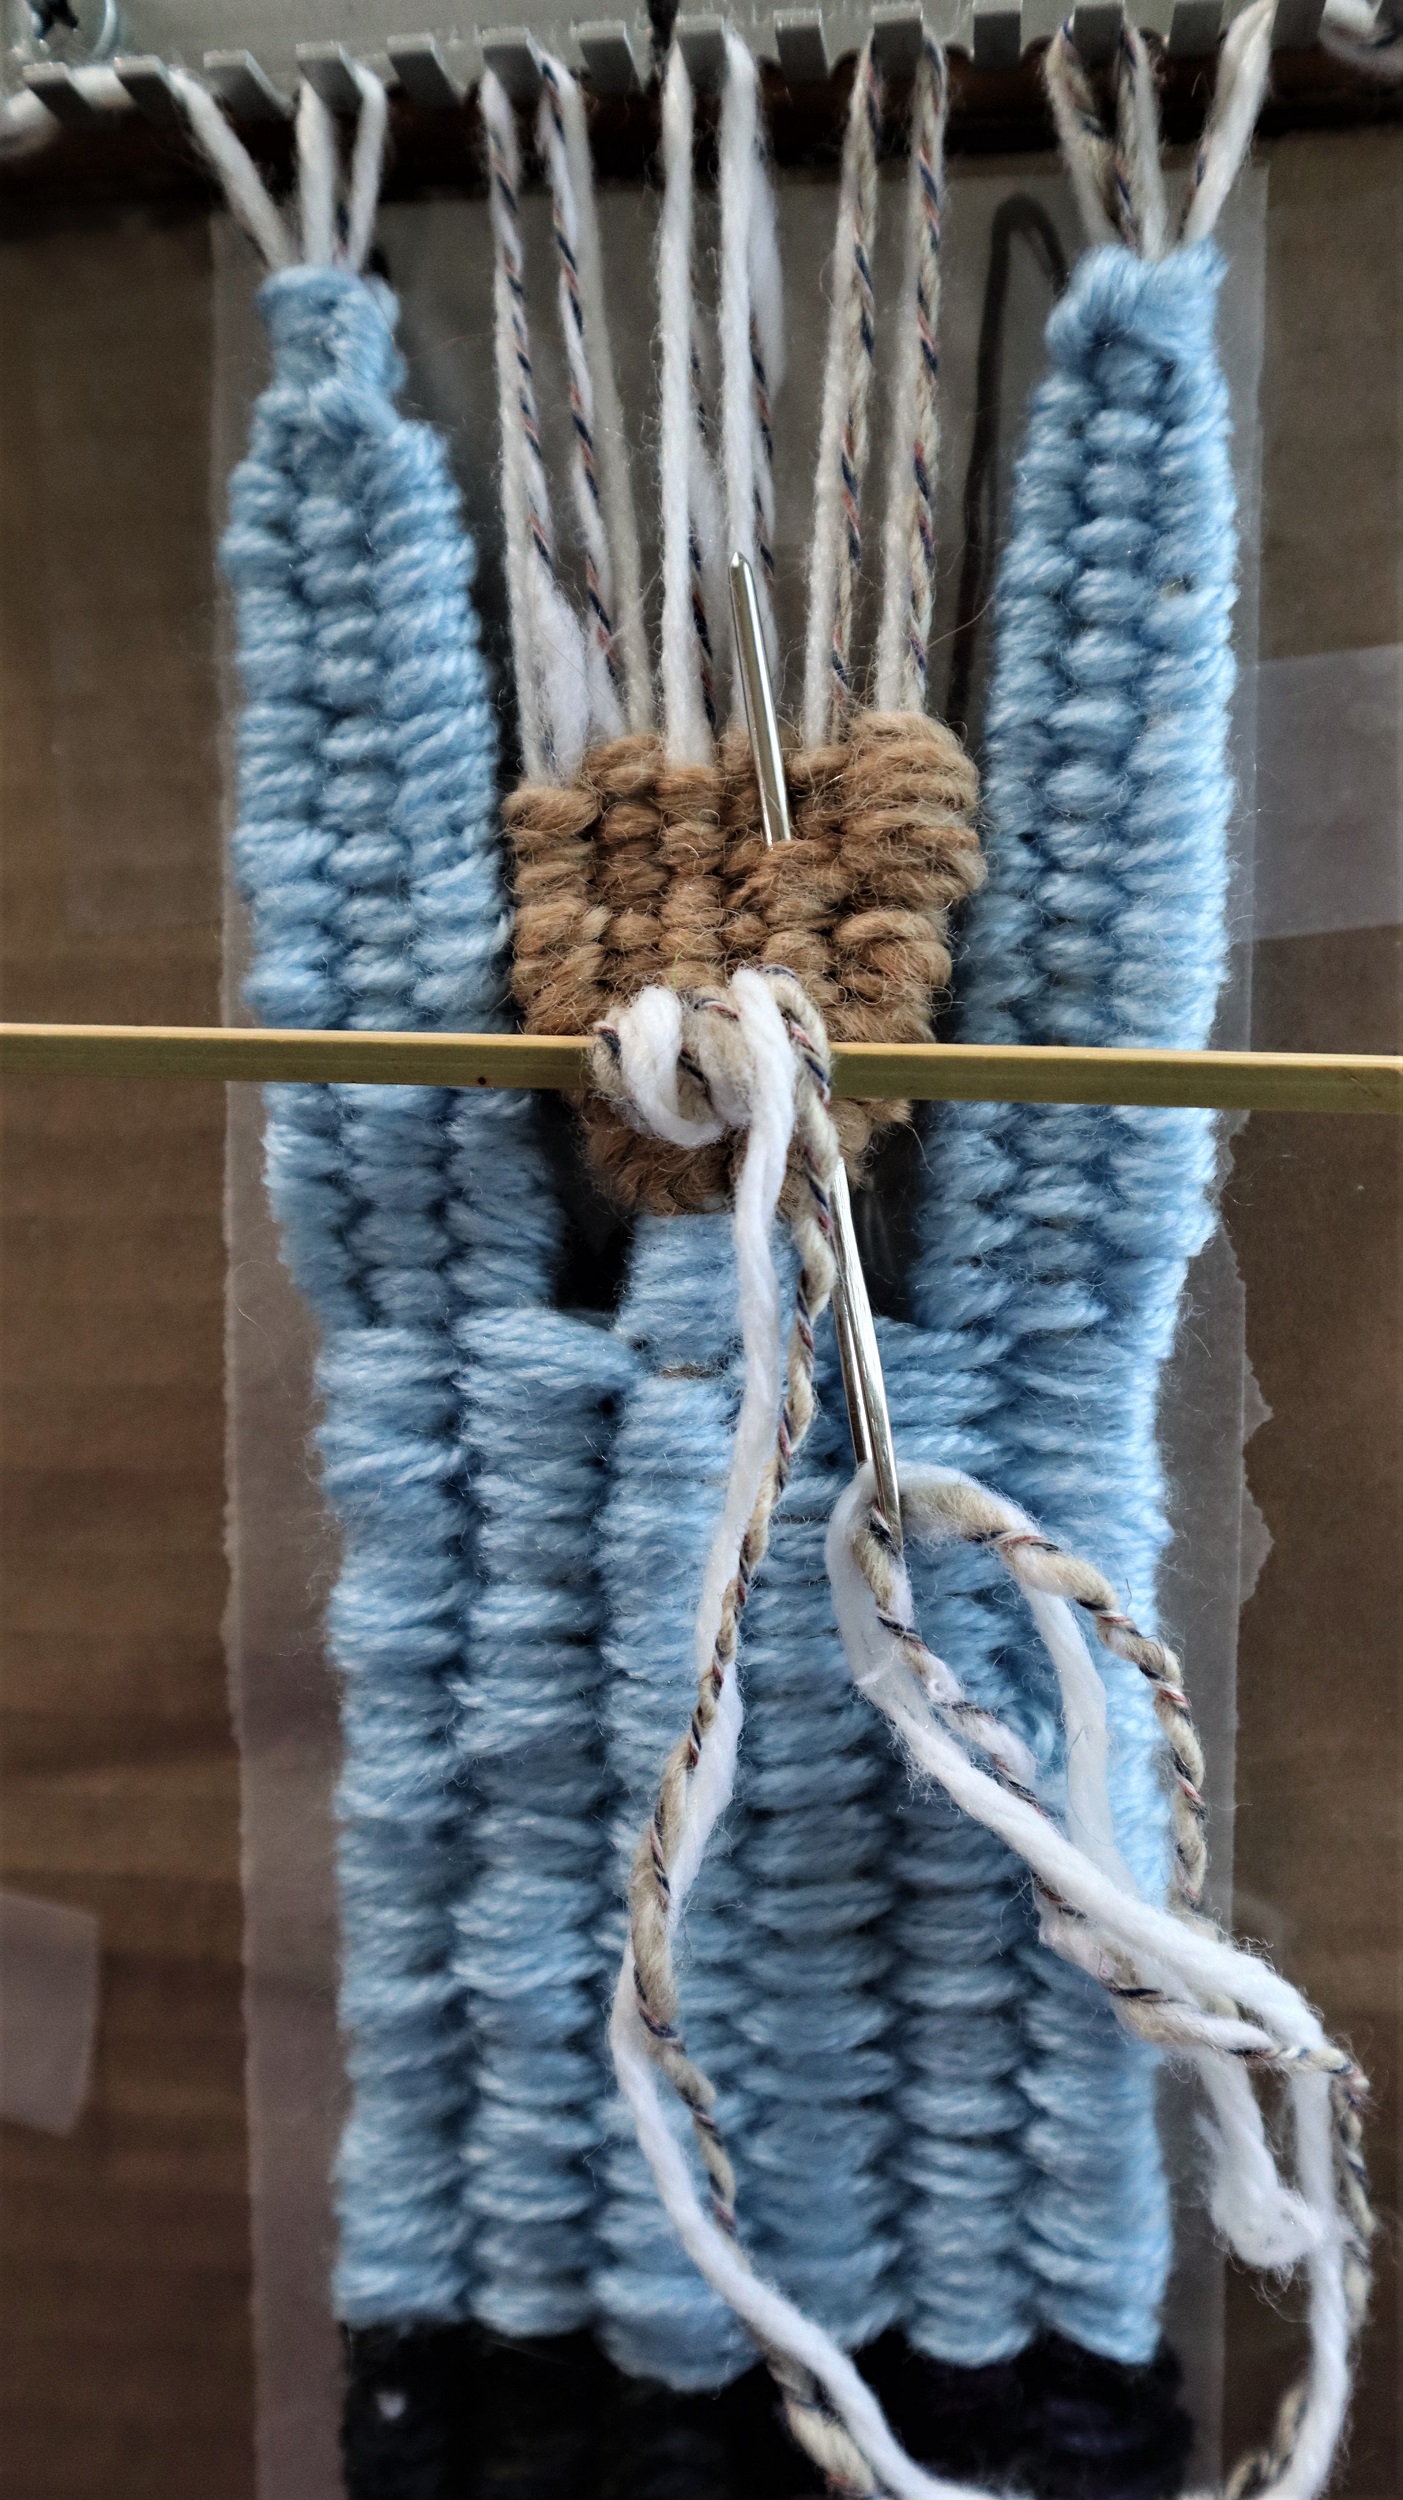
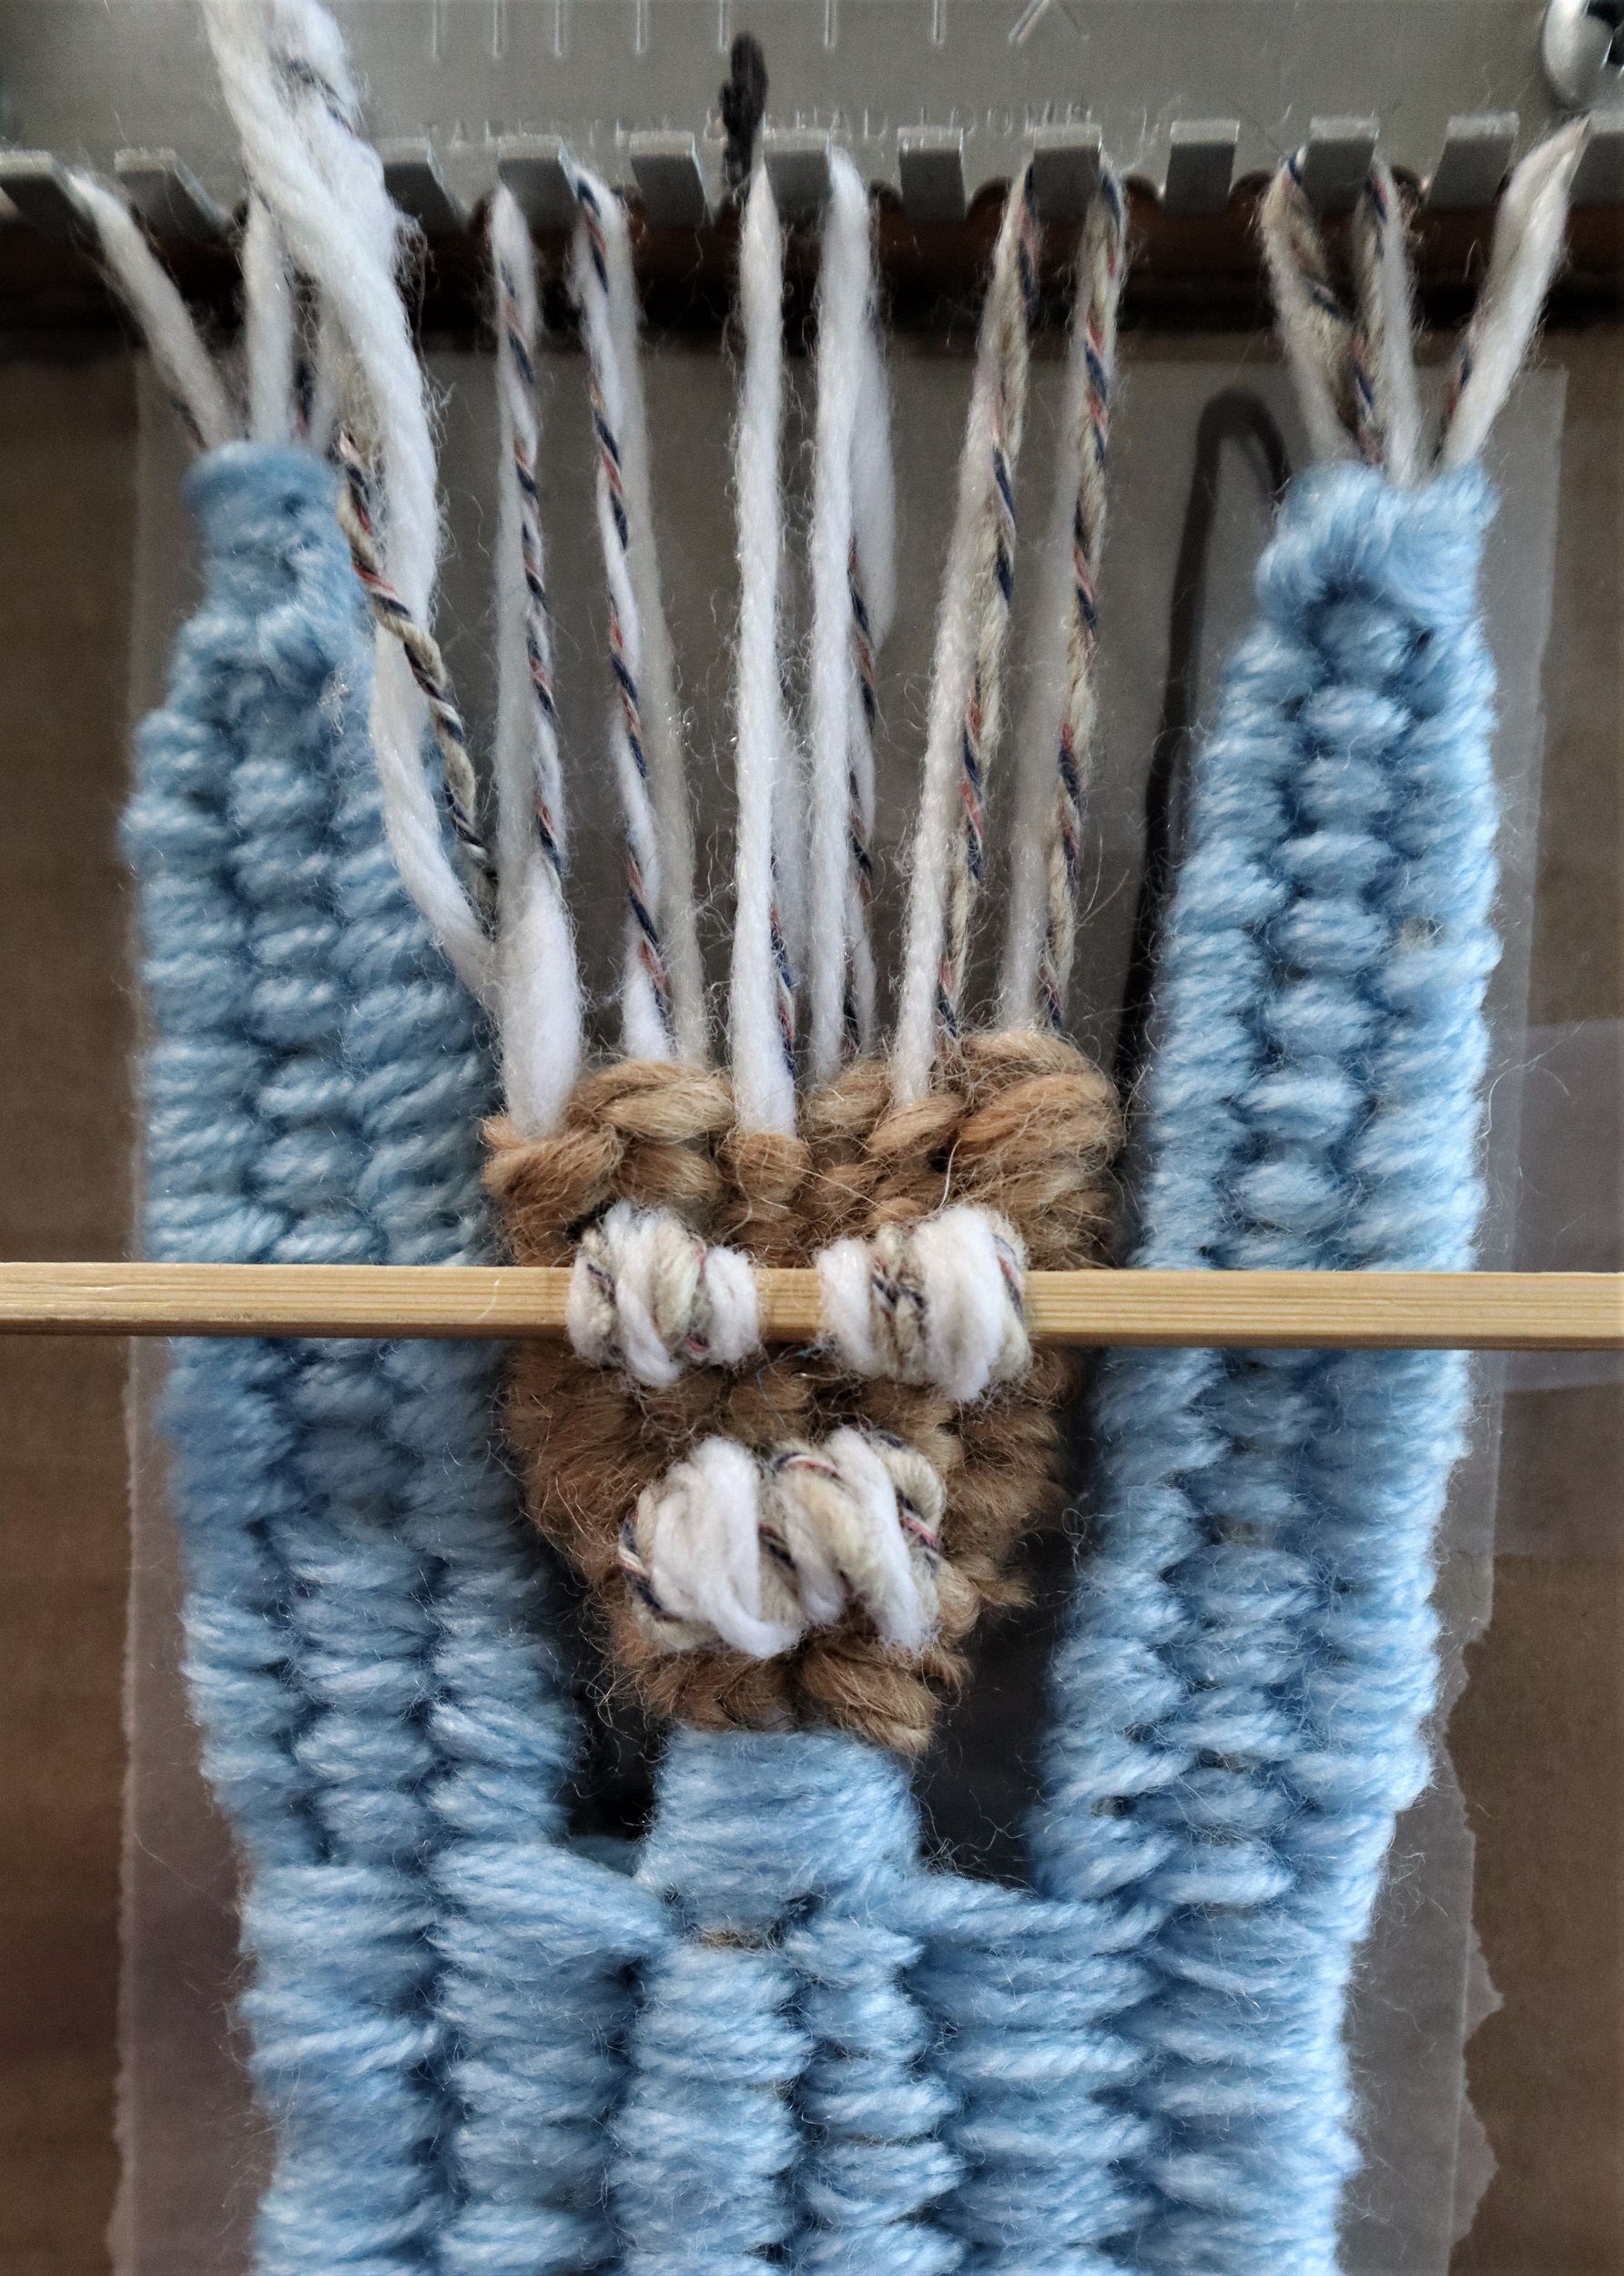
FACE:
With skin tone yarn, weave the face, weaving under 1/over 1 and over 1/under 1.
MOUSTACHE:
Stitch loosely over the shed stick with 1 strand of white yarn and 1 strand grey yarn held together as if they are a single strand at least 3 times. Take the ends to the back of the head.
EYEBROWS:
Take 2 slightly tighter stitches over the shed stick for each eyebrow.
EYES:
Stitch 2 small black ‘e’ size beads on for eyes.
HAIRLINE:
Lock the top of the head in place by stitching around each warp strand at the top of the forehead.
Lift Einstein off the loom.
NOSE:
Stitch 2 vertical stitches with skin tone yarn.
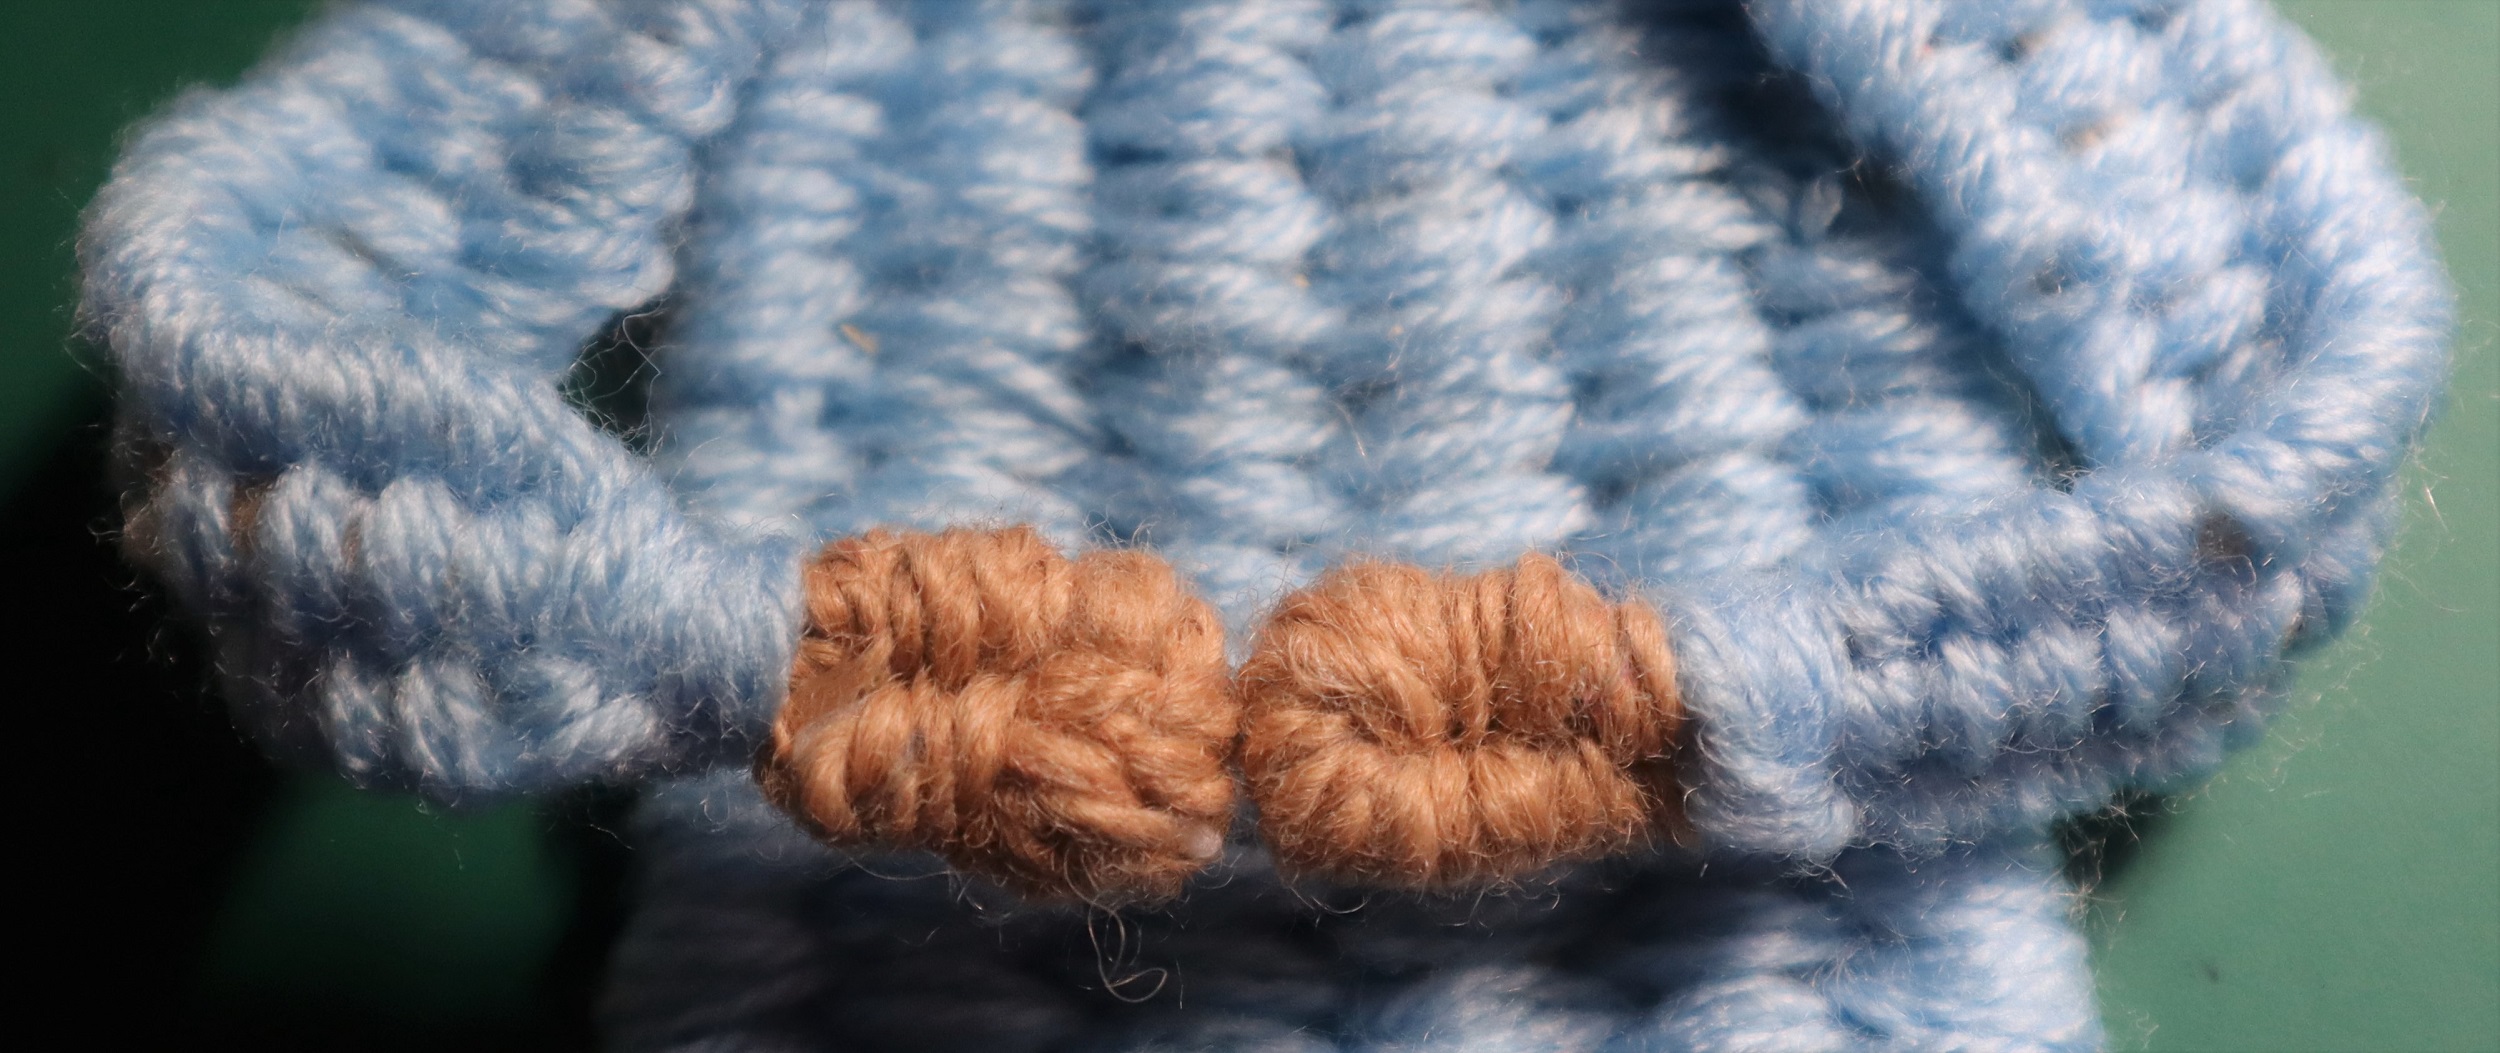
SHOES:
With Brown yarn follow the instructions for the feet on page 36. Weave the yarn ends into the legs.
HANDS:
Weave in the single strand at the side of each hand into the arm so that it is the same size as the loop of the hand.
With skin tone yarn make hands the same way as the feet. Weave the yarn ends into the arms.
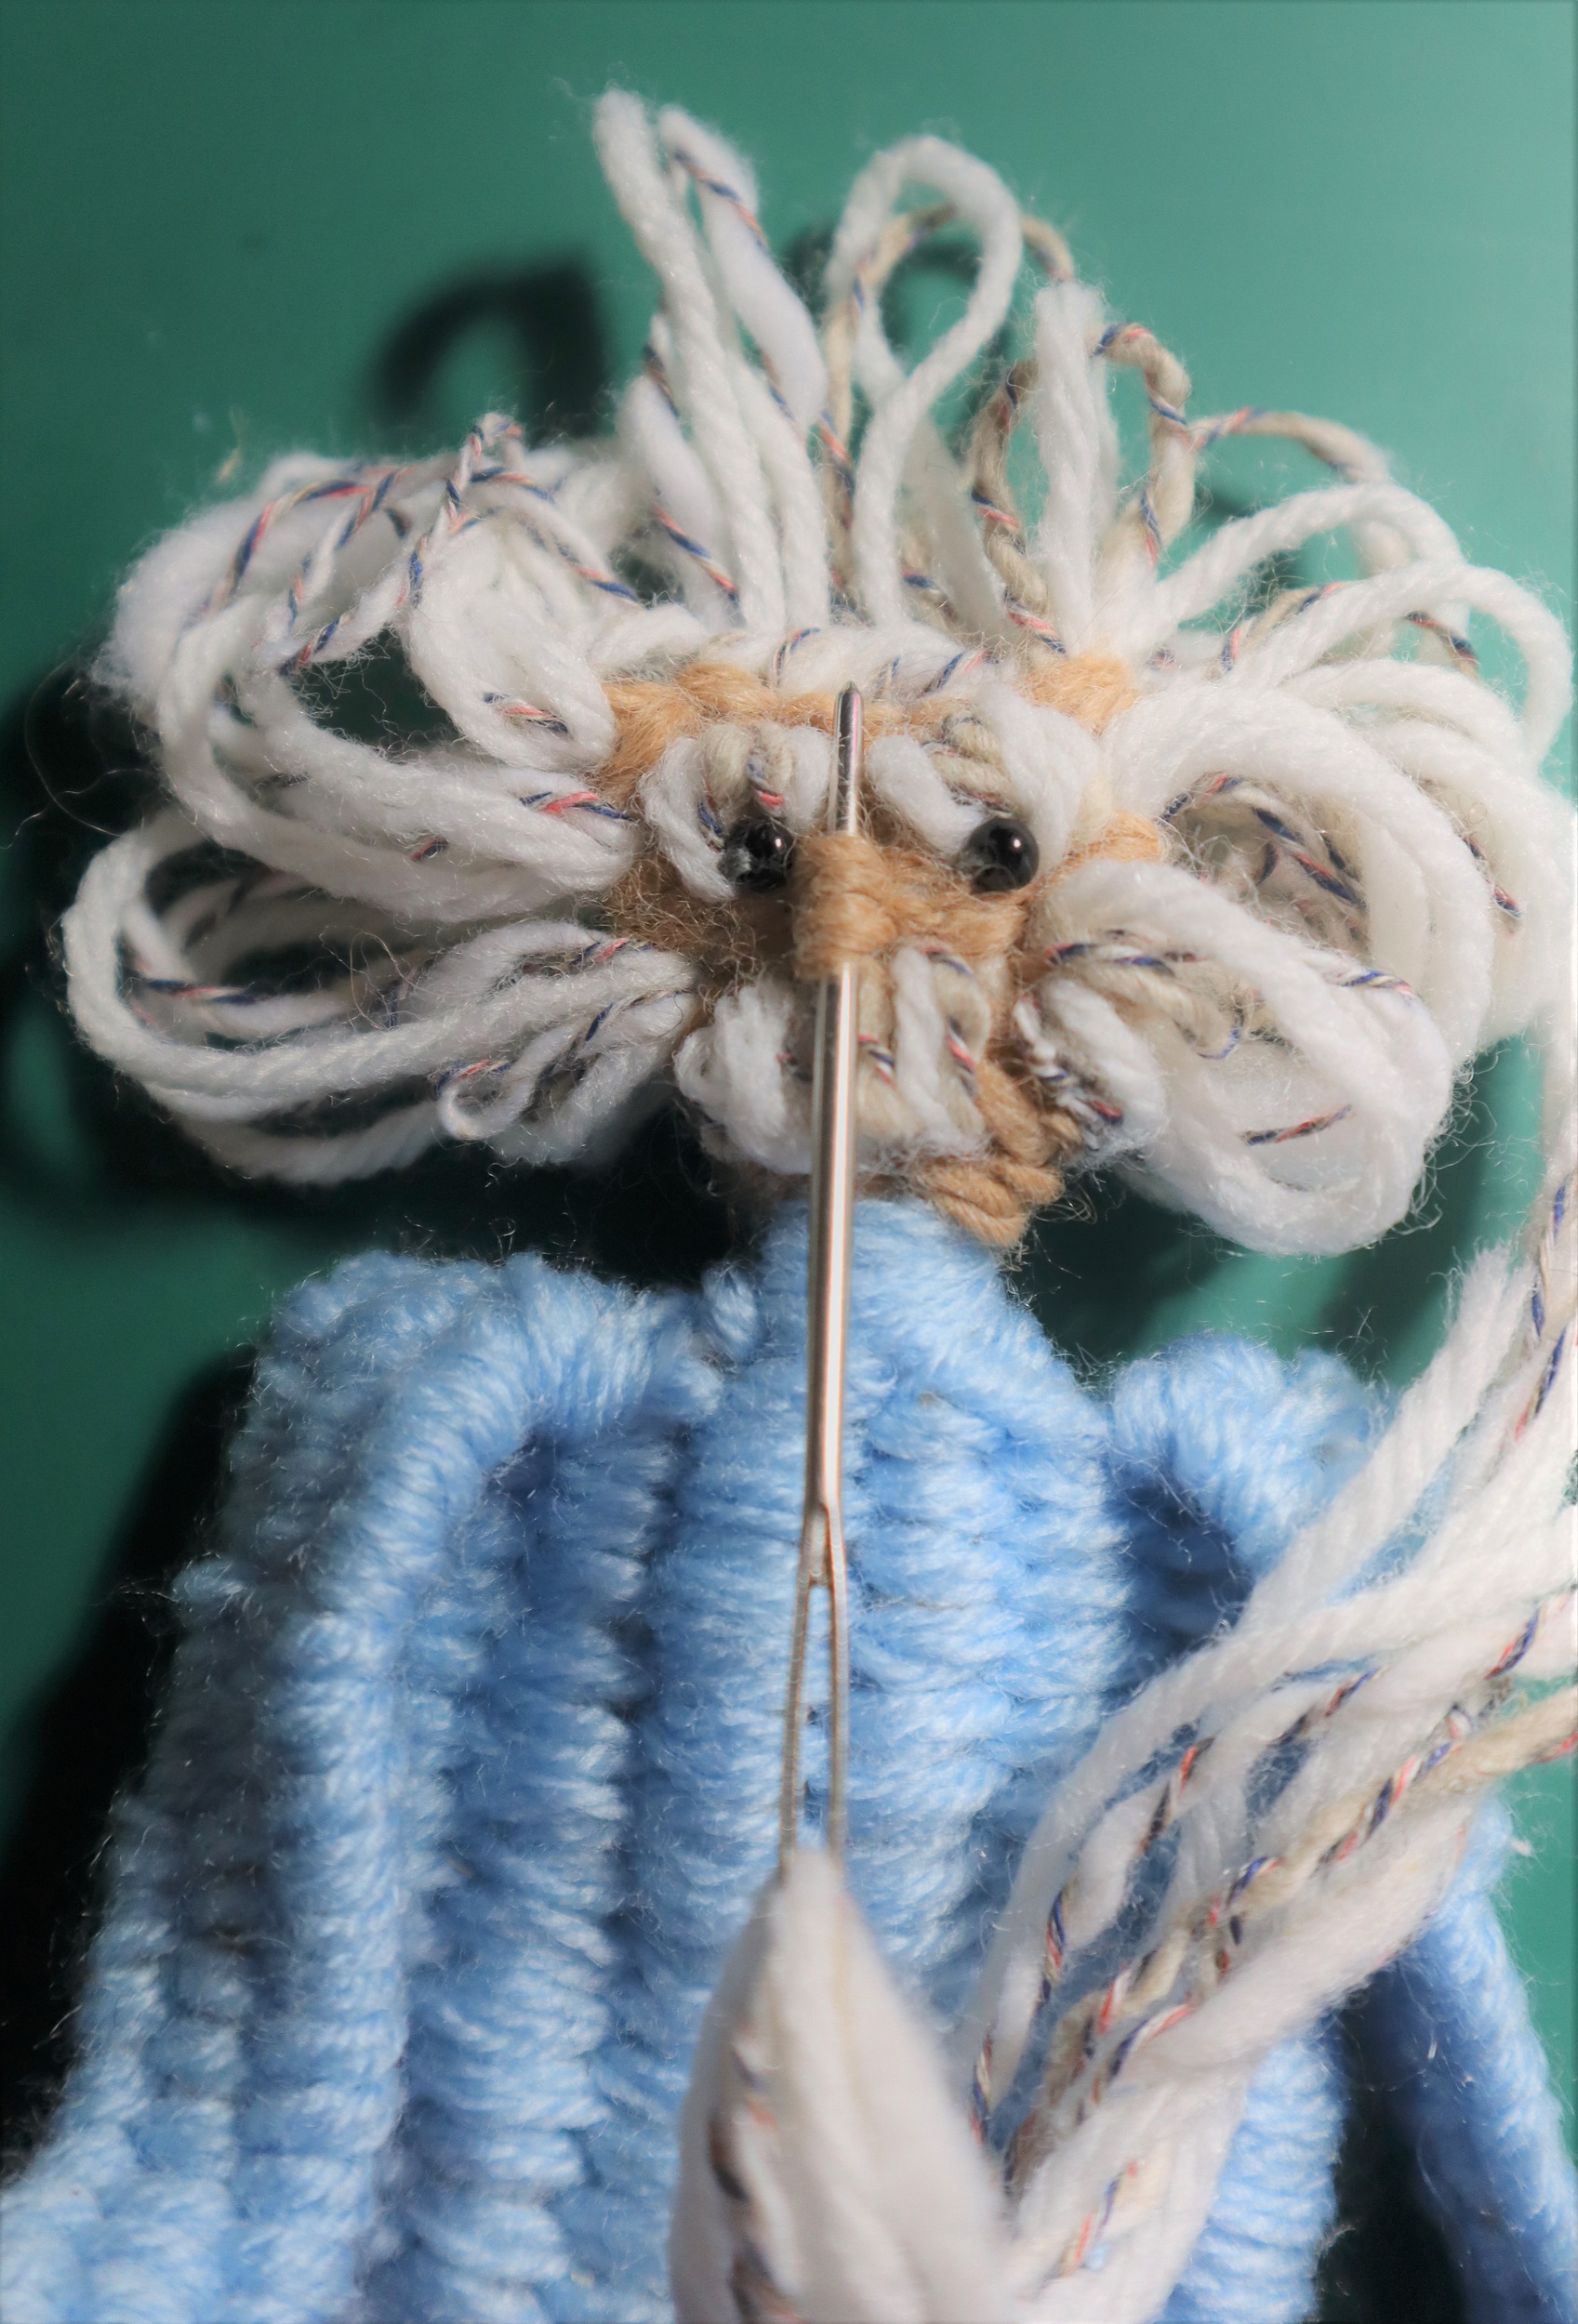
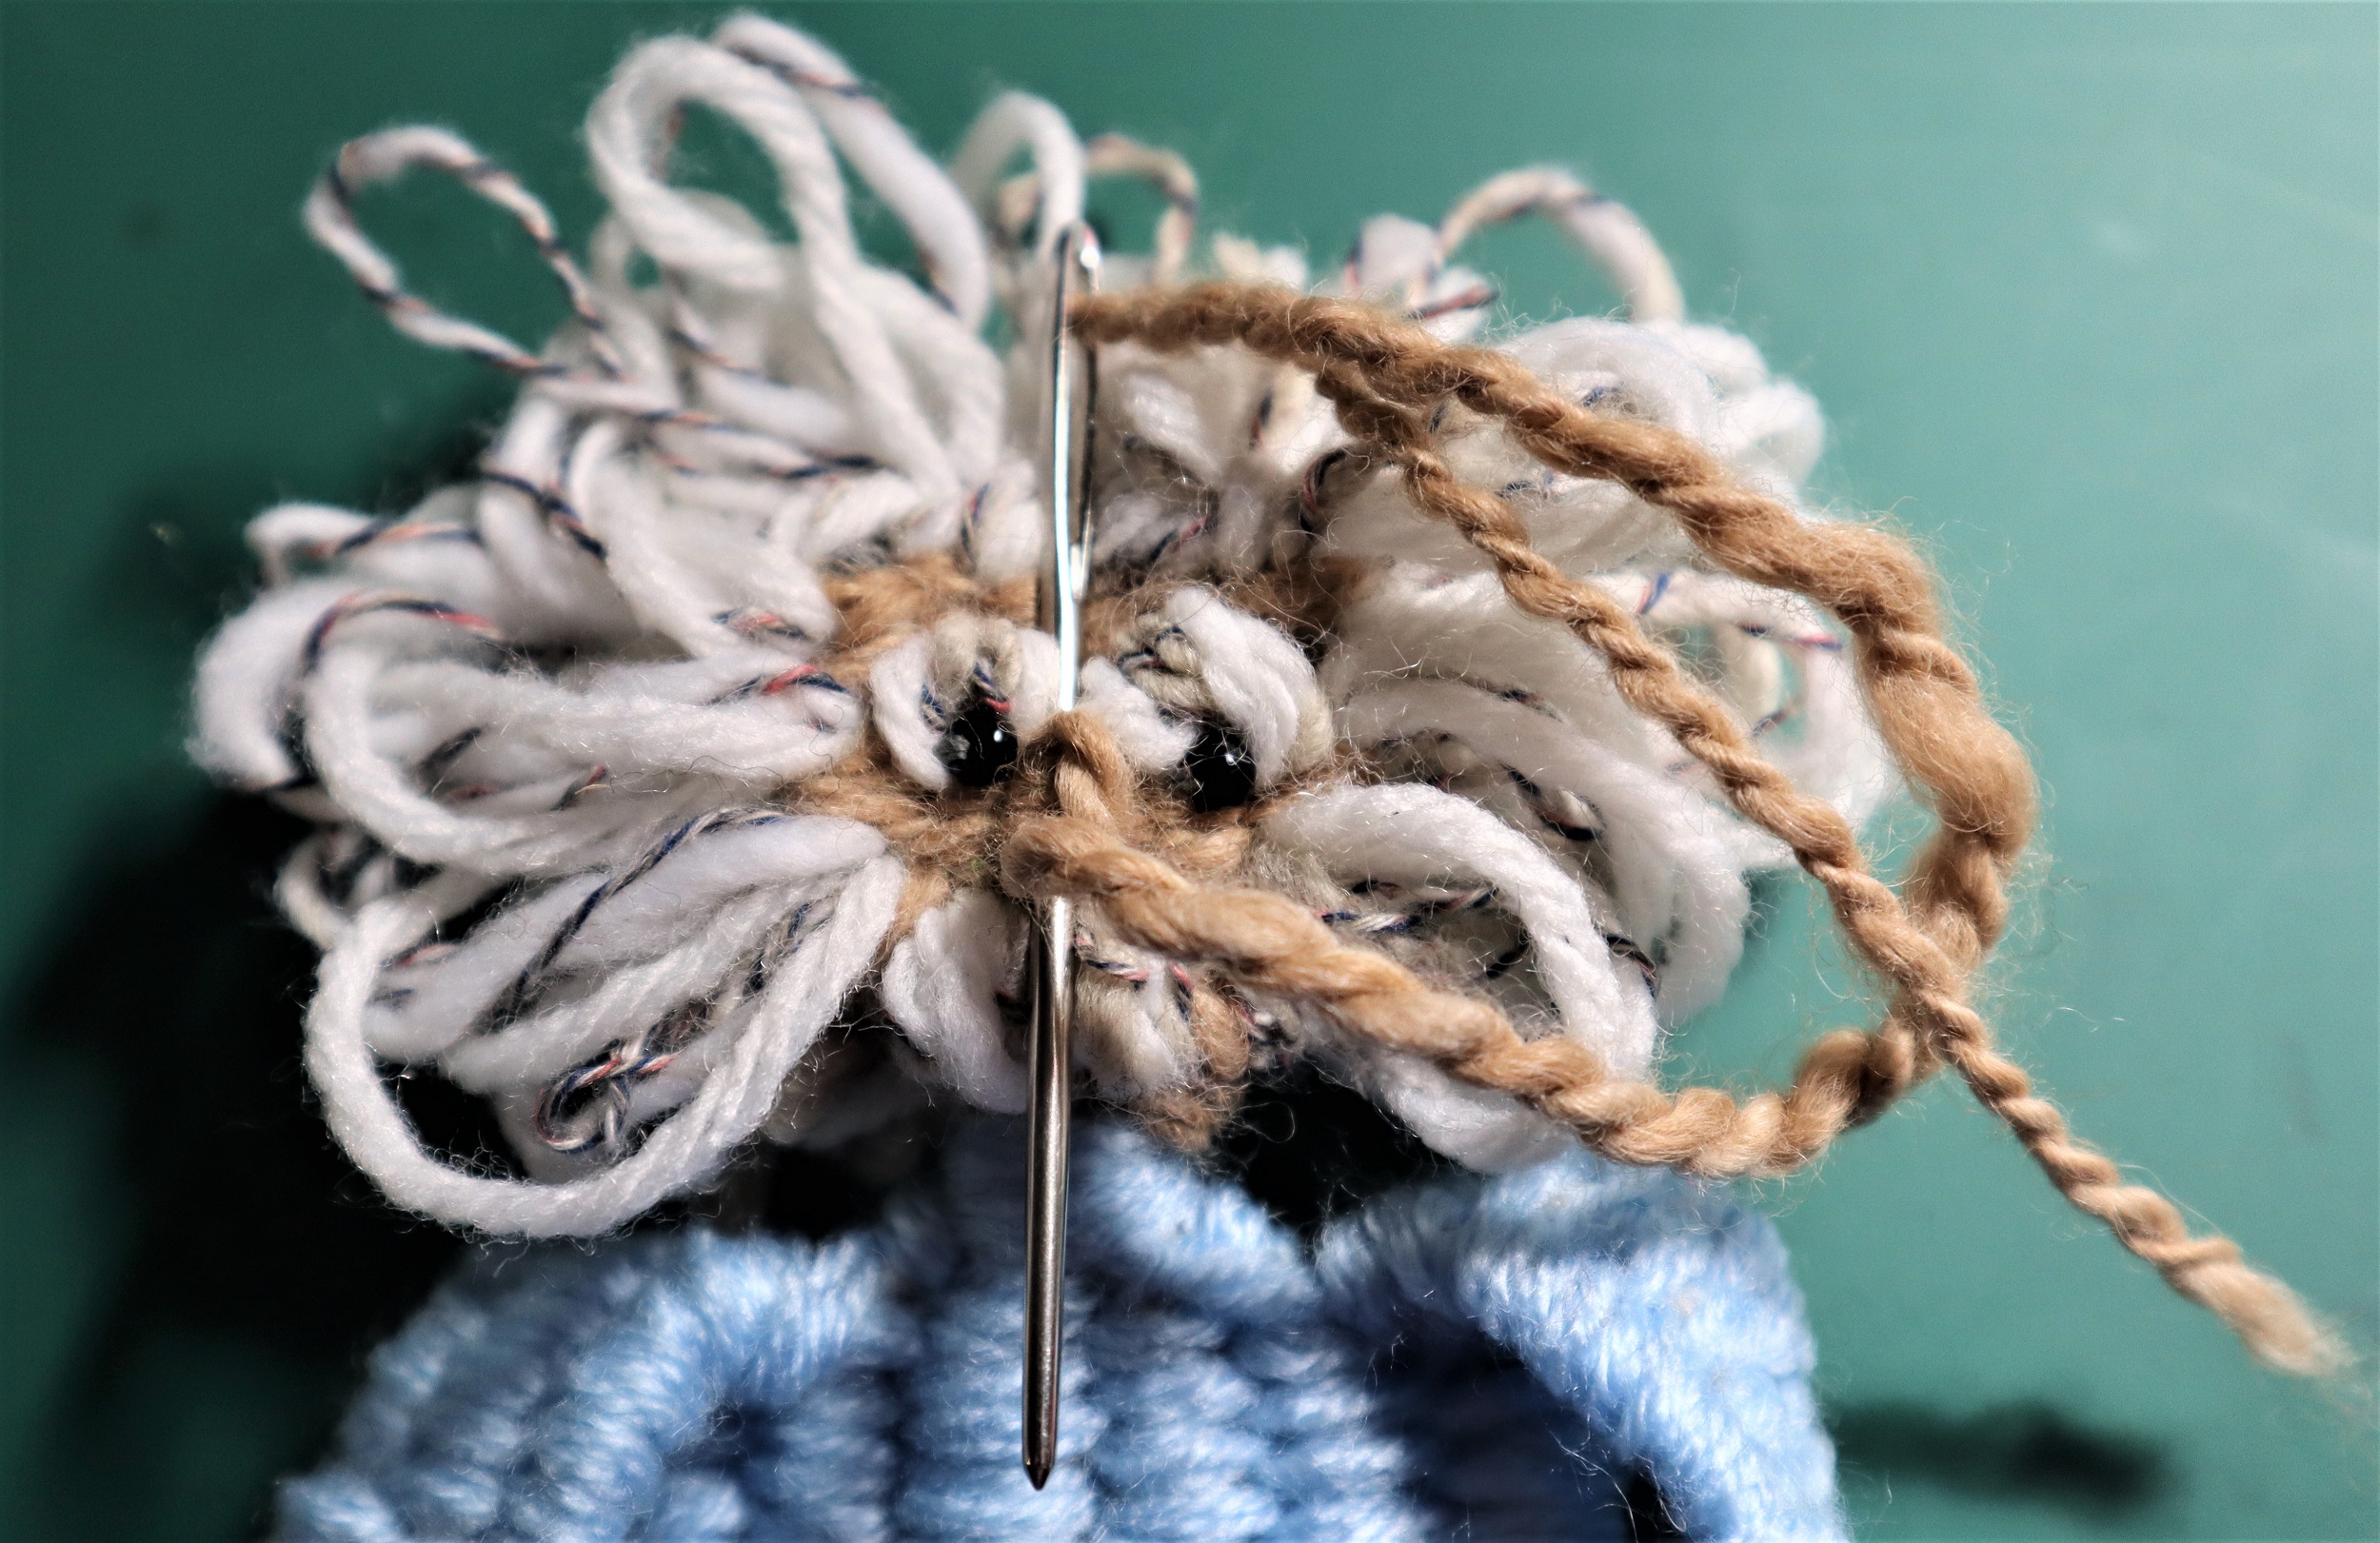
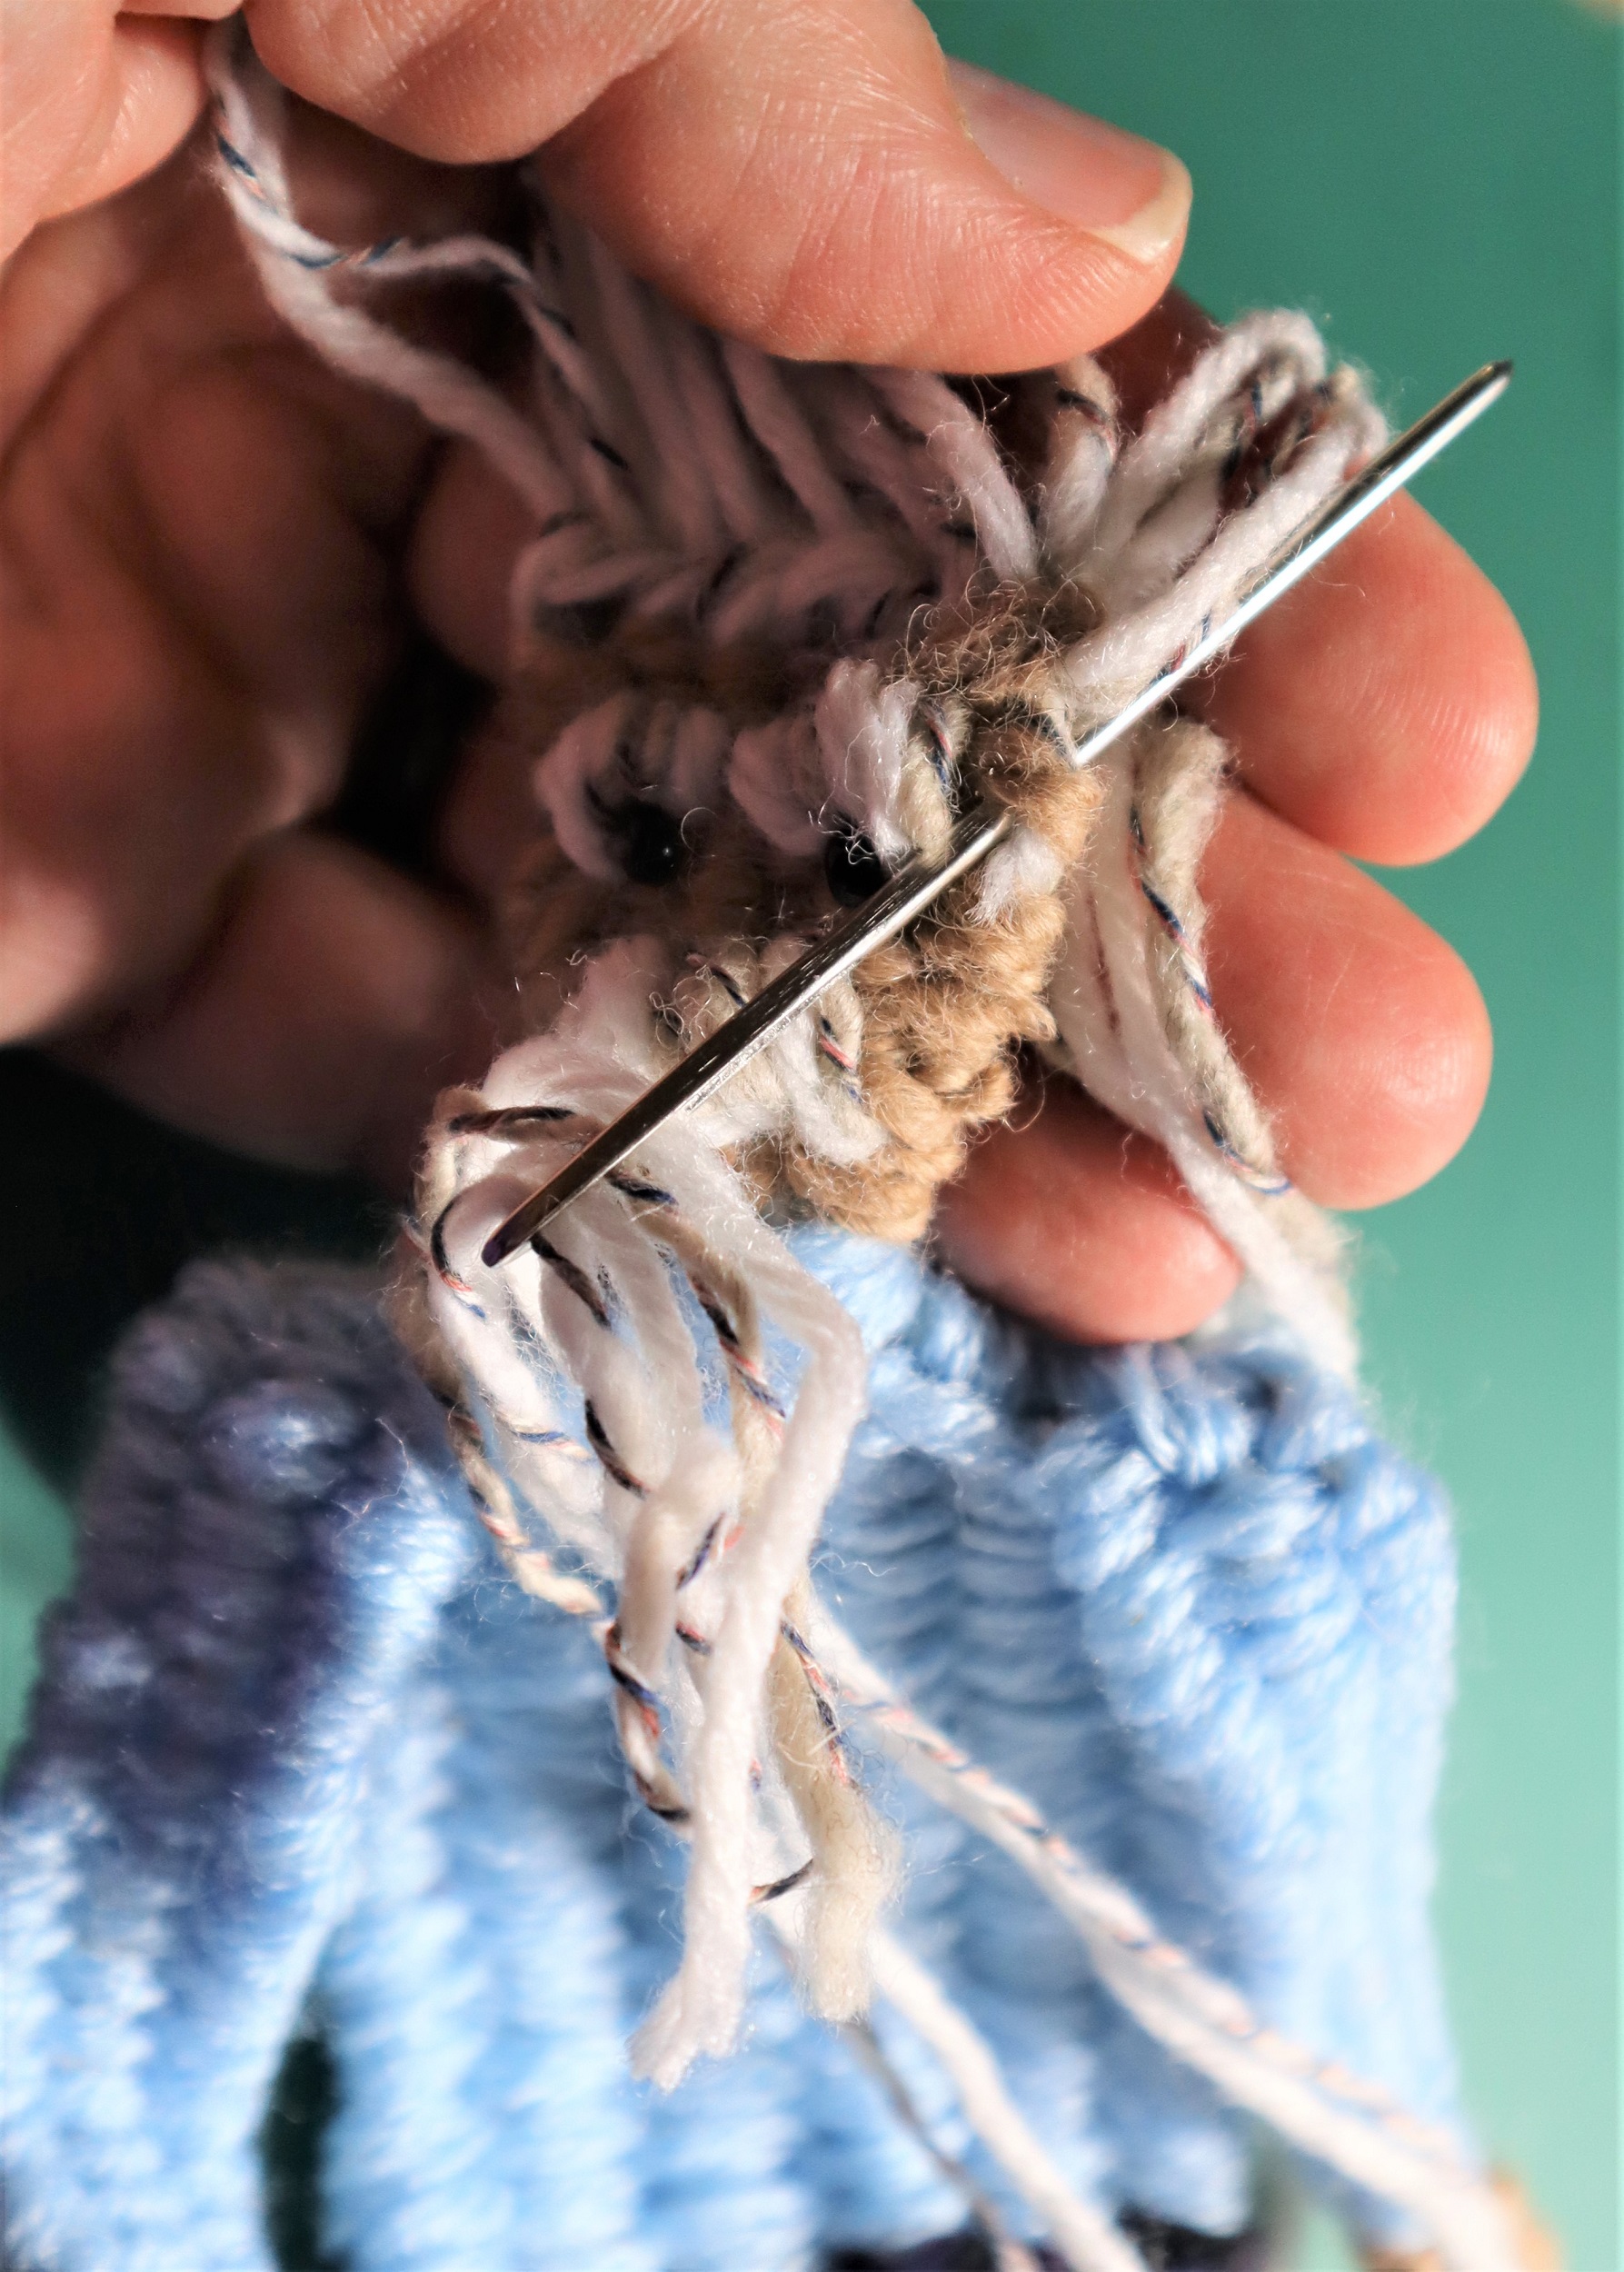
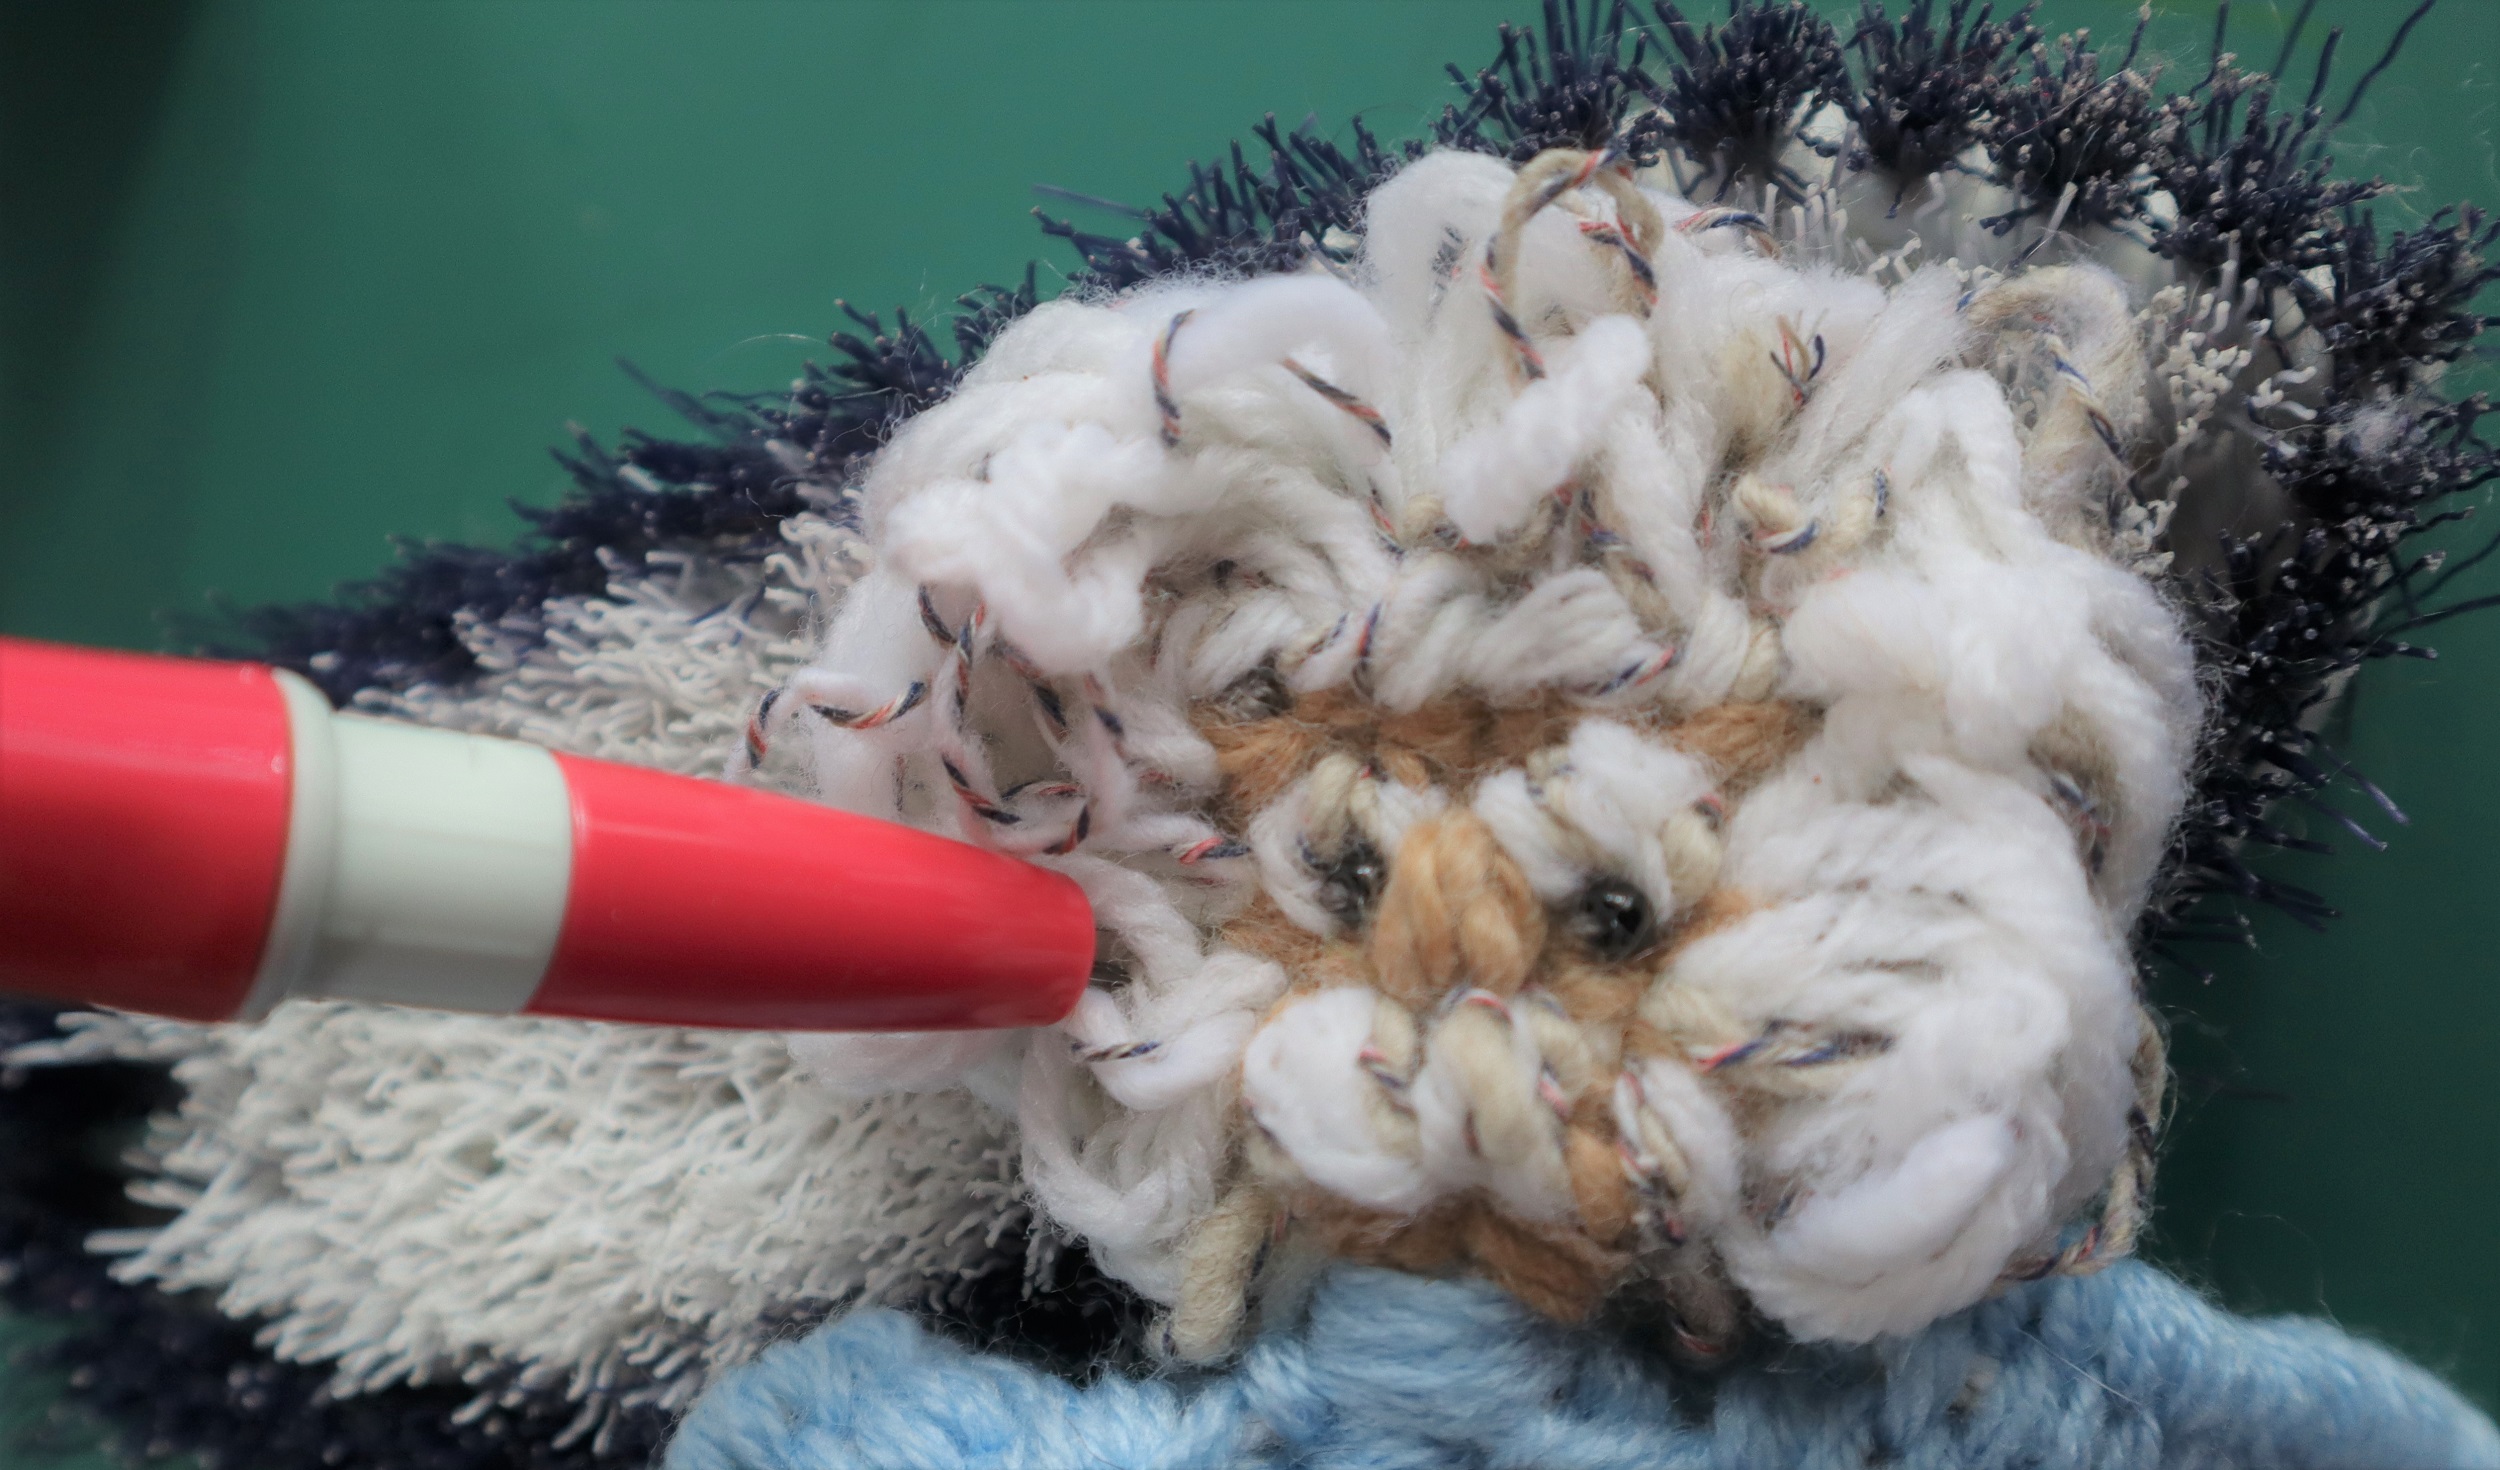
HAIR:
Stitch loops of hair yarn around the edges of the face and on the back of the head.
Use felting needles to finalize the loops into the ‘dandelion’ shape of his classic signature hairstyle.
FINISHING:
1: Steam the woven figure on the wrong side with a steam iron, being sure to not touch the iron to the weaving.
Finger press the arms down and the hair into place.
Weave in the ends.
Trim any ends.
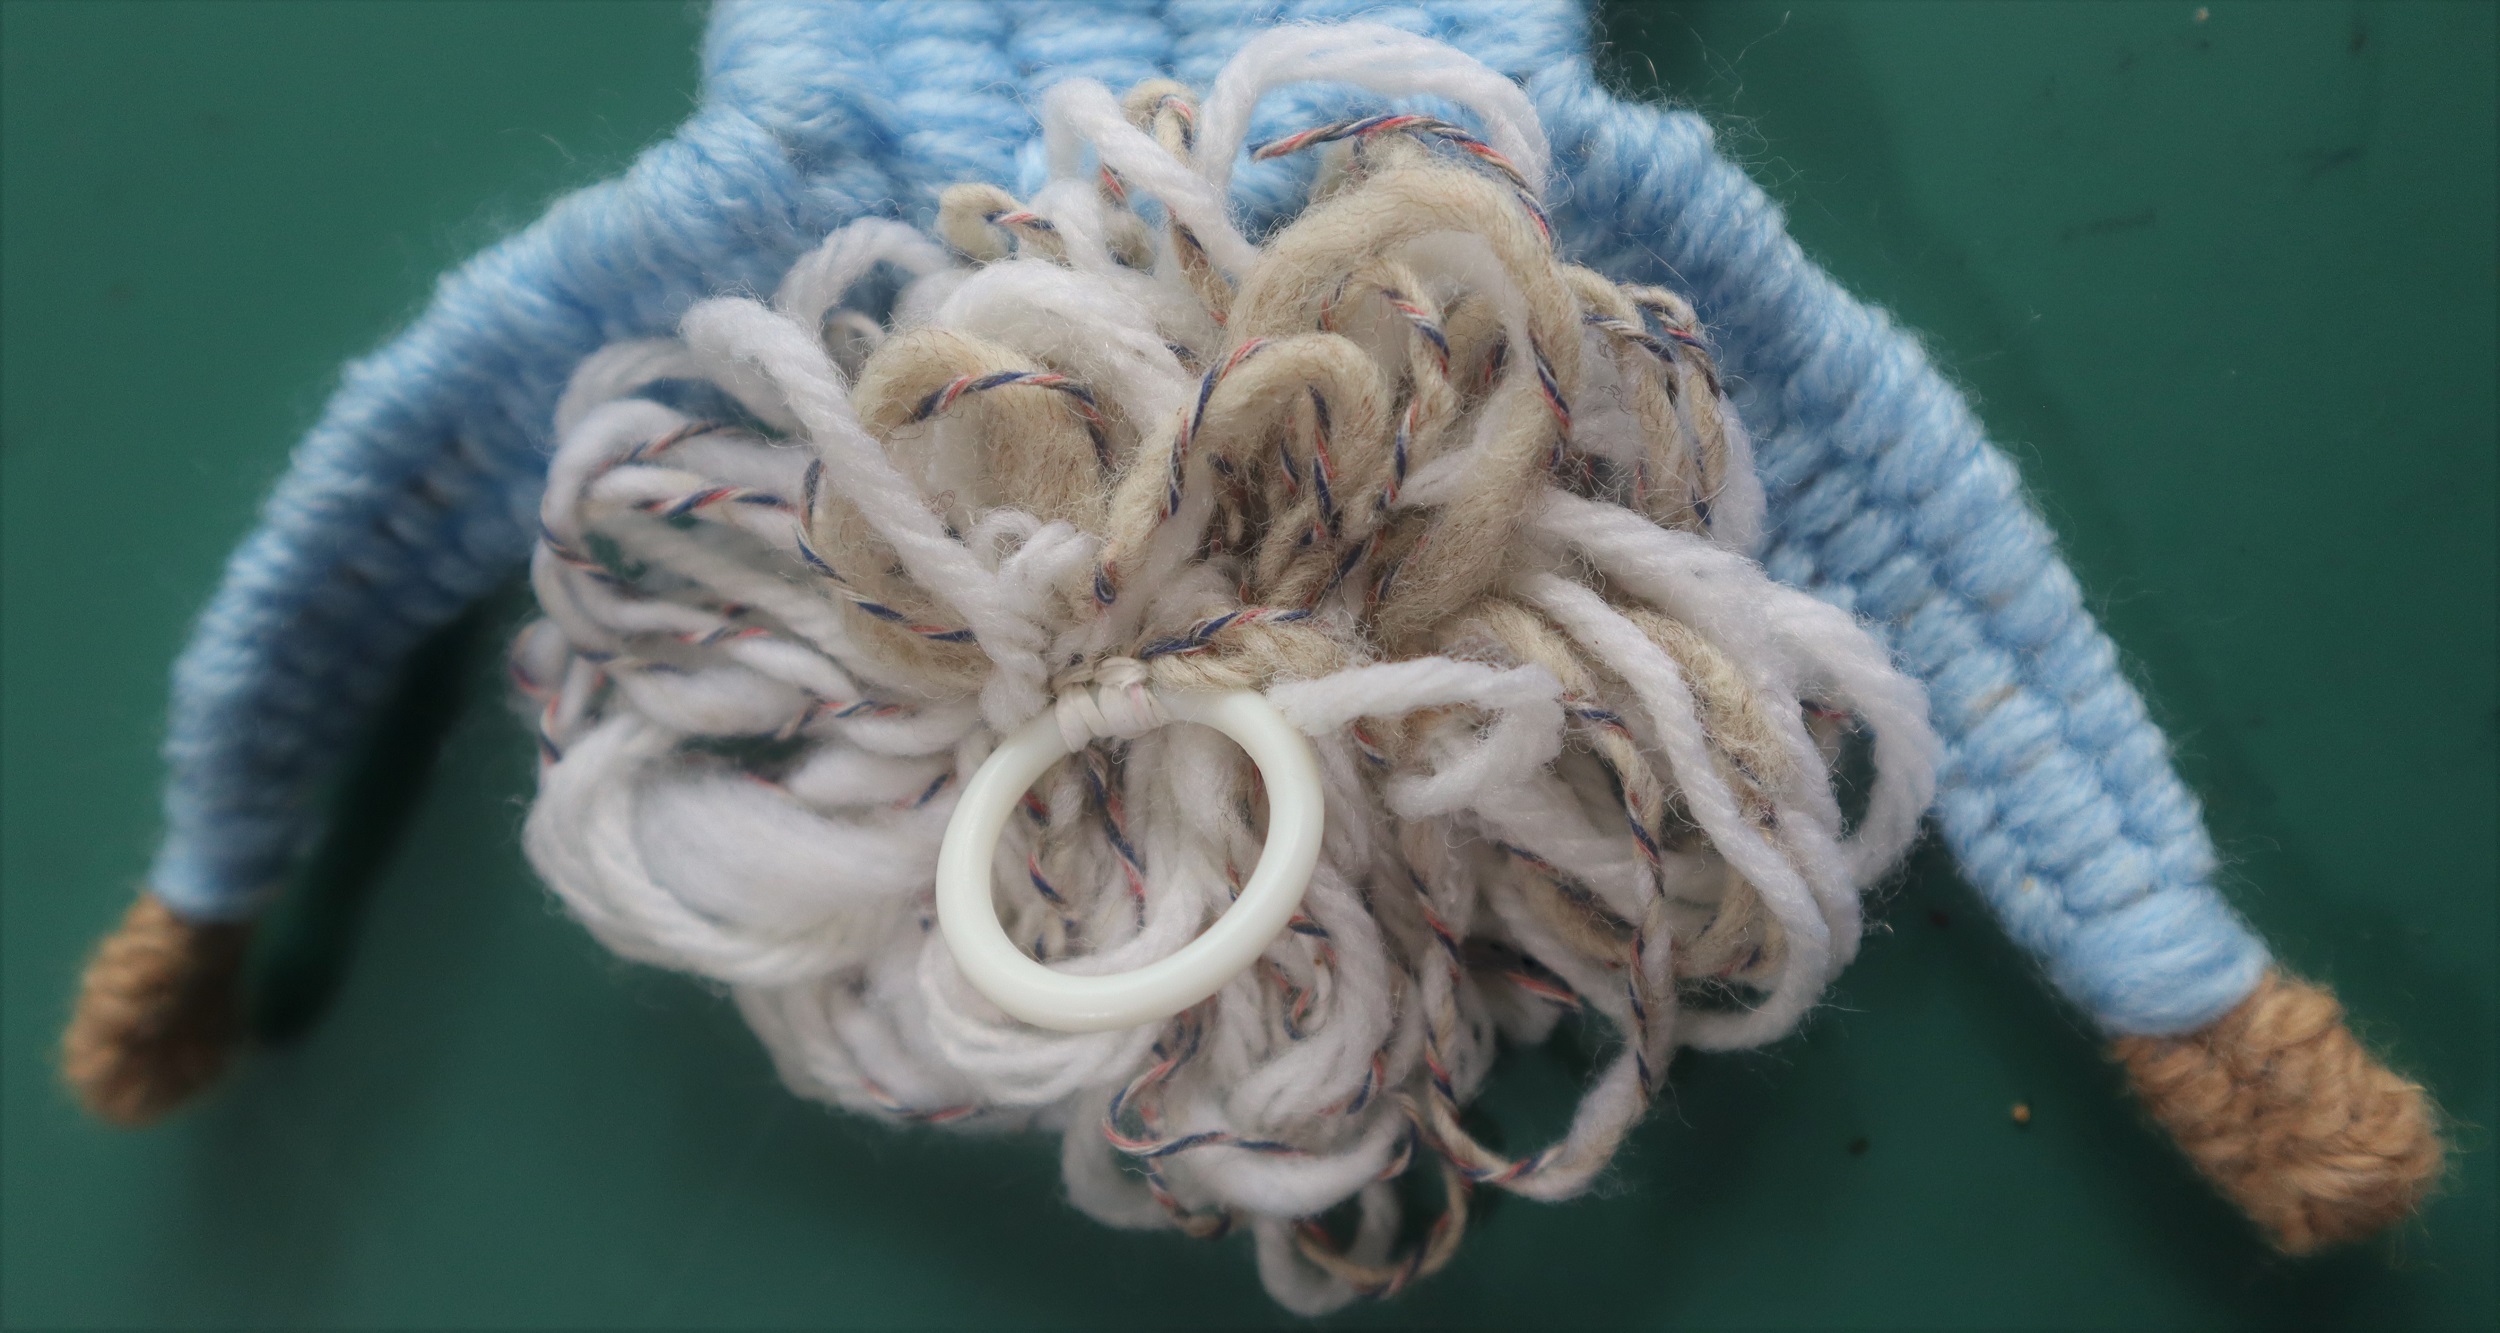
2: Sew a plastic or metal ring to the back of the head for hanging the banner.
To see all the links for the ‘How To’ posts for the “Imagine” Banner Weave along, please go to L I N K S
To order the loom, book and extras kit for the Weave Along from Mirrix, please go to K I T
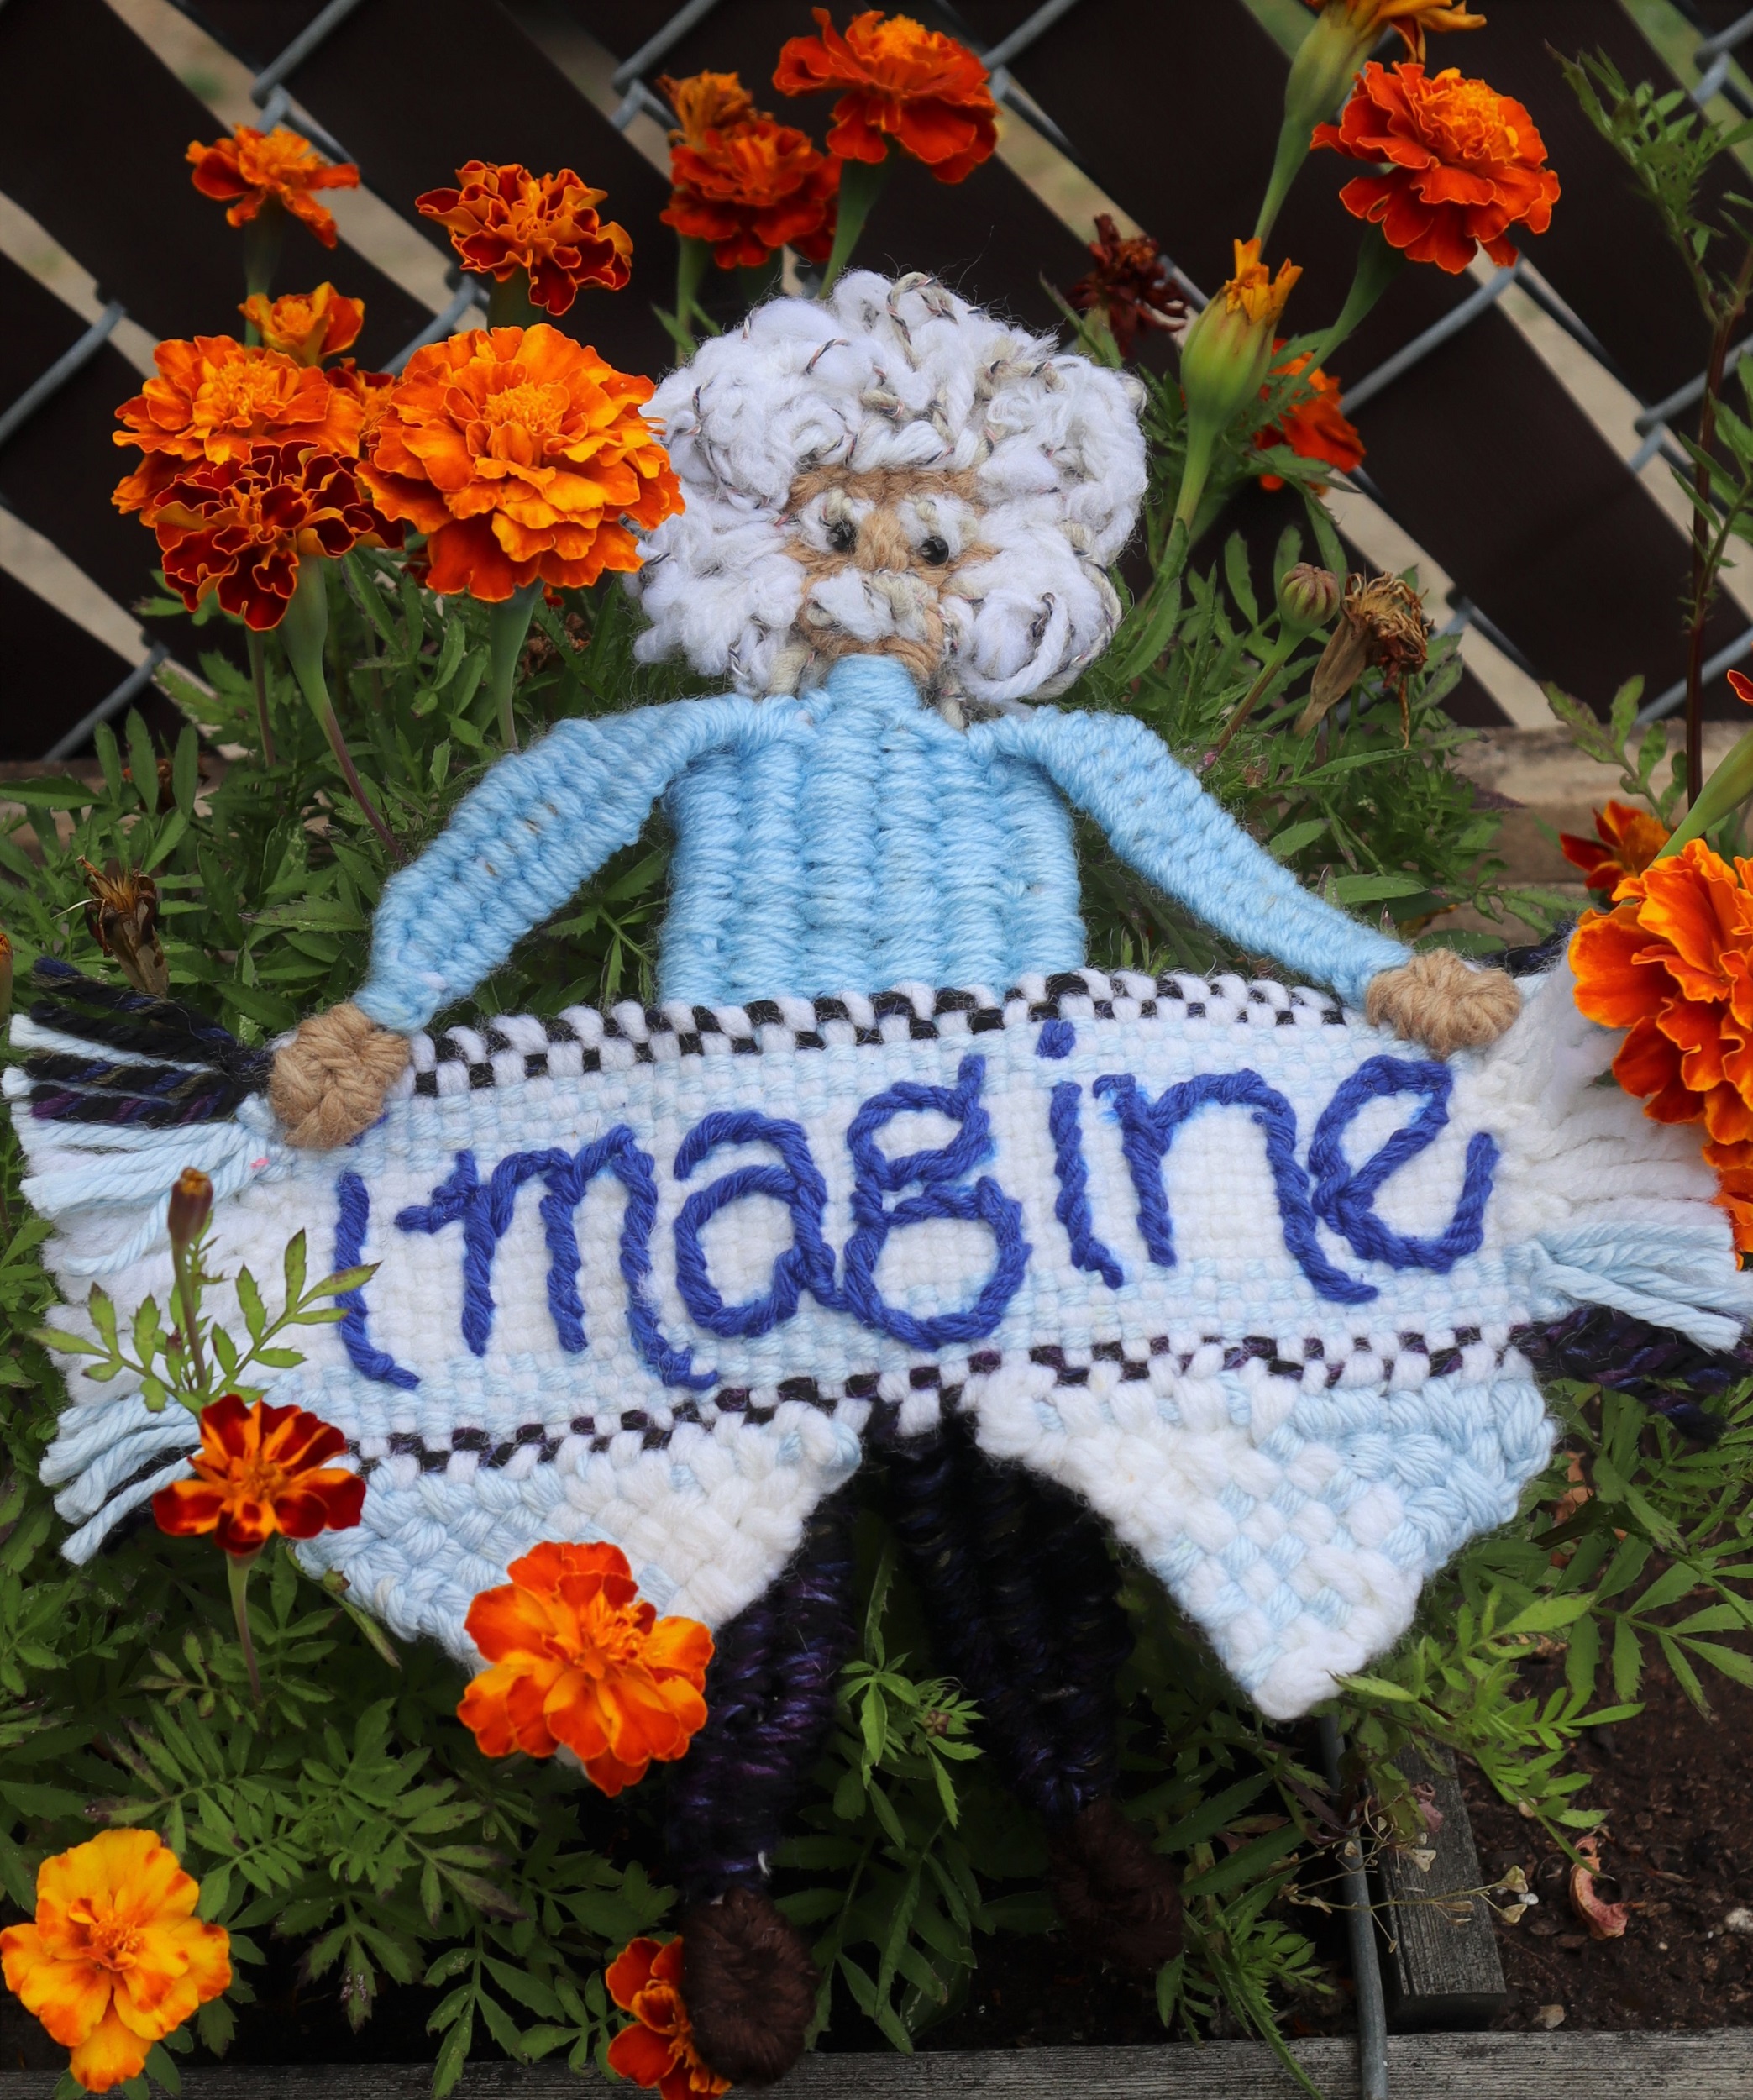
FREE FORM WEAVING: HOMAGE TO ALBERT EINSTEIN:
Albert Einstein is woven (with a few extrapolations and a slight adjustment to the waistline) following the instructions for the Woven Dancer on page 30 of “Innovative Weaving on the Frame Loom”.
In order to hold the pattern onto the loom, a backing board is needed.
INSTRUCTIONS:
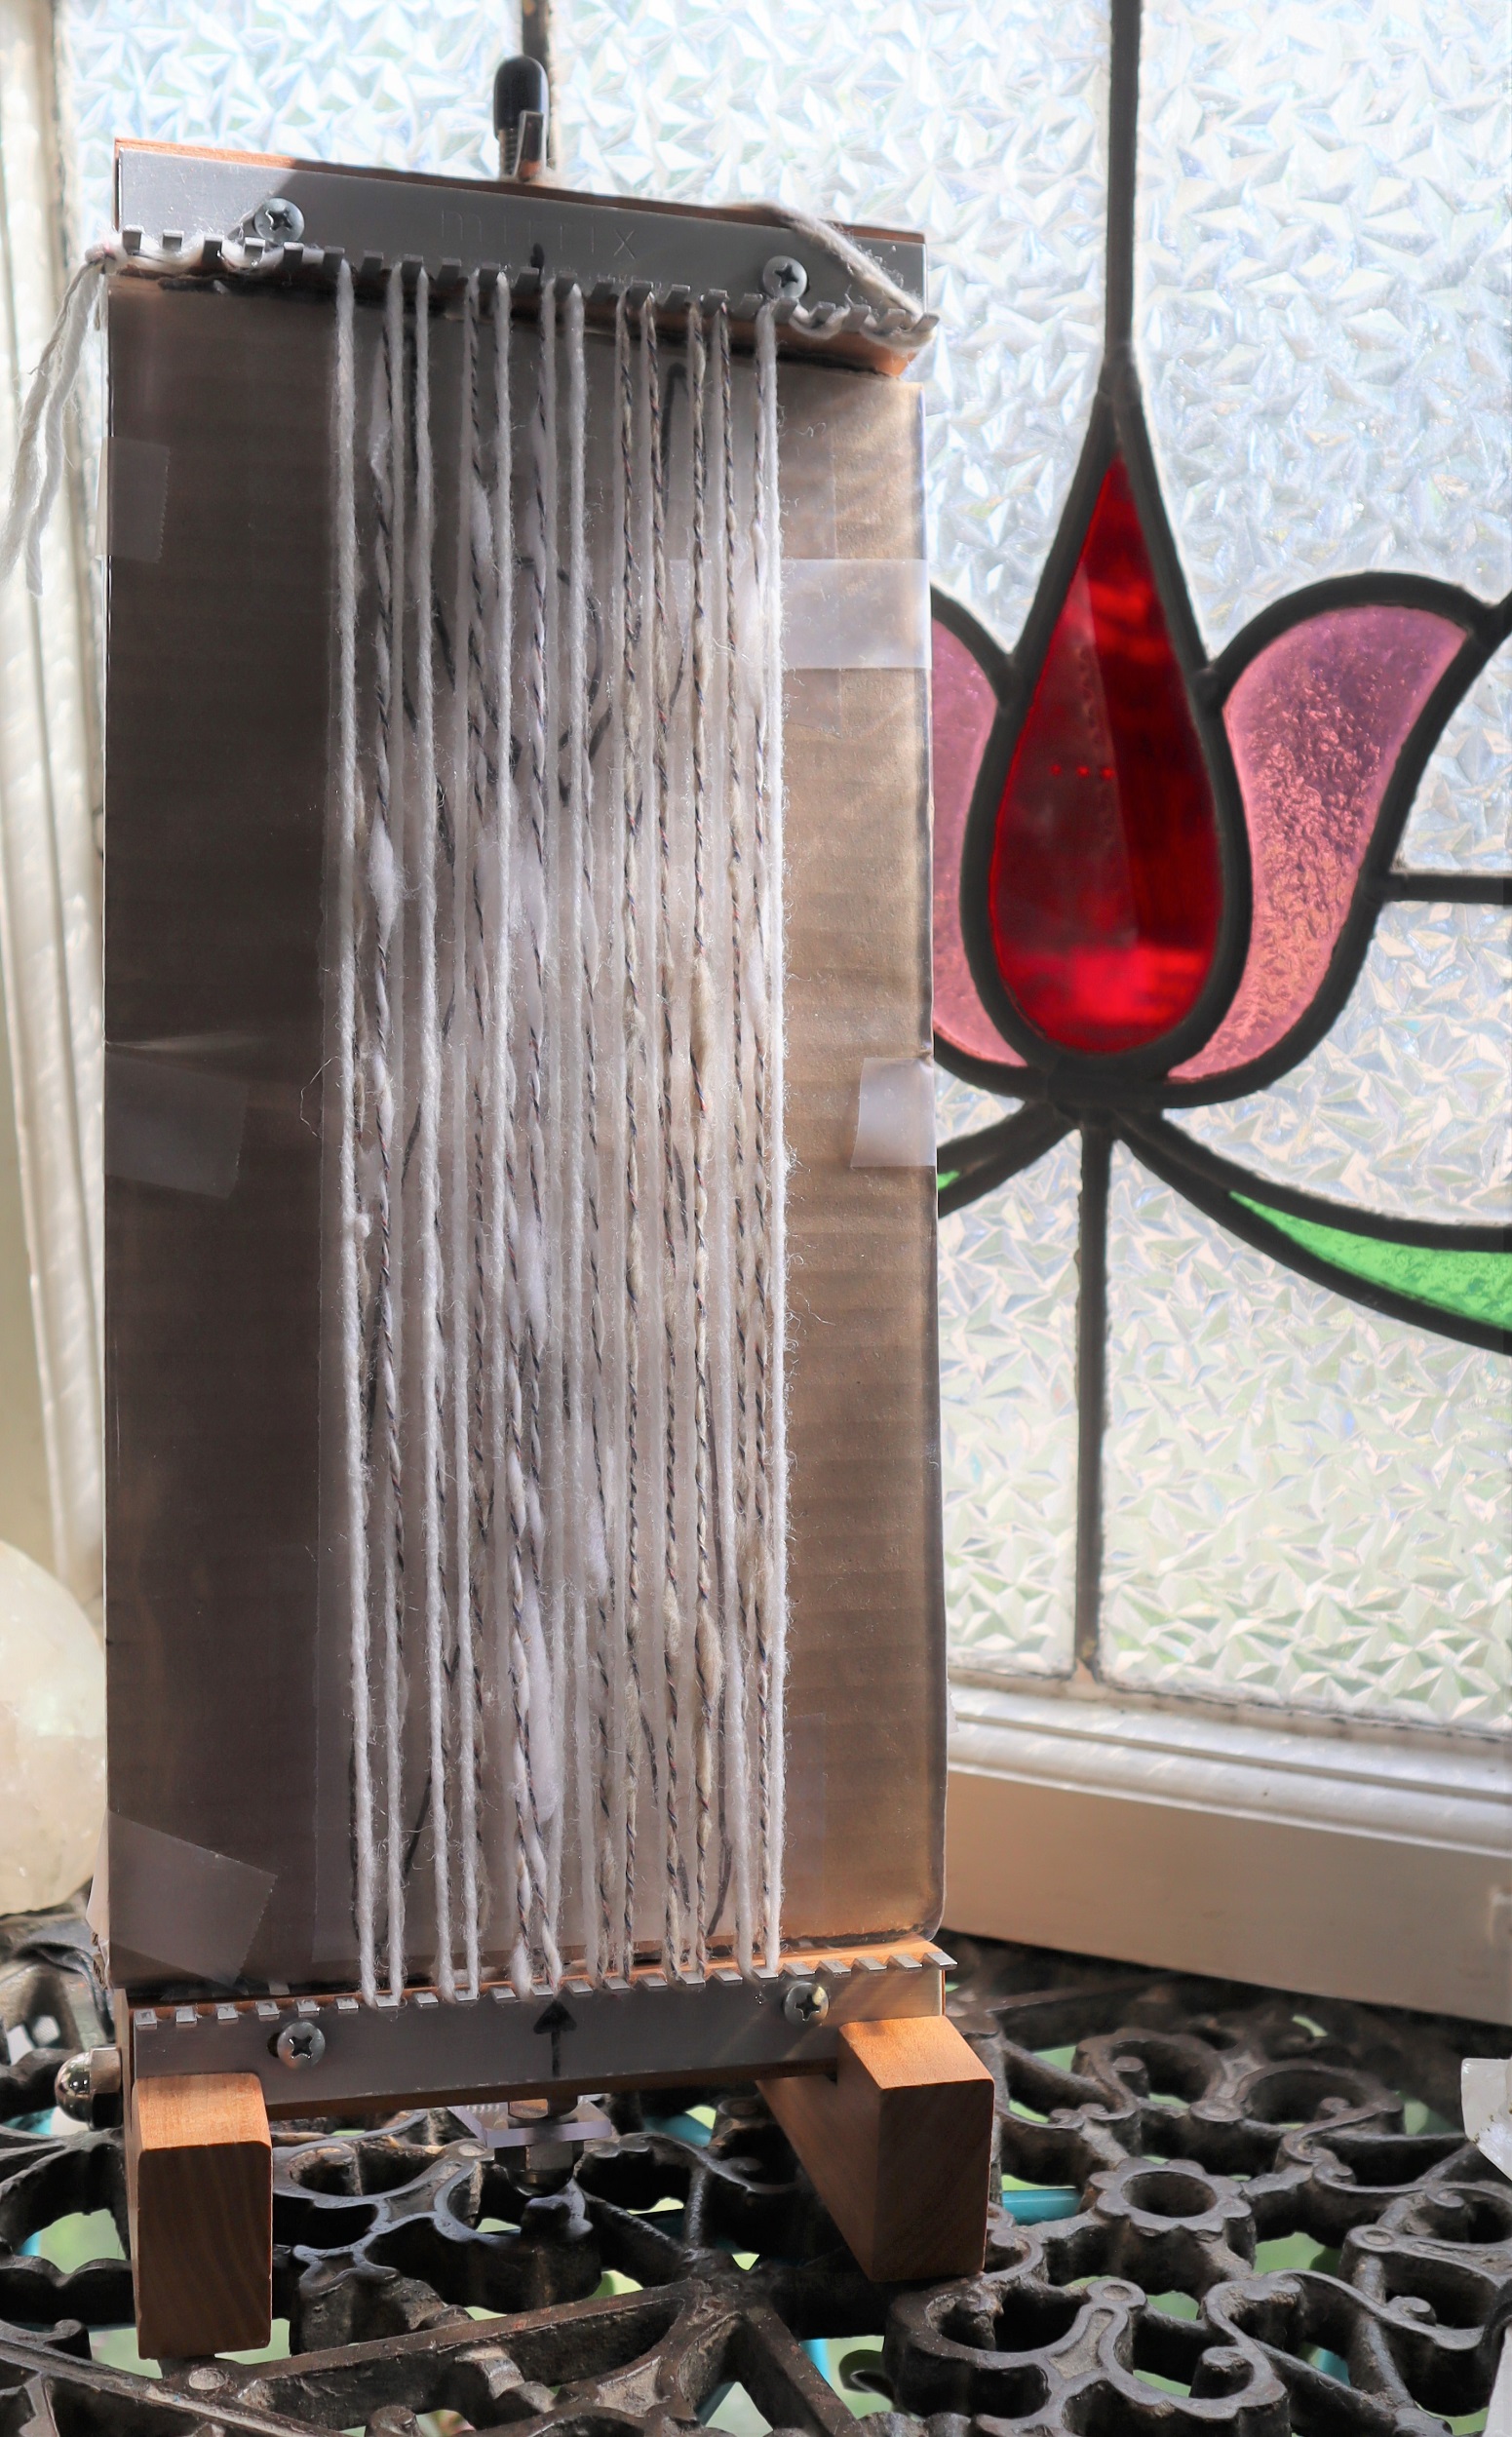
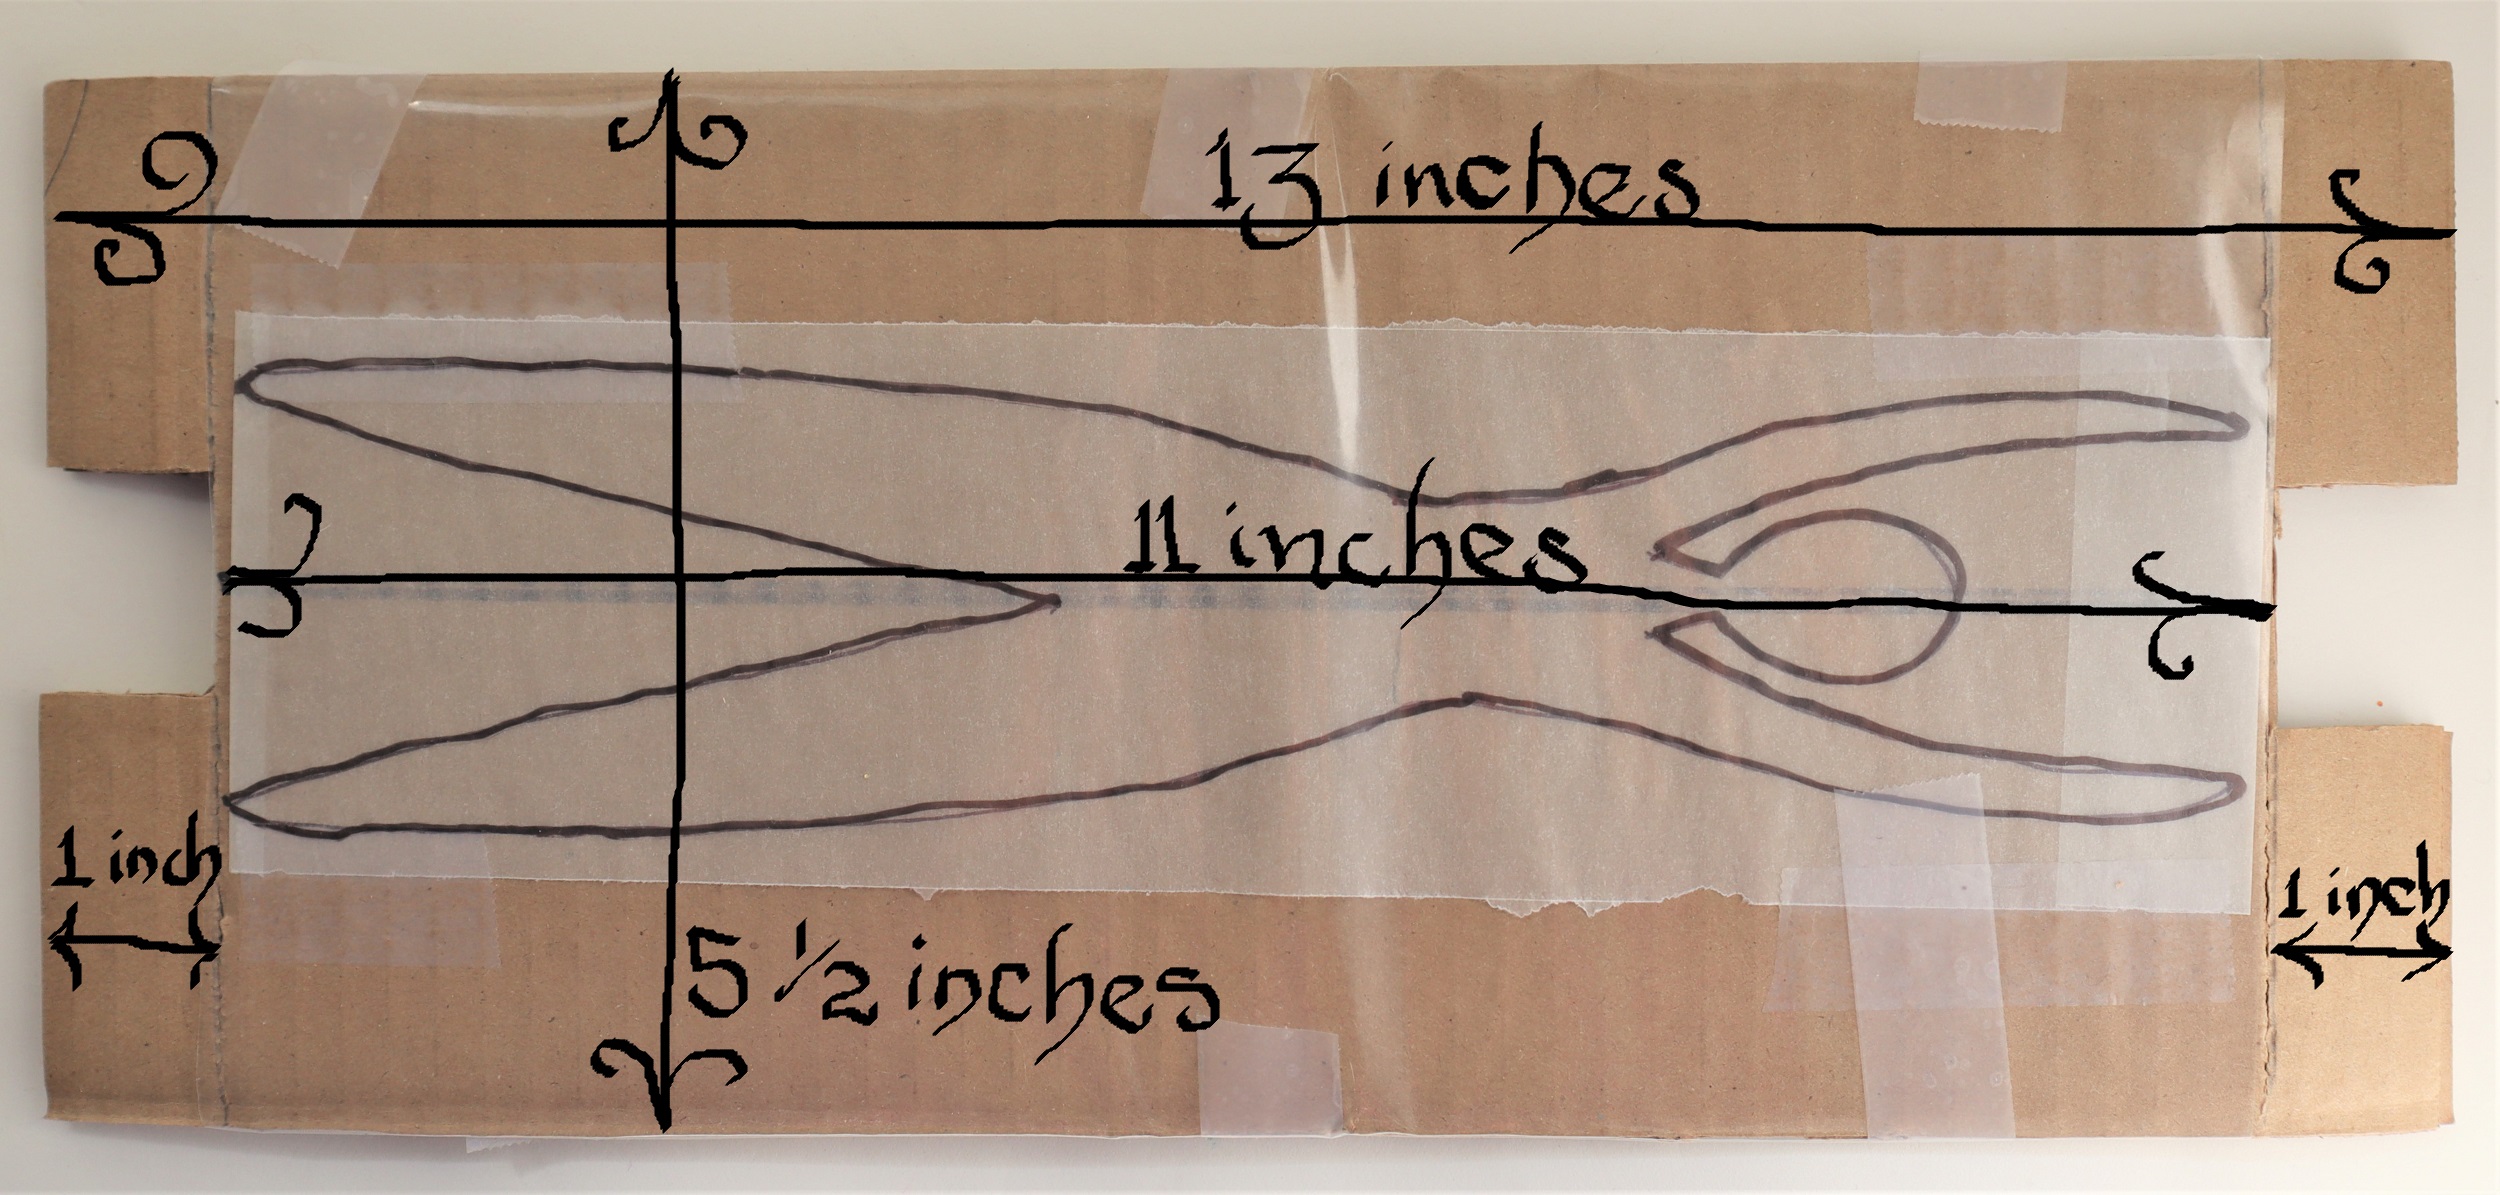
HOW TO MAKE THECARDBOARD BACKING BOARD FOR THE SAFFRON LOOM:
1: With the corrugations running the length of the piece: Cut 2 pieces of corrugated cardboard that are 13 inches/32.5 cm long by 5 1/2 inches/13.75 cm wide.
2: Tape or glue the 2 pieces of cardboard together.
3: Score a line with a ballpoint pen or knitting needle 1 inch/2.5 cm from each end.
4: Cut a notch out of the center of each end piece that is 1 inch/2.5 cm by 1 inch/2.5 cm.
5: Trace the pattern for the largest Woven Dancer onto plain paper or graph paper and center it on the backing board.
6: Tape it in place, then tape a piece of clear plastic, either from recycled plastic or a plastic page protector over the pattern.
To see all the links for the ‘How To’ posts for the “Imagine” Banner Weave along, please go to L I N K S
To order the loom, book and extras kit for the Weave Along from Mirrix, please go to K I T
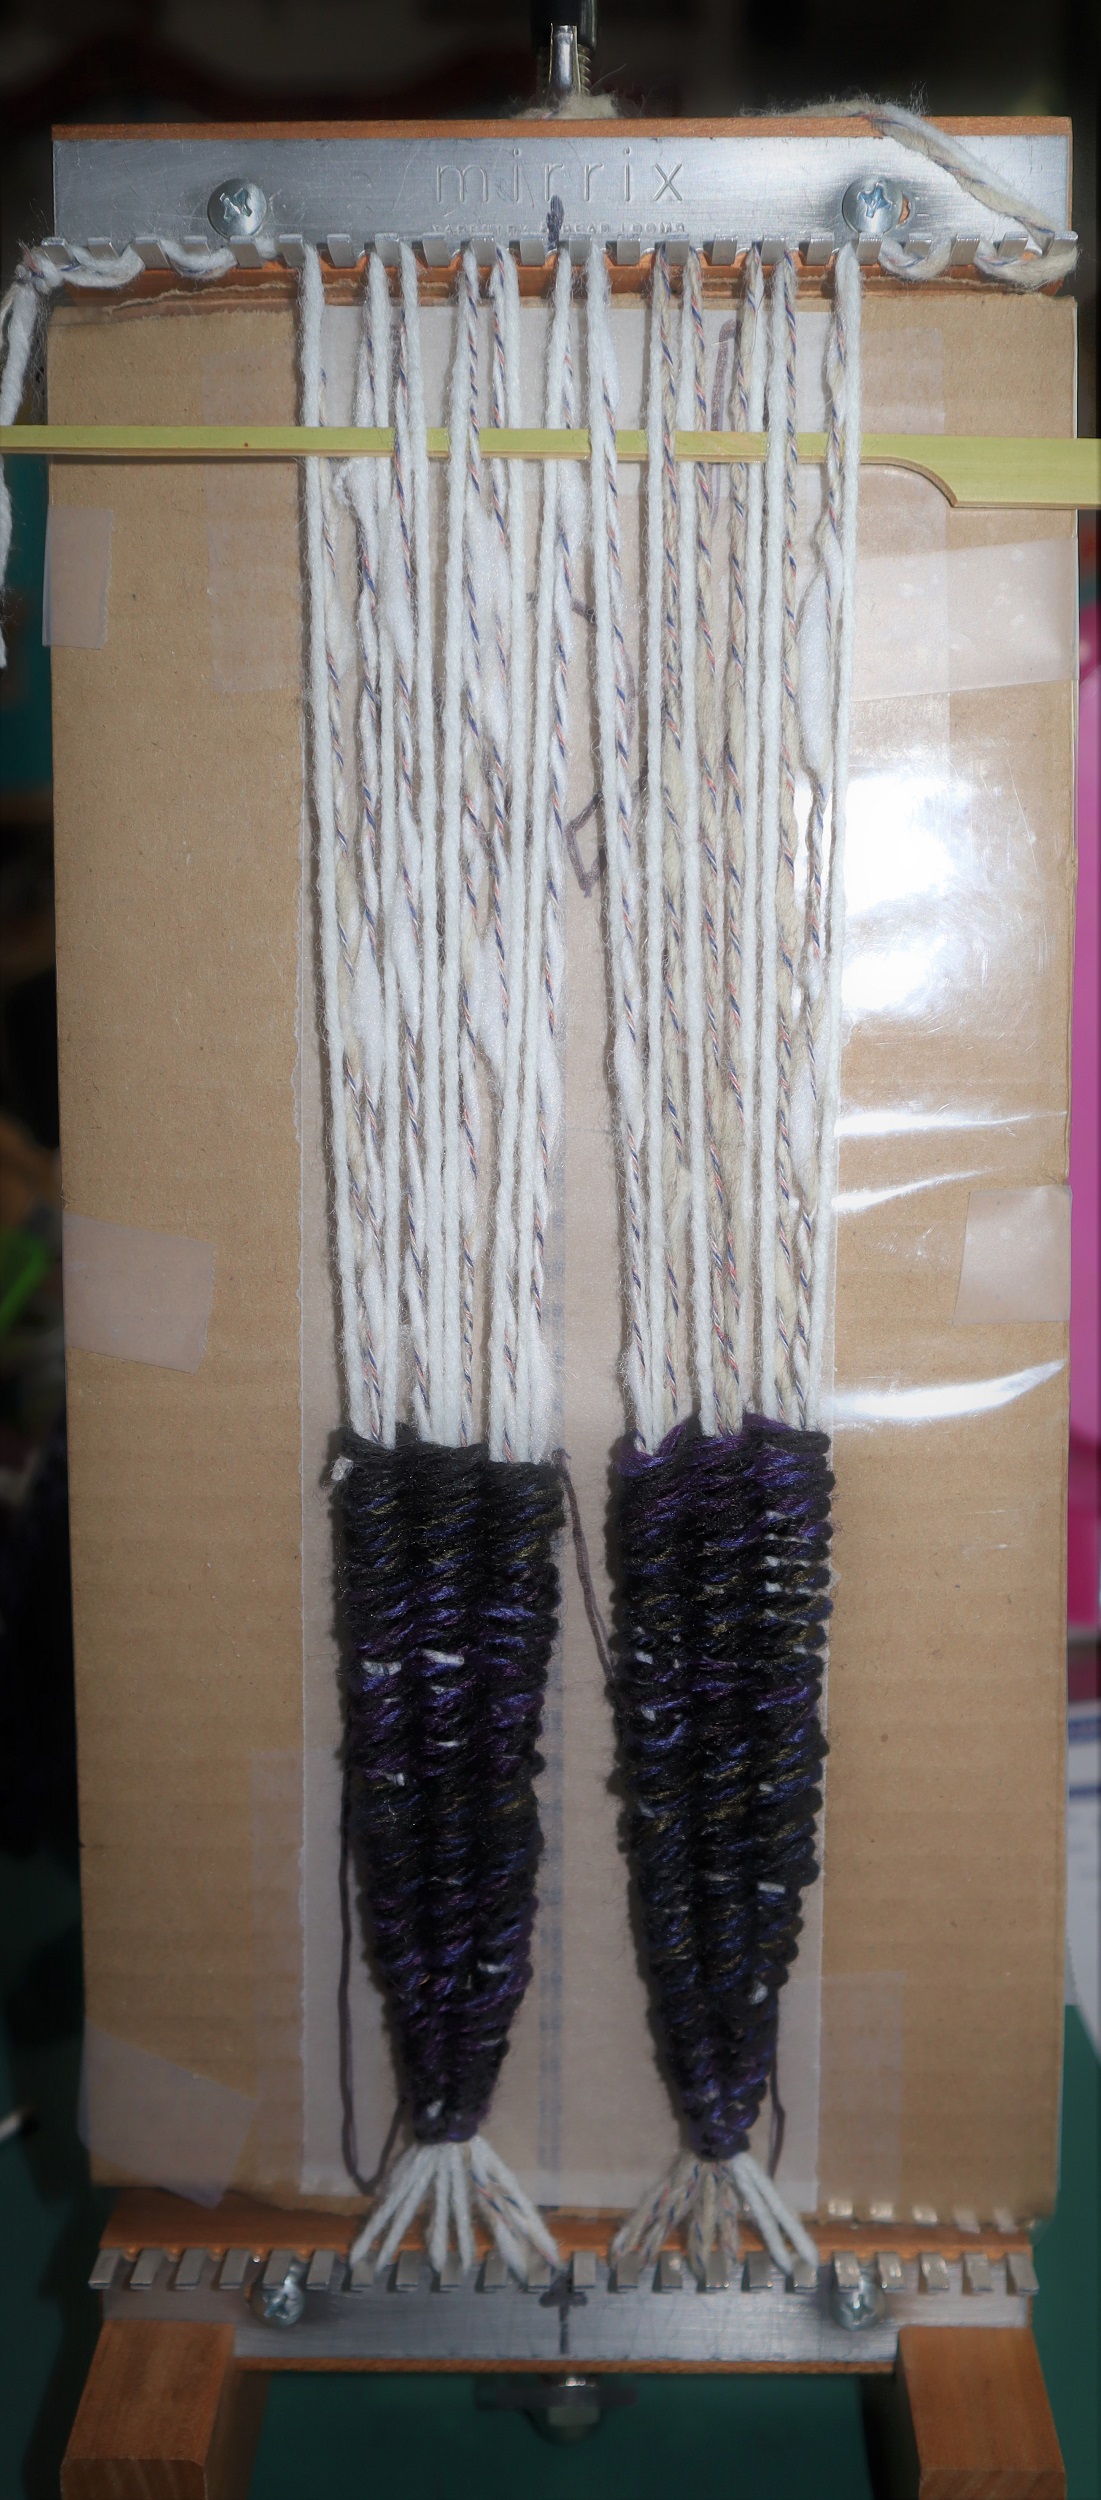
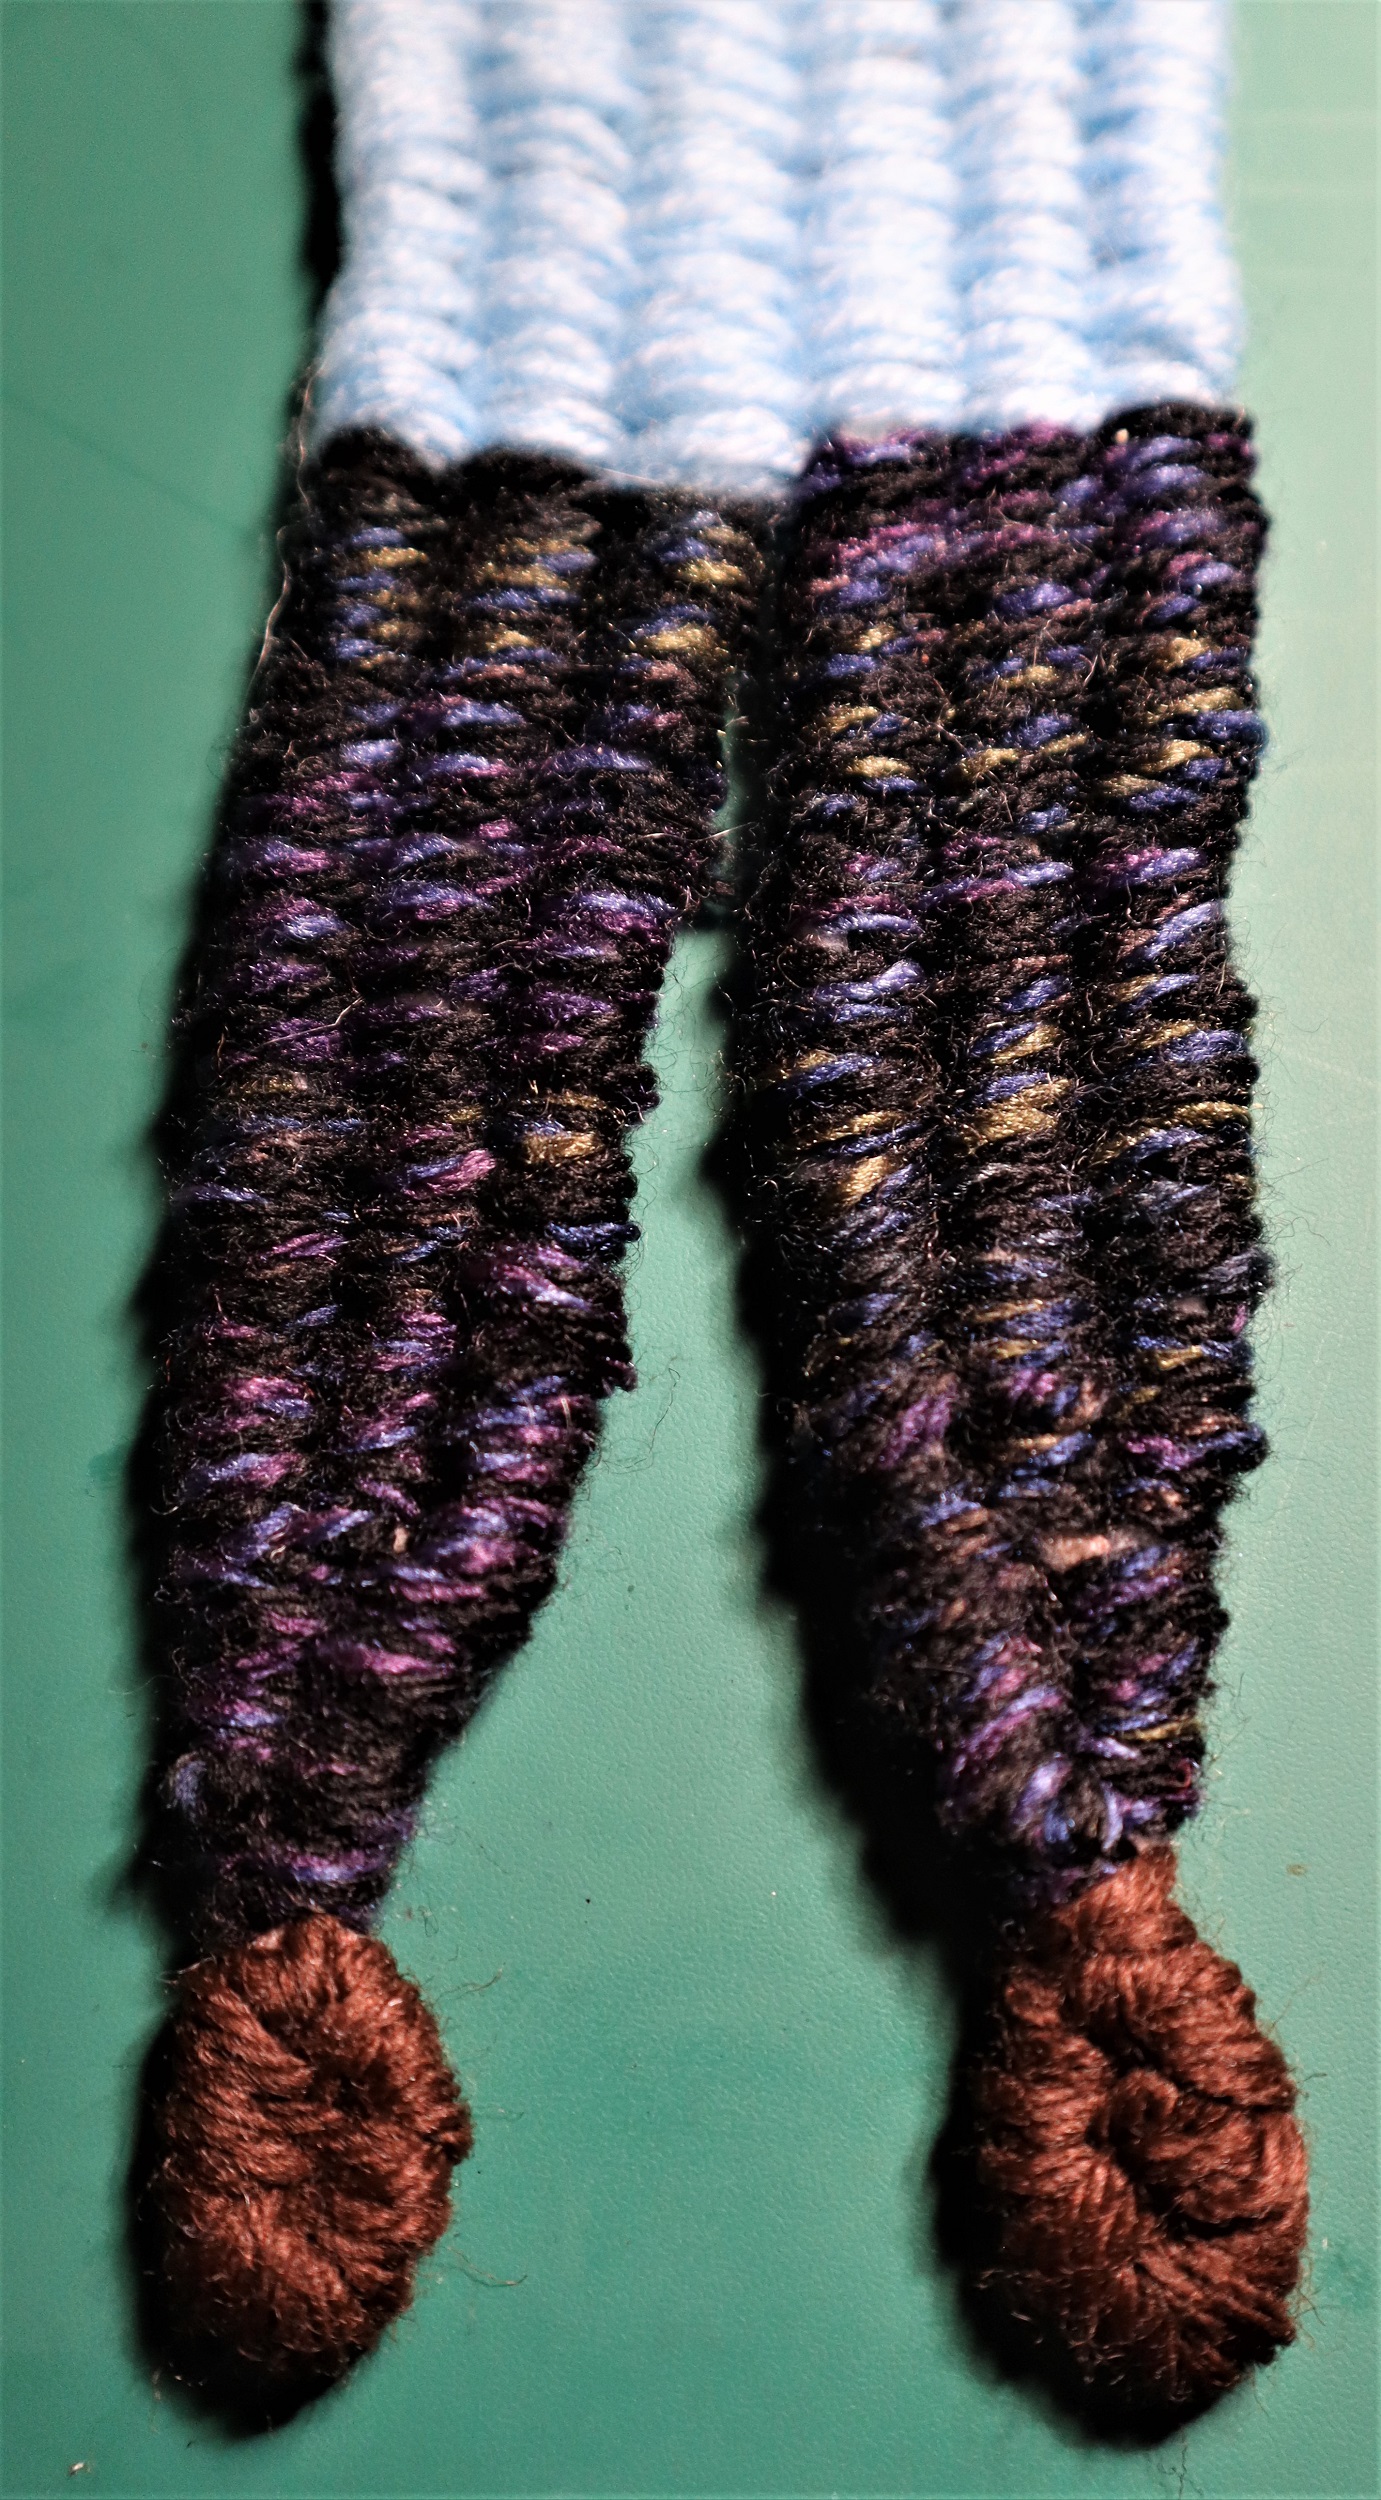
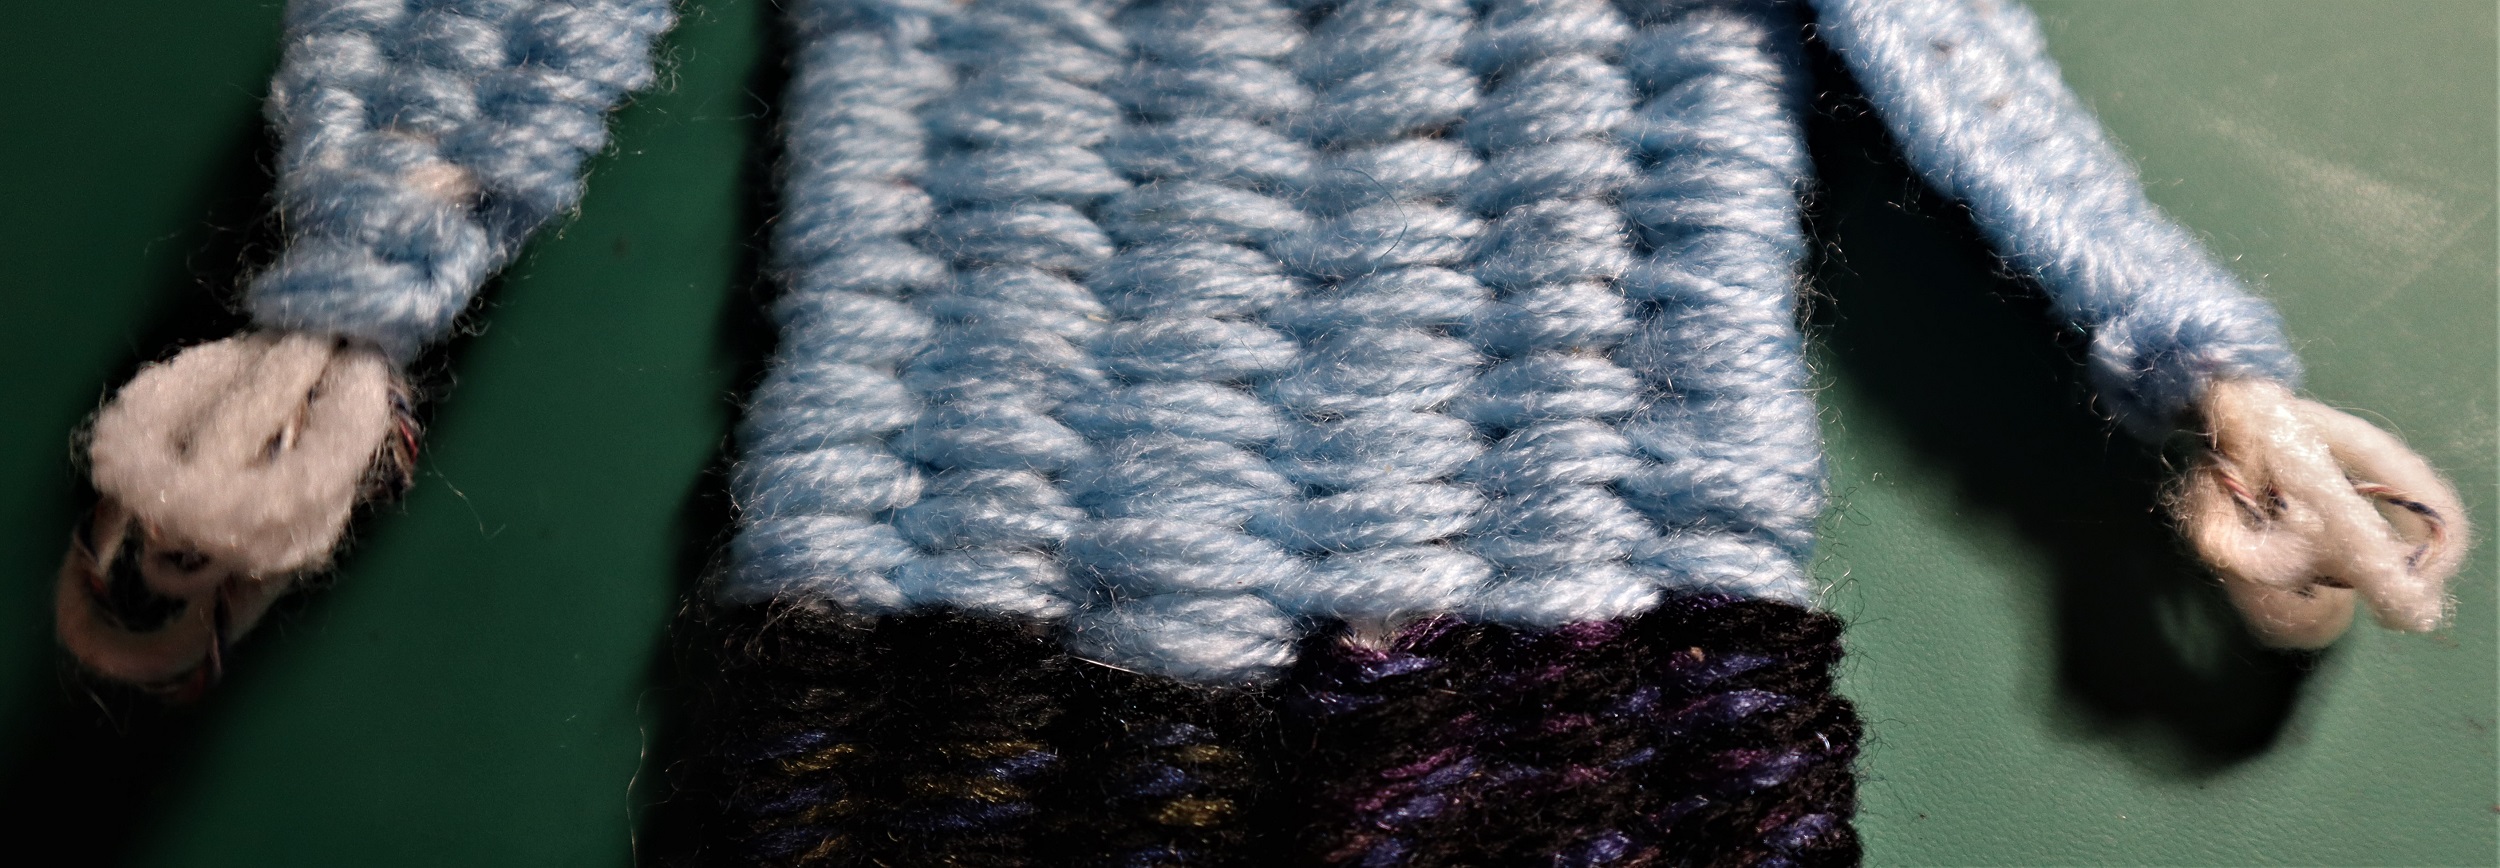
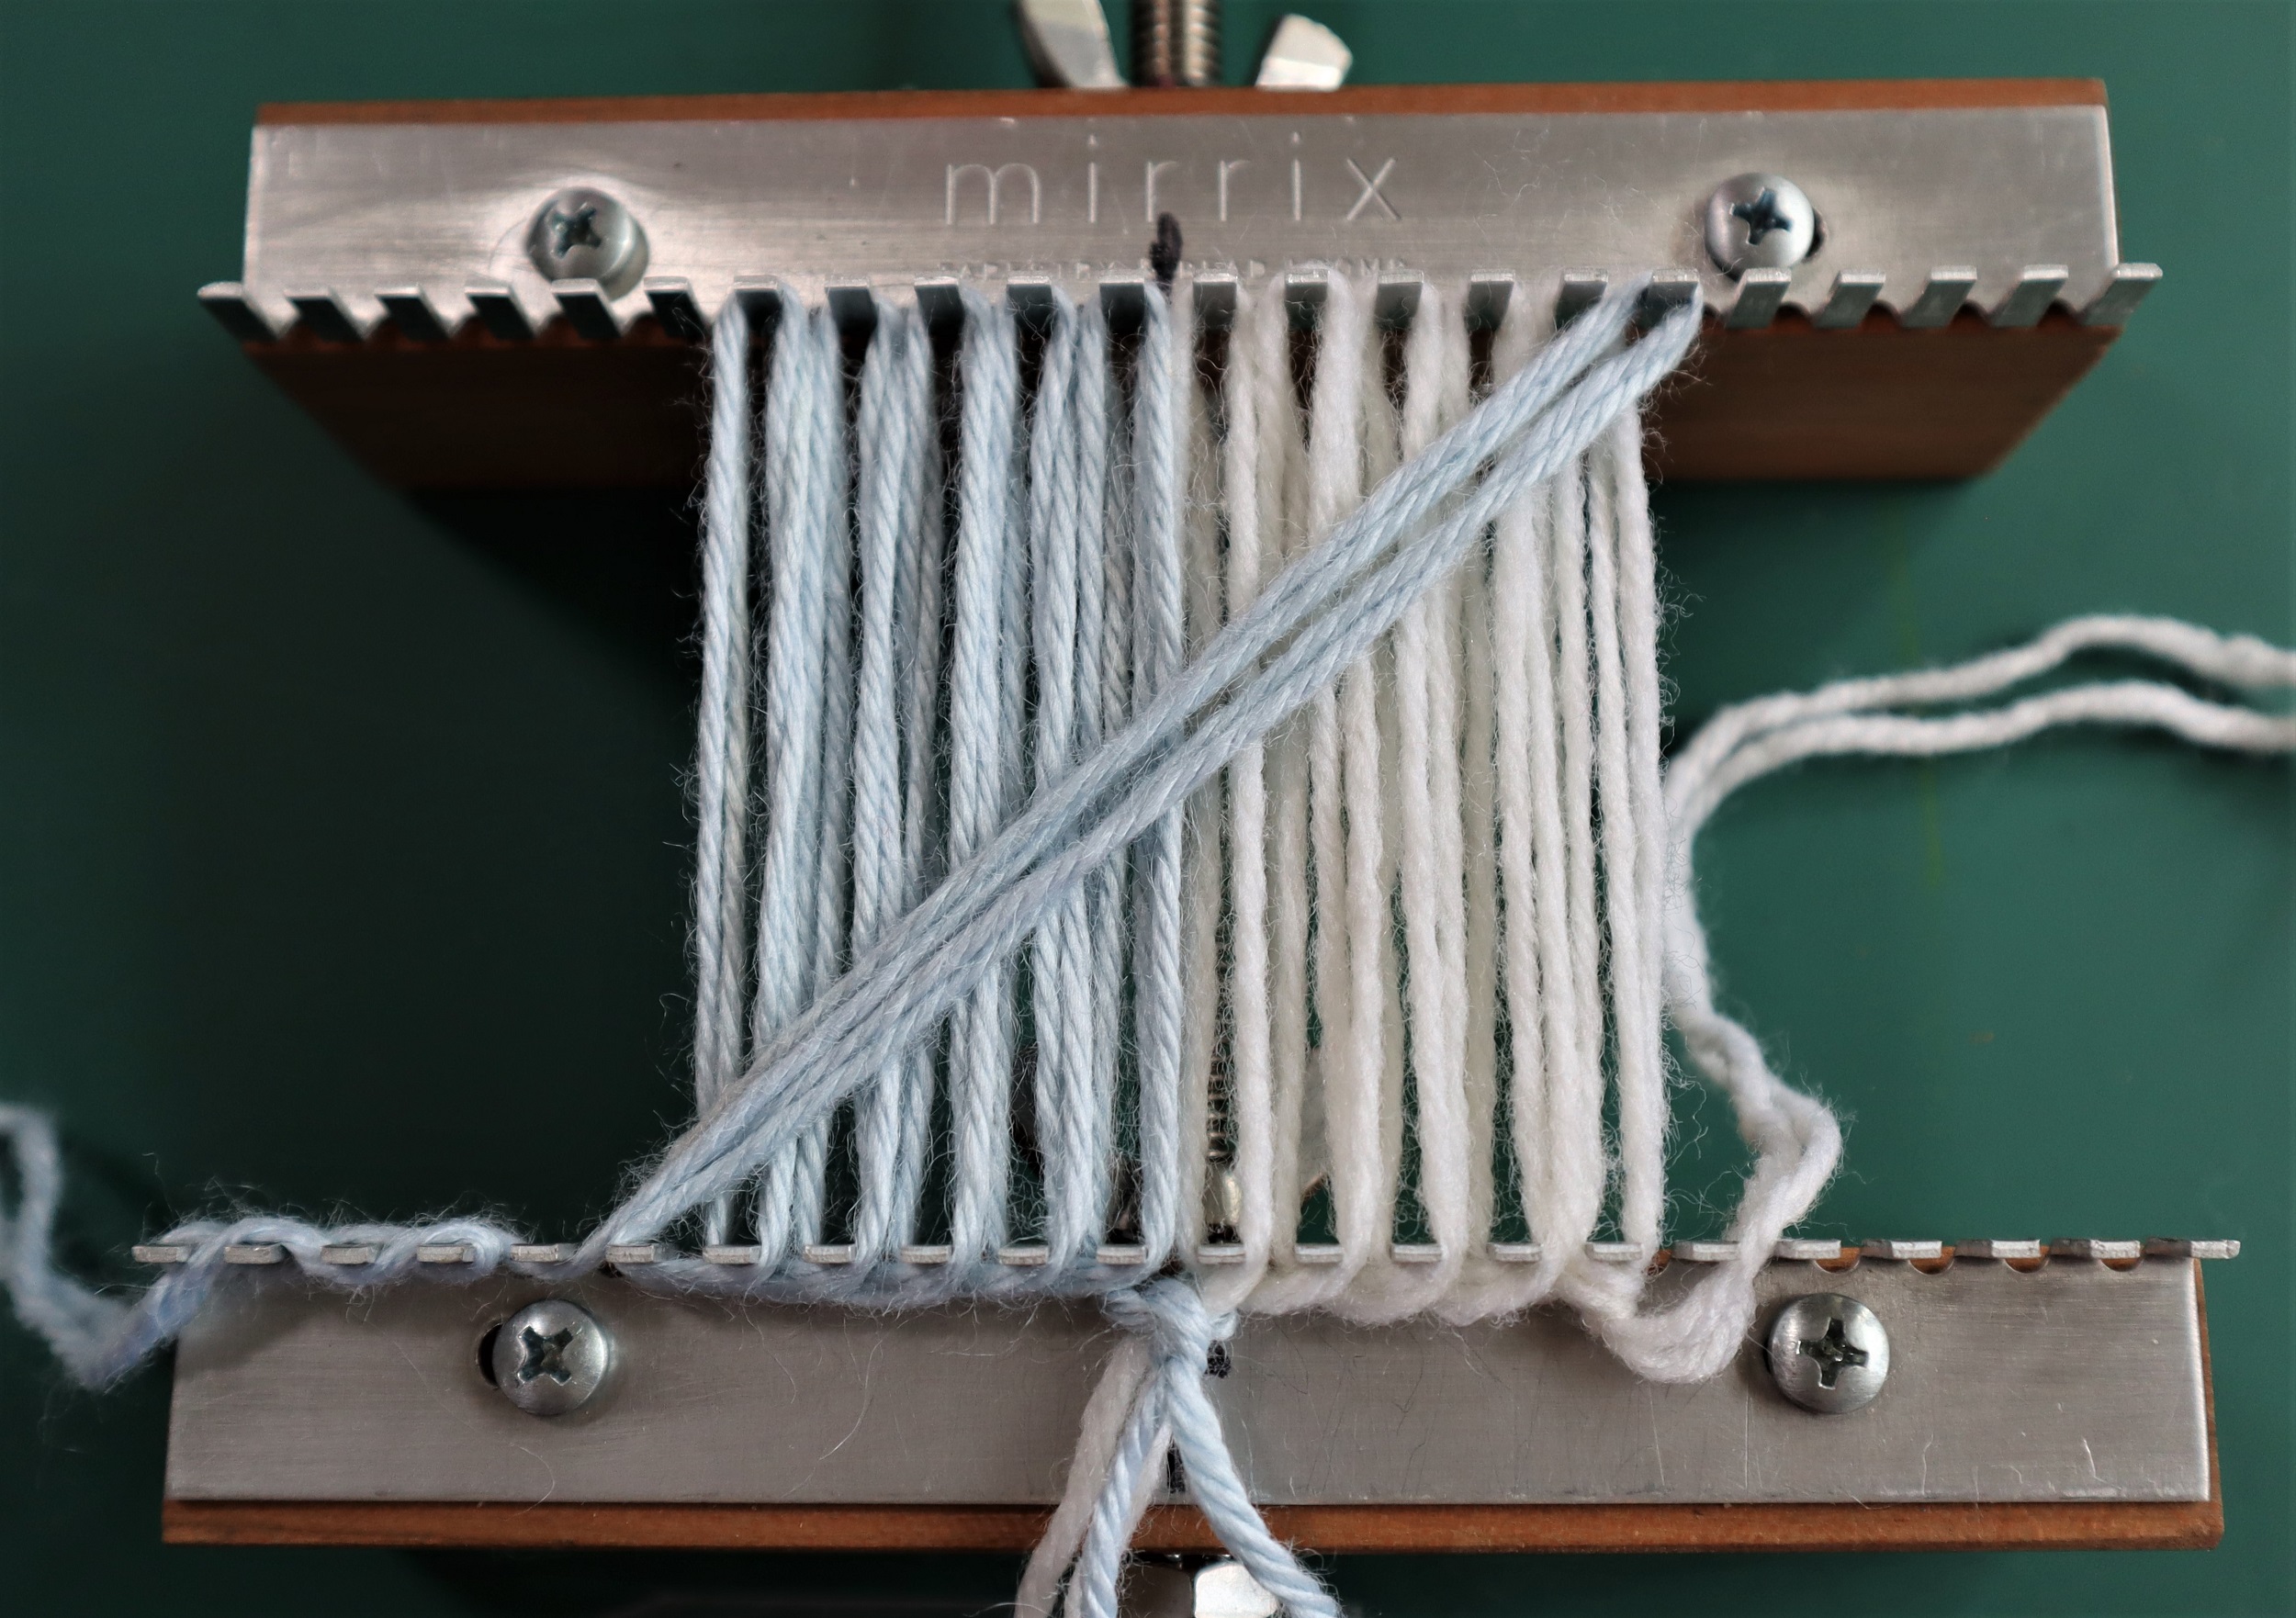
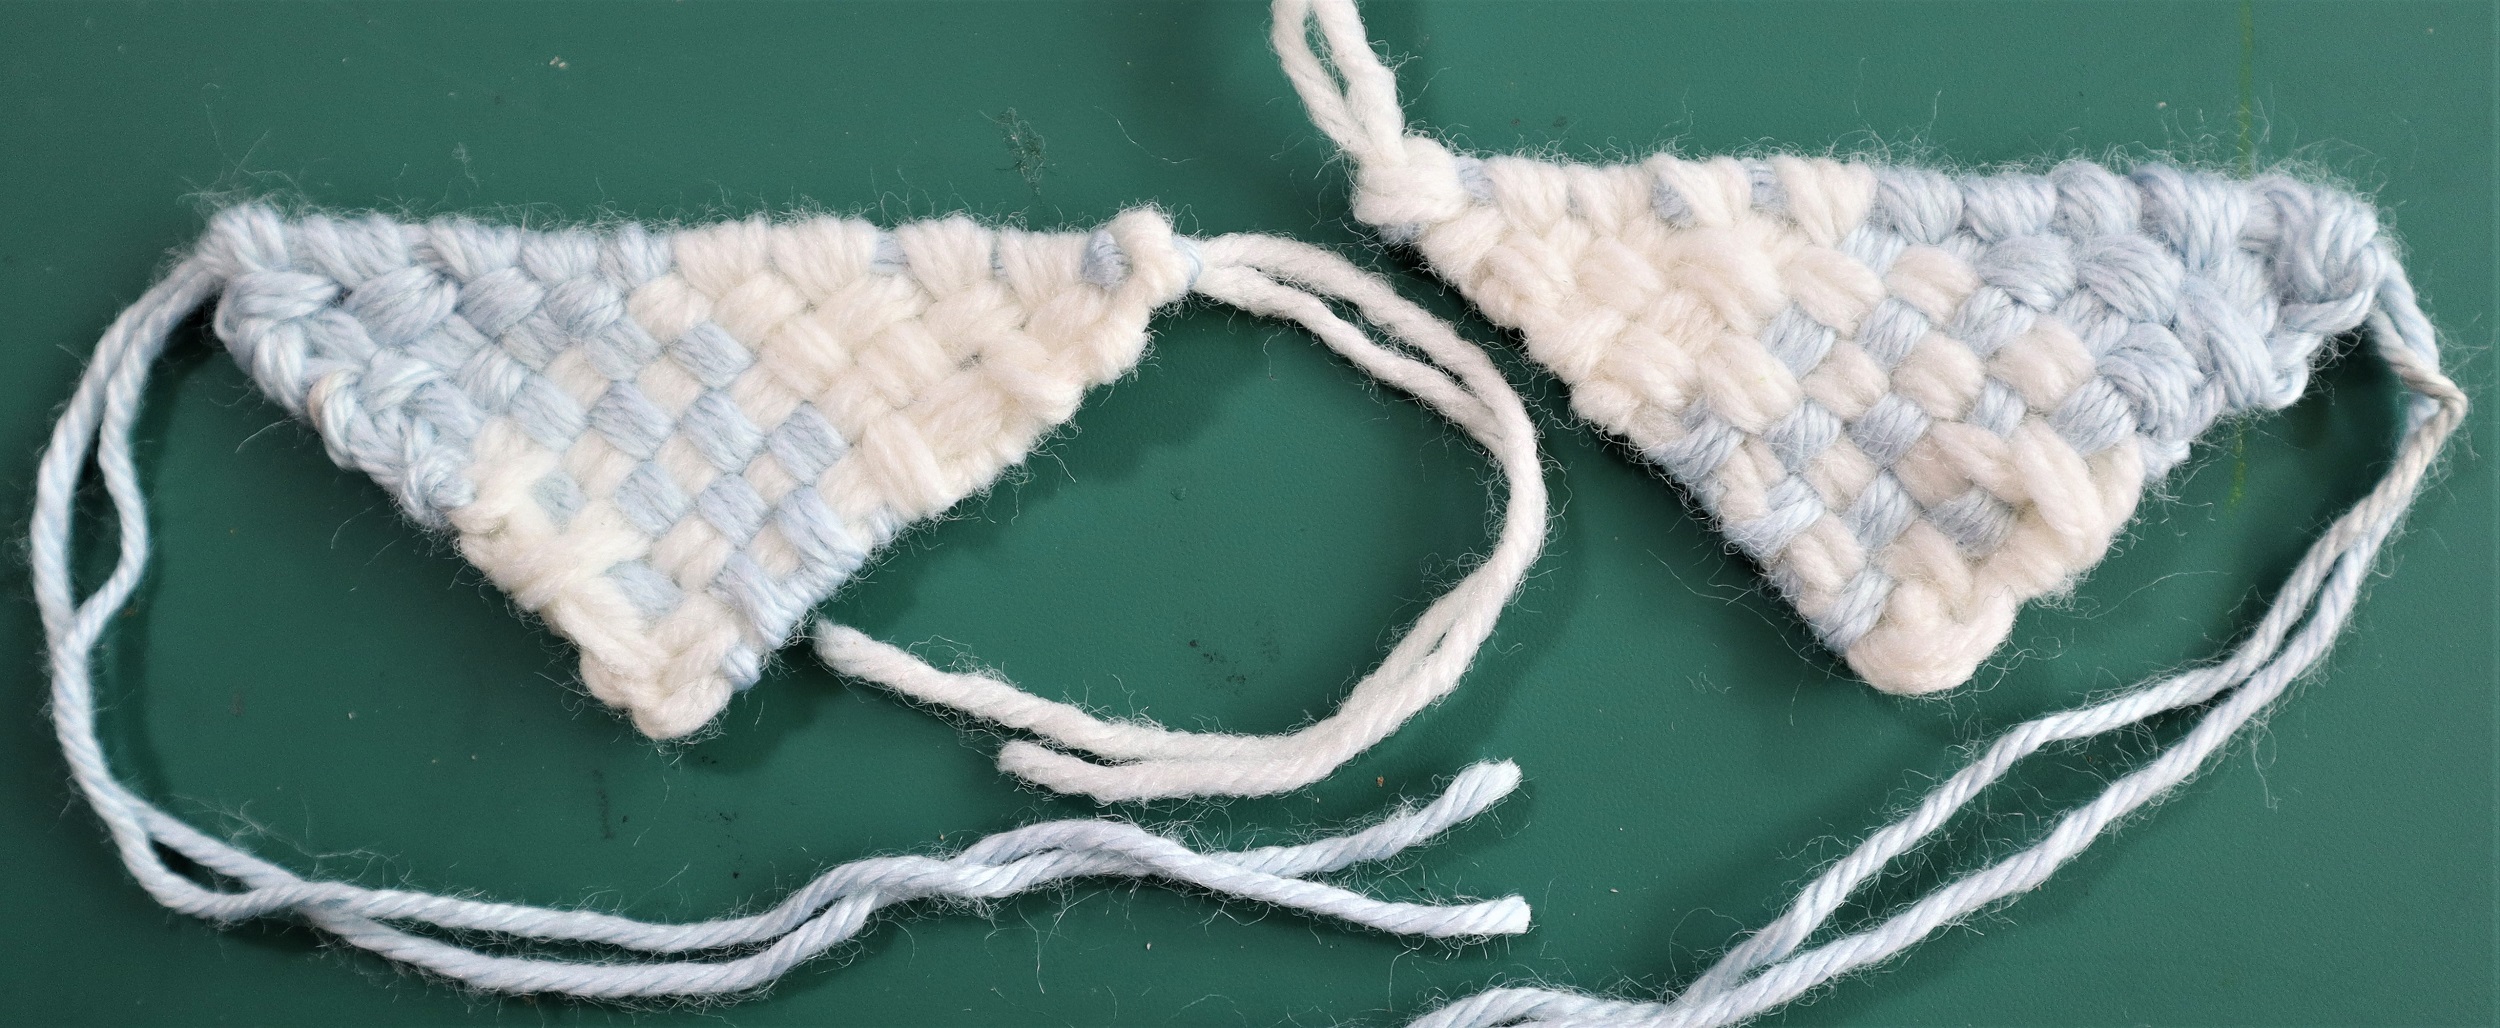
HOW TO WEAVETHE TRIANGLES:
Make 2.
1: SET UP THE LOOM so it is 2 1/2 inches (approximately 6.25 cm) from the lower set of pegs to the upper set. Lock it into the ‘Sandy Stand’.
2: WARP THE LOOM: Following the instructions for warping the Triangle on page 82 of ‘Innovative Weaving on the Frame Loom’, leave 6 sets of pegs at both sides open so just the center 10 pegs are used: Begin at the right hand side.
With 2 strands of white yarn held together as if it is one strand, and 2 strands of pale blue yarn as if it is a single strand, put on 5 loops of white warp strands and then, 5 loops of blue yarn. Cut and tie a knot in the middle.
Diagonal:
Take the blue yarn around the lower left hand peg beside the warp strands up to and around the peg that is adjacent to the warp strands at the top right hand peg
Weave the end of the blue yarn around the lower left hand pegs, back and forth to secure it, then snip the end off.
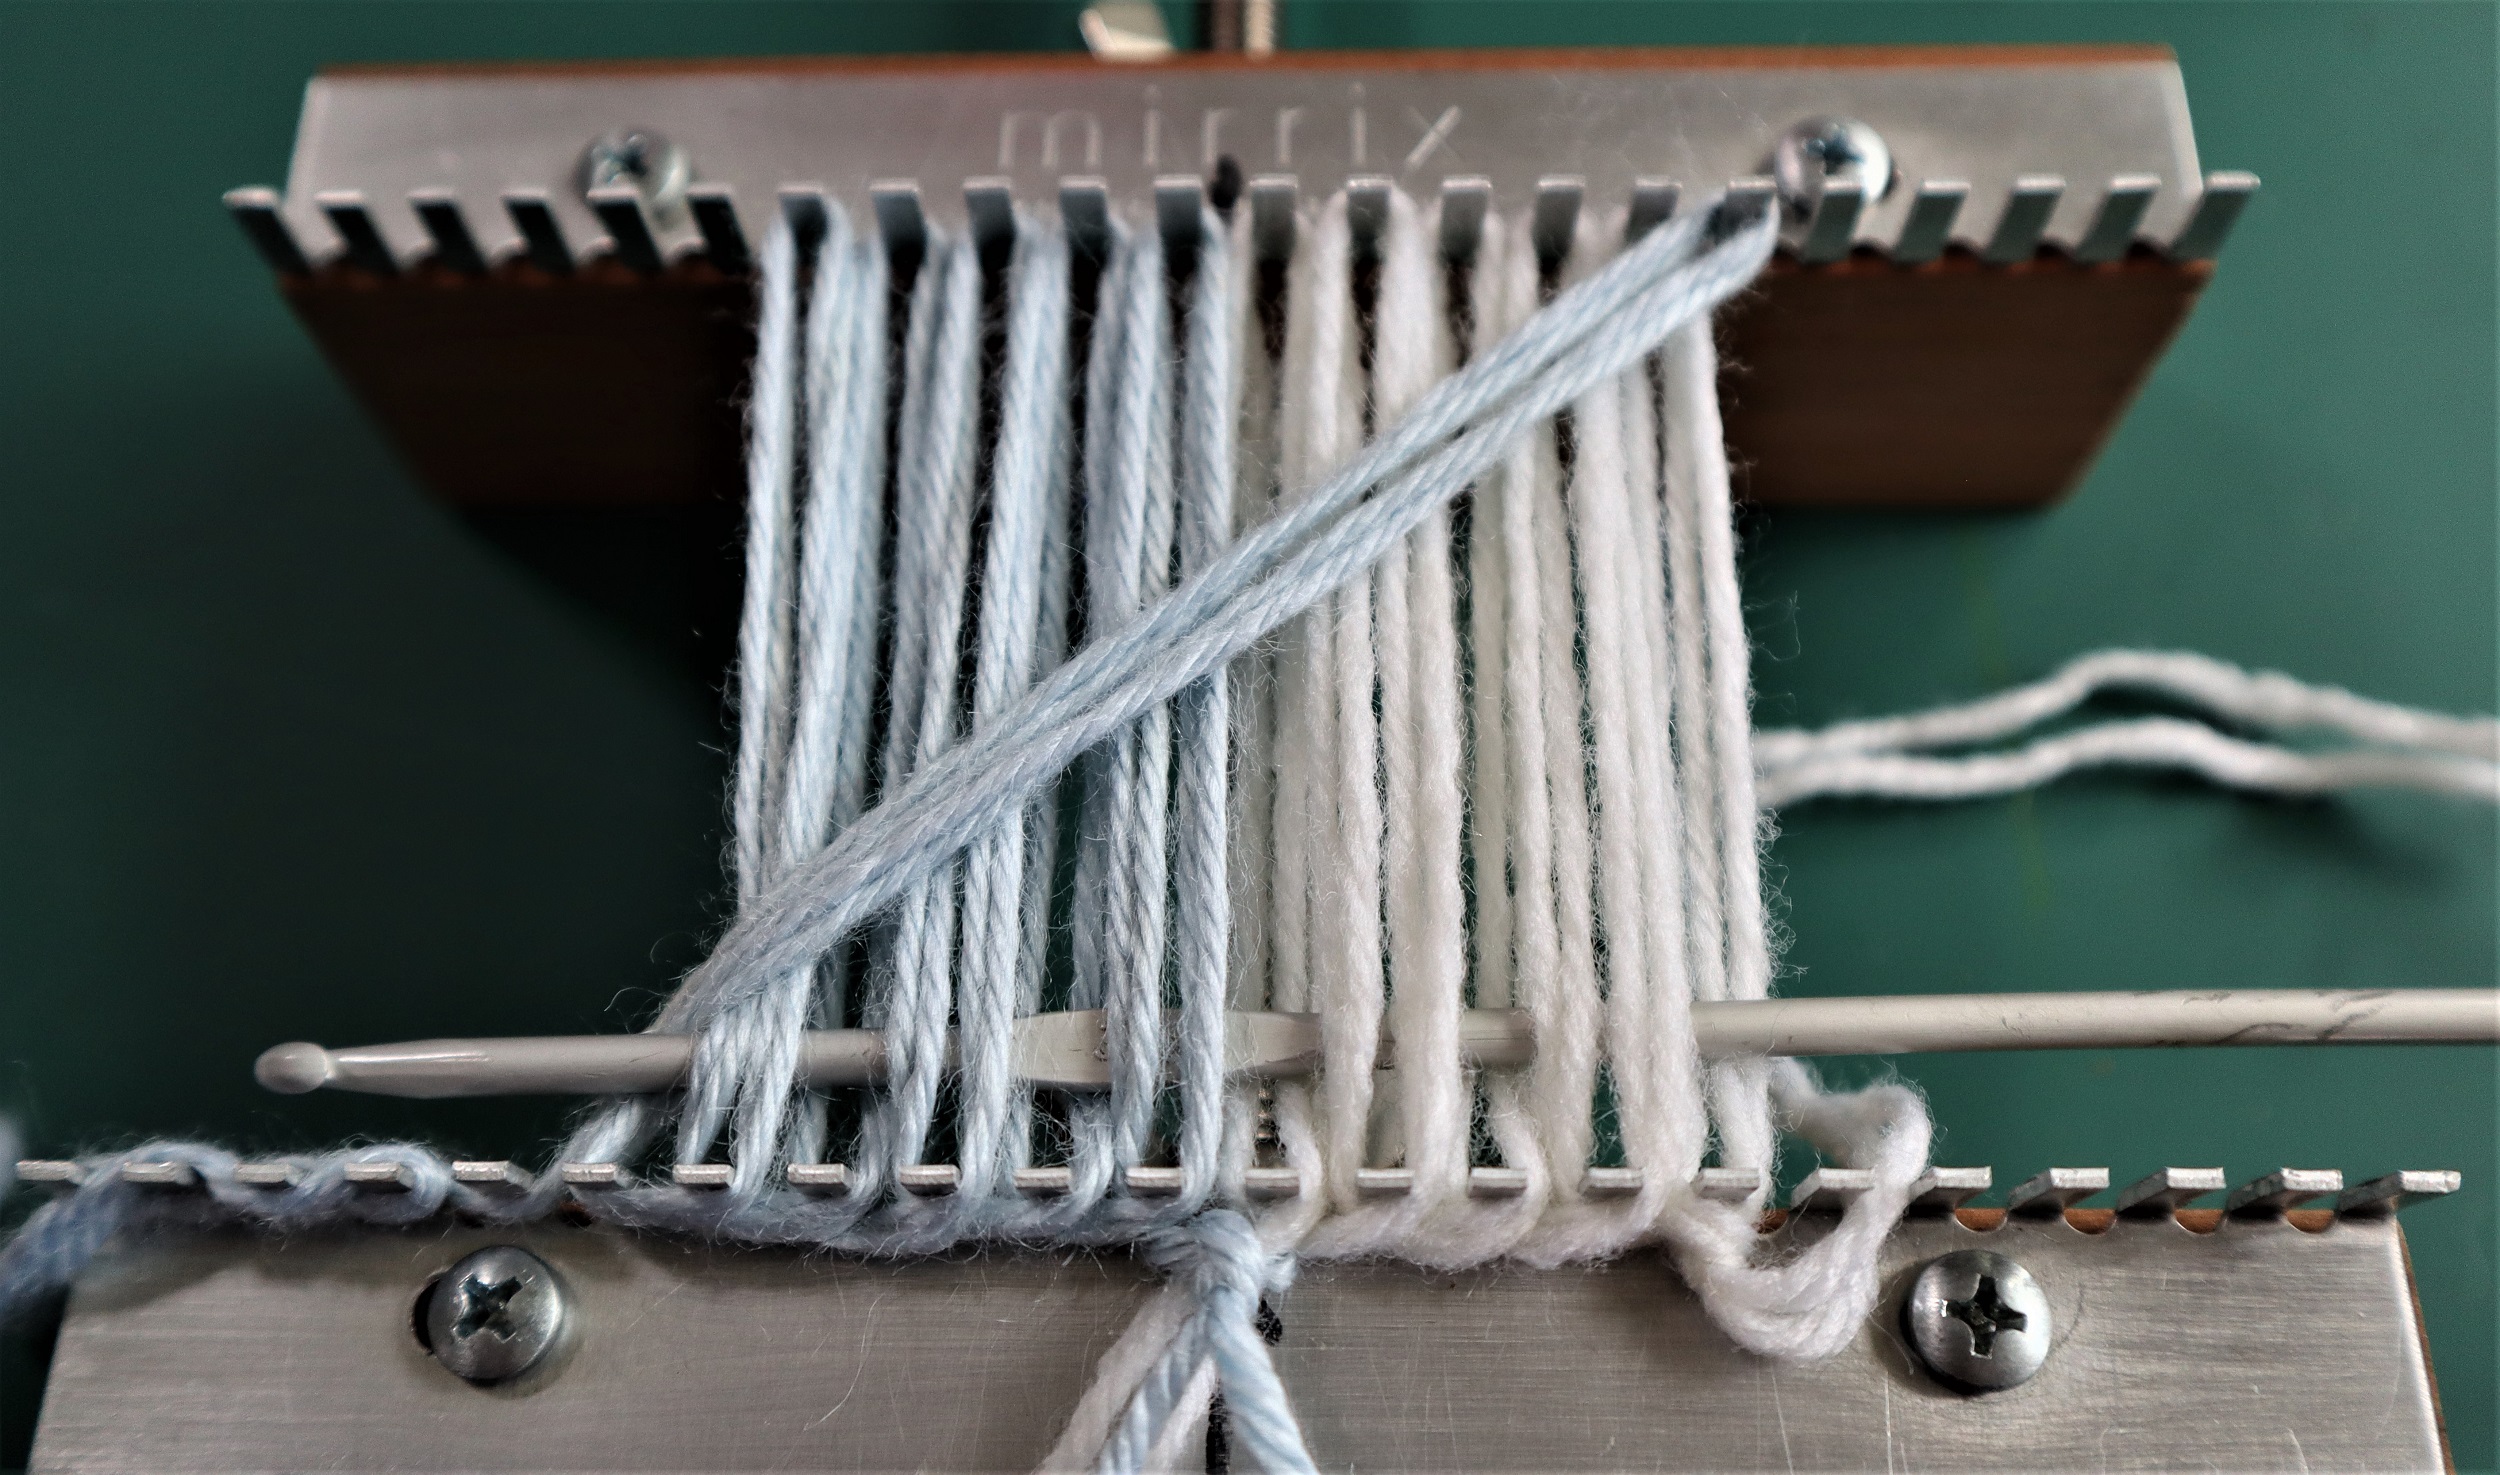
3: WEAVE:
Follow the instructions in the book to weave the triangle, using a crochet hook. Repeat for the second triangle.
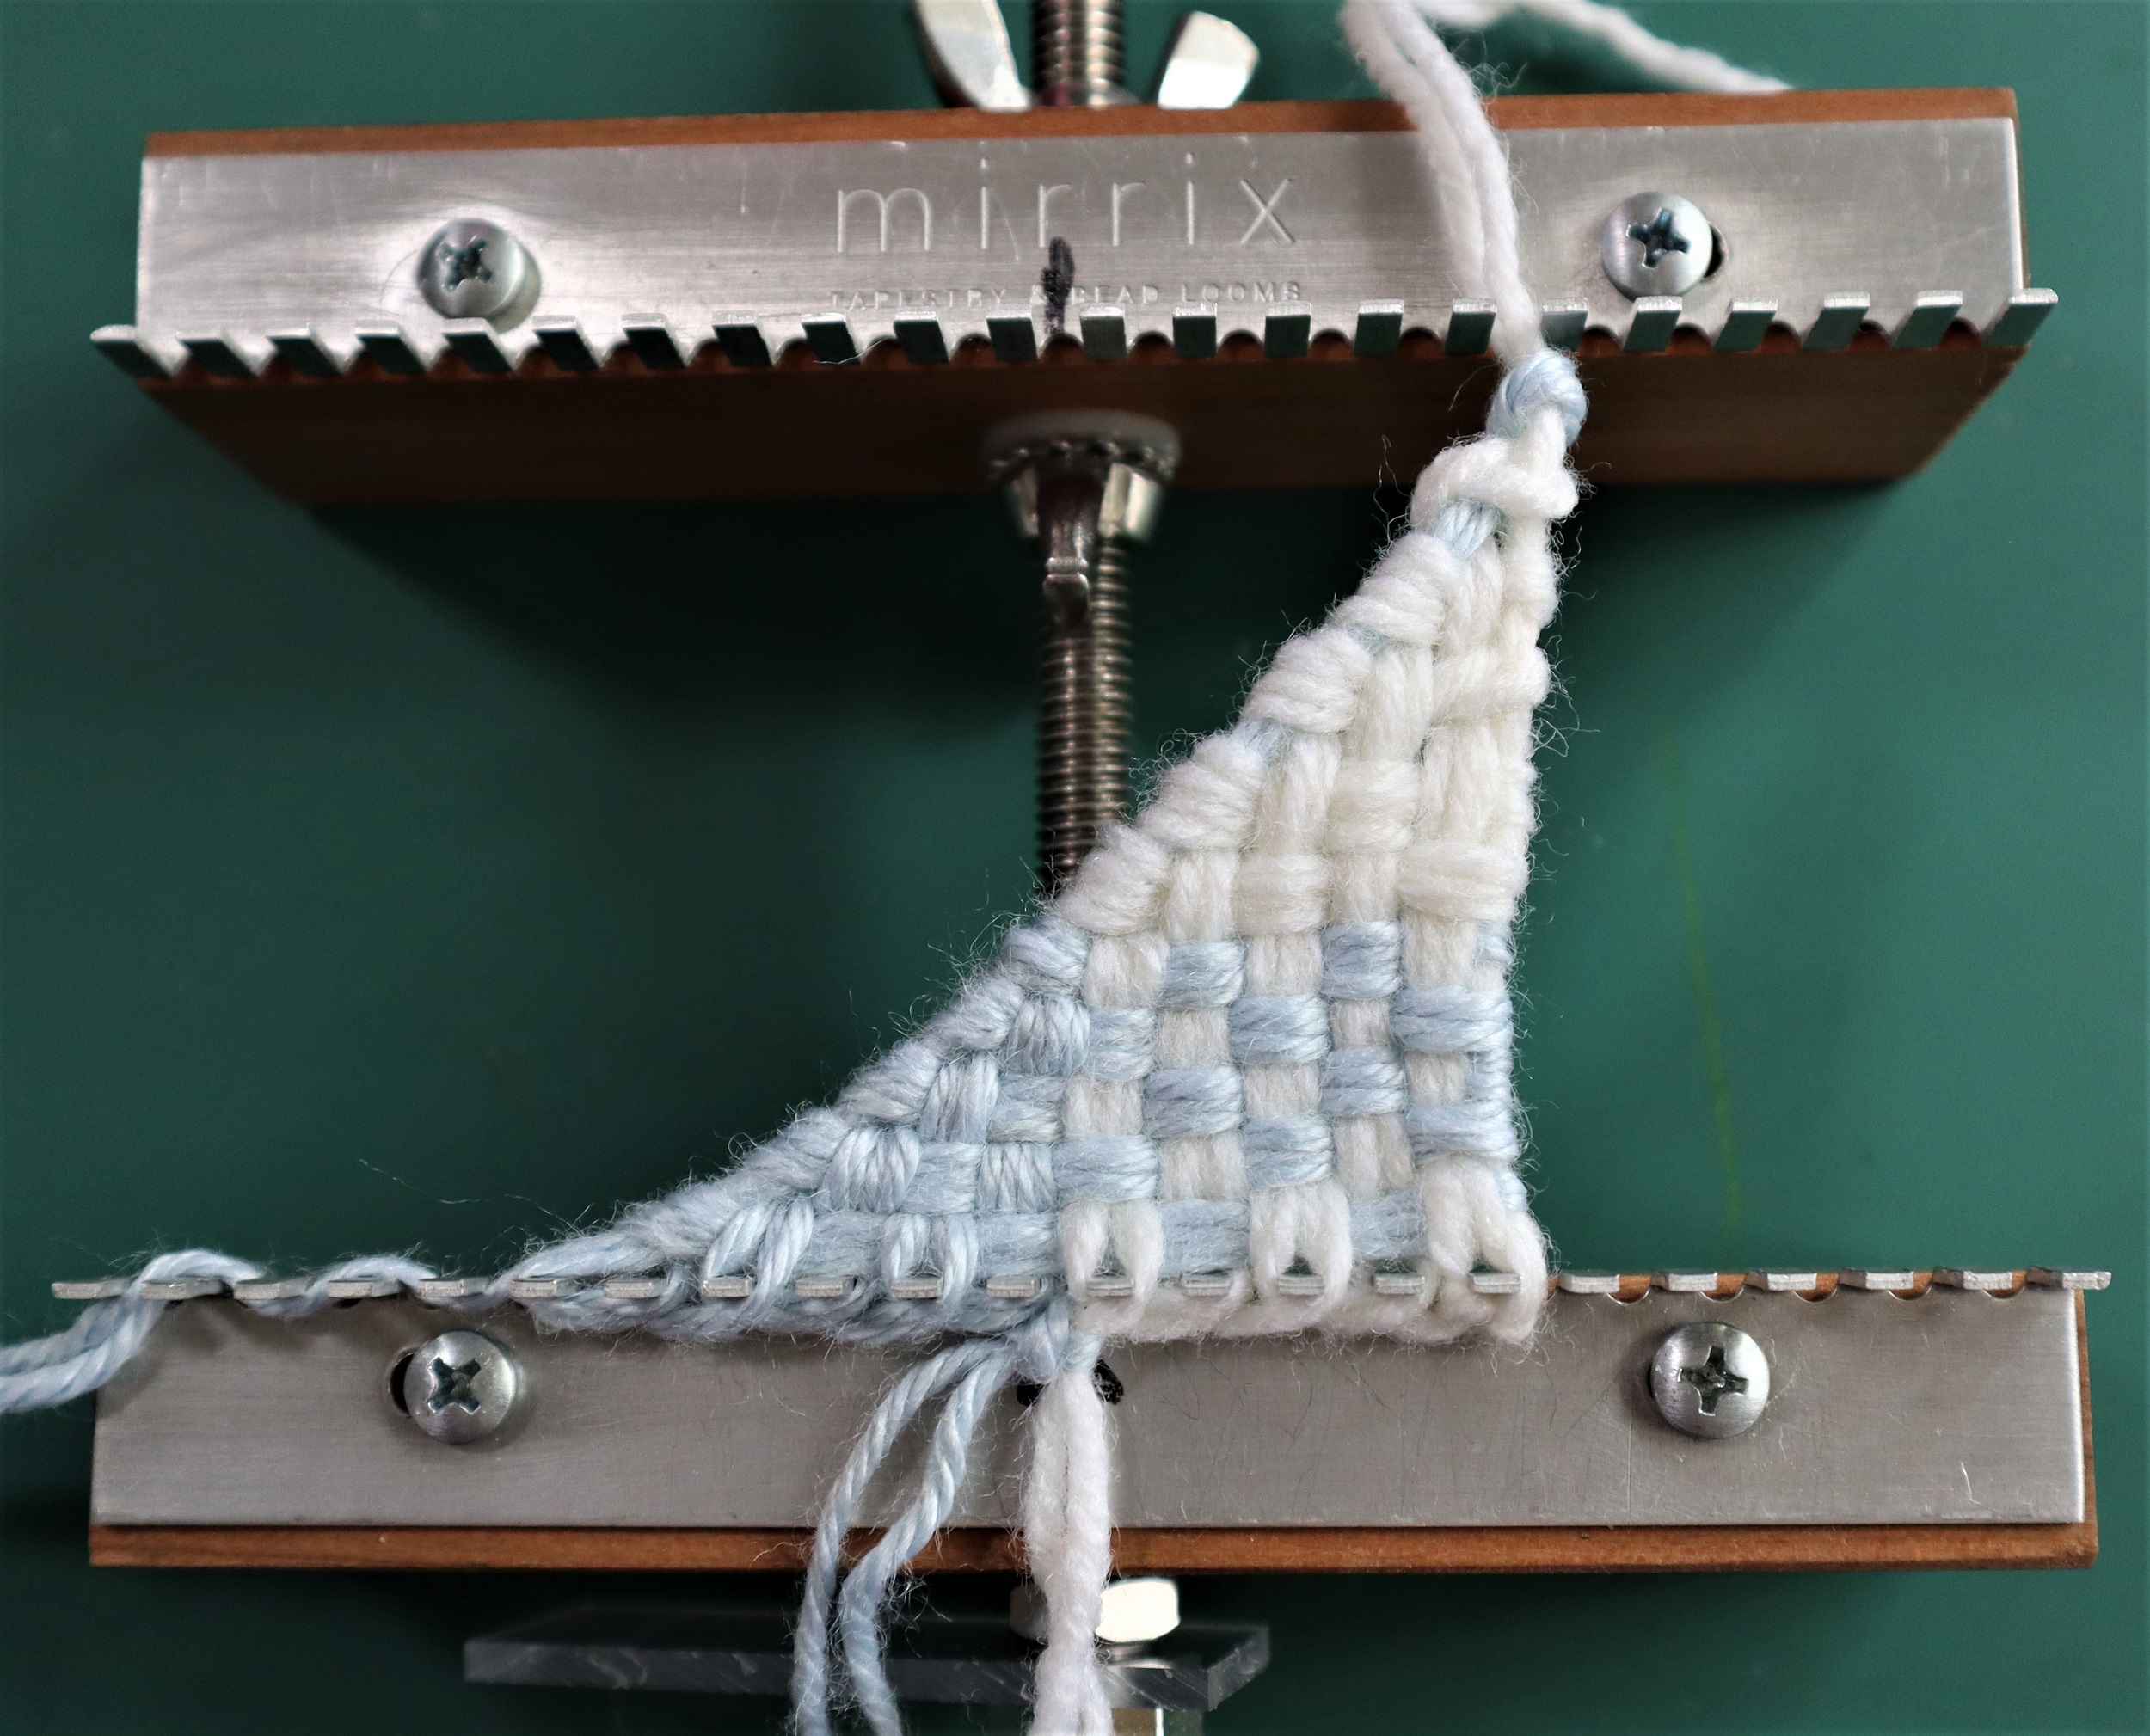
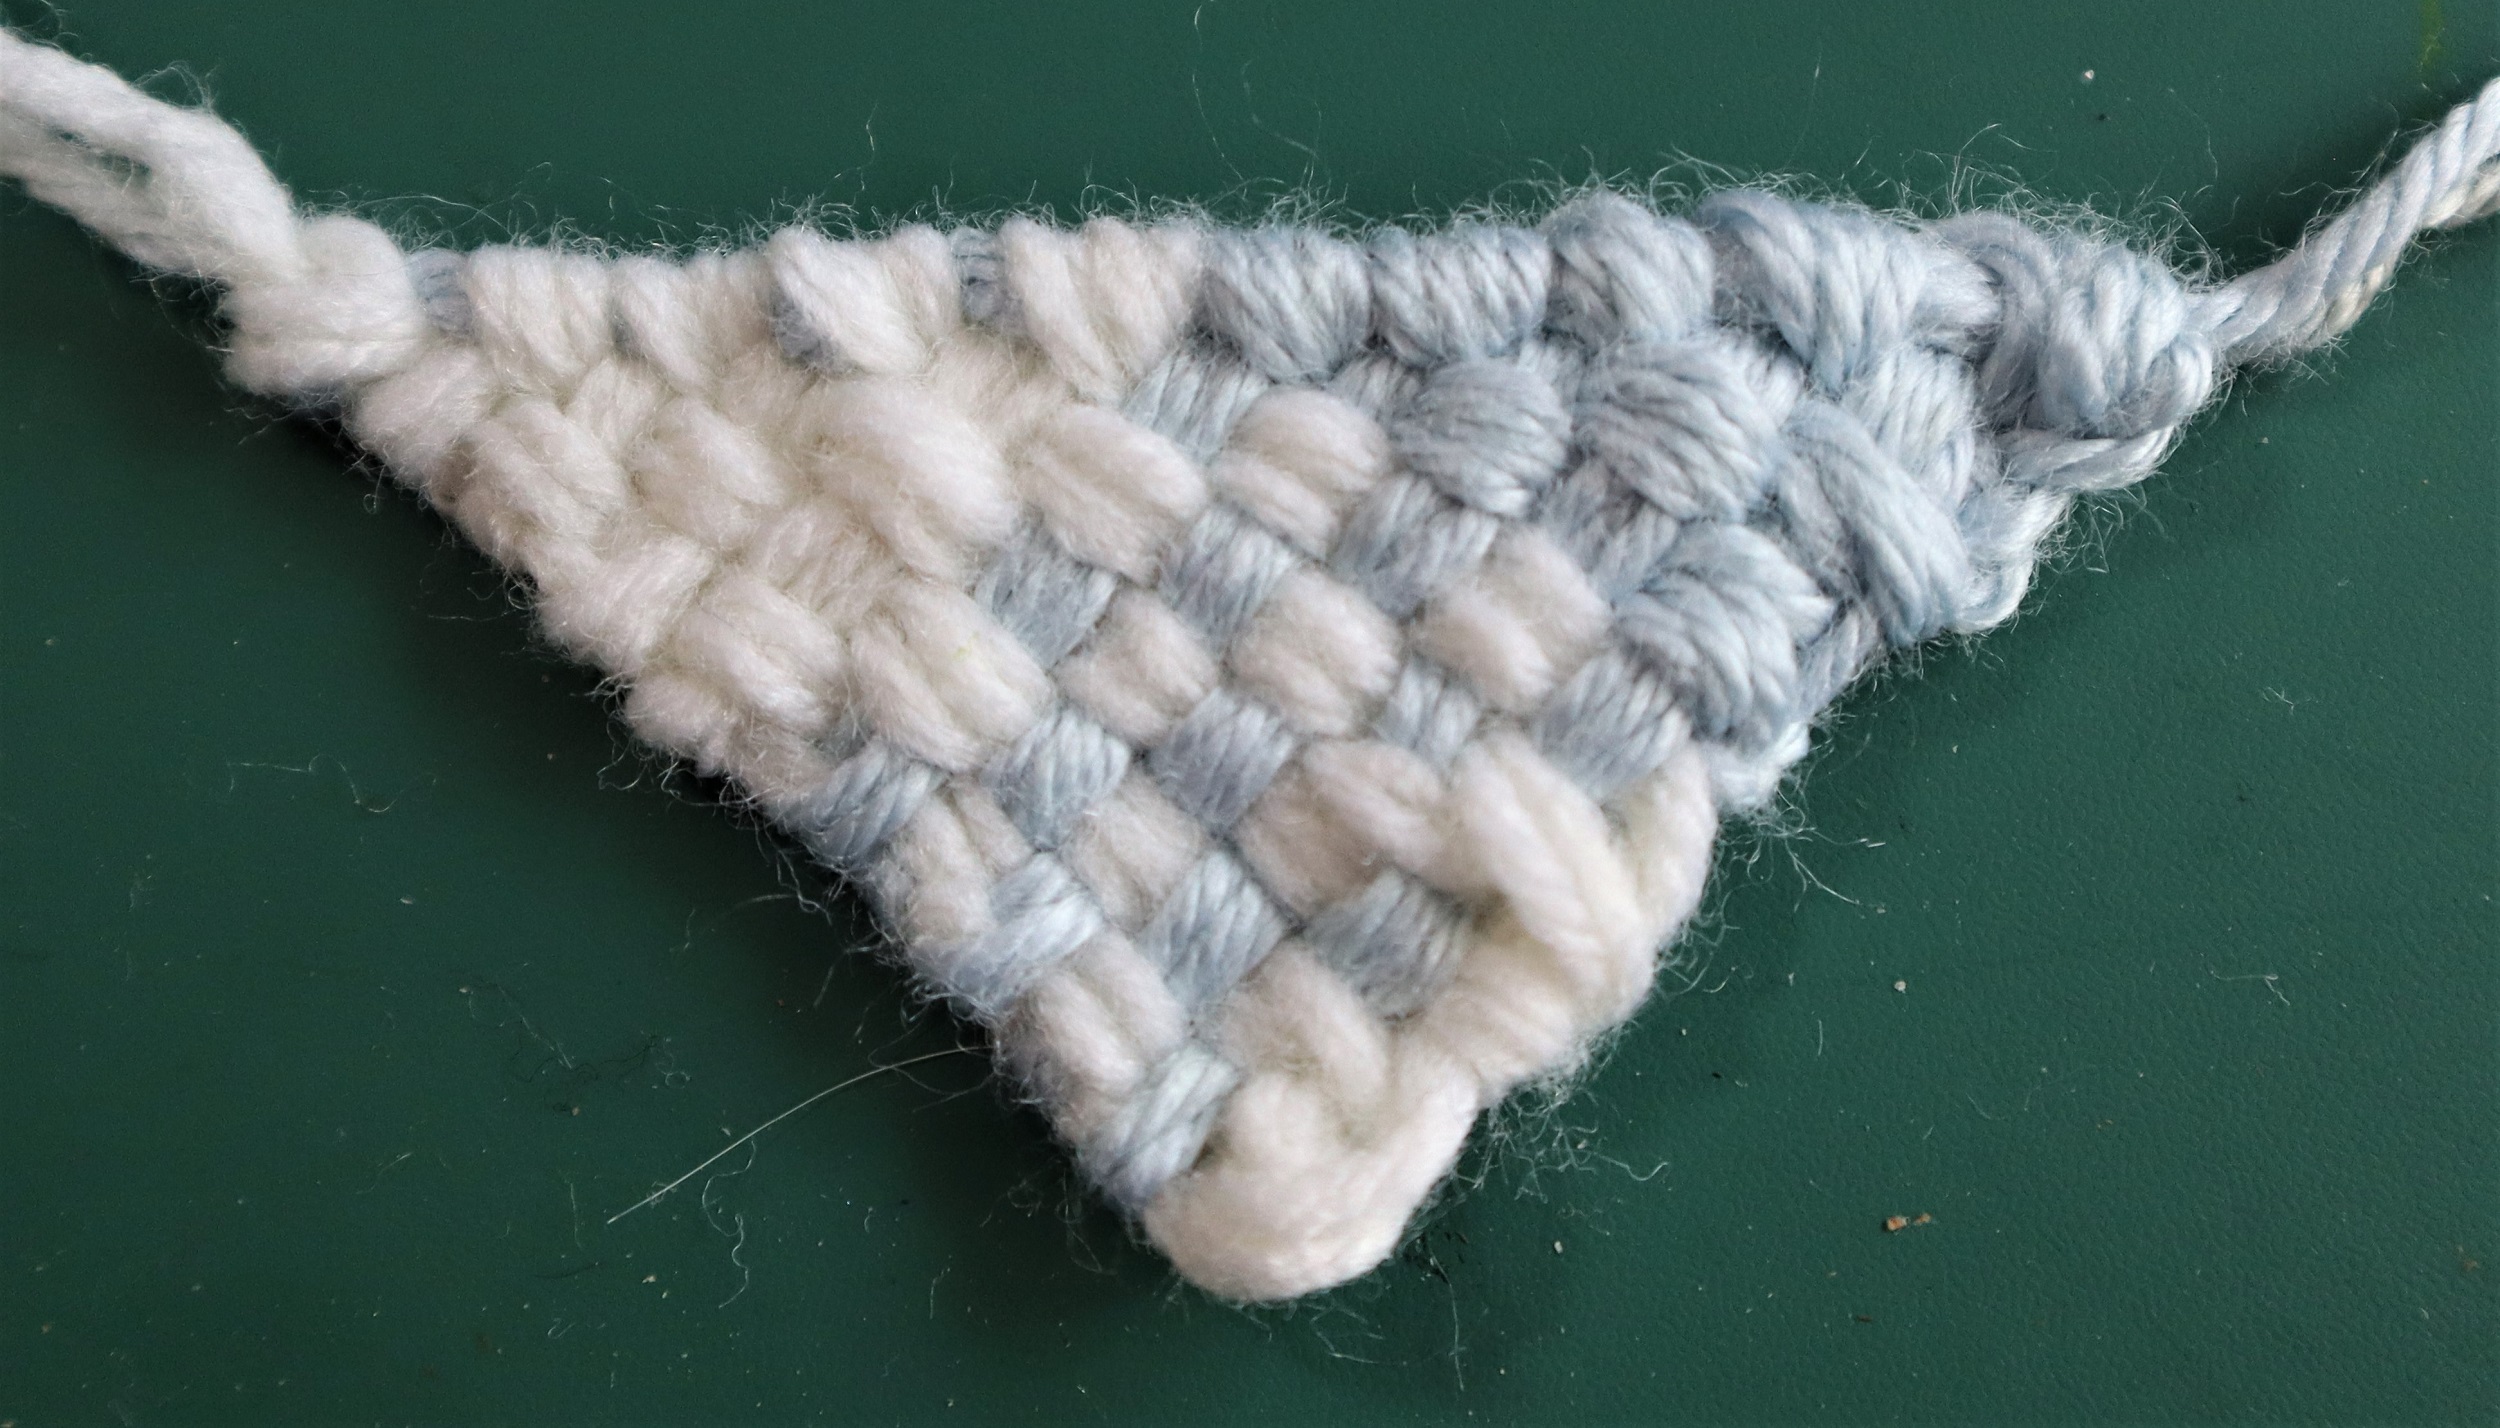
4: FINISHING THE TRIANGLES:
If necessary, pull up on the diagonal yarn end to pull the triangle into shape.
Steam the triangles on the wrong side with a steam iron, being sure to not touch the iron to the weaving.
Finger press the triangles to shape them into pleasing triangles.
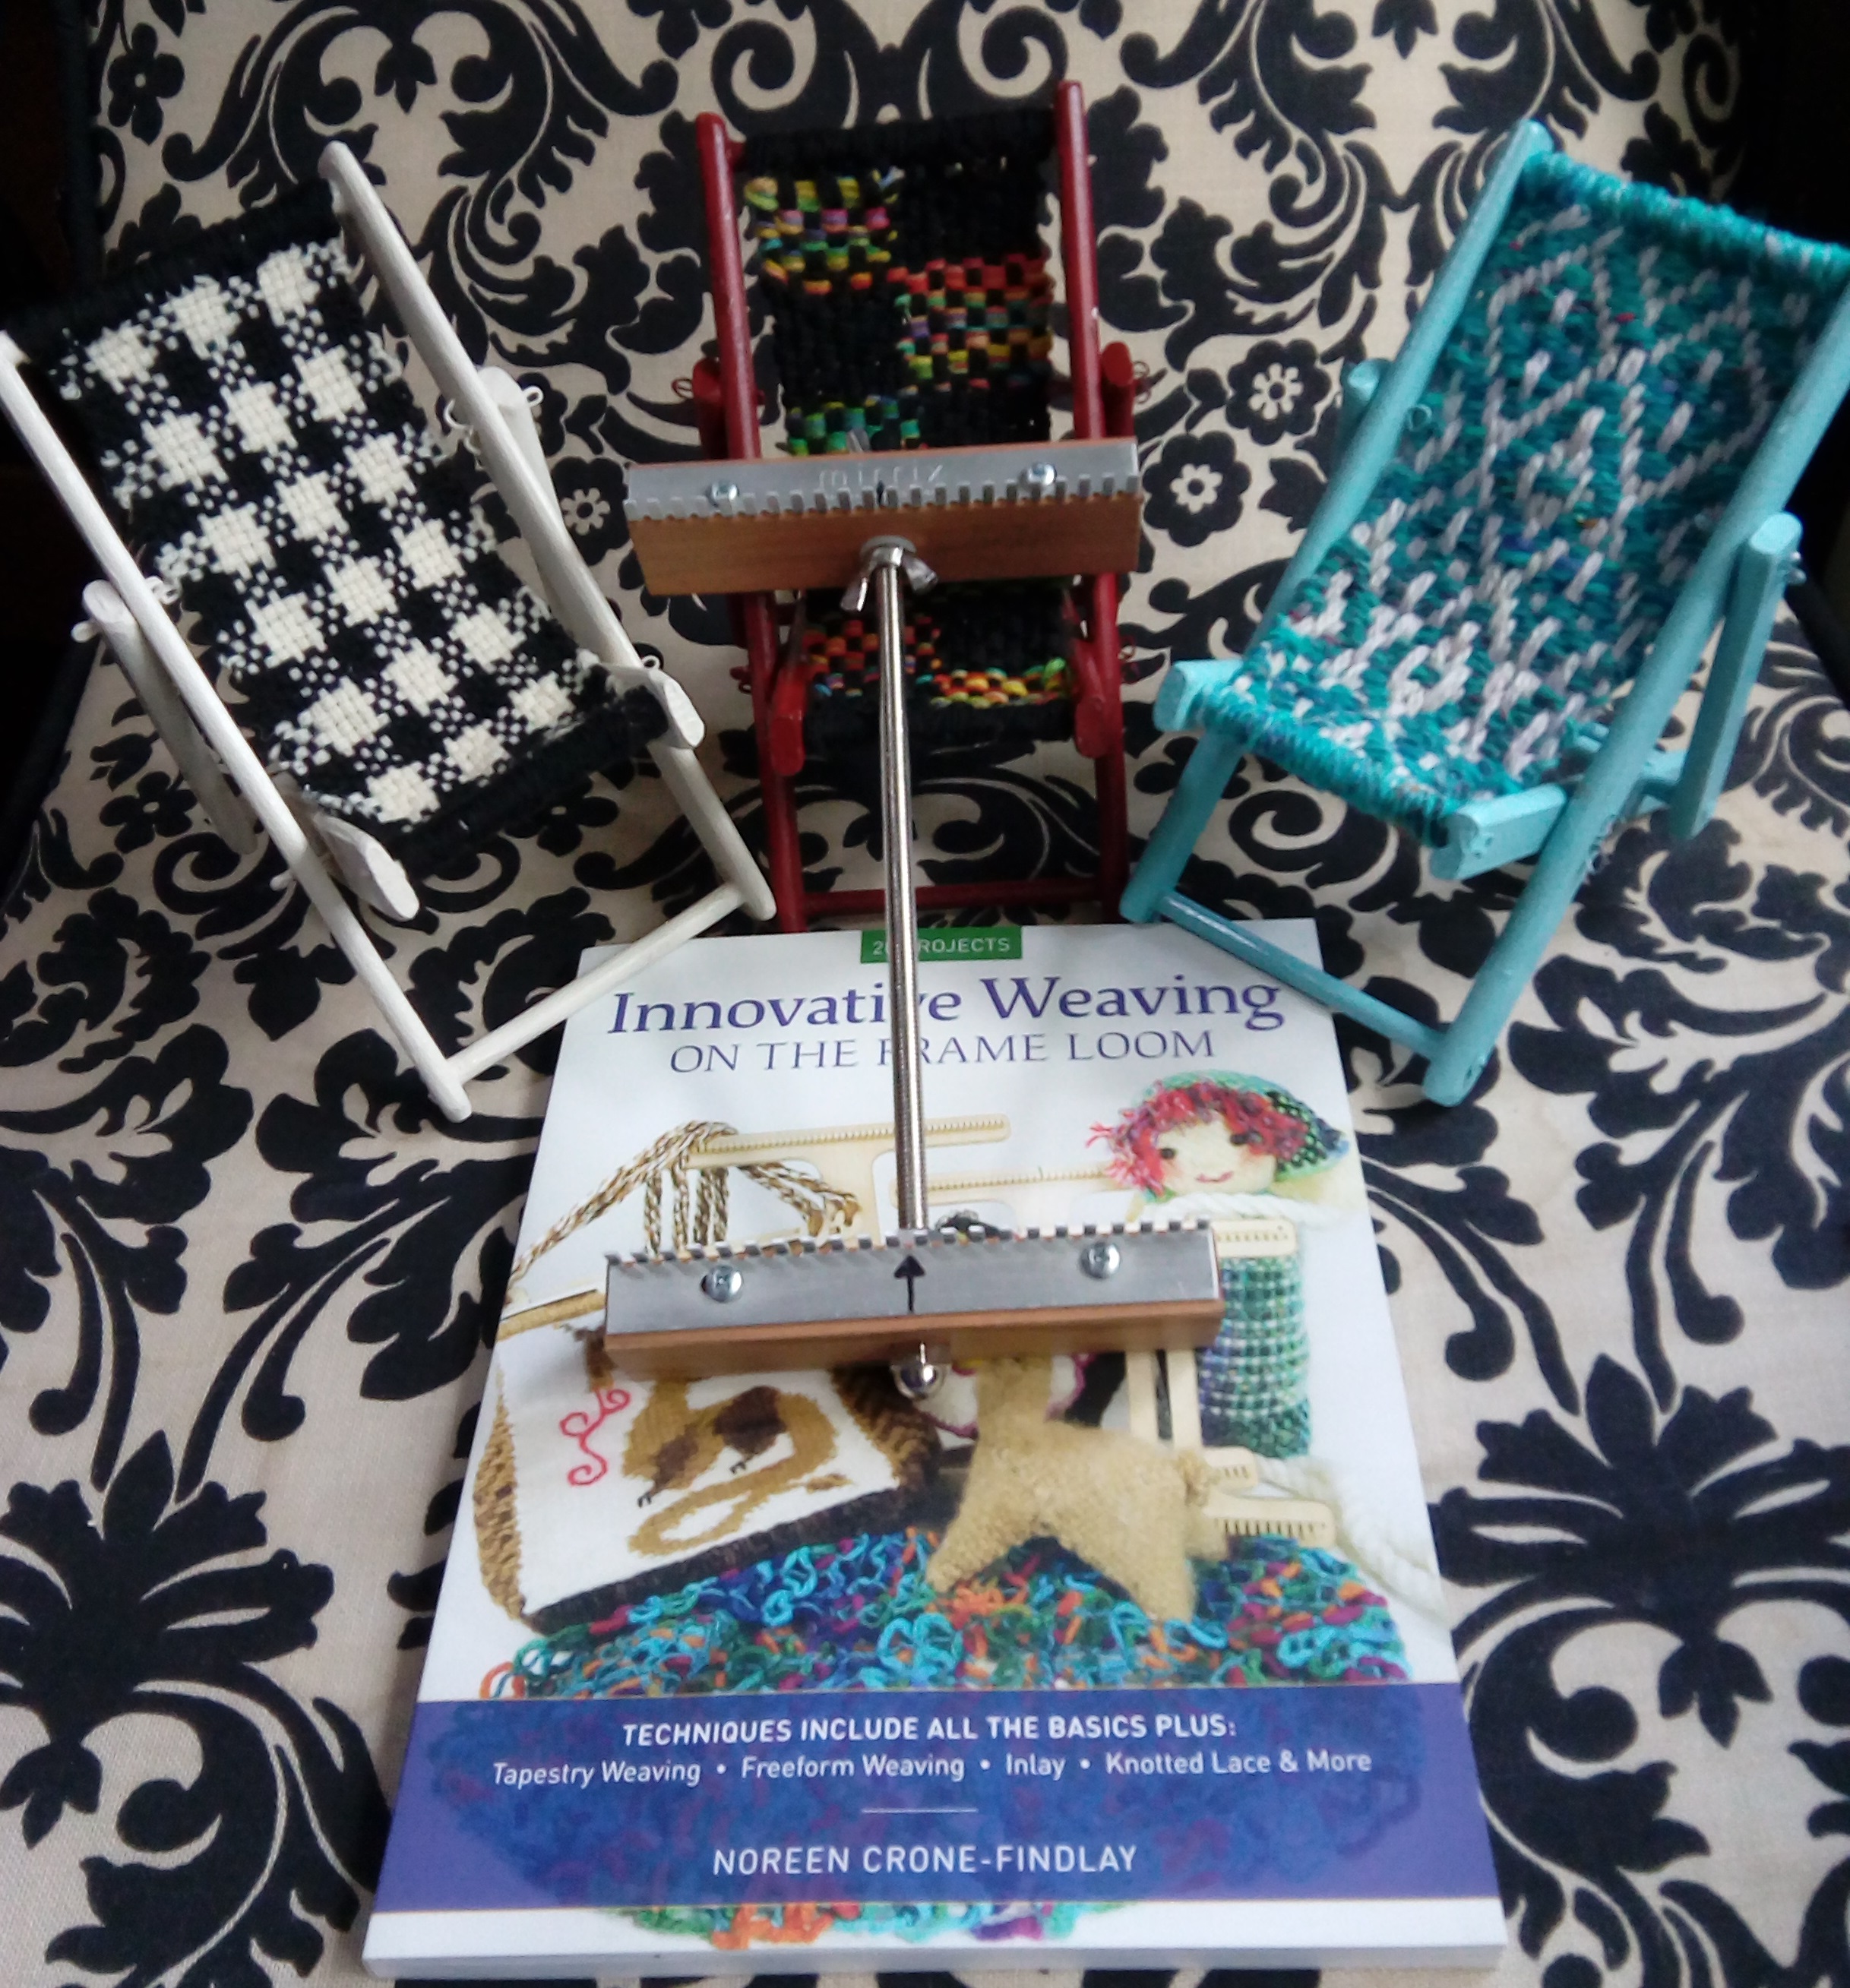
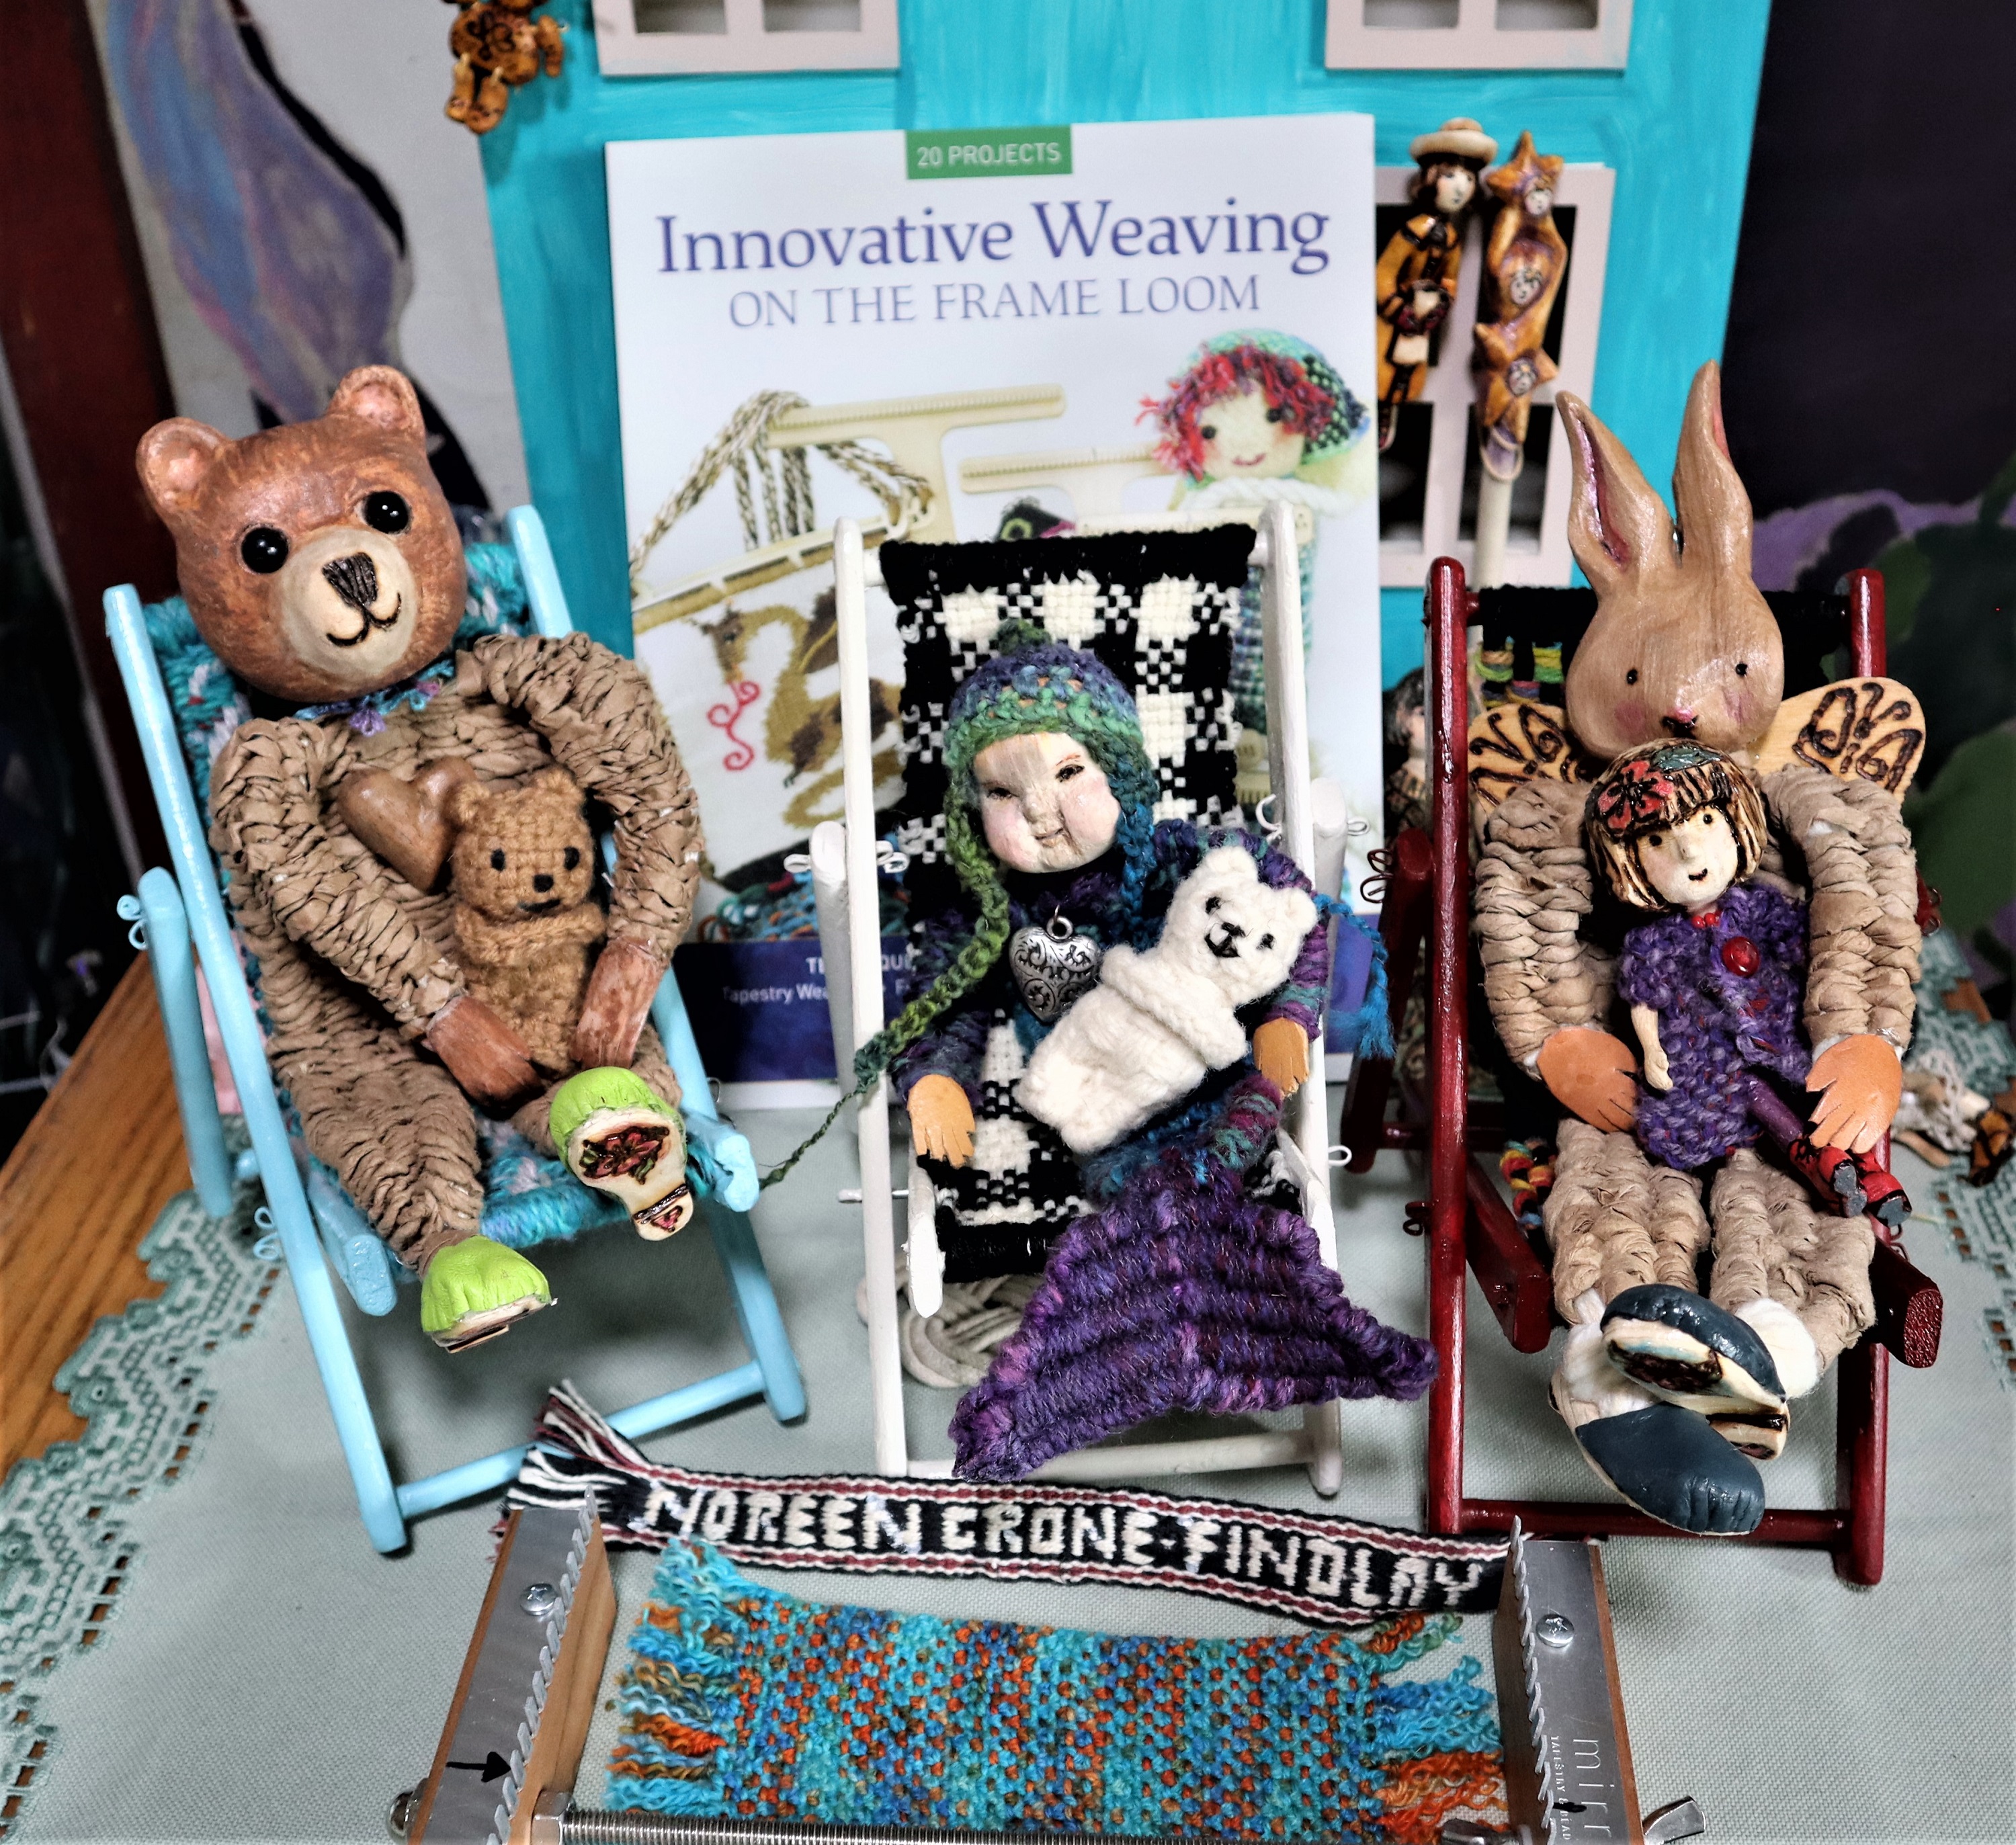
After I carved and wove 3 dolls that didn’t fit the doll furniture that I already had, (see Brown Paper Yarn Dolls) ,
I decided that I had to build them each a chair.
And so I built them each their own little chair with a seat woven on the Mirrix Saffron Loom, using instructions from my book: Innovative Weaving on the Frame Loom.
The Chairs are not in the book, but the weaving patterns are. See pages: 68, 50 and 45.
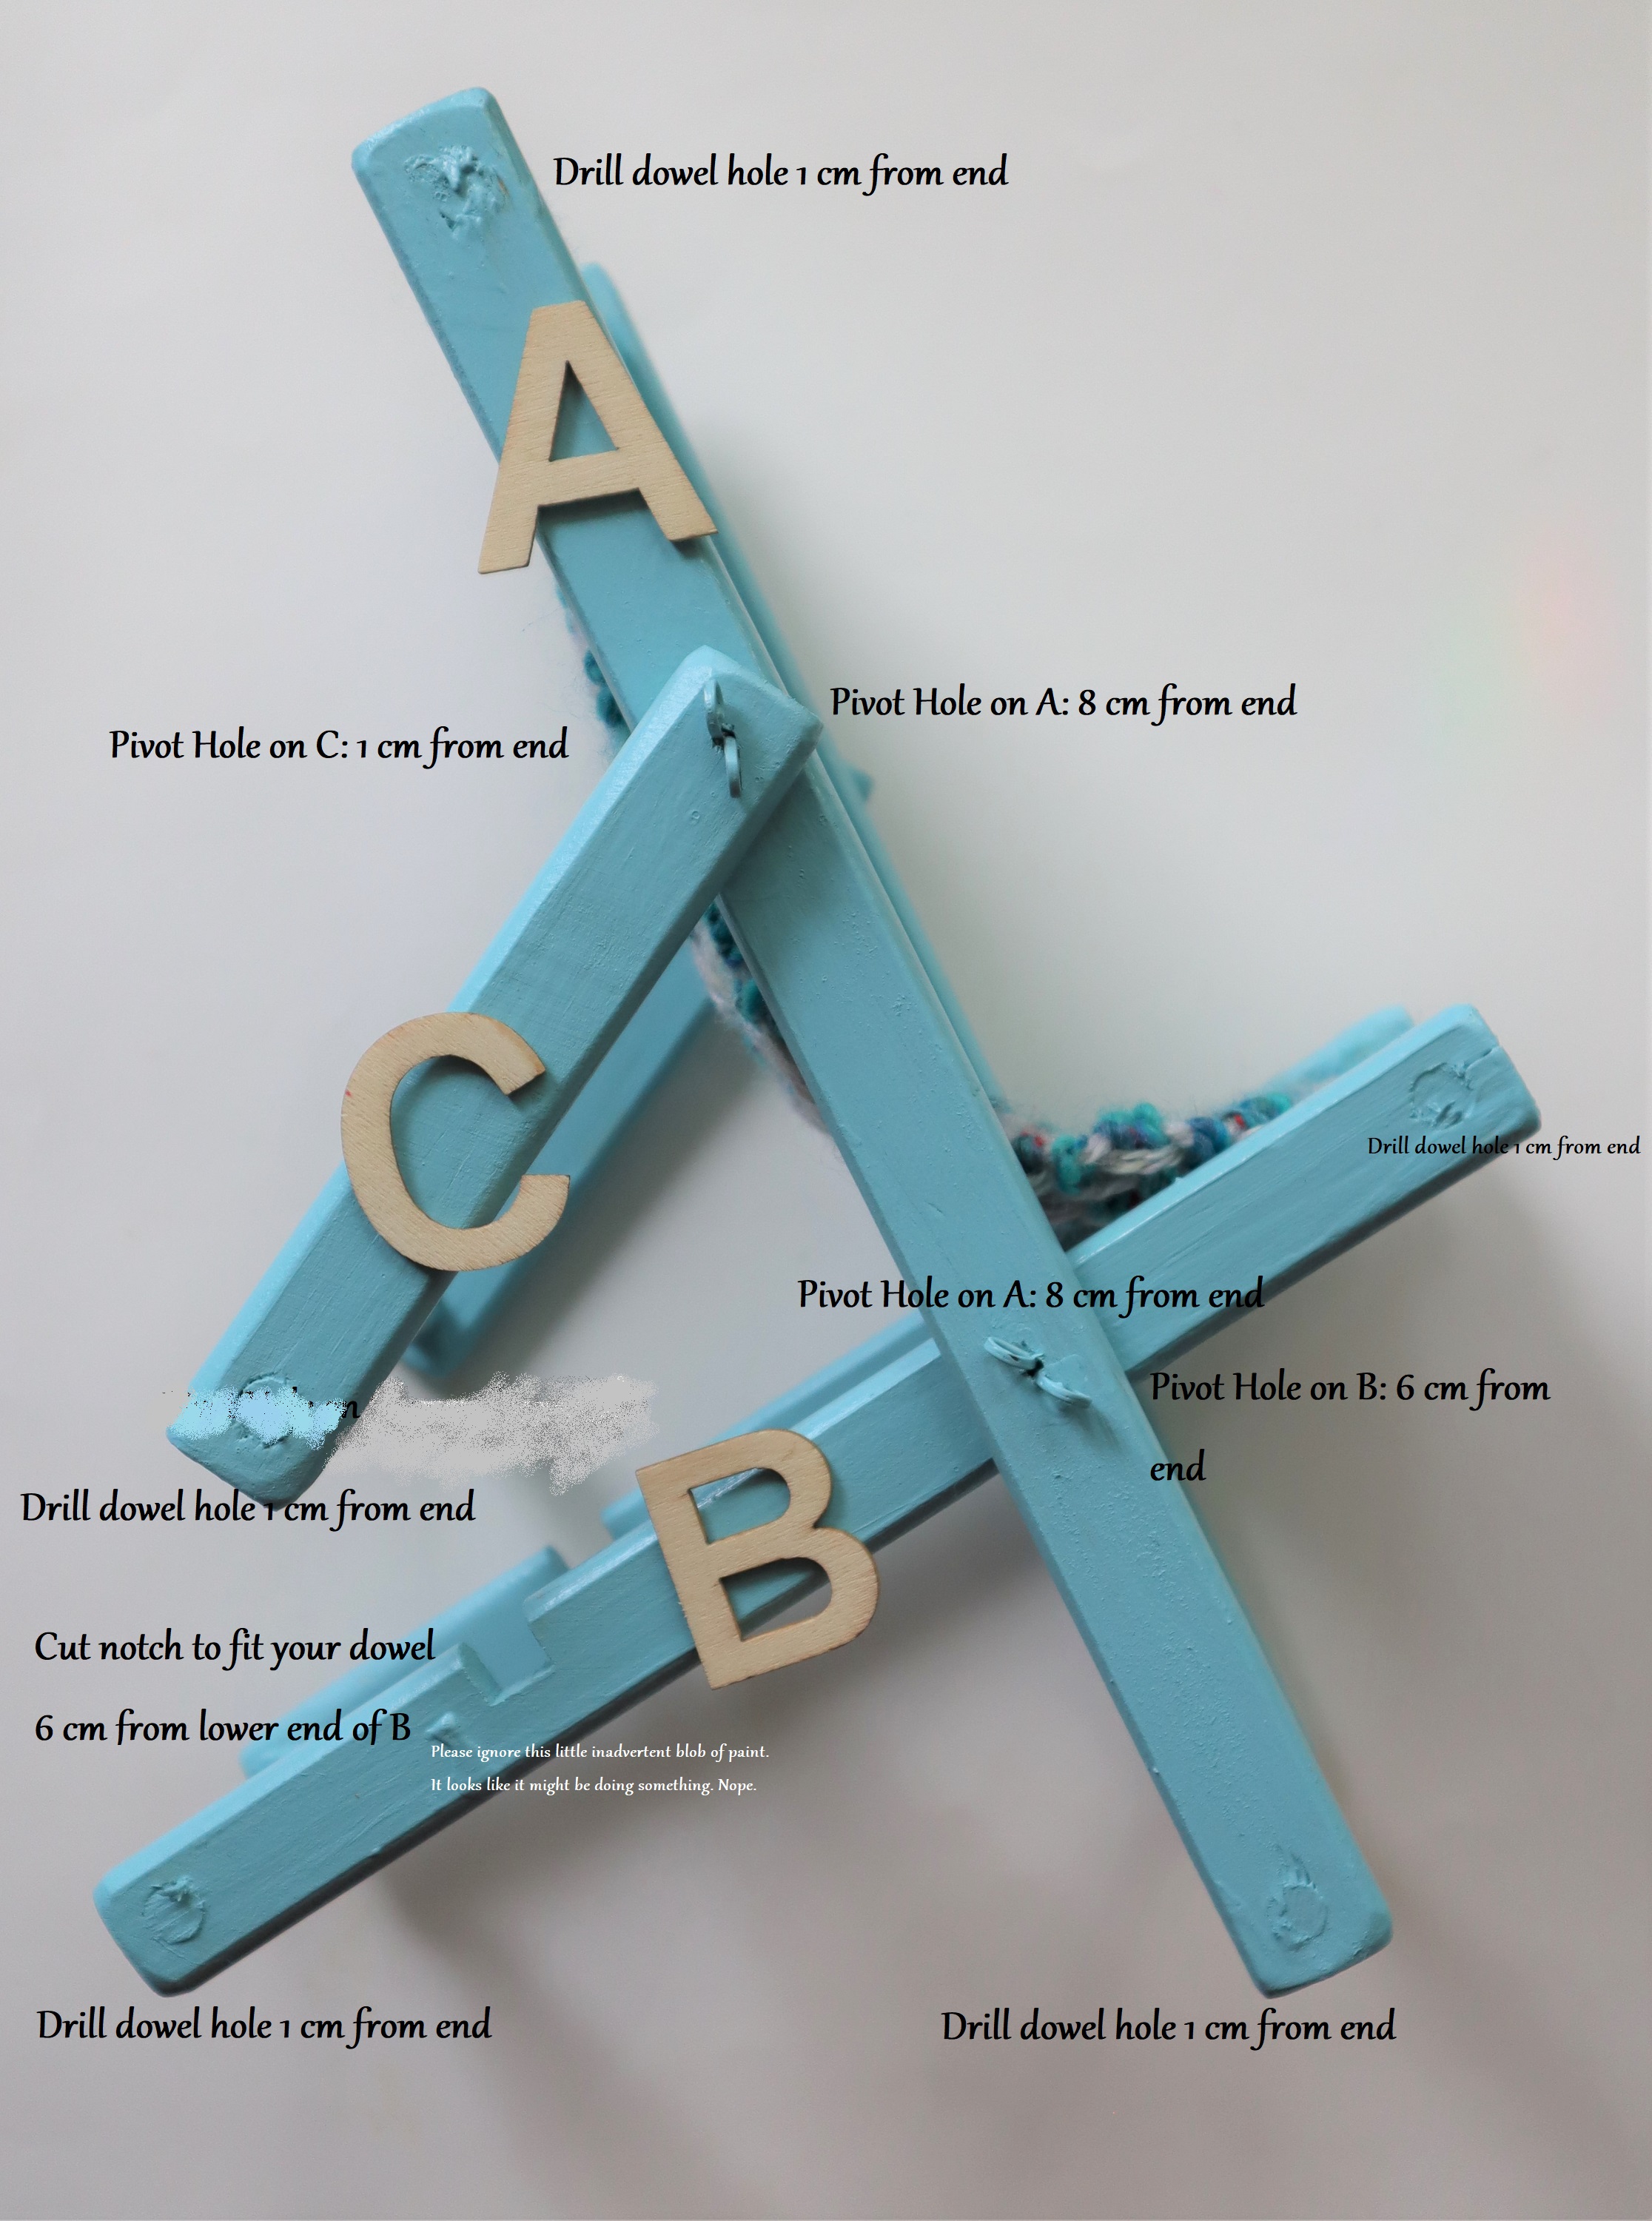
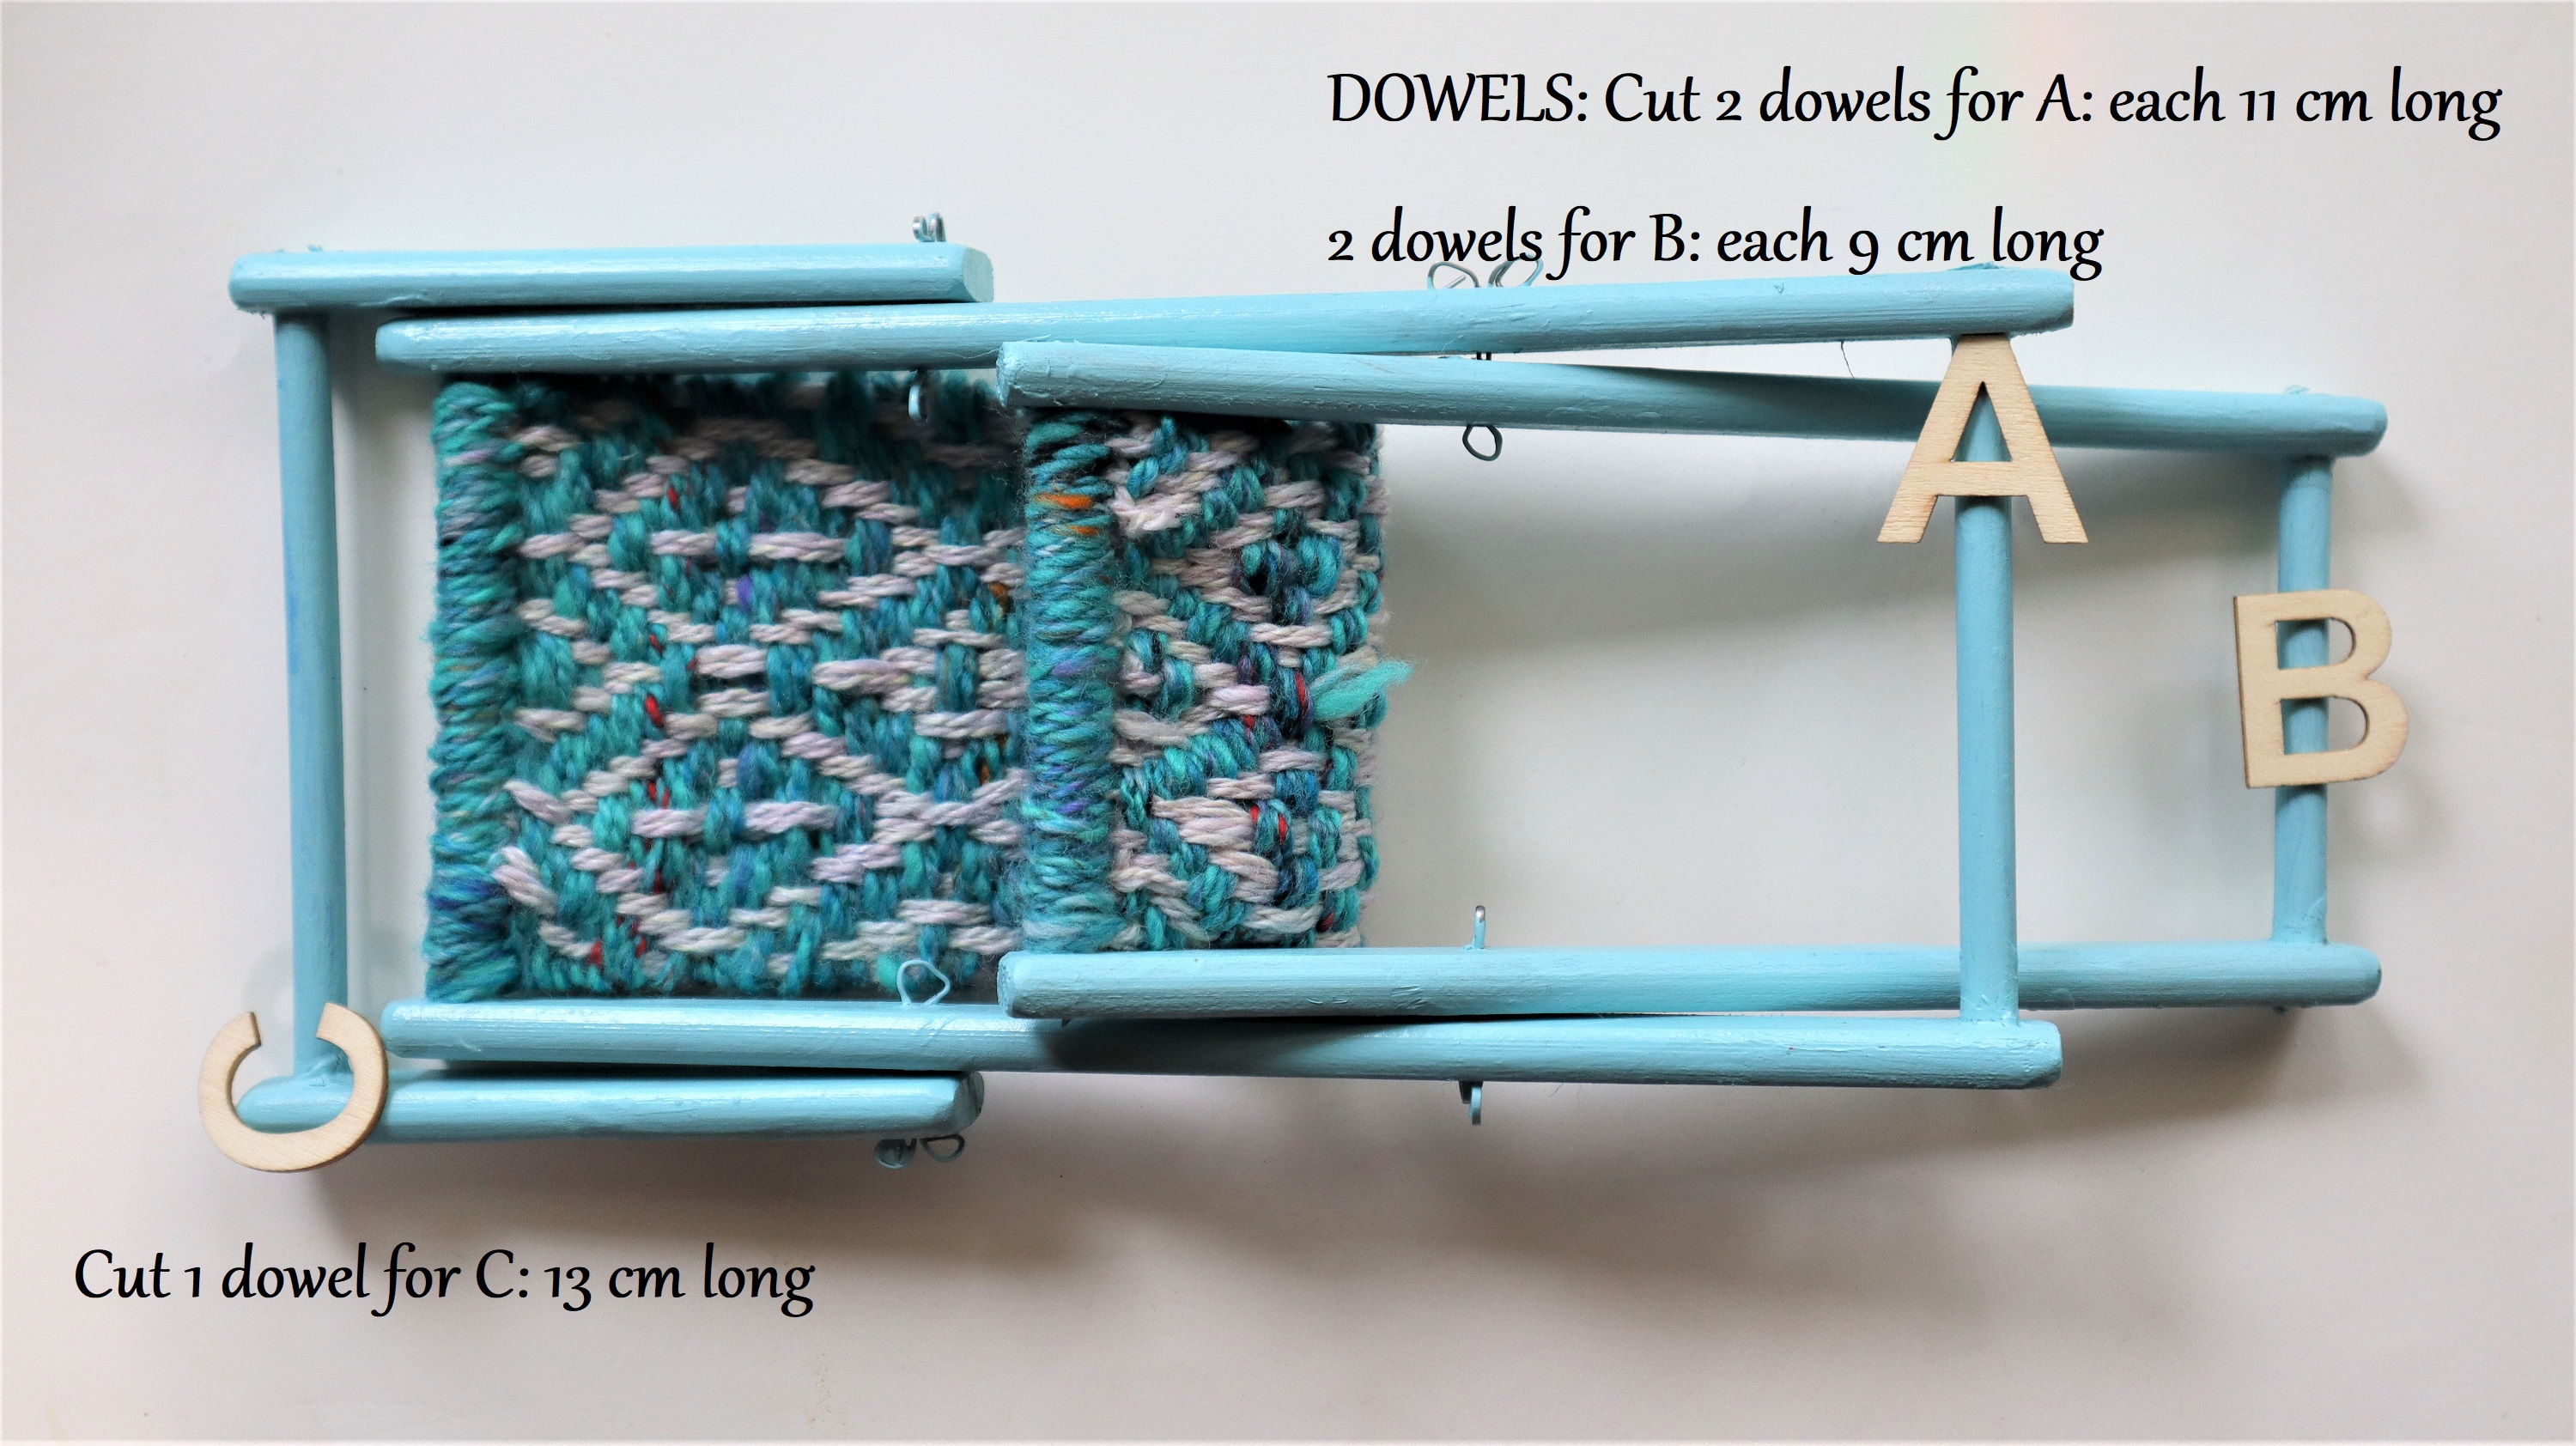
Here are the dimensions for the wooden parts of the chair:
The wooden pieces are all 1 cm thick and 2 cm wide.
Pieces A are 24 cm long (cut 2)
Pieces B are 20 cm long (cut 2)
Pieces C are 11 cm long (cut 2)
The Dowels are 1/4 inch in diameter:
A: Cut 2 that are 11 cm long
B: Cut 2 that are 9 cm long
C: Cut 1 that is 13 cm long
The Seat: Weave a piece of fabric that is 20 cm long by 7 cm wide and stitch through the end of the warp loops, over the top dowel of A and the front dowel of B.
The finished size of the chair is:
Height: 20 cm (8 inches)
From front to back: 18 cm (almost 7 inches)
Width: 13 cm at widest point (about 5 inches)
The dolls are very happy in their new chairs!
I have made a video, showing how to build the chairs- but please note that I forgot to show how I sew the weaving to the chair.
Oops.
I simply lifted the weaving off the loom and stitched through the warp loops with 2 strands of yarn, going over the dowel.
I hope that you will have fun making doll chairs for your dolls and teddy bears, too. ❤