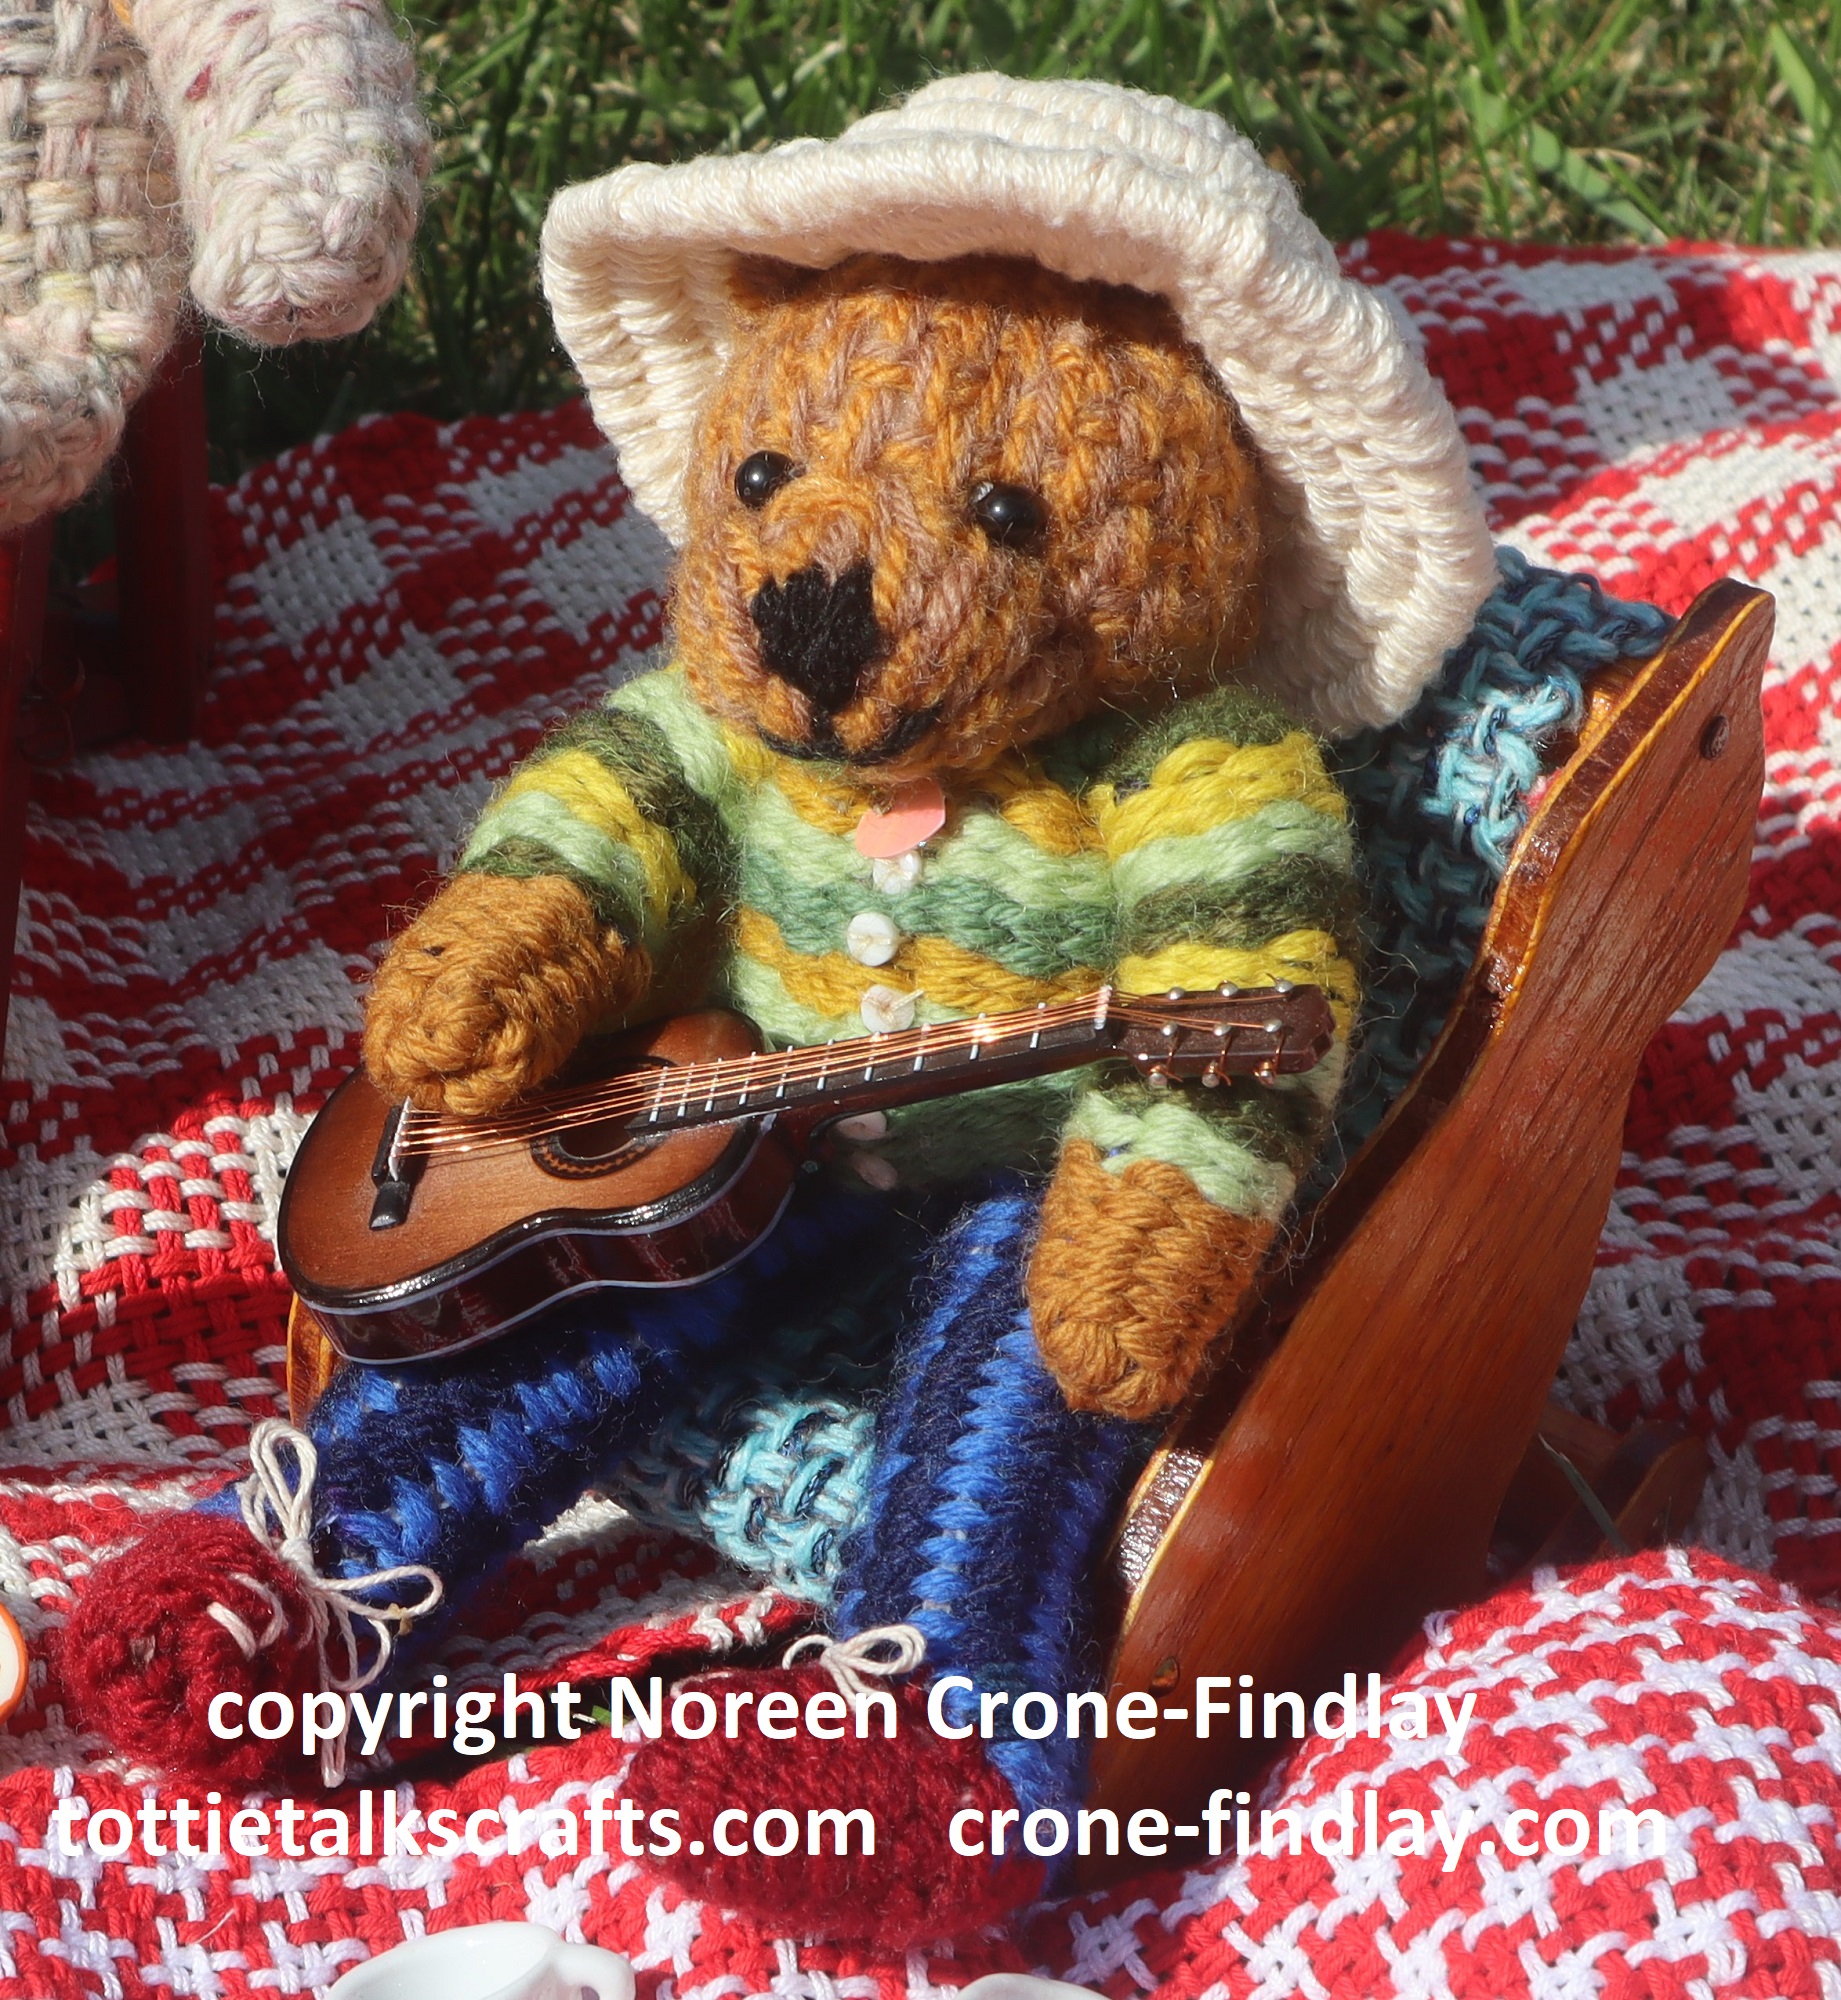
Sampling for a weaving project is a really good idea that most weavers often avoid doing.
But, weaving a small sample can give so much information to the weaver that it is a huge benefit.
Weaving the arms for the Saffron Teddy Bears is a win/win in the sampling department 🙂
The arms are small, but will quickly show you if your yarn is going to make a pleasing fabric for your teddy bear.
If not, then it’s better to make adjustments and weave it over again, rather than committing to weaving the whole body and then finding that the yarn doesn’t work.
So, start your bear by weaving an arm first.
You’ll be glad you did!
The link for all the video tutorials for the Saffron Teddy Bears for the 2022 Summer Weaving Challenge is:
A couple of weeks ago, we went camping and my much loved little Mirrix Saffron loom came with us.
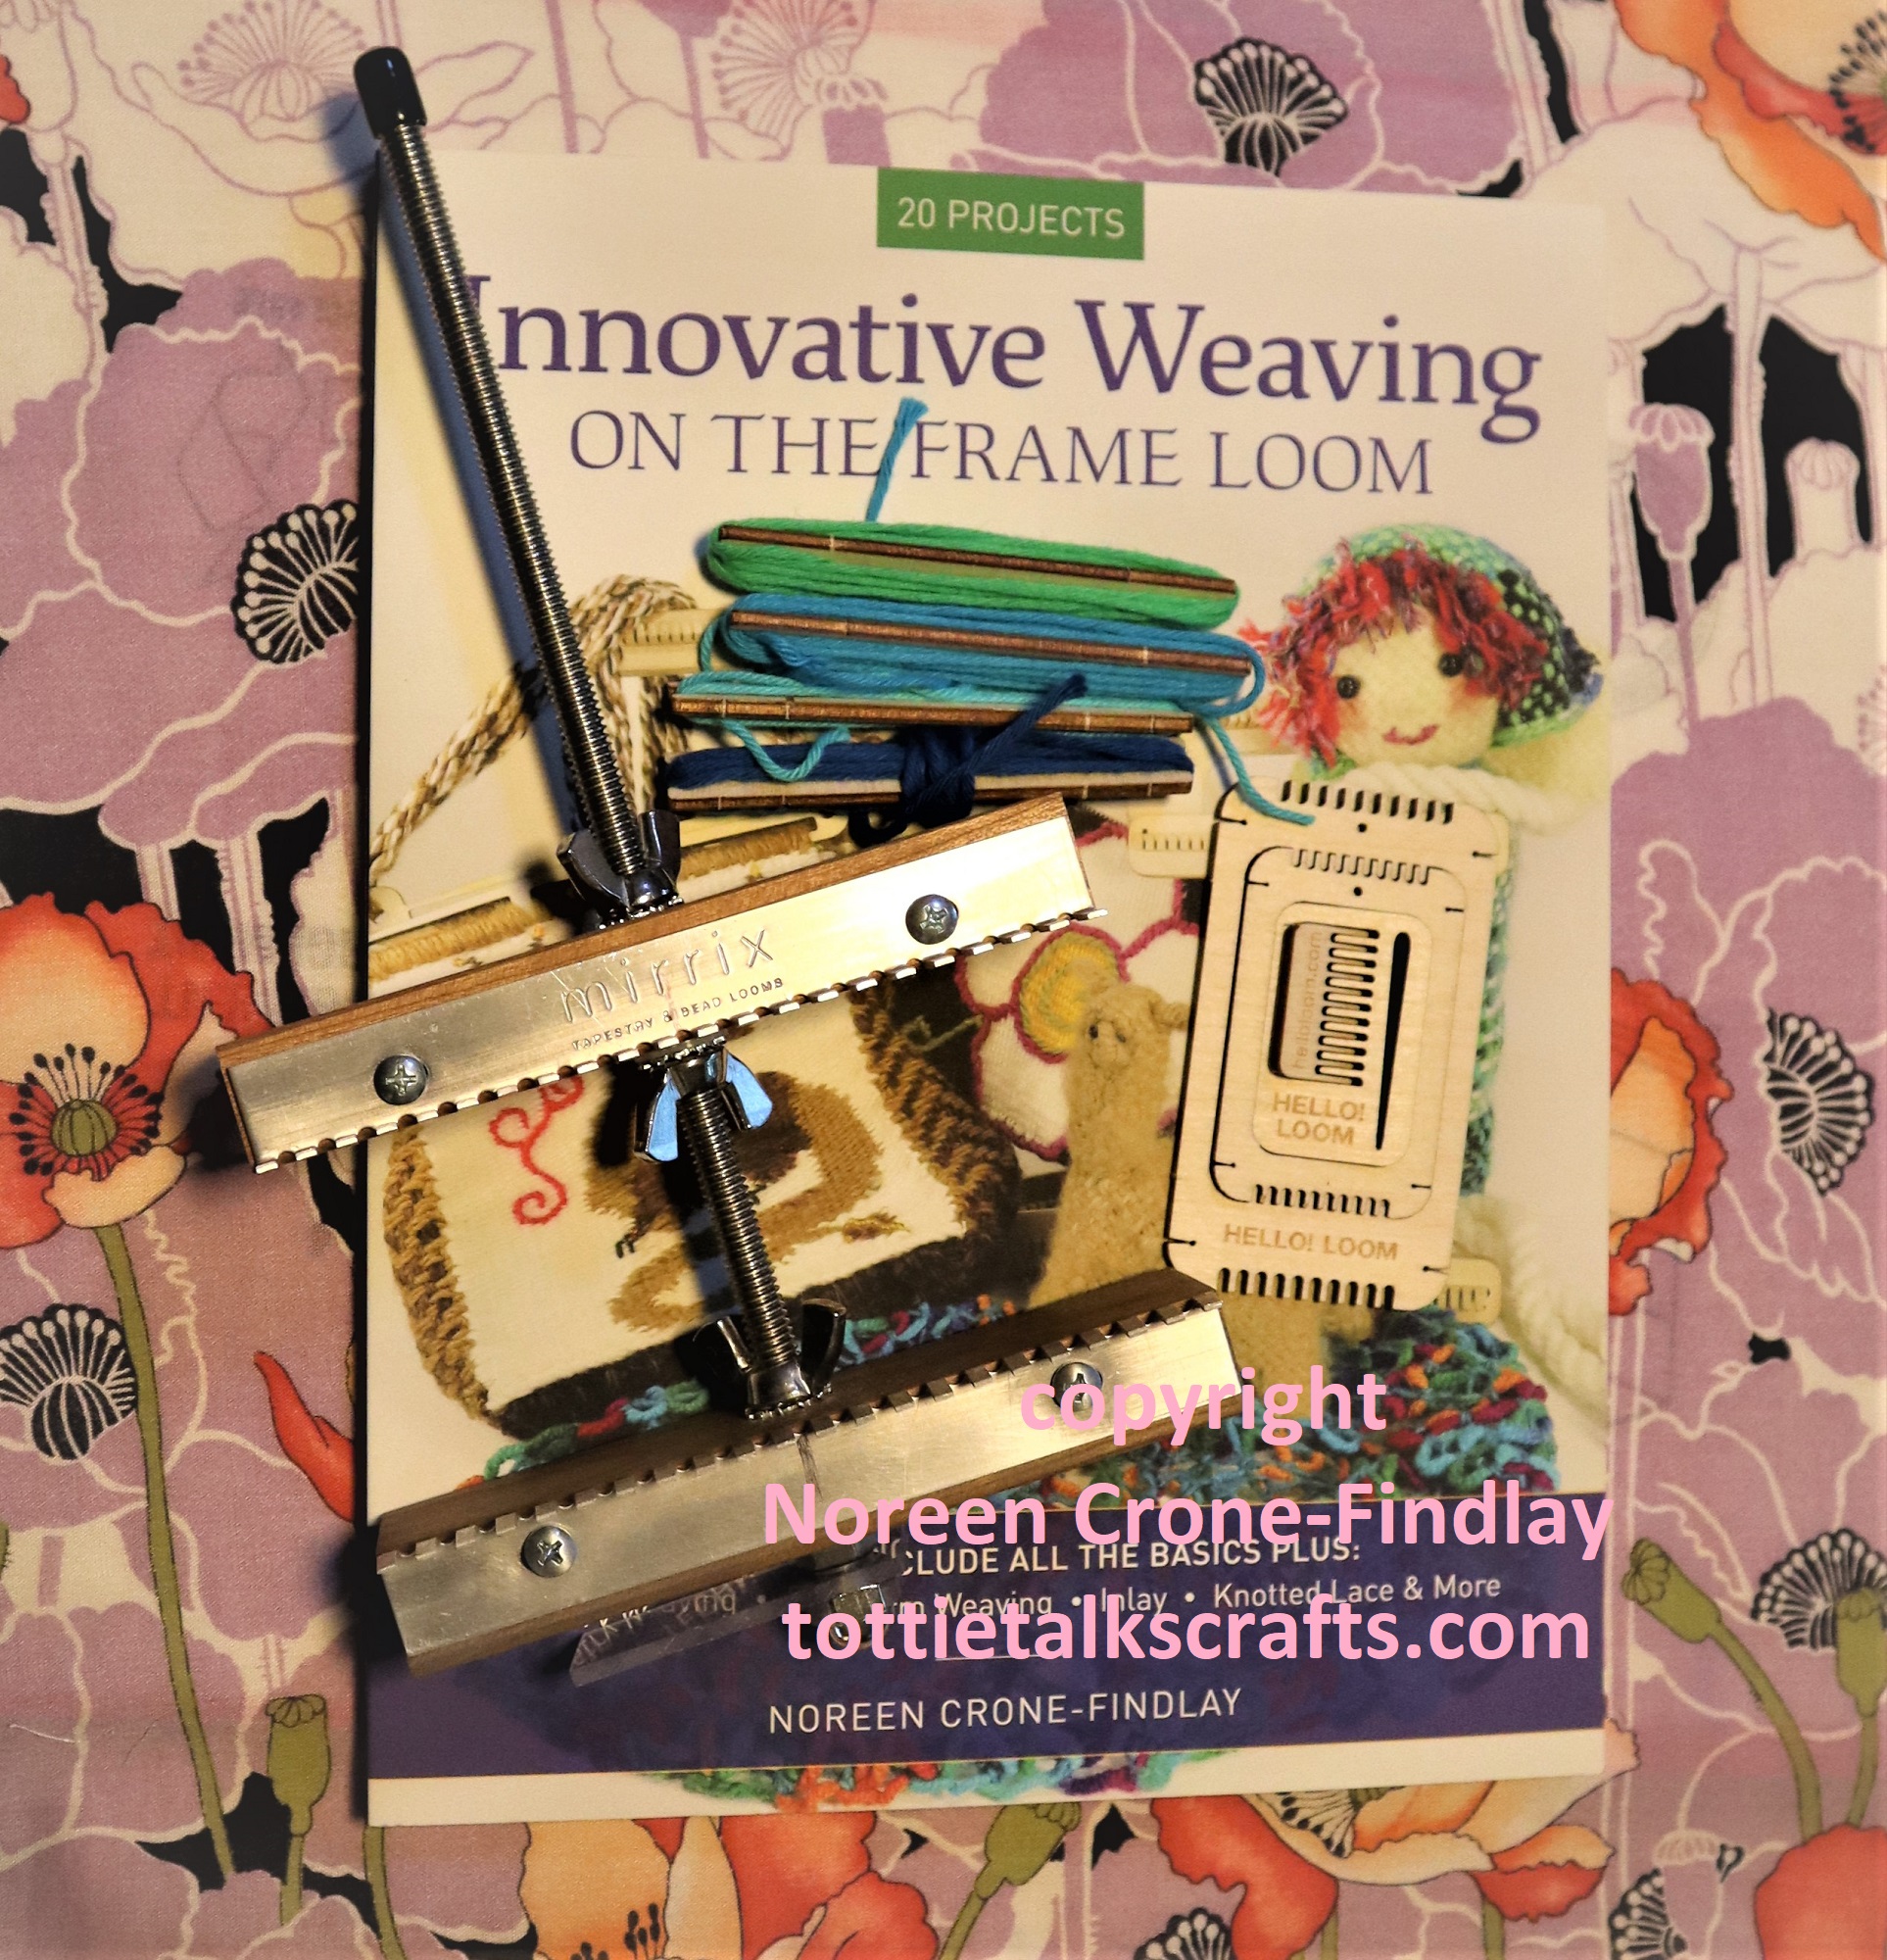
I was weaving away while we were camping (and I still am, but I have advanced to the video filming and editing stage) for the week that I will be leading the Summer Weaving Challenge (August 8 to 15, 2022).
Here’s the link to join in the fun (and you can buy my book: Innovative Weaving on the Frame Loom on the Mirrix website, too on the Starter Kit page 😊 or at any of the online book selling websites.
To see all the links for the ‘How To’ posts for the “Imagine” Banner Weave along, please go to L I N K S
To order the loom, book and extras kit for the Weave Along from Mirrix, please go K I T
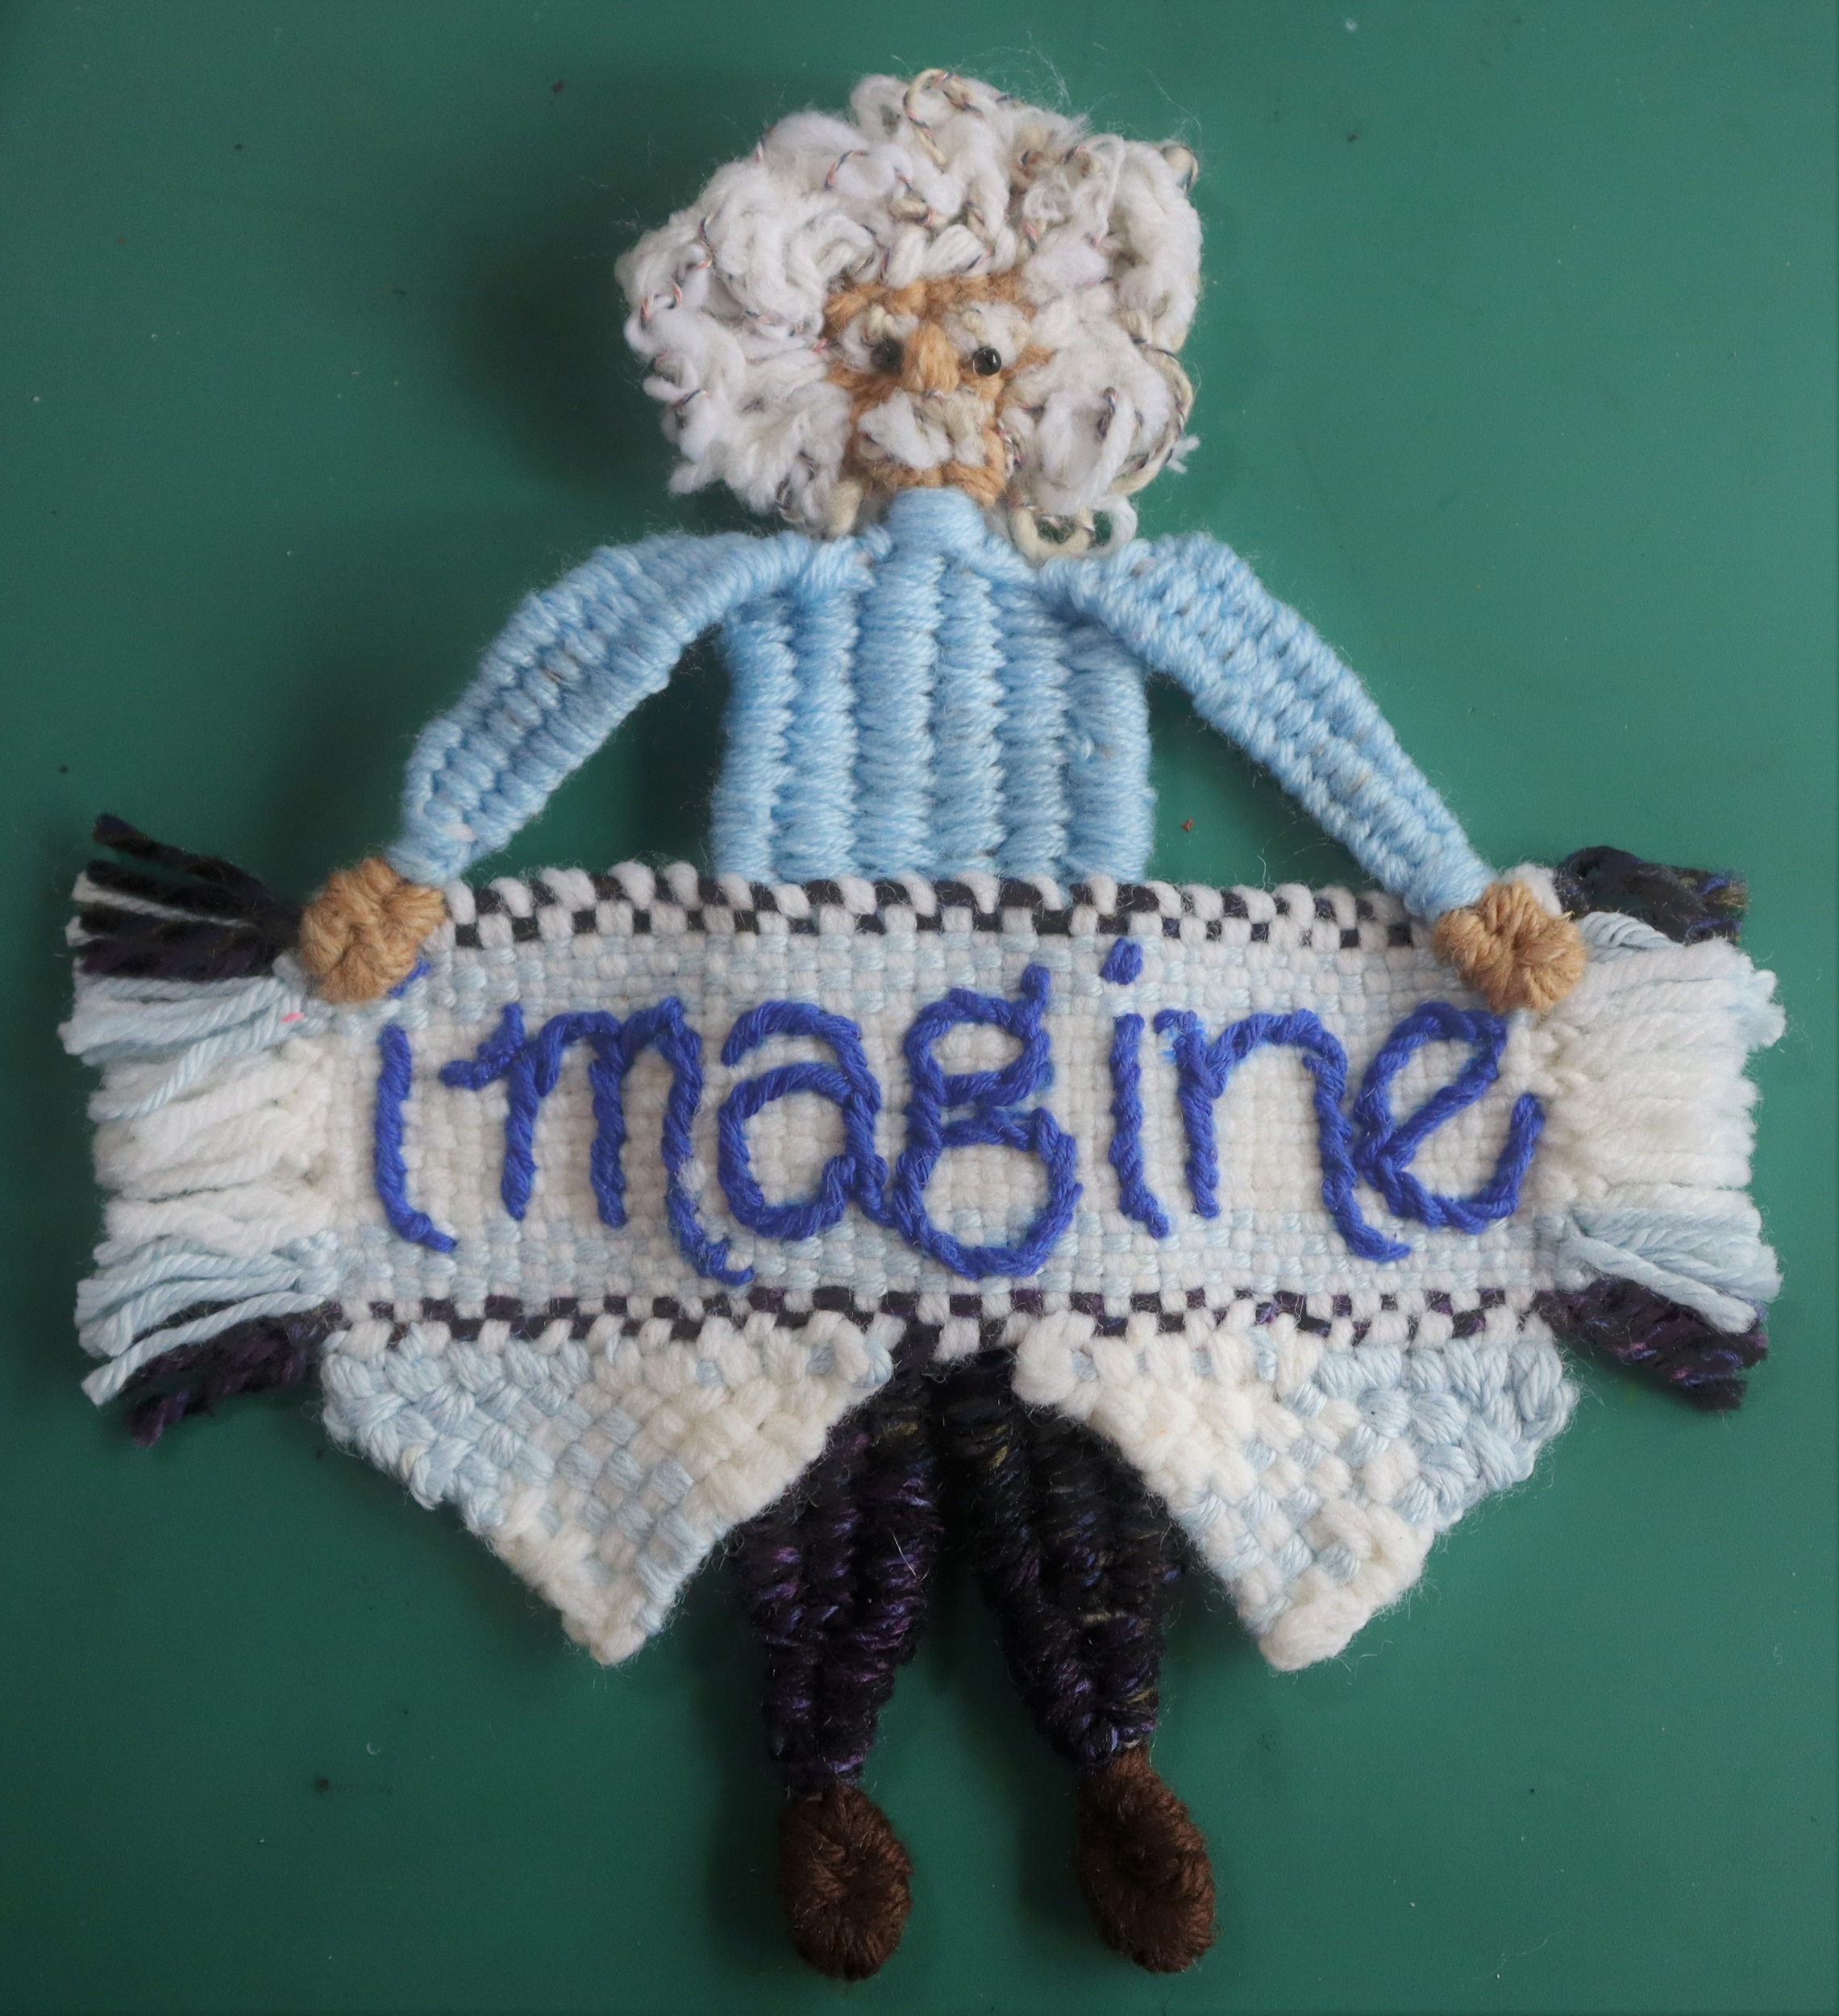
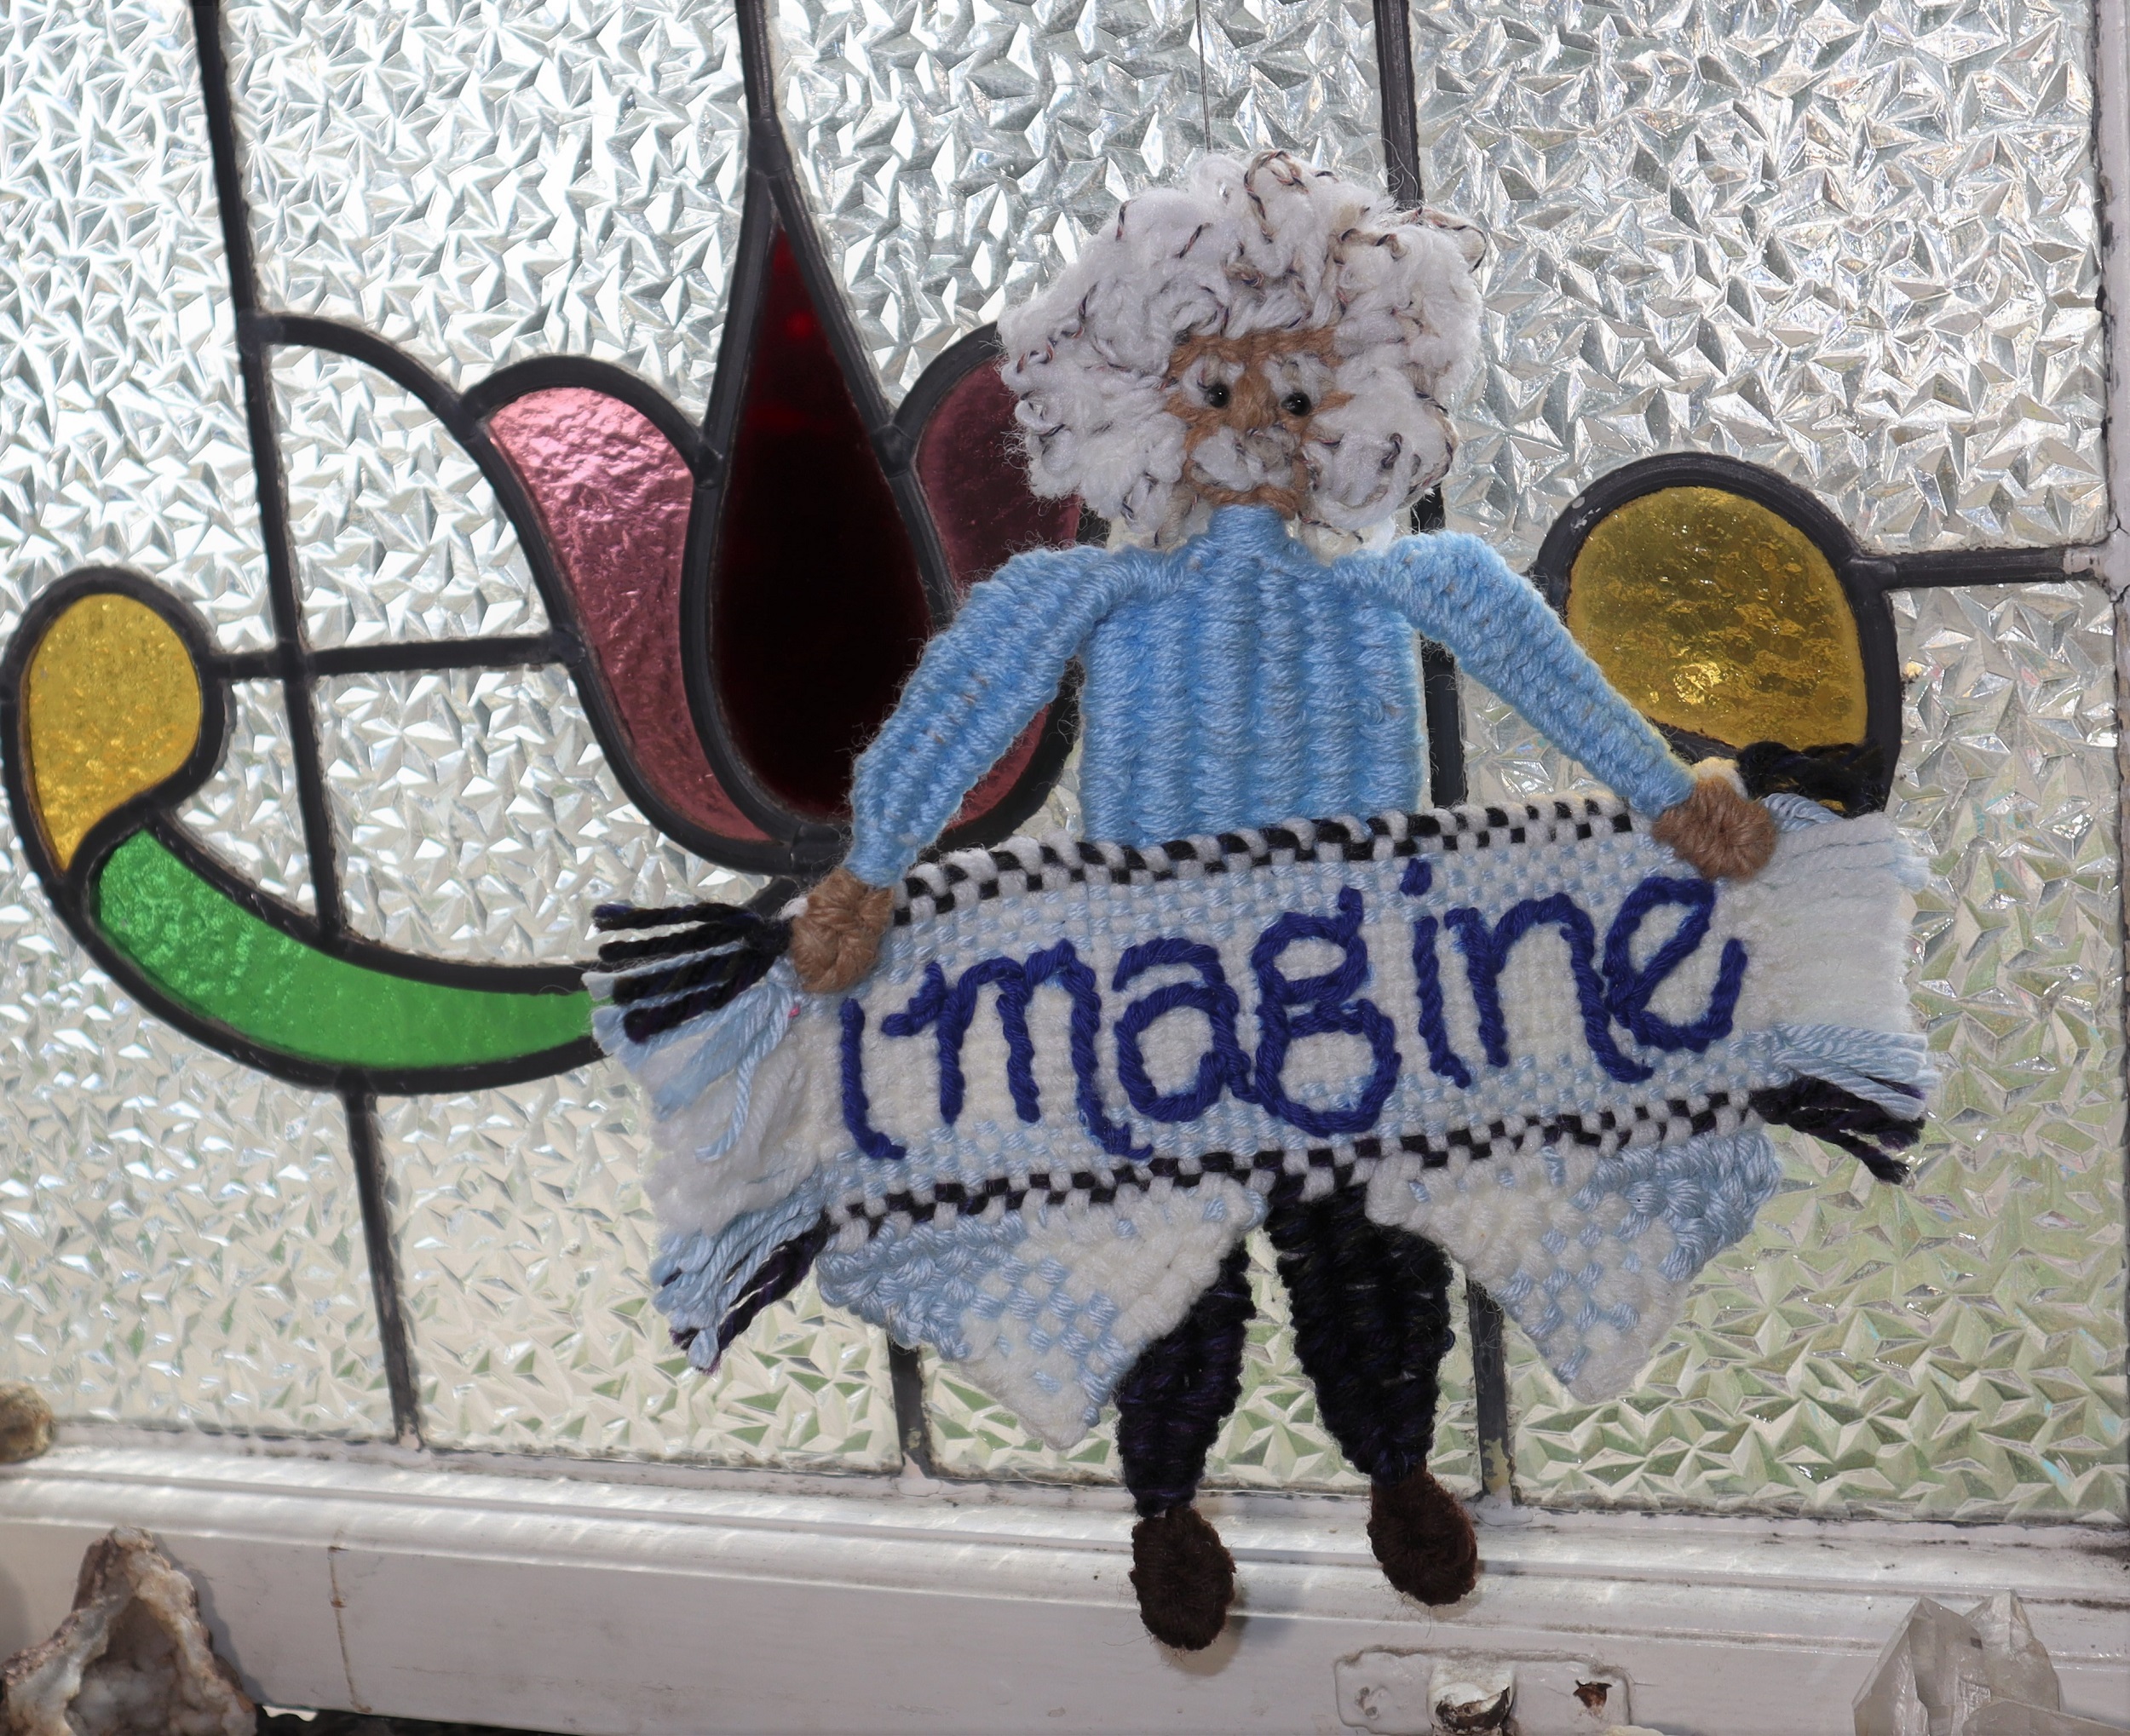
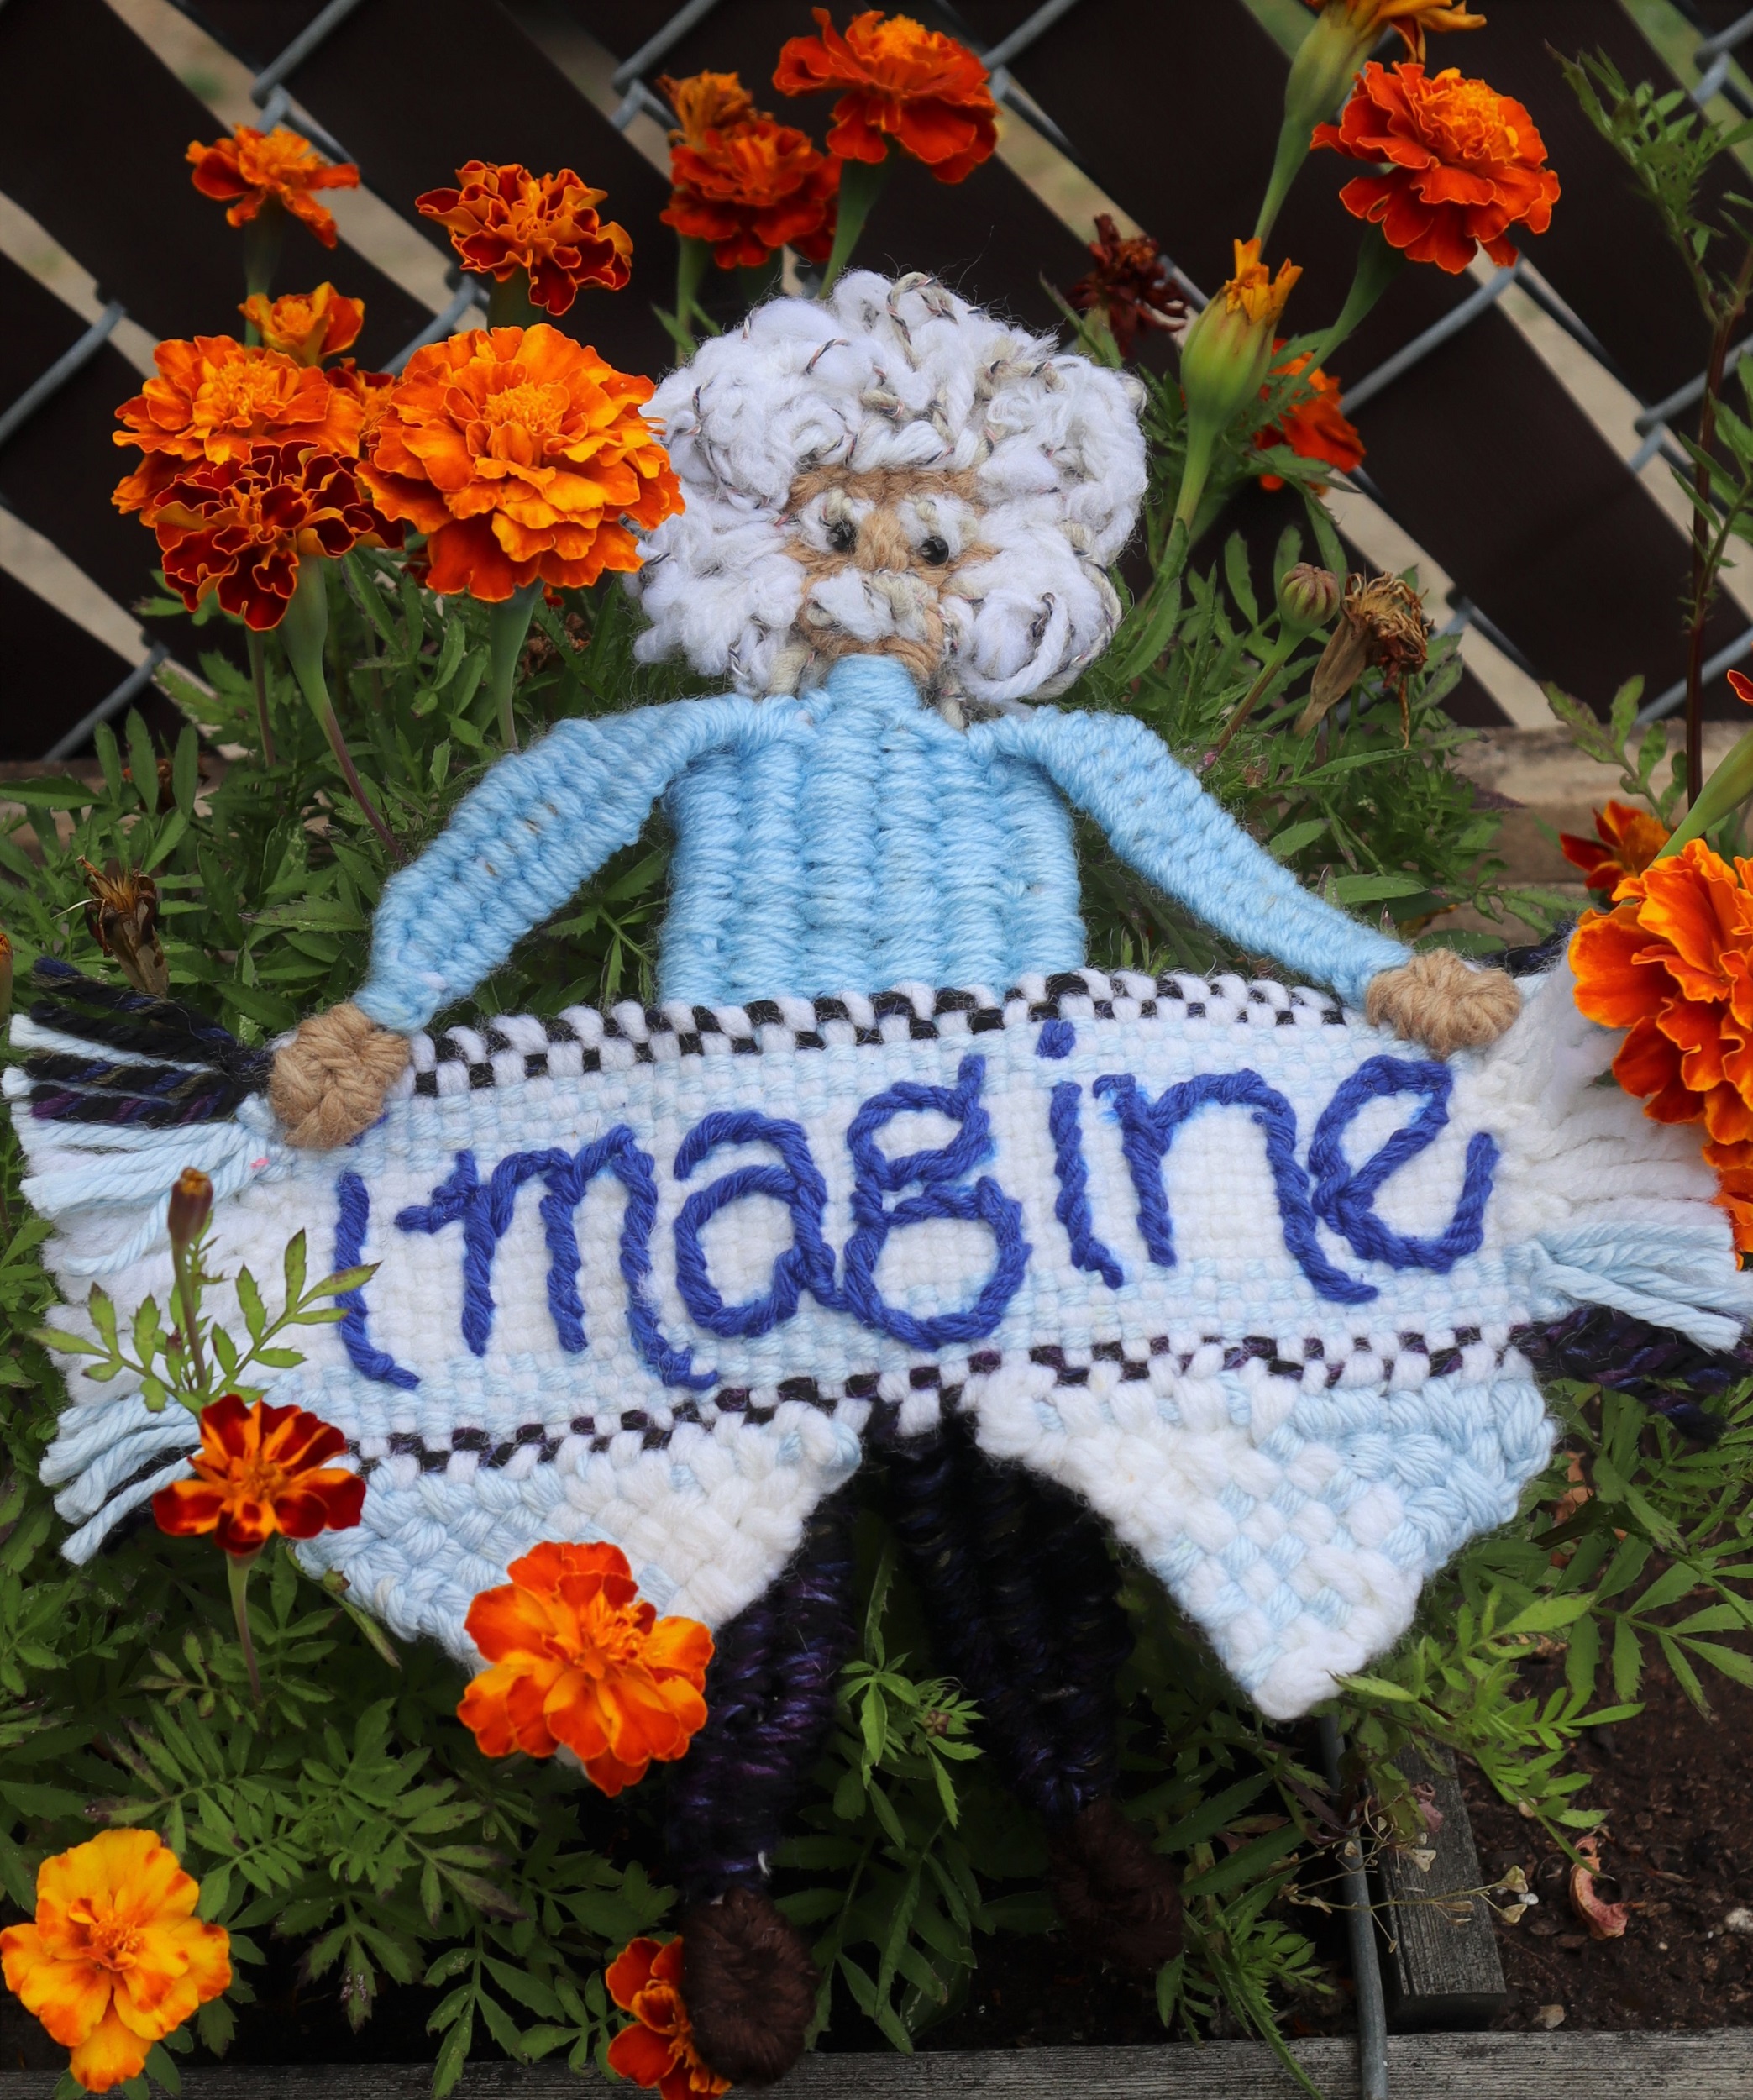
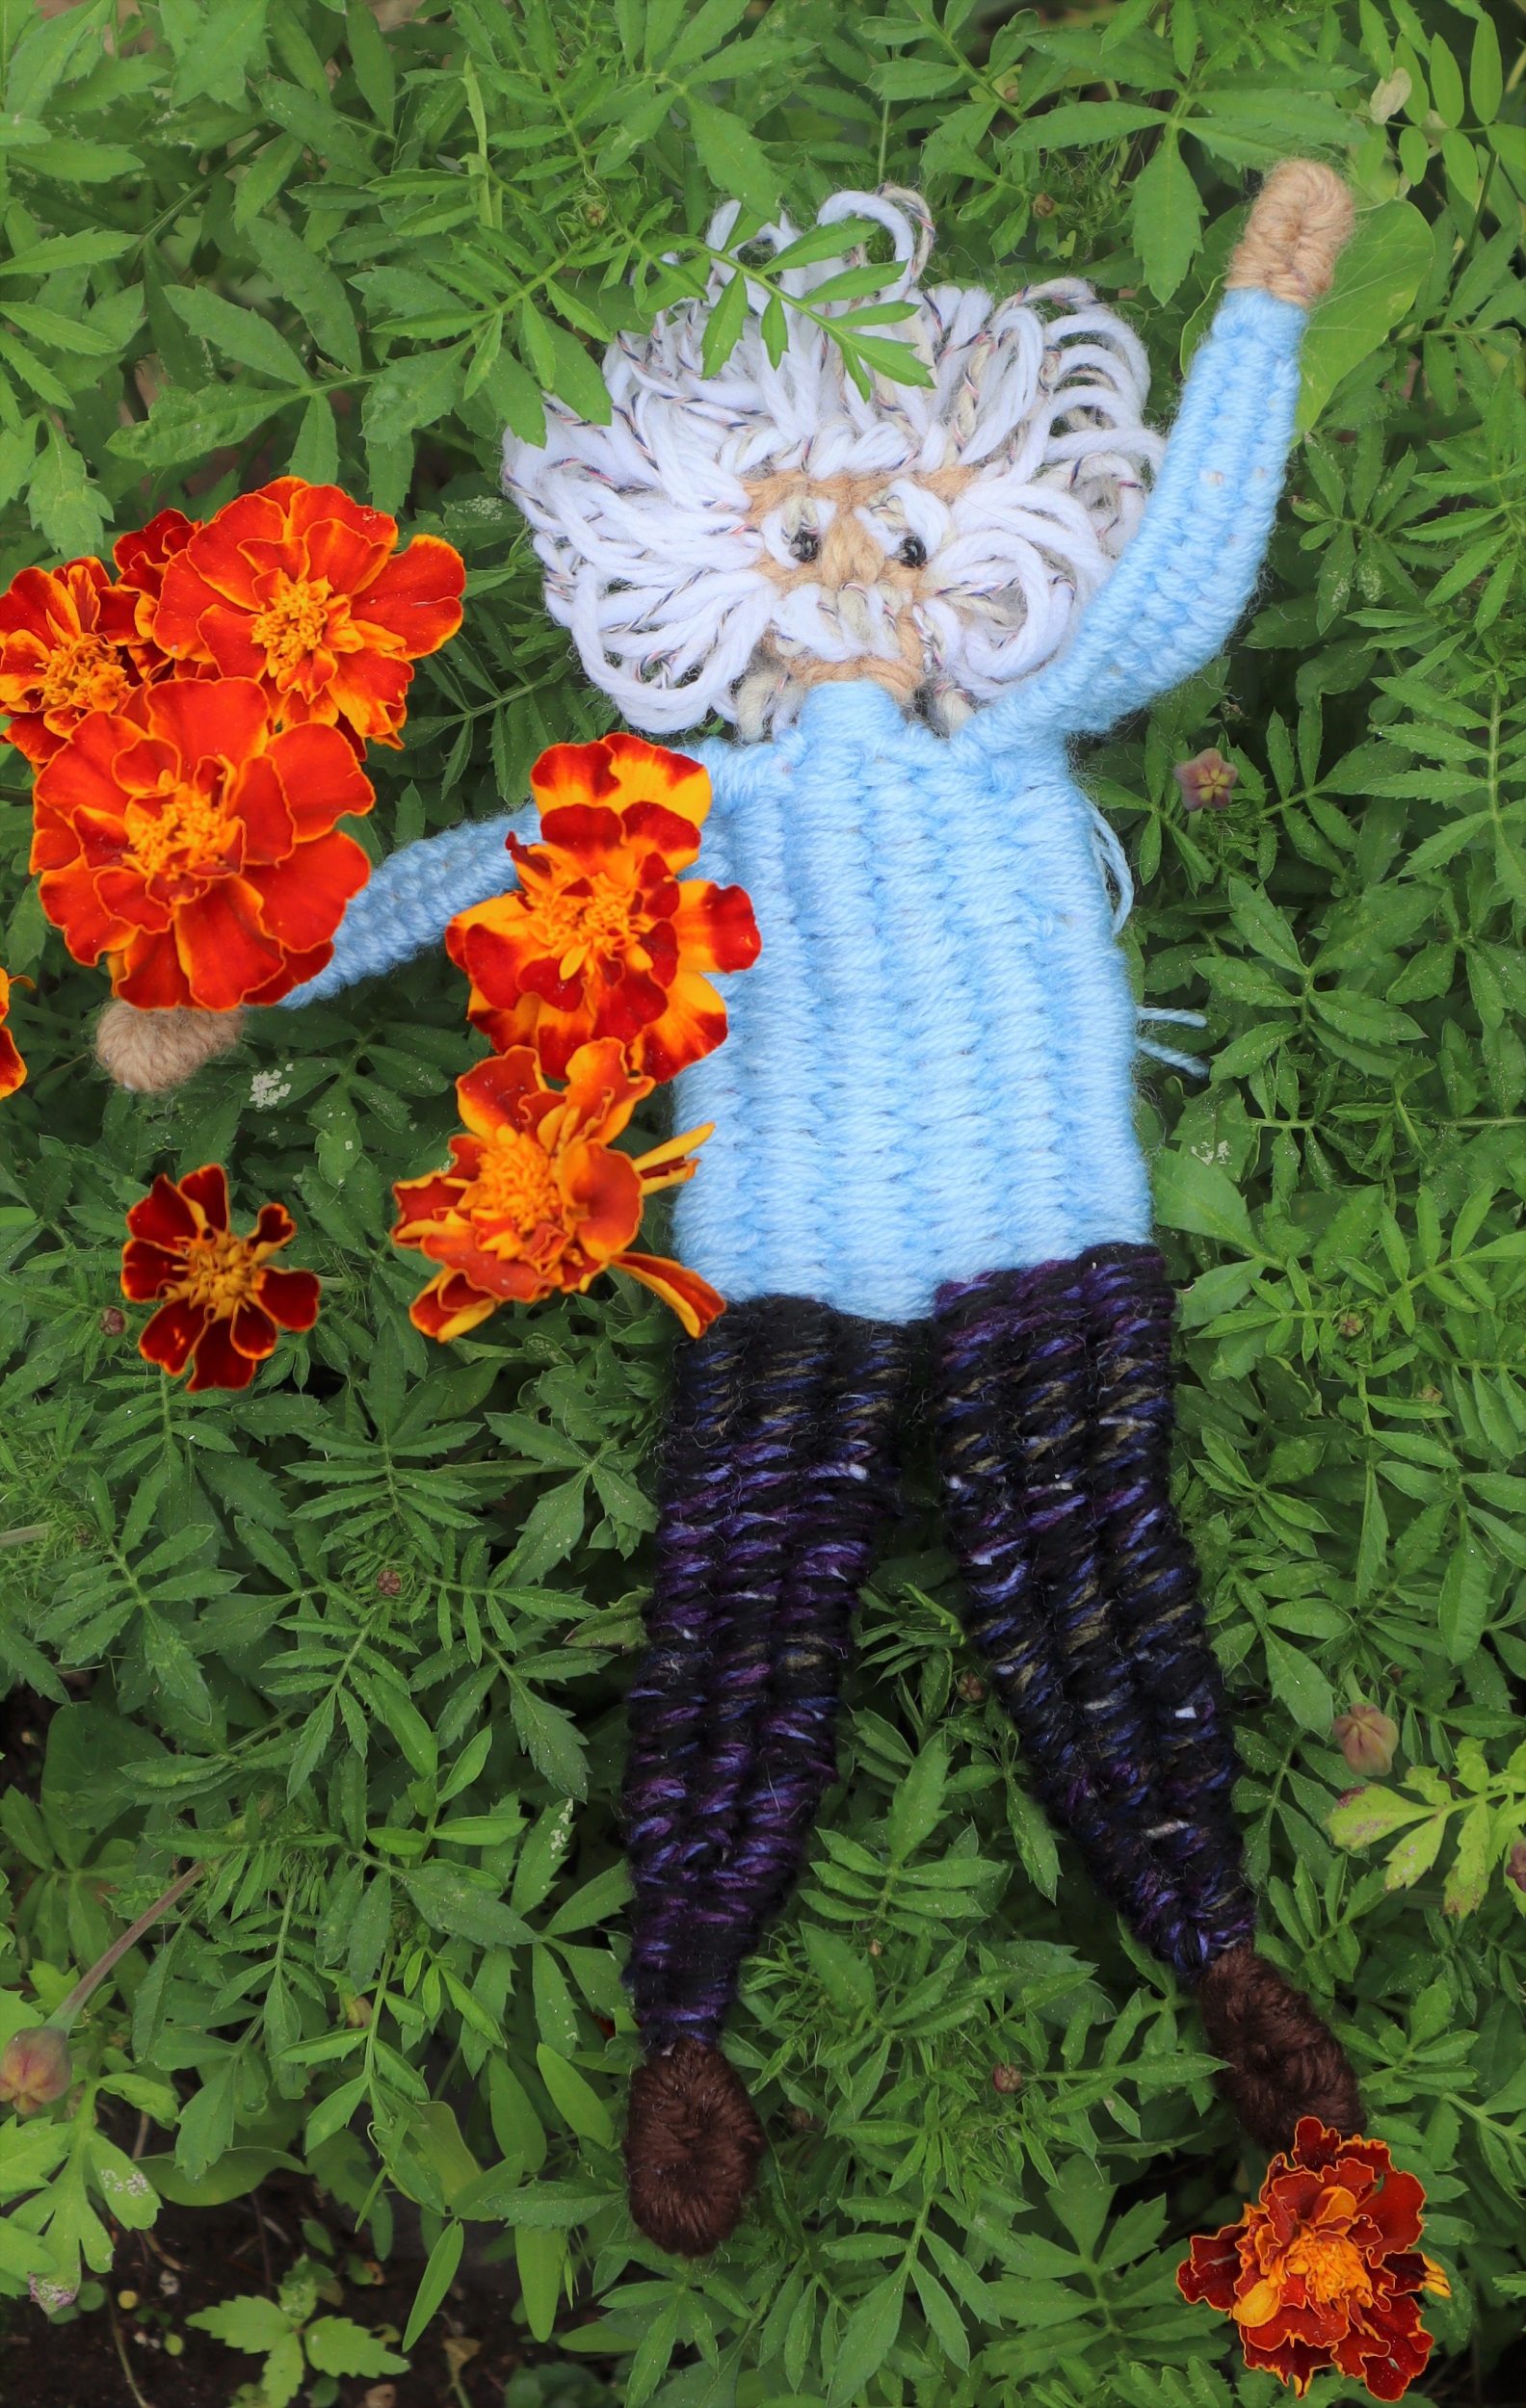
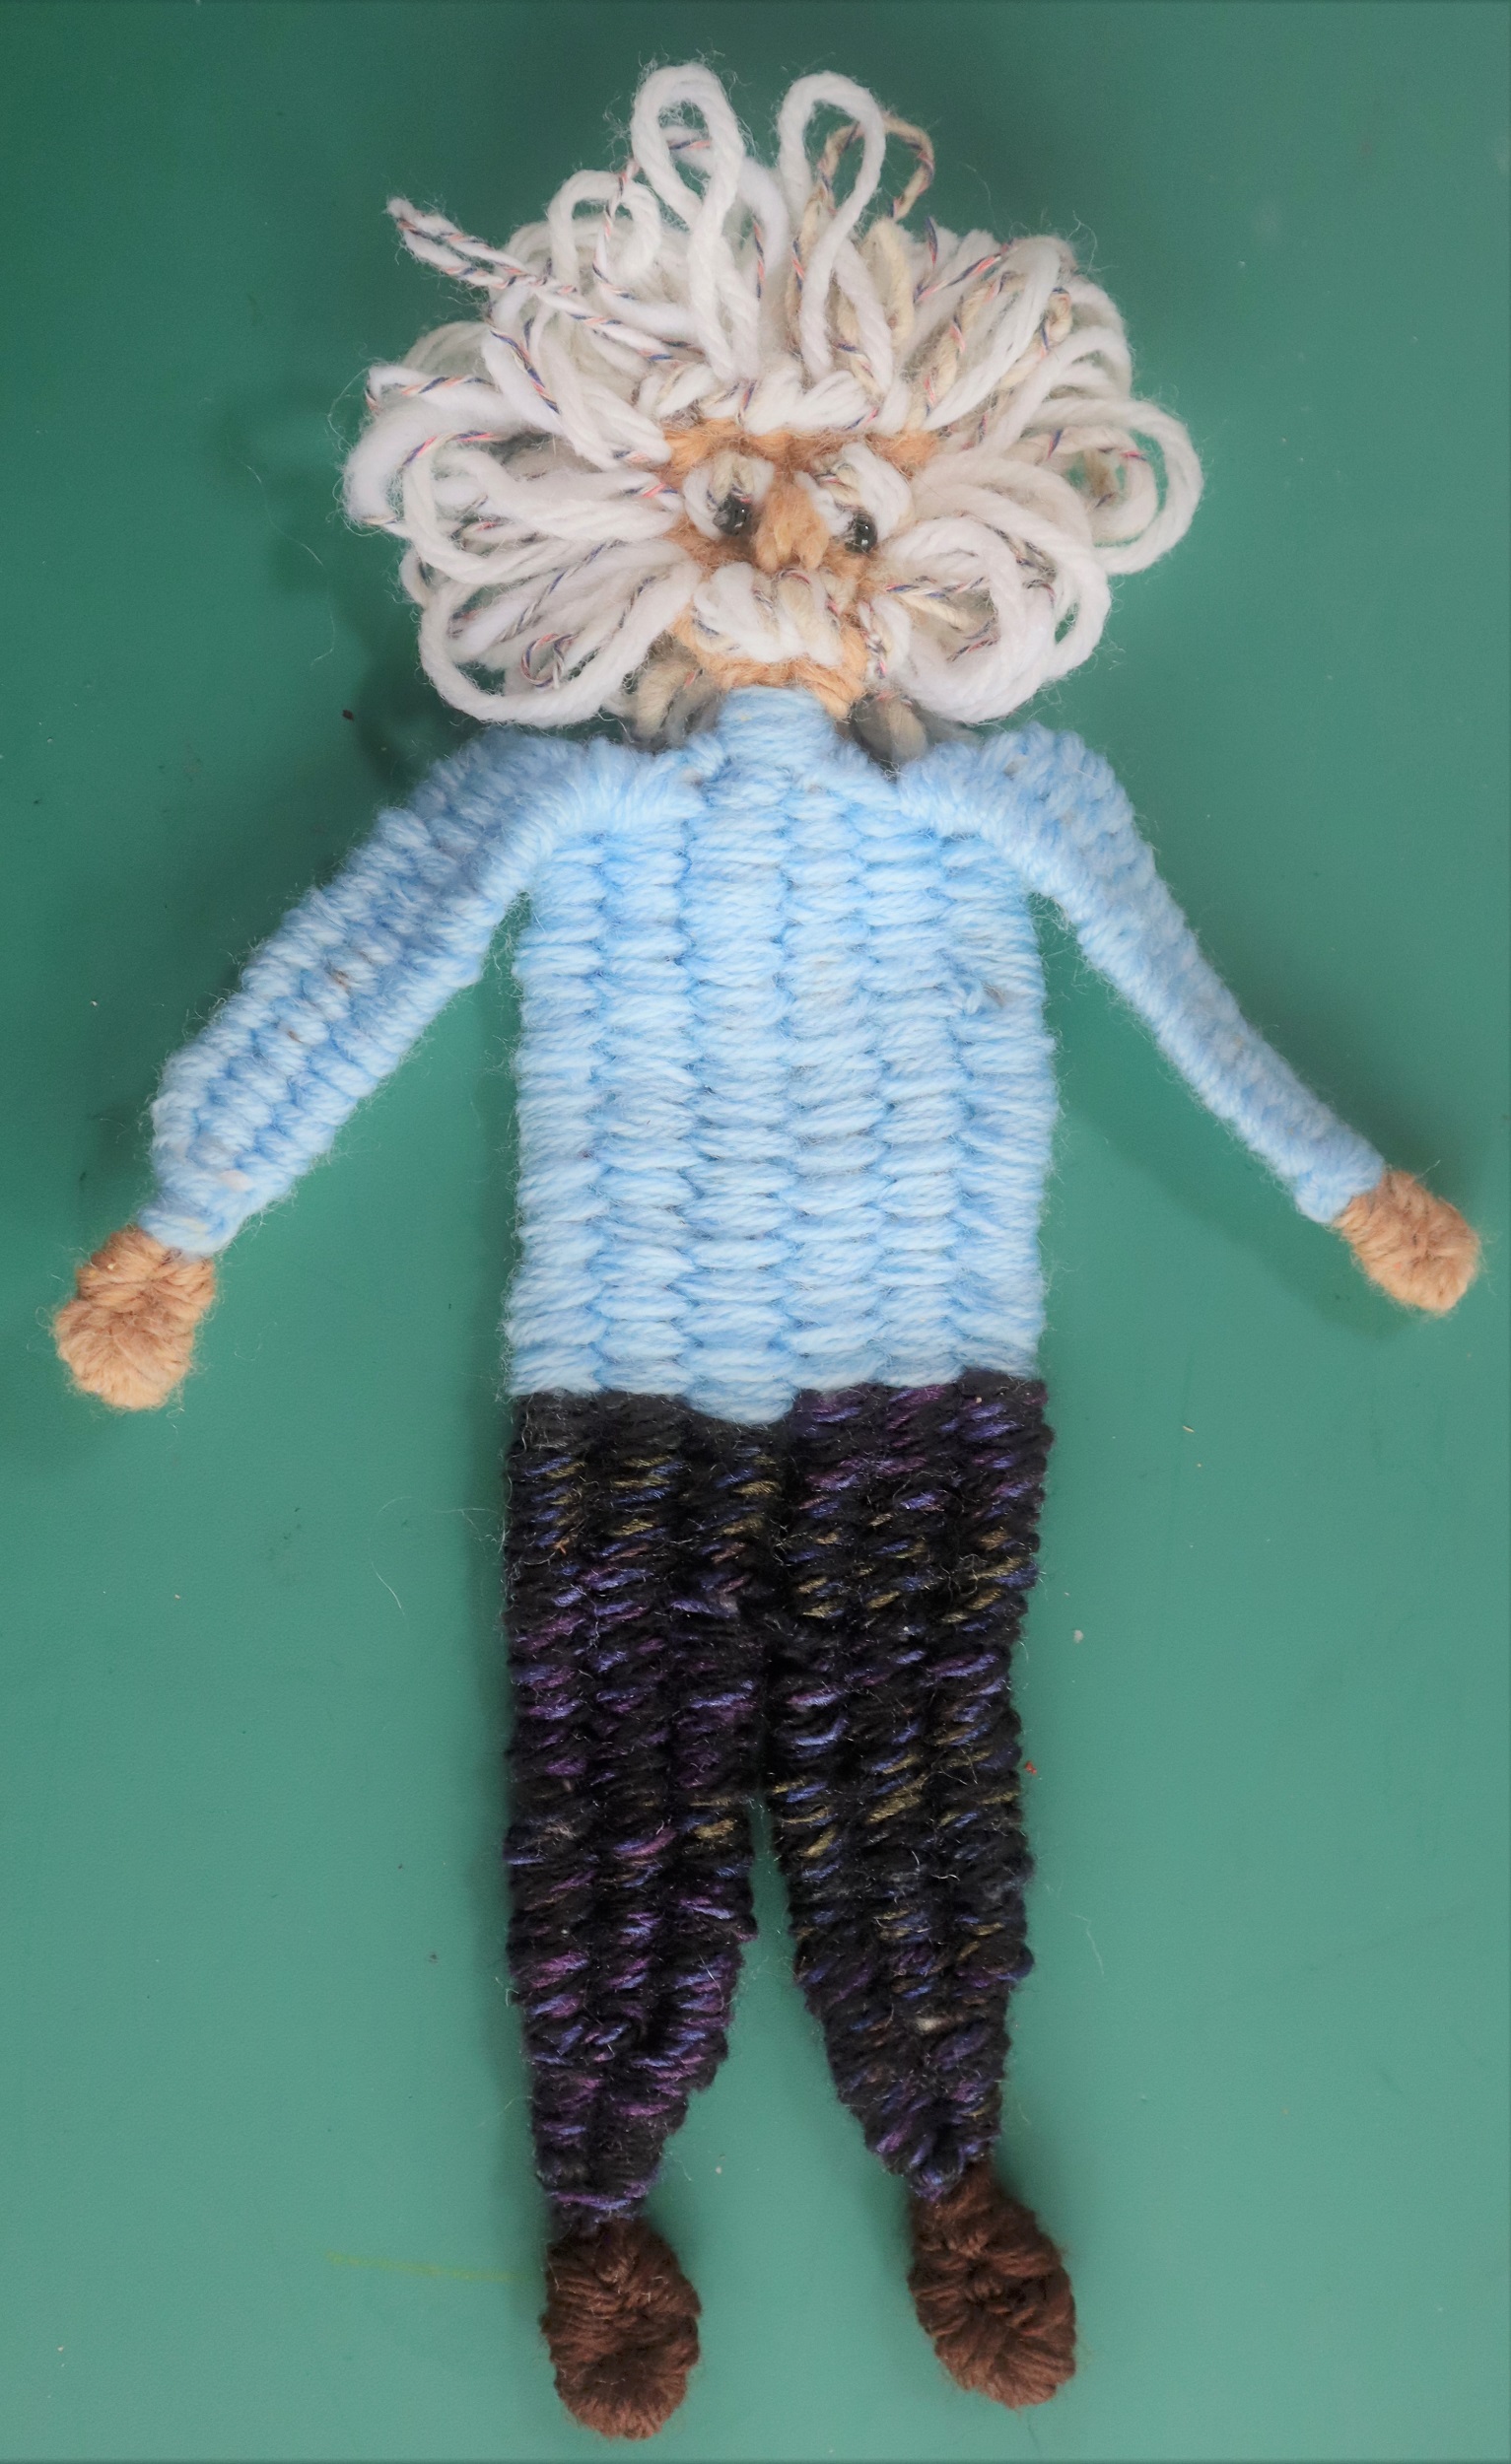
FREE FORM WEAVING: HOMAGE TO ALBERT EINSTEIN:
Albert Einstein is woven (with a few extrapolations and a slight adjustment to the waistline) following the instructions for the Woven Dancer on page 30 of “Innovative Weaving on the Frame Loom”.
In order to hold the pattern onto the loom, a backing board is needed. See: LINK
INSTRUCTIONS:
HOW TOWEAVE THE ALBERT EINSTEIN FIGURE:
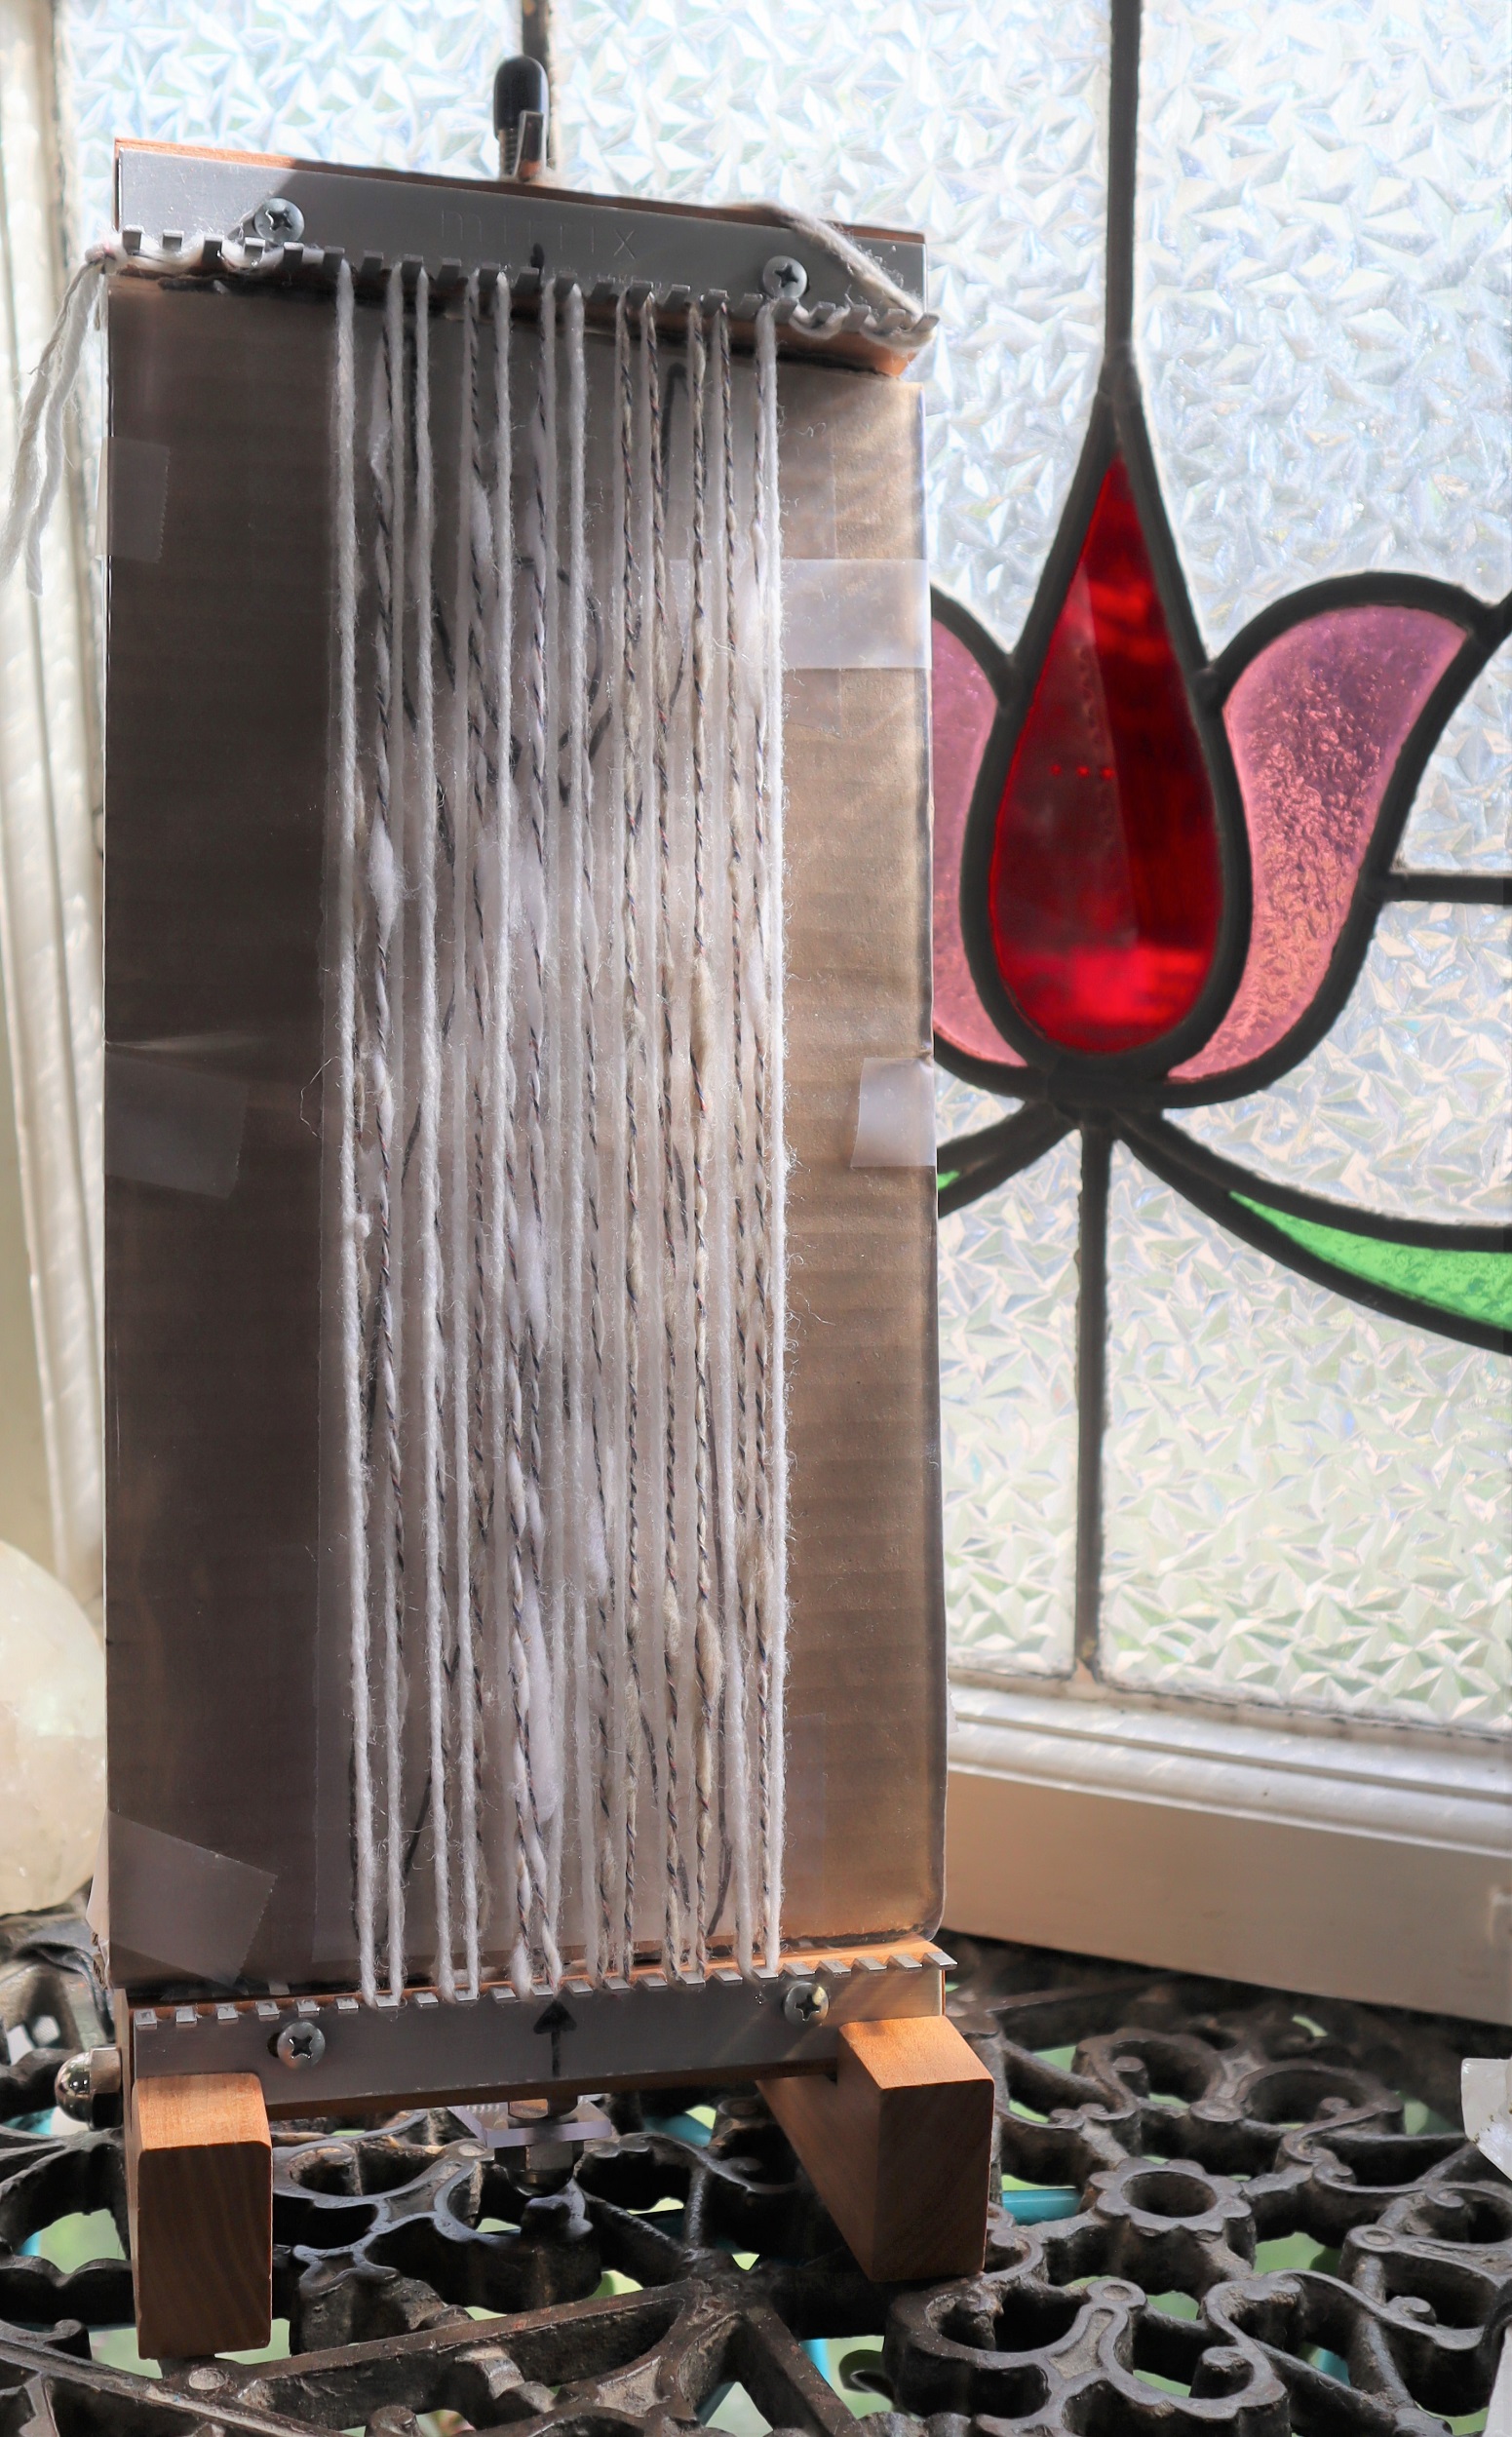
1: SET UP THE LOOM so it is 11 inches/27.5 cm) from the lower set of pegs to the upper set. Lock it into the ‘Sandy Stand’.
Fold the ends of the backing board to the back and slide it in place on the loom.
2: WARP THE LOOM: Following the instructions for the Woven Dancer on page 30 of ‘Innovative Weaving on the Frame Loom’, with 1 strand of #4 Medium weight (Worsted or Sport weight) yarn white and 1 strand grey held together as if they are a single strand:
Skip 6 pegs at each side of the loom and warp the loom, following the instructions in the book closely.
3: WEAVING:
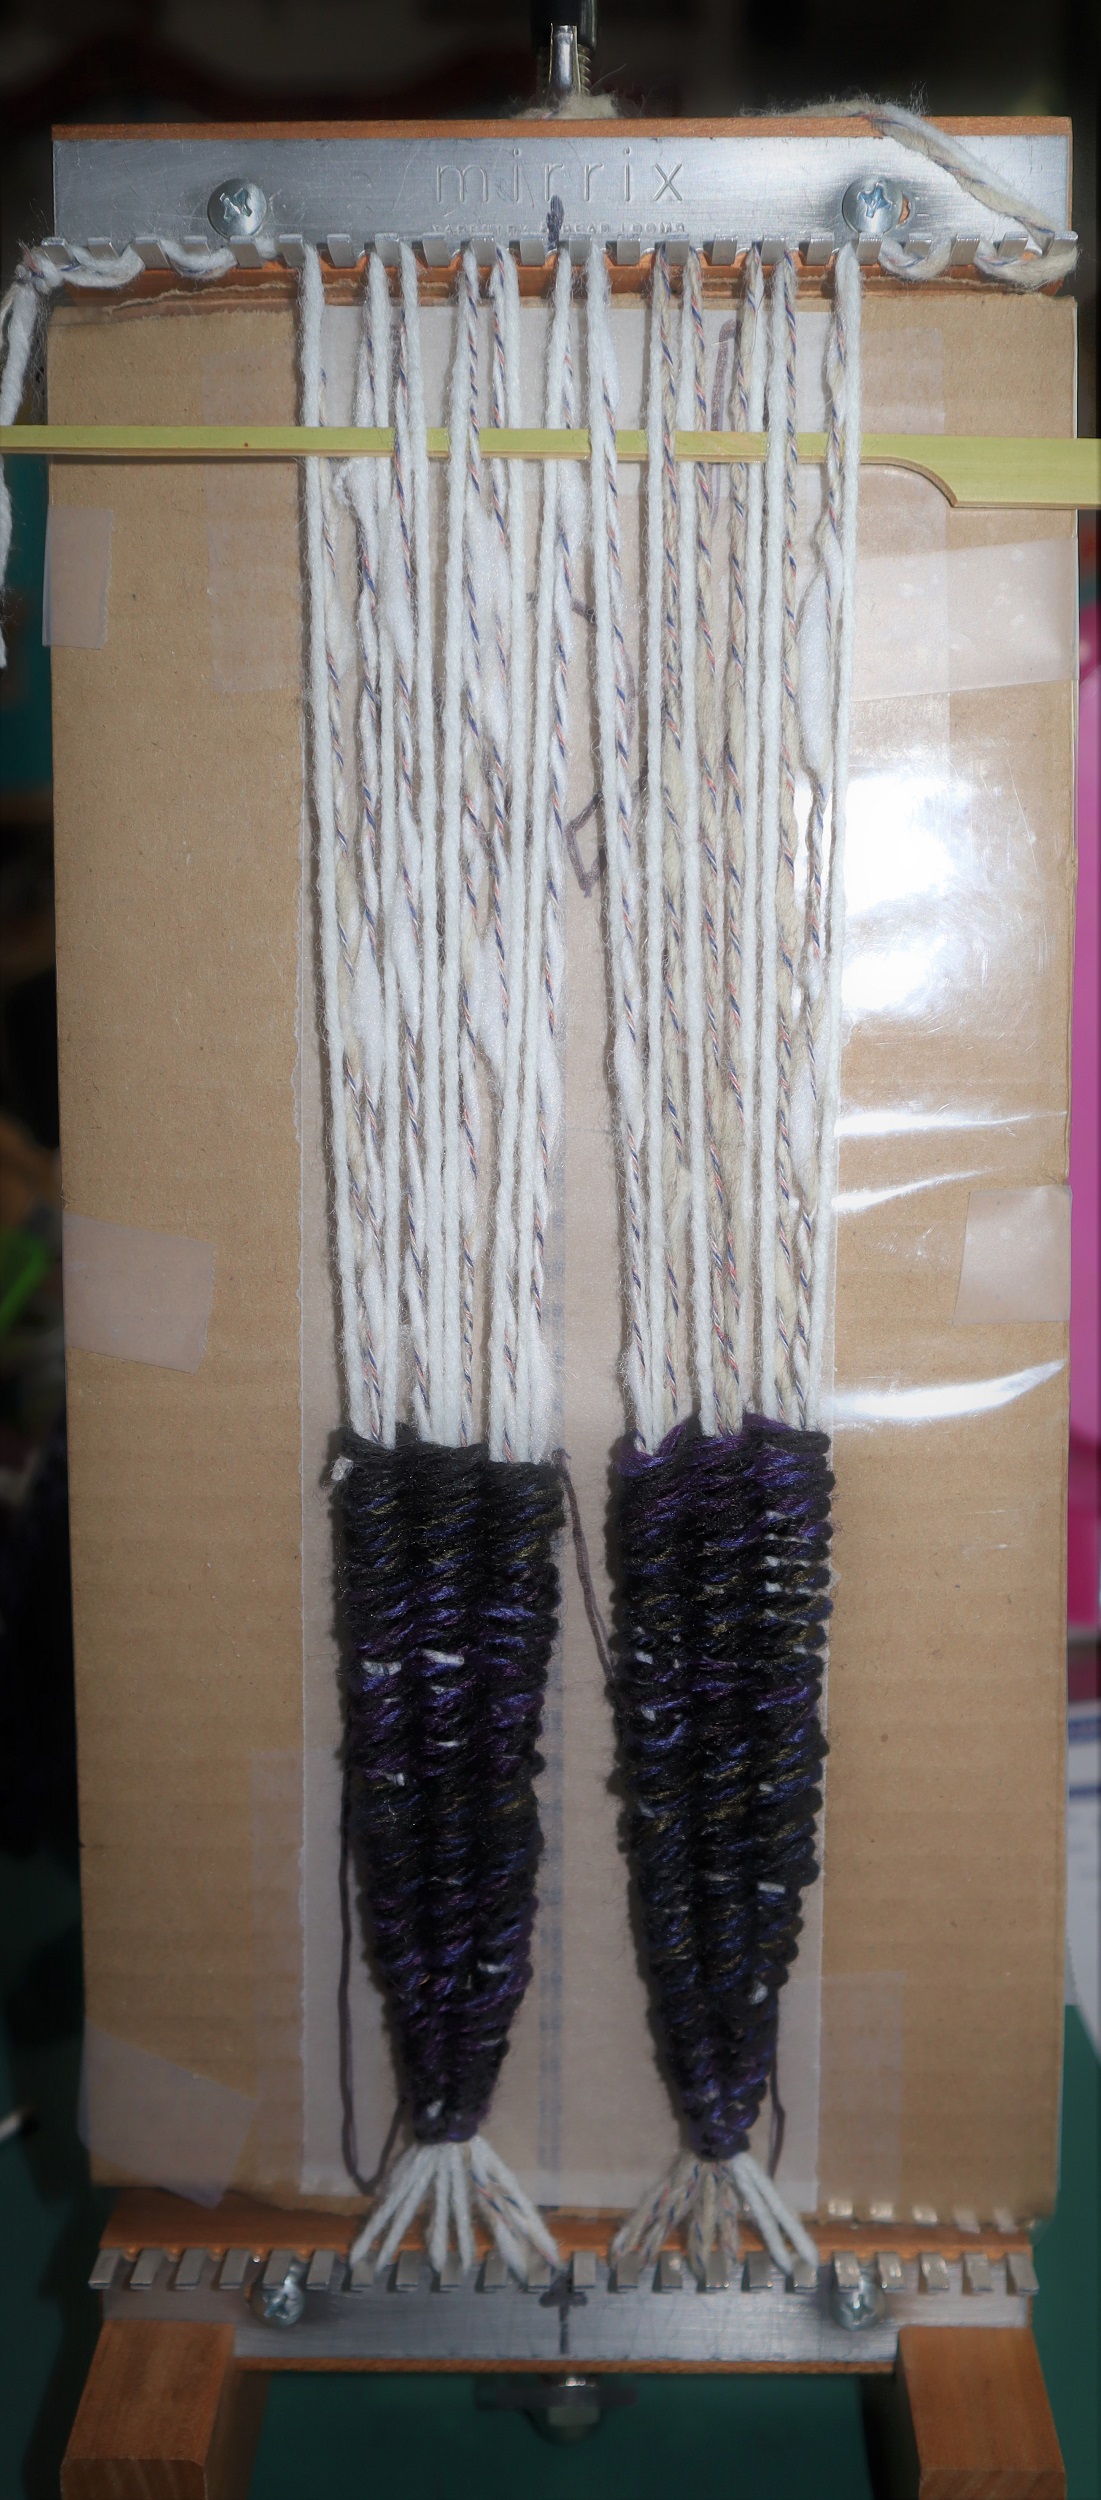
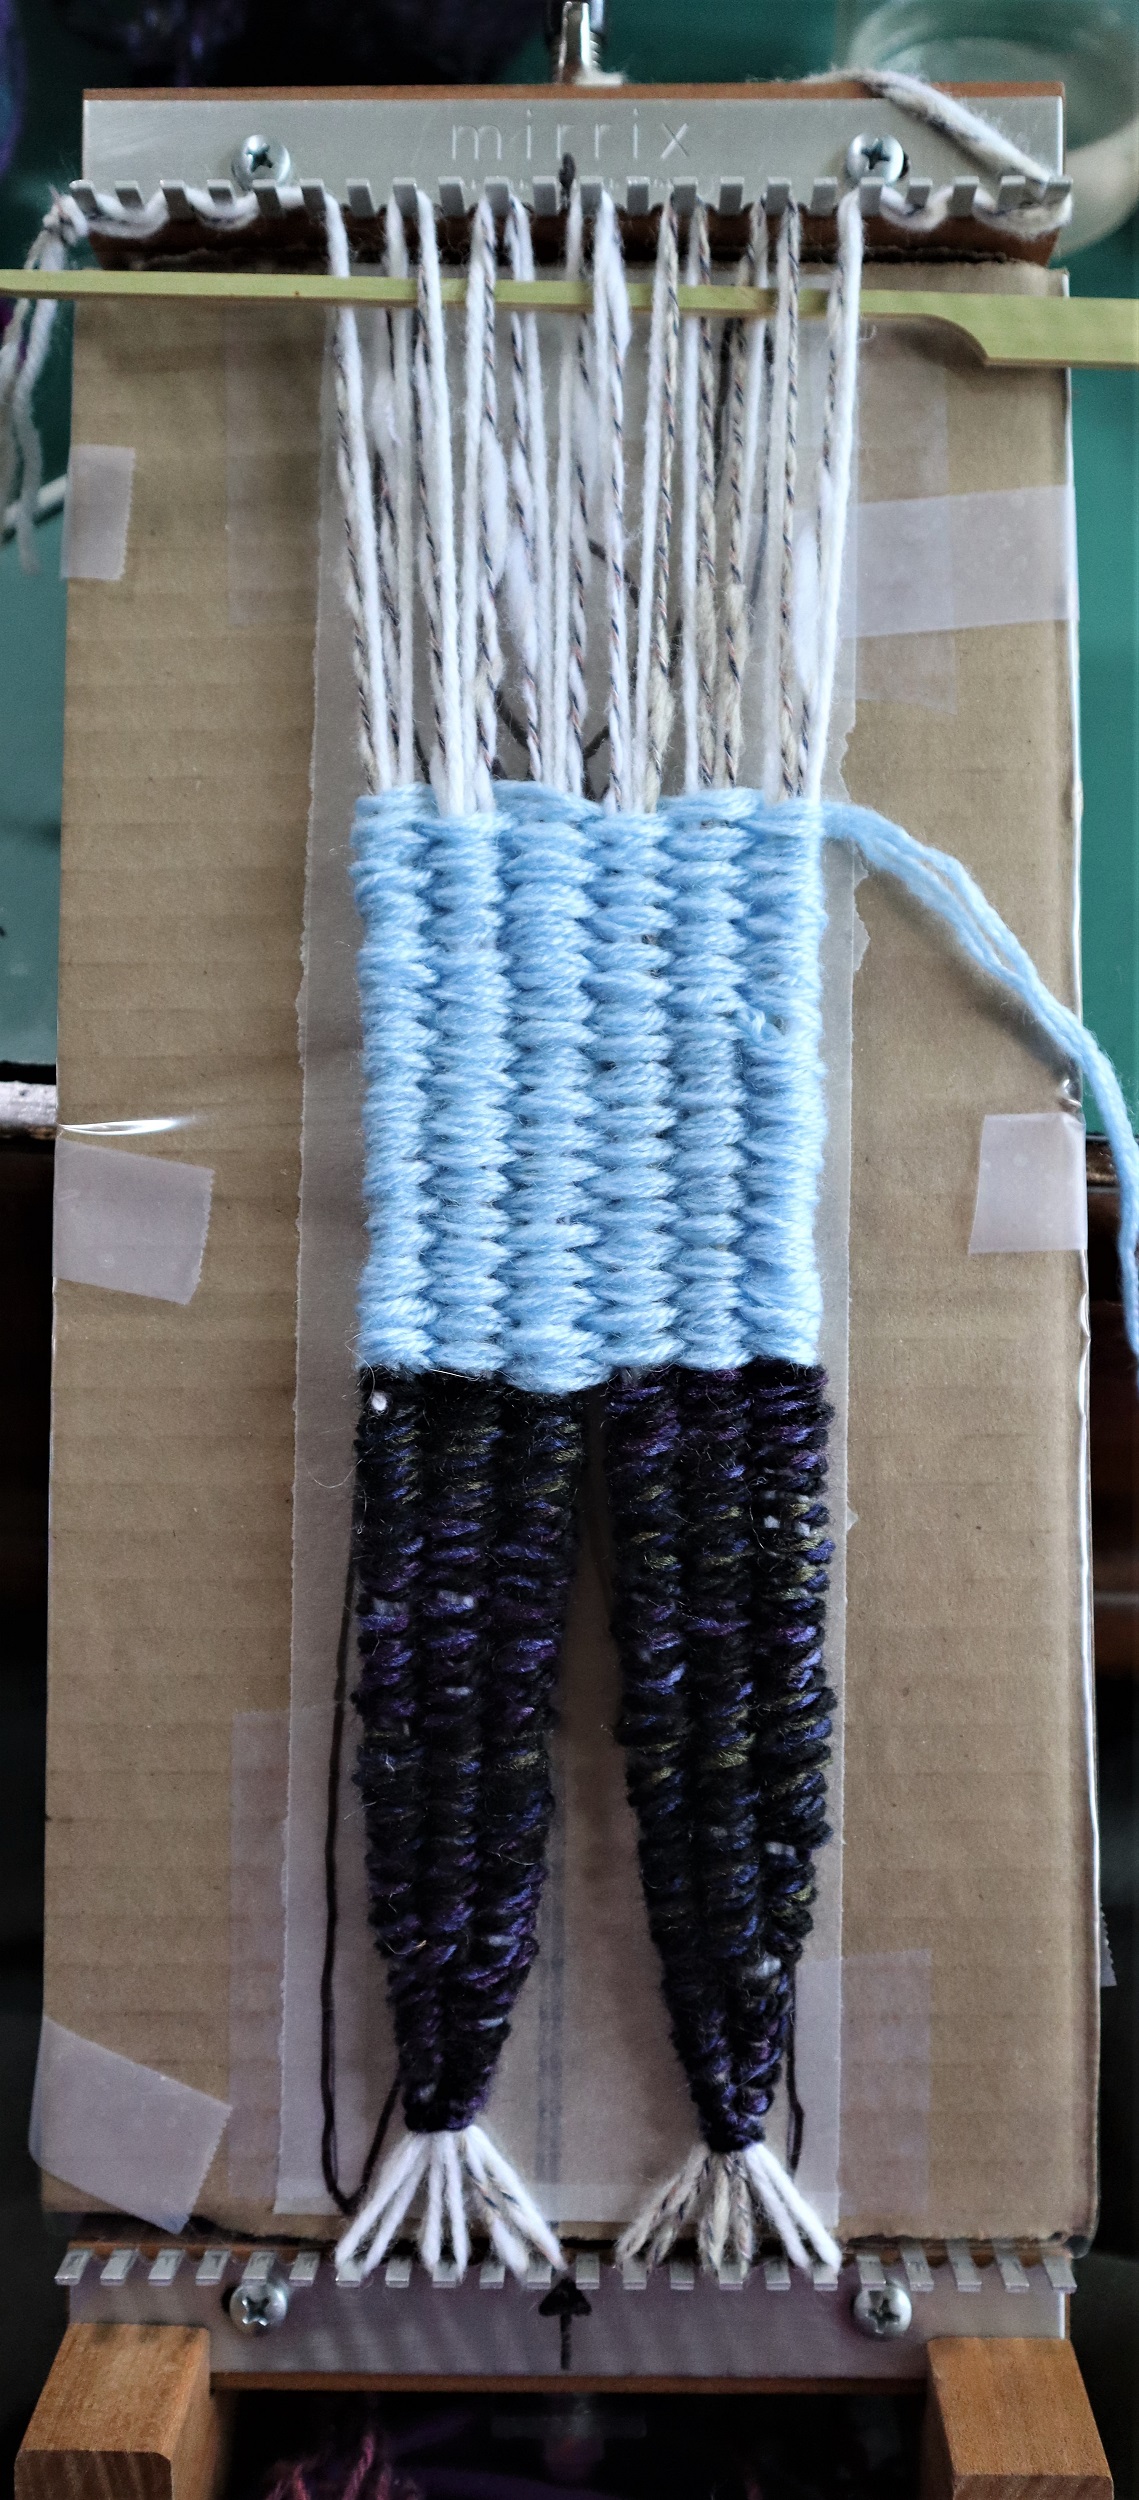
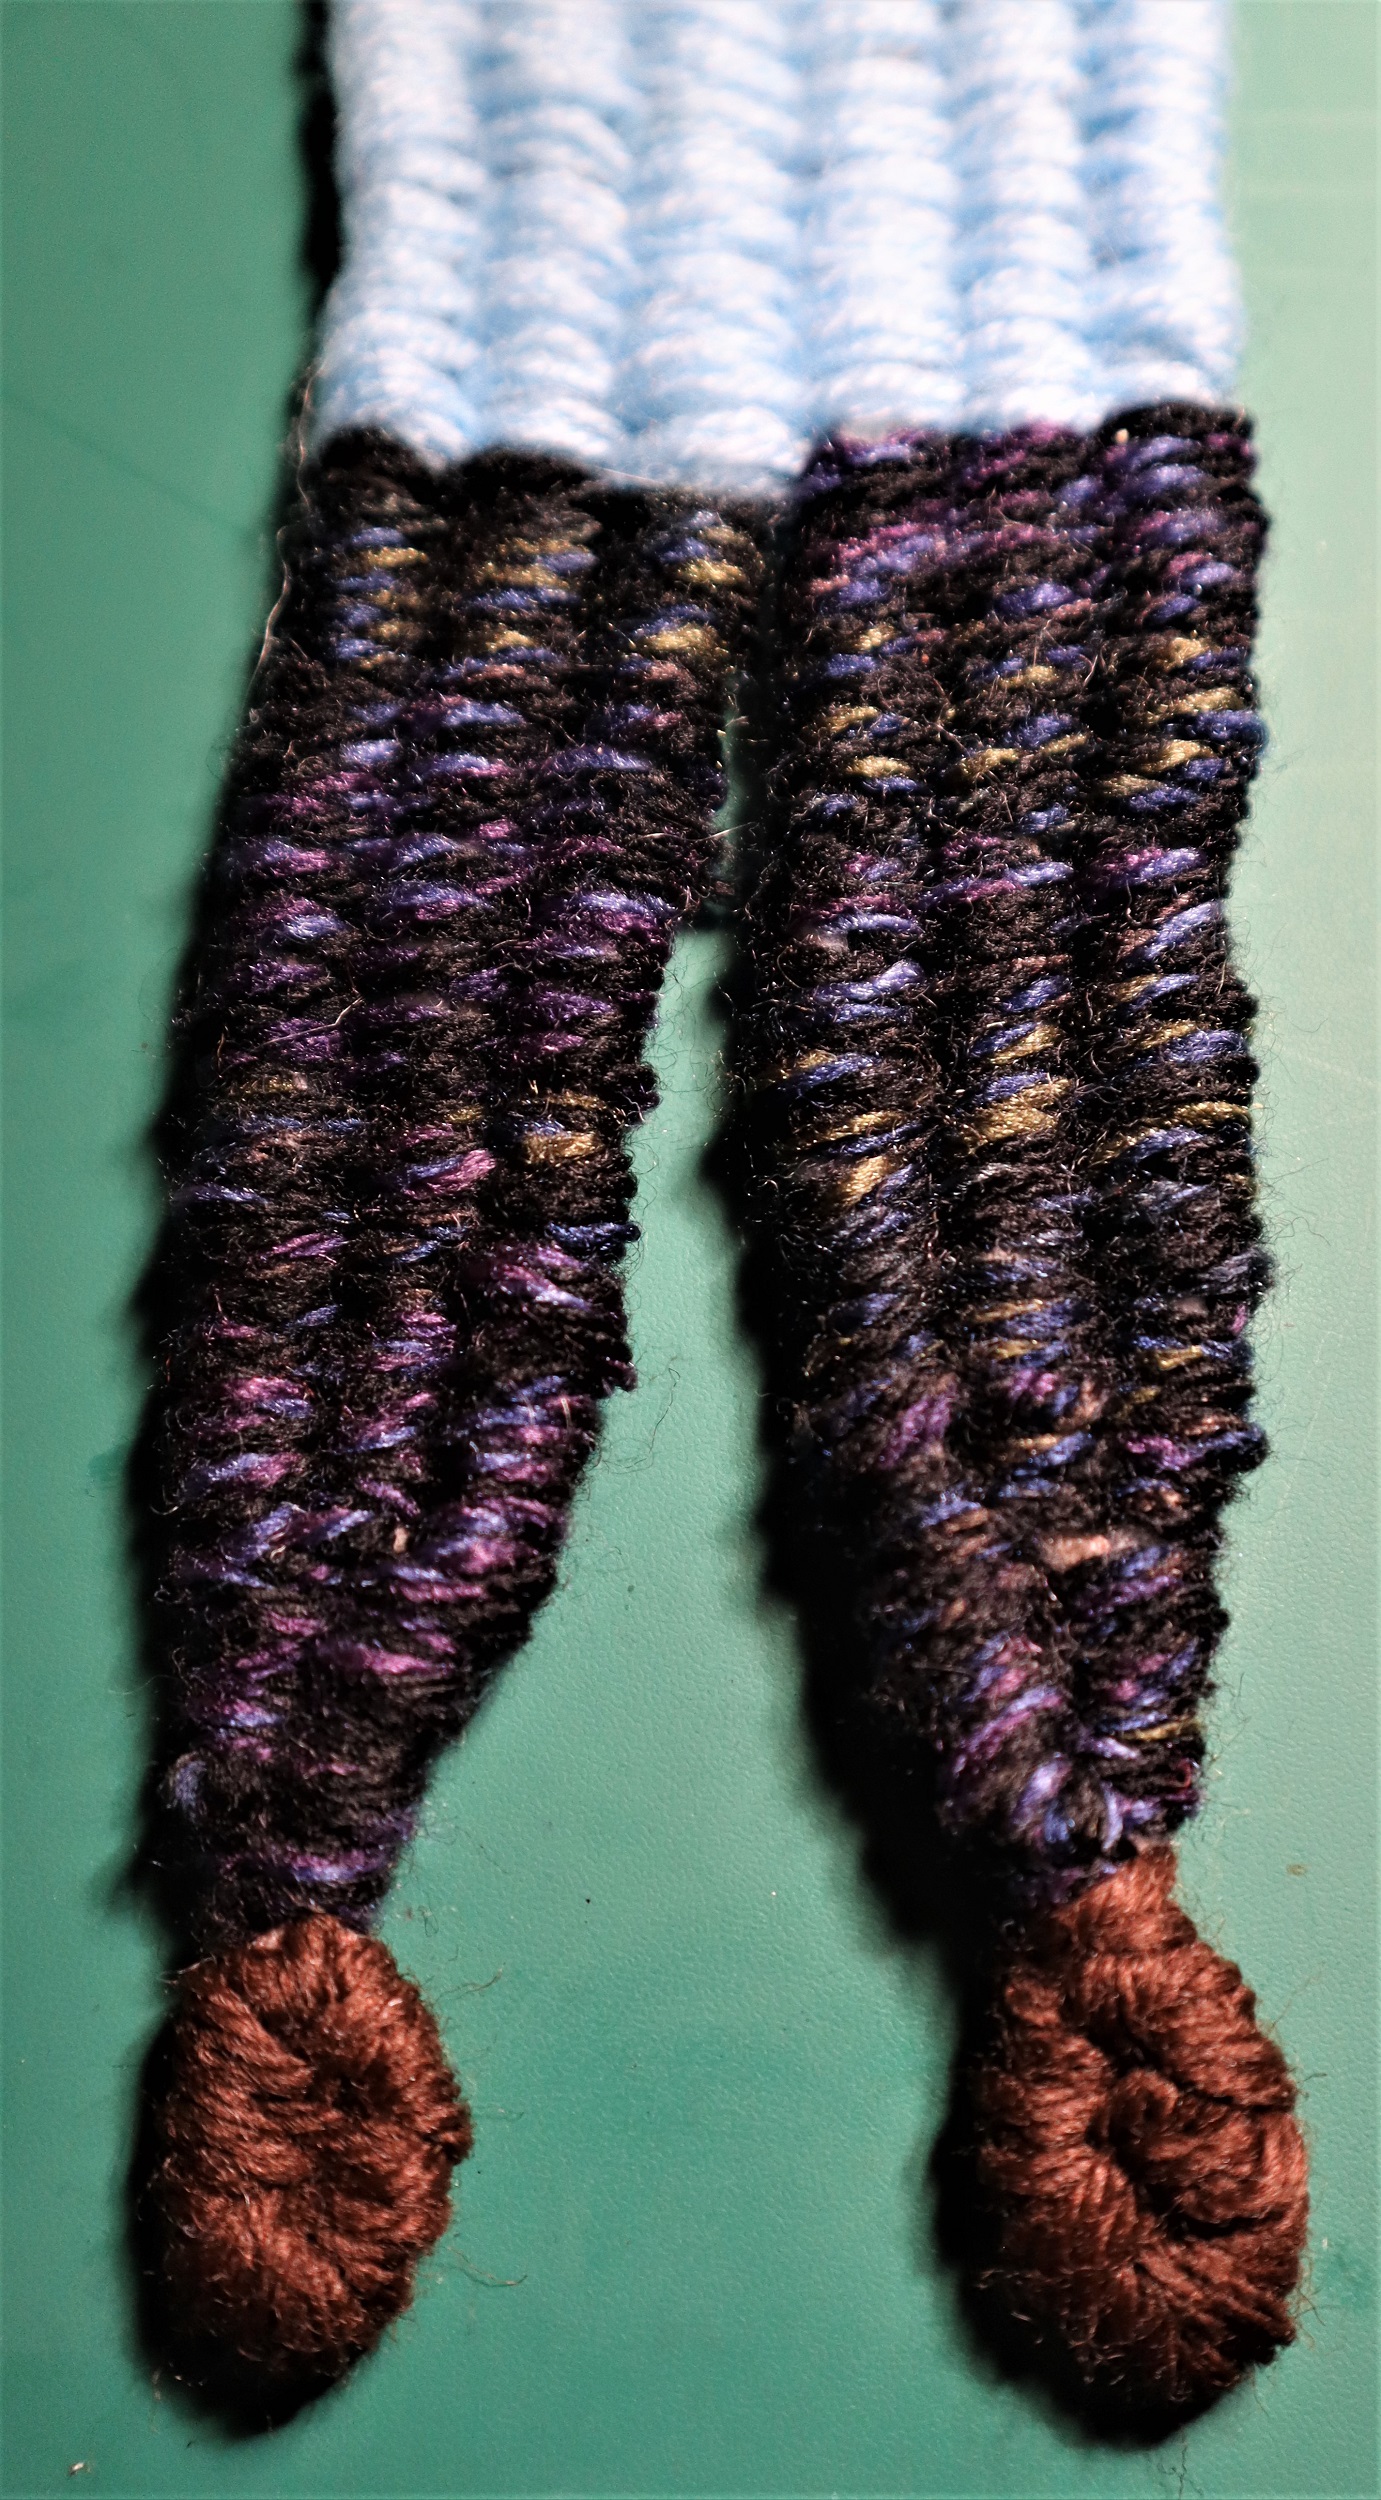
LEGS:
Leaving only an inch or of a tail end rather than the long tail end listed in the instructions in the book, weave the legs with 2 strands of black yarn held together as if they are a single strand, and packing the weaving down closely to completely cover the warp strands. Follow the instructions in the book for weaving the legs, but noting that you will be beating the weft yarn in more densely than in the book.
SWEATER:
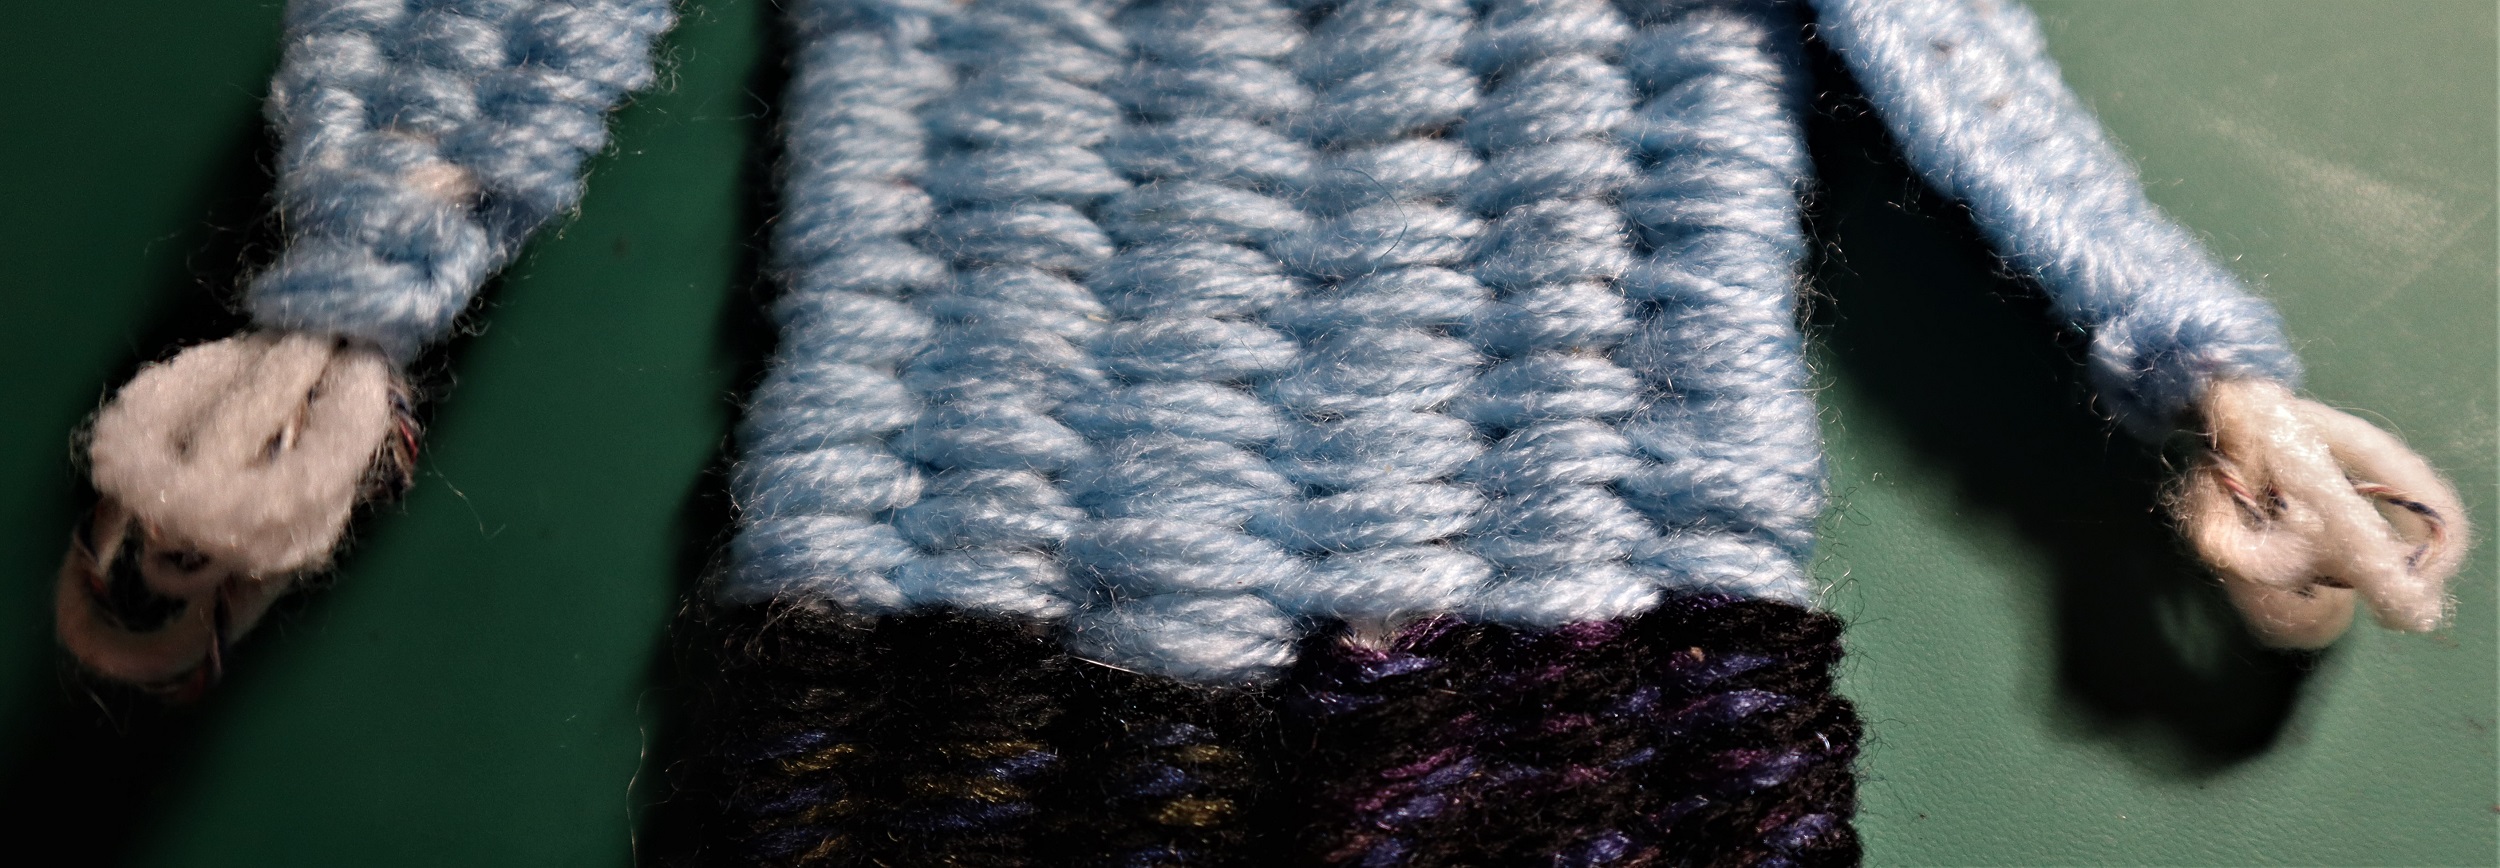
With 2 strands of light blue yarn held together as if they are a single strand, weave up to the neck. Beat the weft so it completely covers the warp strands.
DO NOT pull in the waistline as it is drawn in the book. Weave the sweater straight up to the shoulders.
Wrap the neck with the blue yarn and weave in the ends.
SLEEVES:
Weave the sleeves following the instructions for the arms, but, once again, beat the weft so it completely covers the warp strands.
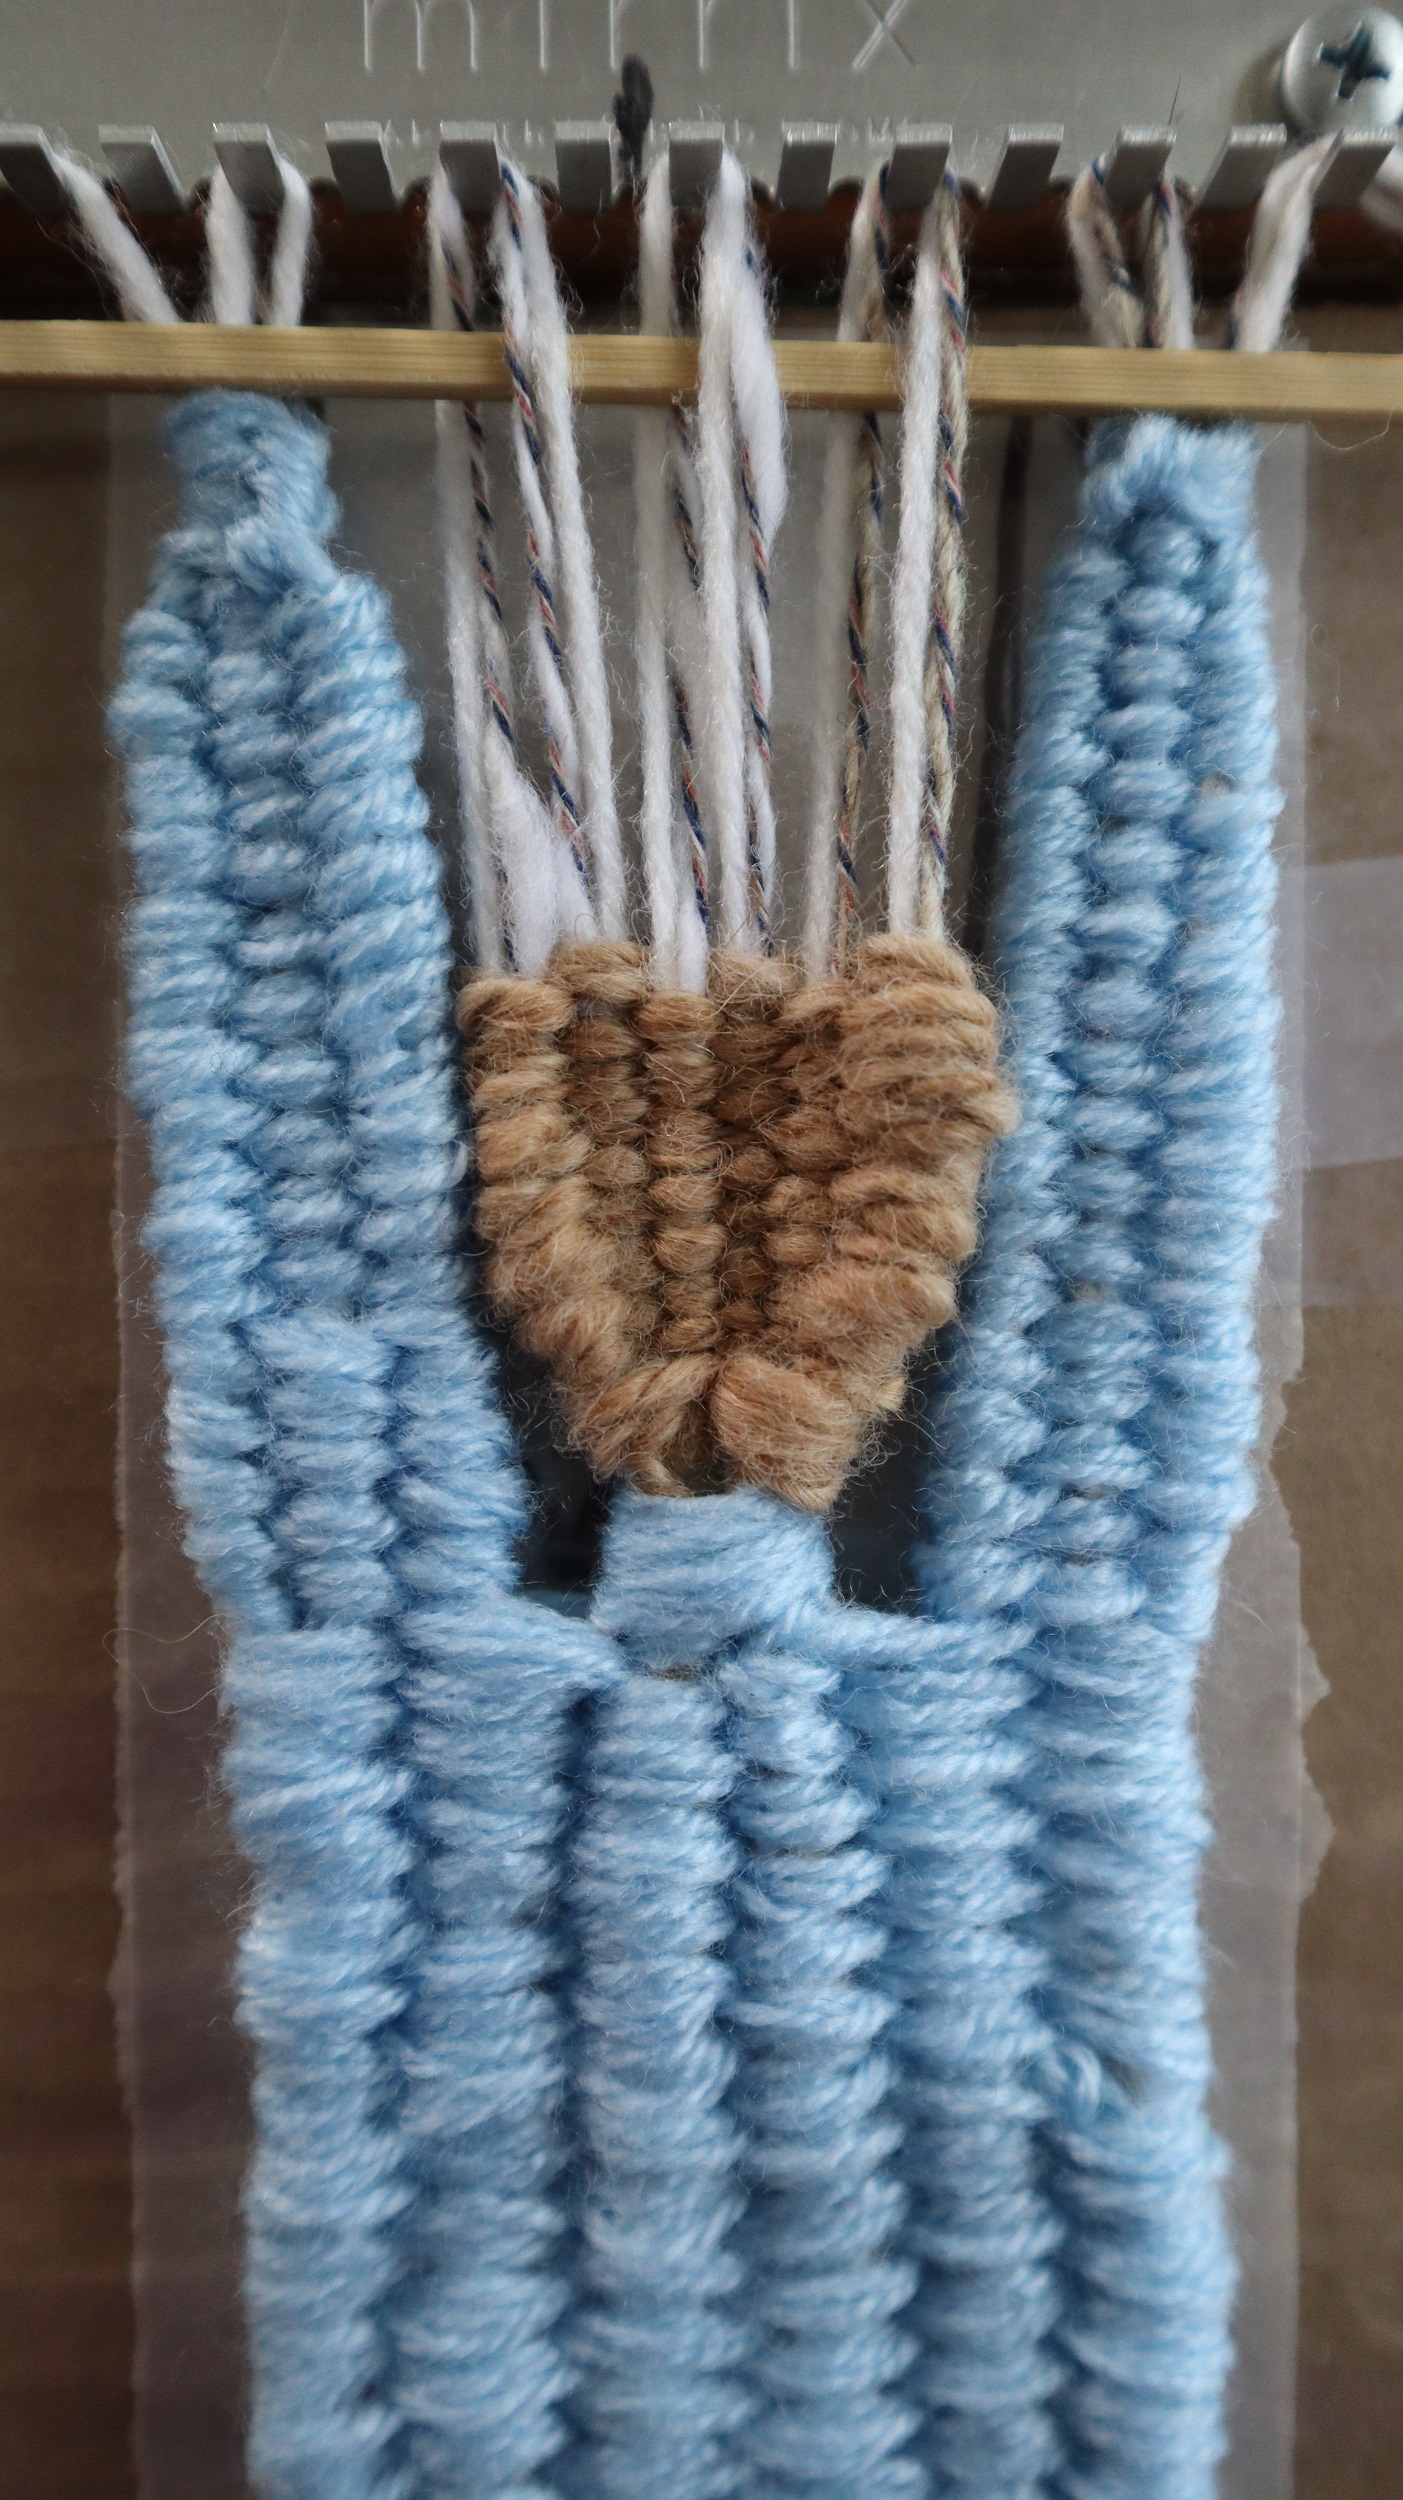
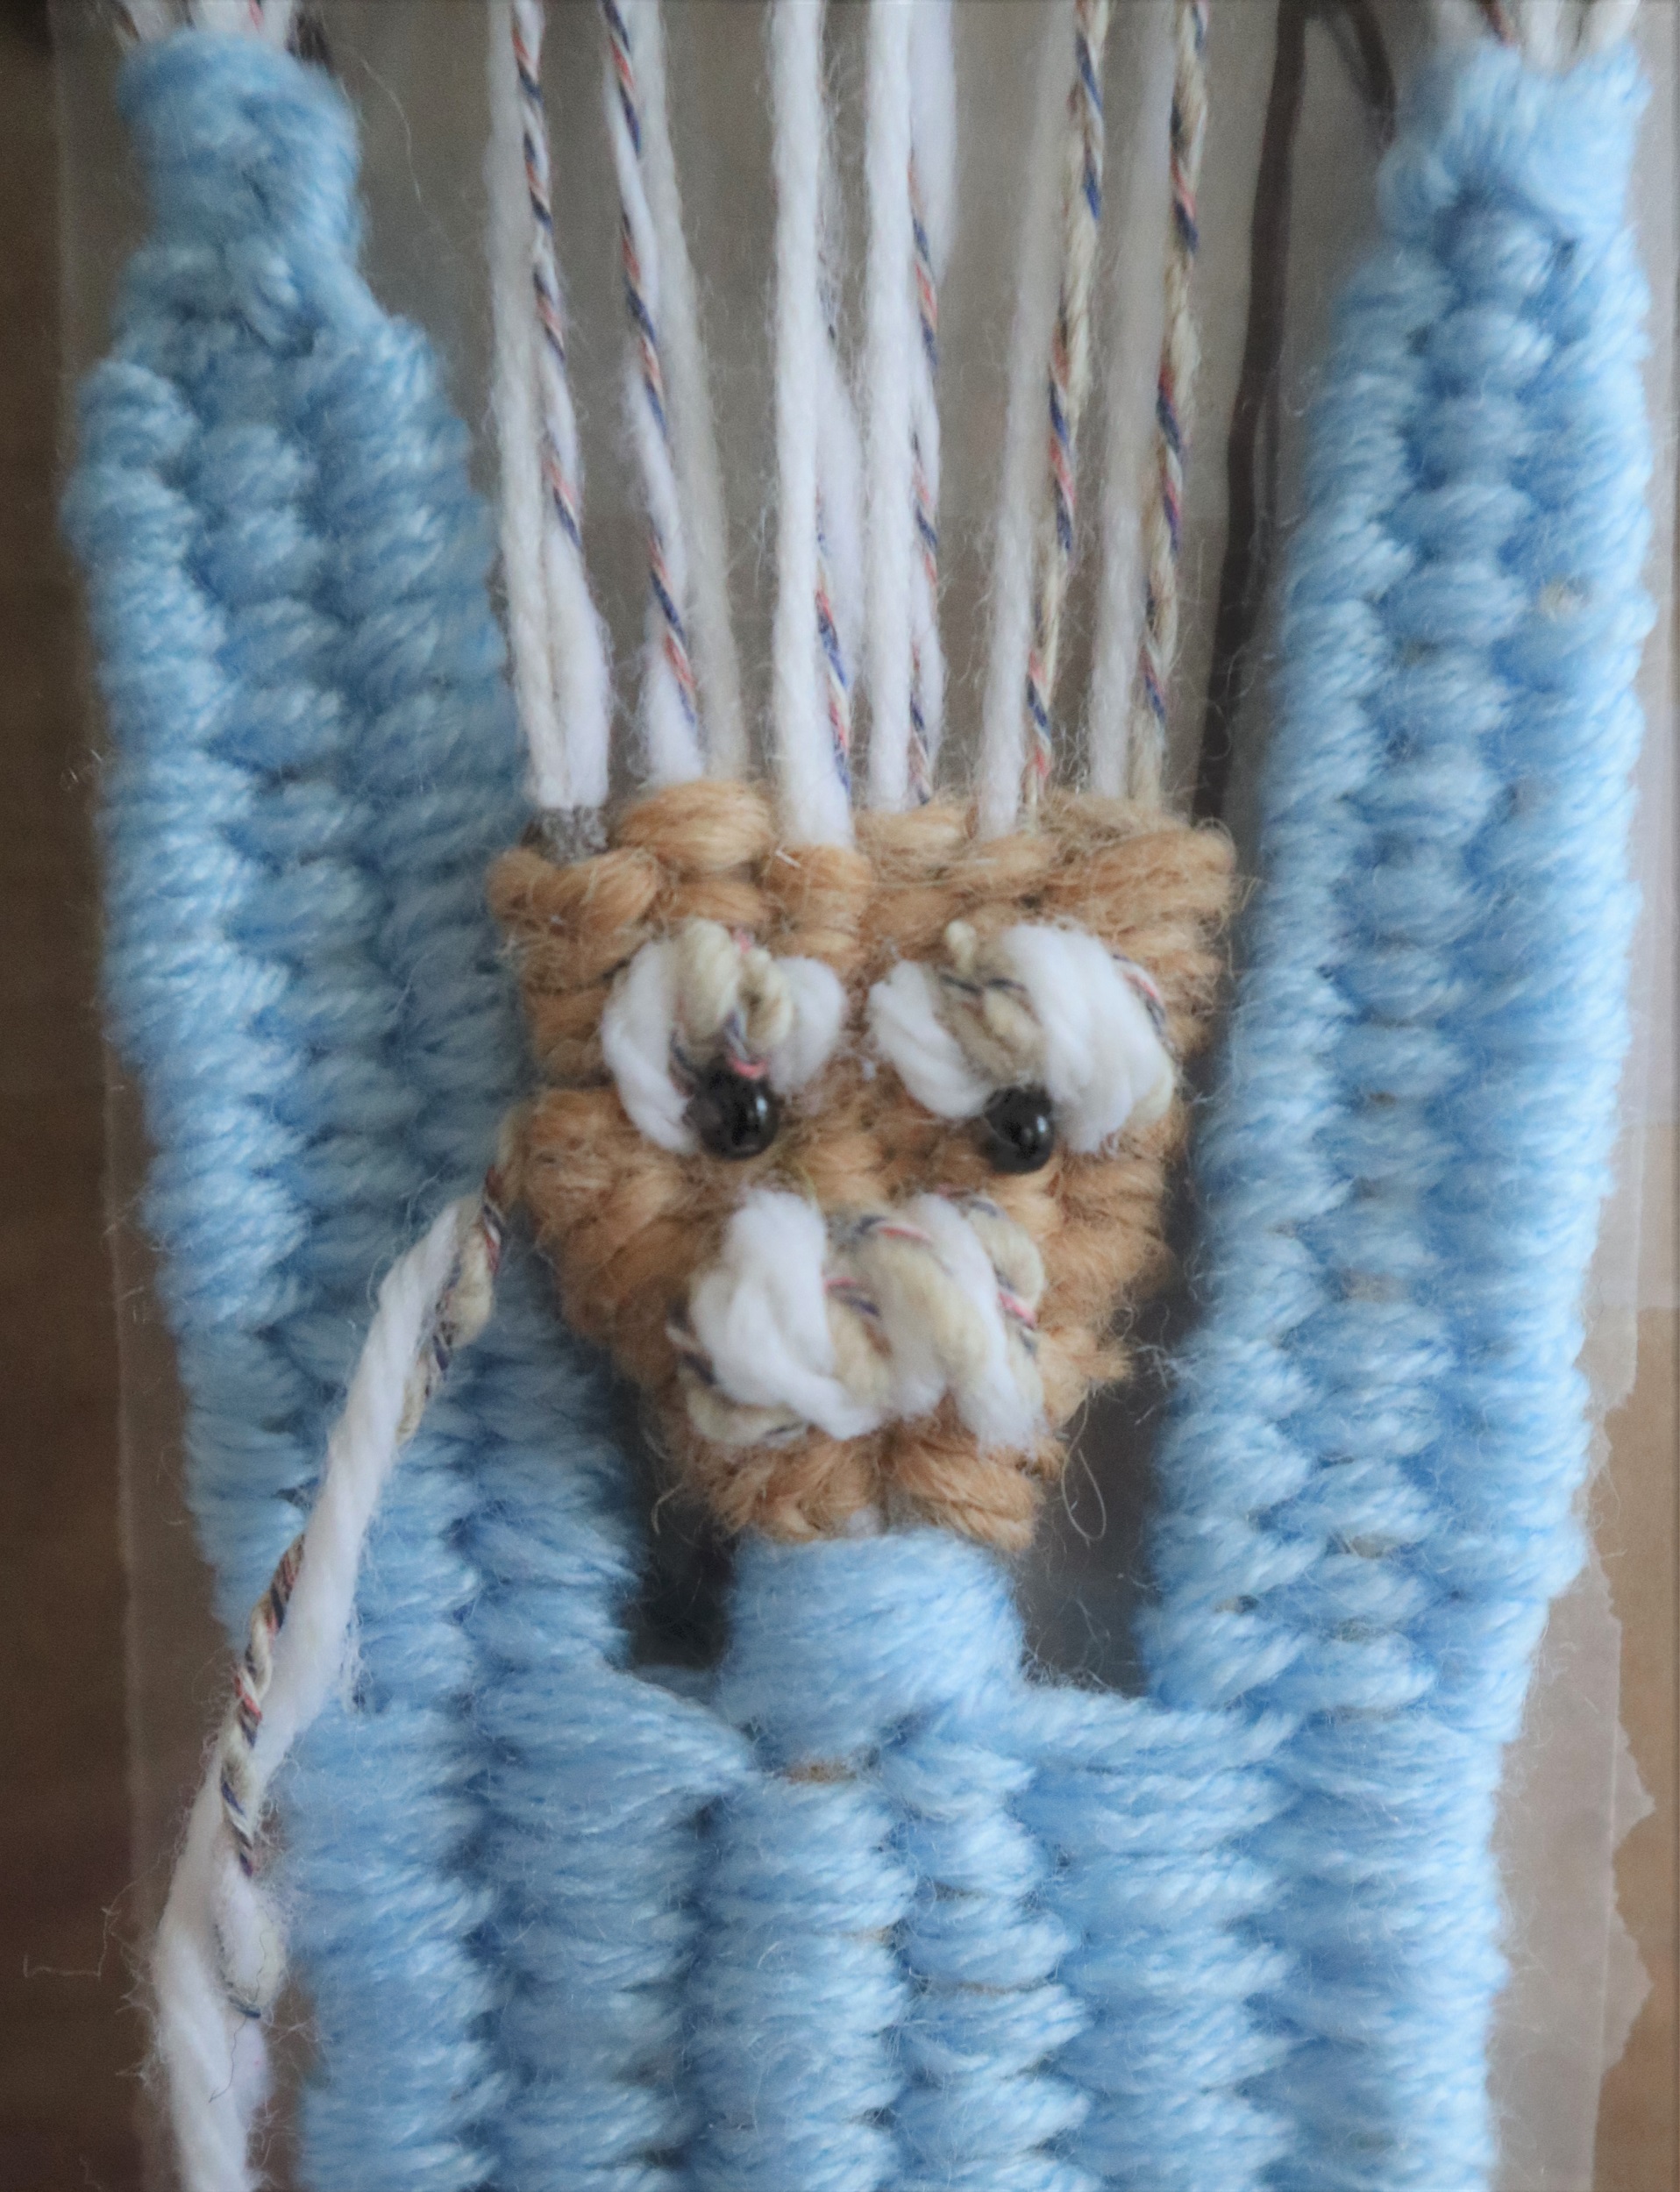
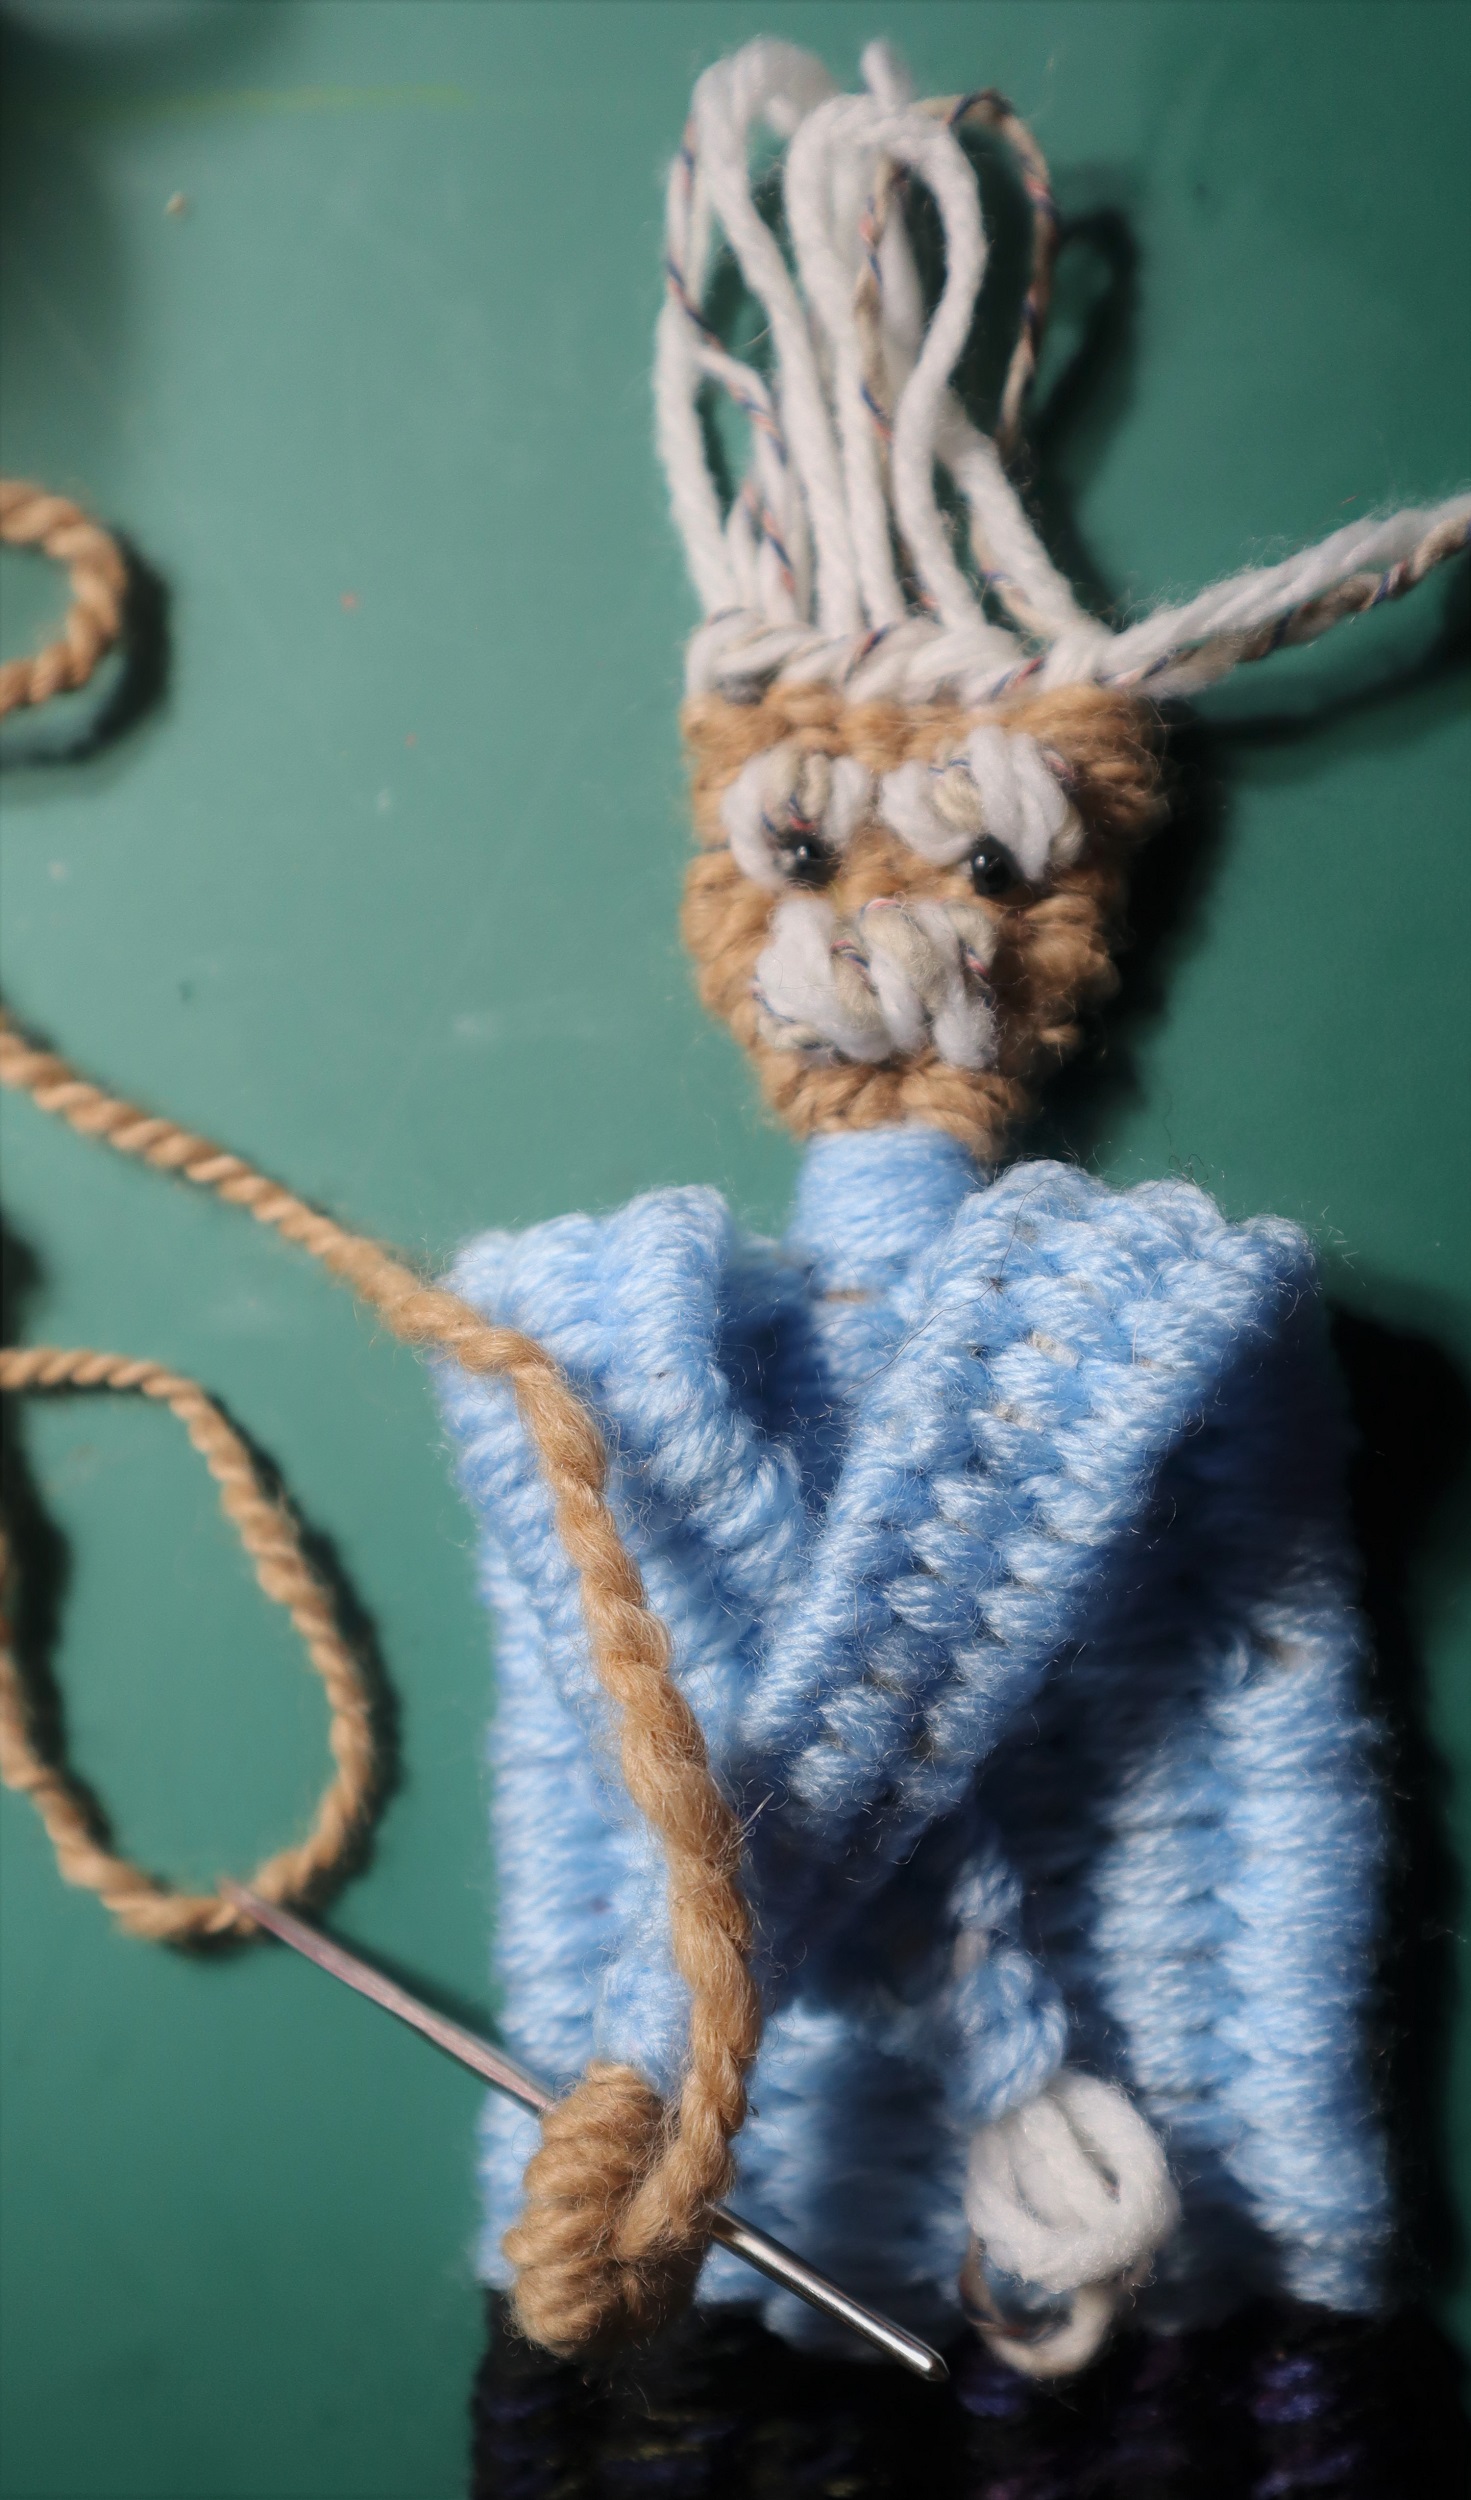
FACE:
With skin tone yarn, weave the face, weaving under 1/over 1 and over 1/under 1.
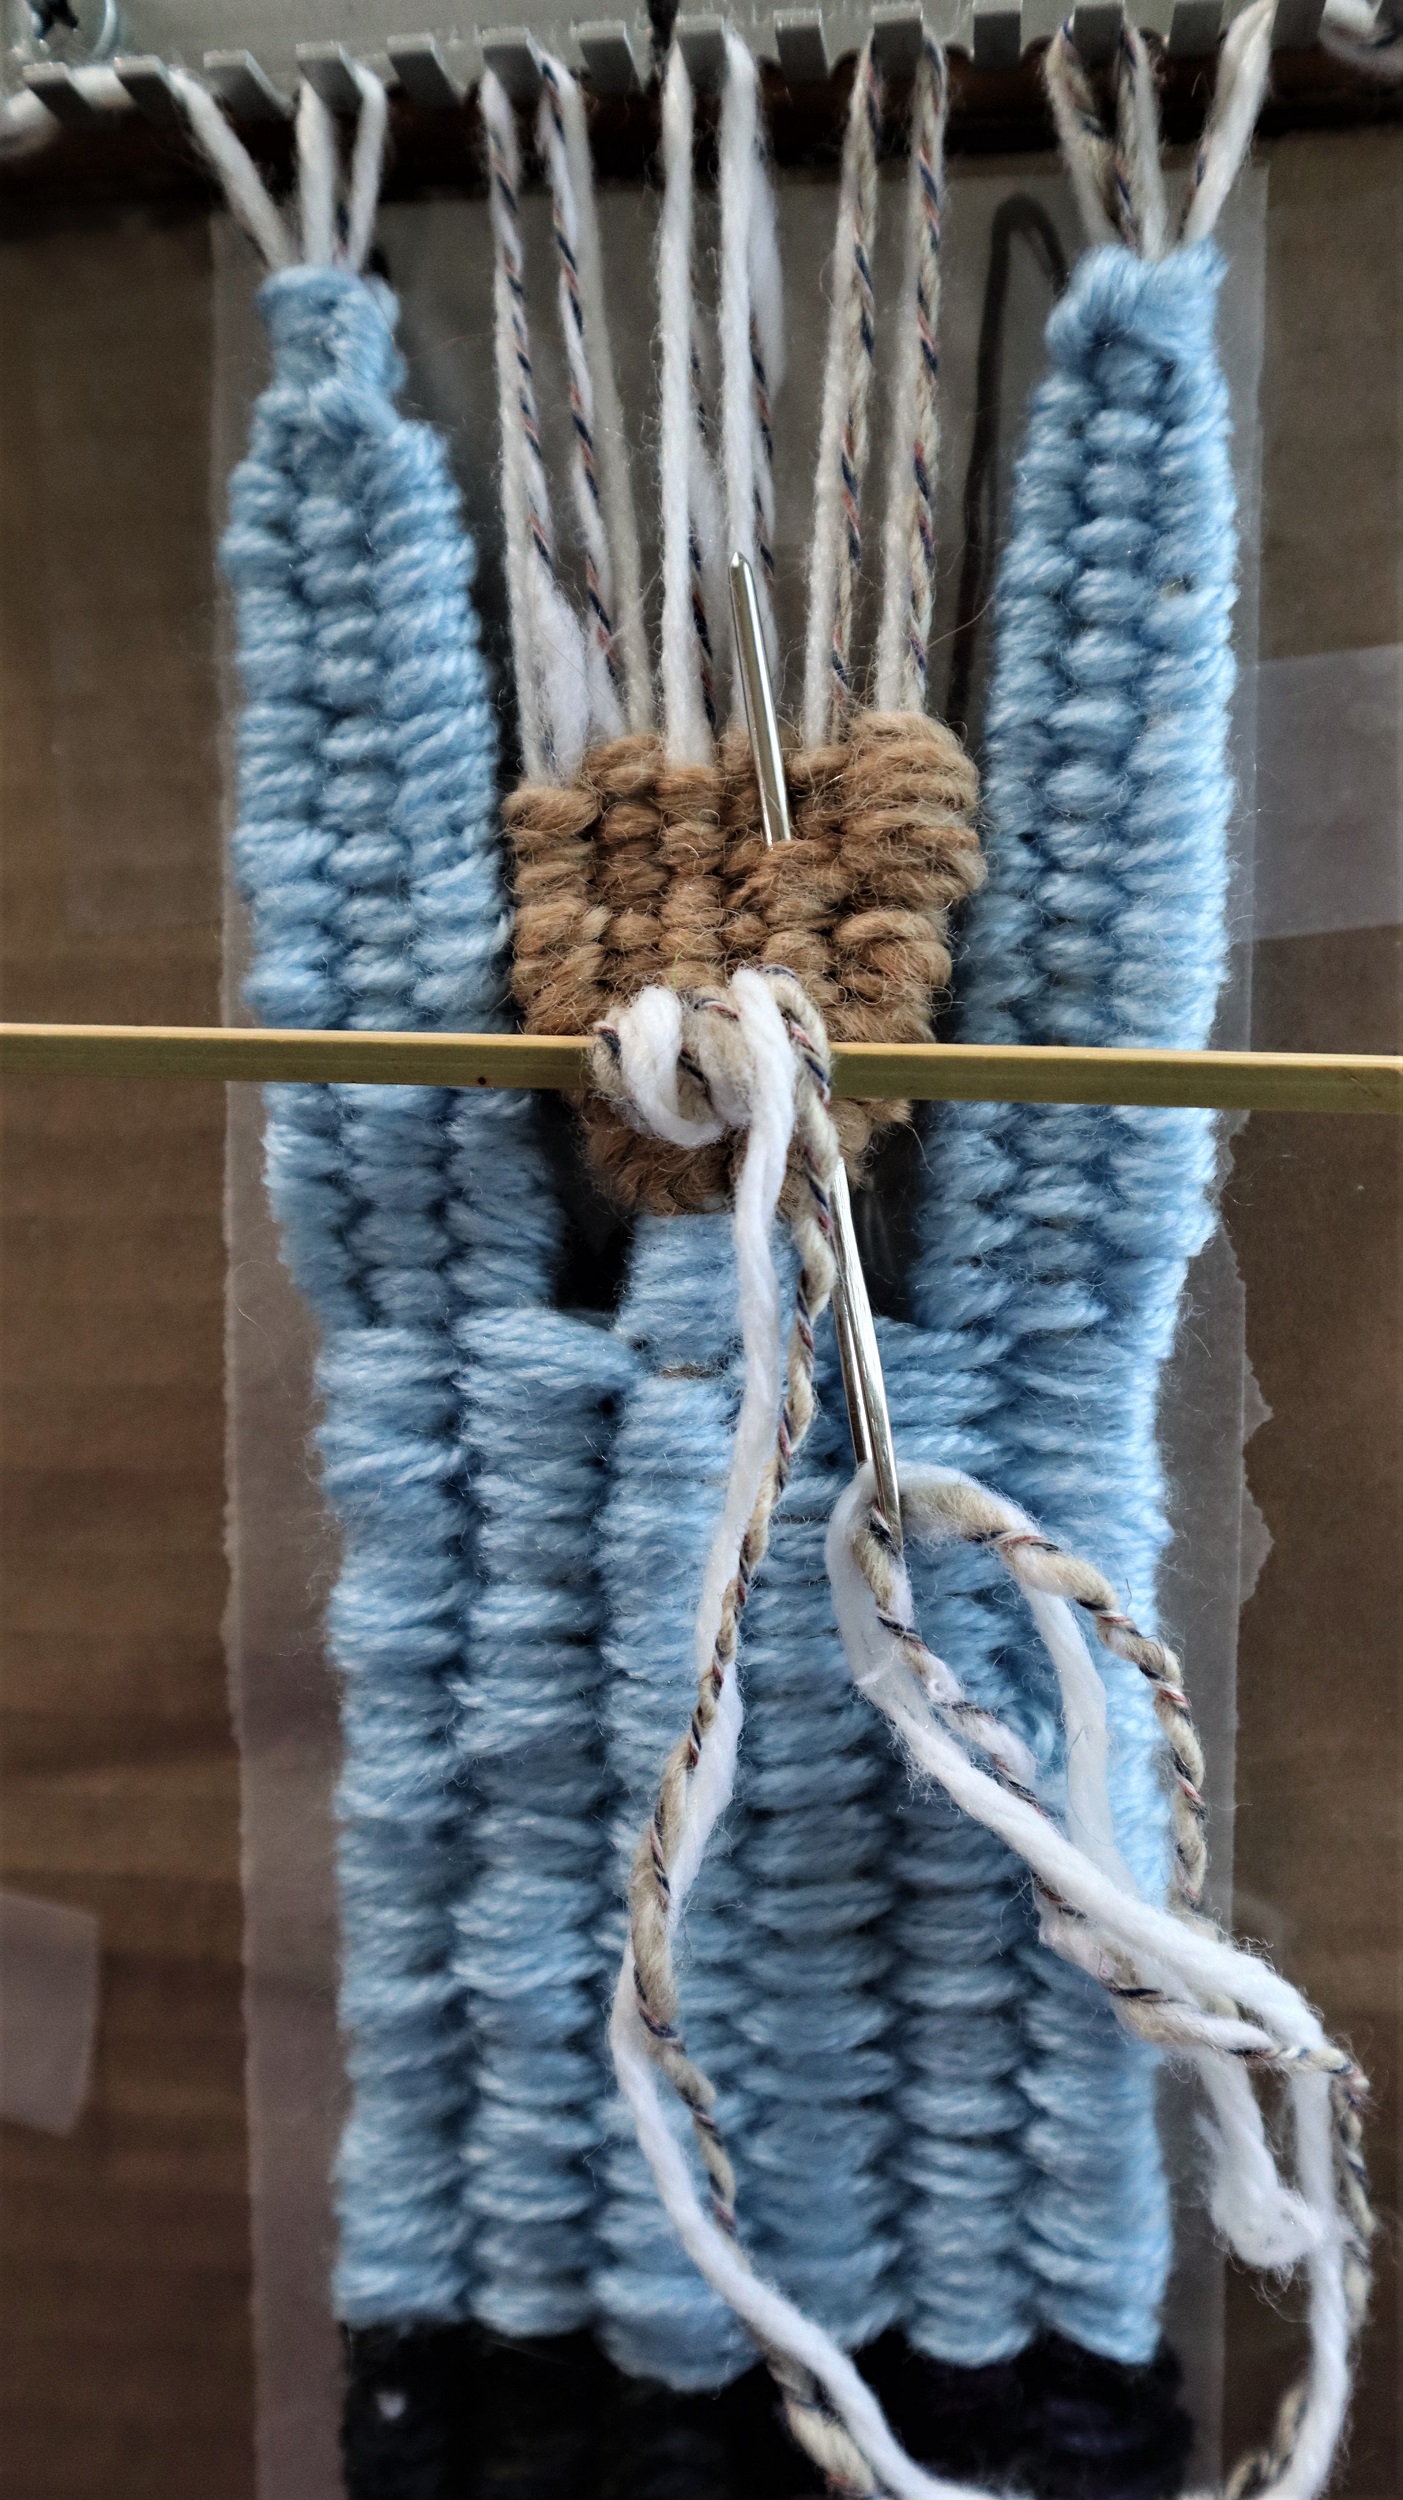
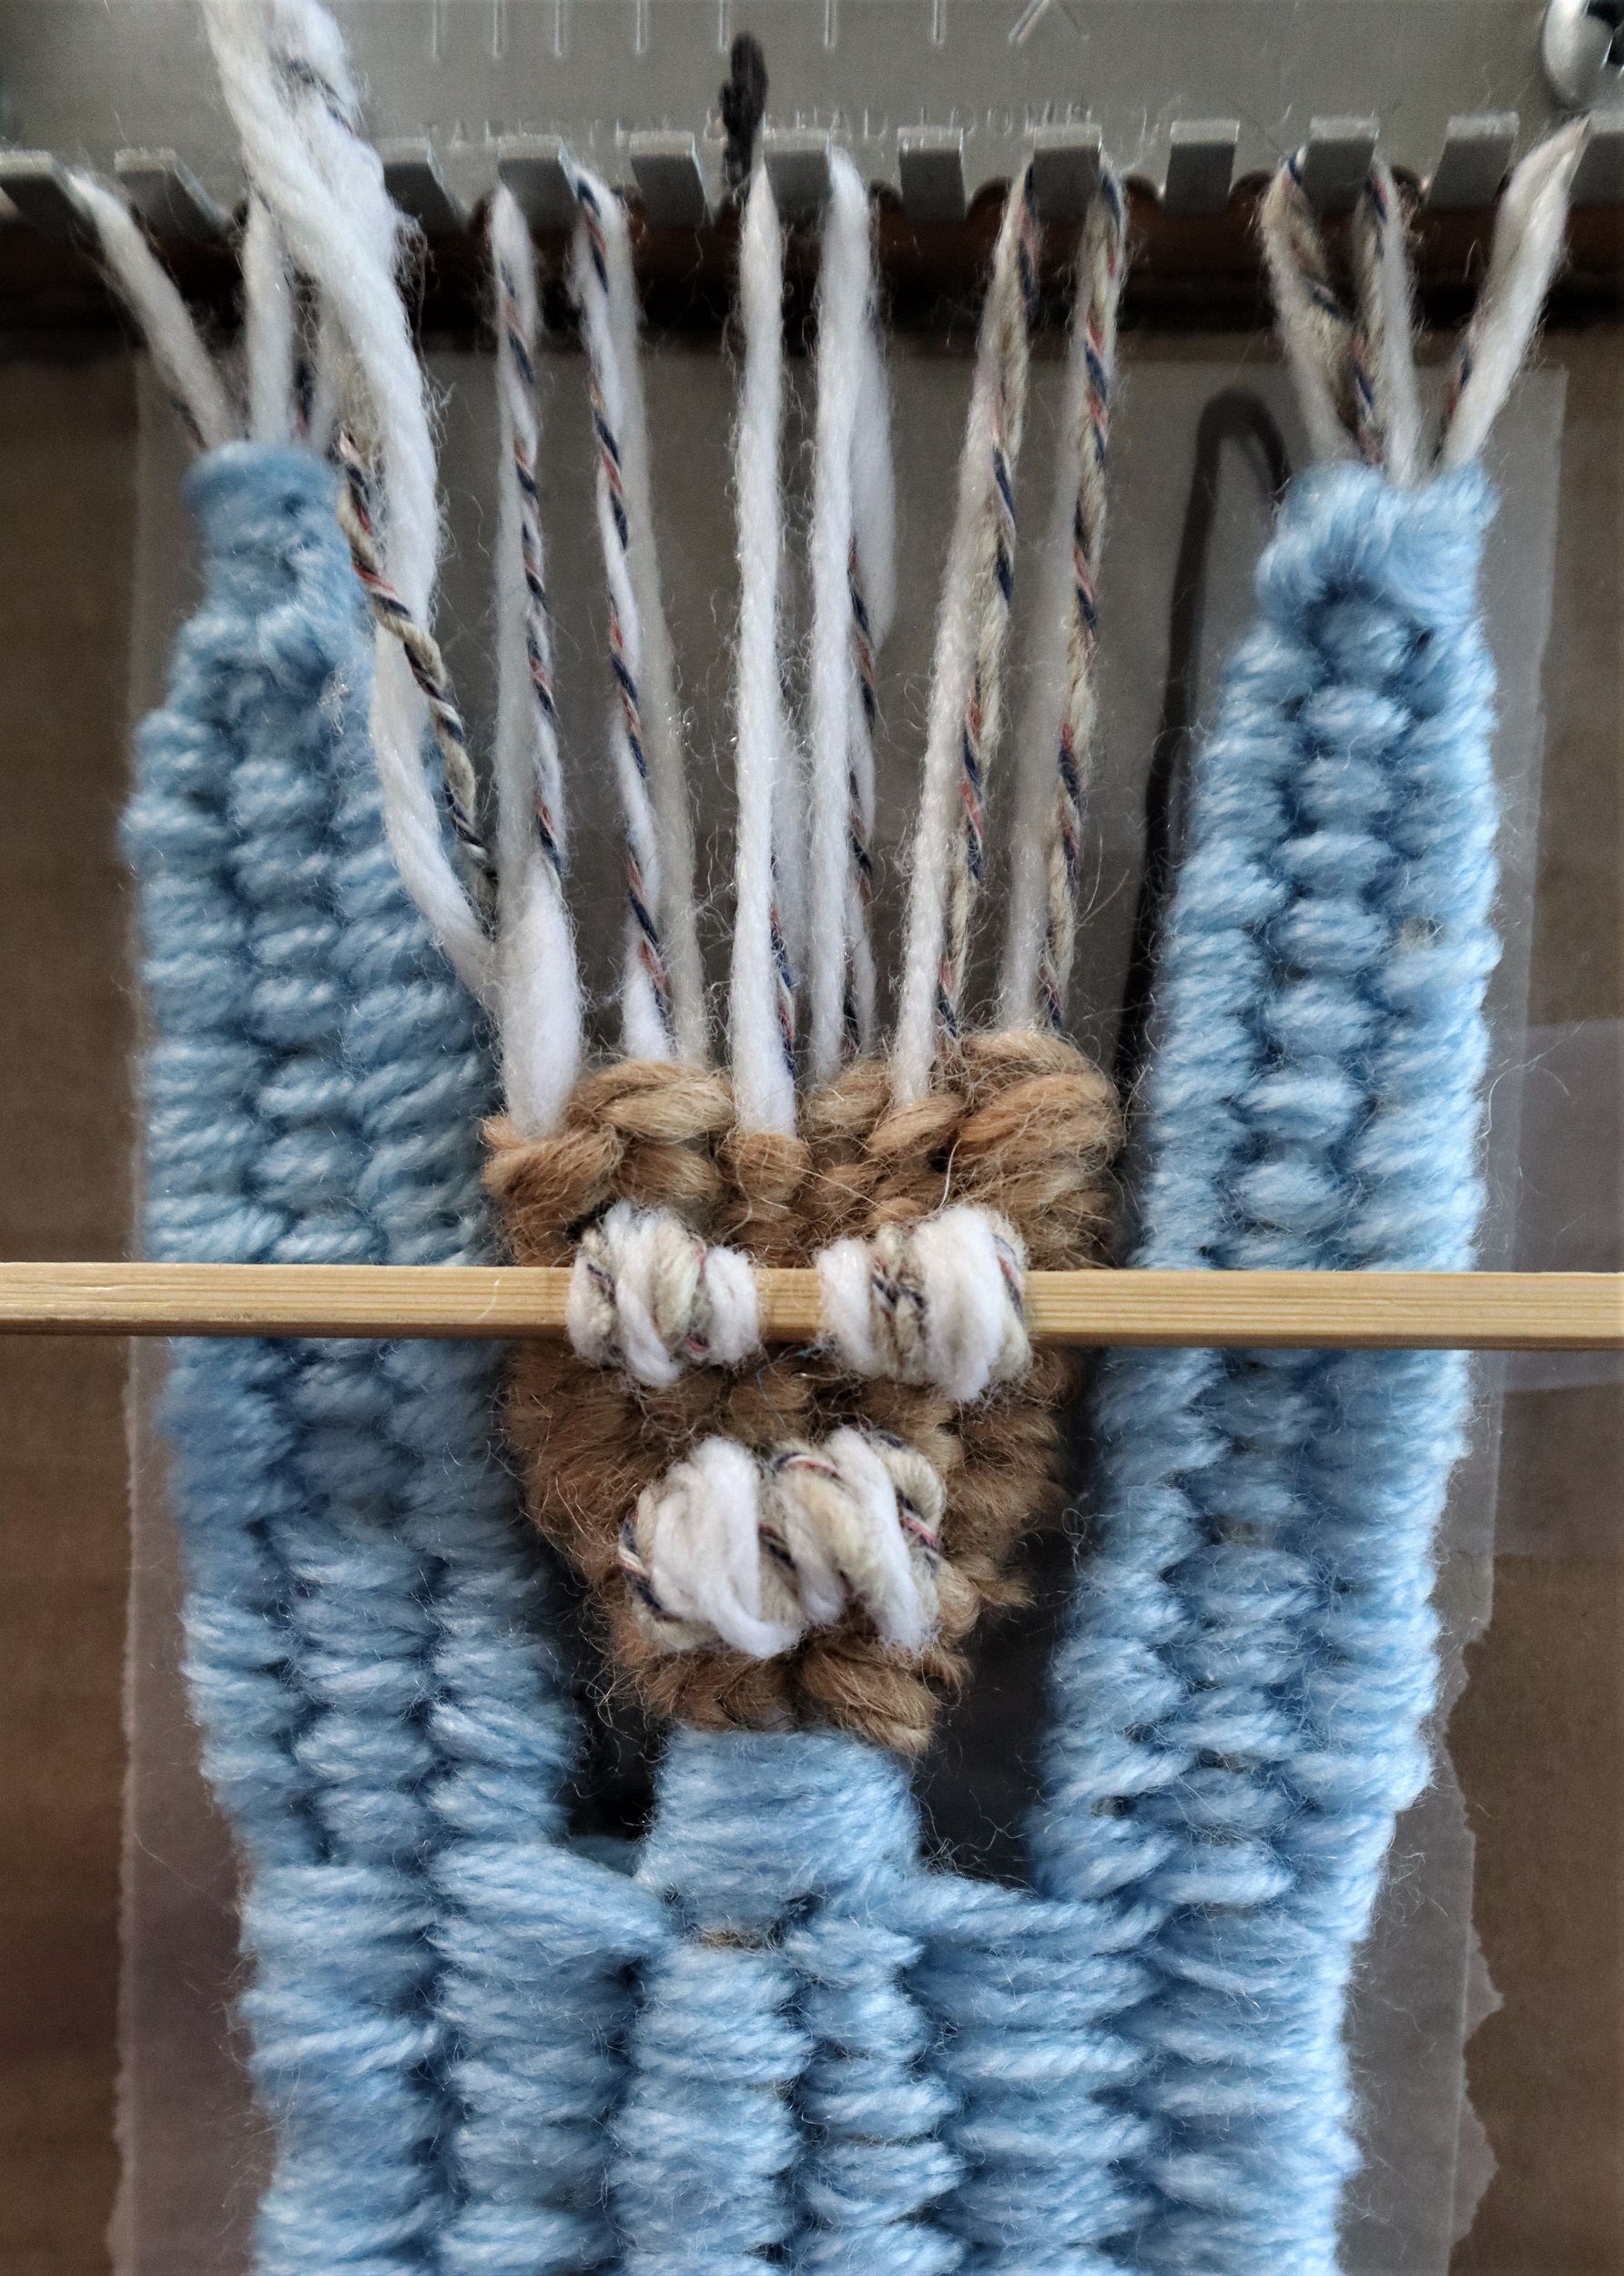
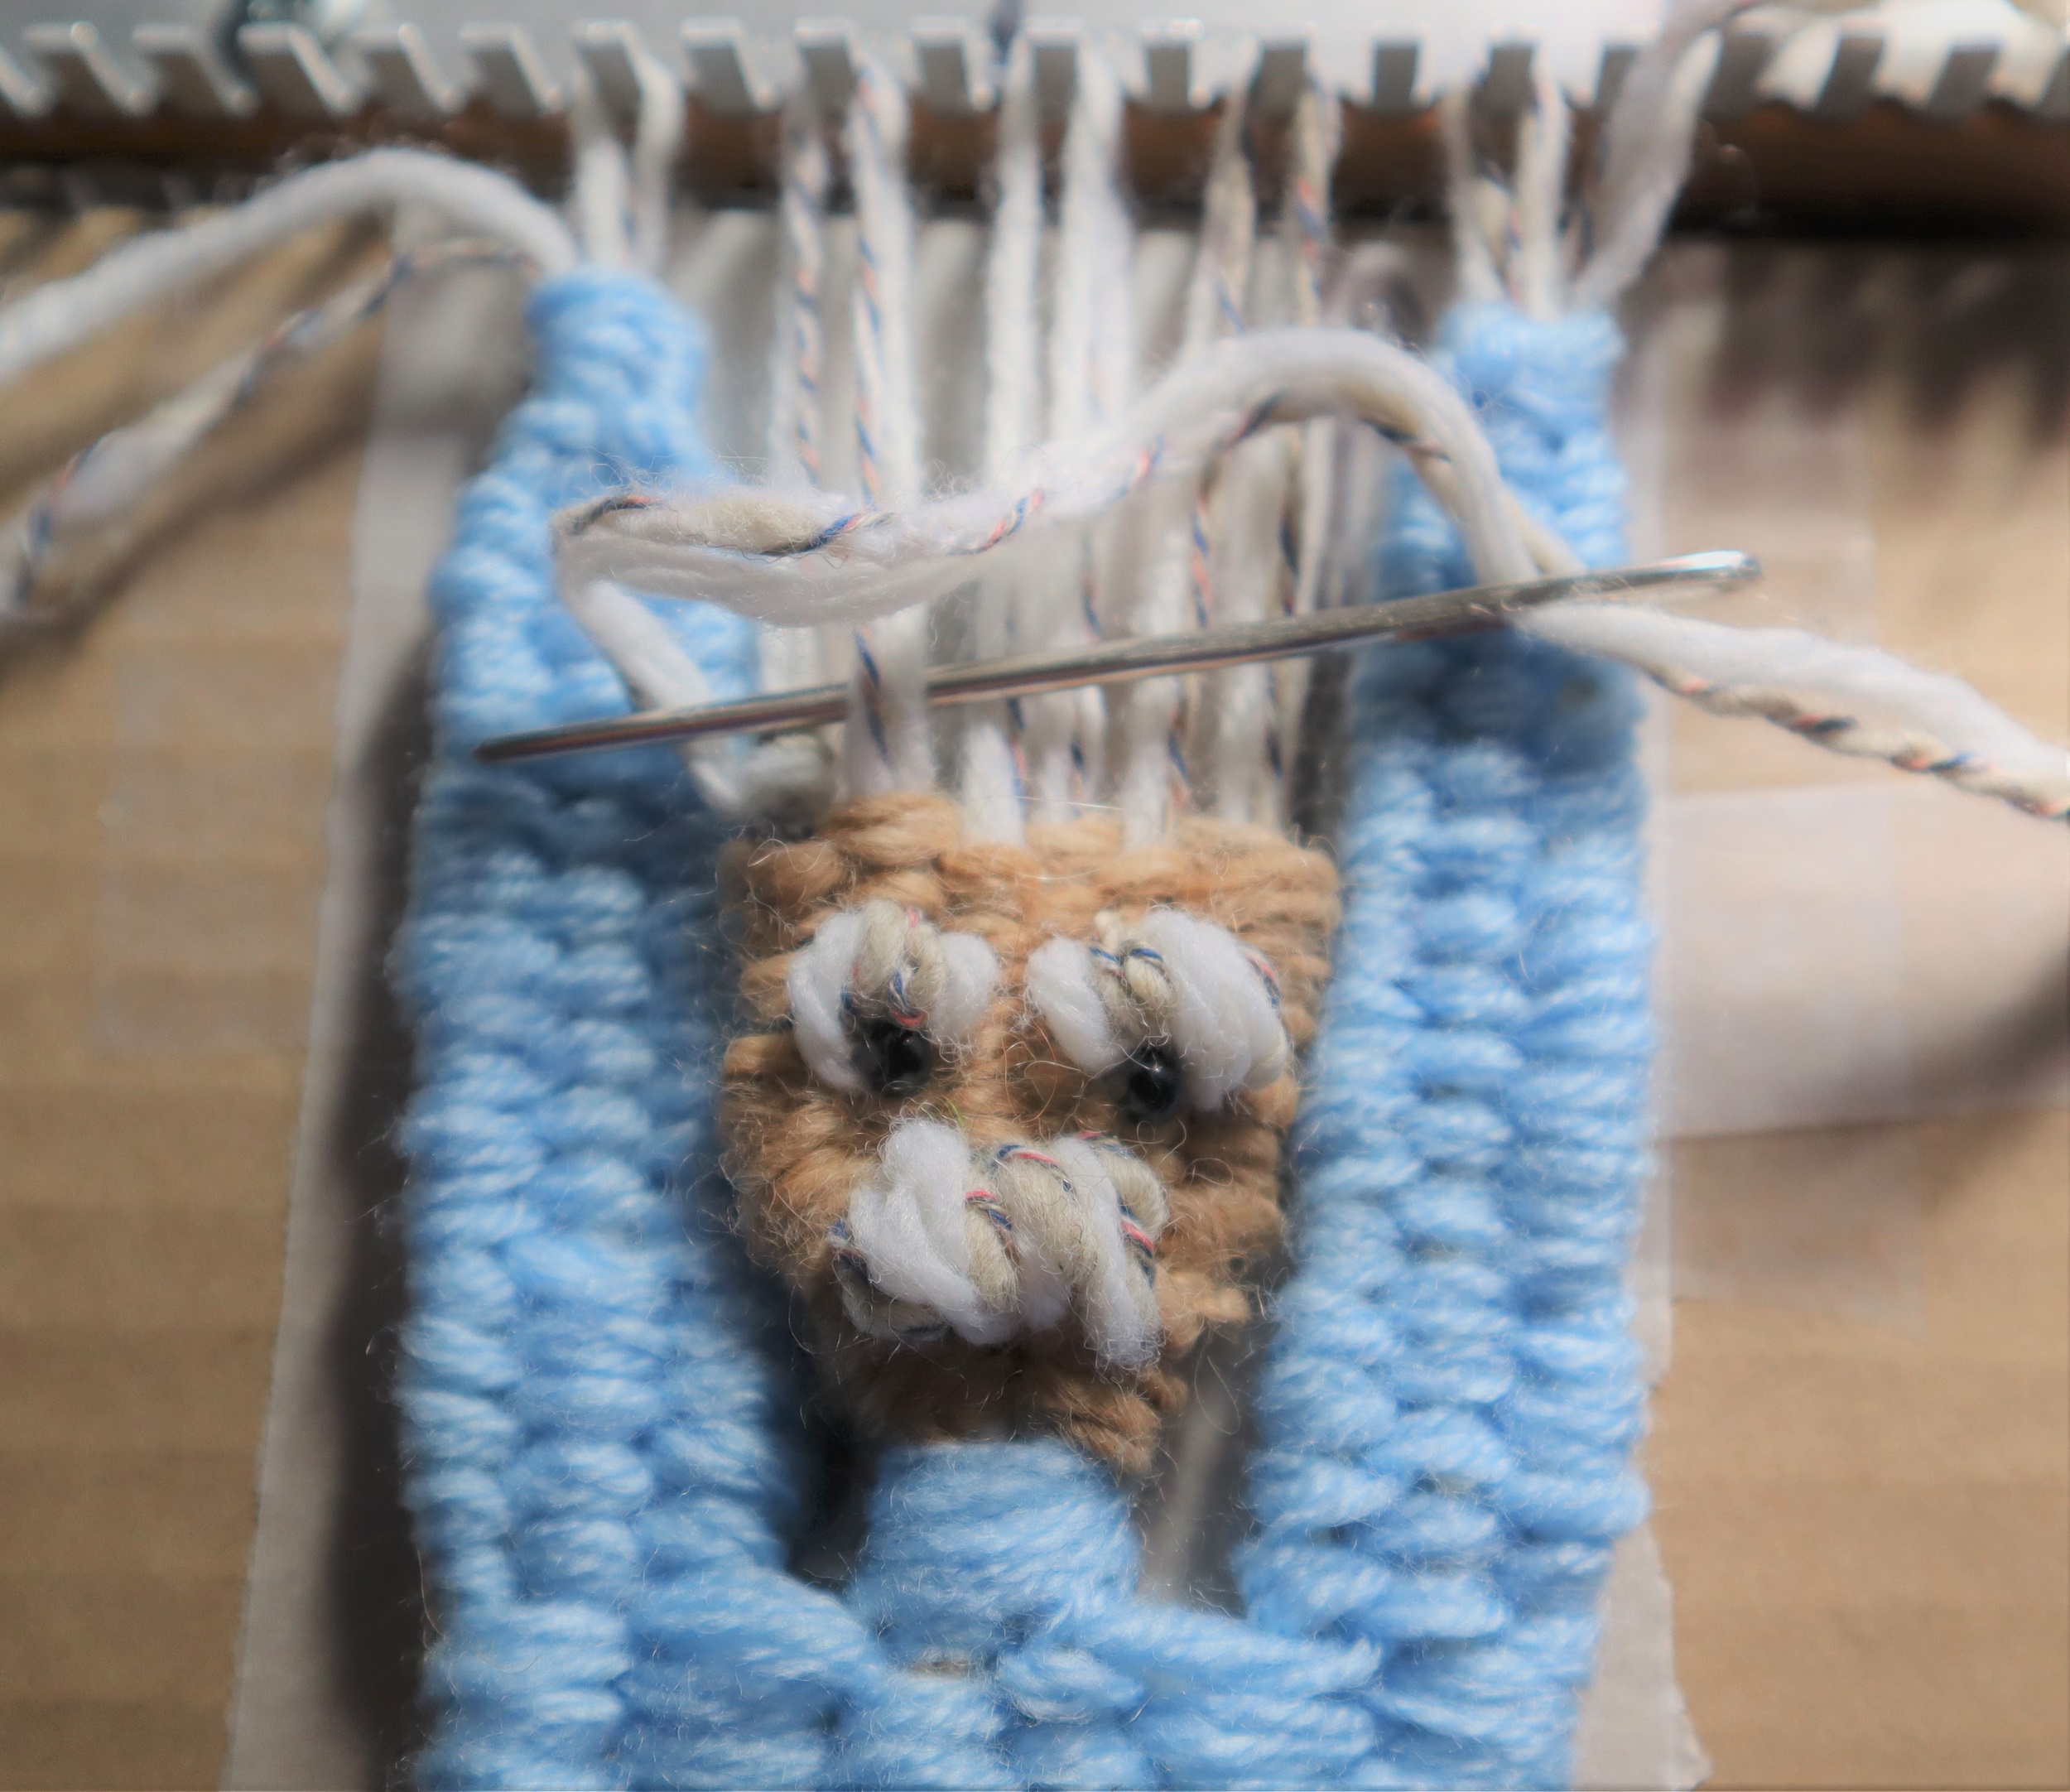
MOUSTACHE:
Stitch loosely over the shed stick with 1 strand of white yarn and 1 strand grey yarn held together as if they are a single strand at least 3 times. Take the ends to the back of the head.
EYEBROWS:
Take 2 slightly tighter stitches over the shed stick for each eyebrow.
EYES:
Stitch 2 small black ‘e’ size beads on for eyes.
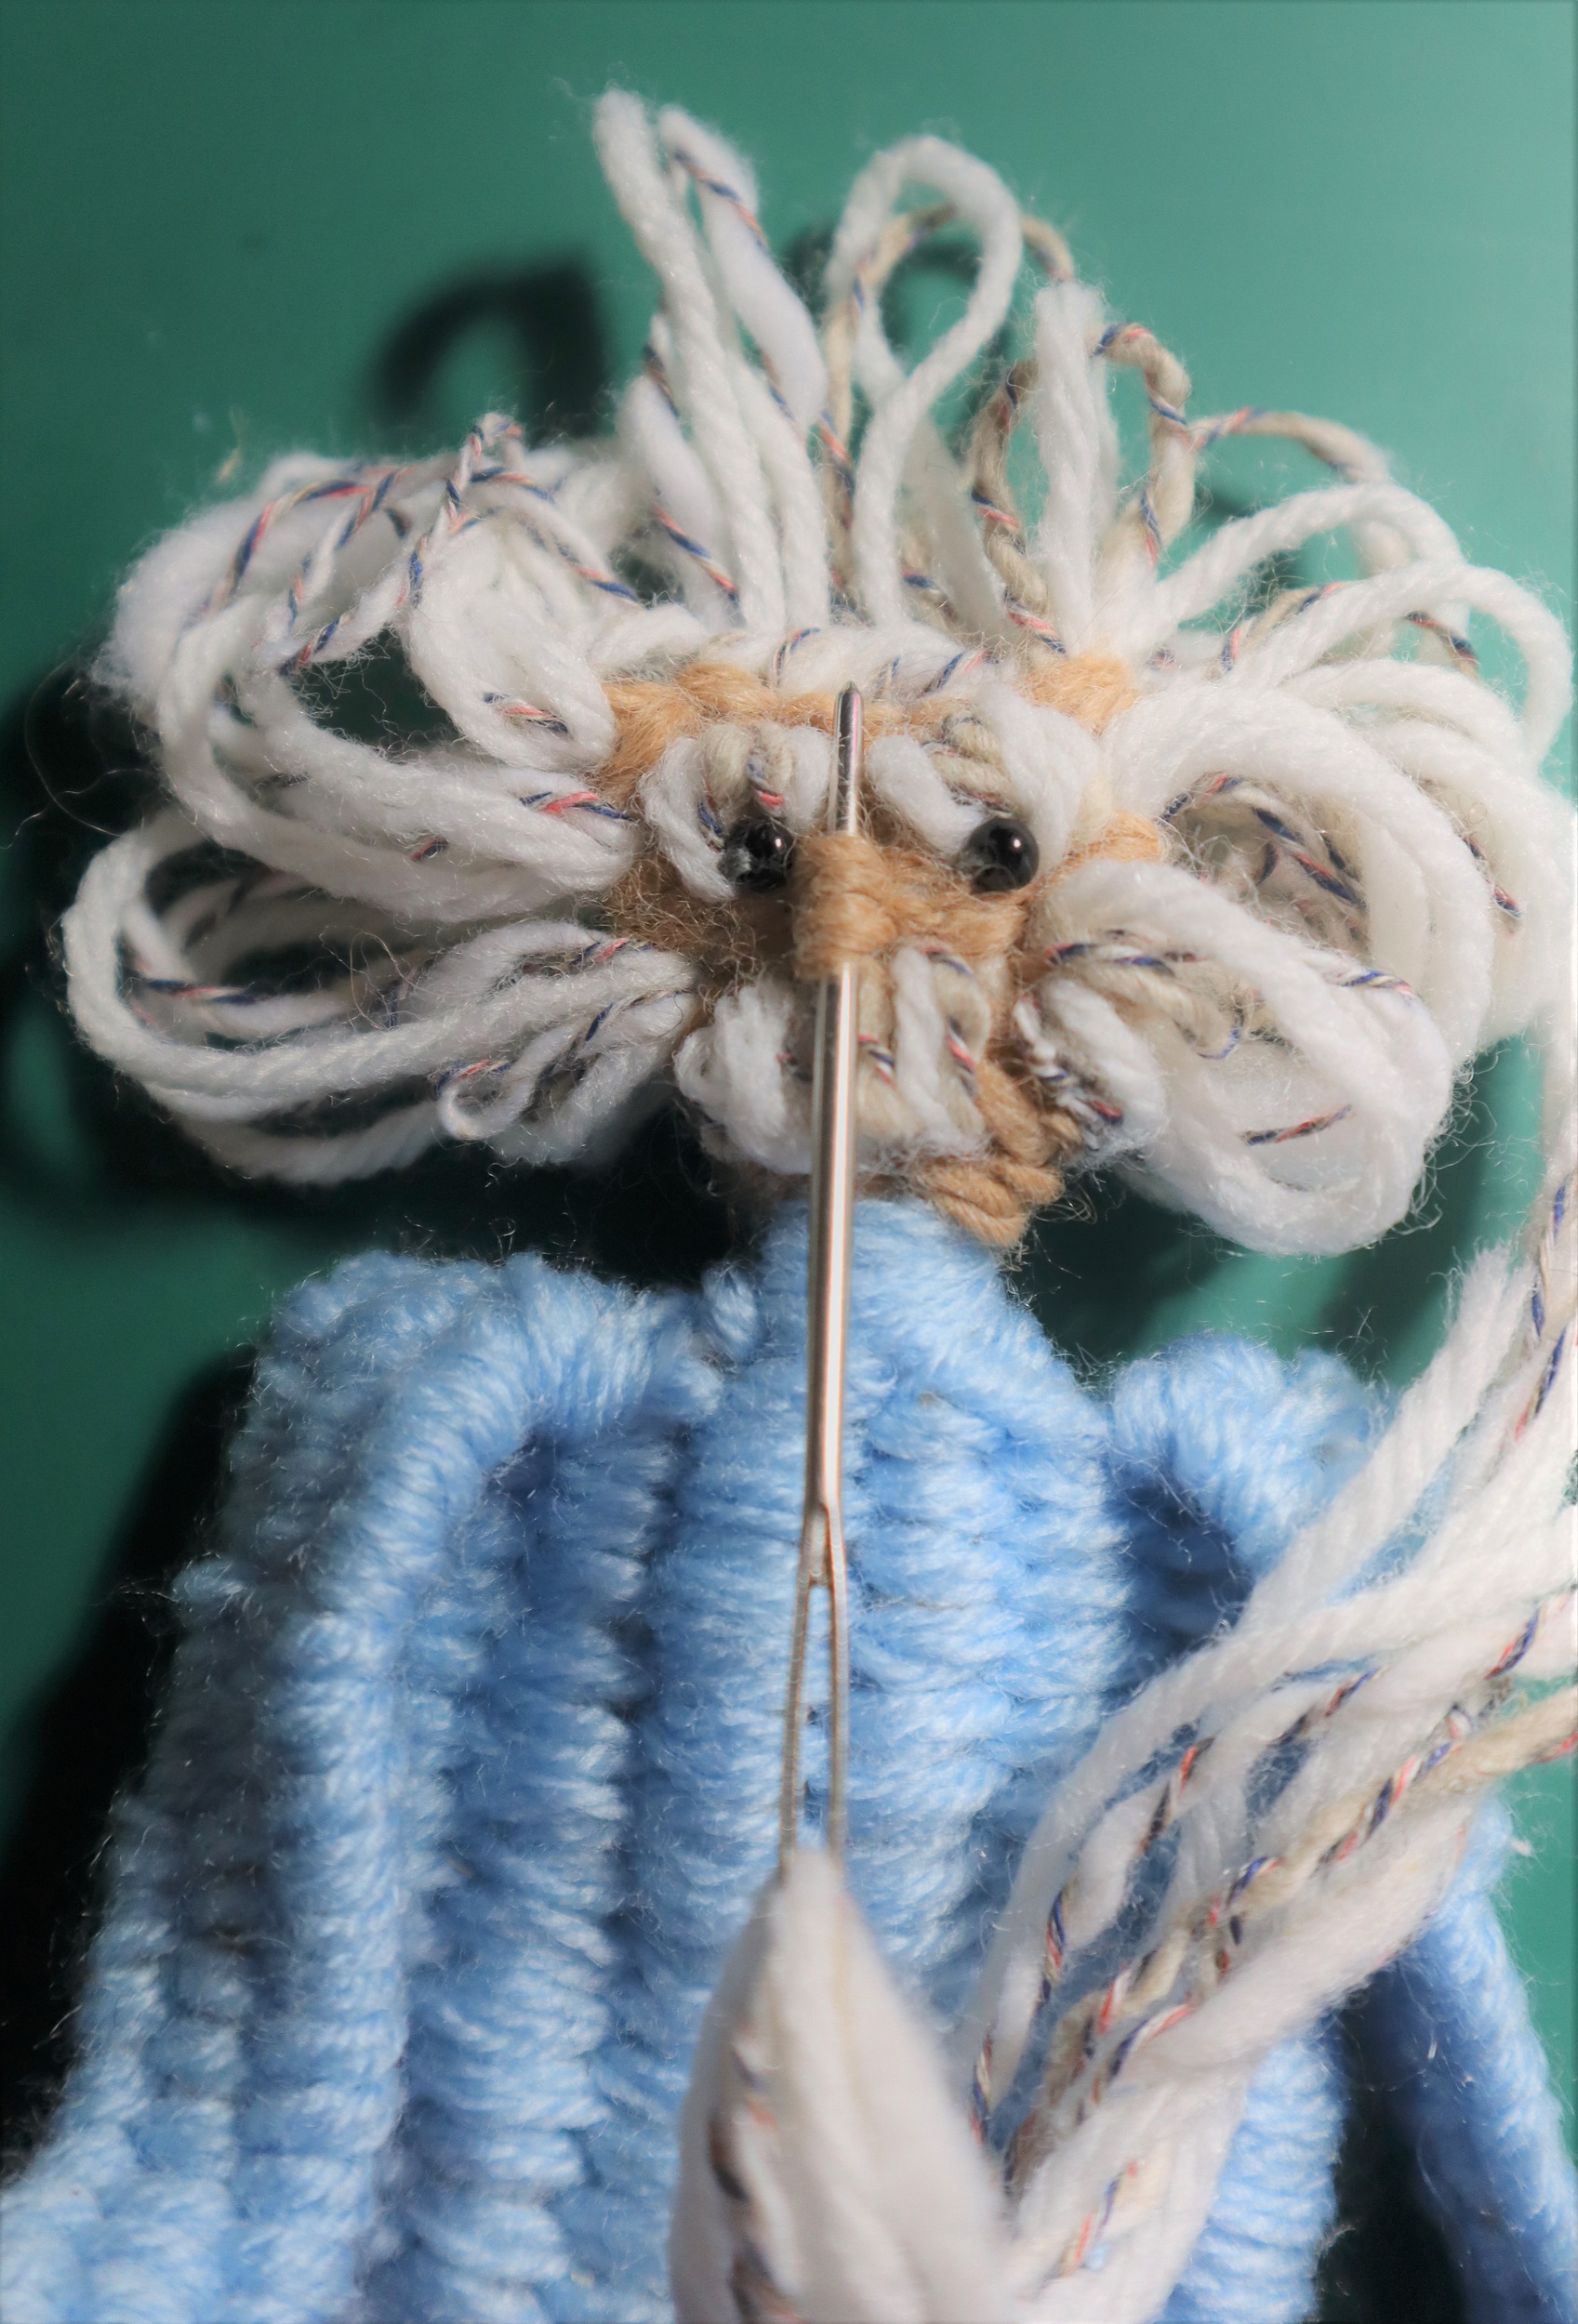
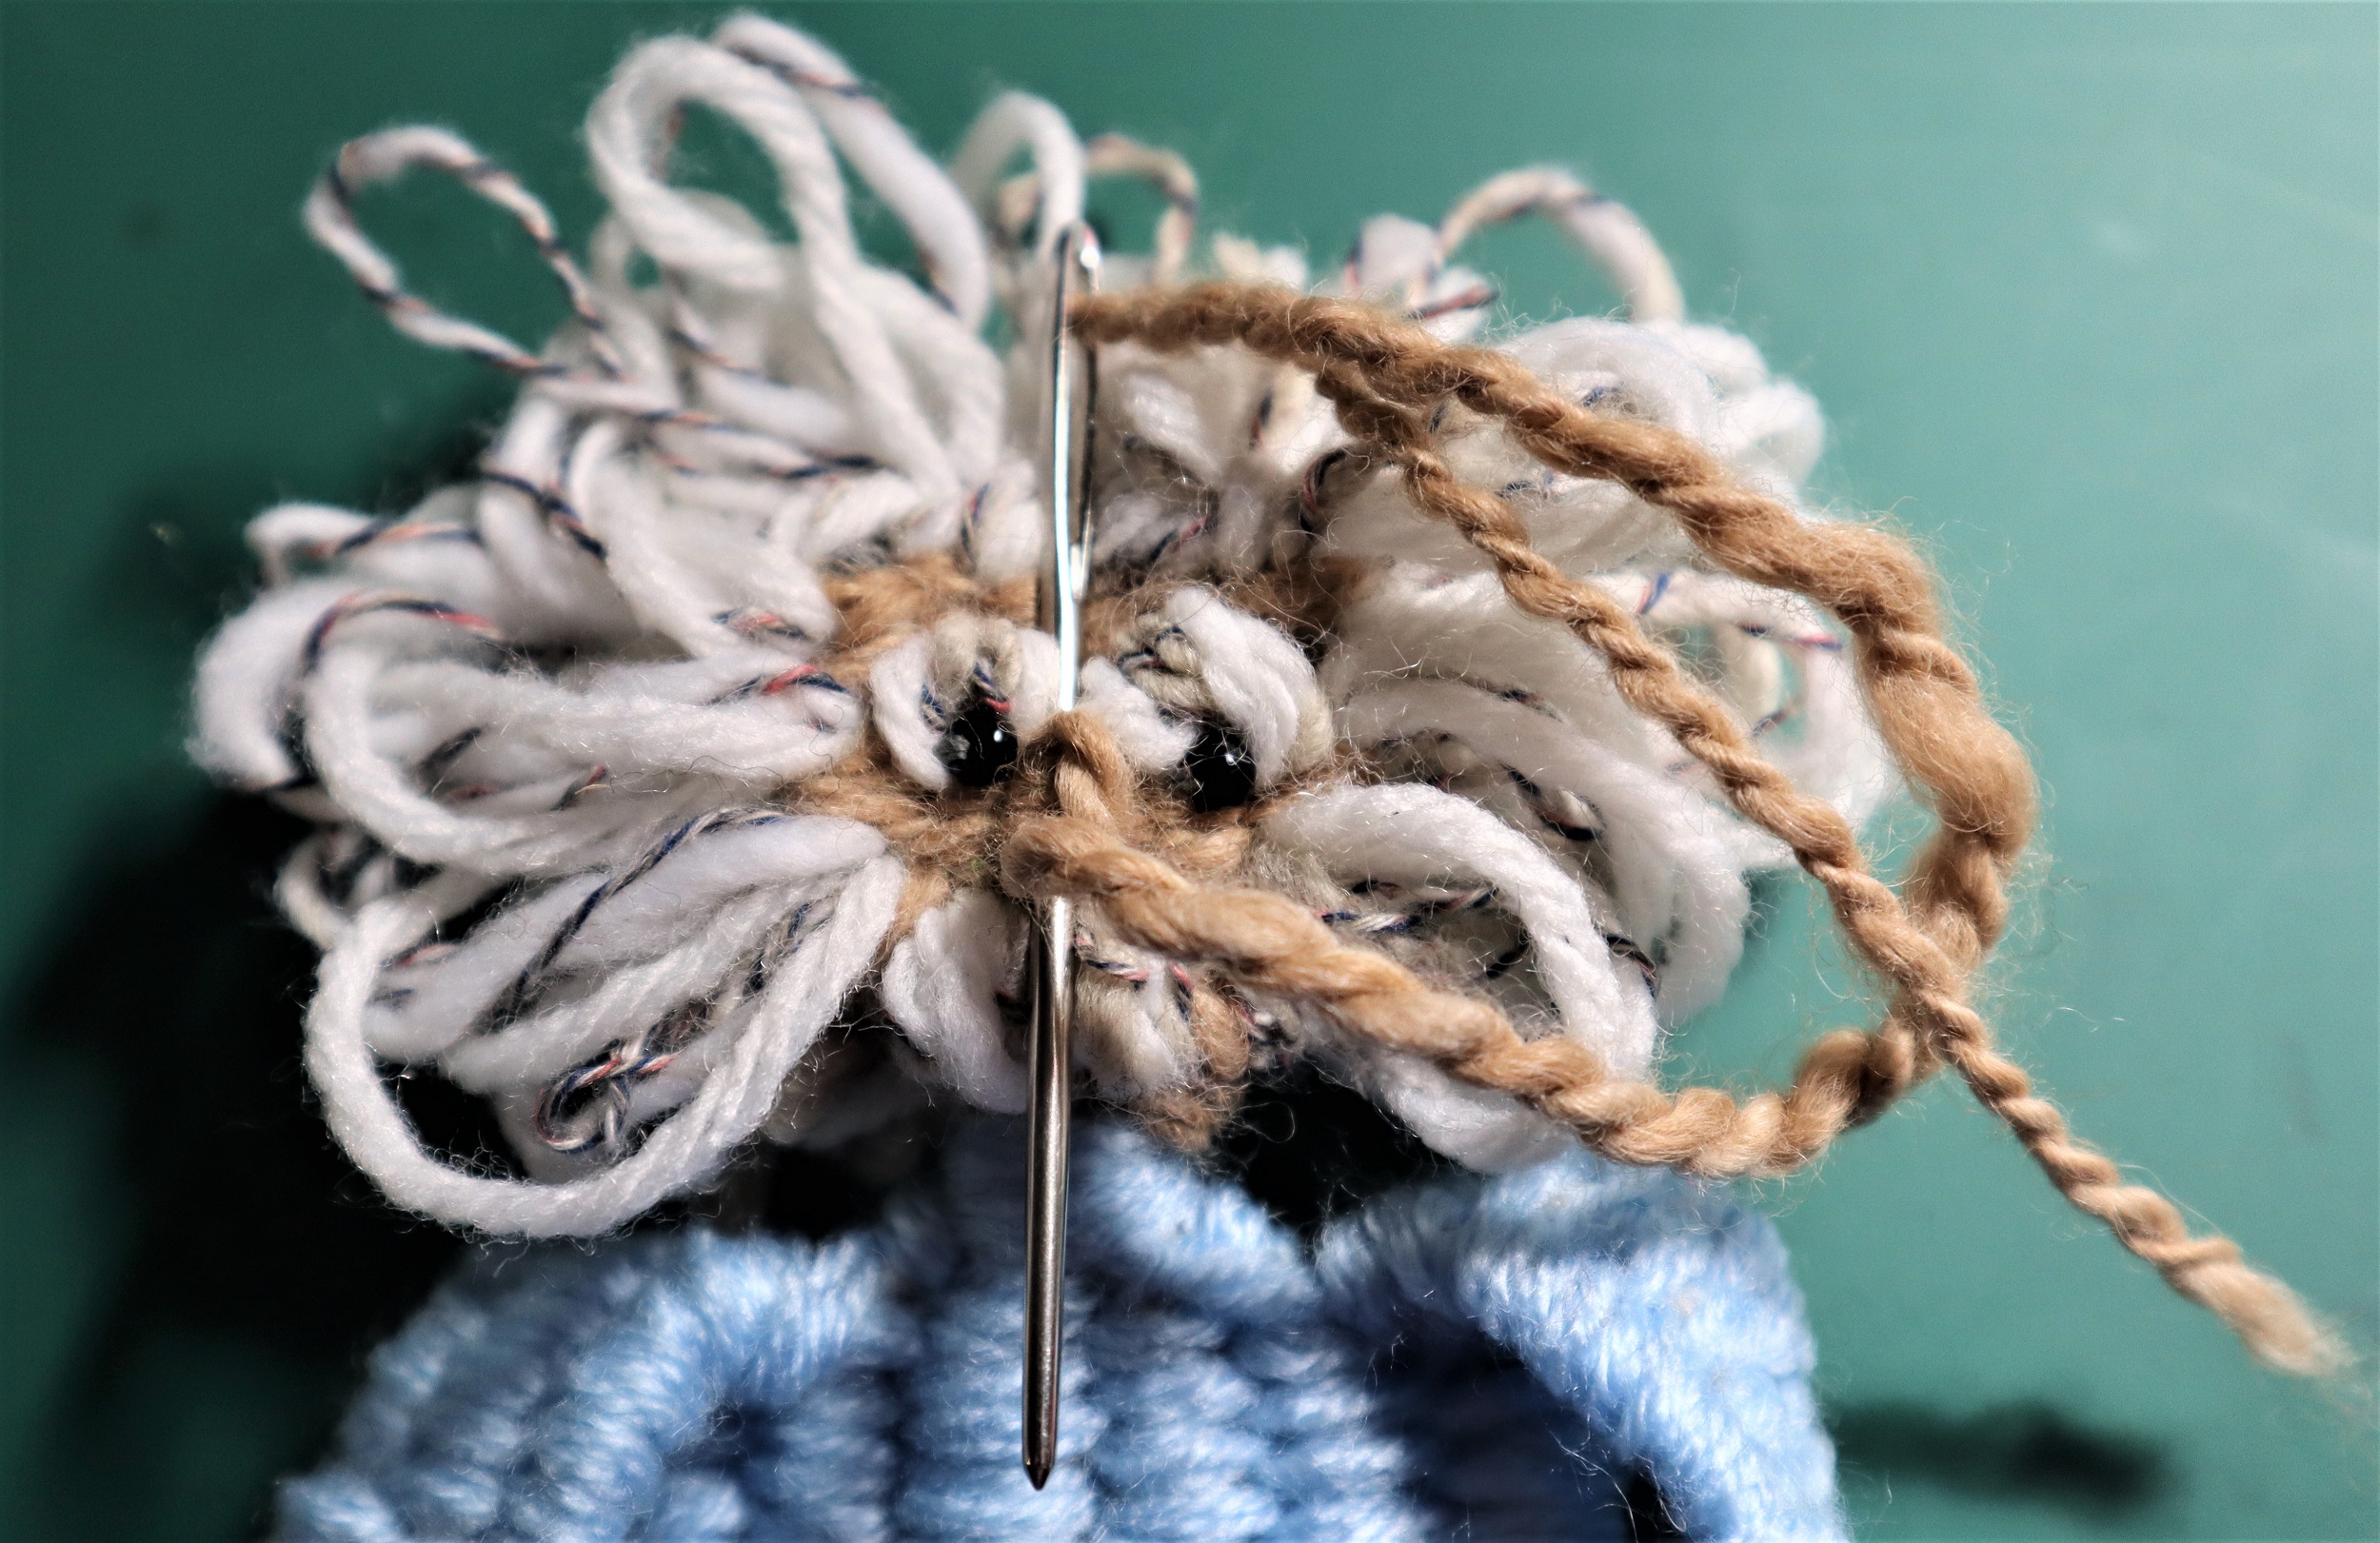
HAIRLINE:
Lock the top of the head in place by stitching around each warp strand at the top of the forehead.
Lift Einstein off the loom.
NOSE:
Stitch 2 vertical stitches with skin tone yarn.
SHOES:
With Brown yarn follow the instructions for the feet on page 36. Weave the yarn ends into the legs.
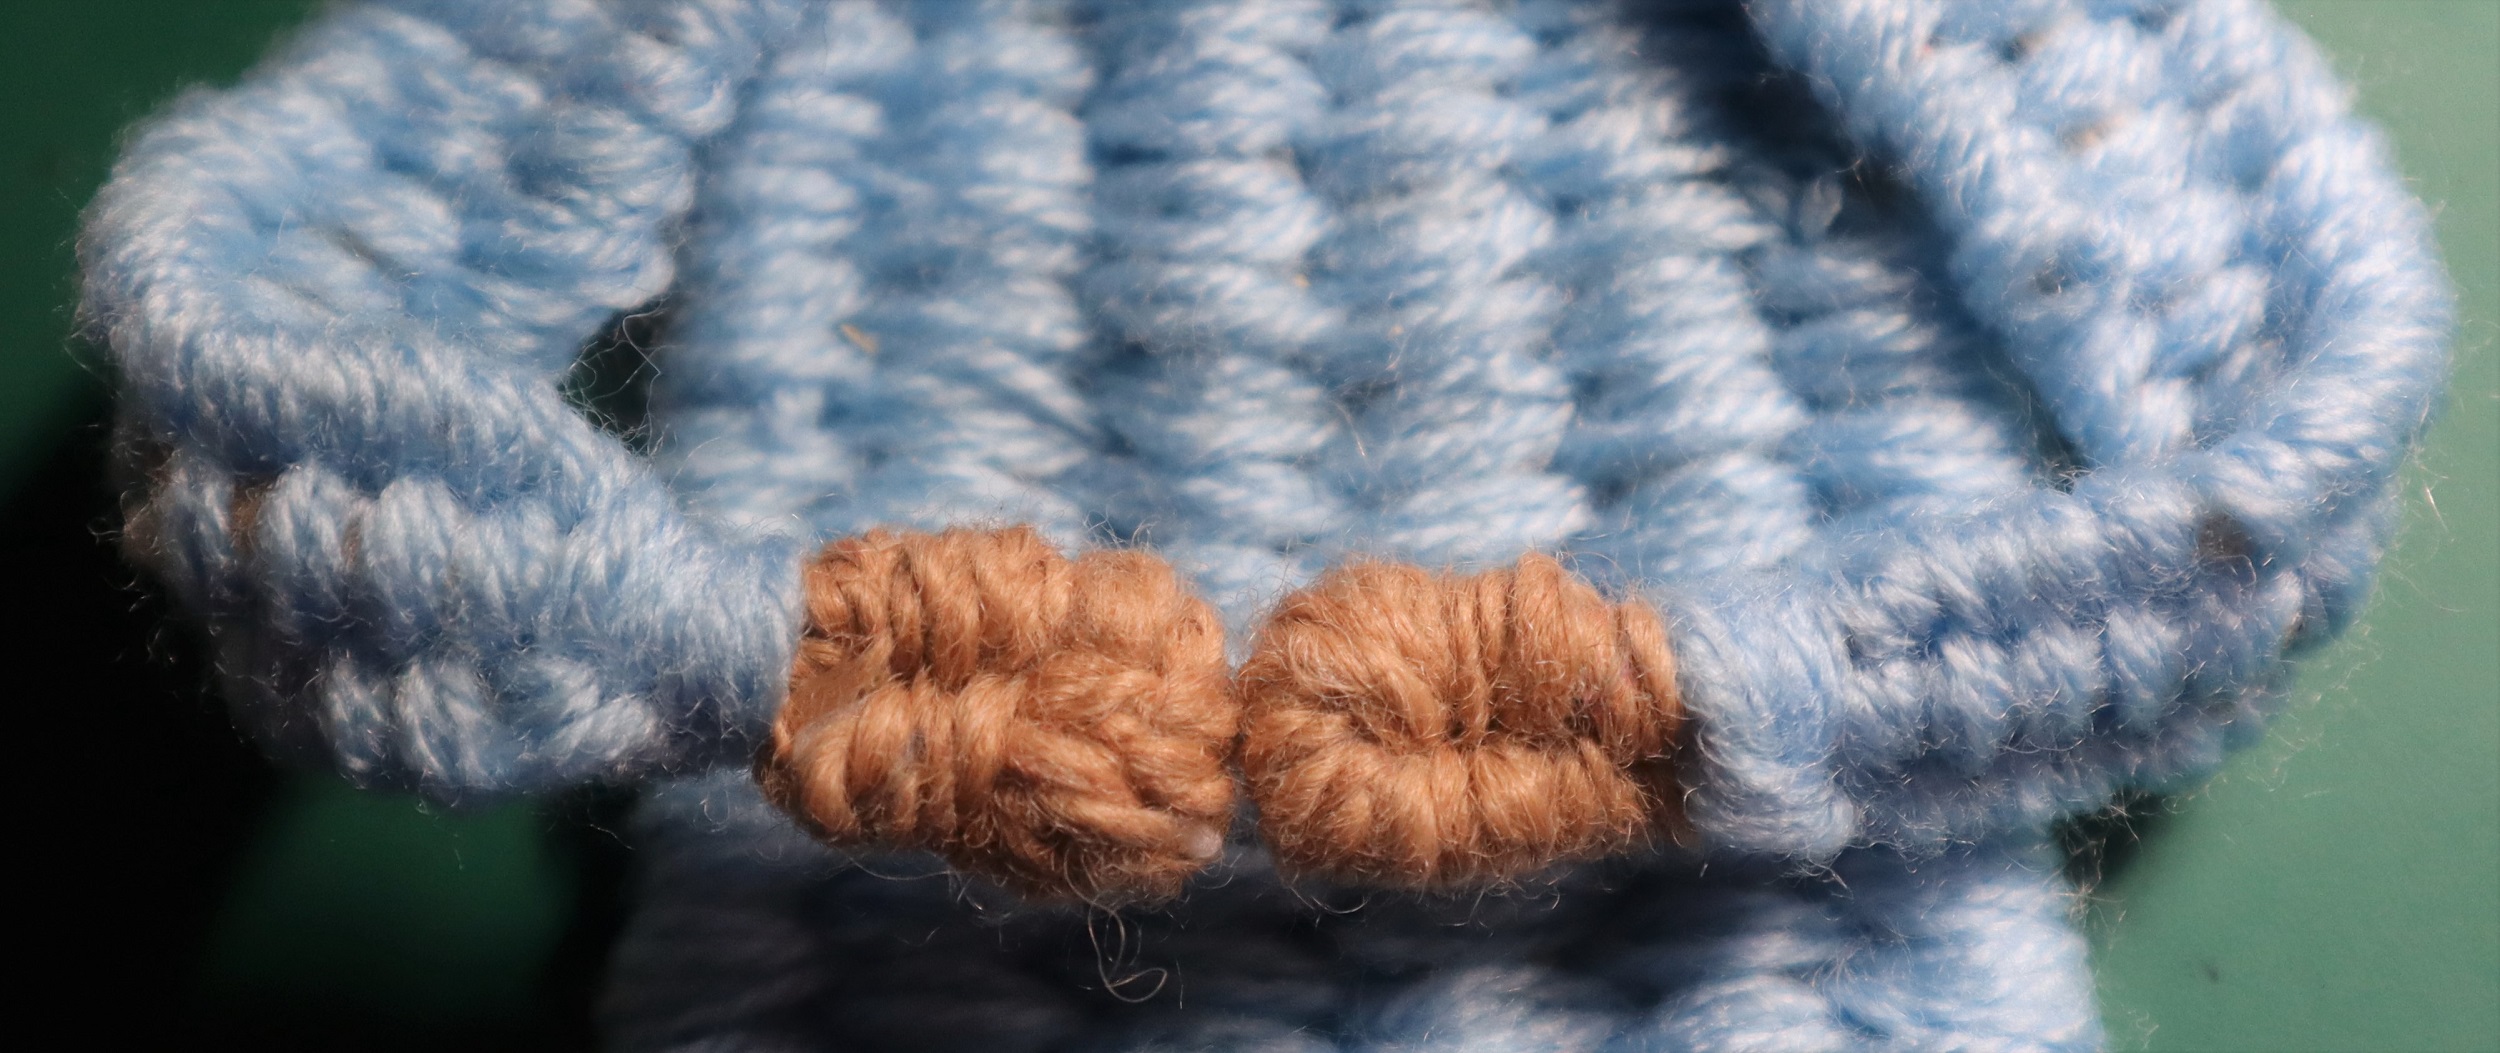
HANDS:
Weave in the single strand at the side of each hand into the arm so that it is the same size as the loop of the hand.
With skin tone yarn make hands the same way as the feet. Weave the yarn ends into the arms.
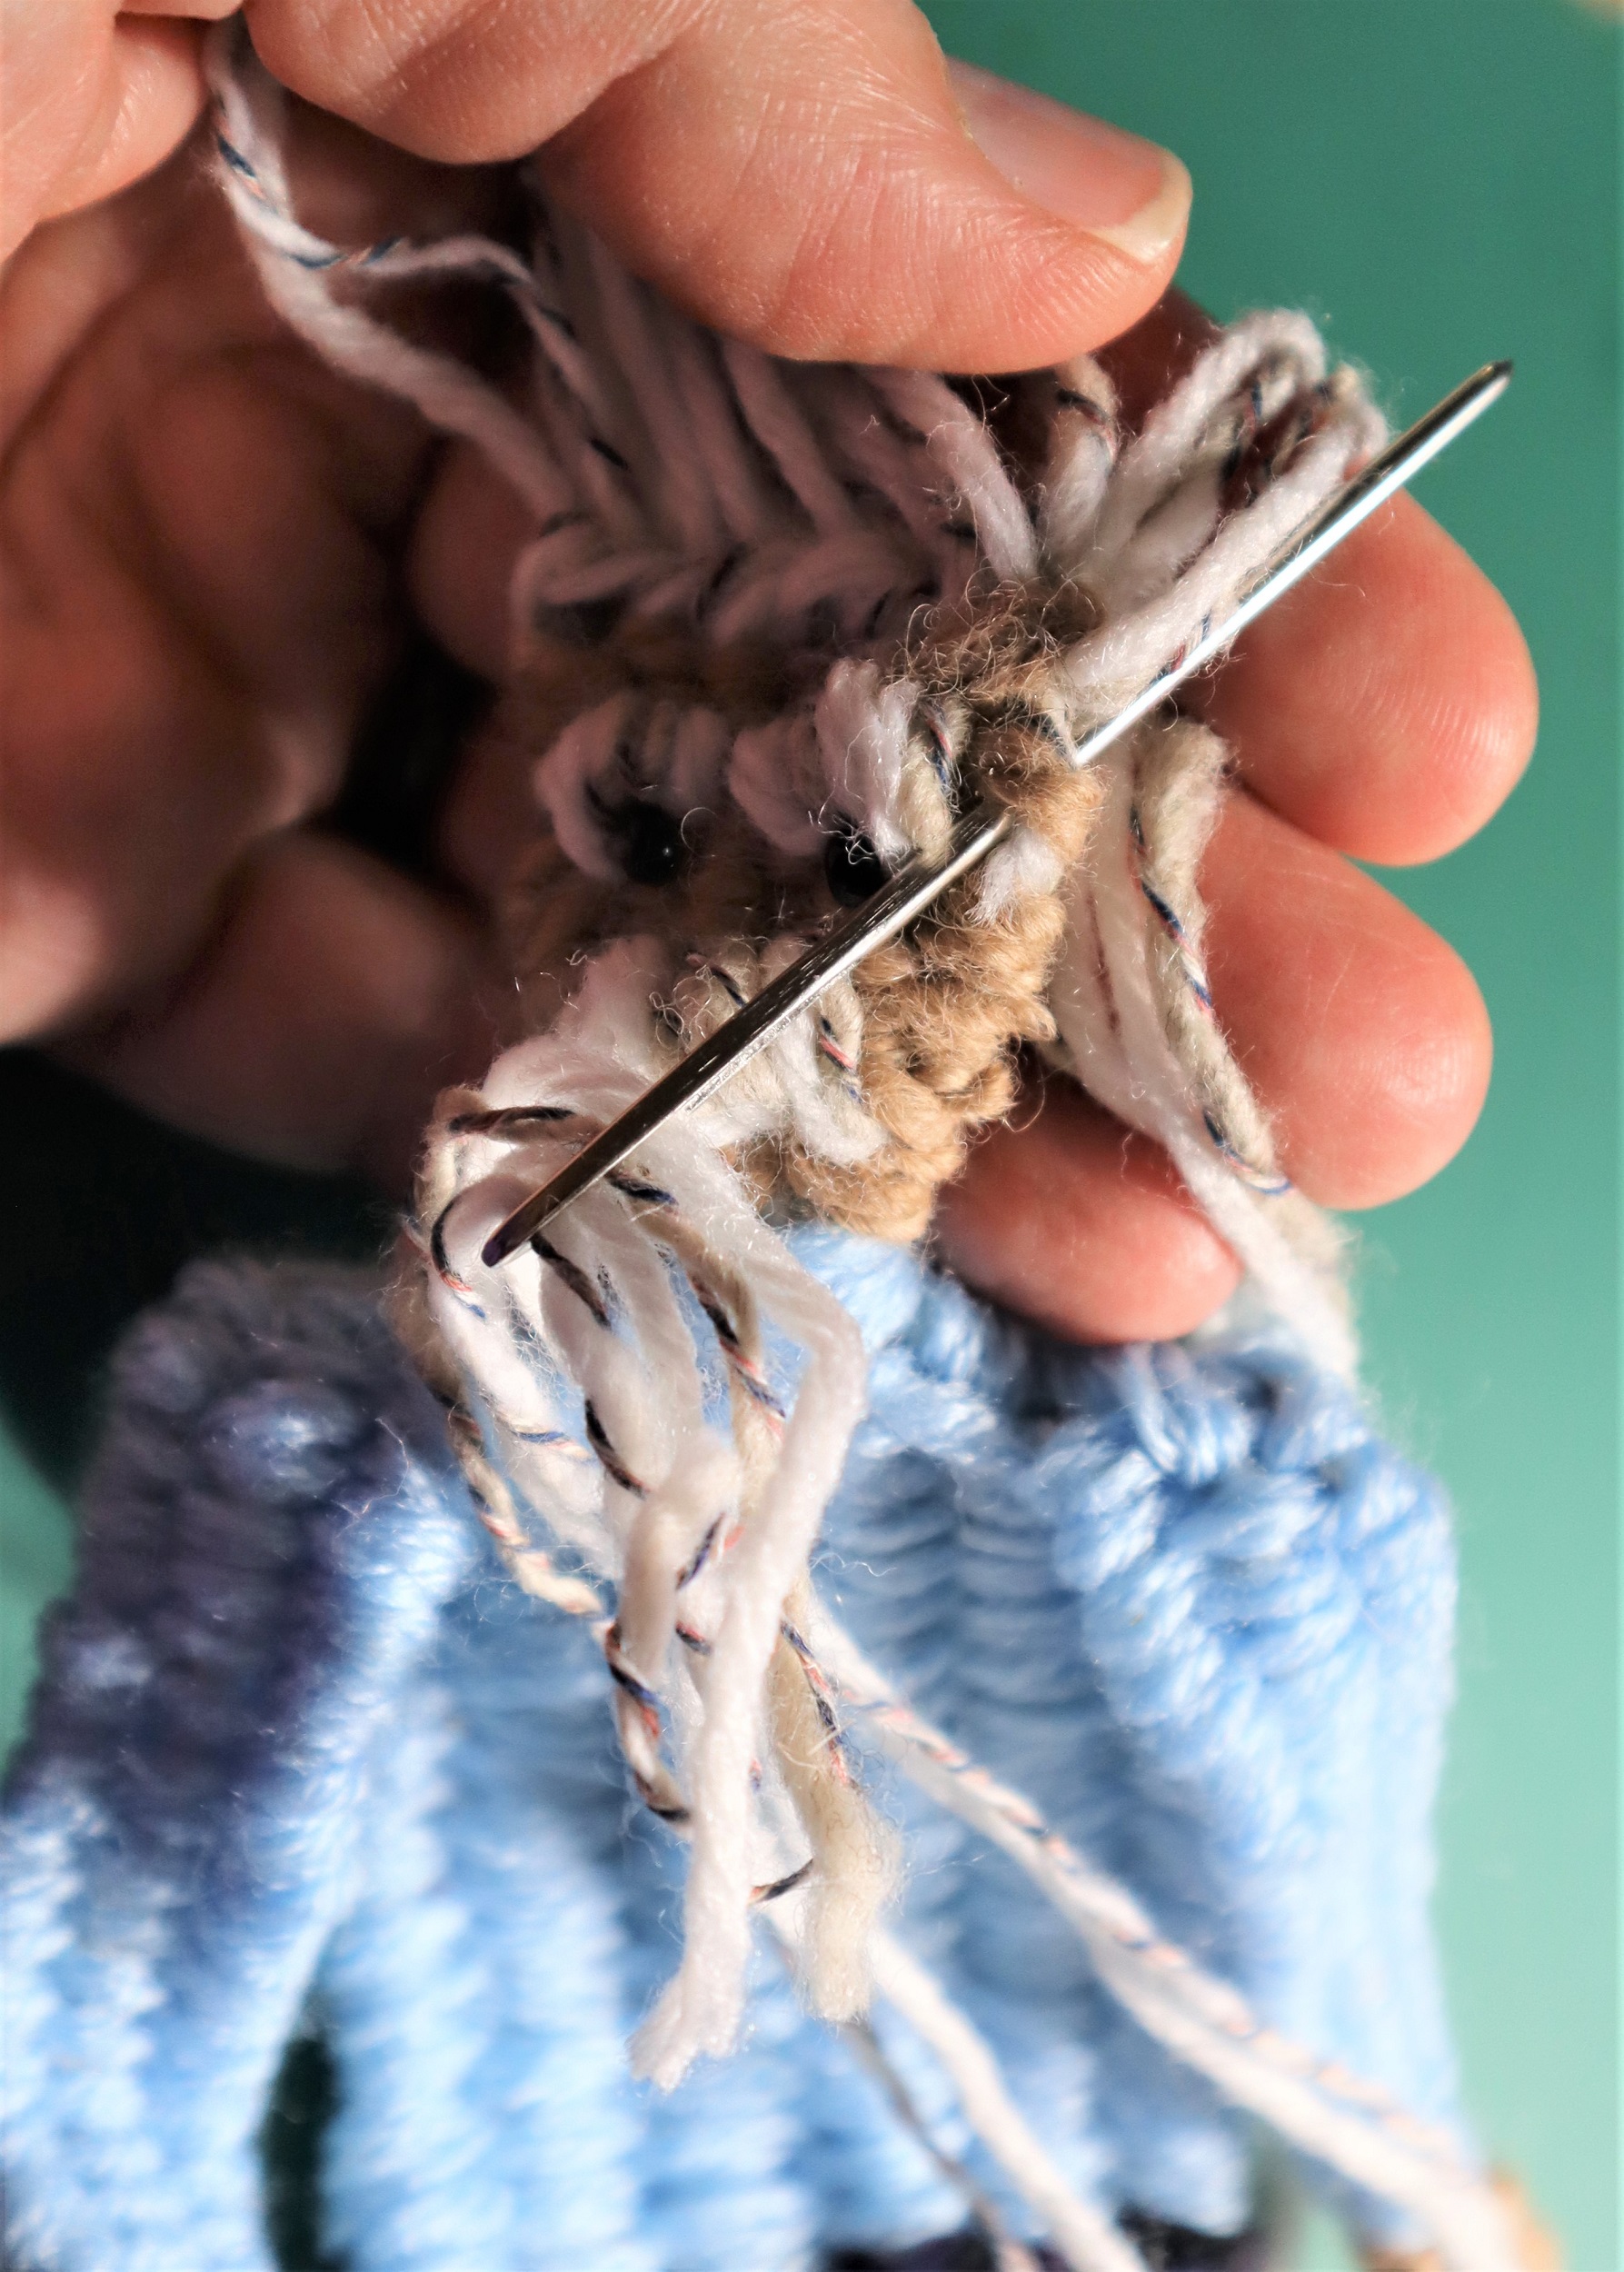
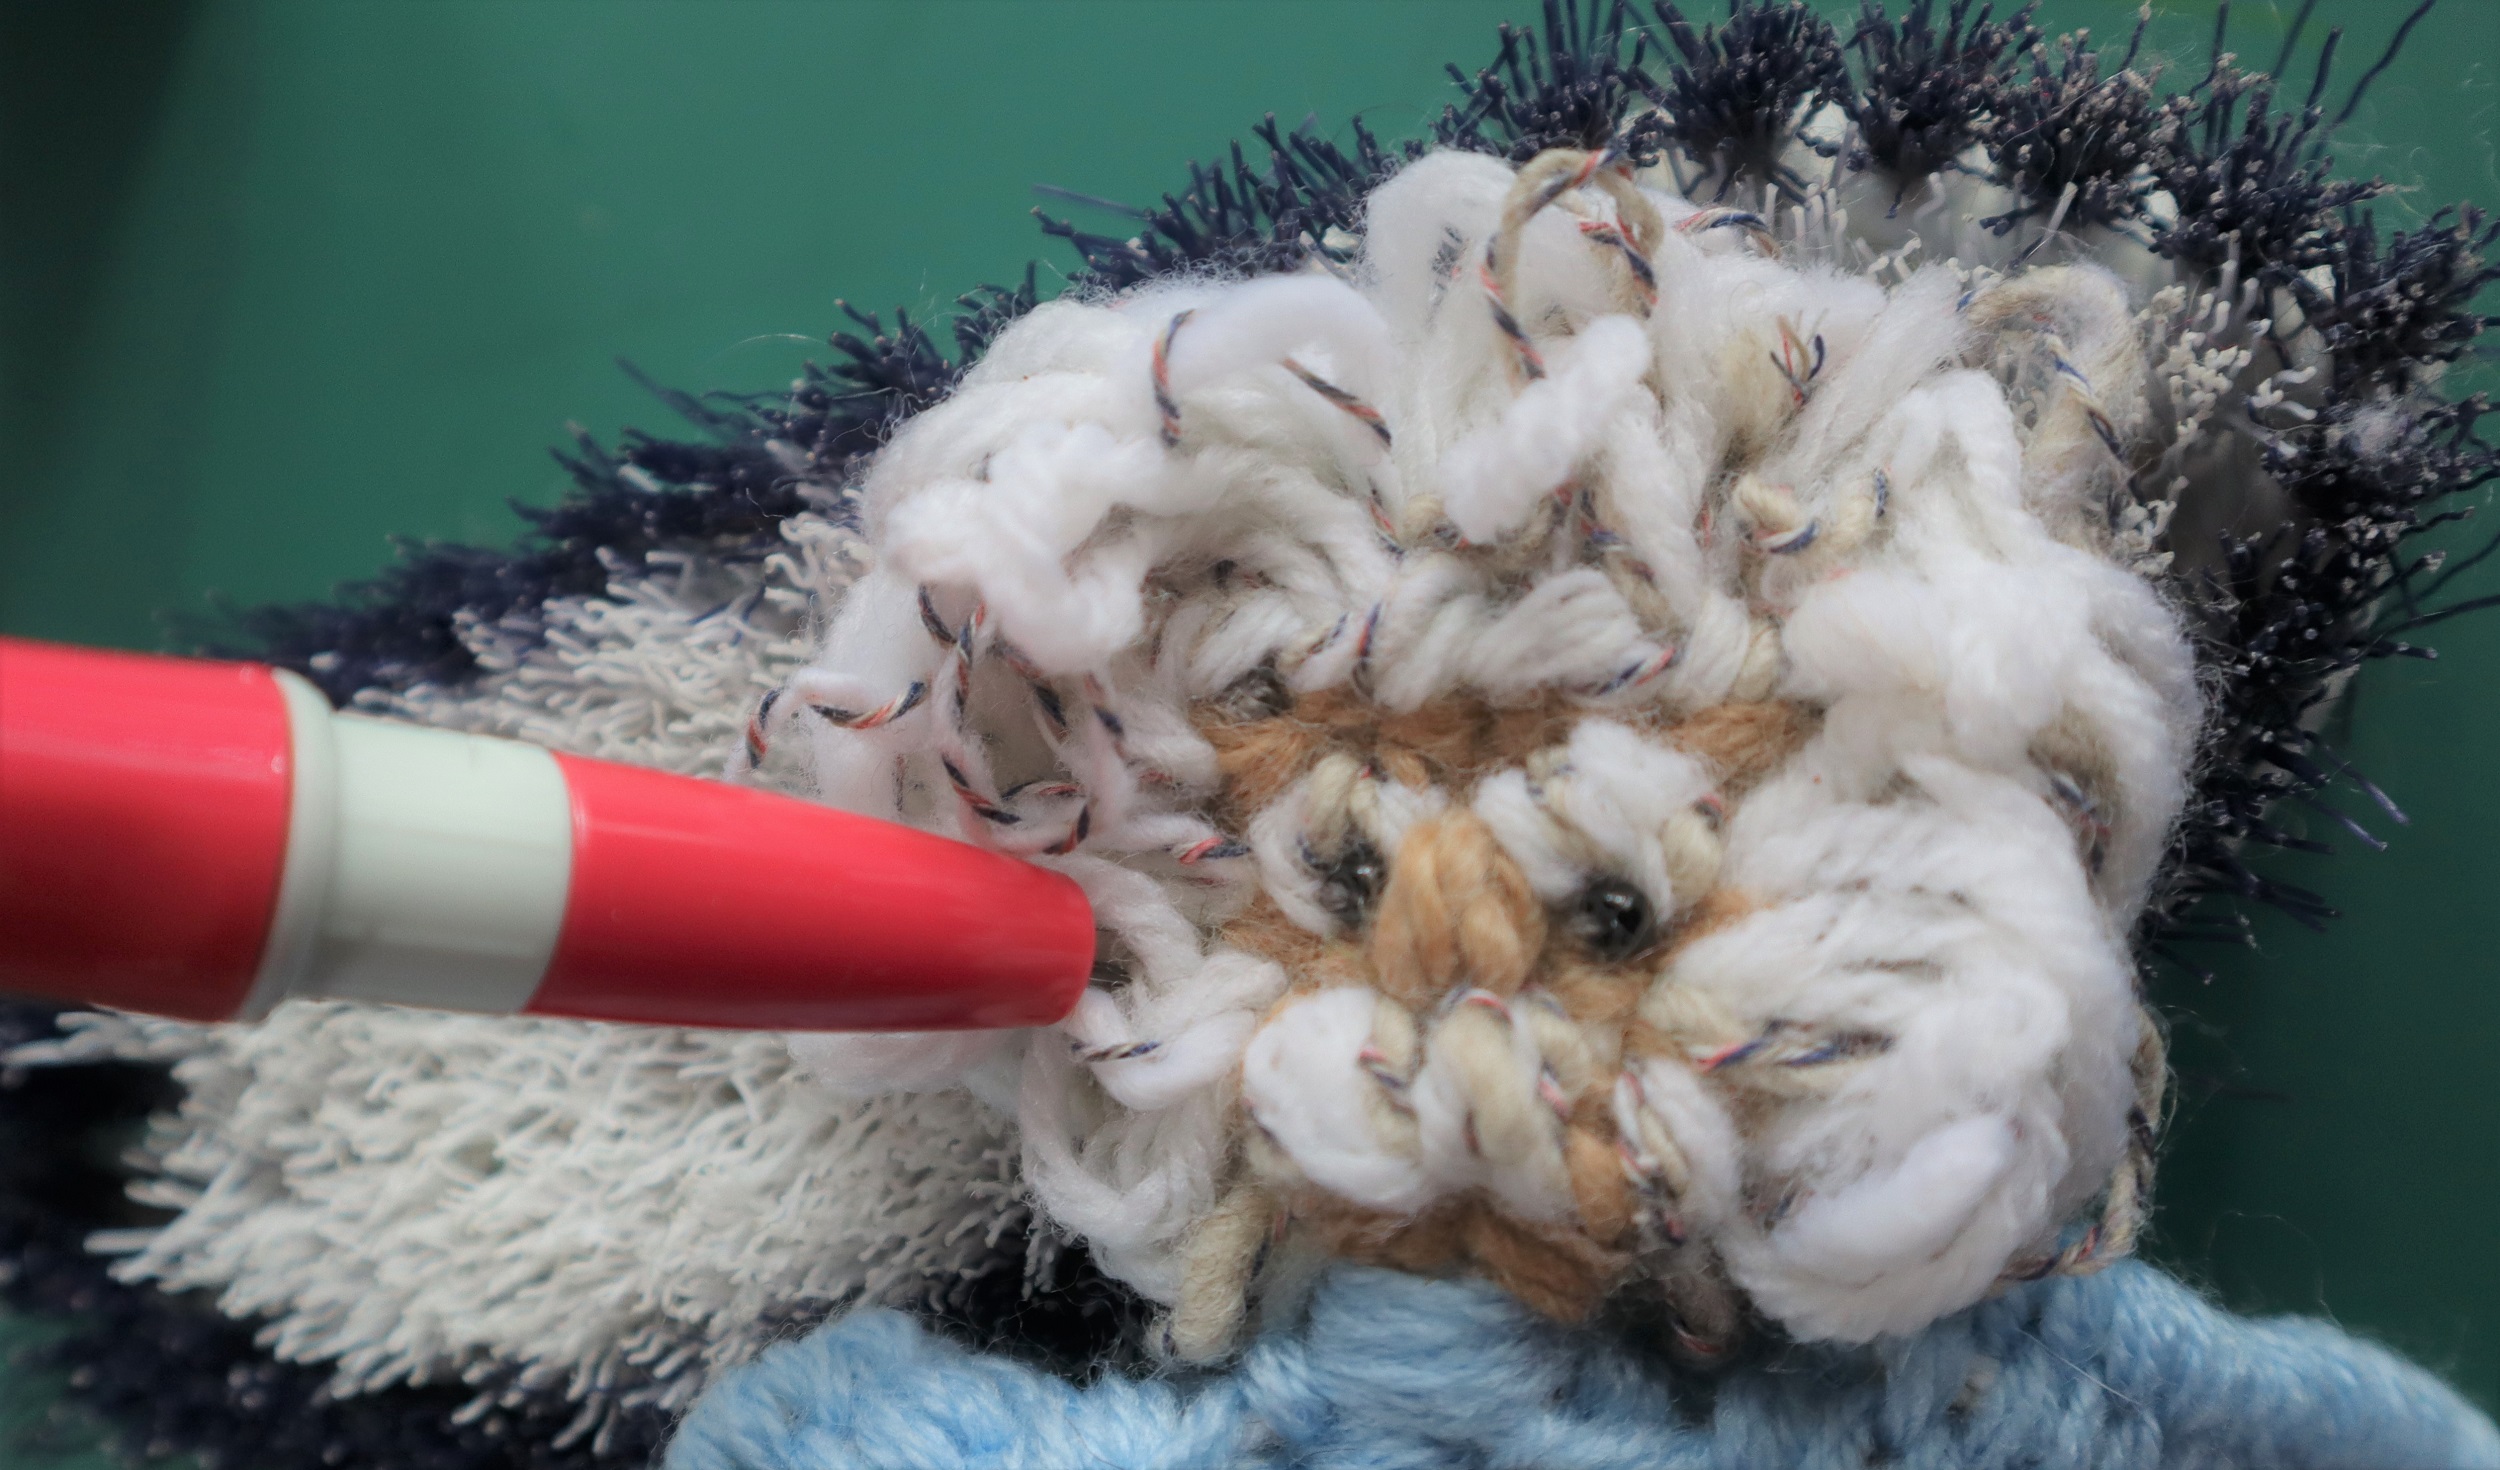
HAIR:
Stitch loops of hair yarn around the edges of the face and on the back of the head.
Use felting needles to finalize the loops into the ‘dandelion’ shape of his classic signature hairstyle.
FINISHING:
1: Steam the woven figure on the wrong side with a steam iron, being sure to not touch the iron to the weaving.
Finger press the arms down and the hair into place.
Weave in the ends.
Trim any ends.
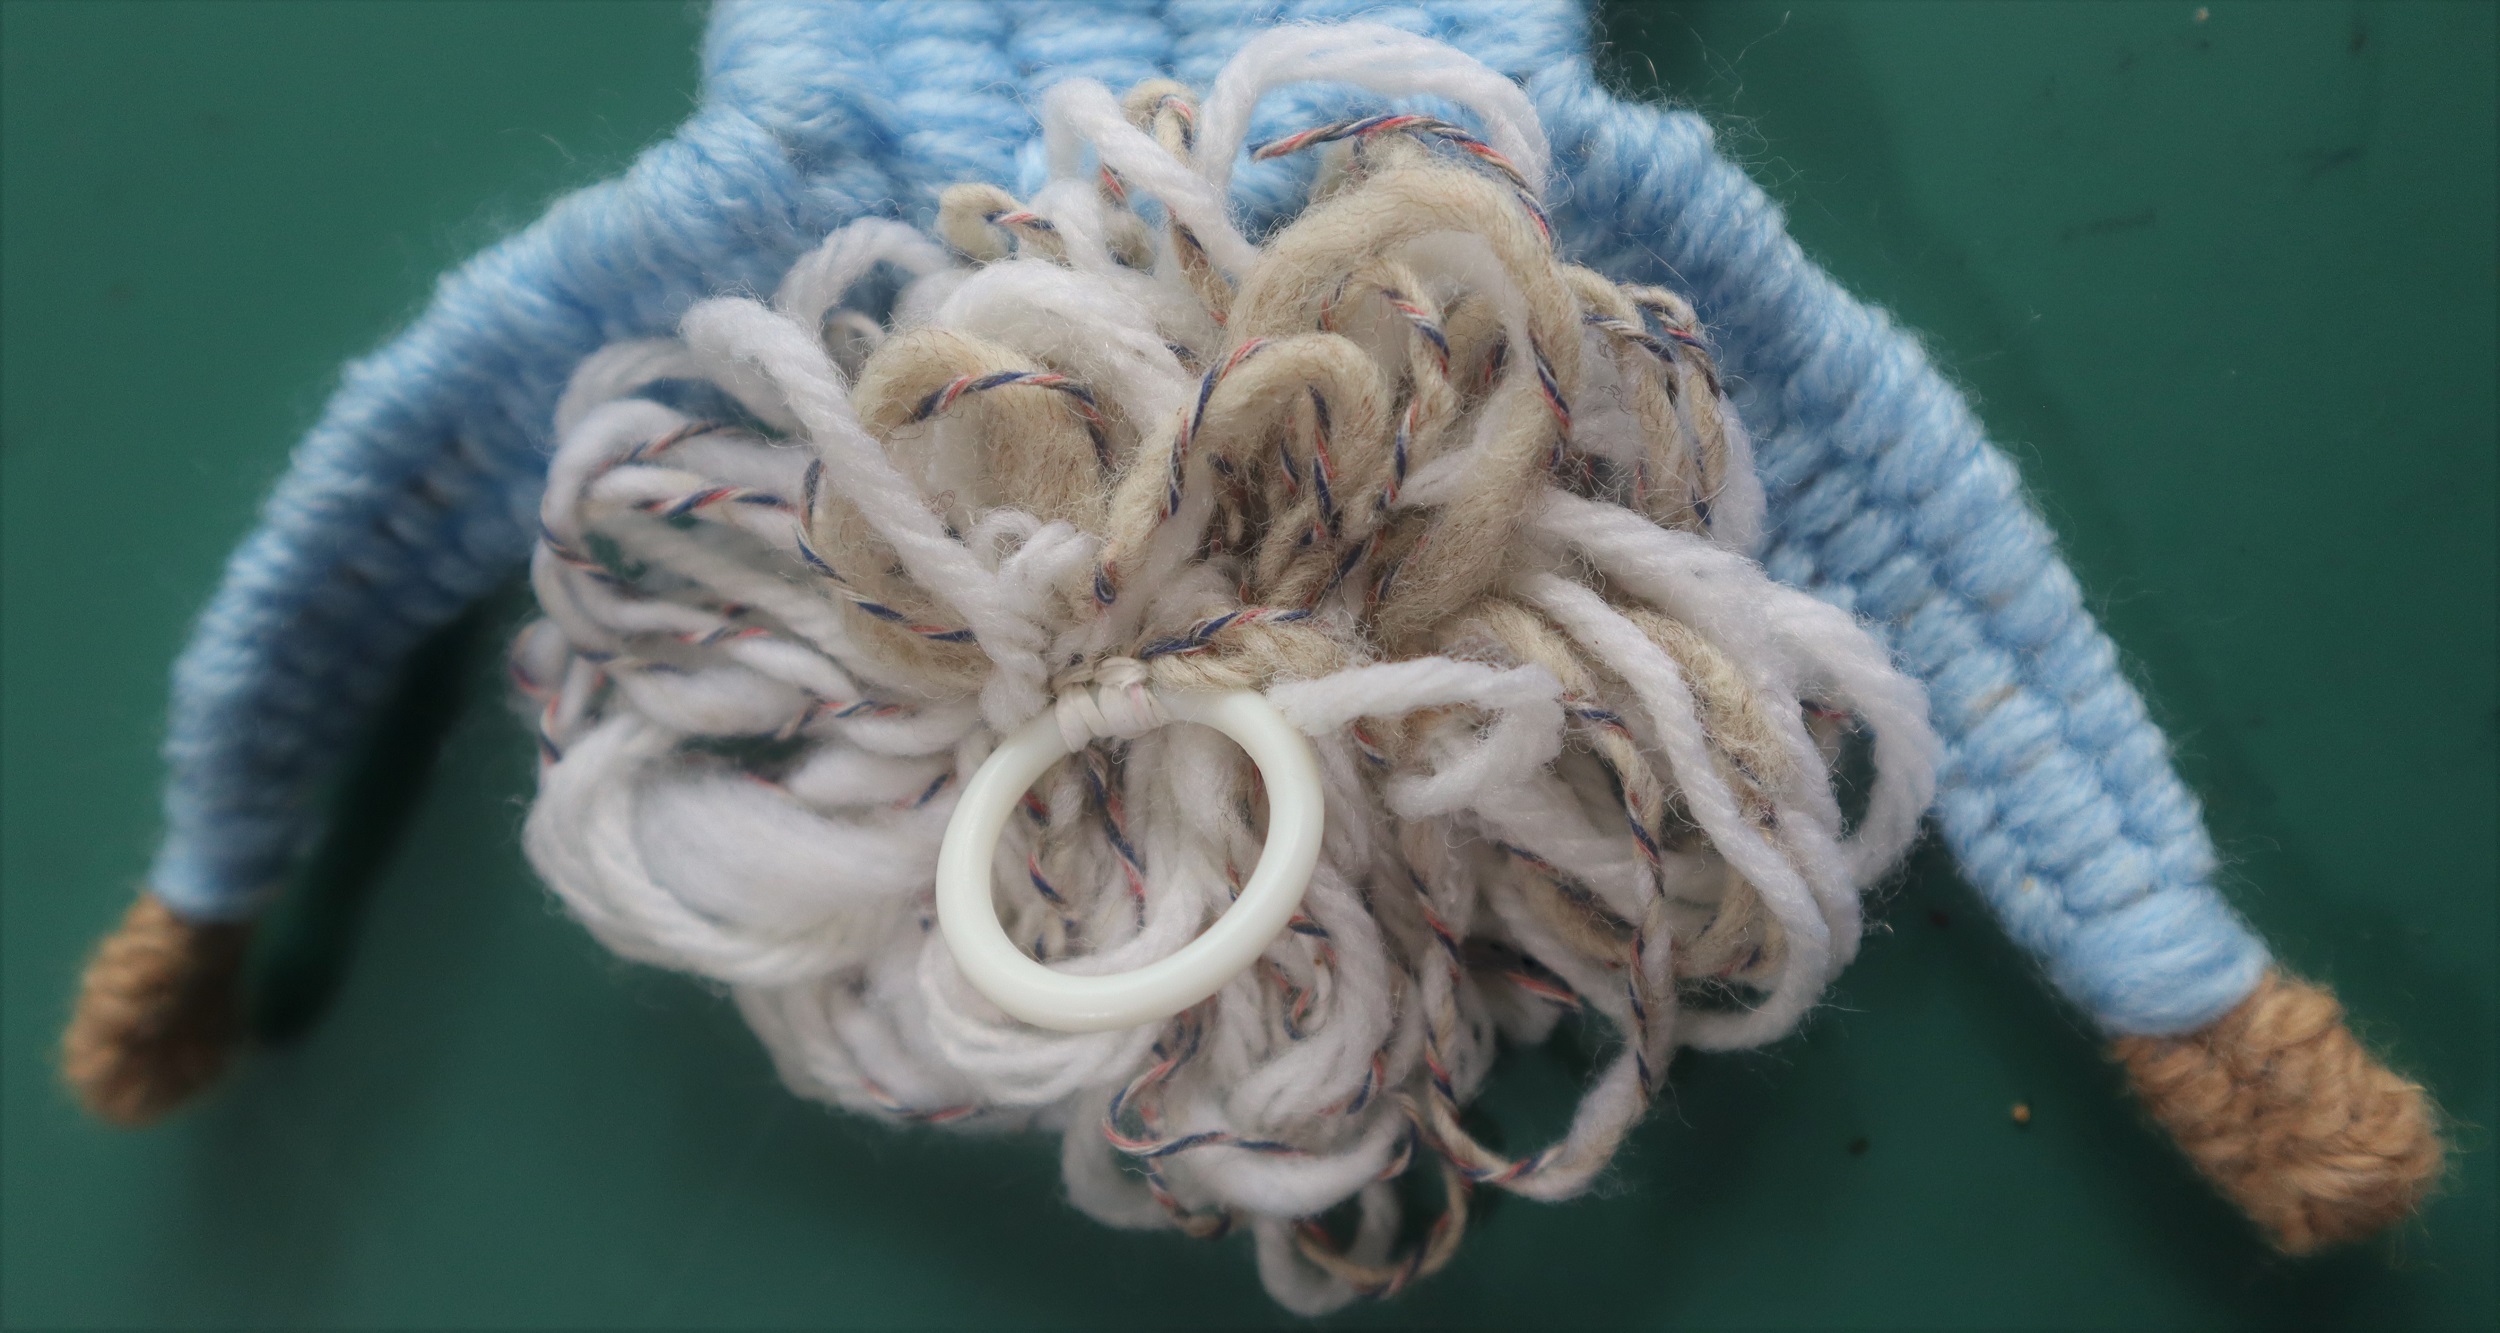
2: Sew a plastic or metal ring to the back of the head for hanging the banner.
To see all the links for the ‘How To’ posts for the “Imagine” Banner Weave along, please go to L I N K S
To order the loom, book and extras kit for the Weave Along from Mirrix, please go to K I T
FREE FORM WEAVING: HOMAGE TO ALBERT EINSTEIN:
Albert Einstein is woven (with a few extrapolations and a slight adjustment to the waistline) following the instructions for the Woven Dancer on page 30 of “Innovative Weaving on the Frame Loom”.
In order to hold the pattern onto the loom, a backing board is needed.
INSTRUCTIONS:
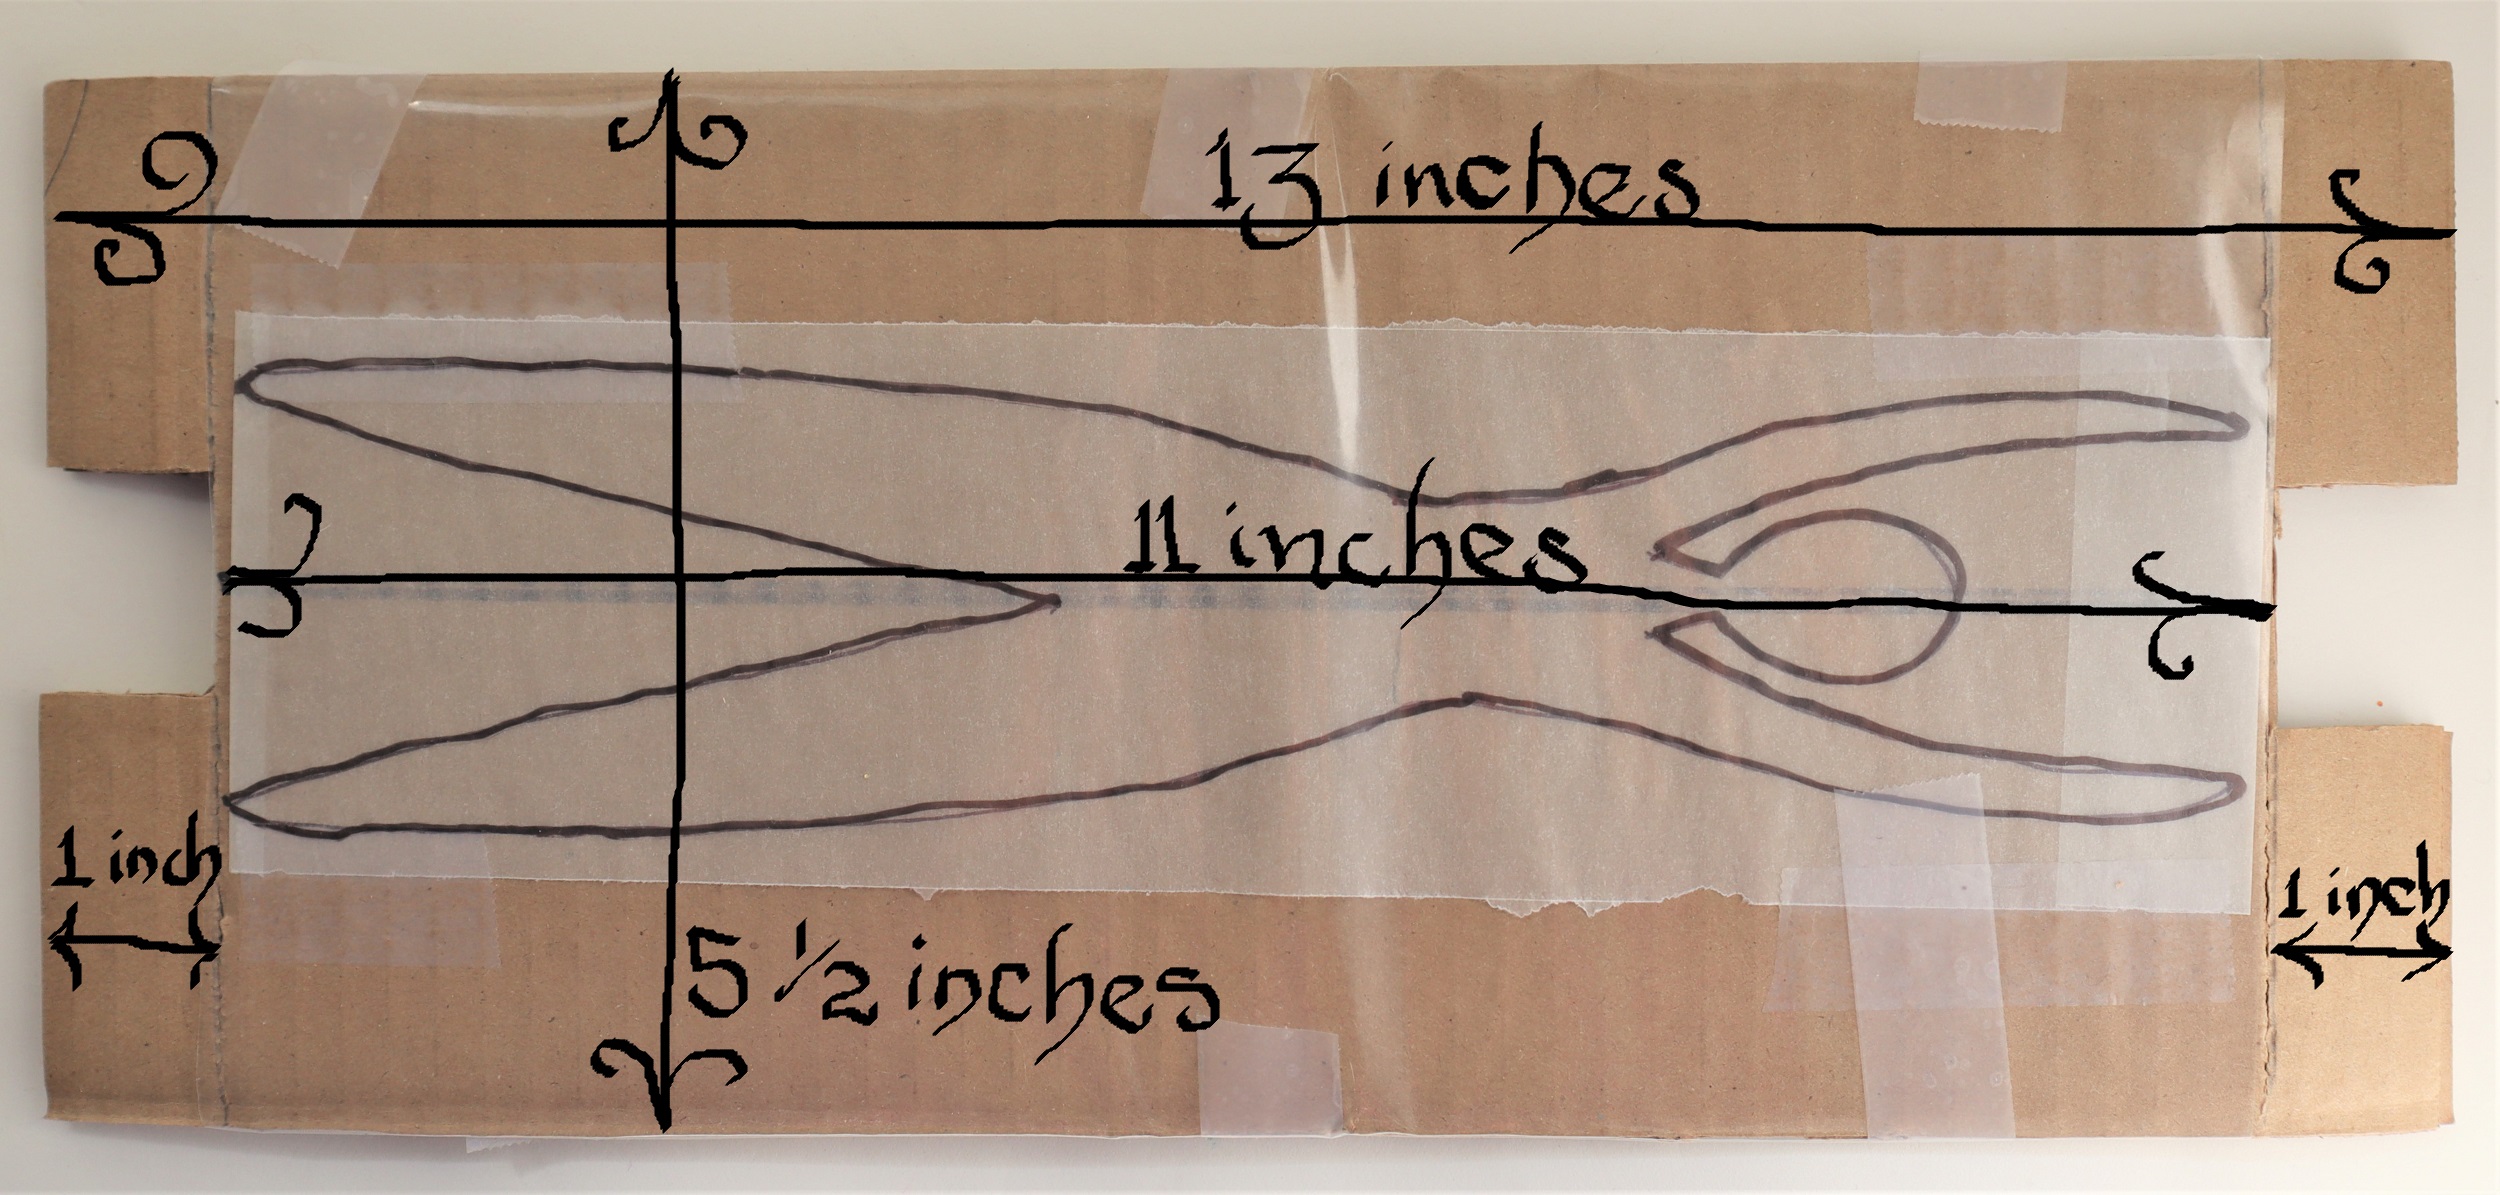
HOW TO MAKE THECARDBOARD BACKING BOARD FOR THE SAFFRON LOOM:
1: With the corrugations running the length of the piece: Cut 2 pieces of corrugated cardboard that are 13 inches/32.5 cm long by 5 1/2 inches/13.75 cm wide.
2: Tape or glue the 2 pieces of cardboard together.
3: Score a line with a ballpoint pen or knitting needle 1 inch/2.5 cm from each end.
4: Cut a notch out of the center of each end piece that is 1 inch/2.5 cm by 1 inch/2.5 cm.
5: Trace the pattern for the largest Woven Dancer onto plain paper or graph paper and center it on the backing board.
6: Tape it in place, then tape a piece of clear plastic, either from recycled plastic or a plastic page protector over the pattern.
To see all the links for the ‘How To’ posts for the “Imagine” Banner Weave along, please go to L I N K S
To order the loom, book and extras kit for the Weave Along from Mirrix, please go to K I T
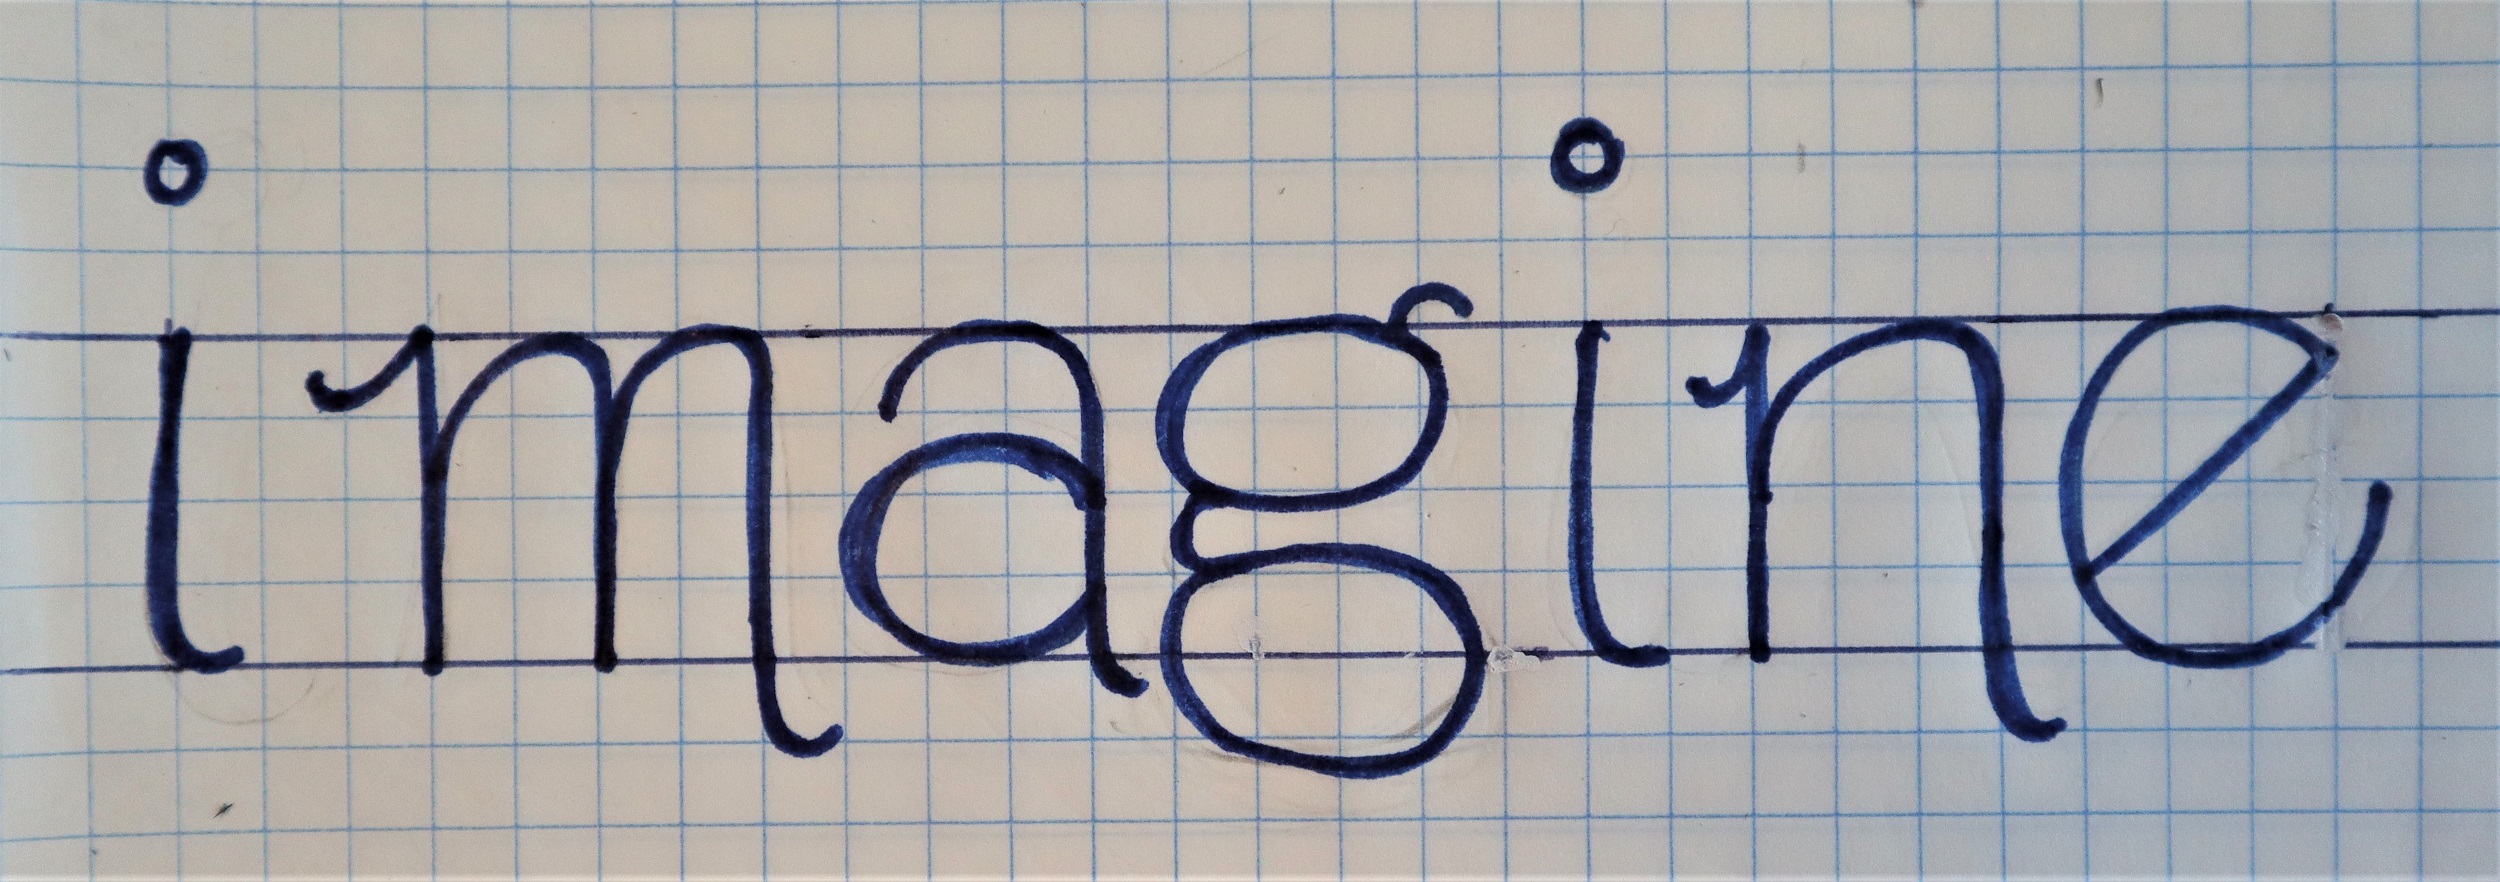
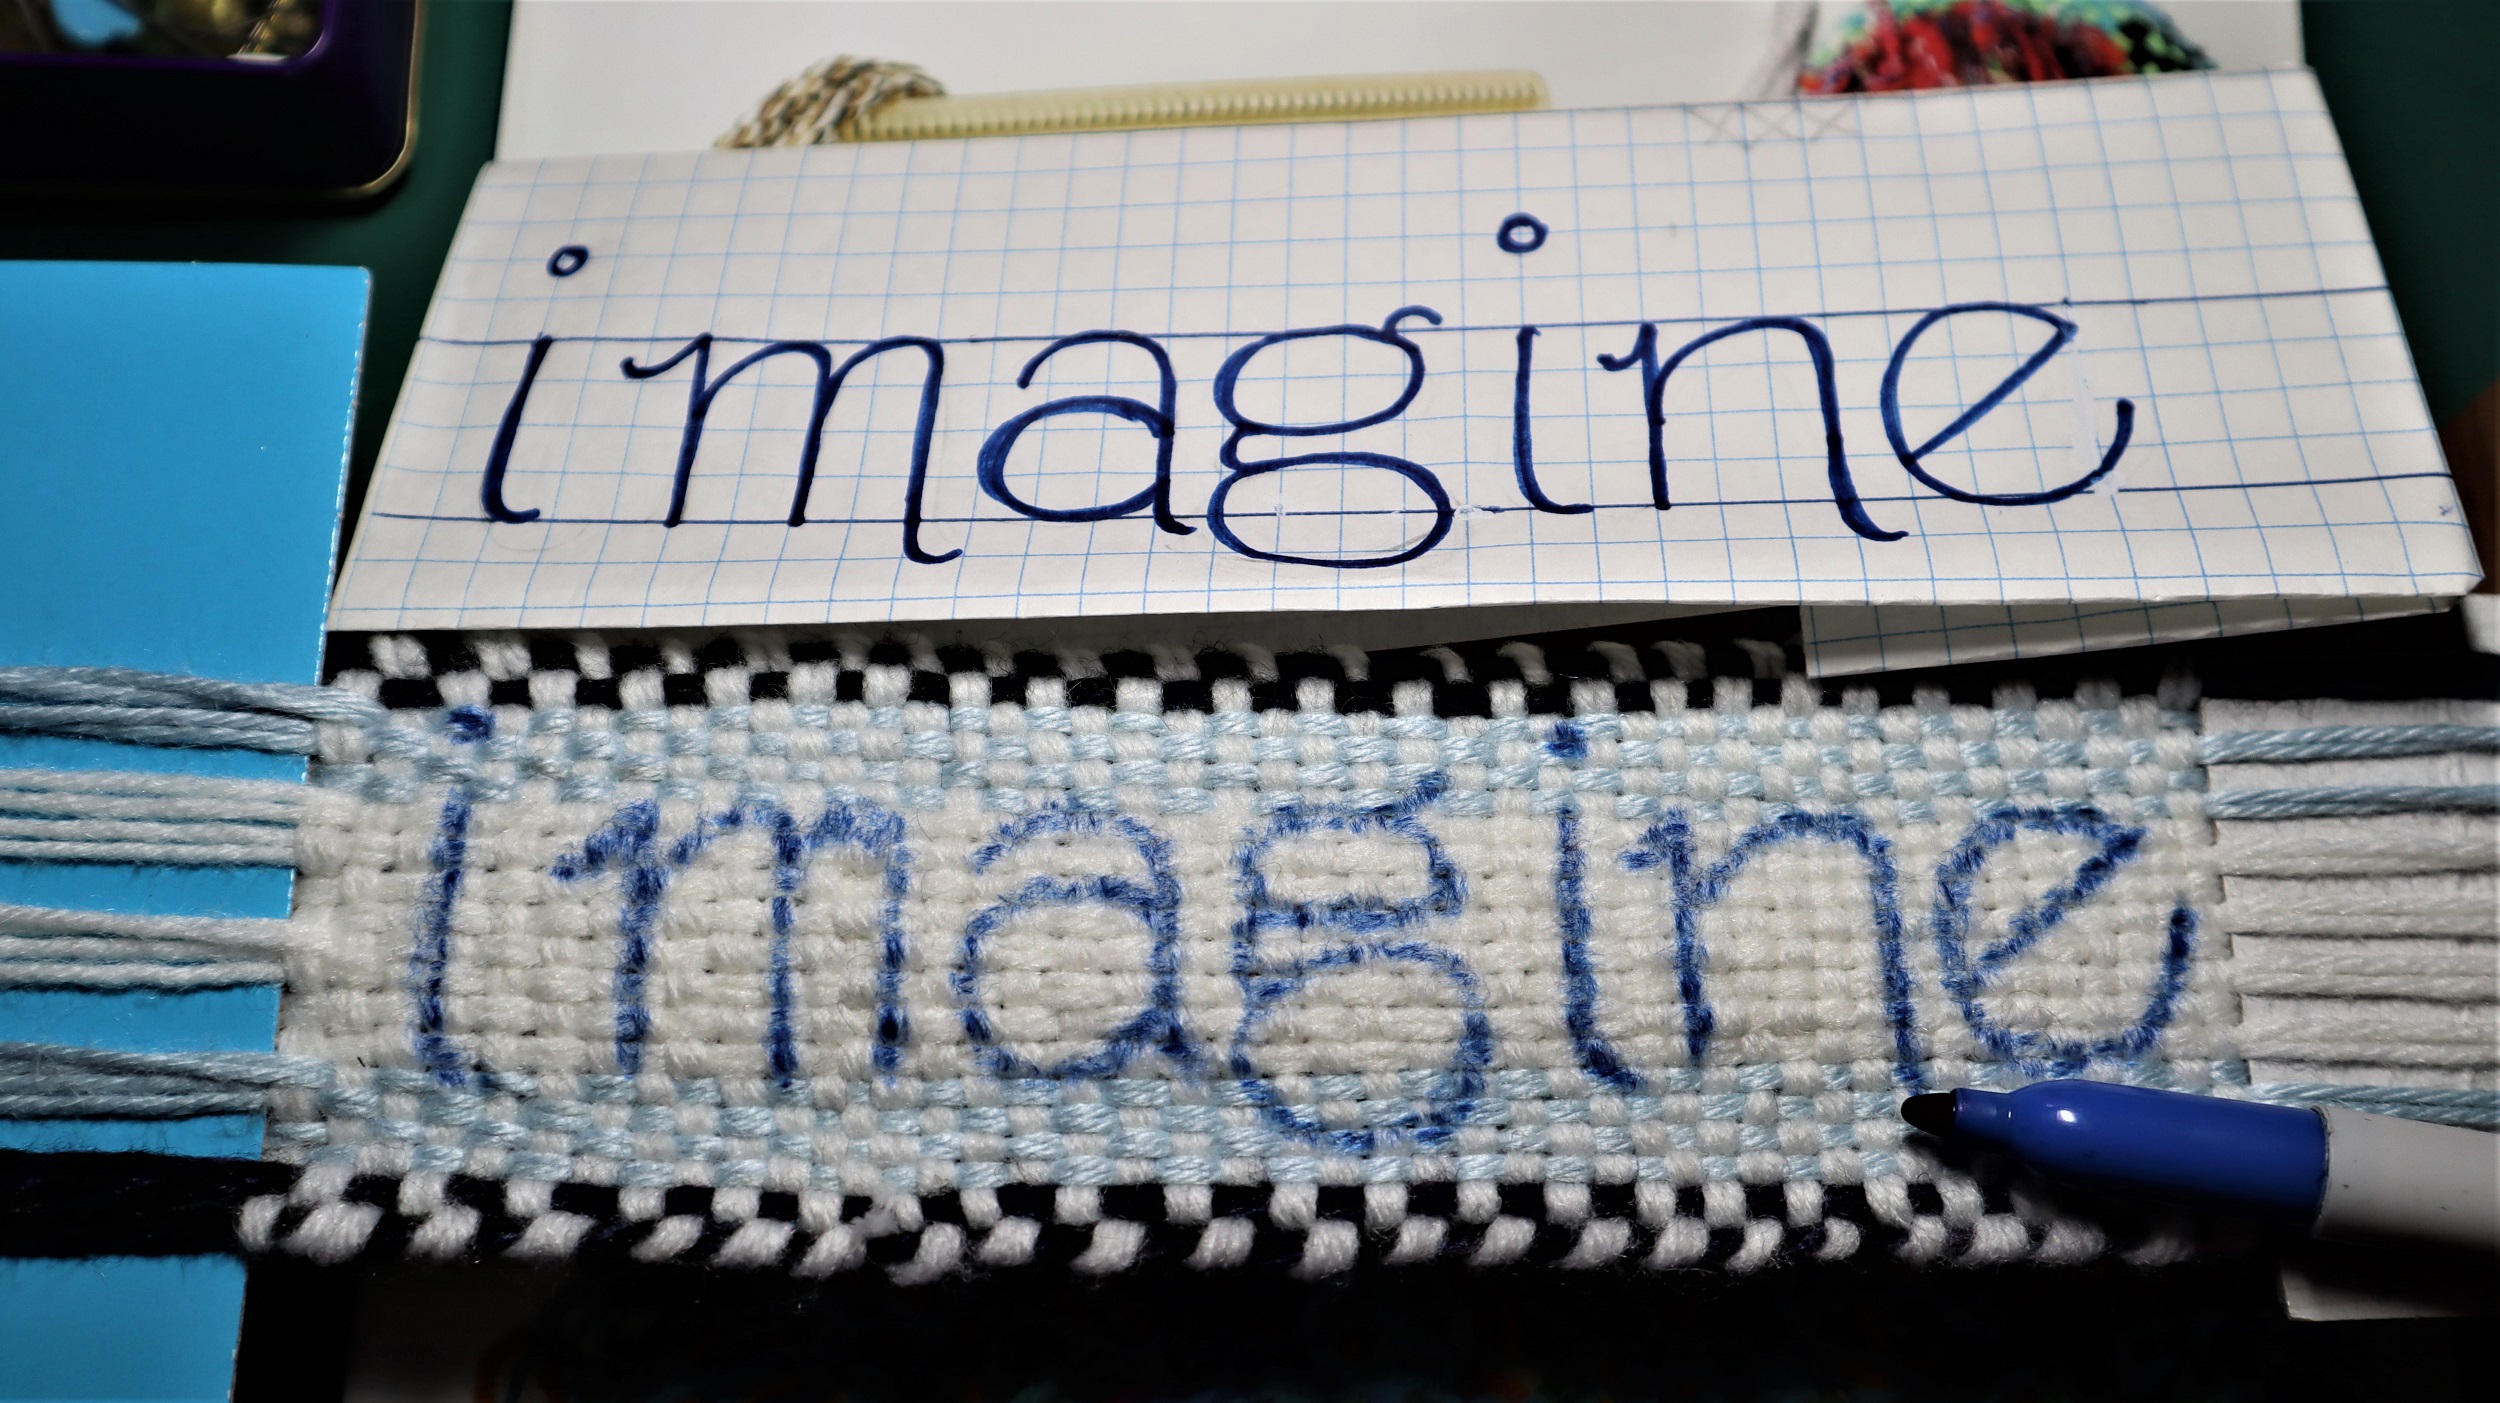
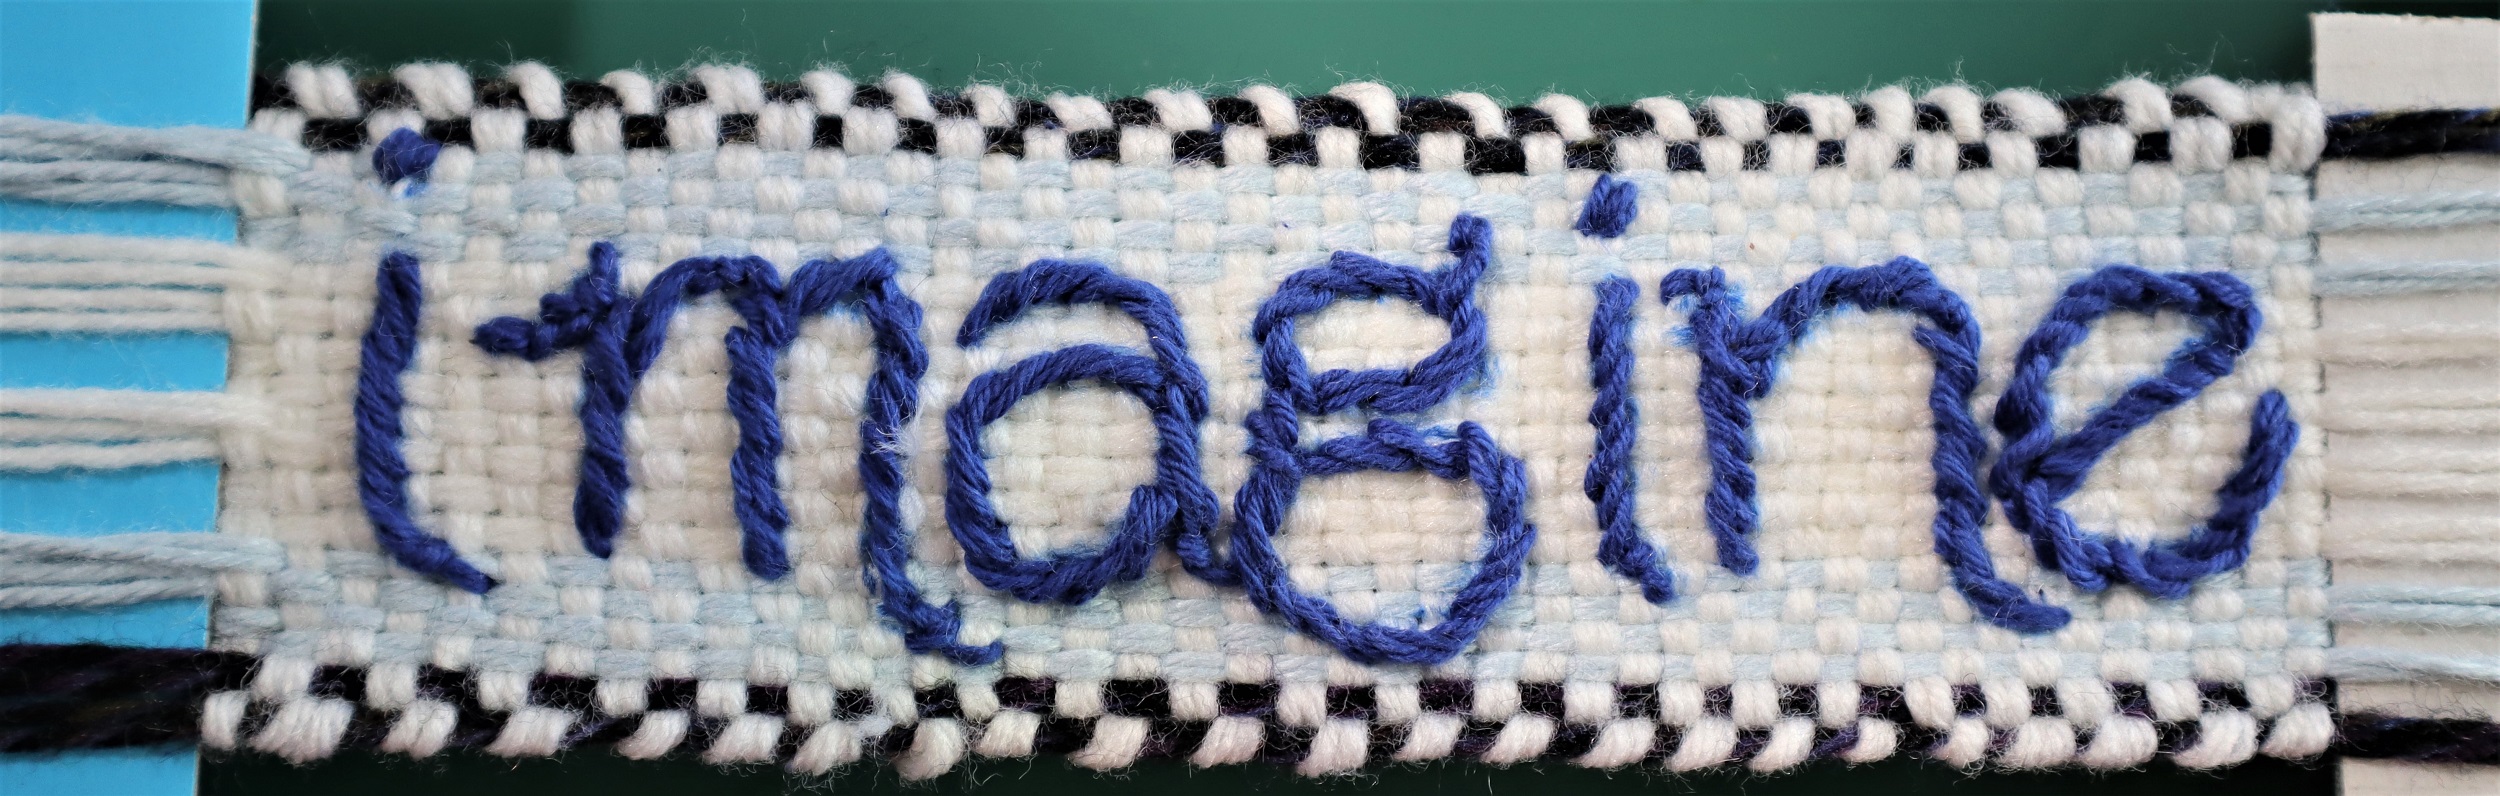
HOW TO EMBROIDER
THE WORD ‘IMAGINE’ ON THE NARROW BAND:
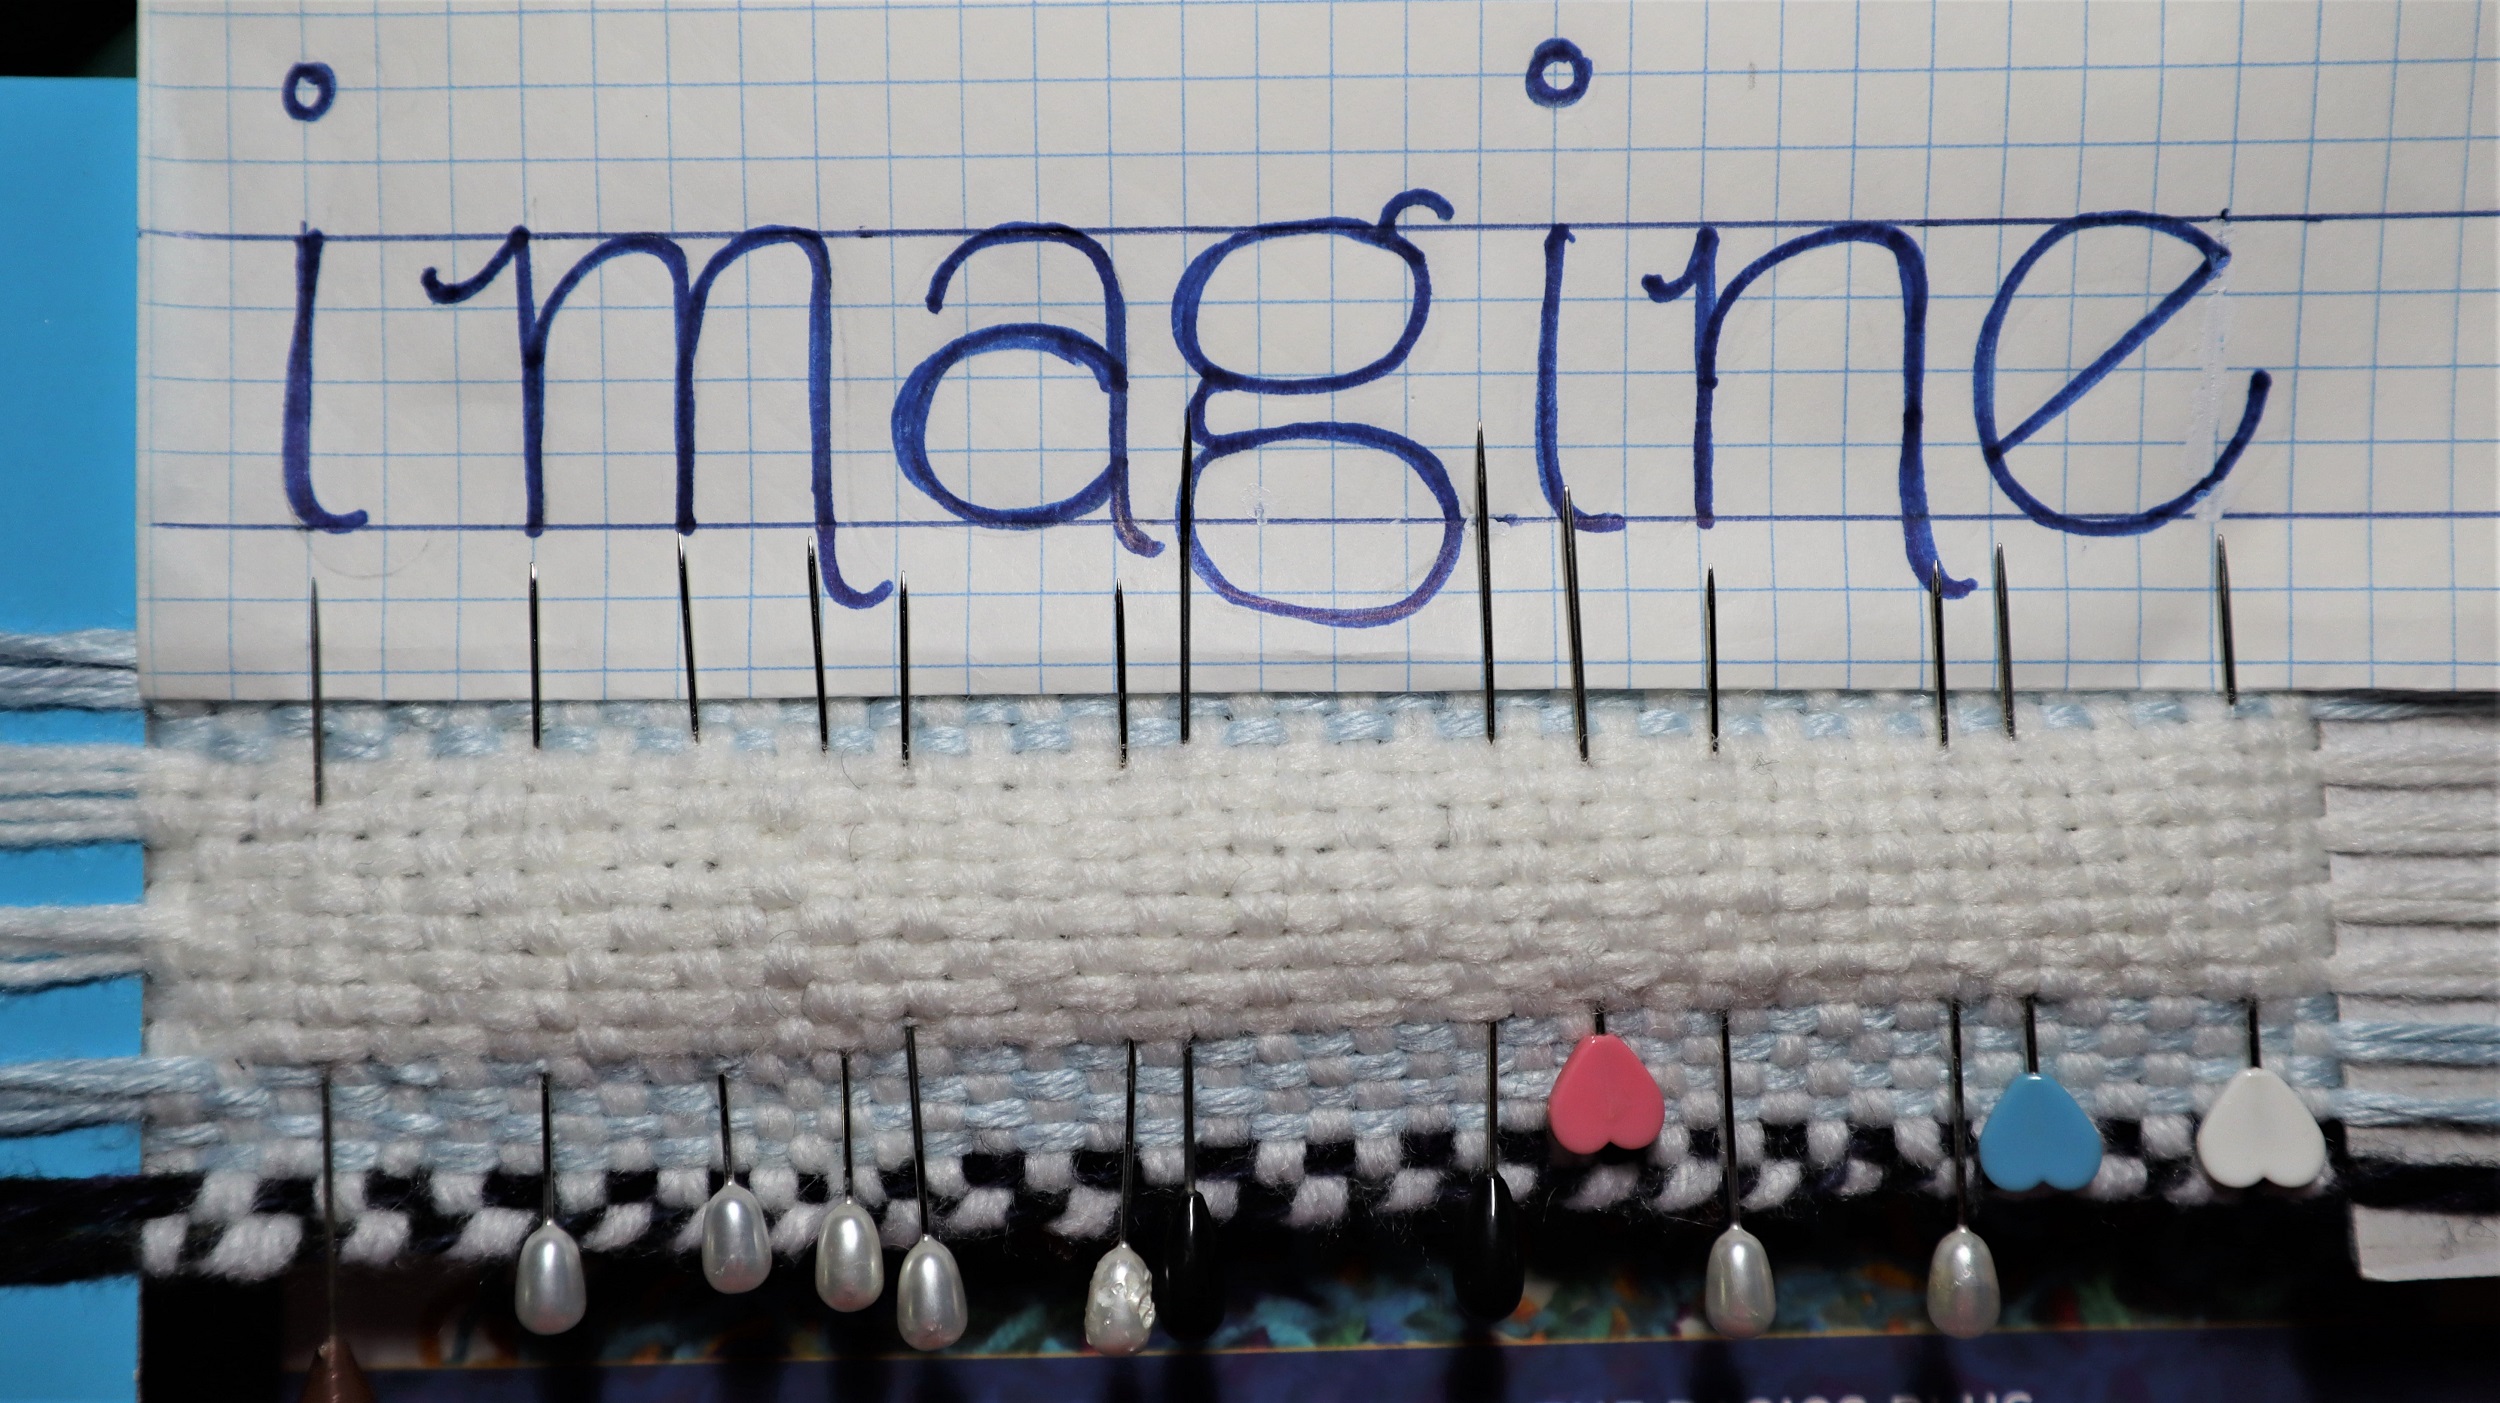
NOTE: The embroidery is done while the weaving is still on the loom and under tension.
1: Print out a copy of the ‘Imagine’ letters so they are approximately 1 inch/2.5 cm high by 7 in/17.5 cm or use 1/4 inch graph paper to draw them out.
2: Fold the paper so the edge of the letters can be placed right against the 1 inch/2.5 cm high white center section of the weaving.
3: Place the straight pins at the upright lines of the letters, ‘I’, ‘m’, ‘n’, and at the outside edges of the chubby ‘a’, ‘g’ and ‘e’.
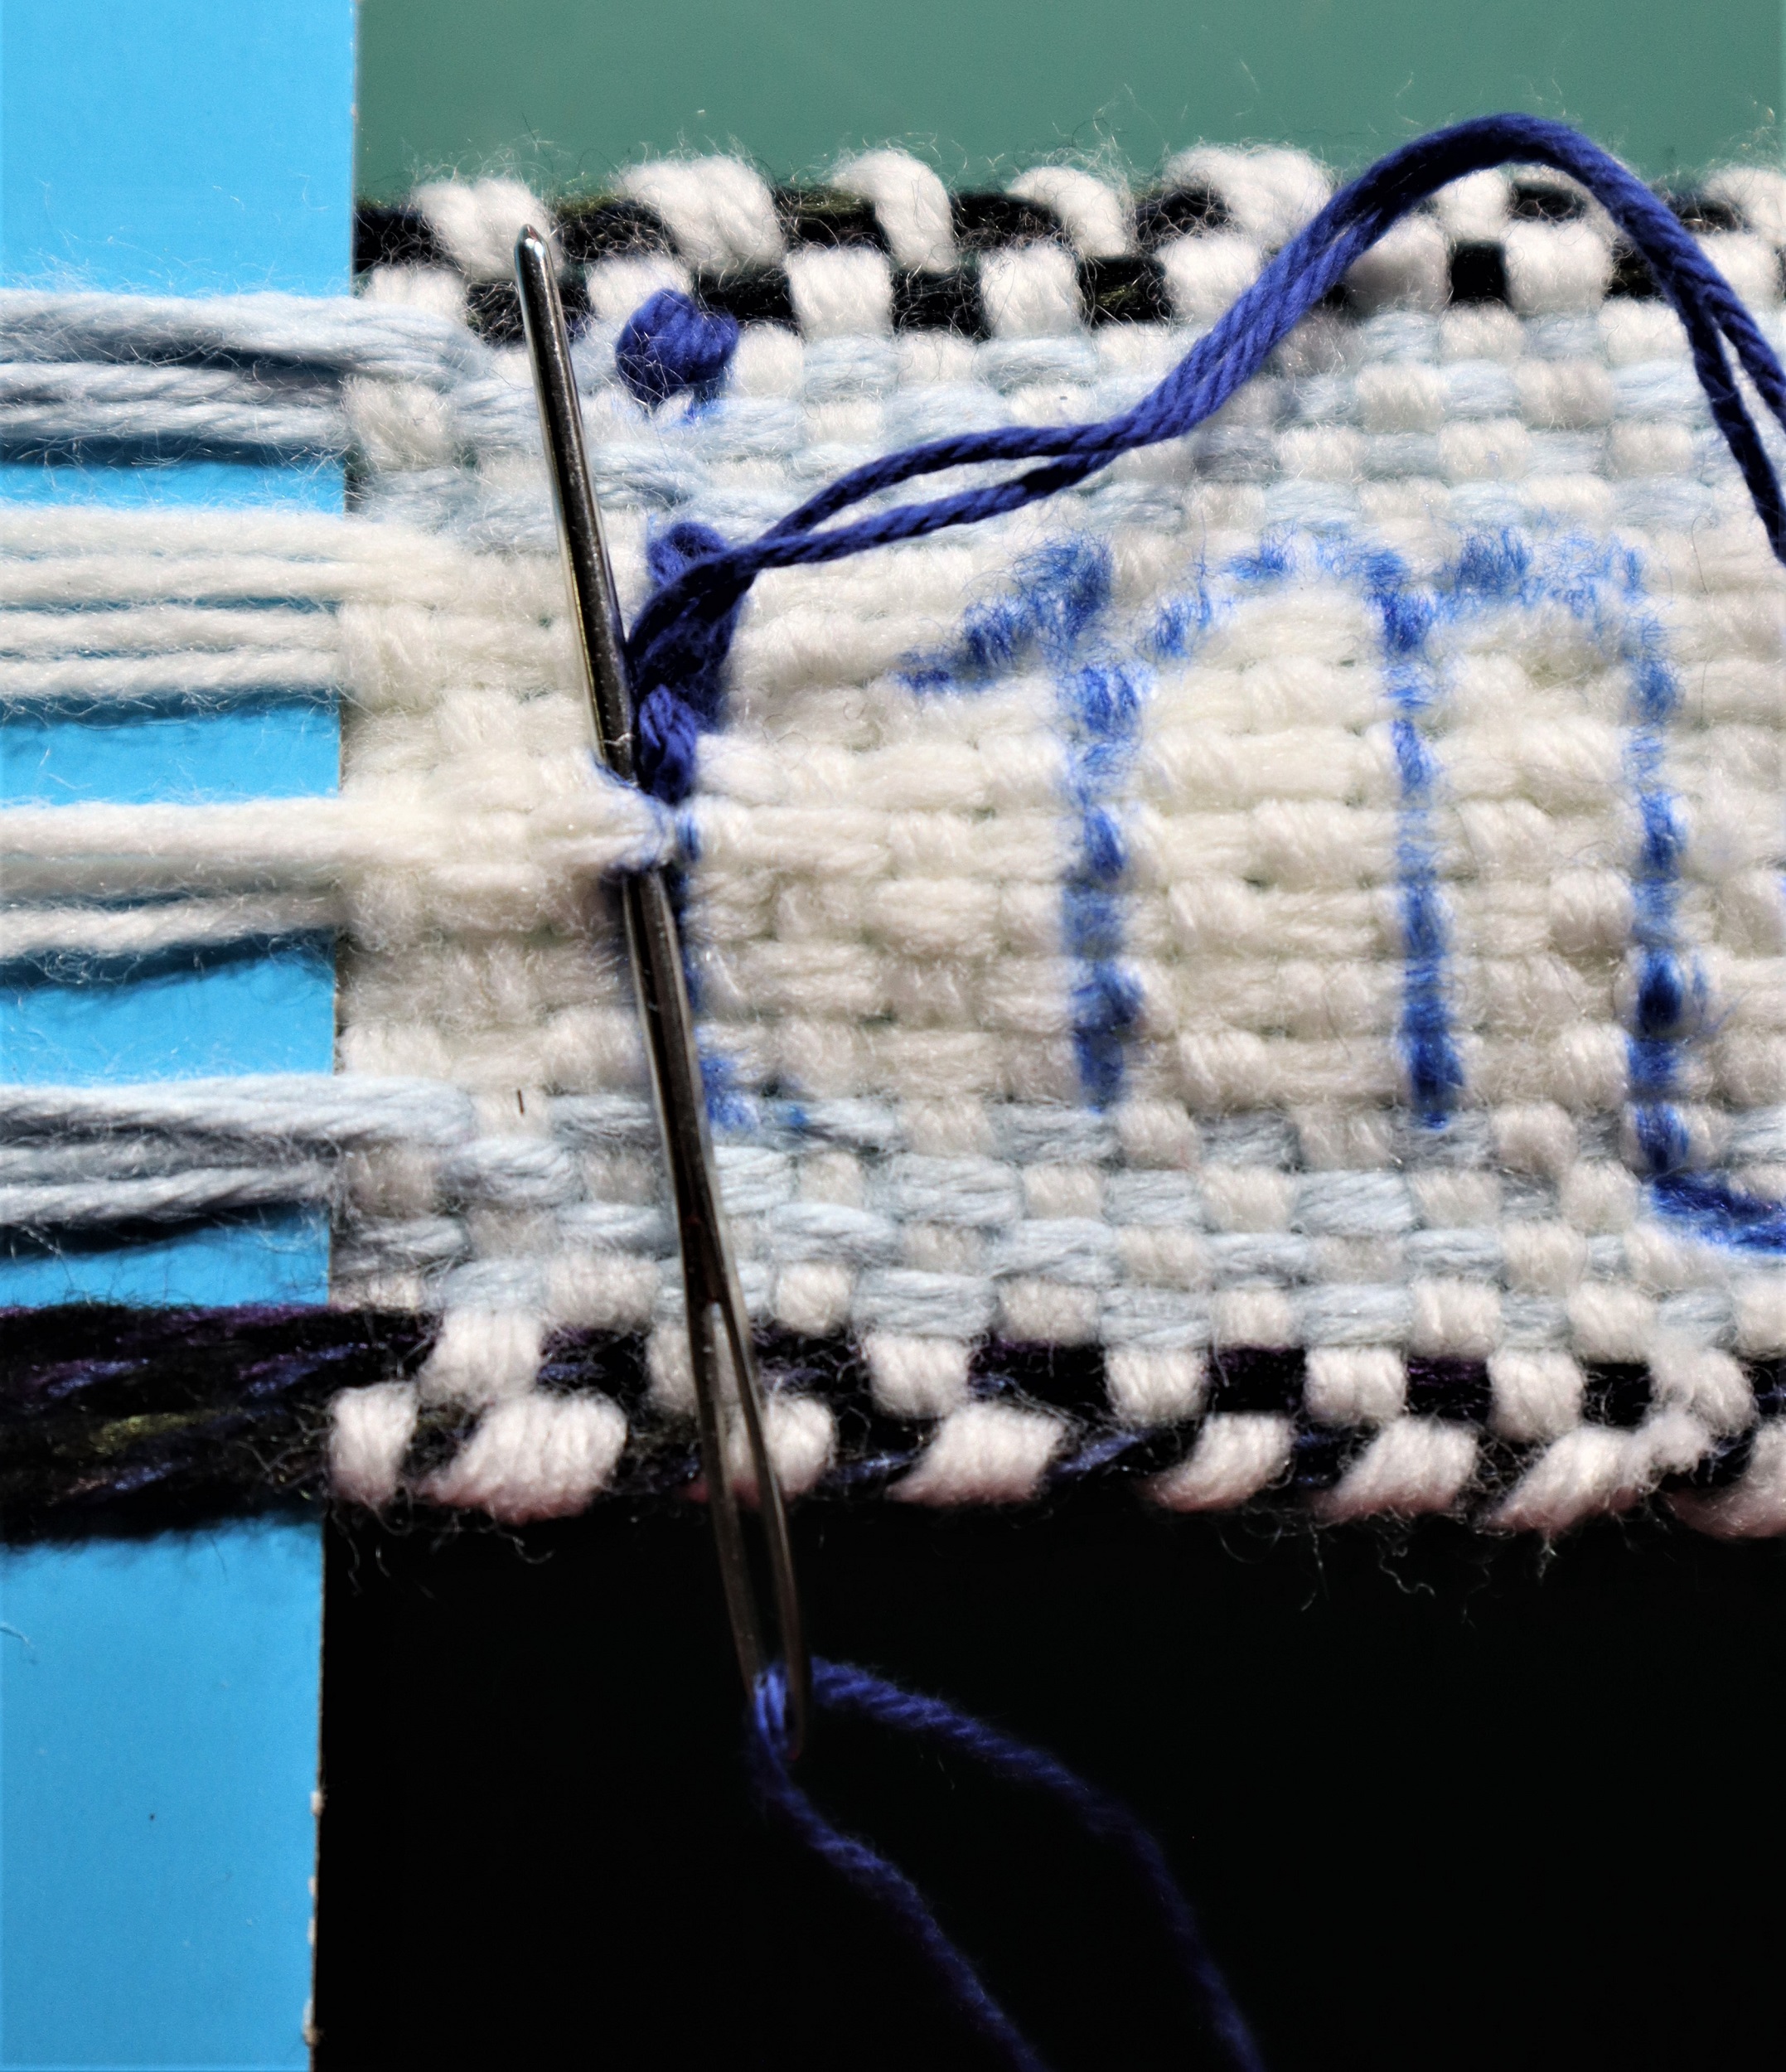
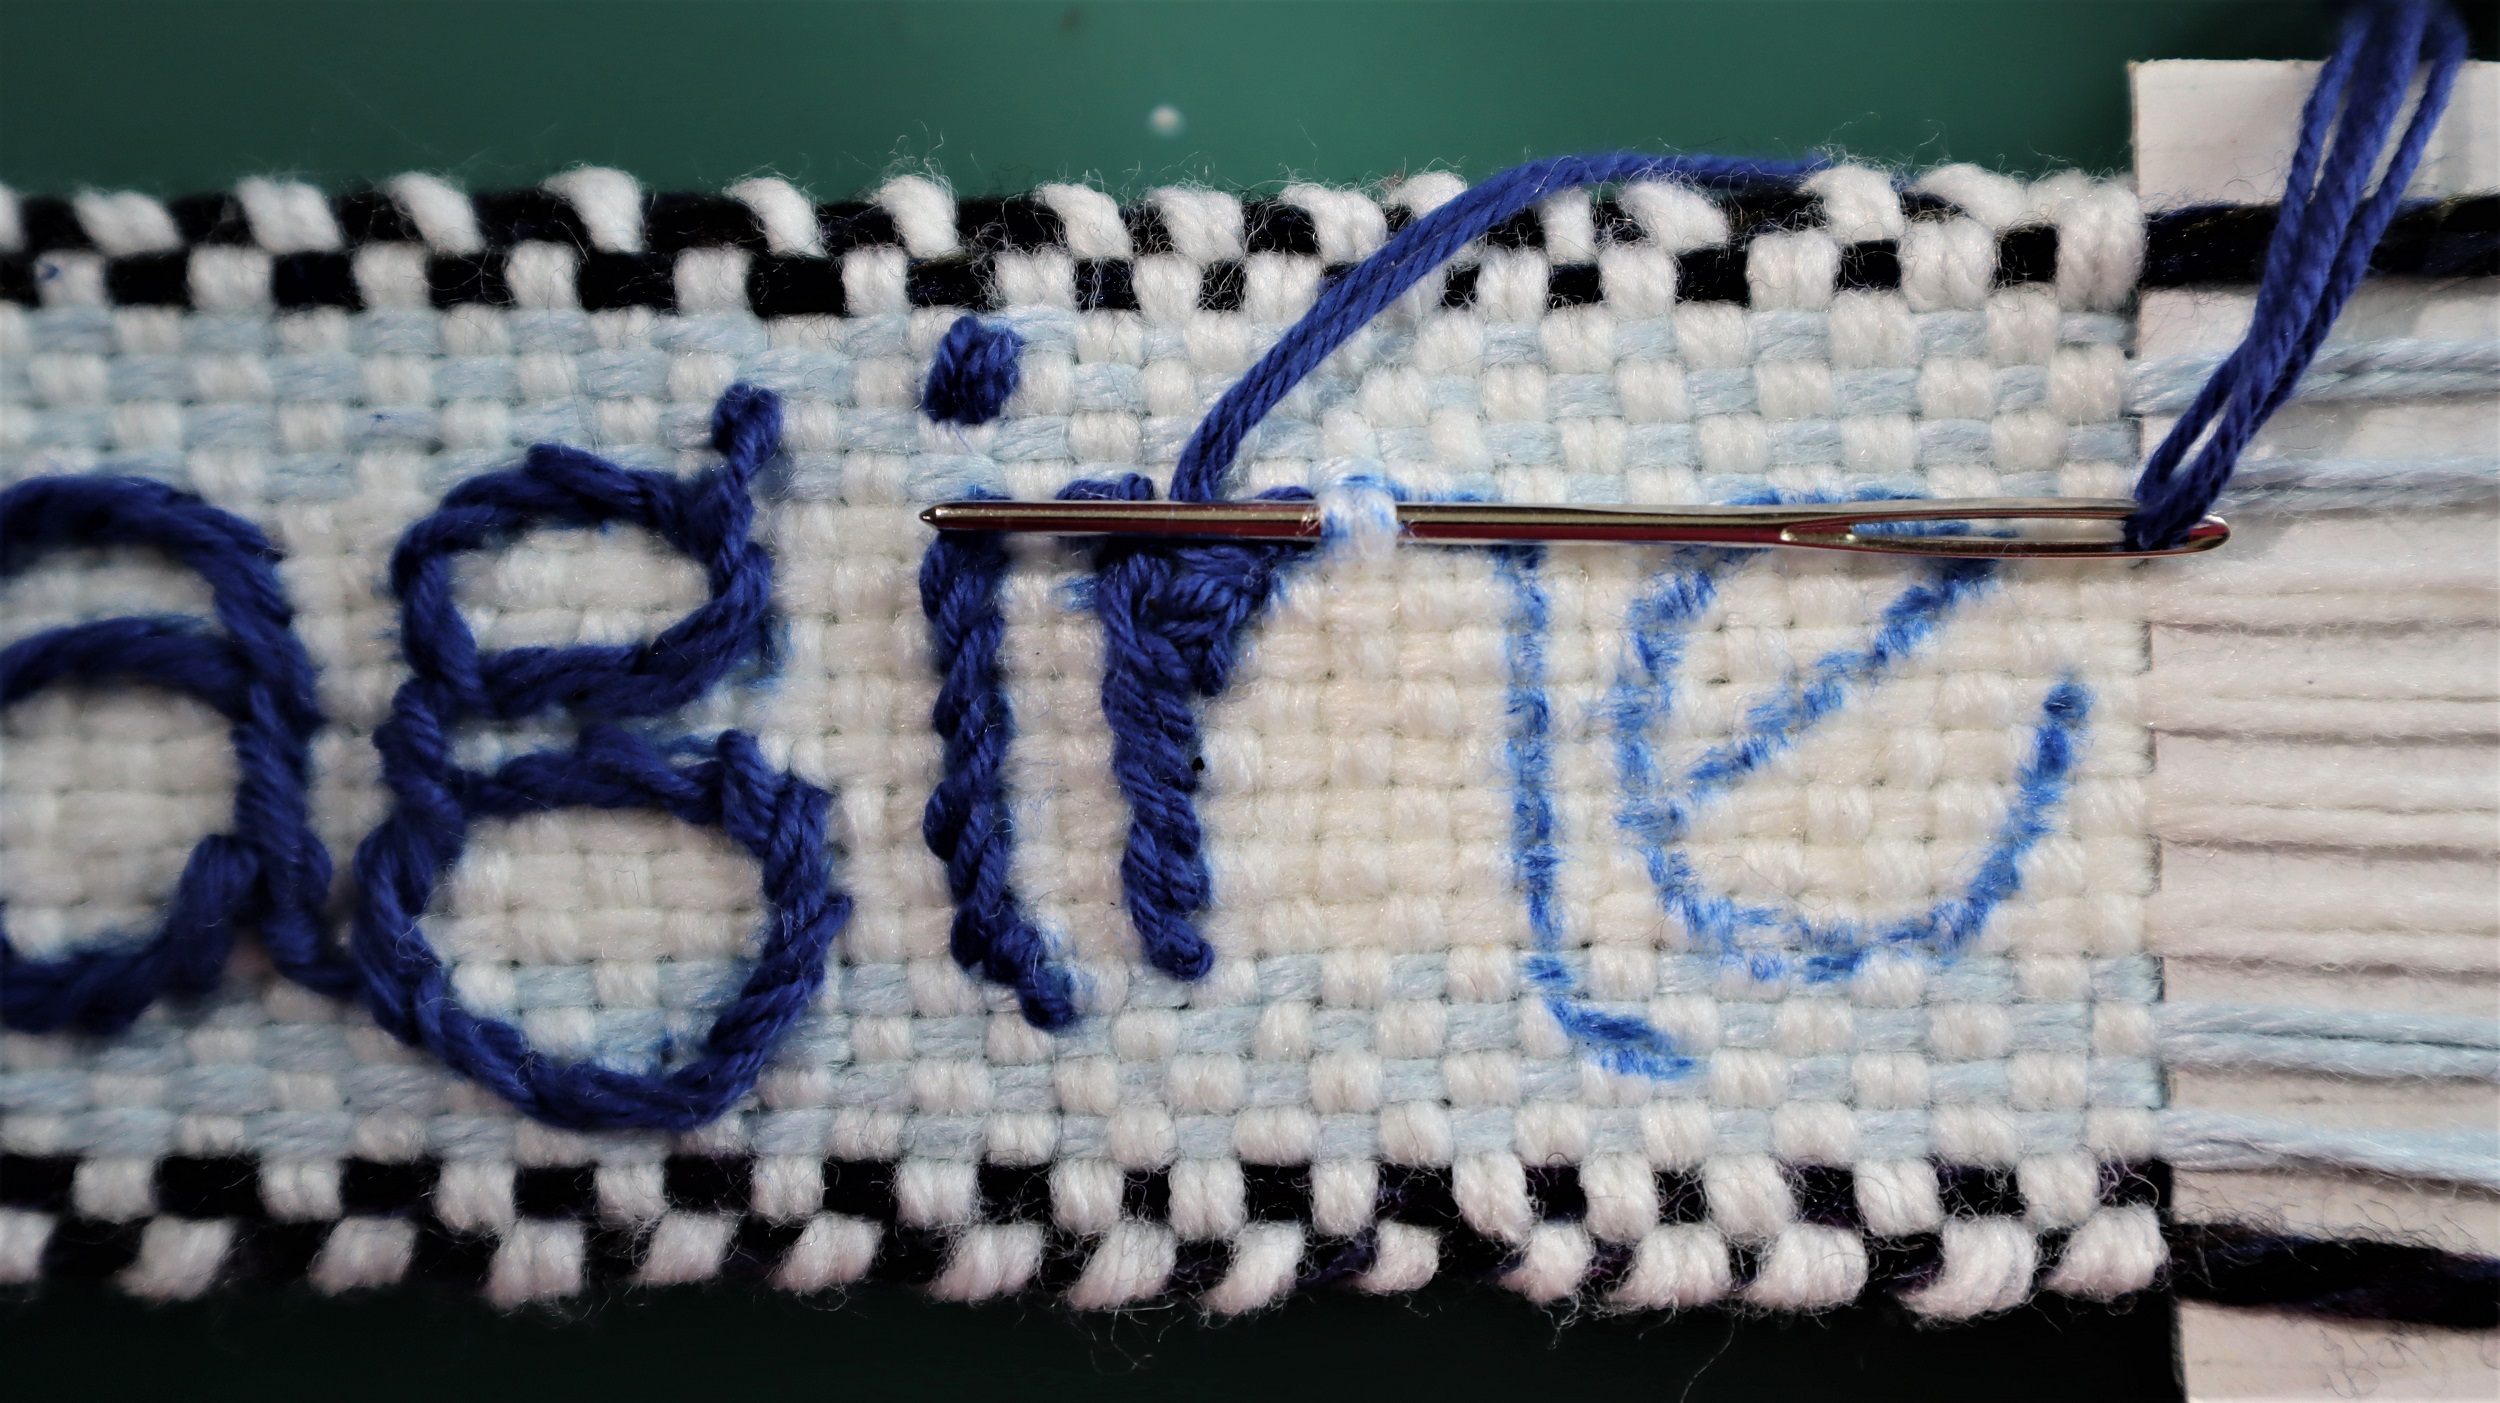
4: Use the pins as guides to draw the letters onto the narrow band using a permanent felt tip marker.
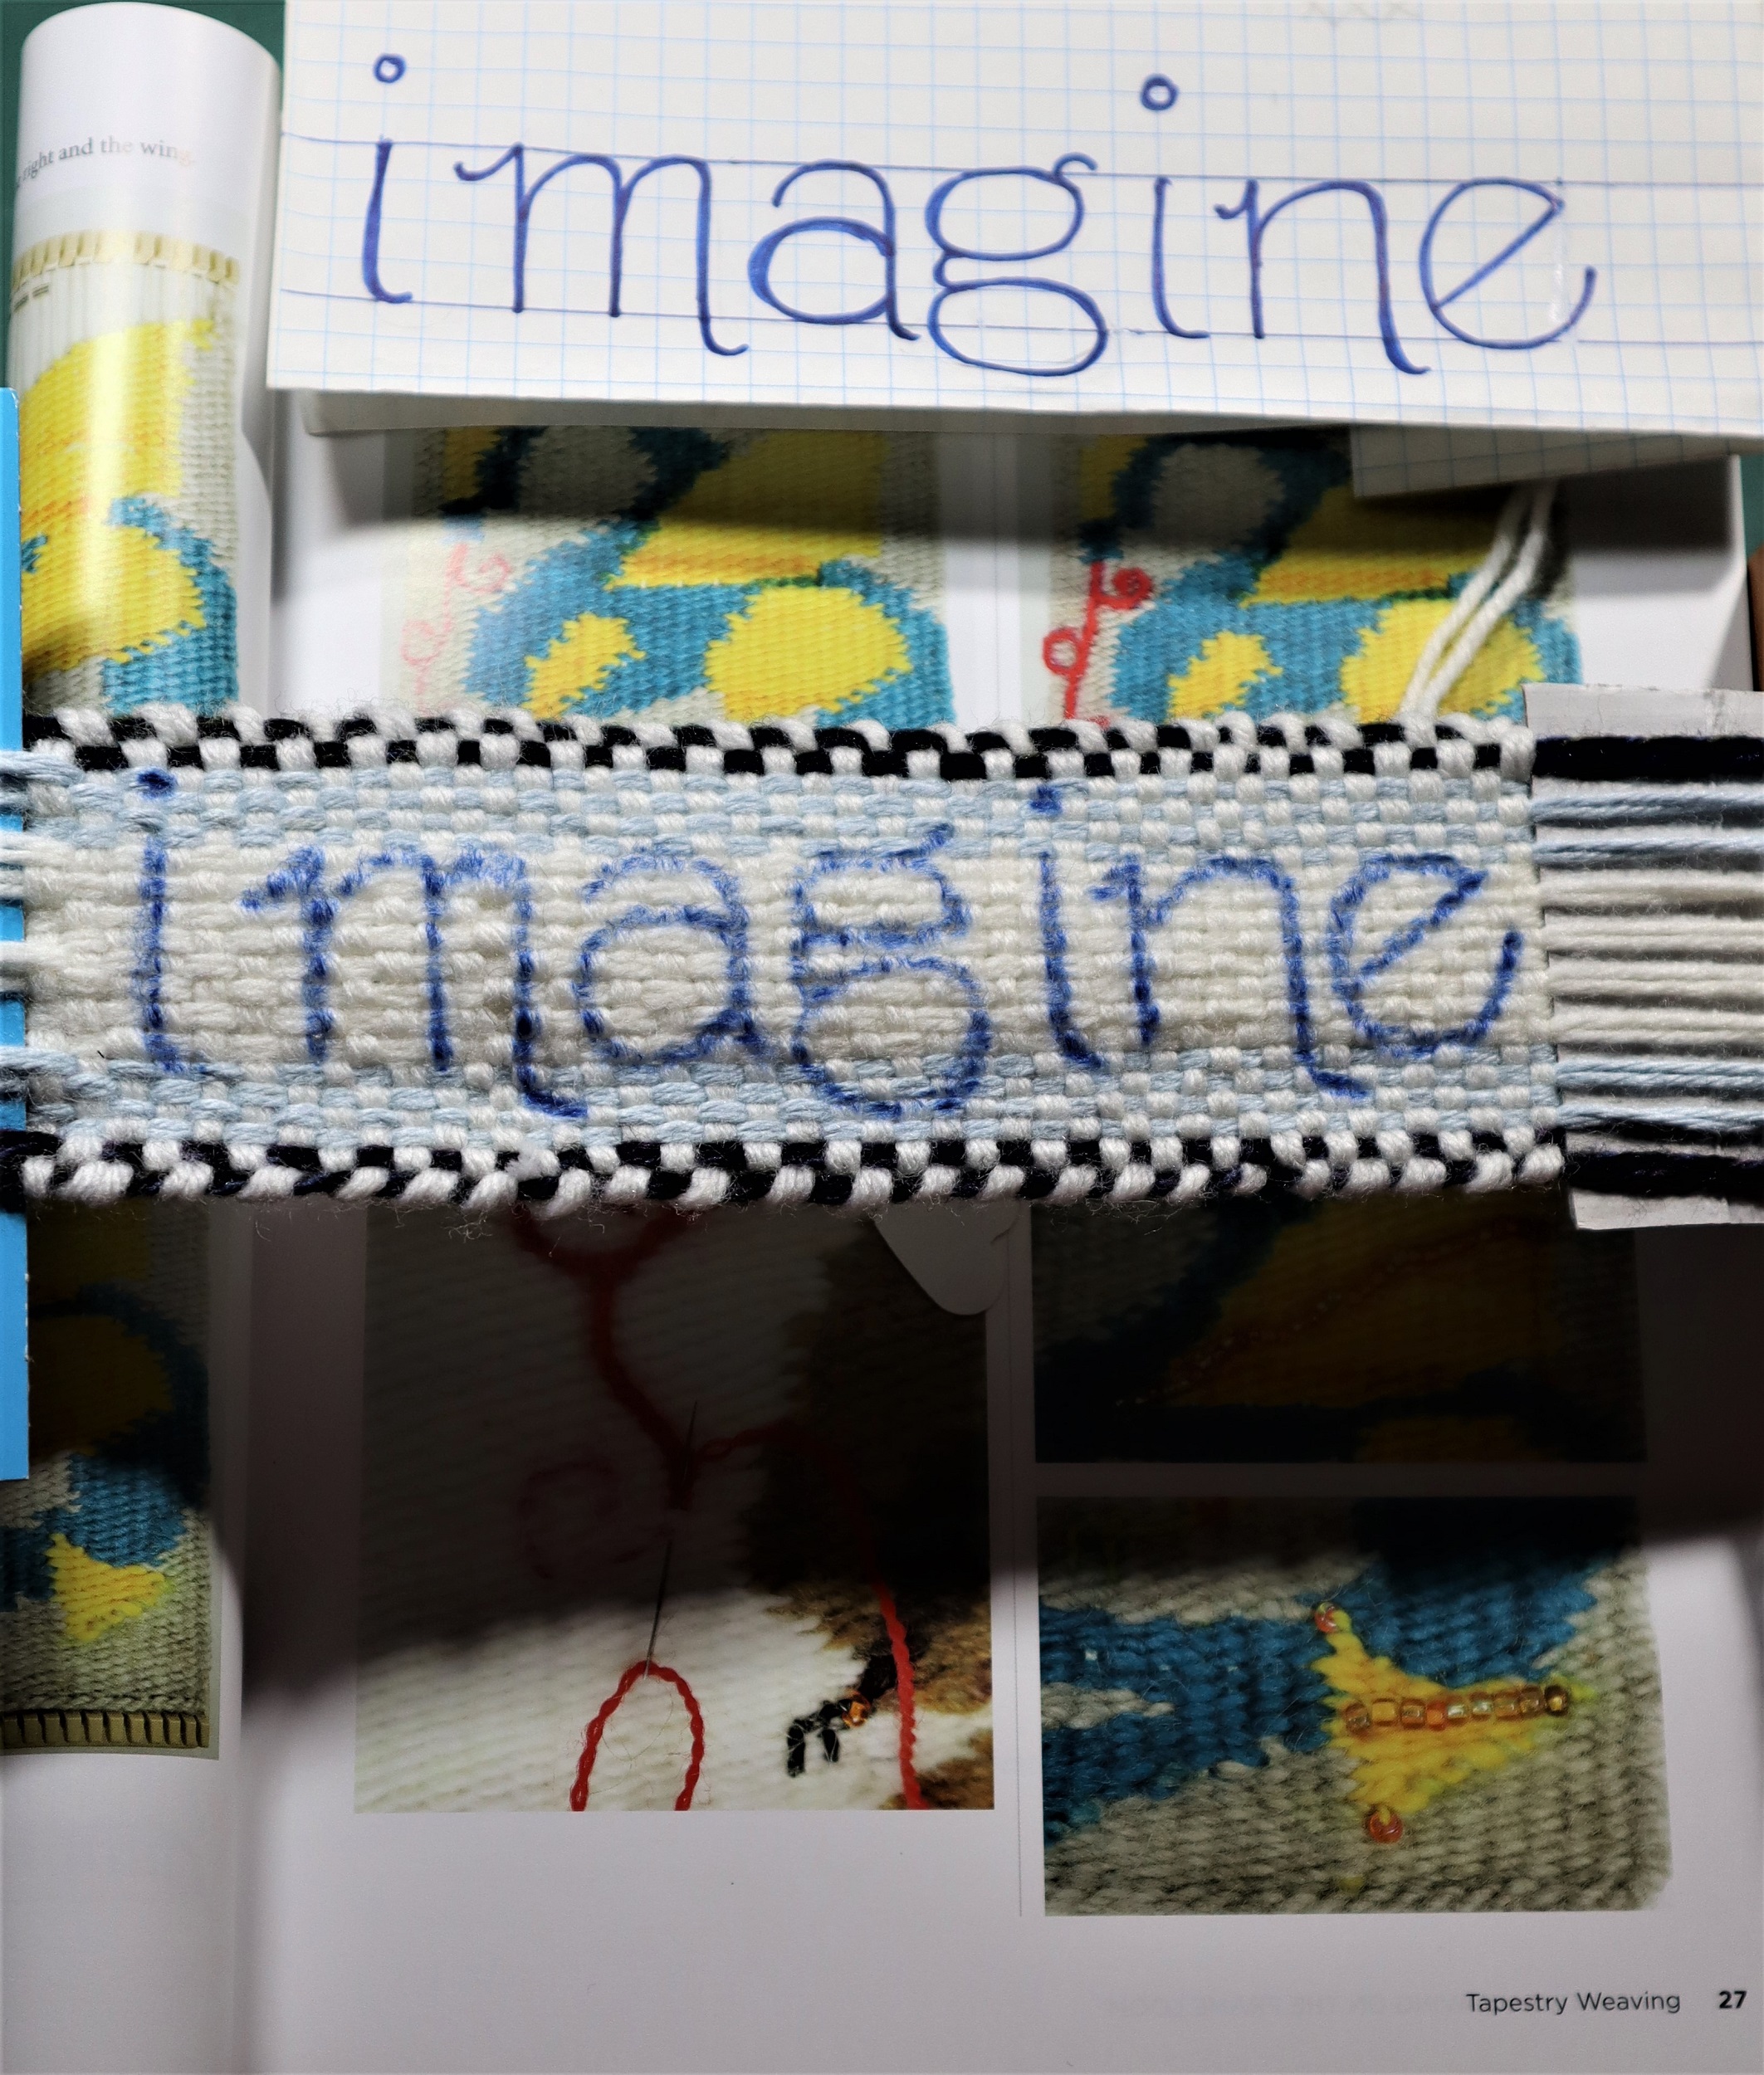
5: Following the instructions on page 27 of “Innovative Weaving on the Frame Loom”, embroider the letters with dark blue embroidery floss.
The photo on the lower left of page 27 shows how the running stitch is done.
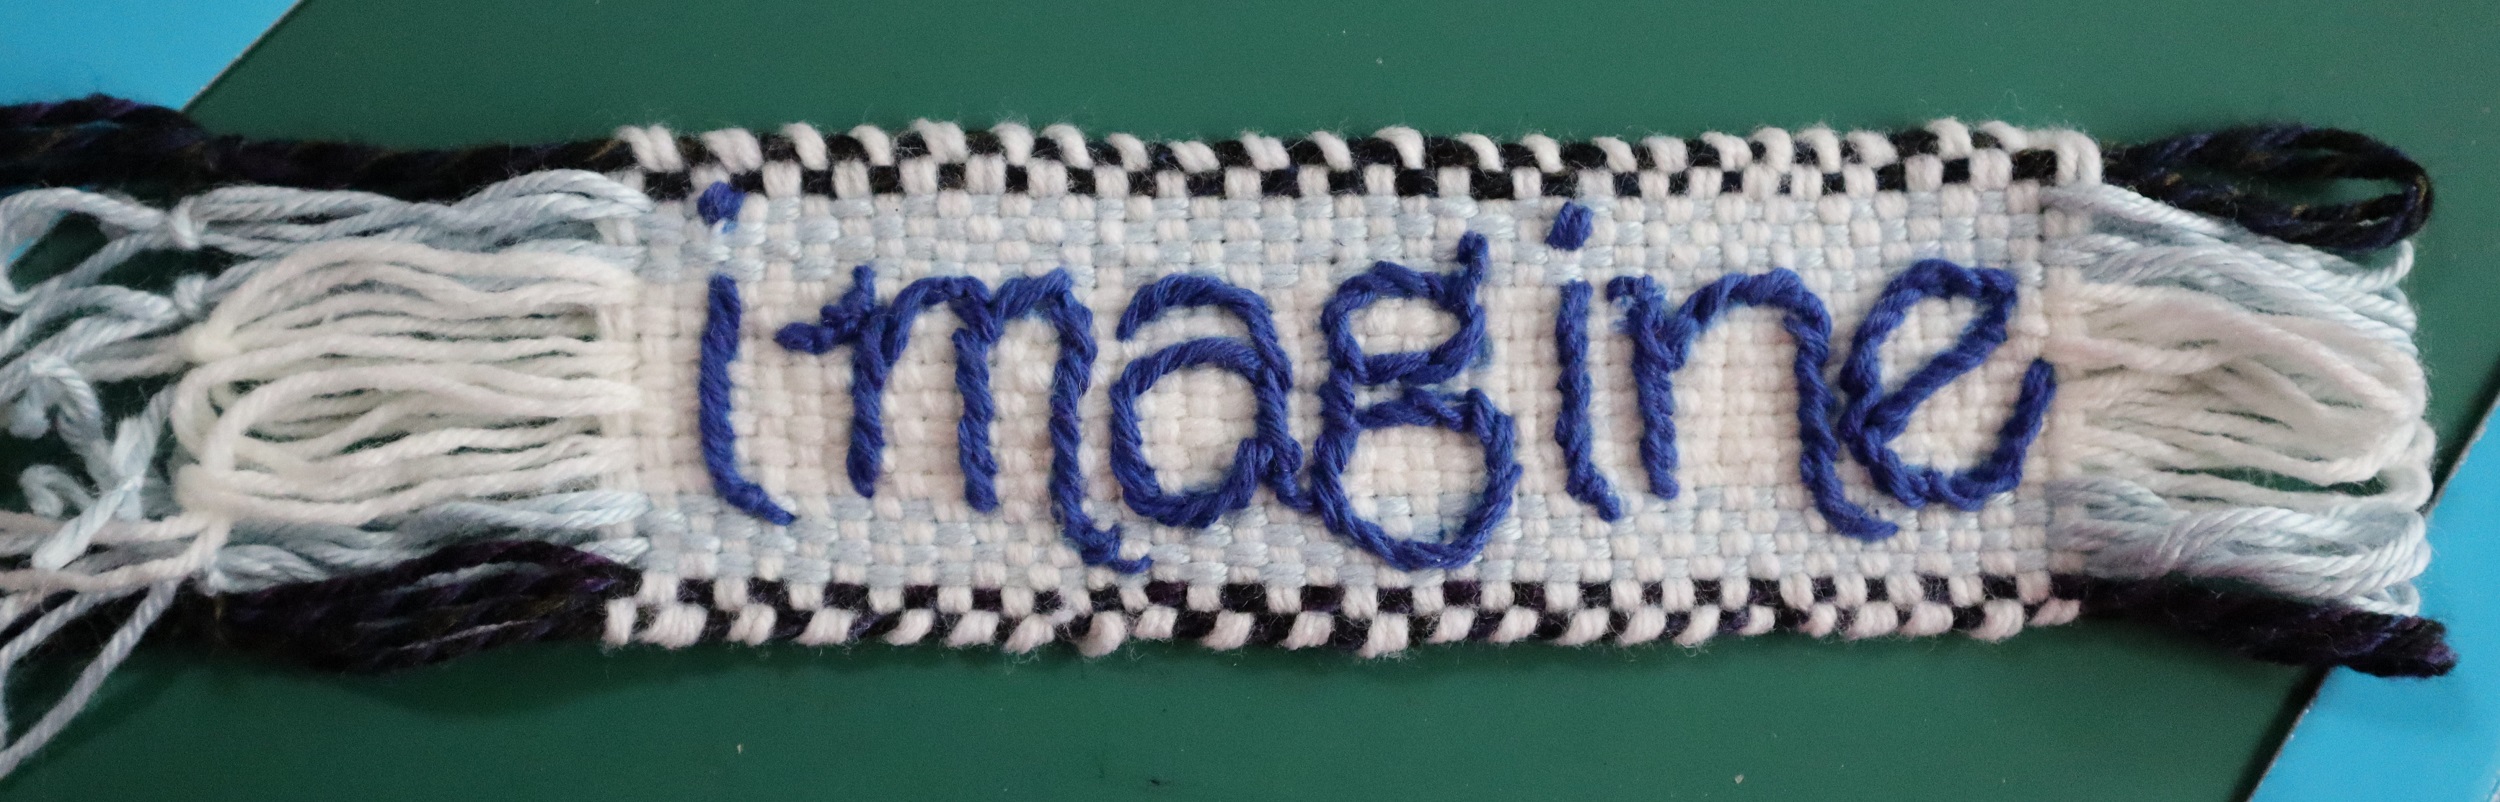
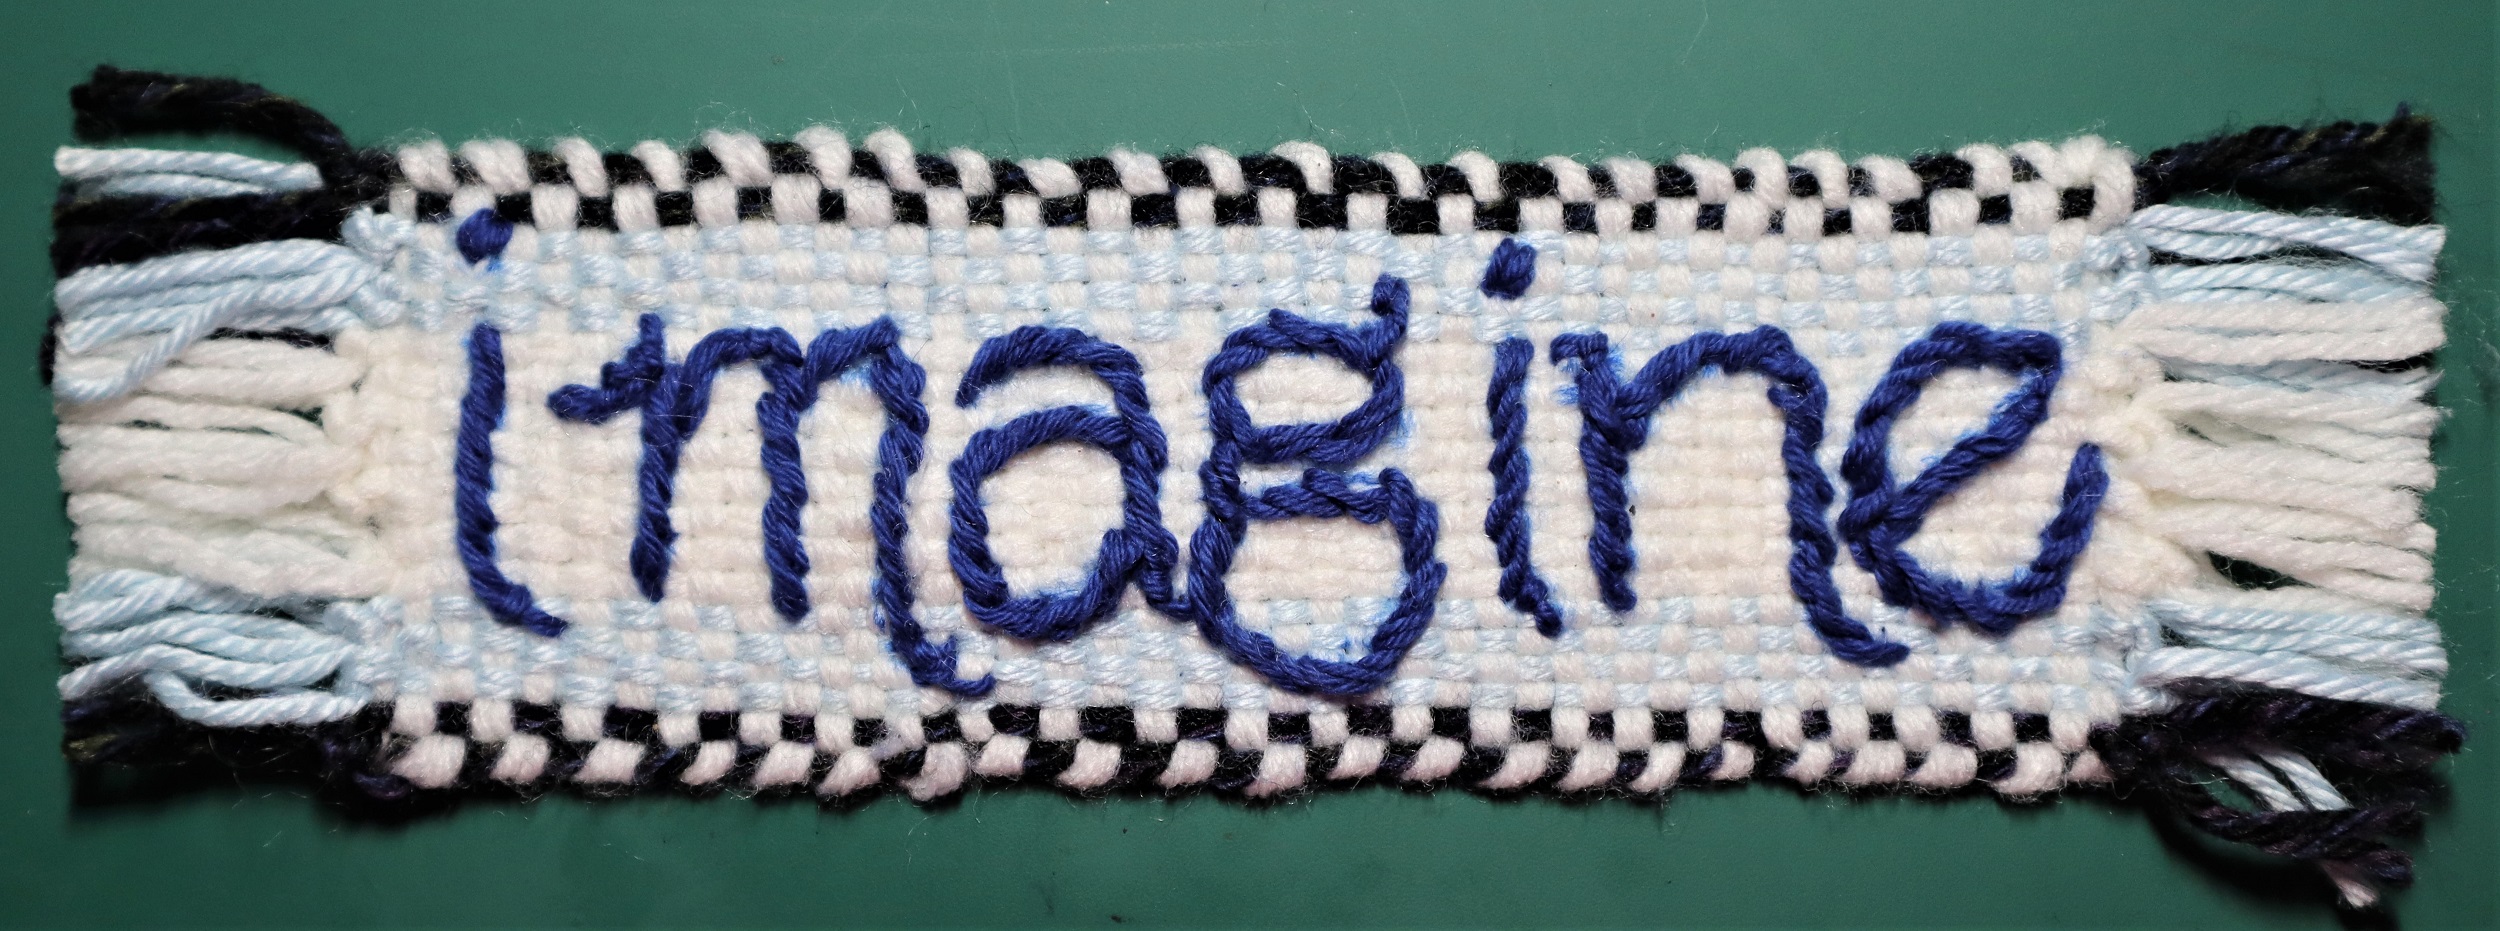
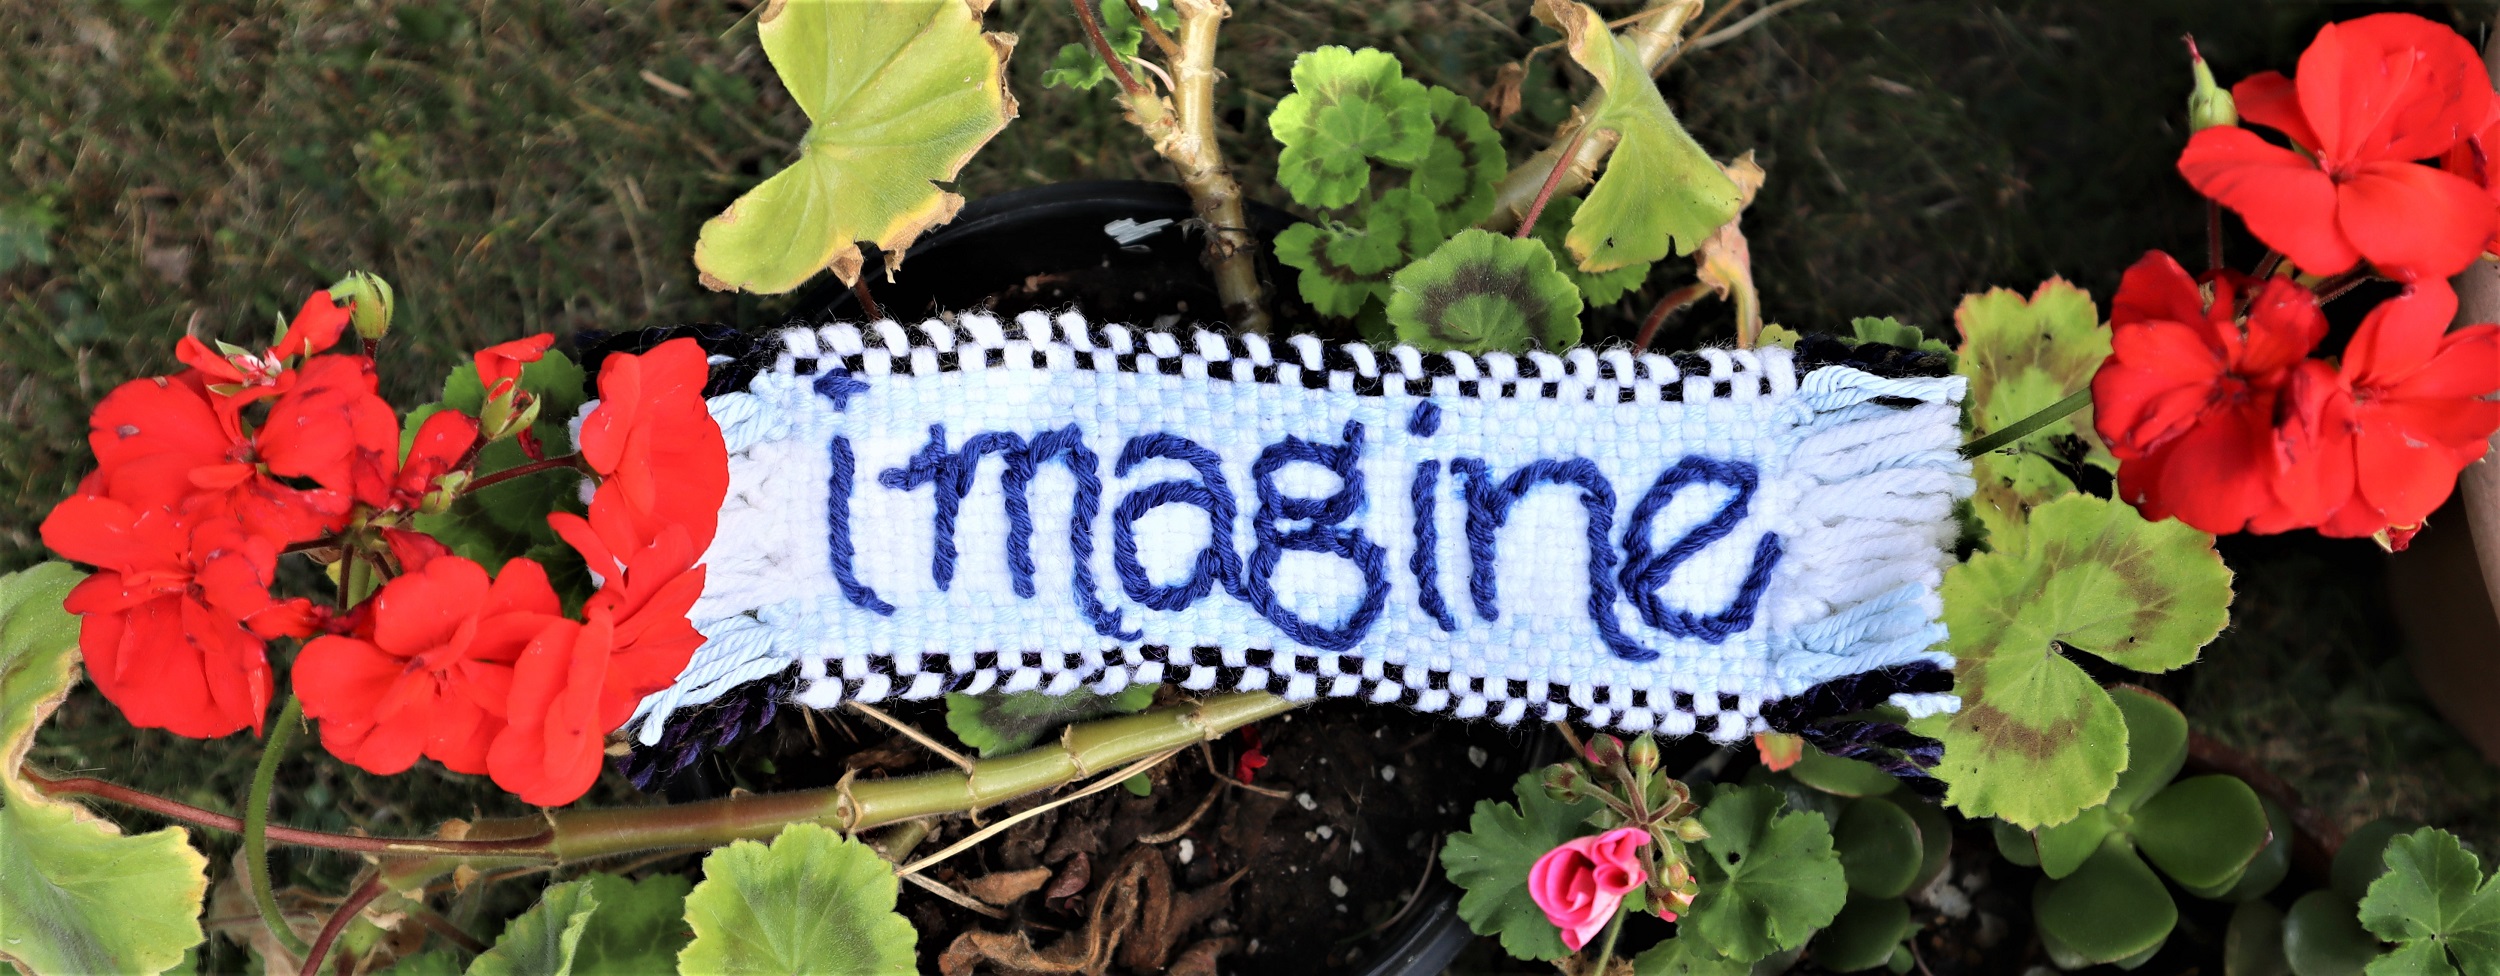
FRINGE:
6: Lift the weaving off the loom and remove the 2 pieces of cardboard.
7: Cut the ends of the loops at the right hand side of the narrow band (it was at the top of the loom) open.
8: Trim the ends that were at the lower edge of the loom, now the left hand side of the band, to the same length as the warp ends at the other end of the narrow band.
9: Tie a knot (left over right and under, right over left and under) with each set of 4 strands of yarn across both ends of the narrow band.
10: FINISHING THE NARROW BAND:
Steam the narrow band on the wrong side with a steam iron, being sure to not touch the iron to the weaving.
Finger press the narrow band to make sure that the fringes behave themselves and line up politely.