
Living with Long Covid and the constellation of syndromes that it unleashes means that I can’t carve wood anymore.
BUT! I can still weave on small looms (hurrah!). So, for the last couple of years I have been working on refining little woven comfort dolls.

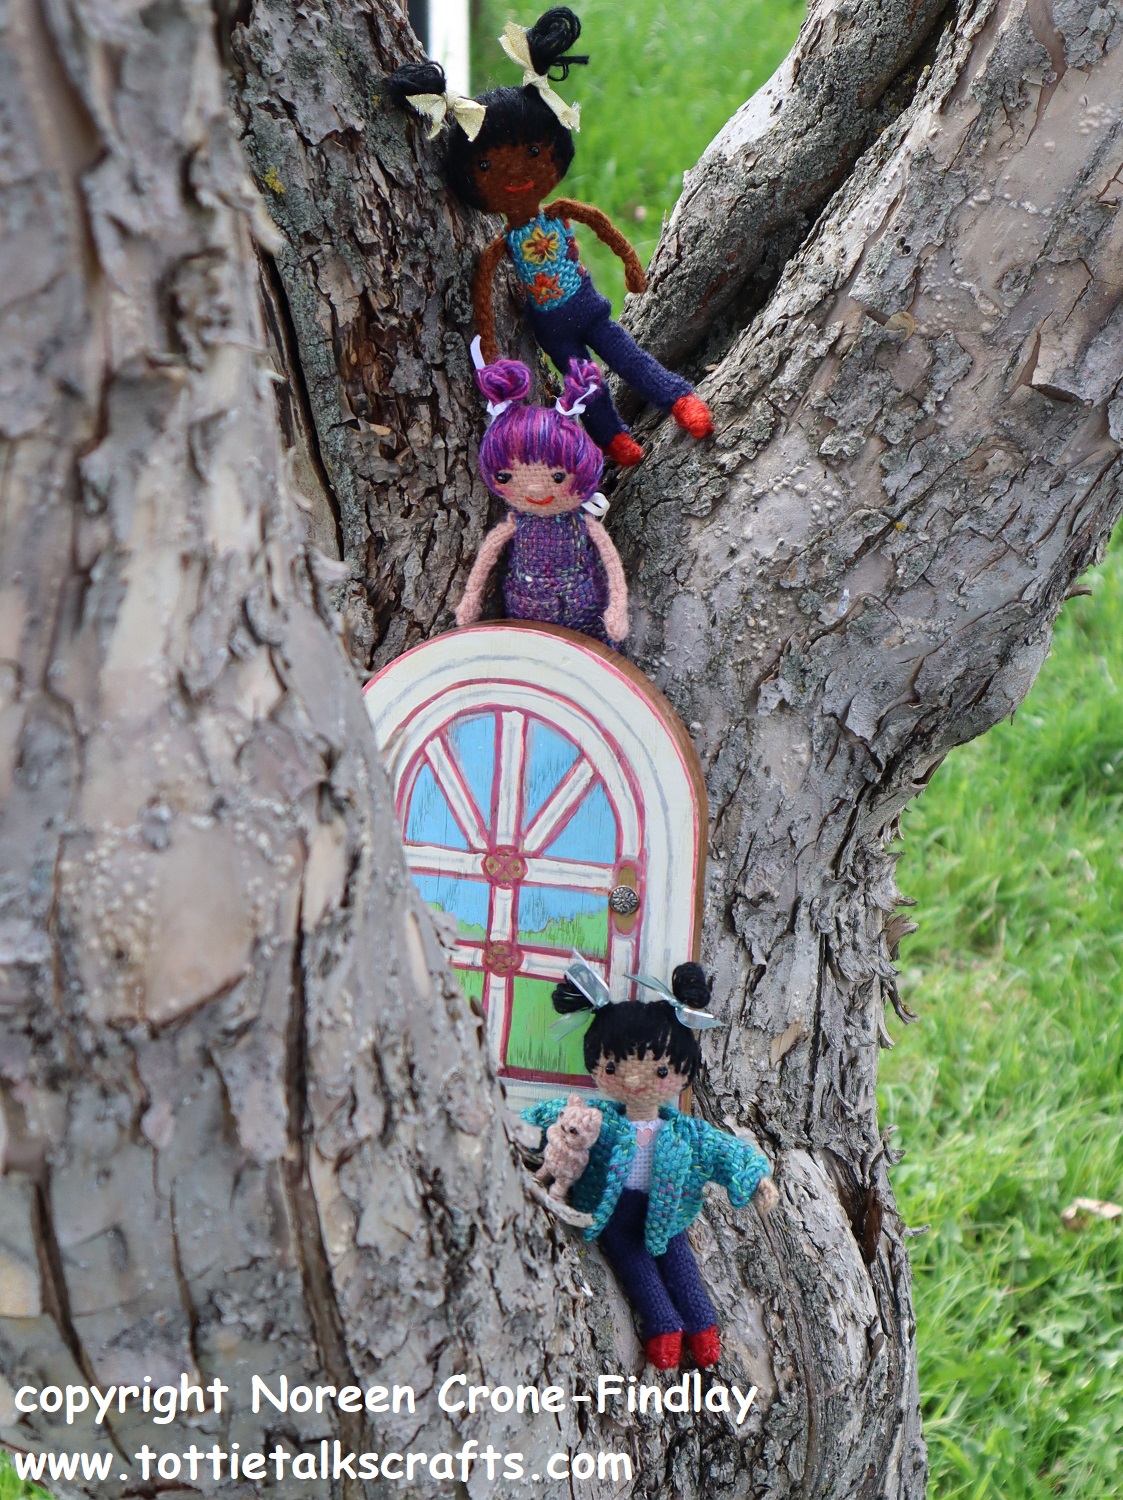
I am finally satisfied with my new series: The Kindred Spirit Dolls.

The Kindred Spirit Dolls are charming little dolls woven on the Kindness Loom as part of the Weaving Kindness Project.
The etsy link for the pattern is: L I N K

The Kindred Spirit Dolls are sweet little beings that are meant to be a comfort and a delight to you as you make them.

And then, if you choose to give the Kindred Spirit Dolls to your family, friends and fellow travelers, they will carry your good wishes and kindness that are woven into every stitch of these precious little dolls!

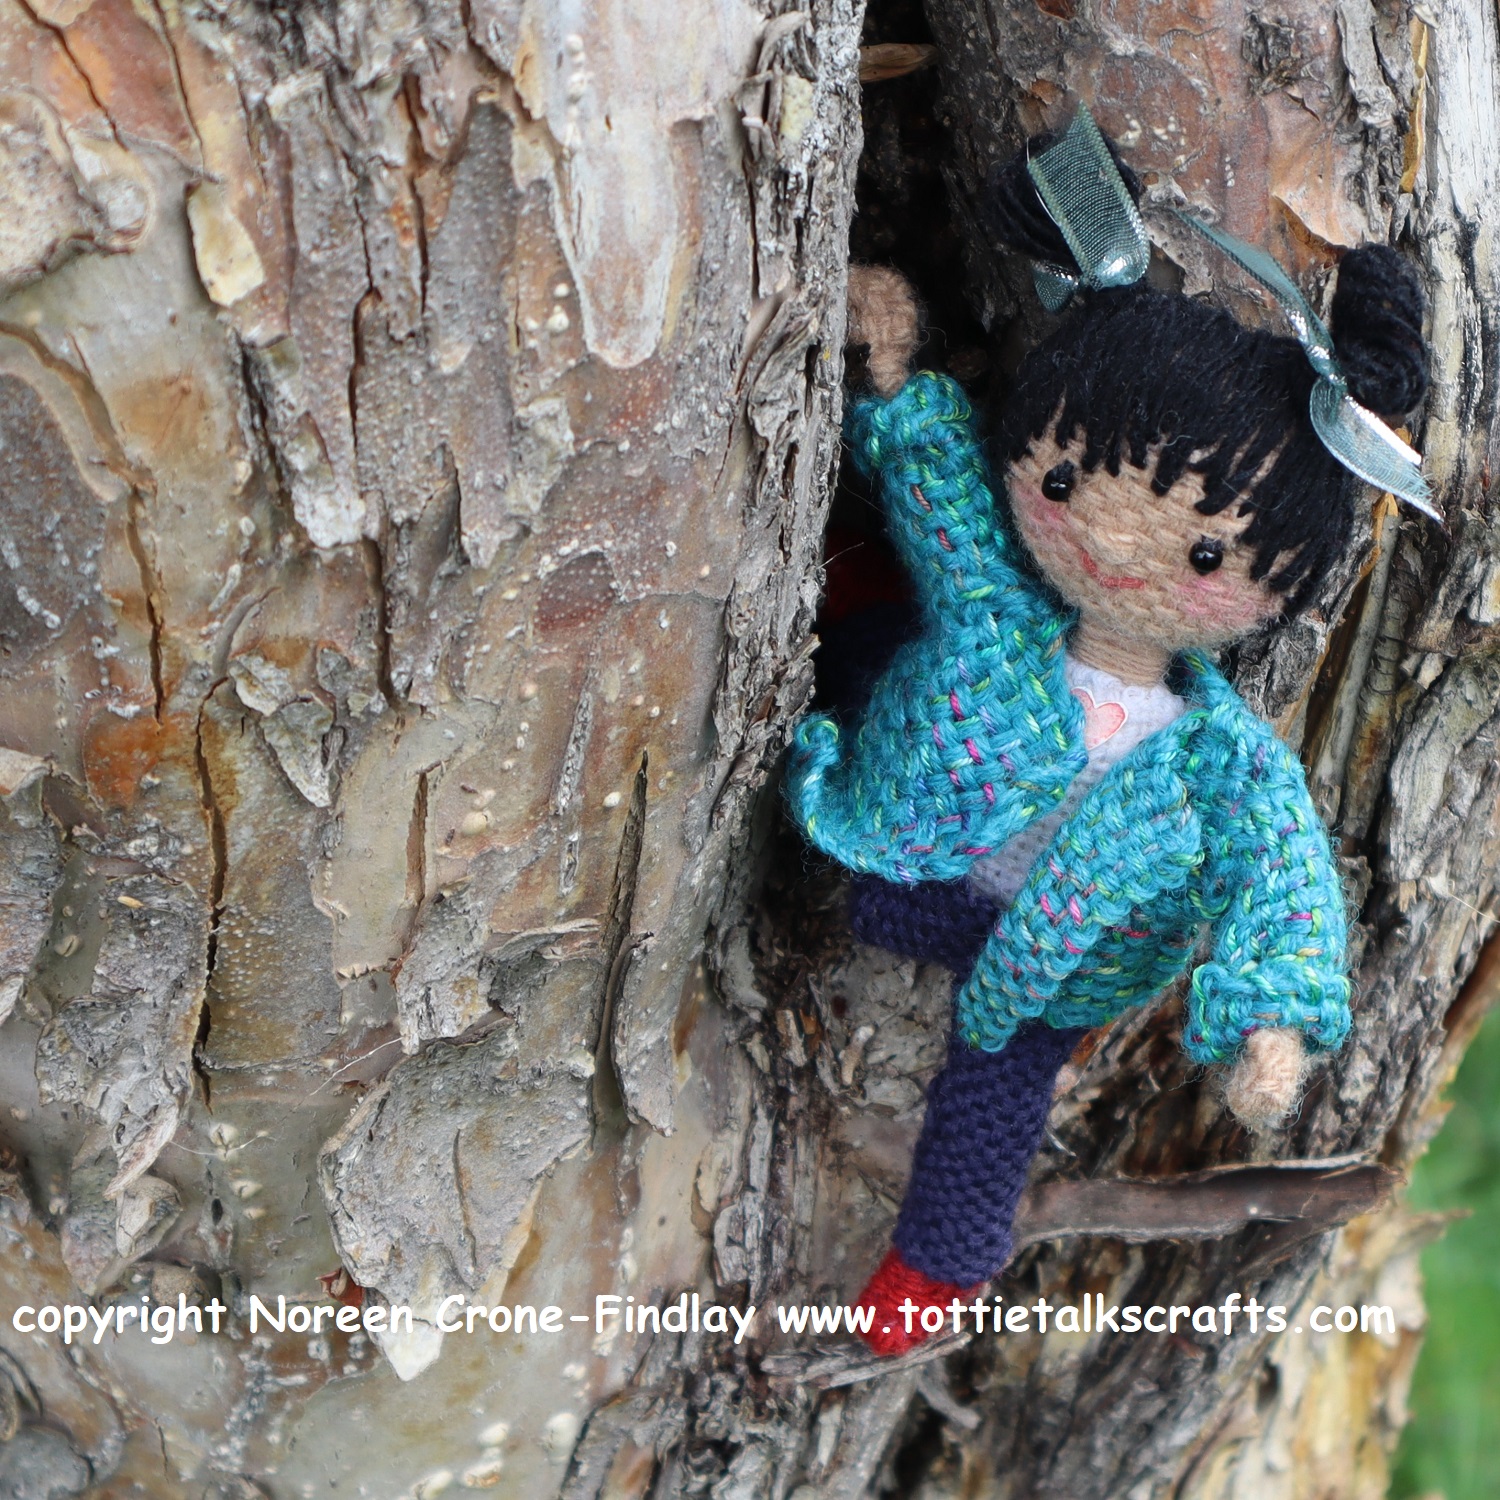
The Kindred Spirit Dolls are small- not quite 3 inches (7.5 cm) tall so they can go everywhere with you.

Because the Kindred Spirit dolls have Noreen’s signature hugging arms- they are ready to give a hug at all times, and they can also hold onto small things, too.

The Kindred Spirit Dolls have optional wings, made by following the instructions for the Kindness Butterfly in the video tutorial: https://www.youtube.com/watch?v=7A11F11Lsp8 that is then stitched to the back of the Kindred Spirit Doll.
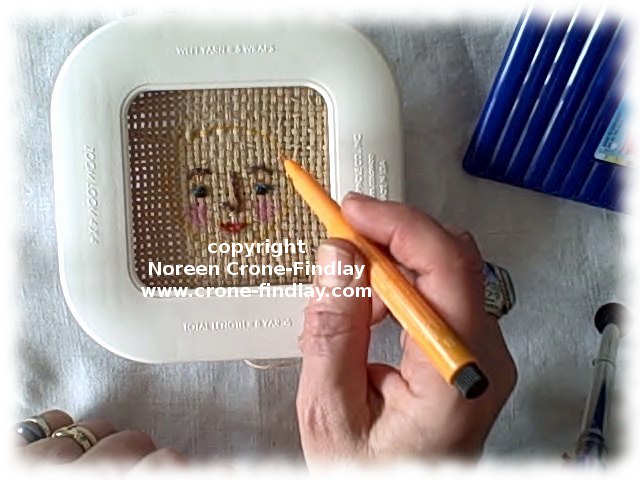
Their hair can be made in many ways. They all have embroidered bangs and side wisps, and if you like the simplicity of the ‘Pixie’ style hair, then don’t add any extras.

But, if a more elaborate hairstyle is your cup of tea, then feel free to add twisted topknots and braids or ponytails and fringes.

I hope that the Kindred Spirit Dolls will bring happiness, comfort and good feelings into your life!

The links for all the Weaving Kindness projects, videos, how to’s & etsy shop ordering info is at:


")
")
")
")
")
")
")
")
")
")
")
")
")
")
")
")
")
")
")
")
")
")
")


