If you want to weave this on a Weave It style loom, then go to https://youtu.be/m-1yK4GYUj4 for instructions on how to weave a triangle on a Weave It style loom.
Many years ago, I had a wonderful dream about the Northern Lights.
I dreamt that thousands of shooting stars were streaming down the Northern Lights (aka Aurora Borealis), but when I looked closer, I saw that the shooting stars were actually Star Babies 🙂
They were laughing, tumbling and frolicing in delight.
It was a wonderful dream, and ever since then, I have designed and made variations on the theme of ‘Star Baby’.
Here’s my woven Star Baby:
STAR BABY TO WEAVE ON THE DEWBERRY RIDGE STAR AND THUMBELINA LOOMS
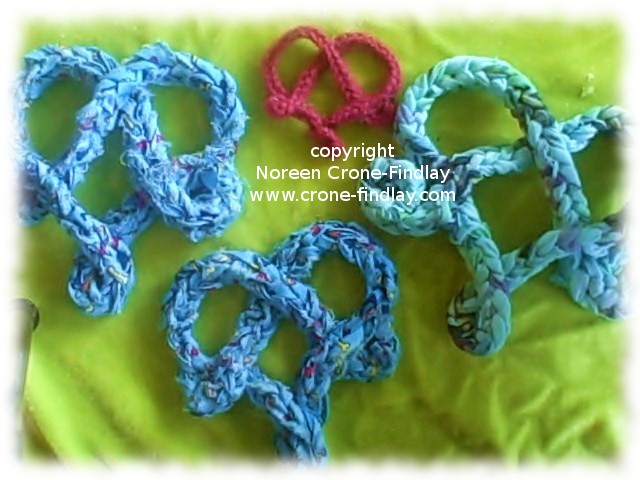
In this video, I show how to make gorgeous Celtic interlace hearts that you can use to embellish woven, knitted, crocheted or sewn fashion accessories or home decor items.
They are also great for scrapbooking and can be used on stationery.
They are perfect Valentines or as Christmas or birthday decorations and ornaments.
Another wonderful way of using these Celtic Interlace hearts is to hang them up as ‘Yarn Bombs’ for people to find and adopt. What a lovely way to brighten someone’s day!
The video shows how to make different sizes of the Celtic Interlace Heart.
Here is the template- print it out so that it’s about 5 inches square, but smaller or larger works just fine, too.
I love making little presents that I can just pop in an envelope and mail to family and friends.
copyright Noreen Crone-Findlay
Yesterday, I had a flash of inspiration…. well, really it was several flashes of inspiration that came together ever so nicely!
Lately, I have been blogging about doodling, Link and Link , so that’s kind of noodling around in the outer reaches of my brain.
And, a week or so ago, my daughter blogged about very cute embroidered Easter Eggs: Link
And, then Linette blogged about some papier mache Easter eggs that she had just made: Link
These all got me thinking about threads all came together and inspired me to design and make some oh so sweet paper eggs that can hang in a houseplant, a tree or be used as a bookmark or in scrapbooking.
Here’s what I did:
copyright Noreen Crone-Findlay
First of all, I drew an egg shape, and then I made a tracer or template from a piece of plastic from the recycling box.
Then, I traced around it on a used envelope (gotta love being green! re-duce, re-use, recycle, reclaim, upcycle!) and cut out 2 eggs. (Front and back).
Then I cut out an inch diameter circle of white paper (use whatever color works best for your choice of skin tone).
I snipped about 4 inches of embroidery floss for the hanger.
copyright Noreen Crone-Findlay
Draw the face on the circle and glue it on the front egg.
I doodled merrily away on the front of the egg, and then, because this one is going to my mom, I wrote a message on the back.
Glue the thread in a loop to the inside of the back and then glue the front to the back….. and Voila!
Adorable paper eggs to celebrate springtime!
Variations: I had brunch with 2 friends yesterday, and I made them eggs, but didn’t do the doodles. I took my colored pens with me, and they doodled happily on their eggs while we visited. Fun! Here are their eggs:
copyright Noreen Crone-Findlay
I also love to use fragments of tatting to decorate and embellish, so I used some scraps of tatting on 2 more eggs…
copyright Noreen Crone-Findlay
This tutorial is Noreen Crone-Findlay’s original concept and design. Please DO NOT COPY the text or photos. Please do share the link! Thanks so much!!!