Tag Archives: weaving techniques

Wooden and Woven Dolls for Christmas

Recently, I had a lovely conversation with my darlin’ grandson.

He said to me: ‘Nanma, I LOVE your dolls.  Will you make me one for Christmas?’

I was thrilled that he is pleased with my work and that he wanted me to make him a doll for Christmas.

What an awesome 7 year old he is!

I asked him if he wanted a wooden one or a woven one, and I was convinced that he said, ‘Wooden’….

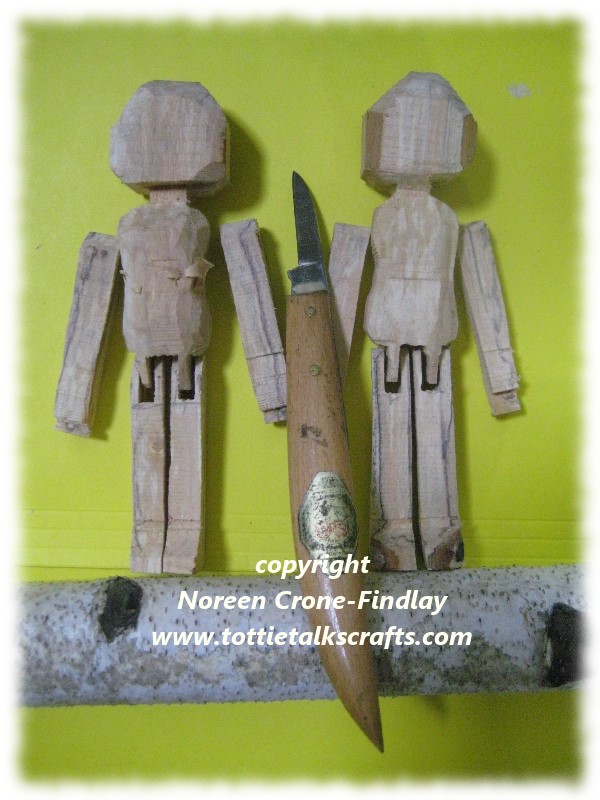
So, I stayed up very, very late one night, and got up early, to carve him a wooden doll:

wooden-james-doll-xmas-2016

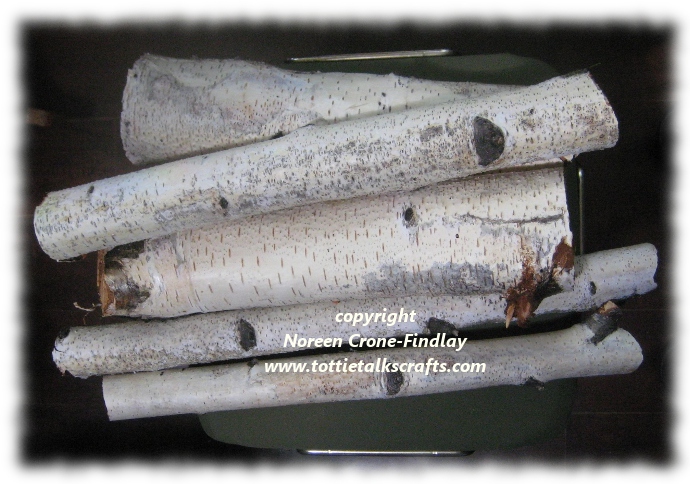
I used a birch branch from our son’s neighbour’s tree.  It’s been drying for a year and a half and is lovely to carve.

wooden-james-doll-xmas-2016-3

Tottie Tomato cheered me on as I carved.

She comforted the new doll, because she knows that the knives, chisels and sandpaper are very uncomfortable, and that paint brushes tickle….

wooden-james-doll-xmas-2016-2

After he was done, and I had knitted his sweater and jeans, Tottie Tomato and New Boy went to hang a few ornaments on the tree in the village.

Something was feeling not quite right….

I thought: I have to check and see if Grandson actually said that he wanted a wooden doll…..

So, I asked him which dolls he loved?

Wooden or the woven art dolls?

We were out at a concert of his Grampa’s music, so I sketched the shape of the 6th Sense art dolls in the air.

YES! he said, firmly!

THOSE are the ones I love!

Oh oh….

I asked him to draw in the air and show me what shape he had in mind.

Yup….. Woven Women 6th Sense art dolls, and NOT 6 inch tall wooden dolls….

oops.

He specified that he wanted it soft to cuddle and that it had to wear black shoes.

I asked him to draw exactly what he wanted…..

wooden-james-doll-xmas-2016-4

He held his hands up in the air and showed me the size.

So…………………………

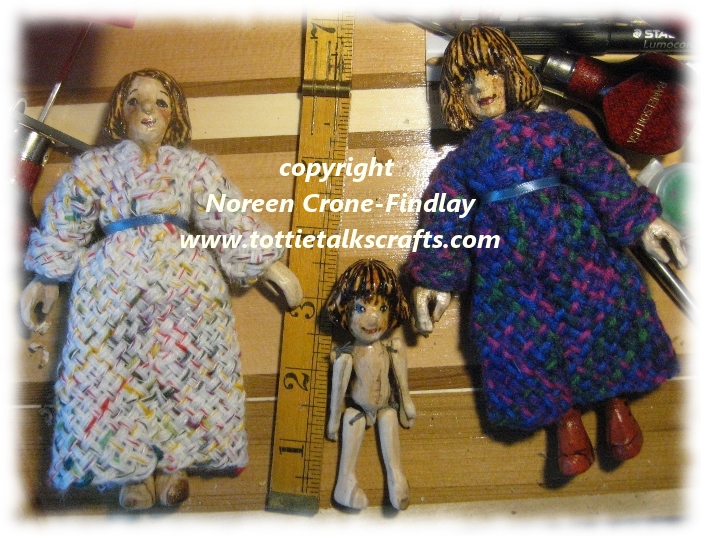
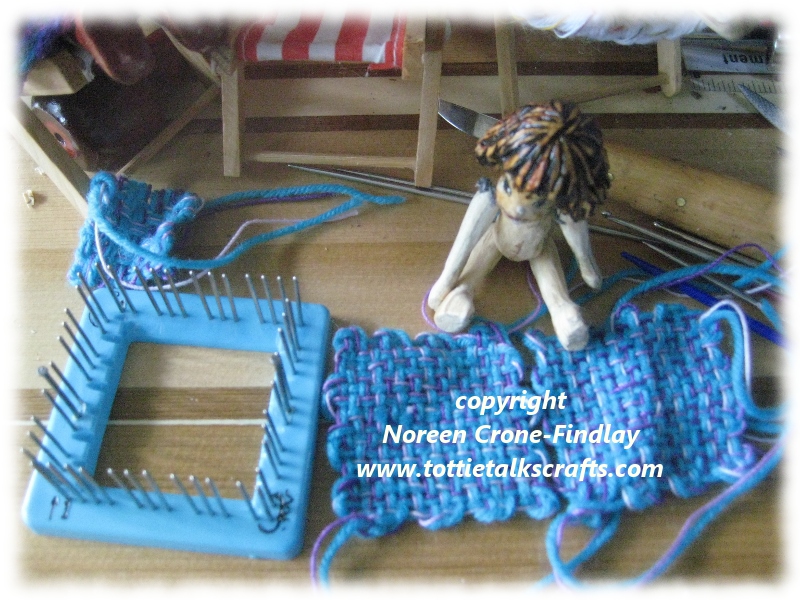
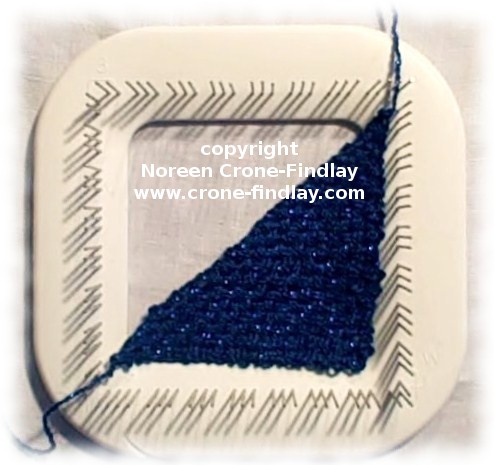
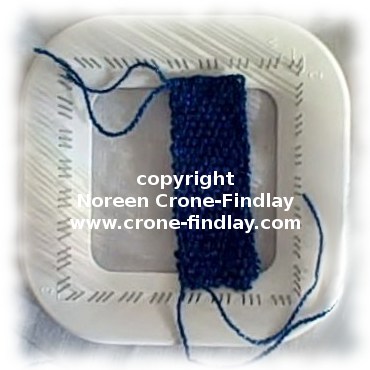
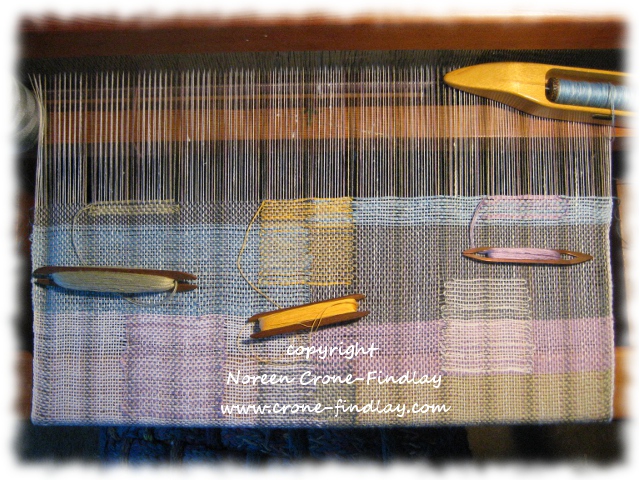
I have been weaving up a storm…………….  well, a doll, along with a few other things……

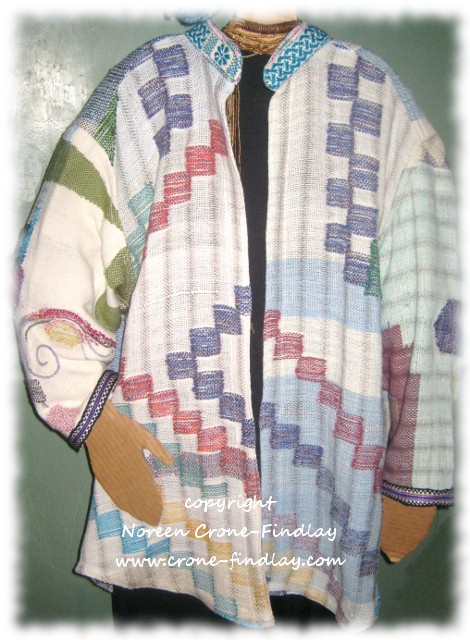
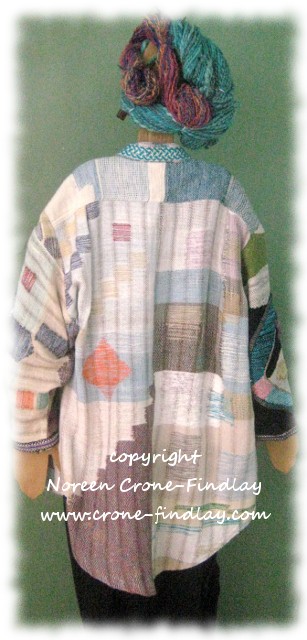
I used the tapestry weaving technique to weave the body front, and plain weave for the back.

I did a clasped warp technique for the arms and legs to make the color changes work for the arms and legs.

wooden-james-doll-xmas-2016-5

I hope that he approves of how I interpreted his design!

I hadn’t thought of making him a doll for Christmas, so I am incredibly grateful that he asked.

And, because I didn’t get the brief right first time around, our little sweetheart gets TWO dolls, not one!

wooden-james-doll-xmas-2016-6

For now, they are chilling out by the Village Christmas tree, enjoying themselves in knitted armchairs that I designed for Findlay and Flora Bear.

The pattern for the chairs is in my etsy shop:

LINK

wooden-james-doll-xmas-2016-7

I can’t bear to wrap them until the last moment, so I will have a chance to enjoy them, too!

Merry Christmas, Happy Channukah, Happy Solstice, Happy Yule, Happy EVERYTHING to you and yours!

Love and blessings all round.

May 2017 bring Peace, Wisdom and Compassion!


14 Comments

Filed under doll & dolls & dollmaking & doll making, Findlay Bear and Flora Panda, gifts & easy to make gifts & presents, knitting, Loom & looms & small loom weaving, wooden dolls

Carving and weaving for the Birch Tree Sisters

Lately, I have had a very magical time, carving small, and even smaller, (much smaller) dolls and weaving for them.

copyright Noreen Crone-Findlay http://www.tottietalkscrafts.com

It all began just over a week ago, when one of our son’s neighbors gave us some lovely Birch wood.

copyright Noreen Crone-Findlay http://www.tottietalkscrafts.com

I knew that there were dolls inside the Birch wood that were just longing to get out!

So, I took some of the Birch branches to the bandsaw:

copyright Noreen Crone-Findlay http://www.tottietalkscrafts.com

And, cut out the rough shapes for the 6 inch tall dolls, and then I started carving:

copyright Noreen Crone-Findlay http://www.tottietalkscrafts.com

I showed how I wove dresses for  ‘Hope’ and ‘Joy’ in my previous post: LINK.

They could hear that there was a little sister calling to them from inside one of the branches on their family tree:

copyright Noreen Crone-Findlay http://www.tottietalkscrafts.com

So:

copyright Noreen Crone-Findlay http://www.tottietalkscrafts.com

After a day or so of carving:

Tiny ‘Coco’ happily emerged from her branch.

copyright Noreen Crone-Findlay http://www.tottietalkscrafts.com

Then, I got out my 2 inch square vintage Weave It loom to weave her a dress.

copyright Noreen Crone-Findlay http://www.tottietalkscrafts.com

She’s about 3 1/2 inches tall.

copyright Noreen Crone-Findlay http://www.tottietalkscrafts.com

Coco Birchtree is very happy to have her picture taken at the Story Door and to join her sisters and the other

Story Door Dolls in my studio.

I’m looking forward to seeing what she and her sisters discover about life around the Story Door!

6 Comments

Filed under doll & dolls & dollmaking & doll making, Loom & looms & small loom weaving, weaving & handwoven, wooden dolls

How to weave a triangle on the Zoom Loom

I have been experimenting with the Schacht Zoom Loom, and figuring out how to weave more shapes with it than just the square it was designed to weave.

In previous blog posts, I’ve shown how to weave small squares Link  and rectangles  Link.

I also posted some hints about how to embroider on the squares that you weave on the Zoom loom: Link

One of the most important shapes to be able to weave when designing with small looms is the the triangle.

copyright Noreen Crone-Findlay

And, so, I’ve figured out how to weave perfect triangles on the Zoom Loom.

It was actually quite tricky to do that figuring, but it was worth it, and I made a video tutorial on how to do it:

Happy Weaving!

3 Comments

Filed under Loom & looms & small loom weaving, tutorial & how to, video tutorial, weaving & handwoven

How to weave a rectangle on the Zoom Loom

I am always intrigued by figuring out ways of maximizing the potential of small looms.

Just because a loom is square, why should it be limited to weaving just squares?

Rectangles are important in the design process, too!

copyright Noreen Crone-Findlay http://www.crone-findlay.com

And, so, I figured it out… and here’s a new video tutorial showing how to weave a rectangle on the Zoom Loom.

There are times when you need to have rectangles and narrow strips to finish a design, and now, you can weave them on  your Zoom loom.

This makes the loom even more versatile :o)

3 Comments

Filed under Loom & looms & small loom weaving, tutorial & how to, video tutorial, weaving & handwoven

A new woven shirt to celebrate springtime

Springtime has been hopelessly late here in Alberta, so I decided to go ahead and celebrate it anyhow, by making myself a new shirt.

I wove the fabric last year:

copyright Noreen Crone-Findlay

copyright Noreen Crone-Findlay

I wove the fabric on my Saori loom:

copyright Noreen Crone-Findlay http://www.crone-findlay.com

This became a sleeve:

copyright Noreen Crone-Findlay http://www.crone-findlay.com

I used my ‘standard’ shirt pattern, Simplicity 2741 LINK

And shortened the sleeves, as I have short arms.

BUT…  I blythely cut it out and sewed it up in, ahem, my husband’s size, oops…. so it is too big for me.

copyright Noreen Crone-Findlay http://www.crone-findlay.com

Ah well, I guess that’s better than being too small, isn’t it? 🙂

copyright Noreen Crone-Findlay http://www.crone-findlay.com

I did all kinds of clasped weft and inlay on body of the shirt.

These are techniques that are used a lot in Saori weaving.

Saori is weaving based on the philosophy of creative self discovery through free form weaving.

See Saori Japan  LINK

At times, when I was weaving the little squares,  I had up to 8 extra shuttles in the row.

copyright Noreen Crone-Findlay http://www.crone-findlay.com

Doing inlaid sections slows down the weaving process, but it is really worth it.

copyright Noreen Crone-Findlay http://www.crone-findlay.com

Here’s the other sleeve:

copyright Noreen Crone-Findlay http://www.crone-findlay.com

I used inkle woven bands for the collar and cuffs.

I am not going to put buttons on it, as I don’t think that I would ever wear it buttoned up.

So, this is my celebration of Spring…. hope you are celebrating merrily, too!

Happy Springtime! 🙂


8 Comments

Filed under Loom & looms & small loom weaving, weaving & handwoven

Soumak Pouch Weave Along- Part 5- Black and white checkerboard motifs

Part 5 of the Soumak Pouch Weave Along is a step by step series of photos that I took while we were on holidays at the end of August.

I adapted the pattern to have checkerboard borders and  wove  the Soumak pouch on my Mirrix Mini (5 inches wide… perfect traveling loom).

copyright Noreen Crone-Findlay

Here’s how the pattern looks with the black and white checked borders:

copyright Noreen Crone-Findlay

If I had wanted to make the pouch wider, I could have added ‘s’ hooks to the side and just added the checked squares to the pattern.

Adding 2 more ‘s’ hooks at the top and bottom on both sides would have added one inch (2.5 cm) to the width of the pouch.

I wanted the squares to be symmetrical off a central square, so I had to do some fancy footwork with working out the size of the squares.

Here’s what I decided: Here’s the graph for the lower border of the pouch:

Each square represents one strand of warp:

copyright Noreen Crone-Findlay

And now… to the step by step photos: Photographed in Jasper Alberta Canada

copyright Noreen Crone-Findlay


copyright Noreen Crone-Findlay


copyright Noreen Crone-Findlay

copyright Noreen Crone-Findlay

copyright Noreen Crone-Findlay

copyright Noreen Crone-Findlay

copyright Noreen Crone-Findlay


copyright Noreen Crone-Findlay

copyright Noreen Crone-Findlay

copyright Noreen Crone-Findlay

copyright Noreen Crone-Findlay

copyright Noreen Crone-Findlay

copyright Noreen Crone-Findlay

copyright Noreen Crone-Findlay

And, here is the finished pouch: Woven in Lamb’s Pride yarn from the Mirrix kit:

copyright Noreen Crone-Findlay

copyright Noreen Crone-Findlay

The embroidery is worked with Kreinik threads.

There is an amethyst bead on the center of the back of the pouch.

Happy Weaving! 🙂


3 Comments

Filed under Loom & looms & small loom weaving, tutorial & how to, weaving & handwoven

Soumak Pouch Weave Along Part 4 Weaving Techniques

The video for Part 4 of the Soumak Pouch Weave Along is a really big one because it’s the ‘how to’s’ for the actual weaving of the pouch.

copyright Noreen Crone-Findlay

Here’s what’s covered in this video:

  • How to weave the 4:2 Soumak border
  • How to weave the 2:1 body of the pouch
  • How to add more weft yarn when you run out
  • How to add new colors
  • How to change colors and make perfect joins between the color blocks
  • How to  step colors sideways in an outward direction
  • How to step colors sideways in an inward direction
  • How to work horizontal stripes
  • How to do the ‘Topsy Turvey Trick’ with the Mini loom
  • How to remove the weaving from the Mini
  • Please note that the pouches are woven with 1 strand of the yarn from the Mirrix Kit, or 2 strands held together, of the Lion Brand Bonbon  yarn

When I went through the video after the final rendering, I smacked my hand to my forehead a couple of times as my directional challenges clearly pop up in the video-  arghhhhhhhhh………. several times, I call the left hand side of the loom, the ~right~ hand side.  arghhhhhhh

And, at one point, I called the weft, ‘warp’………….   oh sigh…………. so please forgive me for the errors.

Luckily, pretty quickly, I do say the ~correct~ thing.   But still……….. arghhhhhhhhhhhh………….

And, no, I am not willing to re-shoot the video….. there are days and days and days of shooting, and so I am not going back to do it again.

Said in the nicest possible way, with really the minimum of snarls and snaps.  😀

Anyhow…. I hope that you will have a WONDERFUL time weaving your pouches!

Without further ado, here’s the video: (bugs and all- and dogs barking and rain raining and thunder thundering…. the dogs were freaked out by the lighting and thunder, so they were indulging in a LOT of vocalizing about the bad bad sky!)

6 Comments

Filed under Loom & looms & small loom weaving, tutorial & how to, weaving & handwoven

Warping Mirrix Looms with Loom Extenders

Loom extenders for the Mirrix looms are sooooooo neat!

You’ll need to make a few adjustments when you are warping the extended loom.

Your best friends when warping the extended loom: Two chairs that don’t have upholstery or cushions:

copyright Noreen Crone-Findlay

Place  the chairs as far apart as possible:

copyright Noreen Crone-Findlay

This leaves a gap that allows you to easily pass the ball of warp around the loom.

You could use 2 small tables if you would prefer, but I like the height of the chairs.

The loom is still happily very stable when it’s extended.

Amazing, isn’t it?

That’s great design for you. 🙂

One of the other things that I have found while weaving on the extended loom is that the weaving can pull in on you.

So, to rectify this, take 2 rubber bands, and 2 paperclips.

Open the paperclips, fold the rubber bands around the side bars, and squeeze the shorter end of the paperclip closed.

copyright Noreen Crone-Findlay

Hook the larger end of the paperclip through the selvedge, about a half inch below the fell line.

Make sure that the end of the paperclip is towards the back of the loom, as this makes it be less of a snaggle hazard.

Here’s the video:

Happy weaving! 🙂

Leave a comment

Filed under Loom & looms & small loom weaving, tutorial & how to, weaving & handwoven

Sketching Swatching and Sampling are such valuable weaving tools

I am working hard on a new tapestry. It’s inching along, as tapestry does, when you are in focused mode.

BUT… I found myself feeling really stuck when I finished one section, and couldn’t move forward onto the next section.

So, I fell back on my ultimate design tool.

I got out my sketchbooks and aquarelles (watercolor pencils), and did the thing that my drawing master back in my art school days drilled into me: Sketch, sketch, sketch!

copyright Noreen Crone-Findlay

He also drilled into his students that it is essential to carry your sketchbook or notebook with you ABSOLUTELY EVERYWHERE, and to sketch every single day.

AND, even more important: Don’t worry about making ‘good’ sketches.

Just catch thoughts, dreams, words, and other fleeting moments on the paper and let them build a vocabulary for you.

The part of the tapestry that had me flummoxed is a child’s costume.

I didn’t know what I wanted to do with it, until I worked my way through a bunch of really rough, ‘thinking on paper’ sketches.

That took me through the roadblock to the ‘AHA’….

And I knew that I needed to move onto sampling and swatching.

copyright Noreen Crone-Findlay

I set up my 8 inch Lani Mirrix loom with a ‘no warp ends’ warp, using ‘S’ hooks… in the video, I show some pointers about this setup.

As a professional designer, I cannot underestimate the importance of swatches and  sampling.

I am always amazed by knitters and crocheters who skip this foundation aspect of the creative process!

So much is revealed in the swatching and sampling stages of creation.

AND… something else that is a huge bonus- so often, the sampling and swatching will reveal that there is something new to explore!

(Which of course, leads back to the sketching…) !

Even though the feeling stuck part of working on this tapestry really stank while I was in it, I ended up feeling really grateful for being forced to move back to basic problem solving techniques.

Why? Because I am now inspired to explore soumak weaving, which I have not done before.

I am fascinated and intrigued…. there will be more about this!

In the mean time, here’s the video about sketching, sampling and swatching.

And, even though I don’t normally like to show pieces while they are in progress, I did do a little ‘reveal’ of the new tapestry.

4 Comments

Filed under Loom & looms & small loom weaving, tutorial & how to, weaving & handwoven

How to weave Leno Lace on the Mirrix loom

I am fascinated by exploring all  the different things that I can do with Mirrix looms.

While I am involved in this four month long co-creation with Mirrix looms, I am going to be  looking at what I can and can’t do with the Mirrix looms.

(Guess what I am NO GOOD at? Bead weaving on the Mirrix!

Yep. All my bead weaving has been off loom and I am TERRIBLE at bead weaving on the loom. 

That one came as a surprise…  ah well… we shall see if that changes! )

In my previous blog post, LINK, I showed how I set up my Lani Mirrix loom, using the ‘No Warp Ends’ warping technique.

copyright Noreen Crone-Findlay

There are several advantages in setting up your Mirrix loom for the ‘No Warp Ends’ technique:

It allows you to sample different weaving techniques quickly and efficiently.

You won’t waste time OR yarn when using the ‘No Warp Ends’ technique.

I love that!

Because the ‘No Warp Ends’ warping technique precludes using a shedding device, it is perfect for weaving techniques that are hand manipulated, like: LENO lace! Yay!

I think that Leno lace is the bee’s knees.

It’s kind of a miniature version of the ancient technique of twisting fibers, called, Sprang.

You do this nifty twist thing, and tadah! You get a  bonus free row that is cheerfully waiting for you, gratis! Whee!

copyright Noreen Crone-Findlay

Leno can seem a little challenging at first, so I figured that a video  tutorial is a good idea.

Here it is:

Happy Weaving!

🙂


6 Comments

Filed under Loom & looms & small loom weaving, tutorial & how to, video tutorial, weaving & handwoven