I have just released a new pattern that has step by step photos showing how to weave these gorgeous baskets, using the easiest little loom ever made, the weaving stick loom:
copyright Noreen Crone-Findlay
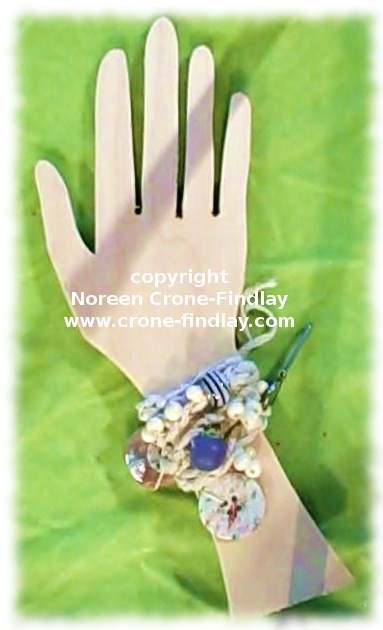
This basket was woven with paper ribbon and embellished with buttons that I made from arbutus twigs and coconut shells.
copyright Noreen Crone-Findlay
The heart shaped basket has a plywood heart base (the template for the heart is included in the pattern).
Here, the heart basket is woven with art yarn:
copyright Noreen Crone-Findlay
Workshop participants who were learning how to weave the baskets asked me:
What can we use these baskets for?
Anything that fits in them that you want to keep organized! Beads, hair clips, packages of smallness, buttons, thread, bobbins, yarn….
copyright Noreen Crone-Findlay
The large oval basket in the photo above was woven with strips of torn fabric, so it’s a great eco option.
The yo yo flowers that embellish it’s side are made from scraps of upcycled fabric. (The instructions on how to make the yo yo circles are also included in the pattern).
This basket is great for holding fruit or heaps of little green tomatoes while they ripen, or anything else your heart desires.
Because it’s made of cloth, if it gets soiled, it can just be rinsed clean.
copyright Noreen Crone-Findlay
The green round basket is woven in the same way as the pink and blue one in the photo below, but I pulled up on the warp strands of the upper edges of the green one to curve it in.
copyright Noreen Crone-Findlay
So you can see that a small change makes a huge difference in the look of the basket.
I did the same thing to curve the top edge of the black oval shaped basket that is woven in exactly the same way as the paper ribbon basket.
copyright Noreen Crone-Findlay
The yarn that you use (combine several strands to get neat effects) and how you embellish the basket will guarantee that each basket that you make is totally unique.
The video for Part 4 of the Soumak Pouch Weave Along is a really big one because it’s the ‘how to’s’ for the actual weaving of the pouch.
copyright Noreen Crone-Findlay
Here’s what’s covered in this video:
How to weave the 4:2 Soumak border
How to weave the 2:1 body of the pouch
How to add more weft yarn when you run out
How to add new colors
How to change colors and make perfect joins between the color blocks
How to step colors sideways in an outward direction
How to step colors sideways in an inward direction
How to work horizontal stripes
How to do the ‘Topsy Turvey Trick’ with the Mini loom
How to remove the weaving from the Mini
Please note that the pouches are woven with 1 strand of the yarn from the Mirrix Kit, or 2 strands held together, of the Lion Brand Bonbon yarn
When I went through the video after the final rendering, I smacked my hand to my forehead a couple of times as my directional challenges clearly pop up in the video- arghhhhhhhhh………. several times, I call the left hand side of the loom, the ~right~ hand side. arghhhhhhh
And, at one point, I called the weft, ‘warp’…………. oh sigh…………. so please forgive me for the errors.
Luckily, pretty quickly, I do say the ~correct~ thing. But still……….. arghhhhhhhhhhhh………….
And, no, I am not willing to re-shoot the video….. there are days and days and days of shooting, and so I am not going back to do it again.
Said in the nicest possible way, with really the minimum of snarls and snaps. 😀
Anyhow…. I hope that you will have a WONDERFUL time weaving your pouches!
Without further ado, here’s the video: (bugs and all- and dogs barking and rain raining and thunder thundering…. the dogs were freaked out by the lighting and thunder, so they were indulging in a LOT of vocalizing about the bad bad sky!)
This is the second stage of the video tutorials that I made on how to weave inkle bands on the Mirrix loom.
copyright Noreen Crone-Findlay
There are two bands on the loom, because in this video, I am working on the 16 inch loom.
When you work on the 8 inch loom, it’s okay to just weave one band at a time, as the warping bar doesn’t flop around.
But, on the 16 inch loom, you do need to either warp up 2 bands, or secure the other end of the warping bar with a cord so it will stay perfectly horizontal.
I tried weaving 3 bands at once on the 16 inch loom, and didn’t like it, as the center knobs on the shedding device got in the way.
Two bands are just great though.
AND…. if you want to weave longer bands, and have either a 12 inch or 16 inch Mirrix loom then the loom extenders will be your friend 🙂
I use a crochet hook and a weaving stick to make the heddling process go quick like a bunny.
Here’s the video tutorial:
Start by placing a piece of cardboard between the layers at the front of the loom and the back so you can’t see the warp strands at the back of the loom.
copyright Noreen Crone-Findlay
Place the shed changing device into the brackets. Unscrew the little knob that holds the heddle rod in place.
Pull the heddle rod back so it’s about half way along the warp strands.
copyright Noreen Crone-Findlay
Place the heddles onto the fingers of your non dominant hand.
copyright Noreen Crone-Findlay
Look down at the warp strands that are at the lower edge of the front of the loom.
There’s a gap between the strands that have gone in front of the warping bar and behind it.
Slip your fingers into the gap and scoot them up to the shedding device.
Slide a shed stick into the gap.
Voila! (which is how ‘walla’ is really spelled 🙂 )
You have shed one ready to heddle!
copyright Noreen Crone-Findlay
Now, slip the crochet hook behind the first warp strand, pluck a heddle off your fingers, and pull it forward.
Catch the other end of the heddle loop and place both loops on the heddle rod.
Go slowly, and be sure that both ends of the heddle loop stay politely on the heddle rod.
copyright Noreen Crone-Findlay
When you have all of the warp strands heddled, slide the heddle bar into position in the knobs, and tighten the lock nut.
Repeat the heddling process on the second set of warp strands for your other band.
copyright Noreen Crone-Findlay
Push the first set of heddles down as you rotate the shedding device.
copyright Noreen Crone-Findlay
Leave the shed stick in place, and use the crochet hook to pick up the warp strands for the other shed.
Take the warp strand from the back to the right of the one in front, and onto the hook,
take the hook over the front strand, and pick up the next strand and carry on across.
copyright Noreen Crone-Findlay
Slide the weaving stick out of the first shed, and slip it along the crochet hook to transfer the warp strands from the crochet hook to the weaving stick.
copyright Noreen Crone-Findlay
Turn the weaving stick on it’s side, and then pick up the warp strands one at a time and capture them with the heddles just as you did for the first set of warp strands.
copyright Noreen Crone-Findlay
Repeat this process for the second band.
Check your heddles carefully to make sure that they are opening the sheds properly.
Ahhhhh! a warped loom is a thing of beauty!
copyright Noreen Crone-Findlay
Attach the handle to the shedding device and adjust the tension by turning the thumbscrews.
Open the first shed, and insert a craft stick, then open the second shed and insert another craft stick.
Squish the warp strands together to establish the width of your band.
copyright Noreen Crone-Findlay
Weave one row, leaving a 6 inch/15 cm tail.
Change sheds, and weave the next row.
Pull up firmly on the tail end and weave it through the same shed.
Repeat several times until the tail end is woven in, and the band is established.
A lady on Ravelry is having trouble making Edward Bear’s foot, so I am going to show some step by steps on how to do it:
copyright Noreen Crone-Findlay
Here is Edward Bear with his head and one leg stuffed.
His foot is turned up and the stitching is started along one side of the foot.
copyright Noreen Crone-Findlay
Here’s a closeup of measuring the foot- Stitch the edges together around the fold to stitch the foot to the leg- around the sides of the foot and across the top of the foot.


")
")
")
")
")
")
")


")
")
")
")
")
")
")
")
")
")
")
")
")


