Day 35 of #100daysofspoolknittersandlittlelooms- Lots of Links for How To Use Spool Knitted or Lucet Cord
Spool knitting and using lucets to make lovely cord is relaxing, meditative, contemplative and just plain fun. But, people often ask me: What do you do with all those cords after you’ve made them?
Here’s a list of useful links to videos that I have made about ways of using spool knitted and luceted cord. (Lucets are flat 2 peg spool knitters))
Go to my Etsy shop to buy pdf patterns for fun spool knitted projects:
Day 16 of #100daysofspoolknittersandlittlelooms- A video tutorial for making square 2 peg cord on almost any spool knitter
For Day 16 of #100daysofspoolknittersandlittlelooms I made a video showing how to use any size of spool knitter (with any number of pegs) like a lucet to make square cord by using only 2 pegs of the spool knitter.
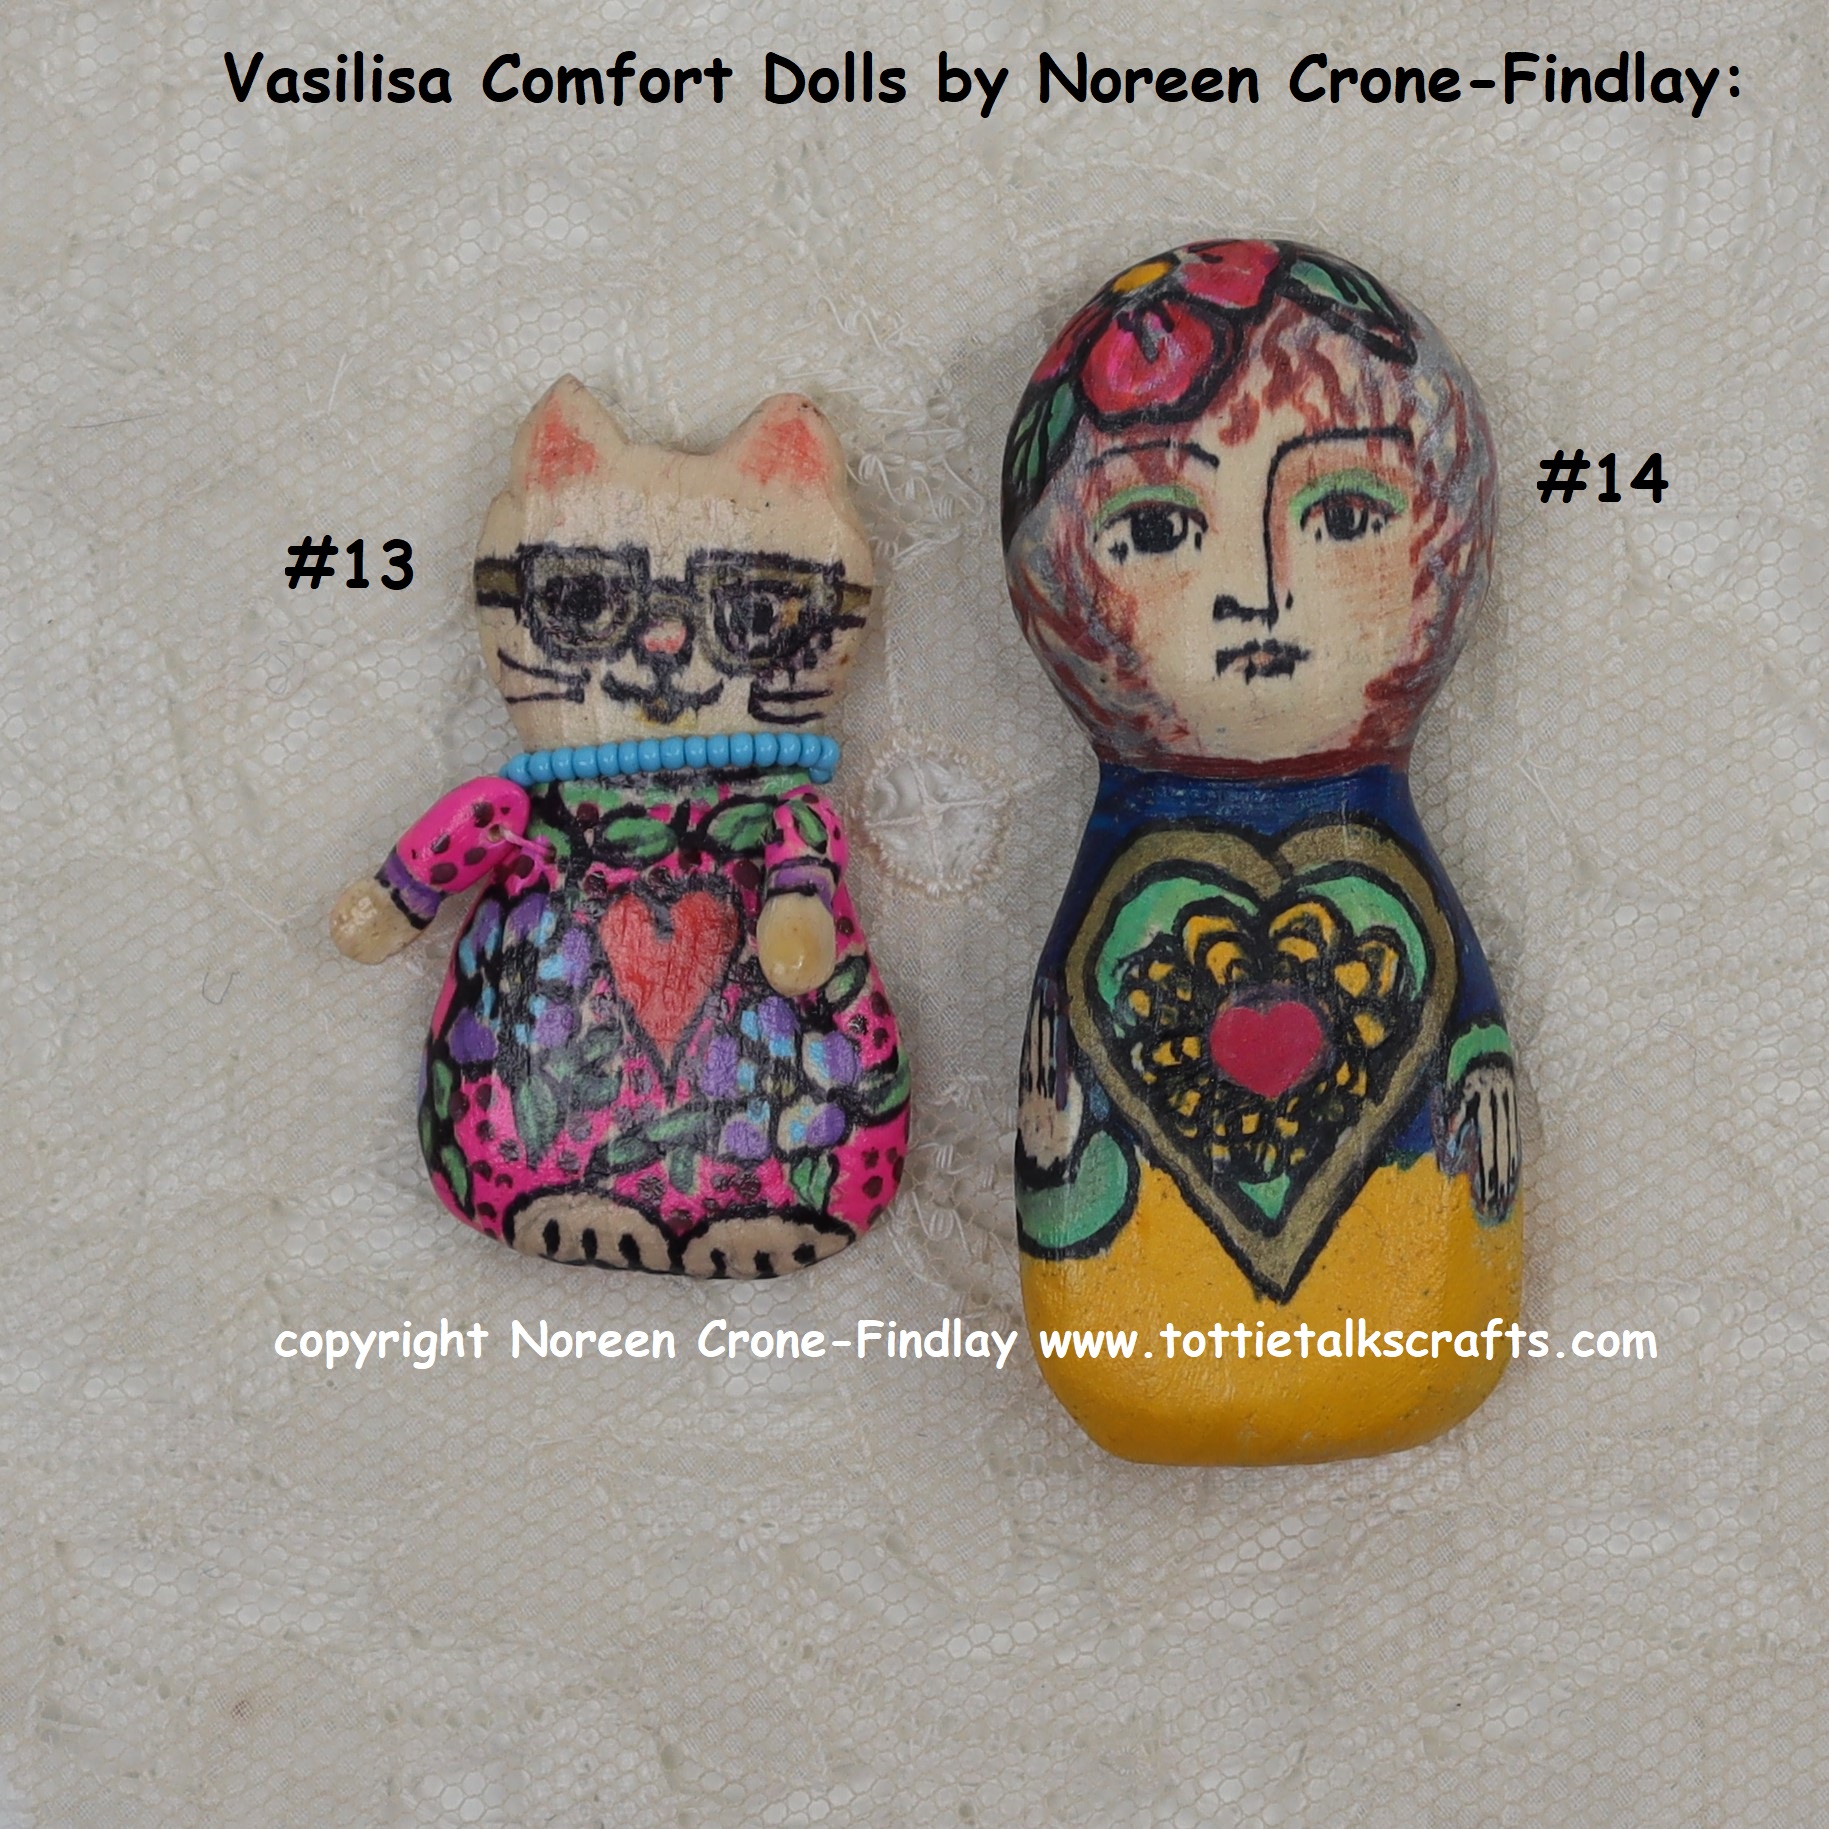
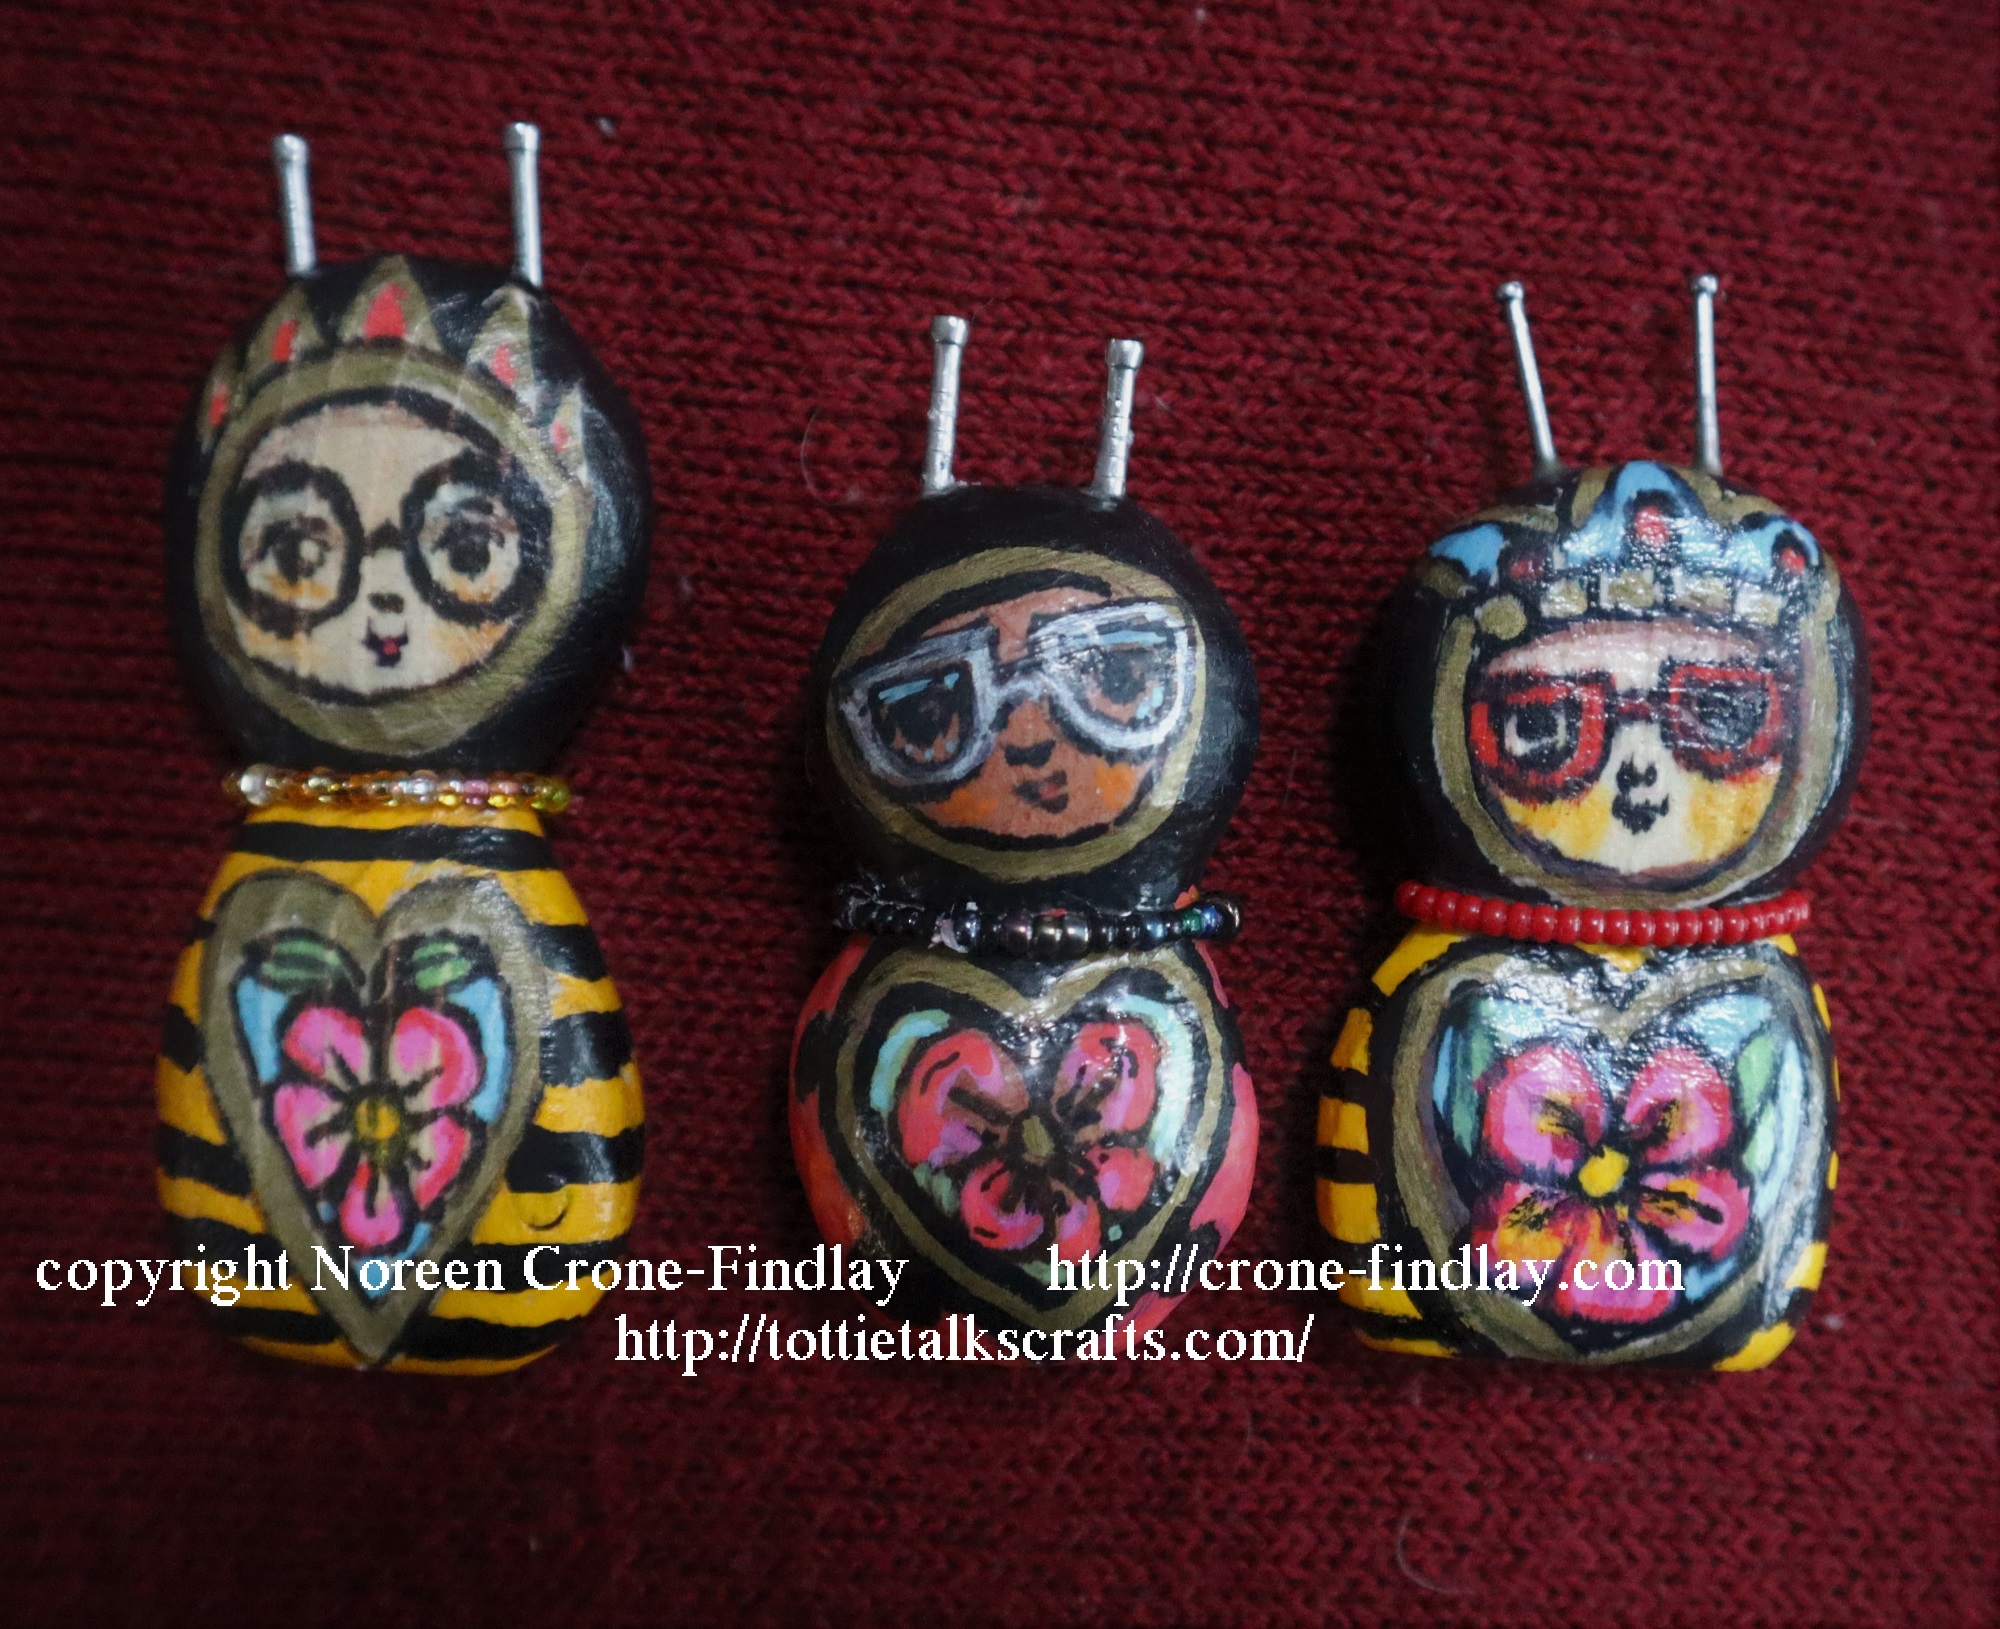
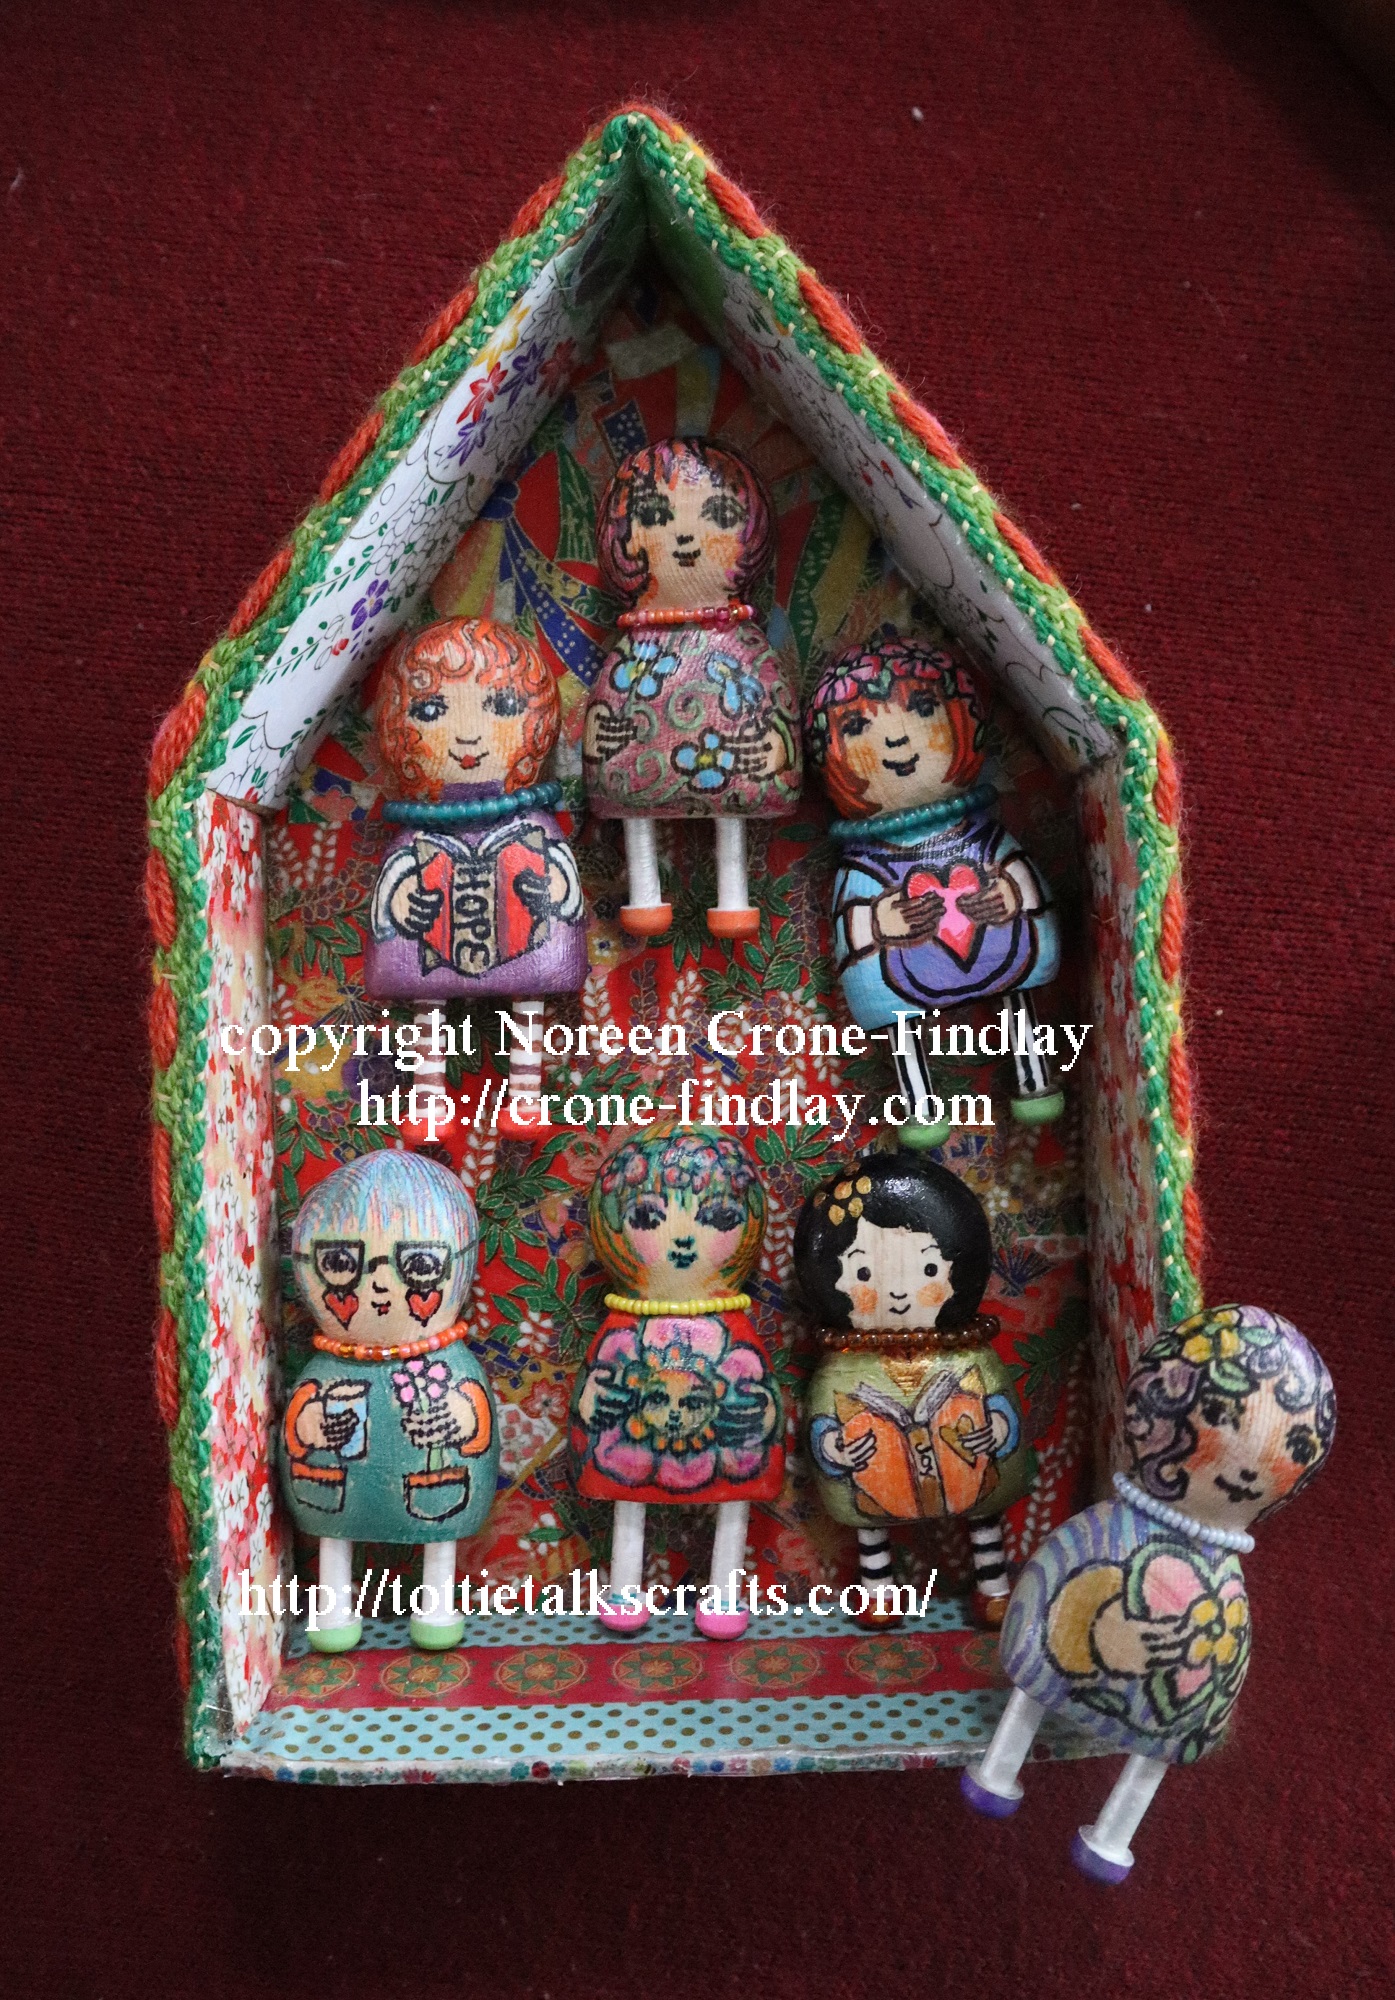
Several people have messaged me recently, asking if I still have any Vasilisa Comfort Dolls available for sale. I don’t have the stamina to carve wood anymore, as I am living with Long Covid/post viral syndrome (blech). So, there won’t be any new ones and these are the only Vasilisa Dolls that are still available.
If you are interested in buying any of them, please leave a comment and I will get back to you asap.
These are the Vasilisa Comfort Doll ‘Mamma/Great Mother of All’ series- they are $75 each + shipping. They are between 4- 5 inches tall
Small Vasilisa Comfort Dolls: These two are $45 + shipping
And, the Kitten is sold but the Vasilisa Comfort Doll #14 is still available $50 + shipping
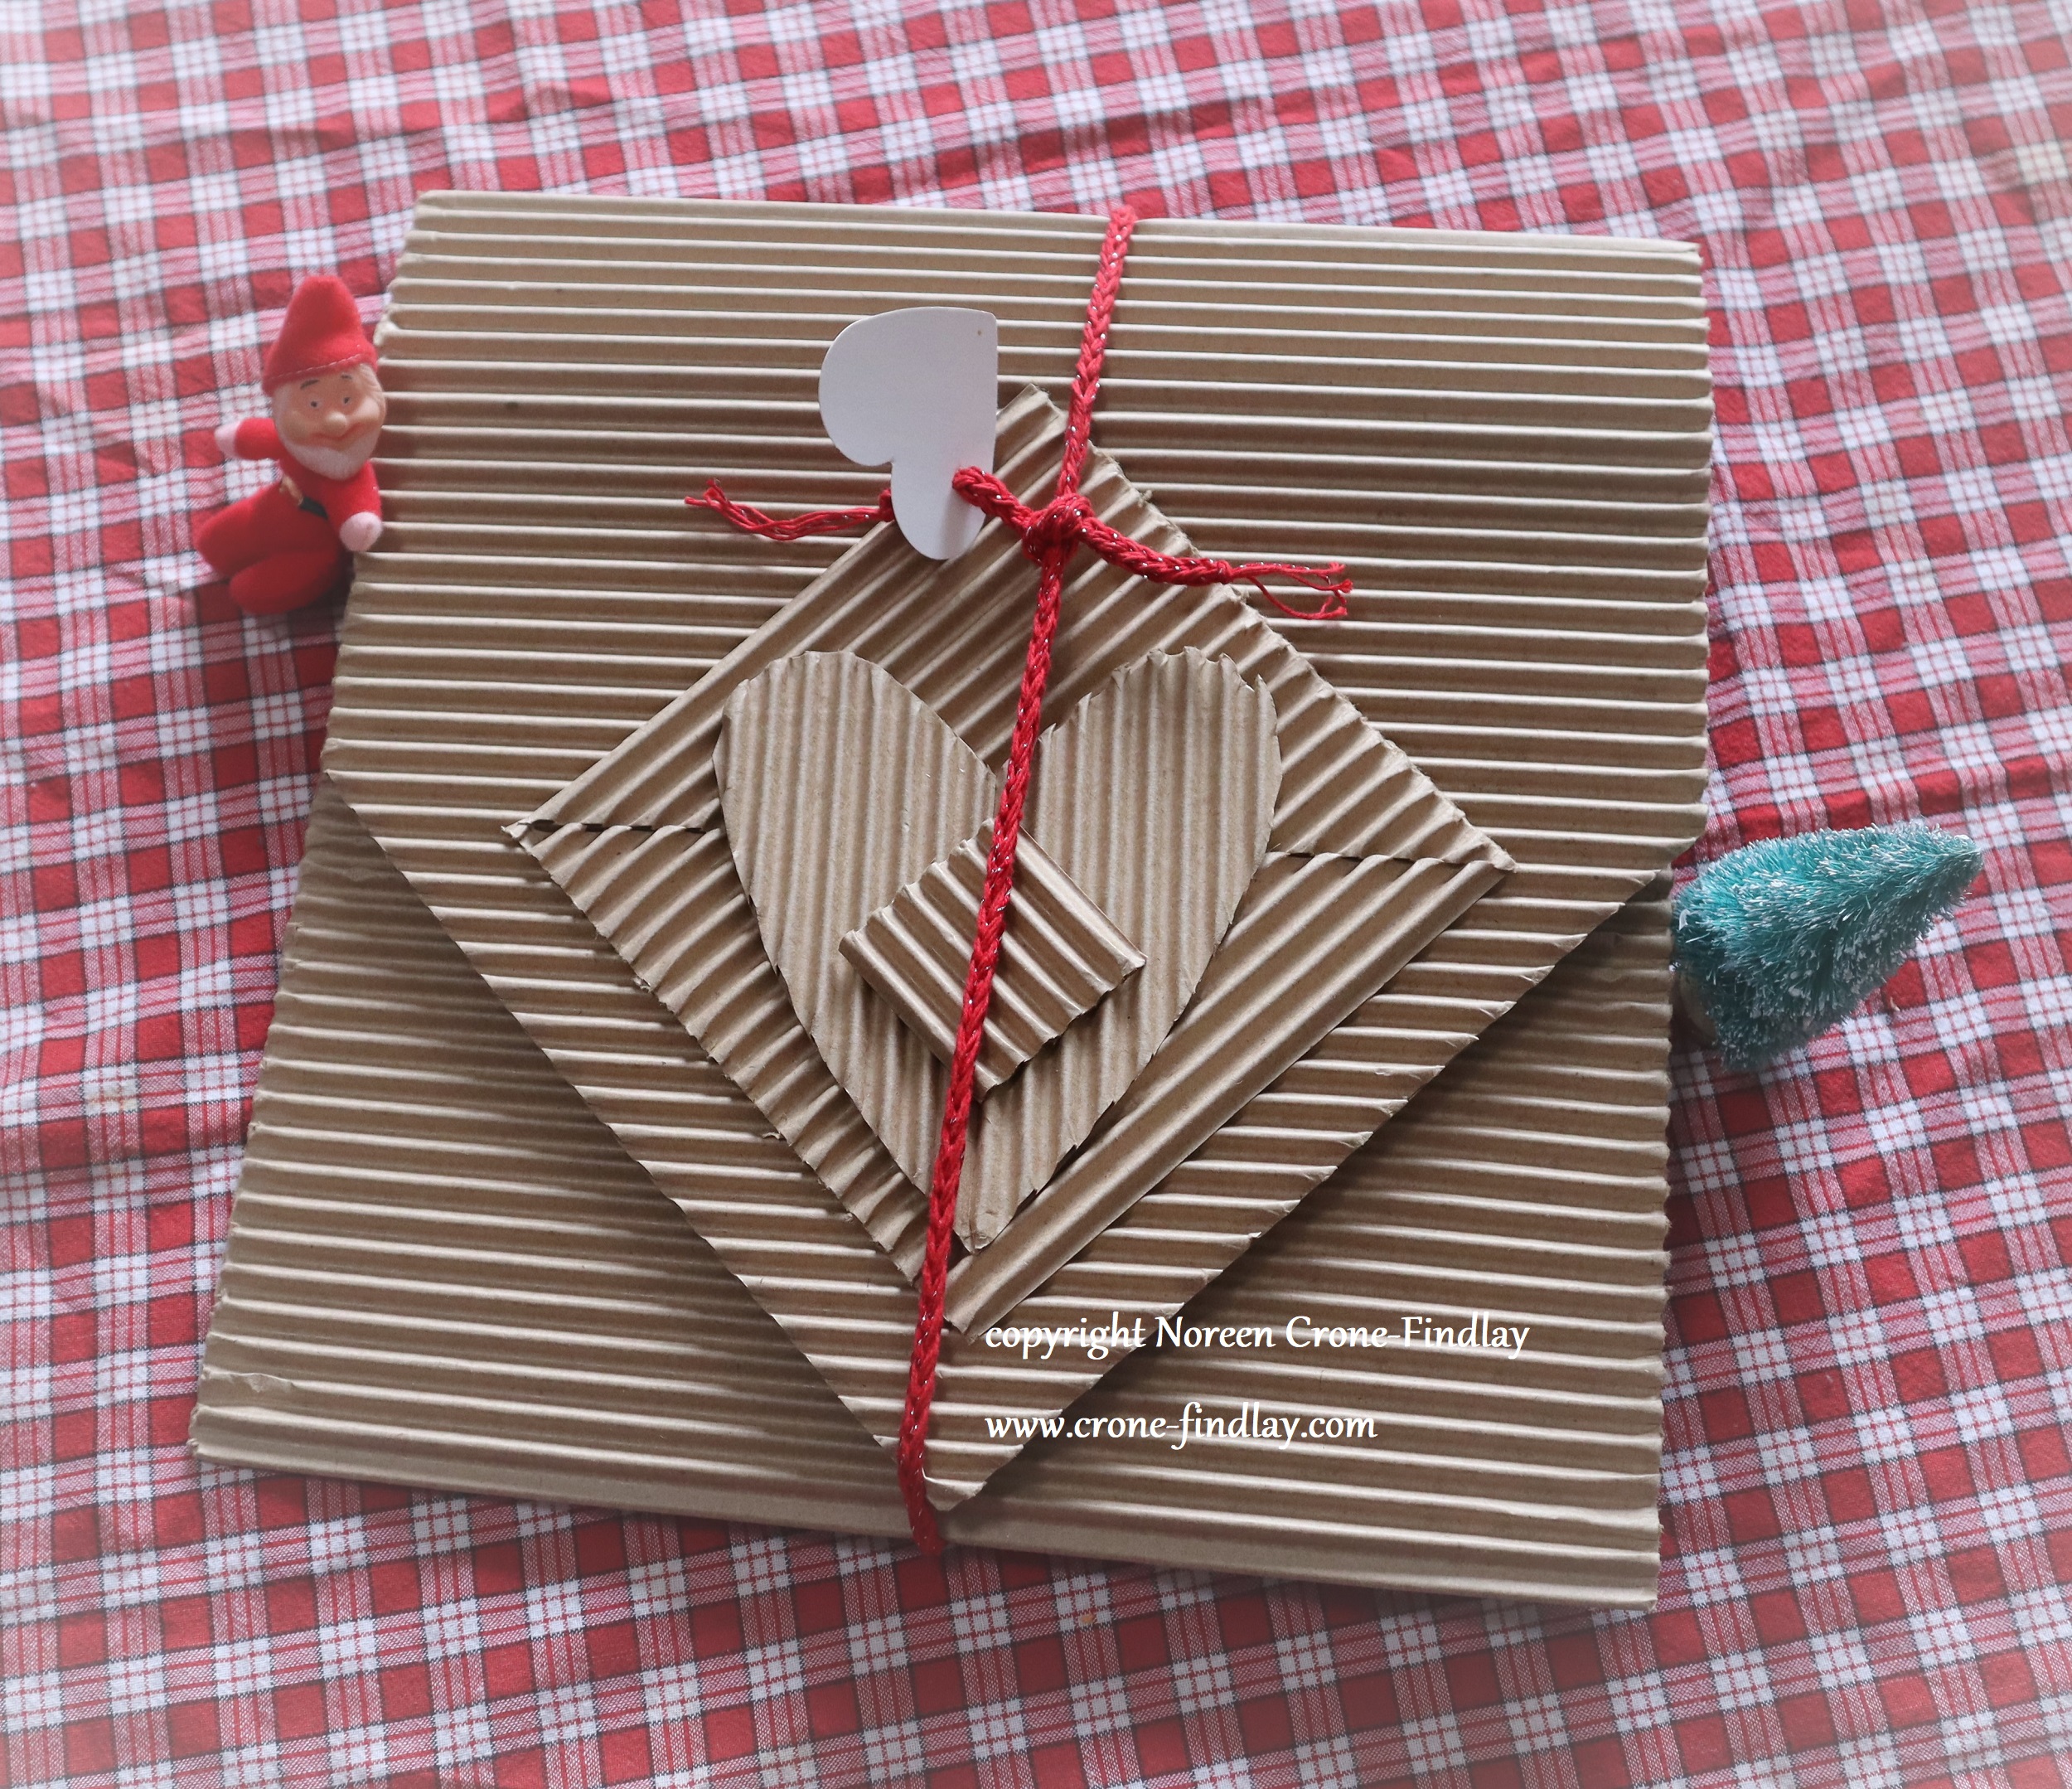
Normally, we wrap all our presents in bags that I have made over the years. We never buy paper for gift wrapping.
But, this year, my husband and I made some gifts that needed special packaging.
So I set my mind to working on how to do this in an eco friendly way.
(I’ll show the special gifts in my next blog post)
Several years ago, Jim bought a roll of cardboard to build a case for his Oud (Turkish Lute).
It came as a roll that is 12 inches wide by ever so long, and it’s been kind of in the way ever since, but I didn’t want to get rid of it because I have a huge fondness for cardboard.
Jim wrapped the first gift in a protective swath of the cardboard, but that seemed rather ‘less than’ to me, so I mulled it over and came up with the folder idea.
I LOVE it.
It’s super simple:
I cut a 36 inch long piece of the cardboard and cut triangles off one end to make the point.
Then glued one triangle to the inside of the point to stabilize it.
I traced a tray to make the curve and then glued the edges.
Next time I will add strips of cardboard along the sides to give more dimension to the folder.
I used the off cuts to decorate the front.
The cord is made from crochet cotton that was given to me last summer (see Tea Towels) and a Lucet (LINK) and I am pleased as can be.
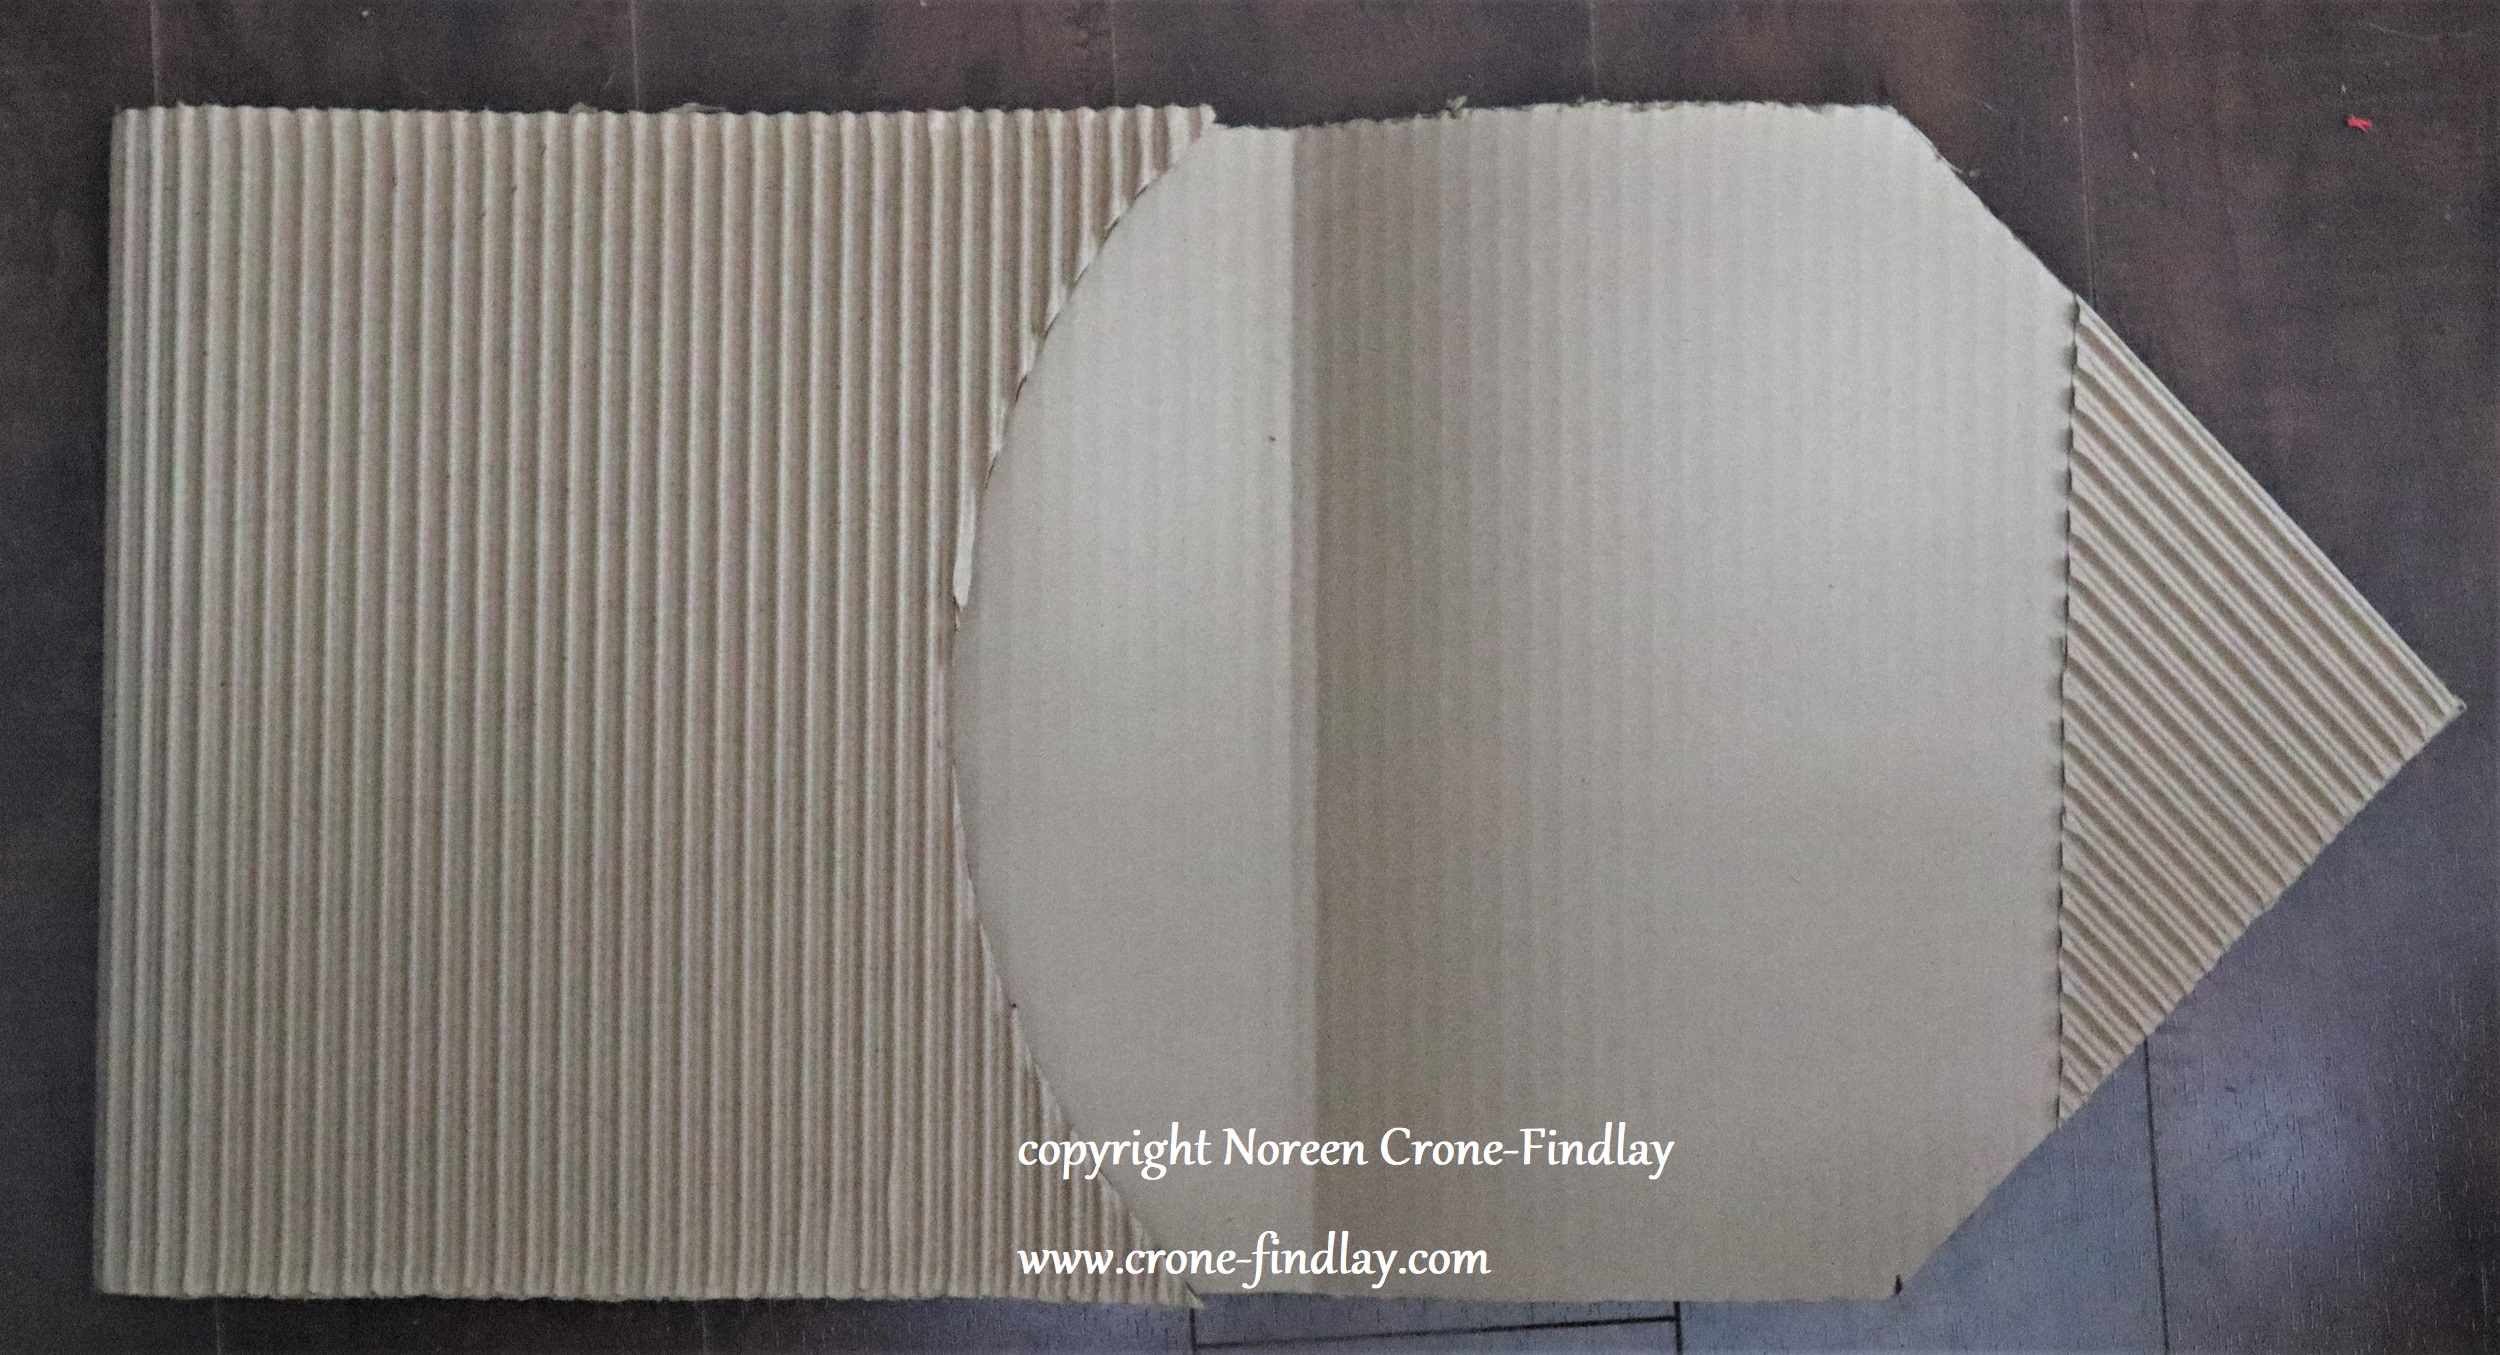
Another cluster of gifts needed special packaging, so I tried to fold origami boxes with the cardboard.
FAIL.
Instead, I came up with trial and erroring in making fitted boxes that were a time consuming pain in the neck to make. I tried using this technique, which works great with ‘normal’ card stock and paper: LINK
I won’t bother doing this again- not with this cardboard.
(Note- even though these were the pits to make, they were still made with love and some mild cussing).
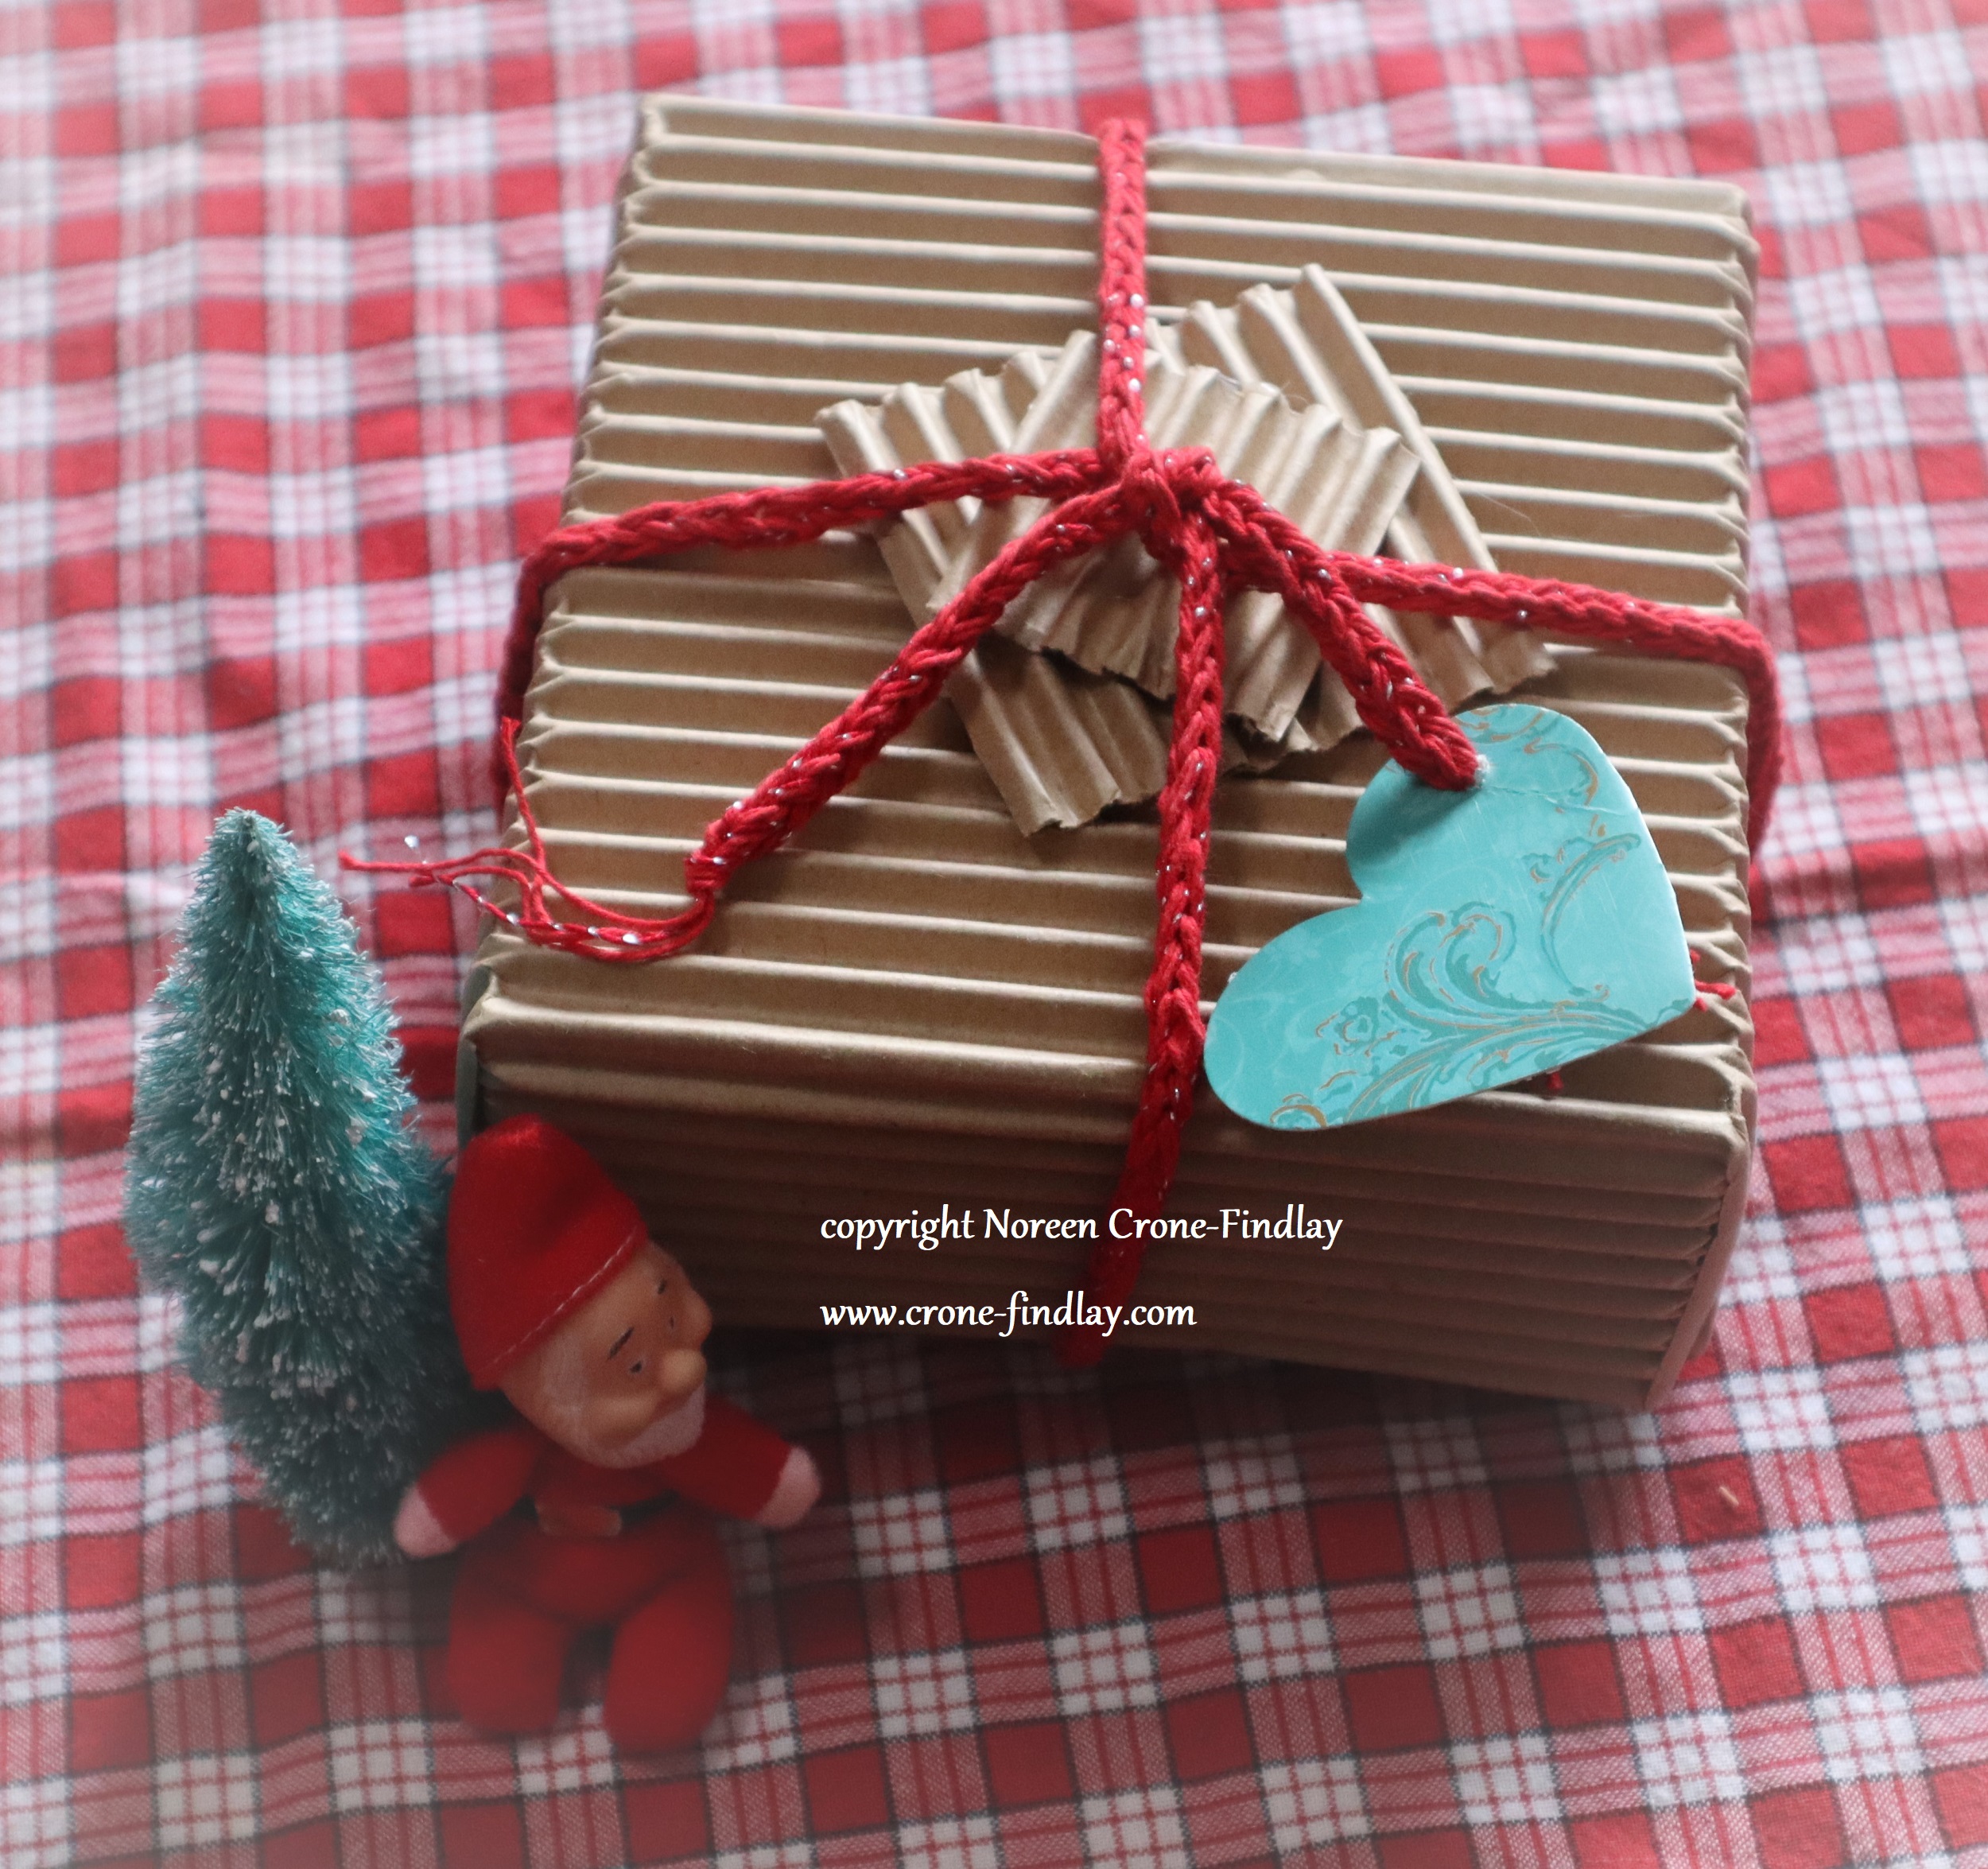
BUT, by now, I was seriously on a roll with this whole box/package designing thing and remembered those nifty containers that are tubes that have semi-circular ends that push in to close them.
Of course, I probably could have looked up a tutorial online and found the simple way to do this, but, oh no, that’s not the way my brain works.
My brain likes ~to figure things out~…..
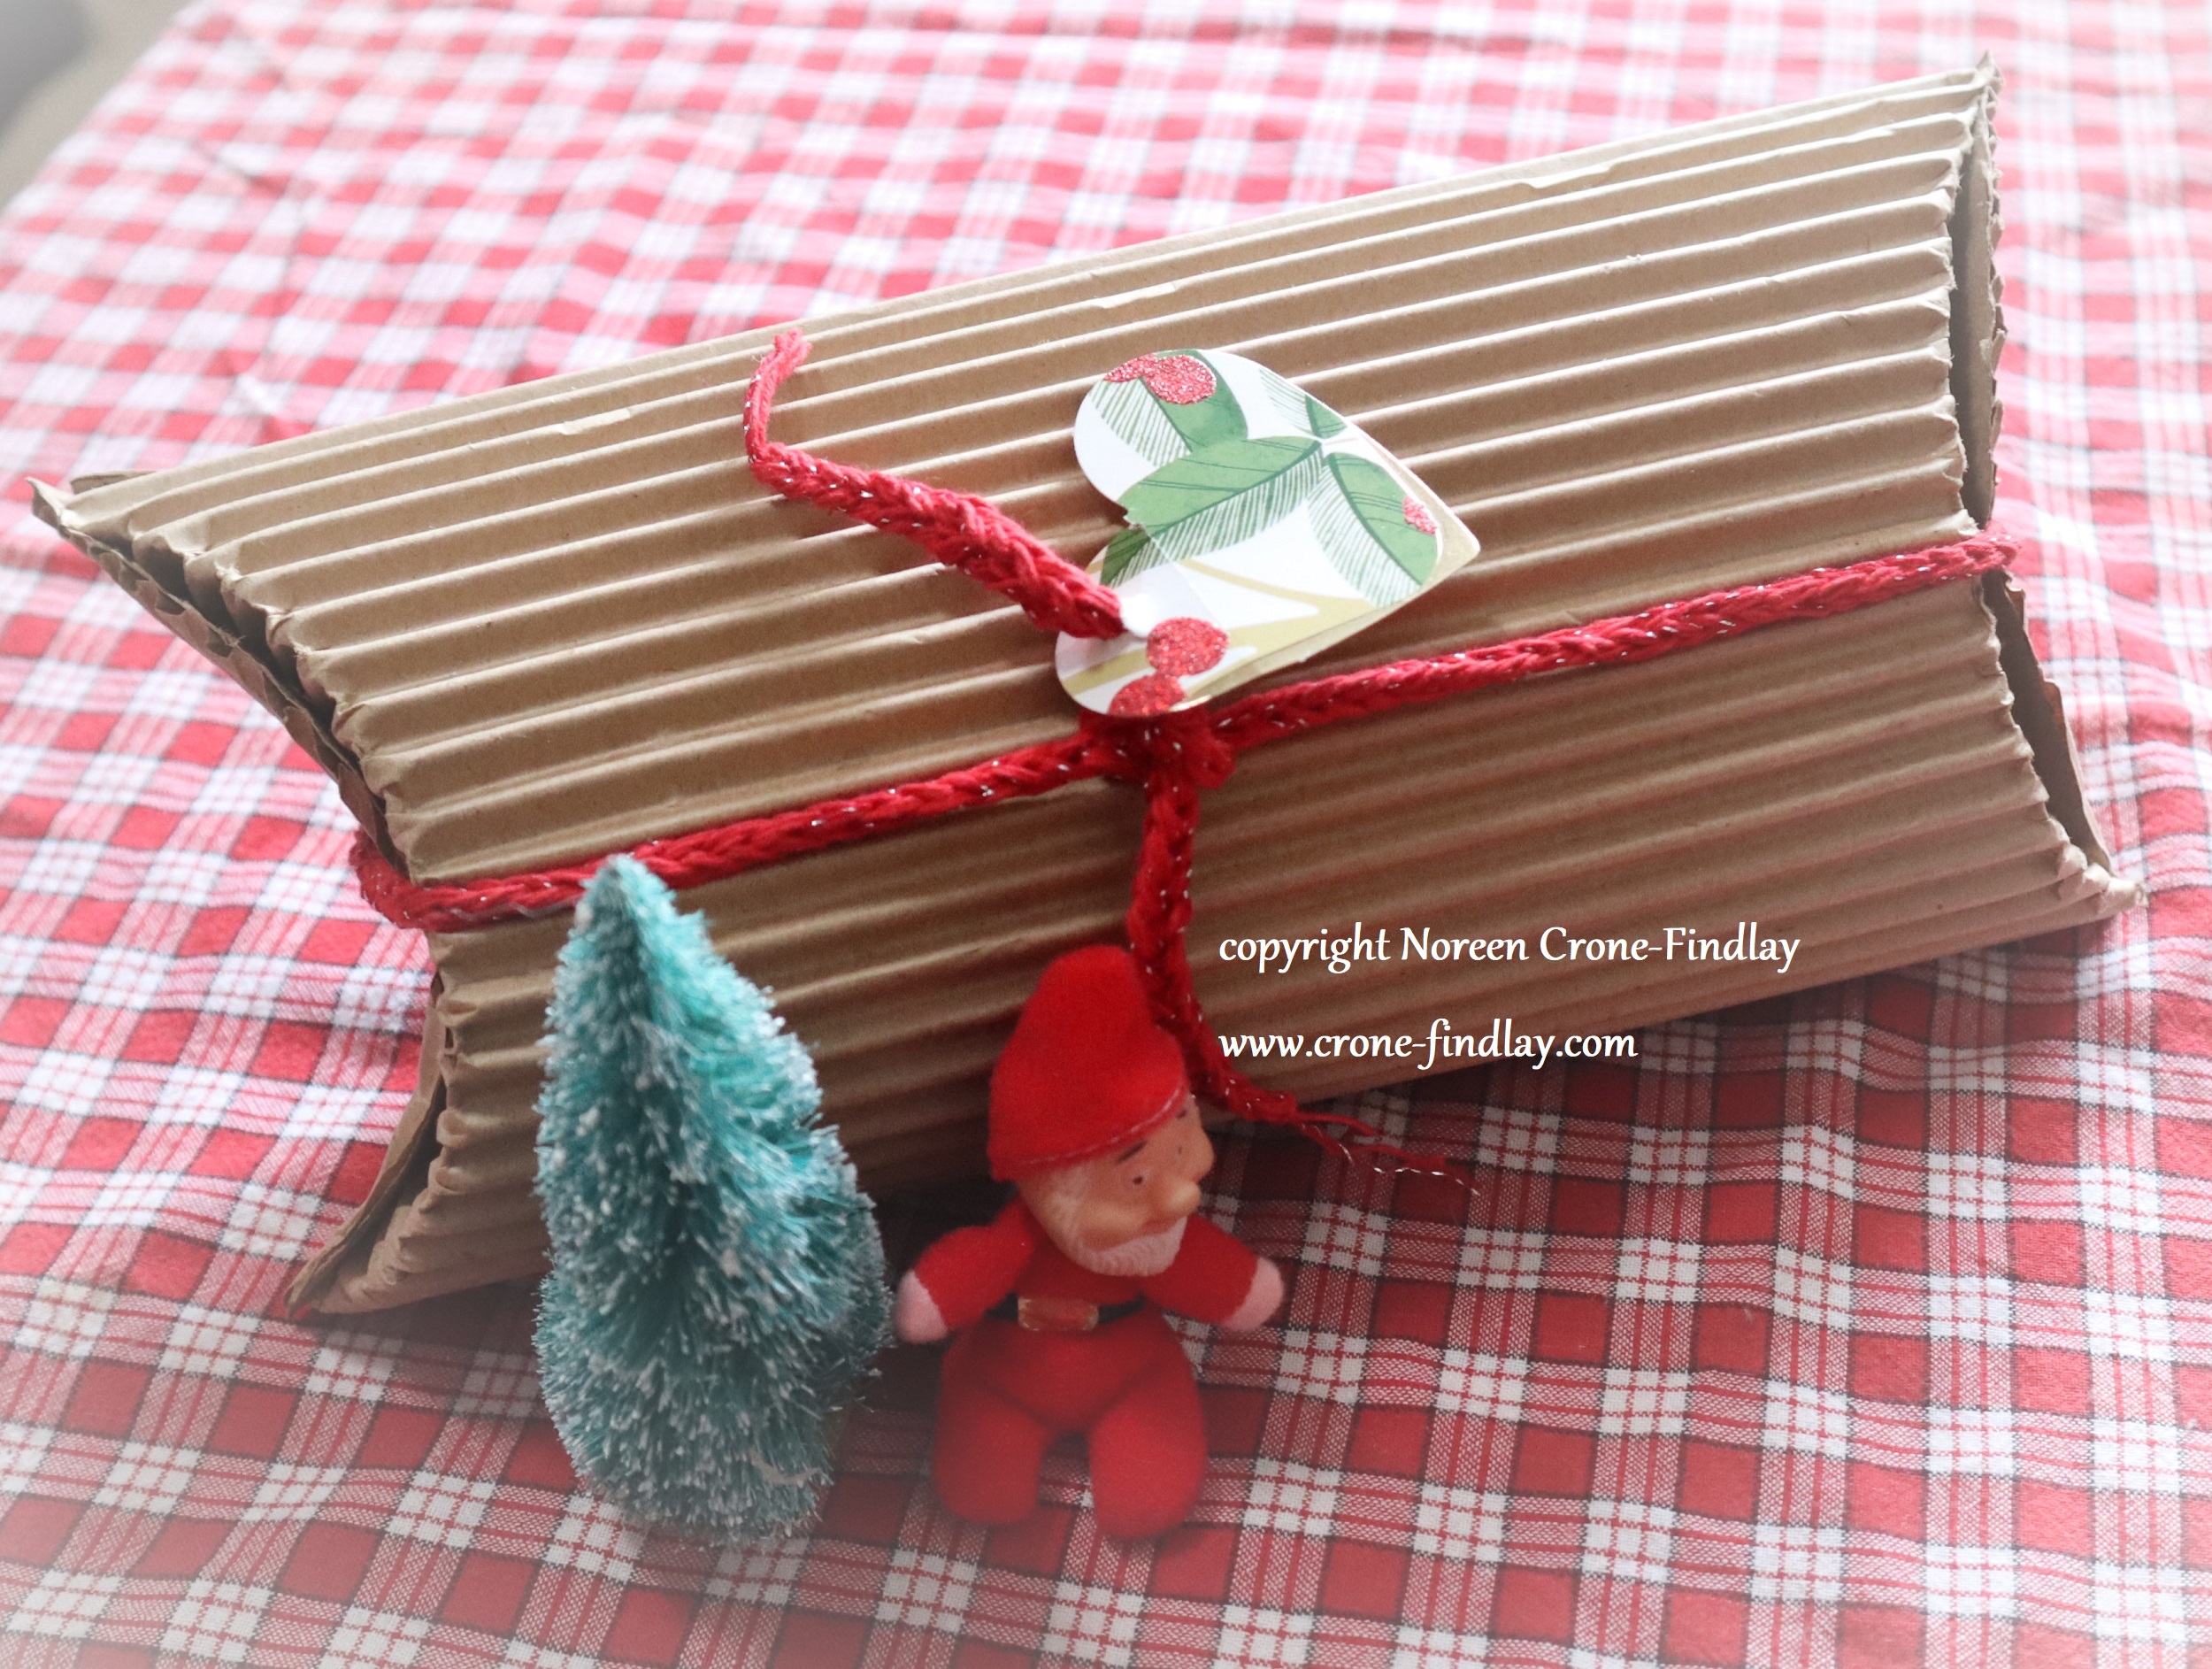
So I pushed cardboard around and flipped and folded it and measured and hummed and finally came up with this ‘Slightly Tube-ish’ container:
I had made several of the ‘Slightly Tube-ish’ ‘ containers when I twigged to the fact that they had a big old mistake, which I then fixed.
I made proper templates for the ‘right’ ‘Slightly Tube-ish’ containers , since I really like these and plan on using the concept again.
But, I wasn’t going to waste the ‘wrong’ ones, so I used them anyhow, with an apology to the recipients of the gifts and an explanation that I have got it right now, and they’ll get a better iteration next time.
Until then, the wrong ‘Slightly Tube-ish’ containers can be re-used and eventually be recycled or used as fire starters.
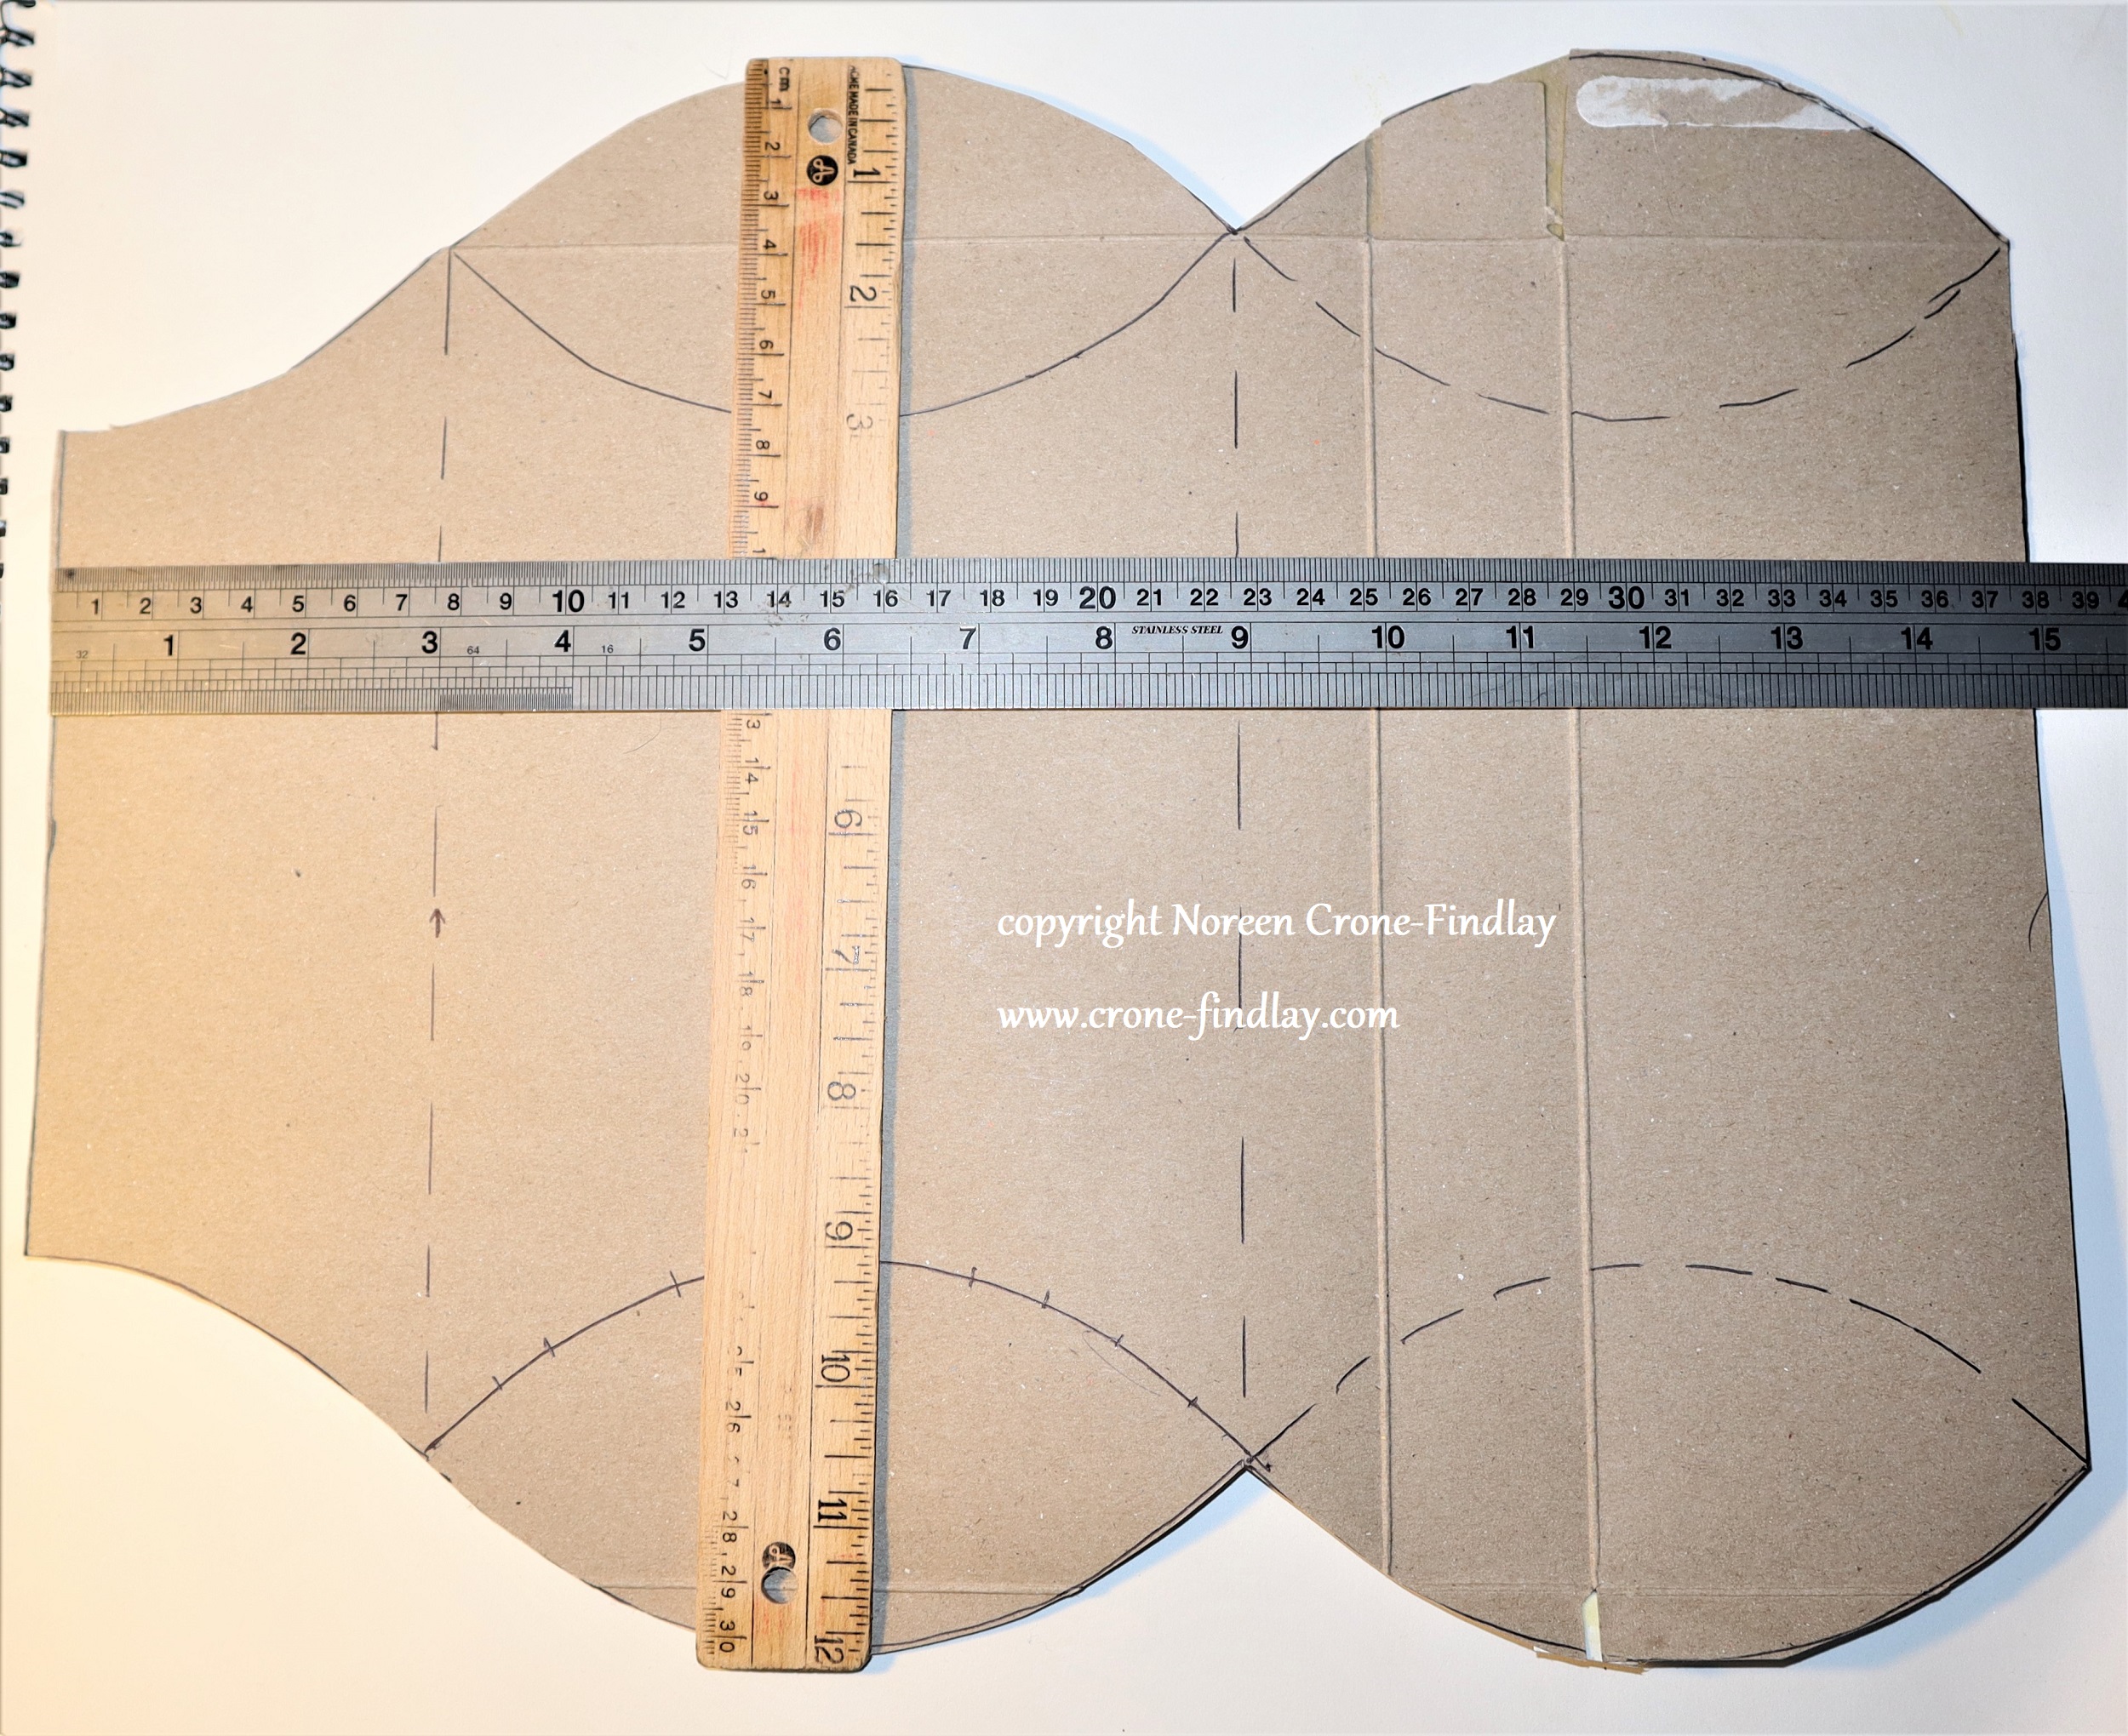
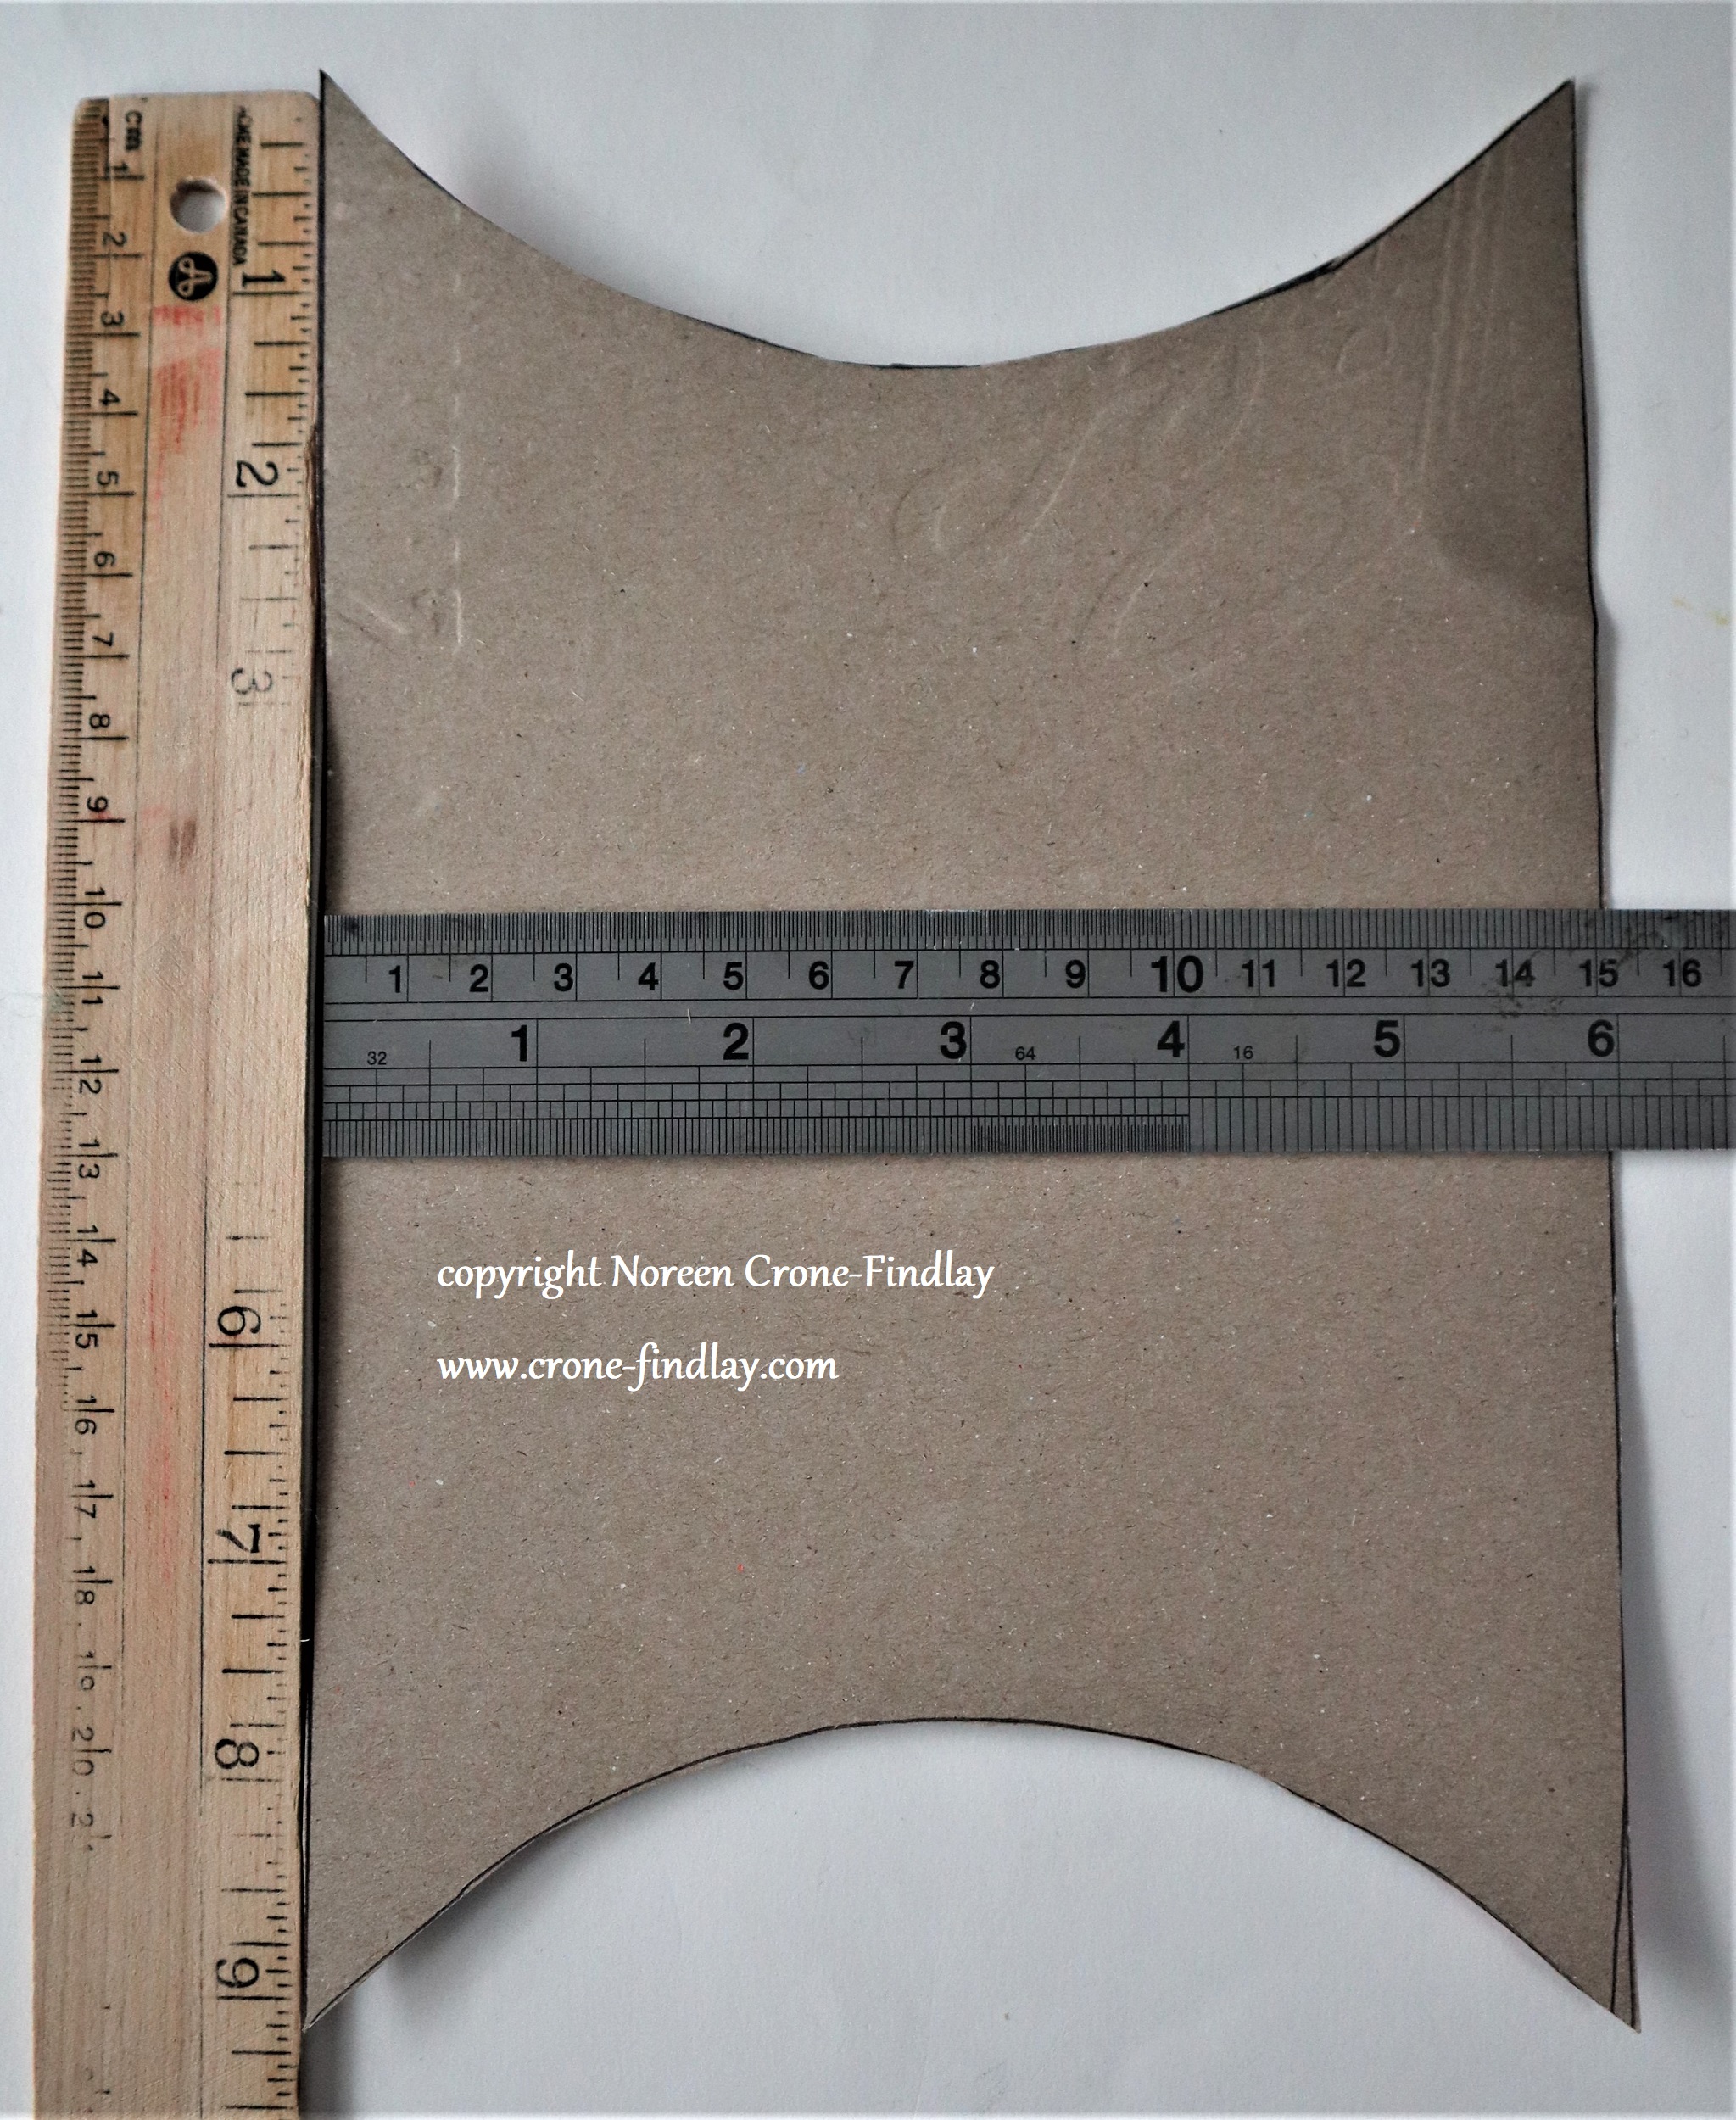
Here are the proper templates:
This one is for cutting out the ‘Slightly Tube-ish’ containerAnd, this one is for scoring the curves on the ends.
All in all, it was a lot of work, but I loved doing it and I hope that my family liked the nifty boxes and folders.
Even though I used cardboard that we had bought years ago for another project, these techniques will work really well on regular upcycled cardboard and cardstock, which pleases me very much!
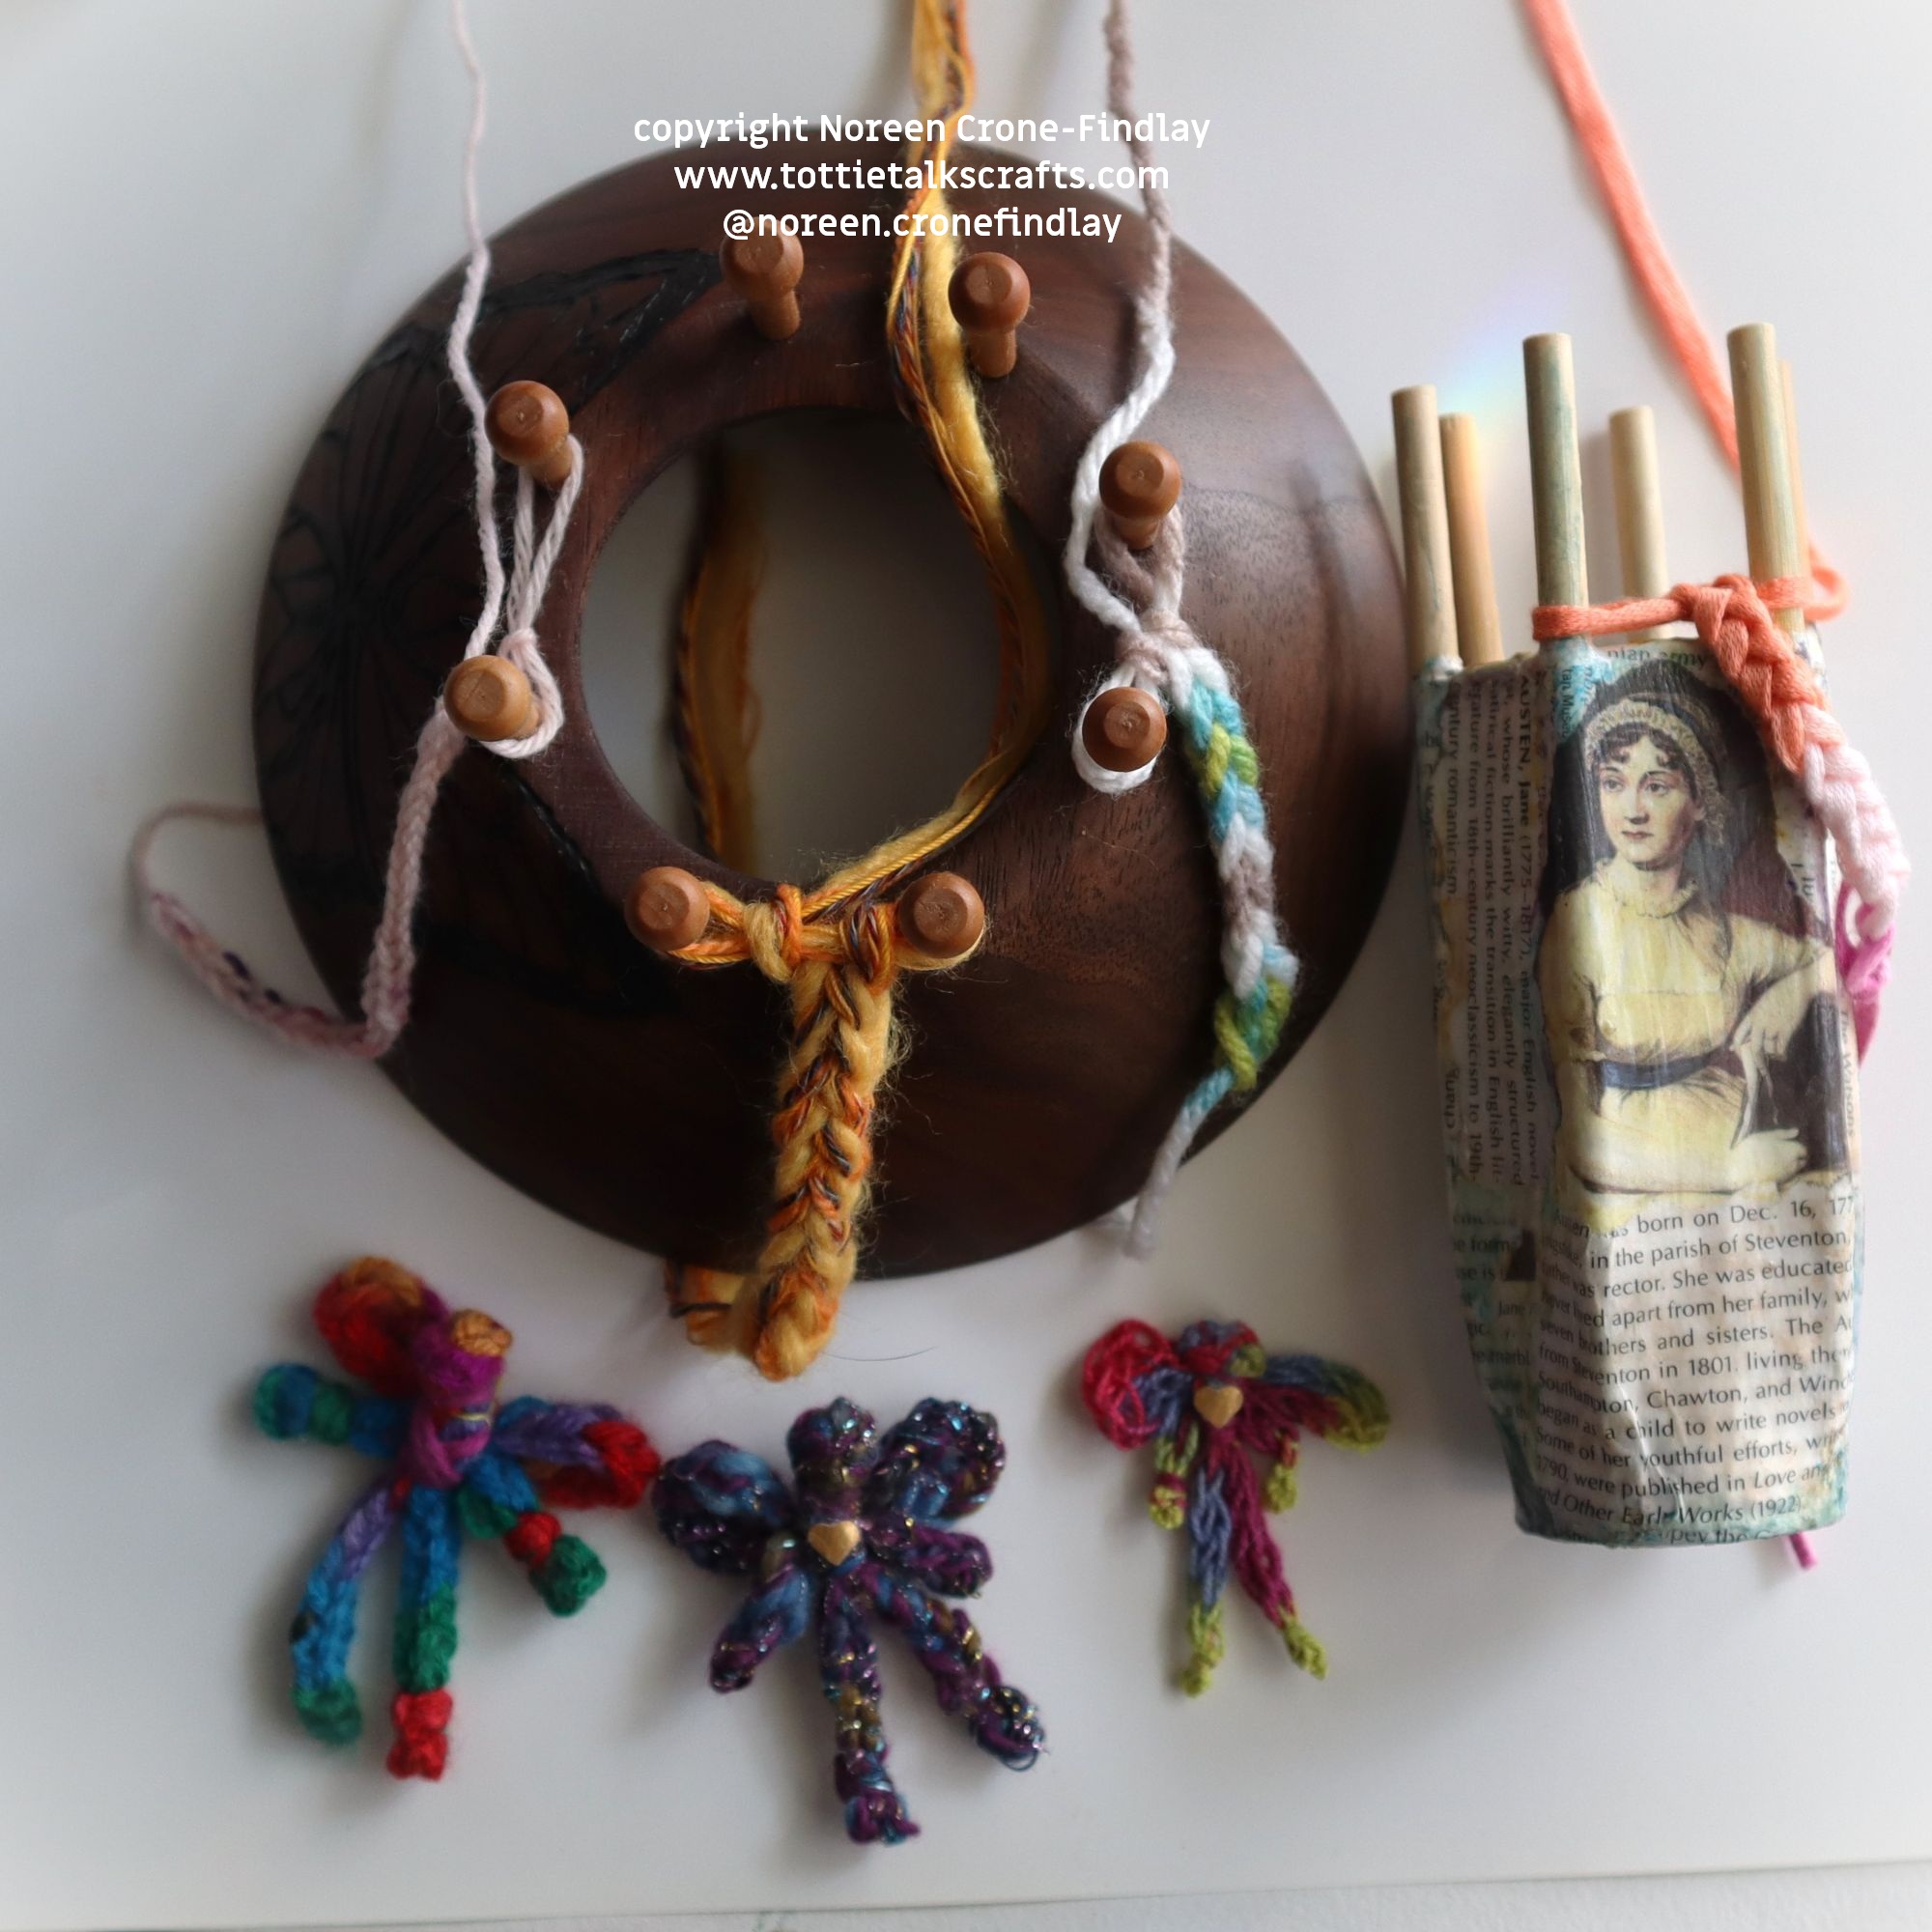
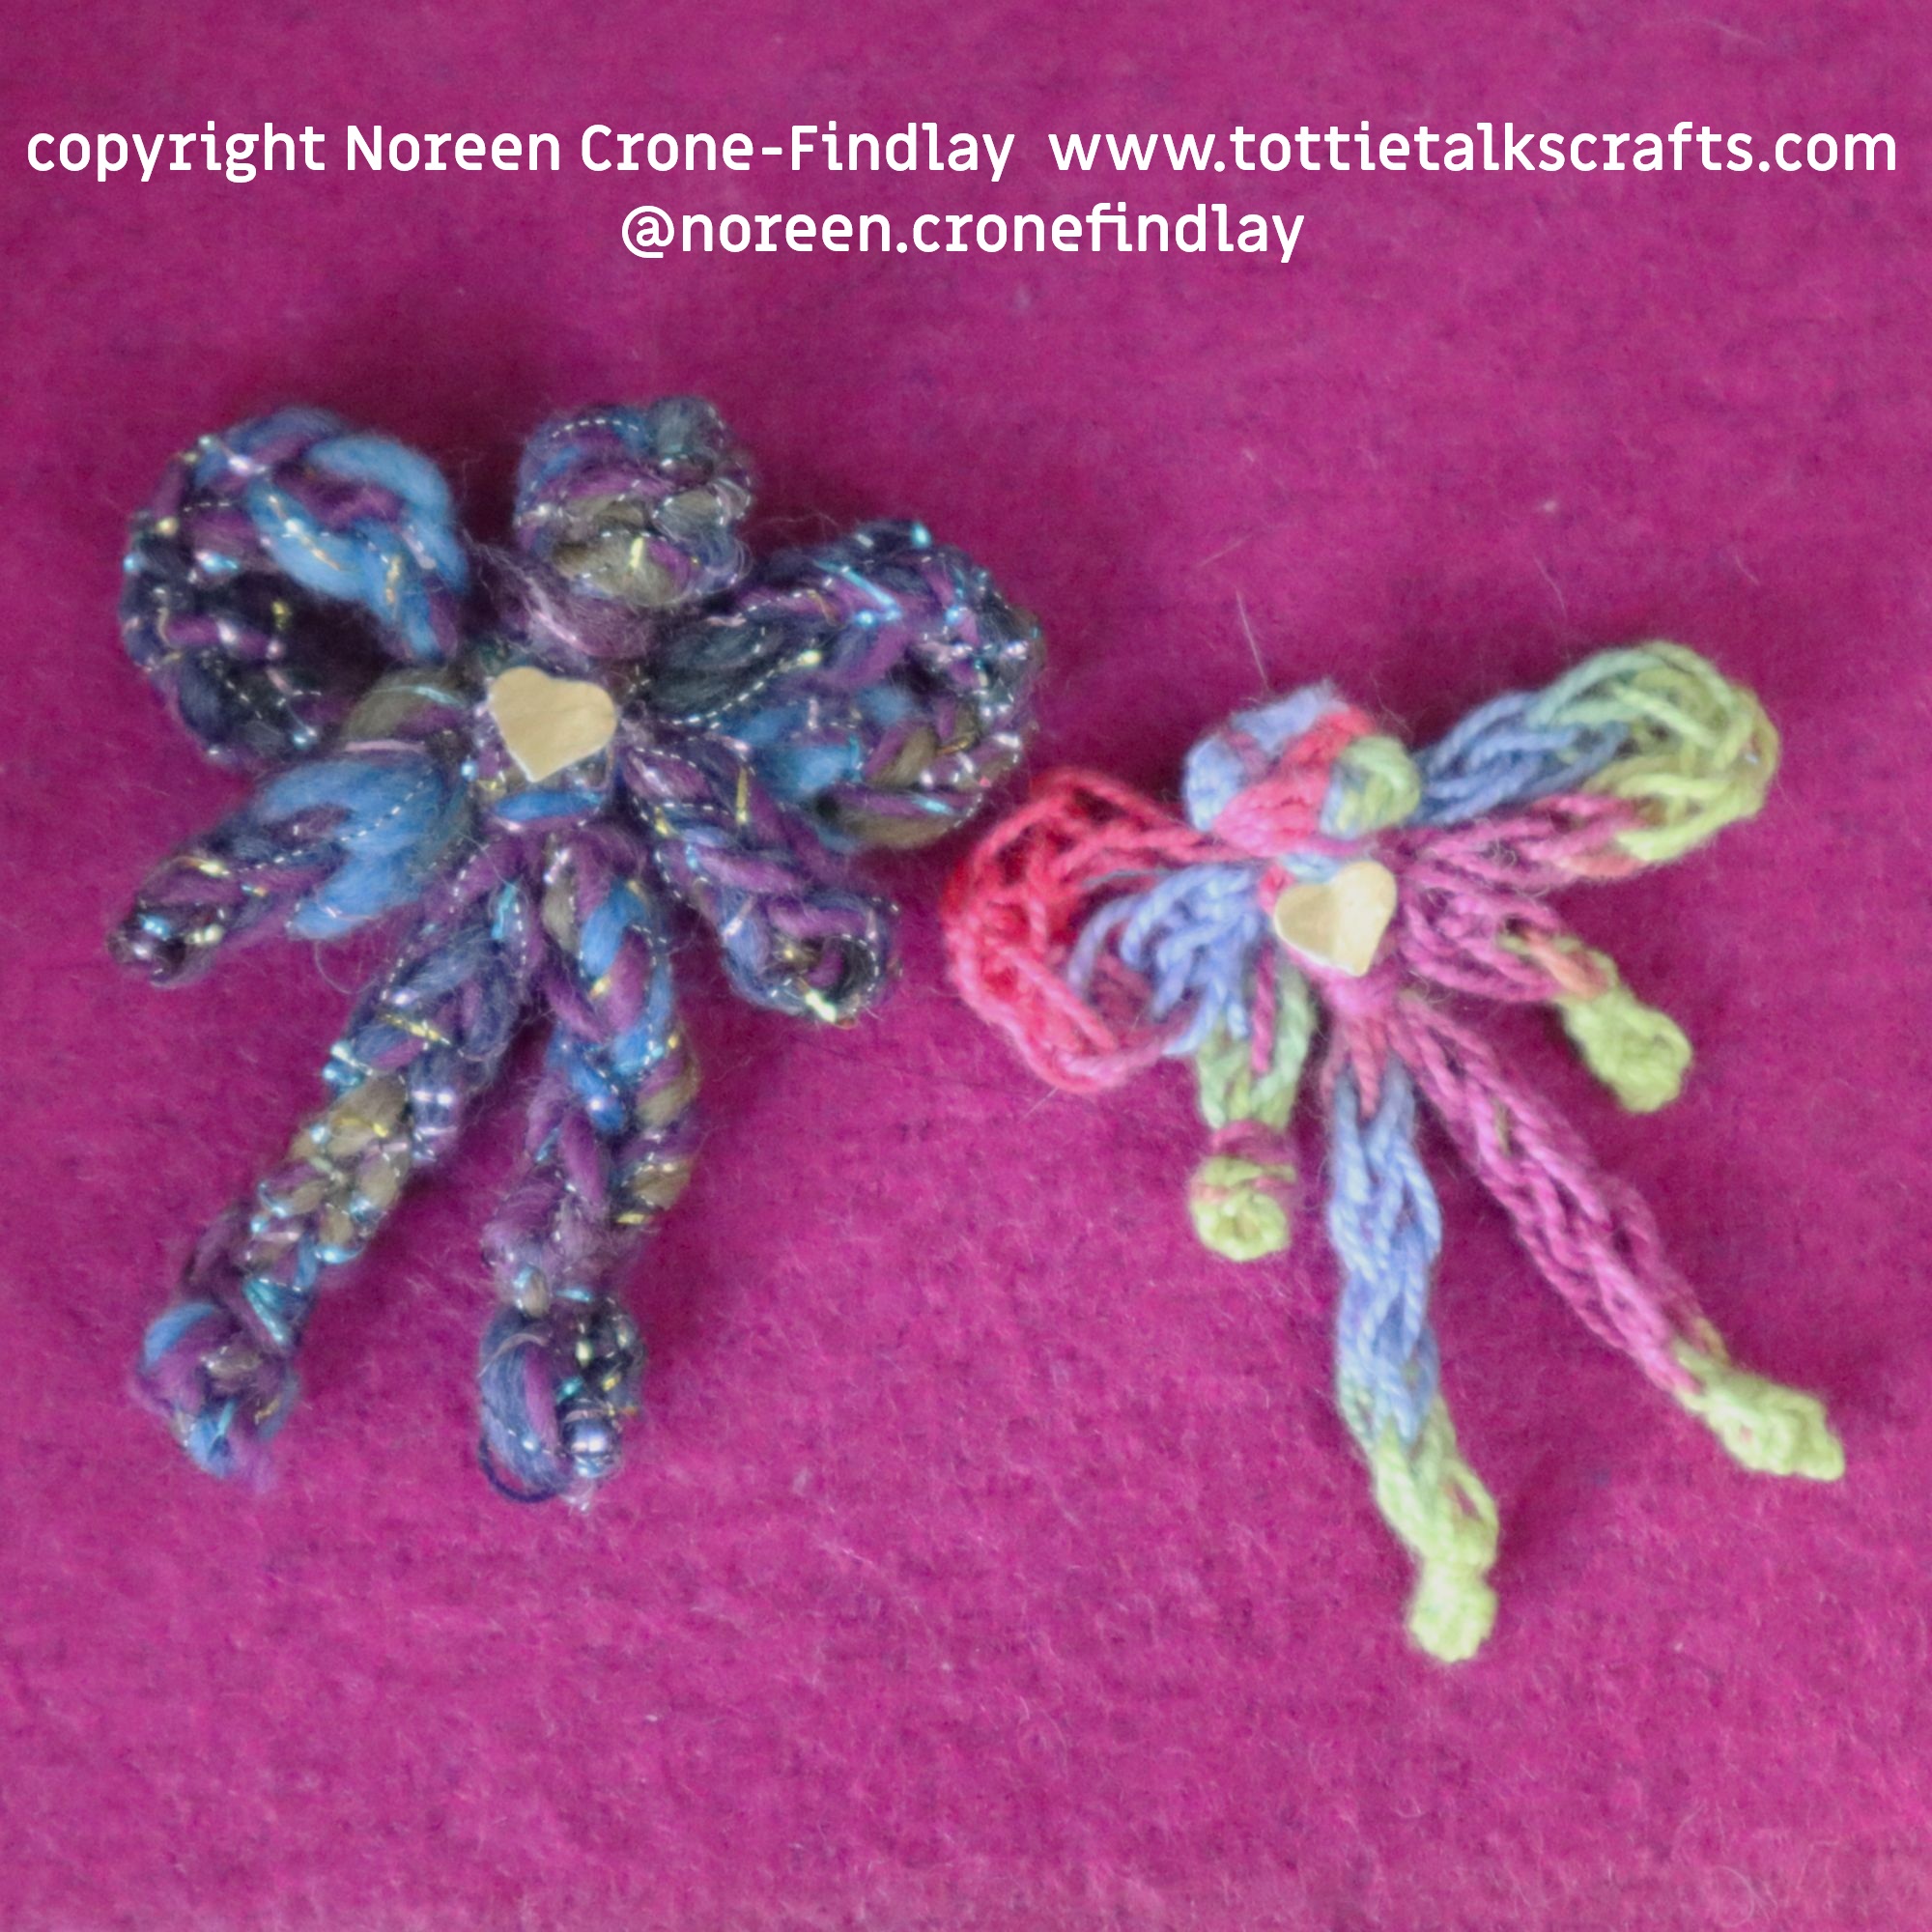
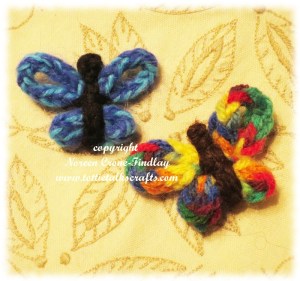
Butterflies are the symbol of transformation, and since everyone I know seems to be experiencing some kind of transformative experience or another, it seems to me to be a good time to make some little butterflies.
They are very quick and easy to make, using a Lucet – although you can also use spool knitted cord, if you prefer.
They can be used to embellish anything that you can think of, or can be stitched to a ribbon for a book mark, or have a pin sewn to the back so they can be worn on a hat, bag, scarf or lapel. They can be attached to a key ring.
They can be used in scrapbooking or card making.
It’s lovely to have one in your pocket to give to a friend who just needs a little comfort…..
Here’s the video for how to make the butterflies:
We are in deep, cold, snowy mid winter in Western Canada, so it’s lovely to have butterflies flittering about the studio, even if I had to make them myself! 🙂
That just reminded me of something that I hadn’t thought of in years….
My mother used to give us ‘Butterfly Kisses’, which were a quick little flutter of her eyelashes on our cheeks.
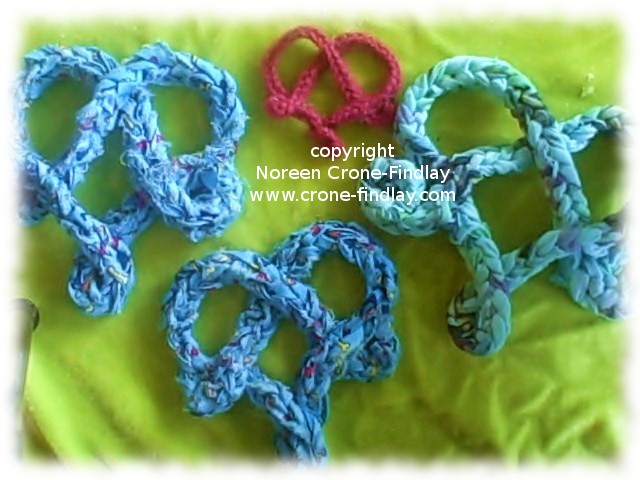
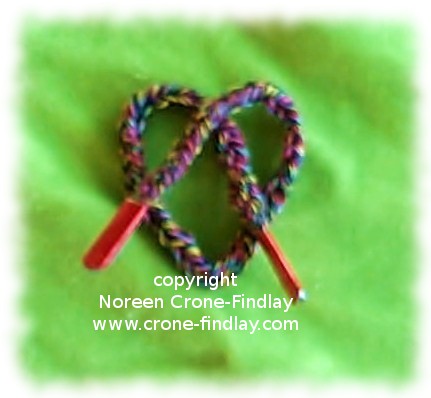
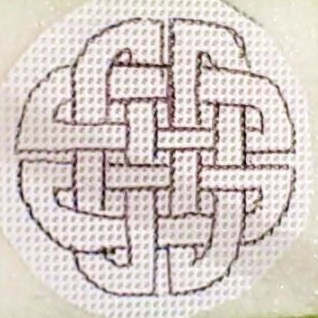
In this video, I show how to make gorgeous Celtic interlace hearts that you can use to embellish woven, knitted, crocheted or sewn fashion accessories or home decor items.
They are also great for scrapbooking and can be used on stationery.
They are perfect Valentines or as Christmas or birthday decorations and ornaments.
Another wonderful way of using these Celtic Interlace hearts is to hang them up as ‘Yarn Bombs’ for people to find and adopt. What a lovely way to brighten someone’s day!
The video shows how to make different sizes of the Celtic Interlace Heart.
Here is the template- print it out so that it’s about 5 inches square, but smaller or larger works just fine, too.
In this video tutorial, I show how to make awesome shoelaces, and a great upcycling way of making those little thingies at the end of the laces.
I couldn’t remember the right name for them when I was making the video, and called them ‘aplets’, but the correct name is ‘aglets or aiglets’.
Wikipedia defines them as: The word aglet (or aiglet) comes from Old French aguillette (or aiguillette), which is the diminutive of aguille (or aiguille), meaning needle.[1] This in turn comes from acus, Latin for needle. An aglet is like a small needle at the end of a corde