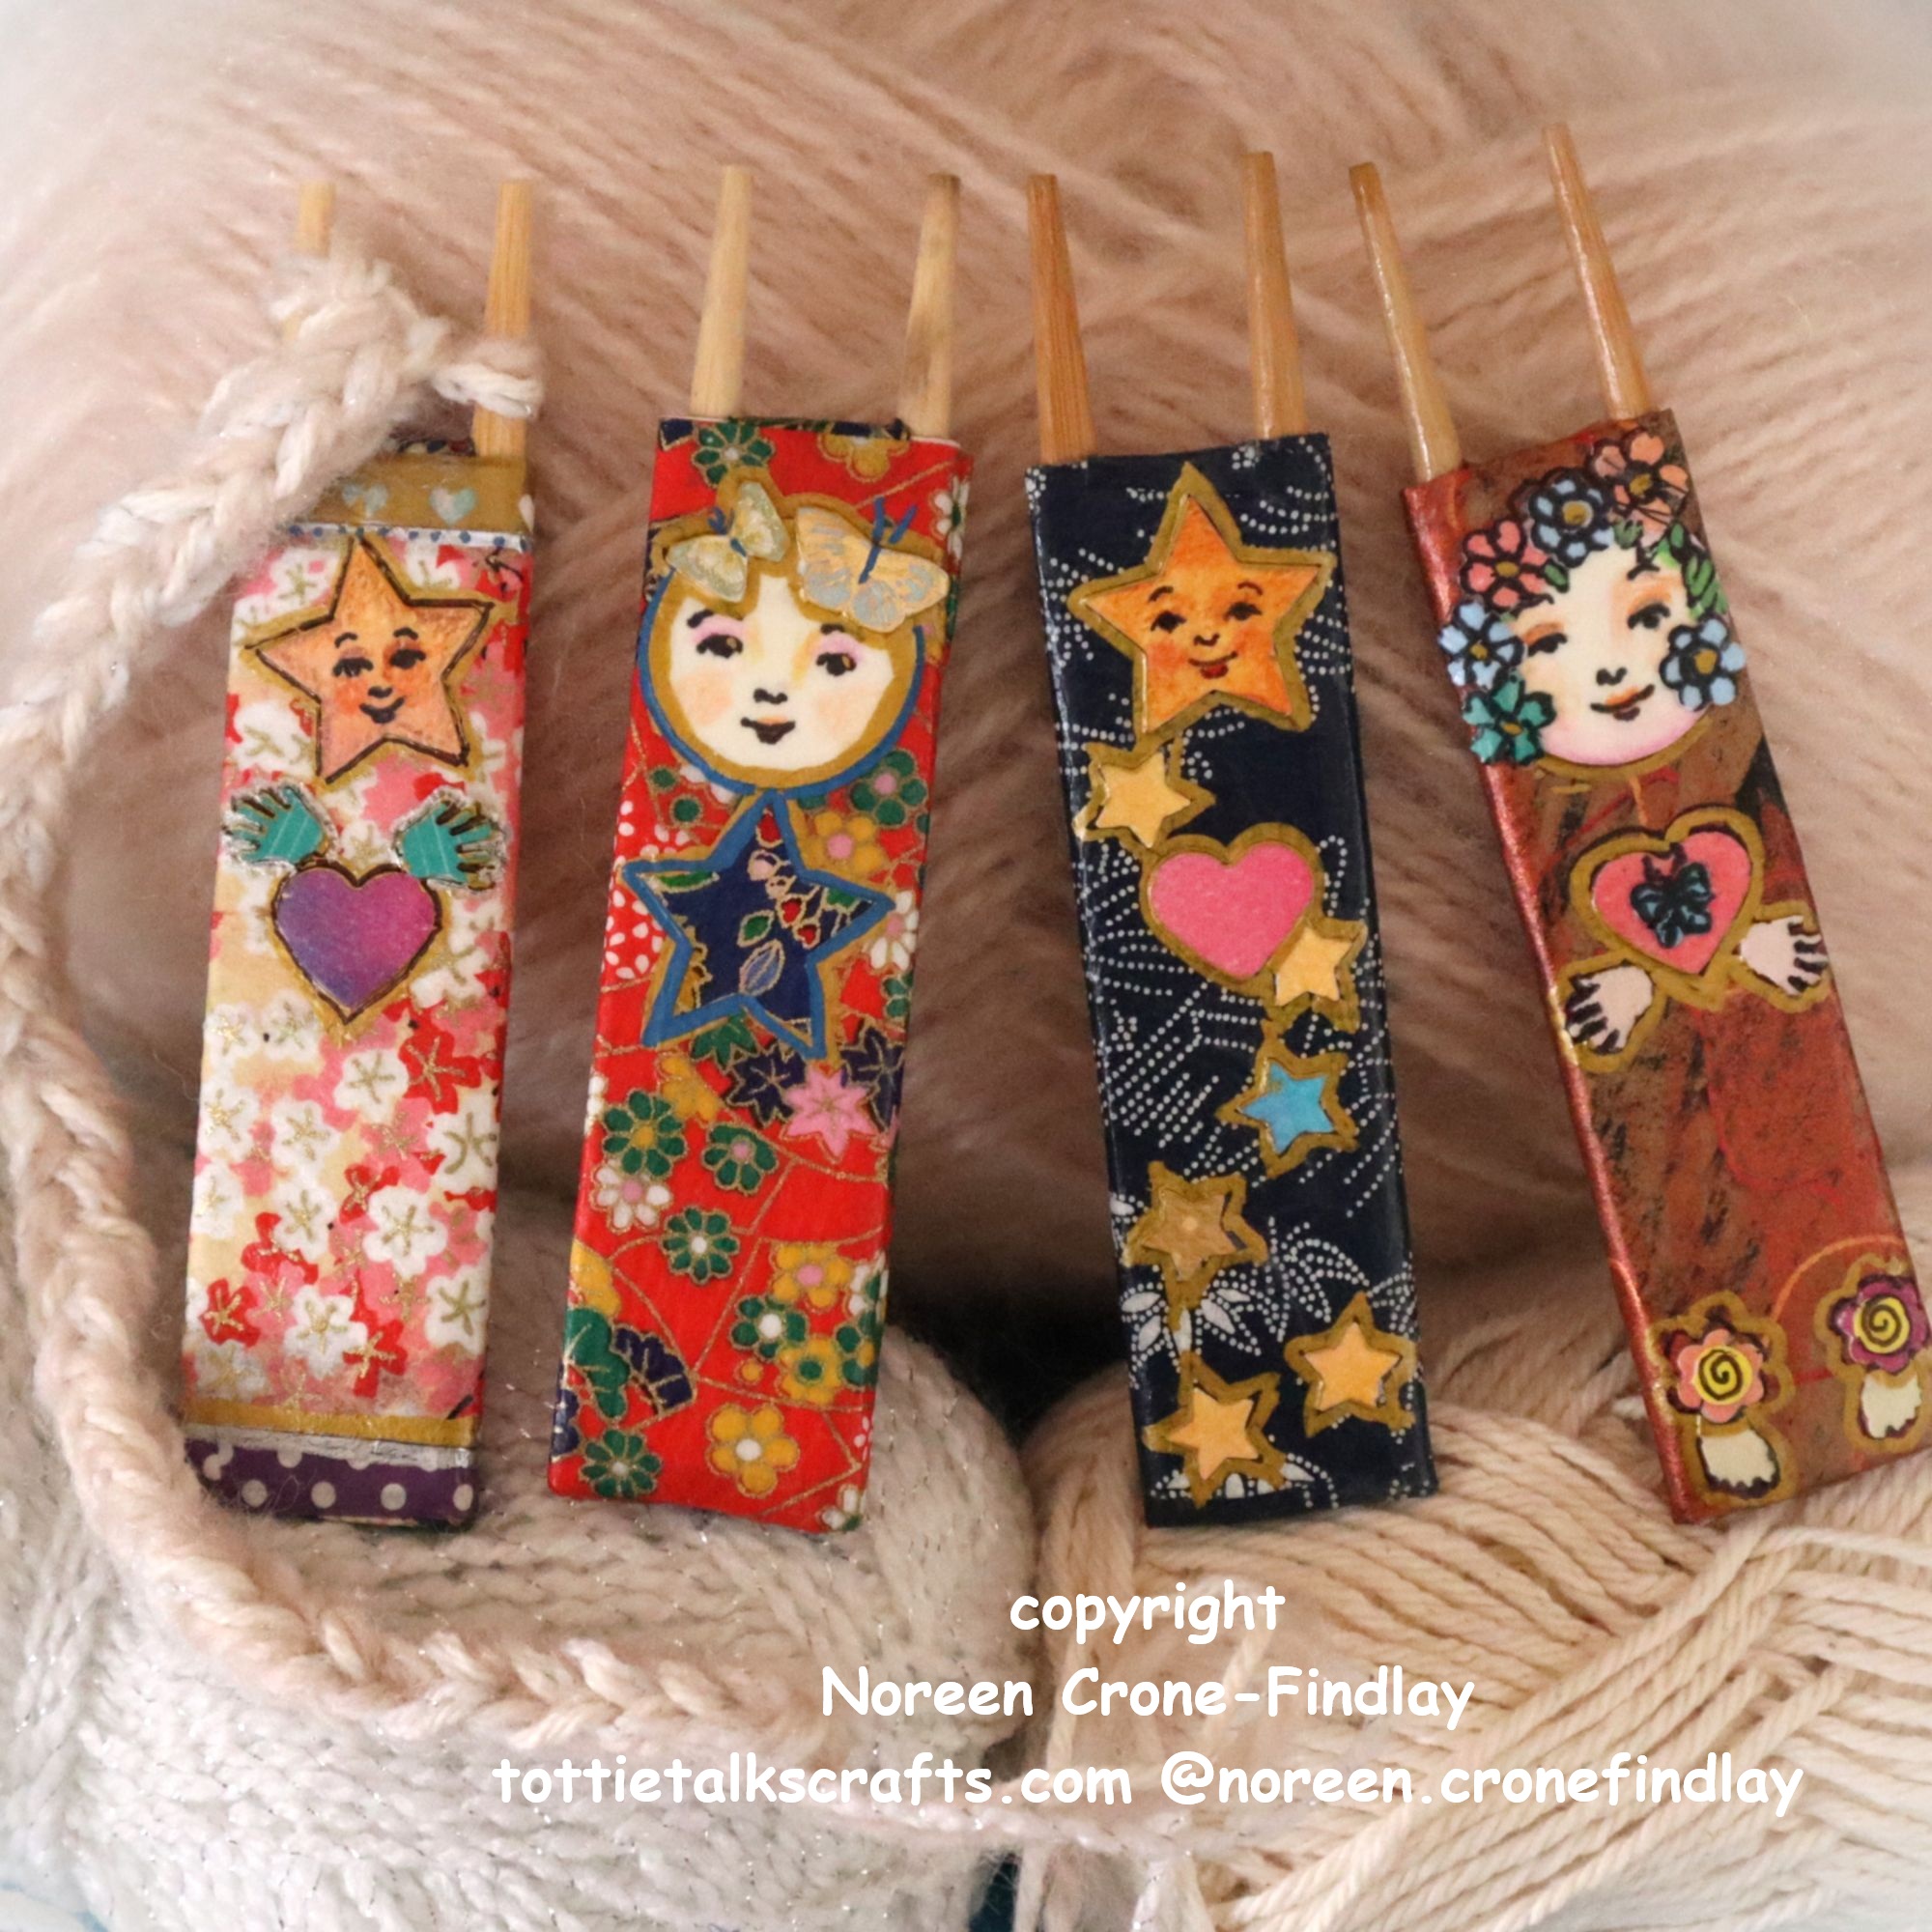
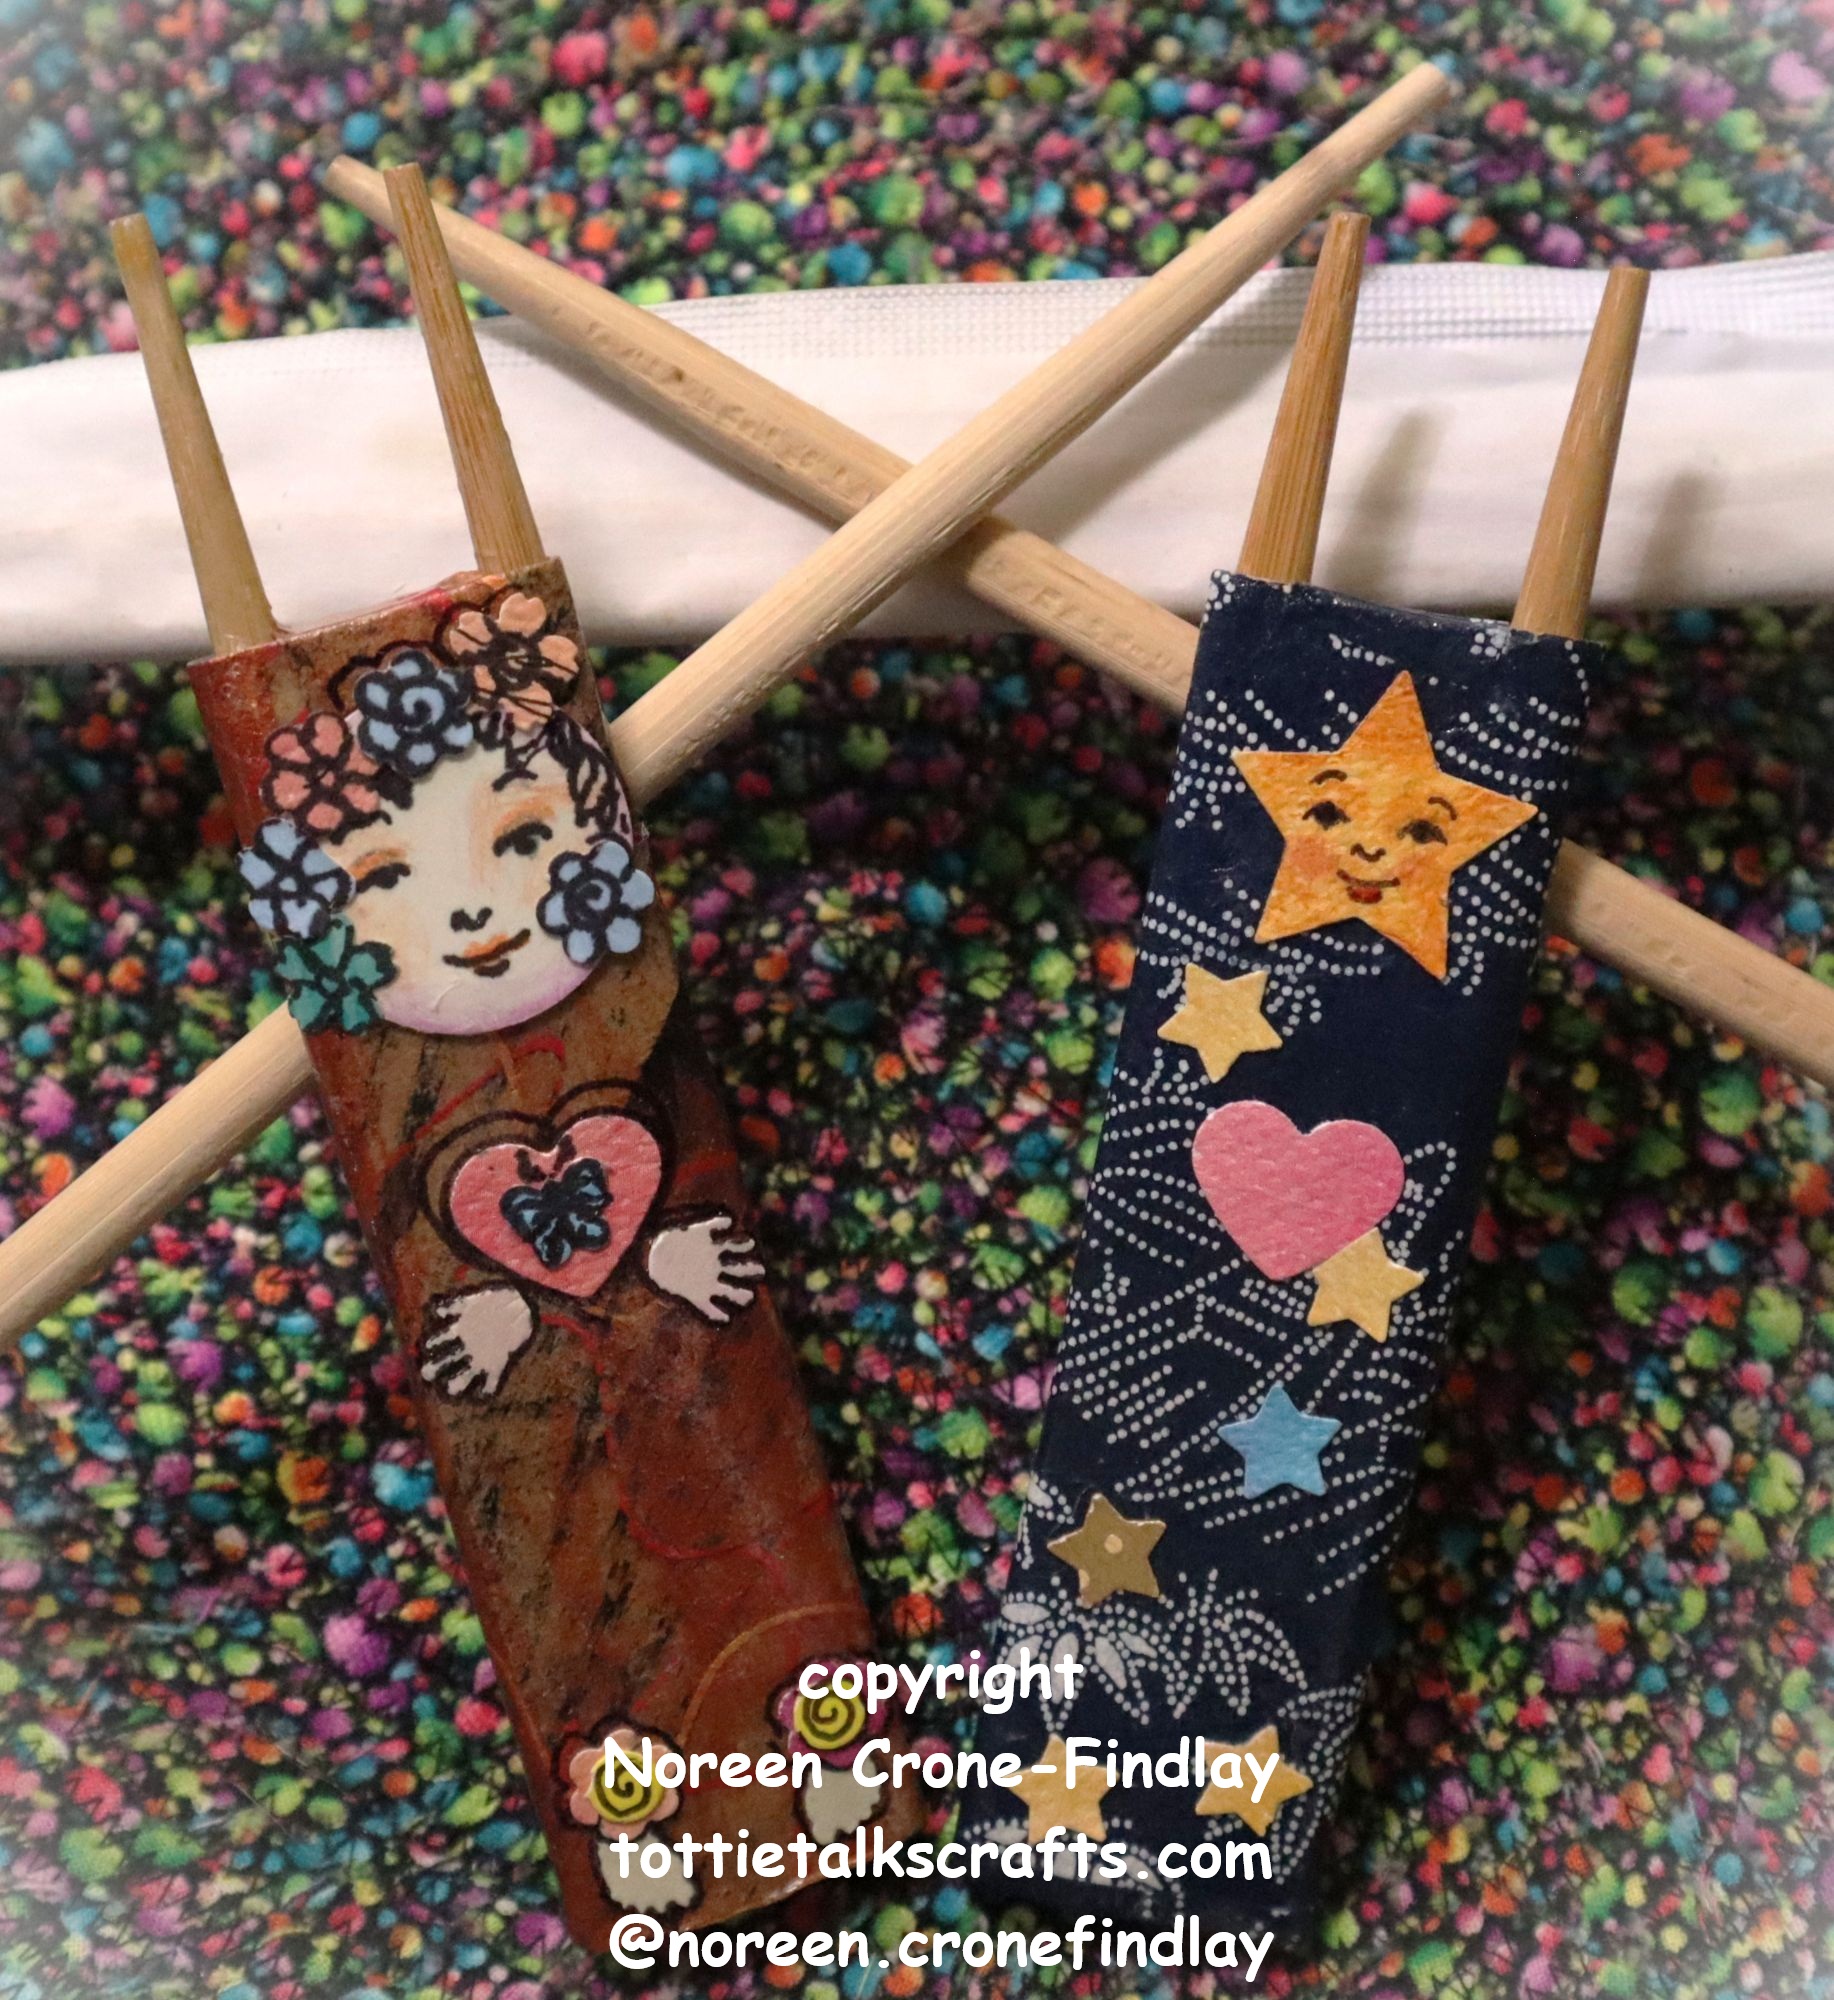
Day 42 of #100daysofspoolknittersandlittlelooms- How to Make a Lucet from Upcycled Chopsticks and How to Make Lucet Cord with it
One of the unexpected bonuses of doing the 100 Day Project is that it reminds me of things that I have designed and then set aside and forgotten.
One of those things is the delightful Lucet Cord maker (Lucets are flat 2 peg spool knitters) that I use upcycled chopsticks to make. They are such a pleasure to work with and I love making cord with them.
Normally, we wrap all our presents in bags that I have made over the years. We never buy paper for gift wrapping.
But, this year, my husband and I made some gifts that needed special packaging.
So I set my mind to working on how to do this in an eco friendly way.
(I’ll show the special gifts in my next blog post)
Several years ago, Jim bought a roll of cardboard to build a case for his Oud (Turkish Lute).
It came as a roll that is 12 inches wide by ever so long, and it’s been kind of in the way ever since, but I didn’t want to get rid of it because I have a huge fondness for cardboard.
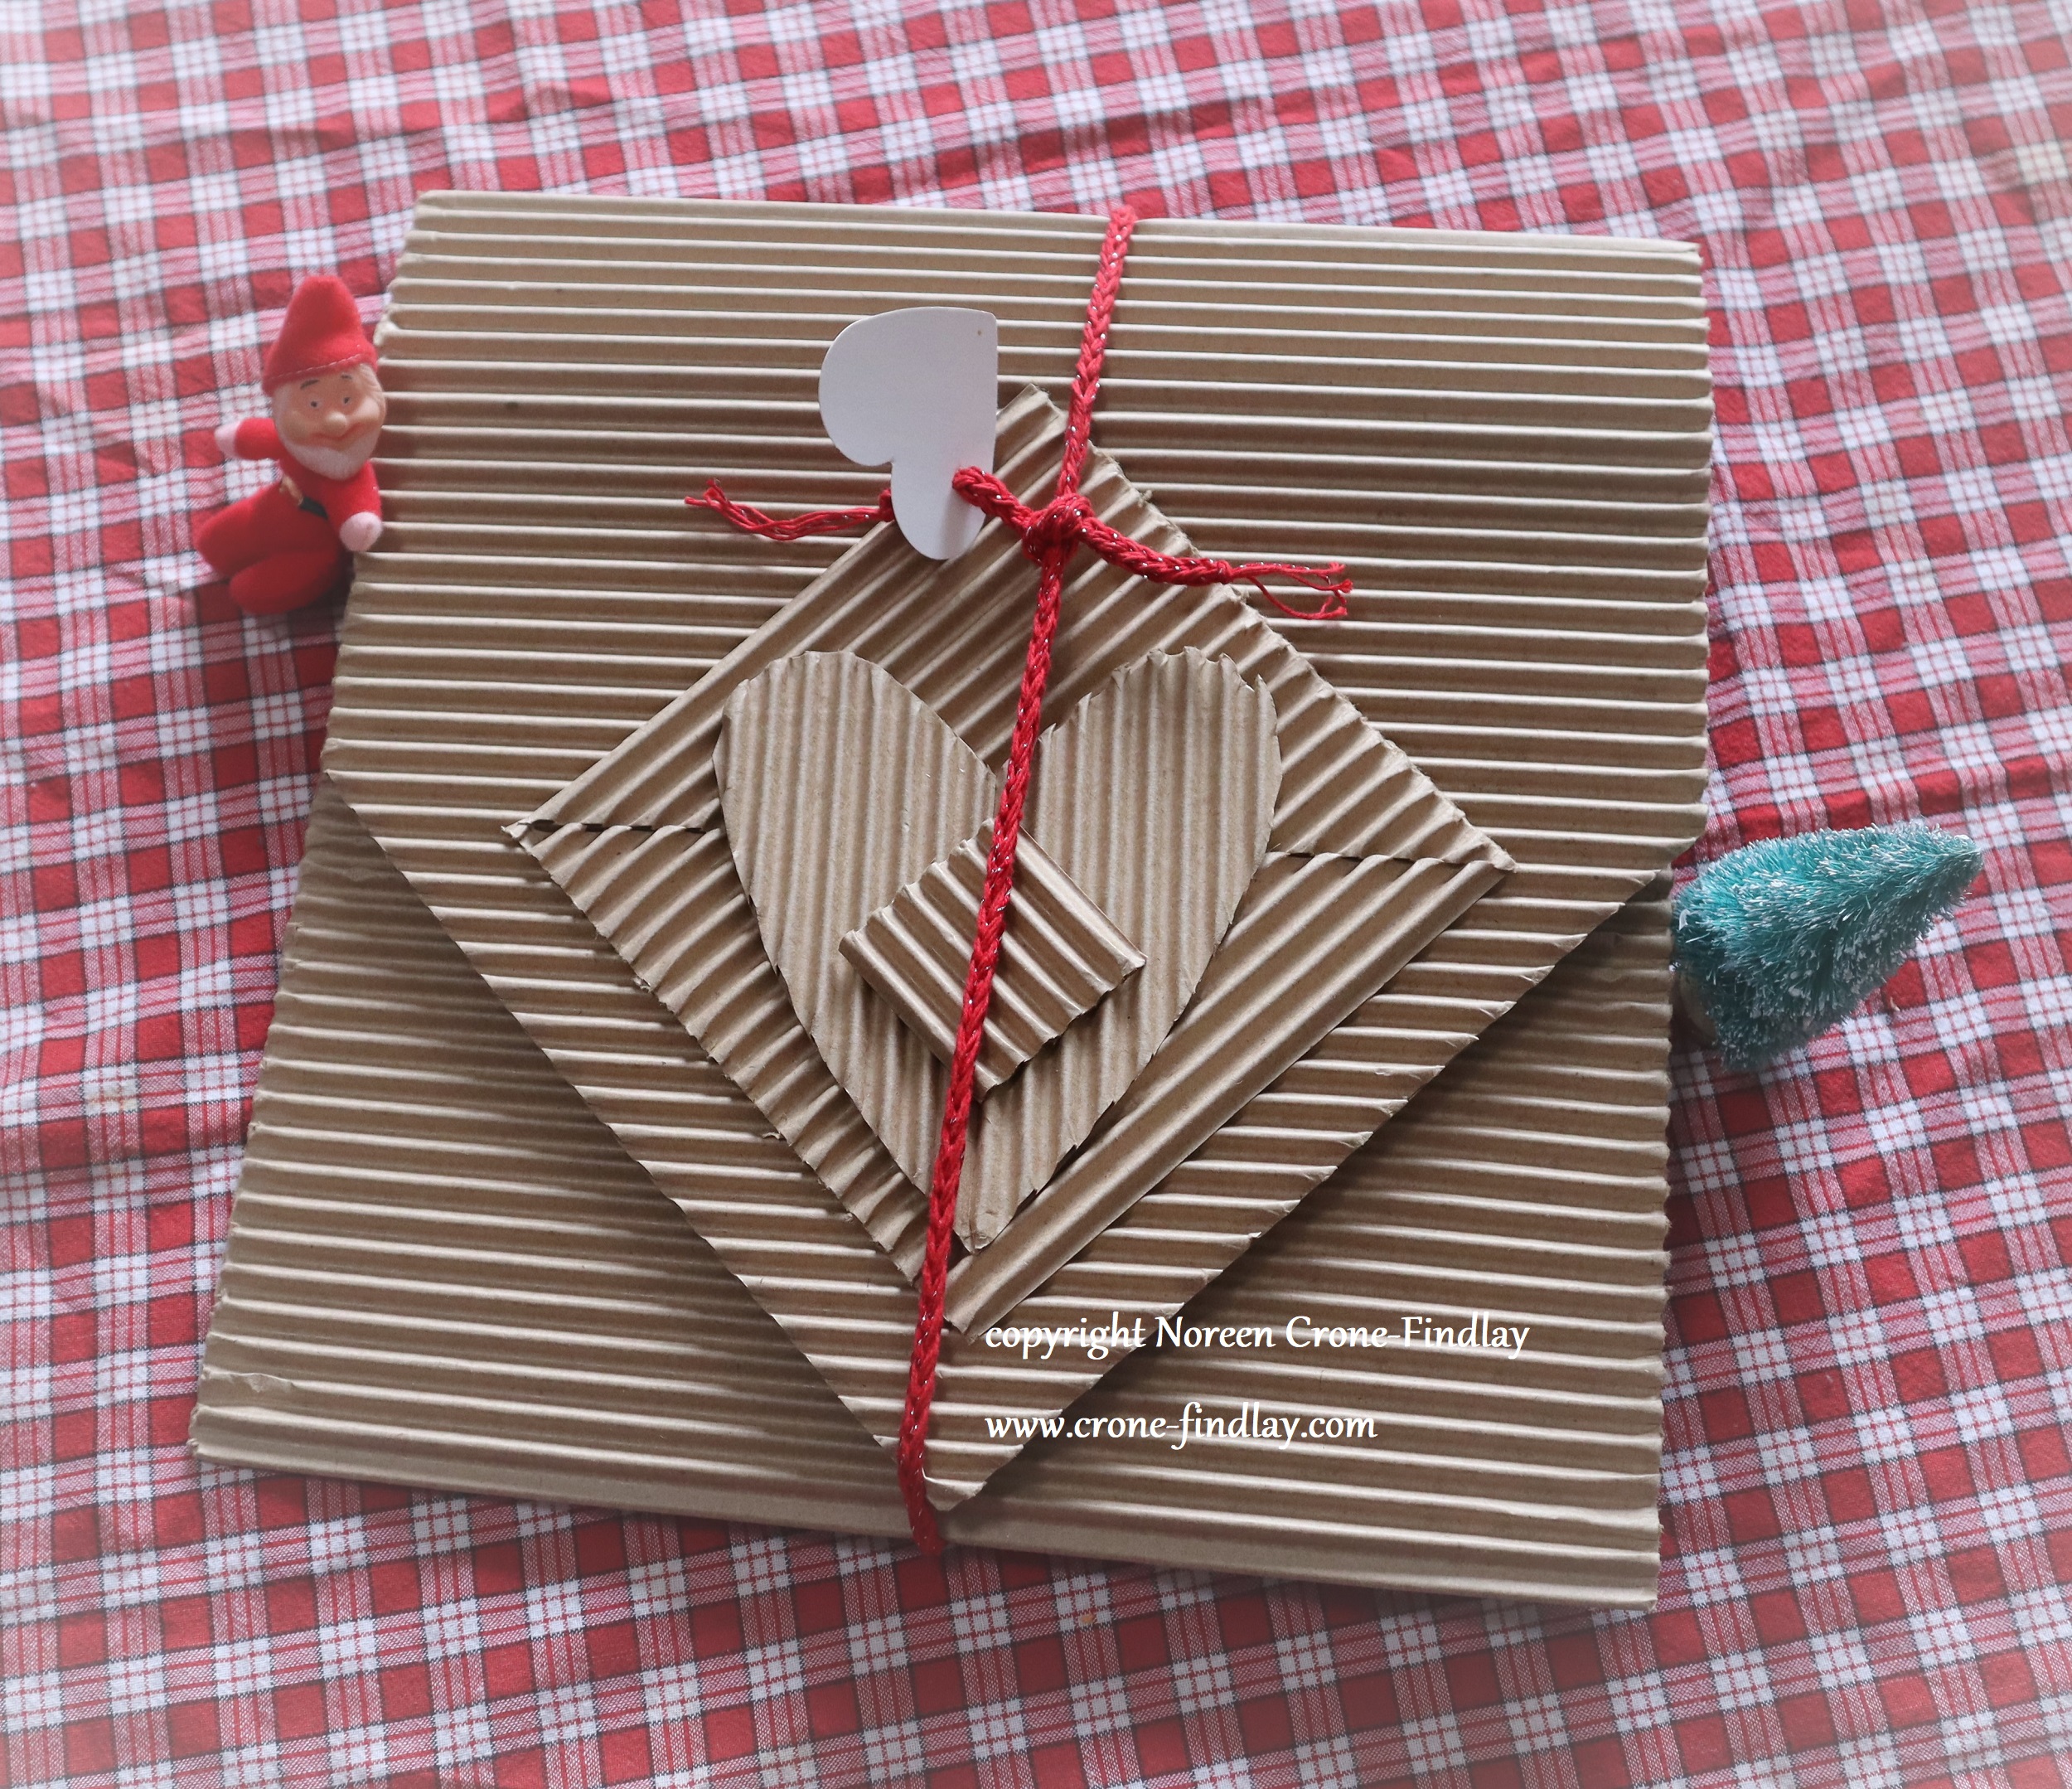
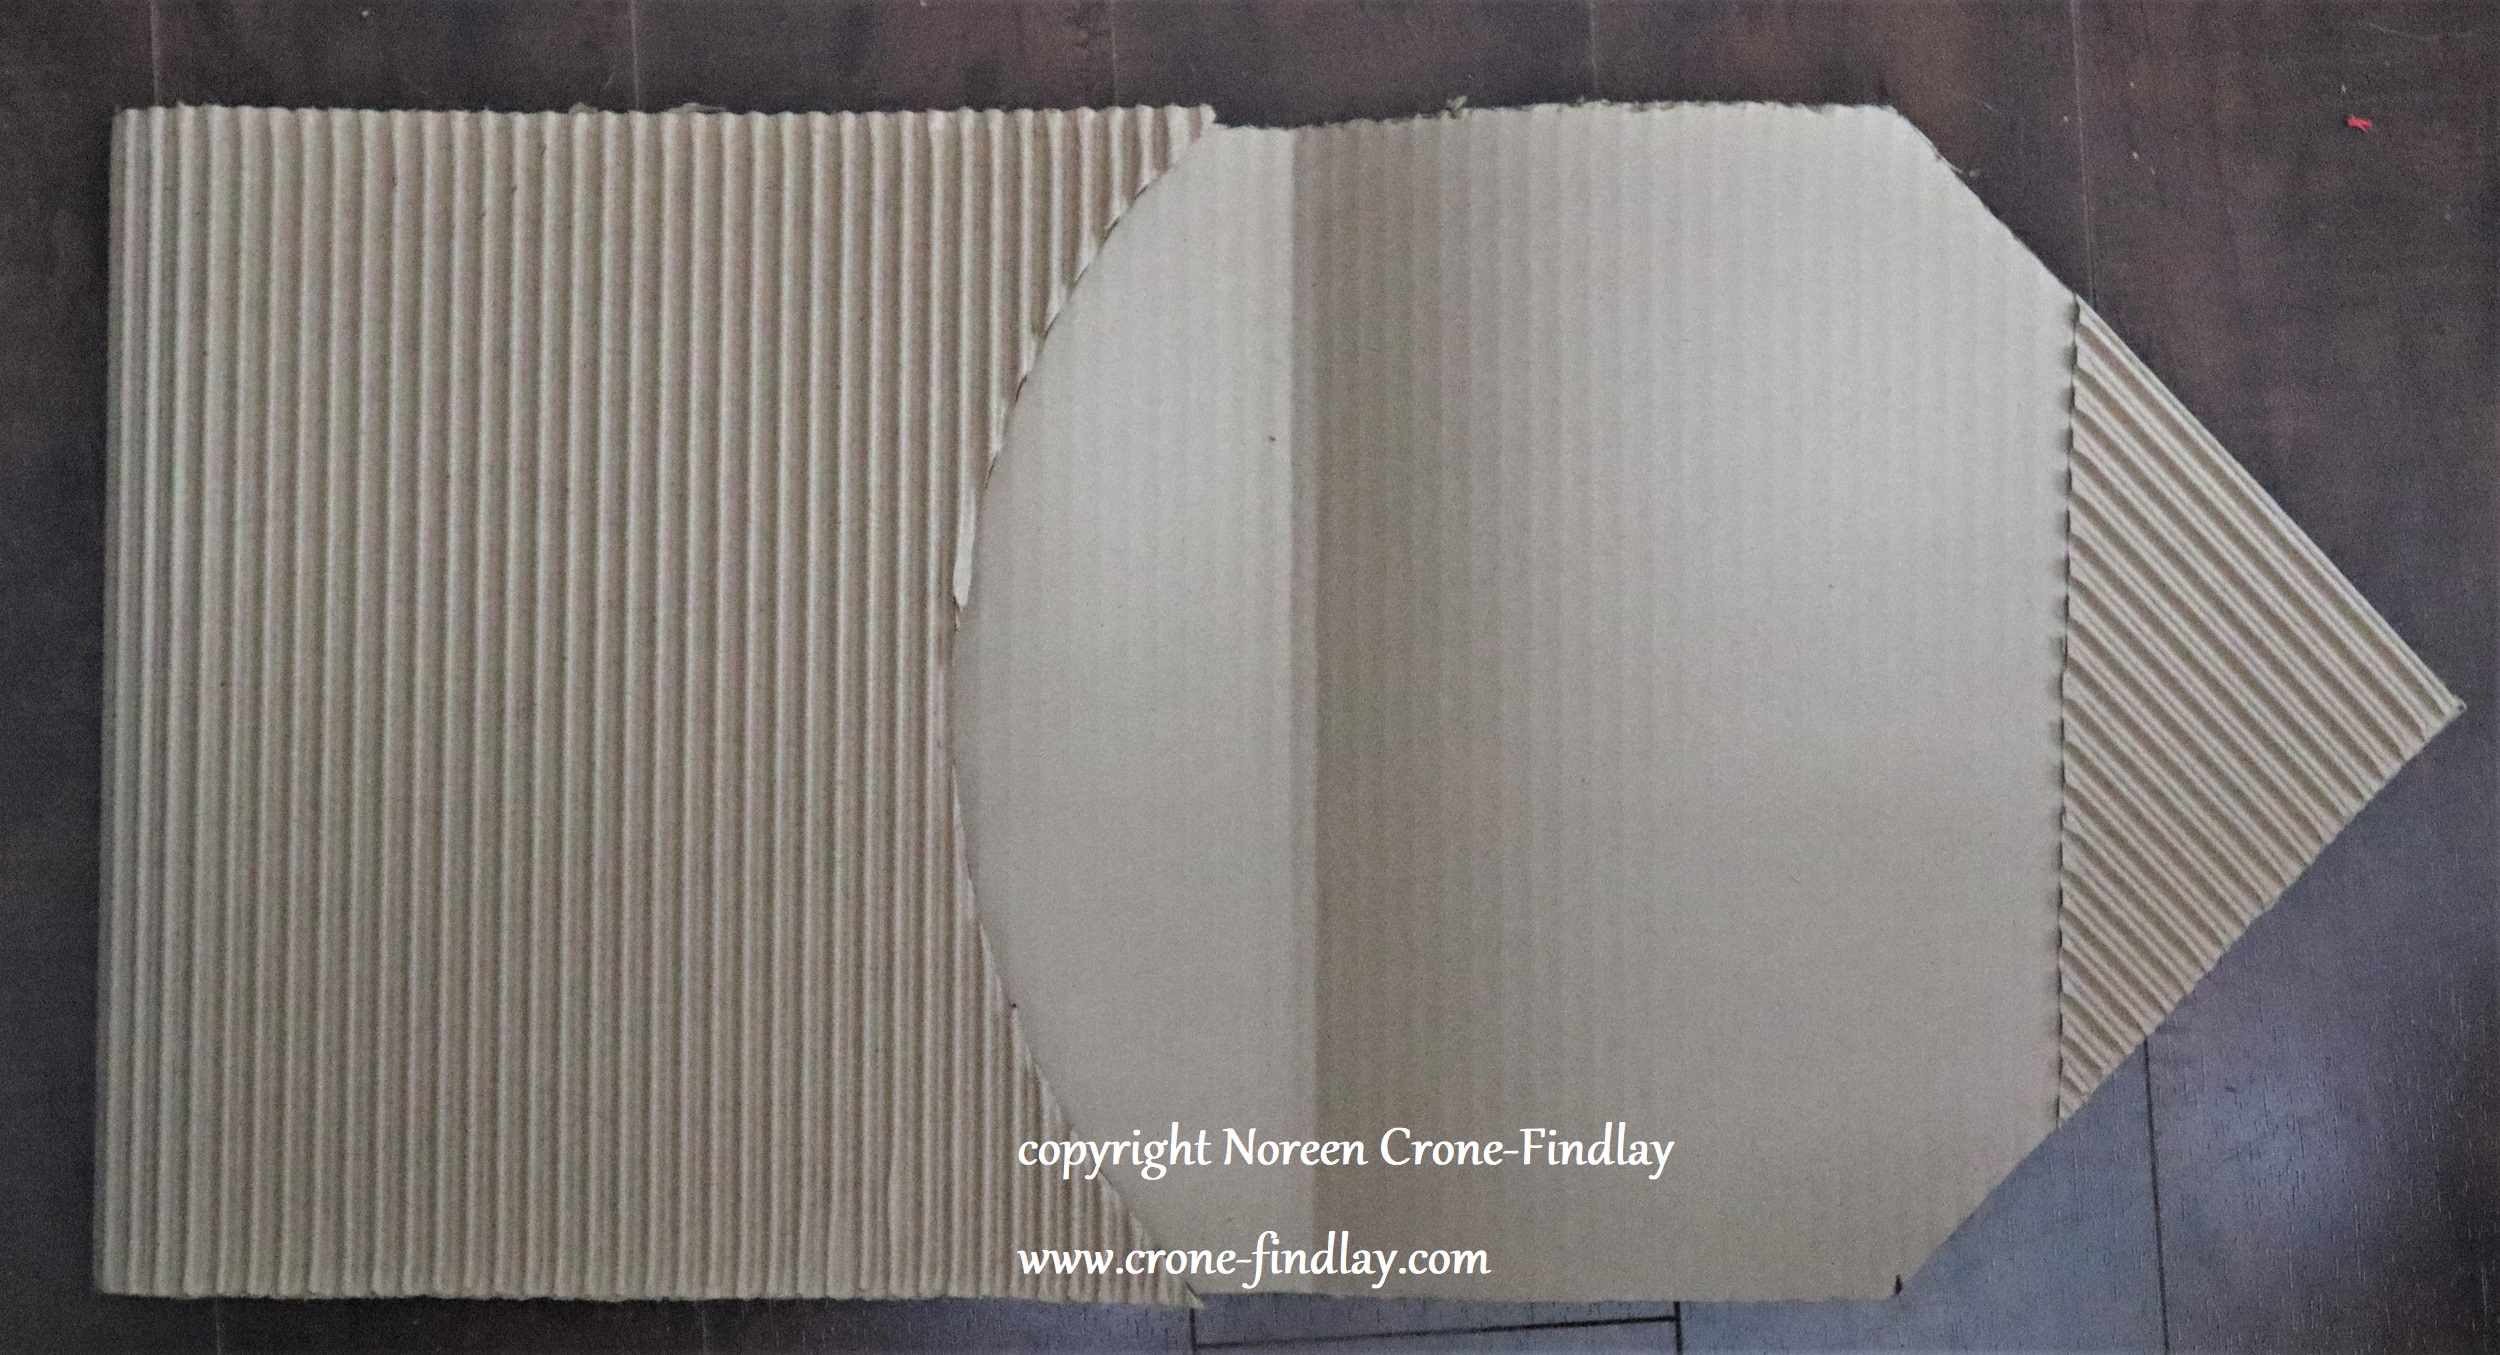
Jim wrapped the first gift in a protective swath of the cardboard, but that seemed rather ‘less than’ to me, so I mulled it over and came up with the folder idea.
I LOVE it.
It’s super simple:
I cut a 36 inch long piece of the cardboard and cut triangles off one end to make the point.
Then glued one triangle to the inside of the point to stabilize it.
I traced a tray to make the curve and then glued the edges.
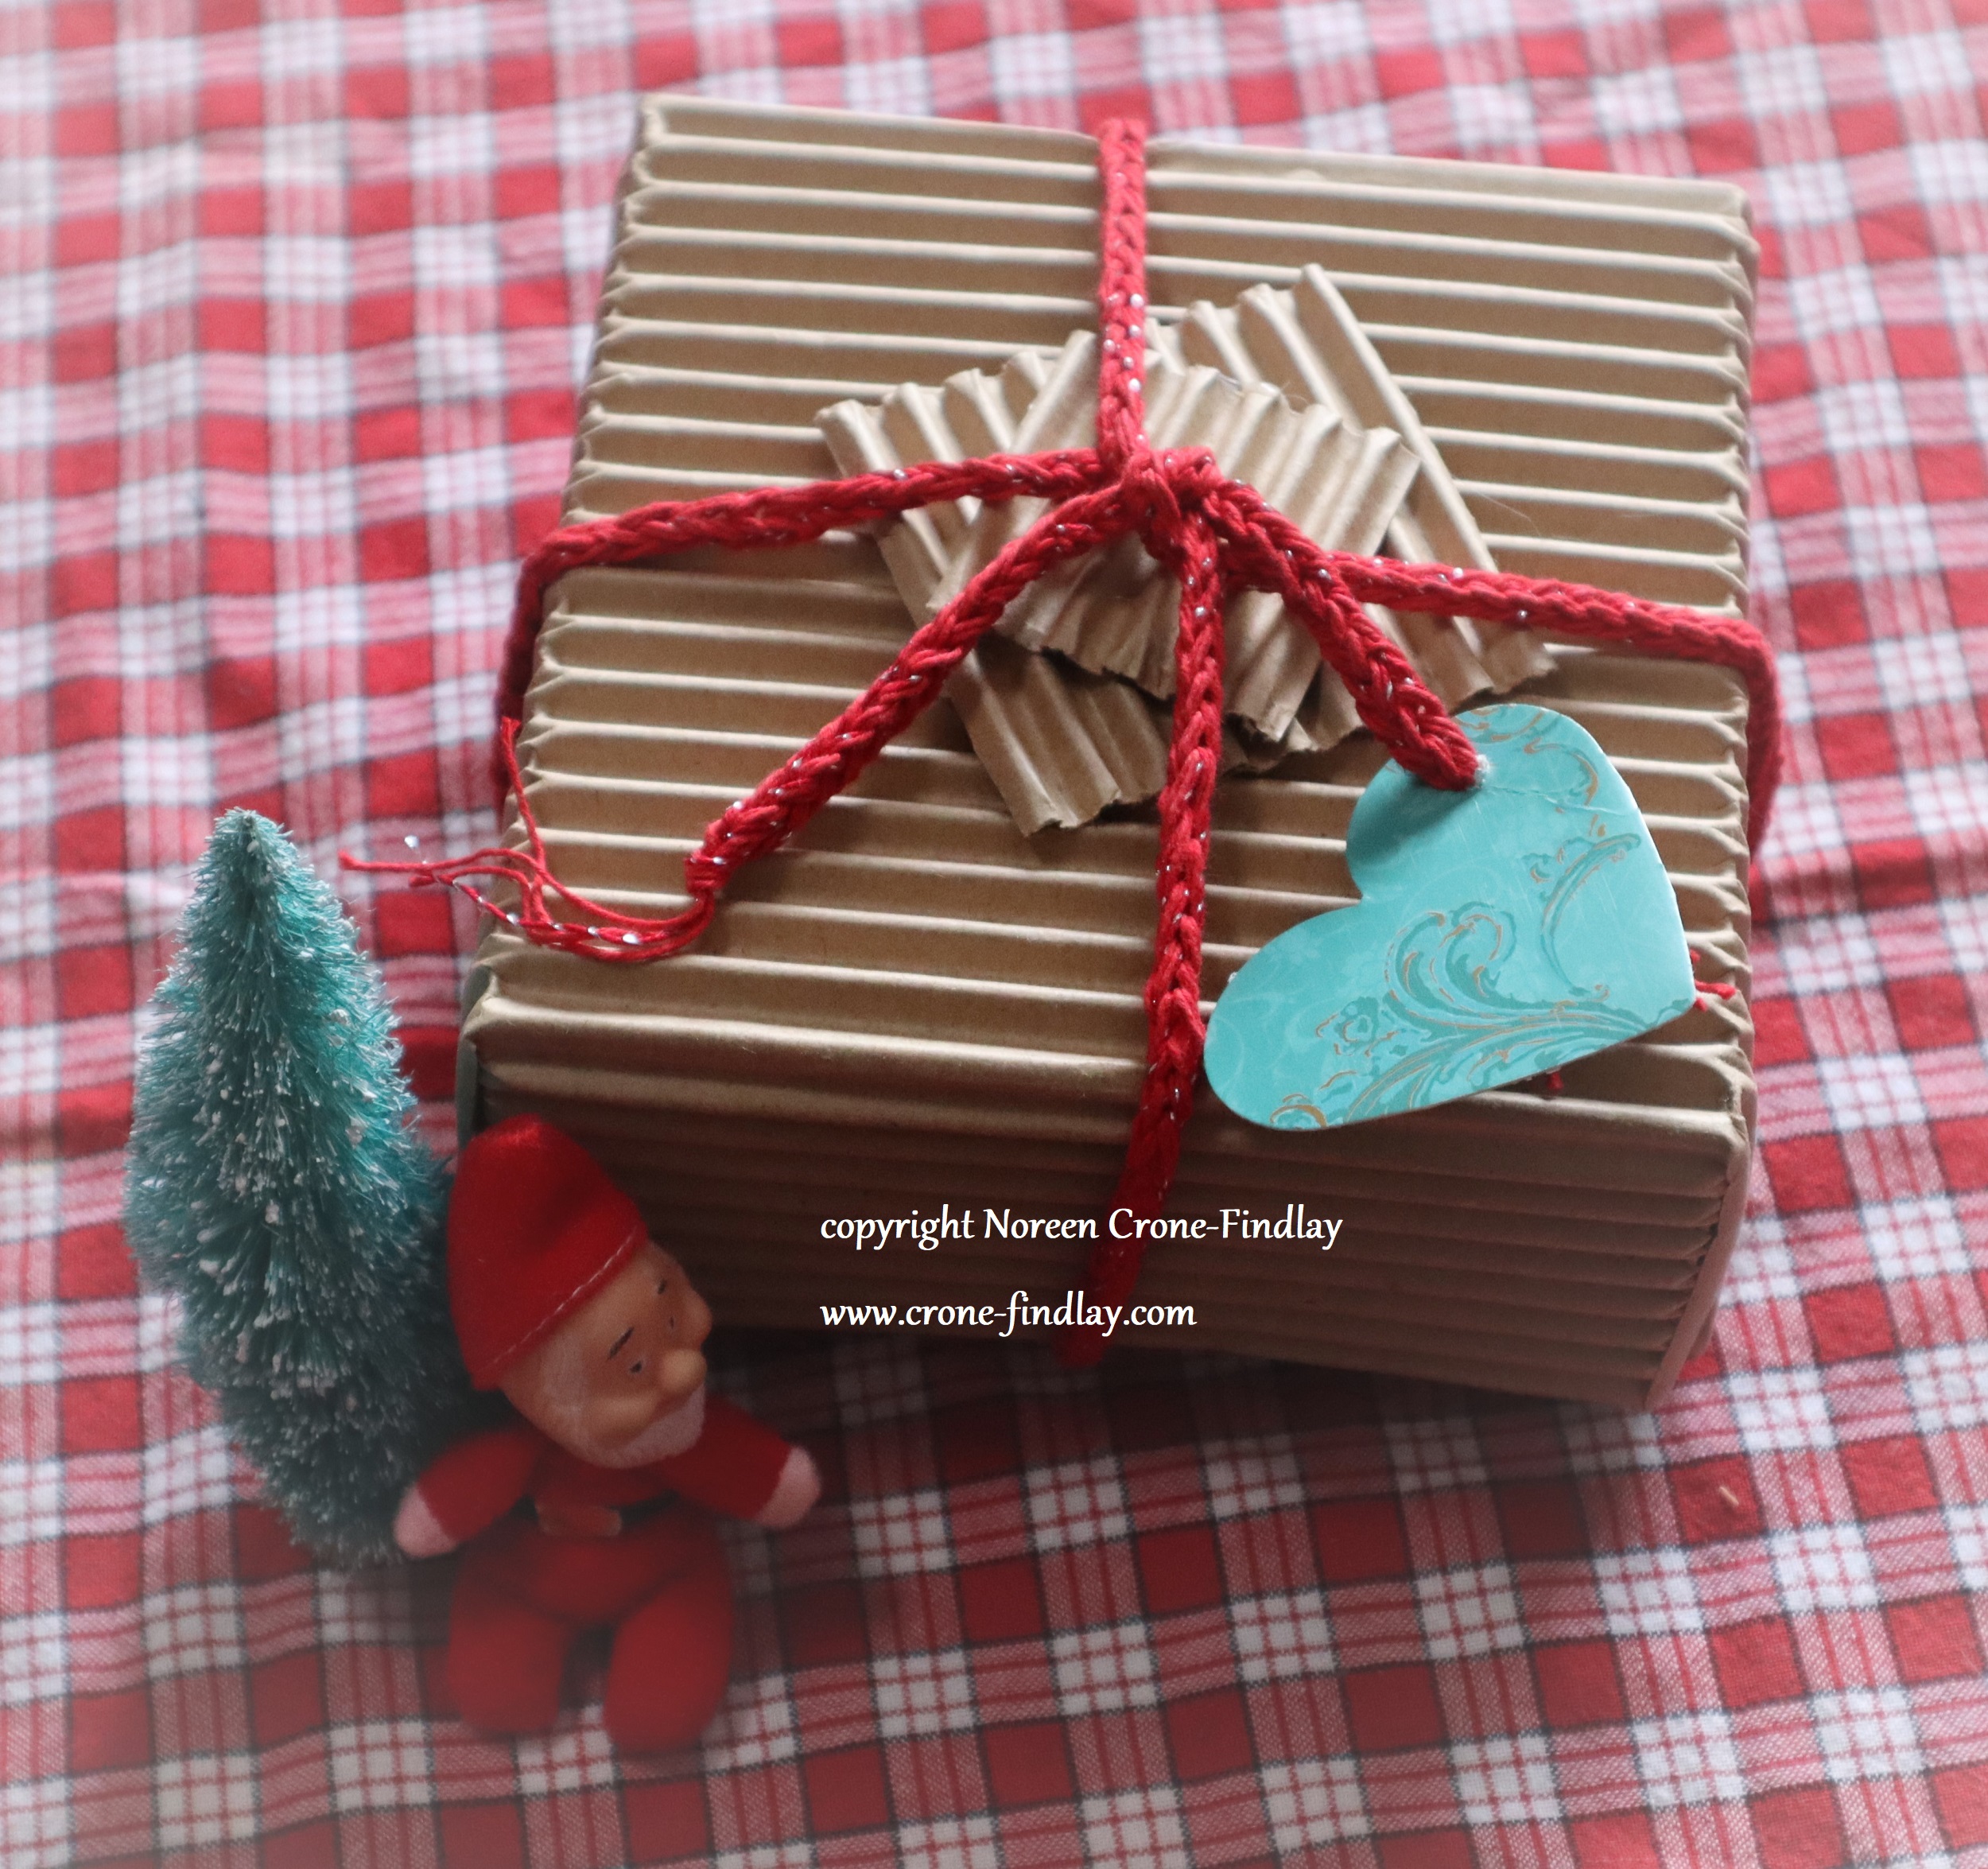
Next time I will add strips of cardboard along the sides to give more dimension to the folder.
I used the off cuts to decorate the front.
The cord is made from crochet cotton that was given to me last summer (see Tea Towels) and a Lucet (LINK) and I am pleased as can be.
Another cluster of gifts needed special packaging, so I tried to fold origami boxes with the cardboard.
FAIL.
Instead, I came up with trial and erroring in making fitted boxes that were a time consuming pain in the neck to make. I tried using this technique, which works great with ‘normal’ card stock and paper: LINK
I won’t bother doing this again- not with this cardboard.
(Note- even though these were the pits to make, they were still made with love and some mild cussing).
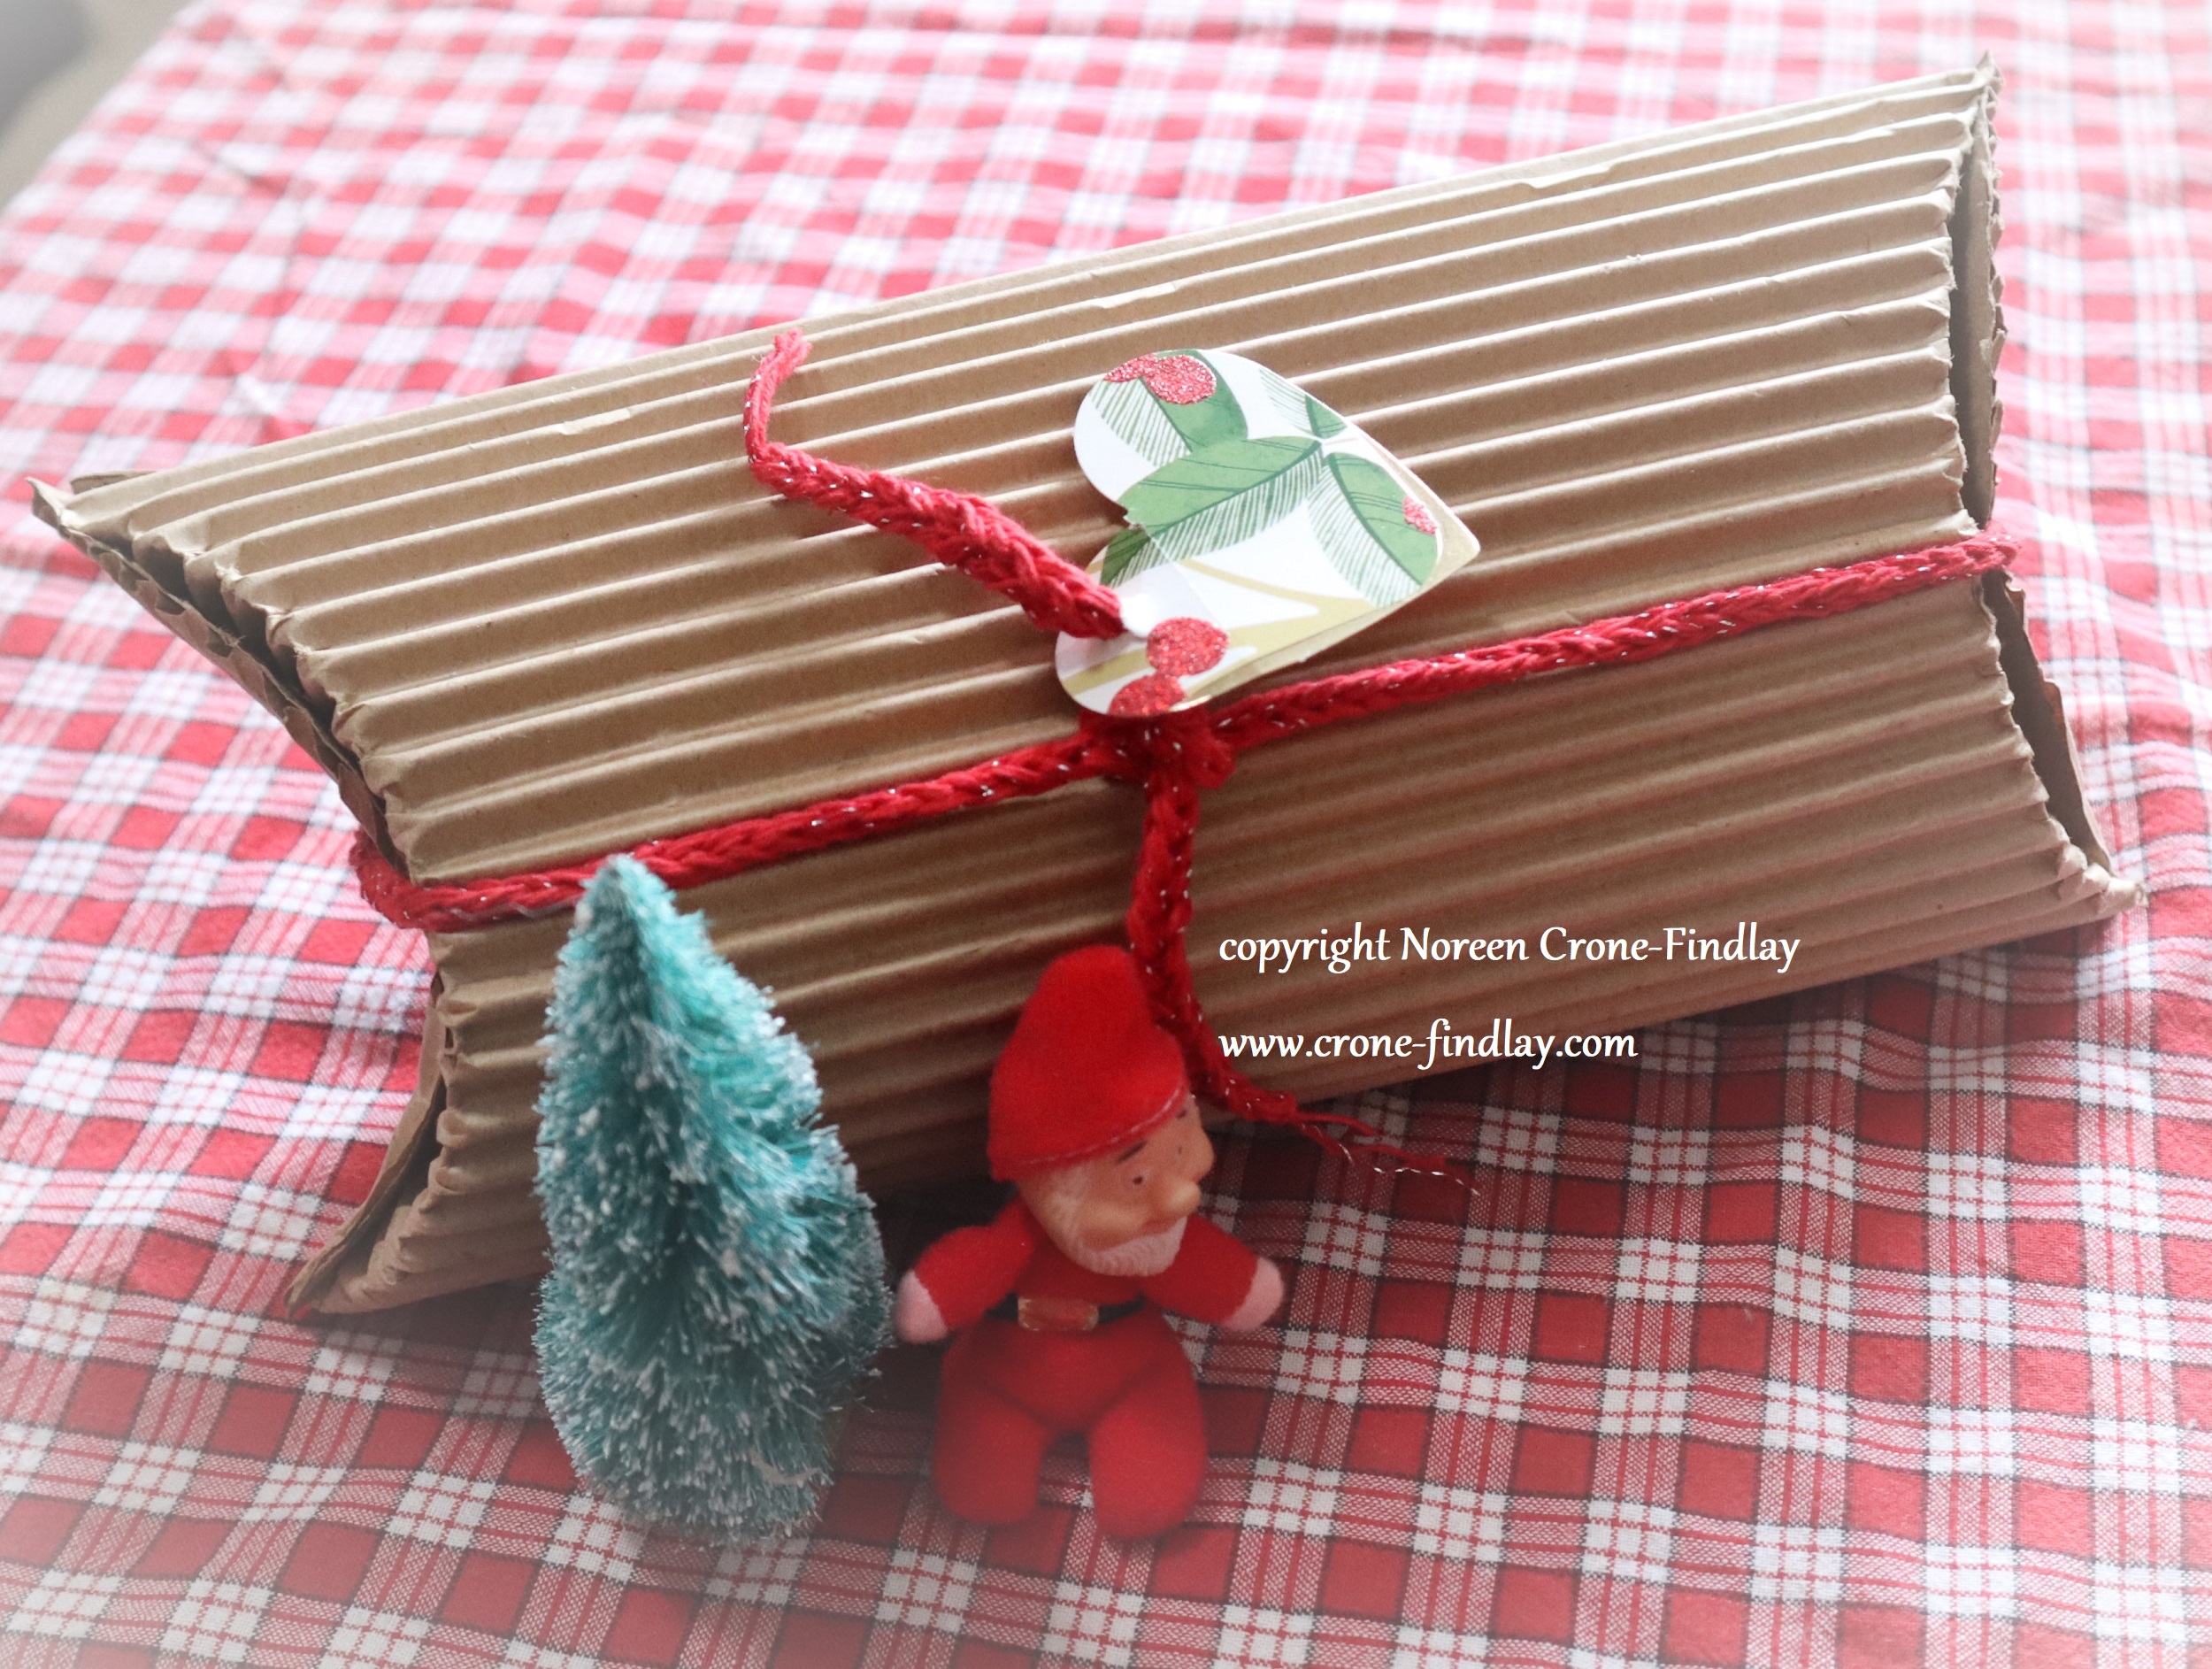
BUT, by now, I was seriously on a roll with this whole box/package designing thing and remembered those nifty containers that are tubes that have semi-circular ends that push in to close them.
Of course, I probably could have looked up a tutorial online and found the simple way to do this, but, oh no, that’s not the way my brain works.
My brain likes ~to figure things out~…..
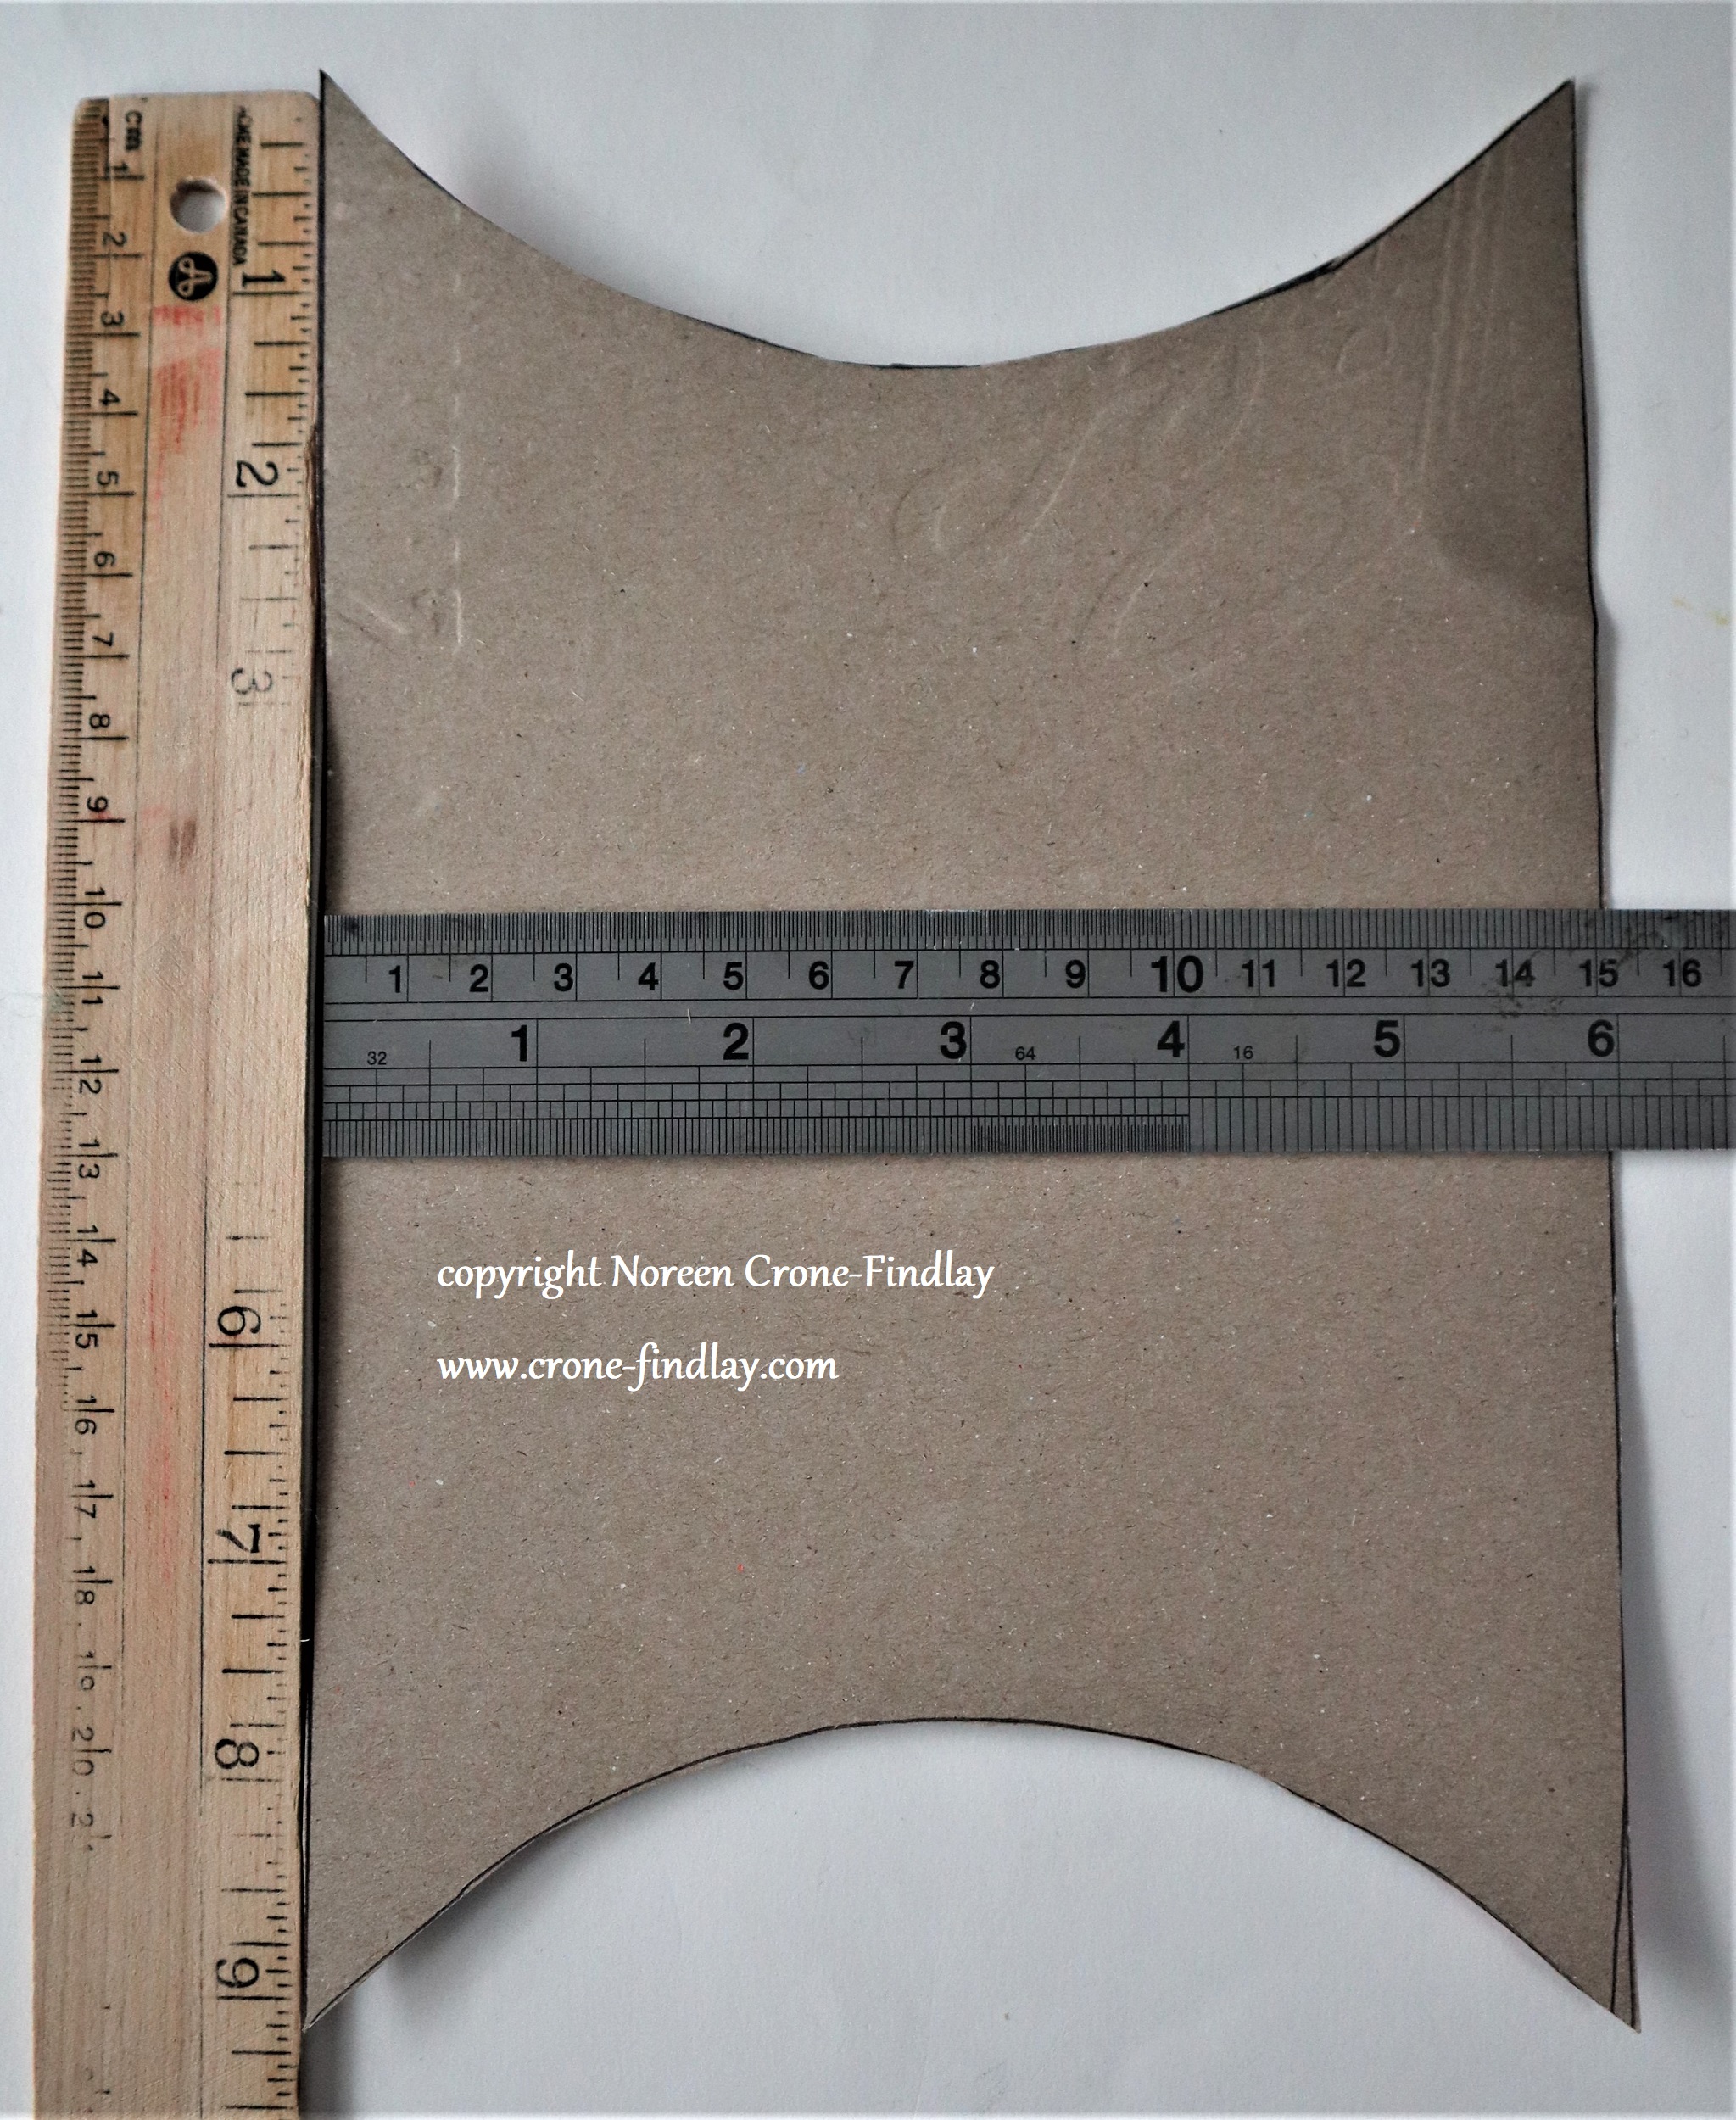
So I pushed cardboard around and flipped and folded it and measured and hummed and finally came up with this ‘Slightly Tube-ish’ container:
I had made several of the ‘Slightly Tube-ish’ ‘ containers when I twigged to the fact that they had a big old mistake, which I then fixed.
I made proper templates for the ‘right’ ‘Slightly Tube-ish’ containers , since I really like these and plan on using the concept again.
But, I wasn’t going to waste the ‘wrong’ ones, so I used them anyhow, with an apology to the recipients of the gifts and an explanation that I have got it right now, and they’ll get a better iteration next time.
Until then, the wrong ‘Slightly Tube-ish’ containers can be re-used and eventually be recycled or used as fire starters.
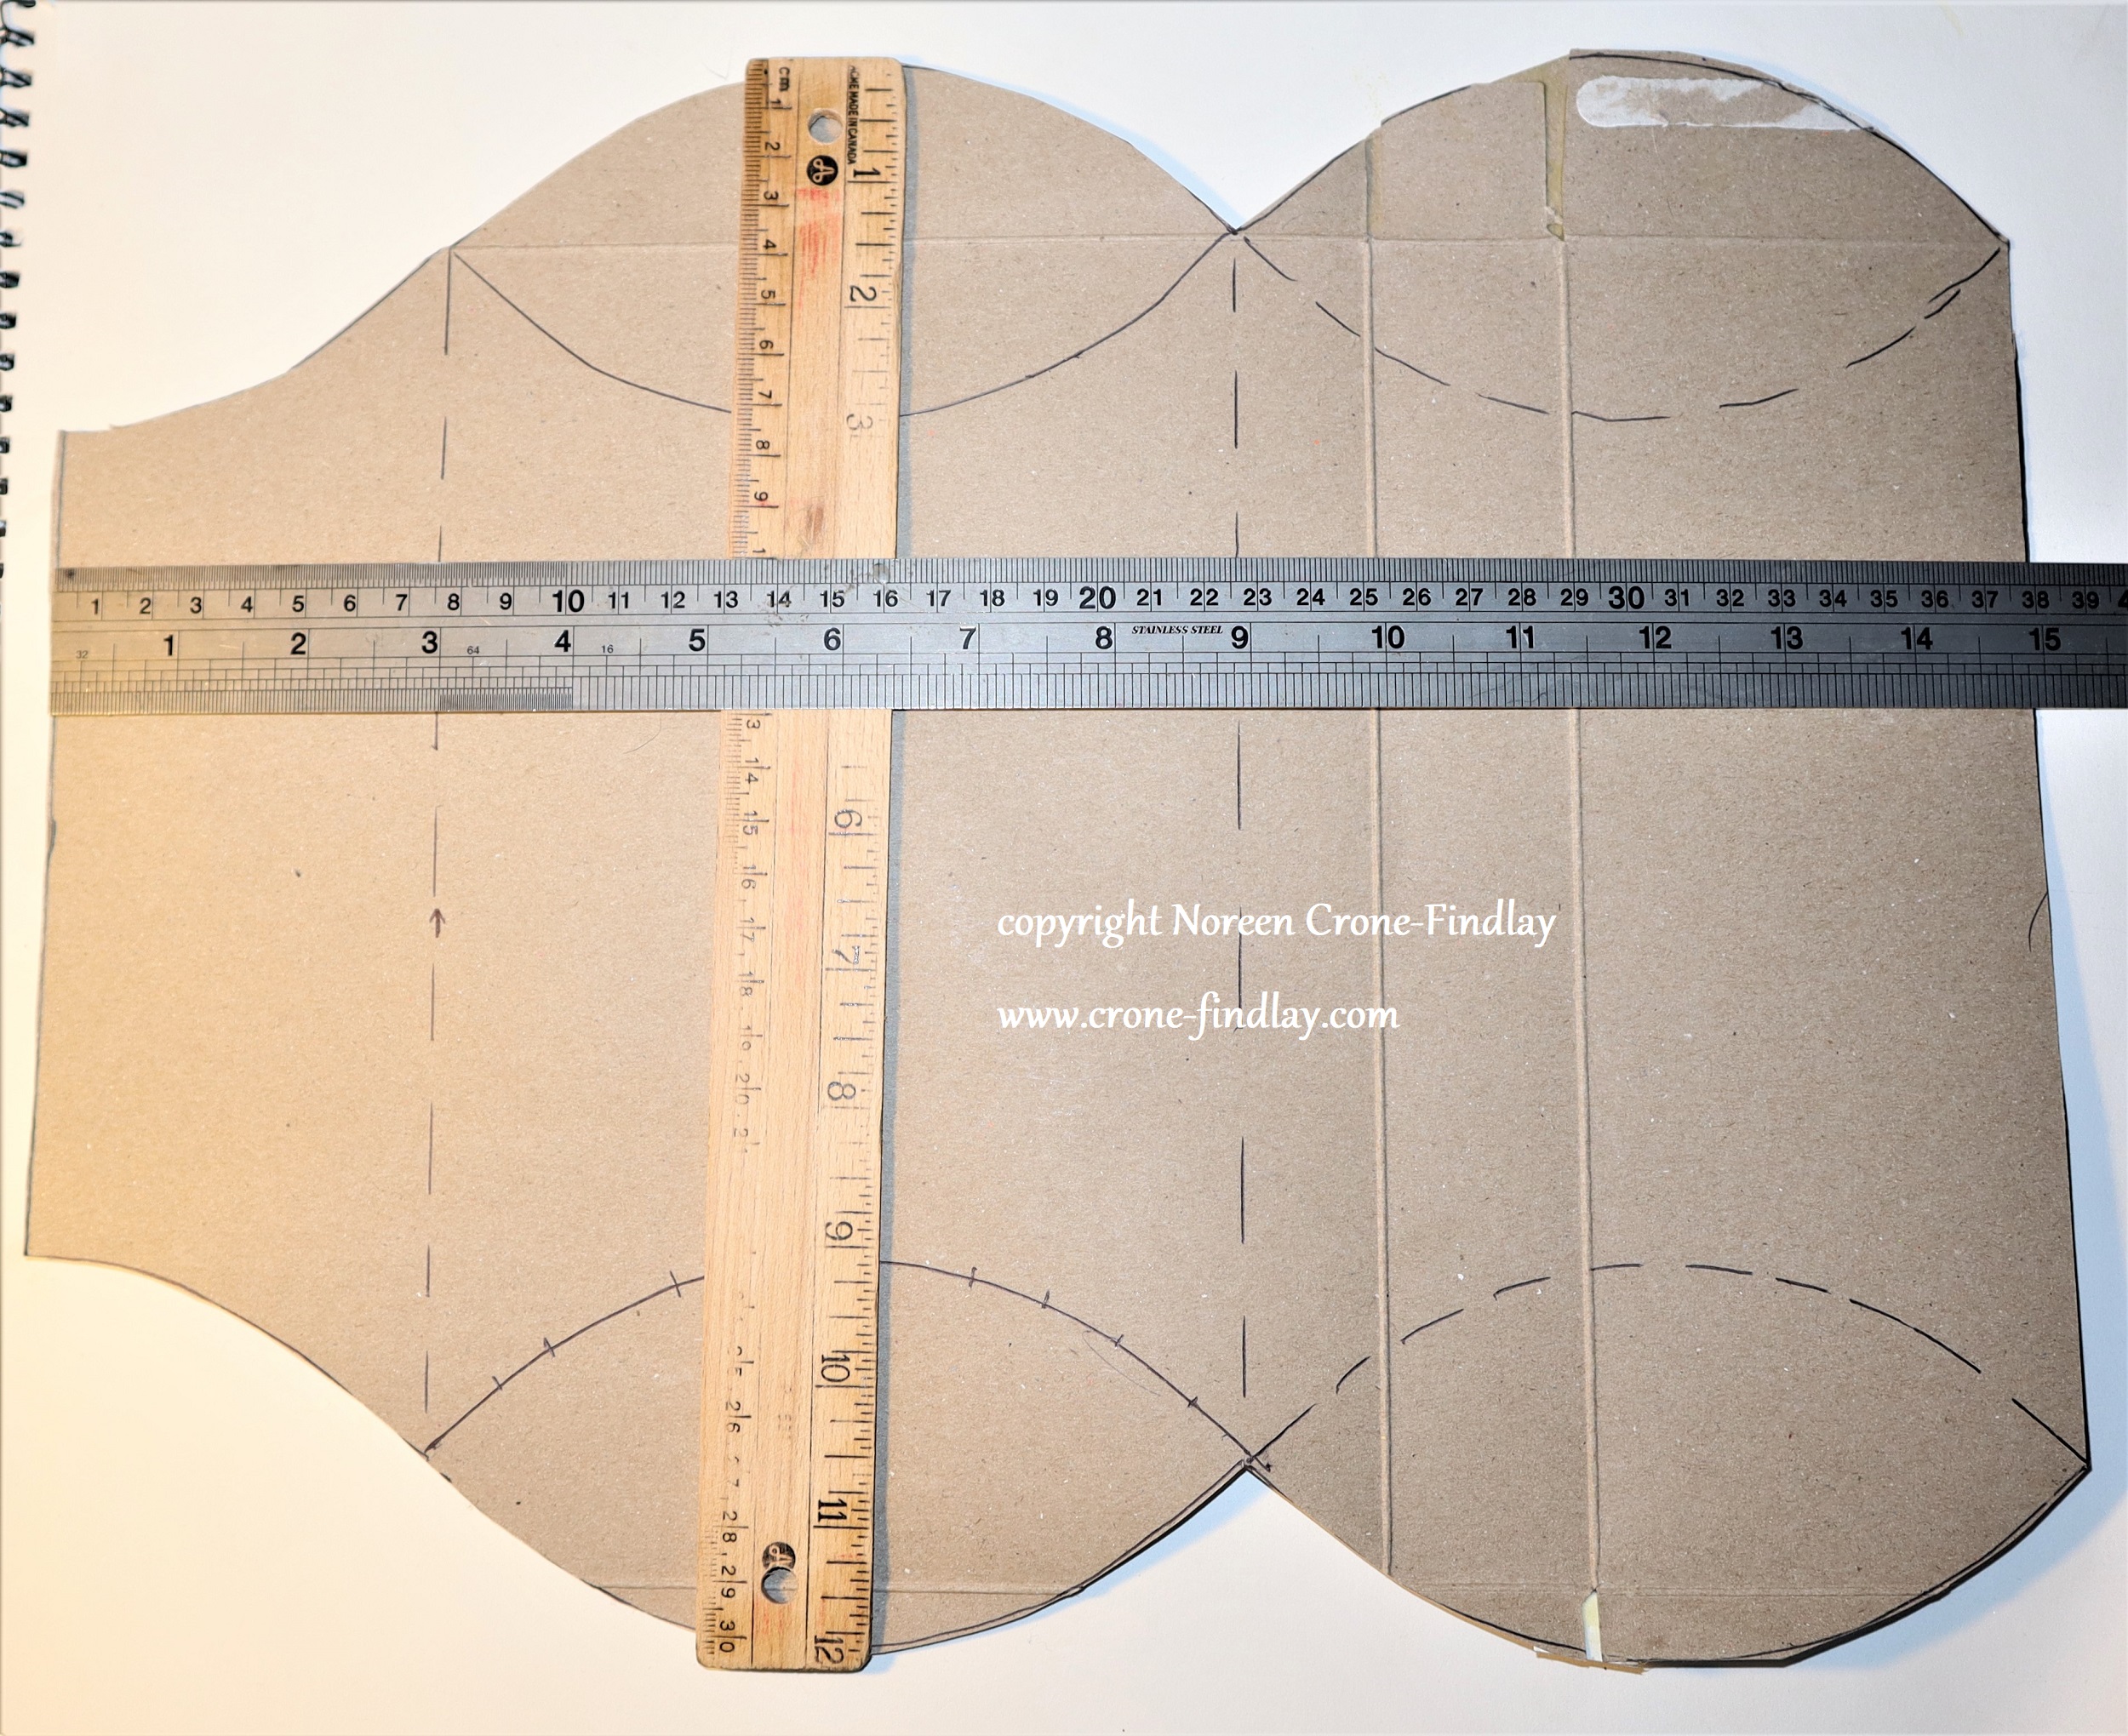
Here are the proper templates:
This one is for cutting out the ‘Slightly Tube-ish’ containerAnd, this one is for scoring the curves on the ends.
All in all, it was a lot of work, but I loved doing it and I hope that my family liked the nifty boxes and folders.
Even though I used cardboard that we had bought years ago for another project, these techniques will work really well on regular upcycled cardboard and cardstock, which pleases me very much!
I wrote and designed and wrote and designed sooooooooooooo many patterns and projects for the Potholder Loom Weaving book that the book became too big, and my editor and I had to make some hard decisions. Even so, the book is a lot thicker than the publisher had originally intended, so many thanks to Stackpole Books and especially to my wonderful editor, Candi Derr, for going to bat for the book and letting it grow bigger than it was originally intended.
We pulled this design from the book and now I am offering it to you as a gift.
If you want to make the blanket larger, use a 27 peg (Pro size) 9 inch loom instead of the Traditional 18 peg size potholder loom.
POTHOLDER LOOM GEOMETRIC BLANKET by Noreen Crone-Findlay (copyright)
The Geometric blanket is a cozy wrap to keep you warm no matter what season. The teddy bears and their friends are having a lovely picnic on the Geometric blanket. Won’t you join them?
NOTES: Feel free to change colors and yarns. The blanket in the photos was woven with a single strand of bulky yarn. If you choose to work with thinner yarns, you will need to purchase (or spin) twice as much yarn and use 2 or more strands held together as if they are a single strand.
The twill pattern is on page 59 of Potholder Loom Weaving. The brown and green butterflies in the original blanket didn’t work well, so use the twill pattern or you choice of alternates instead.
FINISHED MEASUREMENTS: 60 inches/150 cm square.
If you would like a larger blanket, then use the large size (27 pegs or nails per side) potholder loom, following the chart and weaving the same number of squares and rectangles. You will need to purchase at least 50% more yarn.
WPI of yarn: 6 wraps per inch
EQUIPMENT AND TOOLS: Potholder loom- 6 inch size (18 pegs or nails per side), Optional: Small size (9 pegs or nails per side) potholder loom; weaving hook; chopstick or knitting needle for shed stick; crochet hook; scissors; tapestry or craft needle.
YARN: Lion Brand Wool-Ease Tonal; Bulky #5 weight yarn; 80% acrylic/ 20% wool; 124 yd/ 113 m; 4 oz/113 gm; 1 strand of yarn is used as warp and weft. 3 balls of each of the following colors: #112 Raspberry; #153 Night Sky; #123 Sand; #126 Coffee; 4 balls of #194 Lime.
INSTRUCTIONS:
WEAVE:
20 squares in #194 Lime Here’s a link that will show you how to weave with yarn on the potholder loom: LINK
16 squares warped with #194 Lime and woven with #126 Coffee
16 squares in #112 Raspberry
1 square in #153 Night Sky
12 squares in #126 Coffee
36 rectangles, warped vertically over 9 pegs or nails, and woven horizontally over 18 pegs or nails in #153 Night Sky, woven using Rectangle technique on https://youtu.be/K2X4nLRBBNs
16 squares in #123 Sand
4 small squares in #194 Lime, woven using instructions for how to weave small squares (9 pegs or nails by 9 pegs or nails) on p.10 of the Potholder Loom Weaving book or instructions that came with the small size potholder loom.
PUTTING IT ALL TOGETHER:
Stitch all the squares and rectangles together, following the chart .
The bond was formed in childhood, when my beloved teddy was a panda (a pink and white one at that- you can see the very tiny homage I made to her on my website at About Us )
Panda designed by Noreen Crone-Findlay for Lion Brand yarns/Martha Stewart Loom
I hope that I will contribute to other people’s Panda love with this design for a Panda bear knitted on the Martha Stewart loom.
Edward and Anastasia Bear are 2 little bears that I have designed for ‘Your Knitting Life’ magazine (formerly known as ‘Knitting Today’), and they’ve been in each issue of the magazine since it started.
They are small… they’re 6 inches tall, and are knitted on 2.75 mm needles using Regia sock yarn.
Recently, on Ravelry, someone asked if Edward and Anastasia could be made larger, and the answer is, ‘You betcha’!
The humungous Edward Bear in the photo is 18 inches tall. If you knit with 8 or 9 mm needles and super bulky yarn or 2 strands of medium weight yarn held together, you will get one very large Edward Bear! Stitch through the hips to make them bendable.
I am so sorry, but the Edward and Anastasia patterns are no longer being made available by the publisher, and since I don’t own the copyright on them, I can’t give the pattern out. 😦


")
")
")
")
")
")


