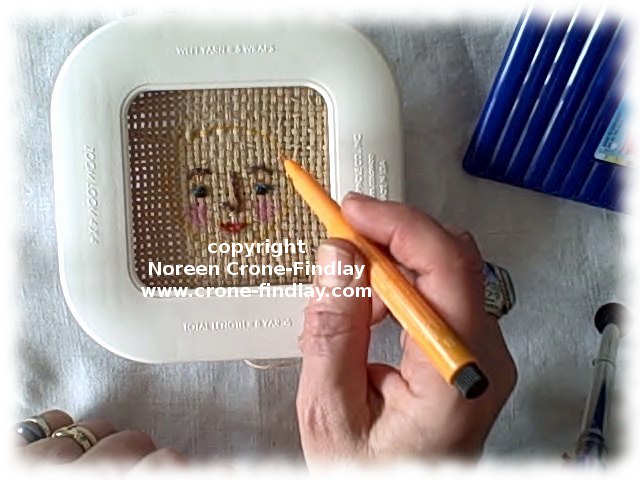
It was essential that my Zoomie doll have pockets. After all… Winter= Cold= Gotta have pockets!
So, I had to figure out a way of weaving tiny squares on the Zoom Loom (it’s the Zoom Loom weave along, so no cheating by crocheting or knitting the pockets).
So many people are afraid to cut their handwoven fabric….
BUT…. conquering the fear of snipping means that you can chop away with great gusto and whip up fabulous, one of a kind garments and accessories! So, YAY!
I was cutting out a spiffy hat today, and it struck me that I should make a quick little video to show what I do to cut off a length of fabric from my main piece of hand woven. So here’s what I do when I am cutting out the pieces for a project:
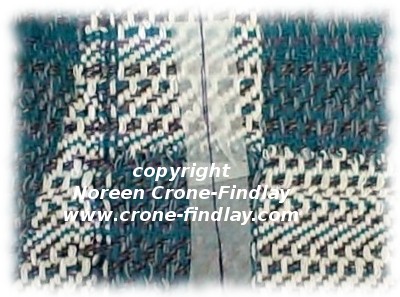
And, recently, I have been experimenting with weaving lace.
Well… weaving leno lace and then embroidering it…..
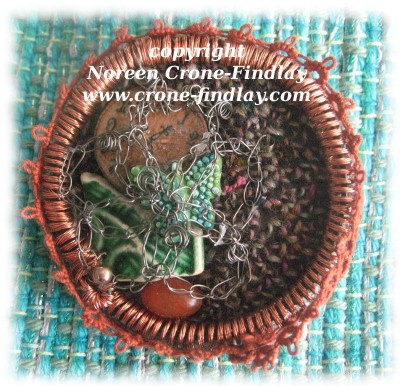
copyright Noreen Crone-Findlay
This was my first attempt, and to be honest, it’s wonky and woobley and ‘real weavers’ would consider it to be a messy failure.
copyright Noreen Crone-Findlay
But, I really learned a lot while I was working on it- and am intrigued and intend to keep working with this technique.
By the way, this was woven on my 16 inch Mirrix loom, with loom extenders attached.
When I was warping up for my second embroidered Leno lace scarf, I made a video about the things I figured out while warping with loom extenders:
I got so overwhelmed with all the work for the Soumak Weave Along that I didn’t have time to do much more with the embroidered leno lace.
I needed my 16 inch loom for a tapestry, so I wove off the blue scarf to get it off the loom, and will be doing the embroidery with the scarf being off loom.
copyright Noreen Crone-Findlay
I am pleased with the progress I have made with the embroidery, and look forward to doing more of this technique.
I love scarves and wear them year round.
Leno lace scarves are light enough to be comfortable even in the summer, especially in the evening.
copyright Noreen Crone-Findlay
I haven’t had a chance to wash and block this one yet, so it’s not as nice as it will be.
I am planning on working a twisted cord with beads on it for the fringes.
Leno lace is so wonderful and has so much design potential that I intend to continue experimenting with it!
I’ve found that there are a few things that can make the process of attaching the heddles go quick as a wink.
Efficient is good! 🙂
copyright Noreen Crone-Findlay
The first thing that I do, after I release the warping bar from the blocks and turn them around, is to slide a piece of cardboard or masonite between the layers of warp strands at the front of the loom and the back of the loom.
It sits there, in the middle, blocking the distracting view of those warp strands at the back of the loom. 🙂
Then, I use a shed stick that is at least as long as the width of the loom to pick up every other warp strand.
copyright Noreen Crone-Findlay
Then, I flip the shed stick on it’s side, with each end being supported by the shedding device blocks.
I now have 2 layers of warp strands because of this shed being open.
So, to keep the back warp strands out of view, I slide a ruler or strip of cardboard into the open shed.
Bliss! Now, I just have one set of warp strands ready for the heddles- Yay!
This makes things sooooo much easier!
I like the center brass knob of the shed changer to be as close to the exact center of the warp strands.
So, I count how many strands I need to attach to the rod, and divide that in 1/2.
I place 1/2 the heddles on 2 of my fingers, and 1/2 on the other 2 fingers.
copyright Noreen Crone-Findlay
I loosen the heddle rod and slide it along so it’s about 2 inches/5 cm from the edge of the warp strands.
copyright Noreen Crone-Findlay
Then, I reach behind the warp strand with a crochet hook, pluck a heddle off my fingers, and pull it behind the warp strand.
I catch both ends of the heddle loop and pop them onto the heddle bar. Slide the bar along as you go.
When I run out of the the first clump of heddles, I should be half way along the warp strands.
I work across , picking up all the strands, and attaching them to the heddle bar, then tighten up the little nut that holds the heddle bar in place.
Remove the shed stick and ruler, then rotate the heddle bar, sliding the heddles down the warp strands.
Turn the shed opener enough so the heddles open your first shed.
copyright Noreen Crone-Findlay
Use the shed stick to pick up the warp strands that are between the warp strands that you have just heddled.
Turn it on it’s side, insert the ruler, and repeat the process.
Check to make sure that all the heddles are securely attached to the heddle rods.
When I was making the video, one little bounder escaped, which was actually a good thing.
This allowed me to show how to capture the escapee heddle and tie it back in place.
copyright Noreen Crone-Findlay
Remove the shed stick and ruler and check the sheds, then attach the handle or treadle and Voila!
Normally, I tend to prefer small looms, but I have just fallen in love with using loom extender bars on the Mirrix loom.
copyright Noreen Crone-Findlay
It’s really hard to convey how tall the ‘Alice in Wonderland’ version of the Big Sister 16 inch loom is when she’s got her stilts on.
With the extenders, she is 40 inches/1 m tall.
Now, that’s tall!
This means that you can achieve lots more weaving with one warp up.
(I’m working on some really fun stuff with my Big Sister Stiltie! So, stay tuned!)
My husband bought me the components for the extenders at the place he buys parts for our ancient tractor, so I didn’t have instructions on how to do this.
So, I had to figure it out for myself.
I found that there are a few tricks that make the set up easier when adding the loom extenders to your Mirrix loom.
copyright Noreen Crone-Findlay
First, lift the top of the loom off the side rails and set aside.
copyright Noreen Crone-Findlay
Unscrew the thumbscrews from the threaded rods, and screw them onto the extension rods.
I screwed them on so they were 5 inches/12.5 cm from the top end of the extensions.
Put the washers back on top of the thumbscrews.
copyright Noreen Crone-Findlay
Screw the coupler to the top of the loom rod.
copyright Noreen Crone-Findlay
Hot tip: Place the end of a tape measure inside the coupler so you can watch to see that you have screwed it on so it is half way onto the lower rod.
I had my doubts about how stable this was going to be, because the coupler seemed wobbly to me.
copyright Noreen Crone-Findlay
But, I went ahead, and screwed the extension rod in anyhow….
copyright Noreen Crone-Findlay
And, then, when I tightened it up by hand, I was amazed at how it was suddenly rock solid!
WHEEE!
This is good!
Wobbly bad!
Solid- GOOD!!!
Repeat for the other side…
copyright Noreen Crone-Findlay
Measure to be sure you have everything square, and put the top half of your loom back on.
Stand back in amazement at your loomie on stilts! Wowsa!
The best part is that the loom is still miraculously stable and works perfectly.
I find that resting it against the edge of the desk and having the lower edge sitting in my lap is the most comfortable way to weave with the extensions on.
Also, weaving standing up works well.
Having the stand for it would be sublime.
I made a video of the ‘putting it together’ process:
Tapestry bobbins have a mystique around them and they can be expensive.
But, what do you do if you need a lot of tapestry bobbins and have a limited budget?
Well… you improvise.
copyright Noreen Crone-Findlay
First you analyse, then you upcycle!
After all… a tapestry bobbin is a yarn delivery device.
What does it need to do?
It needs to hold yarn in a way that allows you to pass it through a fairly small shed.
It should have a tip that will allow you to tap your weft yarn into place.
It needs to be able to hang from the tapestry while it’s parked.
So…. there are things that will work quite nicely for you as you feed your piggybank, but weave your tapestries in the meantime.
I make my own quirky, but perfect for me tapestry bobbins from upcycled wood: Link to post
copyright Noreen Crone-Findlay
Recently, I noticed that one of my fave bobbins looks a lot like a little spoon…
and of course, that started me thinking…
would a little coffee spoon work as a tapestry bobbin?
It seemed rather outrageous….
copyright Noreen Crone-Findlay
So, I took a little orphaned silver coffee spoon that had been in a box of sandbox toys that I bought for my grandson at a garage sale, and hammered the poor thing flat.
It works BEAUTIFULLY as a tapestry bobbin!
copyright Noreen Crone-Findlay
This made me think…. hmmm…. metal spoon…. hmmmm…. ~metal bobbins~…. hmmmmmm….
So, what about a 4 inch nail with a bead on the end? Would that work?
Yup. Wash it well first, and if the tip is snaggy, sand it smooth or file with a nail file.
You could paint it if you want, or coat it with a clear gel just to ensure that it won’t discolor your yarn.
Stuff a bit of tissue into the opening of the bead to secure it.
copyright Noreen Crone-Findlay
I learned about using bamboo forks as bobbins on Ravelry.
I like them!
But, I have found that they work much better if you stick a bead on the end.
Squish the tines of the fork into the bead center and you’re set to weave.
copyright Noreen Crone-Findlay
I love tatting, and used to carve tatting shuttles.
I’ve discovered that my Little Bird shuttles work beautifully as tapestry bobbins. Whodathunkit? 🙂
So, be creative and think outside the box when you are contemplating tapestry bobbins.
I mean, really… spoons and forks?
Yes!
If you are willing to experiment, you’ll find all kinds of things that will work really well in your weaving!
Here’s a video that I made about cheap and cheerful alternatives for tapestry bobbins:
Part 3 of the video tutorial series on how to weave inkle bands on Mirrix looms is about the weaving process:
copyright Noreen Crone-Findlay
Something that I learned as I trundled up my ever so steep learning curve with figuring out how to weave inkle bands on the Mirrix loom:
I started out by weaving one row on one band, putting it’s shuttle down, then picking up the second shuttle and weaving one row on the other band.
Sounds slow and clunky, doesn’t it? Well, you’re right.
The most efficient way to weave 2 bands at once is to weave as far as you can on one band, then set that shuttle aside, and weave away on the second band.
Oh… speaking of shuttles, here’s the tracing of my most favorite inkle shuttle:
copyright Noreen Crone-Findlay
I designed this one several years ago, and I love it. Works like a charm.
Here’s the video that shows the weaving process:
copyright Noreen Crone-Findlay
When you need to advance the warp, loosen the tension quite a lot.
Support the spring as you gently ooze the warp rod around and up the back of the loom.
Pat the warp strands back into the channel, and tighten up the tension again.
Remember, you do not need to have the tension as tight as when you are weaving a tapestry or beading.
You’ll find the perfect tension that suits you best.
Keep on weaving until the warp rod is sitting on top of the loom, and then check into the 4 th video in the series:
This is the second stage of the video tutorials that I made on how to weave inkle bands on the Mirrix loom.
copyright Noreen Crone-Findlay
There are two bands on the loom, because in this video, I am working on the 16 inch loom.
When you work on the 8 inch loom, it’s okay to just weave one band at a time, as the warping bar doesn’t flop around.
But, on the 16 inch loom, you do need to either warp up 2 bands, or secure the other end of the warping bar with a cord so it will stay perfectly horizontal.
I tried weaving 3 bands at once on the 16 inch loom, and didn’t like it, as the center knobs on the shedding device got in the way.
Two bands are just great though.
AND…. if you want to weave longer bands, and have either a 12 inch or 16 inch Mirrix loom then the loom extenders will be your friend 🙂
I use a crochet hook and a weaving stick to make the heddling process go quick like a bunny.
Here’s the video tutorial:
Start by placing a piece of cardboard between the layers at the front of the loom and the back so you can’t see the warp strands at the back of the loom.
copyright Noreen Crone-Findlay
Place the shed changing device into the brackets. Unscrew the little knob that holds the heddle rod in place.
Pull the heddle rod back so it’s about half way along the warp strands.
copyright Noreen Crone-Findlay
Place the heddles onto the fingers of your non dominant hand.
copyright Noreen Crone-Findlay
Look down at the warp strands that are at the lower edge of the front of the loom.
There’s a gap between the strands that have gone in front of the warping bar and behind it.
Slip your fingers into the gap and scoot them up to the shedding device.
Slide a shed stick into the gap.
Voila! (which is how ‘walla’ is really spelled 🙂 )
You have shed one ready to heddle!
copyright Noreen Crone-Findlay
Now, slip the crochet hook behind the first warp strand, pluck a heddle off your fingers, and pull it forward.
Catch the other end of the heddle loop and place both loops on the heddle rod.
Go slowly, and be sure that both ends of the heddle loop stay politely on the heddle rod.
copyright Noreen Crone-Findlay
When you have all of the warp strands heddled, slide the heddle bar into position in the knobs, and tighten the lock nut.
Repeat the heddling process on the second set of warp strands for your other band.
copyright Noreen Crone-Findlay
Push the first set of heddles down as you rotate the shedding device.
copyright Noreen Crone-Findlay
Leave the shed stick in place, and use the crochet hook to pick up the warp strands for the other shed.
Take the warp strand from the back to the right of the one in front, and onto the hook,
take the hook over the front strand, and pick up the next strand and carry on across.
copyright Noreen Crone-Findlay
Slide the weaving stick out of the first shed, and slip it along the crochet hook to transfer the warp strands from the crochet hook to the weaving stick.
copyright Noreen Crone-Findlay
Turn the weaving stick on it’s side, and then pick up the warp strands one at a time and capture them with the heddles just as you did for the first set of warp strands.
copyright Noreen Crone-Findlay
Repeat this process for the second band.
Check your heddles carefully to make sure that they are opening the sheds properly.
Ahhhhh! a warped loom is a thing of beauty!
copyright Noreen Crone-Findlay
Attach the handle to the shedding device and adjust the tension by turning the thumbscrews.
Open the first shed, and insert a craft stick, then open the second shed and insert another craft stick.
Squish the warp strands together to establish the width of your band.
copyright Noreen Crone-Findlay
Weave one row, leaving a 6 inch/15 cm tail.
Change sheds, and weave the next row.
Pull up firmly on the tail end and weave it through the same shed.
Repeat several times until the tail end is woven in, and the band is established.


")
")
")
")
")
")
")
")
")
")
")
")
")
")
")
")
")
")
")
")
")
")
")
")
")
")
")
")
")
")
")
")
")
")
")
")
")
")
")
")


