To see all the links for the ‘How To’ posts for the “Imagine” Banner Weave along, please go to L I N K S
To order the loom, book and extras kit for the Weave Along from Mirrix, please go K I T
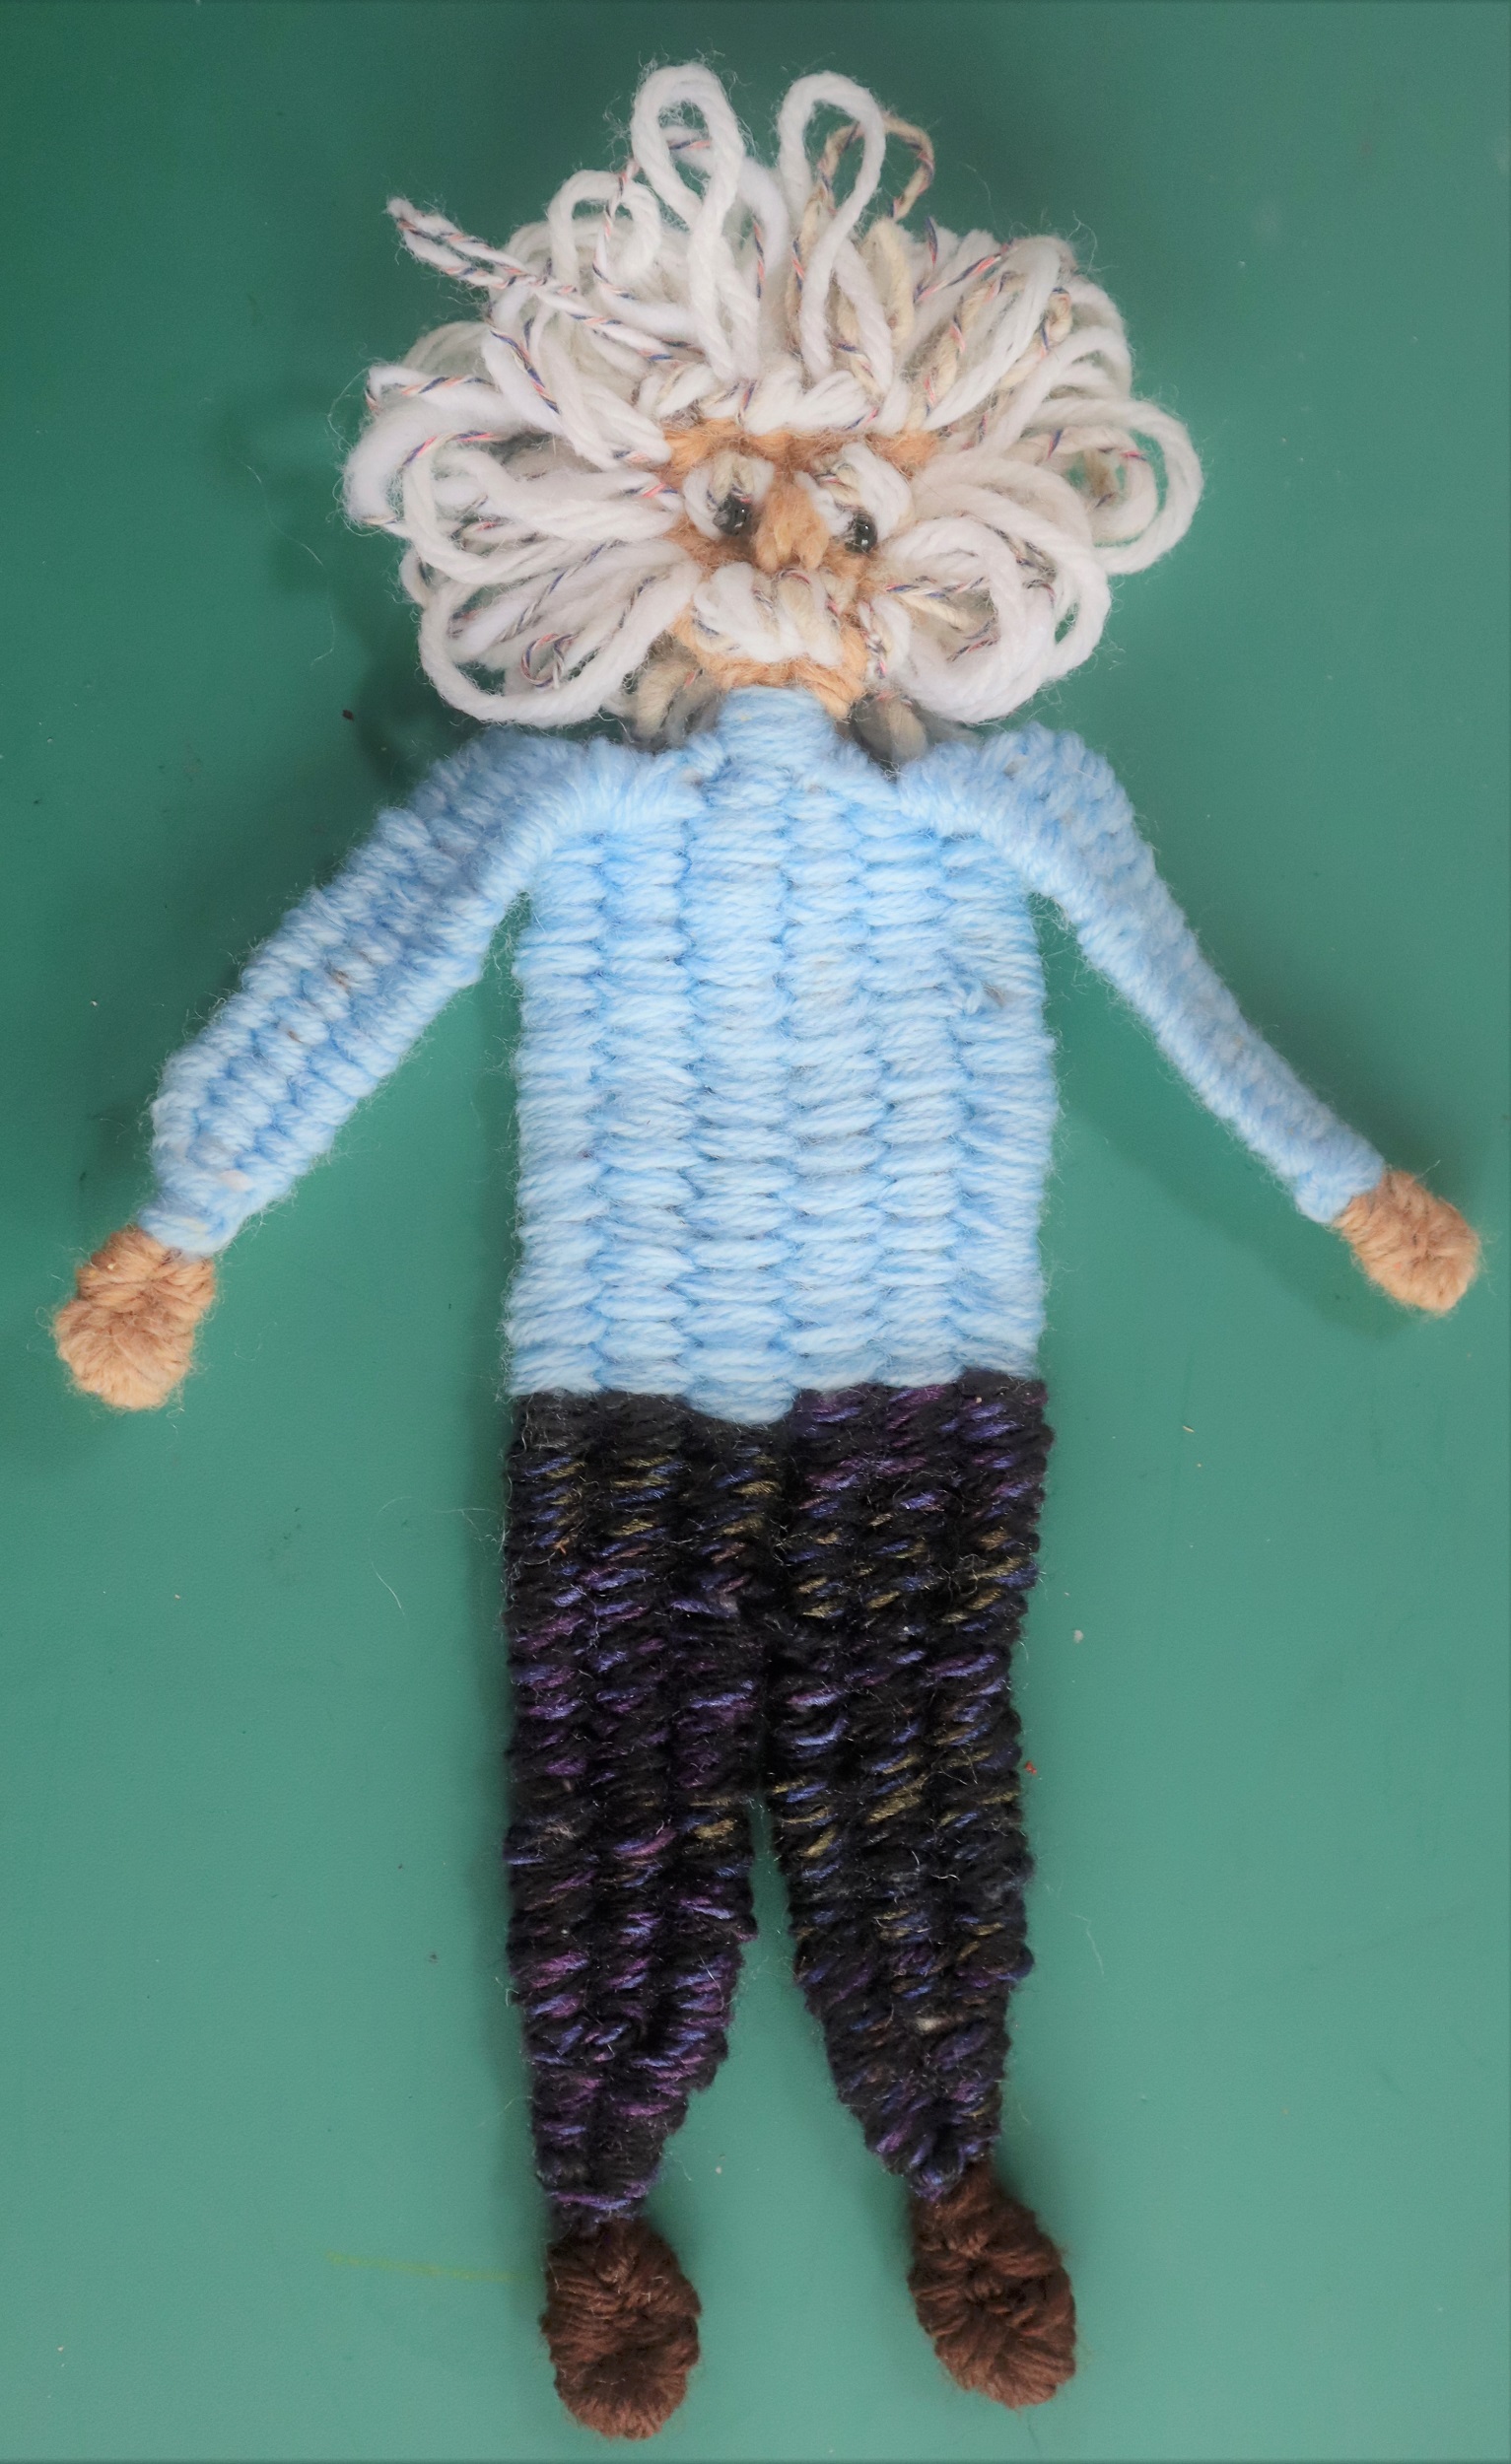
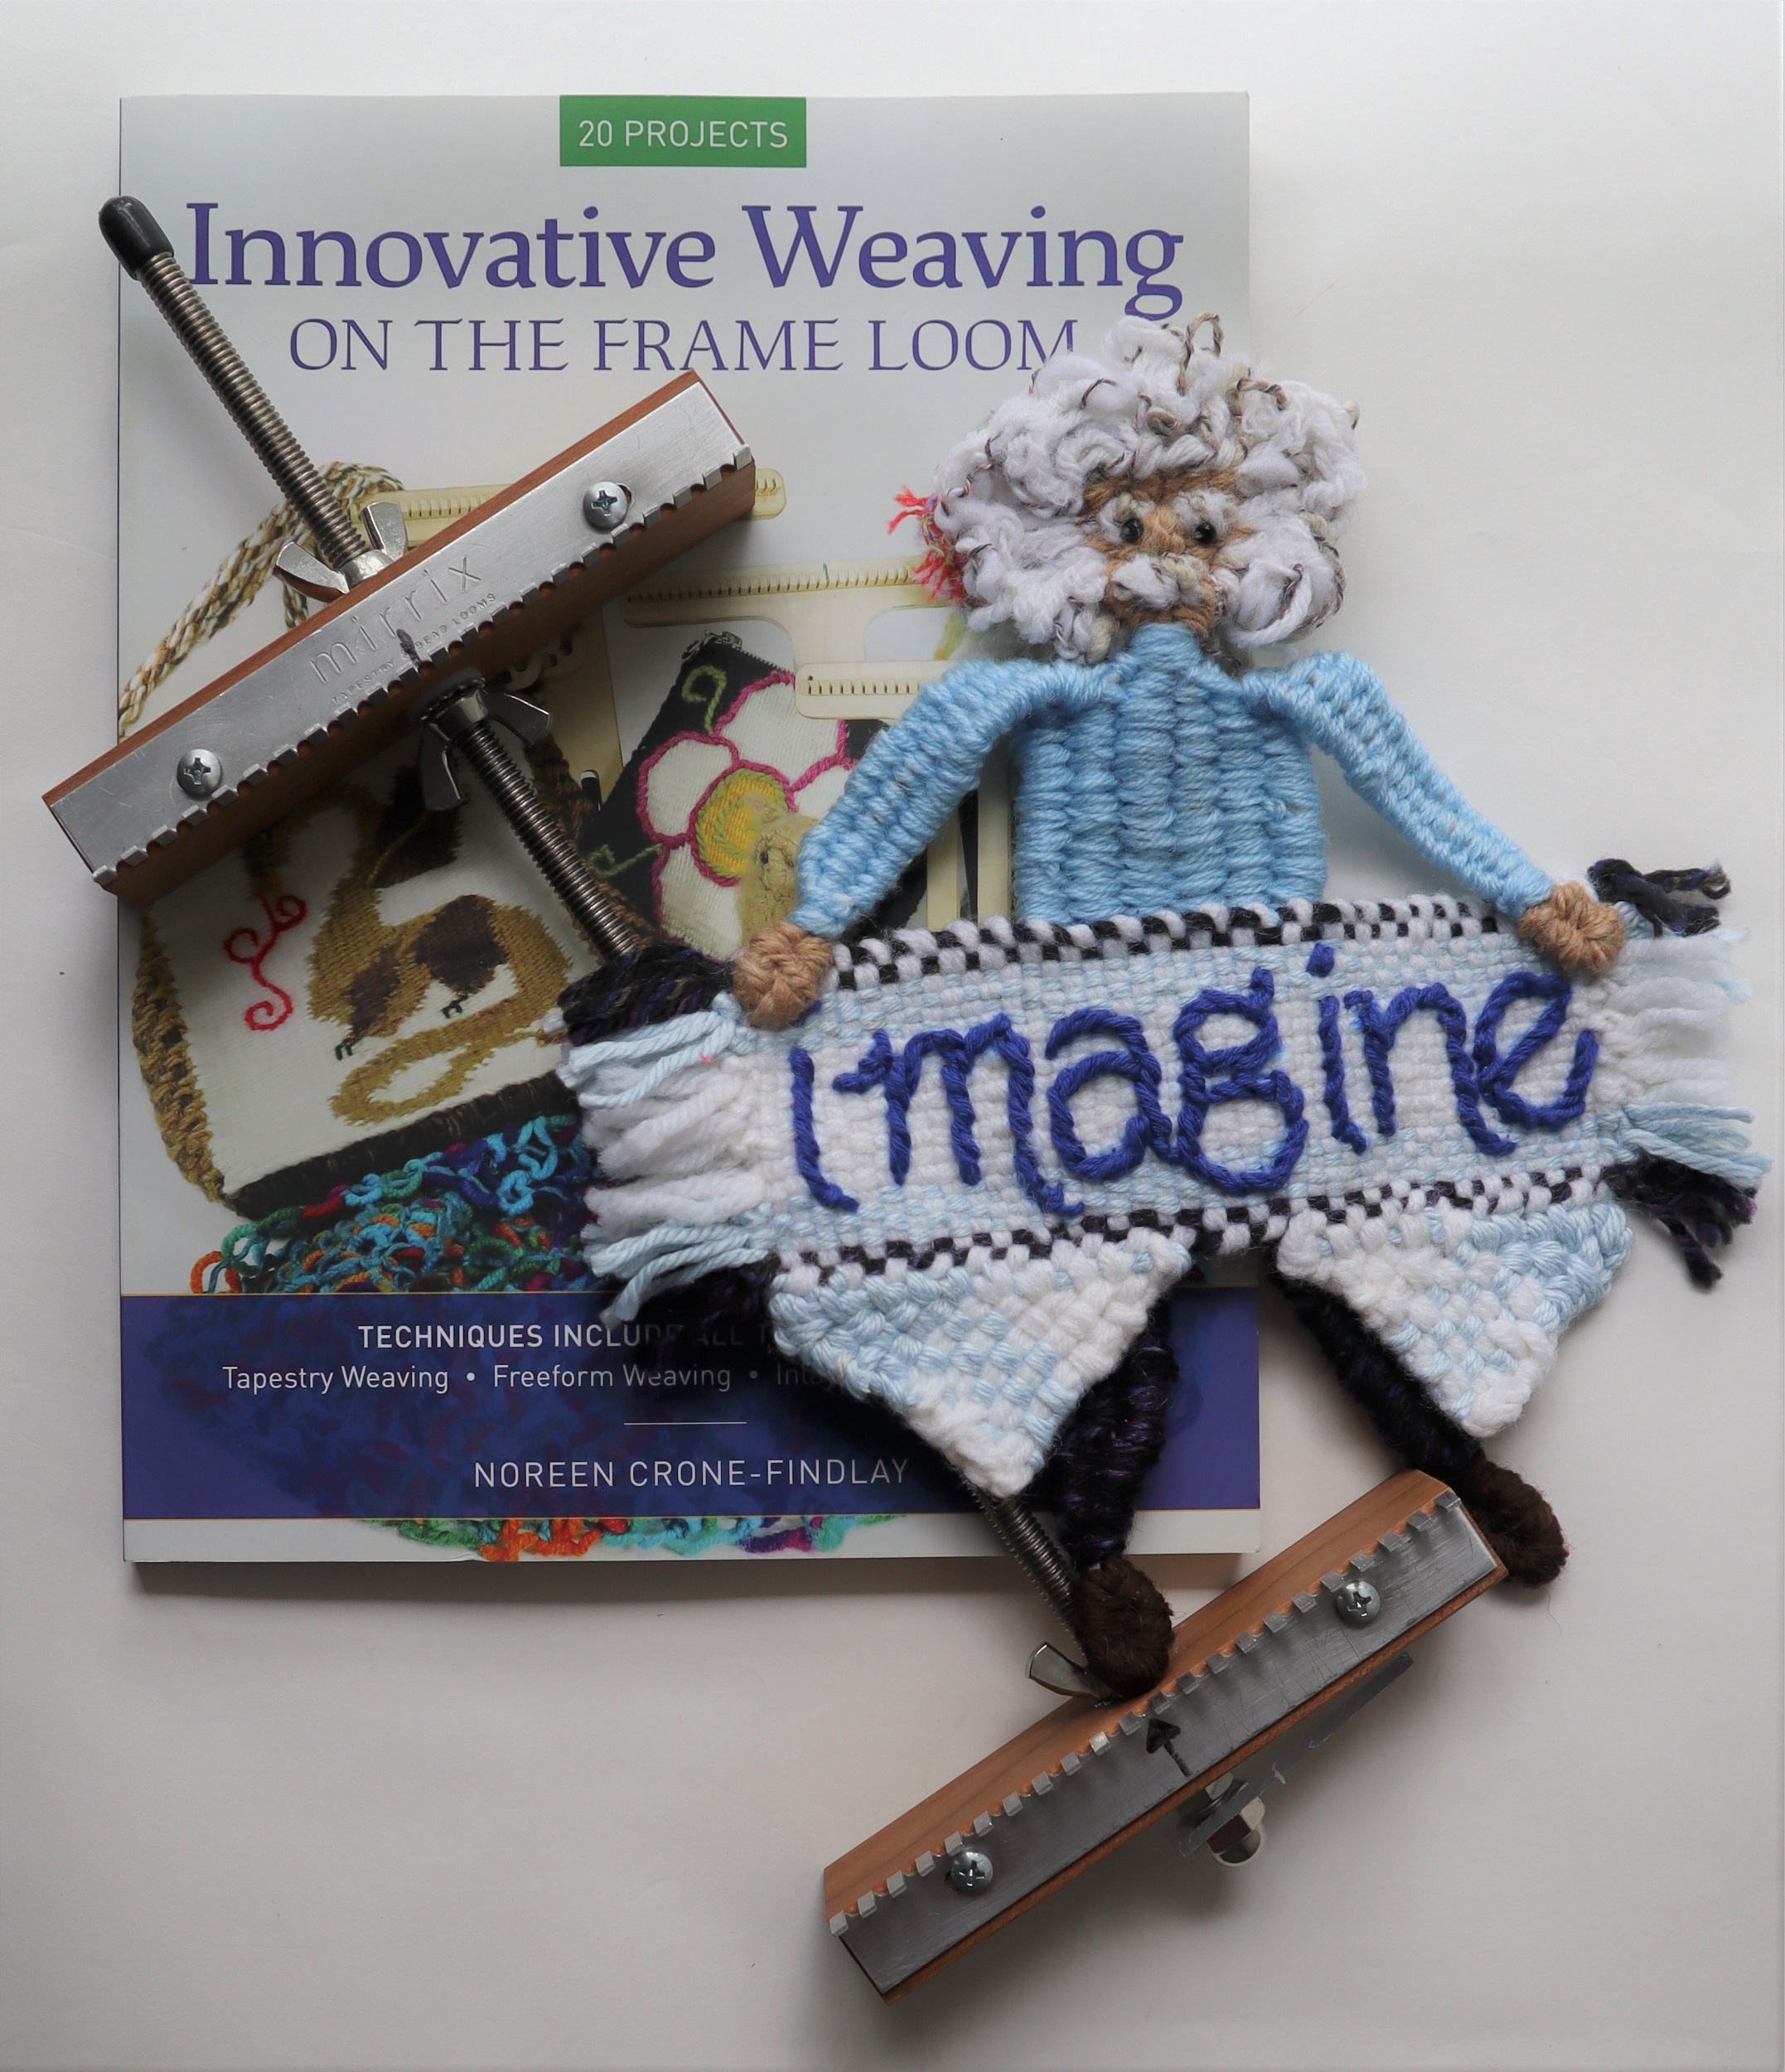
FREE FORM WEAVING: HOMAGE TO ALBERT EINSTEIN:
Albert Einstein is woven (with a few extrapolations and a slight adjustment to the waistline) following the instructions for the Woven Dancer on page 30 of “Innovative Weaving on the Frame Loom”.
In order to hold the pattern onto the loom, a backing board is needed. See: LINK
INSTRUCTIONS:
HOW TOWEAVE THE ALBERT EINSTEIN FIGURE:
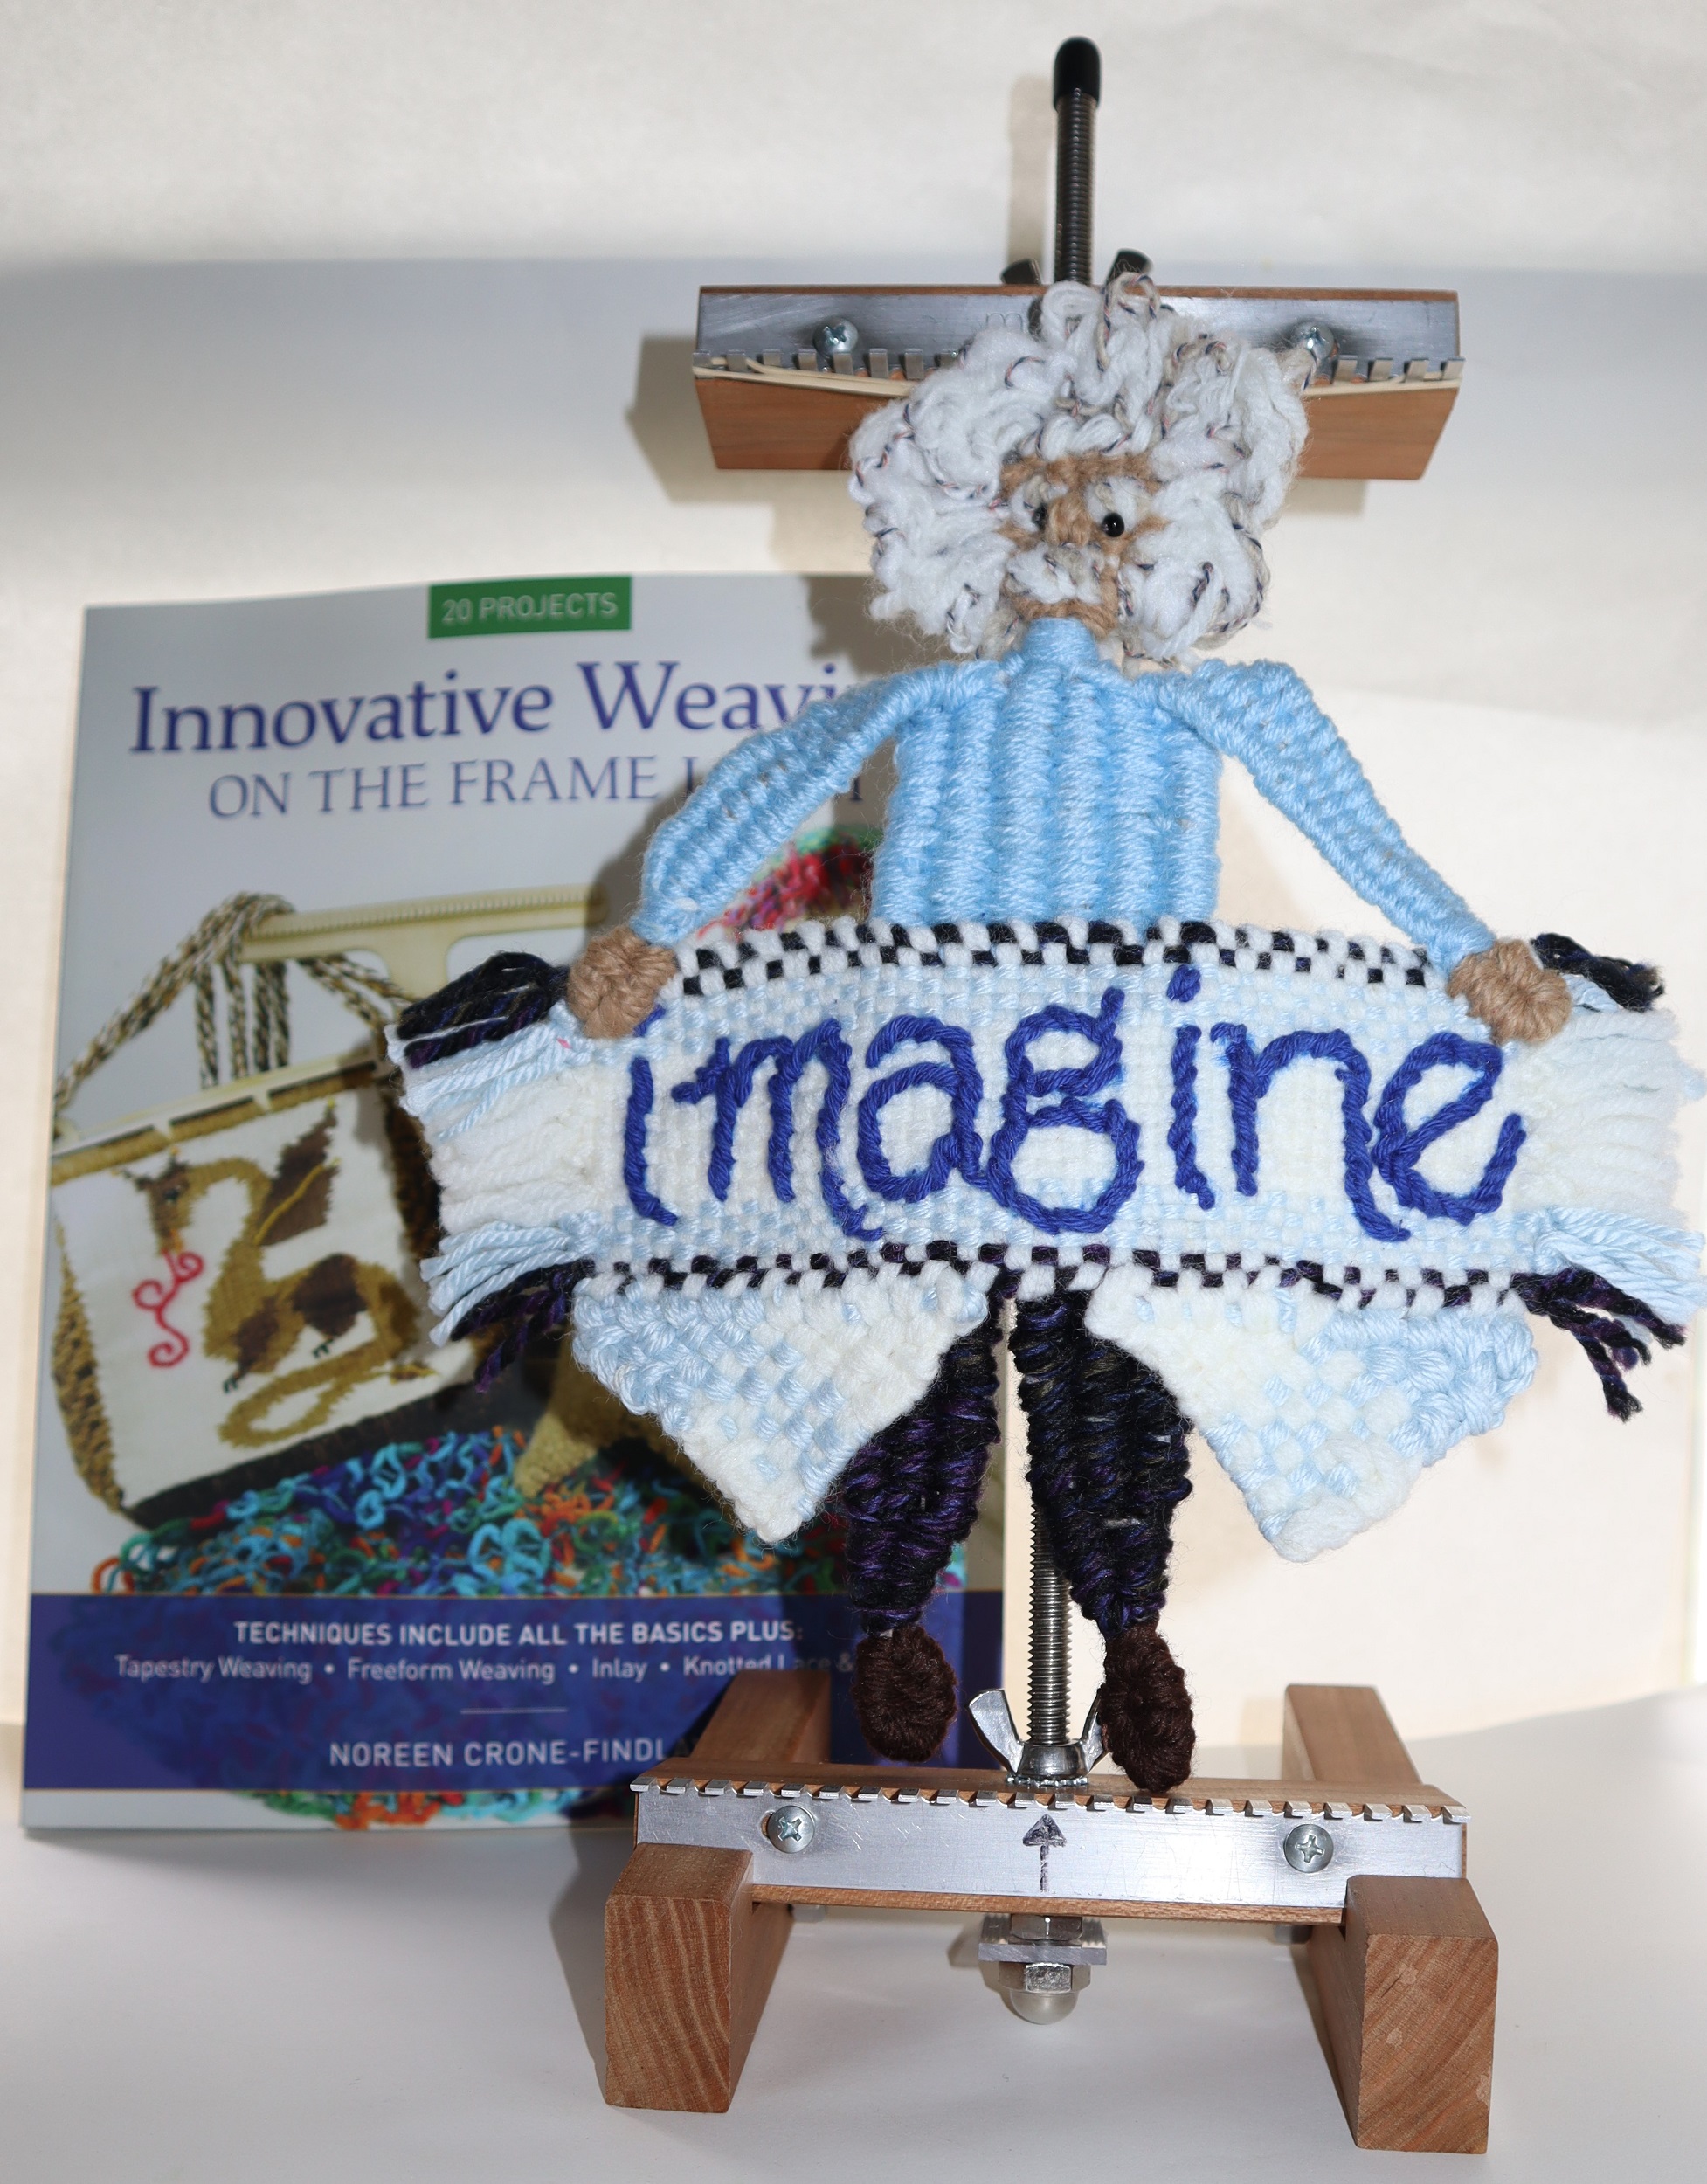
1: SET UP THE LOOM so it is 11 inches/27.5 cm) from the lower set of pegs to the upper set. Lock it into the ‘Sandy Stand’.
Fold the ends of the backing board to the back and slide it in place on the loom.
2: WARP THE LOOM: Following the instructions for the Woven Dancer on page 30 of ‘Innovative Weaving on the Frame Loom’, with 1 strand of #4 Medium weight (Worsted or Sport weight) yarn white and 1 strand grey held together as if they are a single strand:
Skip 6 pegs at each side of the loom and warp the loom, following the instructions in the book closely.
3: WEAVING:
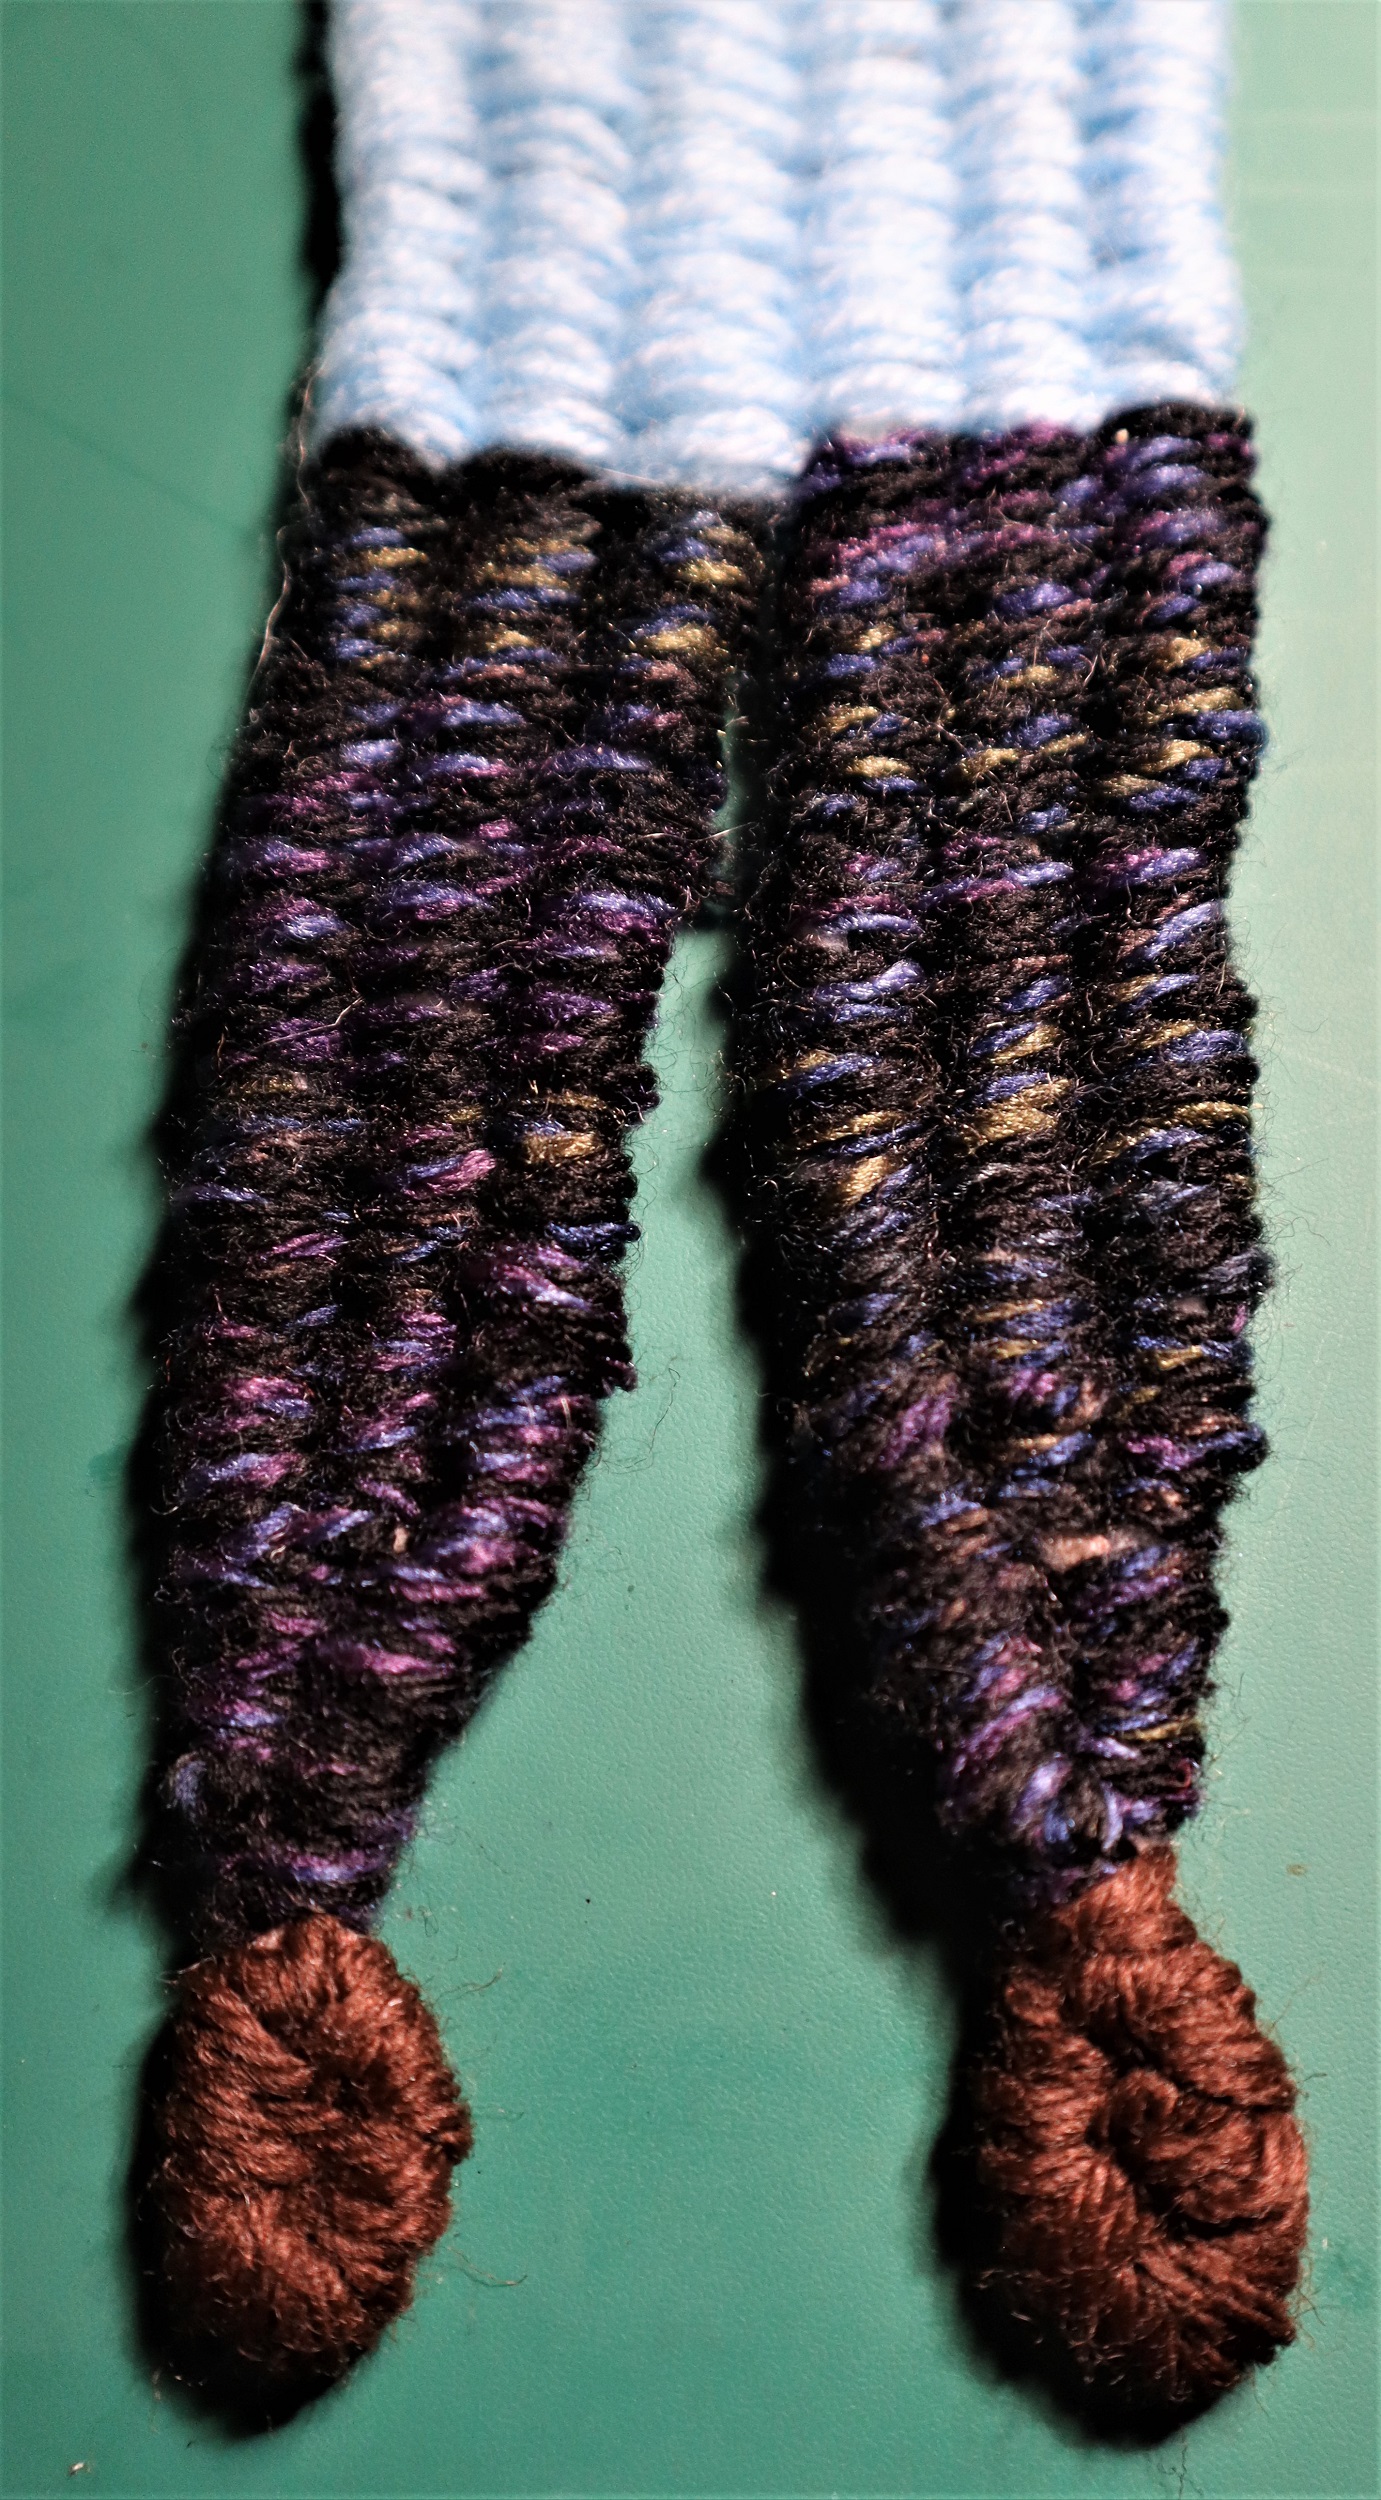
LEGS:
Leaving only an inch or of a tail end rather than the long tail end listed in the instructions in the book, weave the legs with 2 strands of black yarn held together as if they are a single strand, and packing the weaving down closely to completely cover the warp strands. Follow the instructions in the book for weaving the legs, but noting that you will be beating the weft yarn in more densely than in the book.
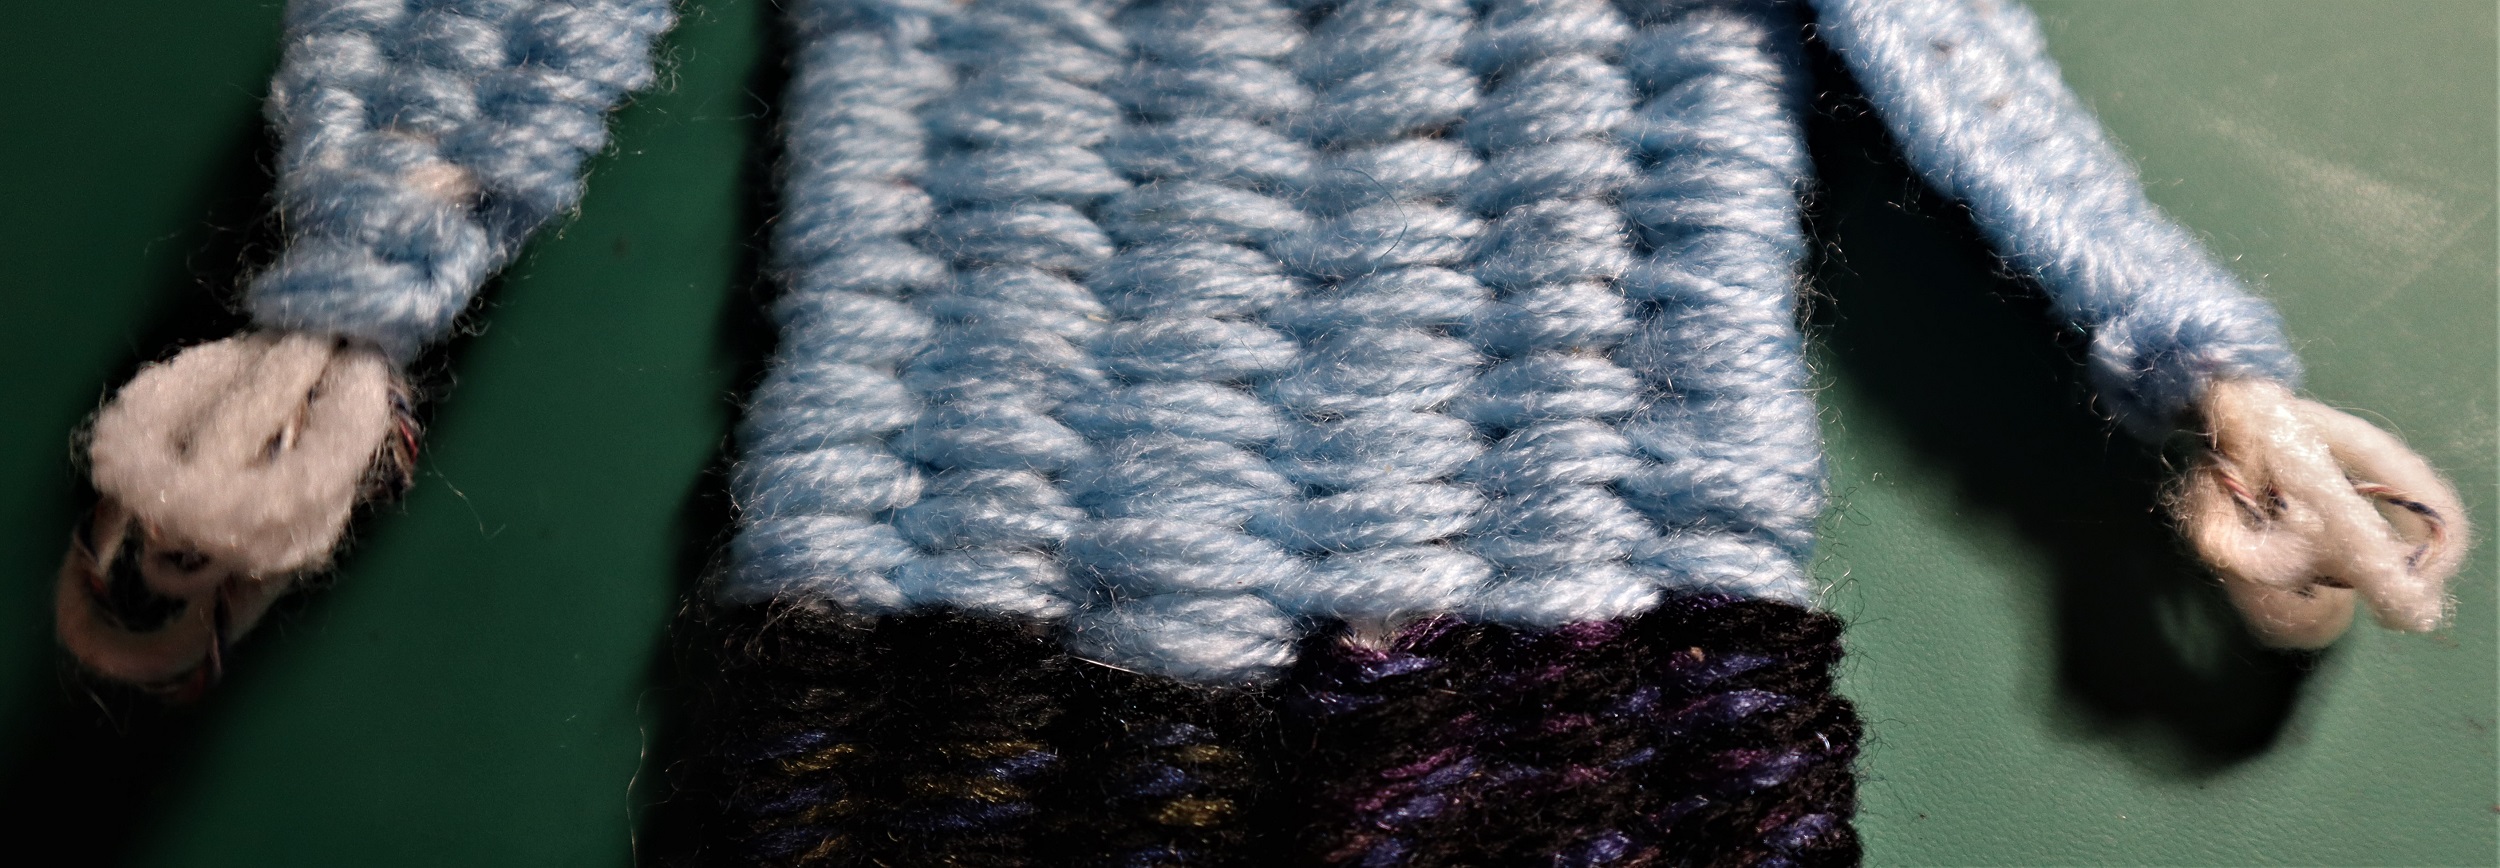
SWEATER:
With 2 strands of light blue yarn held together as if they are a single strand, weave up to the neck. Beat the weft so it completely covers the warp strands.
DO NOT pull in the waistline as it is drawn in the book. Weave the sweater straight up to the shoulders.
Wrap the neck with the blue yarn and weave in the ends.
SLEEVES:
Weave the sleeves following the instructions for the arms, but, once again, beat the weft so it completely covers the warp strands.
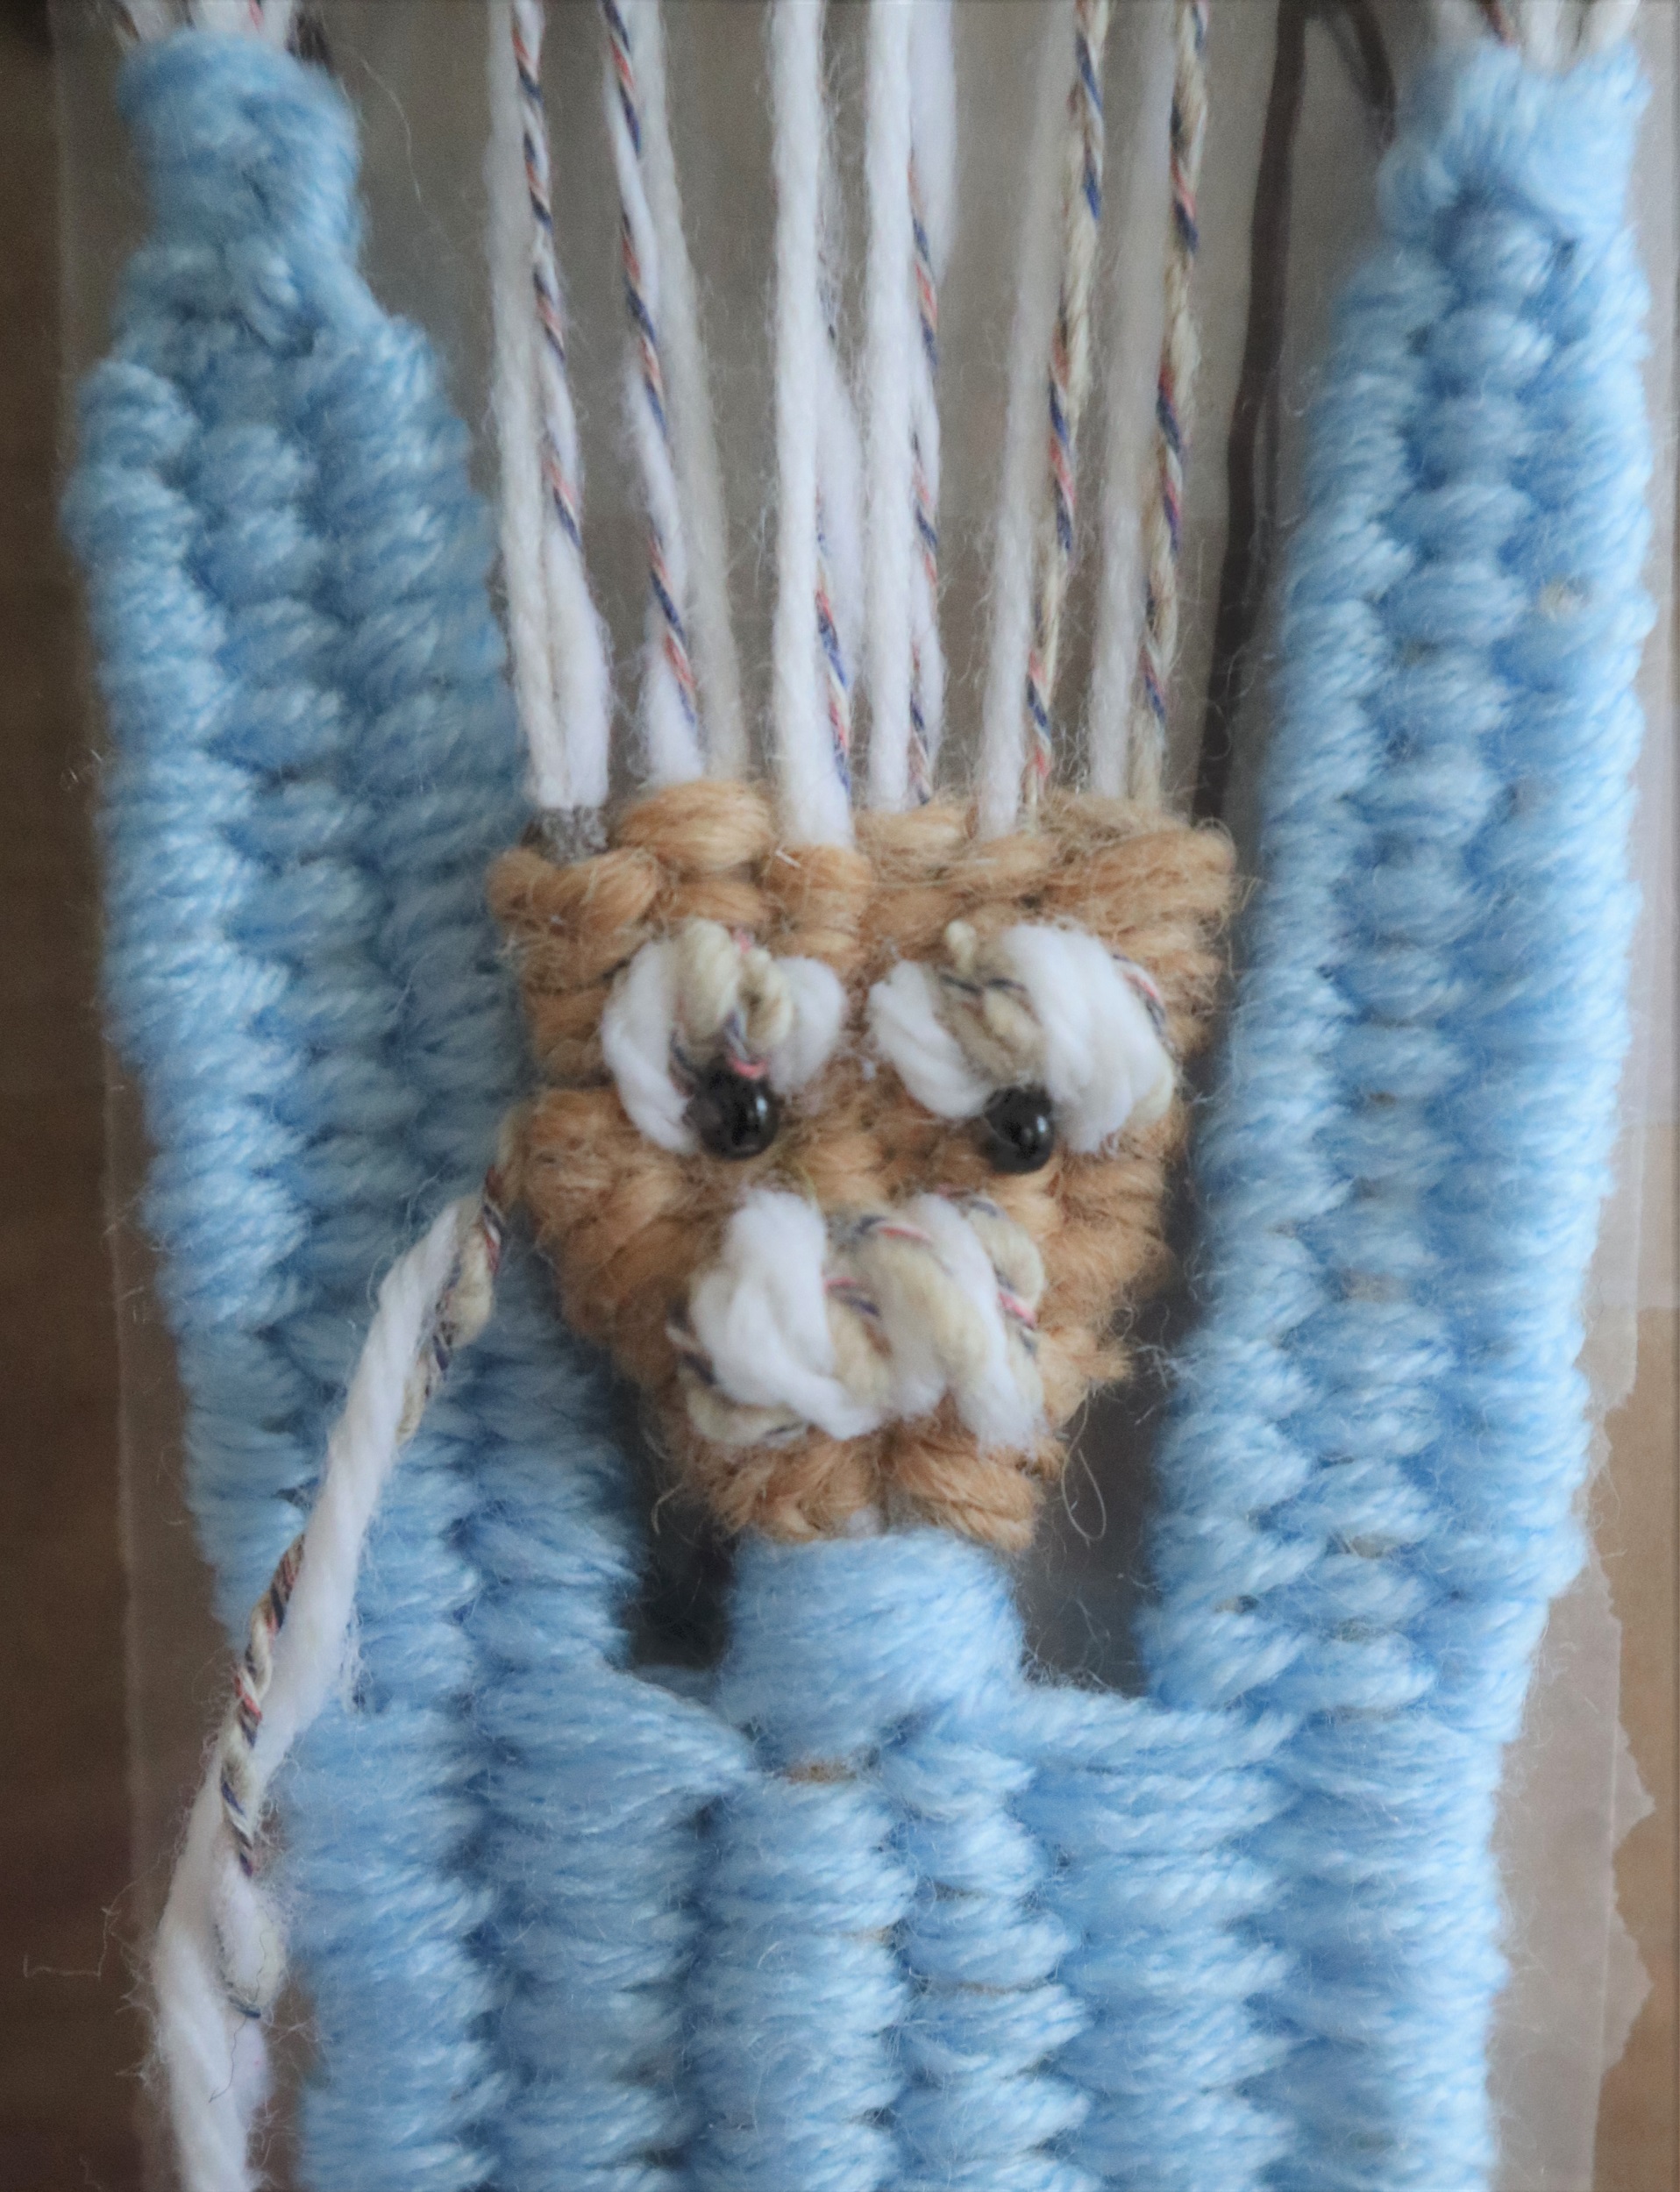
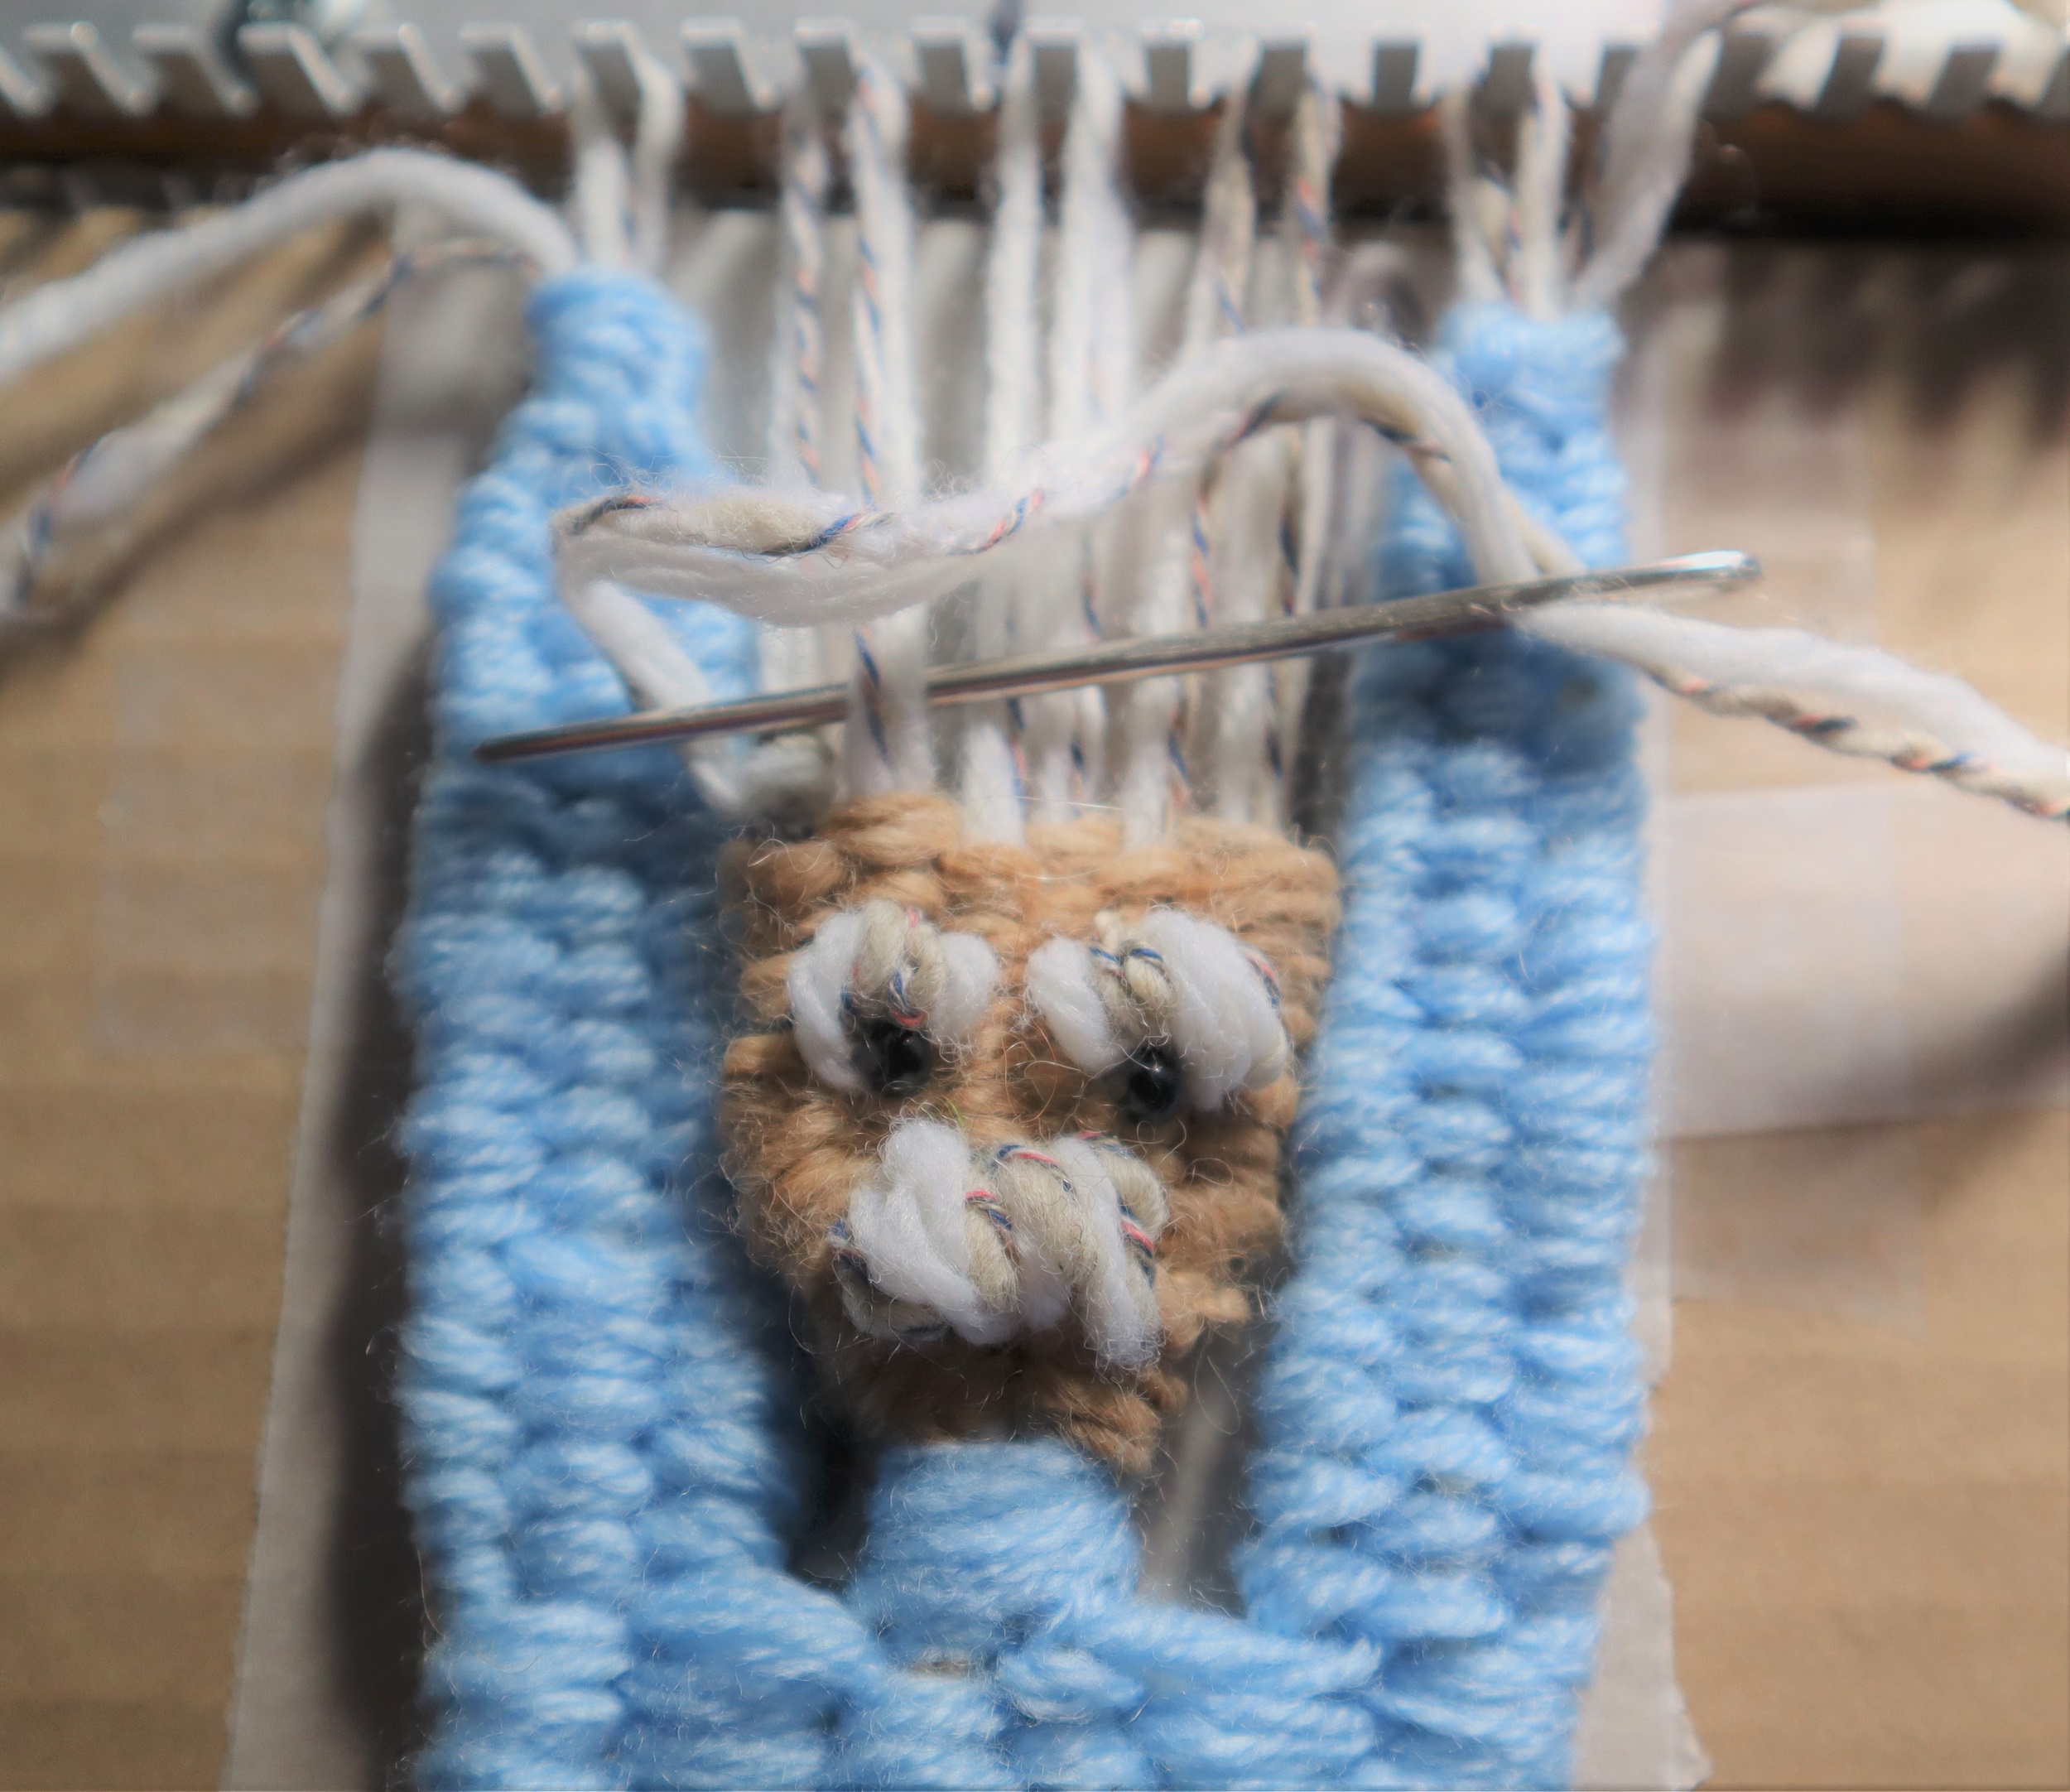
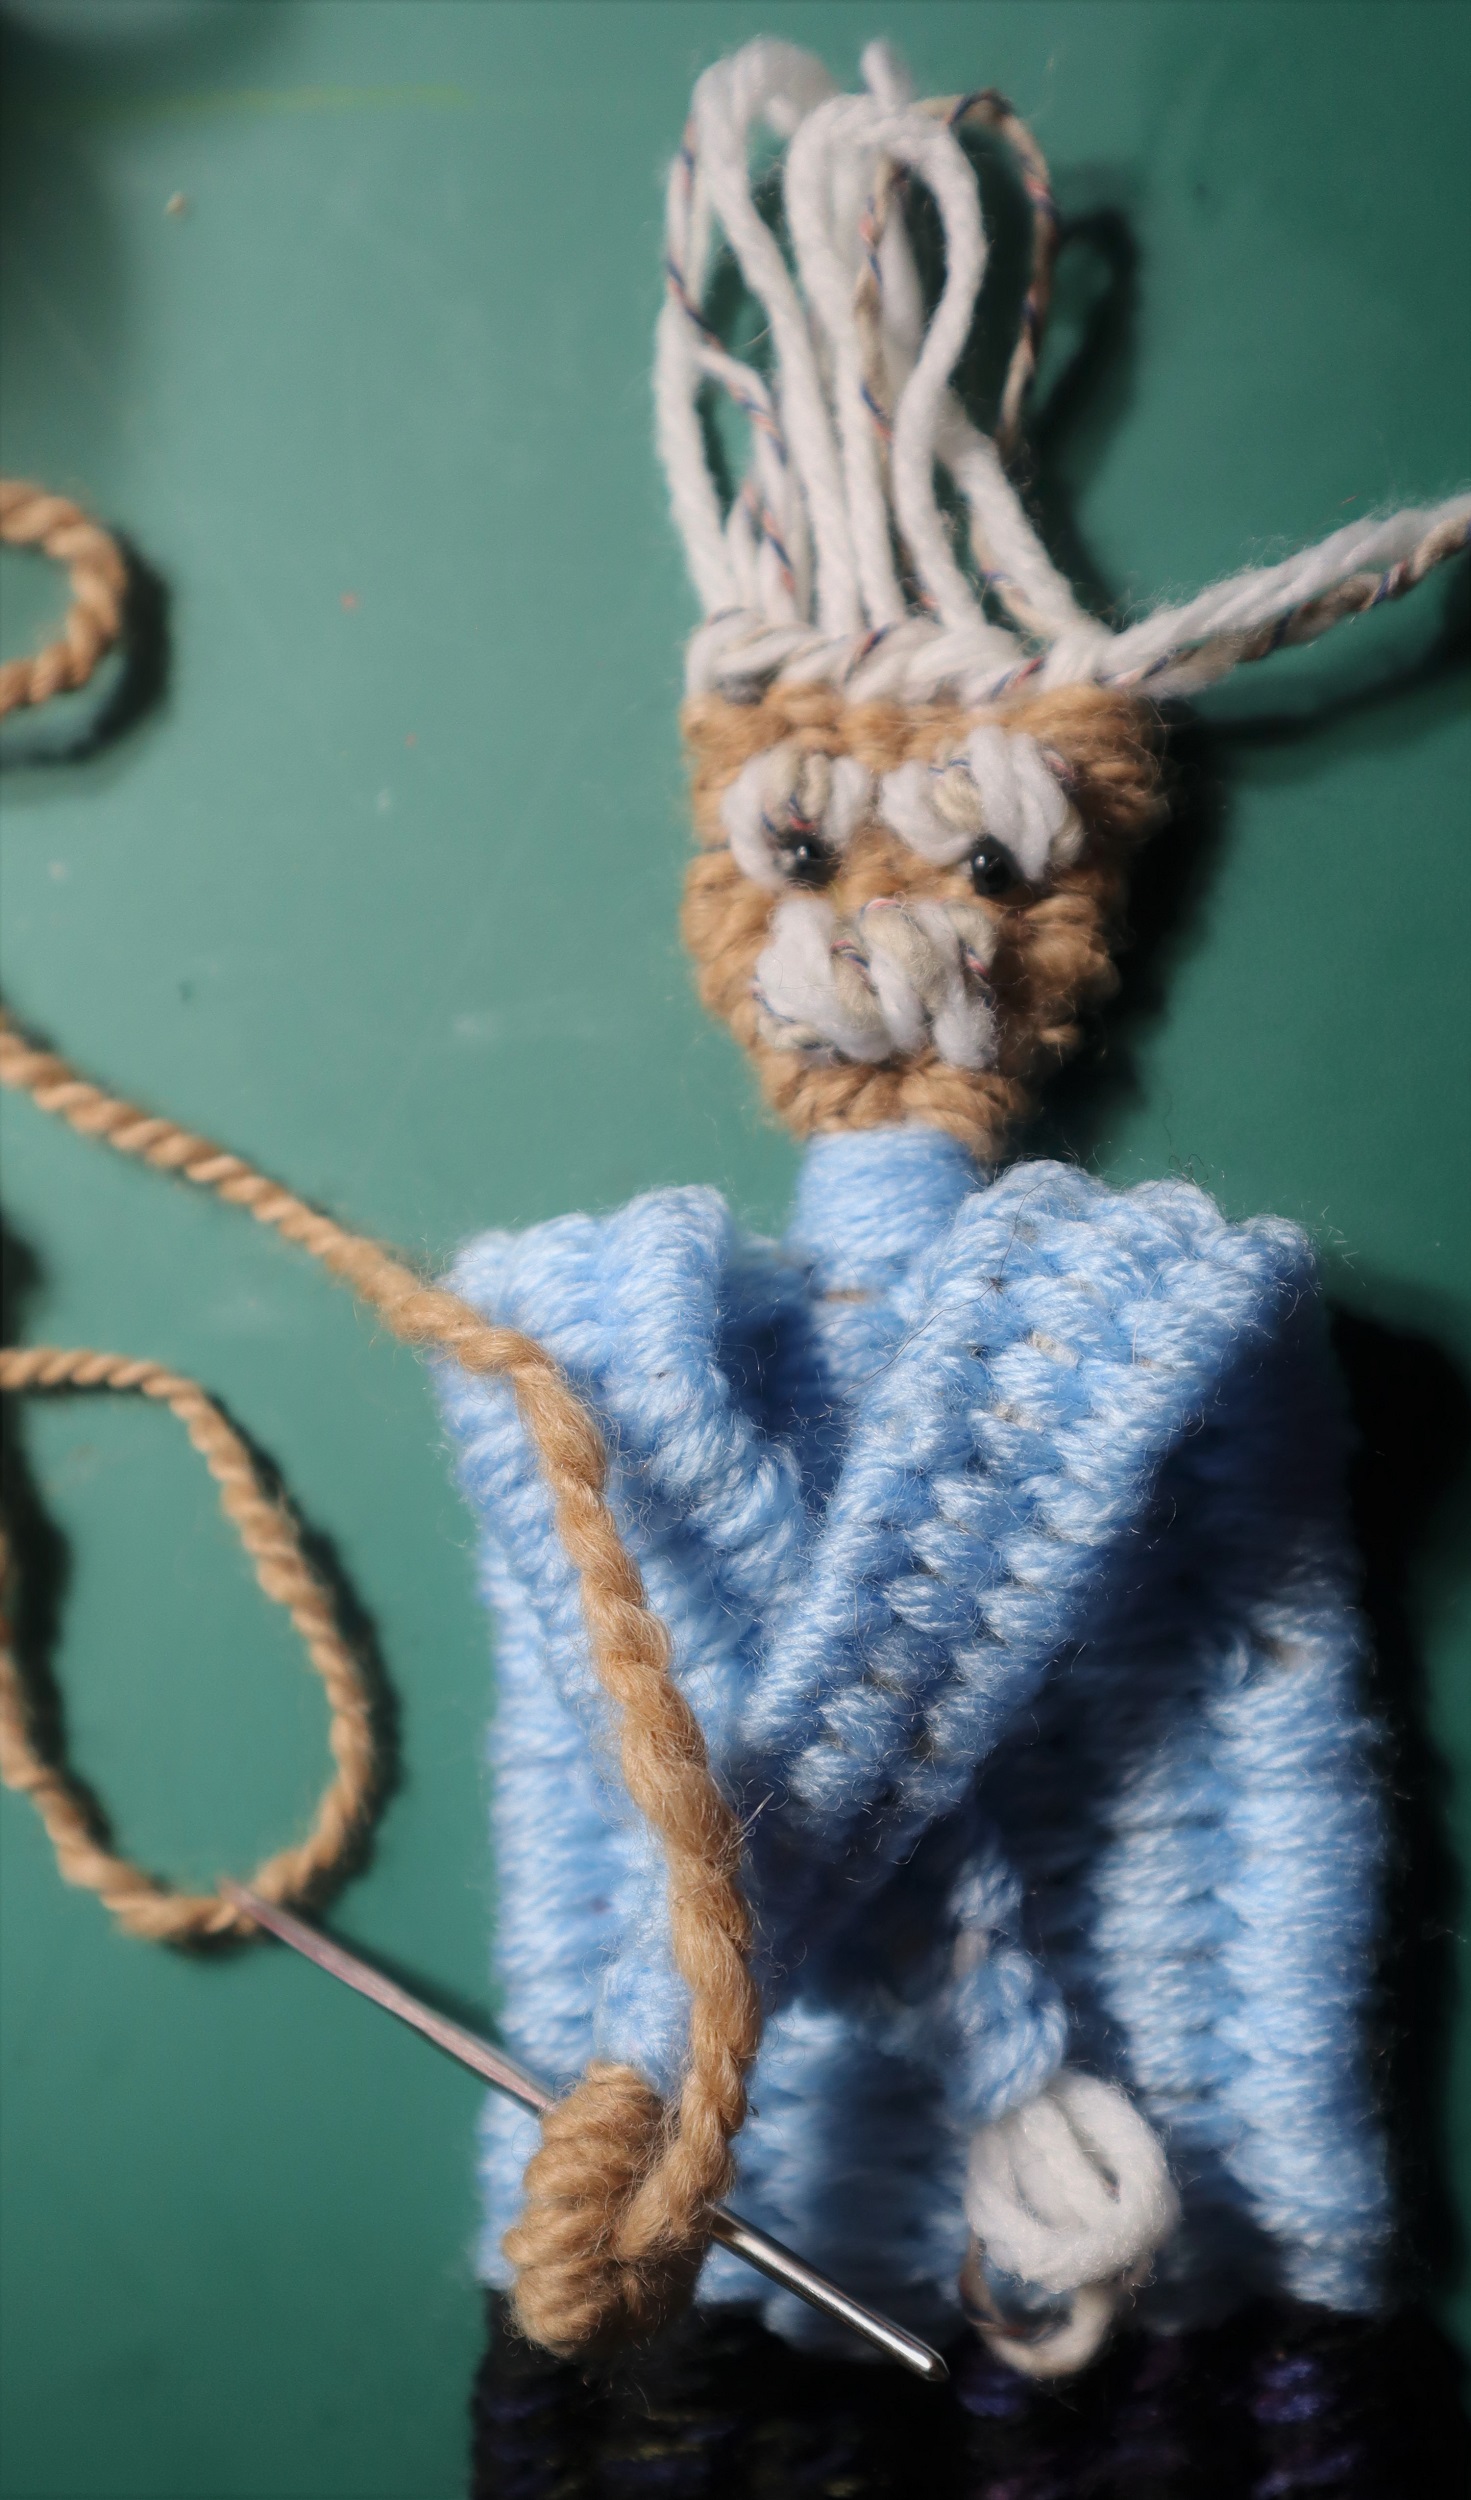
FACE:
With skin tone yarn, weave the face, weaving under 1/over 1 and over 1/under 1.
MOUSTACHE:
Stitch loosely over the shed stick with 1 strand of white yarn and 1 strand grey yarn held together as if they are a single strand at least 3 times. Take the ends to the back of the head.
EYEBROWS:
Take 2 slightly tighter stitches over the shed stick for each eyebrow.
EYES:
Stitch 2 small black ‘e’ size beads on for eyes.
HAIRLINE:
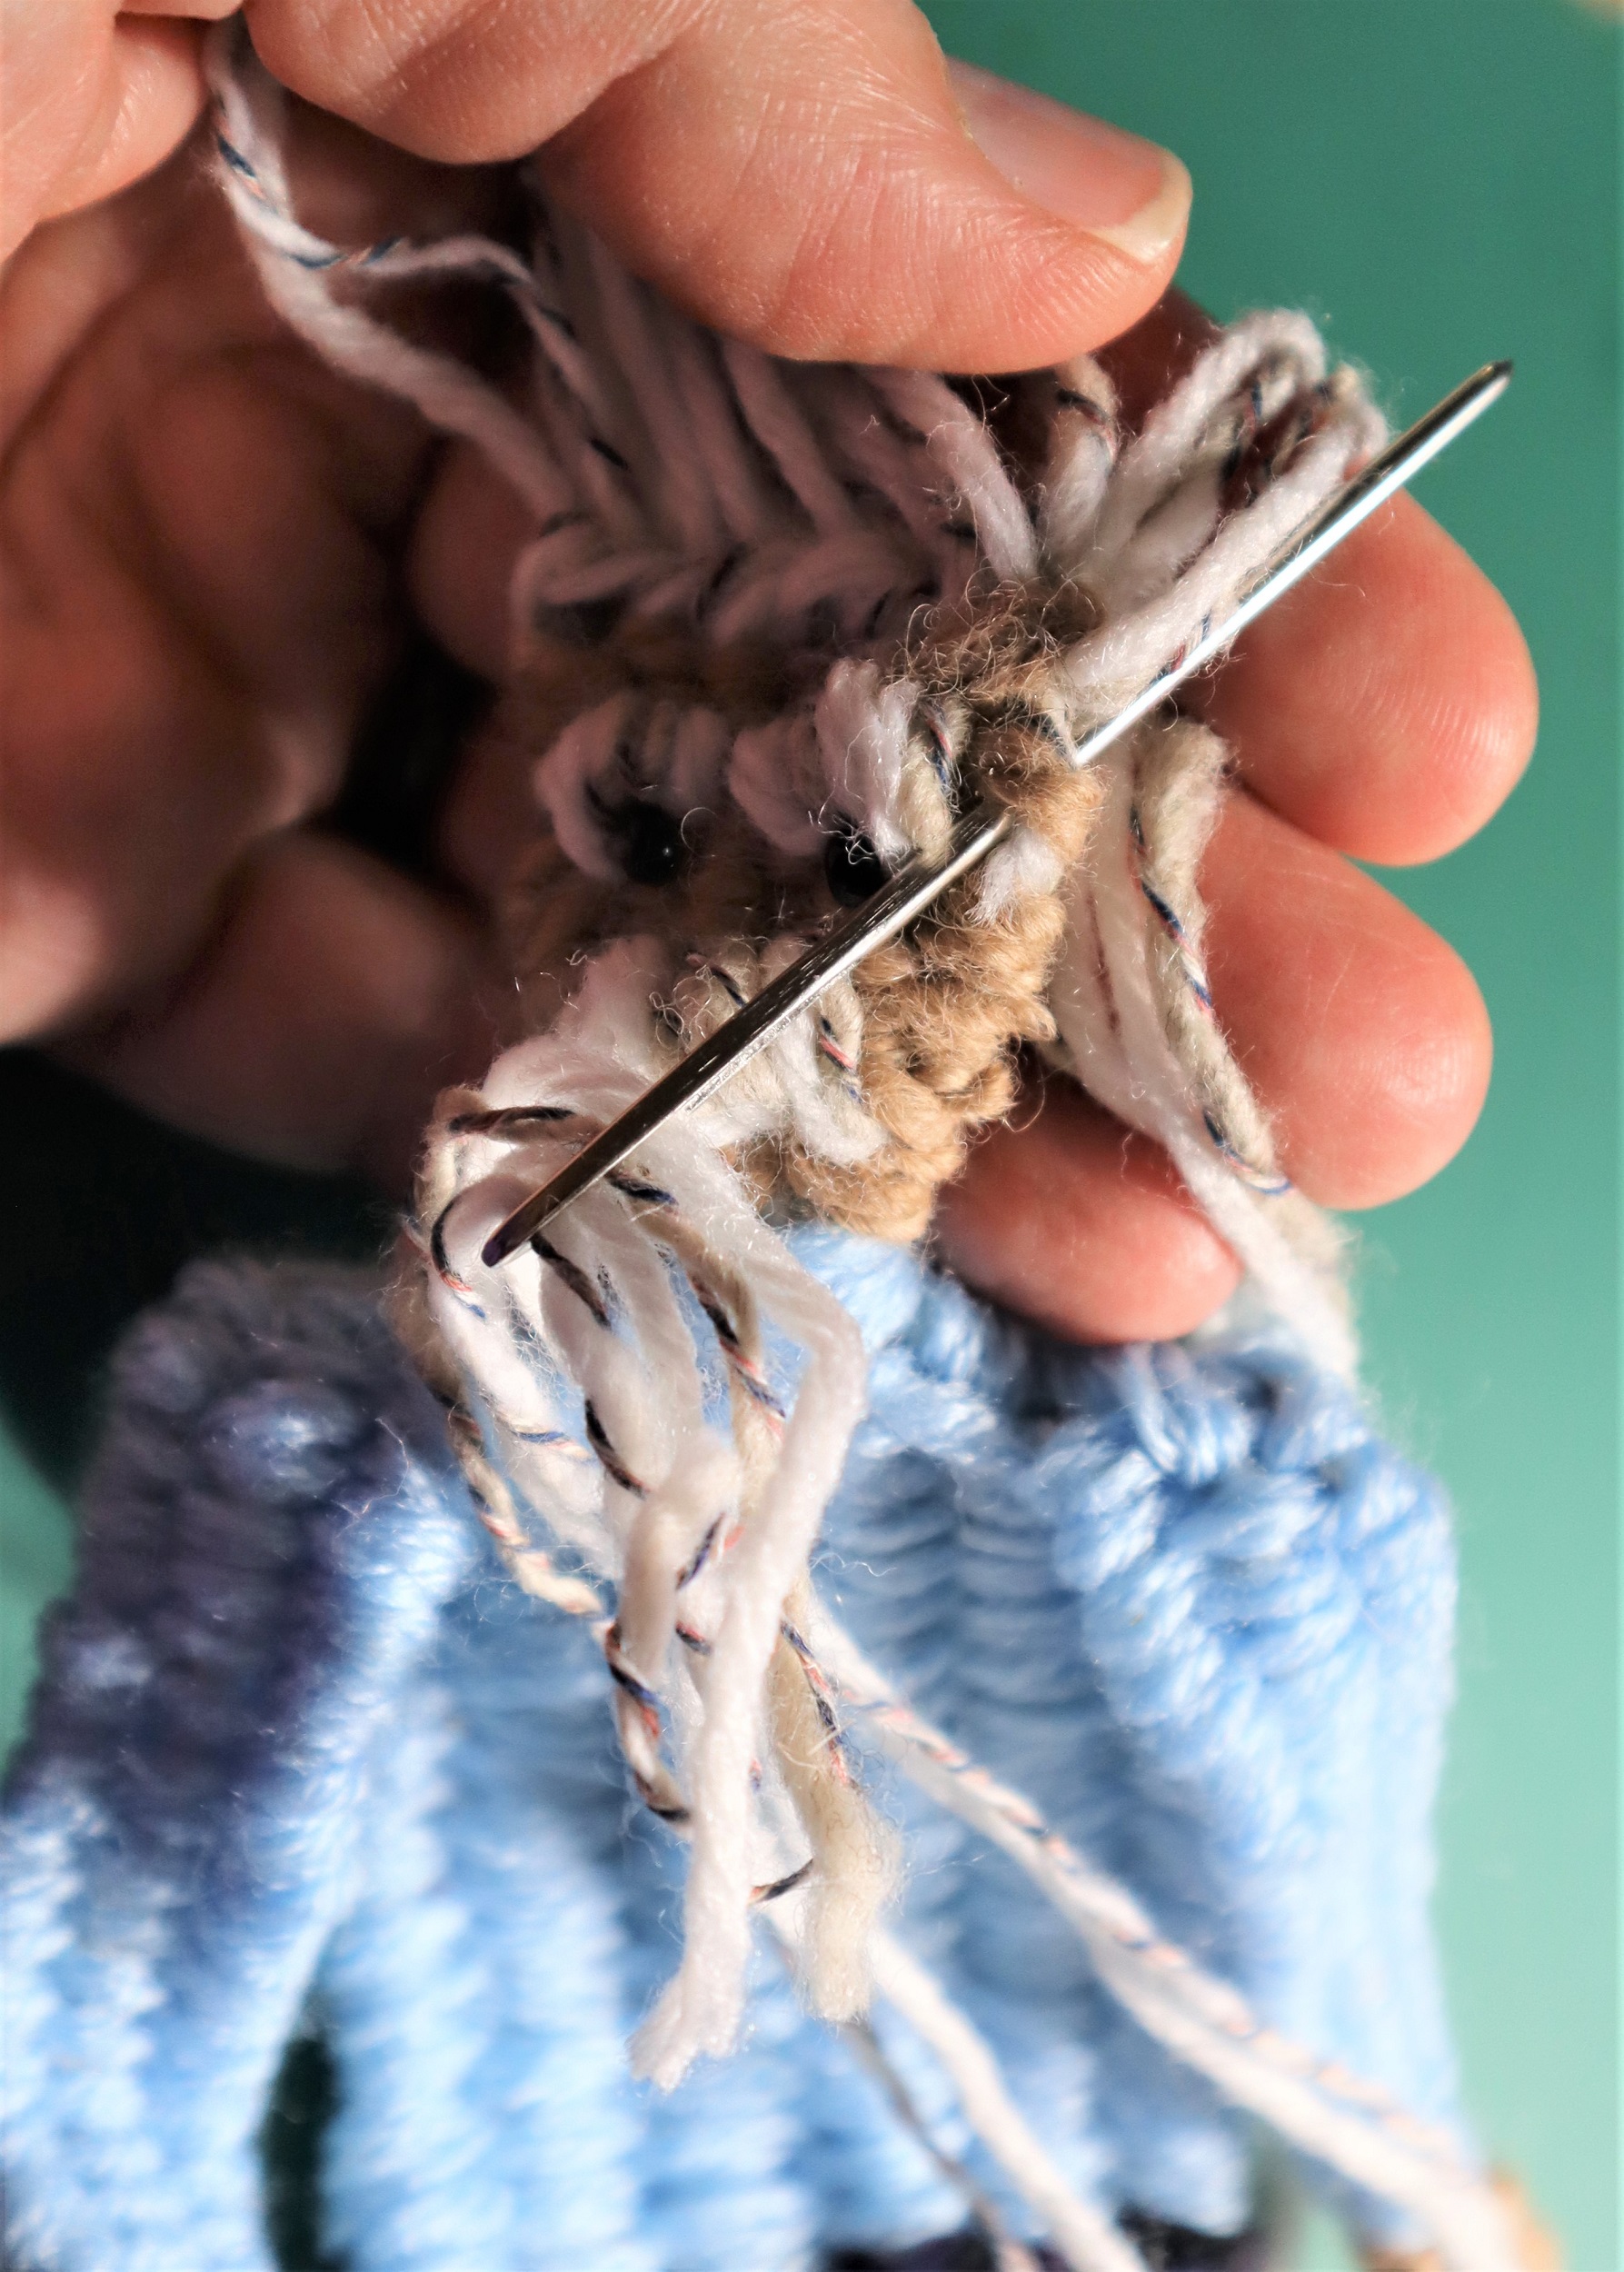
Lock the top of the head in place by stitching around each warp strand at the top of the forehead.
Lift Einstein off the loom.
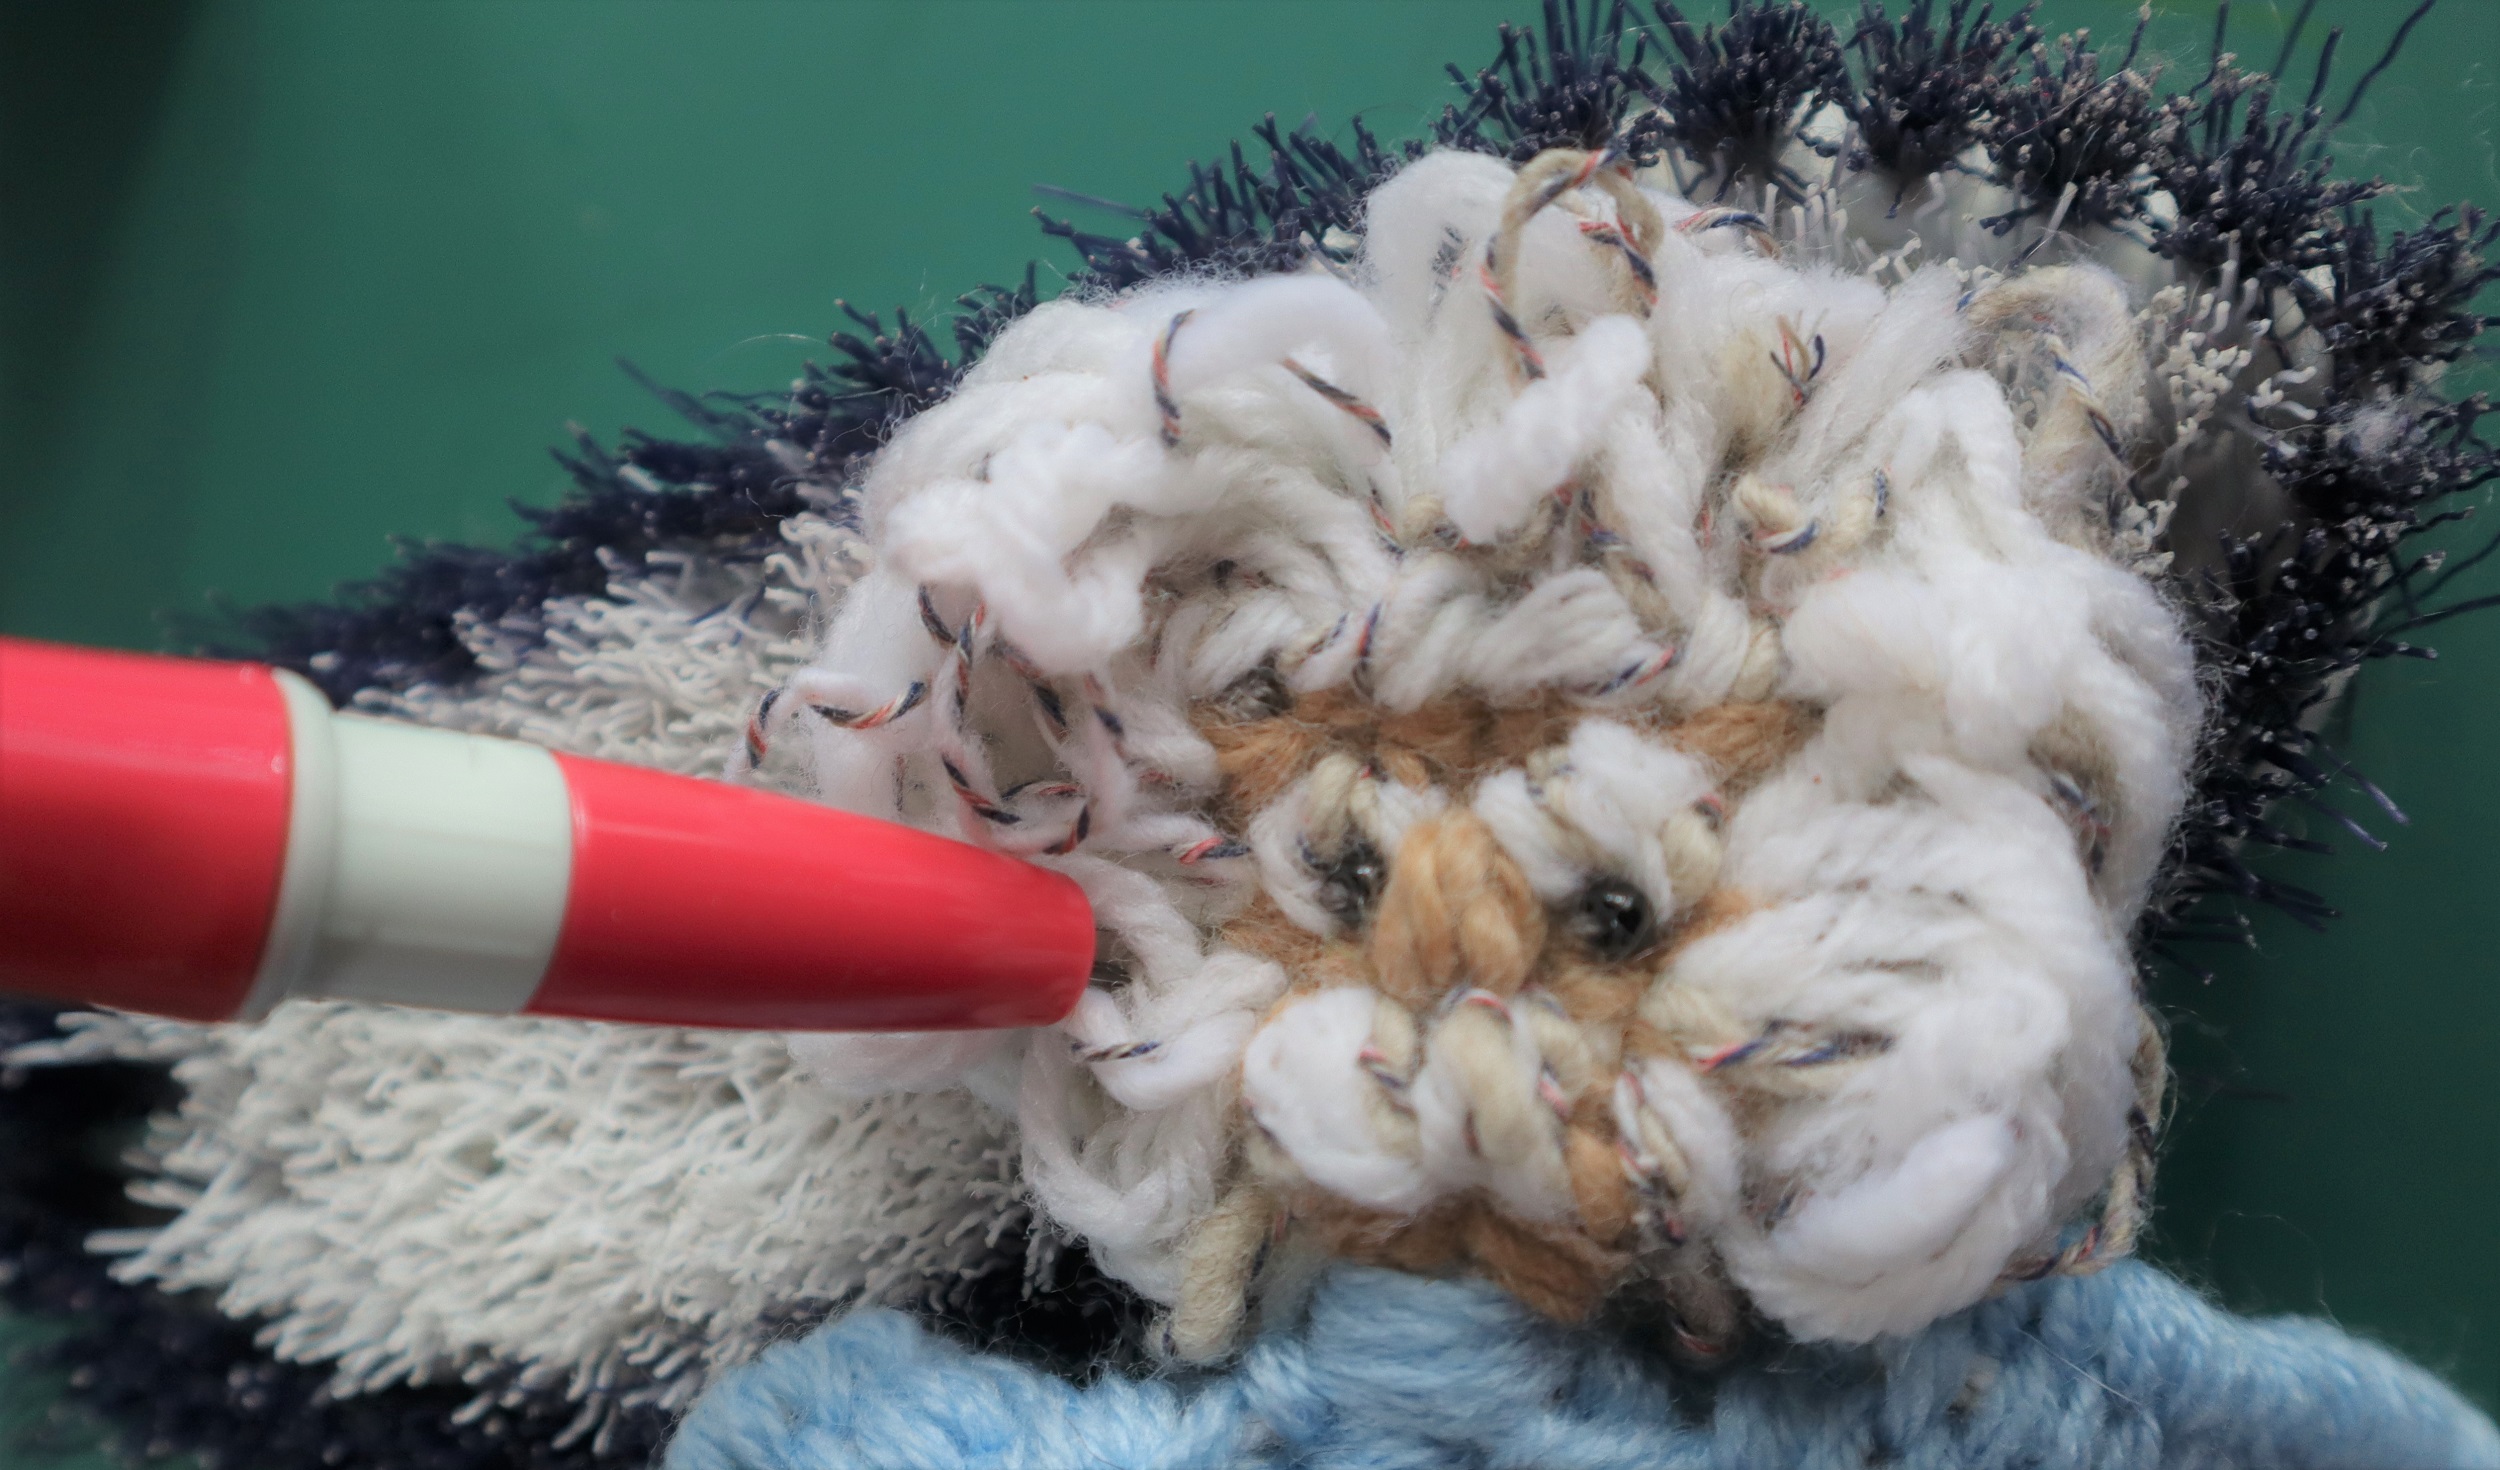
NOSE:
Stitch 2 vertical stitches with skin tone yarn.
SHOES:
With Brown yarn follow the instructions for the feet on page 36. Weave the yarn ends into the legs.
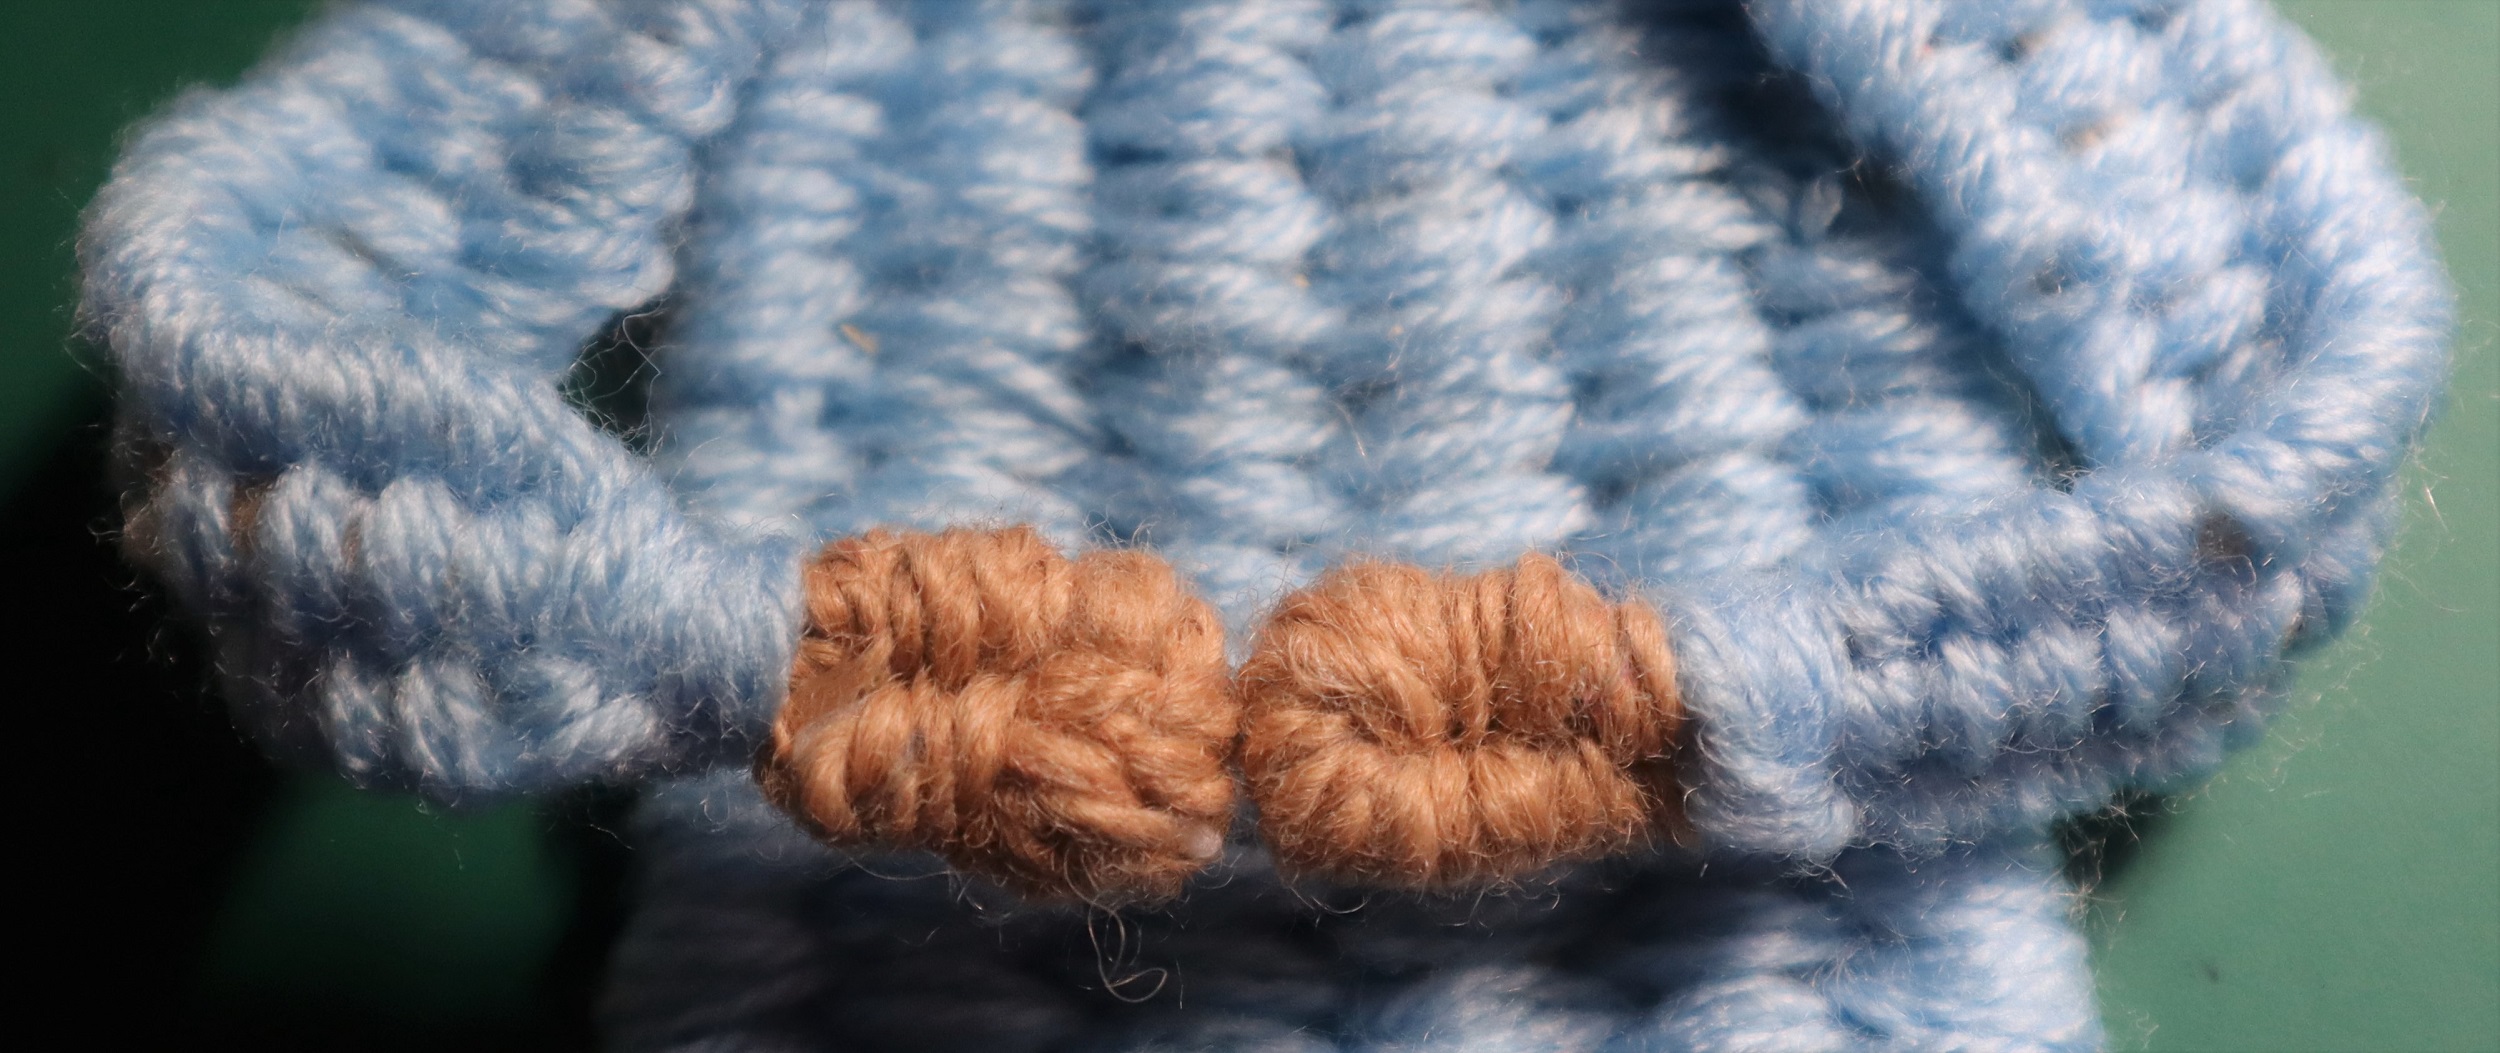
HANDS:
Weave in the single strand at the side of each hand into the arm so that it is the same size as the loop of the hand.
With skin tone yarn make hands the same way as the feet. Weave the yarn ends into the arms.
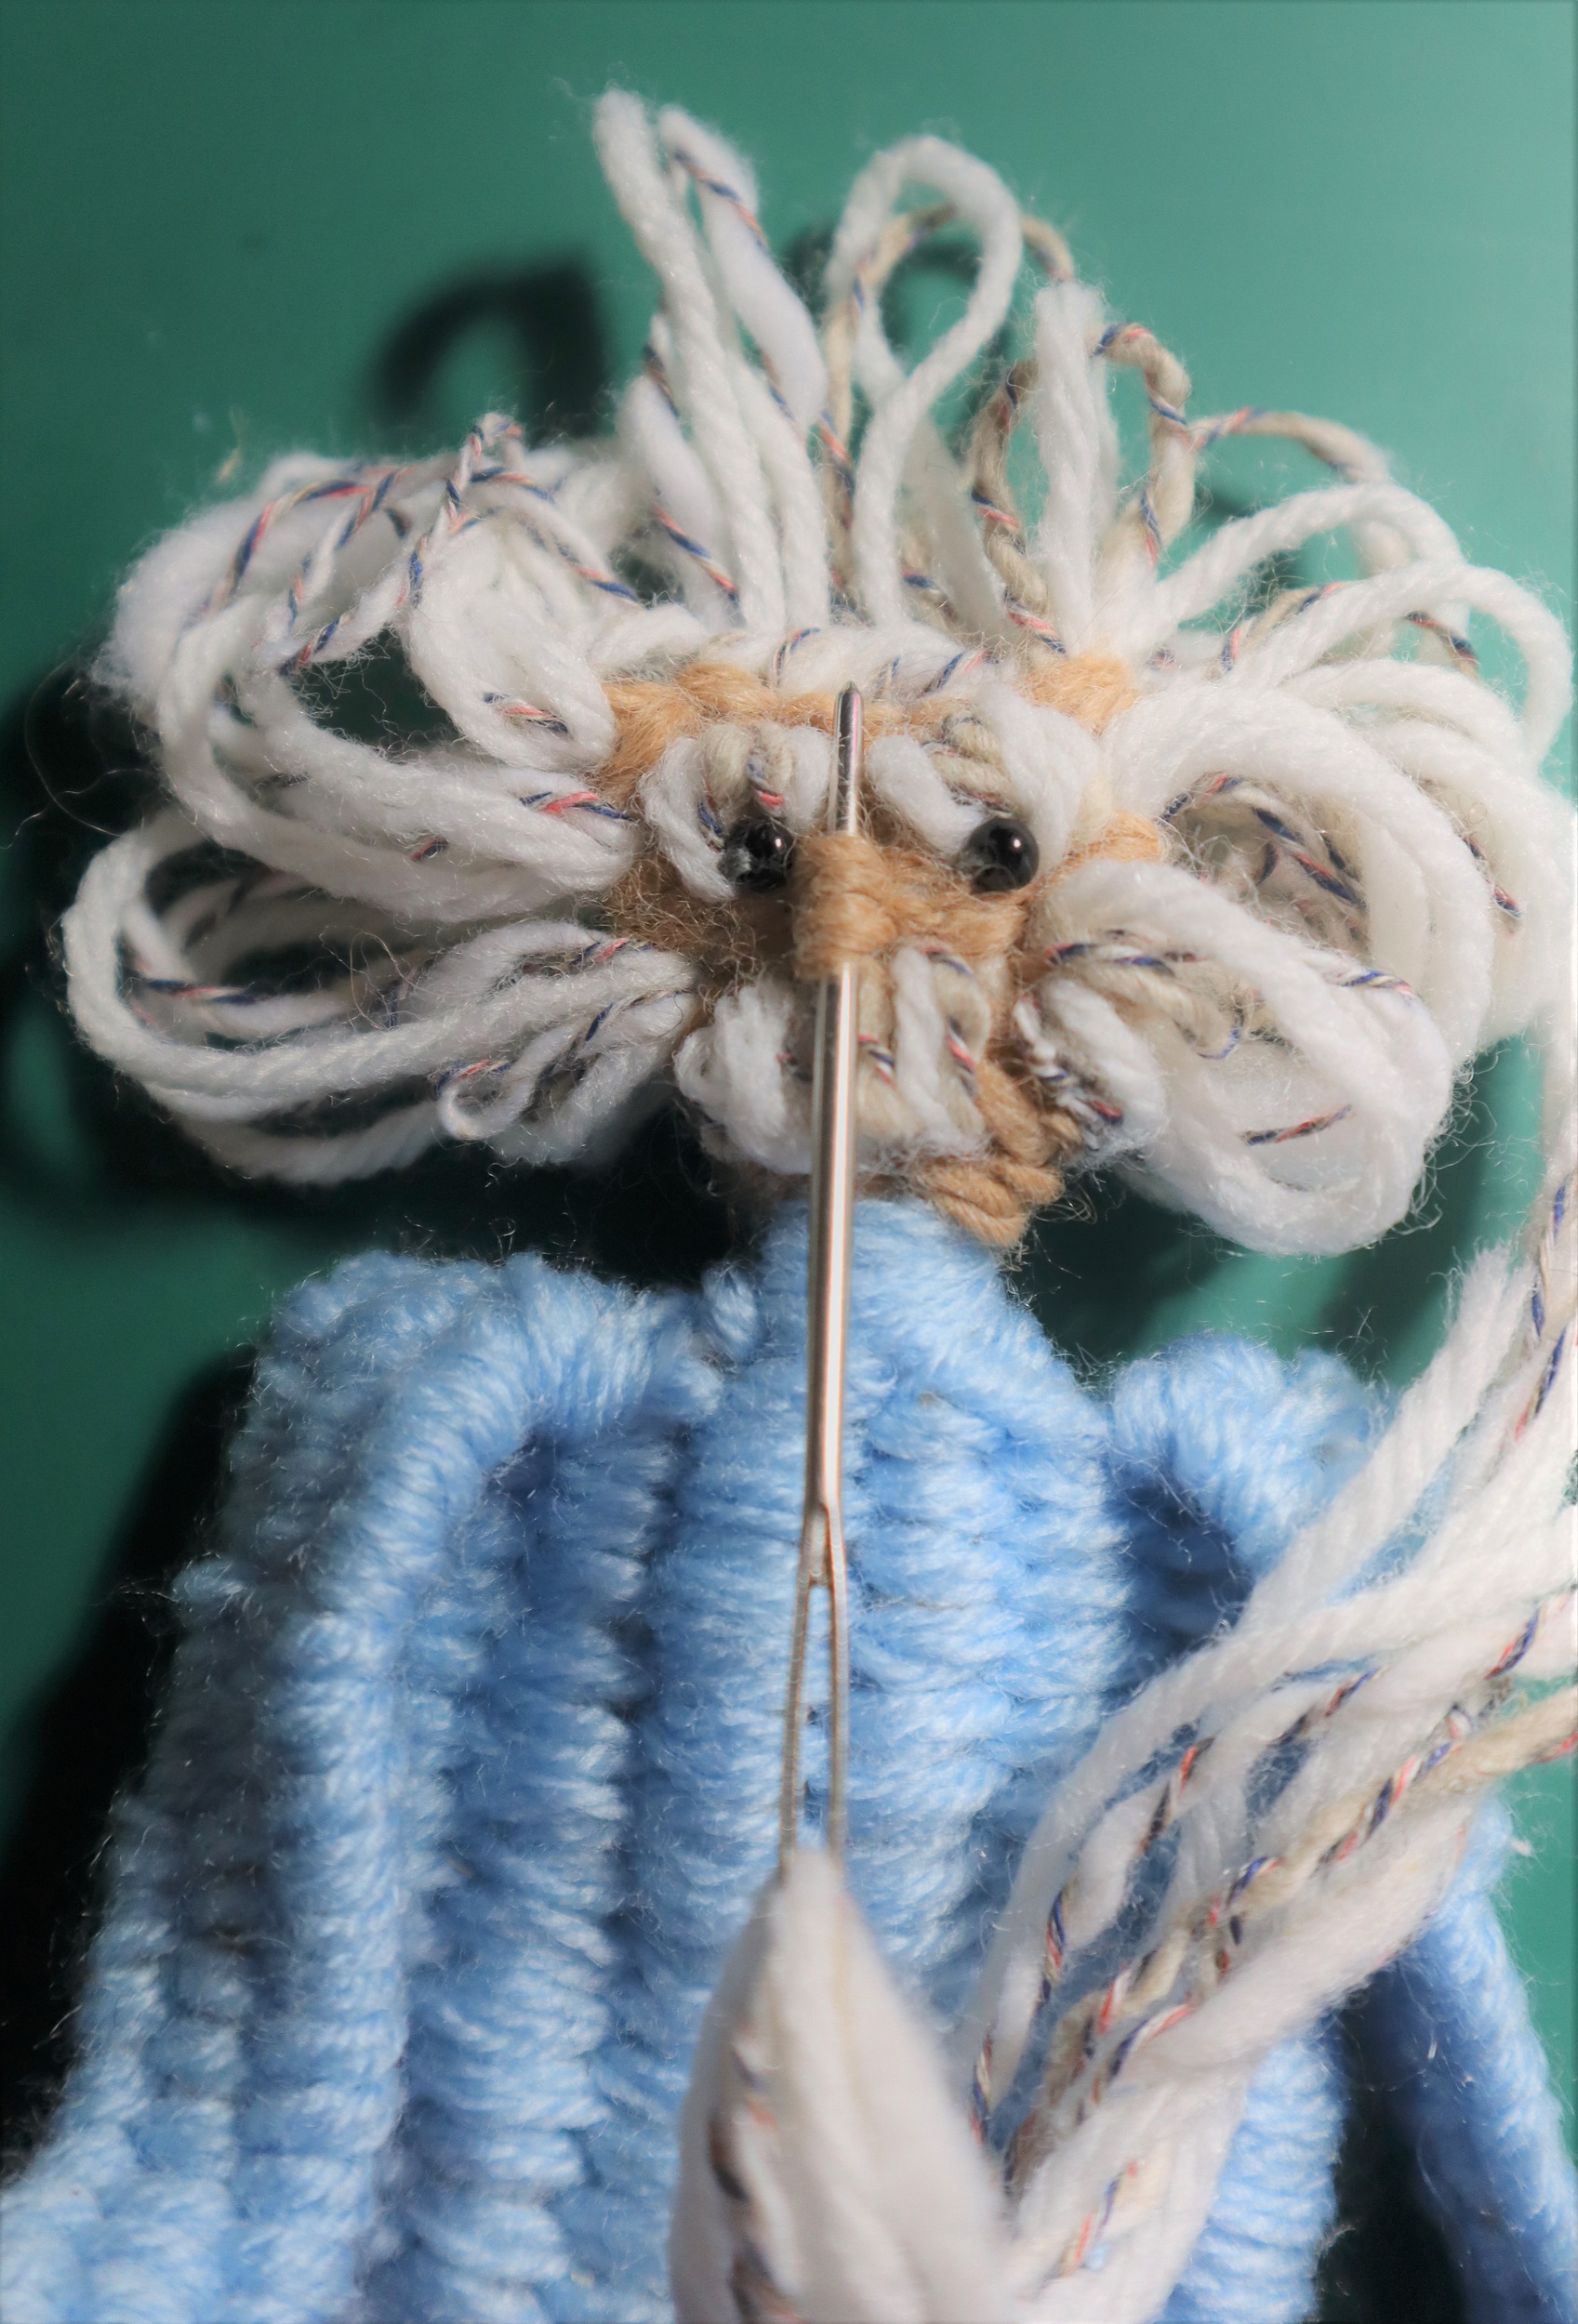
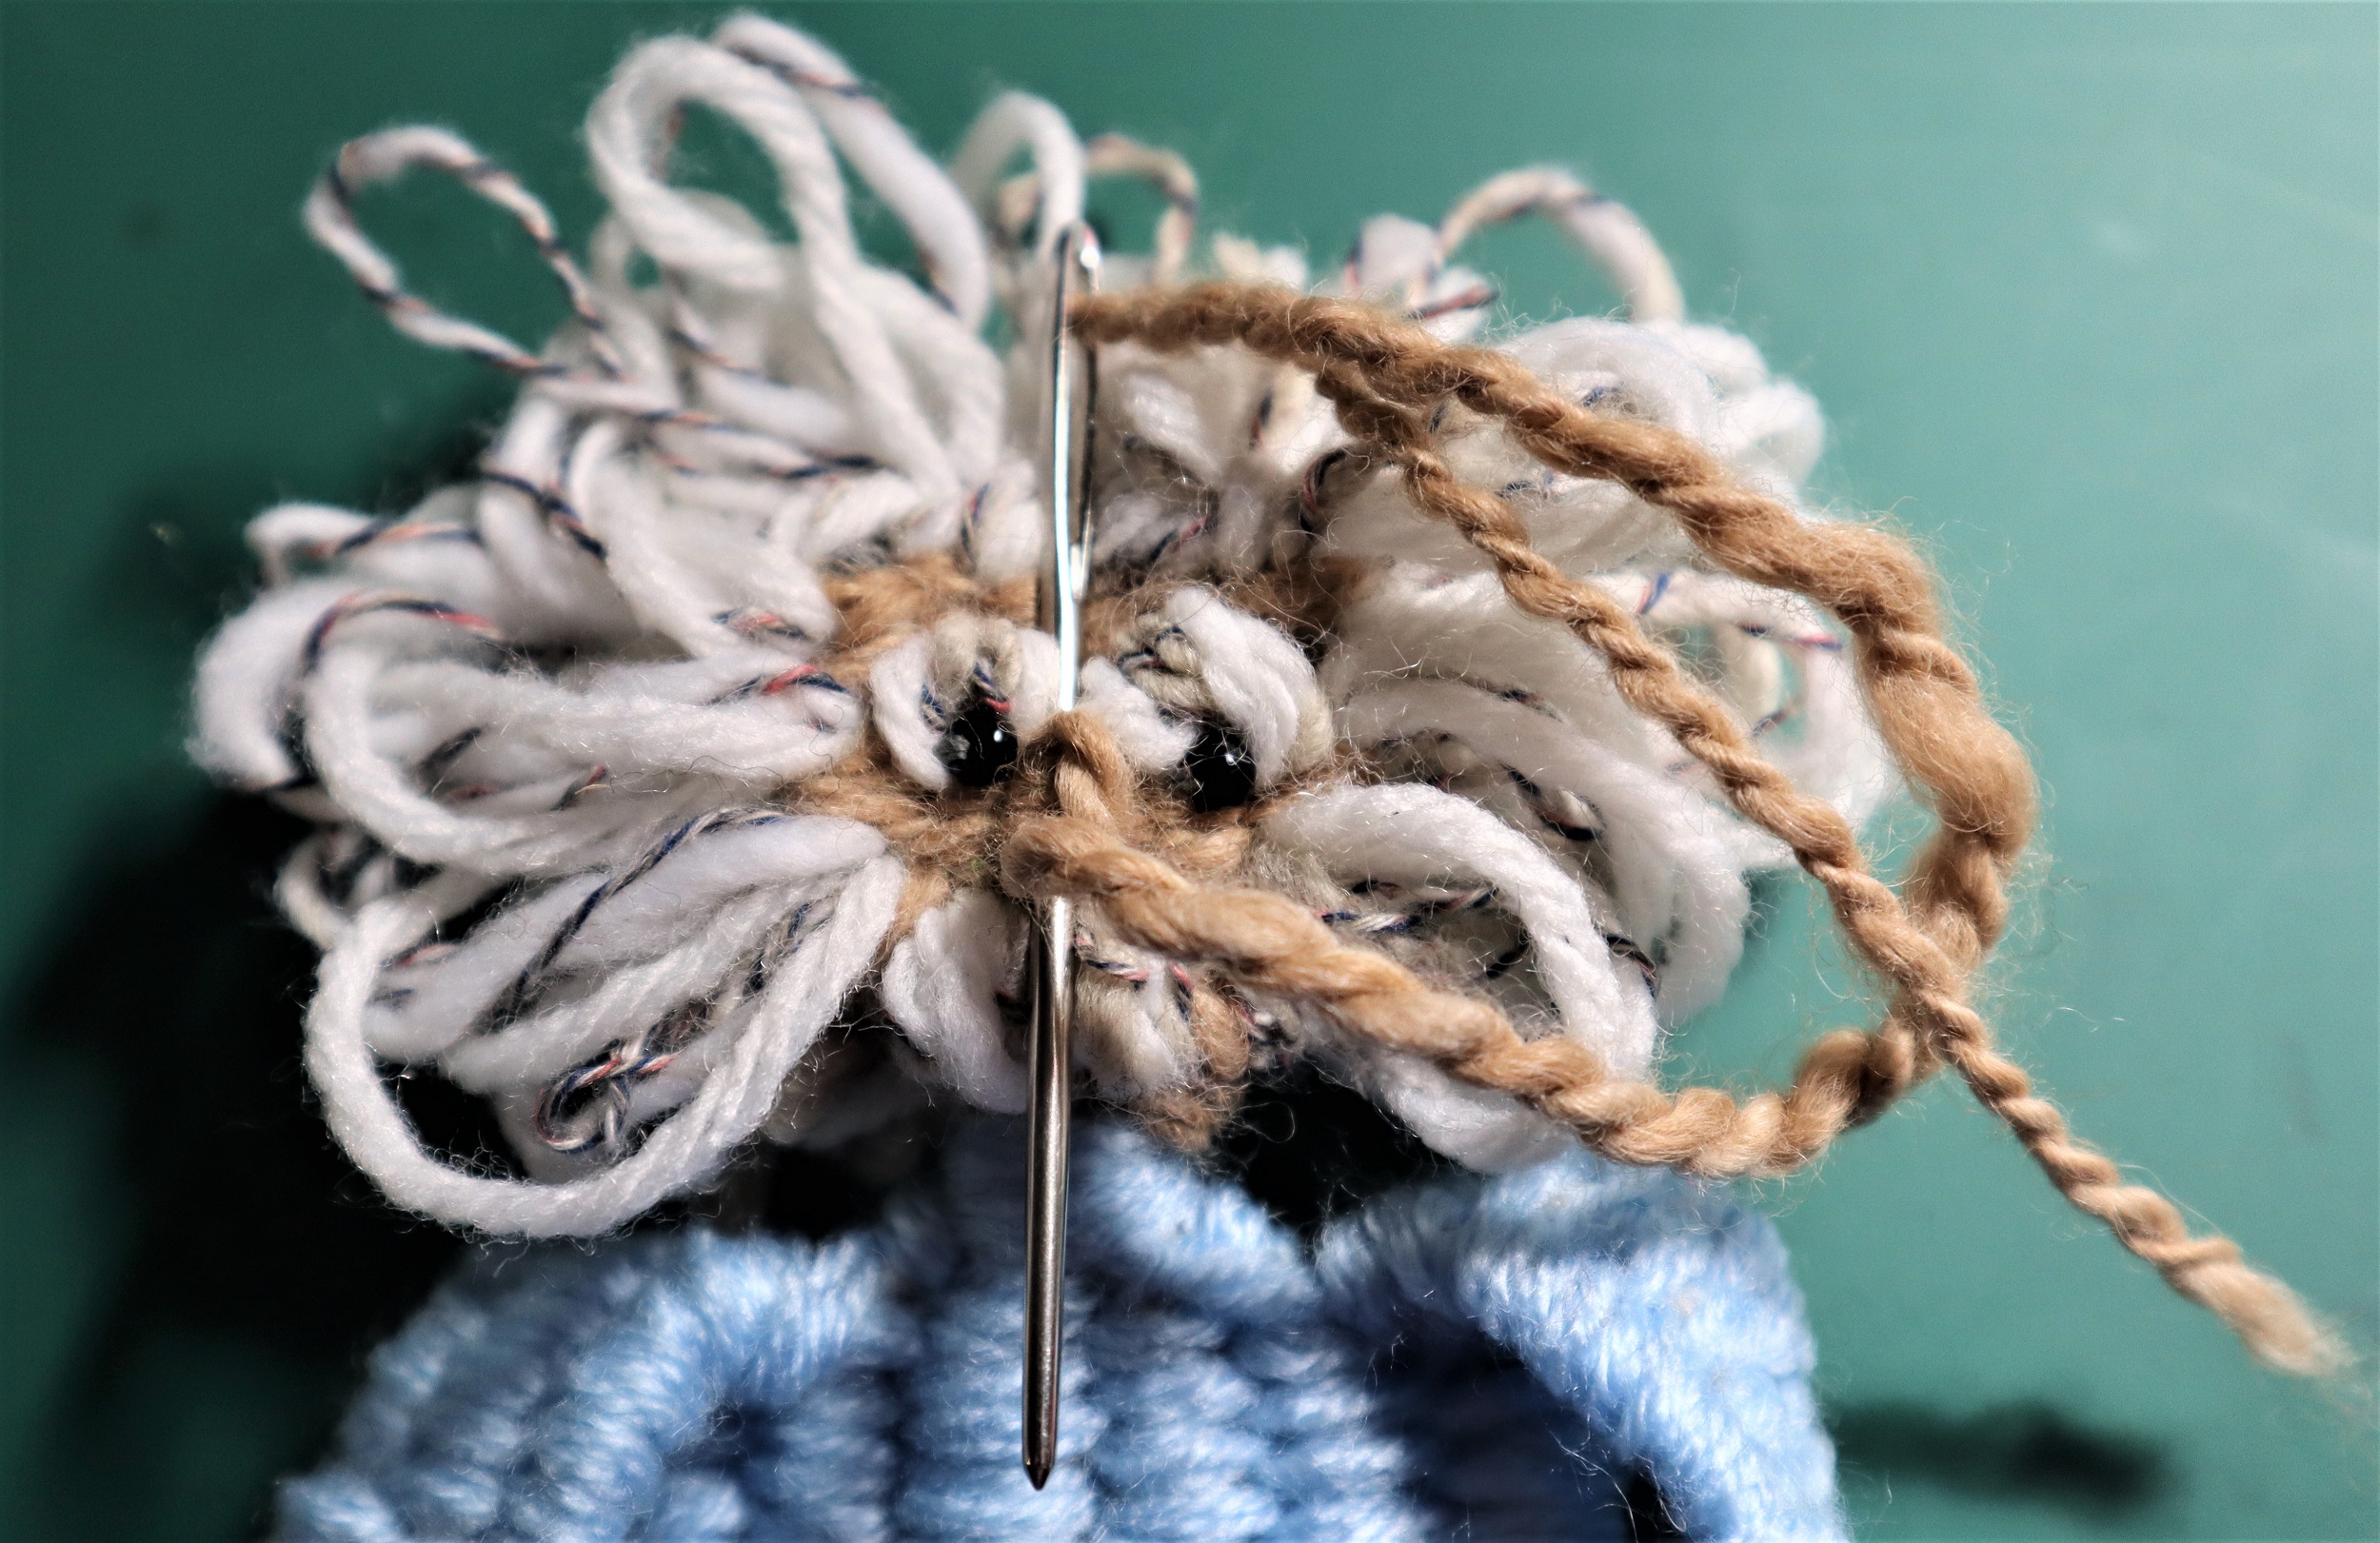
HAIR:
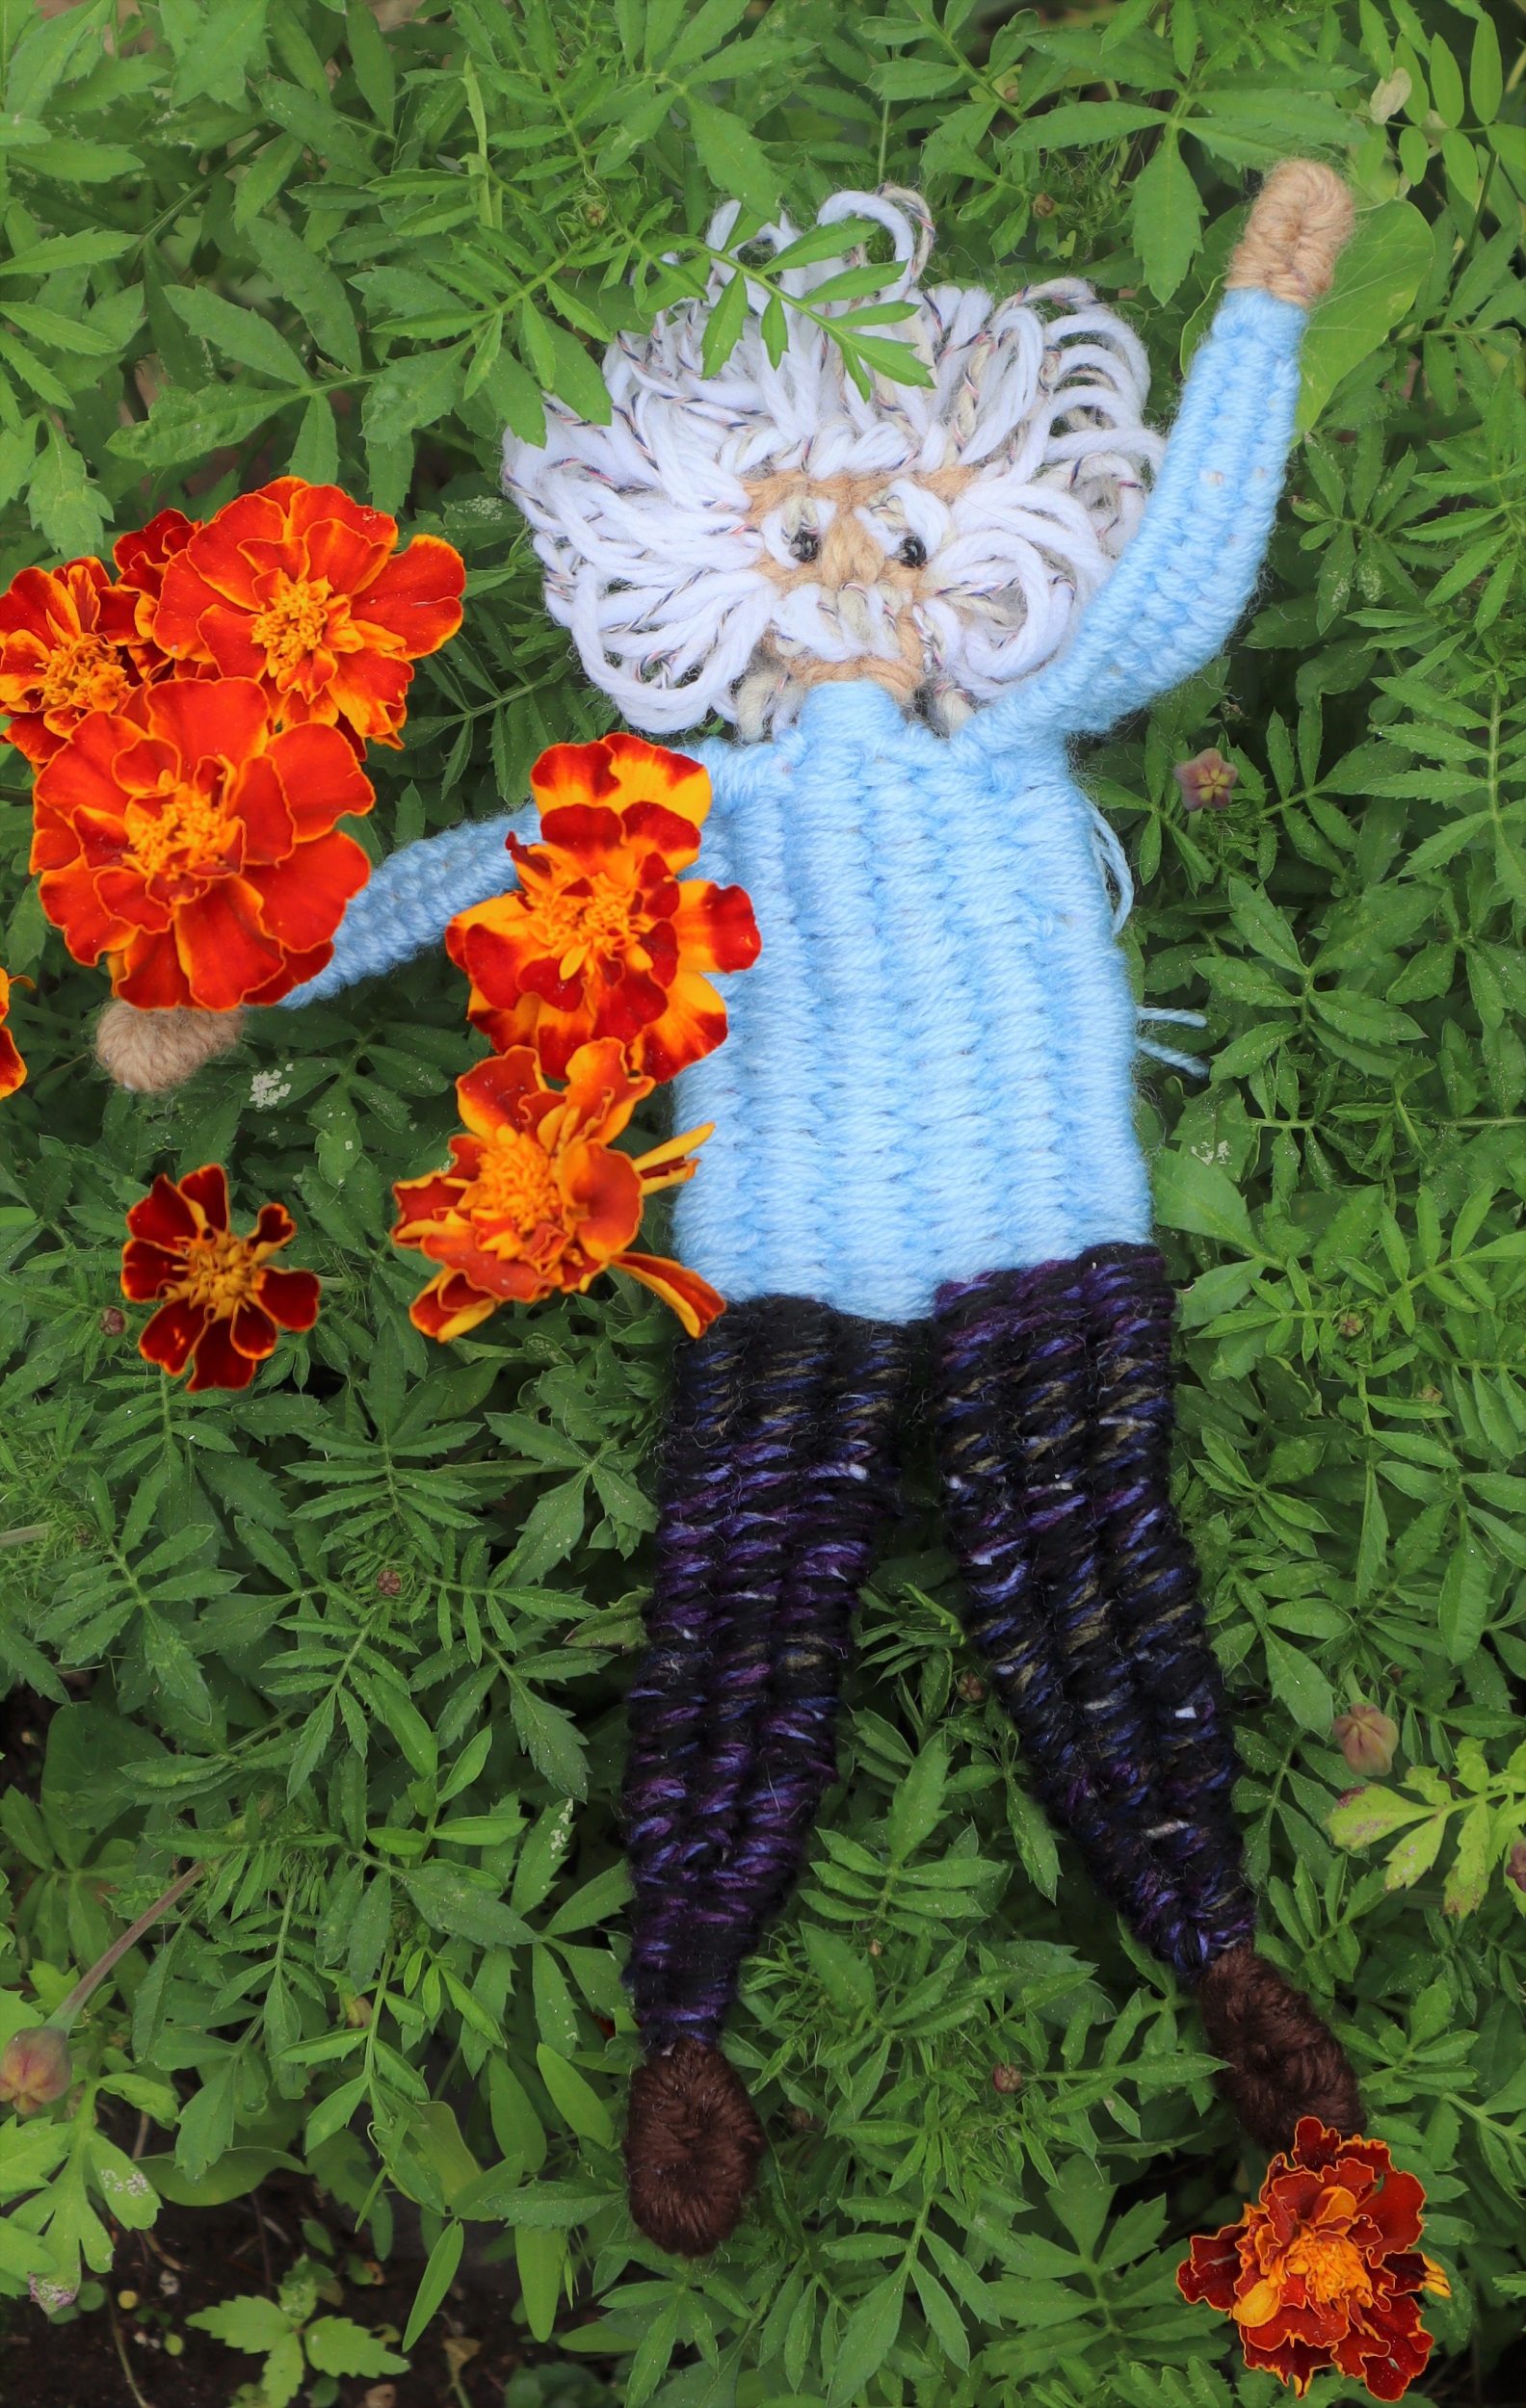
Stitch loops of hair yarn around the edges of the face and on the back of the head.
Use felting needles to finalize the loops into the ‘dandelion’ shape of his classic signature hairstyle.
FINISHING:
1: Steam the woven figure on the wrong side with a steam iron, being sure to not touch the iron to the weaving.
Finger press the arms down and the hair into place.
Weave in the ends.
Trim any ends.
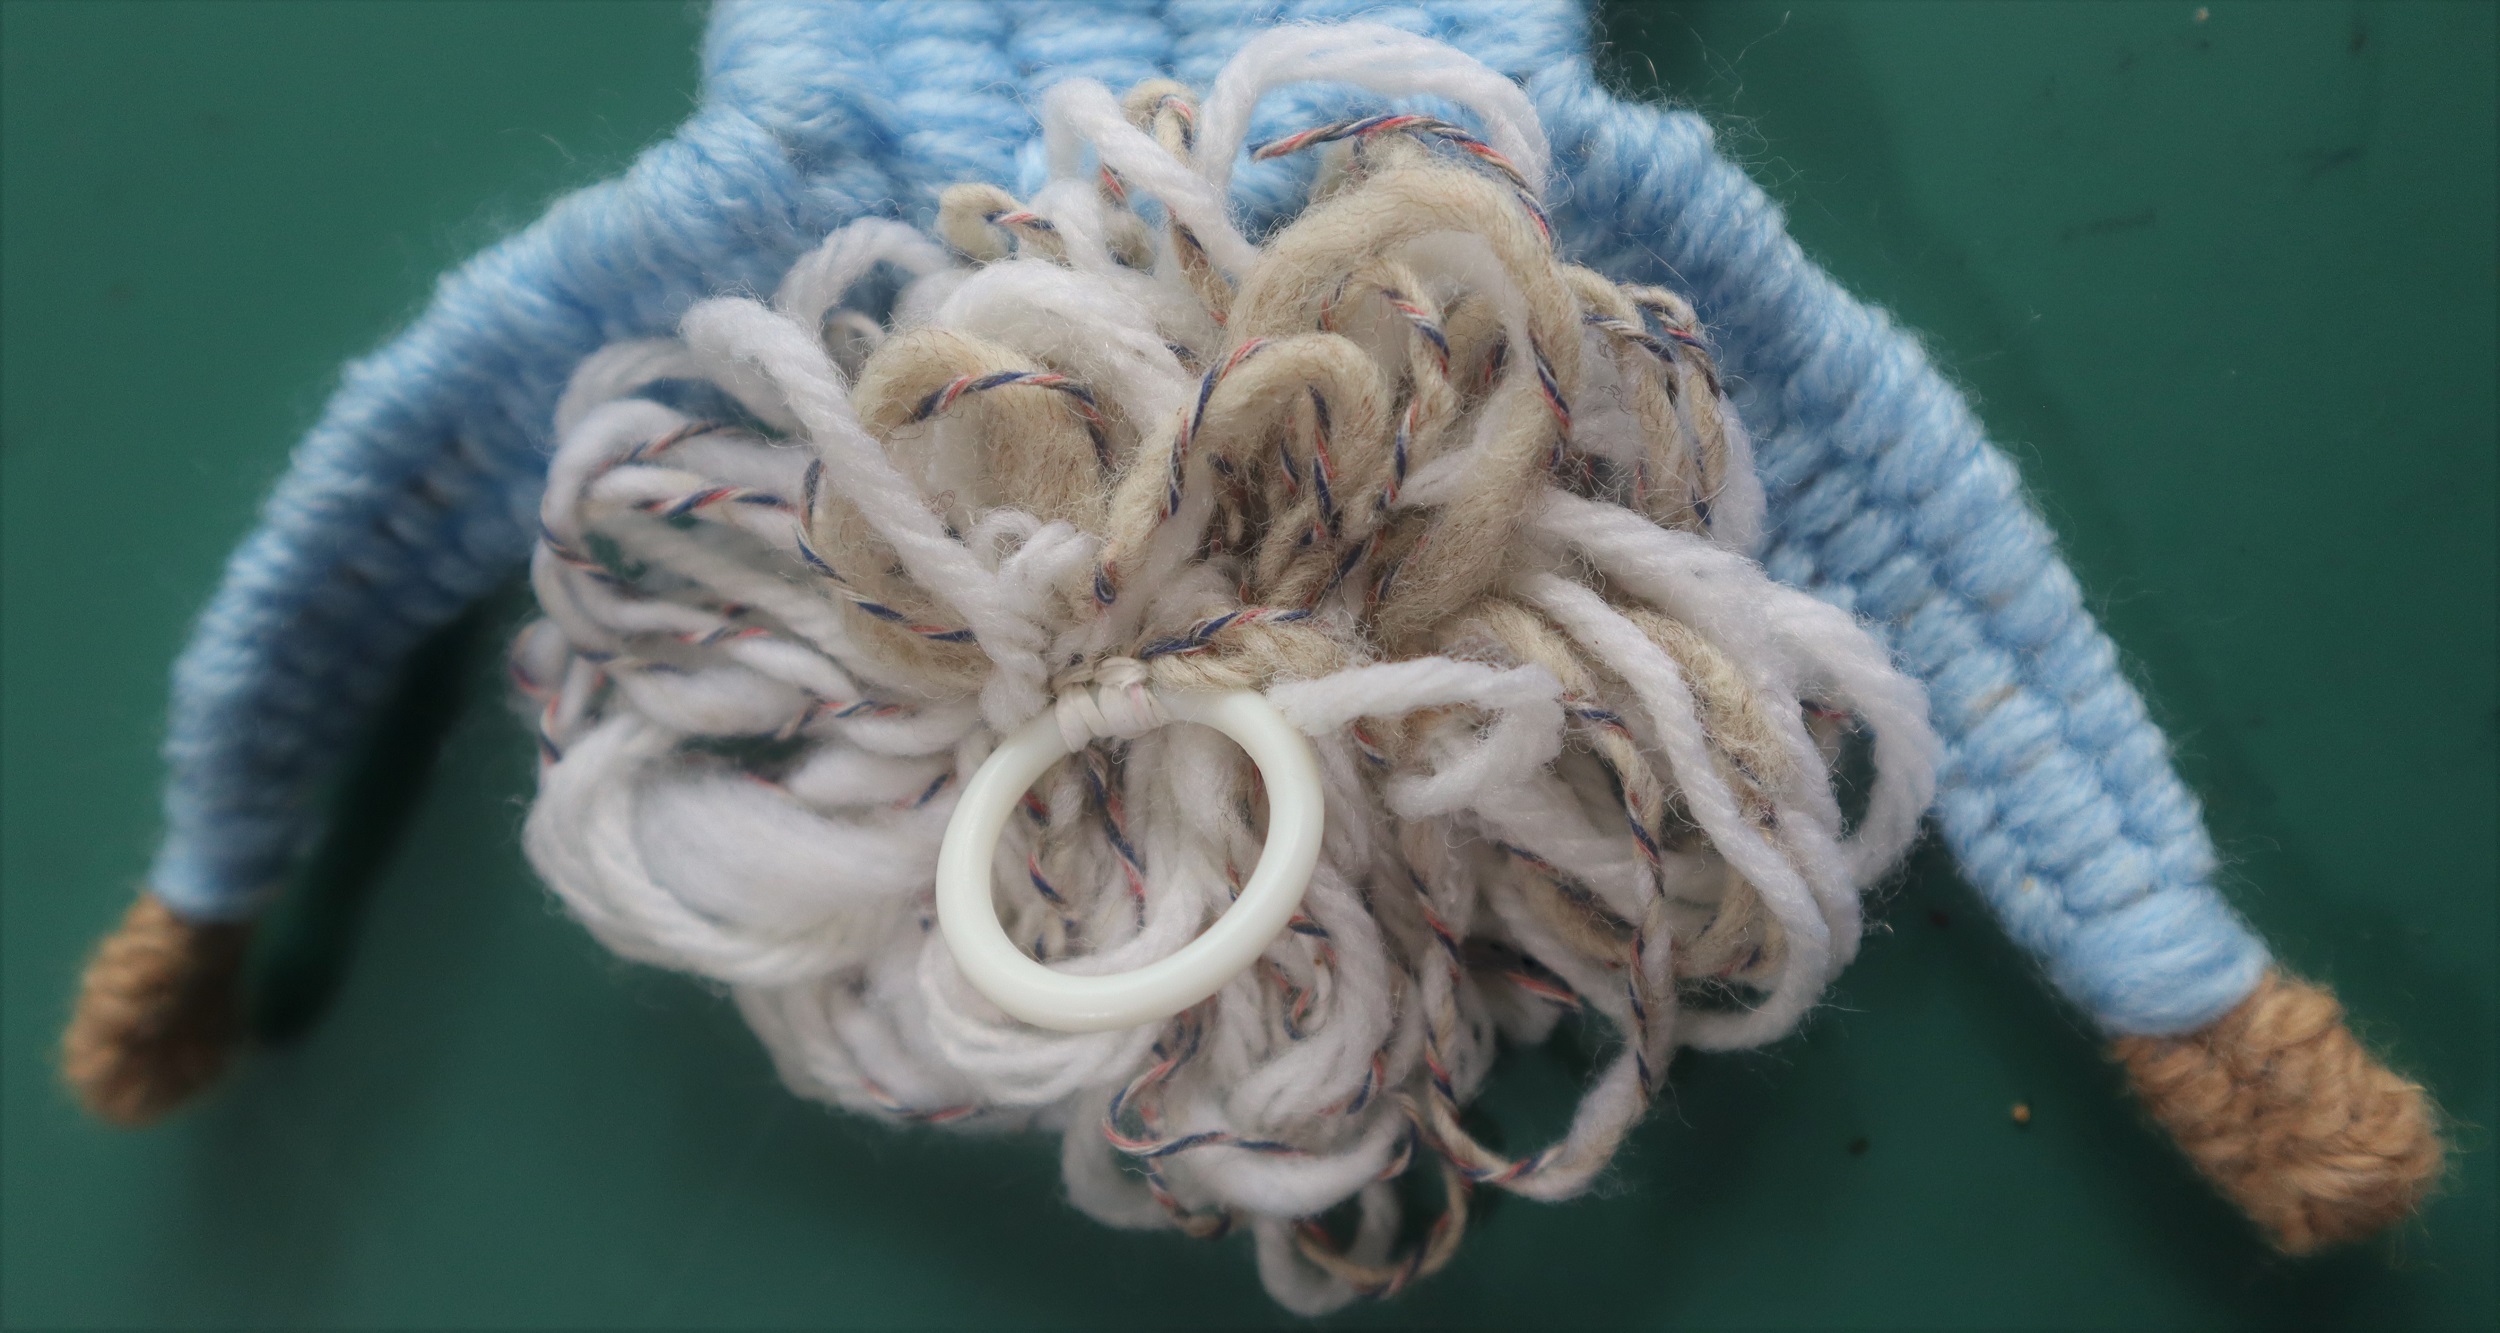
2: Sew a plastic or metal ring to the back of the head for hanging the banner.
To see all the links for the ‘How To’ posts for the “Imagine” Banner Weave along, please go to L I N K S
To order the loom, book and extras kit for the Weave Along from Mirrix, please go to K I T
FREE FORM WEAVING: HOMAGE TO ALBERT EINSTEIN:
Albert Einstein is woven (with a few extrapolations and a slight adjustment to the waistline) following the instructions for the Woven Dancer on page 30 of “Innovative Weaving on the Frame Loom”.
In order to hold the pattern onto the loom, a backing board is needed.
INSTRUCTIONS:
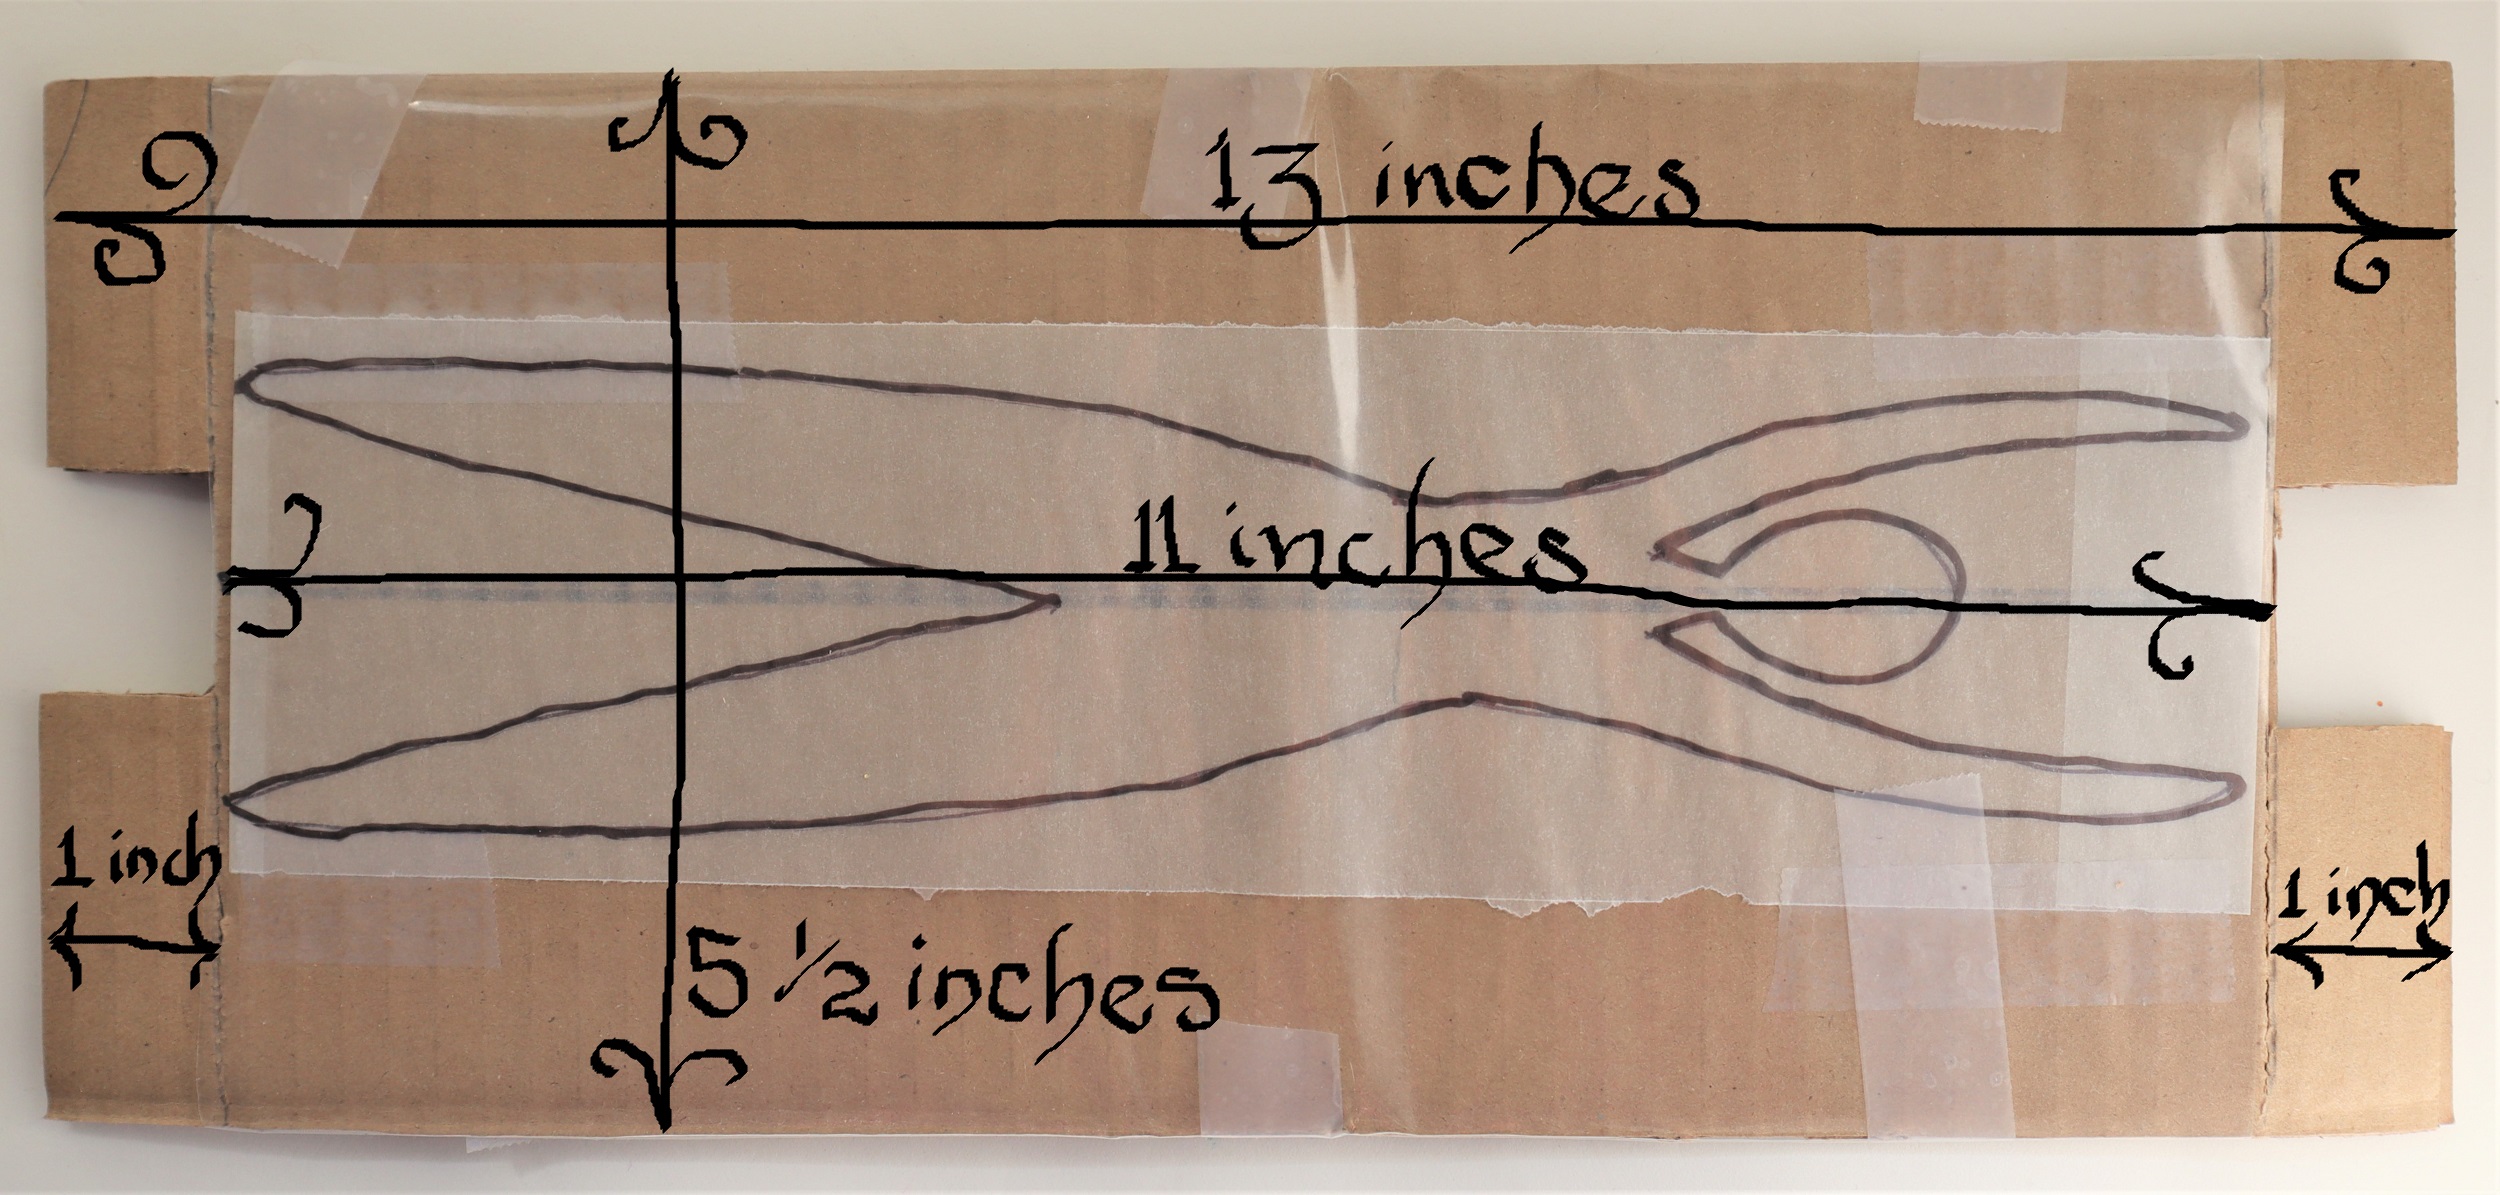
HOW TO MAKE THECARDBOARD BACKING BOARD FOR THE SAFFRON LOOM:
1: With the corrugations running the length of the piece: Cut 2 pieces of corrugated cardboard that are 13 inches/32.5 cm long by 5 1/2 inches/13.75 cm wide.
2: Tape or glue the 2 pieces of cardboard together.
3: Score a line with a ballpoint pen or knitting needle 1 inch/2.5 cm from each end.
4: Cut a notch out of the center of each end piece that is 1 inch/2.5 cm by 1 inch/2.5 cm.
5: Trace the pattern for the largest Woven Dancer onto plain paper or graph paper and center it on the backing board.
6: Tape it in place, then tape a piece of clear plastic, either from recycled plastic or a plastic page protector over the pattern.
To see all the links for the ‘How To’ posts for the “Imagine” Banner Weave along, please go to L I N K S
To order the loom, book and extras kit for the Weave Along from Mirrix, please go to K I T
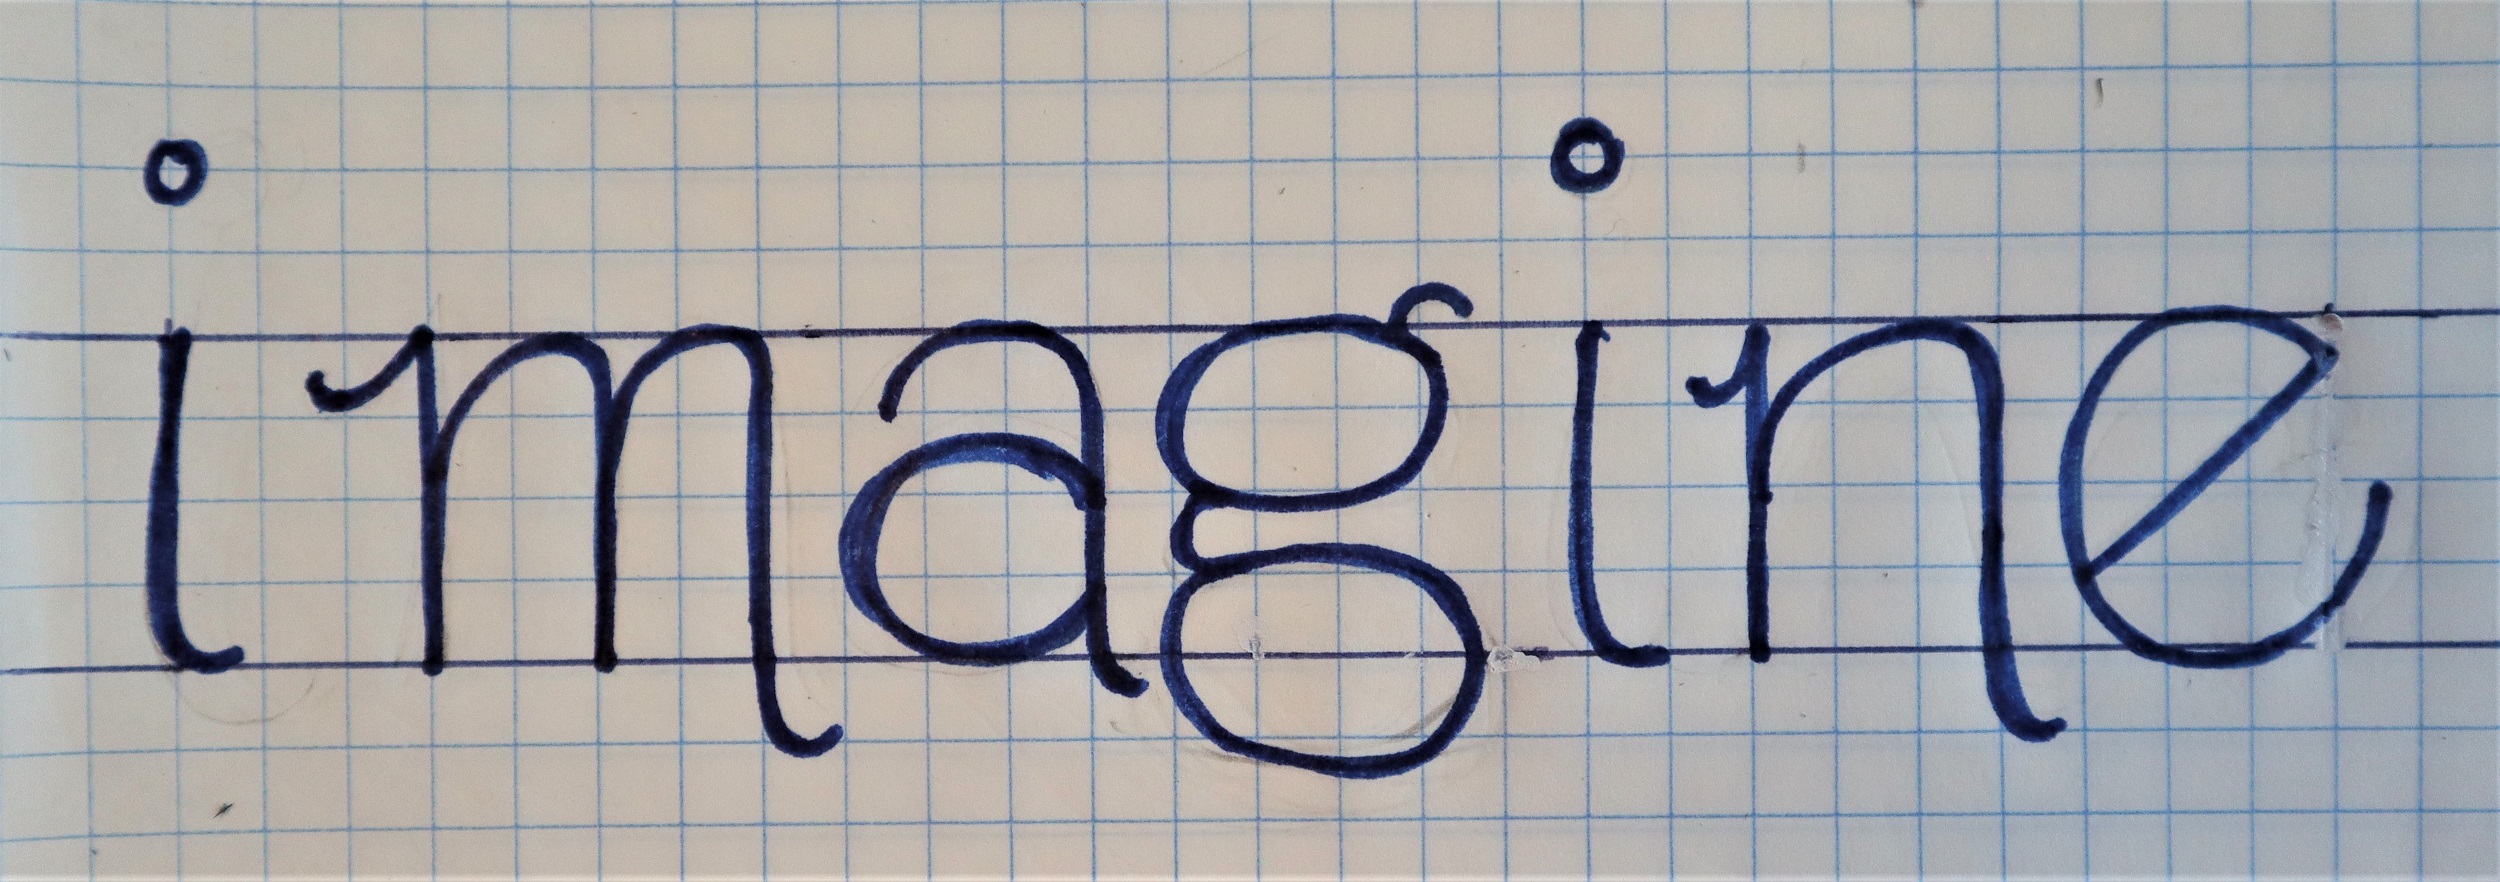
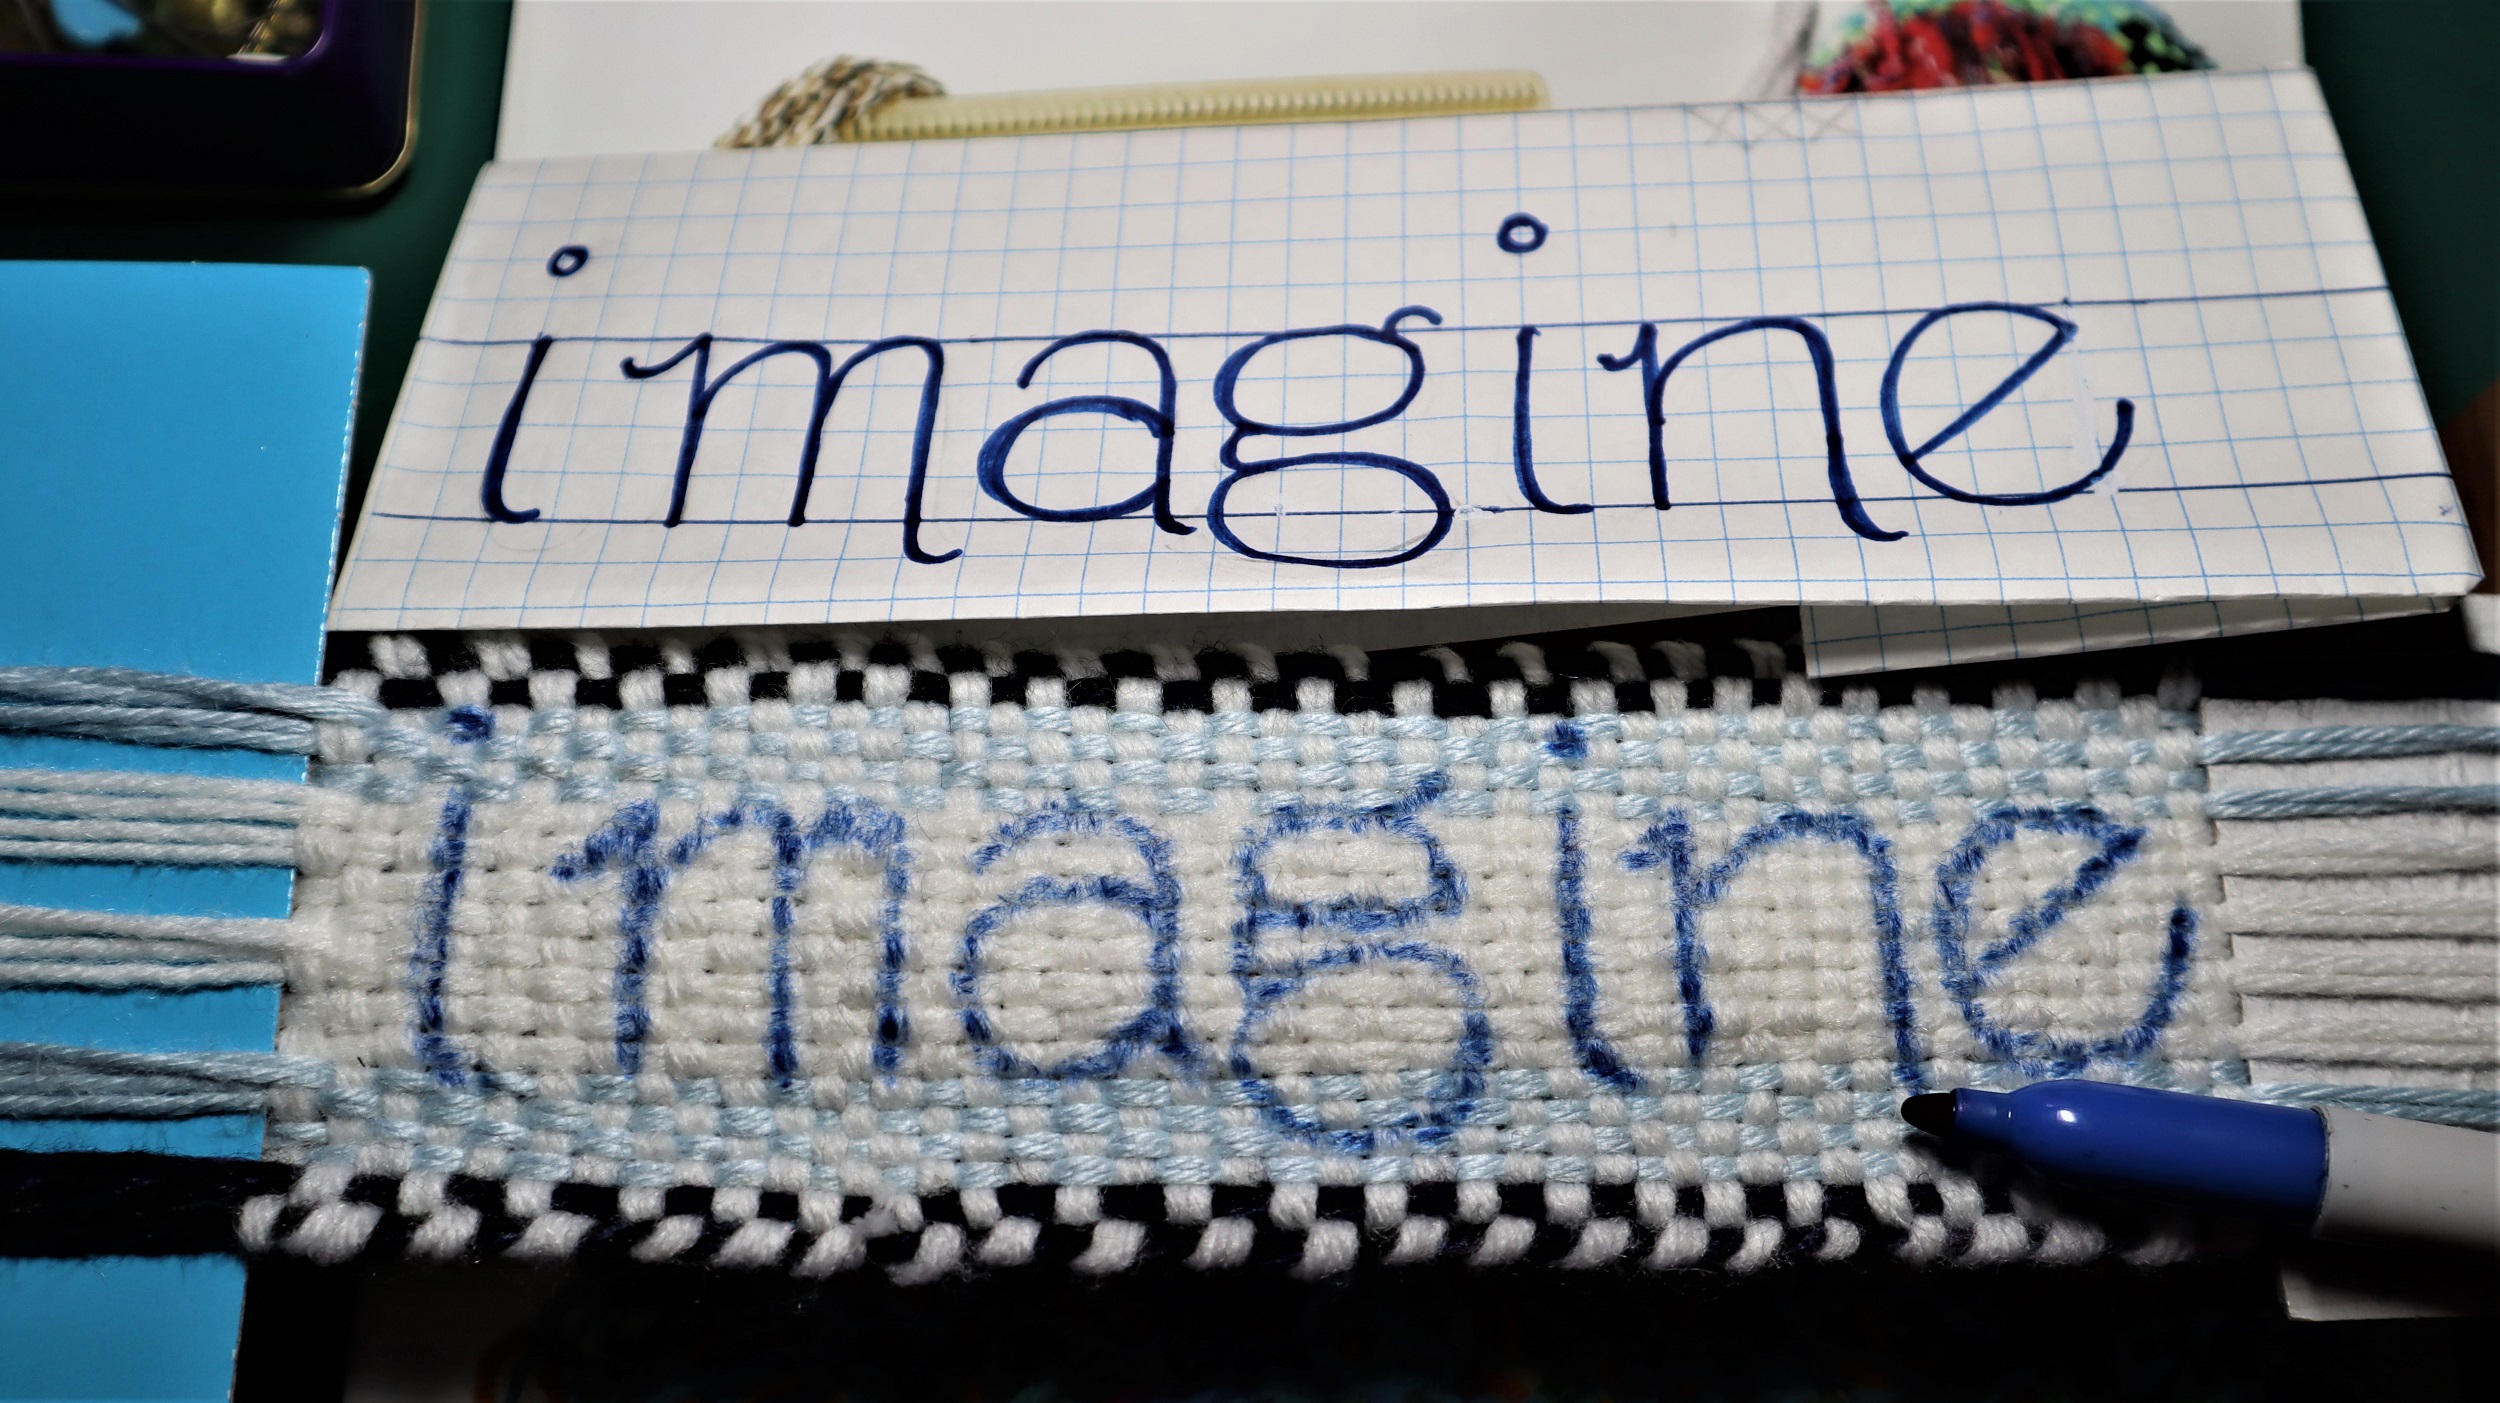
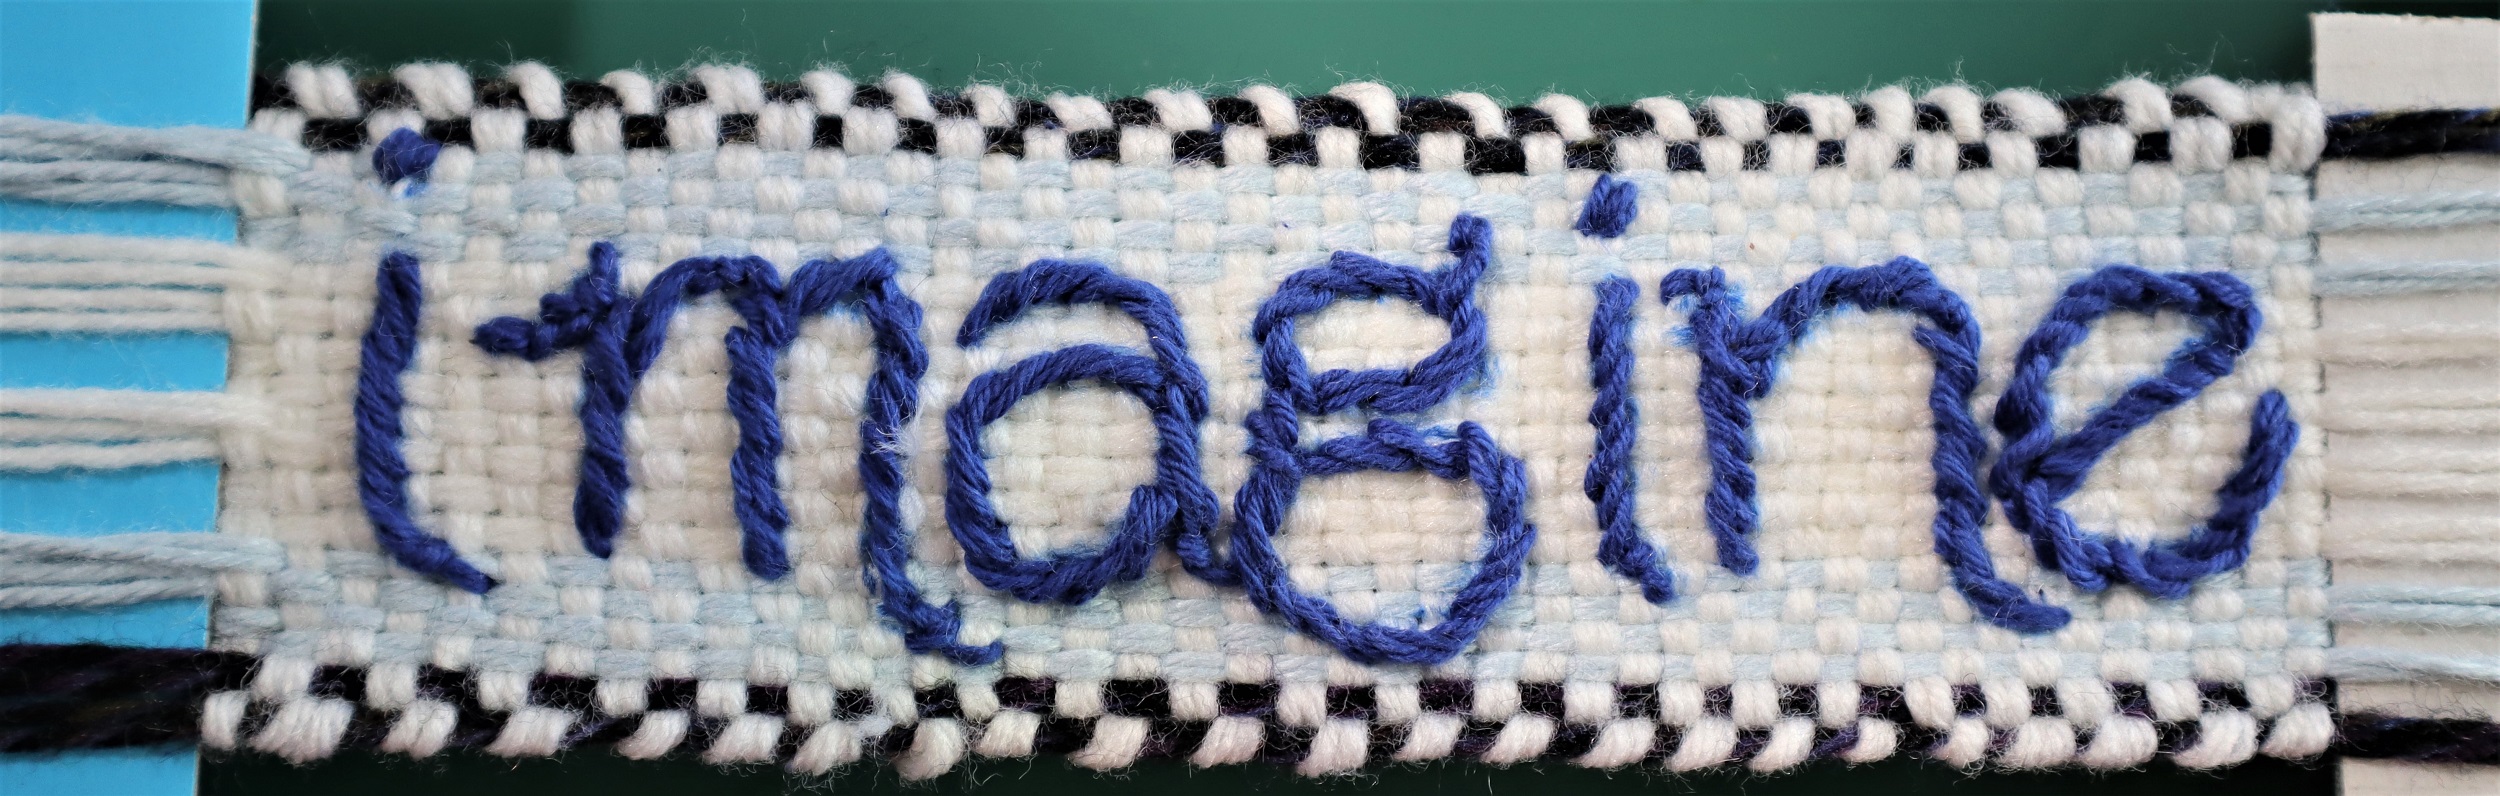
HOW TO EMBROIDER
THE WORD ‘IMAGINE’ ON THE NARROW BAND:
NOTE: The embroidery is done while the weaving is still on the loom and under tension.
1: Print out a copy of the ‘Imagine’ letters so they are approximately 1 inch/2.5 cm high by 7 in/17.5 cm or use 1/4 inch graph paper to draw them out.
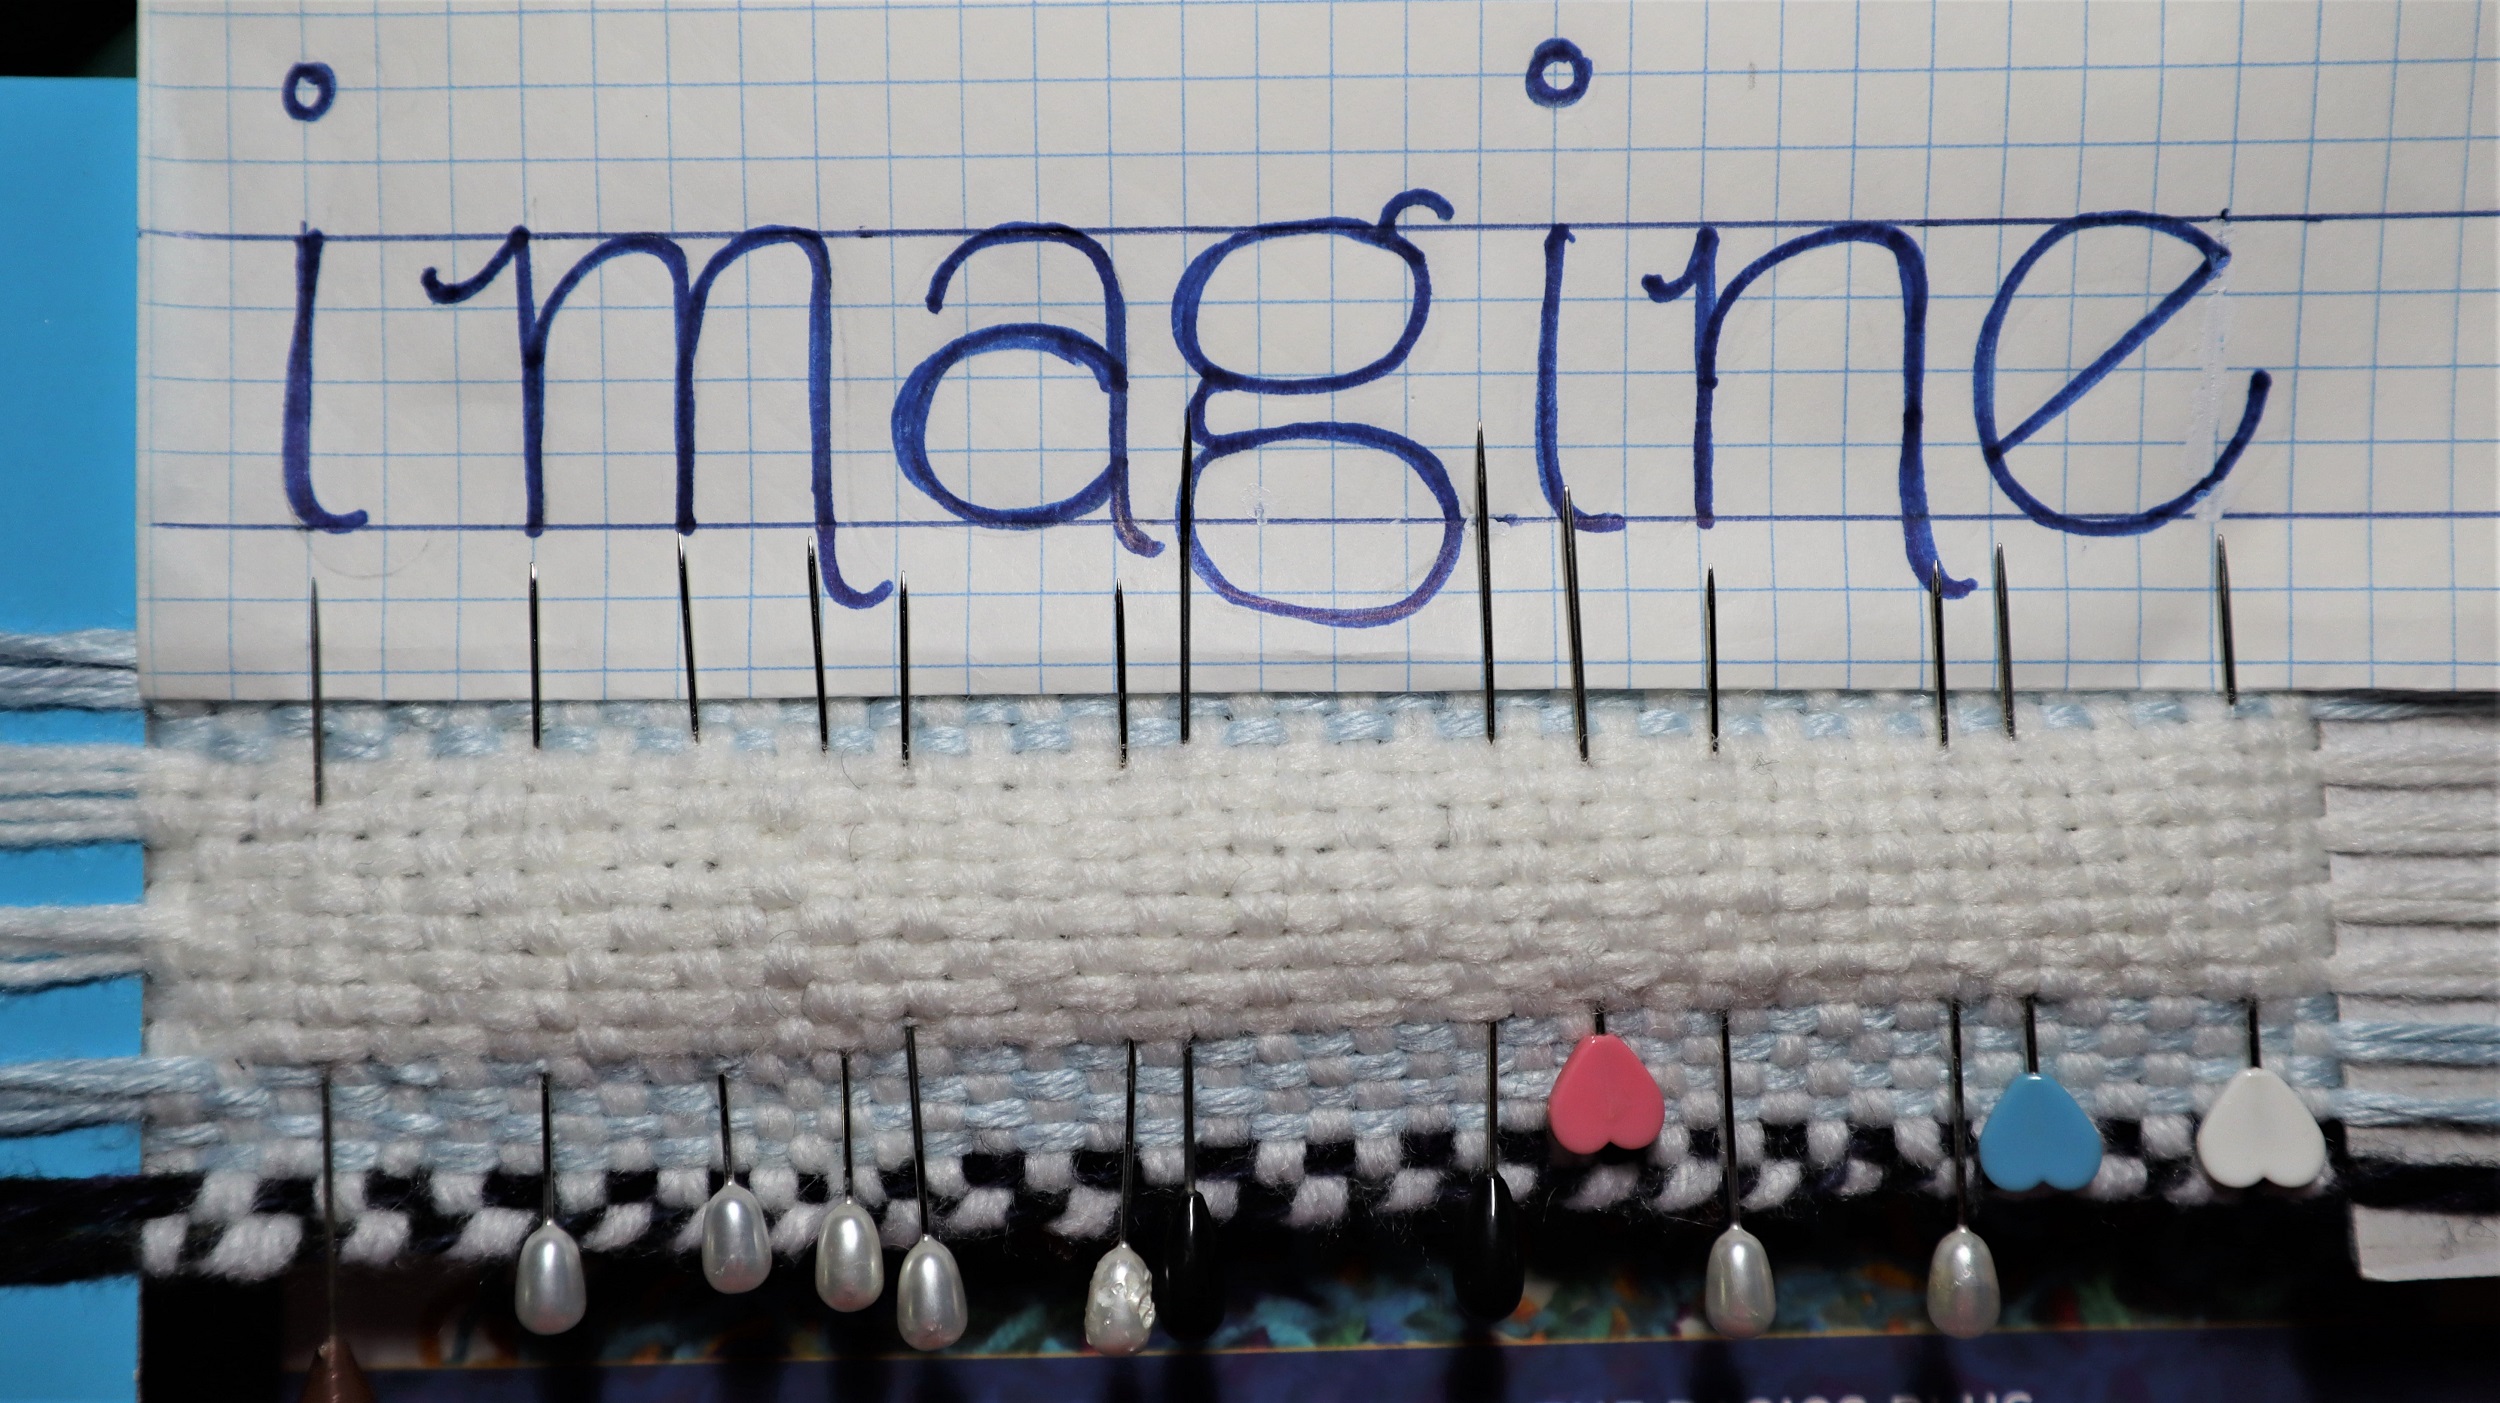
2: Fold the paper so the edge of the letters can be placed right against the 1 inch/2.5 cm high white center section of the weaving.
3: Place the straight pins at the upright lines of the letters, ‘I’, ‘m’, ‘n’, and at the outside edges of the chubby ‘a’, ‘g’ and ‘e’.
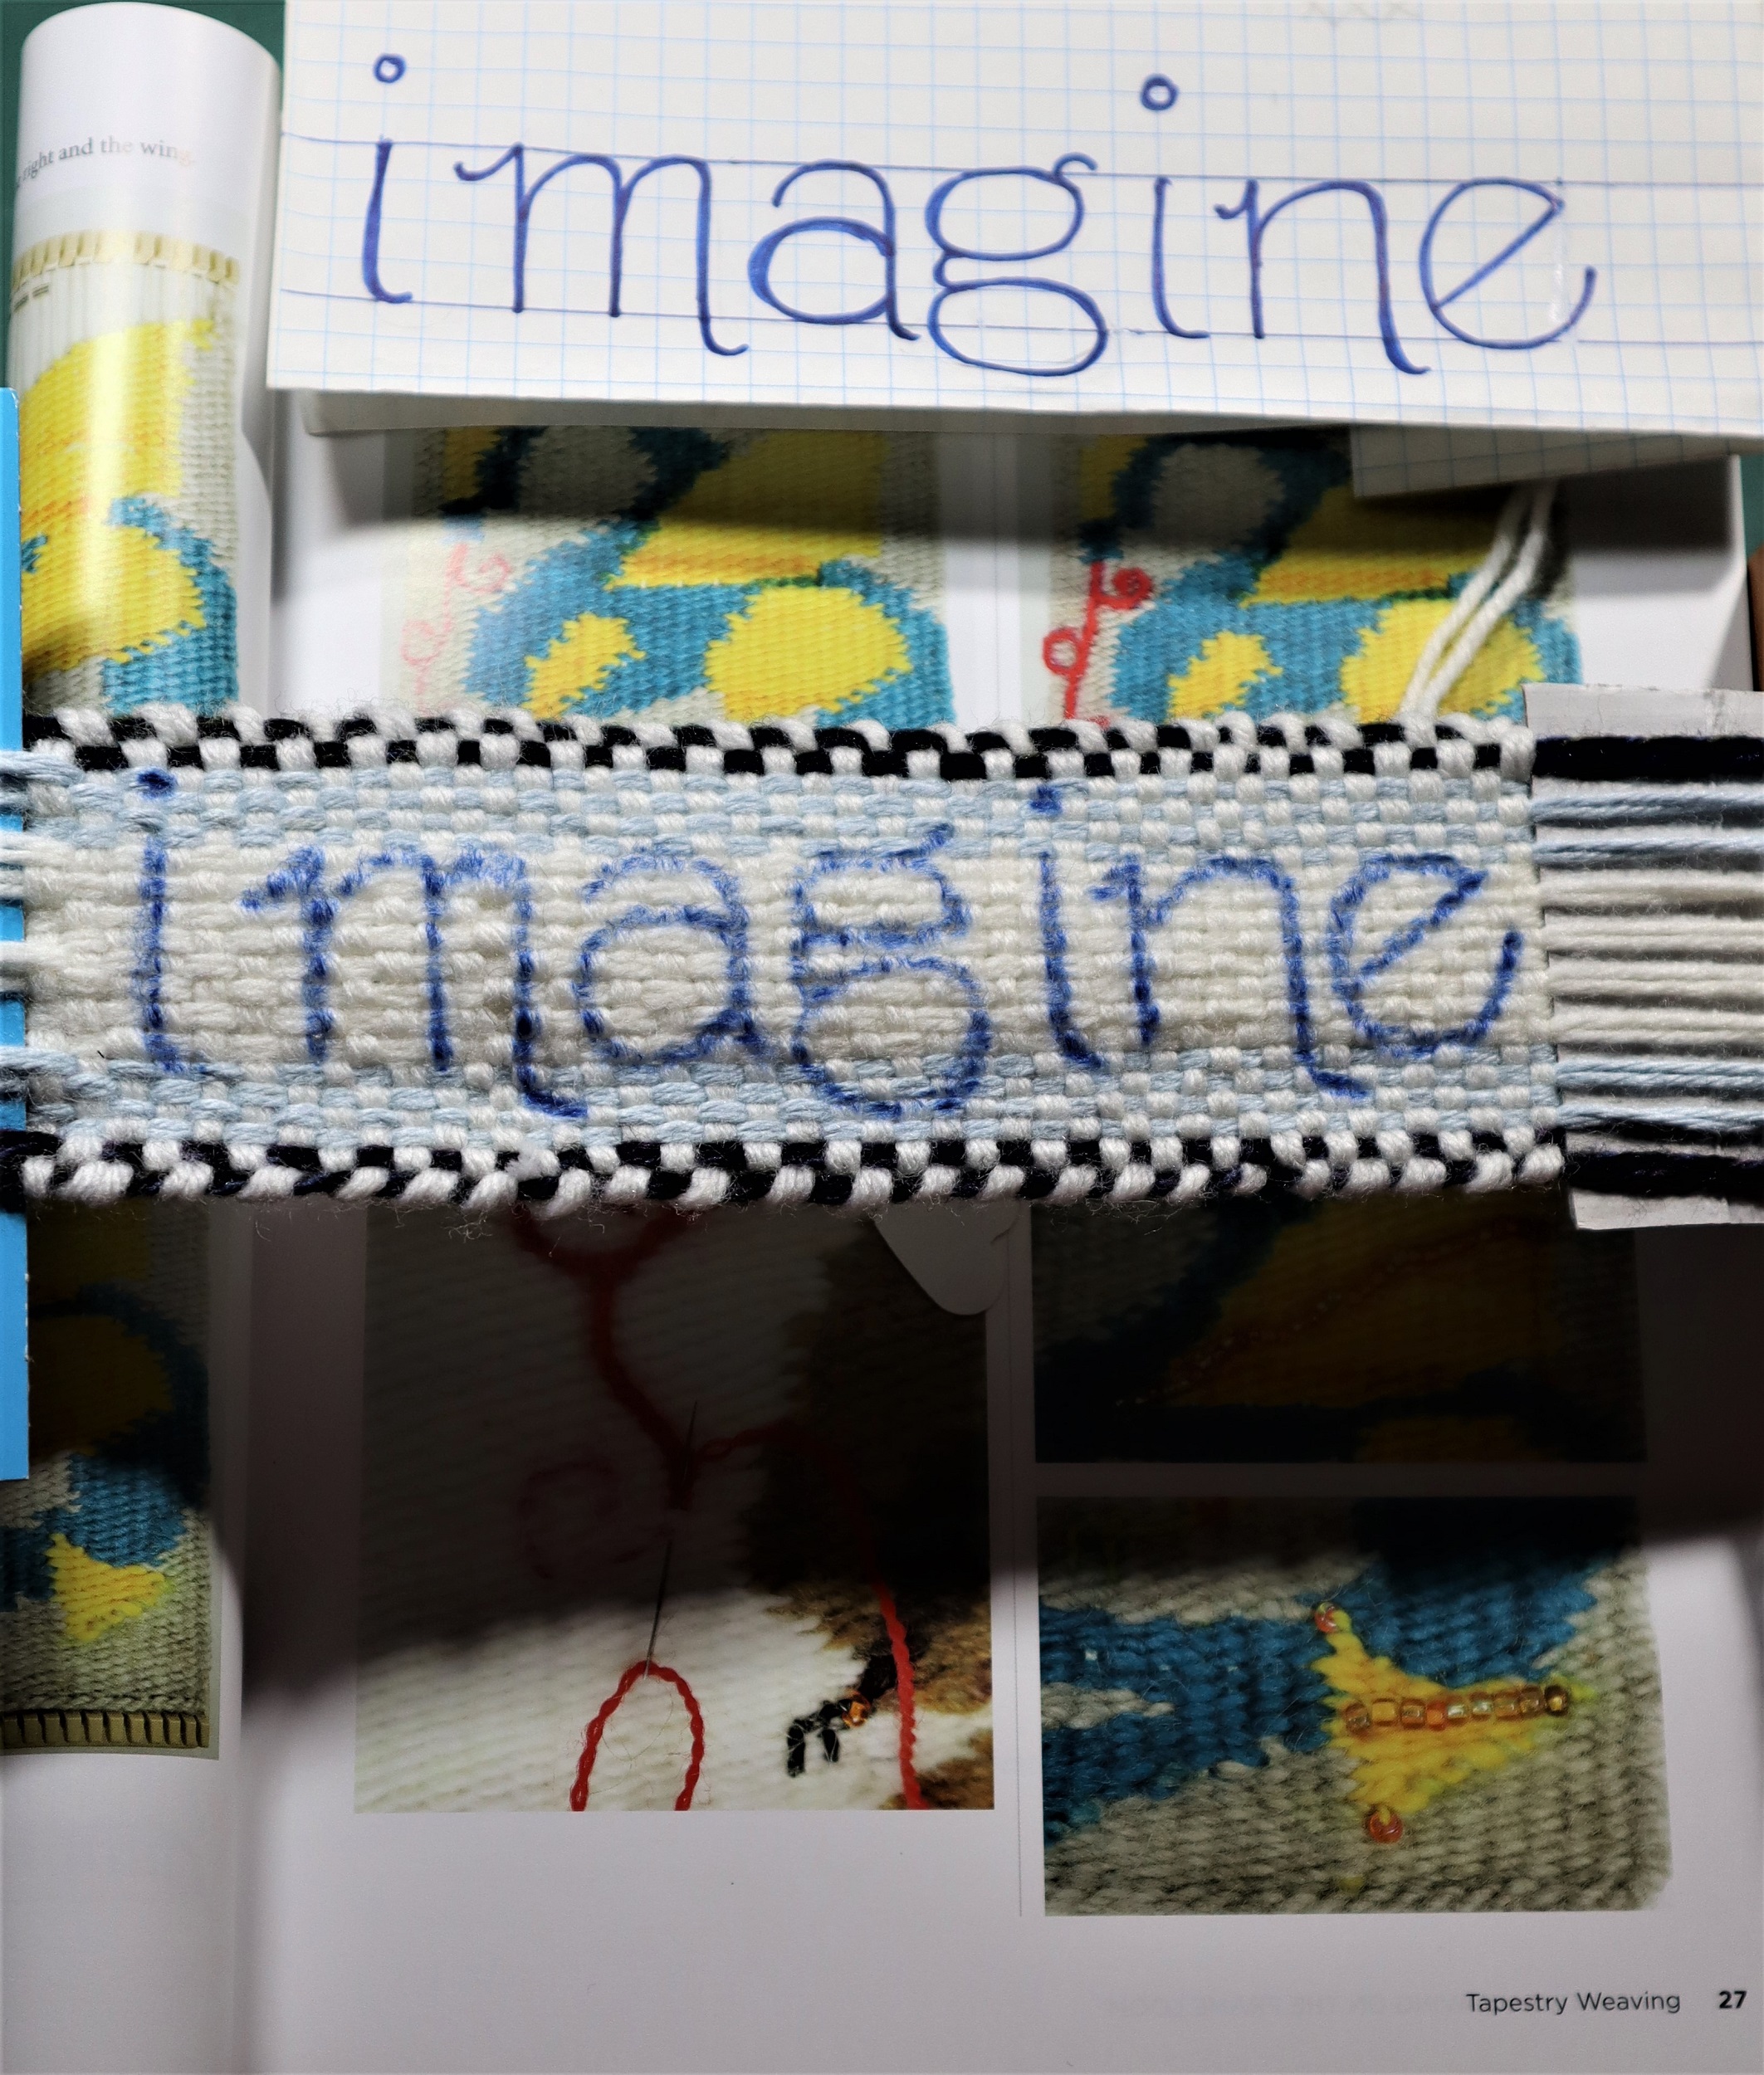
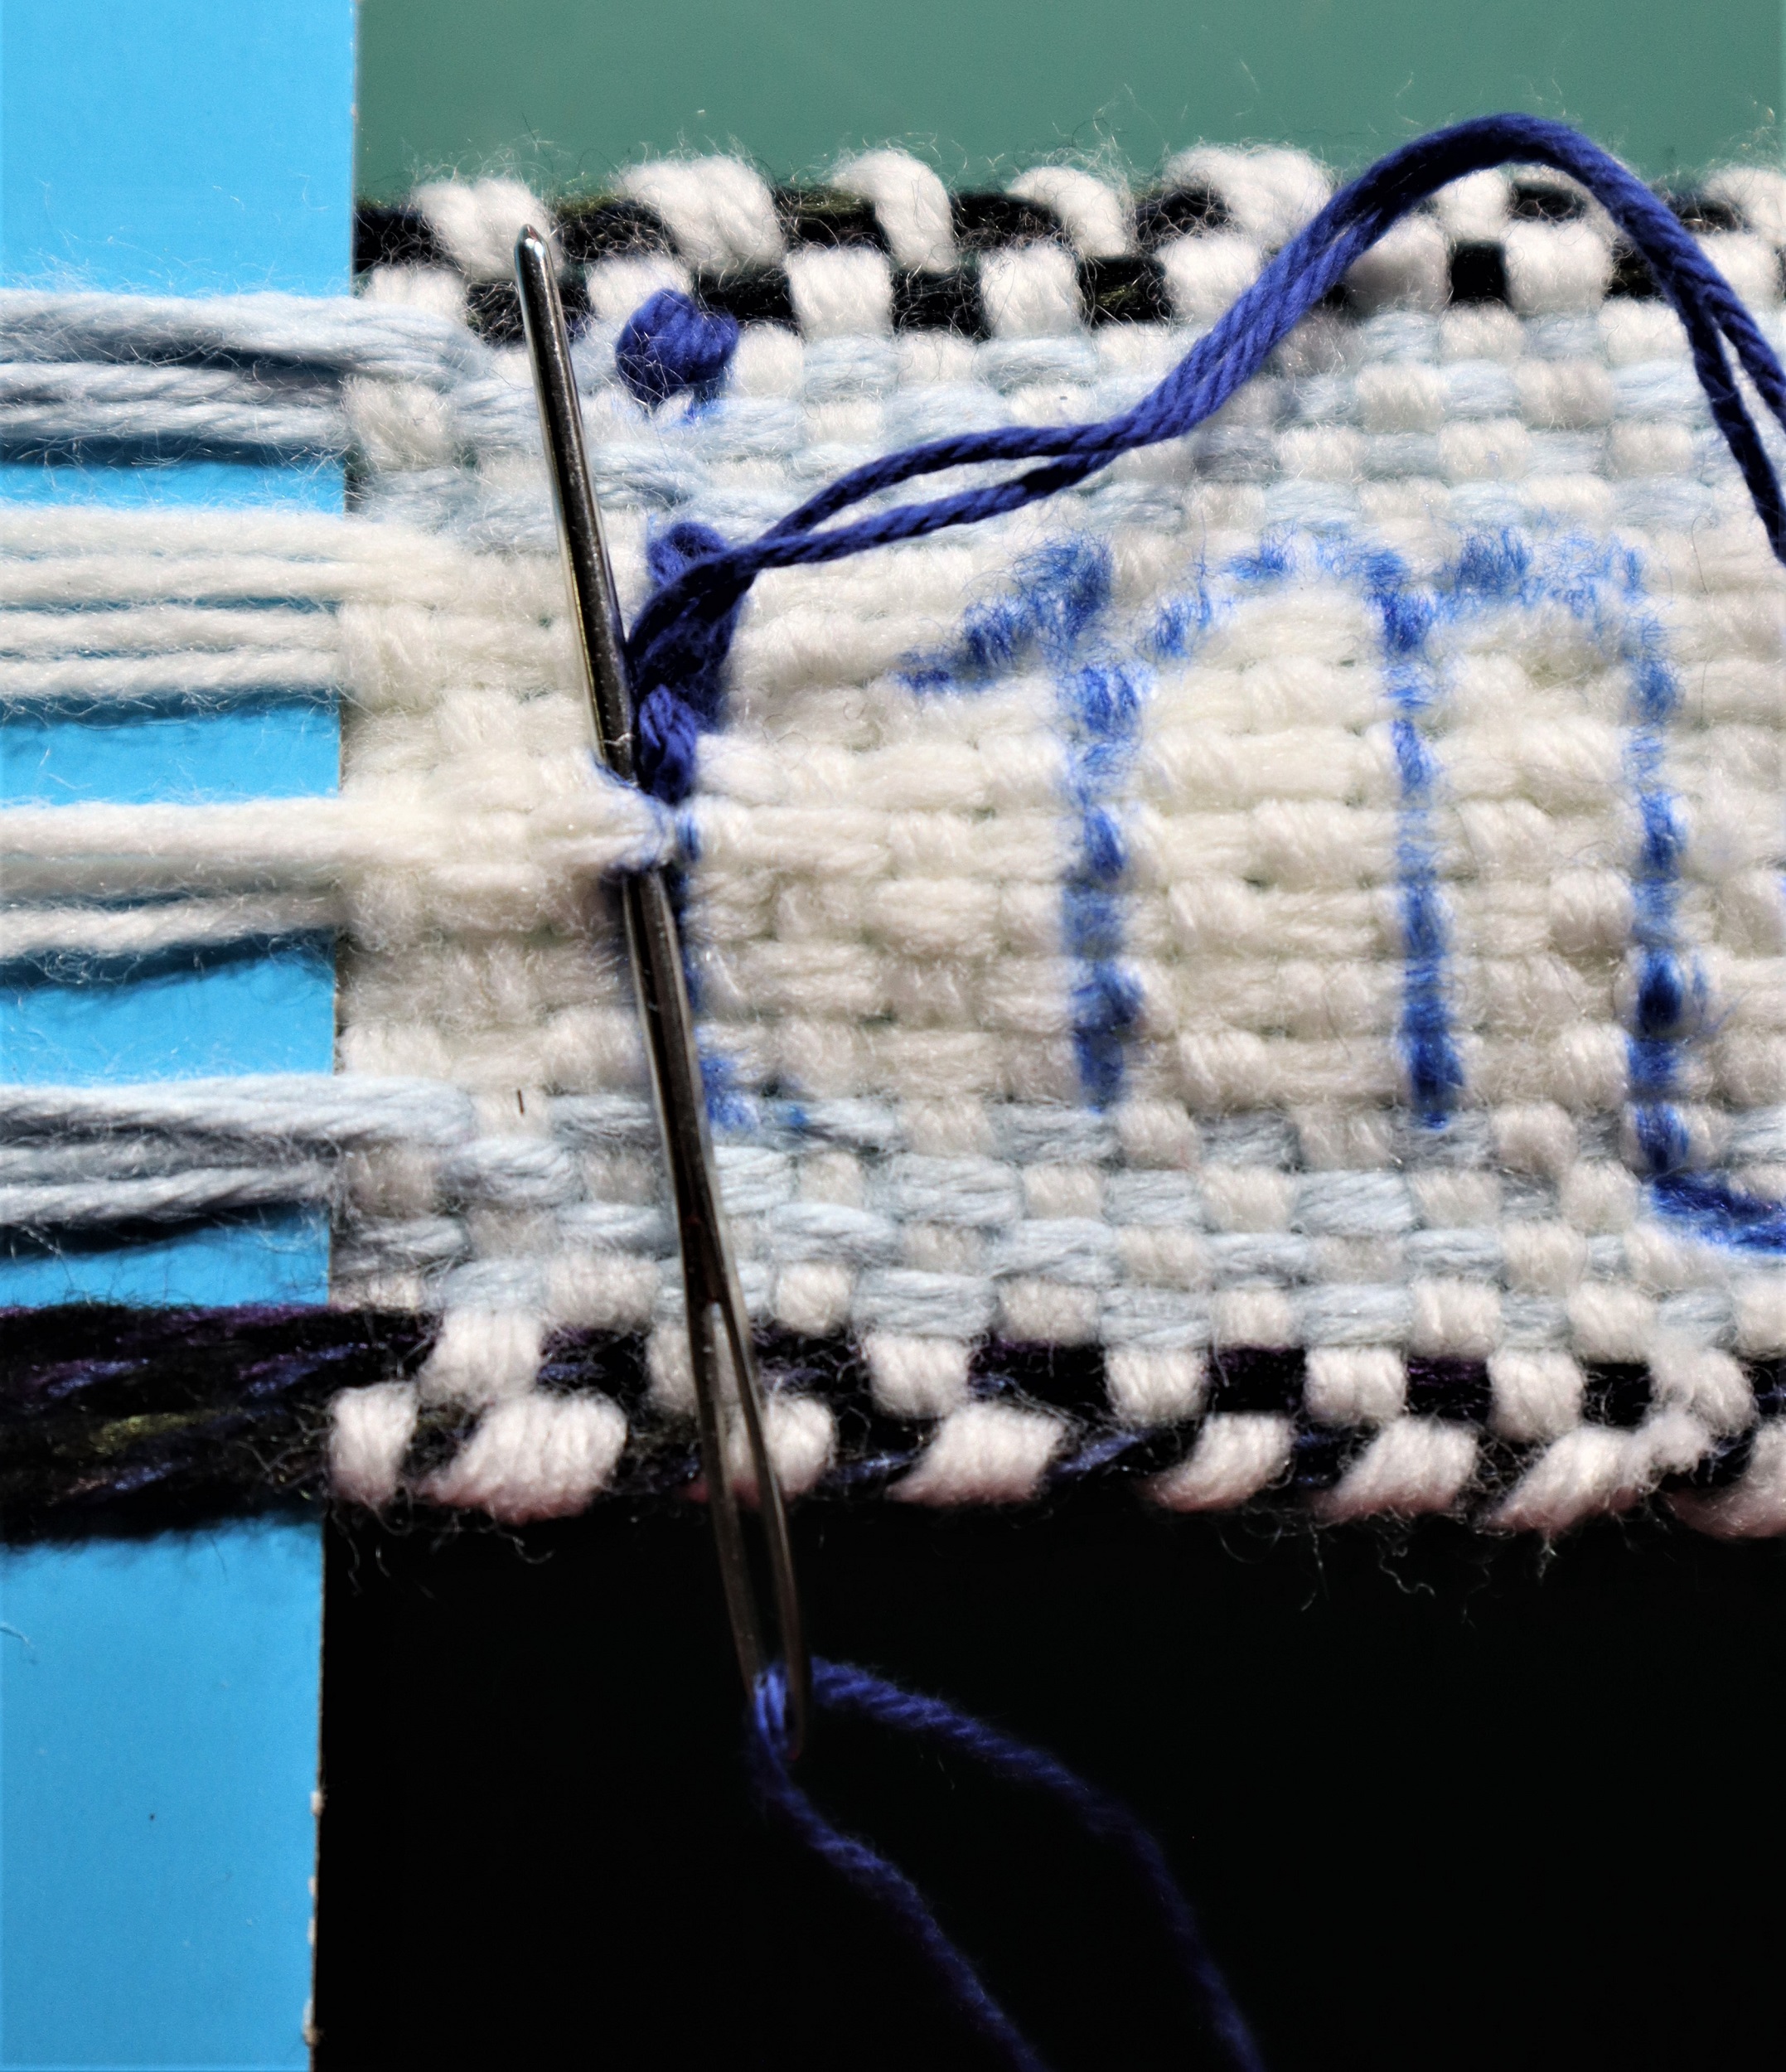
4: Use the pins as guides to draw the letters onto the narrow band using a permanent felt tip marker.
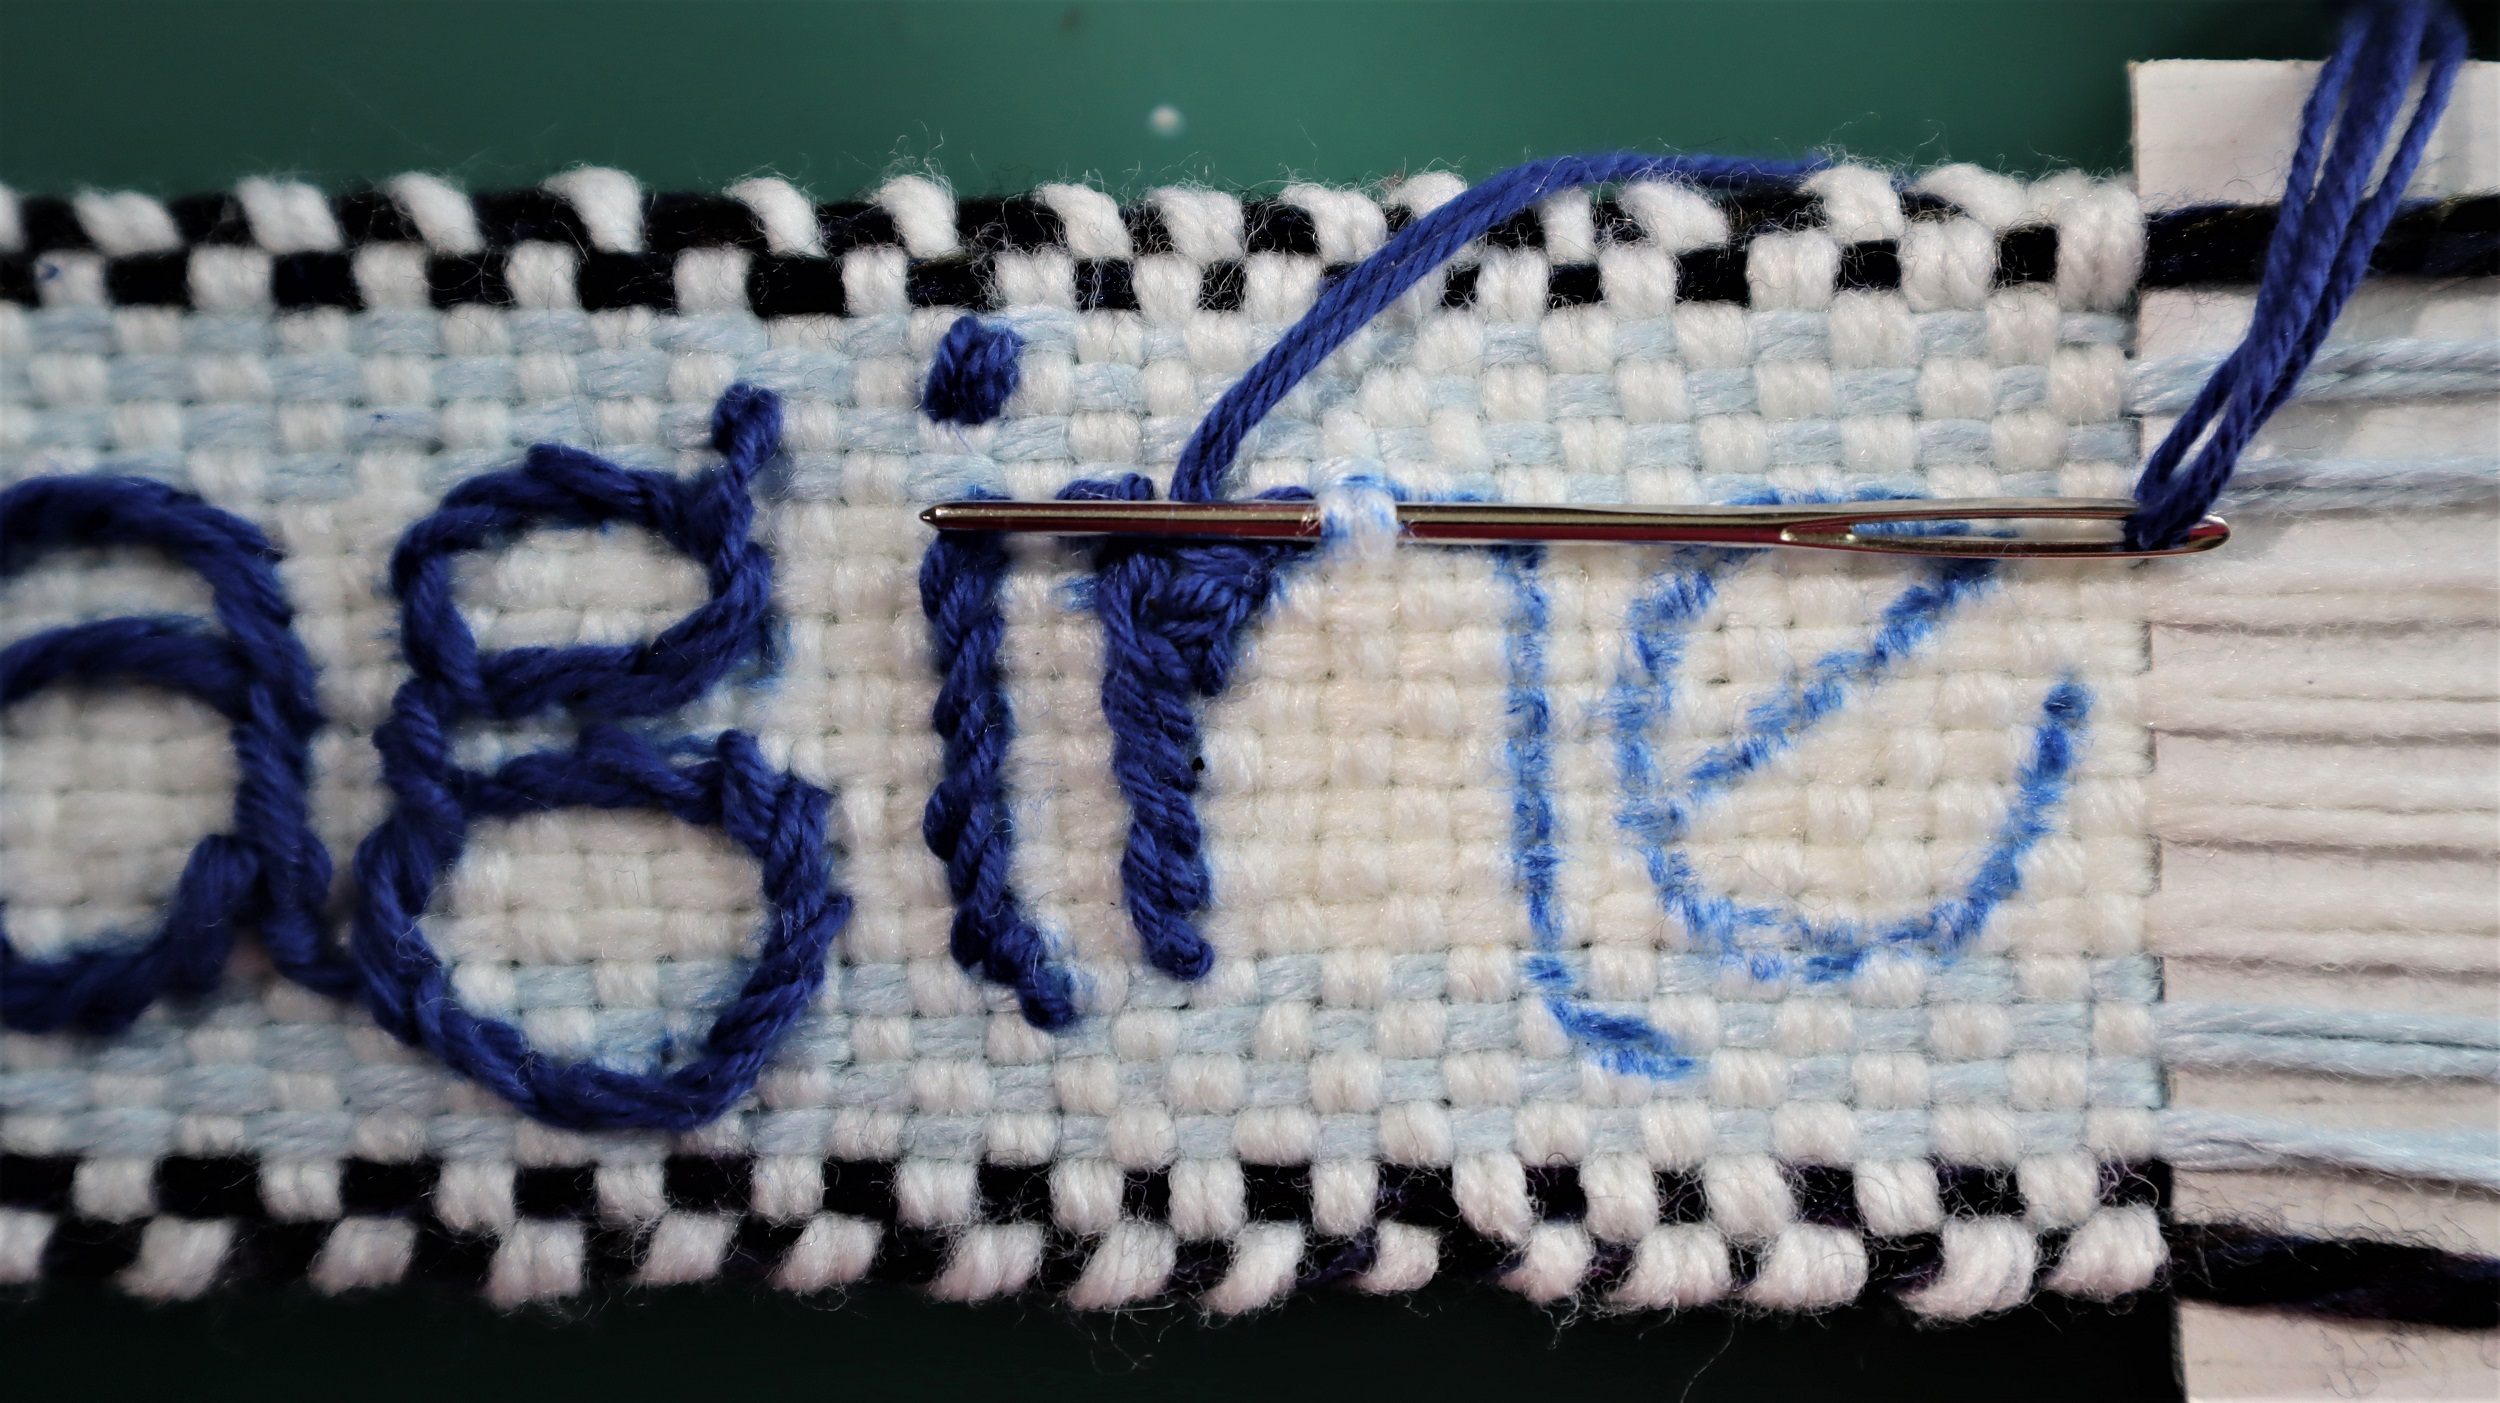
5: Following the instructions on page 27 of “Innovative Weaving on the Frame Loom”, embroider the letters with dark blue embroidery floss.
The photo on the lower left of page 27 shows how the running stitch is done.
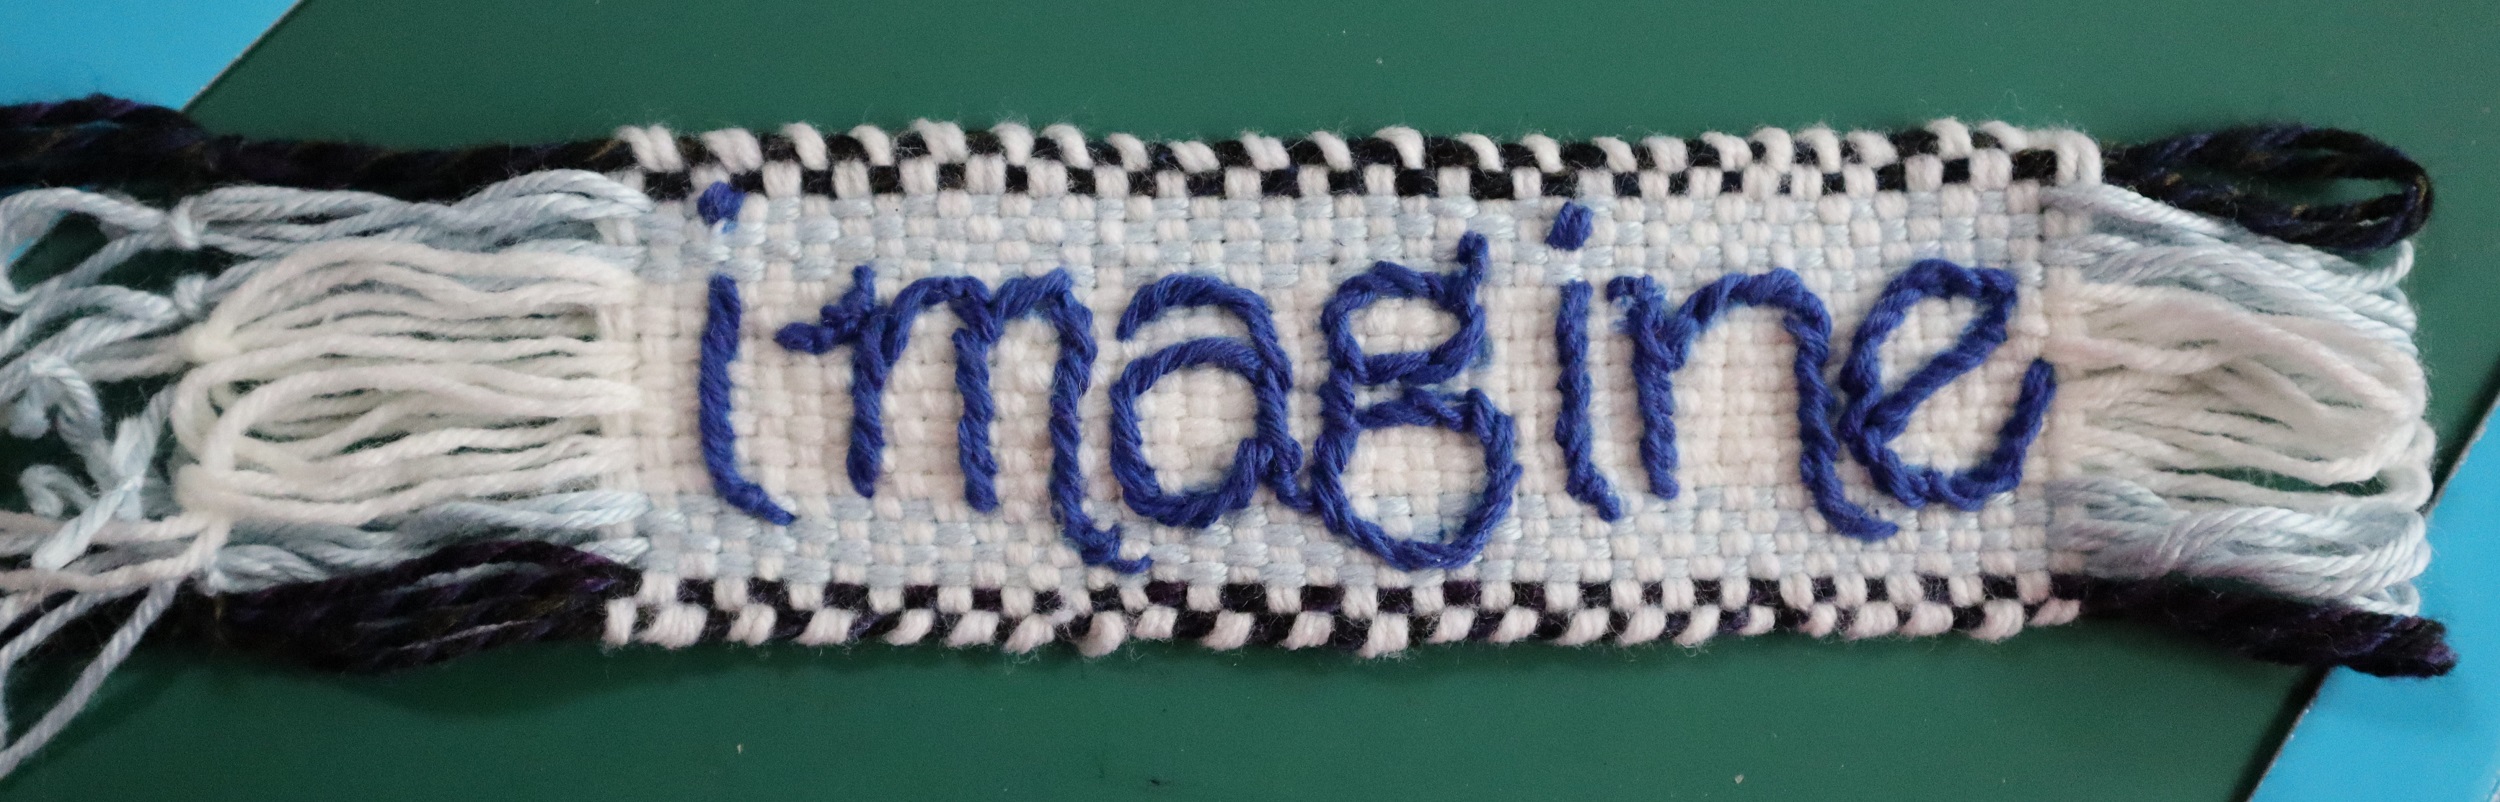
FRINGE:
6: Lift the weaving off the loom and remove the 2 pieces of cardboard.
7: Cut the ends of the loops at the right hand side of the narrow band (it was at the top of the loom) open.
8: Trim the ends that were at the lower edge of the loom, now the left hand side of the band, to the same length as the warp ends at the other end of the narrow band.
9: Tie a knot (left over right and under, right over left and under) with each set of 4 strands of yarn across both ends of the narrow band.
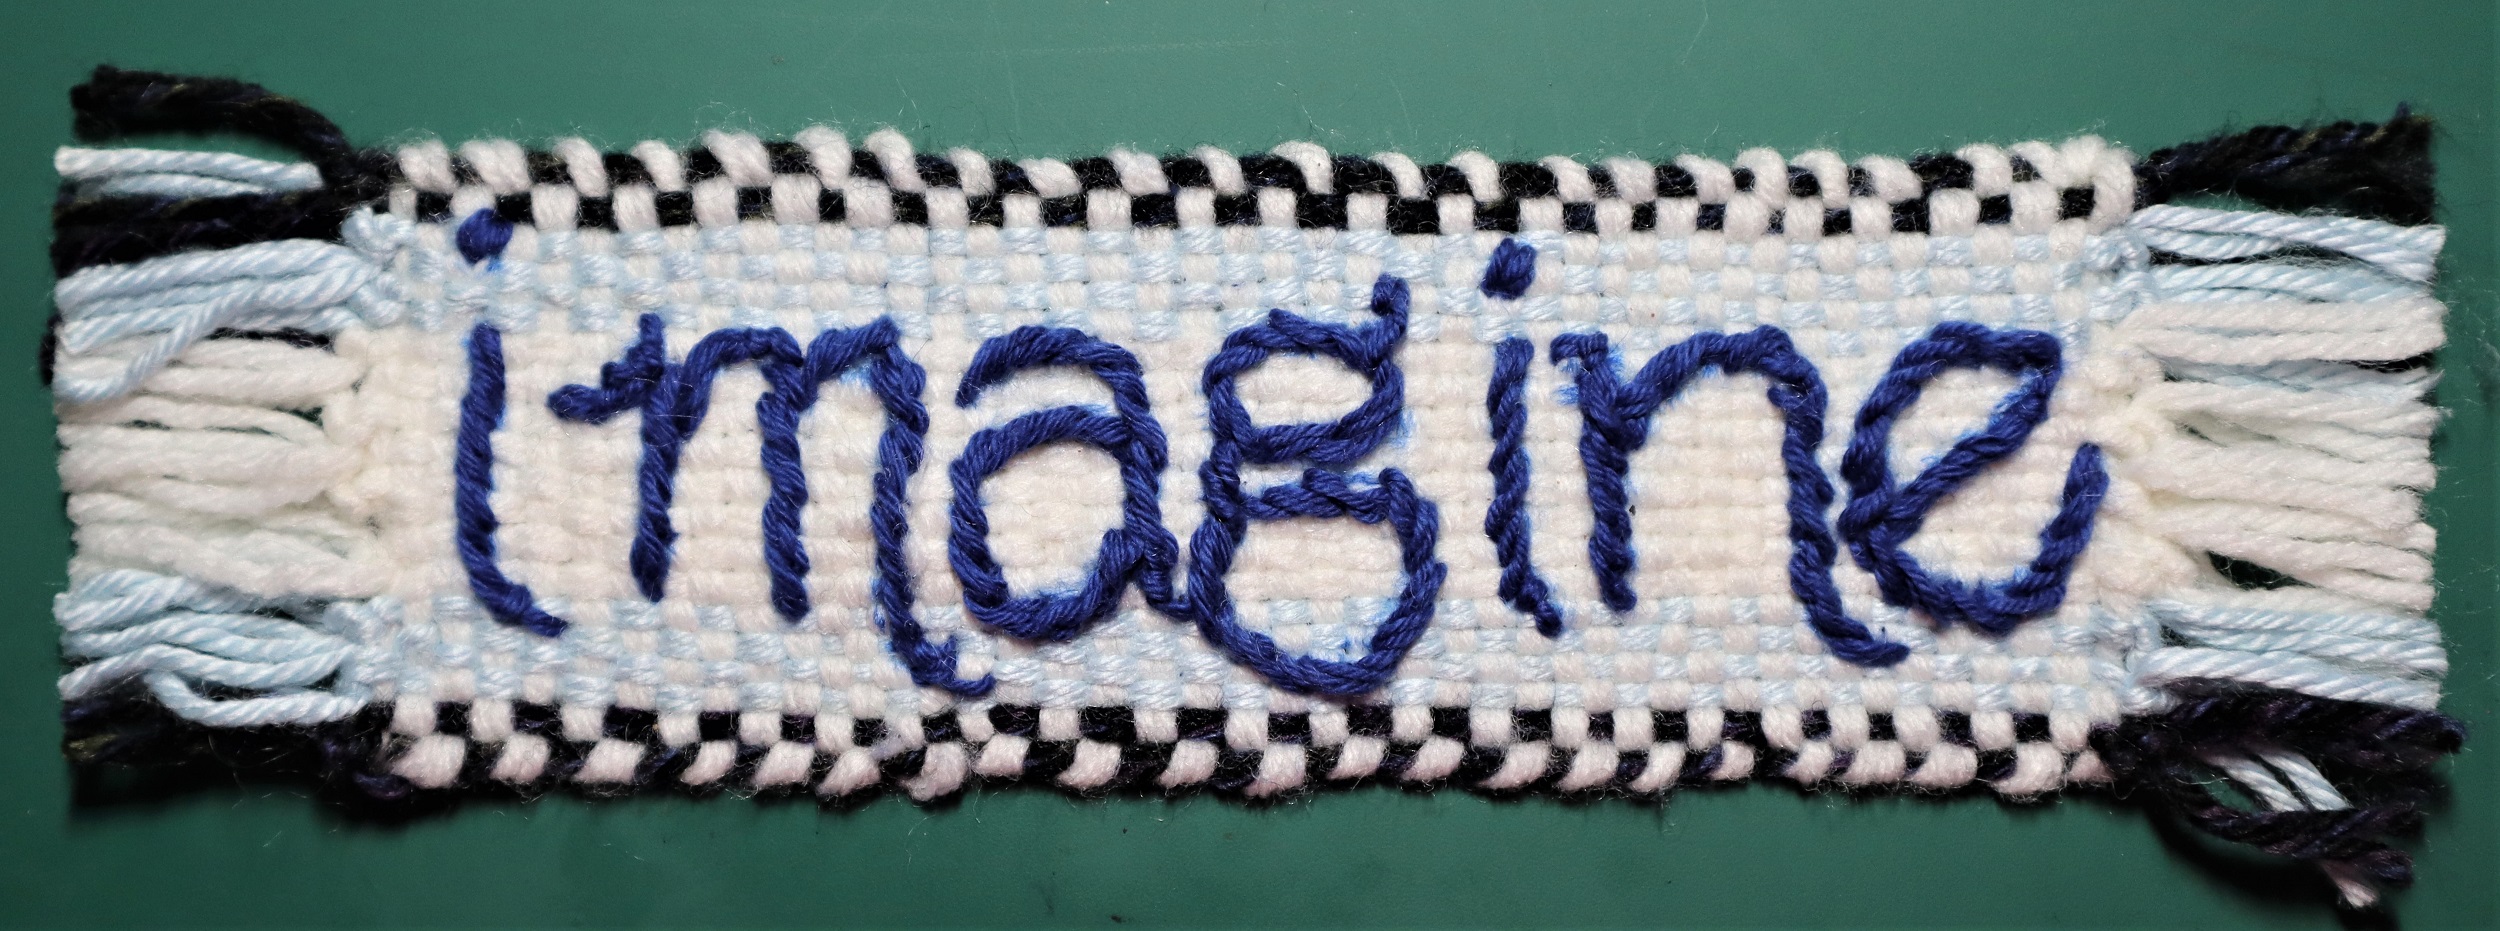
10: FINISHING THE NARROW BAND:
Steam the narrow band on the wrong side with a steam iron, being sure to not touch the iron to the weaving.
Finger press the narrow band to make sure that the fringes behave themselves and line up politely.
Other things that are needed for the ‘Imagine’ banner:
Yarn: Less than an ounce of each of the following colors: white, grey, black, pale blue, brown, beige
Embroidery floss: 1 skein of navy or dark blue
2 small black ‘e’ beads for the eyes and needle and thread to sew them on
Scissors
cardboard
a plastic page protector
a ruler
transparent tape
felting needles,
6 rubber bands
paper
long straight pins
permanent felt tip pen
plastic or metal ring to hang the banner
1 Weaving Needle (5 1/2 inches or 6 inches long with a blunt tip)
1 Shed Stick: a second weaving needle or 6 inch Paddle style bamboo Cocktail Skewer or a short dpn knitting needle
1 craft needle (short metal tapestry needle approximately 2 3/4 inches long)
-1 crochet hook: 4.5 mm crochet hook works just fine
PART ONE:
THE WOVEN AND EMBROIDERED NARROW BAND:
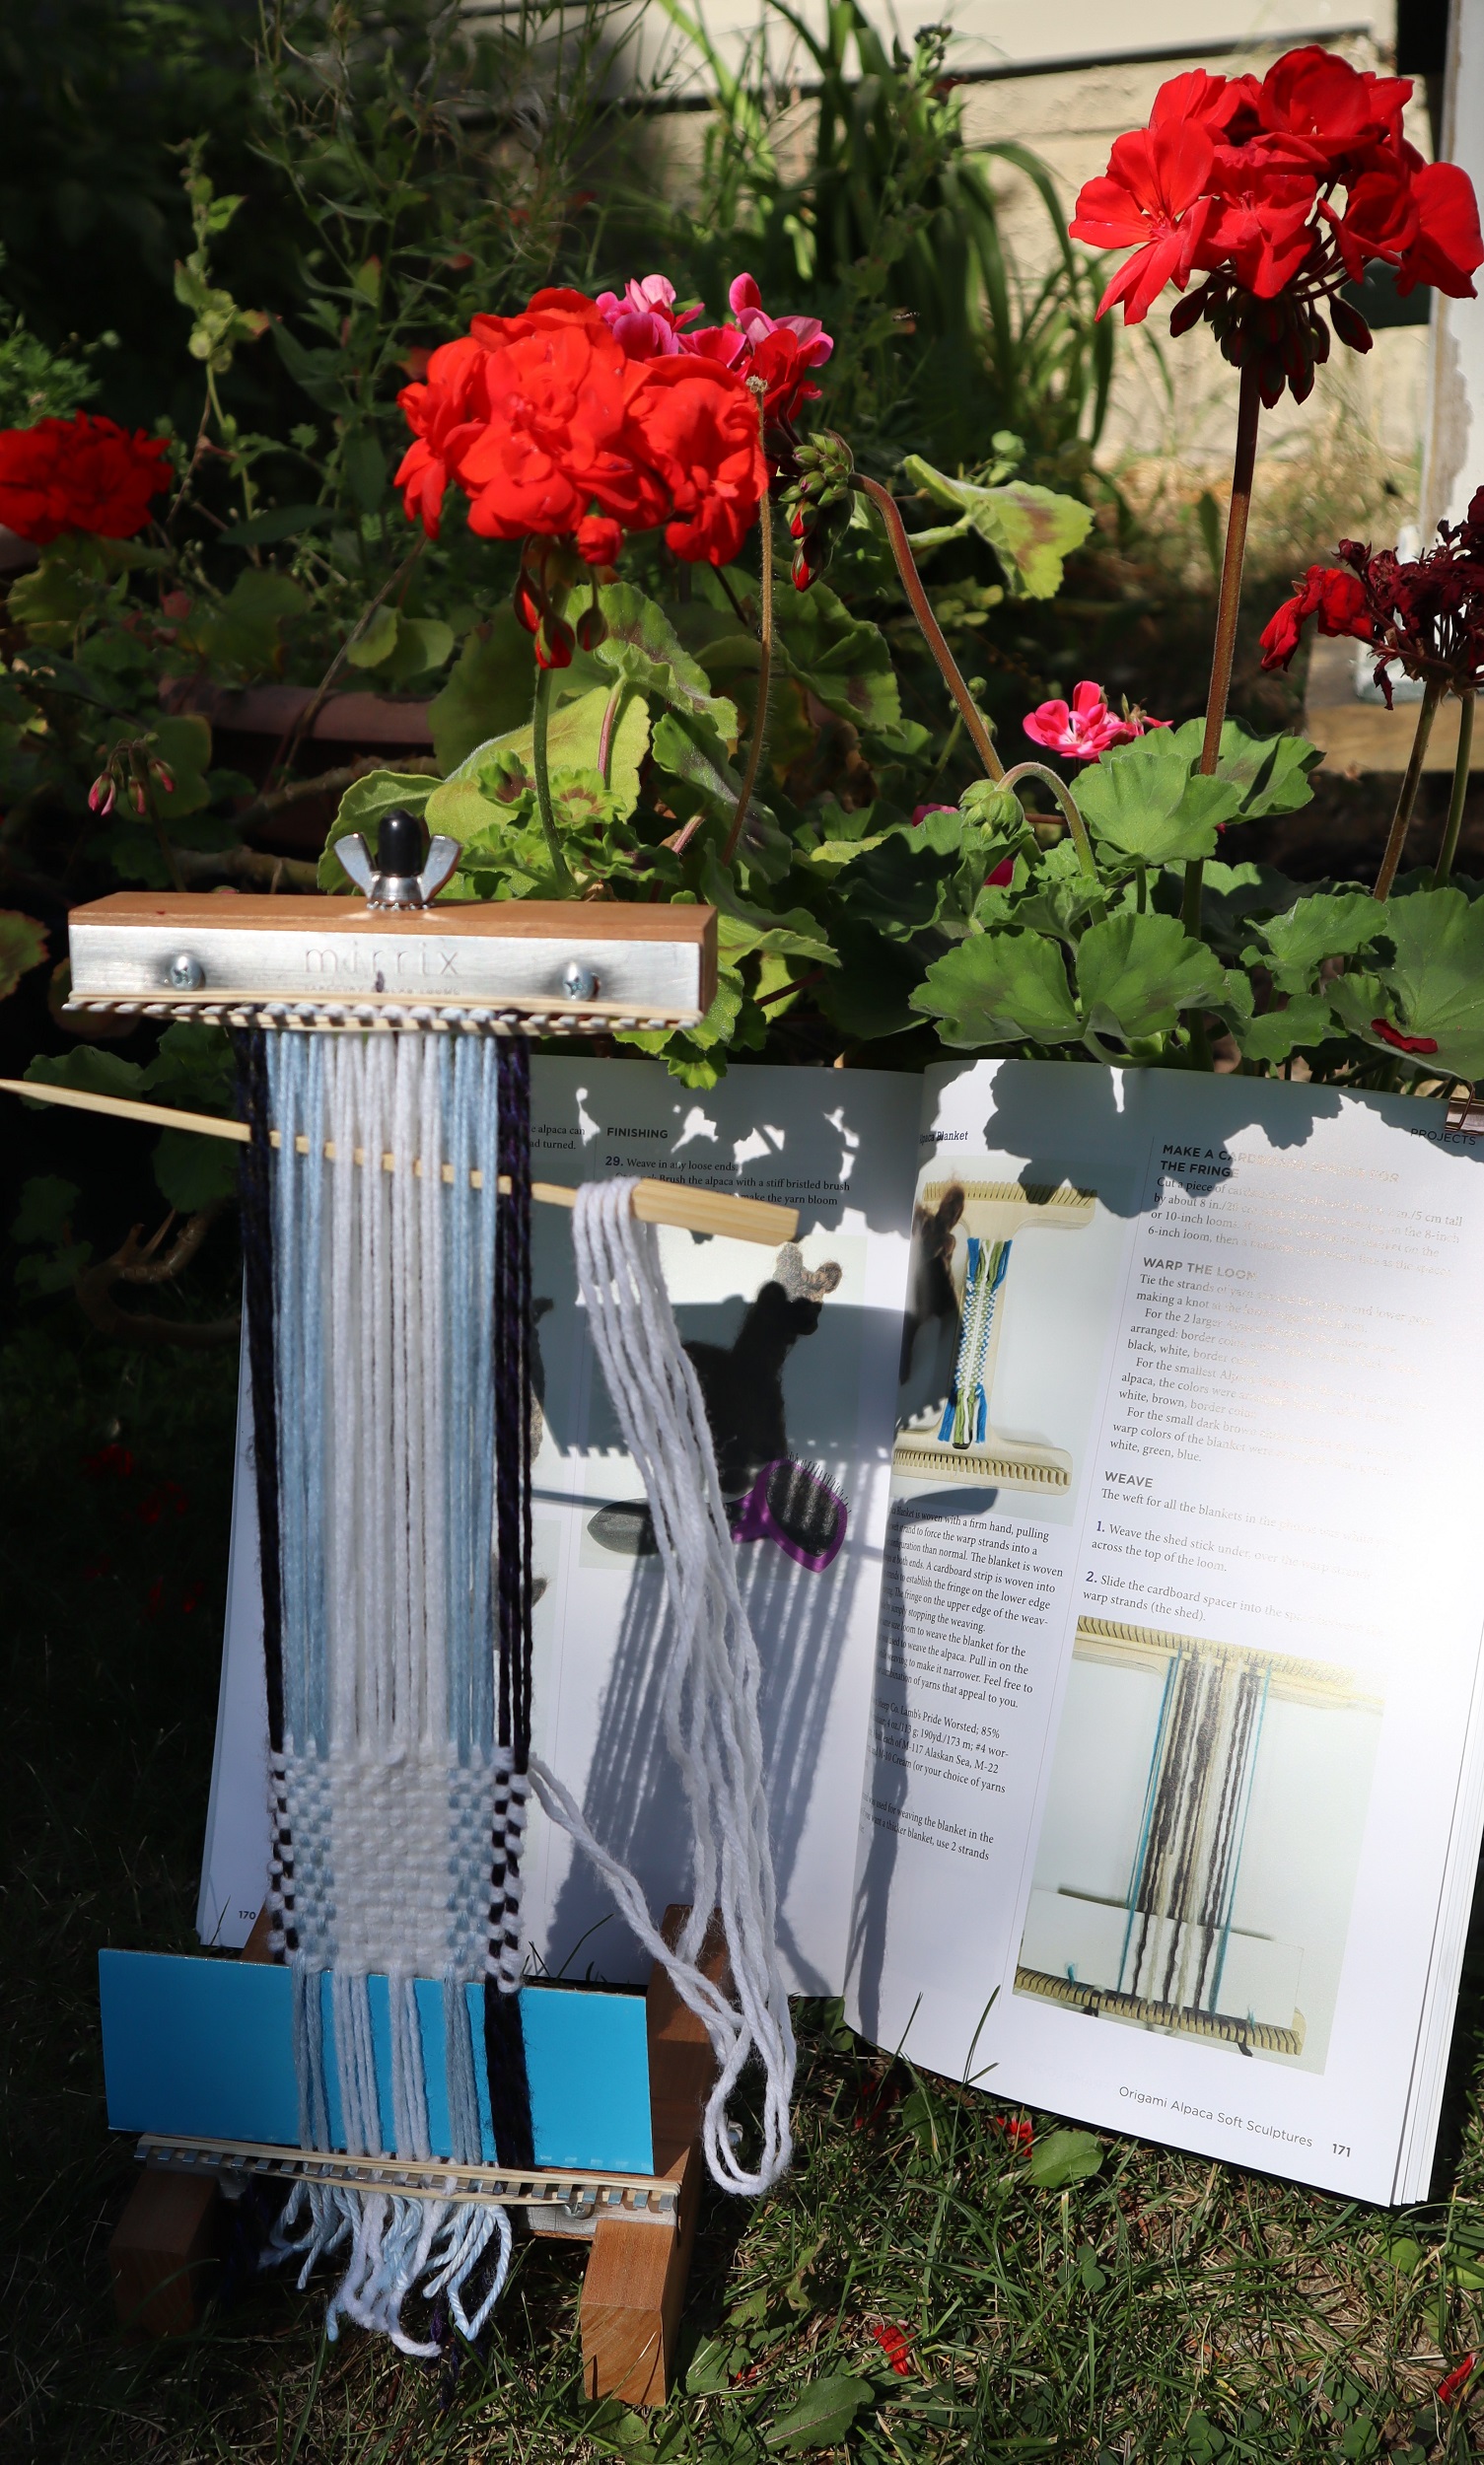
The narrow band in Albert Einstein’s hands is woven (with a couple of small modifications) following the instructions on page 171 of “Innovative Weaving on the Frame Loom” for the Alpaca Blanket. While it’s still on the loom, the word, ‘Imagine’, is embroidered using a simple running stitch.
INSTRUCTIONS:
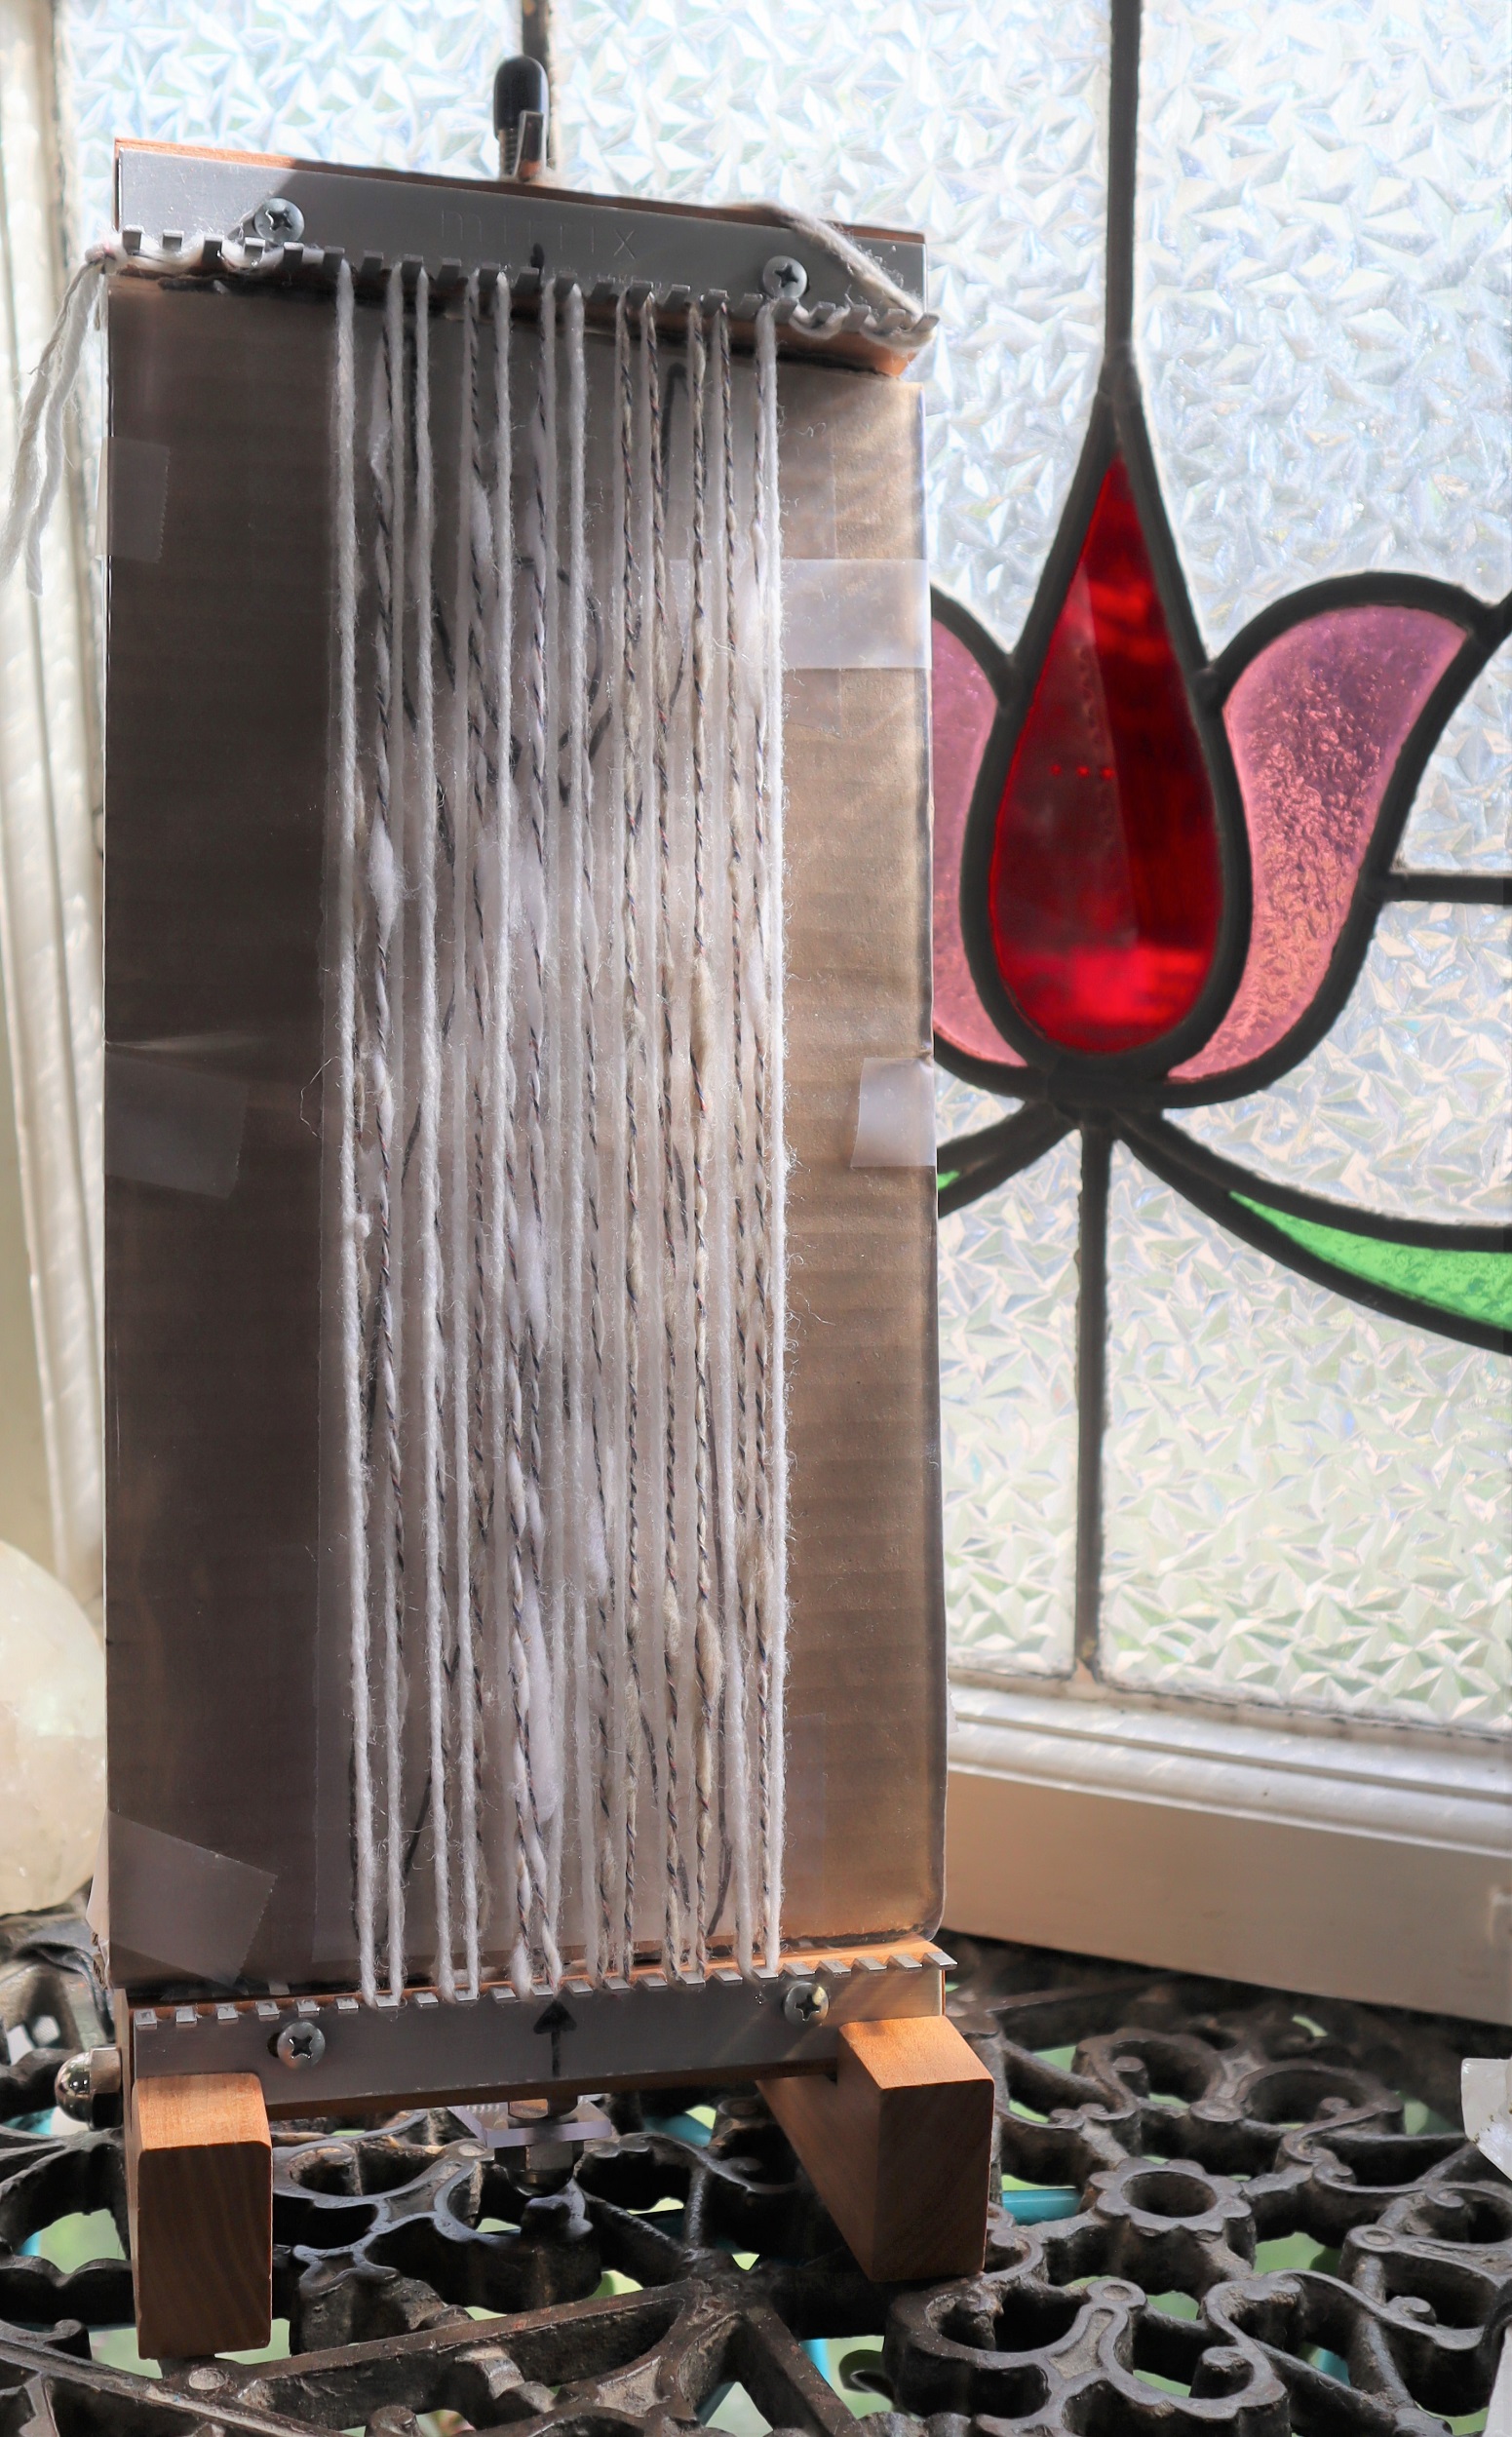
1: SET UP THE LOOM so it is 11 1/2 inches / 29 cm from the lower set of pegs to the upper set. Lock it into the ‘Sandy Stand’.
2: WARP THE LOOM: Following the instructions for the Alpaca Blanket on page 171 of ‘Innovative Weaving on the Frame Loom’, put on 10 sets of warp strands.
Use 2 strands of #4 Medium weight (Worsted or Sport weight) yarn held together as if it is a single strand.
Skip 6 pegs at each side of the loom and warp the following colors, or your choice of colors:
NOTE: A ‘set’ of warp strands in this case means tying around one peg from bottom to top of loom and snipping it after tying the knot at the lower edge. The 2 strands of warp yarn are held together while warping the loom.
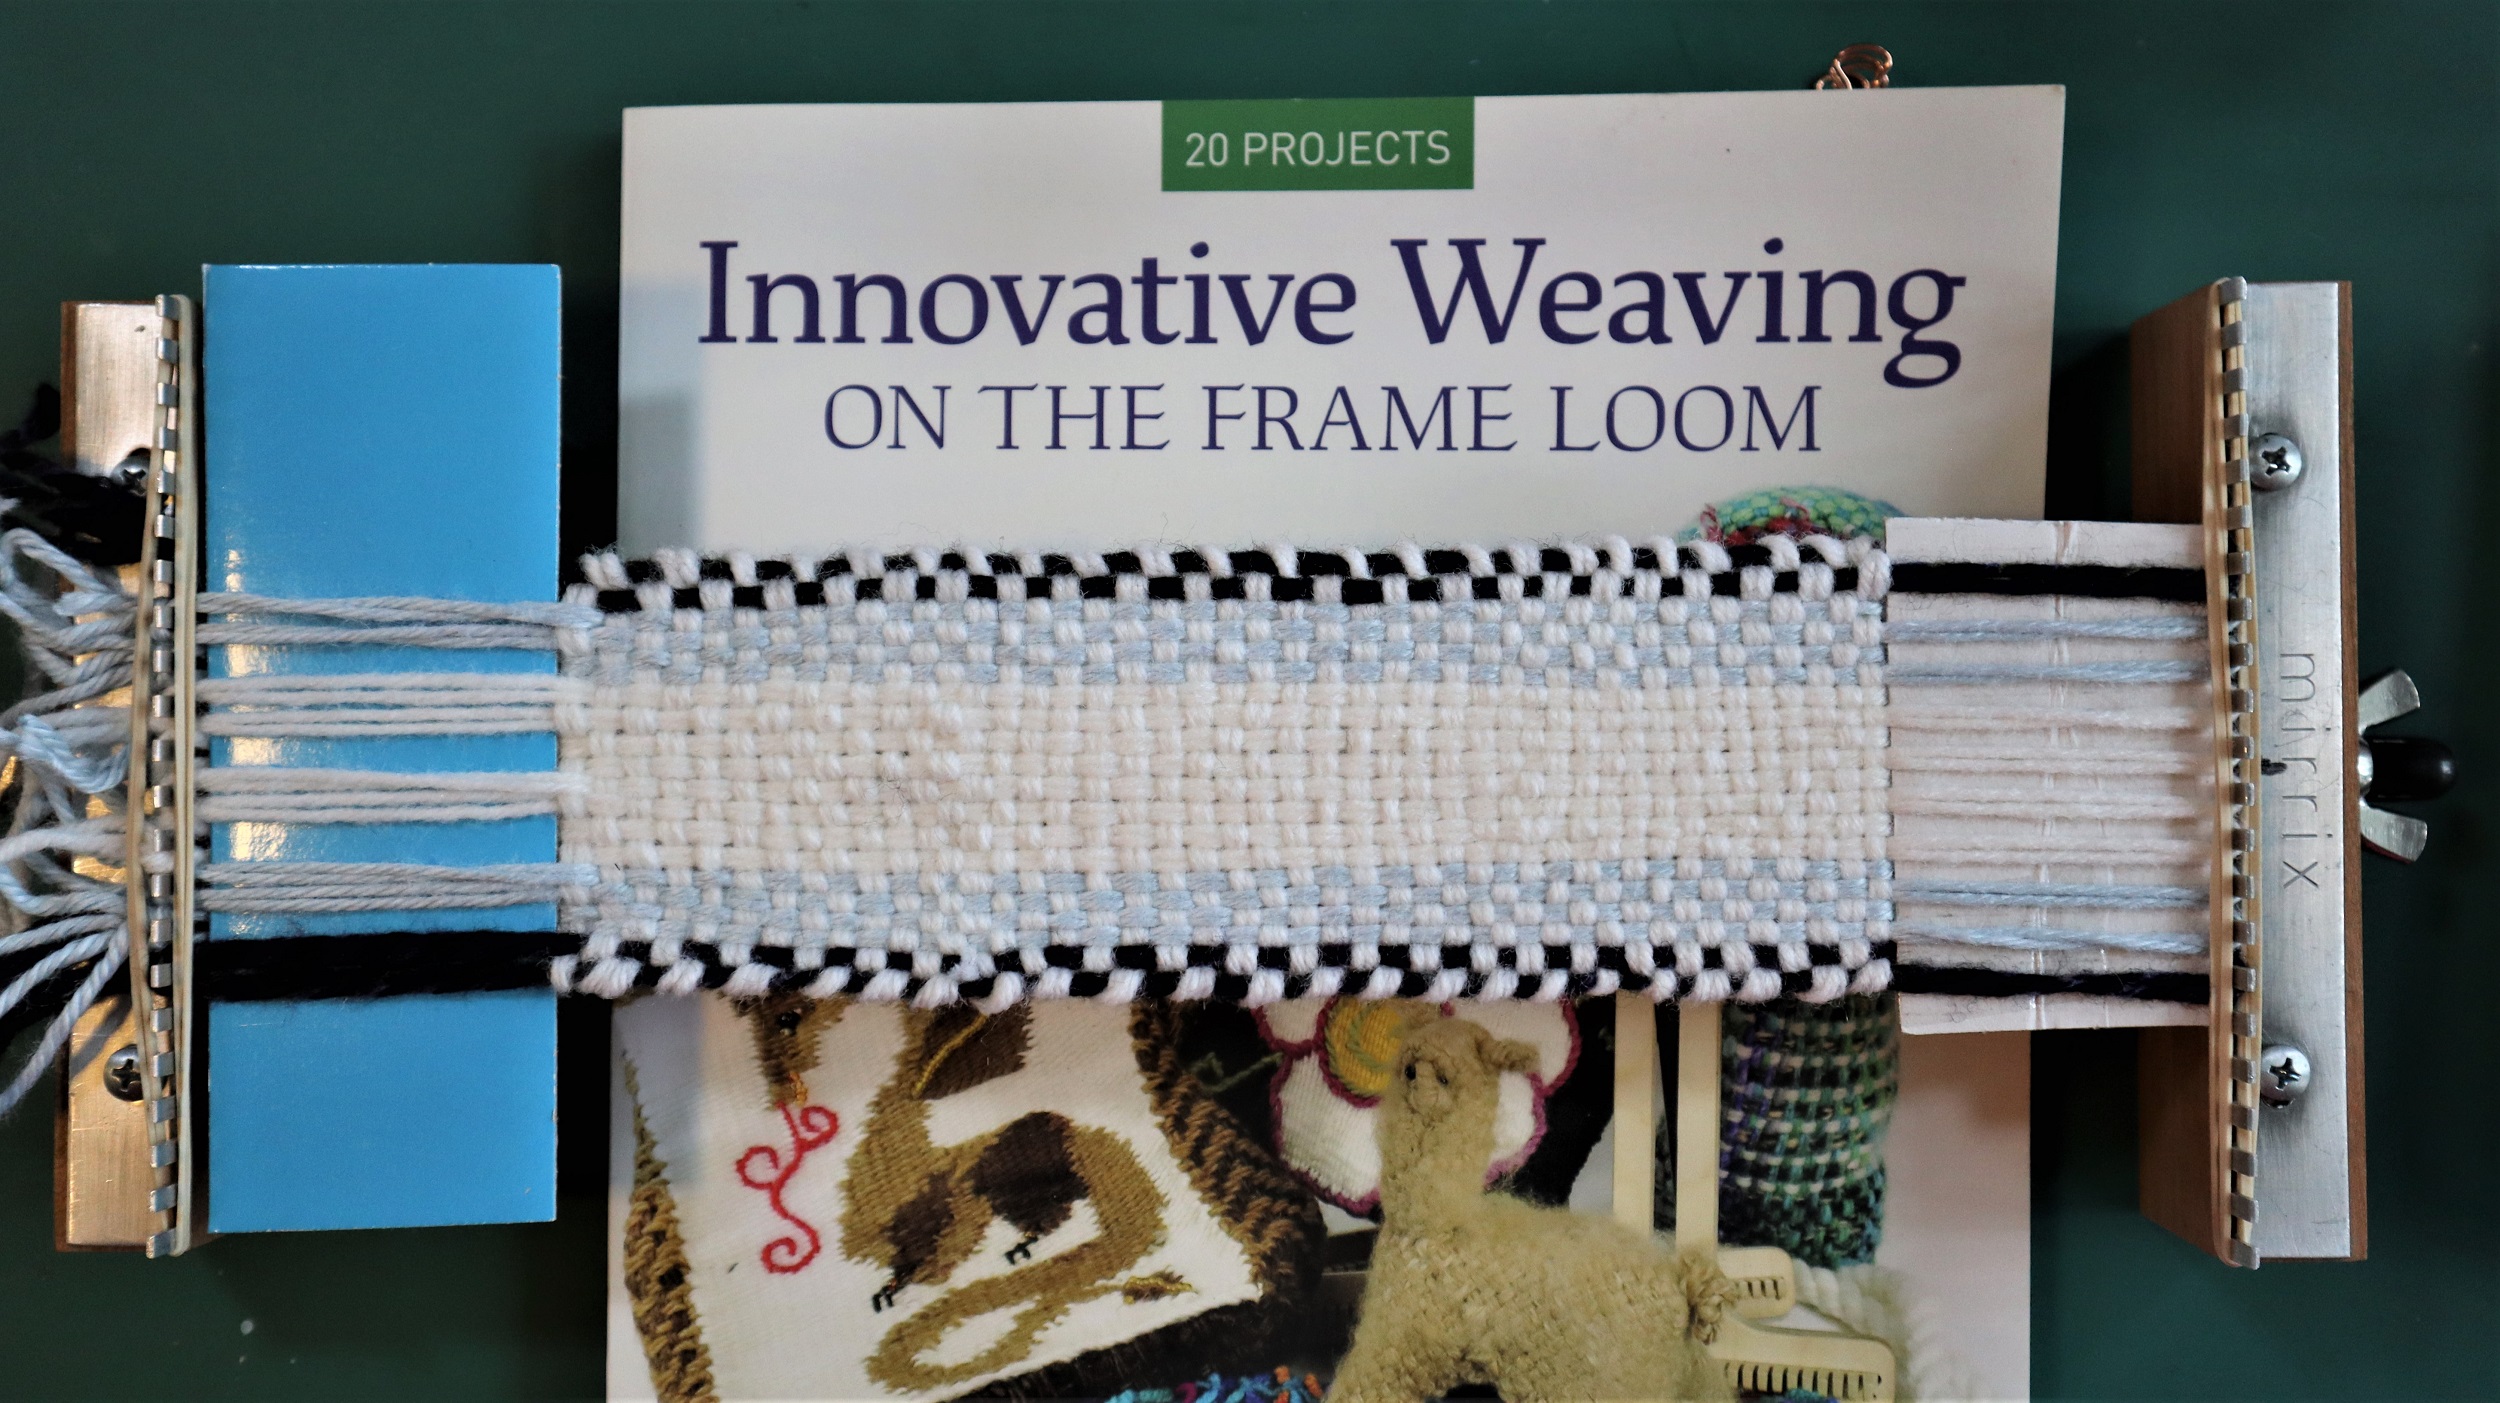
1 set of warp strands Black
2 sets Light Blue
4 sets White
2 sets Light Blue
1 set Black
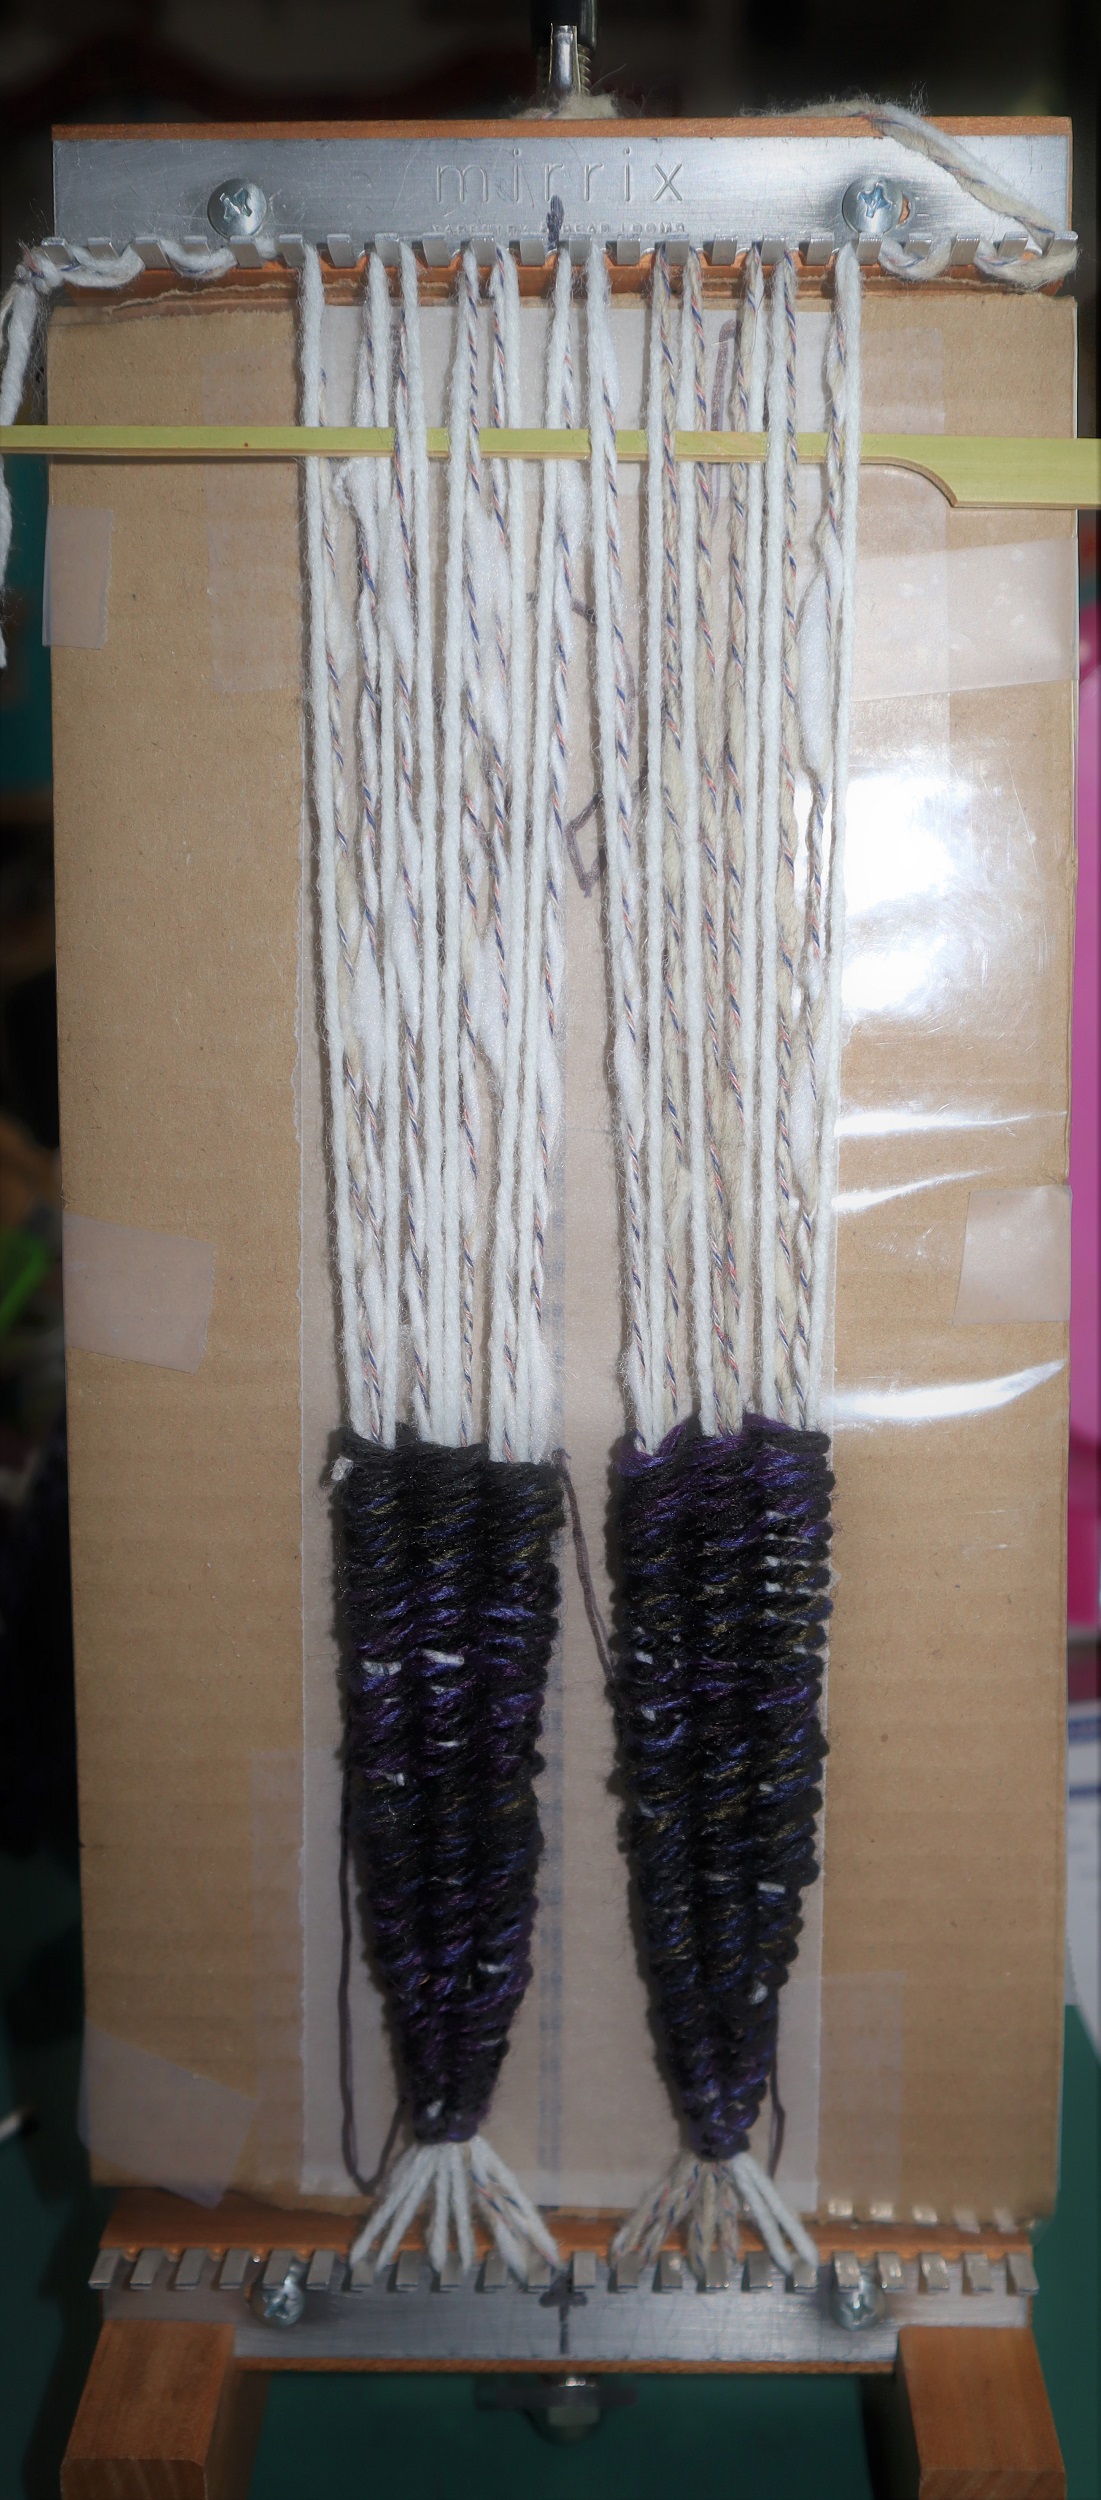
3: Slide 3 rubber bands over the lower set of pegs and 3 rubber bands over the upper set of pegs to help keep the warp strands from jumping off.
4: Cut 2 pieces of cardboard that are 2 inches/5 cm tall. The piece that will go into the lower edge of the warp strands should be 5 1/2 or 6 inches/15 cm wide. The piece that will go into the upper edge of the weaving once it’s done can be just 3 inches/7.5 cm wide.
5: Weave the shed stick under 2/over 2 across the warp strands at the top of the loom.
6: Weave the longer piece of cardboard into the warp strands – slide it into the shed formed by the shed stick and push it down to the lower edge of the loom. This will make the warp fringe at the first end.
7: WEAVING:
NOTE: The instructions in the book say to pull in on the weft strands while weaving. When using the Saffron loom, that is not necessary.
With 2 strands of white yarn and a weaving needle, following the instructions in the book, weave until the weaving is 7 1/2 inches/ 19 cm tall.
Fold the shorter piece of cardboard in half lengthwise and weave it into the warp strands, then open it up. This will keep the weaving taut while you embroider the word, ‘imagine’.
The 2 pieces of cardboard – 1 at each end of the weaving are essential to keep the weaving in place while embroidering the letters.
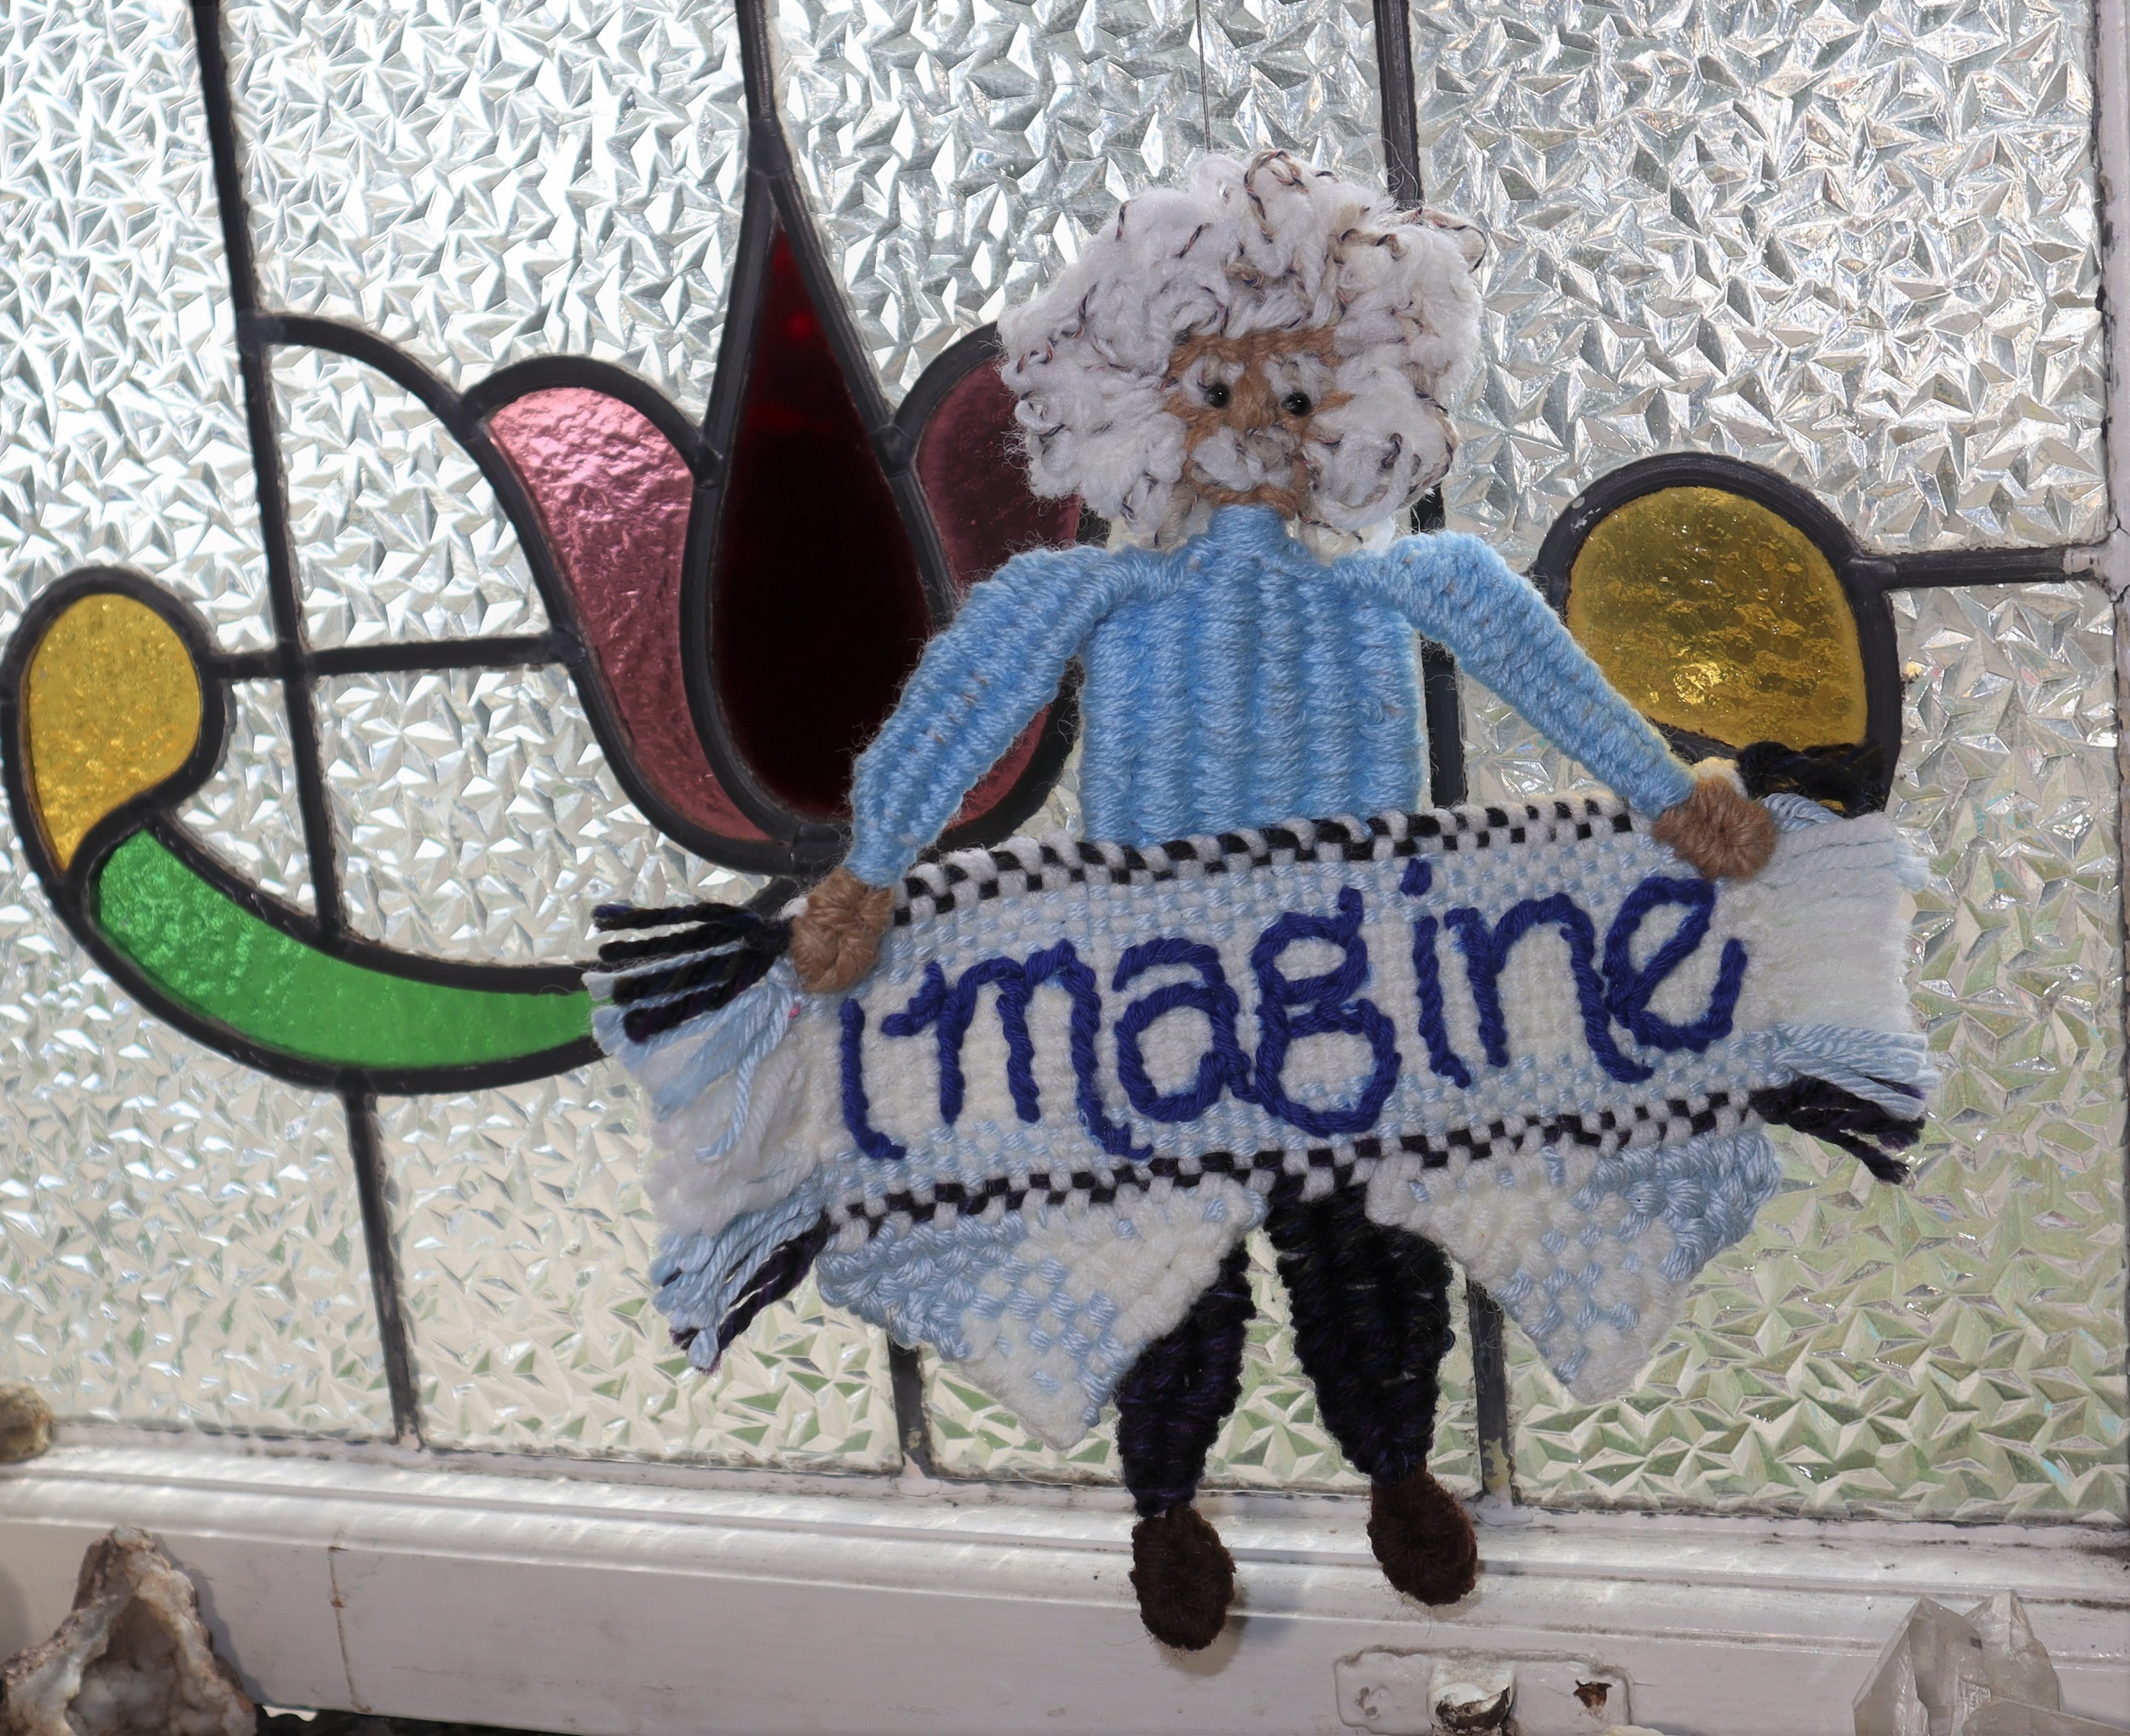
Woven on the Mirrix Saffron loom, using techniques from “Innovative Weaving on the Frame Loom”
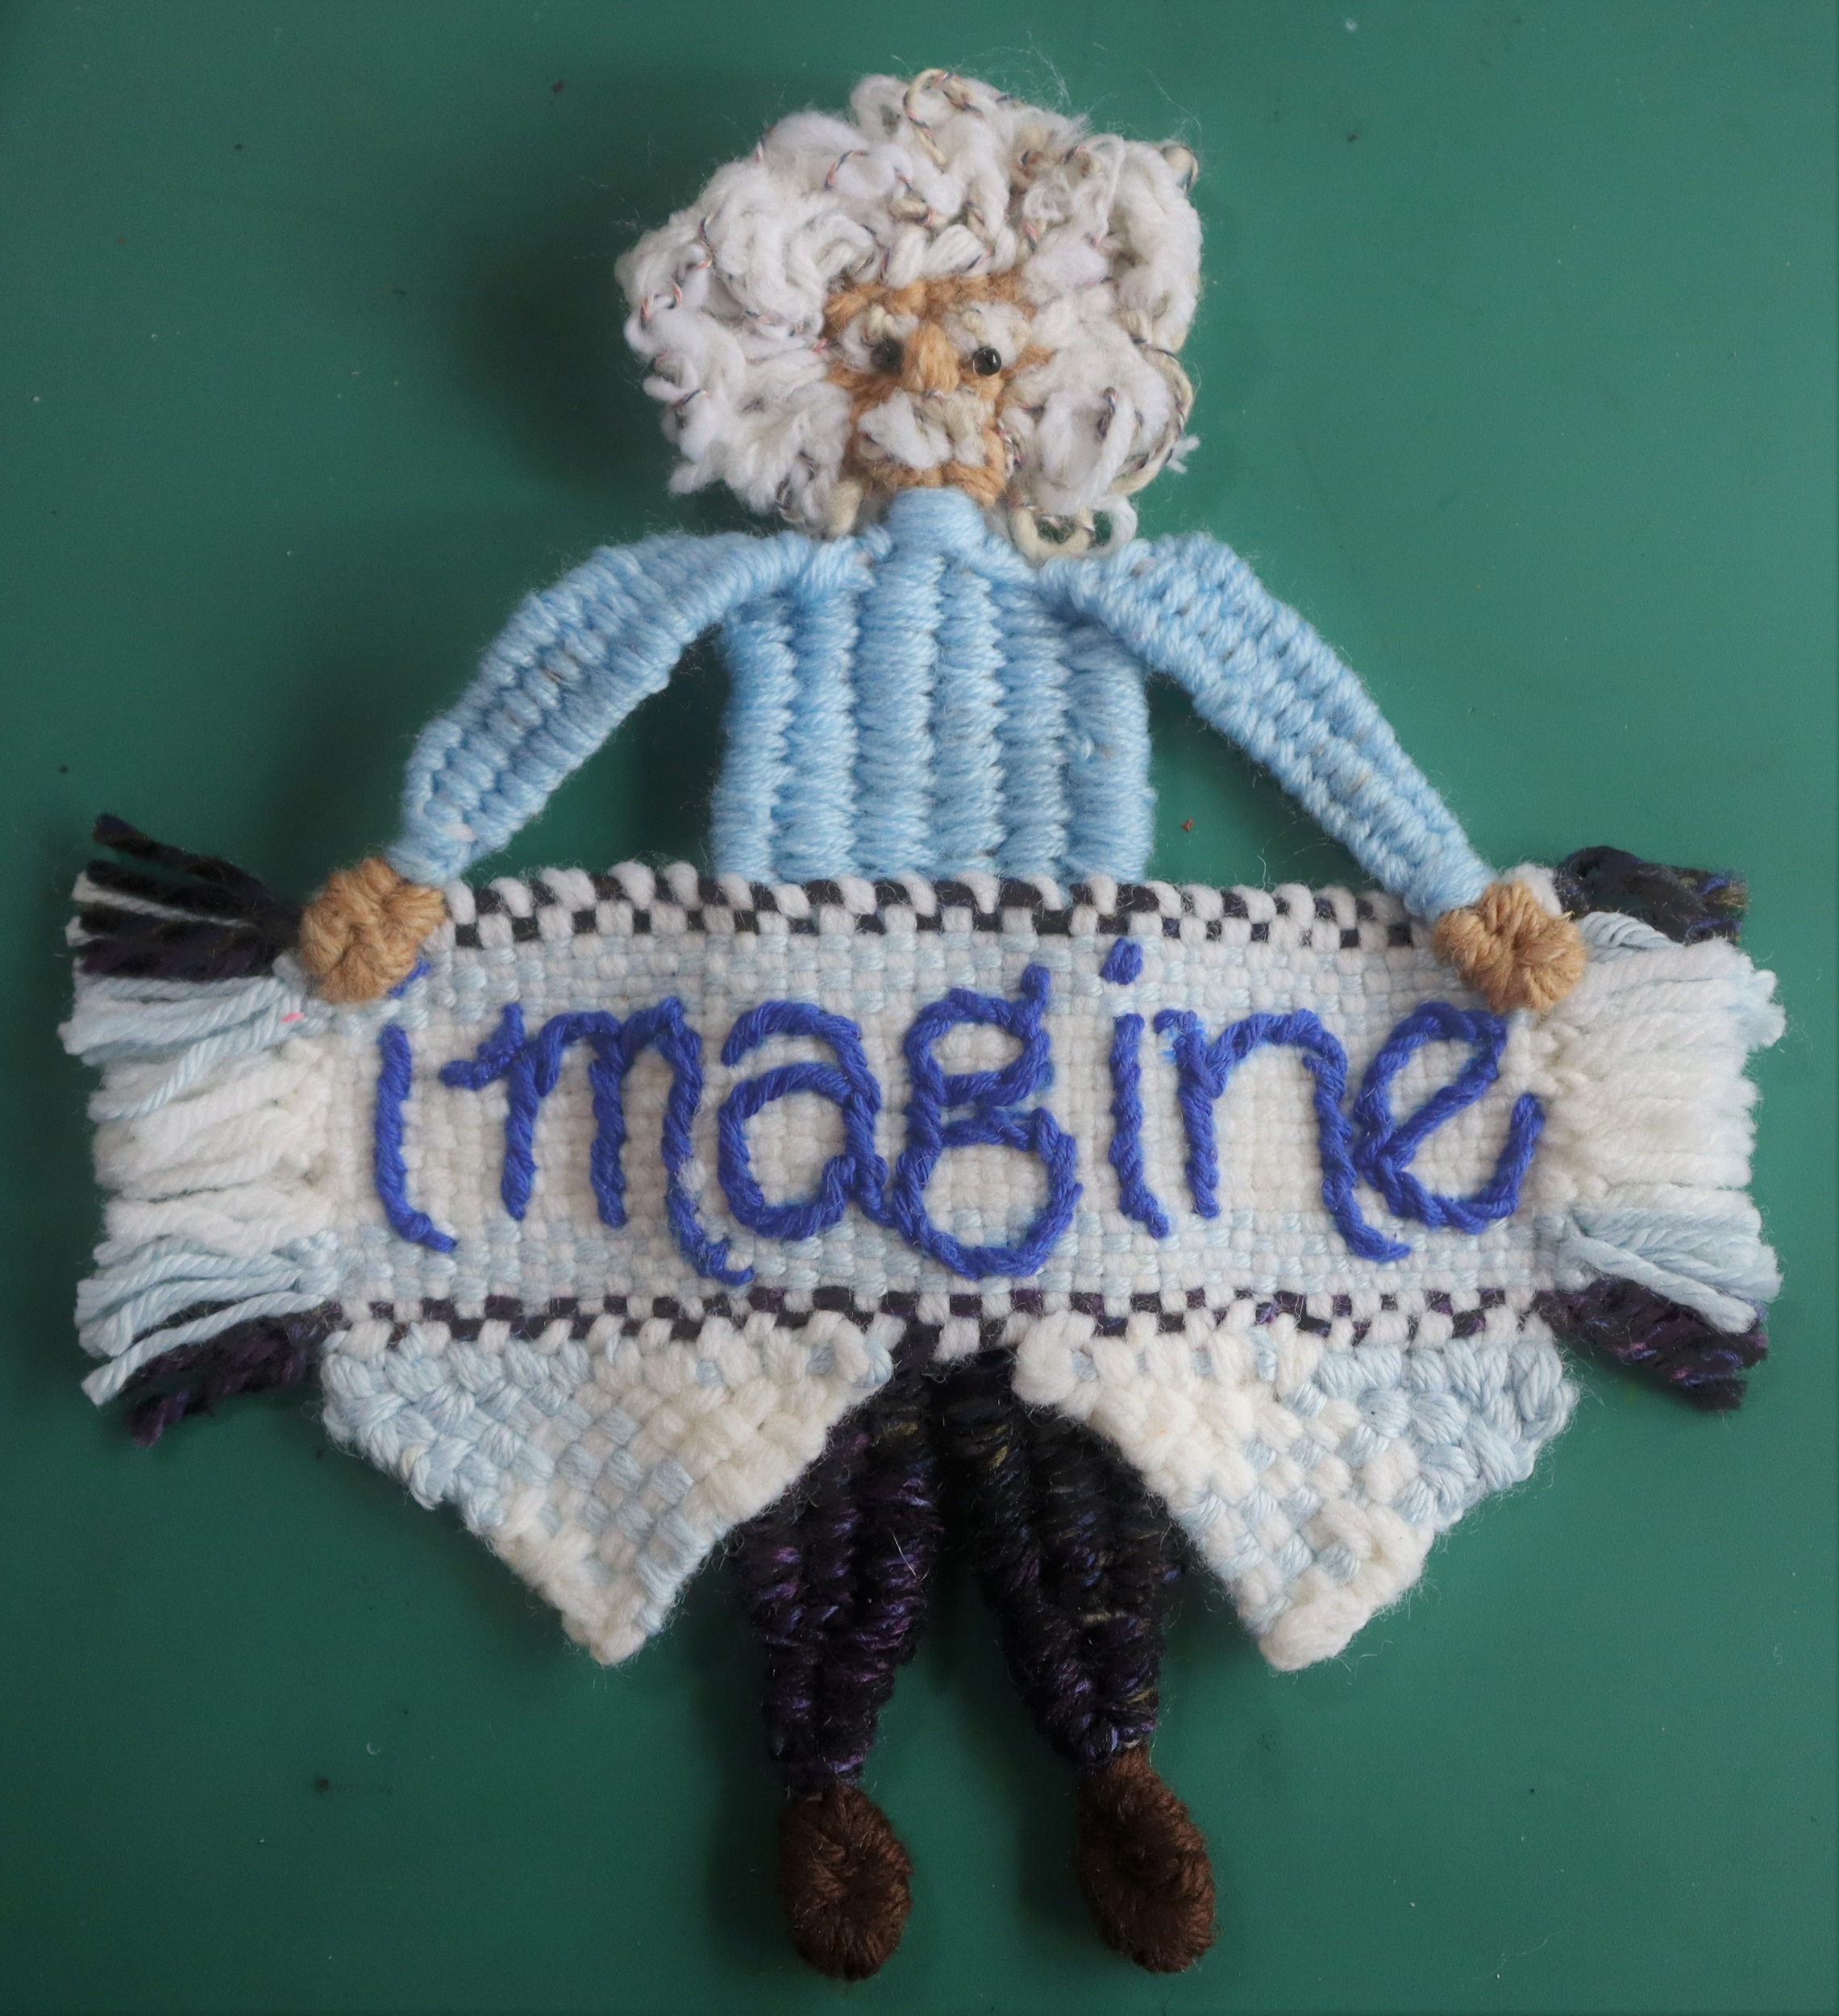
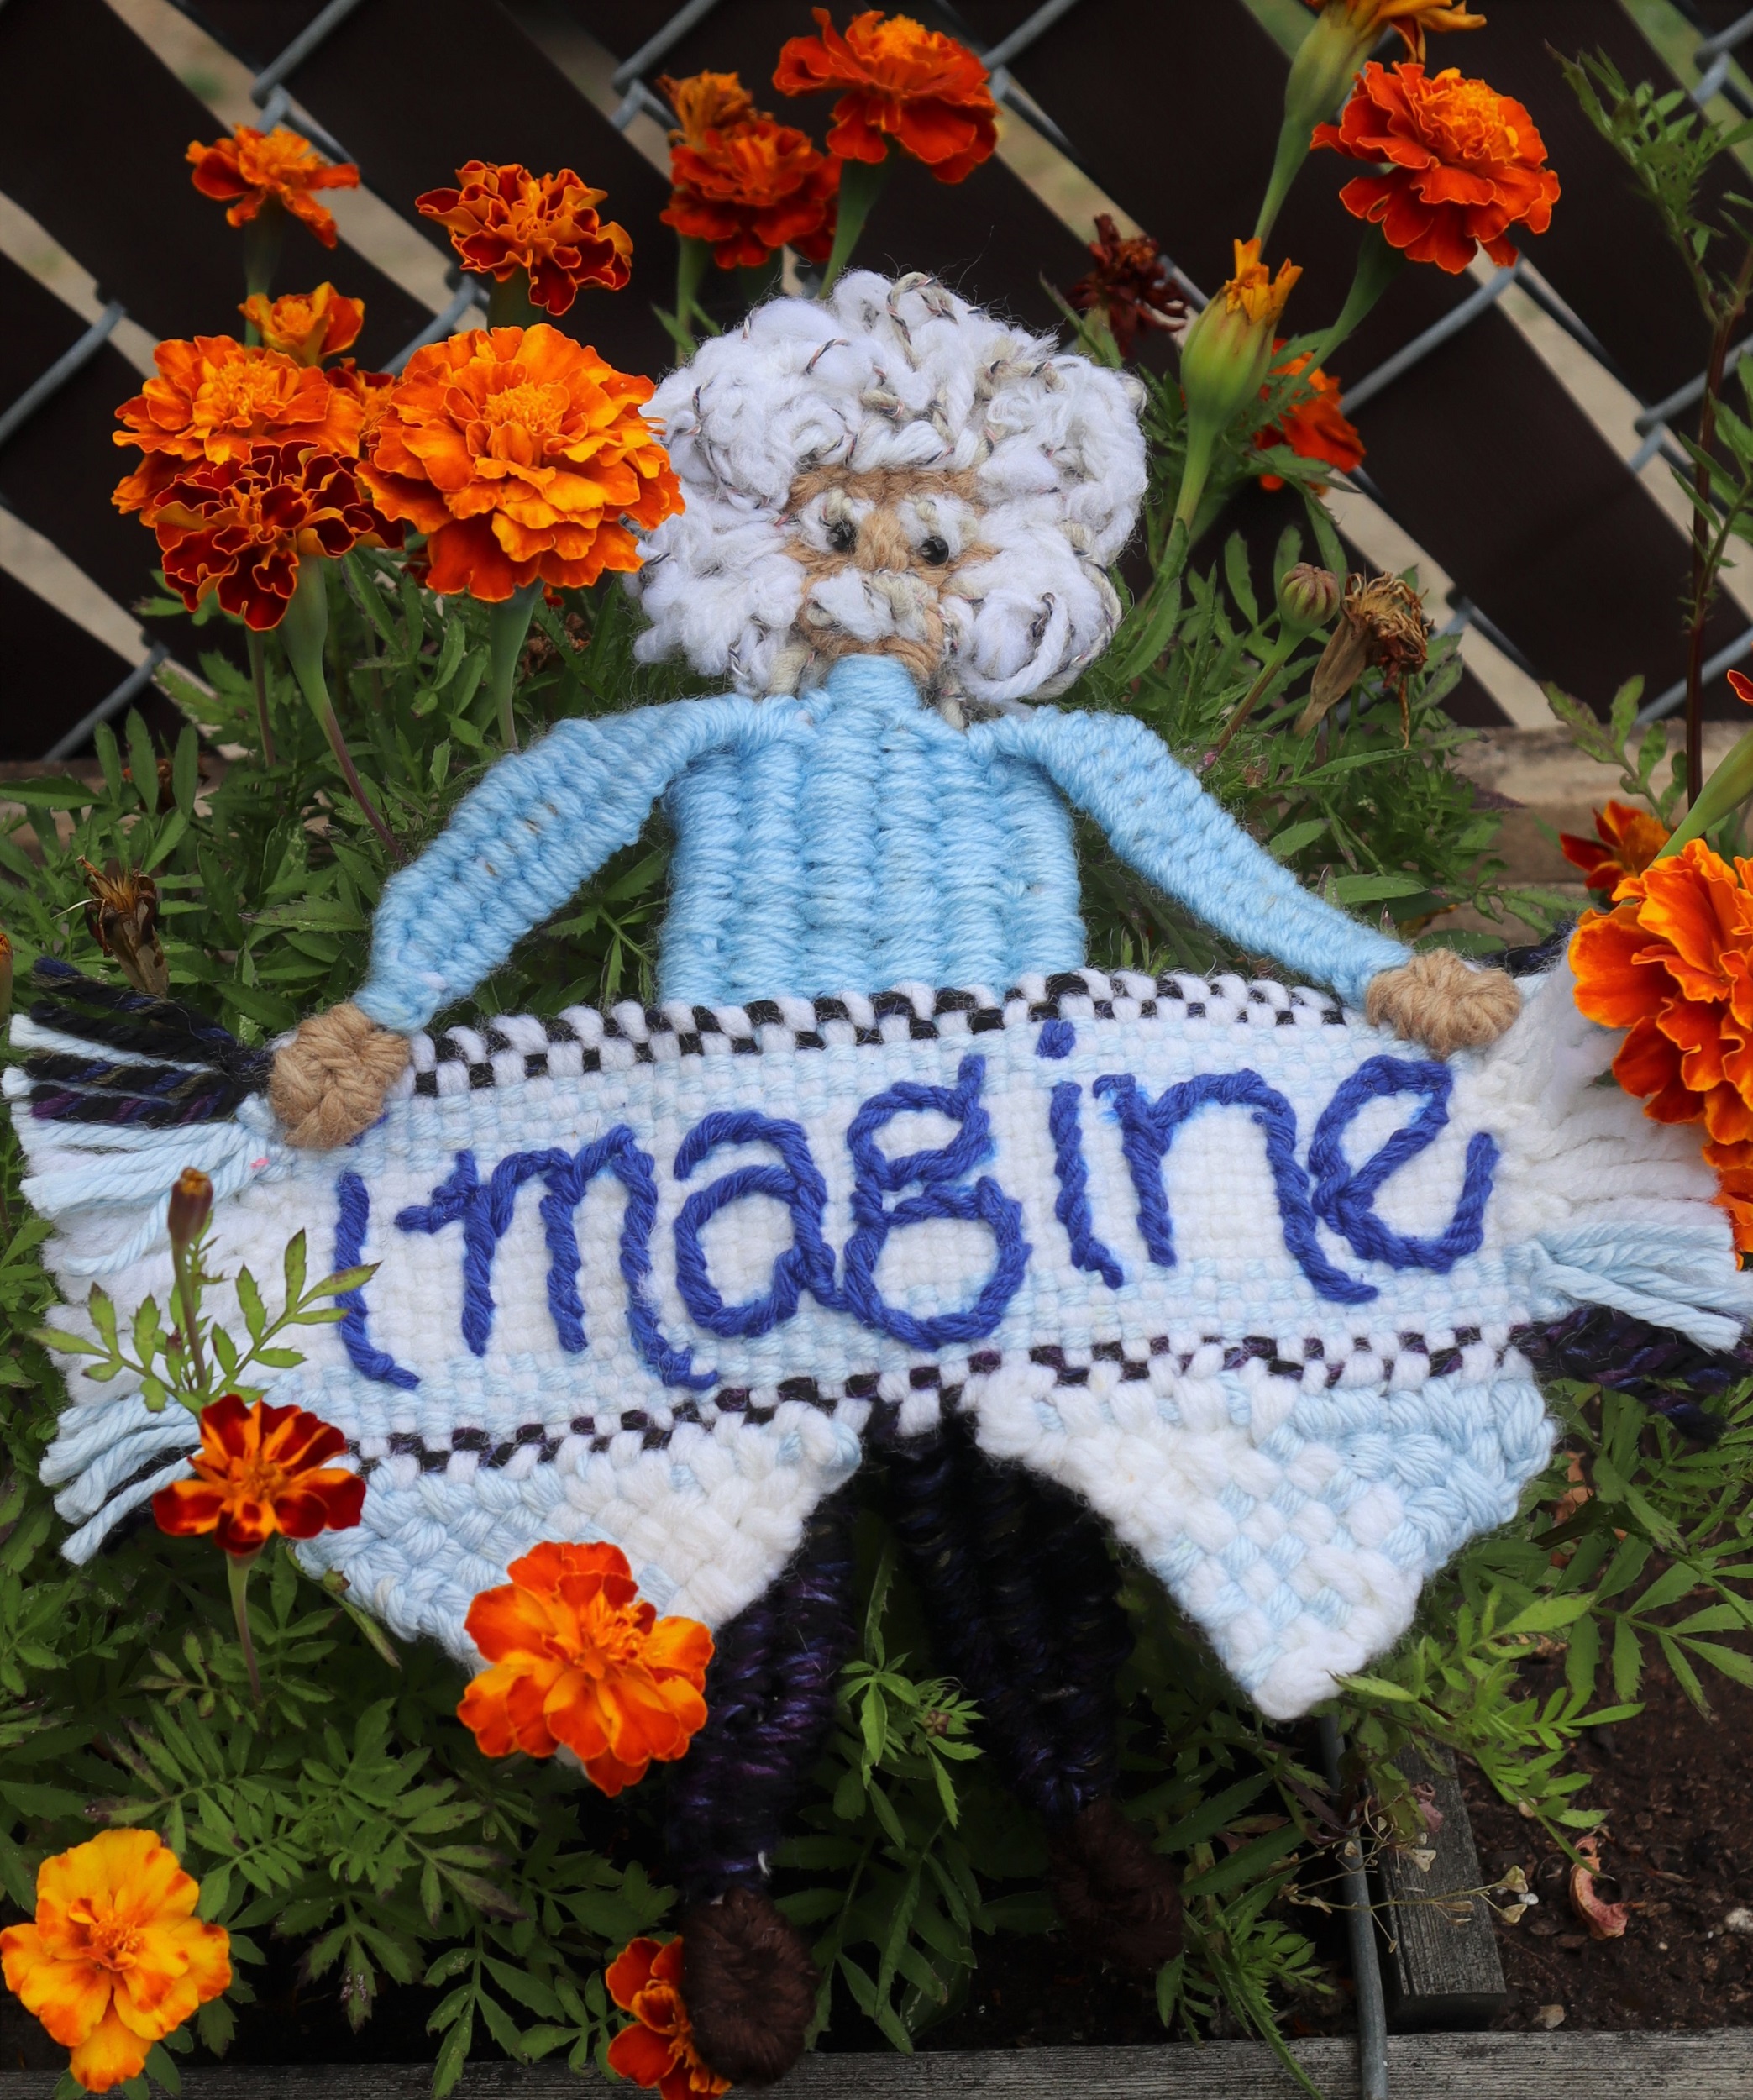
A Weave Along by Noreen Crone-Findlay
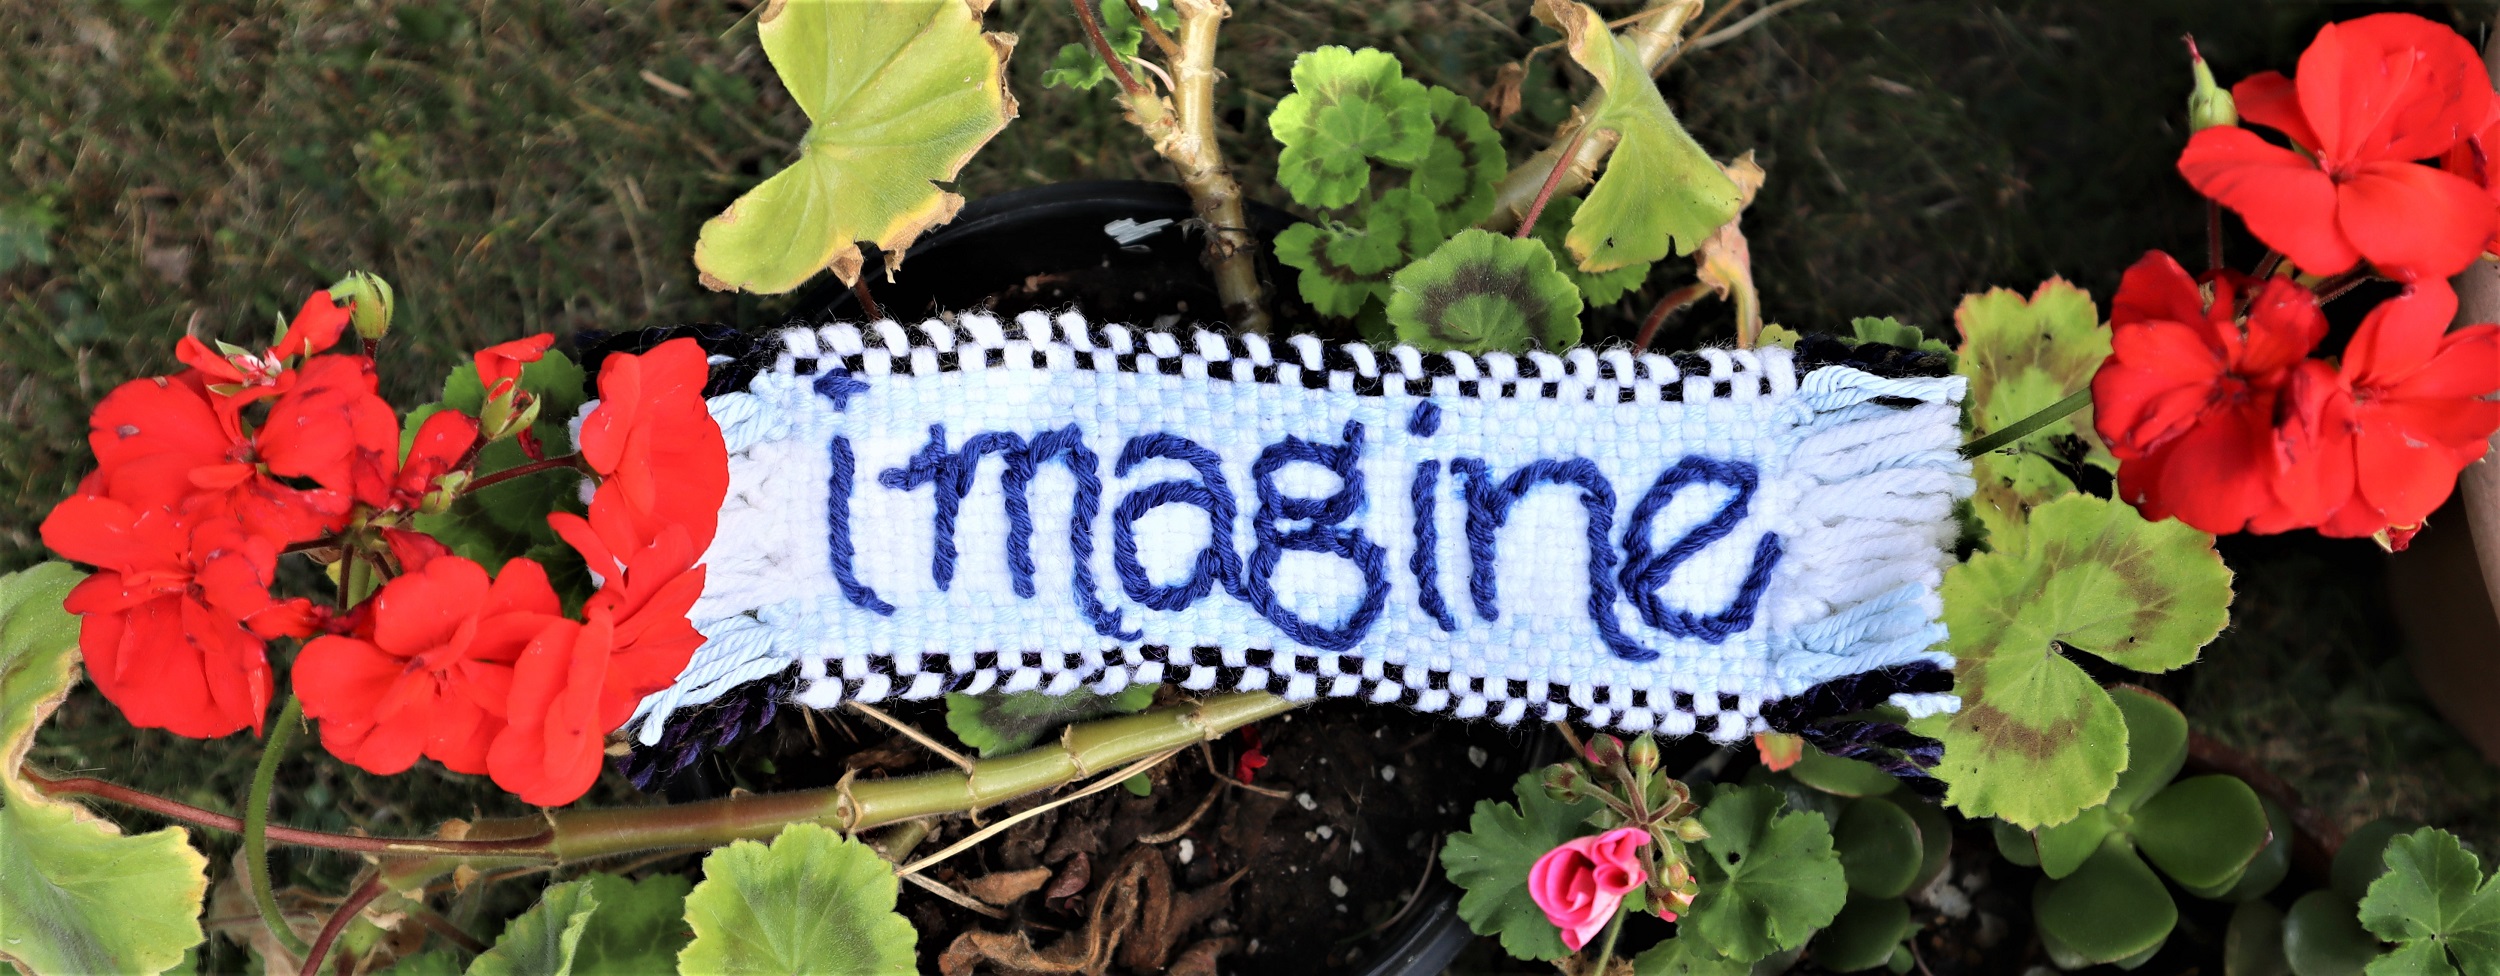
The “Imagine” banner is a reminder about the power of creativity. Noreen Crone-Findlay, author of “Innovative Weaving on the Frame Loom”, has designed this banner as a weave along, featuring the delightful Mirrix Saffron Loom.
Albert Einstein has been credited with saying that he valued imagination over knowledge.
Now is certainly the time for us all to imagine that we can make things better, so hurrah for creativity, resiliency and imagination!
The 3 components of the ‘Imagine’ banner are all based on techniques that are featured in ‘Innovative Weaving on the Frame Loom’, with little tweaks so that you can make a unique and one of a kind celebration of creativity to inspire yourself and other people, too.
You will need the Mirrix Saffron Loom and ‘Innovative Weaving on the Frame Loom’ by Noreen Crone-Findlay (that’s me, of course) to participate in the weave along.
Mirrix is offering a kit that includes both, as well as other tools that are used to create the ‘Imagine’ banner.
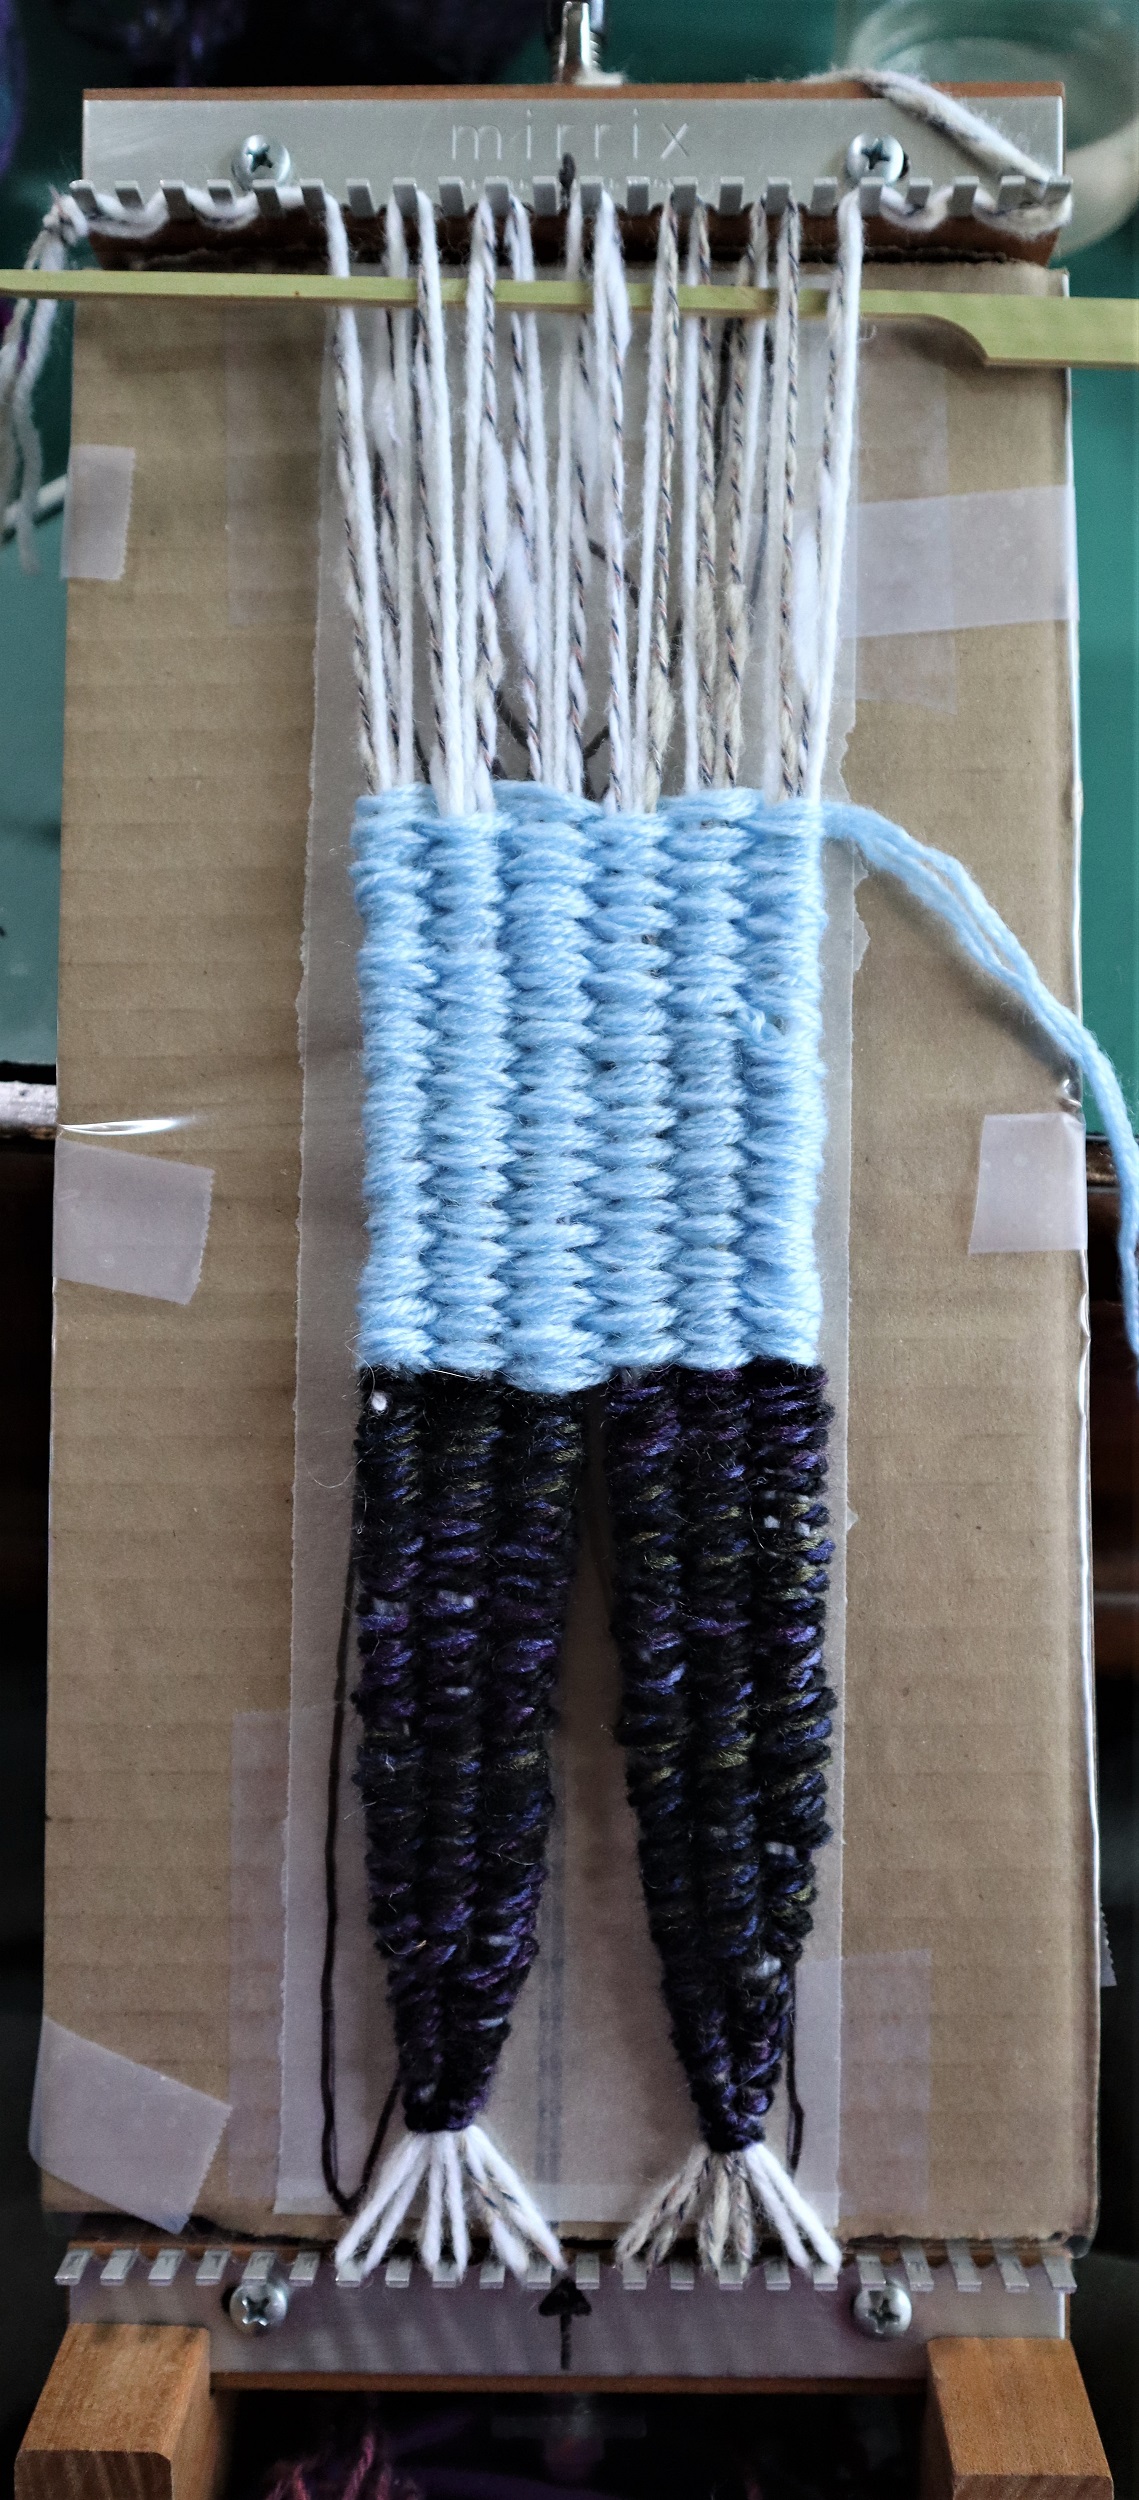
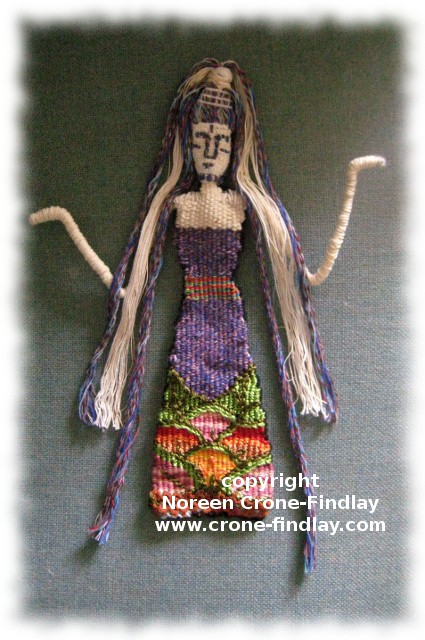
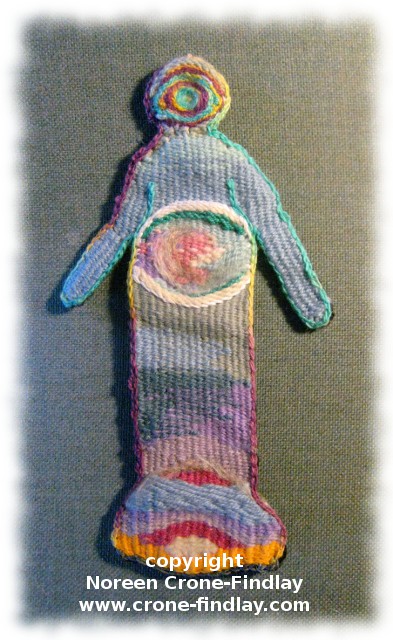
As part of my ongoing participation in a year long weave along of tapestry diaries, I am weaving small images for my Woven Women show of tapestries and other woven works.
I have just finished 2 new tiny woven pieces – they were both on the same loom, so I had to finish the second one so I could cut them both off the loom and finish them.
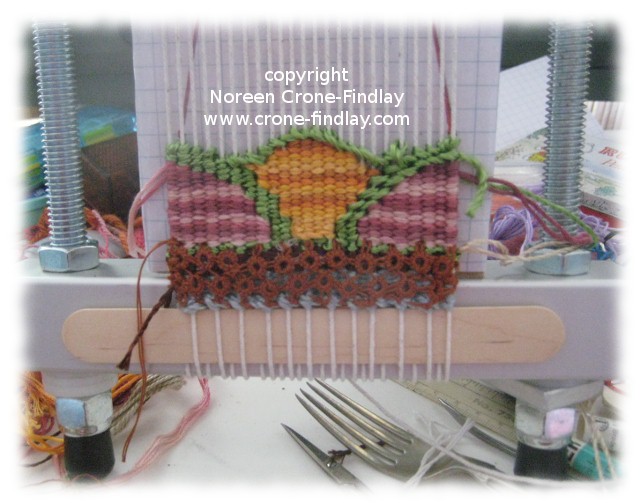
And, here they are: (They are each 11 inches tall).
I am making plaster frames for the series of 3 inch by 5 inch tapestries, and have started experimenting with how I will be painting them…. right now, the first one looks like a black blob, so there’s not much point in photographing it, but I will soon.
Weaving the tapestry diary pieces is just pure joy. 🙂
I am working on some larger pieces, too. Must take some photos….
This week, I began a series of small woven figures for my Woven Women show (see previous post LINK).
I joined the Tapestry Diary Weave Along on Ravelry, and I am so pleased that I did.
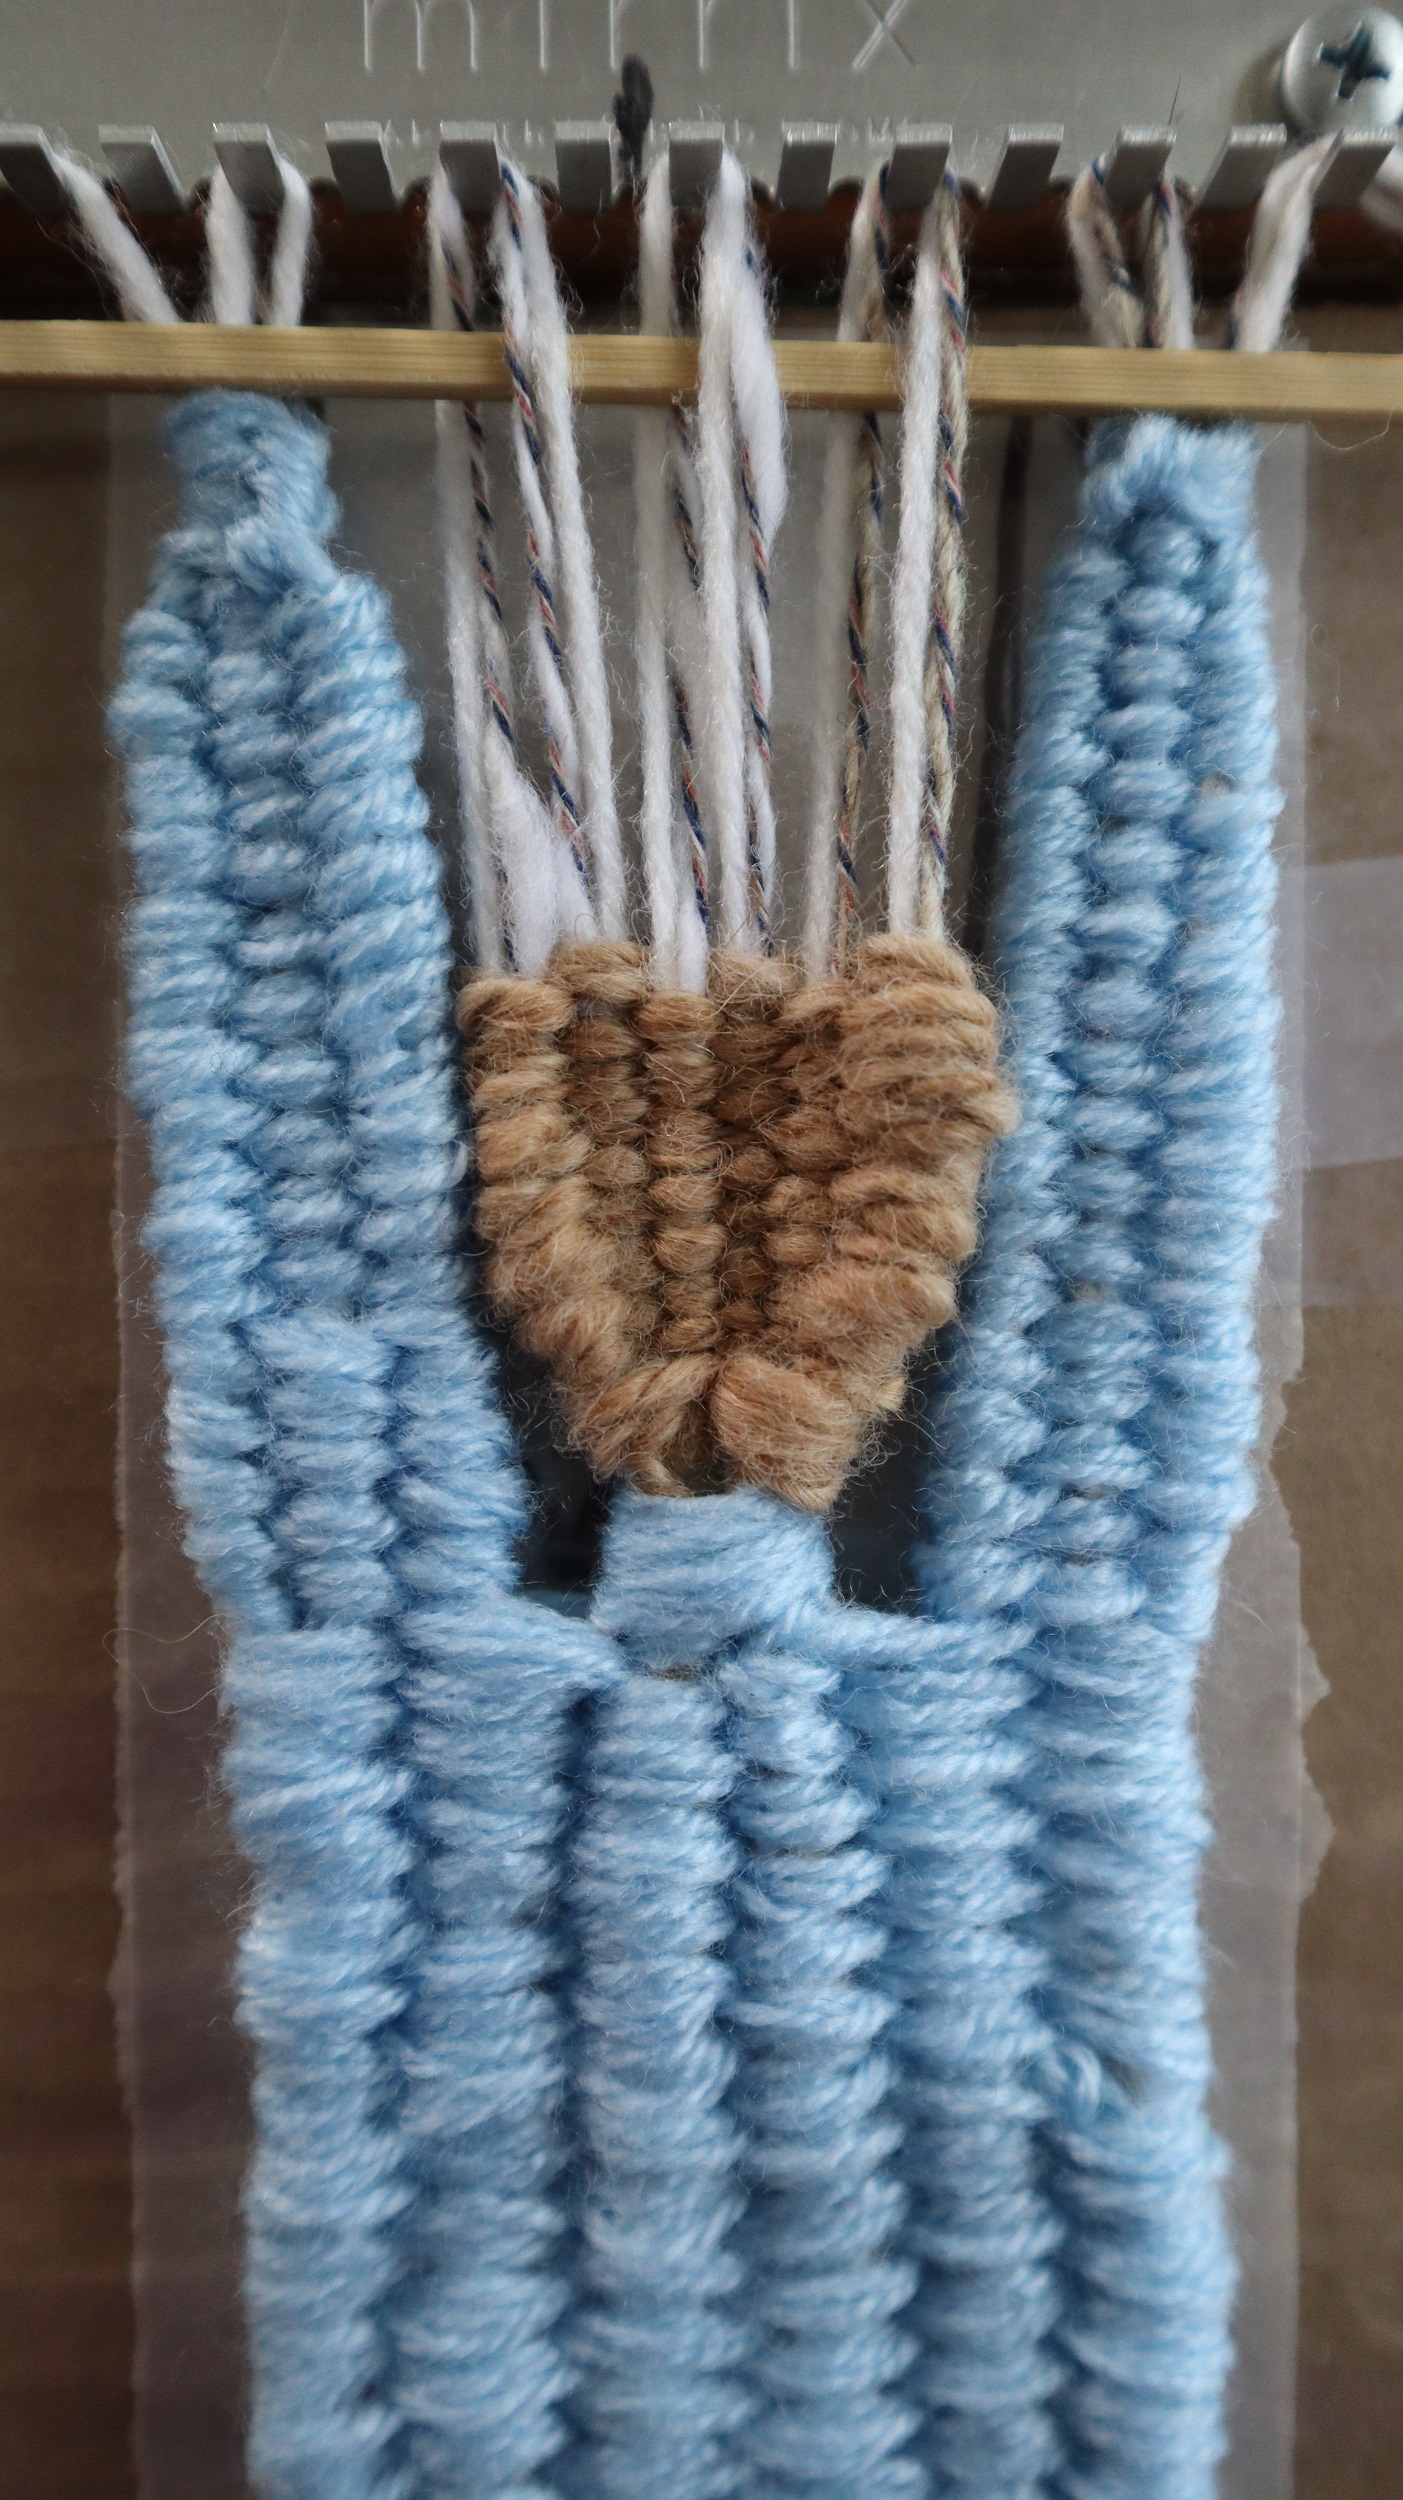
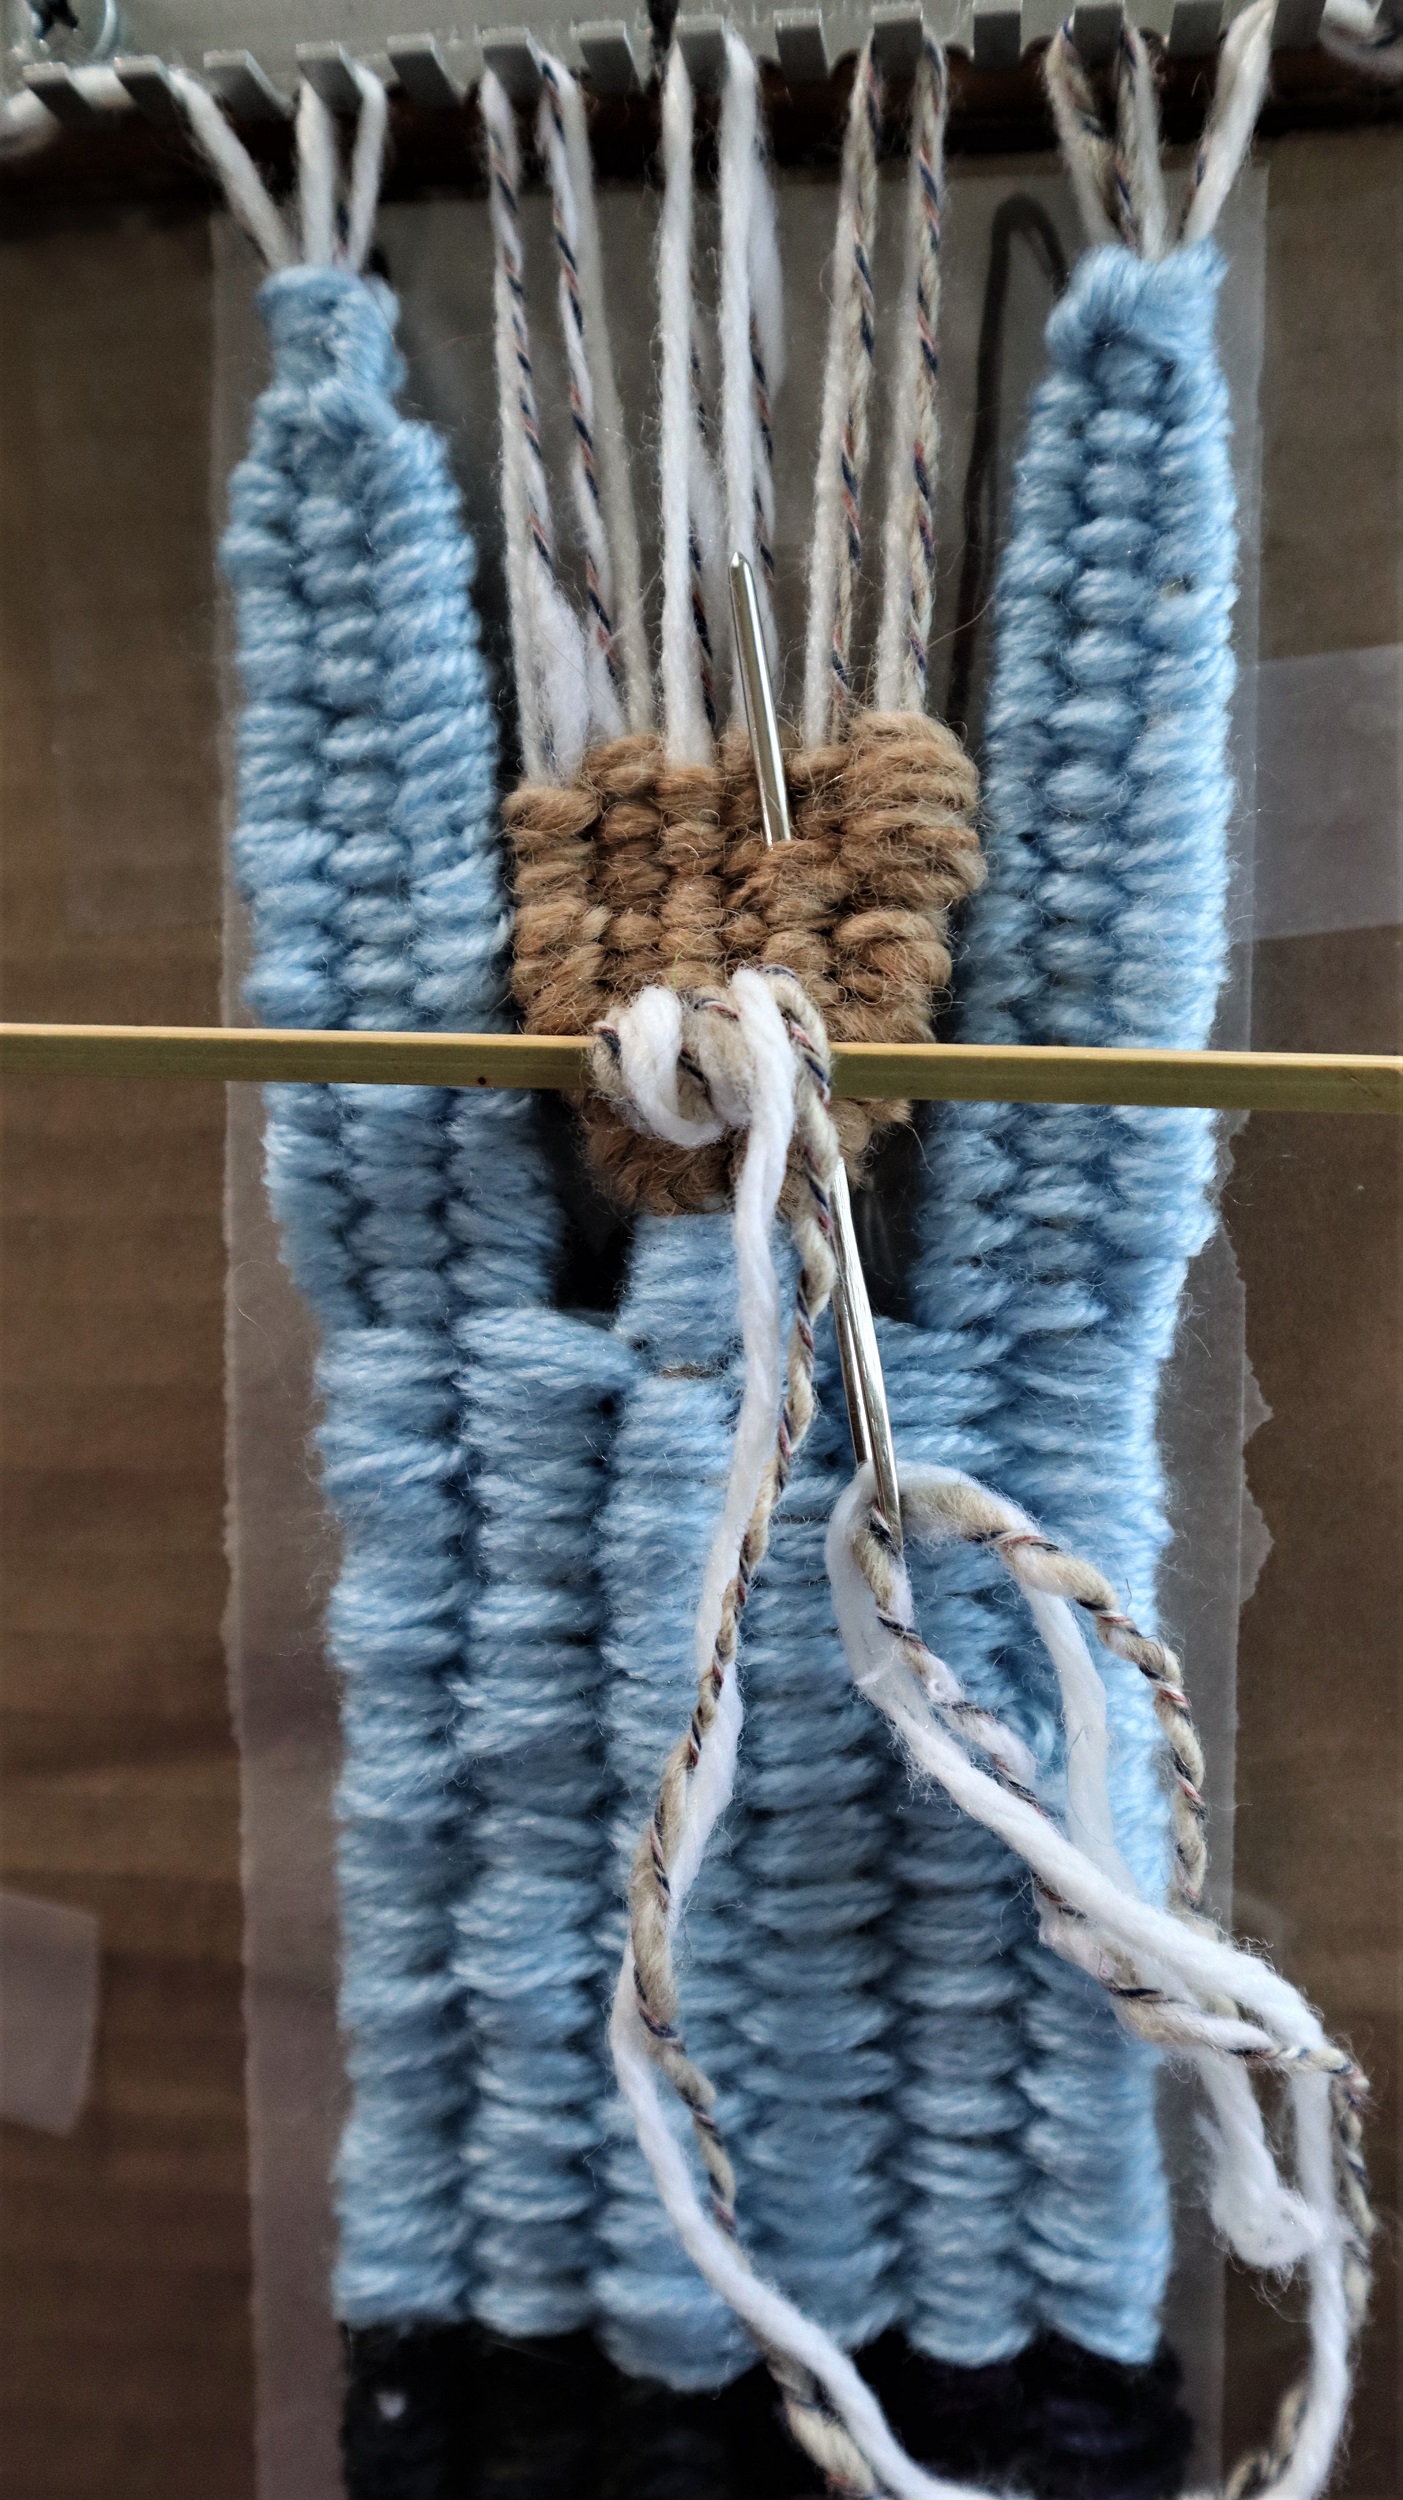
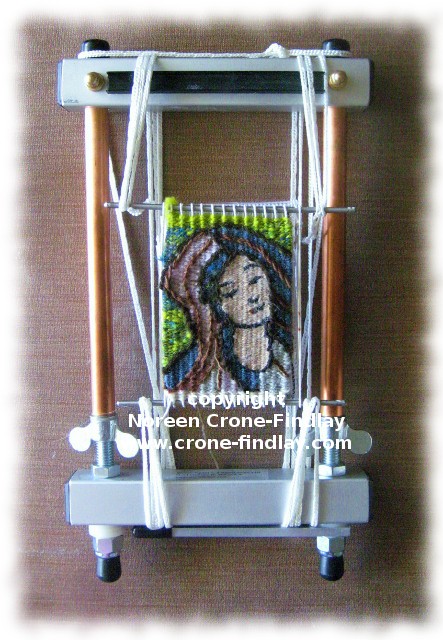
This is the progression of the first piece, so far:
I warped up my 8 inch Mirrix so I can weave one diary entry on the front of the loom and one on the back.
copyright Noreen Crone-Findlay
A Tapestry Diary is a kind of daily journal that, of course, reflects what is happening what is happening in the weaver’s life at that moment….
copyright Noreen Crone-Findlay
I’ve been longing for springtime, so it was natural that flowers would appear immediately.
Using my mother’s stash of embroidery floss and yarn has been powerful for me.
Even though she is no longer with us, it is very tender to be working with something that she loved so much.
copyright Noreen Crone-Findlay
Each day, I’ve been uploading a pic of my progress in my diary- I find this rather daunting, as the ‘not good enough’ gremlins leap up and bite so uncomfortably! ugh….
copyright Noreen Crone-Findlay
I had some concerns about weaving with super slippery rayon embroidery floss, but it was fine…. although, I’ll need to do some serious sewing in on the wrong side.
That’s a bit of tatting that I stitched to the hem of the dress.
I always have a tatting shuttle in my pocket for ‘incidental moments’- it’s wonderfully contemplative, meditative and also so portable that I can take it with me everywhere.
I tat long strips of edging that I then include in my tapestries.
copyright Noreen Crone-Findlay
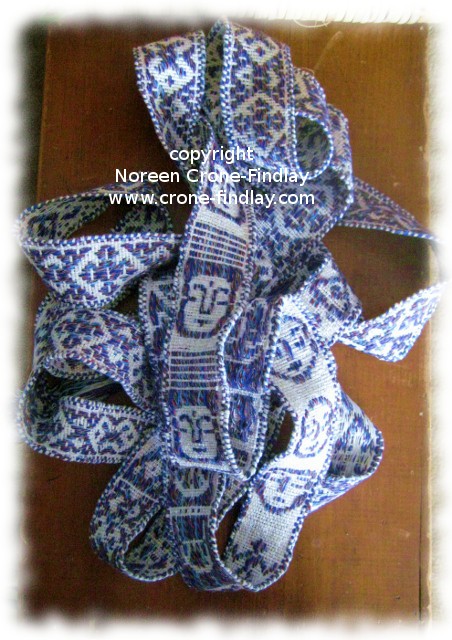
The face is applique’d on – I designed and wove a series of faces in a narrow band, using my double hole rigid heddle loom.
copyright Noreen Crone-Findlay
The arms are wrapped wires- I haven’t quite finished the wrapping, which is okay, as I won’t get to finish this piece until I weave the next one that is on the other side of the loom.
Being part of the Weave Along is such a pleasure- the international community of weavers that has formed around this weave along is a generous and supportive group.
I have no way of knowing how the Tapestry Diaries will unfold, but I will be posting as they do.
Even though I haven’t been posting about my solo show of tapestries and woven works (Woven Women) that is opening in August 2014 (eep…. tick tock, tick tock…. eep), I have been working away on new pieces for it.
I noticed that the Tapestry weaving group on Ravelry (the facebook of the fibre arts world) is having a weave along in which people are weaving ‘Tapestry Diaries’.
That means that they are weaving daily, weekly or monthly, on pieces that reflect their lives in those given moments.
I have wanted to do this for several years, but just have never started one…. until, the other day, I had an ‘Aha!’ moment.
I have been contemplating a series of small woven figures- I’ve woven the faces for them, but haven’t started the bodies.
It struck me that weaving the bodies for these figures would work beautifully as a Tapestry Diary.
I got all excited about doing this, and then took the plunge and asked the moderator if I could join, even if I am late to the party.
She graciously said that I could, and so I am!
I love that the online community creates ‘Virtual Guilds’ with members from all over the planet inspiring and encouraging each other. It’s just awesome.
I decided to warp up my 8 inch Mirrix tapestry loom to get started, but I can see that I may want to warp up my 16 inch Mirrix for this, too.
Some people choose to weave very specific shapes in their tapestry diaries, like little squares or rectangles, that are quite uniform in size.
I have decided that my shape is going to be one that I have loved working with over the decades.
It’s an hourglass motif that has shown up in embroidery, weaving, stitchery, stone and metal work for thousands of years.
It’s sometimes called. ‘The Shepherdess’ motif.
I did a bunch of drawings, until I was happy with a very simple, basic shape that I think will give me lots of options for experimenting with color and pattern. Of course, I have no idea how they will turn out. 🙂
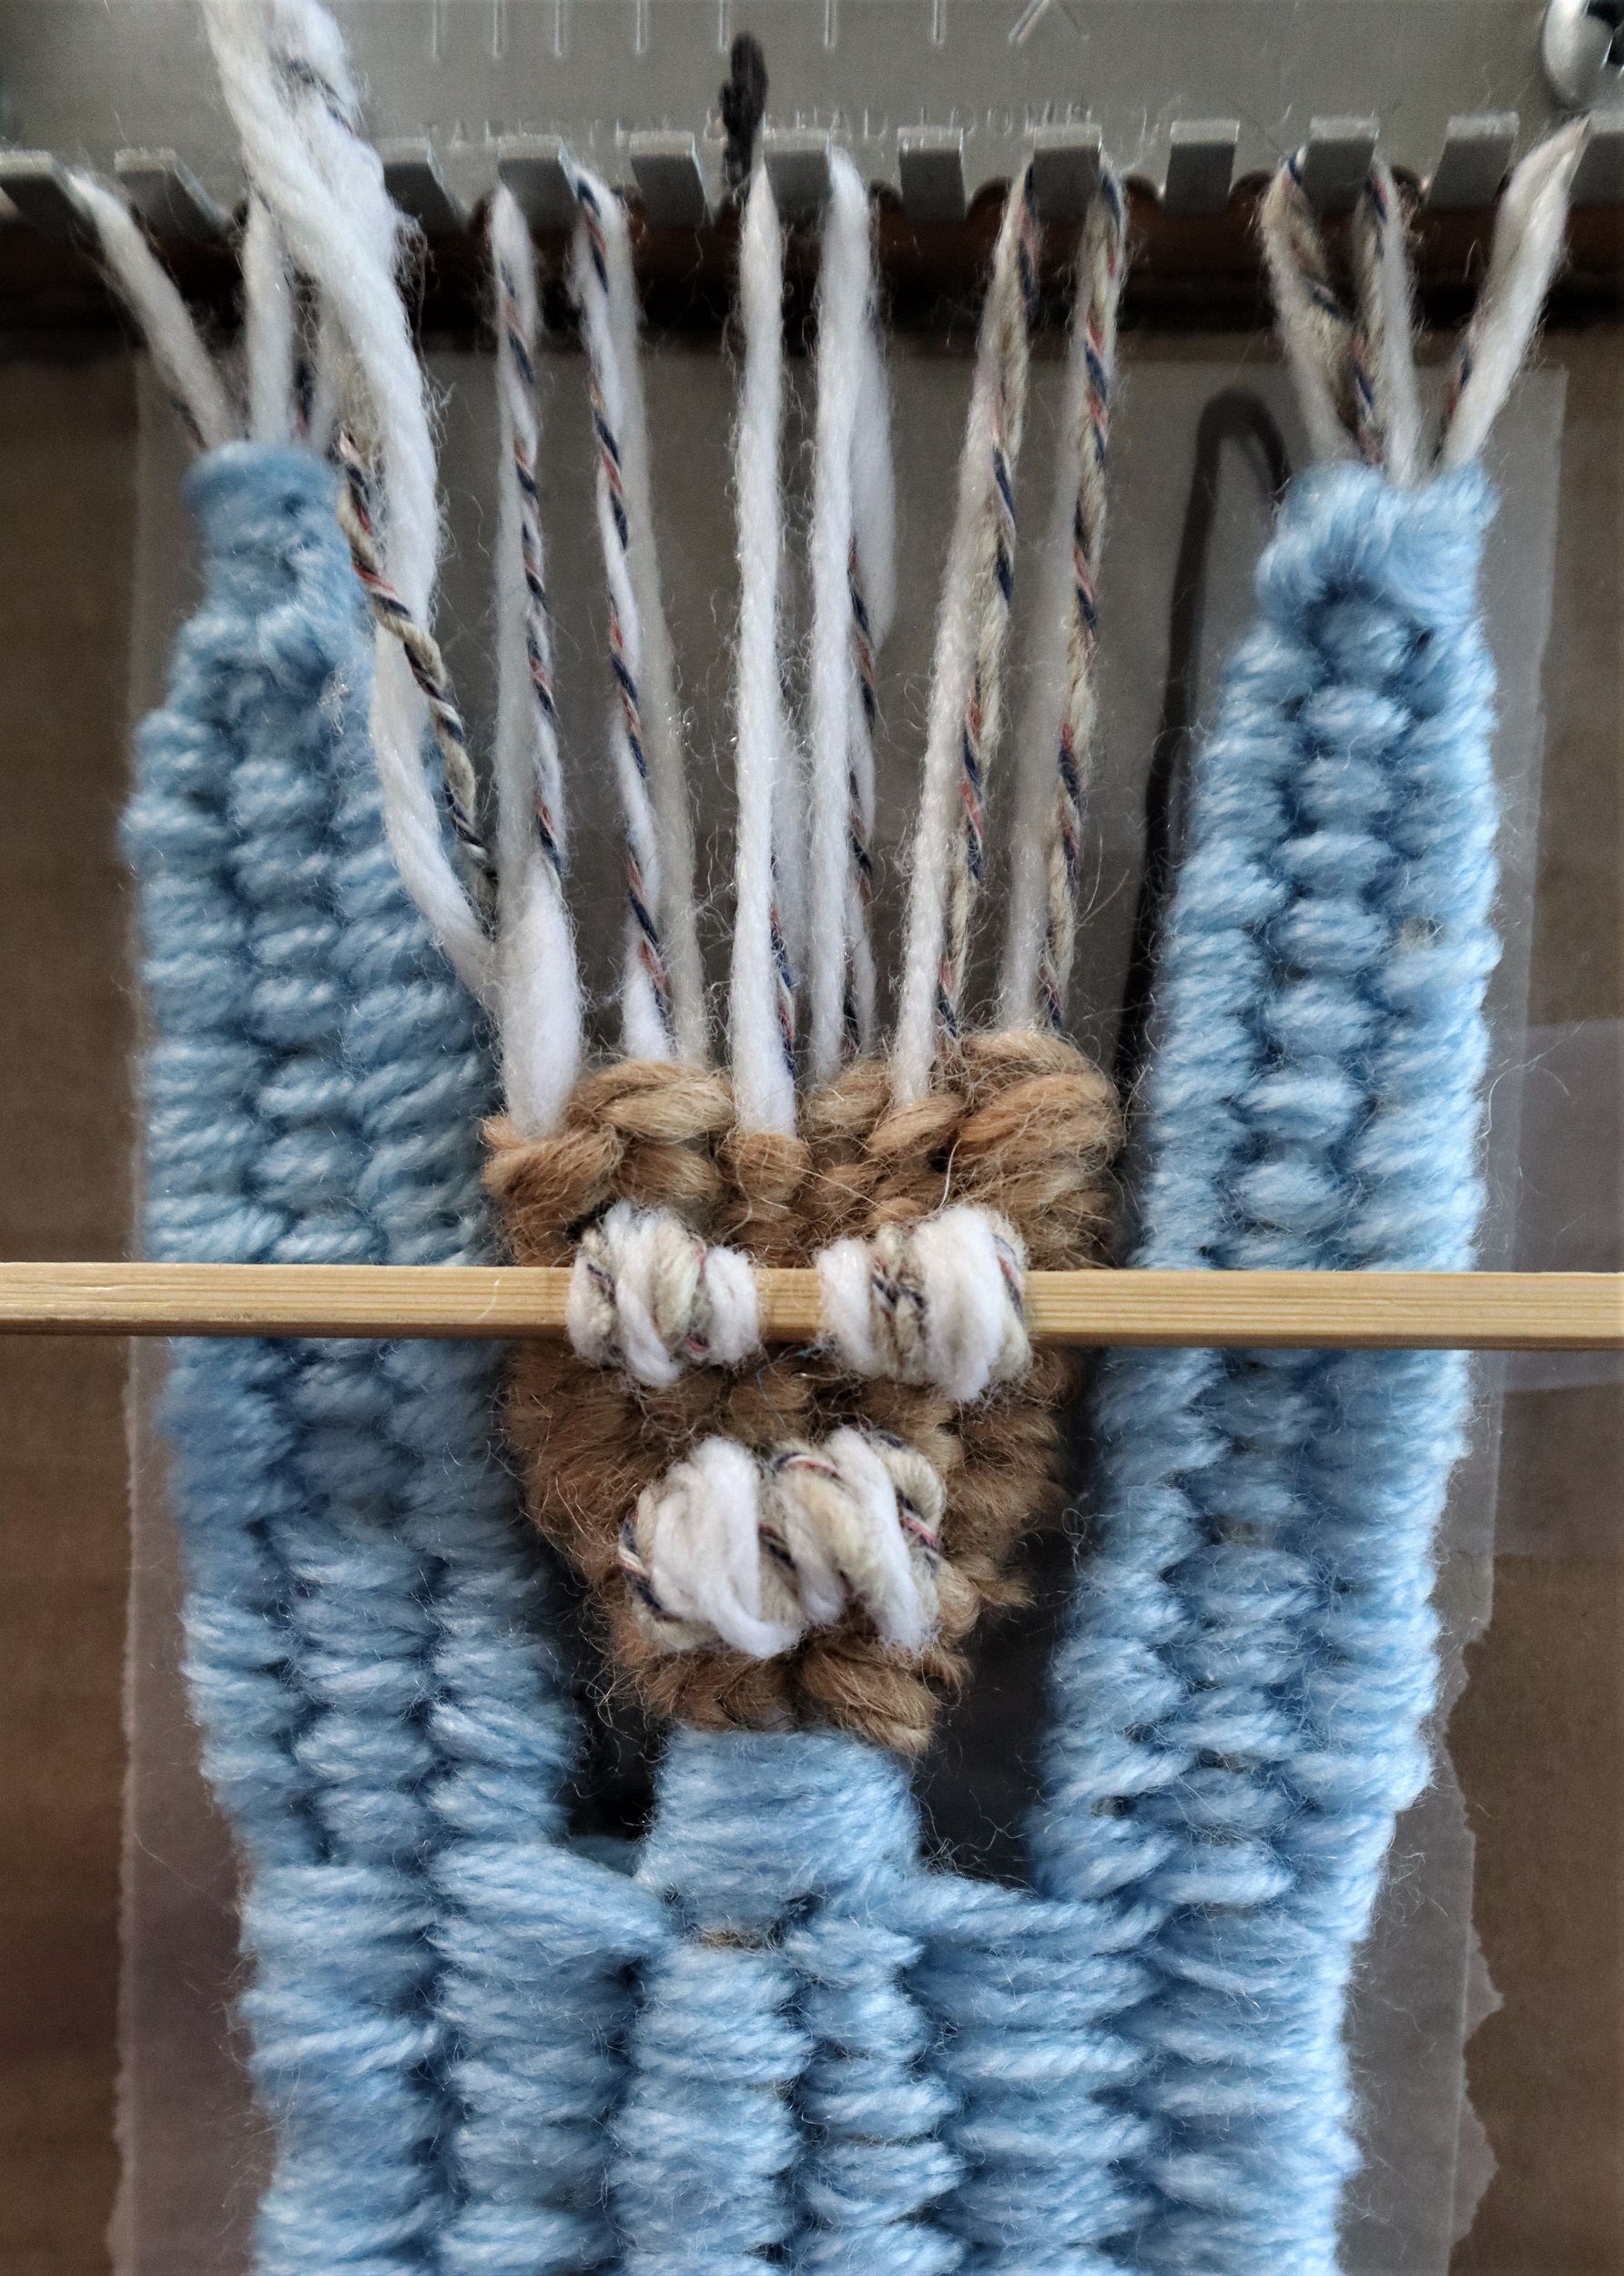
I chose to weave these figures in a fairly narrow configuration- only 3 inches wide, set at 8 ends per inch.
Here’s my loom warped up, heddled, and with the first little bit woven.
Tottie Tomato looked outside the studio window and saw someone tobogganing on the snowbanks….
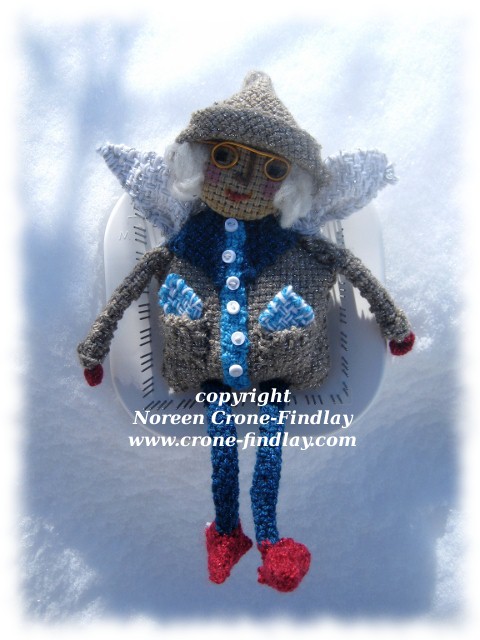
copyright Noreen Crone-Findlay
She astonished Tottie by fluttering up into the tree….. and Tottie realized that the fluttery little person was a fairy!
The fairy looked awfully familiar…..
copyright Noreen Crone-Findlay
Tottie Tomato saw that she was shivering- it was so cold!
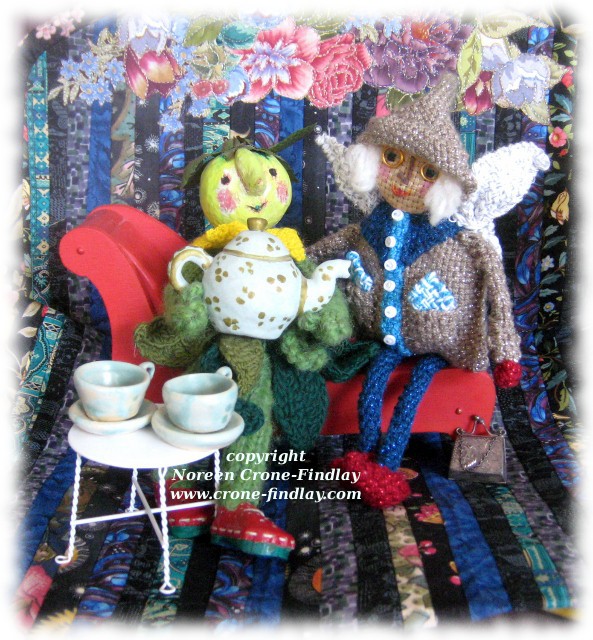
So, she invited the Winter Fairy in for a cup of tea….
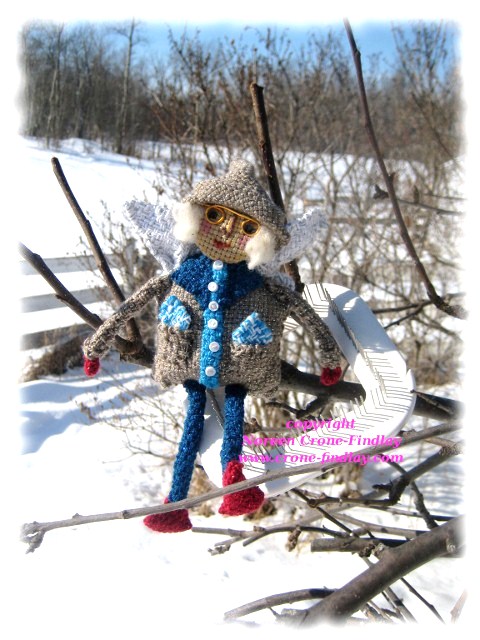
copyright Noreen Crone-Findlay
Tottie Tomato had been watching the progress of the Winter Fairy coming to life, so she was surprised to see her outside!
Winter Fairy said that she felt that, once she had her wings, she really ought to see what Winter was all about.
Sledding was fun – but chilly.
The Winter Fairy told Tottie Tomato that she prefers to experience winter from the warm side of the window, so she has decided to take up permanent residence in the studio and perhaps wait until springtime before venturing outside again.
Tottie Tomato is looking forward to many pleasant cups of tea with the Winter Fairy.
She plans on showing her around the studio and introducing her to all manner of lovely folks.
Tottie Tomato is very happy that I took part in the Zoom Loom Doll Weave Along on Ravelry- otherwise, the Winter Fairy would never have joined us here in the studio!