After my husband and I made a set of pivoting clamps for my copper pipe tapestry looms, see this post: LINK
I thought…. oh, would it ever be great if we could make a stand for the looms.
I’ve been using a music stand as an easel, which works great for my little 8 inch Mirrix loom, but it was just not good for the larger copper pipe looms.
Luckily, last fall, I bought a length of 3/4 inch copper tubing at a garage sale- what a deal!
I paid $2(!) for 14 ft of copper tubing! (The people used to run a ‘You Pick’ farm but were selling up all their irrigation equipment, including this unused chunk of copper tubing! wowsa).
I was convinced that we could uncoil it and use it to make a stand.
Jim was not at all convinced!
He insisted that we buy steel conduit, because it was stronger. And straighter. And it hadn’t been coiled up by an over eager giant.
I hated it.
I stuck to my guns, and kept saying that yes, yes, the wonky curves in the tubing will be fiiiiiiiiine!!!!!
Jim was still not convinced.
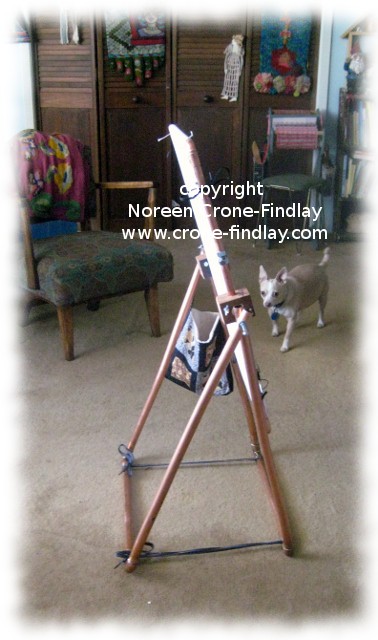
But, together, we bodgered together a slightly wonky, somewhat Dr Seuss-y stand for my copper pipe looms and
I LOVE LOVE LOVE it!
We made 2 ‘U’ shapes…. basing the measurement for the inside tube on the width of my looms (we made 3 copper pipe looms that are the same width- at some point I’ll explain why) plus the height I wanted the stand to be.
Then, we made the larger ‘U’ shape to fit around the first ‘U’, so it can fold flat.
I wanted long pivot bolts so I can hang scissors and bobbin baskets and bags off the sides of the loom.
And, yep, the ‘stops’ are boot laces. Humble, but functional!
Yes, it’s a little wonky, but I LOVE it! It’s so much more ergonomically friendly to weave at it now than on the music stand.
And, now I don’t have to set up the saw horses to warp the copper pipe looms.
The loom can be easily rotated in the stand. Bliss.

copyright Noreen Crone-Findlay
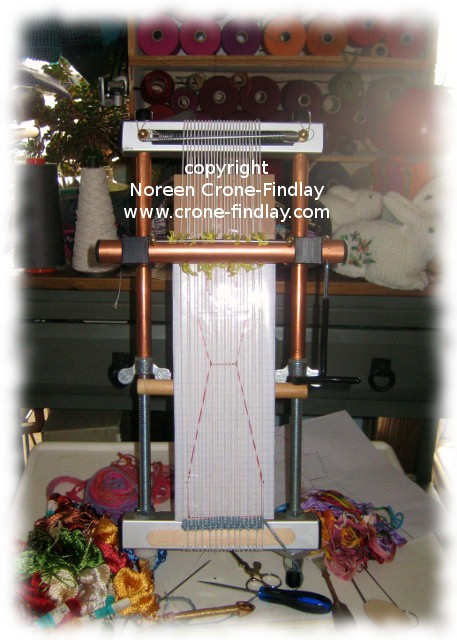
This photo shows how we put a longer bolt into the pivot clamp so that it can easily pass through the 2 copper pipes of the stand.
I wanted a long bolt because I hang bags for bobbins and yarn, as well as scissors, from it for convenience.
I put a wooden bead between the stand and the pivot clamp (as well as washers) to space it out from the wing nuts of the clamps.
By tightening the bolt on the outside of the pivot, against the stand, it puts enough pressure on the loom to keep it from spinning while you are weaving.
I sit with the lower edge of the loom in my lap, which keeps it from spinning, but, eventually, when I have woven to the top, I can see that I will have to change that position.
Will post about that when I get there!
And, it is very easy to release one loom and transfer another loom onto the stand. 🙂
I am such a happy camper.
Okay, back to my weaving. 🙂