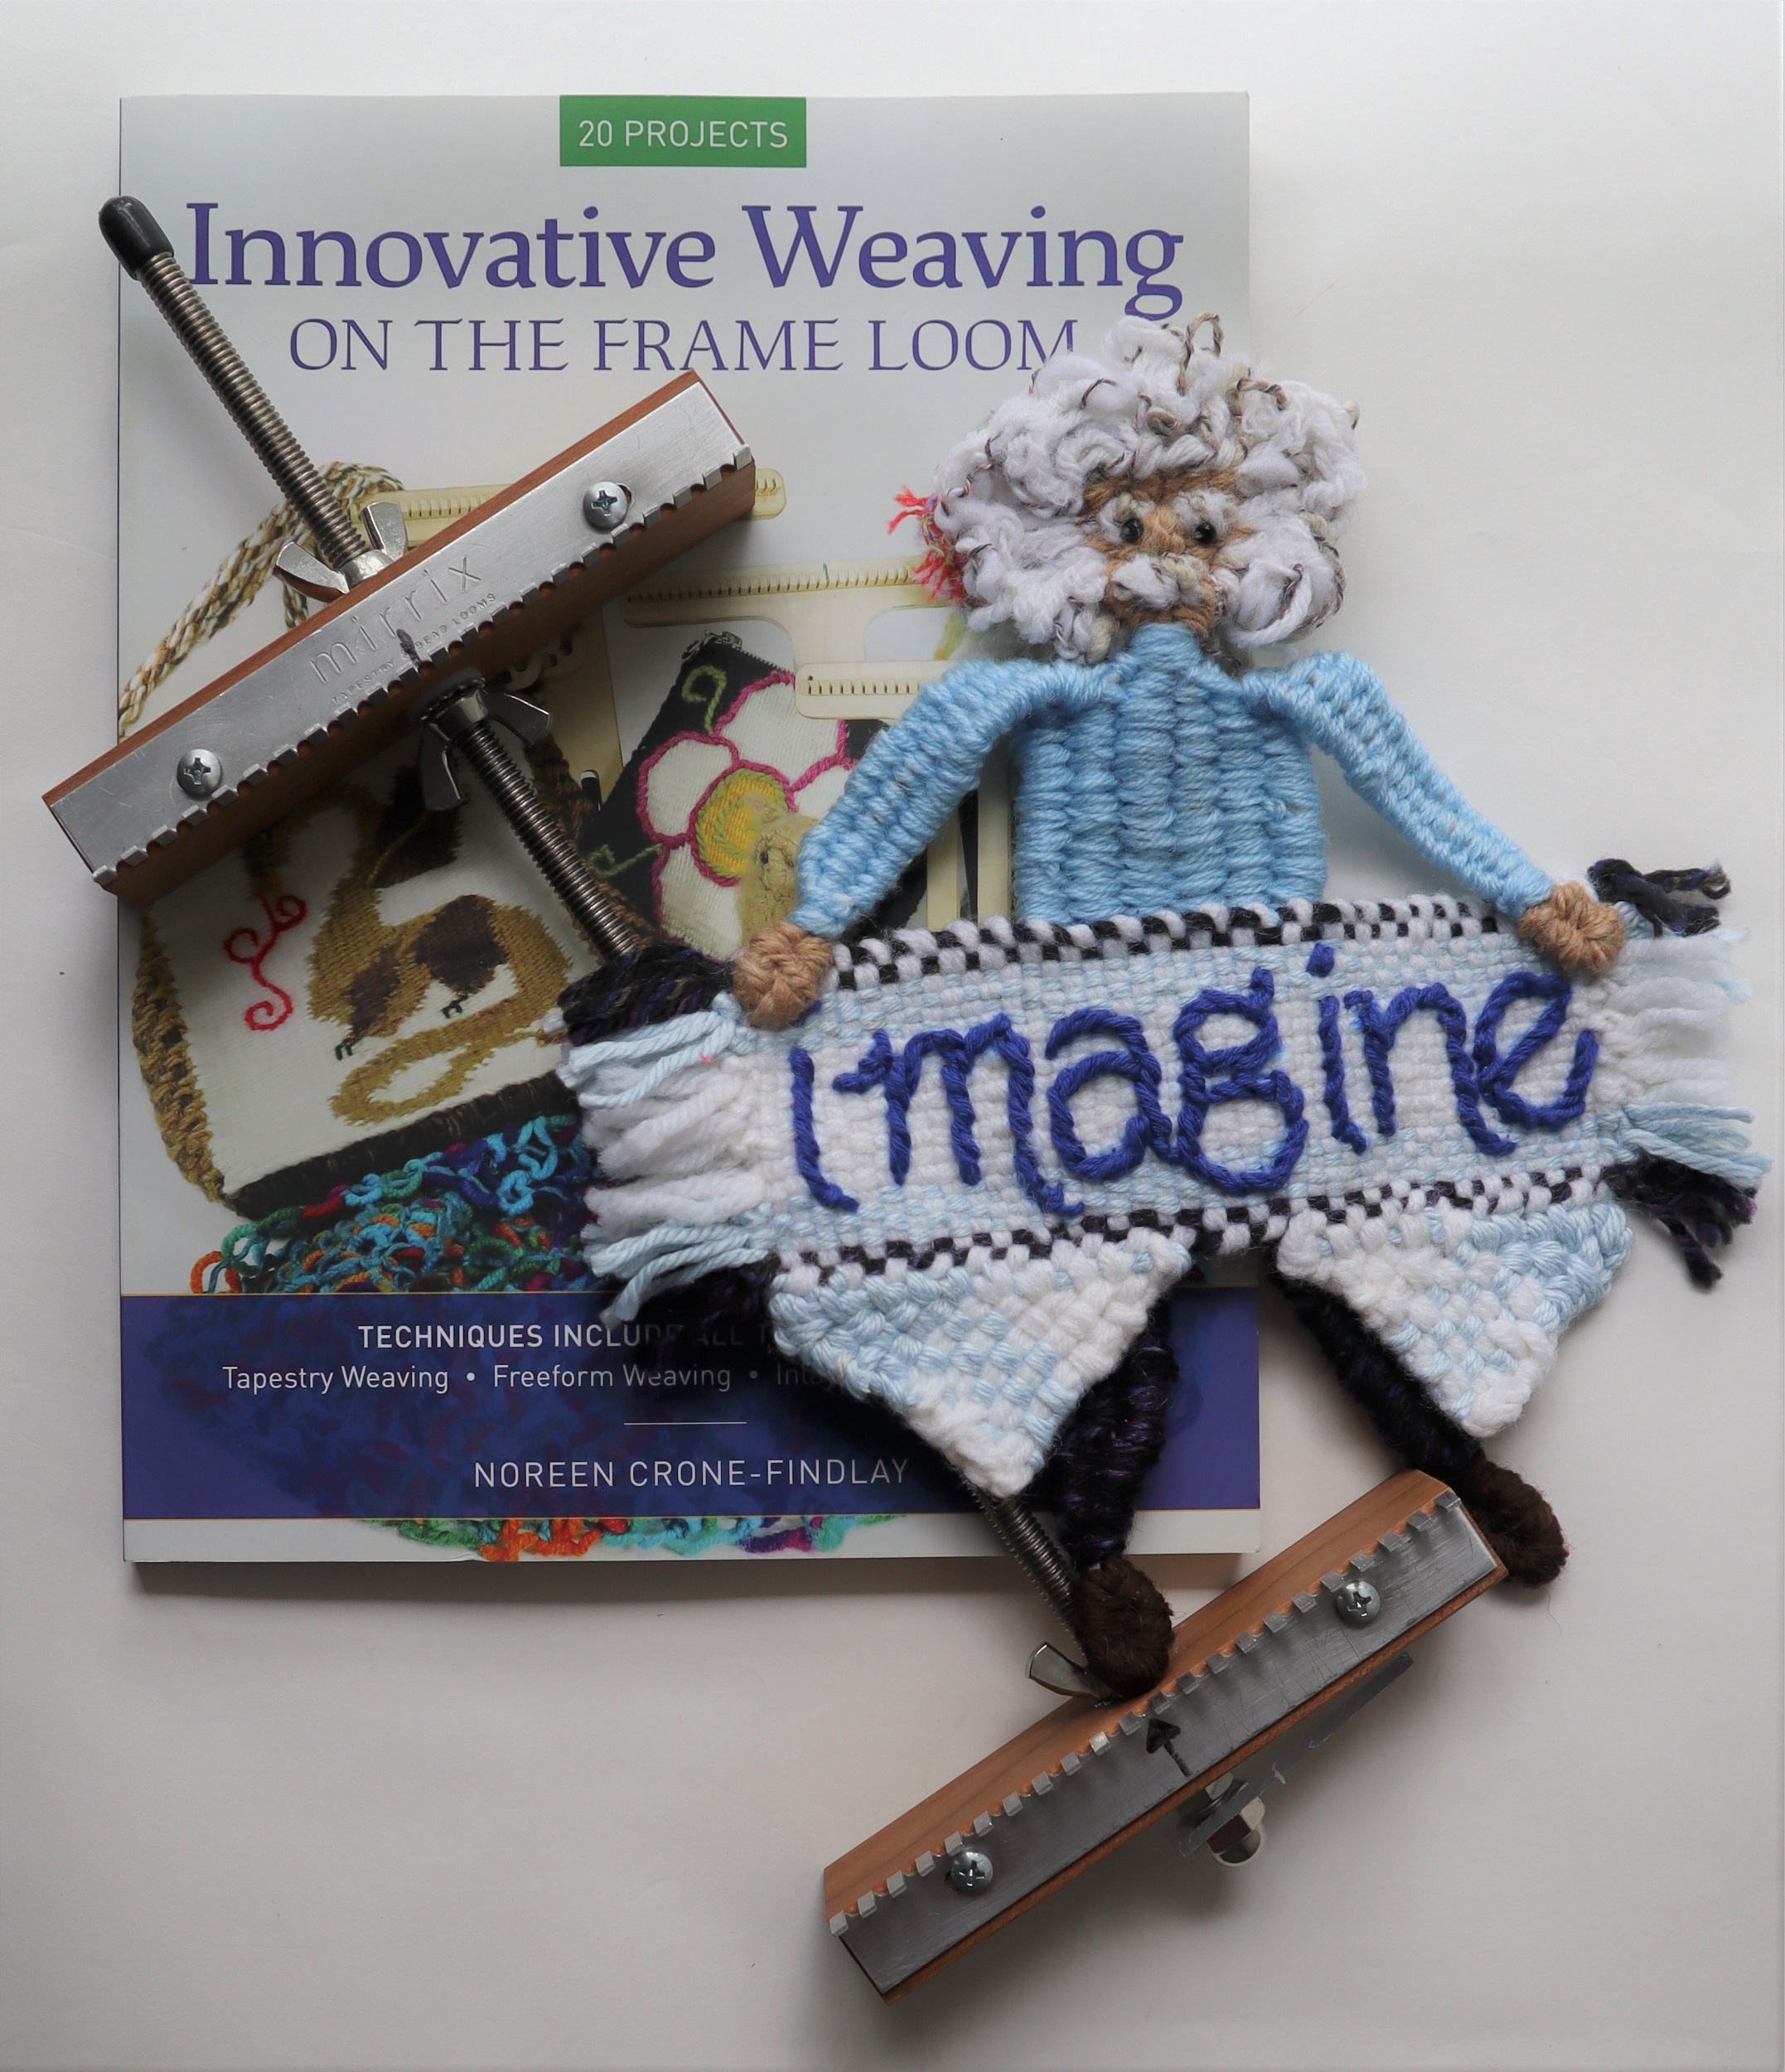
To see all the links for the ‘How To’ posts for the “Imagine” Banner Weave along, please go to L I N K S
To order the loom, book and extras kit for the Weave Along from Mirrix, please go to K I T
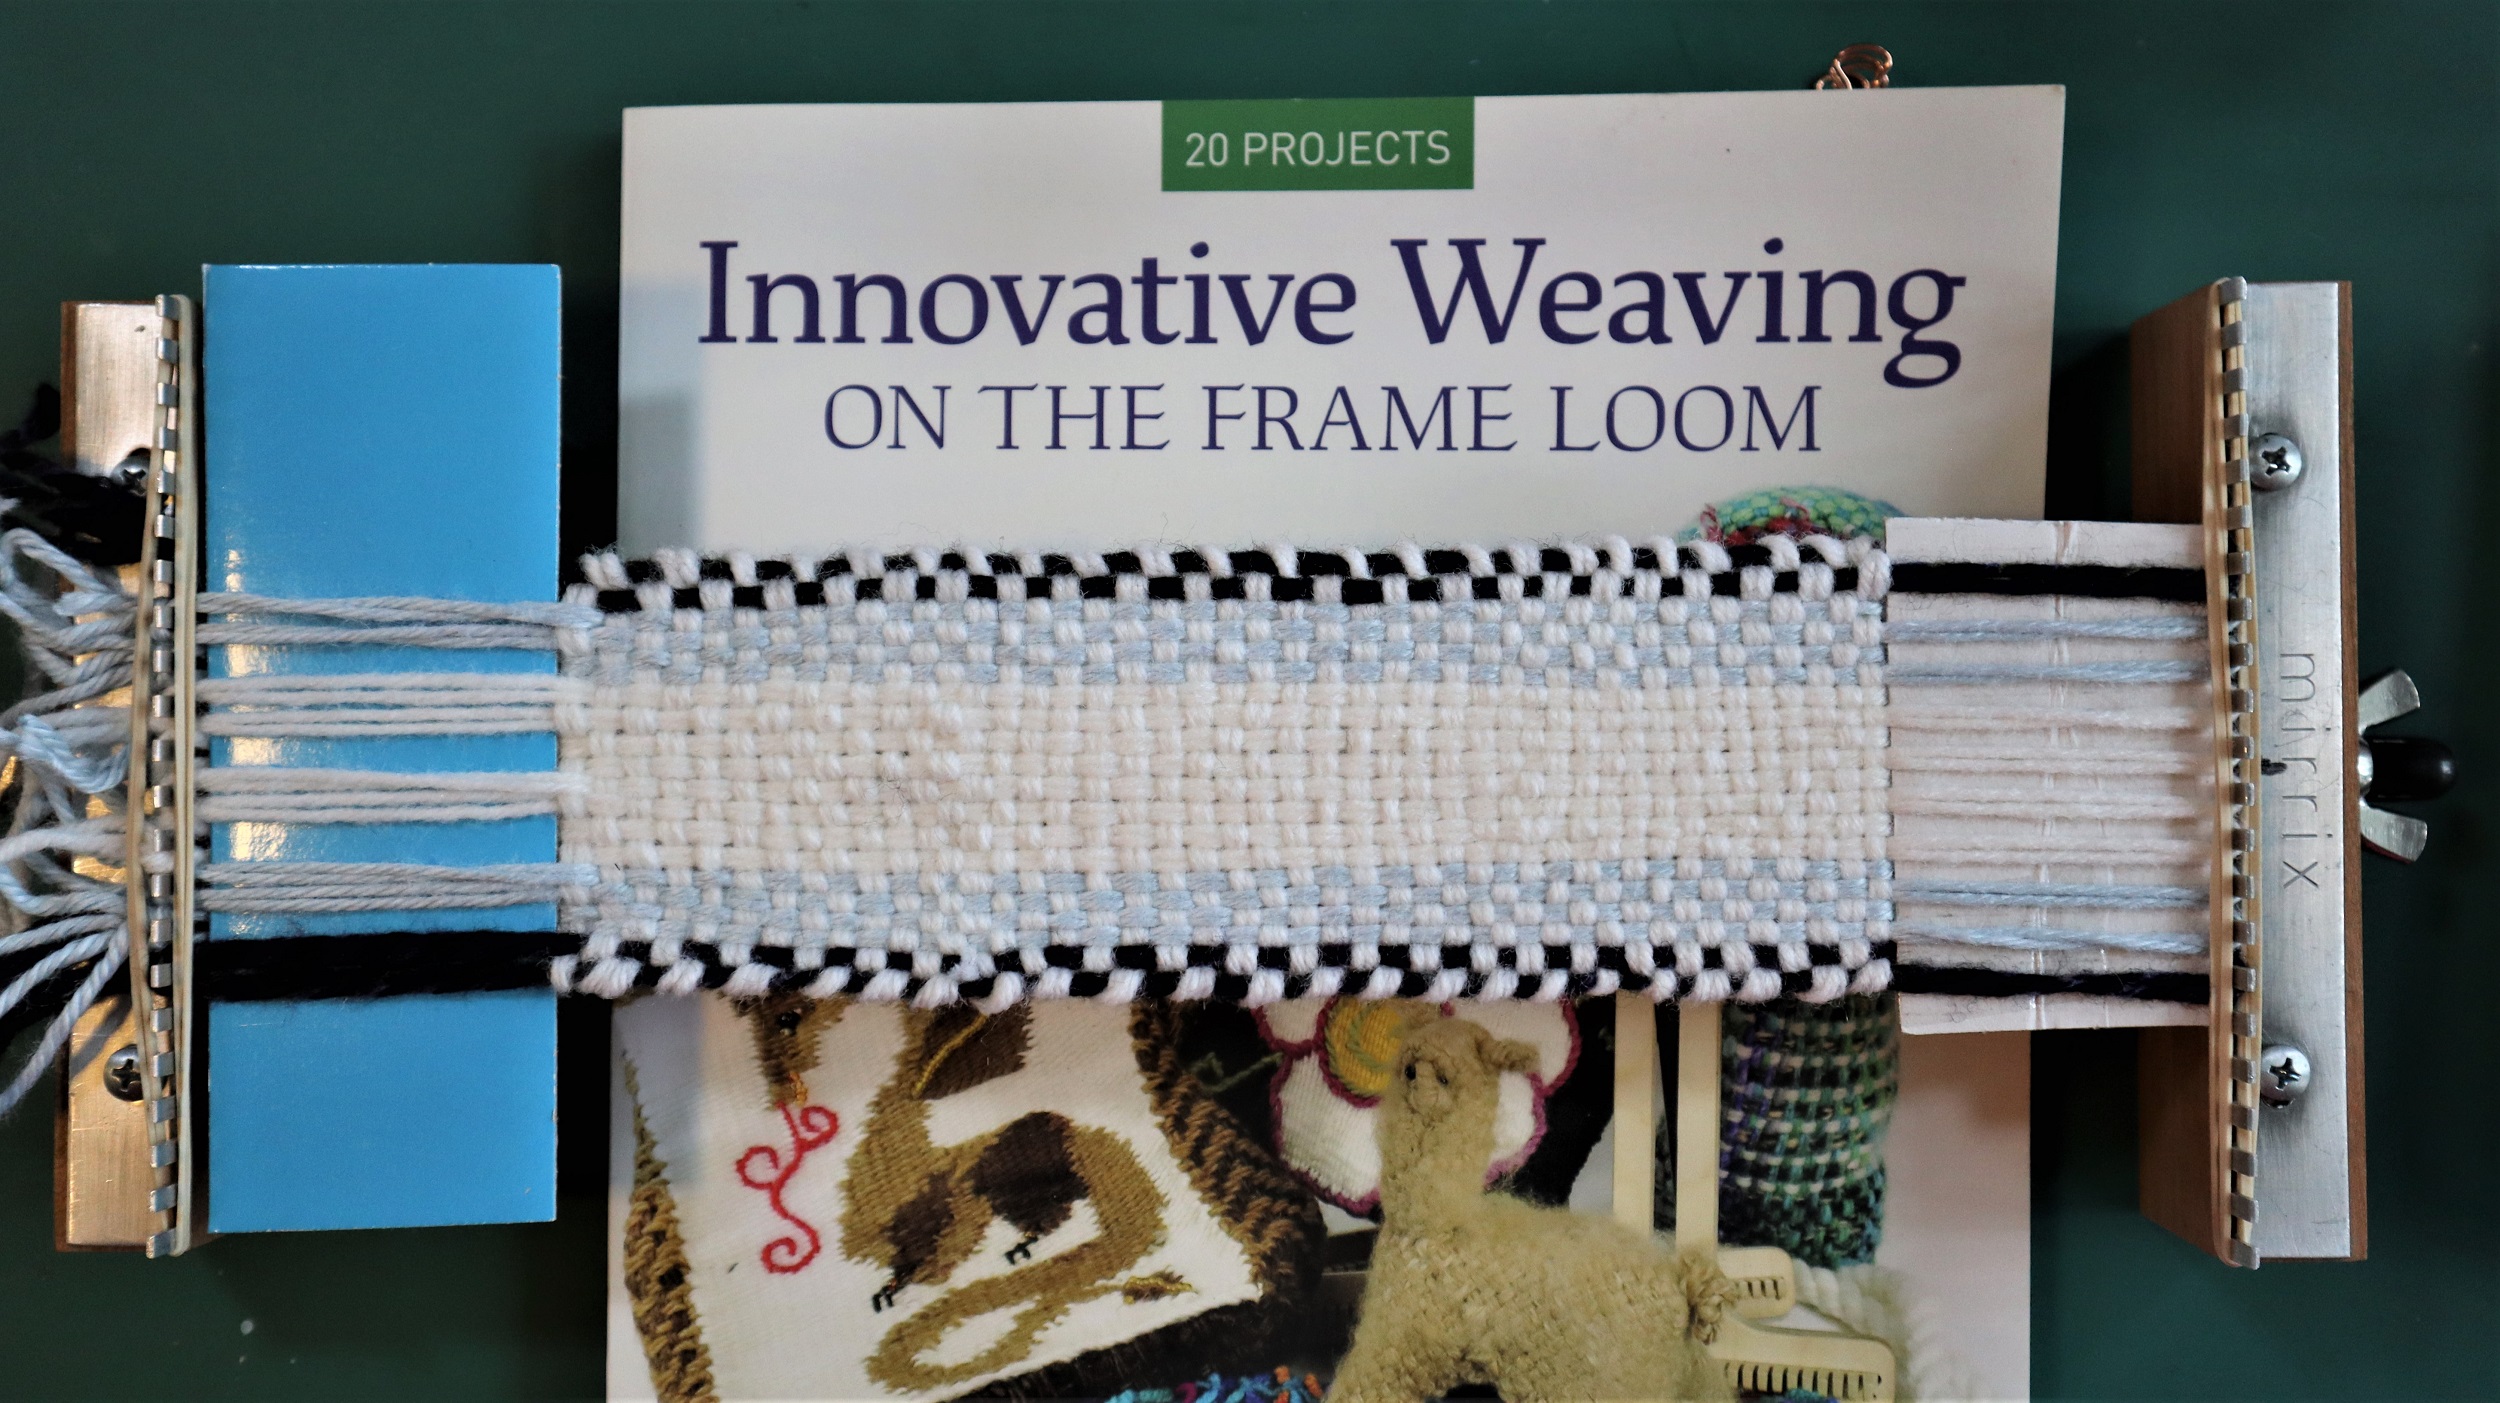
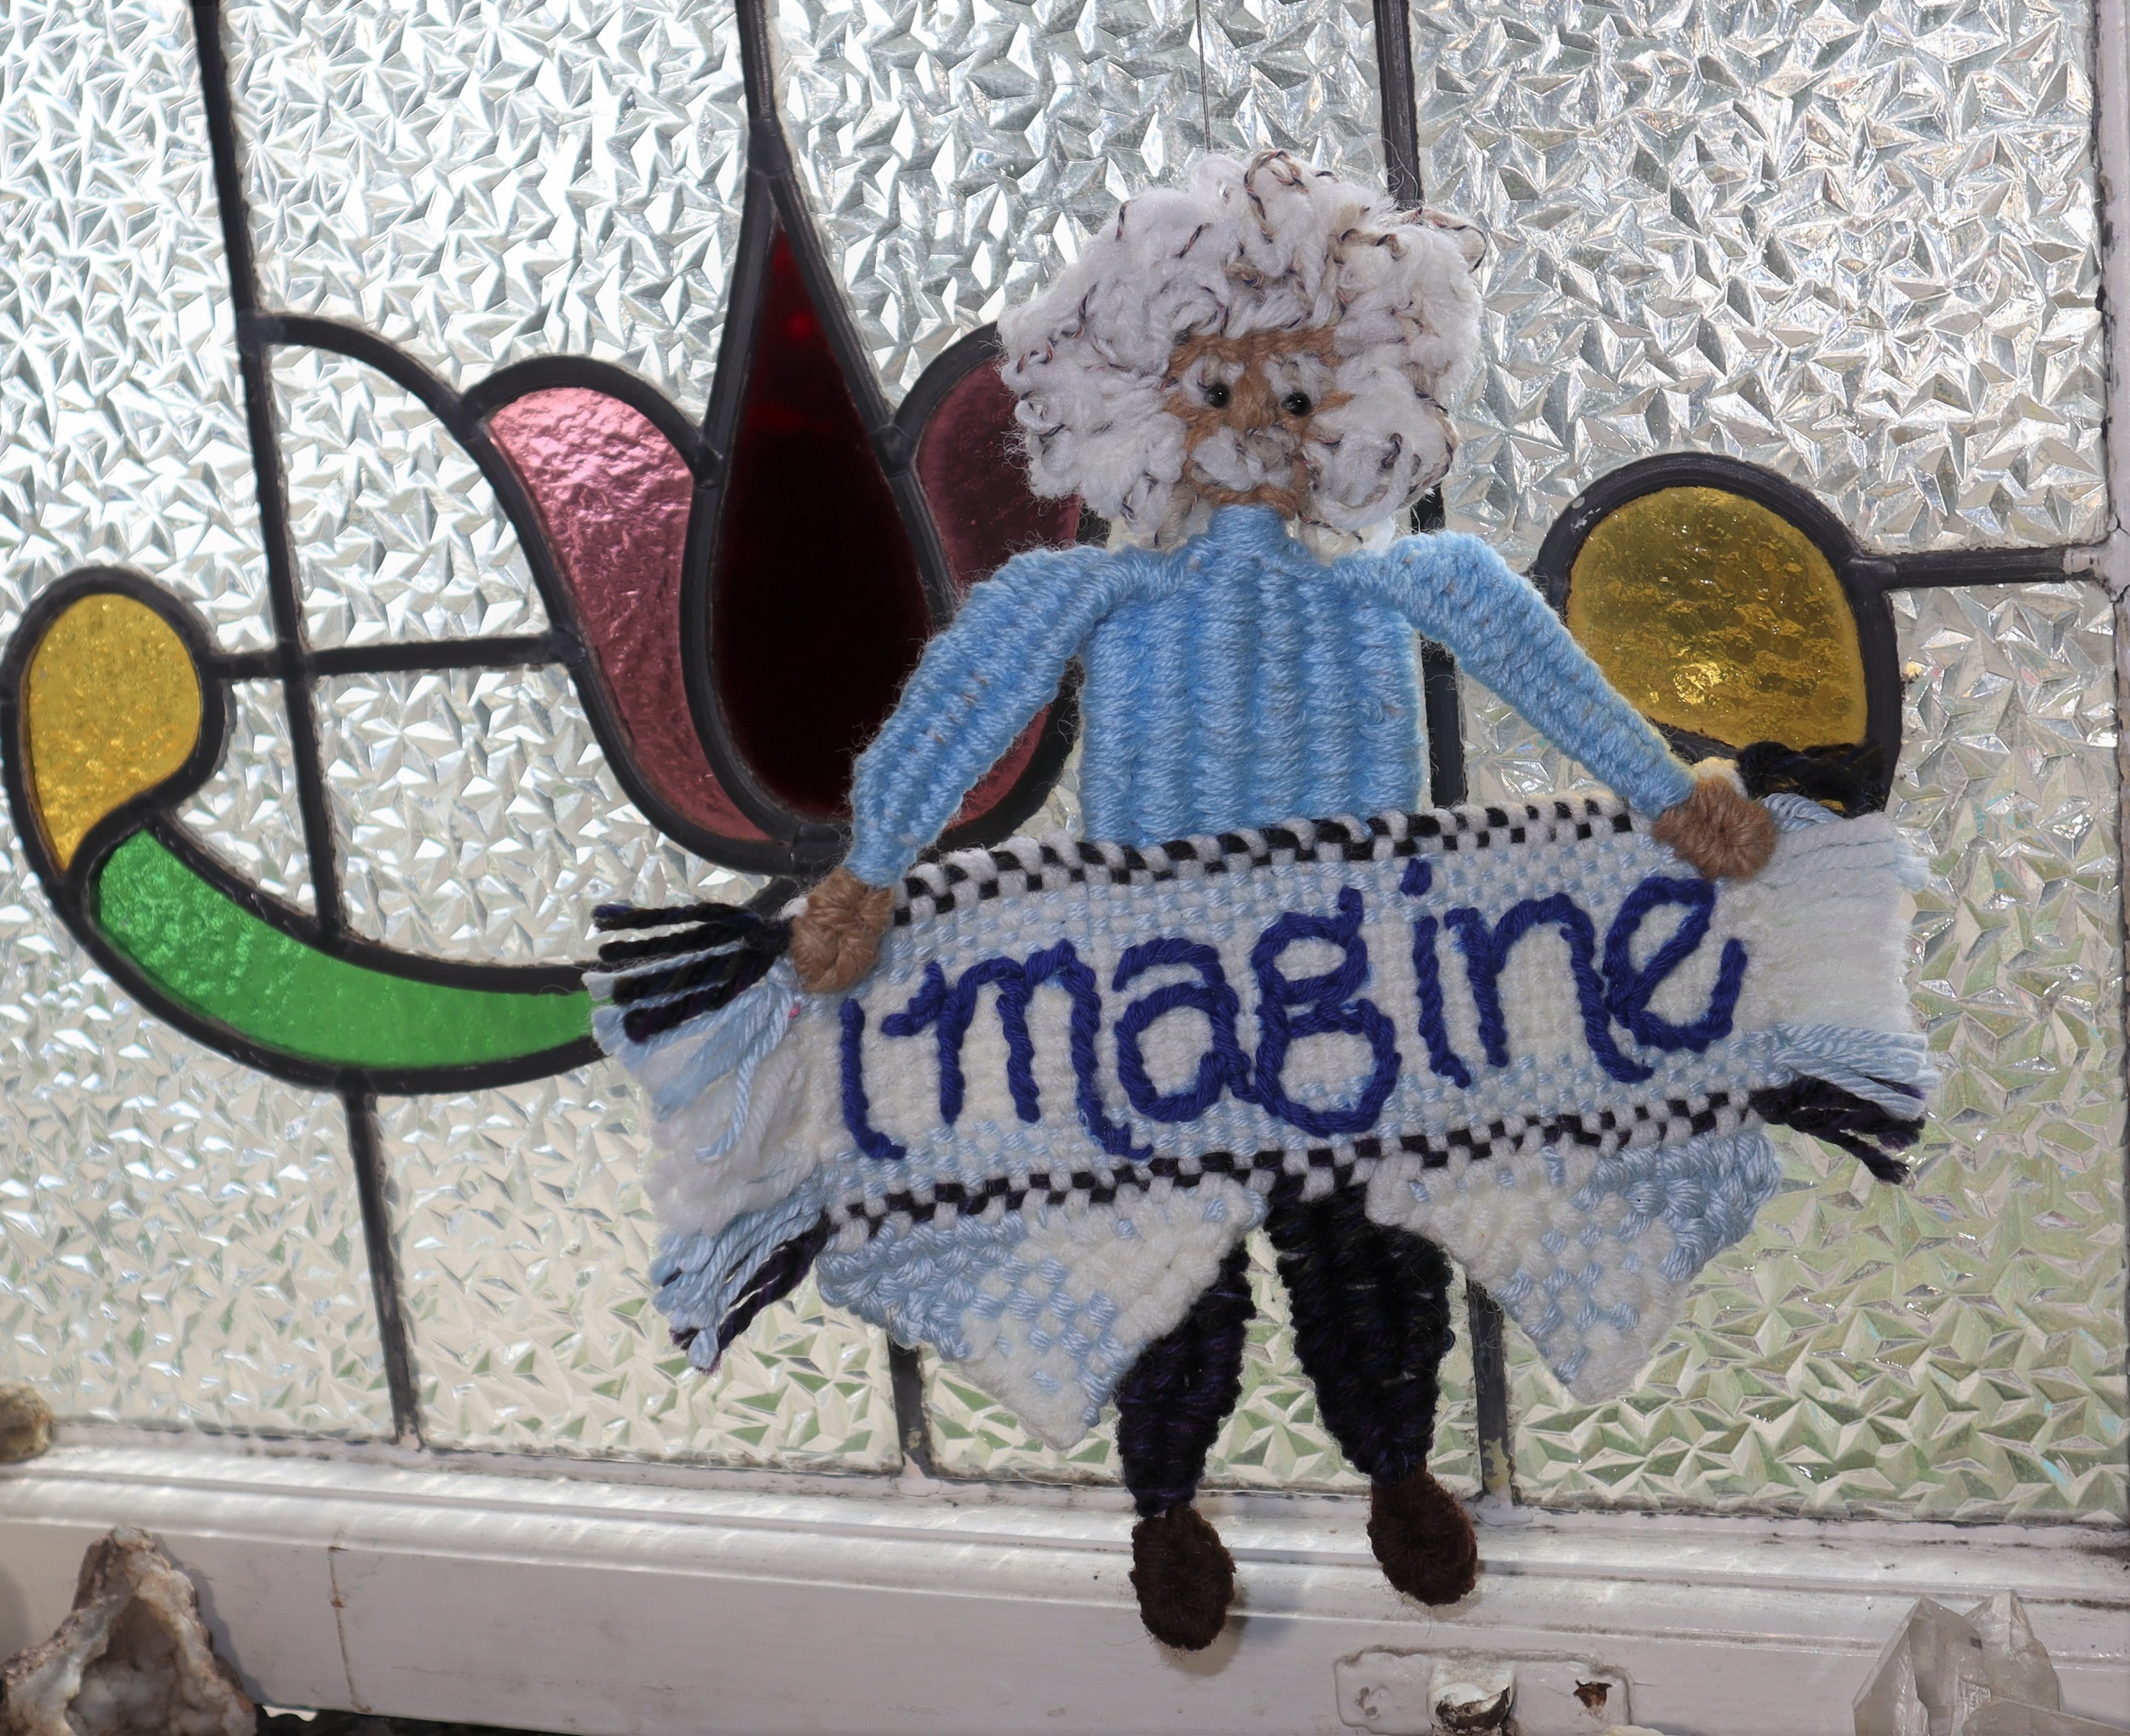
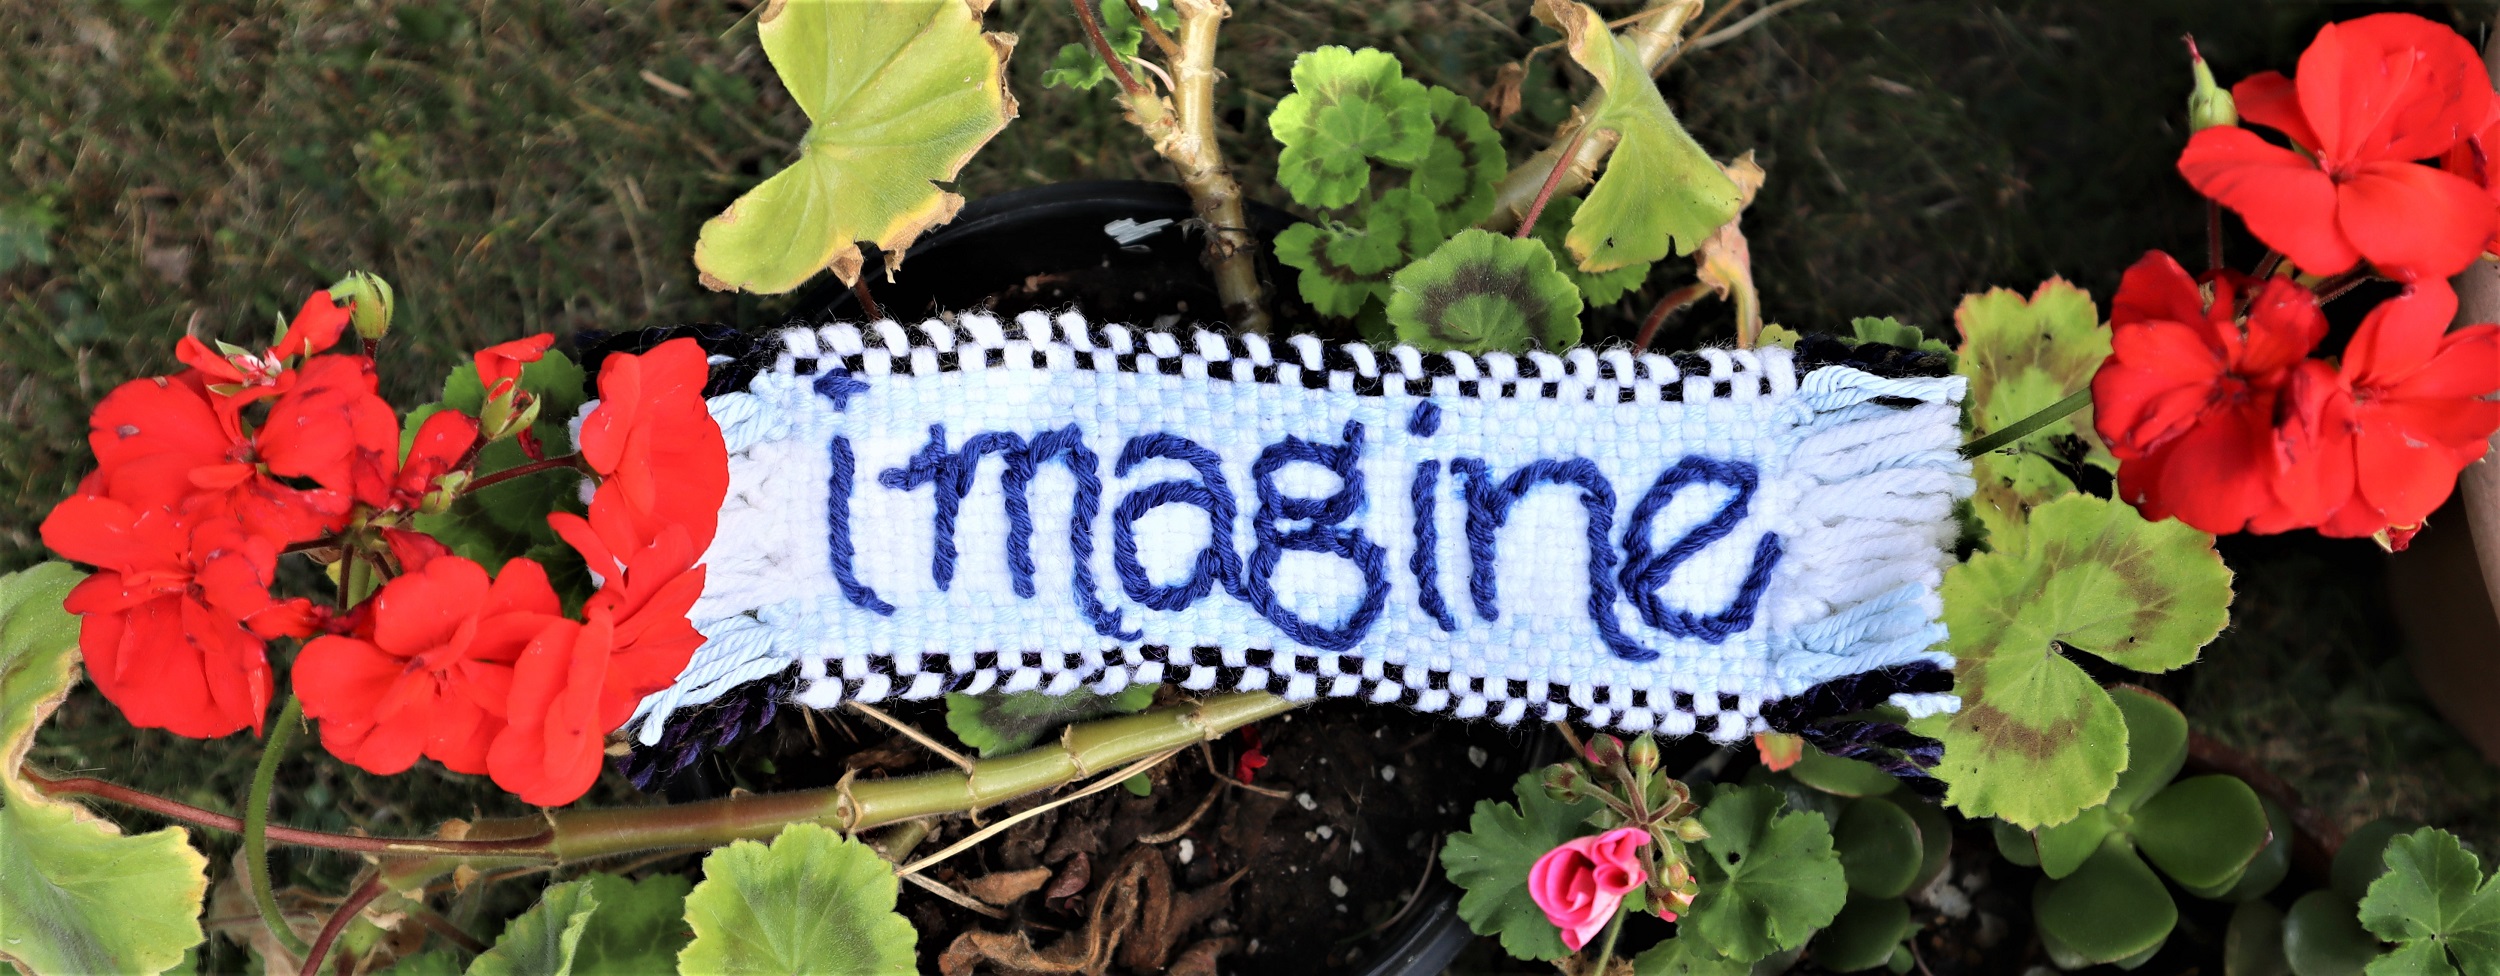
HOW TO EMBROIDER
THE WORD ‘IMAGINE’ ON THE NARROW BAND:
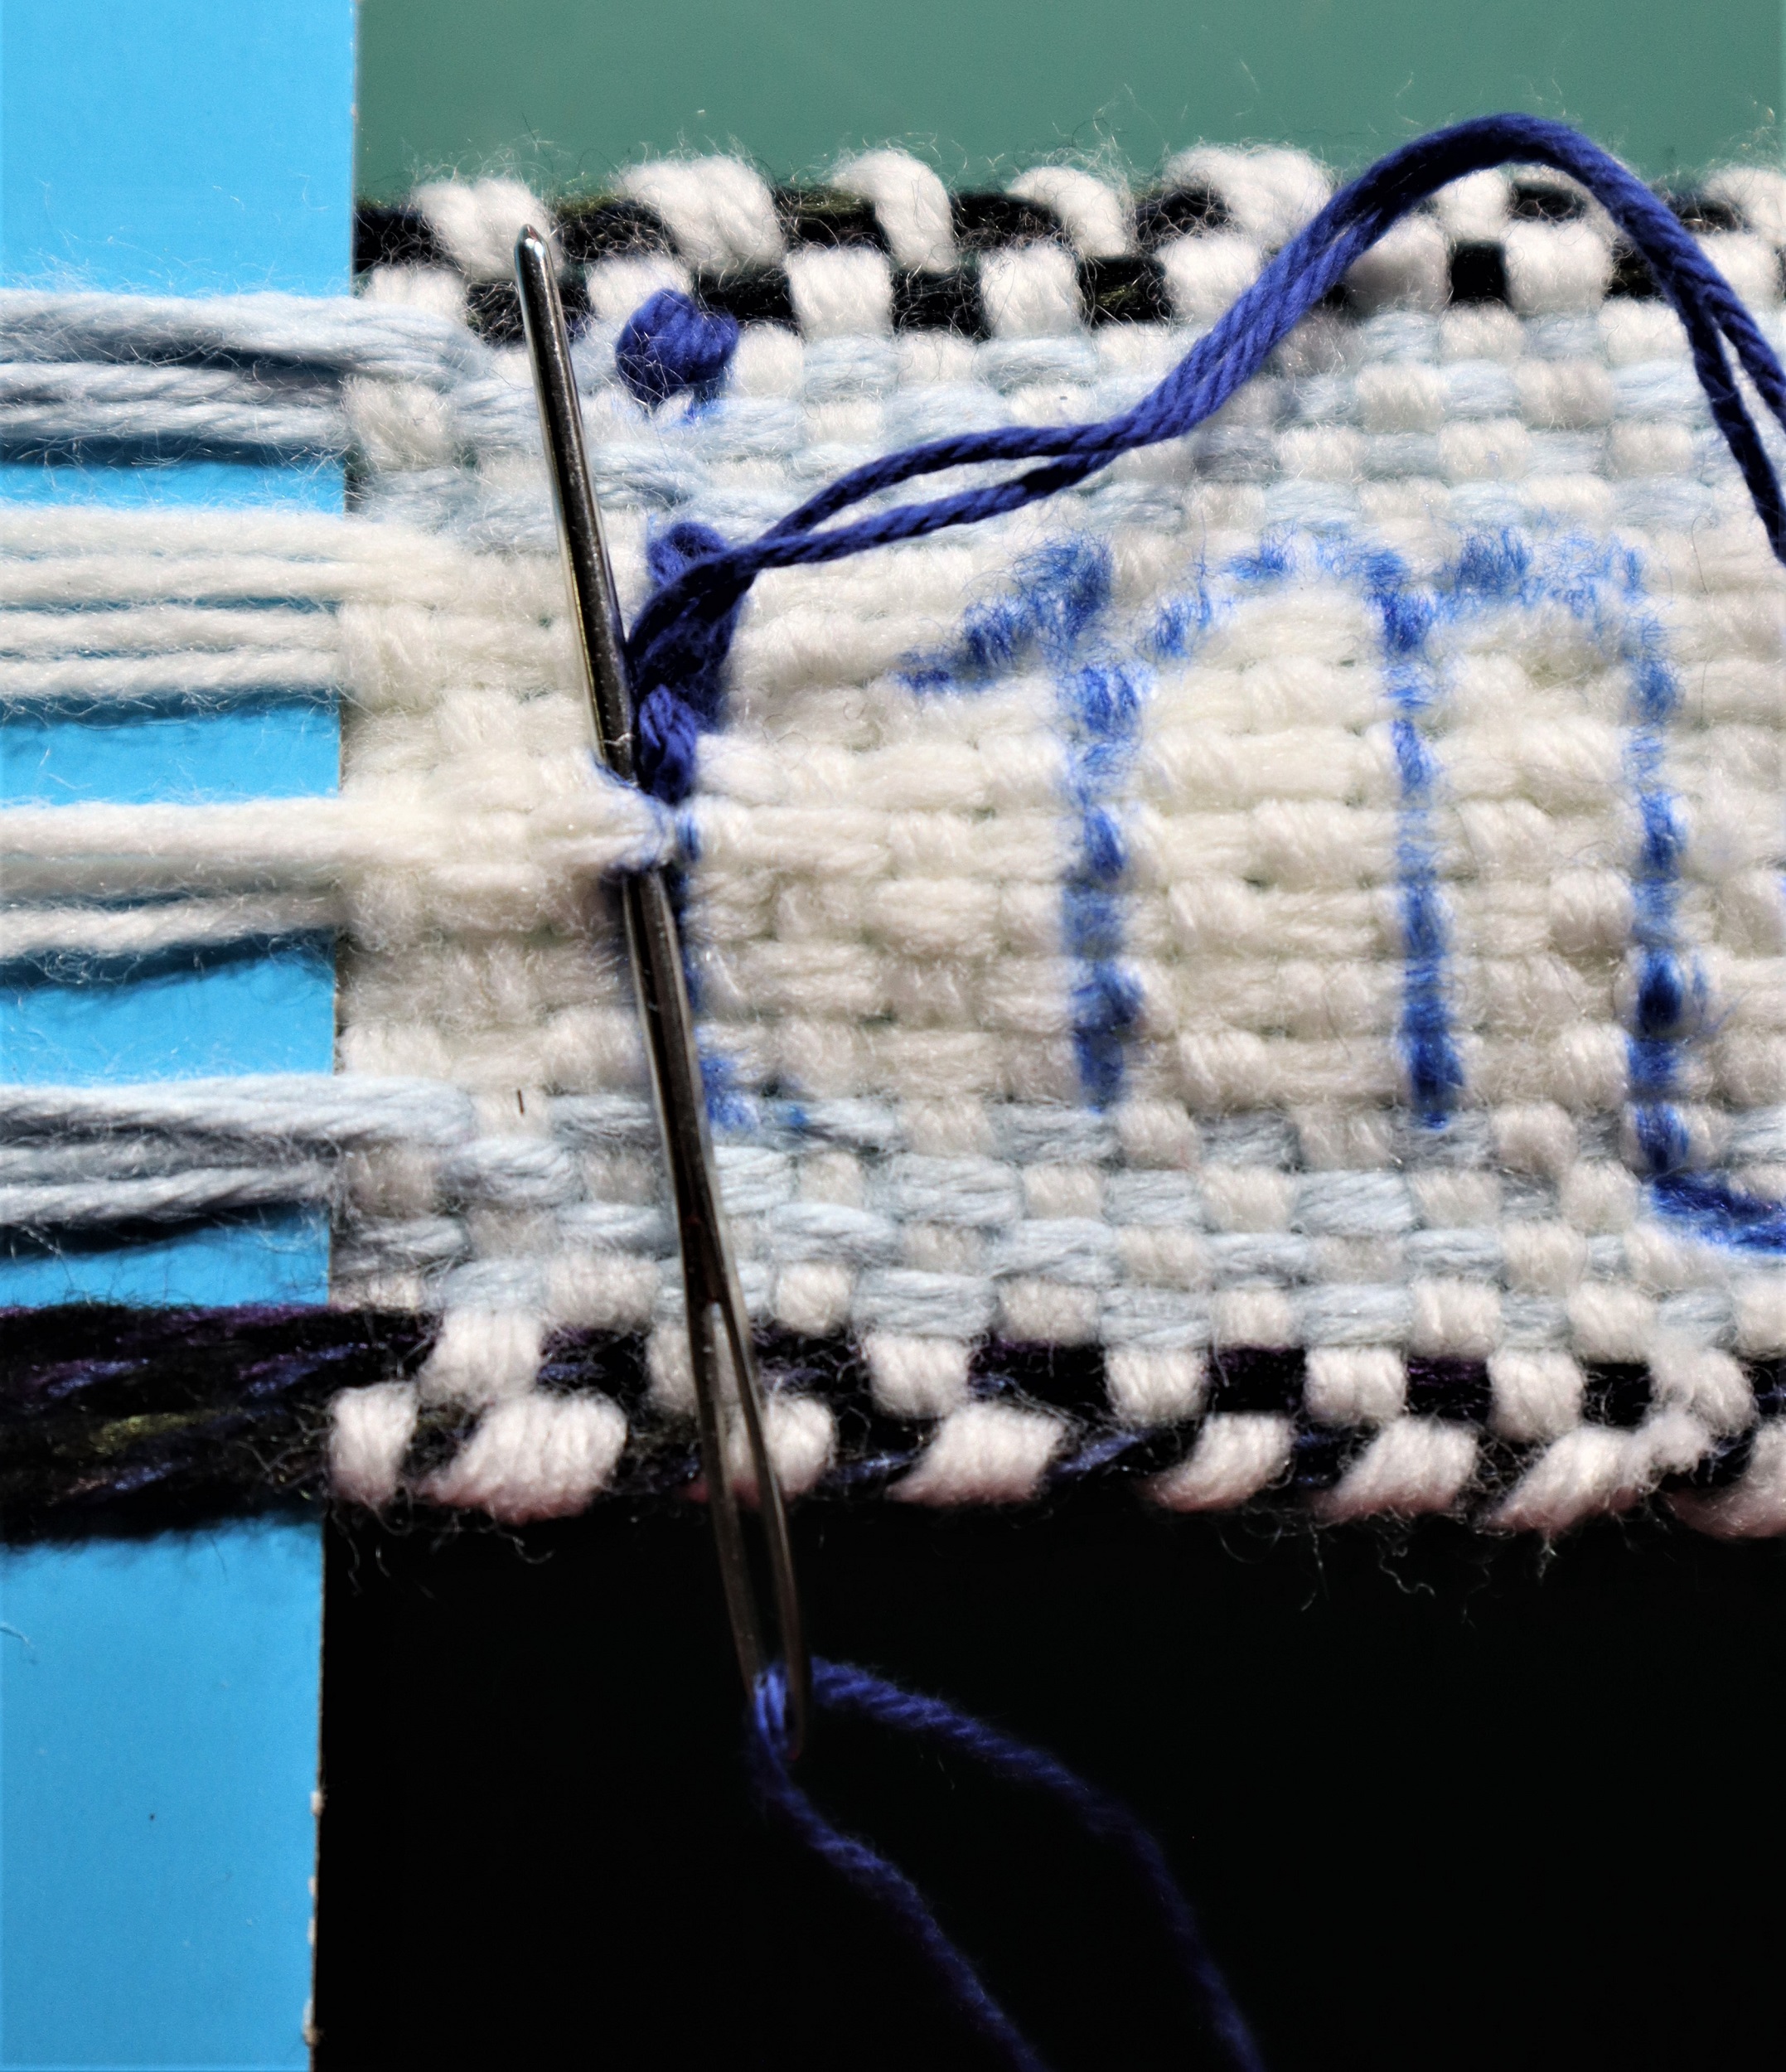
NOTE: The embroidery is done while the weaving is still on the loom and under tension.
1: Print out a copy of the ‘Imagine’ letters so they are approximately 1 inch/2.5 cm high by 7 in/17.5 cm or use 1/4 inch graph paper to draw them out.
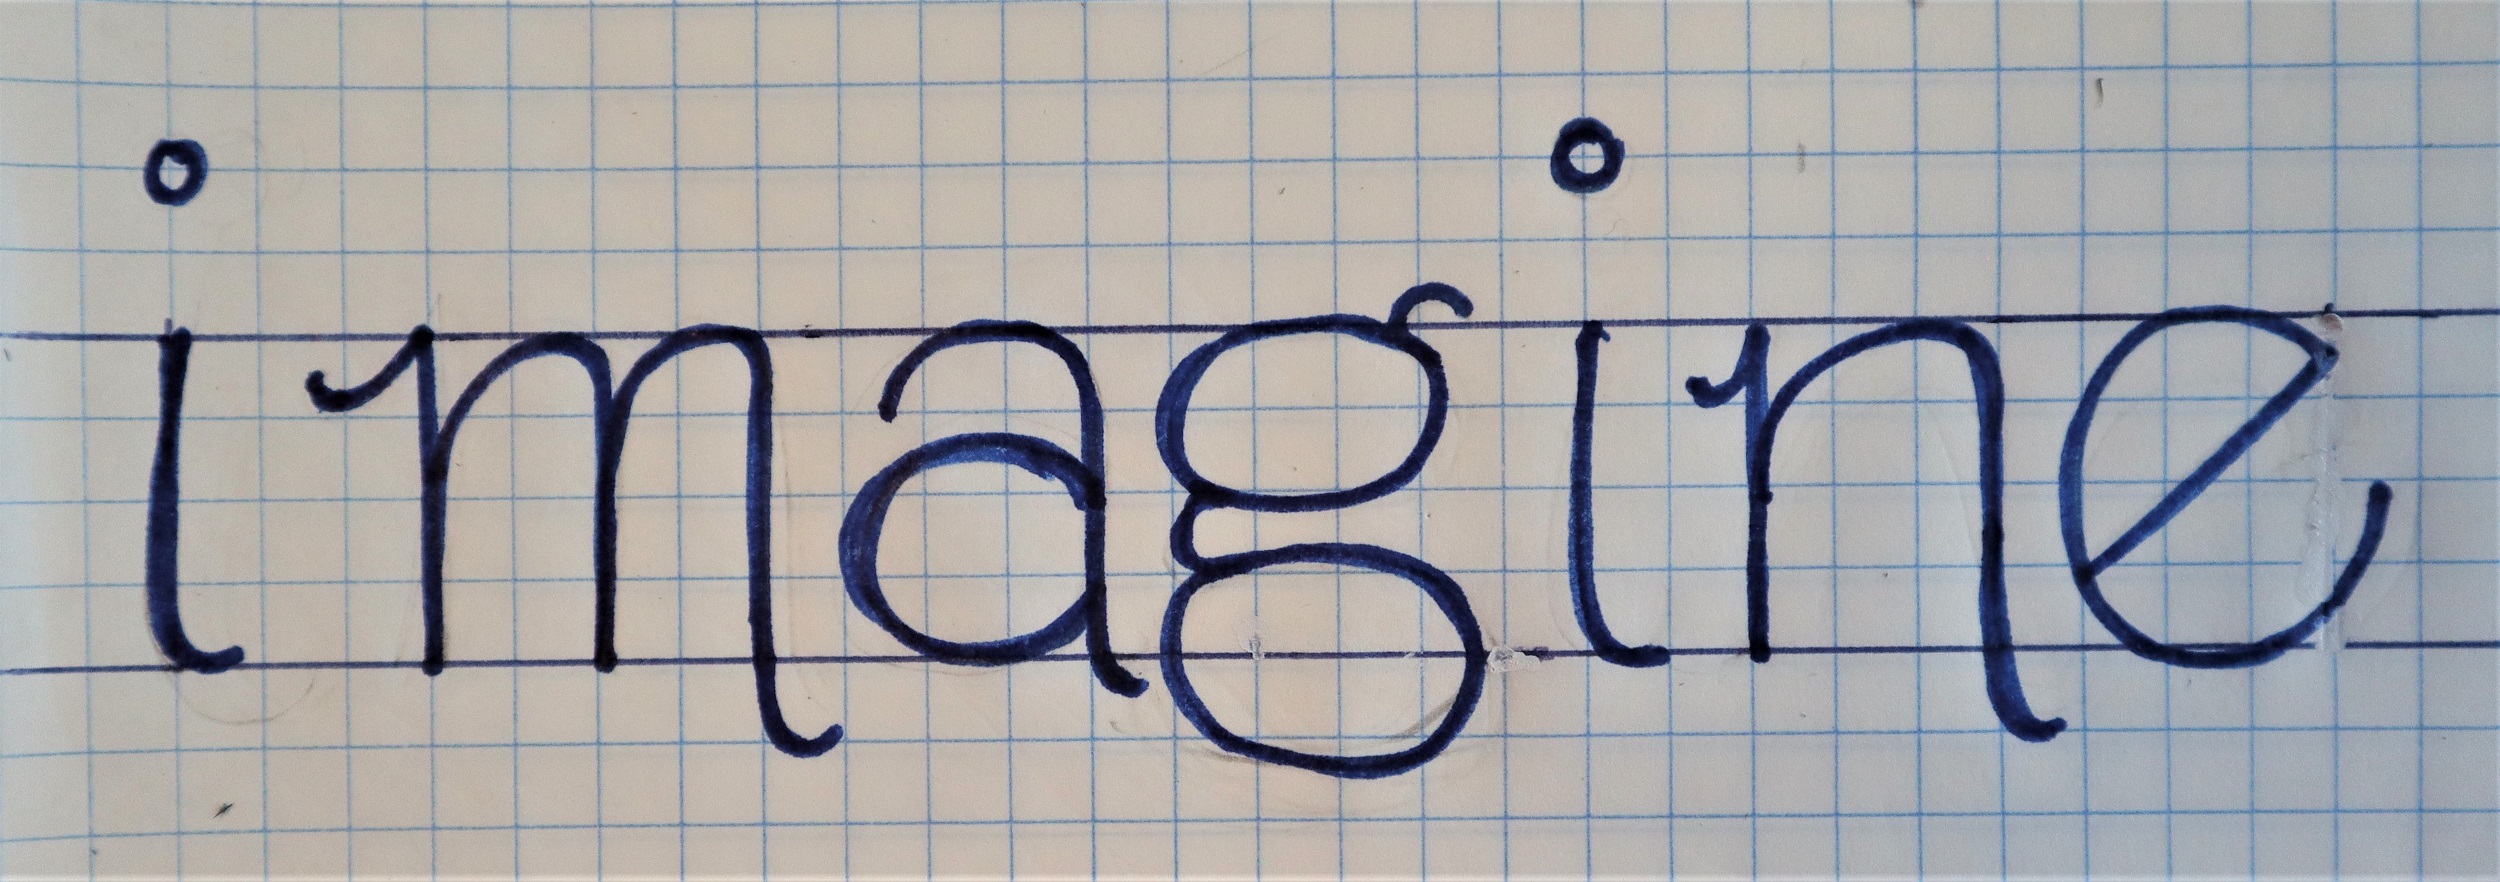
2: Fold the paper so the edge of the letters can be placed right against the 1 inch/2.5 cm high white center section of the weaving.
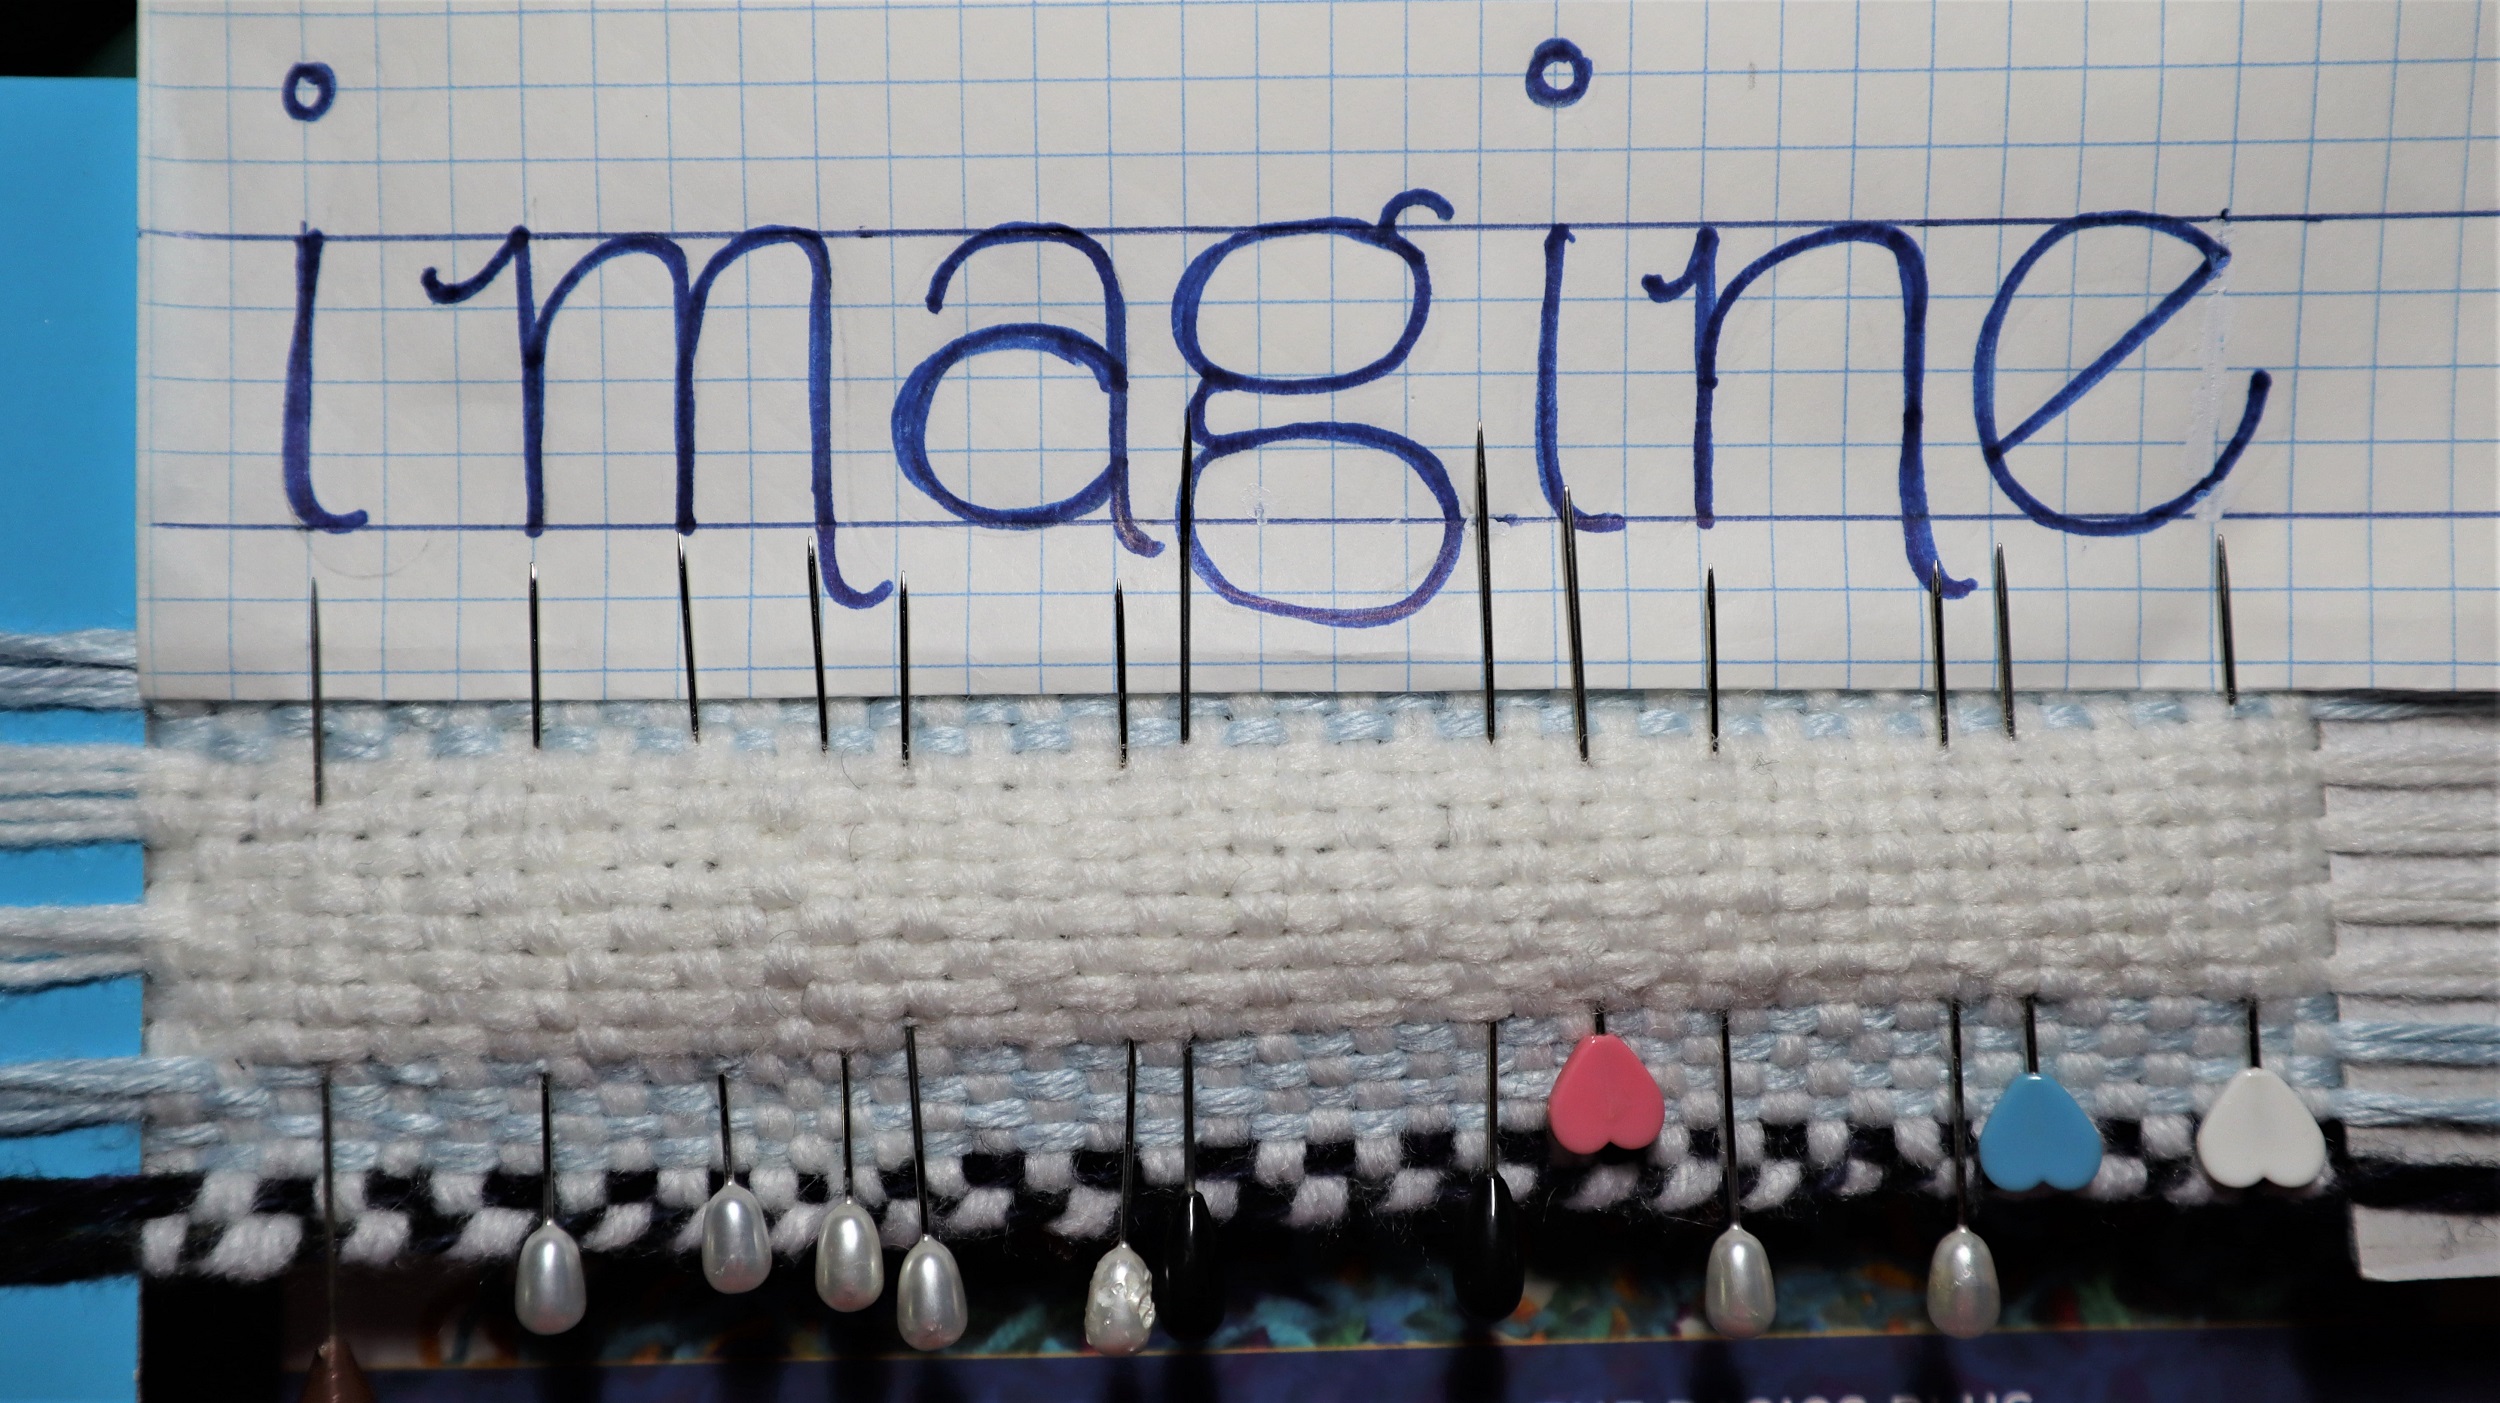
3: Place the straight pins at the upright lines of the letters, ‘I’, ‘m’, ‘n’, and at the outside edges of the chubby ‘a’, ‘g’ and ‘e’.
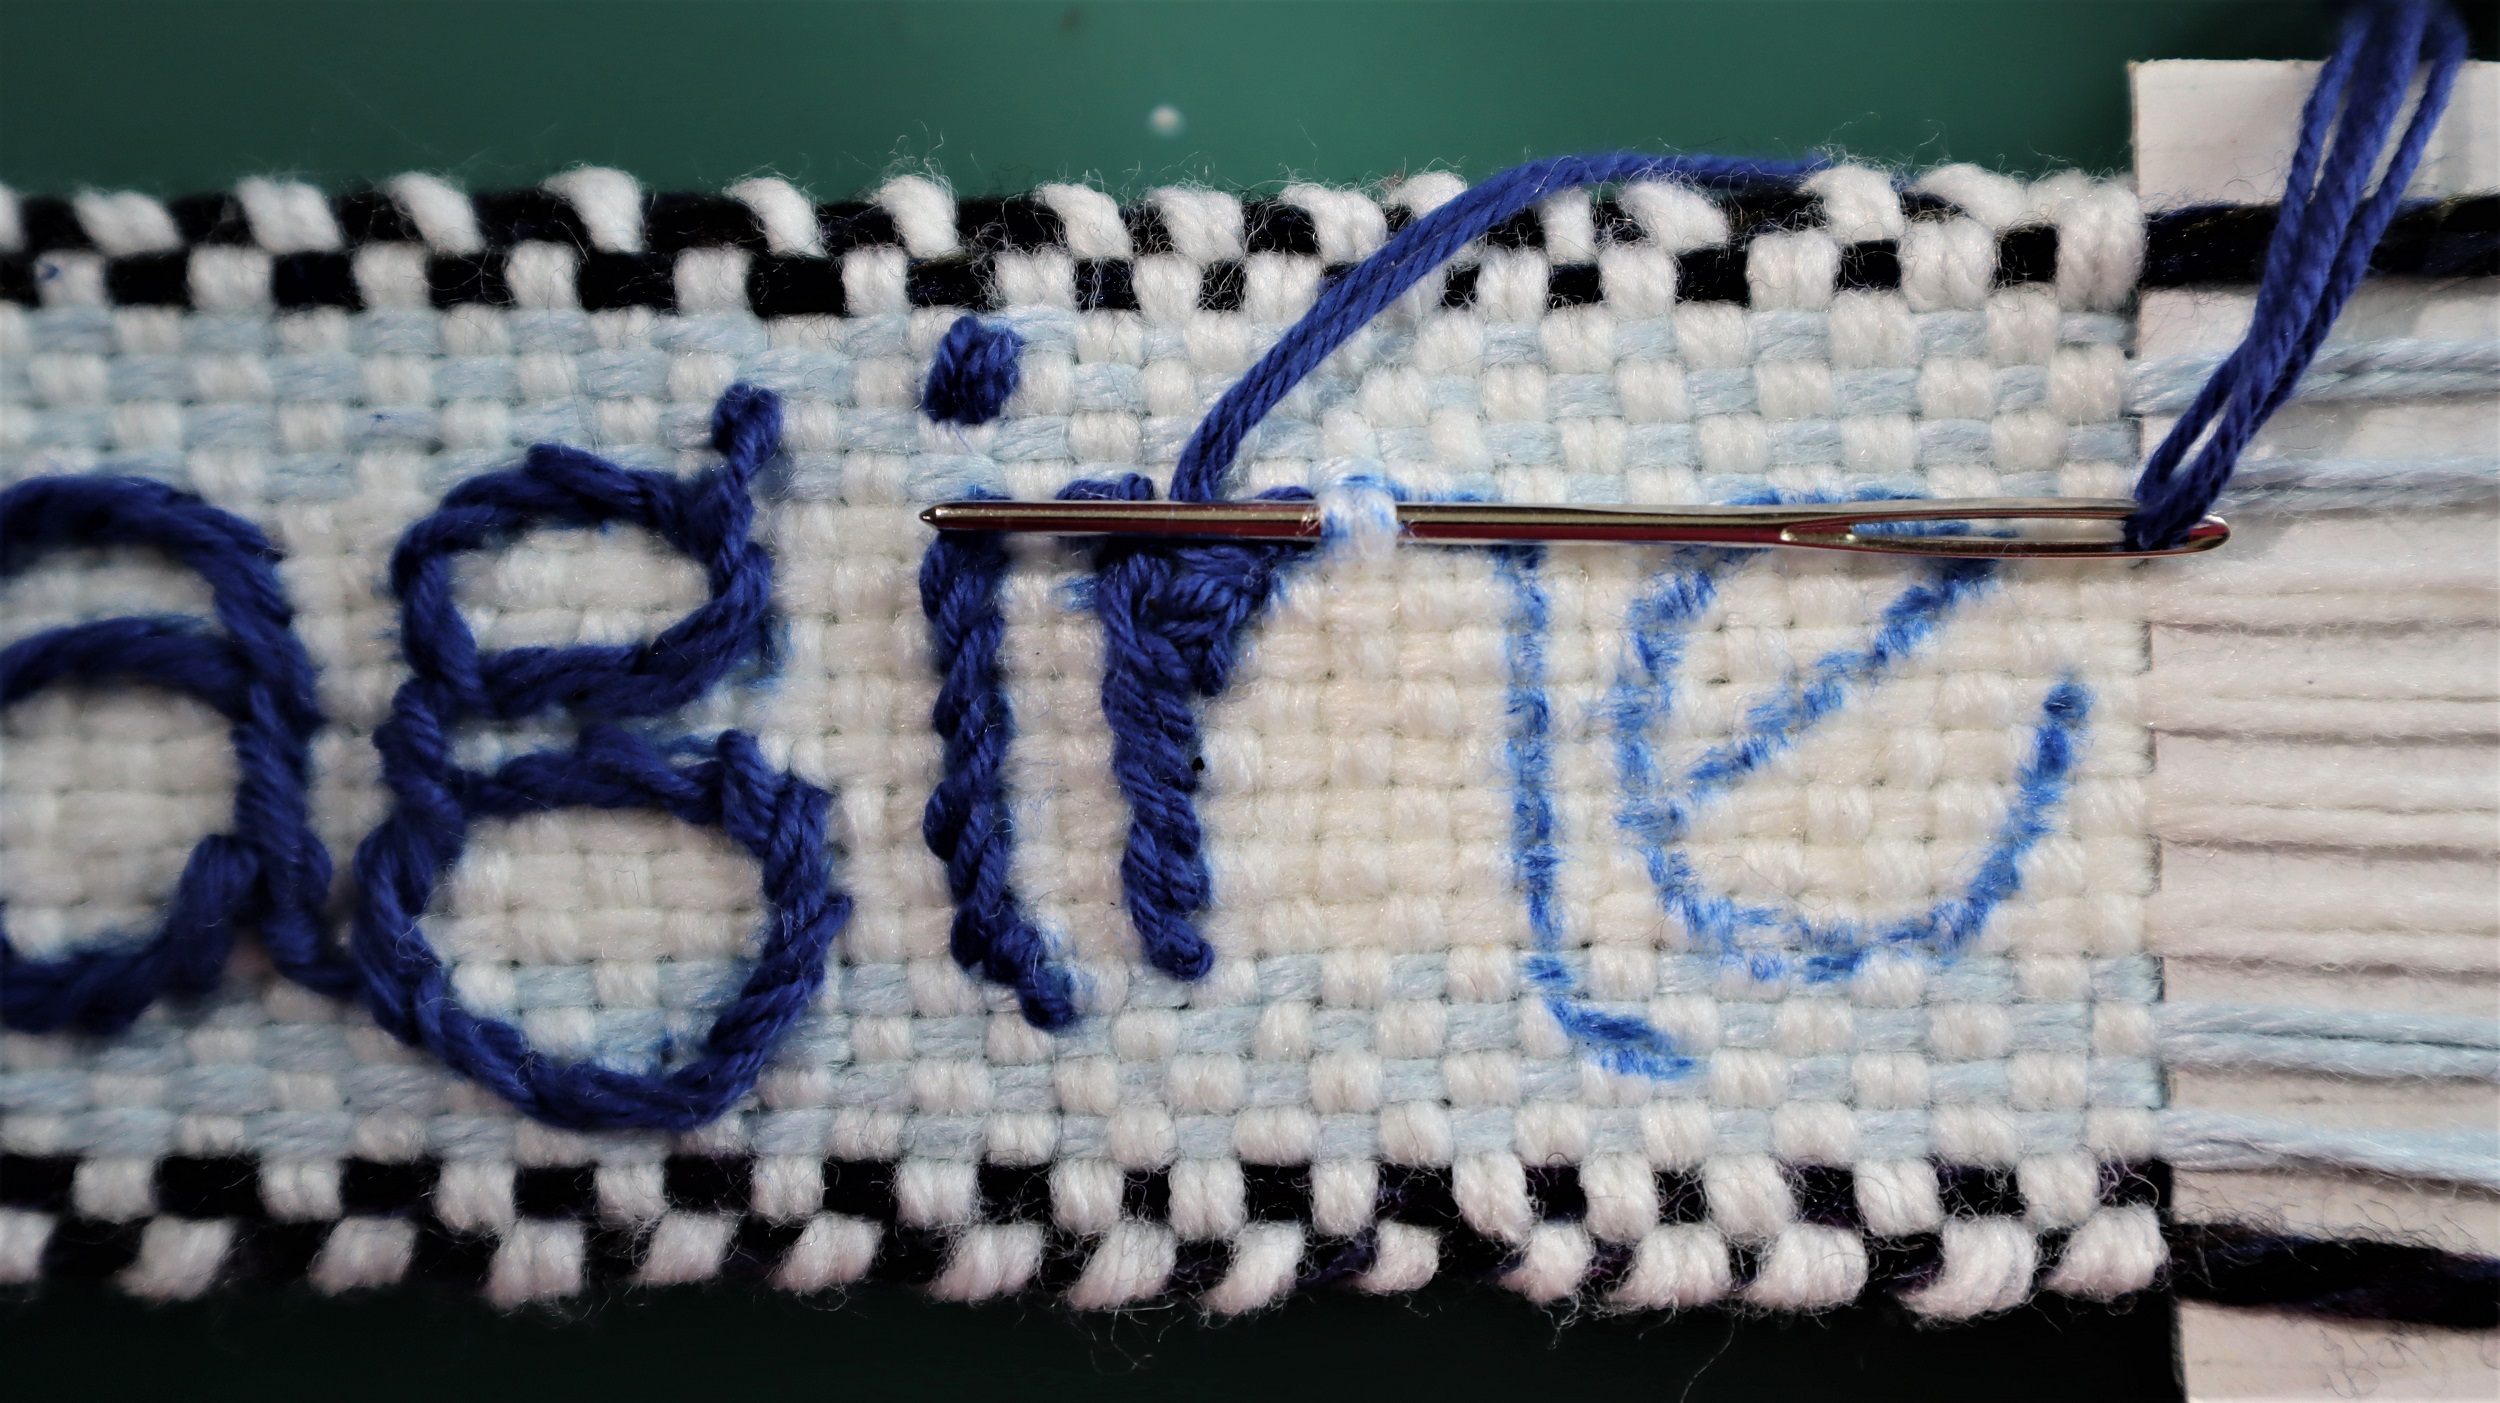
4: Use the pins as guides to draw the letters onto the narrow band using a permanent felt tip marker.
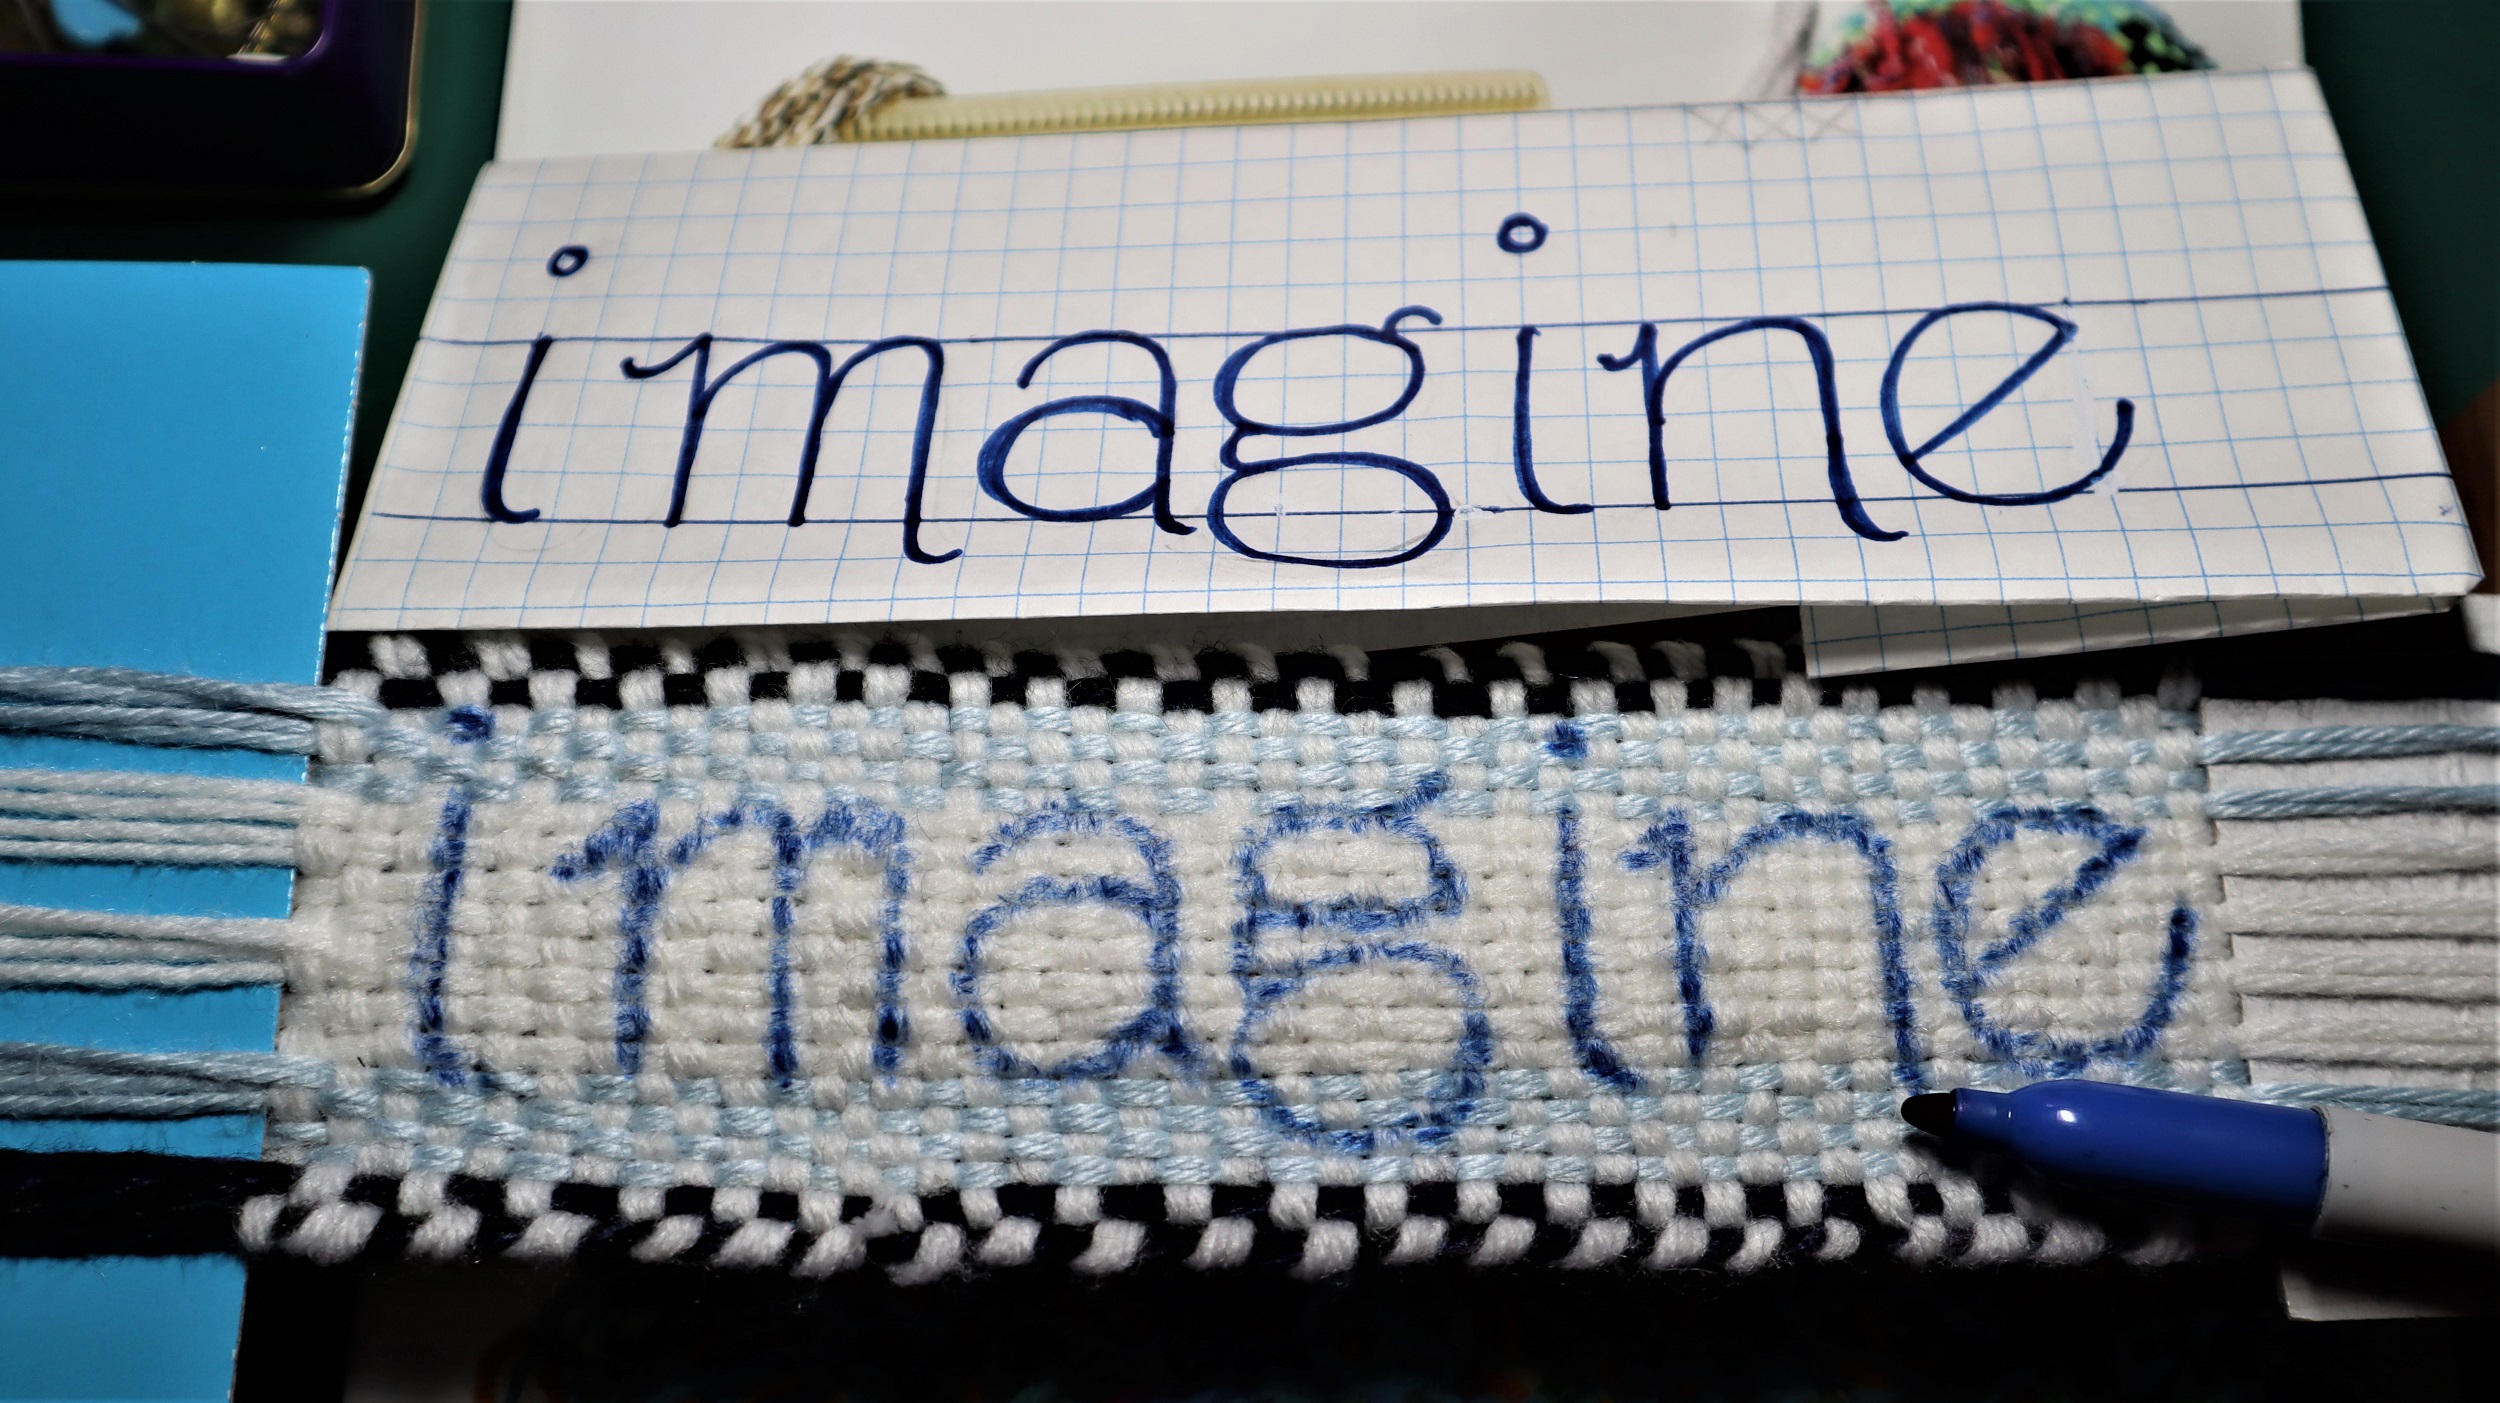
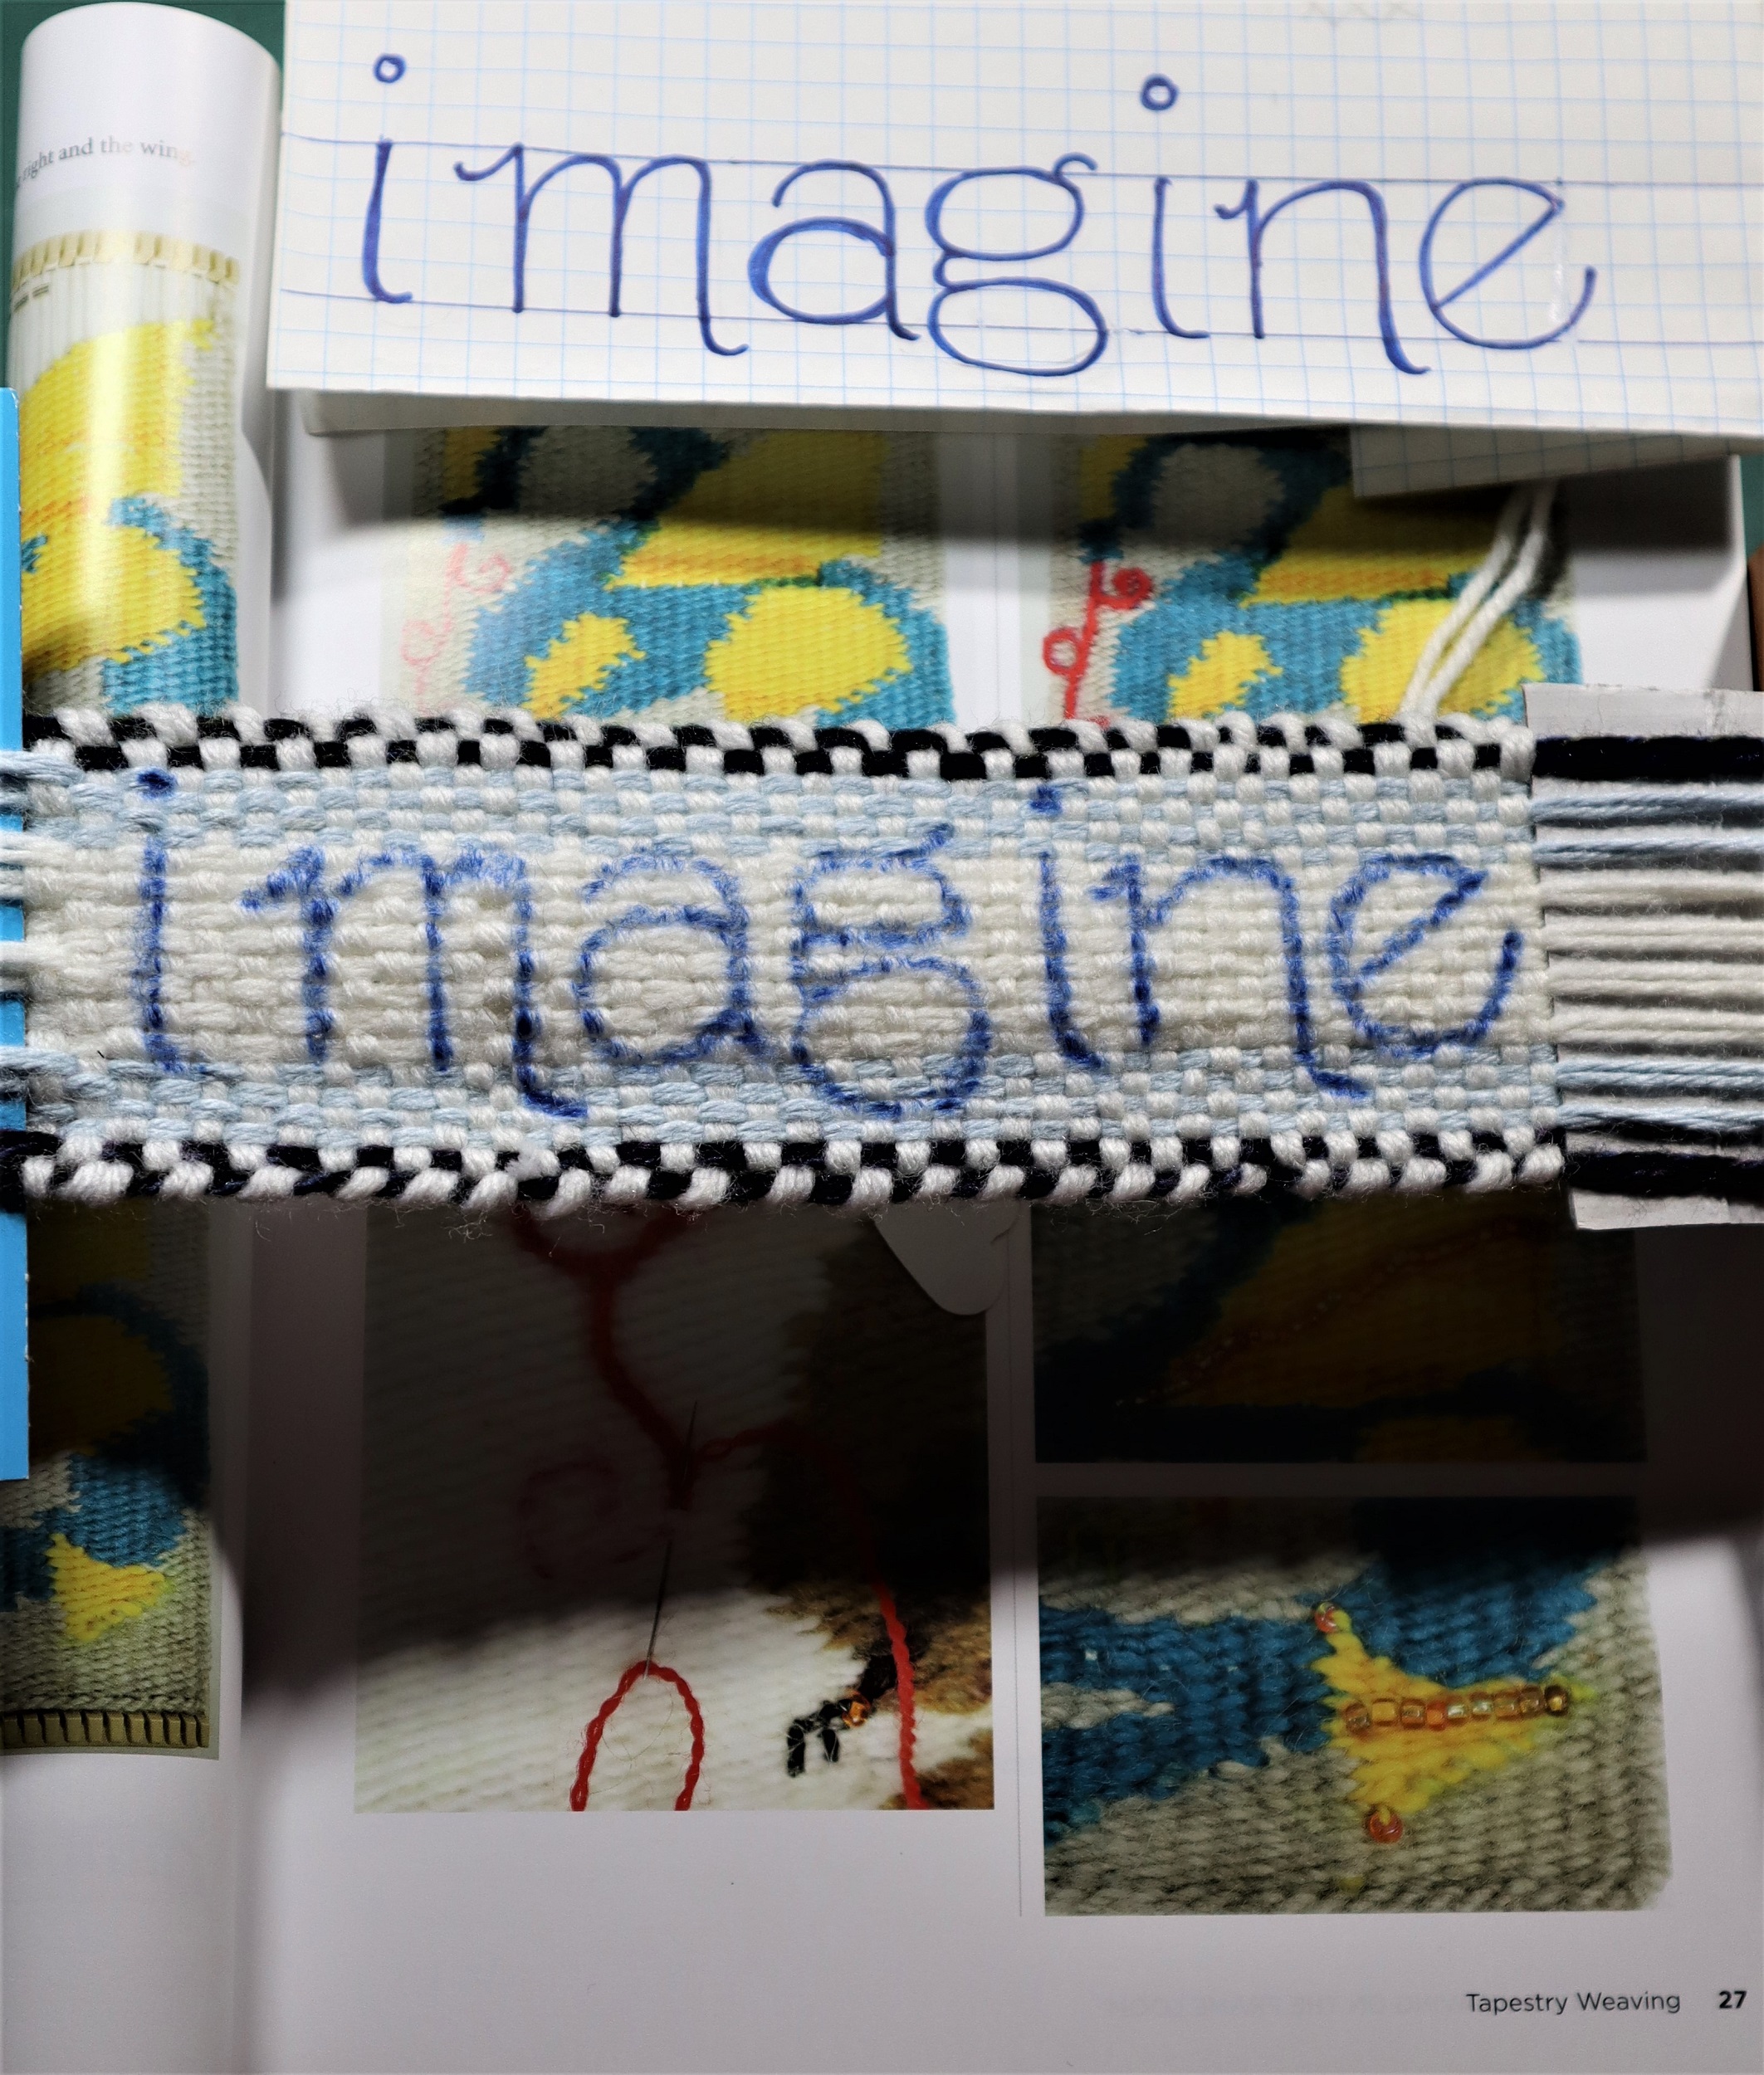
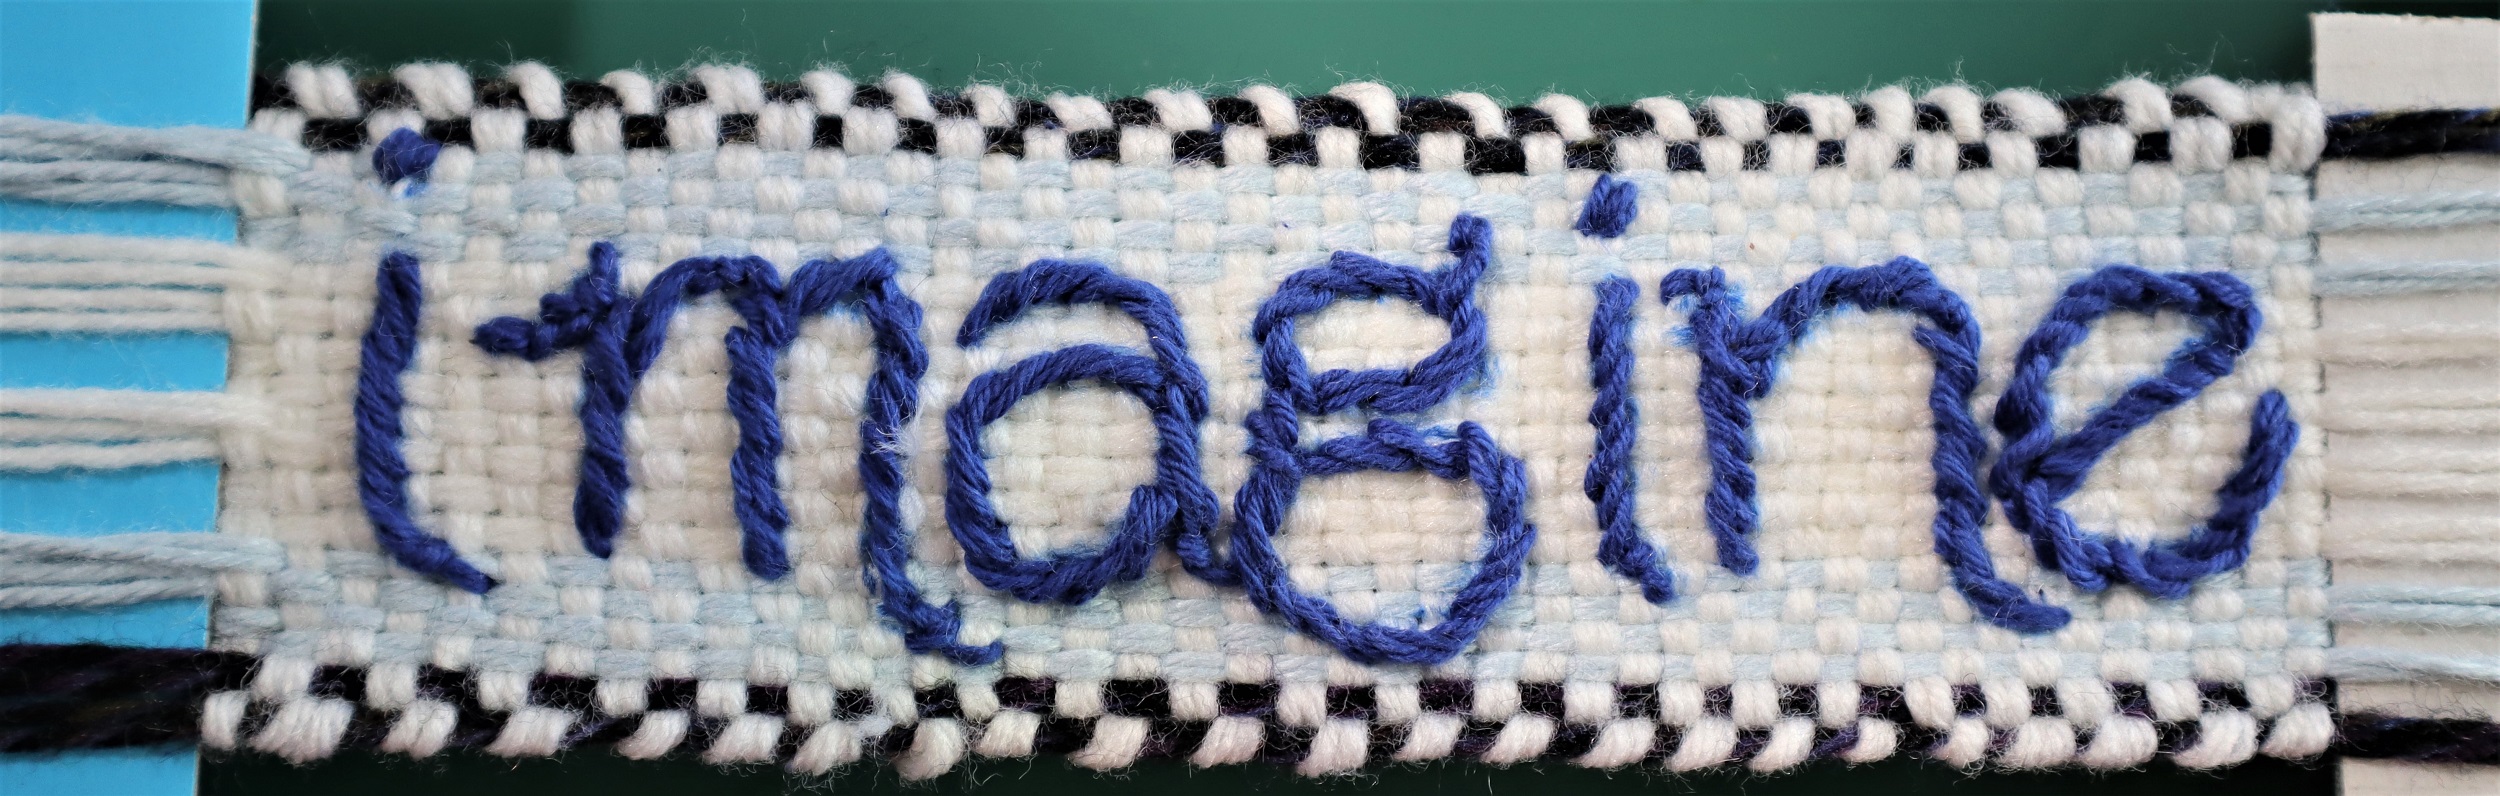
5: Following the instructions on page 27 of “Innovative Weaving on the Frame Loom”, embroider the letters with dark blue embroidery floss.
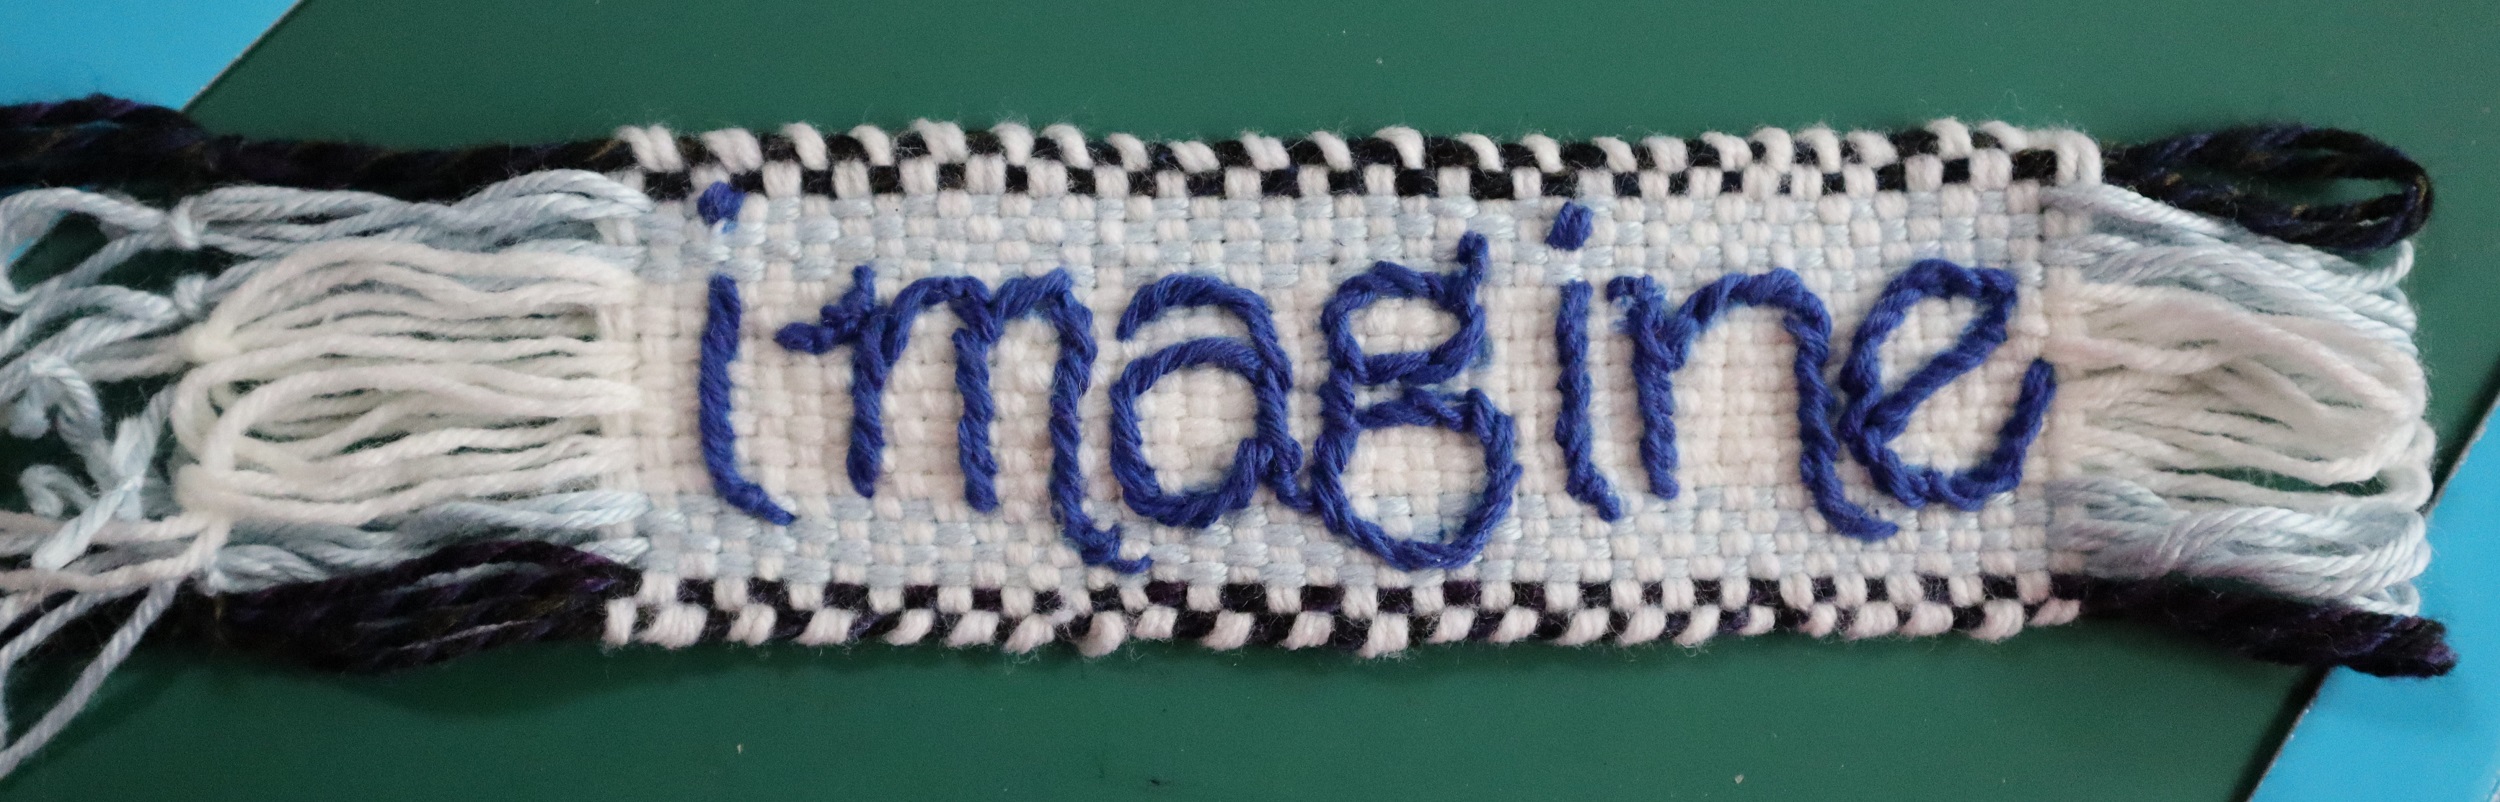
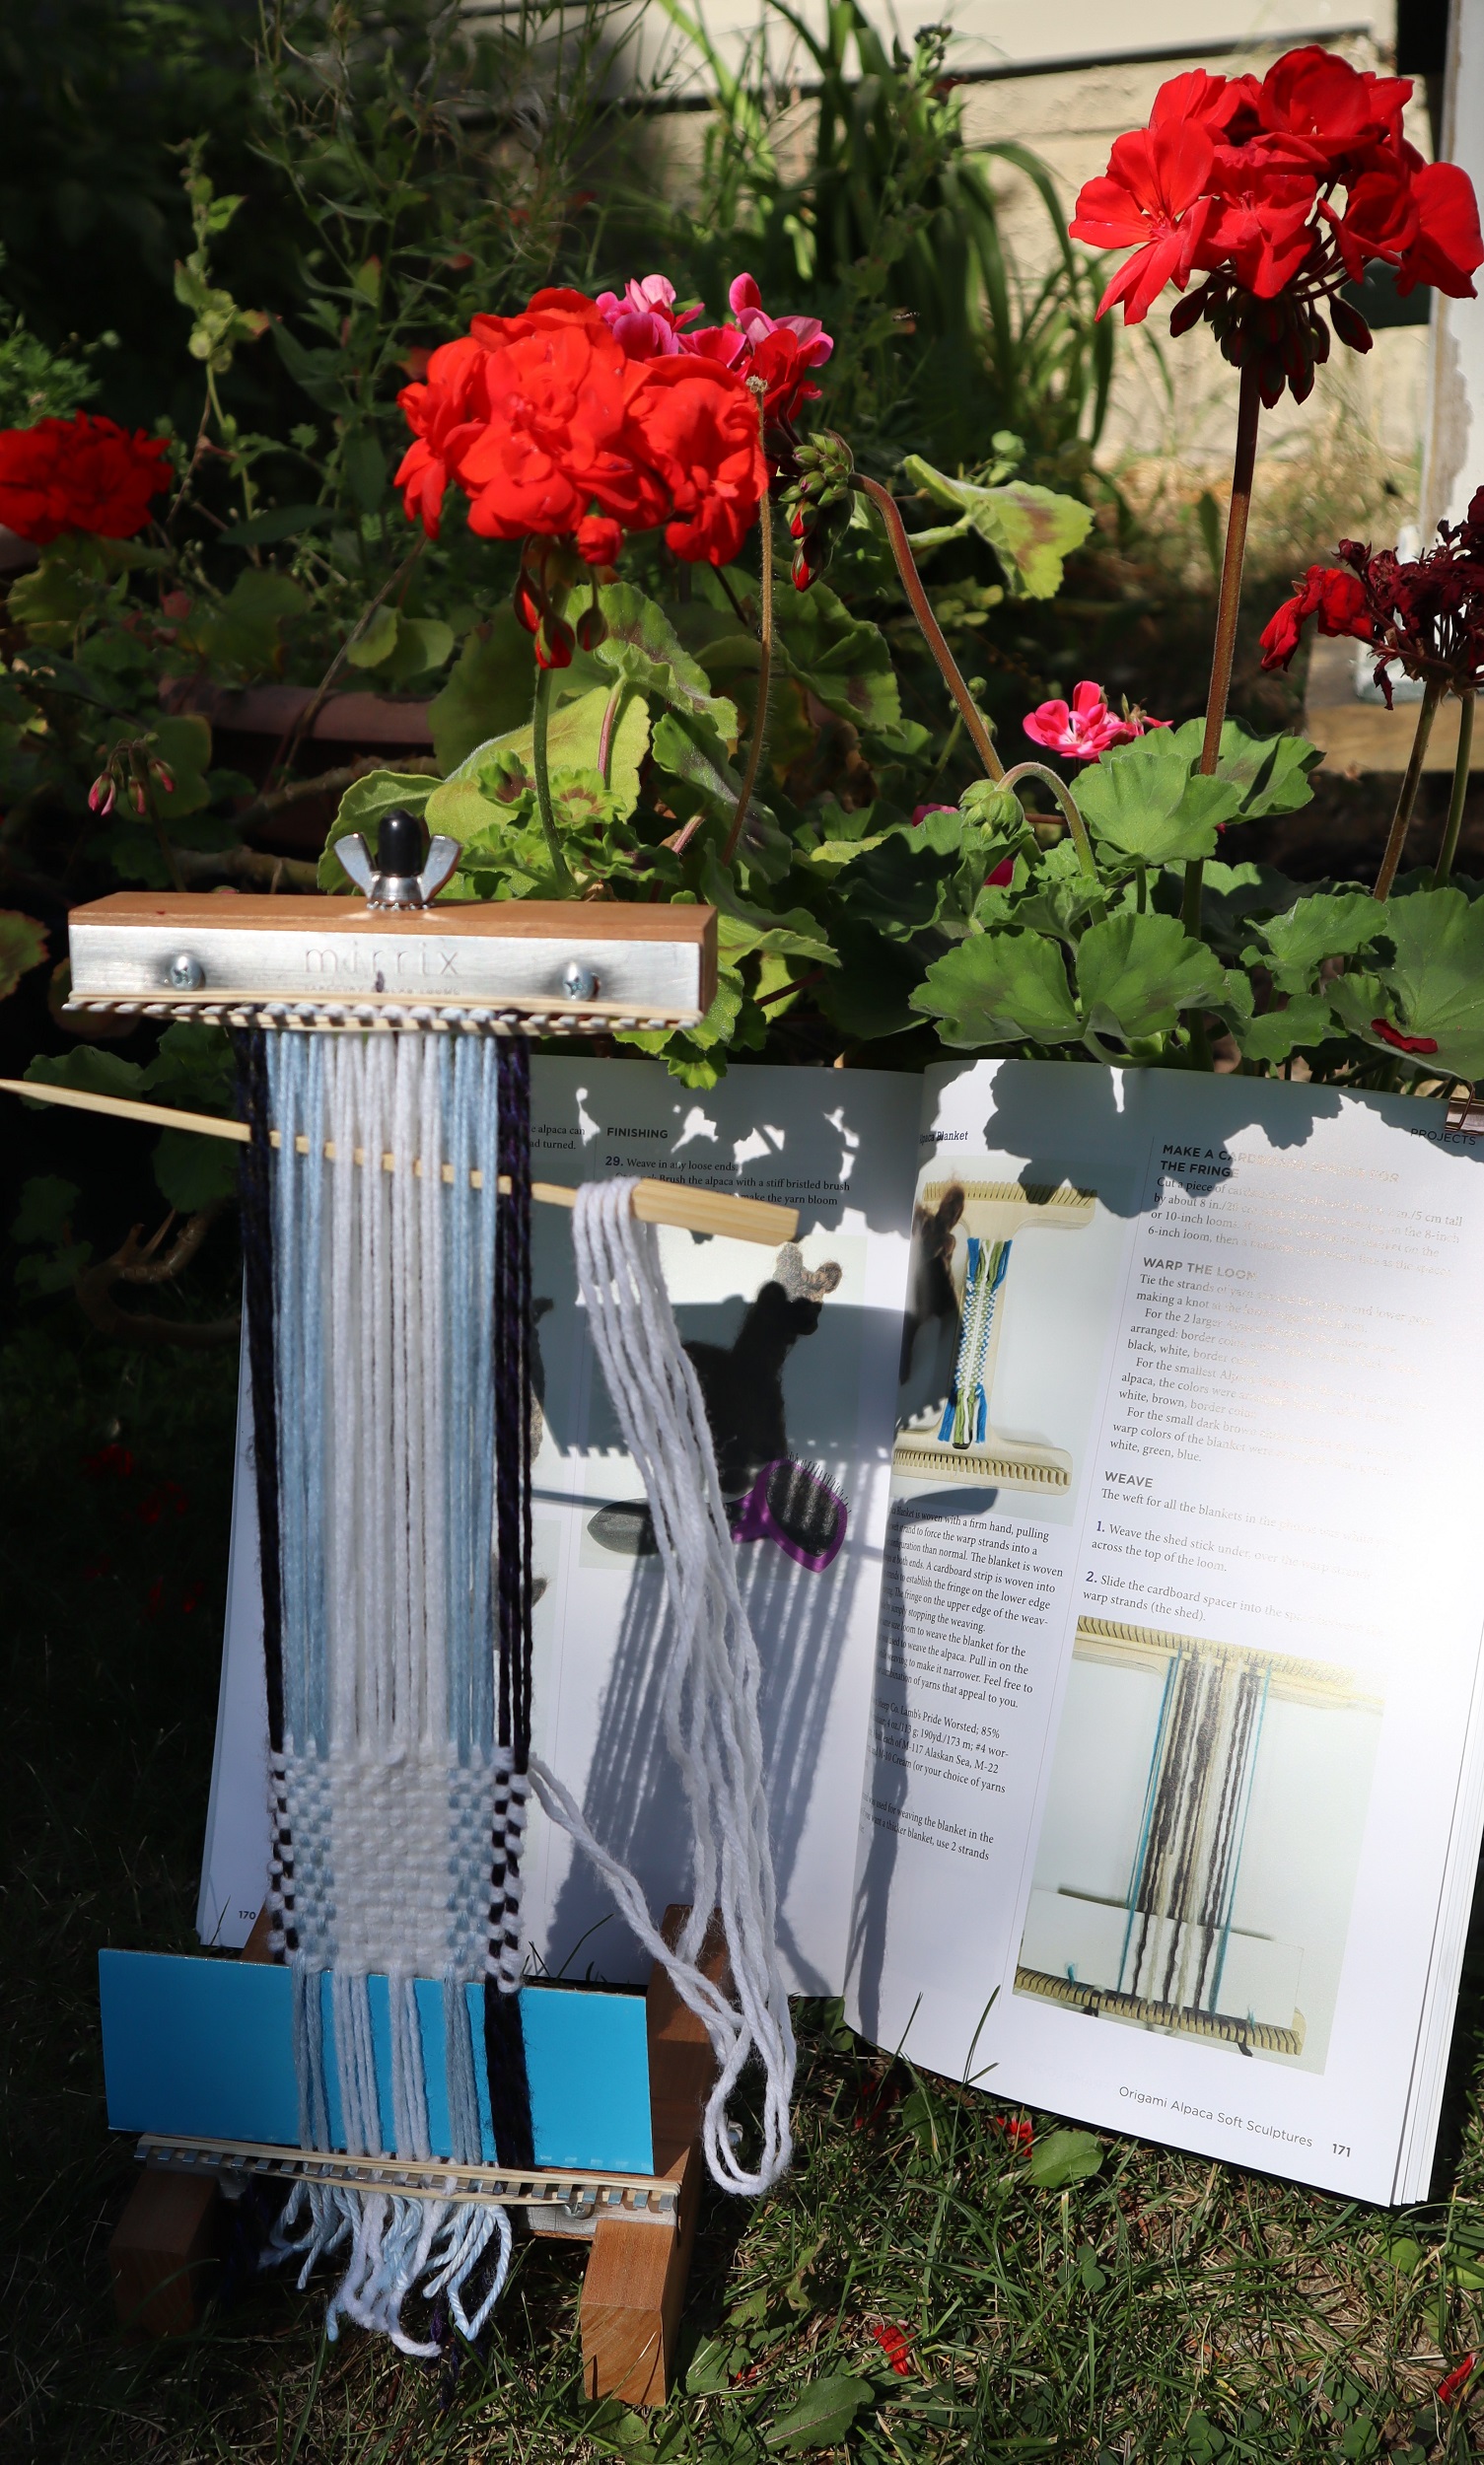
FRINGE:
6: Lift the weaving off the loom and remove the 2 pieces of cardboard.

7: Cut the ends of the loops at the right hand side of the narrow band (it was at the top of the loom) open.
8: Trim the ends that were at the lower edge of the loom, now the left hand side of the band, to the same length as the warp ends at the other end of the narrow band.
9: Tie a knot (left over right and under, right over left and under) with each set of 4 strands of yarn across both ends of the narrow band.
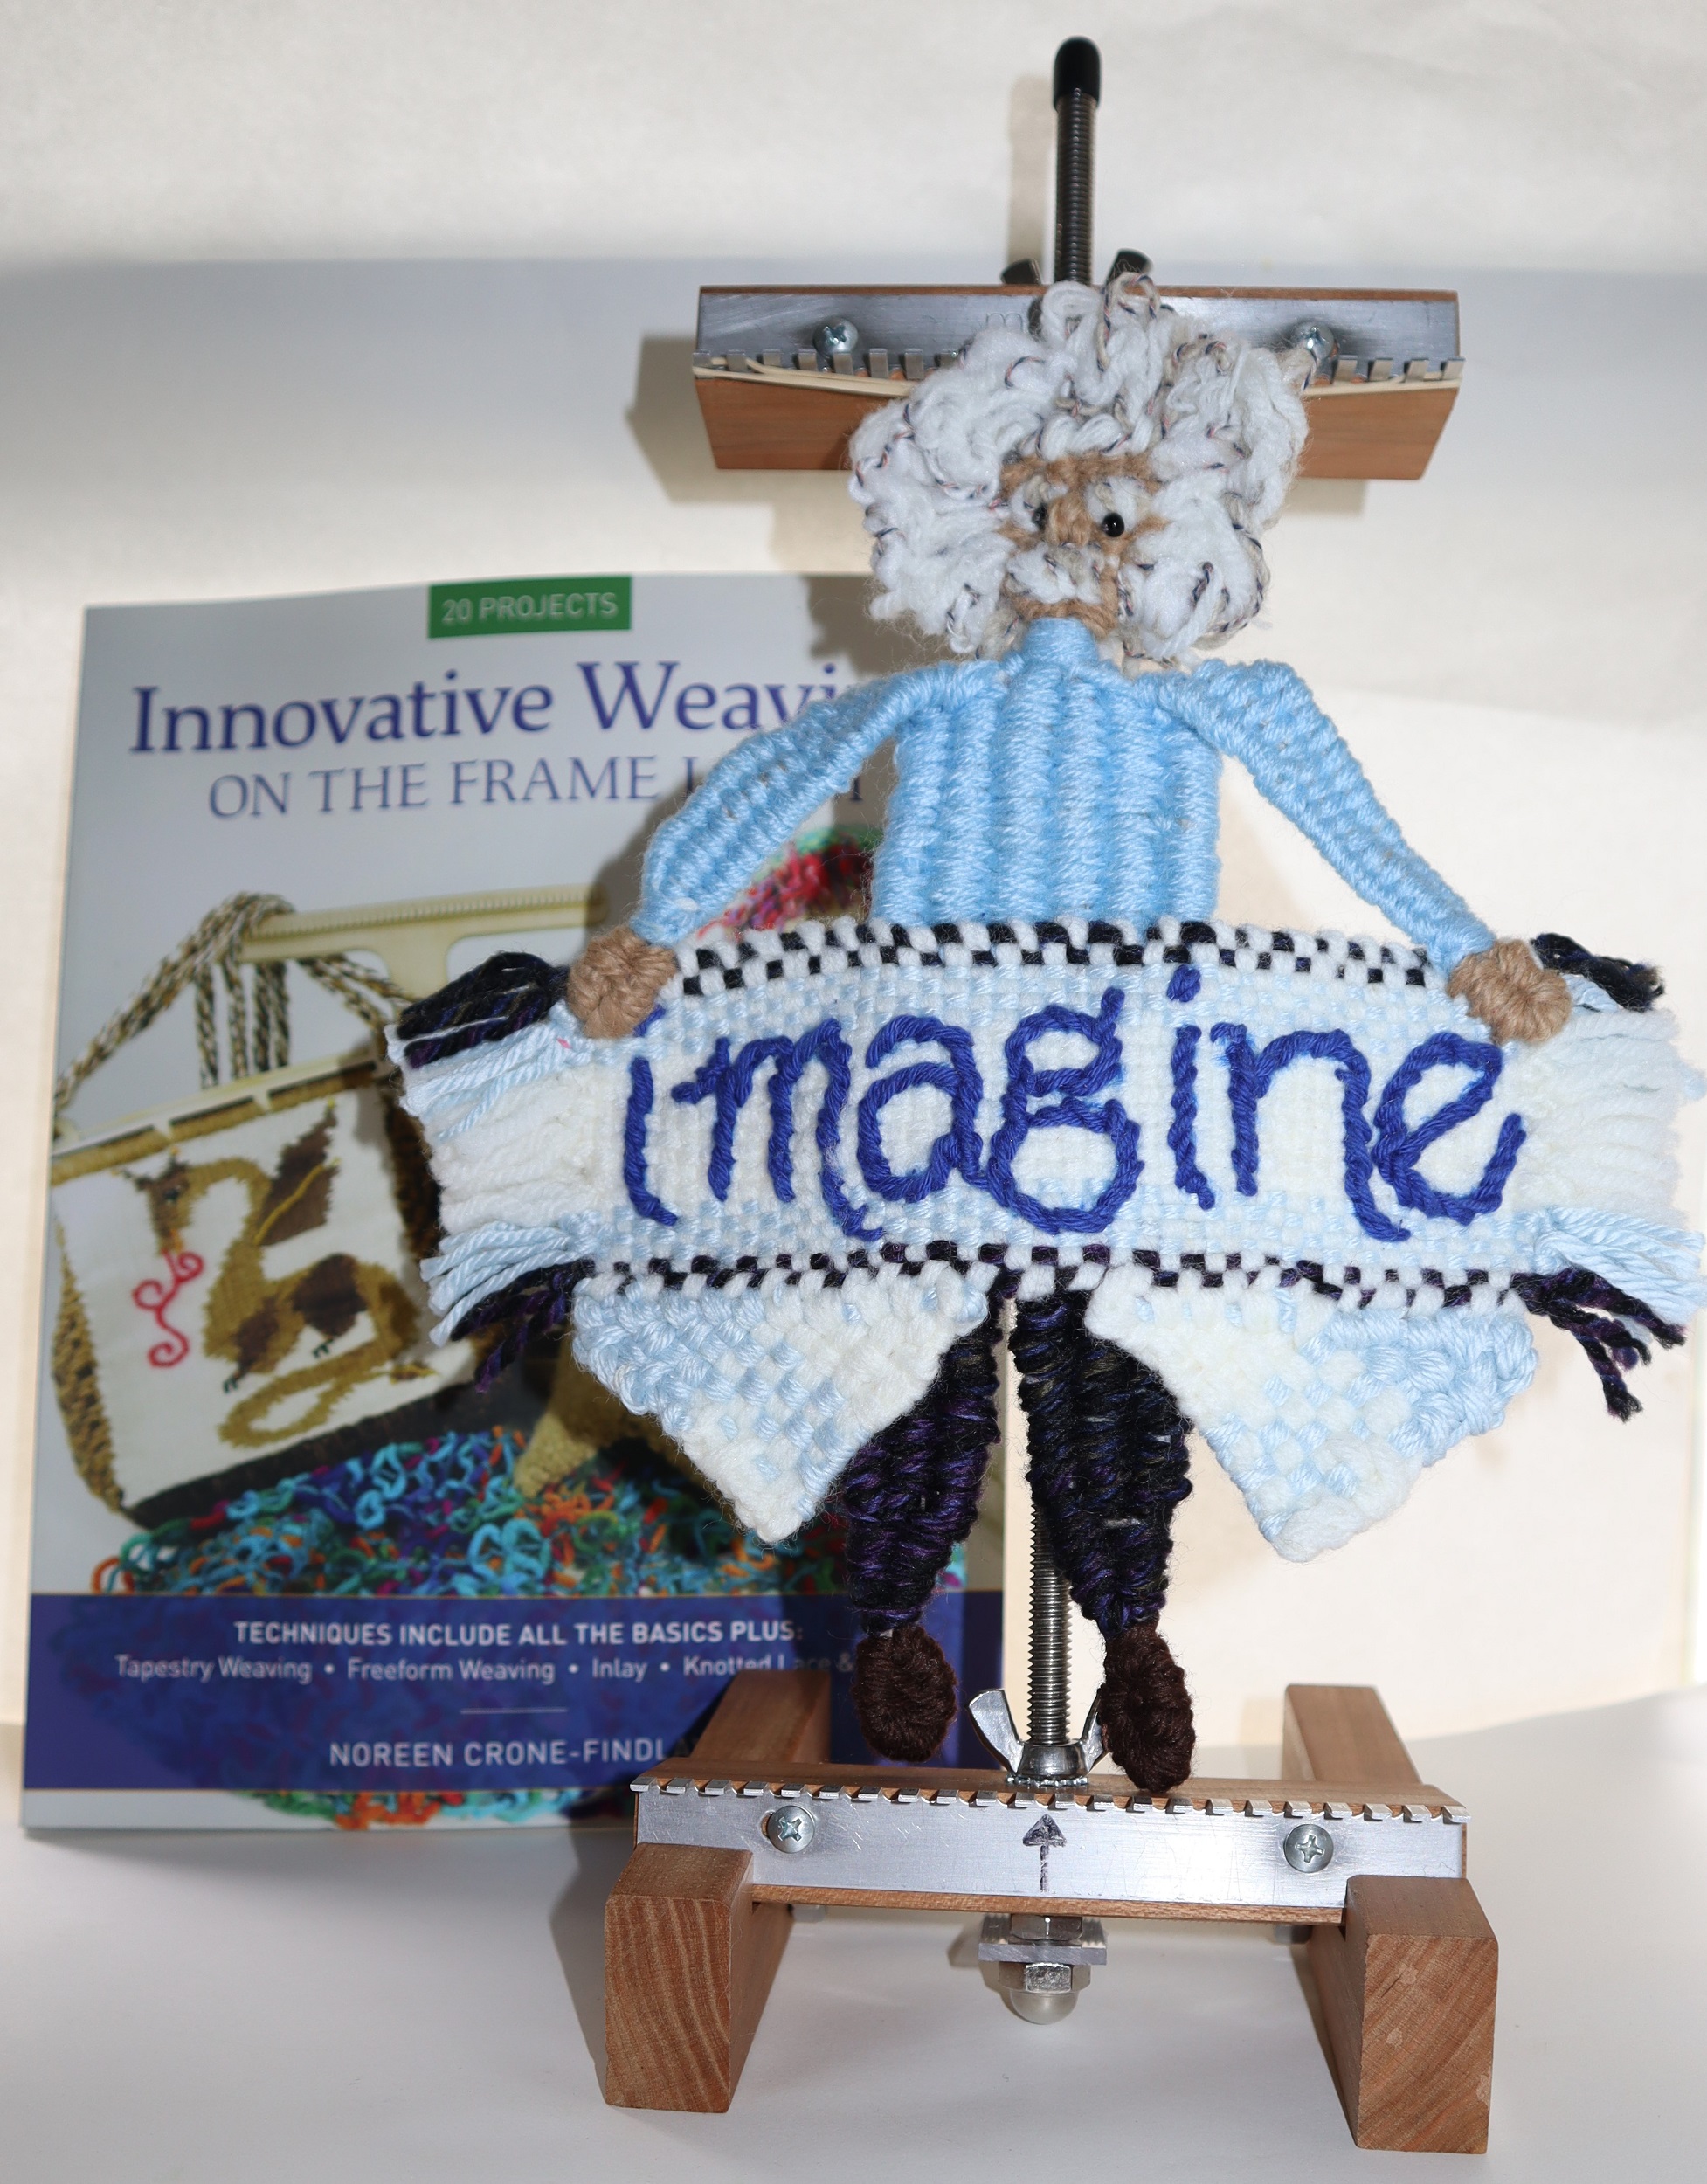
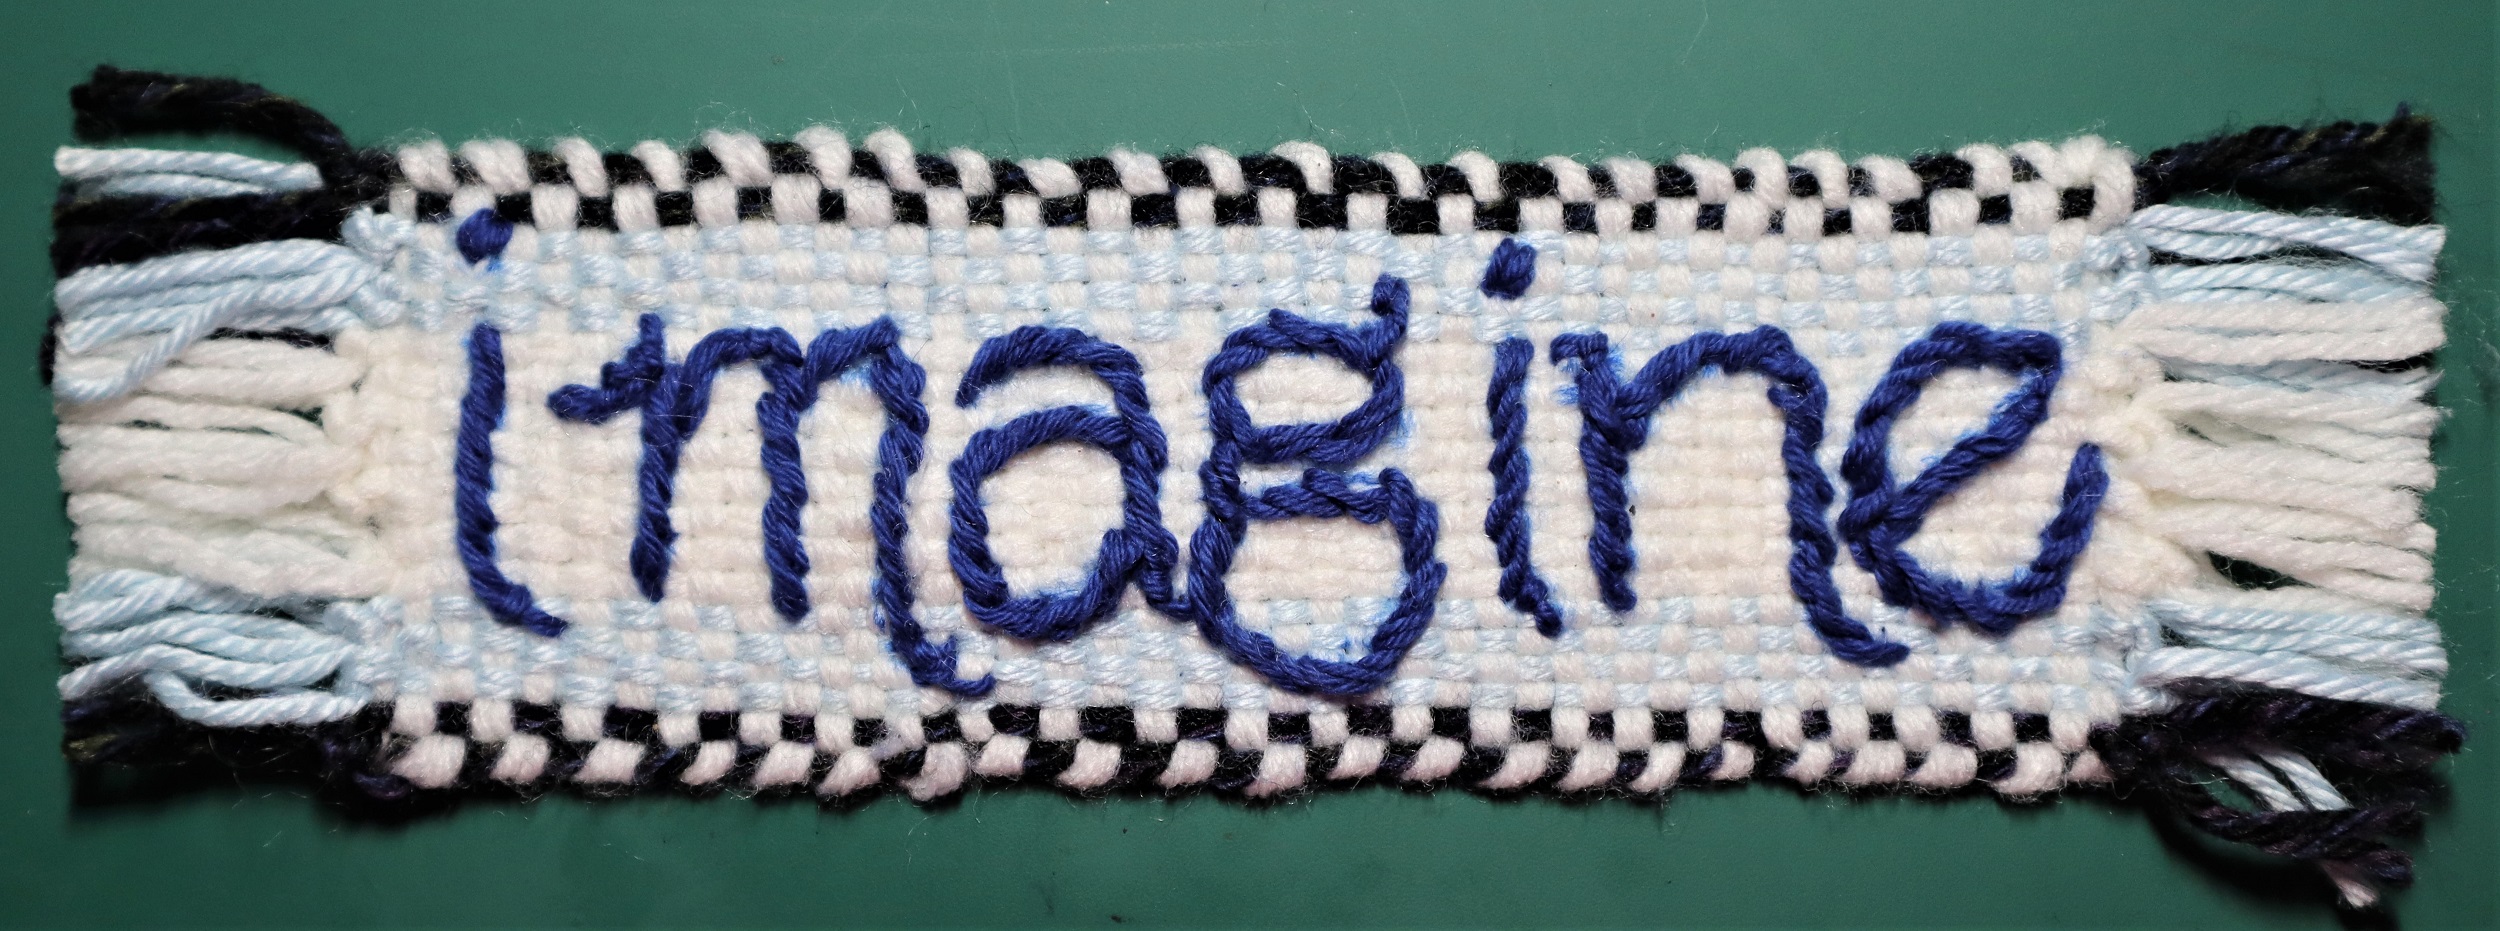
10: FINISHING THE NARROW BAND:
Steam the narrow band on the wrong side with a steam iron, being sure to not touch the iron to the weaving.
Finger press the narrow band to make sure that the fringes behave themselves and line up politely.
Trim them again if necessary.