
The head and nose of the Saffron Teddy Bear are very expressive.
Here’s how to weave the head:
And here’s how to weave the nose:
The link for all the video tutorials for the Saffron Teddy Bears for the 2022 Summer Weaving Challenge is:
The head and nose of the Saffron Teddy Bear are very expressive.
Here’s how to weave the head:
And here’s how to weave the nose:
The link for all the video tutorials for the Saffron Teddy Bears for the 2022 Summer Weaving Challenge is:
Sampling for a weaving project is a really good idea that most weavers often avoid doing.
But, weaving a small sample can give so much information to the weaver that it is a huge benefit.
Weaving the arms for the Saffron Teddy Bears is a win/win in the sampling department 🙂
The arms are small, but will quickly show you if your yarn is going to make a pleasing fabric for your teddy bear.
If not, then it’s better to make adjustments and weave it over again, rather than committing to weaving the whole body and then finding that the yarn doesn’t work.
So, start your bear by weaving an arm first.
You’ll be glad you did!
The link for all the video tutorials for the Saffron Teddy Bears for the 2022 Summer Weaving Challenge is:
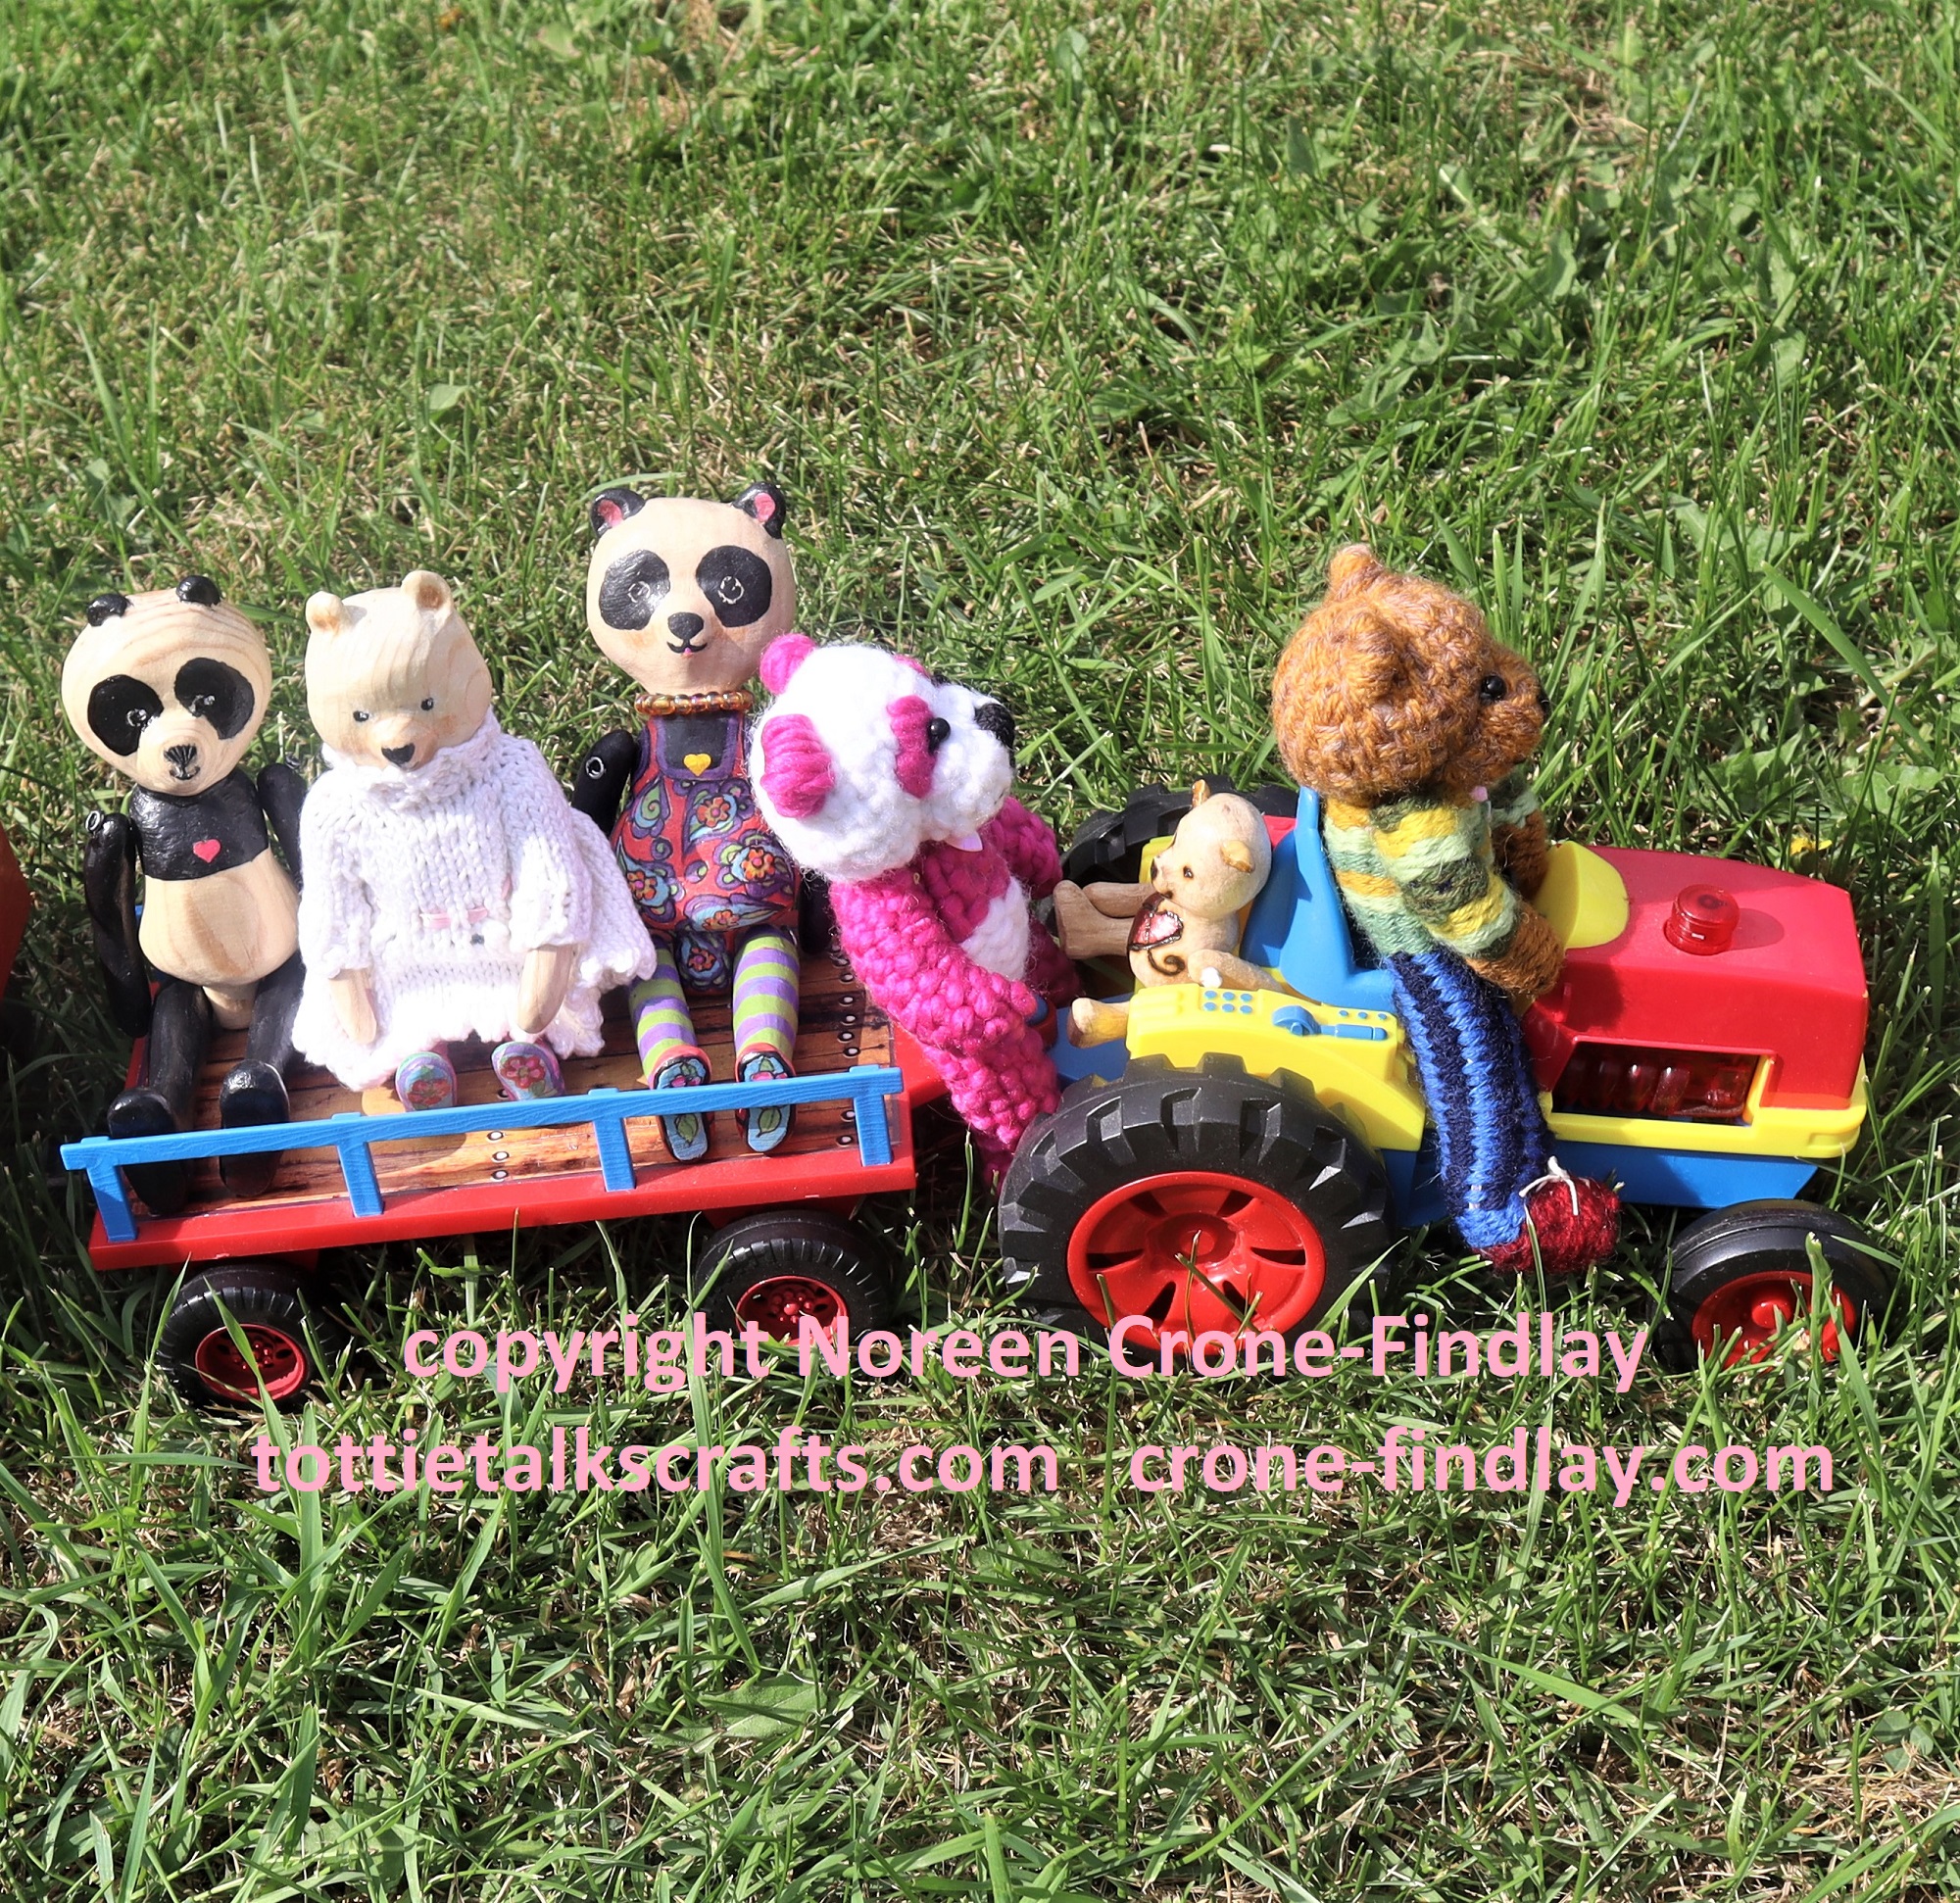
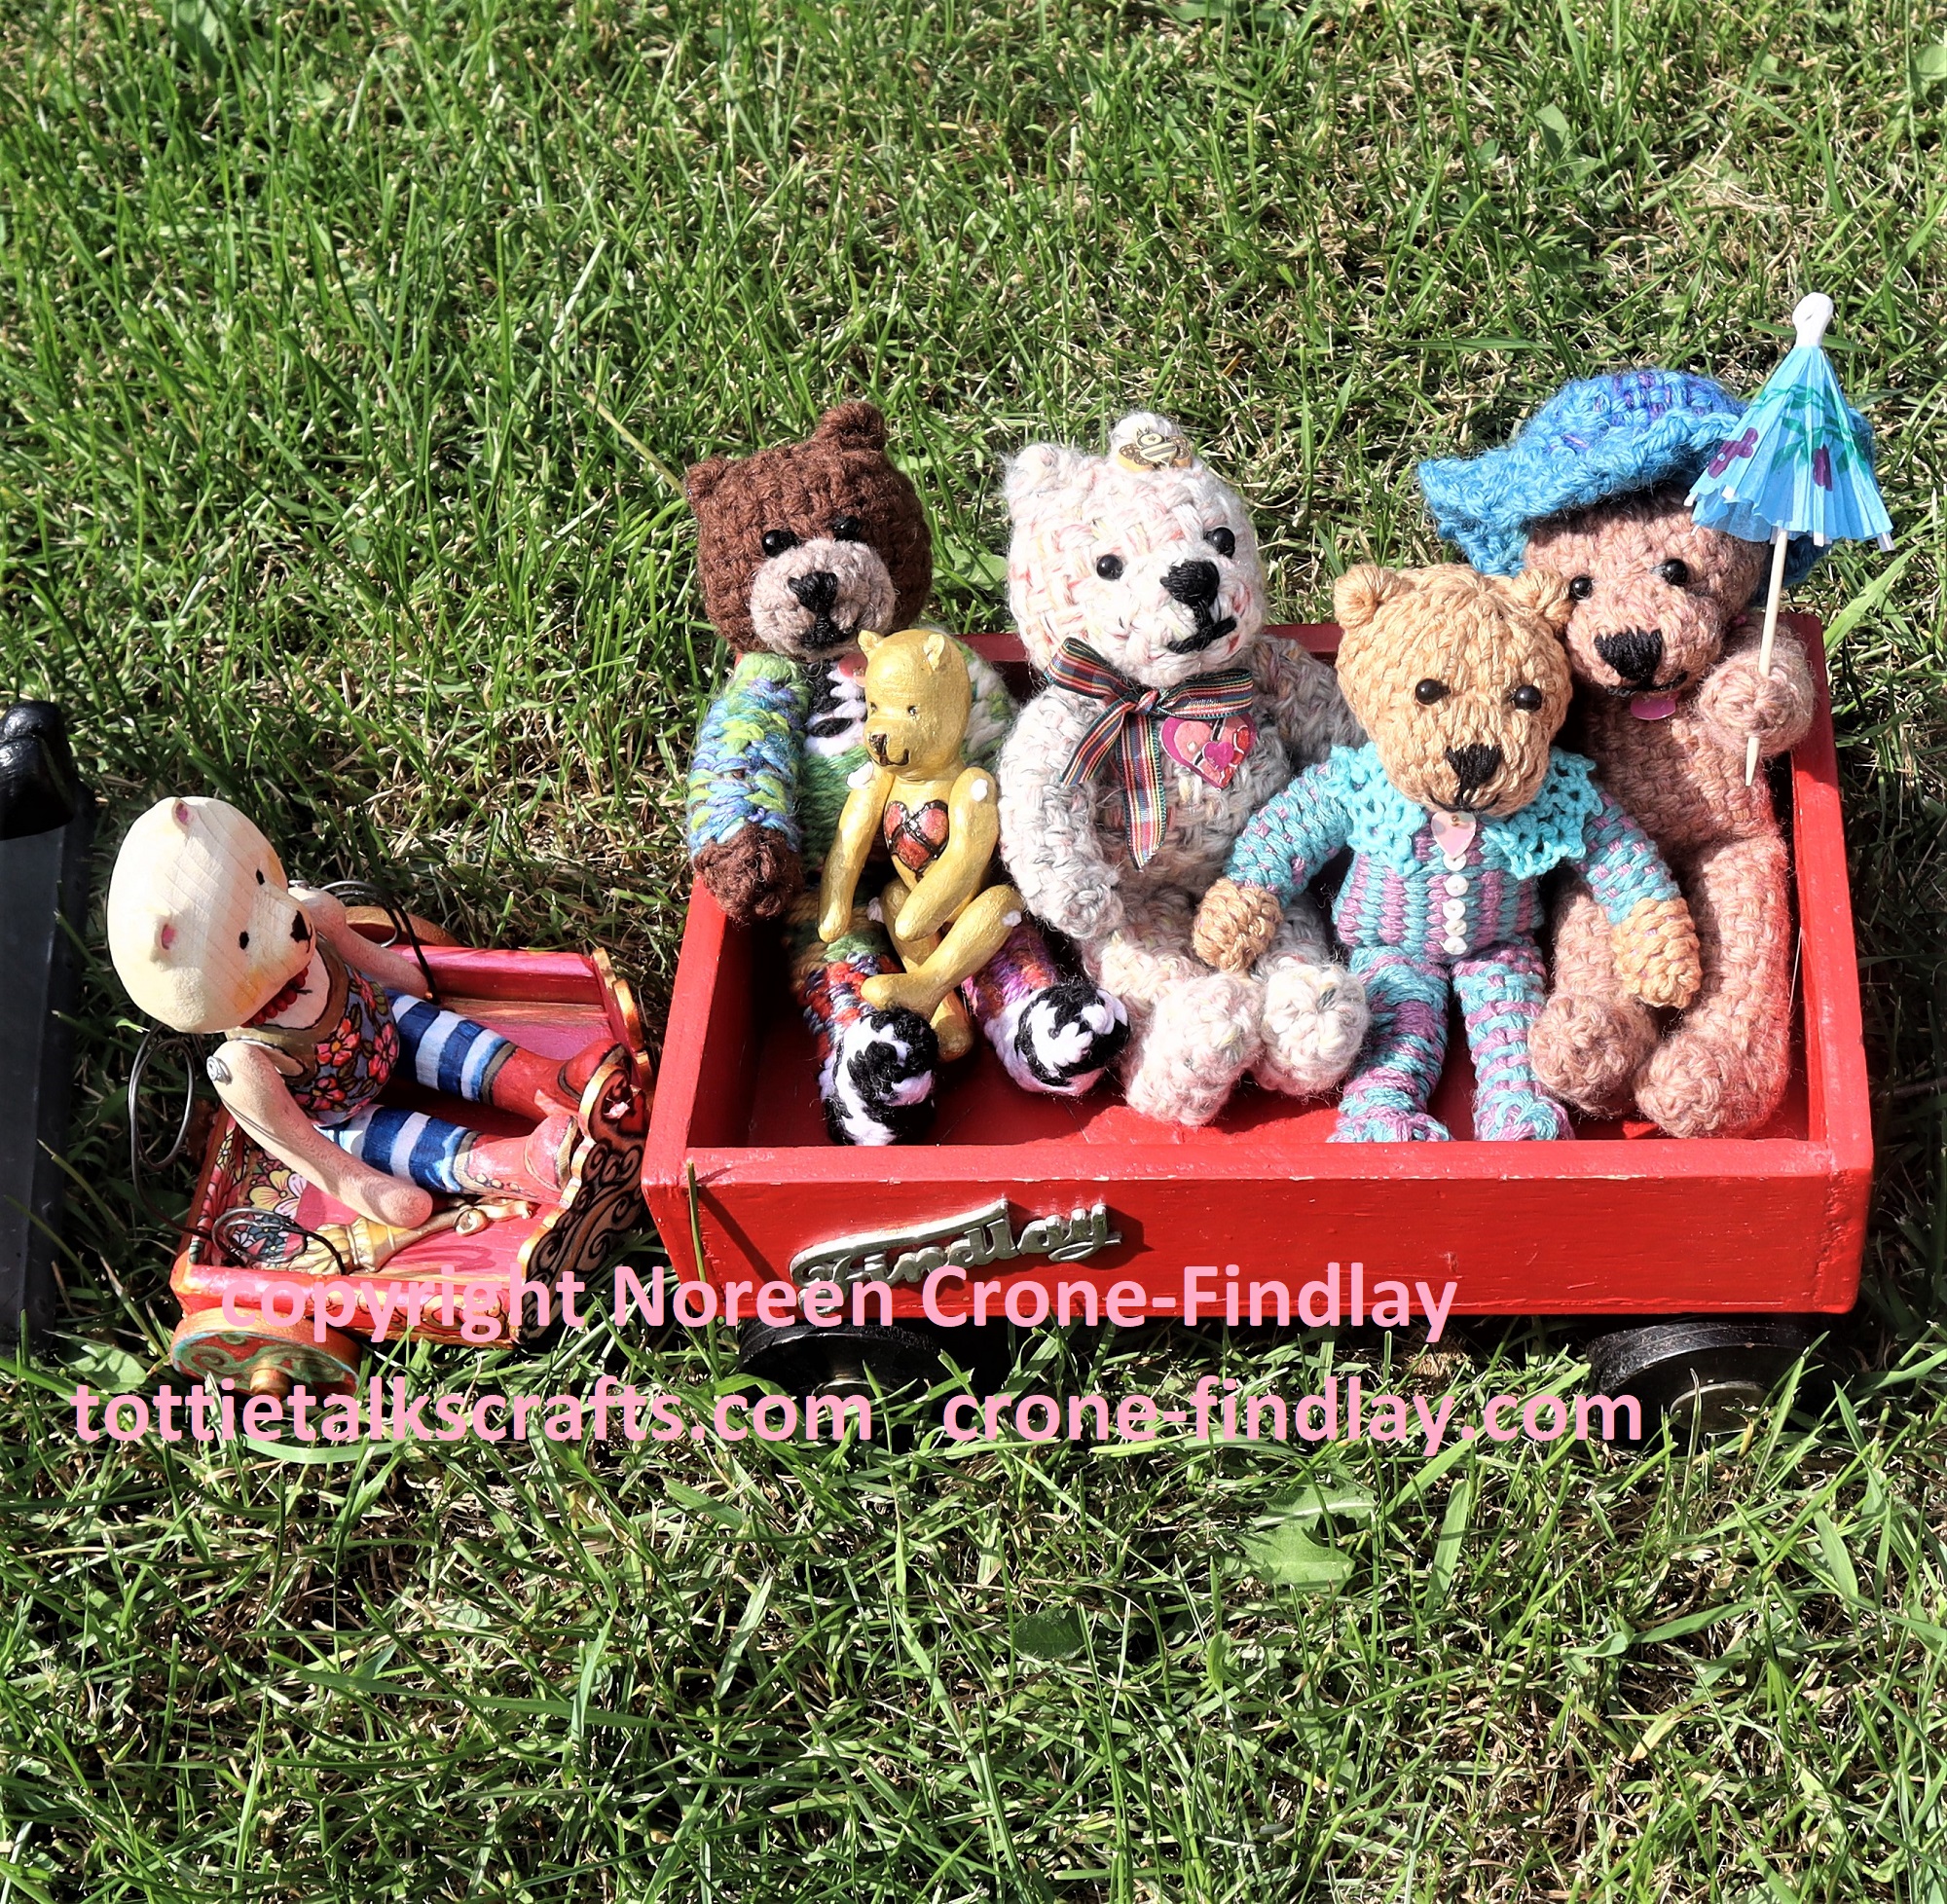
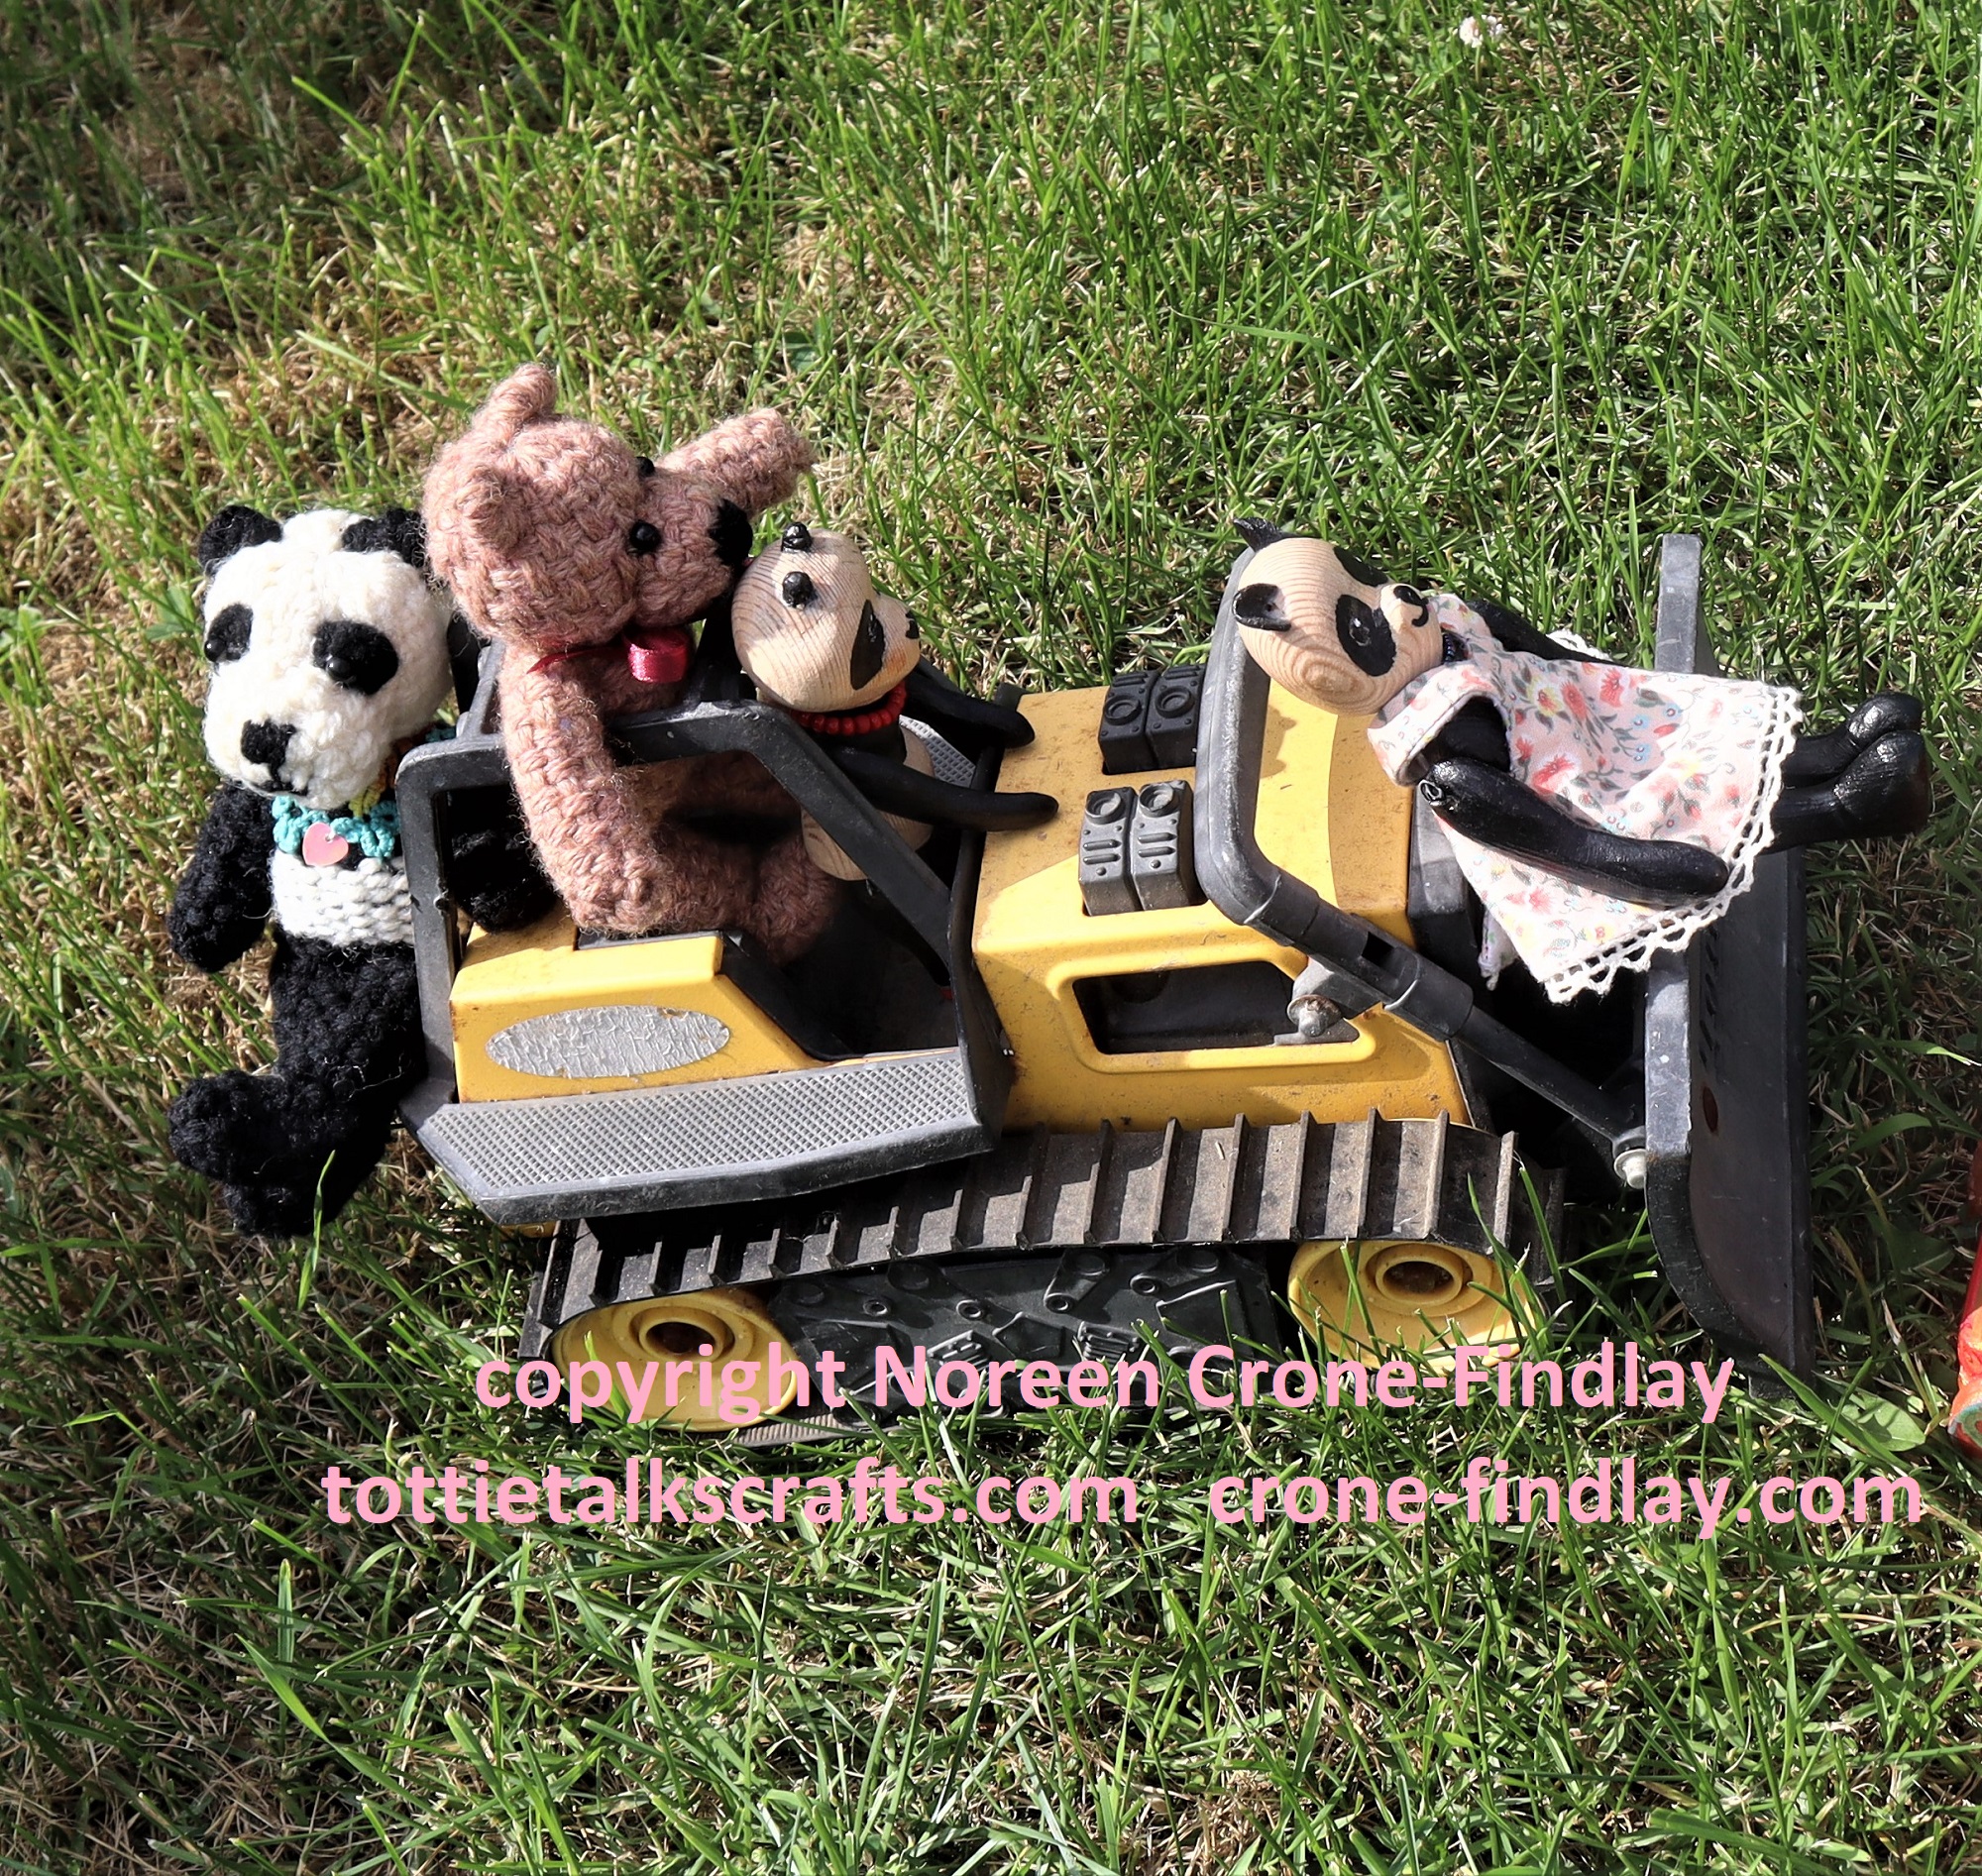
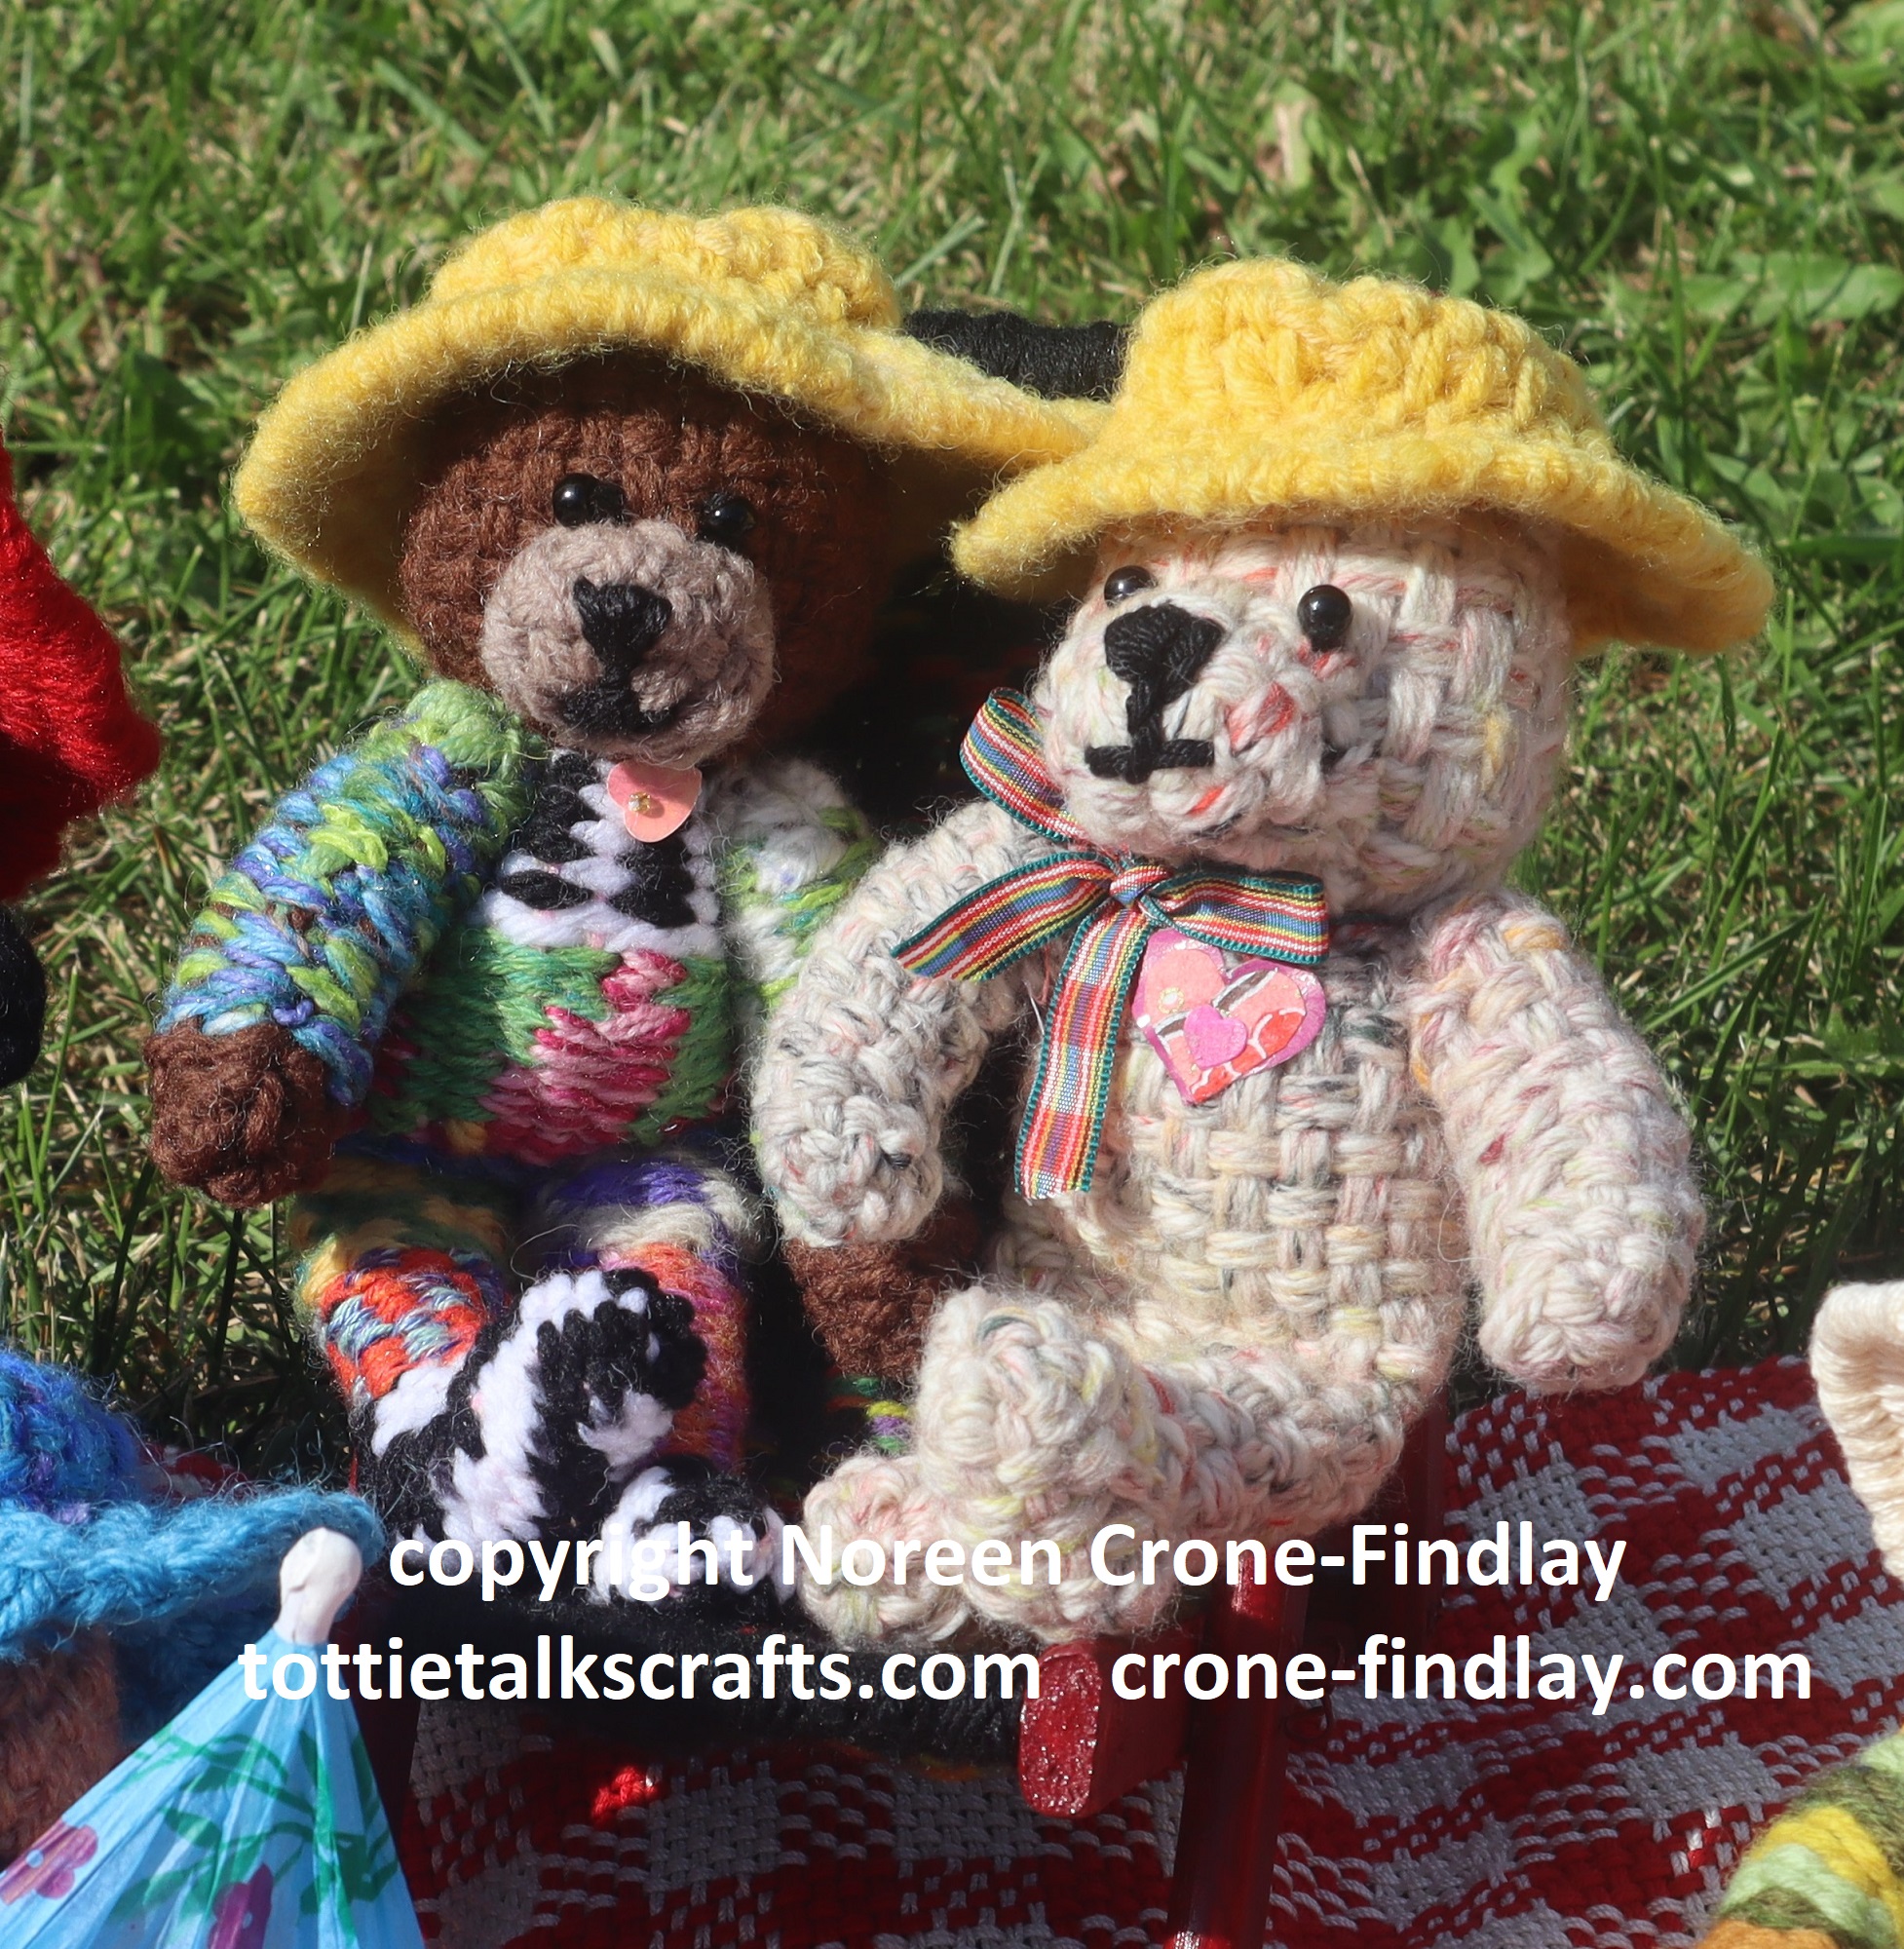
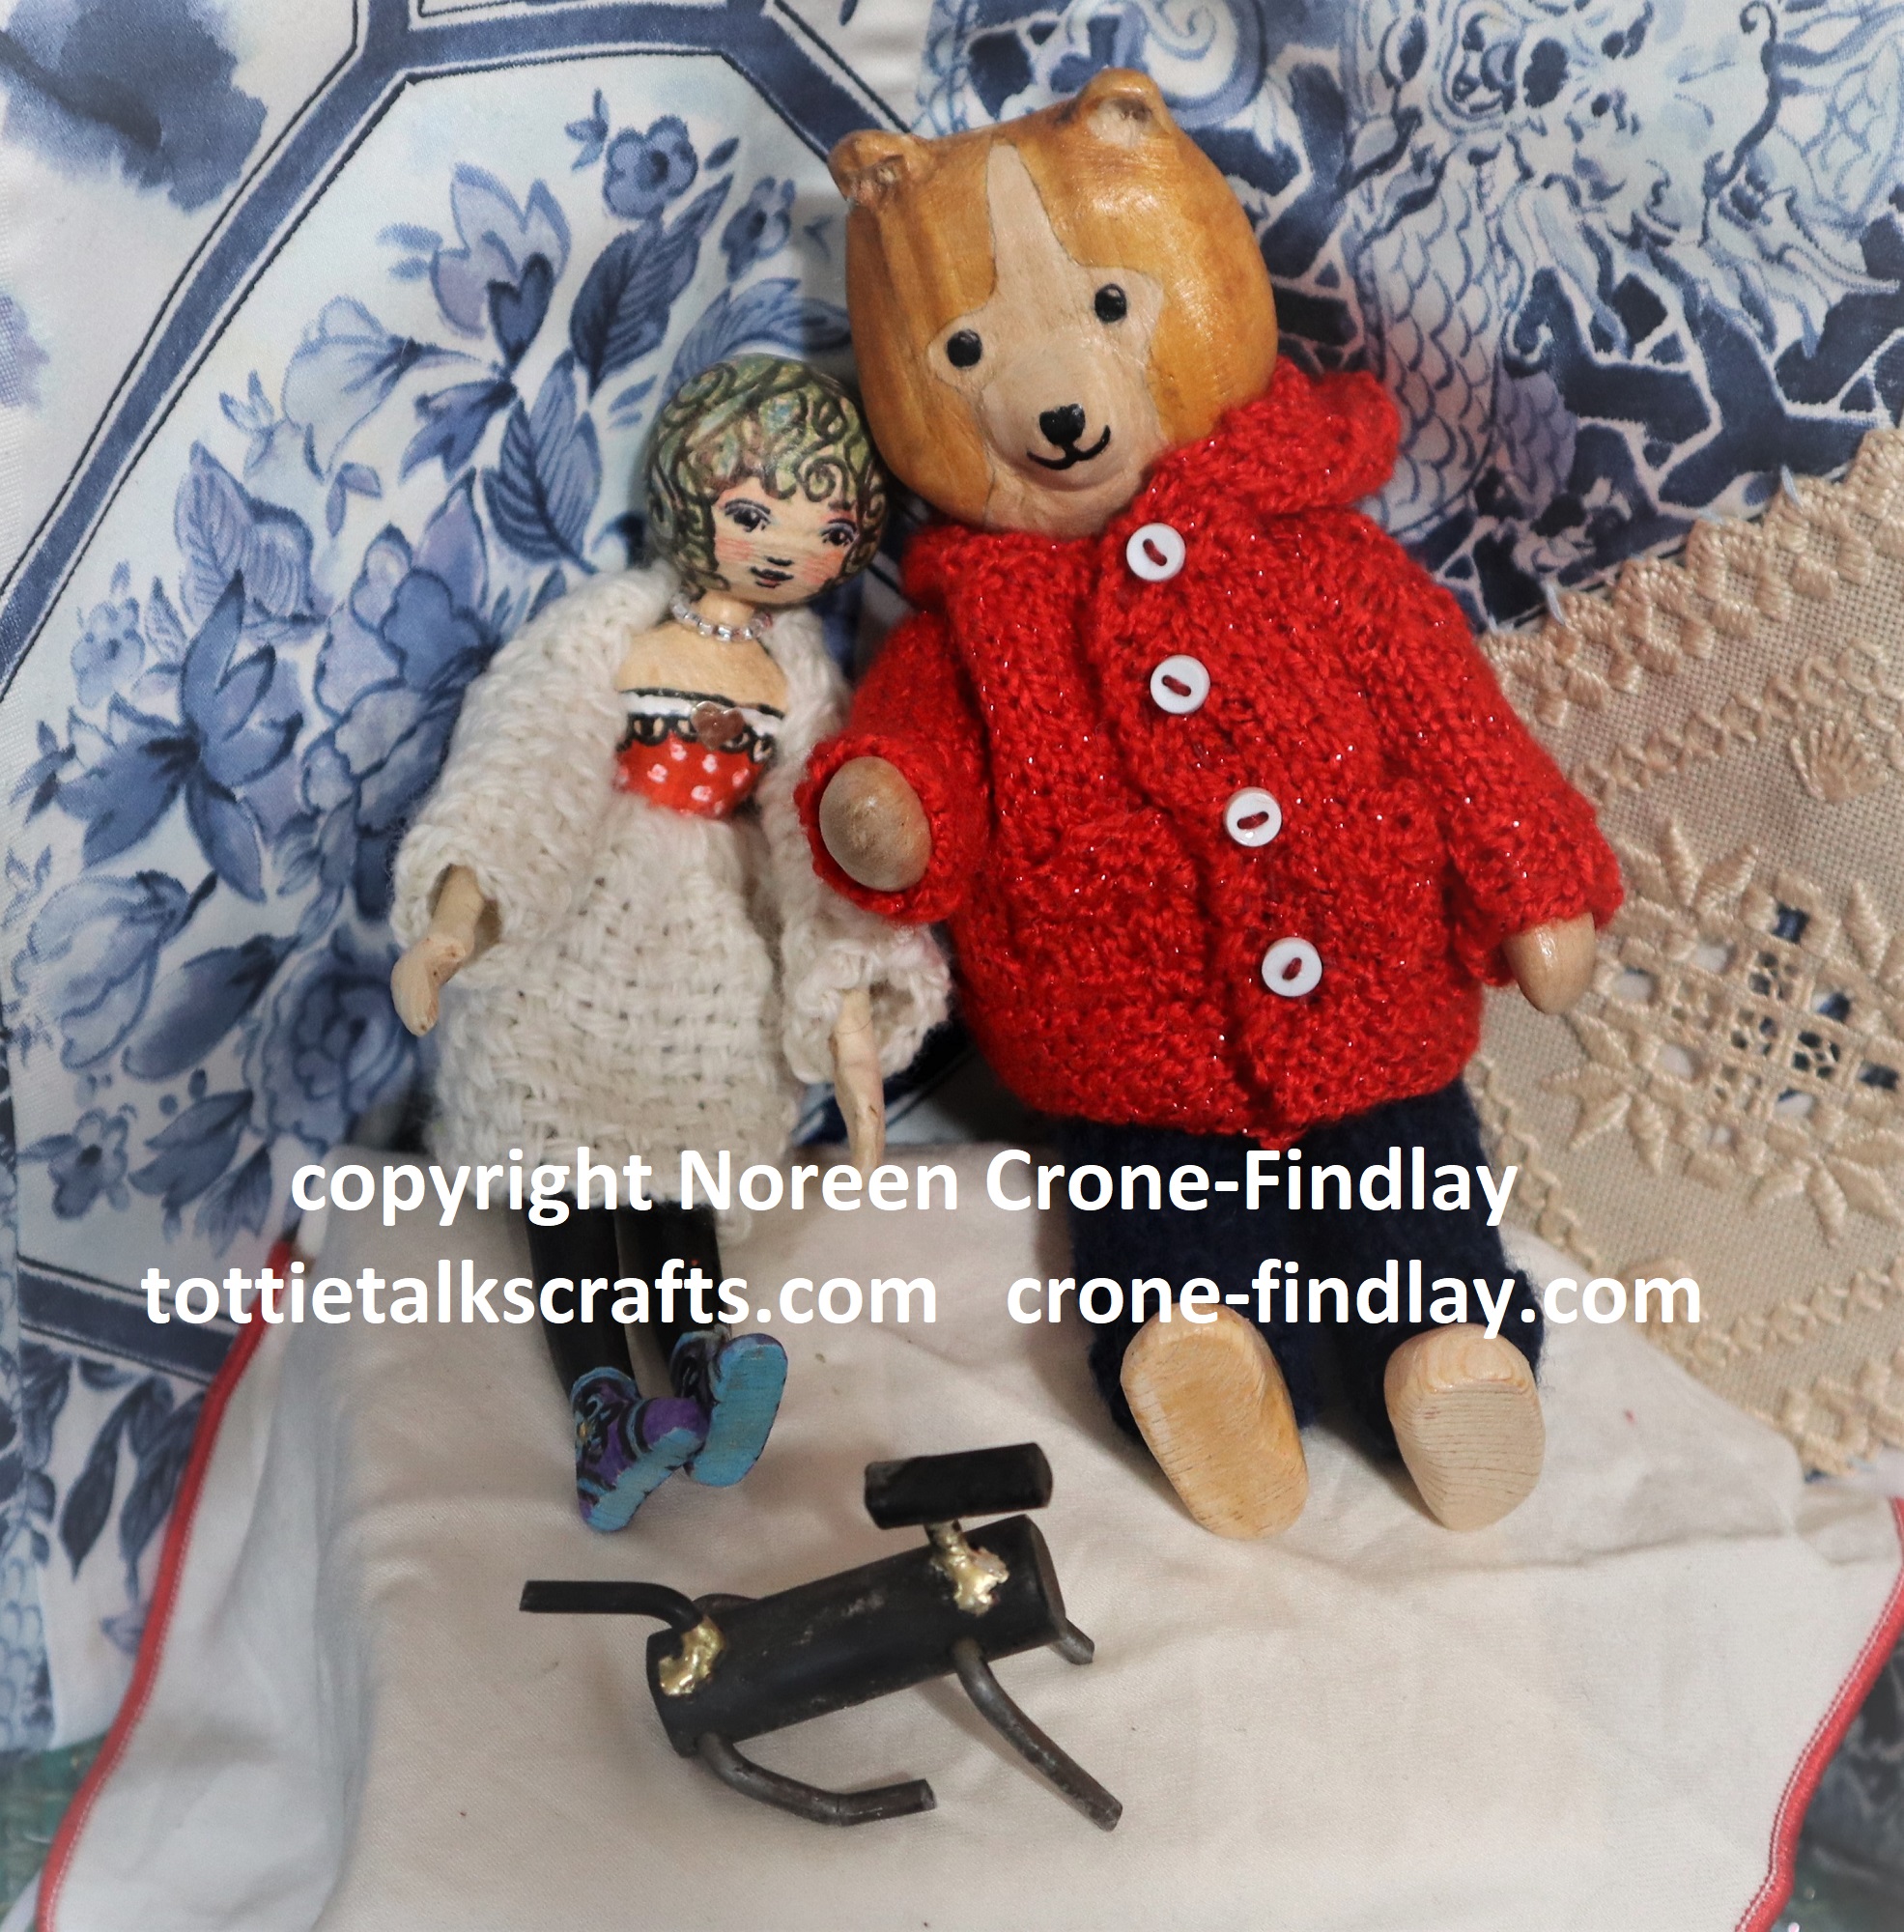
The Saffron Woven Teddy Bears invited some wooden teddy bears and tiny woven bears to have an adventure with them, and then to join them for a picnic.
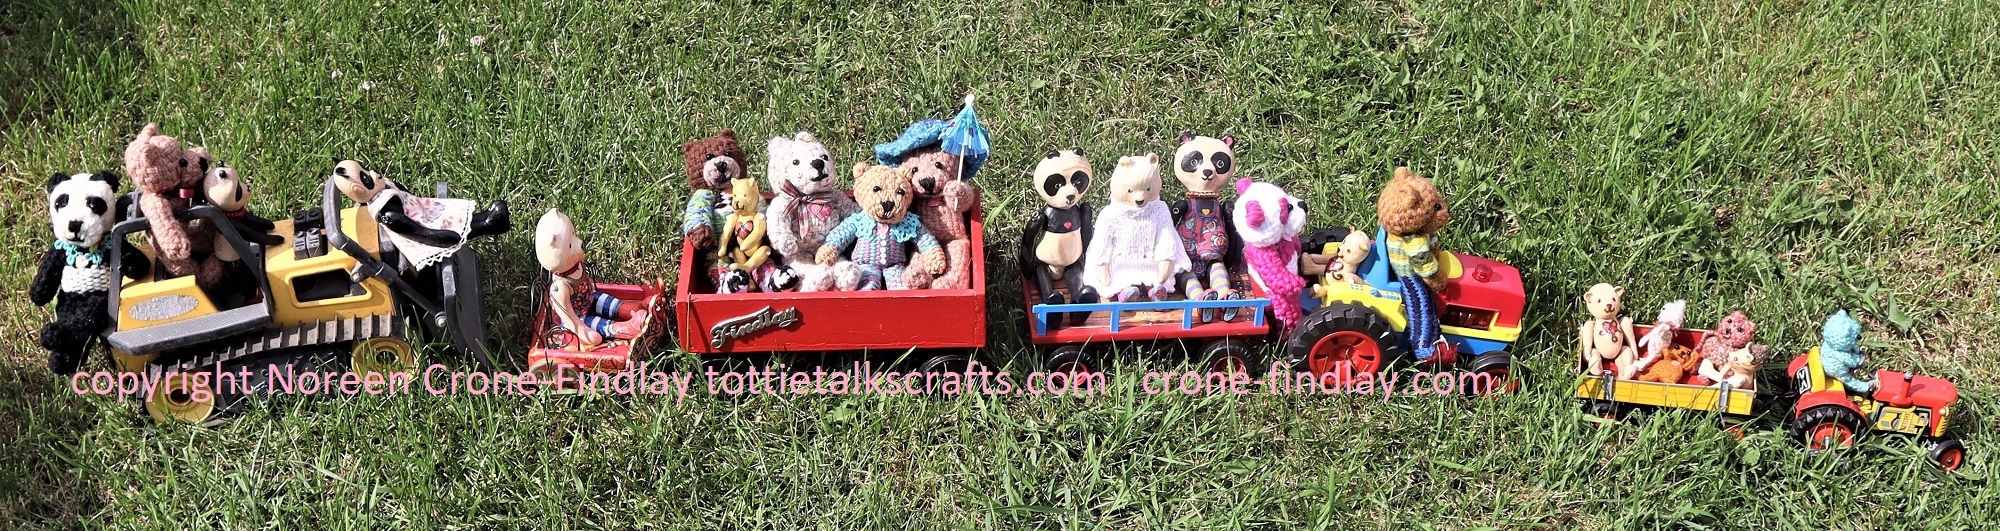
They climbed onto some tractors and into some wagons and even a bulldozer to ramble off to the picnic place.
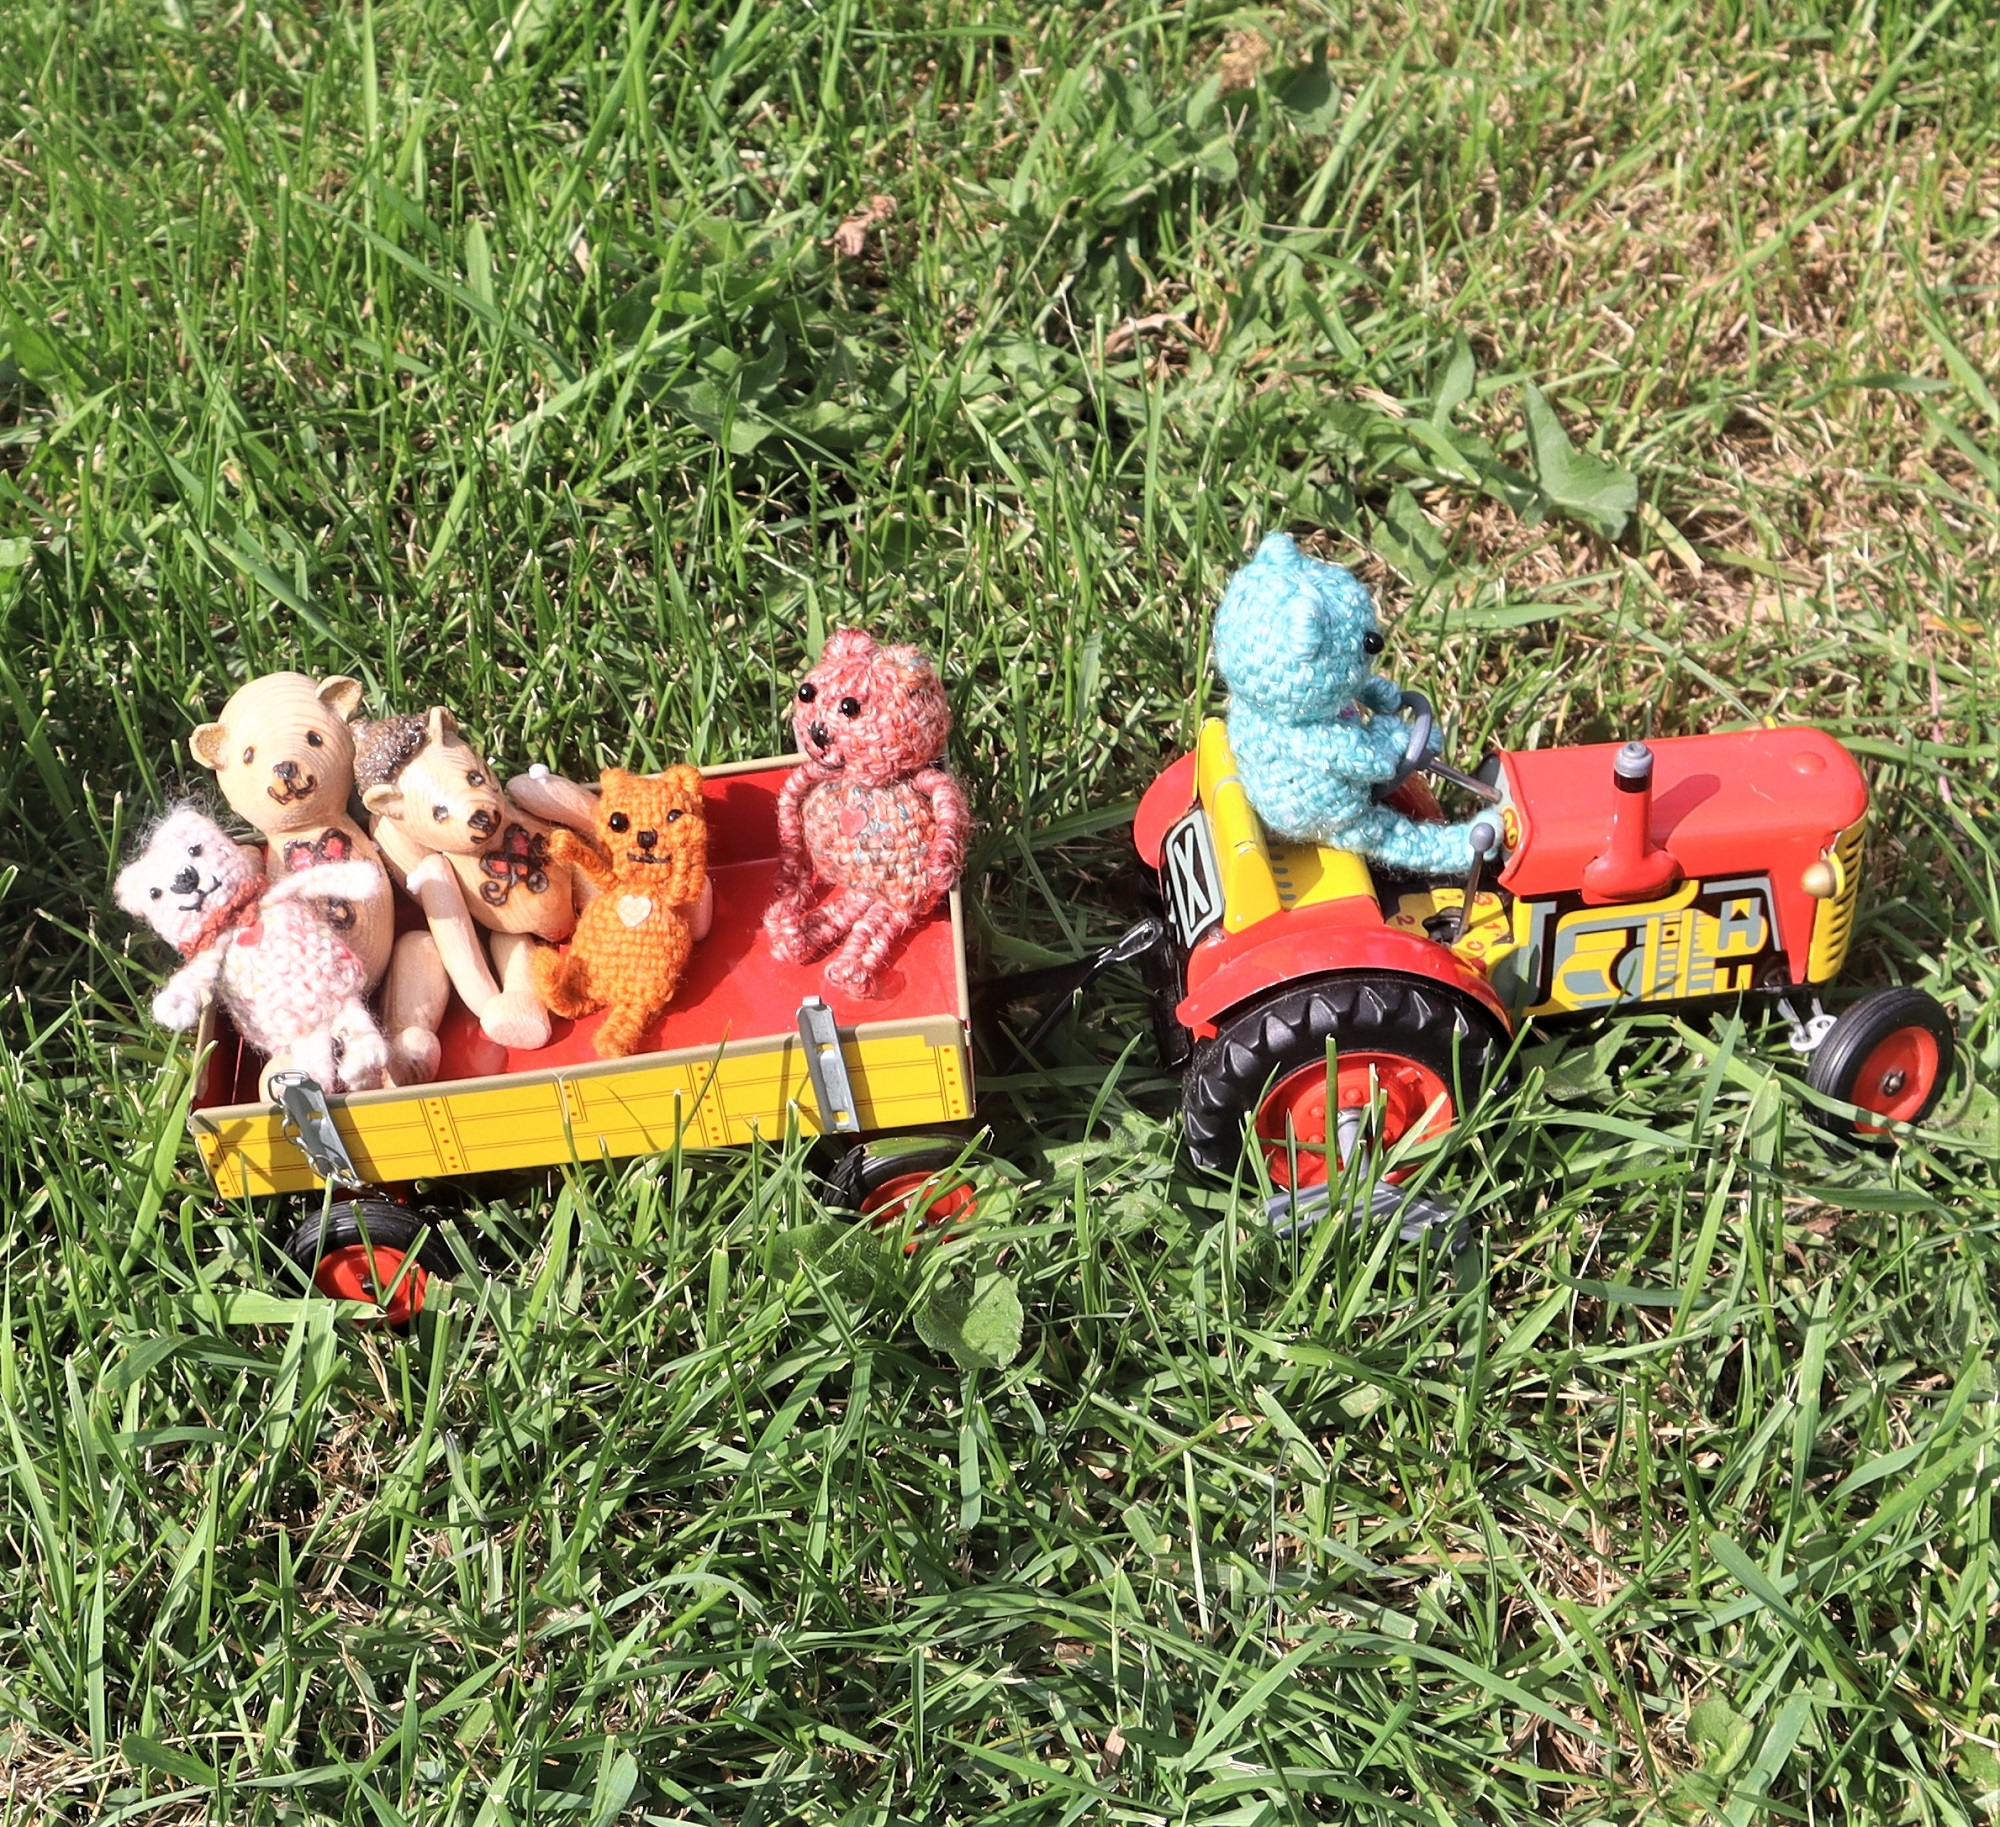
The tiny Blue Bear of Happiness was thrilled to drive the clockwork tractor, but found changing the gears was challenging and sent the passengers tumbling a few times.
They didn’t mind, in fact it was kind of fun.
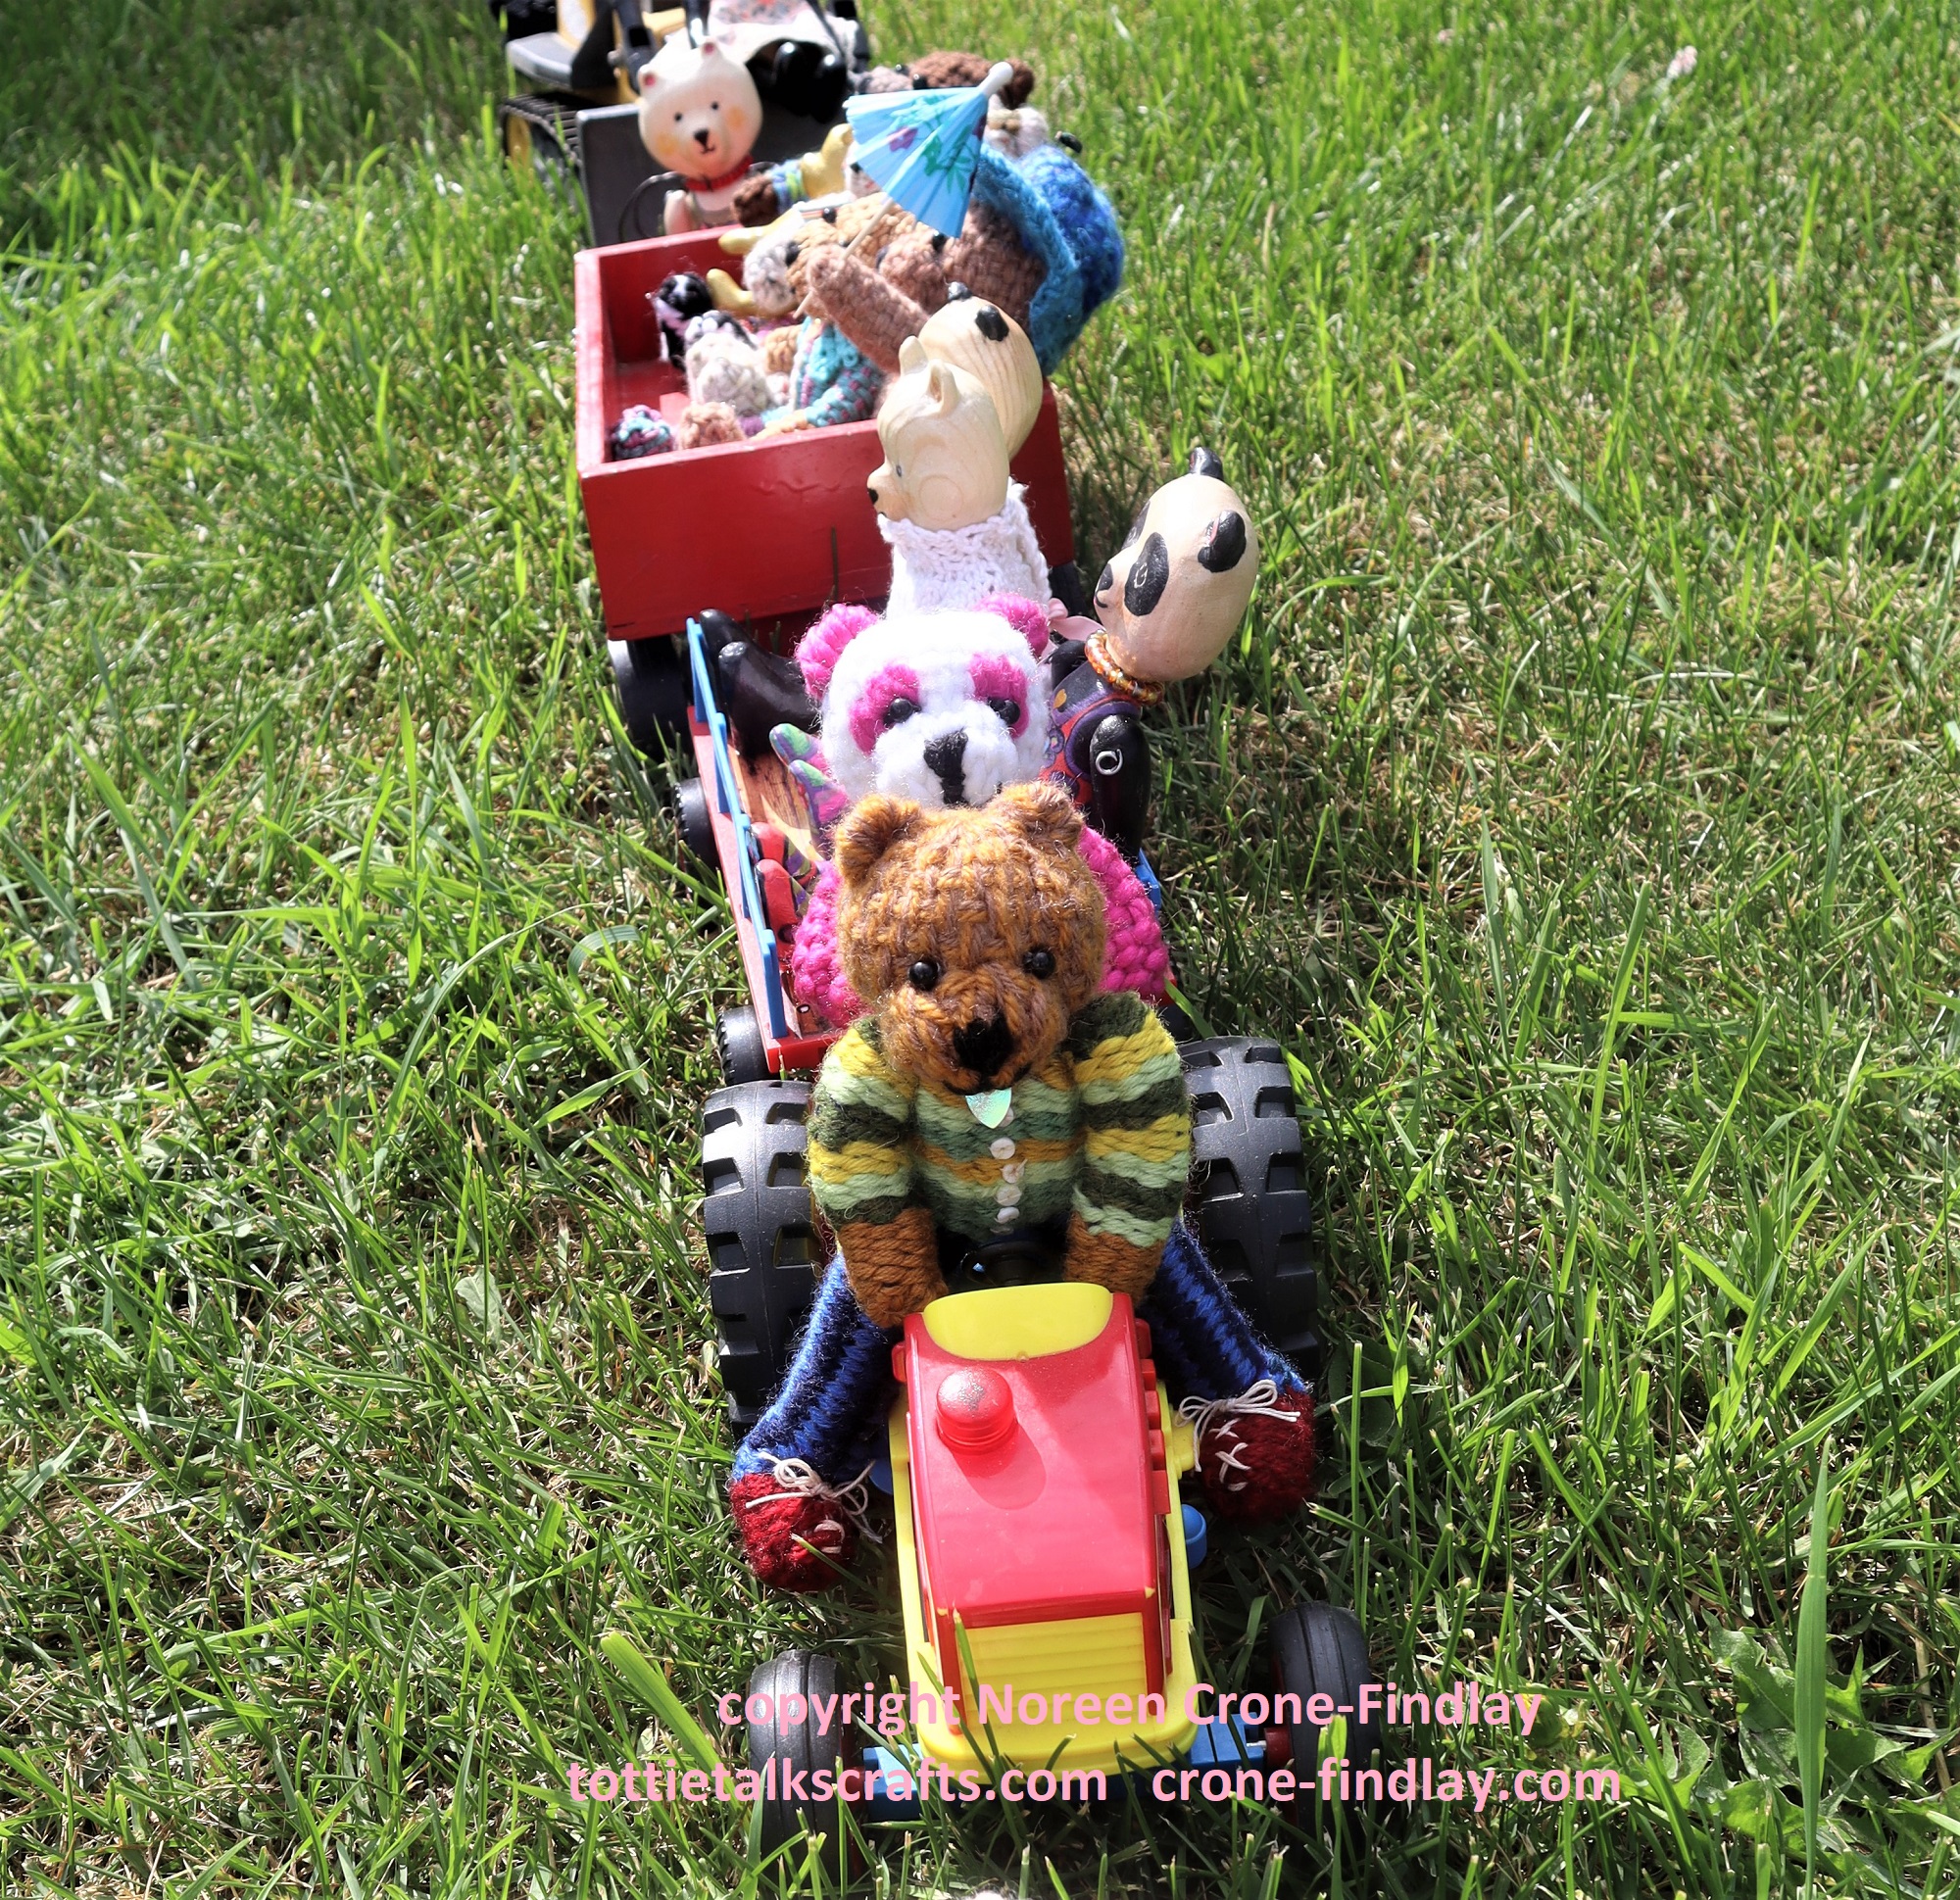
Jimmy Bear drove the larger tractor with style and his passengers enjoyed the ride in the various trailers, carts and chariots, but did find the heat to be rather intense. (It was blisteringly hot!)
A bulldozer was the ride of choice for a few of the Pandas and their friend….
All the bears sang ‘The Teddy Bear’s Picnic’ at the top of their lungs.
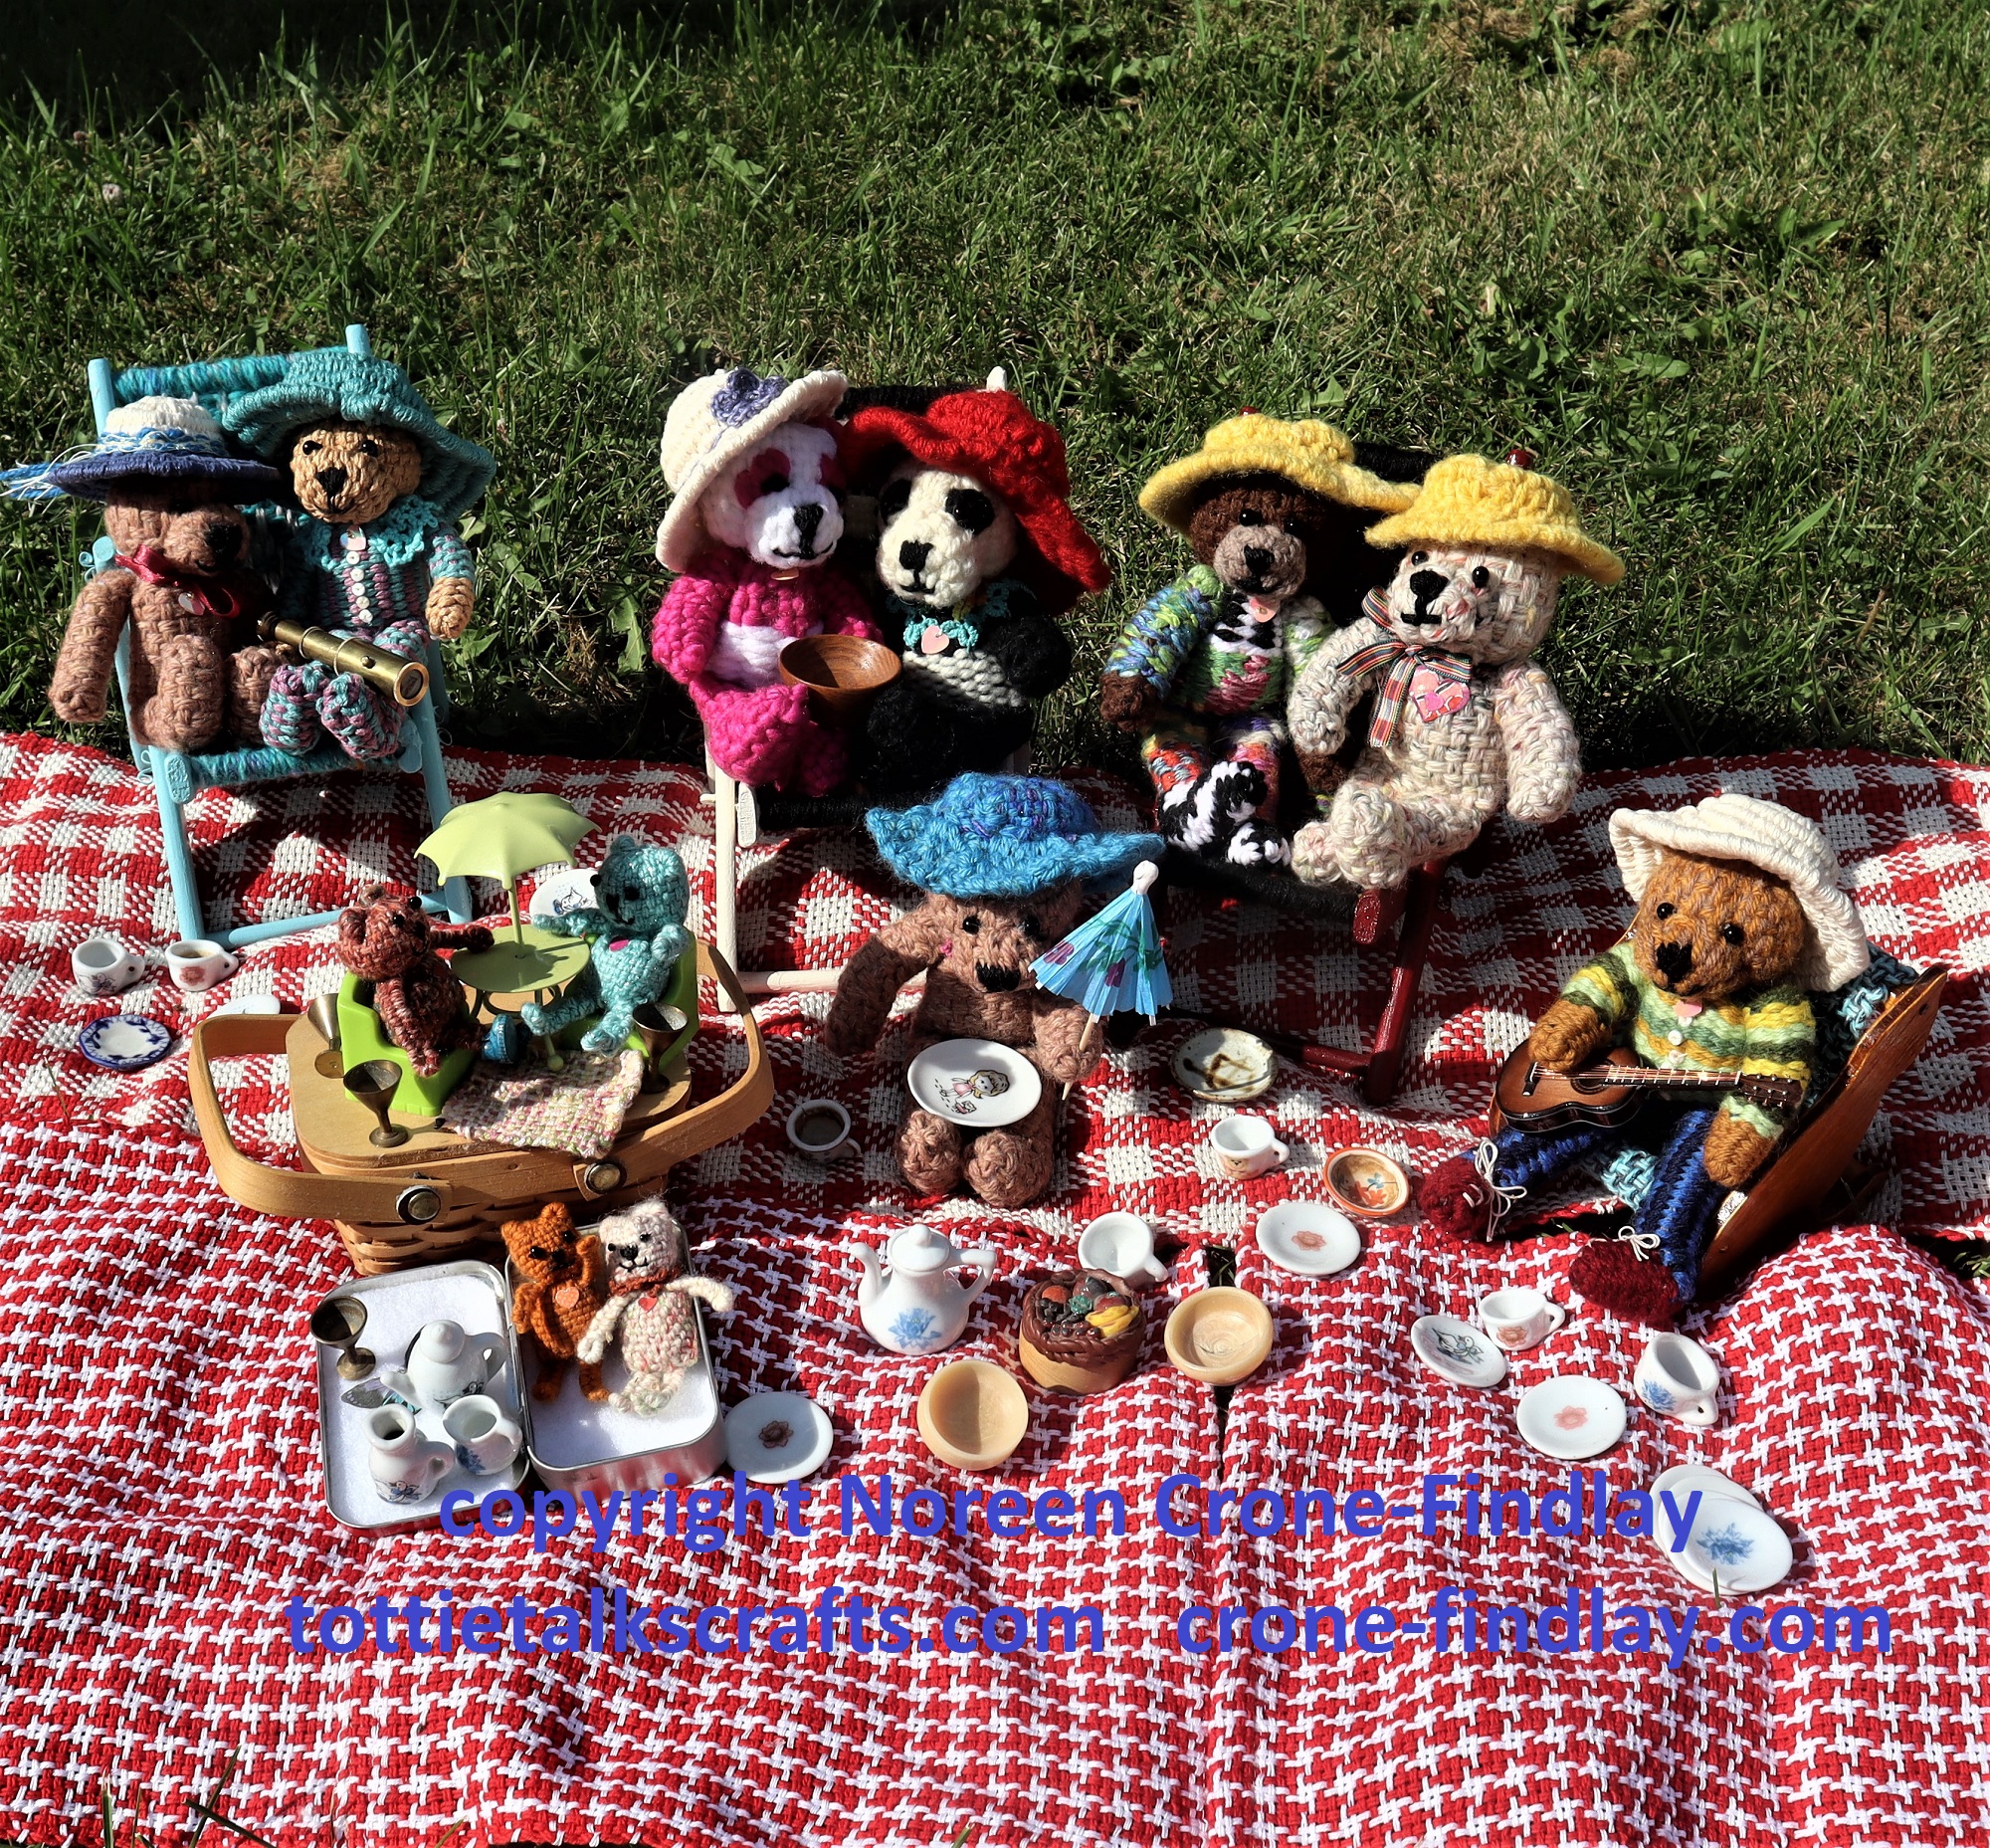
Sadly, the carved wooden teddys found the heat to be un-bearable, so they scampered back into the studio and sat in front of the fan to cool off.
The woven Saffron Bears were perfectly happy in their sun hats, so the sun didn’t bother them.
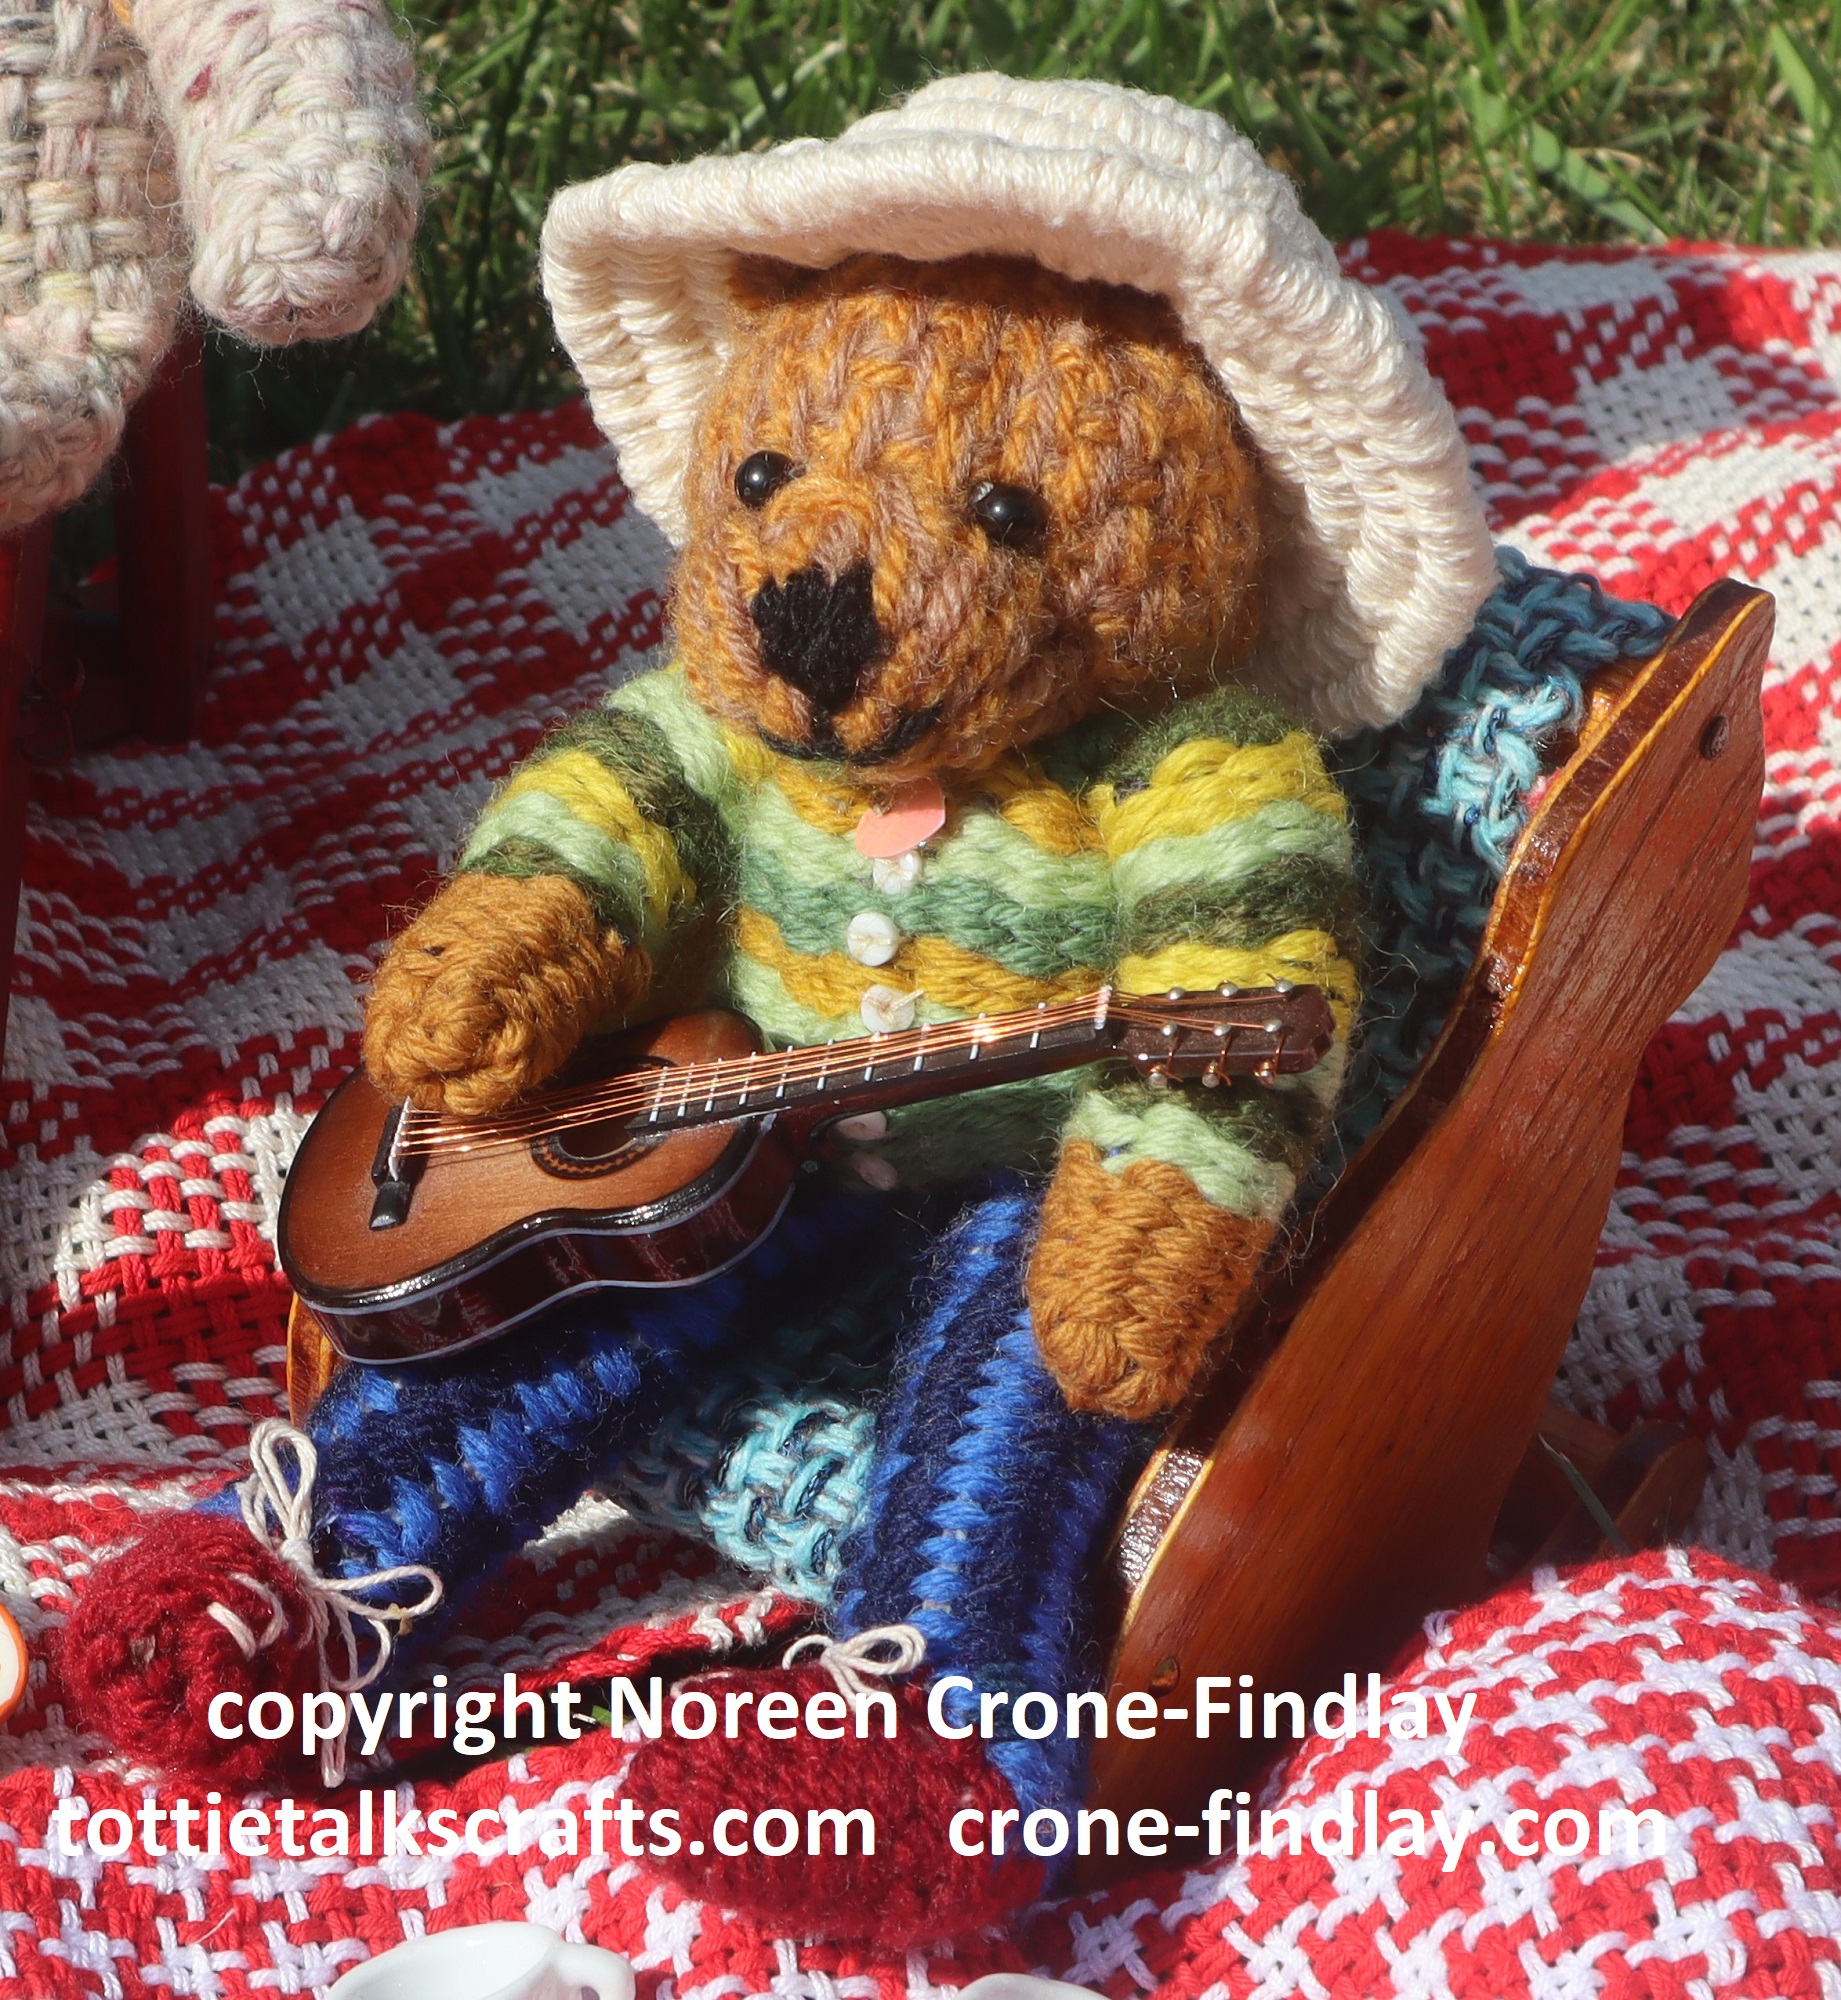
Jimmy Bear played his guitar and all the other bears loved it.

Two of the bears had brought along a telescope to watch birds, but were able to keep an eye on their carved wooden friends to make sure they made it safely back to the studio.
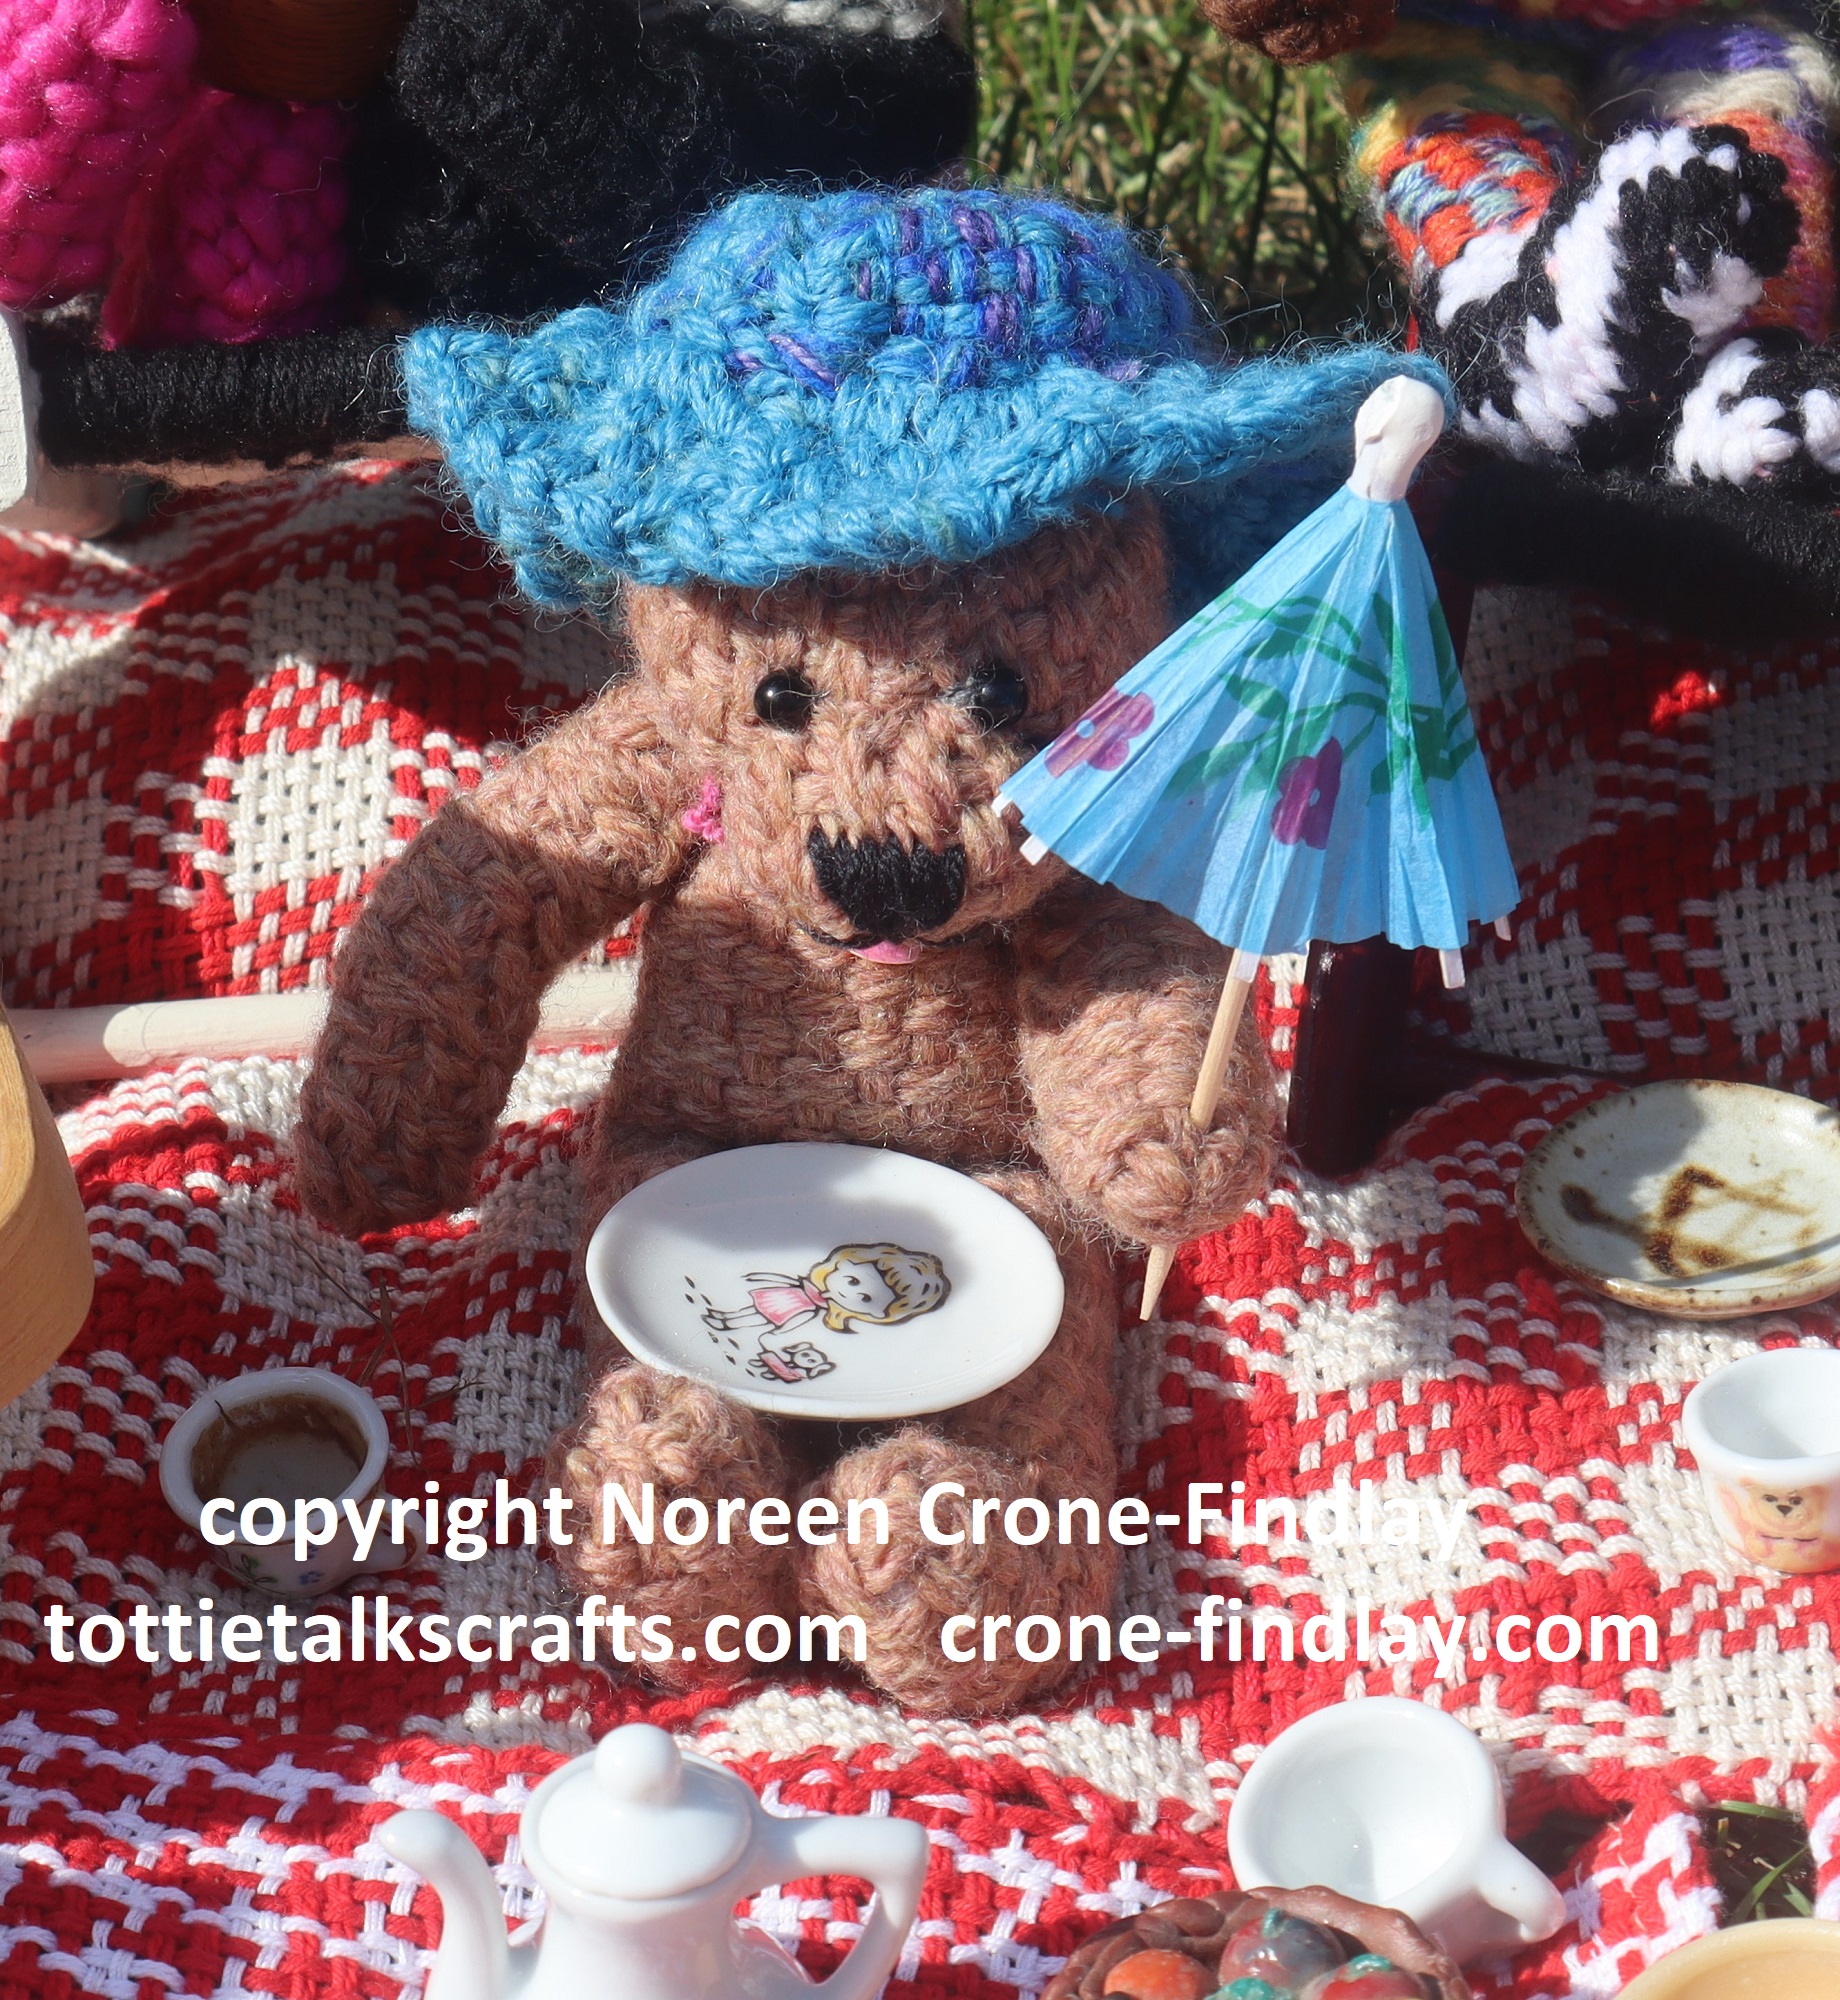
Only one of the bears had remembered to bring a parasol, but shared it when anyone need a little rest from the sun.
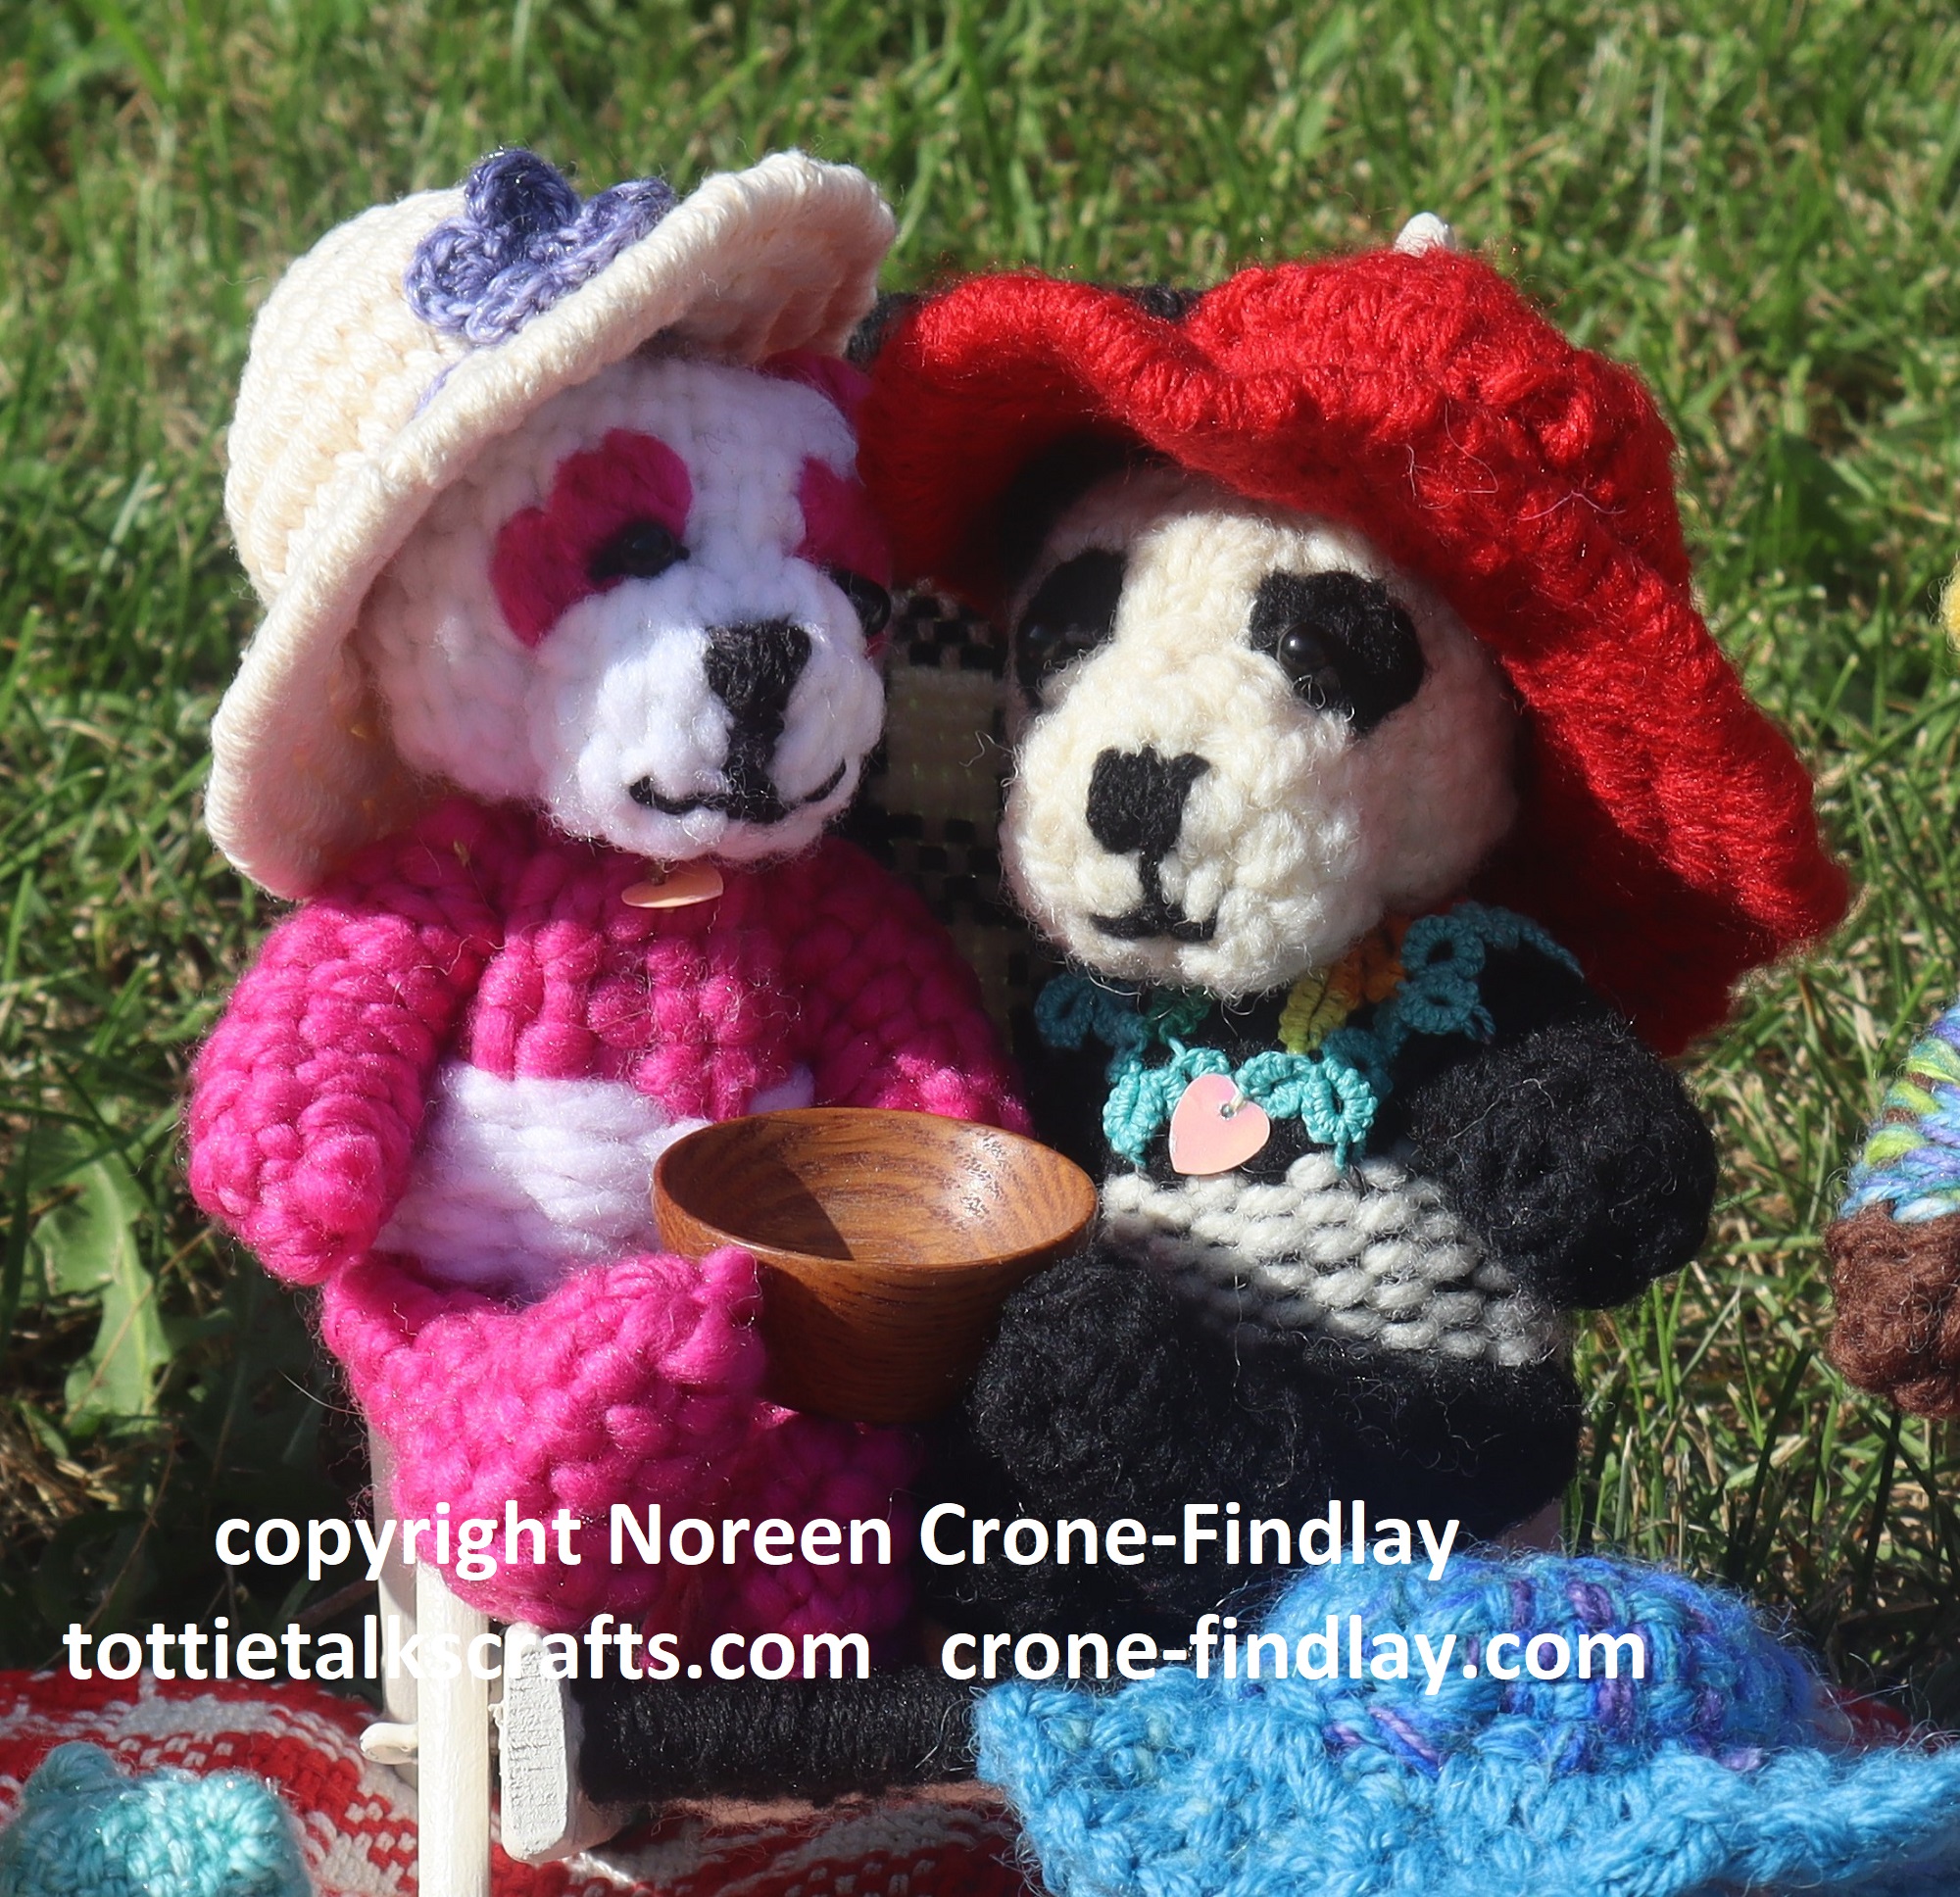
The pandas wondered if the grass might taste like bamboo, but the hot sun had dried it out so much that they decided to not sample it.
And two little bears leaned back in their folding chair and quietly dozed off right after this picture was taken.
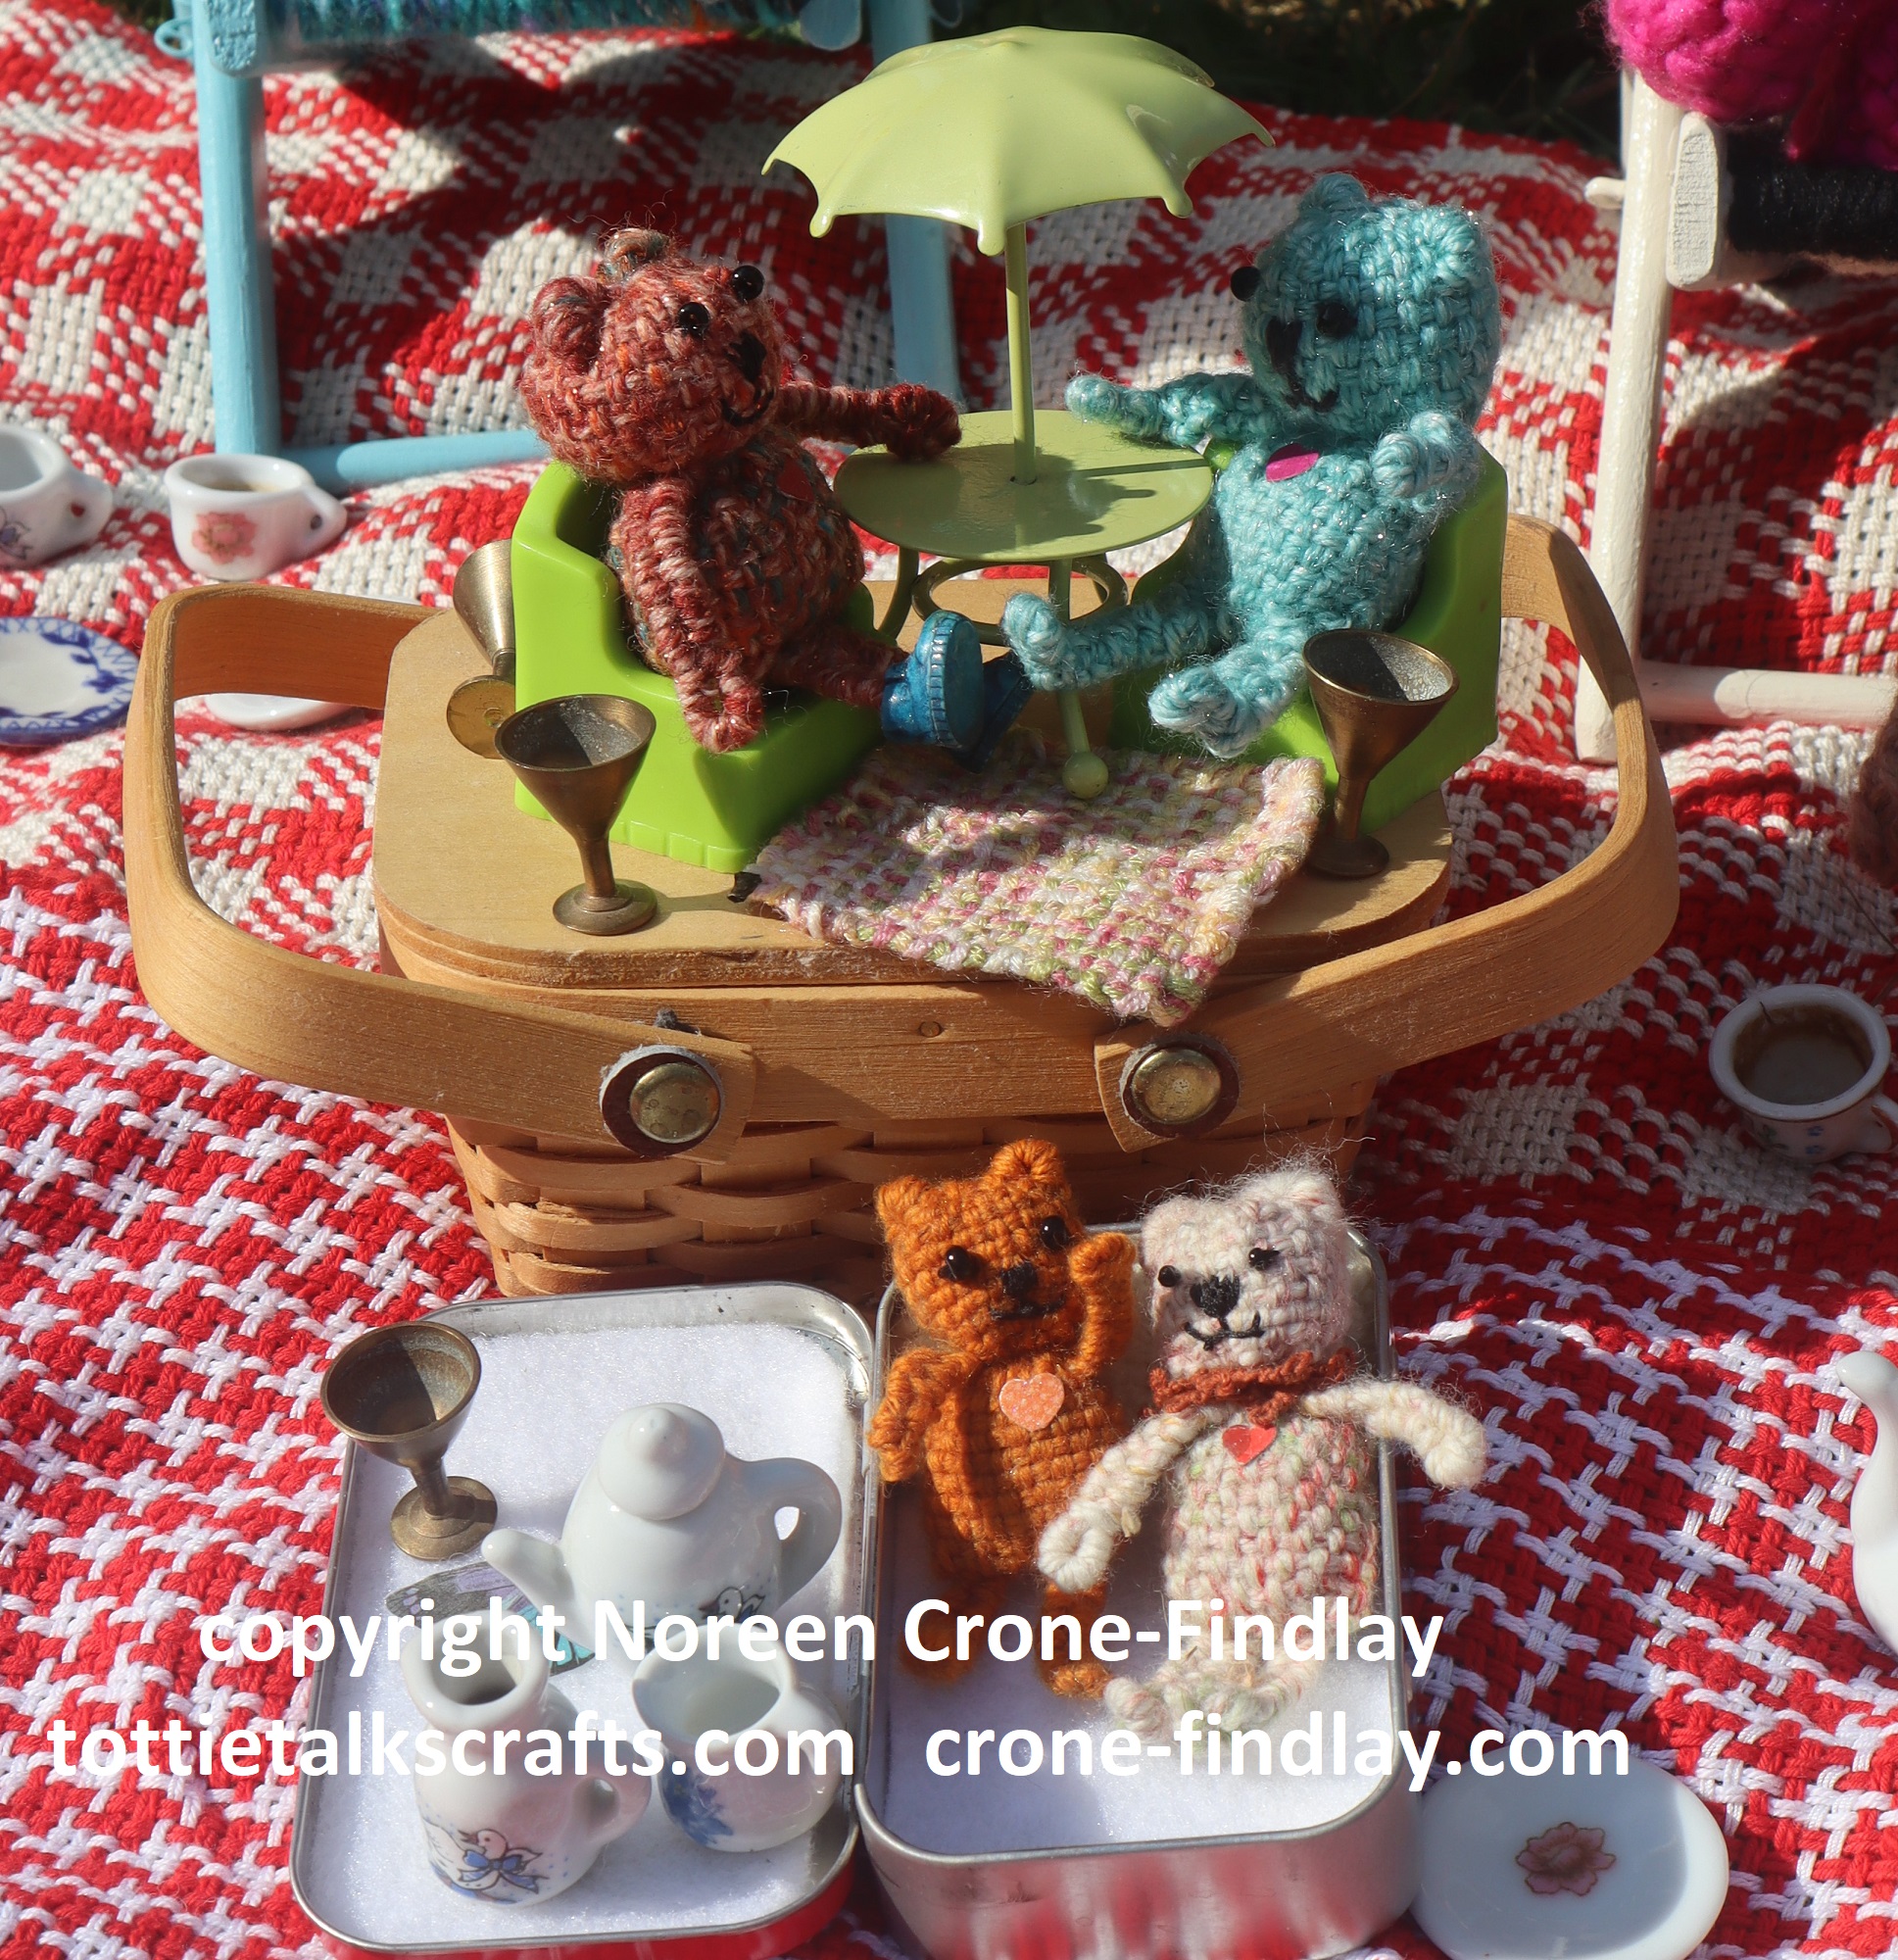
The tiniest bears were so glad that someone had remembered to bring their travelling bed along and after some giggling and wiggling, they fell asleep, too….
While the Blue Bear of Happiness and Wee Brown Bear enjoyed the shade of their umbrella.
All in all, it was a fine afternoon on an incredibly hot and sunny summer day.
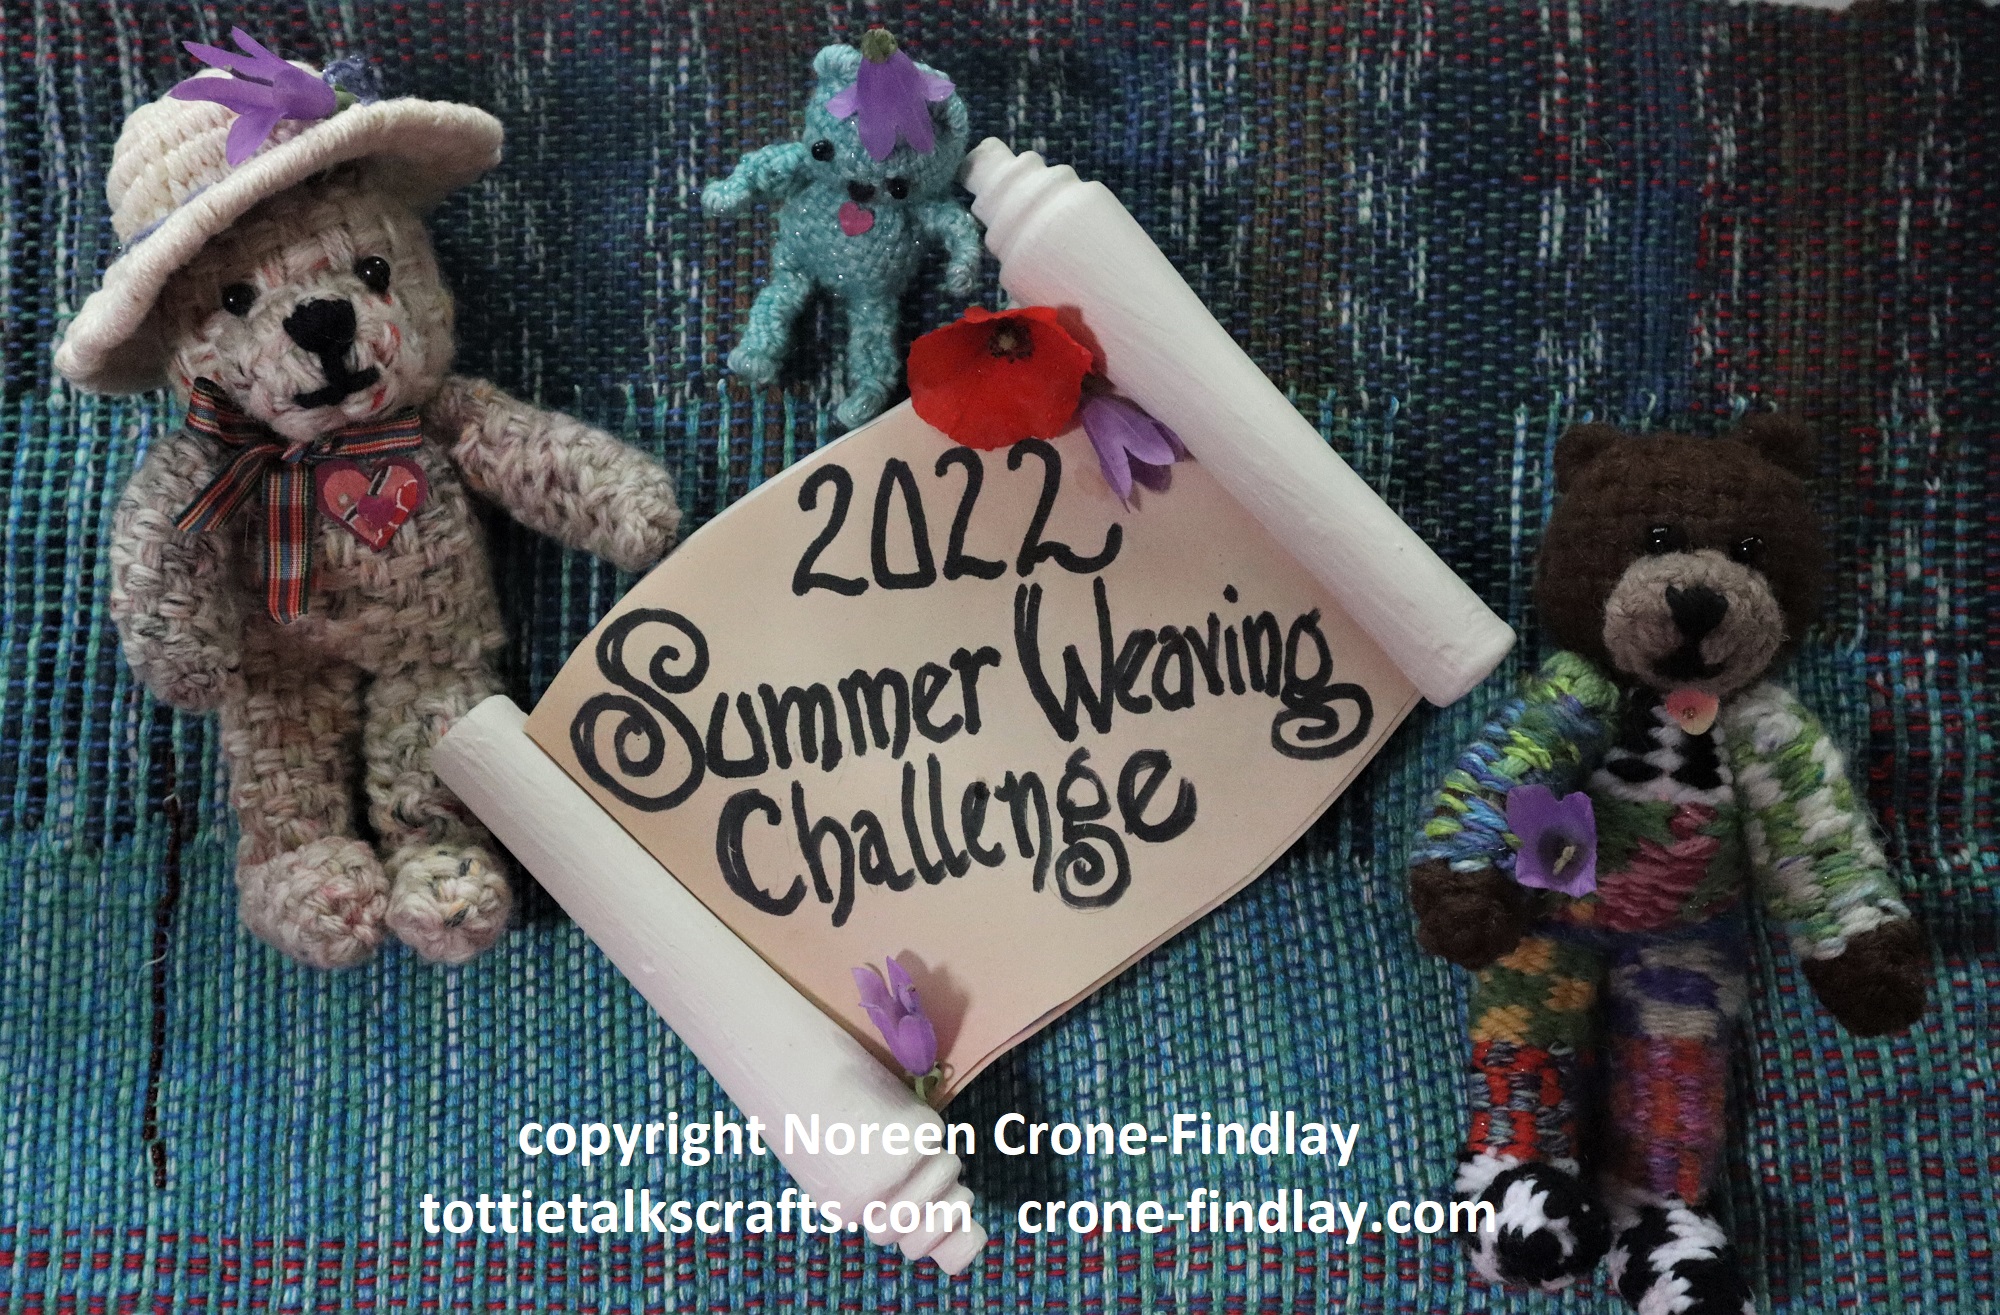
I designed and wove all the Teddy Bears for the Mirrix Summer Weaving Challenge 2022.
The Saffron Bears were all woven on the Mirrix Saffron Loom. LINK
The tiny Bears were woven on the Baby Duo looms from Hello! Looms. LINK
All the ‘how to’ links to the videos for the step by step process of weaving all the looms are listed on
L I N K (Note: They will be added one by one through the week of August 8 to 15, 2022 and will remain available once they have been released, so there is no time limit on getting the weaving done.)
Happy Weaving! And, may the teddy bears bring you delight!
When I started designing the Teddy Bears to weave on the Saffron loom from Mirrix for the
2022 Summer Weaving Challenge, I had NO IDEA that I would go down such an amazing Rabbit Hole
There are so many ways to weave the Saffron Teddy Bear.
Even though the same basic ‘recipe’ is used to weave all the bodies, using different weaving techniques and different weights of yarns makes each of the Saffron Bears totally unique.

Here are some video tutorials showing how to weave the variations of the Saffron Bear’s Body:
The Basic Body:
The Black Panda Body:
The Pink Panda Body (How to Weave the Body with Super Bulky Yarns):
The Striped Body (Tapestry/Weft Face Technique):
Some Notes about Tapestry Weave for the Body:
See the Teddy Bear’s Picnic to see all the Bears having a wonderful day:
The Links for all the Video Tutorials are at:
This post is where I’ll be putting all the links to all the ‘how to’ videos for the woven Teddy Bears that I have designed for the Mirrix Summer Weaving Challenge for the summer of 2022.
The videos will stay up as long as I have a YouTube channel.
For starters…..
Here’s the link to the Summer Weaving Challenge on the Mirrix website: LINK
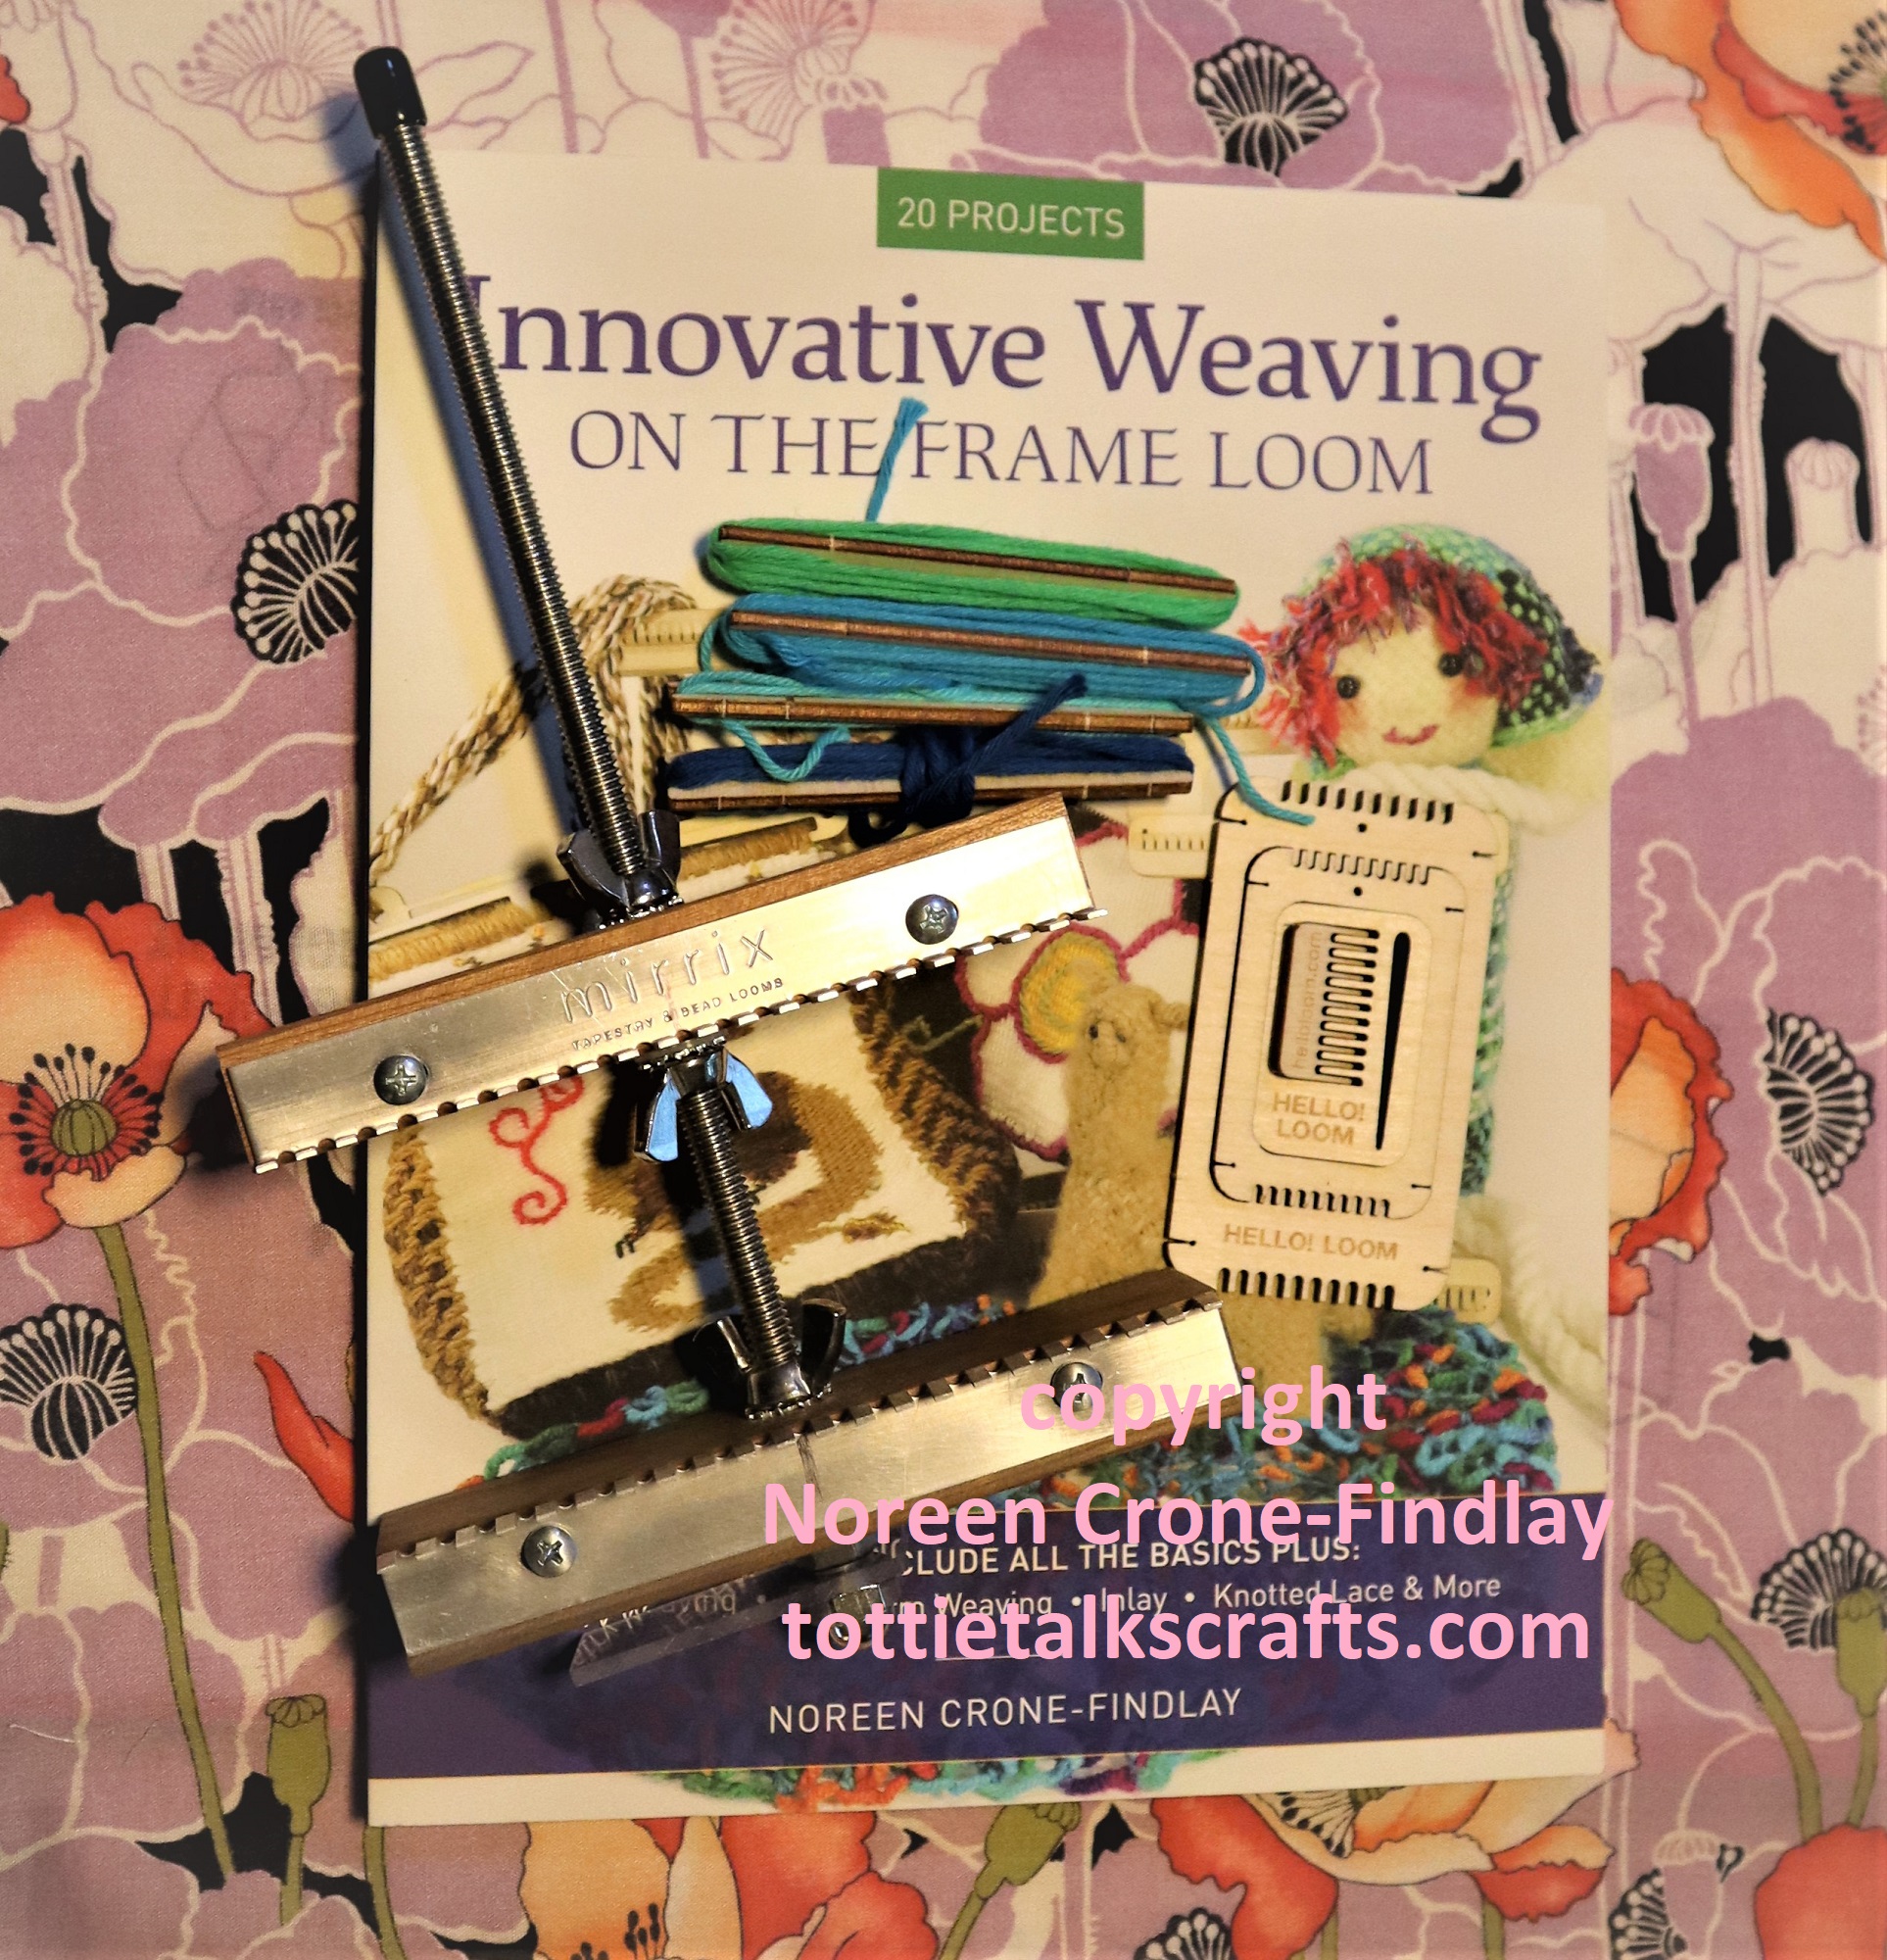
If you don’t have my book, you can order it from Mirrix, and yup, you’ll want a Saffron loom, too (it’s one of my most favorite looms ever- so adaptable!). LINK
How to carve a weaving hook from a chopstick using a few simple tools: LINK
LINKS TO THE POSTS FOR ALL THE VIDEO TUTORIALS:
INTRODUCTION: The Teddy Bears have a Parade and a Picnic: LINK
1- What is needed for weaving the Saffron Bears LINK
2- Saffron Teddy Bears- How to weave the Arms LINK
3- Saffron Teddy Bears- How to weave the Teddy Bear Body, with lots of variations LINK
4- Saffron Teddy Bears- How to weave the Teddy Bear Head and Nose LINK
5- Saffron Teddy Bears- How to Assemble the Teddy Bears LINK
6- Saffron Teddy Bears- How to Weave Sun Hats for the Teddy Bears LINK
7- Tiny Teddy Bears woven on the Baby Duo Looms from Hello! Looms LINK
Happy Teddy Bears! Happy Weaving! Happy Summertime!
I have been weaving up a delightful basket of bears for the week of Aug 8- 14, 2022.

That’s the week that I will be leading the Summer Weaving Challenge that is hosted by Mirrix looms.
The Teddy Bears will be revealed in their full adorableness and by then, I will have finished editing the heap of ‘how to’ videos that I have been obsessively filming about the making of the teddy bears.
The Teddy Bears will be having a wonderful picnic, and I will show how each of them (and those that are still in the works) are in fact, samplers of techniques in my book: Innovative Weaving on the Frame Loom.
I’ll be posting links for the videos for the Saffron Teddy Bears here LINK on my blog beginning Aug 2, 2022.
If you don’t have my book, you can order it from Mirrix, and yup, you’ll want a Saffron loom, too (it’s one of my most favorite looms ever- so adaptable!).
Here’s the link: https://mirrixlooms.com/collections/starter-packages/products/noreen-crone-findlay-x-mirrix-looms-imagine-weave-along-kit
Happy Weaving! Happy Summertime!
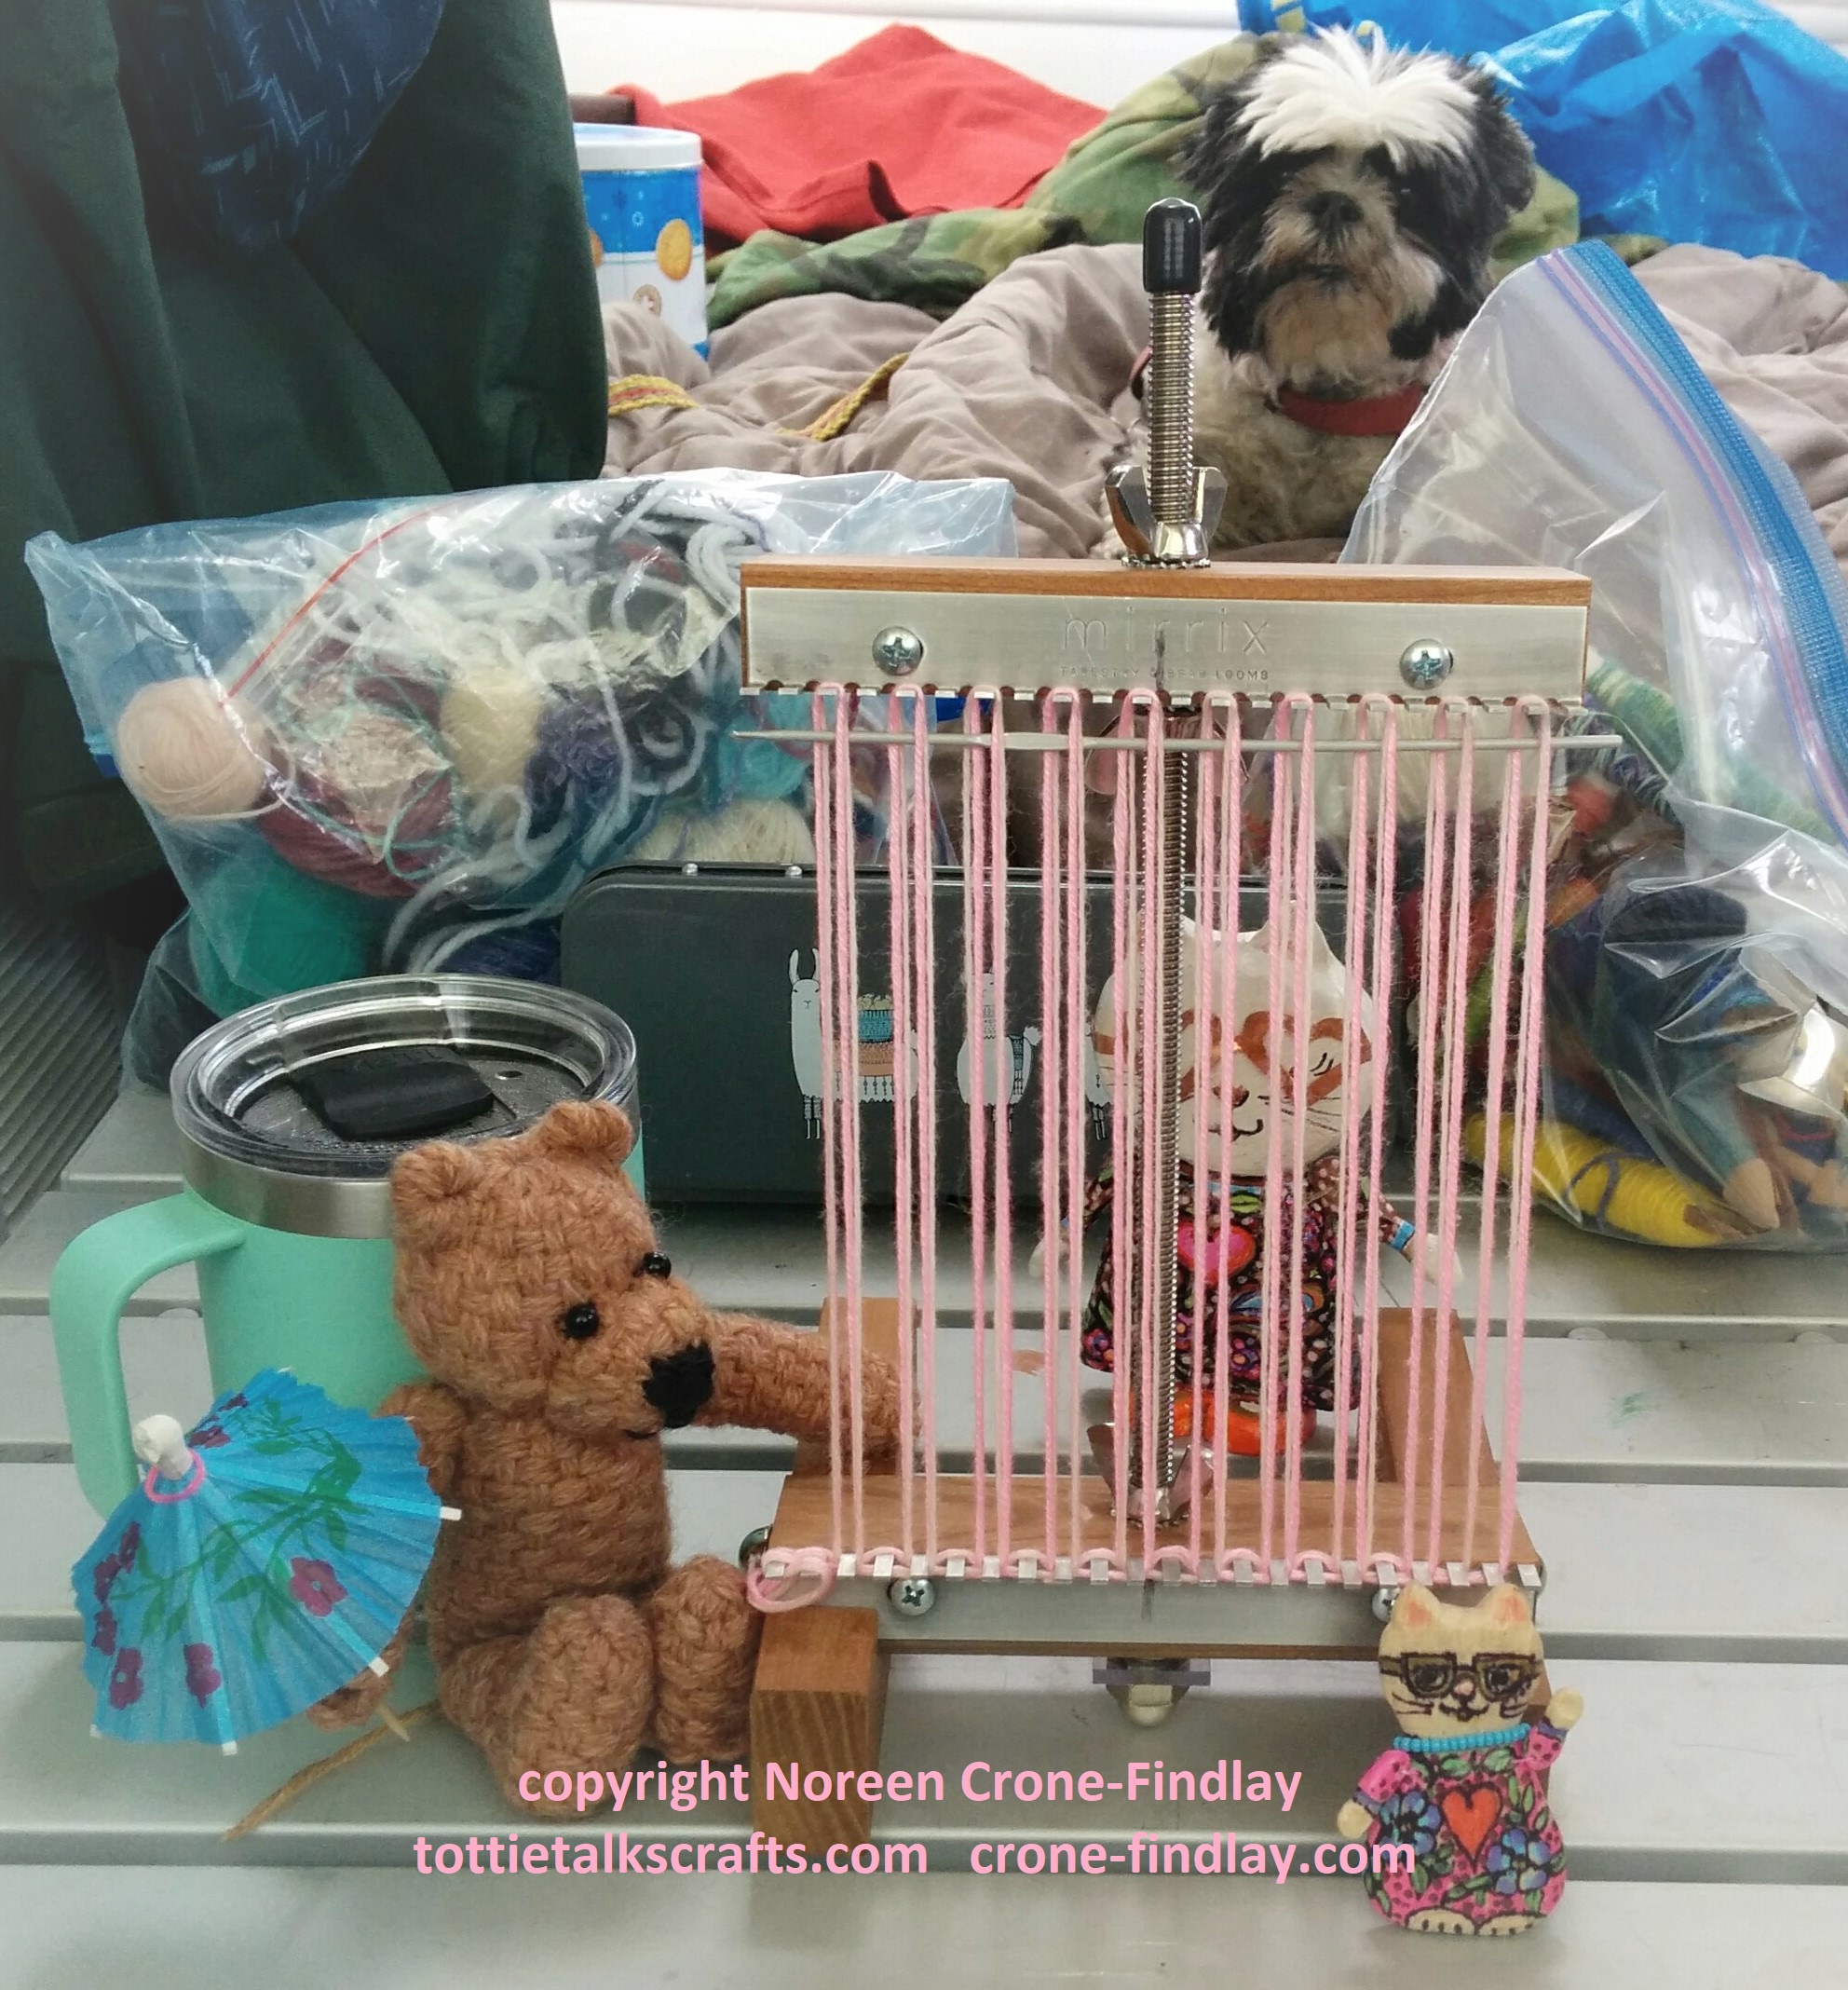
A couple of weeks ago, we went camping and my much loved little Mirrix Saffron loom came with us.
I was weaving away while we were camping (and I still am, but I have advanced to the video filming and editing stage) for the week that I will be leading the Summer Weaving Challenge (August 8 to 15, 2022).
Here’s the link to join in the fun (and you can buy my book: Innovative Weaving on the Frame Loom on the Mirrix website, too on the Starter Kit page 😊 or at any of the online book selling websites.
https://mirrixlooms.com/pages/2022-summer-weaving-challenge
The links to all the how to videos will be posted at LINK
Mirrix Looms are sponsoring a Summer Weaving Challenge again this summer.
Go to https://mirrixlooms.com/pages/2022-summer-weaving-challenge for all the info.
I am going to be leading the Challenge for the week of August 8th – 14th.
I’ll be adding to the inspiration by posting all kinds of fun weaving projects with a focus on the magic of frame looms.
I am featuring the Mirrix Saffron and as a sweet little treat, I’m also going to be using the Baby Duo from Hello! Looms. (helloloom.com)
If you don’t have a copy of my book Innovative Weaving on the Frame Loom, it’s available at Mirrix looms in their ‘Starter Packages’ section of their shop. Here’s the link: https://mirrixlooms.com/collections/starter-packages/products/noreen-crone-findlay-x-mirrix-looms-imagine-weave-along-kit
It’s FULL of great how to’s and other deliciousness. Small loom weaving is perfect for summer.
It’s going to be fun!
The death of our beloved 15 year old small dog has been really hard on both my husband and me.
I wrote in my previous post about the Comfort Doll that I carved from a fallen branch- LINK
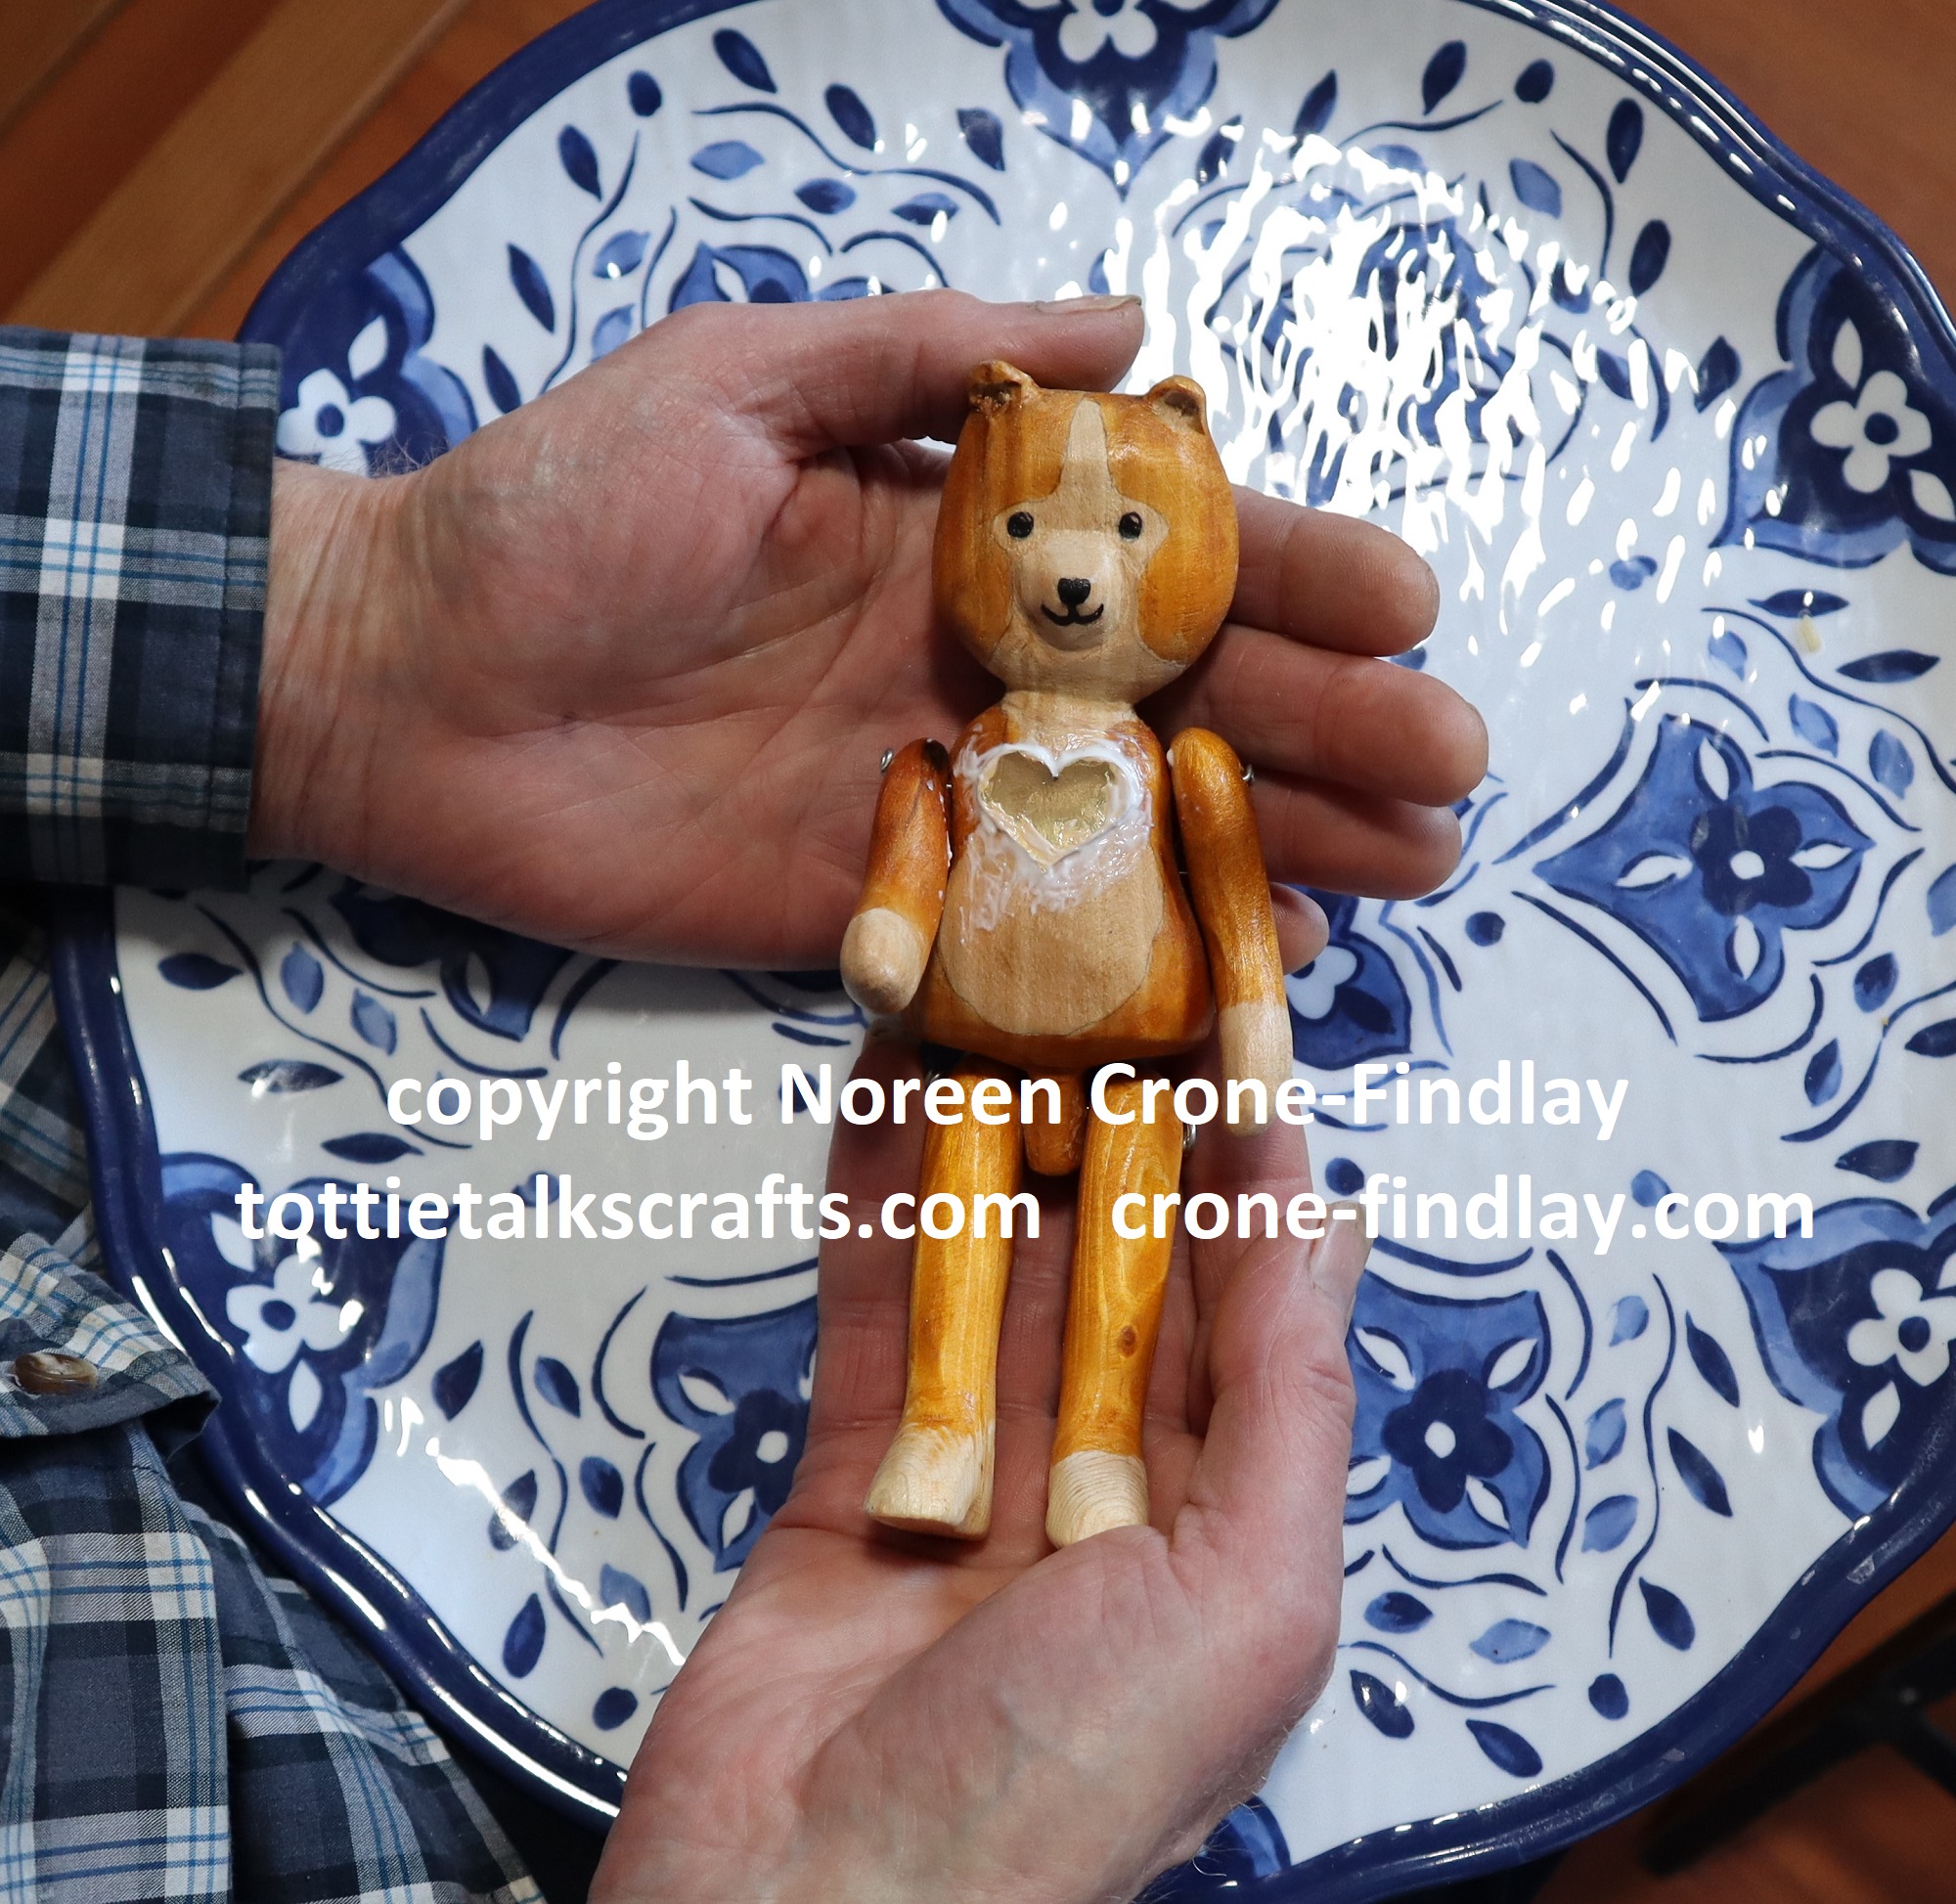
When I was carving her, I was inspired to carve a Teddy Bear that would have an open space in it’s heart…..

I used amber color shellac to paint the Teddy Bear to look like our little dog, and then…
My husband and I each placed a tiny scoop of our little dog’s ashes in the open circle.
Then I glued a gold heart over it to seal it….

The glue seals it completely.
It took a while to dry and turn clear.

We both held the little teddy bear and found it to be very comforting….


My husband loves working with metal, so he made a little steel doggie: Edward Alloy in tribute to our wee fellow, and it has joined them on the box…..

We have found this tender making of small things in celebration of our wee dog to be very comforting!
Last week, our darling little dog died. He was 15 years old and we miss him terribly.
The day before he died, a branch fell from the huge Elm tree in front of our house. I love the tree and so I picked up the branch and moved it onto our lawn, thinking that I should probably carve something from it.

A couple of days after we came home from the Vet, without our dear boy in our arms, the impulse to pick up the branch and start carving grew stronger and stronger.
I had been feeling called to carve another 6 inch doll like one that had carved last fall, so I used her as a companion and guide:
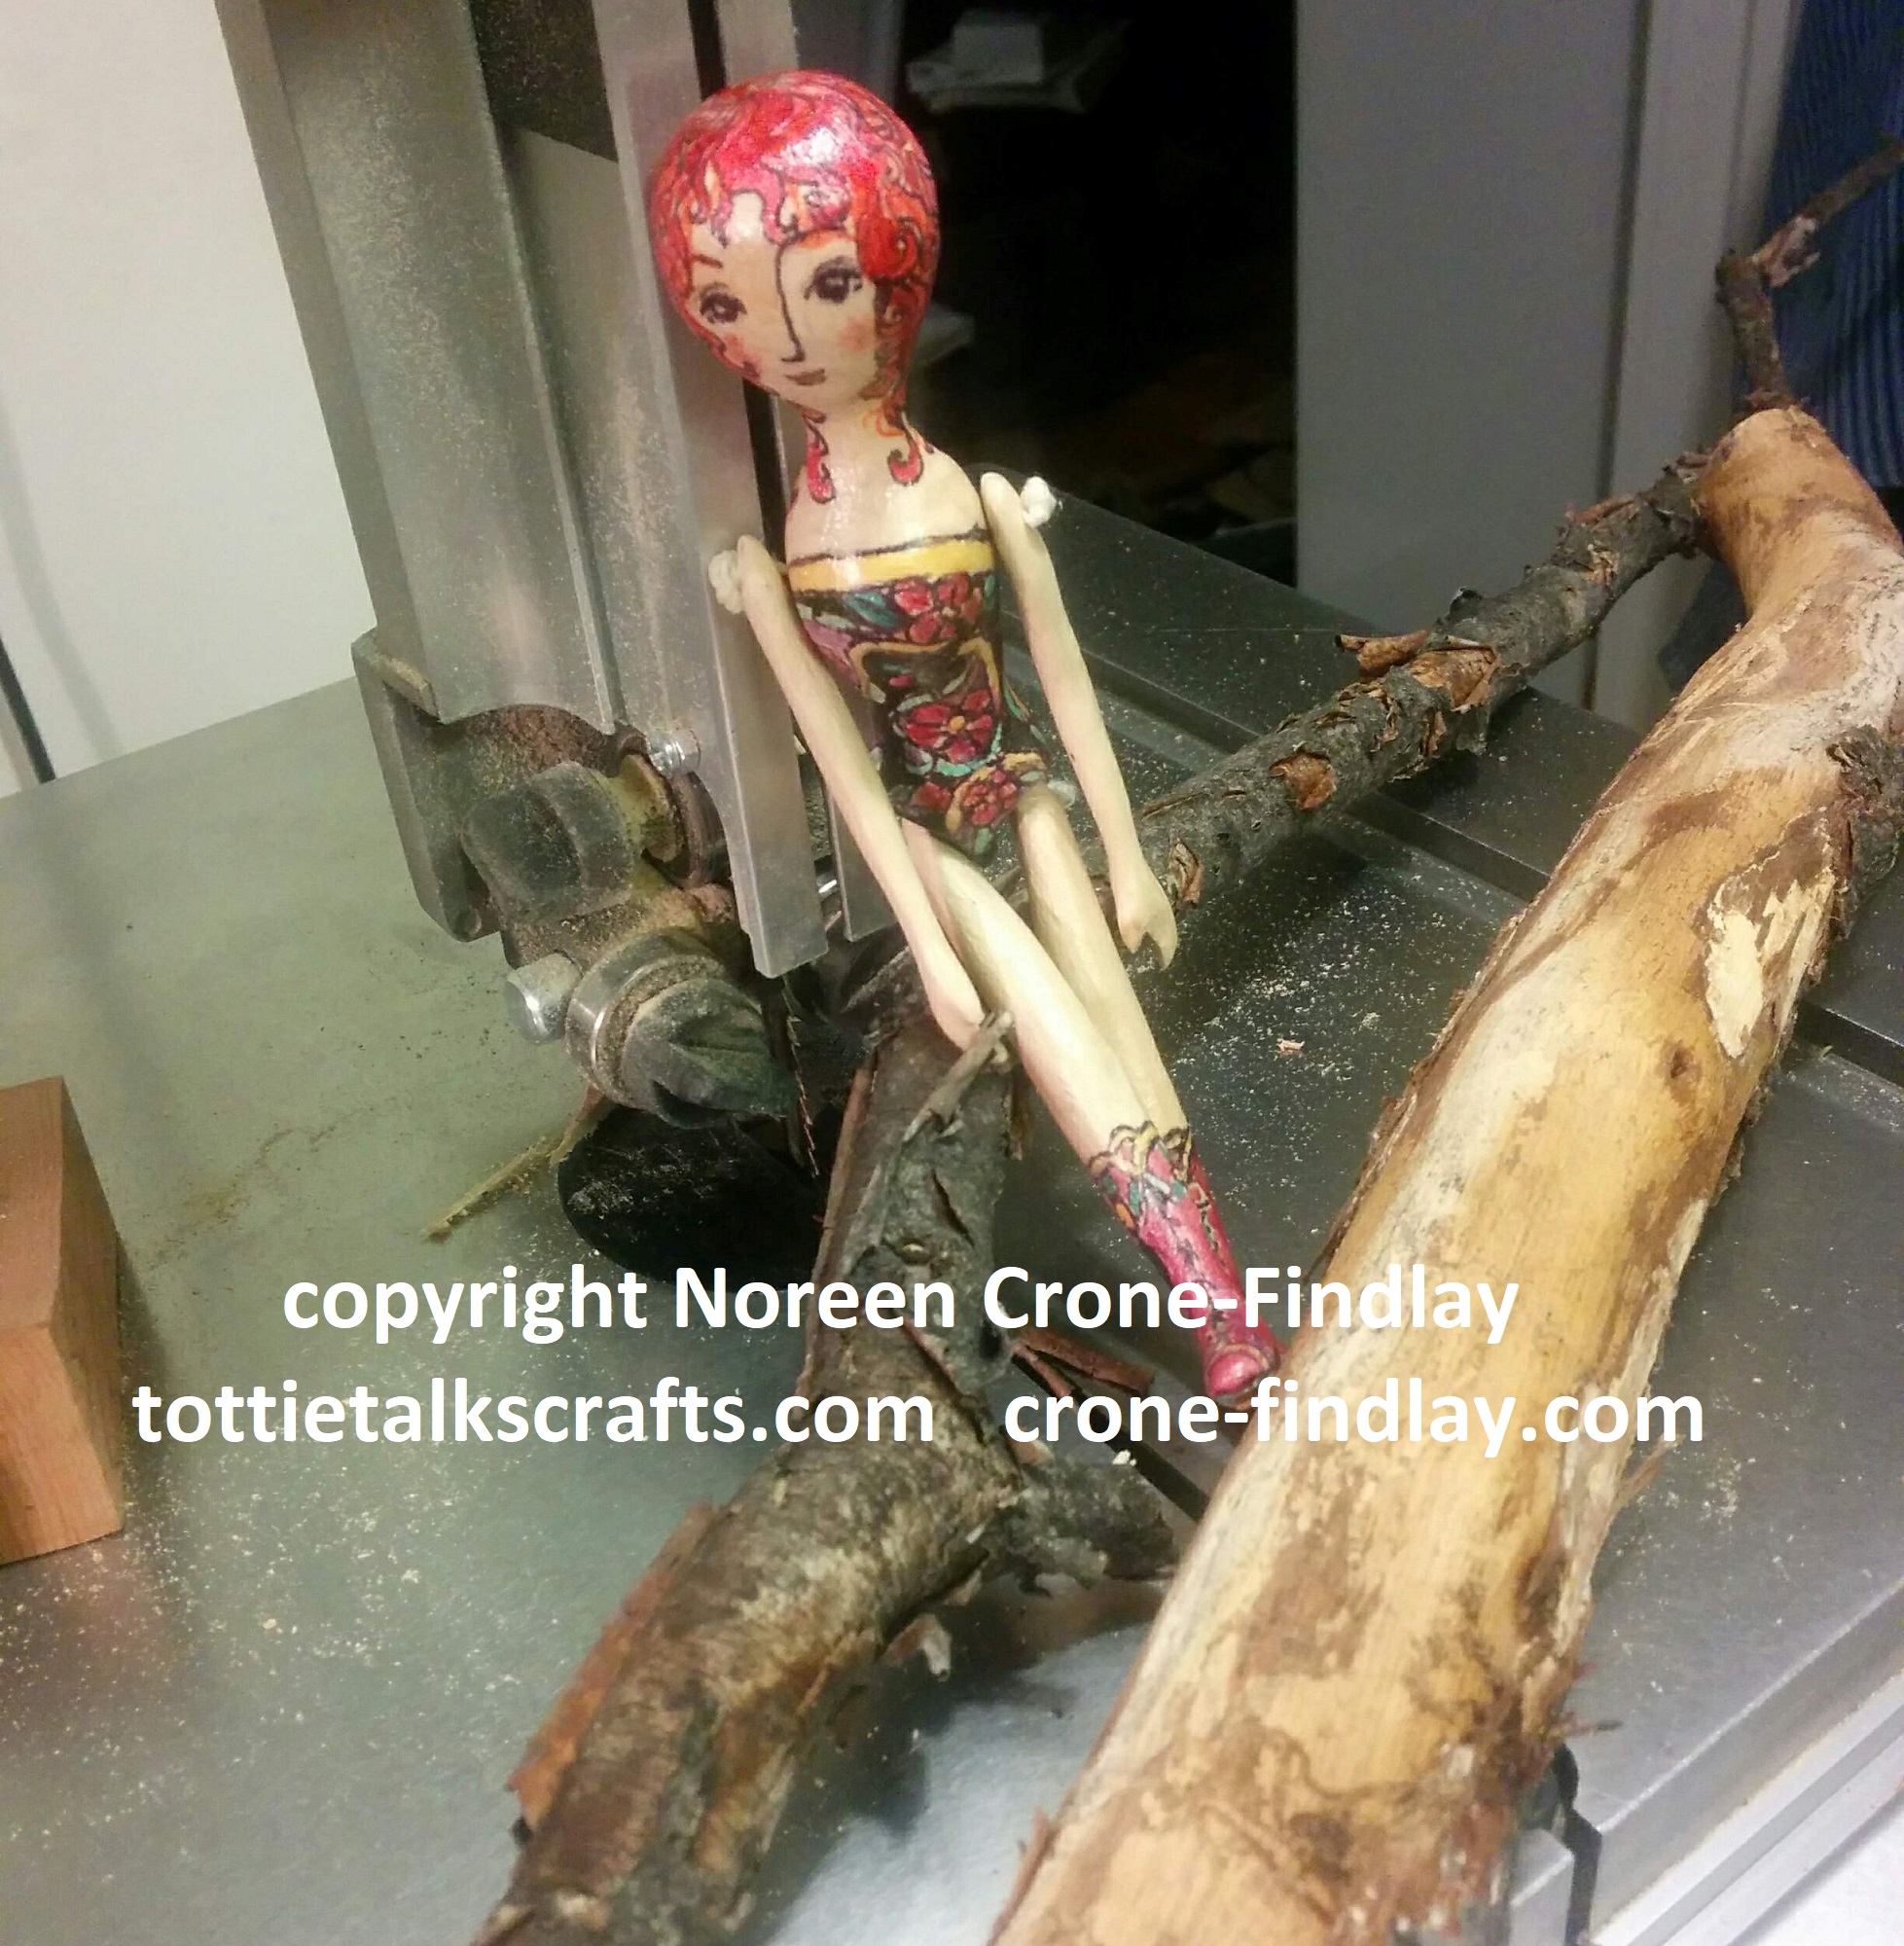
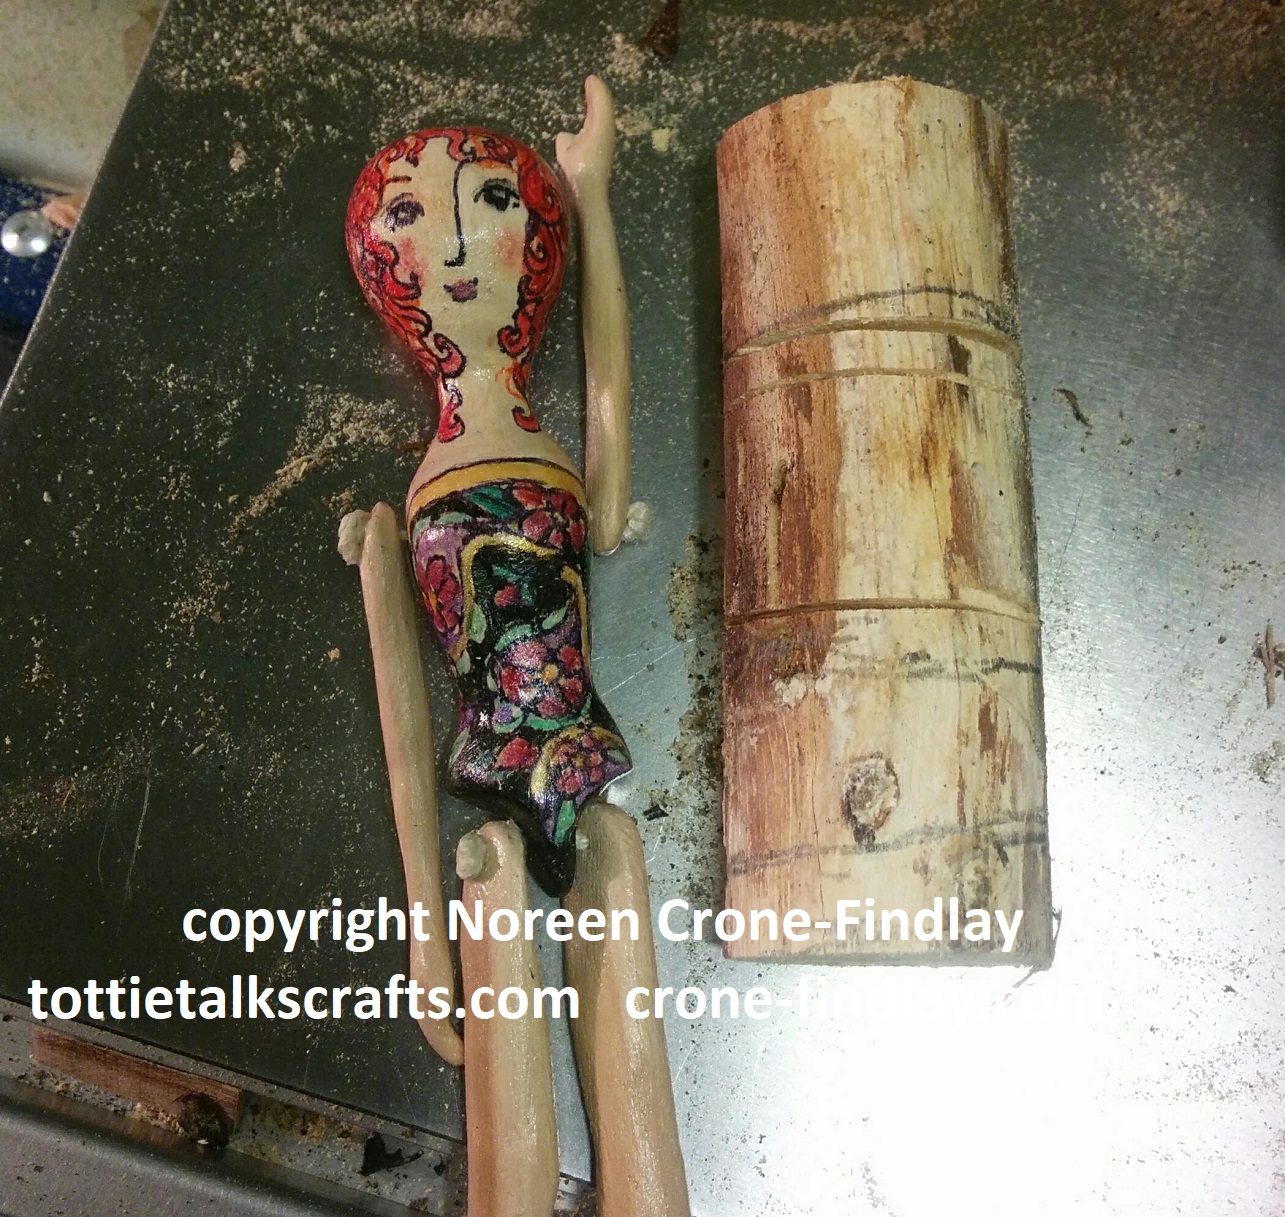

I used the same branch for her arms:
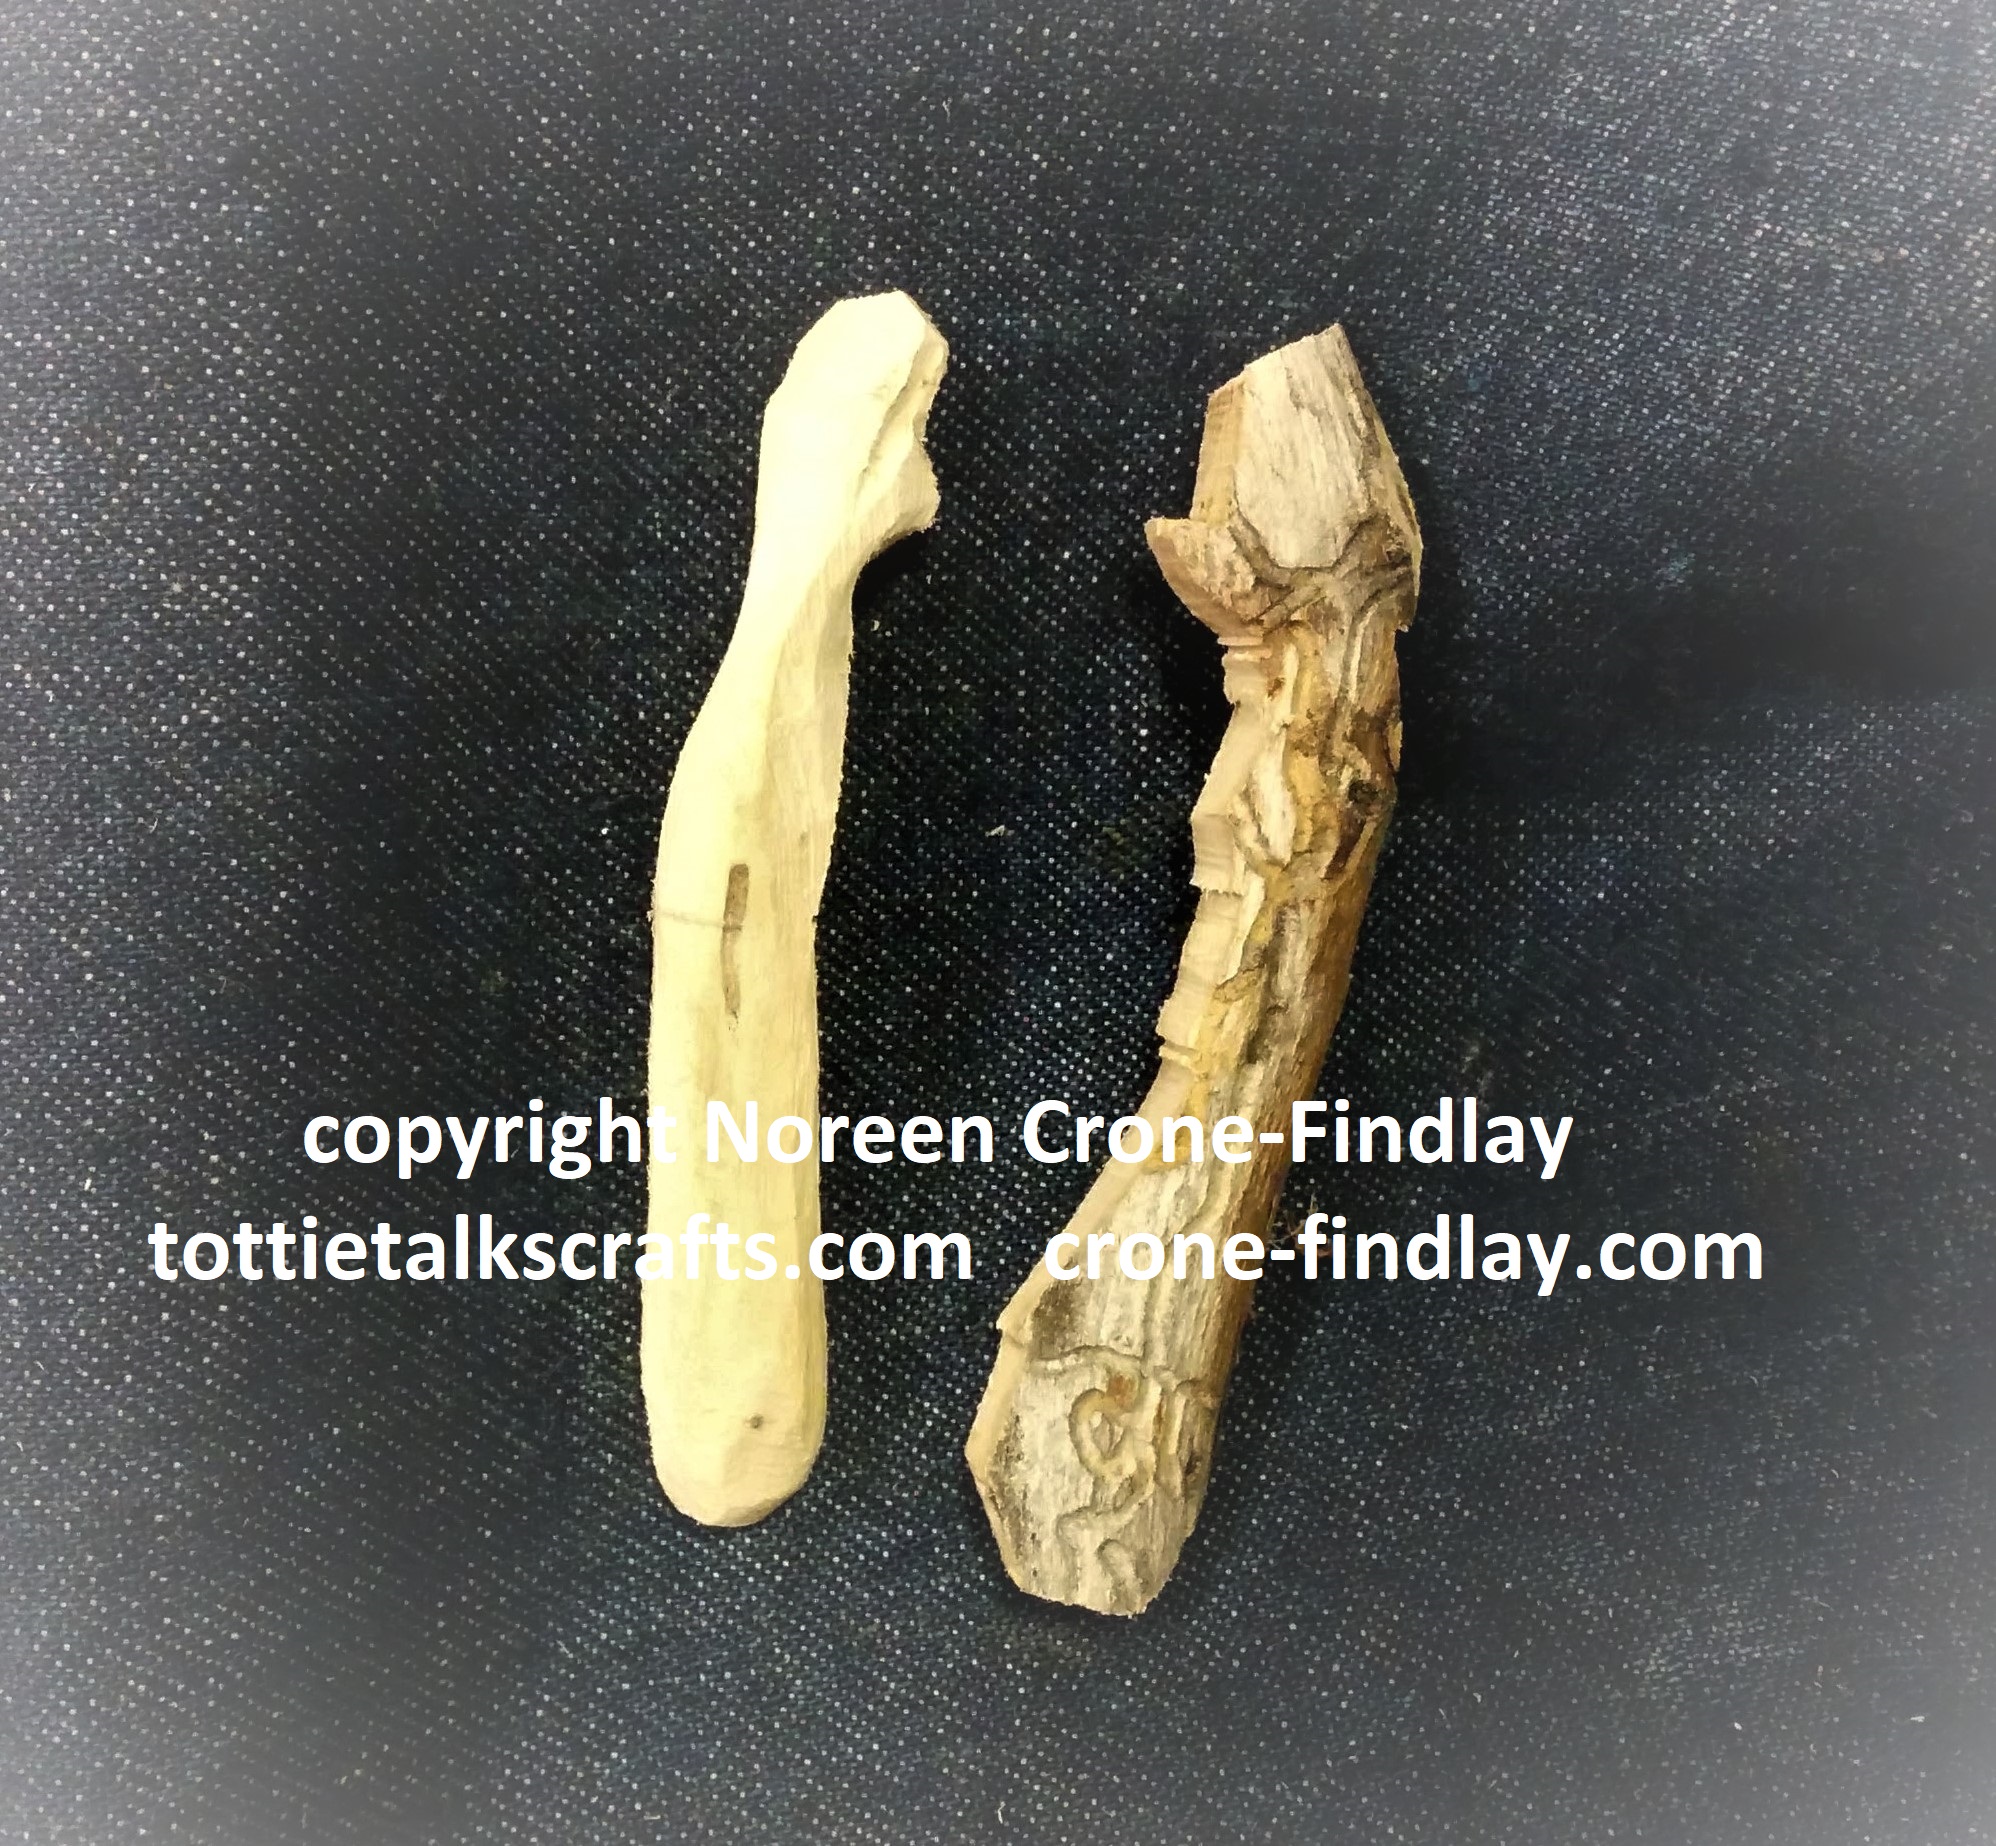
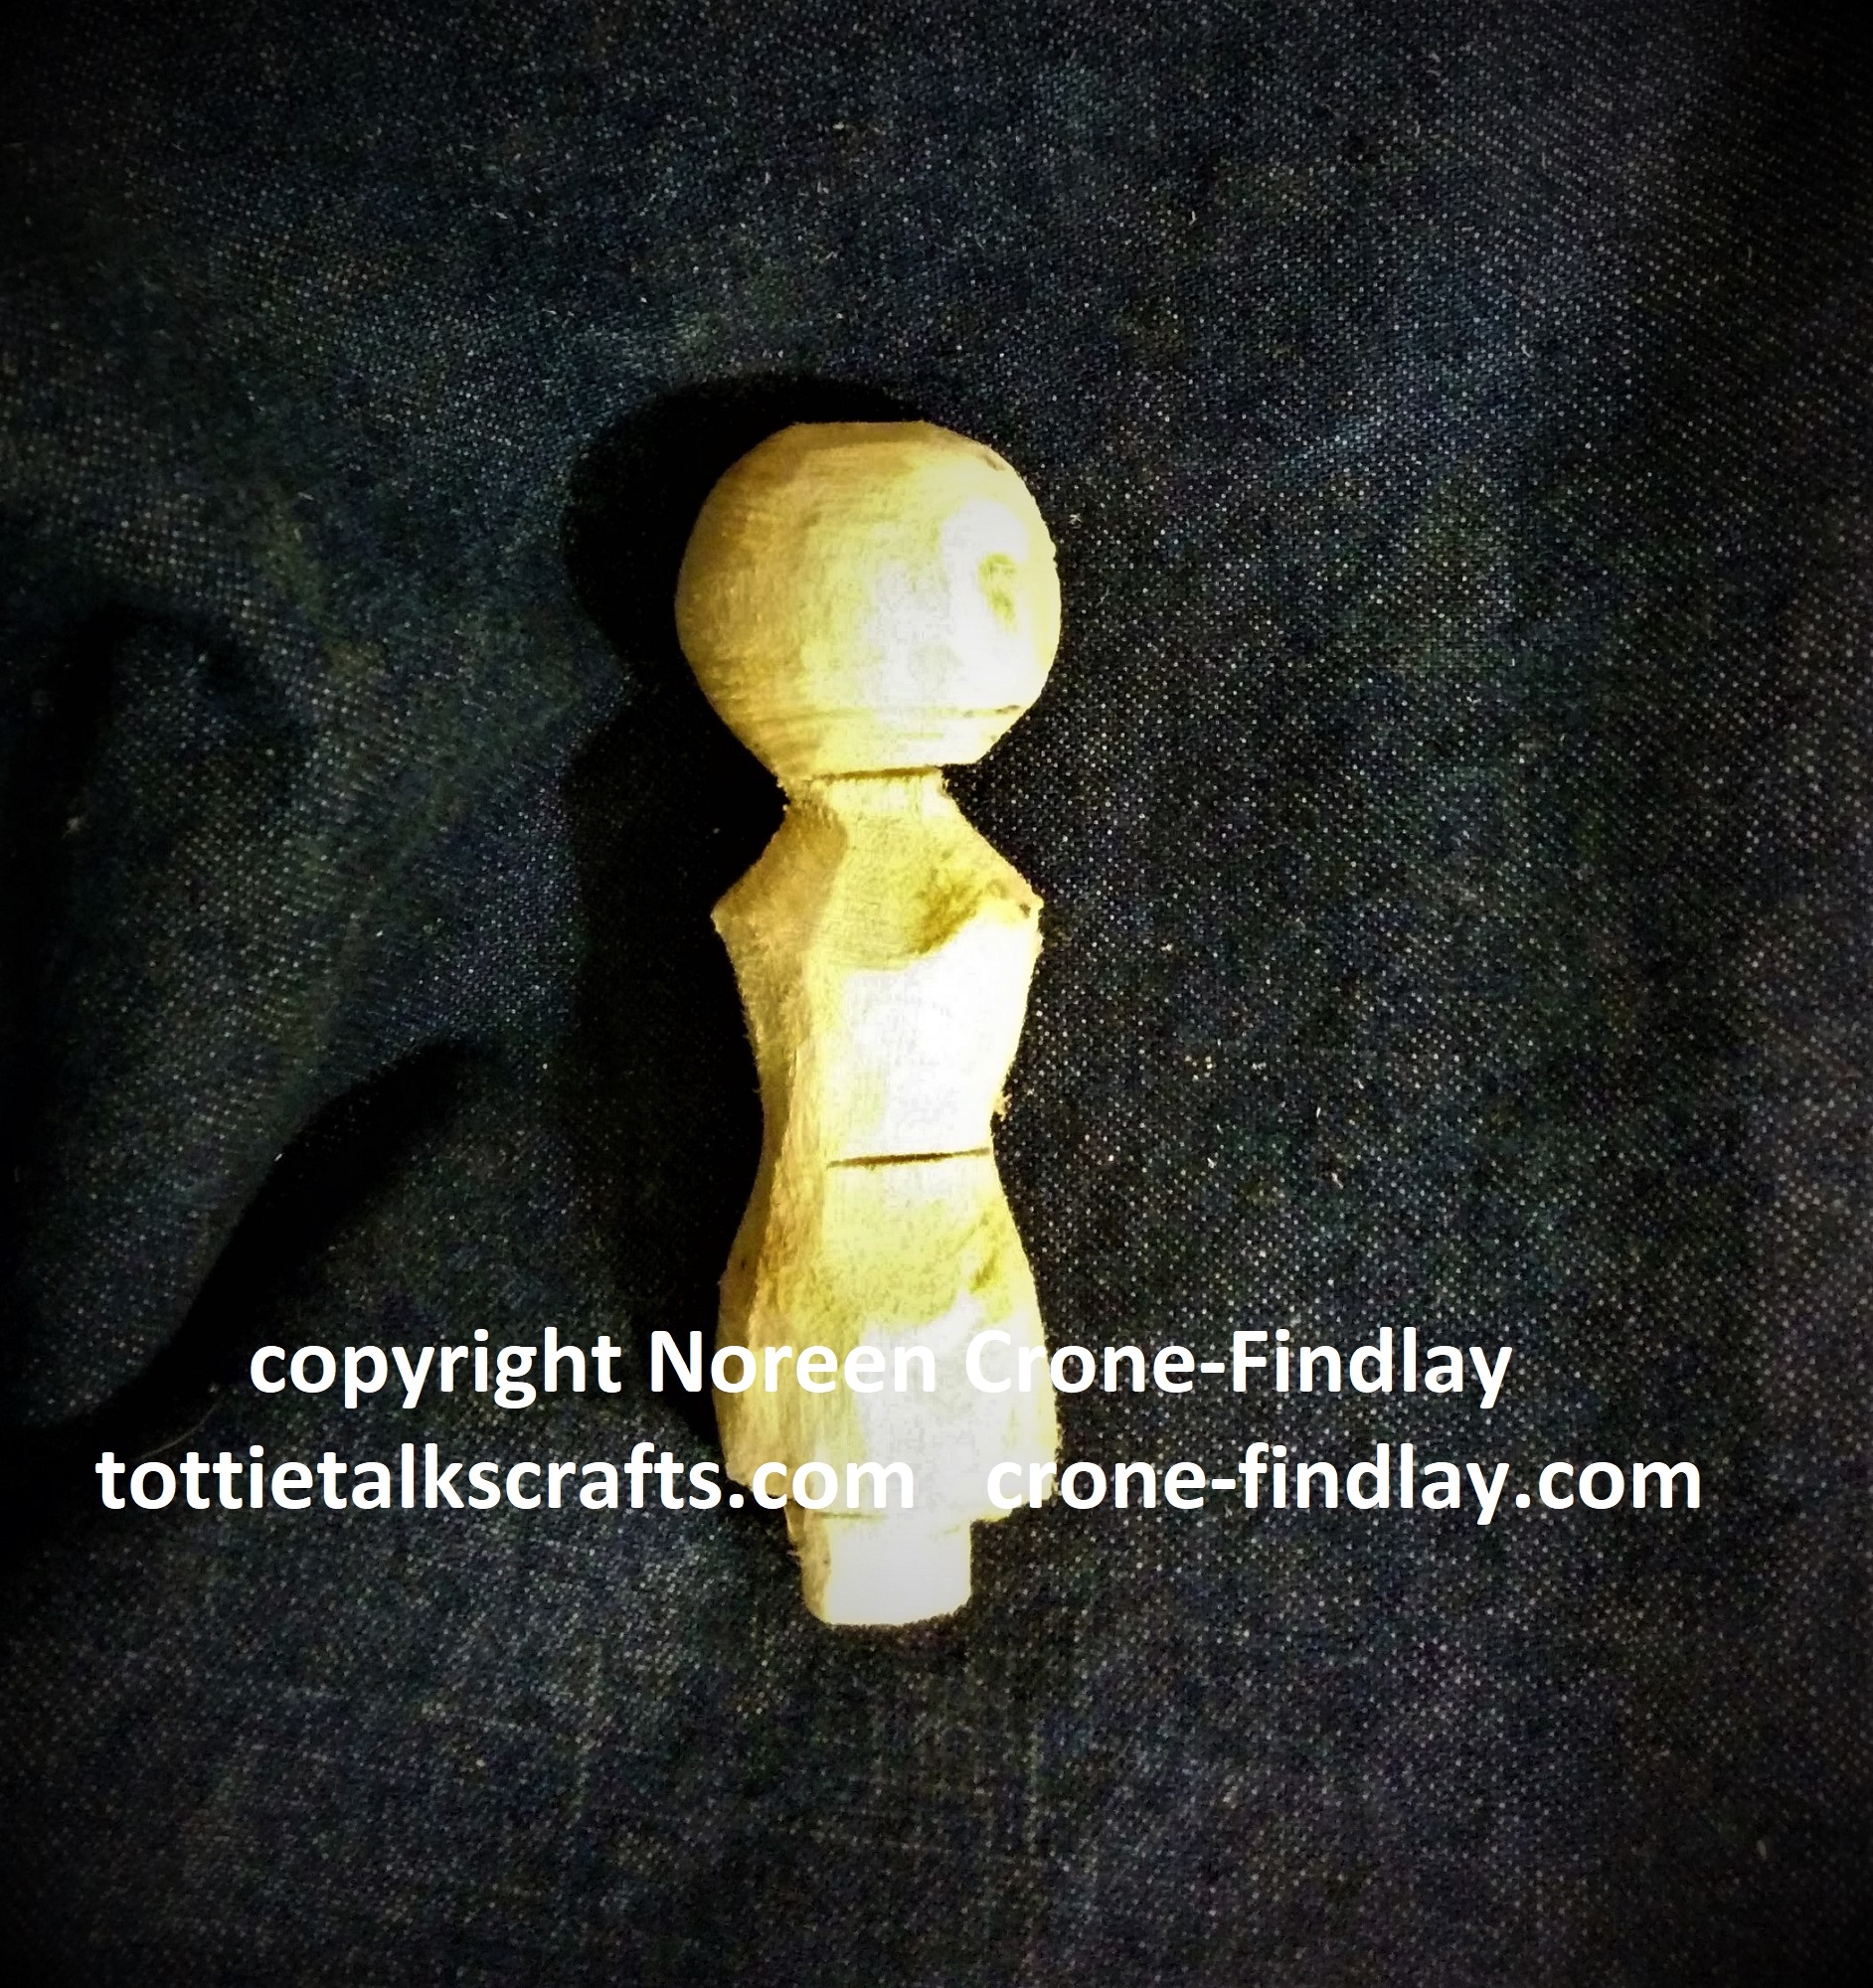
And for her legs, but I got the first pair all wrong, so I made another pair from another scrap of wood.

Of course, it took me a few days to carve her and to allow the still wet wood to dry before I could paint her.
This allowed me to follow my inner prompts that were a gift from this little healing dolly and start work on carving a teddy bear. I have posted about him here: LINK
I was surprised that she wanted a very round head, but when I went to carve it down, she firmly told me to just sand it smooth and live with it. Okay…. it’s important to not try to push the doll where she does not want to go!
She let me know exactly what she wanted for her hair, leotard, leggings and boots:
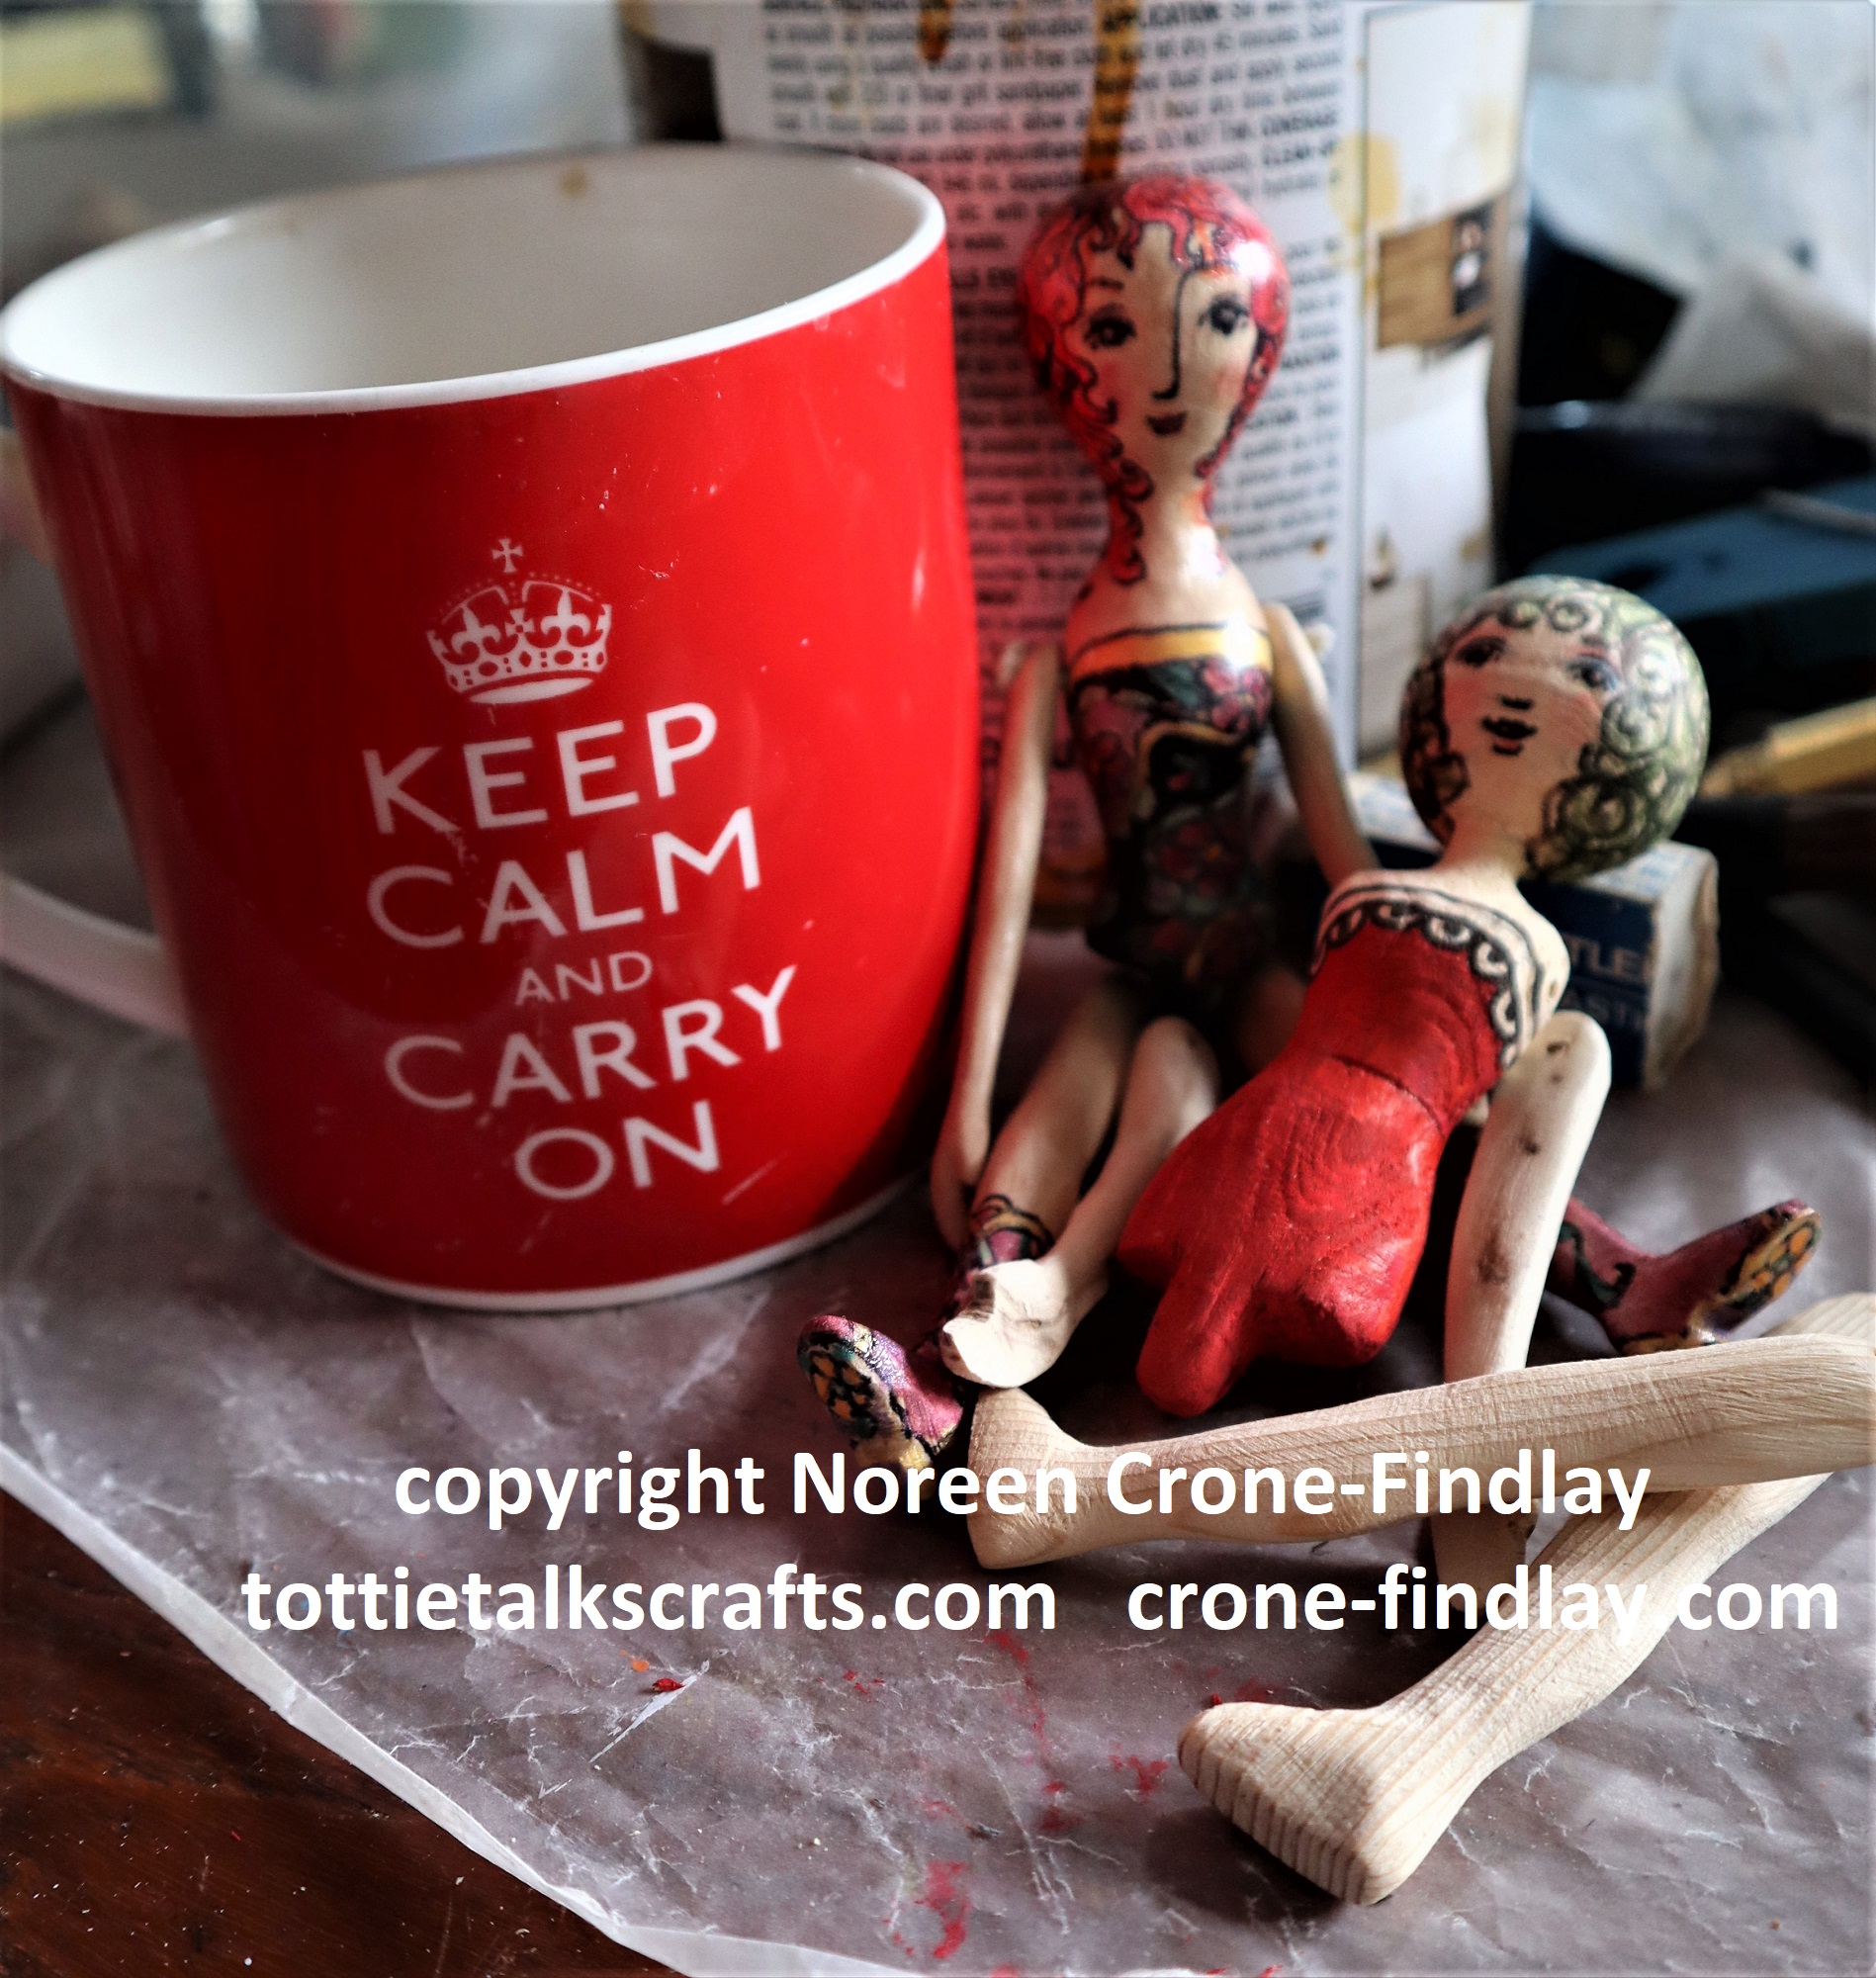

I knitted her a dress that was totally wrong for her, but works beautifully on a different doll.
Then I tried a different dress that I had knitted for another little doll. Nope.
She wanted me to weave her a white skirt and shrug from yarn that my daughter in law spun.
So, I did….

Her name is Pollydolly and I have found the process of carving her (and the teddy bear that I will post about next) to be very soothing and healing.
Dollmaking is very much a healing art and no matter what form it takes, it’s good for the soul.
Grieving is a journey that is unique to each person who has to follow the path, and it’s important to do the things that help the grief be nurtured in a transformative way that becomes the root of compassion.
Carving dolls and bears and knitting and weaving are an important part of my way of healing.
In the next post about the Teddy Bear that Pollydolly told me to carve, I’ll show you where she is sitting now. LINK
If you are grieving, please know that you are not alone. There is so much to grieve right now, and we all have to find our way through it. Blessings on your journey!
With love! ❤
Noreen Crone-Findlay, designer and author


