Tag Archives: hand woven

Mirrix Loom Weave Along Soumak Pouch- 1- Warp and Weft

In September, I will be leading a Weave Along, using Mirrix Looms.

I will be posting the  pattern, video tutorials, instructions and step by step photos for the Weave Along here on Tottie Talks Crafts.

copyright Noreen Crone-Findlay

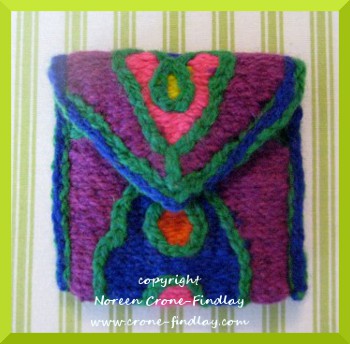
The project is a Business Card Pouch, which also works well as a cellphone pouch, woven in Soumak, embellished with corded edges and chain stitch embroidery.

I have designed it to be welcoming to entry level weavers, but also, with options that will appeal (I hope) to more advanced weavers, too.

Because it can take awhile to get orders cleared and shipped, I am posting some suggested warp and weft yarns, as well as the links for ordering them now.

Hopefully, your yarns will arrive before September first.

Here are a few photos of some of the Business Card pouches that I have woven so far:
copyright Noreen Crone-Findlay

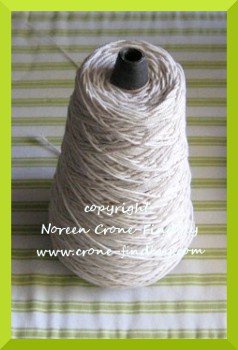
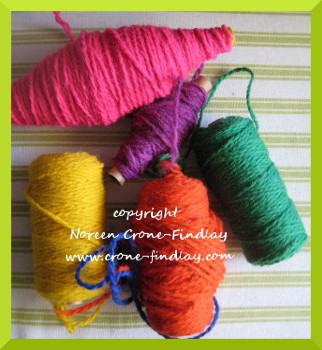
This is the first Business card pouch that I wove, using:
copyright Noreen Crone-Findlay

Harrisville Warp LINK

and: Wool weft:  Harrisville Variety Yarn Pack: Brights LINK
copyright Noreen Crone-Findlay

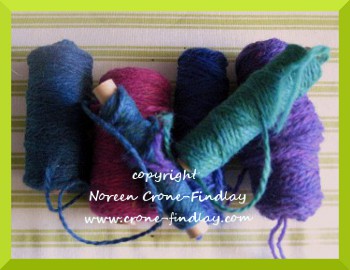
I wove the second  pouch with the Harrisville warp and for weft:
copyright Noreen Crone-Findlay

Harrisville Variety Yarn Pack Jewels LINK
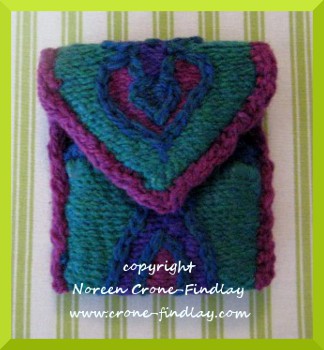
copyright Noreen Crone-Findlay

I quite like both p0uches, but …. OOPS!

They are slightly too small for their intended purpose!  EEGADS! Business cards don’t fit in them!
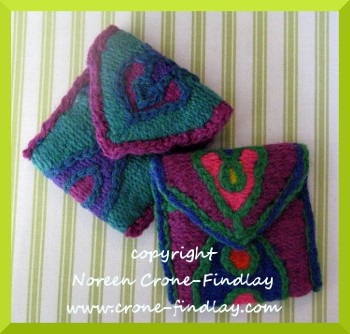
copyright Noreen Crone-Findlay

So, I went back to the drawing board, and altered the pattern.

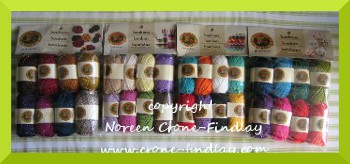
By then, gorgeous yarn had arrived from Lion Brand yarns: LINK TO BONBON YARN
copyright Noreen Crone-Findlay

The photo doesn’t convey the scale of the balls of Bonbon…

They are tiny, perfect little balls of loveliness. Each of them is 2 1/2 inches (6cm) tall.

The cotton is simply gorgeous to weave with.  I love it.

I wove these Pouches in Bonbon cottons, with Metallic chain stitch embroidery:
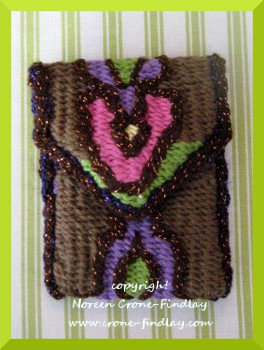
copyright Noreen Crone-Findlay

I used the  ‘Nature’ colorway for the pouch in the photo above, and ‘Beach for the pouch in the photo below:

copyright Noreen Crone-Findlay

The Metallic yarns come in six packs, as does the cotton. I used yarns from both colorways: Party and Celebrate, for these pouches.
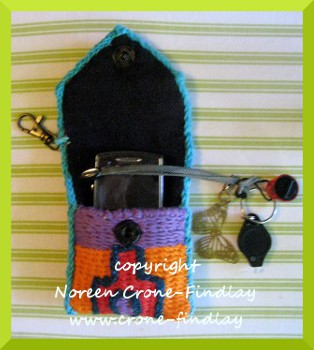
copyright Noreen Crone-Findlay

My daughter in law suggested that I add a swivel snap hook to the upper corner of the pouch.

I thought that it was a great suggestion, and so I have added it.

The swivel clip allows you to clip it to your bag, or the belt loop of blue jeans.

If your cellphone is one of the larger ones, you may need to upsize your pouch if you would rather use it as a cellphone pouch instead of a business card pouch.
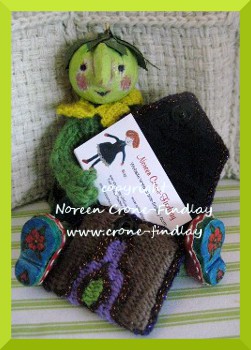
copyright Noreen Crone-Findlay

I used Lion Cotton for the warp for these two pouches, because I wanted to use yarns that you can order at the same time to make this all easier for you:
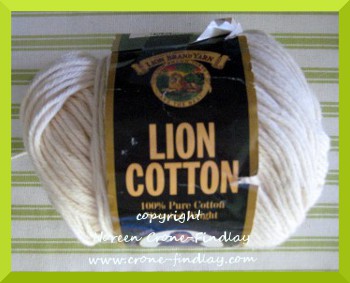
copyright Noreen Crone-Findlay

I wasn’t sure if it would work for the projects, but it does just fine.

I don’t think that I would use it for tapestry warp for a really large project, because it has a cheerful slightly bouncy nature.

Warp for tapestry really does need to be made of sterner stuff 😀  None of that youthful springiness!

Speaking of warp- a couple of my Ravelry friends have asked if carpet warp would be okay for the Weave Along, and yes, indeed, it will work fine.
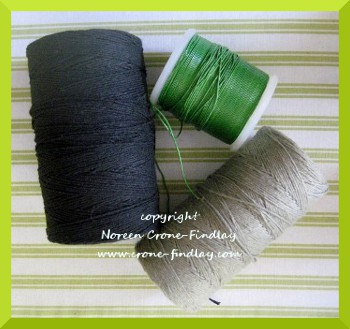
copyright Noreen Crone-Findlay

I am going to weave some of the pouches on carpet warp, and also on the green linen that’s on that ginormous spool.

In my next post, I will show you the equipment, materials and tools that you will need to gather up for the Weave Along.

Here’s the link to  a post that has all the blog post links, to keep everything quick and easy to refer to : LINK

You are invited to post comments on the blog posts here on Tottie Talks Crafts.

CHECK LIST FOR WARP AND WEFT:

– warp

-weft

-optional contrast yarn for chain stitch embellishment
9 Comments

Filed under Loom & looms & small loom weaving, tutorial & how to, weaving & handwoven

Setting up loom extenders on the Mirrix loom

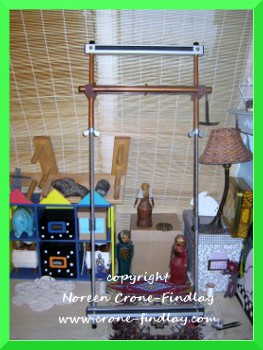
Normally, I tend to prefer small looms, but I have just fallen in love with using  loom extender bars on the Mirrix loom.

copyright Noreen Crone-Findlay

It’s really hard to convey how tall the ‘Alice in Wonderland’ version of the Big Sister 16 inch loom is when she’s got her stilts on.

With the extenders, she is 40 inches/1 m tall.

Now, that’s tall!

This means that you can achieve lots more weaving with one warp up.

(I’m working on some really fun stuff with my Big Sister Stiltie! So, stay tuned!)

My husband bought me the components for the extenders at the place he buys parts for our ancient tractor, so I didn’t have instructions on how to do this.

So, I had to figure it out for myself.

I found that there are a few tricks that make the set up easier when adding the loom extenders to your Mirrix loom.

copyright Noreen Crone-Findlay

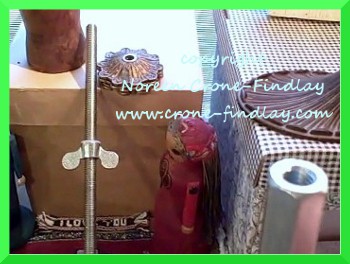
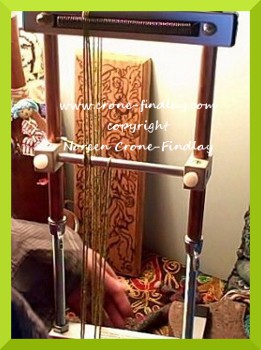
First, lift the top of the loom off the side rails and set aside.

copyright Noreen Crone-Findlay

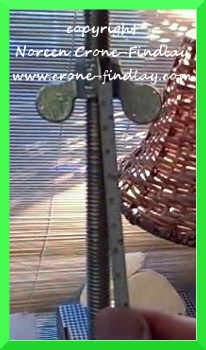
Unscrew the thumbscrews from the threaded rods, and screw them onto the extension rods.

I screwed them on so they were 5 inches/12.5 cm from the top end of the extensions.

Put the washers back on top of the thumbscrews.

copyright Noreen Crone-Findlay

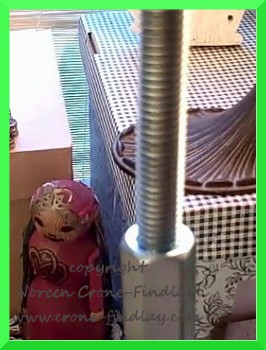
Screw the coupler to the top of the loom rod.

copyright Noreen Crone-Findlay

Hot tip: Place the end of  a tape measure inside the coupler so you can watch to see that you have screwed it on so it is half way onto the lower rod.

I had my doubts about how stable this was going to be, because the coupler seemed wobbly to me.

copyright Noreen Crone-Findlay

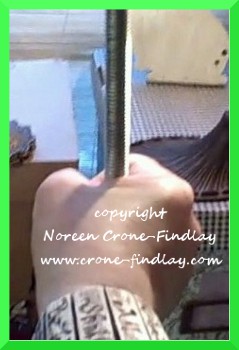
But, I went ahead, and screwed the extension rod in anyhow….

copyright Noreen Crone-Findlay

And, then, when I tightened it up by hand, I was amazed at how it was suddenly rock solid!

WHEEE!

This is good!

Wobbly bad!

Solid- GOOD!!!

Repeat for the other side…

copyright Noreen Crone-Findlay

Measure to be sure you have everything square, and put the top half of your loom back on.

Stand back in amazement at your loomie on stilts! Wowsa!
The best part is that the loom is still miraculously stable and works perfectly.

I find that resting it against the edge of the desk and having the lower edge sitting in my lap is the most comfortable way to weave with the extensions on.

Also, weaving standing up works well.

Having the stand for it would be sublime.

I made a video of the ‘putting it together’ process:

Happy weaving! 😀

Leave a comment
Filed under Loom & looms & small loom weaving, tutorial & how to, video tutorial, weaving & handwoven

Sketching Swatching and Sampling are such valuable weaving tools

I am working hard on a new tapestry. It’s inching along, as tapestry does, when you are in focused mode.

BUT… I found myself feeling really stuck when I finished one section, and couldn’t move forward onto the next section.

So, I fell back on my ultimate design tool.

I got out my sketchbooks and aquarelles (watercolor pencils), and did the thing that my drawing master back in my art school days drilled into me: Sketch, sketch, sketch!

copyright Noreen Crone-Findlay

He also drilled into his students that it is essential to carry your sketchbook or notebook with you ABSOLUTELY EVERYWHERE, and to sketch every single day.

AND, even more important: Don’t worry about making ‘good’ sketches.

Just catch thoughts, dreams, words, and other fleeting moments on the paper and let them build a vocabulary for you.

The part of the tapestry that had me flummoxed is a child’s costume.

I didn’t know what I wanted to do with it, until I worked my way through a bunch of really rough, ‘thinking on paper’ sketches.

That took me through the roadblock to the ‘AHA’….

And I knew that I needed to move onto sampling and swatching.

copyright Noreen Crone-Findlay

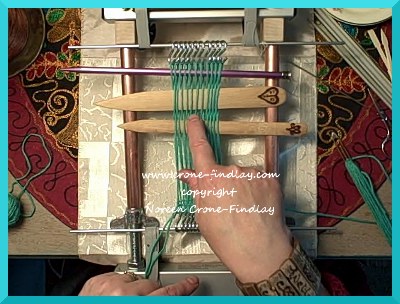
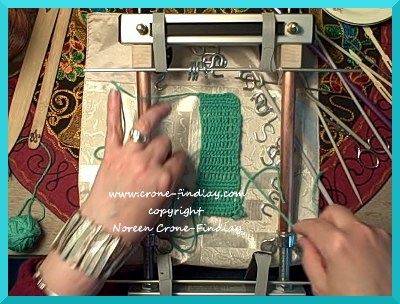
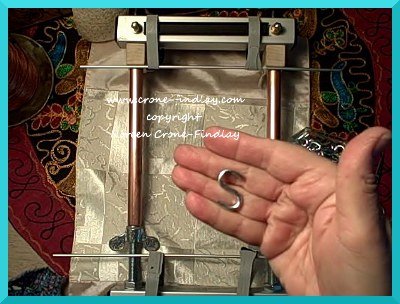
I set up my 8 inch Lani Mirrix loom with a ‘no warp ends’ warp, using ‘S’ hooks… in the video, I show some pointers about this setup.

As a professional designer, I cannot underestimate the importance of swatches and  sampling.

I am always amazed by knitters and crocheters who skip this foundation aspect of the creative process!

So much is revealed in the swatching and sampling stages of creation.

AND… something else that is a huge bonus- so often, the sampling and swatching will reveal that there is something new to explore!

(Which of course, leads back to the sketching…) !

Even though the feeling stuck part of working on this tapestry really stank while I was in it, I ended up feeling really grateful for being forced to move back to basic problem solving techniques.

Why? Because I am now inspired to explore soumak weaving, which I have not done before.

I am fascinated and intrigued…. there will be more about this!

In the mean time, here’s the video about sketching, sampling and swatching.

And, even though I don’t normally like to show pieces while they are in progress, I did do a little ‘reveal’ of the new tapestry.

4 Comments

Filed under Loom & looms & small loom weaving, tutorial & how to, weaving & handwoven

How to weave inkle bands on Mirrix looms part 4

This is the fourth video tutorial about how to weave inkle bands on Mirrix looms.

copyright Noreen Crone-Findlay

A dear friend asked me: “Why are you spending all this time figuring out how to weave inkle bands on the Mirrix loom? You have inkle looms! ”

Yes, I do… an open sided one, a closed side one that my husband built me from upcycled pallet wood, and a mini.

And, I love them…. but, I find that the open side and mini inkle looms both kind of flop when I have one end on the desk edge and one end in my lap. This is the way that I like to weave with inkle looms, and I find the wobble/flop rather frustrating.

I really like how stable the Mirrix is when I have the lower edge in my lap and the upper edge against a workbench, table or desk.

Also, I love the precision of the tensioning on the Mirrix… those thumbscrews are sweet!

And, I also love the shedding device………. soooooooooo smooth.  😀

Besides, the Mirrix takes up sooooooooooooo little room to store it- inkle looms do take up a chunk of space in the studio!

That’s four good reasons that have made this rather challenging learning curve worthy of the time I have invested.

Here’s the video for the finishing process of weaving inkle bands on the Mirrix loom:

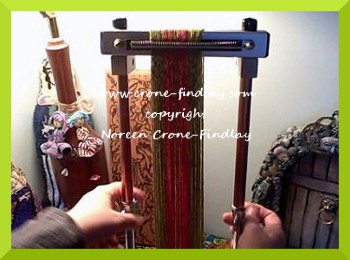
When you have woven your bands to the point that the warping rod is sitting on top of the loom, you will need to remove the spring:
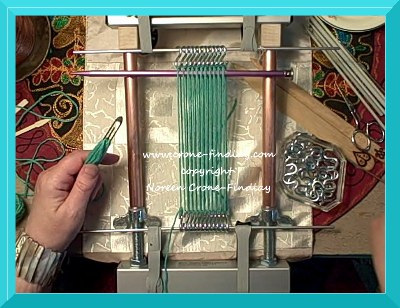
copyright Noreen Crone-Findlay

Loosen the tension up  a lot….

copyright Noreen Crone-Findlay

Lift the spring rod out of the spring.

Release the ends of the springs from the knobs.

Gently, ease the spring out of the warp strands by spreading the warp strands out slightly and pushing on the spring to disengage it.

Continue weaving until the shuttle almost can’t make it through the shed.

copyright Noreen Crone-Findlay

Weave one row.

Keep the shuttle in the shed, and place a darning or tapestry needle in the shed with the point pointing in the direction that the shuttle exits the shed.

Weave the next row, and repeat with a second darning needle.

The needles now point in opposite directions.

Weave one more row.

Cut the weft strand, and thread it into the first needle.

Pull it through, and remove the needle.

Thread the weft strand into the remaining needle and pull it through.

La de dah! you have finished your inkle band!

Wheee! 😀

I always weave the tail end in a little bit more before I trim it off.

Loosen the tension wayyyyyyyyyyyyyyyyyy off, and slide the warping rod out of the loops.

Trim the ends, and pull them through the heddles.

Congratulations, you’ve woven some scrumptious new inkle bands! 🙂

Happy Weaving!

1 Comment

Filed under Loom & looms & small loom weaving, tutorial & how to, weaving & handwoven

How to weave inkle bands on the Mirrix loom part 3

Part 3 of the video tutorial series on how to weave inkle bands on Mirrix looms is about the weaving process:

copyright Noreen Crone-Findlay

Something that I learned as I trundled up my ever so steep learning curve with figuring out how to weave inkle bands on the Mirrix loom:

I started out by weaving one row on one band, putting it’s shuttle down, then picking up the second shuttle and weaving one row on the other band.

Sounds slow and clunky, doesn’t it? Well, you’re right.

The most efficient way to weave 2 bands at once is to weave as far as you can on one band, then set that shuttle aside, and weave away on the second band.

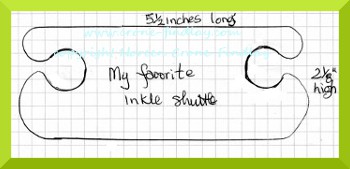
Oh… speaking of shuttles, here’s the tracing of my most favorite inkle shuttle:

copyright Noreen Crone-Findlay

I designed this one several years ago, and I love it. Works like a charm.

Here’s the video that shows the weaving process:

copyright Noreen Crone-Findlay

When you need to advance the warp, loosen the tension quite a lot.

Support the spring as you gently ooze the warp rod around and up the back of the loom.

Pat the warp strands back into the channel, and tighten up the tension again.

Remember, you do not need to have the tension as tight as when you are weaving a tapestry or beading.

You’ll find the perfect tension that suits you best.

Keep on weaving until the warp rod is sitting on top of the loom, and then check into the 4 th video in the series:

How to finish the bands.

🙂

Leave a comment

Filed under Loom & looms & small loom weaving, tutorial & how to, video tutorial, weaving & handwoven

How to weave inkle bands on the Mirrix loom part two

This is the second stage of the video tutorials that I made on how to weave inkle bands on the Mirrix loom.

copyright Noreen Crone-Findlay

There are two bands on the loom, because in this video, I am working on the 16 inch loom.

When you work on the 8 inch loom, it’s okay to just weave one band at a time, as the warping bar doesn’t flop around.

But, on the 16 inch loom, you do need to either warp up 2 bands, or secure the other end of the warping bar with a cord so it will stay perfectly horizontal.

I tried weaving 3 bands at once on the 16 inch loom, and didn’t like it, as the center knobs on the shedding device got in the way.

Two bands are just great though.

AND…. if you want to weave longer bands, and have either a 12 inch or 16 inch Mirrix loom then the loom extenders will be your friend 🙂


I use a crochet hook and a weaving stick to make the heddling process go quick like a bunny.

Here’s the video tutorial:

Start by placing a piece of cardboard between the layers at the front of the loom and the back so you can’t see the warp strands at the back of the loom.

copyright Noreen Crone-Findlay

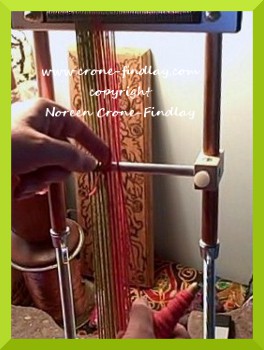
Place the shed changing device into the brackets.  Unscrew the little knob that holds the heddle rod in place.

Pull the heddle rod back so it’s about half way along the warp strands.

copyright Noreen Crone-Findlay

Place the heddles onto the fingers of your non dominant hand.

copyright Noreen Crone-Findlay

Look down at the warp strands that are at the lower edge of the front of the loom.

There’s a gap between the strands that have gone in front of the warping bar and behind it.

Slip your fingers into the gap and scoot them up to the shedding device.

Slide a shed stick into the gap.

Voila! (which is how ‘walla’ is really spelled 🙂  )

You have shed one ready to heddle!

copyright Noreen Crone-Findlay

Now, slip the crochet hook behind the first warp strand, pluck a heddle off your fingers, and pull it forward.

Catch the other end of the heddle loop and place both loops on the heddle rod.

Go slowly, and be sure that both ends of the heddle loop stay politely on the heddle rod.

copyright Noreen Crone-Findlay

When you have all of the warp strands heddled, slide the heddle bar into position in the knobs, and tighten the lock nut.

Repeat the heddling process on the second set of warp strands for your other band.

copyright Noreen Crone-Findlay

Push the first set of heddles down as you rotate the shedding device.

copyright Noreen Crone-Findlay

Leave the shed stick in place, and use the crochet hook to pick up the warp strands for the other shed.

Take the warp strand from the back to the right of the one in front, and onto the hook,

take the hook over the front strand, and pick up the next strand and carry on across.

copyright Noreen Crone-Findlay

Slide the weaving stick out of the first shed, and slip it along the crochet hook to transfer the warp strands from the crochet hook to the weaving stick.

copyright Noreen Crone-Findlay

Turn the weaving stick on it’s side, and then pick up the warp strands one at a time and capture them with the heddles just as you did for the first set of warp strands.

copyright Noreen Crone-Findlay

Repeat this process for the second band.

Check your heddles carefully to make sure that they are opening the sheds properly.

Ahhhhh! a warped loom is a thing of beauty!

copyright Noreen Crone-Findlay

Attach the handle to the shedding device and adjust the tension by turning the thumbscrews.

Open the first shed, and insert a craft stick, then open the second shed and insert another craft stick.

Squish the warp strands together to establish the width of your band.

copyright Noreen Crone-Findlay

Weave one row, leaving a 6 inch/15 cm tail.

Change sheds, and weave the next row.

Pull up firmly on the tail end and weave it through the same shed.

Repeat several times until the tail end is woven in, and the band is established.

Next video: The fun part! Wheeeeeee…. weaving…… 🙂


Leave a comment

Filed under Loom & looms & small loom weaving, tutorial & how to, video tutorial, weaving & handwoven

How to weave inkle bands on the Mirrix loom part one

I love weaving inkle (warp face) bands.

I use  in dollmaking:

copyright Noreen Crone-Findlay

Link to purchase pattern for Inkle dolls: Inkle Dolls

And, they are wonderful for trimming handwoven clothing:

copyright Noreen Crone-Findlay

Link to post that shows how to shape inkle bands to make a yoke or other shaped pieces of garments: Warp pulling

Over the years,  I have also made hat bands, book marks, all kinds of jewelry, key fobs,  vests, bags, bag handles, the garters for the men’s kilt hose for my son’s wedding, shawls, freeform pieces that combine inkle weaving, knitting, embroidery, spool knitting and crochet, as well as rugs.

Yep. I love inkle weaving.

So, as I have been exploring the possibilities of weaving with my Mirrix looms, I had to give inkle weaving a try.

I found that it was quite challenging at first. But, I don’t give up easily 🙂

I ended up spending waaaaaaaaaaaaaaay more hours than I should have, experimenting and obsessing over making inkle bands on the Mirrix.

Well… I finally succeeded.

Since it was so challenging, I figured that I should share what I have learned, so that other intrepid inkle weavers can leap right in, without all the trial,  error and frogging that I went through!

There are definitely tricks to weaving inkle bands on the Mirrix looms, and I have made 4 videos to share those tricks.

Here’s part one of the video:

Here is the draft for the bands that I wove in the videos:

copyright Noreen Crone-Findlay

To read the draft: Each square represents one warp strand.

You can check your warping by looking at each shed to see that it has the same number of strands, in the order that they appear in the line.

You will be  putting a total of 8 green strands on, followed by 4 orange strands, 3 sets of  (1 orange, 1 green) for a total of 6 strands, then 4 orange strands and ending with 8 green strands.

At the top and bottom of the loom, you’ll see the full count of warp strands.

At the warping bar, the 2 sheds will be separated into their correct (we hope!) configuration for each shed.

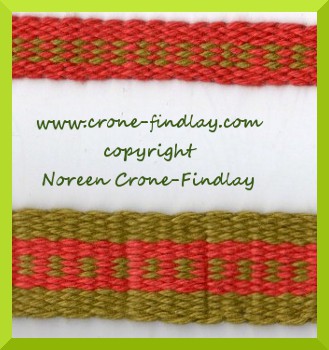
The chart will give you bands like this:

copyright Noreen Crone-Findlay

The upper band is the band on the right hand side of the loom in videos 2 – 4.

I only used the center of the draft for it, without the green border strands.

The yarn is Lion Brand Cotton.

copyright Noreen Crone-Findlay

Setting up the loom for inkle bands is different than normal warping.

You need to have the warping bar at the front of the loom.

copyright Noreen Crone-Findlay

Tie the green yarn onto the warping bar and take it up and around the loom, just the same as if the warping bar was in the back.

copyright Noreen Crone-Findlay

You will need to cut the warp strand of color 1 to tie on color 2 at the warping bar, for EVERY color change.

WHAT?!?!?!

Yes. really.

It sounds insane, but this is the biggest key to making the whole inkle thing work on the Mirrix loom.

Trust me. You ~can~ twist your yarns around each other, and are welcome to, I’m sure, if that would make you happy….

BUT…. the quickest, easiest way to have problem free warping for inkle is to cut those little darlin’s and tie the knots between the colors.

copyright Noreen Crone-Findlay

Yay! Warped!  Insert the spring rod into the spring to keep the warp strands locked into their notches.

This is sooooooooooo important!  (yep… voice of ‘oops’ experience here 😦 )

And in Part 2…. it’s on to the heddles.

I have a nifty, super friendly way of using a crochet hook and weaving stick to make the heddling process go like a breeze.

That’s coming up next…. so stay tuned! 🙂

3 Comments

Filed under Loom & looms & small loom weaving, tutorial & how to, Uncategorized, video tutorial, weaving & handwoven

How to weave Leno Lace on the Mirrix loom

I am fascinated by exploring all  the different things that I can do with Mirrix looms.

While I am involved in this four month long co-creation with Mirrix looms, I am going to be  looking at what I can and can’t do with the Mirrix looms.

(Guess what I am NO GOOD at? Bead weaving on the Mirrix!

Yep. All my bead weaving has been off loom and I am TERRIBLE at bead weaving on the loom. 

That one came as a surprise…  ah well… we shall see if that changes! )

In my previous blog post, LINK, I showed how I set up my Lani Mirrix loom, using the ‘No Warp Ends’ warping technique.

copyright Noreen Crone-Findlay

There are several advantages in setting up your Mirrix loom for the ‘No Warp Ends’ technique:

It allows you to sample different weaving techniques quickly and efficiently.

You won’t waste time OR yarn when using the ‘No Warp Ends’ technique.

I love that!

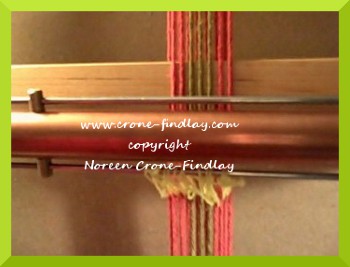
Because the ‘No Warp Ends’ warping technique precludes using a shedding device, it is perfect for weaving techniques that are hand manipulated, like: LENO lace! Yay!

I think that Leno lace is the bee’s knees.

It’s kind of a miniature version of the ancient technique of twisting fibers, called, Sprang.

You do this nifty twist thing, and tadah! You get a  bonus free row that is cheerfully waiting for you, gratis! Whee!

copyright Noreen Crone-Findlay

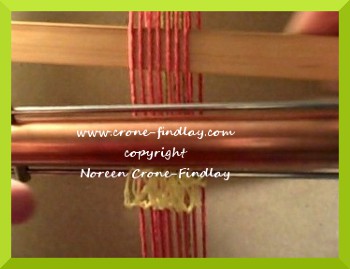
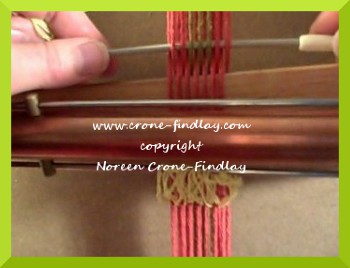
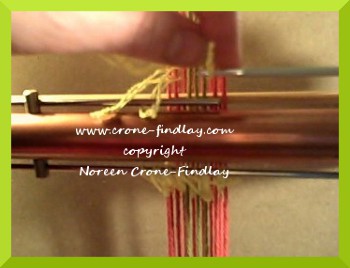
Leno can seem a little challenging at first, so I figured that a video  tutorial is a good idea.

Here it is:

Happy Weaving!

🙂


6 Comments

Filed under Loom & looms & small loom weaving, tutorial & how to, video tutorial, weaving & handwoven

A slightly different approach to the ‘No Warp Ends’ on the Mirrix

I hate wasting yarn… so I really don’t like loom waste – who wants to toss their yarn in the trash? Really 🙂

That’s why I love Claudia Chase’s ‘No Warp Ends’ technique for the Mirrix  looms.

copyright Noreen Crone-Findlay

The one thing that I wasn’t keen on was using paper clips to be the holders for the yarn ends, so I thought about it and mulled it over.

Hmmmm….  I use ‘S’ hooks all the time to hang things and connect them, but I have never used them on a loom.

This called for some experimenting.

I don’t know about you…. but, I have a tendency to start with a really complicated plan, and have to do a lot of trial and errors to get to the elegant and simple final version.

I was thinking about all kinds of ways of making harnesses to hold the bars for the ‘s’ hooks…. oh my!

I also figured that I wanted to use both sides of the loom while setting up for this technique.

I had woven two affinity bracelets at the same time- one on the front of the loom, and one on the back, so this seemed to stick in my mind as ‘the way to go’.

Well… I twiddled and fiddled, and threw away the whole overly elaborate harness idea, and ended up using 4 loops of double sided velcro to hold the bars to the upper and lower edges of the loom.

That was a  big breakthrough- talk about a simple way to do this! Yay!~

And, I am really pleased with the final method that I came up with- it really works for me!

copyright Noreen Crone-Findlay

Here is the video, showing how I warp the Mirrix Lani using the ‘No Warp Ends’ technique, with ‘S’ hooks:

Happy Weaving! 🙂

8 Comments

Filed under Loom & looms & small loom weaving, tutorial & how to, video tutorial, weaving & handwoven

Whatcha working on these days? he asked

Last week, a friend asked me what I was working on these days.

In response, I  rattled off a list of projects and tasks that is the length of my arm.

The next day, as I was leaving the dentist, he drove up to the stop sign, he said: ‘Oh yah, you say you’re working on all these things, but here you are, just walking down the street!’ 😀

Um… if I could master the transporter, I would! Zap! into the dentist chair! Zap! Home again! Sparkle sparkle zing. 🙂

I would like that…. 🙂

Anyhow, here are some of the things that are happening in my studio right now….

(Not ~ all  ~ the things that are happening, as I can’t show projects that I am designing for magazines etc- the editors would be smacking me on the side of the head if I did….)

(and I am working on some stuff that I need to not talk about until it ripens. You know how it is.)

Okay… first things first…

We have adopted an adorable little rescue…. he’s 4 1/2 years old and is just wonderful.

(except for being a cat botherer… that is NOT good 😦  )  This is him (in his fetching blue harness) with his adopted big brother. (Our  dear old chihuahua/daschund cross).

copyright Noreen Crone-Findlay

Ah, well, other than being oh so barkie about the cats, he is completely adorable. As you can see, he has settled in beautifully.

Although, every adoption takes time and patience and attention….

Alright…. a brief zip around the studio:

Okay, in the southeast corner, there’s a big project happening on my tri loom (configured to the 3 foot size).

I’ll be posting more about this as the project moves closer to the finish line:

copyright Noreen Crone-Findlay

My tri loom is from Dewberry Ridge looms, and it’s beautifully crafted. I love it.

I have other projects on the go on Dewberry Ridge looms:

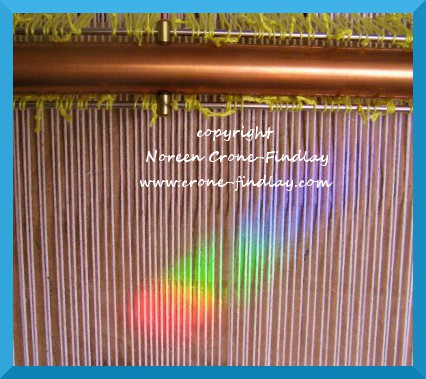
copyright Noreen Crone-Findlay

I am weaving a scarf for my daughter on the 14 inch tri loom. Link to another post about this scarf: linkie

And, I am using a Dewberry Ridge Potholder loom for a new design that I will be releasing soon:

copyright Noreen Crone-Findlay

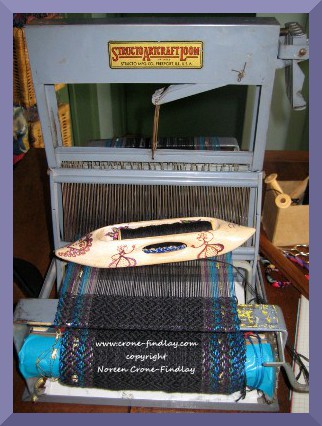
And, I am still working on my husband’s vest on the Structo Loom:

copyright Noreen Crone-Findlay

And…. I am working on several new tapestries in my series of ‘Woven Women’-

I have two ‘new to me’ looms that I bought from other weavers who didn’t bond with them:

copyright Noreen Crone-Findlay

I am delighted with my ‘new to me’ Mirrix ‘Joni’ tapestry loom.  I am just singing Joni’s praises!

I am loving working with her! Perfection!

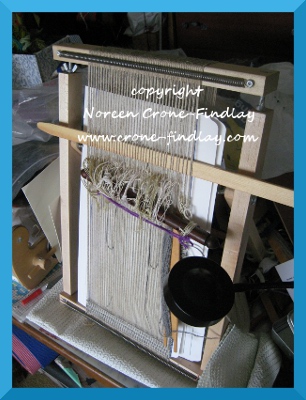
At the same time that I bought Joni Mirrix, I spotted a little wooden tapestry loom on Kijiji, and happily bought her.

copyright Noreen Crone-Findlay

This is a very slow little loom to work with, as there are no built in shedding devices, just good old fashioned weaving swords and string heddles.

Even though, I quite love this little loom and am enjoying working on her. 🙂

And………… I am also working on a whole buncha other stuff, that I’ll be telling you more about later.

Until then, may the sun shine softly upon you!

Happy weaving!


4 Comments

Filed under Loom & looms & small loom weaving, potholder loom, weaving & handwoven