Normally, we wrap all our presents in bags that I have made over the years. We never buy paper for gift wrapping.
But, this year, my husband and I made some gifts that needed special packaging.
So I set my mind to working on how to do this in an eco friendly way.
(I’ll show the special gifts in my next blog post)
It came as a roll that is 12 inches wide by ever so long, and it’s been kind of in the way ever since, but I didn’t want to get rid of it because I have a huge fondness for cardboard.
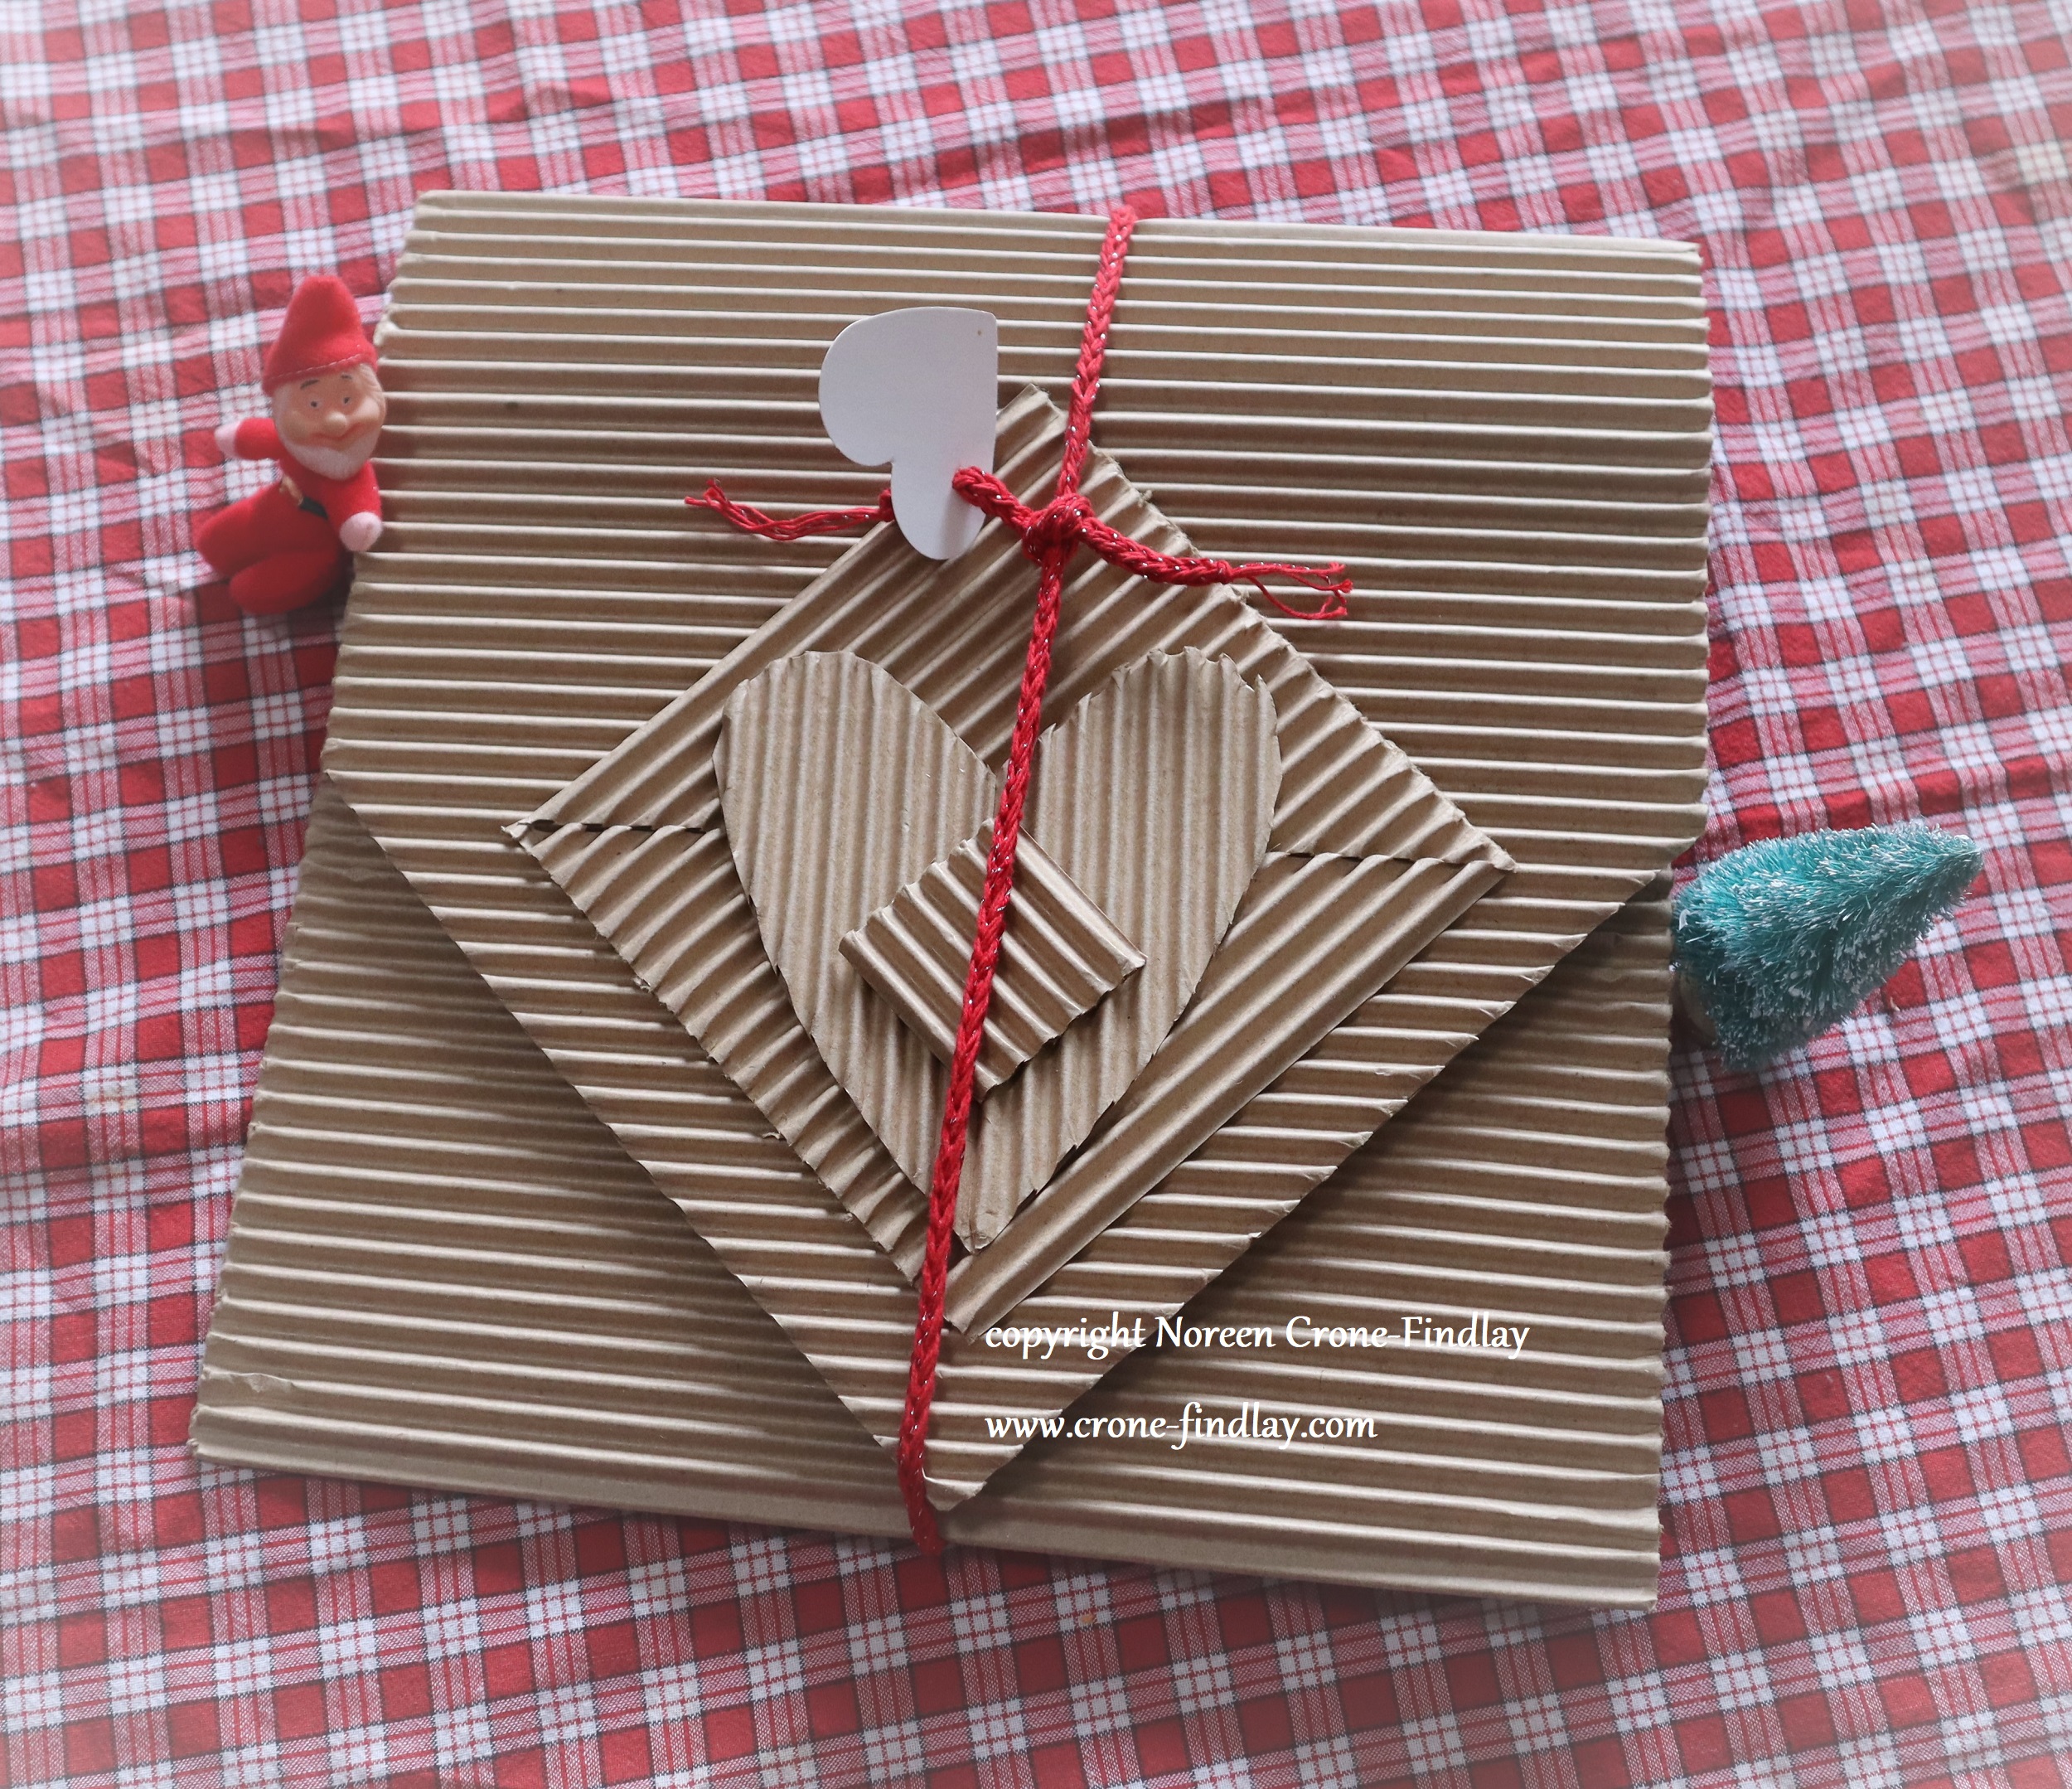
Jim wrapped the first gift in a protective swath of the cardboard, but that seemed rather ‘less than’ to me, so I mulled it over and came up with the folder idea.
I LOVE it.
It’s super simple:
I cut a 36 inch long piece of the cardboard and cut triangles off one end to make the point.
Then glued one triangle to the inside of the point to stabilize it.
I traced a tray to make the curve and then glued the edges.
Next time I will add strips of cardboard along the sides to give more dimension to the folder.
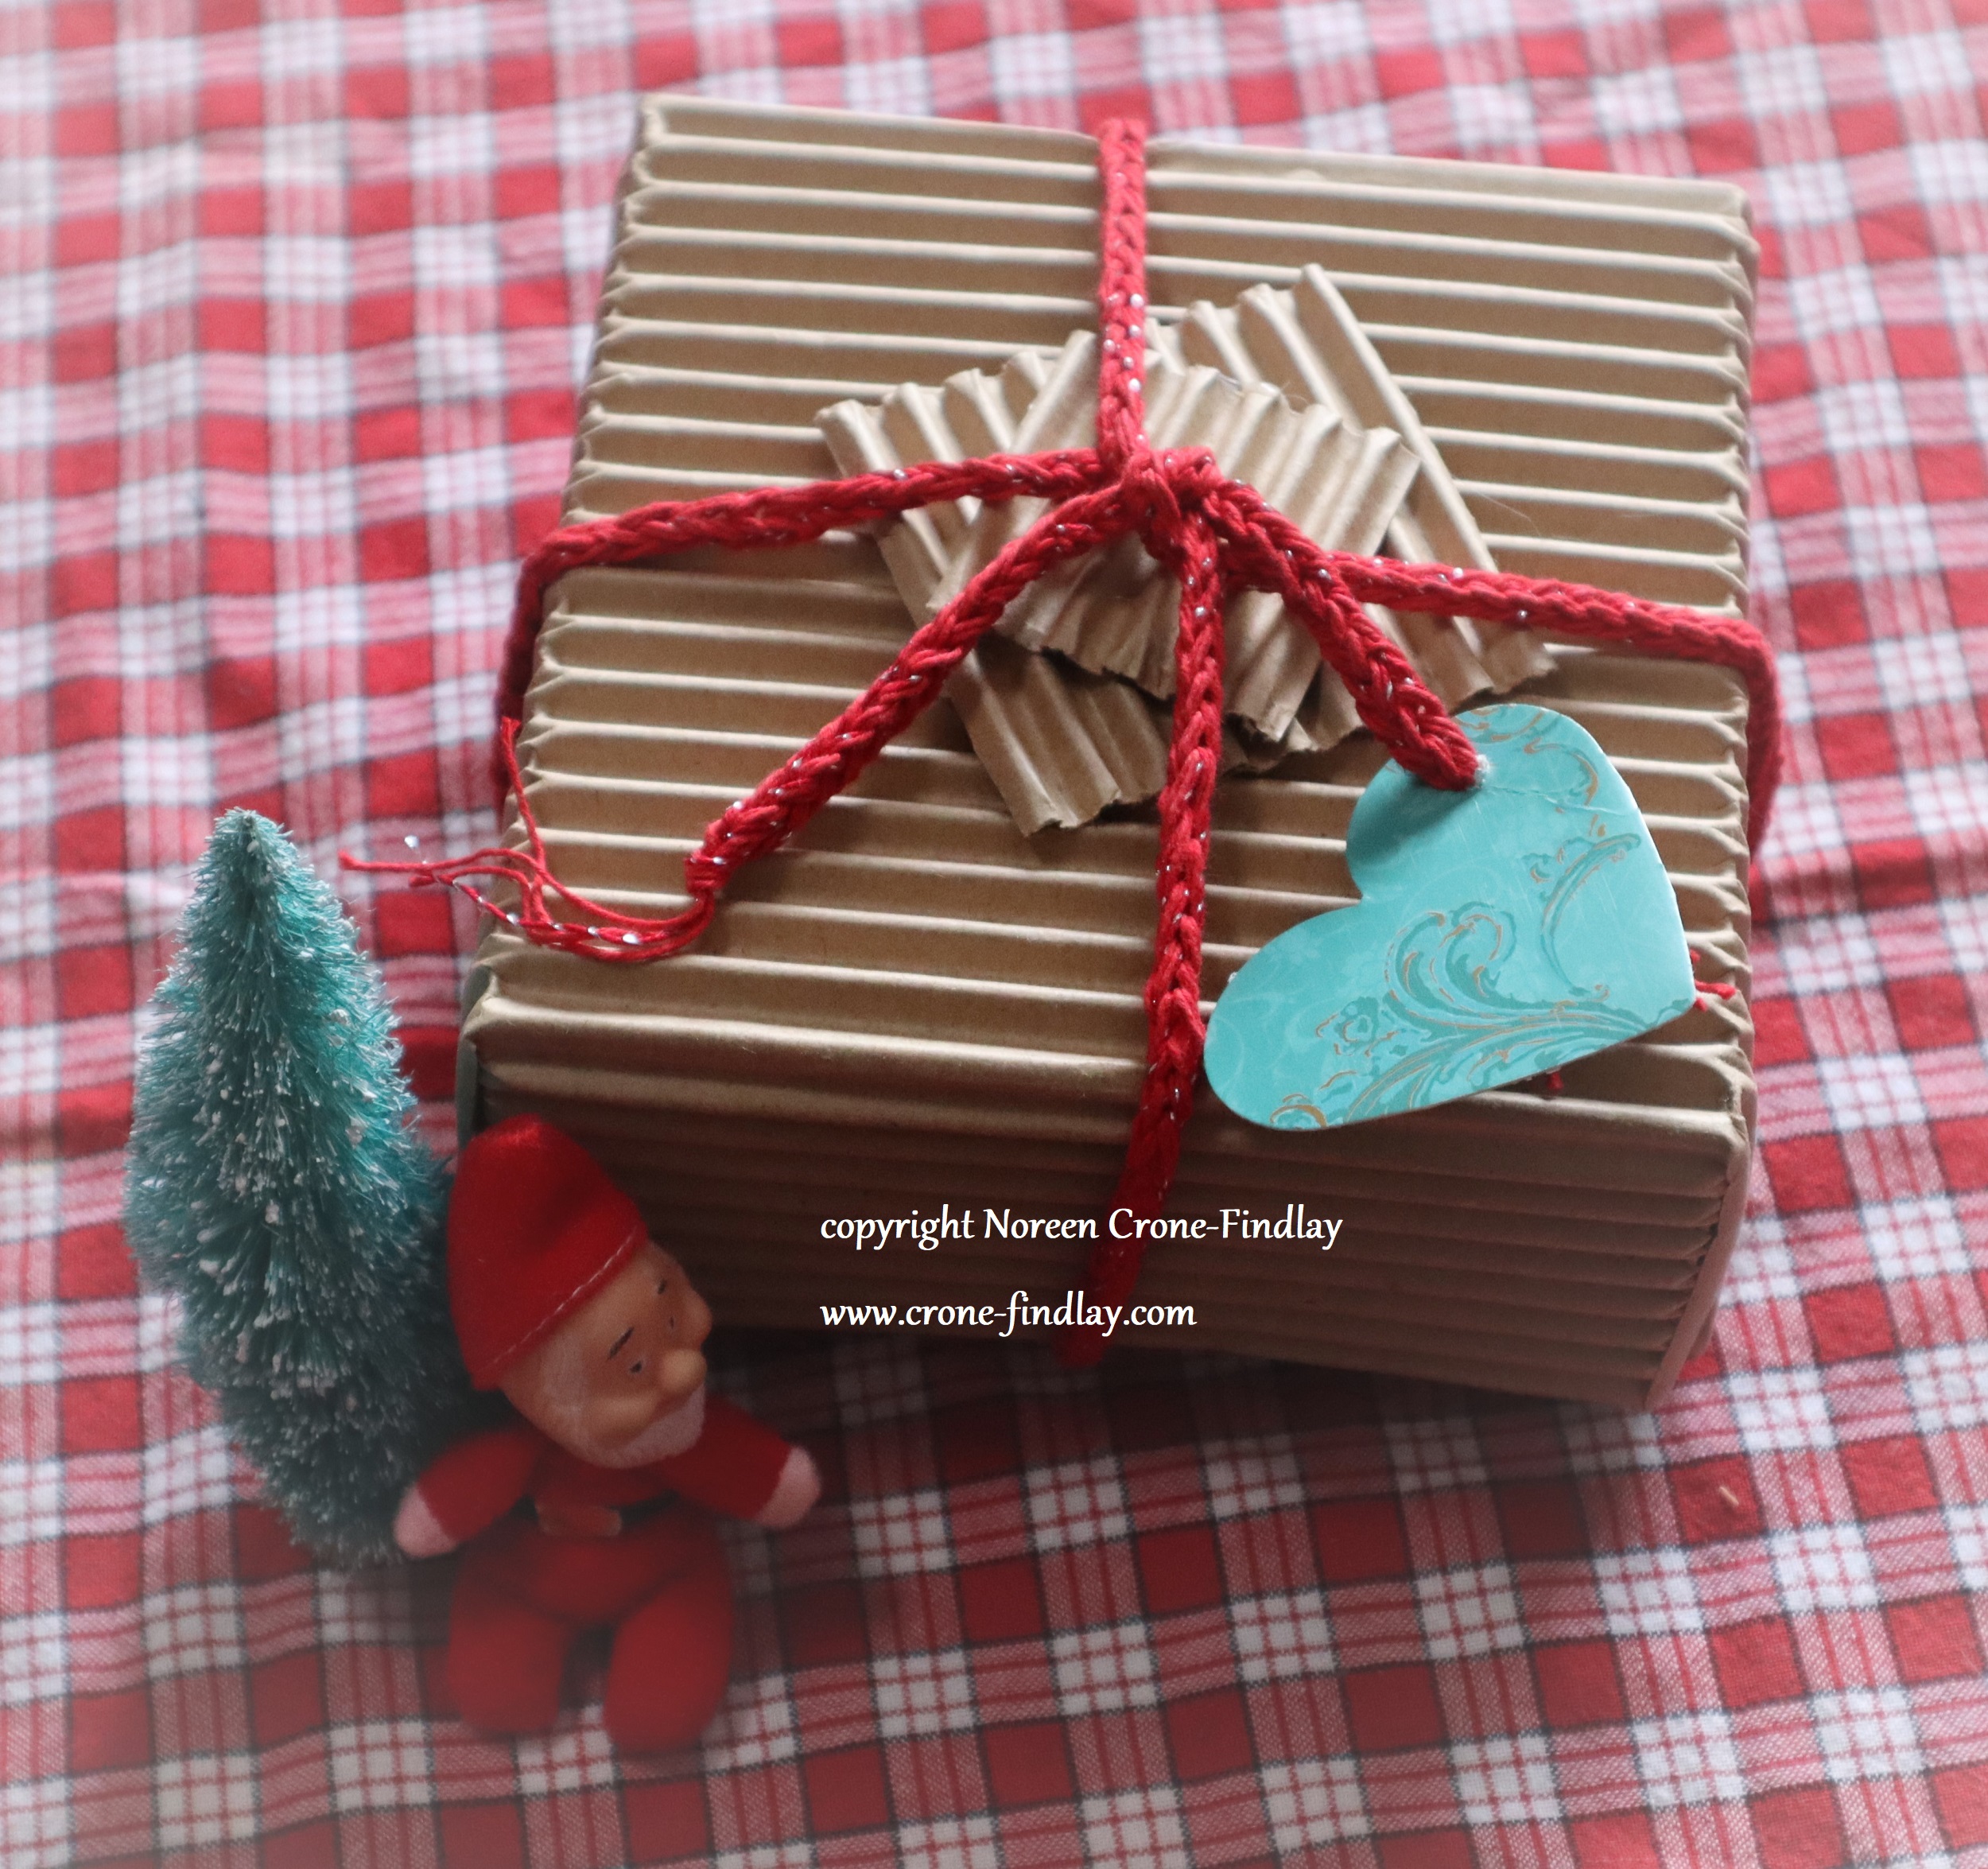
I used the off cuts to decorate the front.
The cord is made from crochet cotton that was given to me last summer (see Tea Towels) and a Lucet (LINK) and I am pleased as can be.
Another cluster of gifts needed special packaging, so I tried to fold origami boxes with the cardboard.
FAIL.
Instead, I came up with trial and erroring in making fitted boxes that were a time consuming pain in the neck to make. I tried using this technique, which works great with ‘normal’ card stock and paper: LINK
I won’t bother doing this again- not with this cardboard.
(Note- even though these were the pits to make, they were still made with love and some mild cussing).
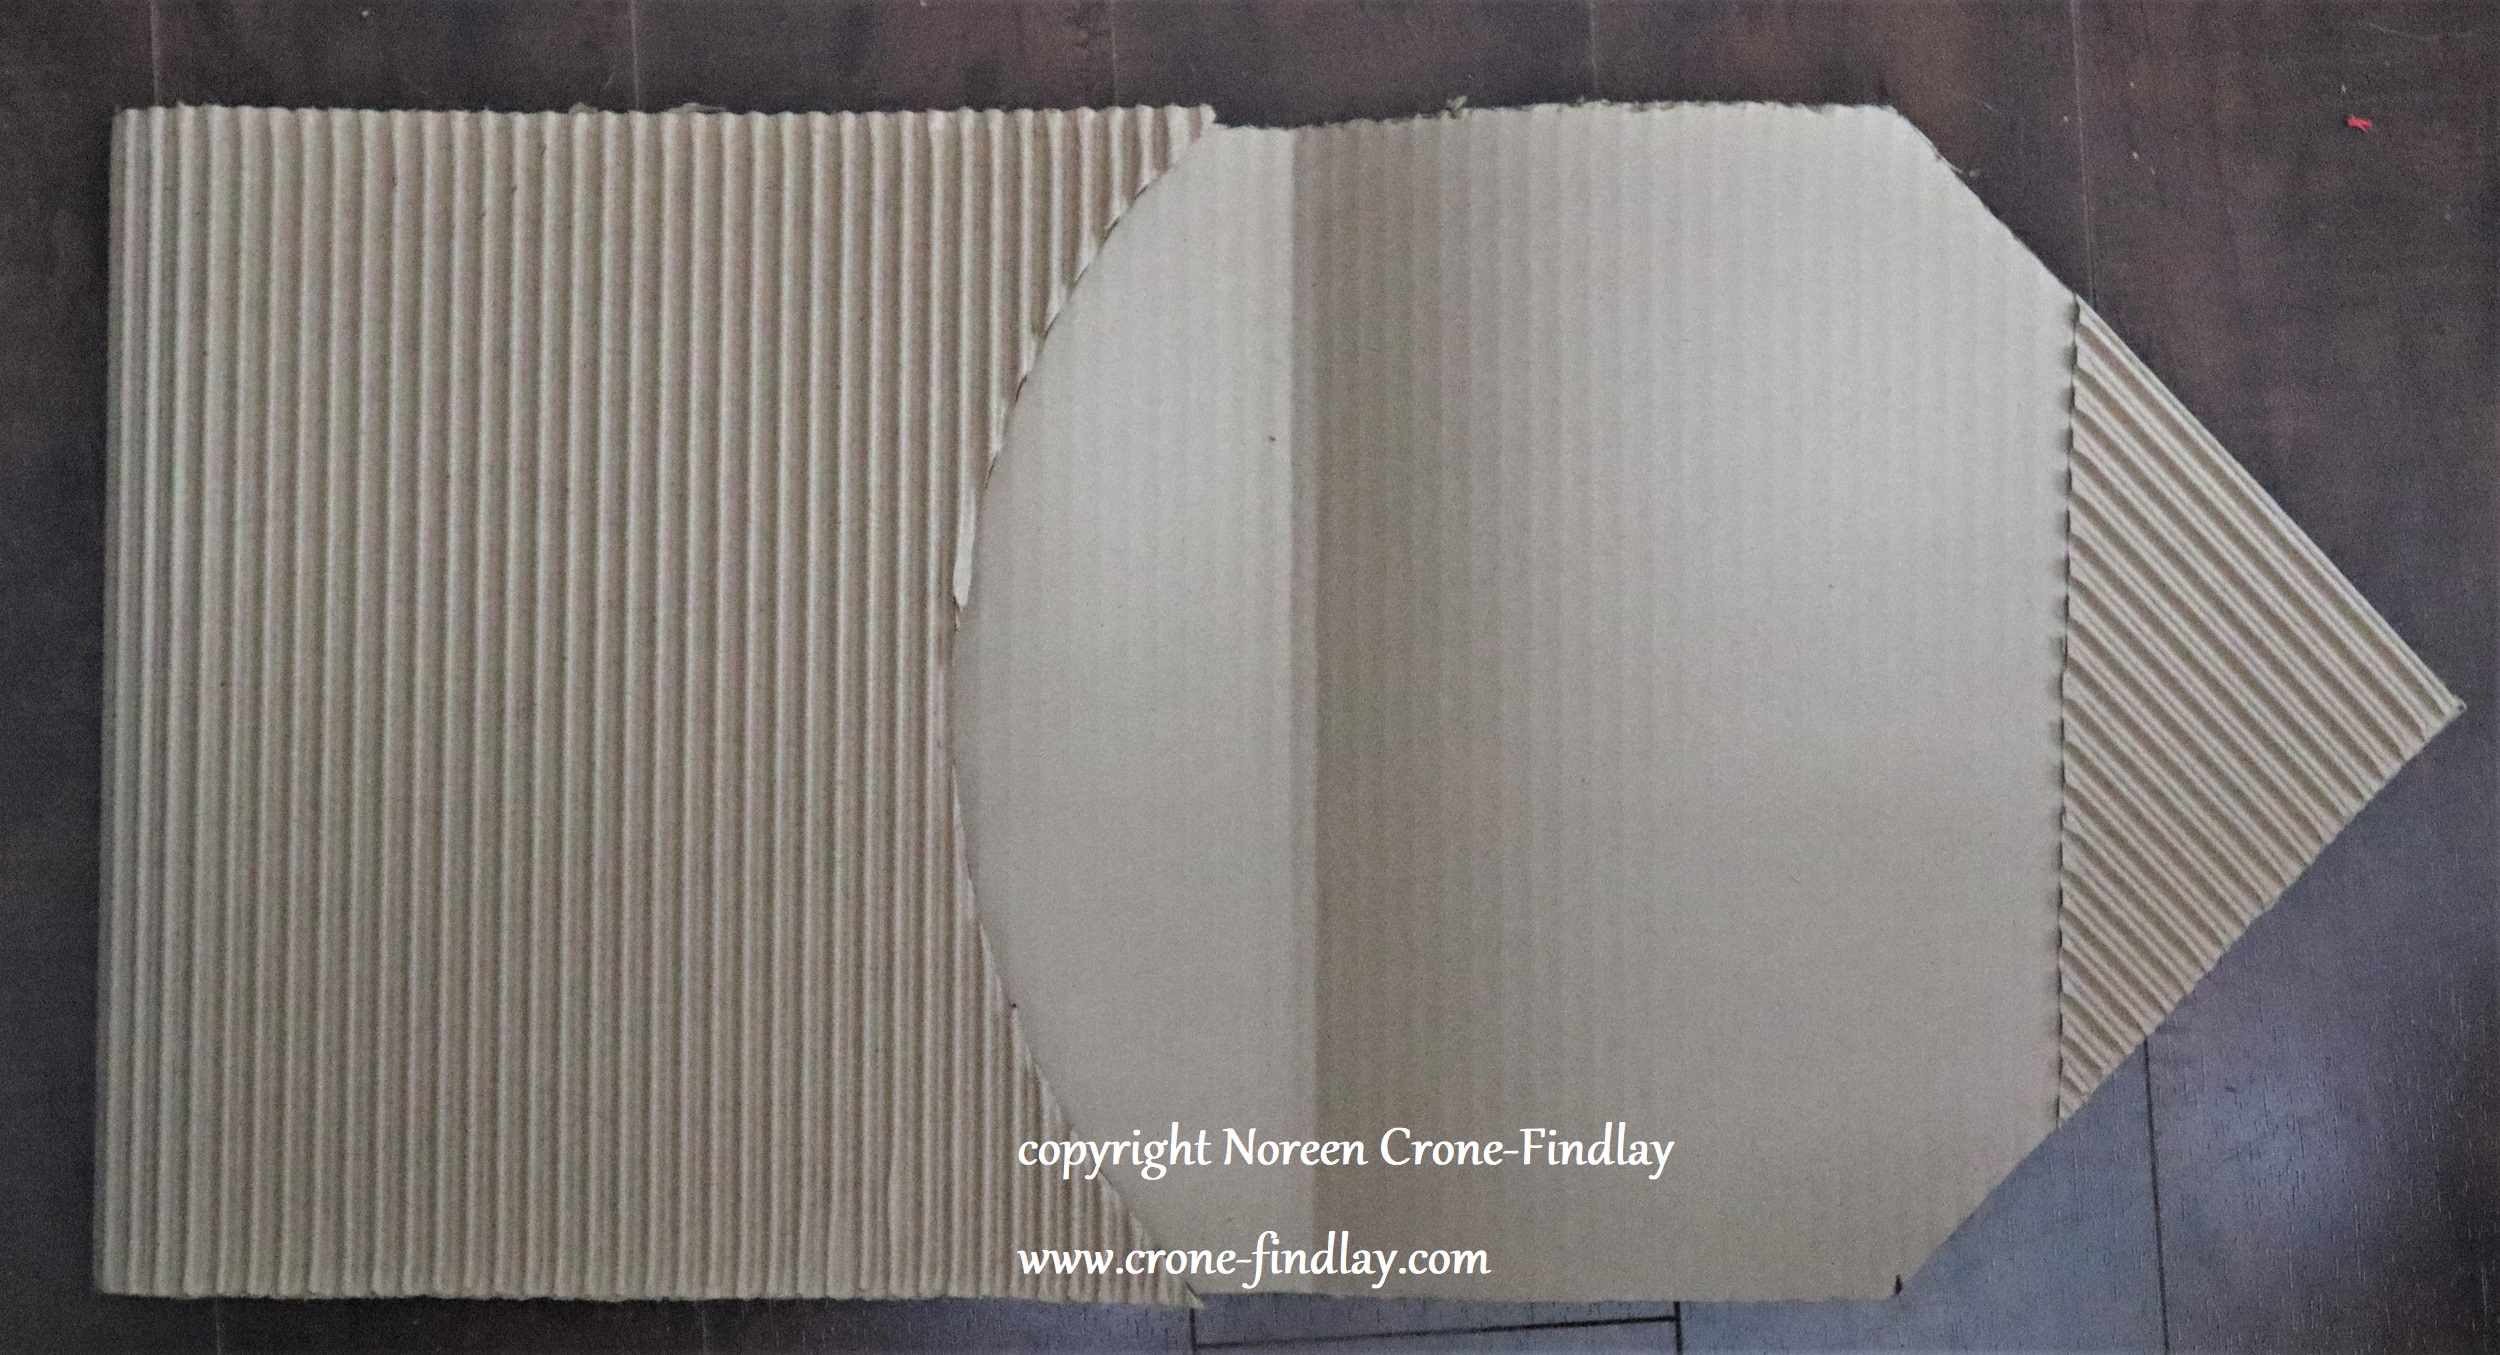
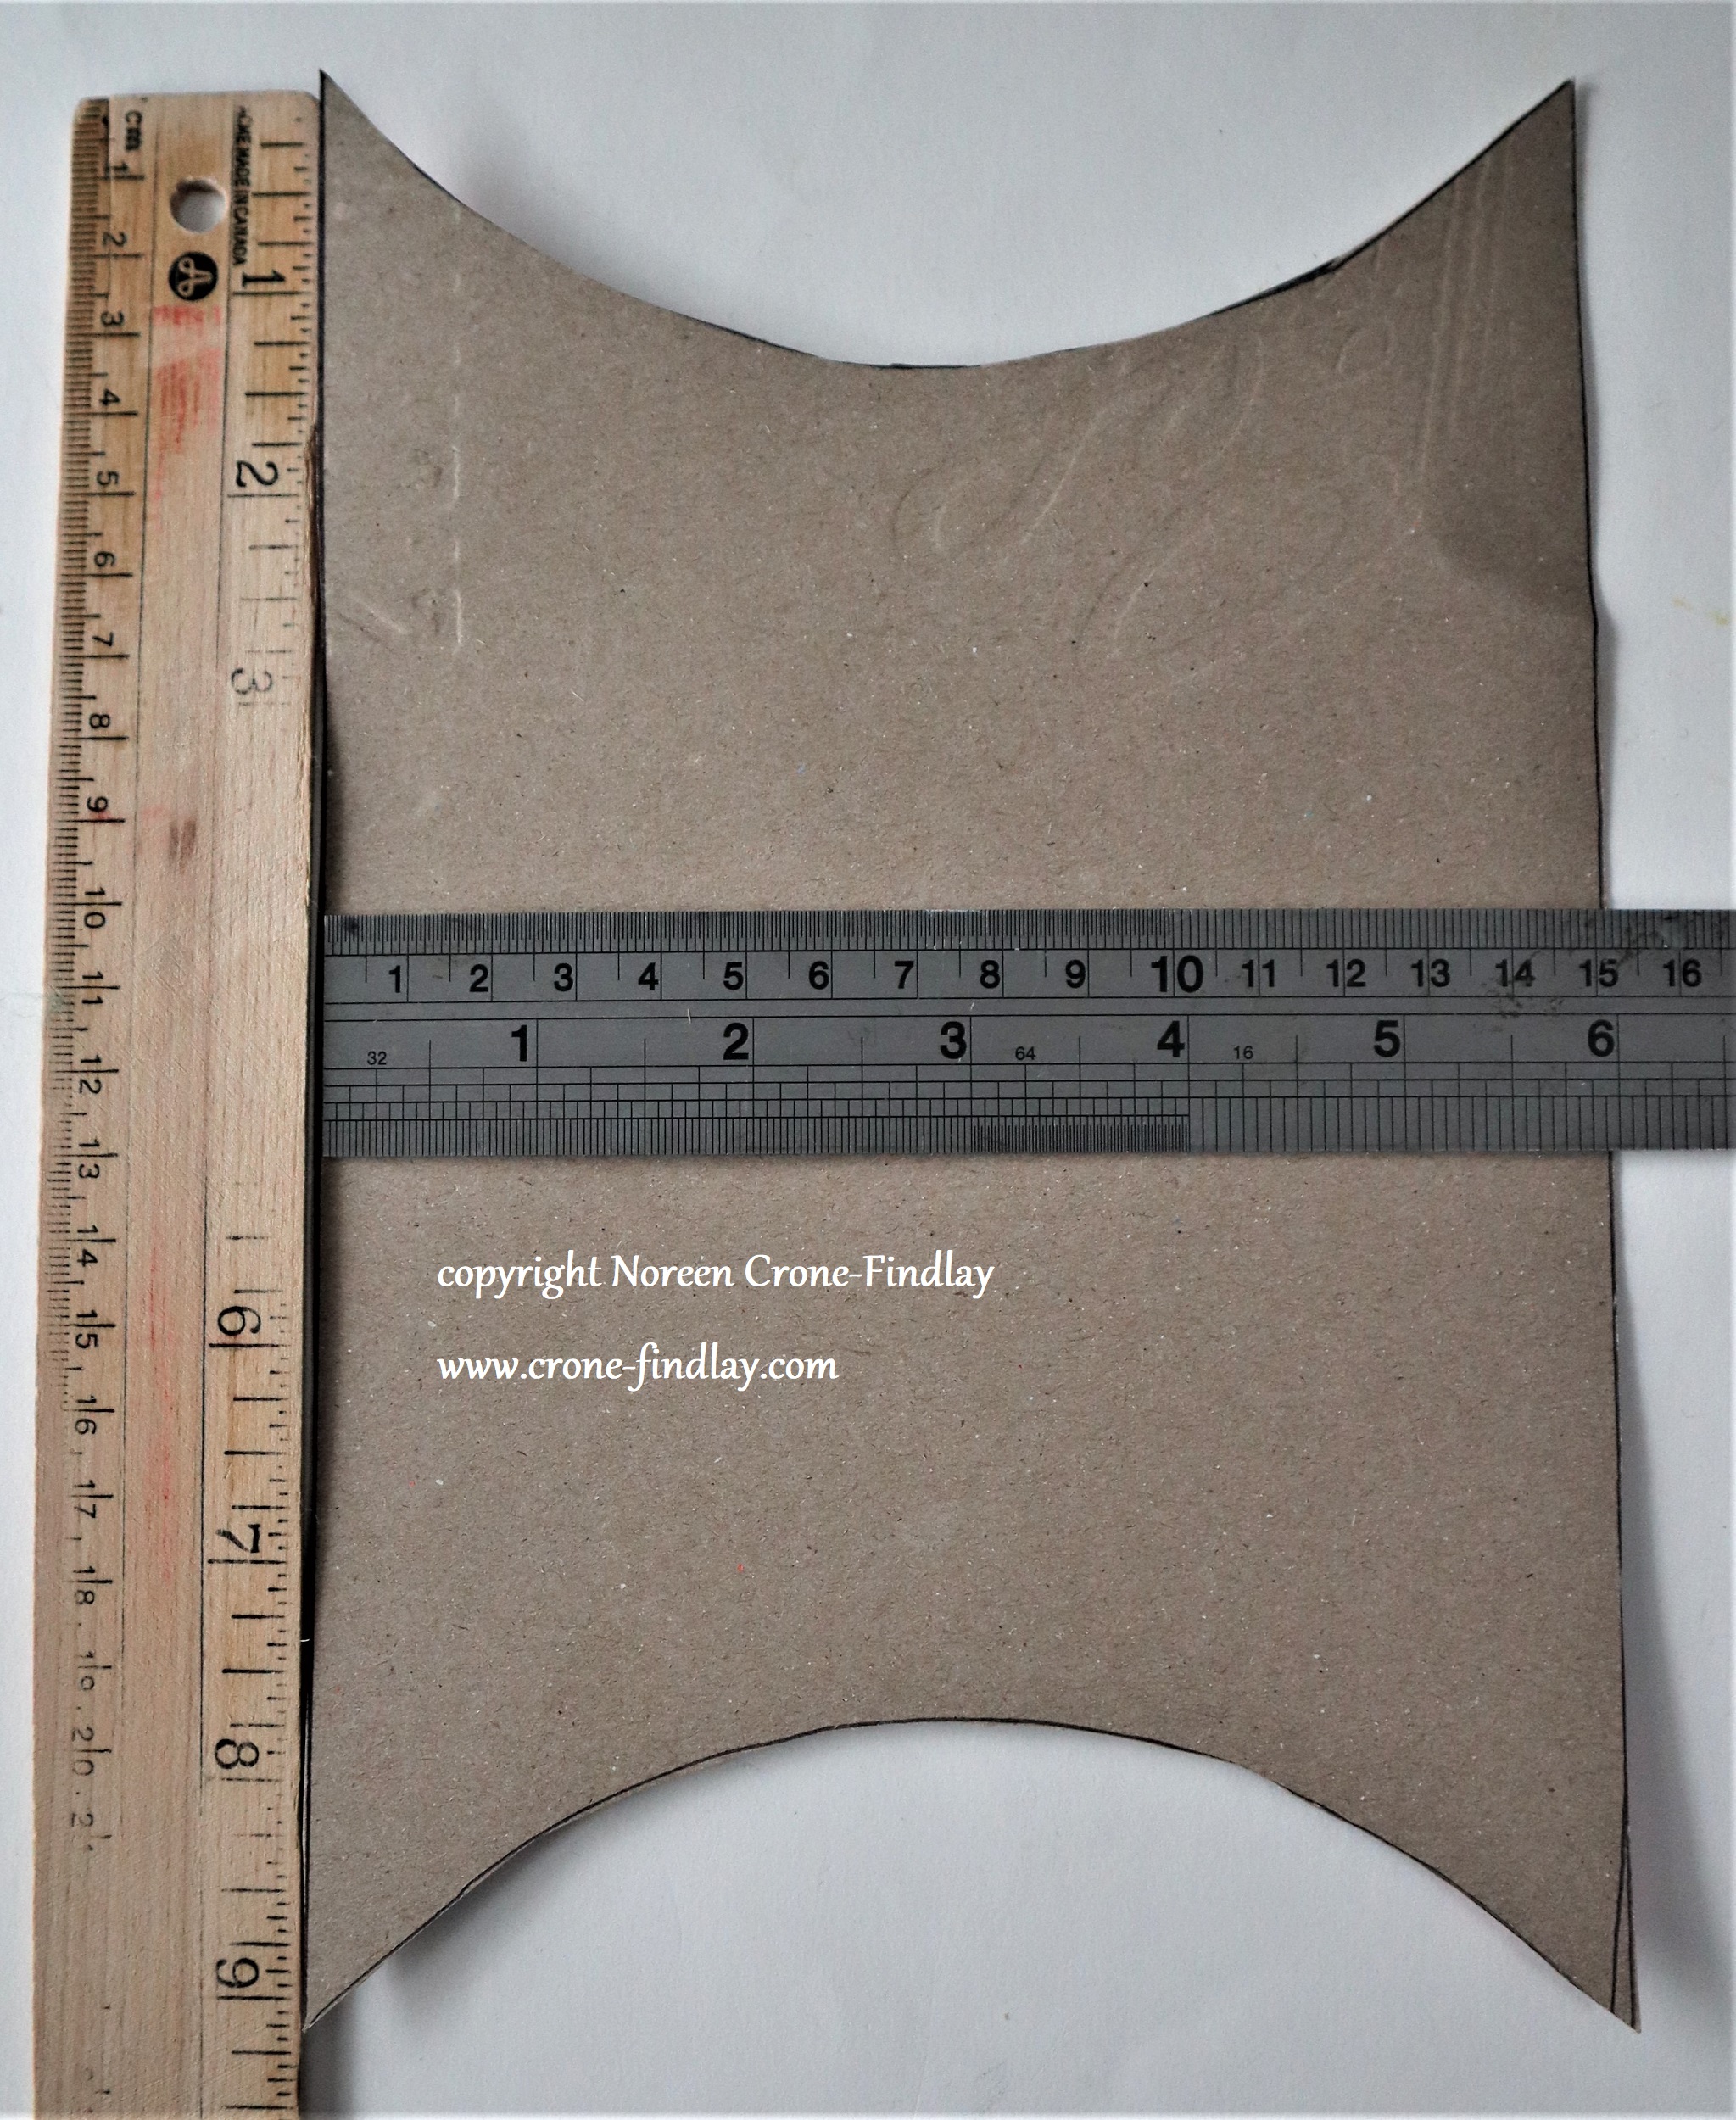
BUT, by now, I was seriously on a roll with this whole box/package designing thing and remembered those nifty containers that are tubes that have semi-circular ends that push in to close them.
Of course, I probably could have looked up a tutorial online and found the simple way to do this, but, oh no, that’s not the way my brain works.
My brain likes ~to figure things out~…..
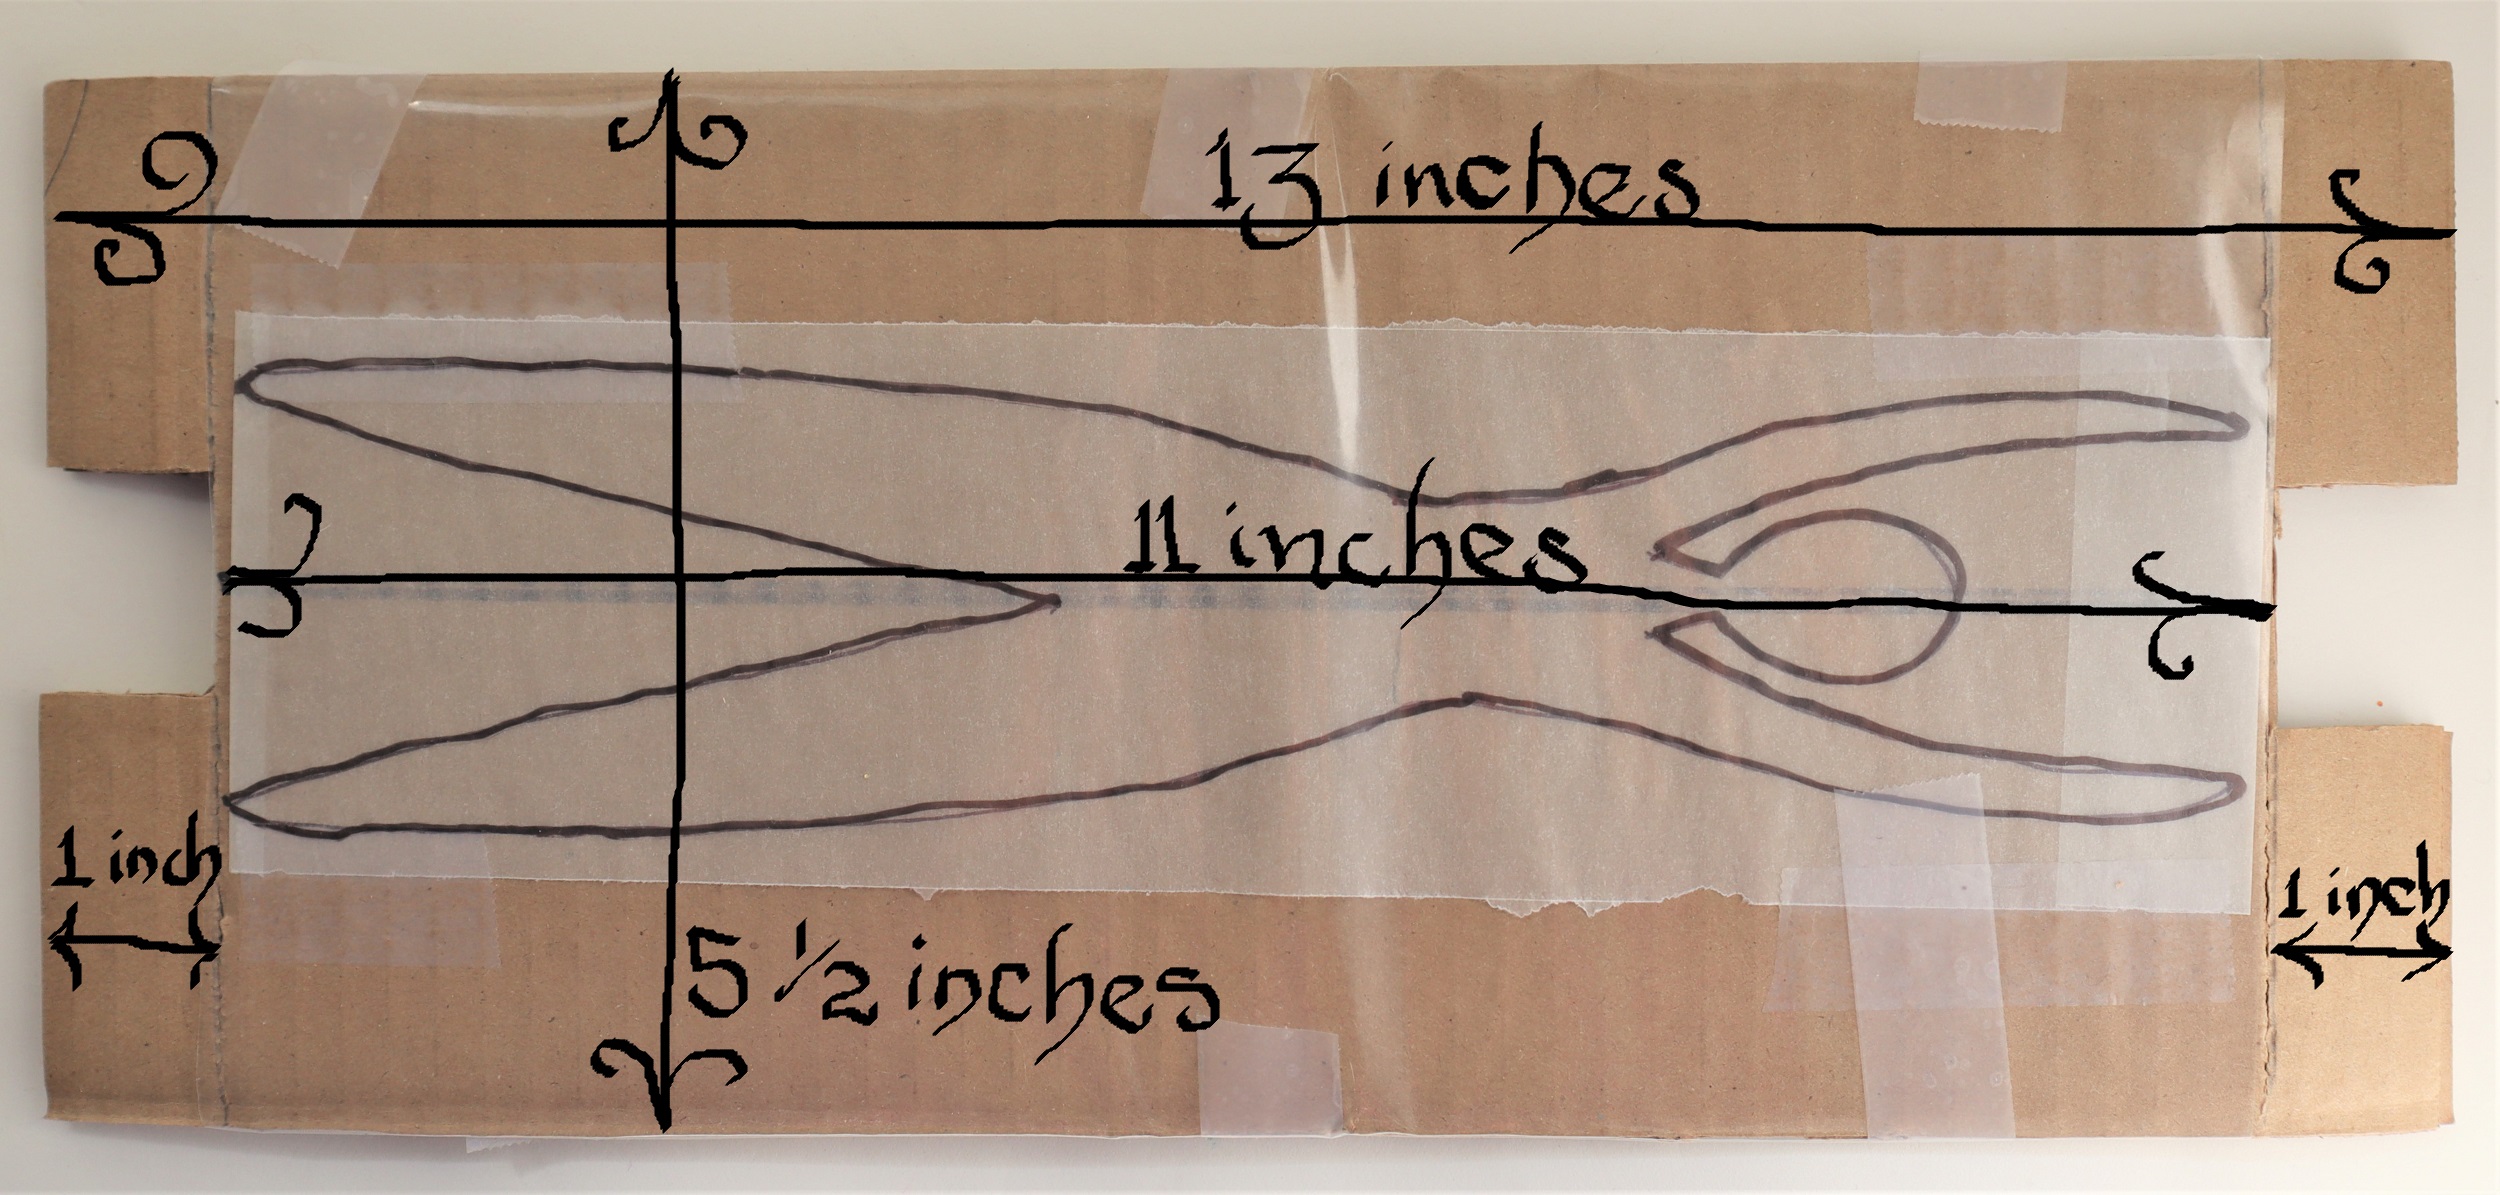
So I pushed cardboard around and flipped and folded it and measured and hummed and finally came up with this ‘Slightly Tube-ish’ container:
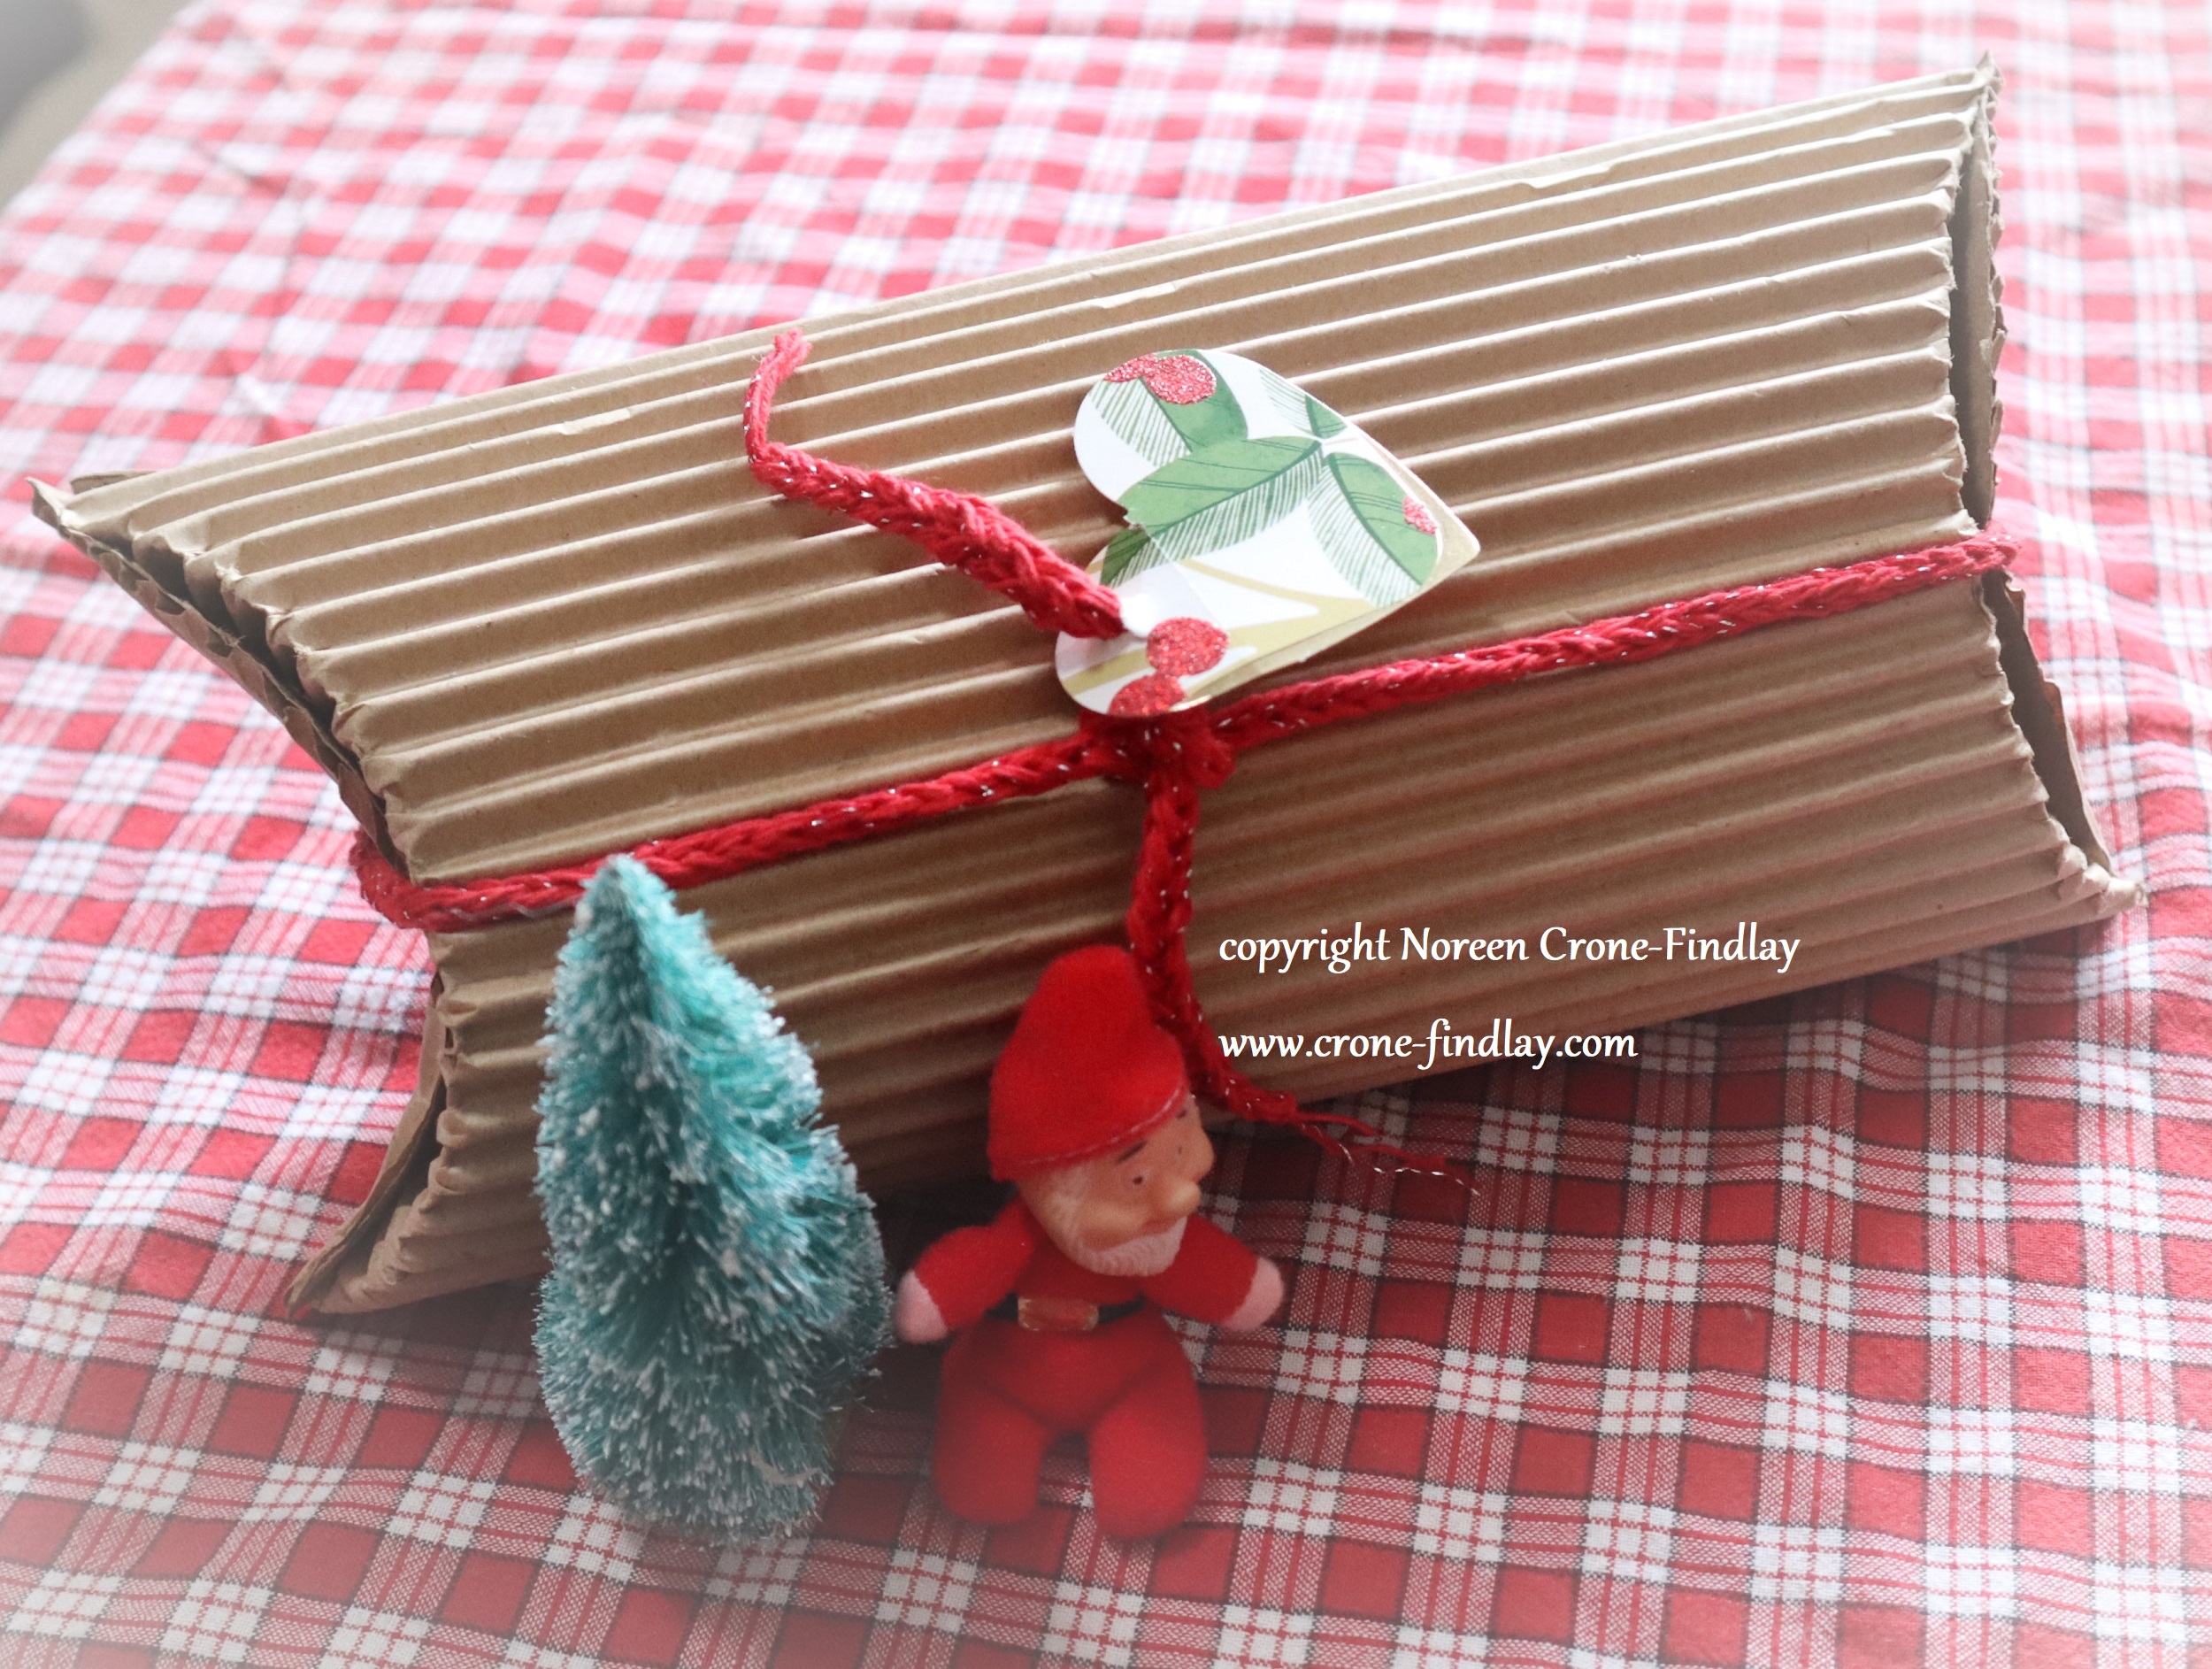
I had made several of the ‘Slightly Tube-ish’ ‘ containers when I twigged to the fact that they had a big old mistake, which I then fixed.
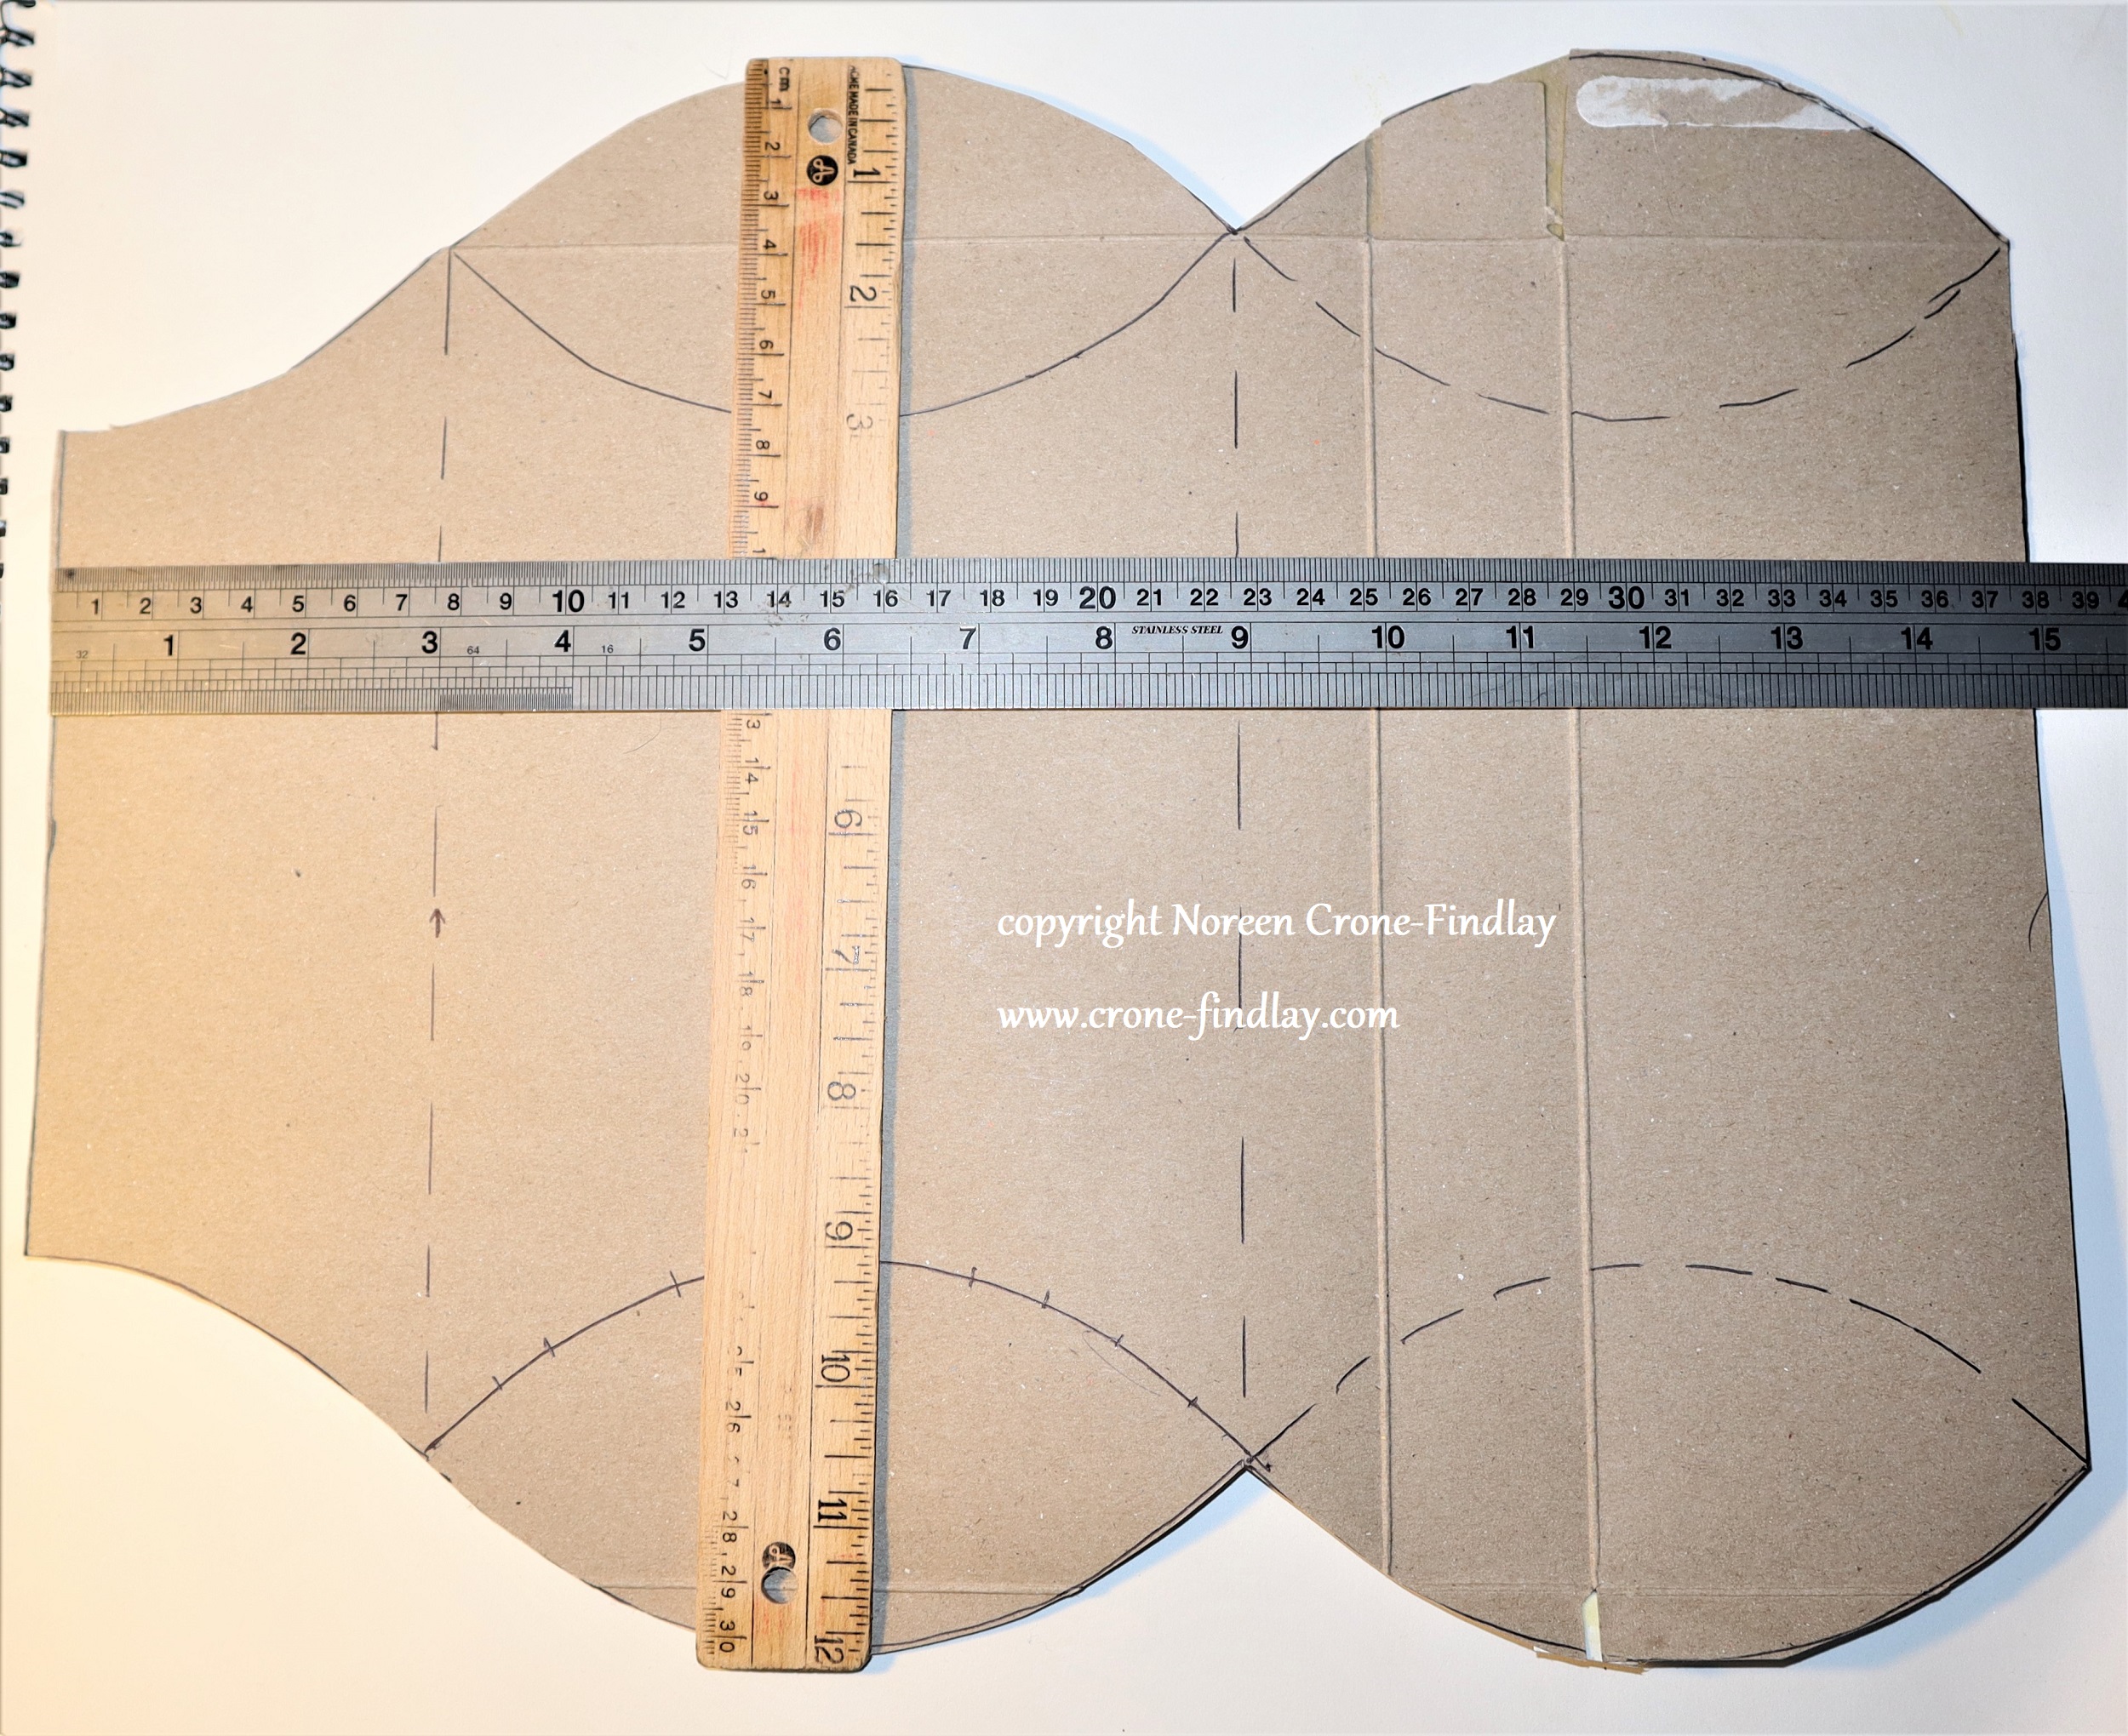
I made proper templates for the ‘right’ ‘Slightly Tube-ish’ containers , since I really like these and plan on using the concept again.
But, I wasn’t going to waste the ‘wrong’ ones, so I used them anyhow, with an apology to the recipients of the gifts and an explanation that I have got it right now, and they’ll get a better iteration next time.
Until then, the wrong ‘Slightly Tube-ish’ containers can be re-used and eventually be recycled or used as fire starters.
Here are the proper templates:
All in all, it was a lot of work, but I loved doing it and I hope that my family liked the nifty boxes and folders.
Even though I used cardboard that we had bought years ago for another project, these techniques will work really well on regular upcycled cardboard and cardstock, which pleases me very much!
Happy Upcycling! ❤