To see all the links for the ‘How To’ posts for the “Imagine” Banner Weave along, please go to L I N K S
To order the loom, book and extras kit for the Weave Along from Mirrix, please go to K I T
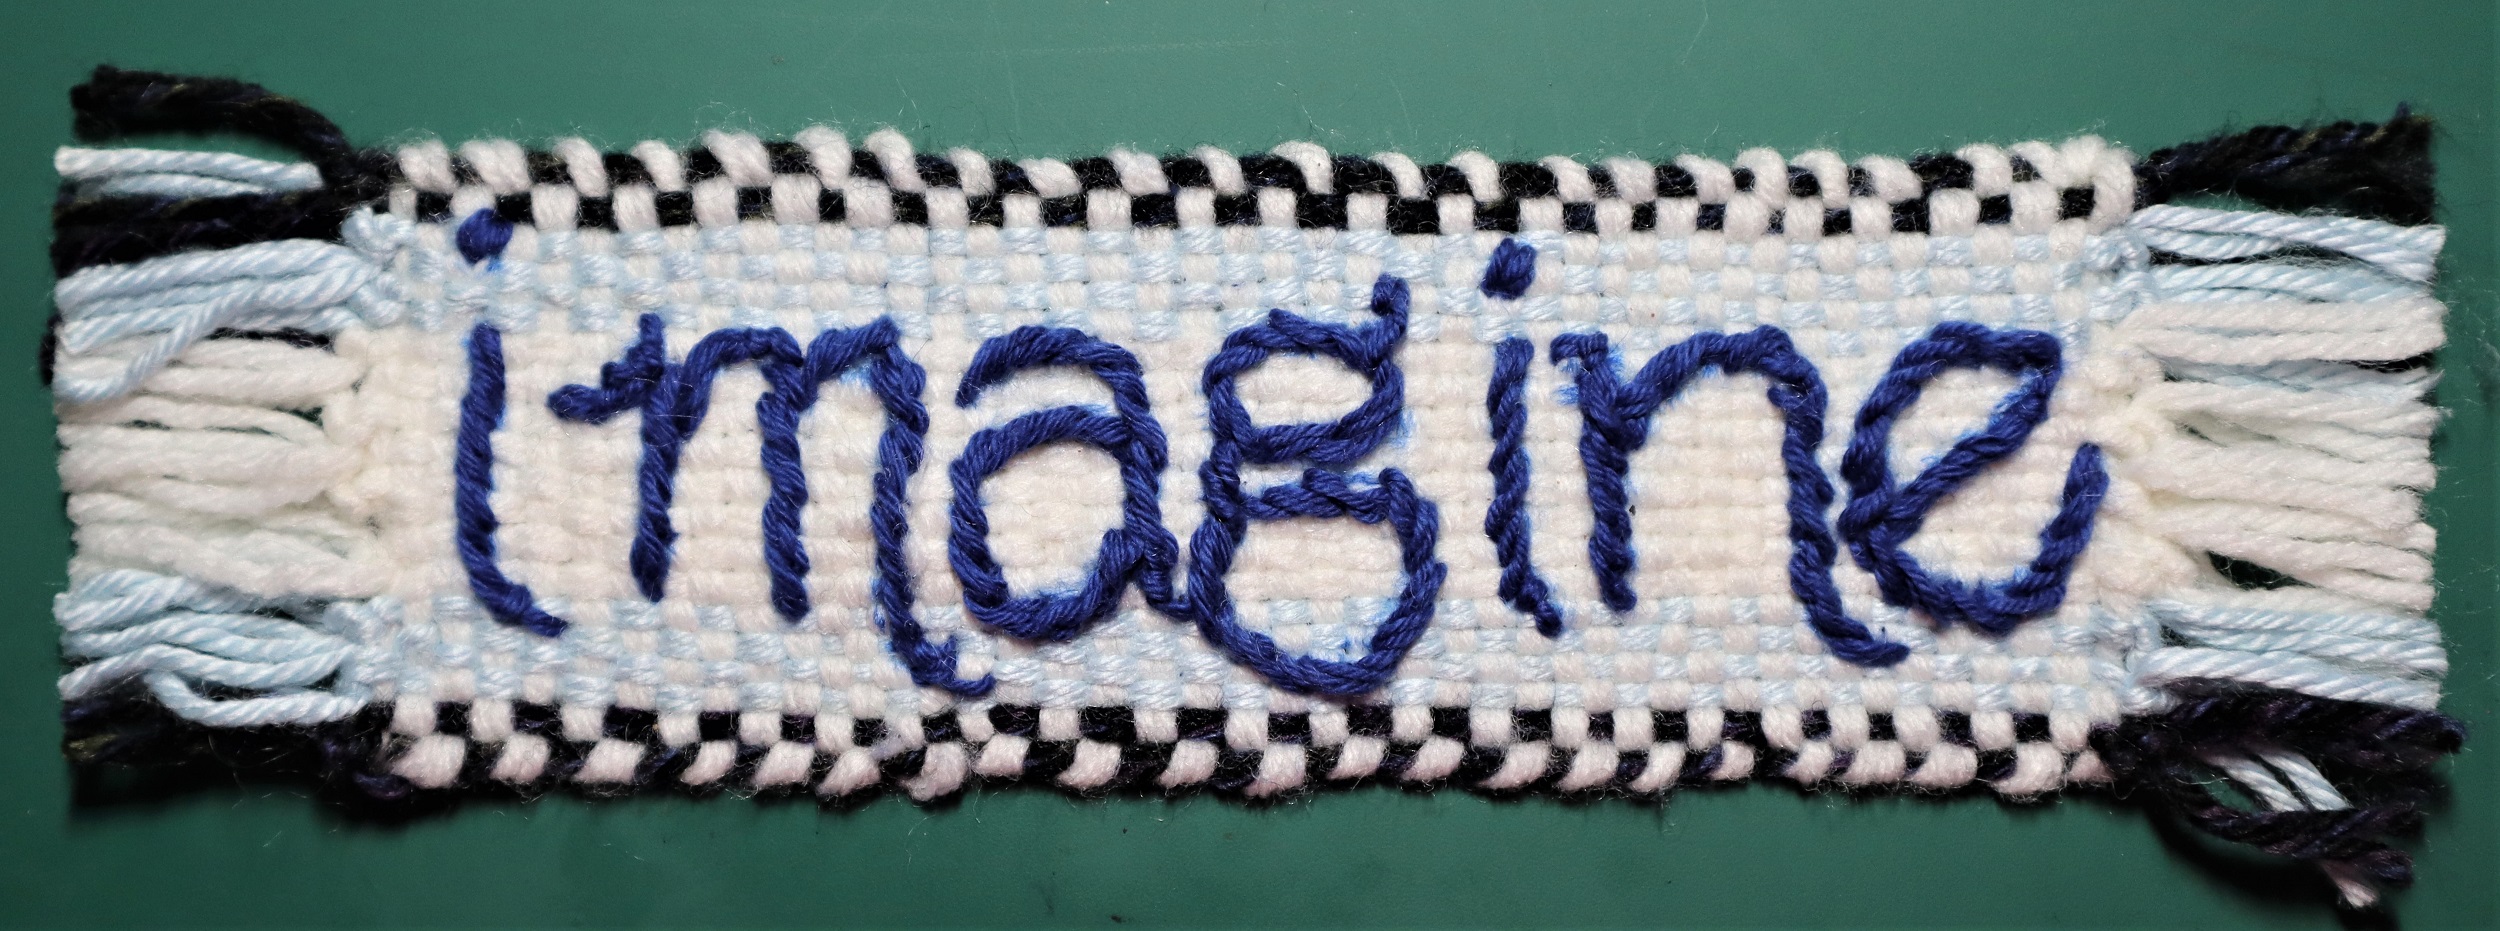
HOW TO EMBROIDER
THE WORD ‘IMAGINE’ ON THE NARROW BAND:
NOTE: The embroidery is done while the weaving is still on the loom and under tension.
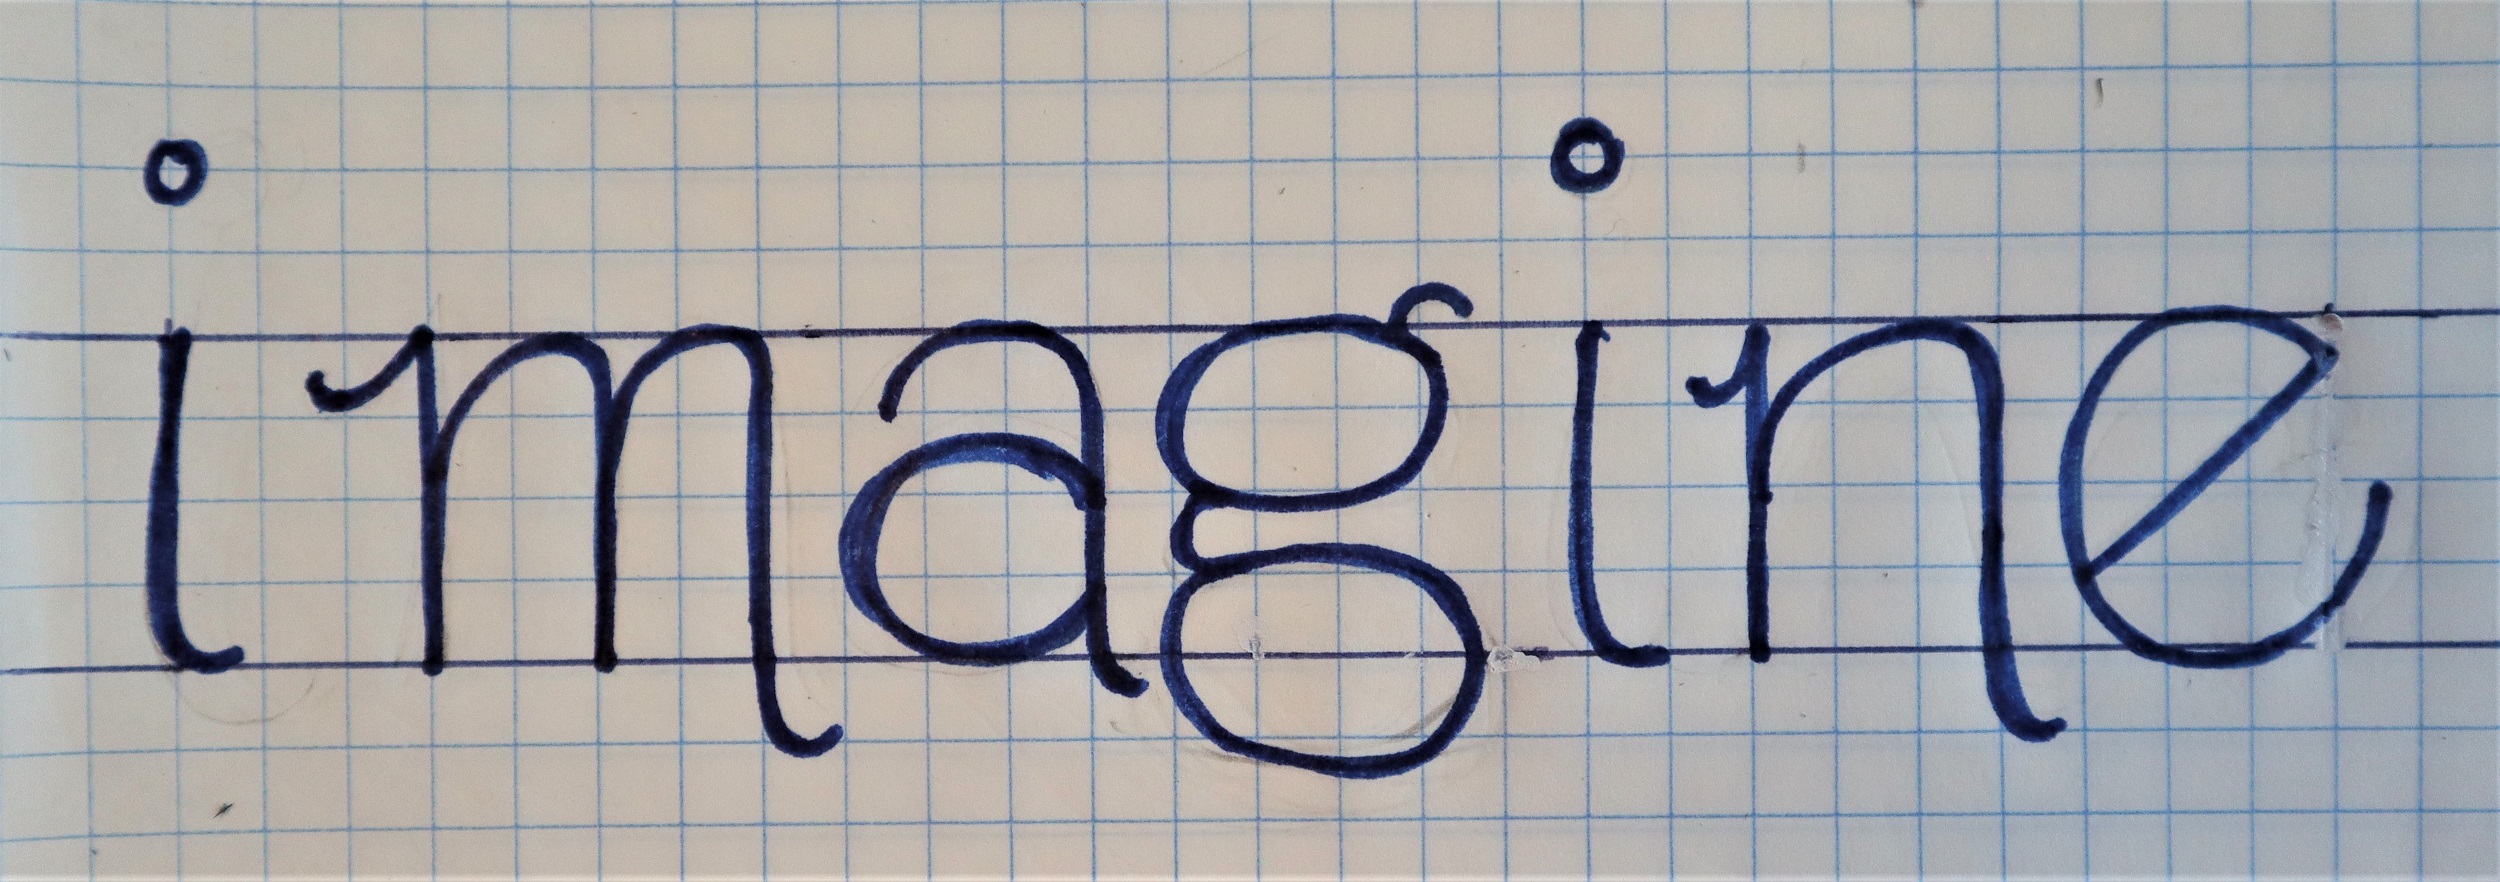
1: Print out a copy of the ‘Imagine’ letters so they are approximately 1 inch/2.5 cm high by 7 in/17.5 cm or use 1/4 inch graph paper to draw them out.
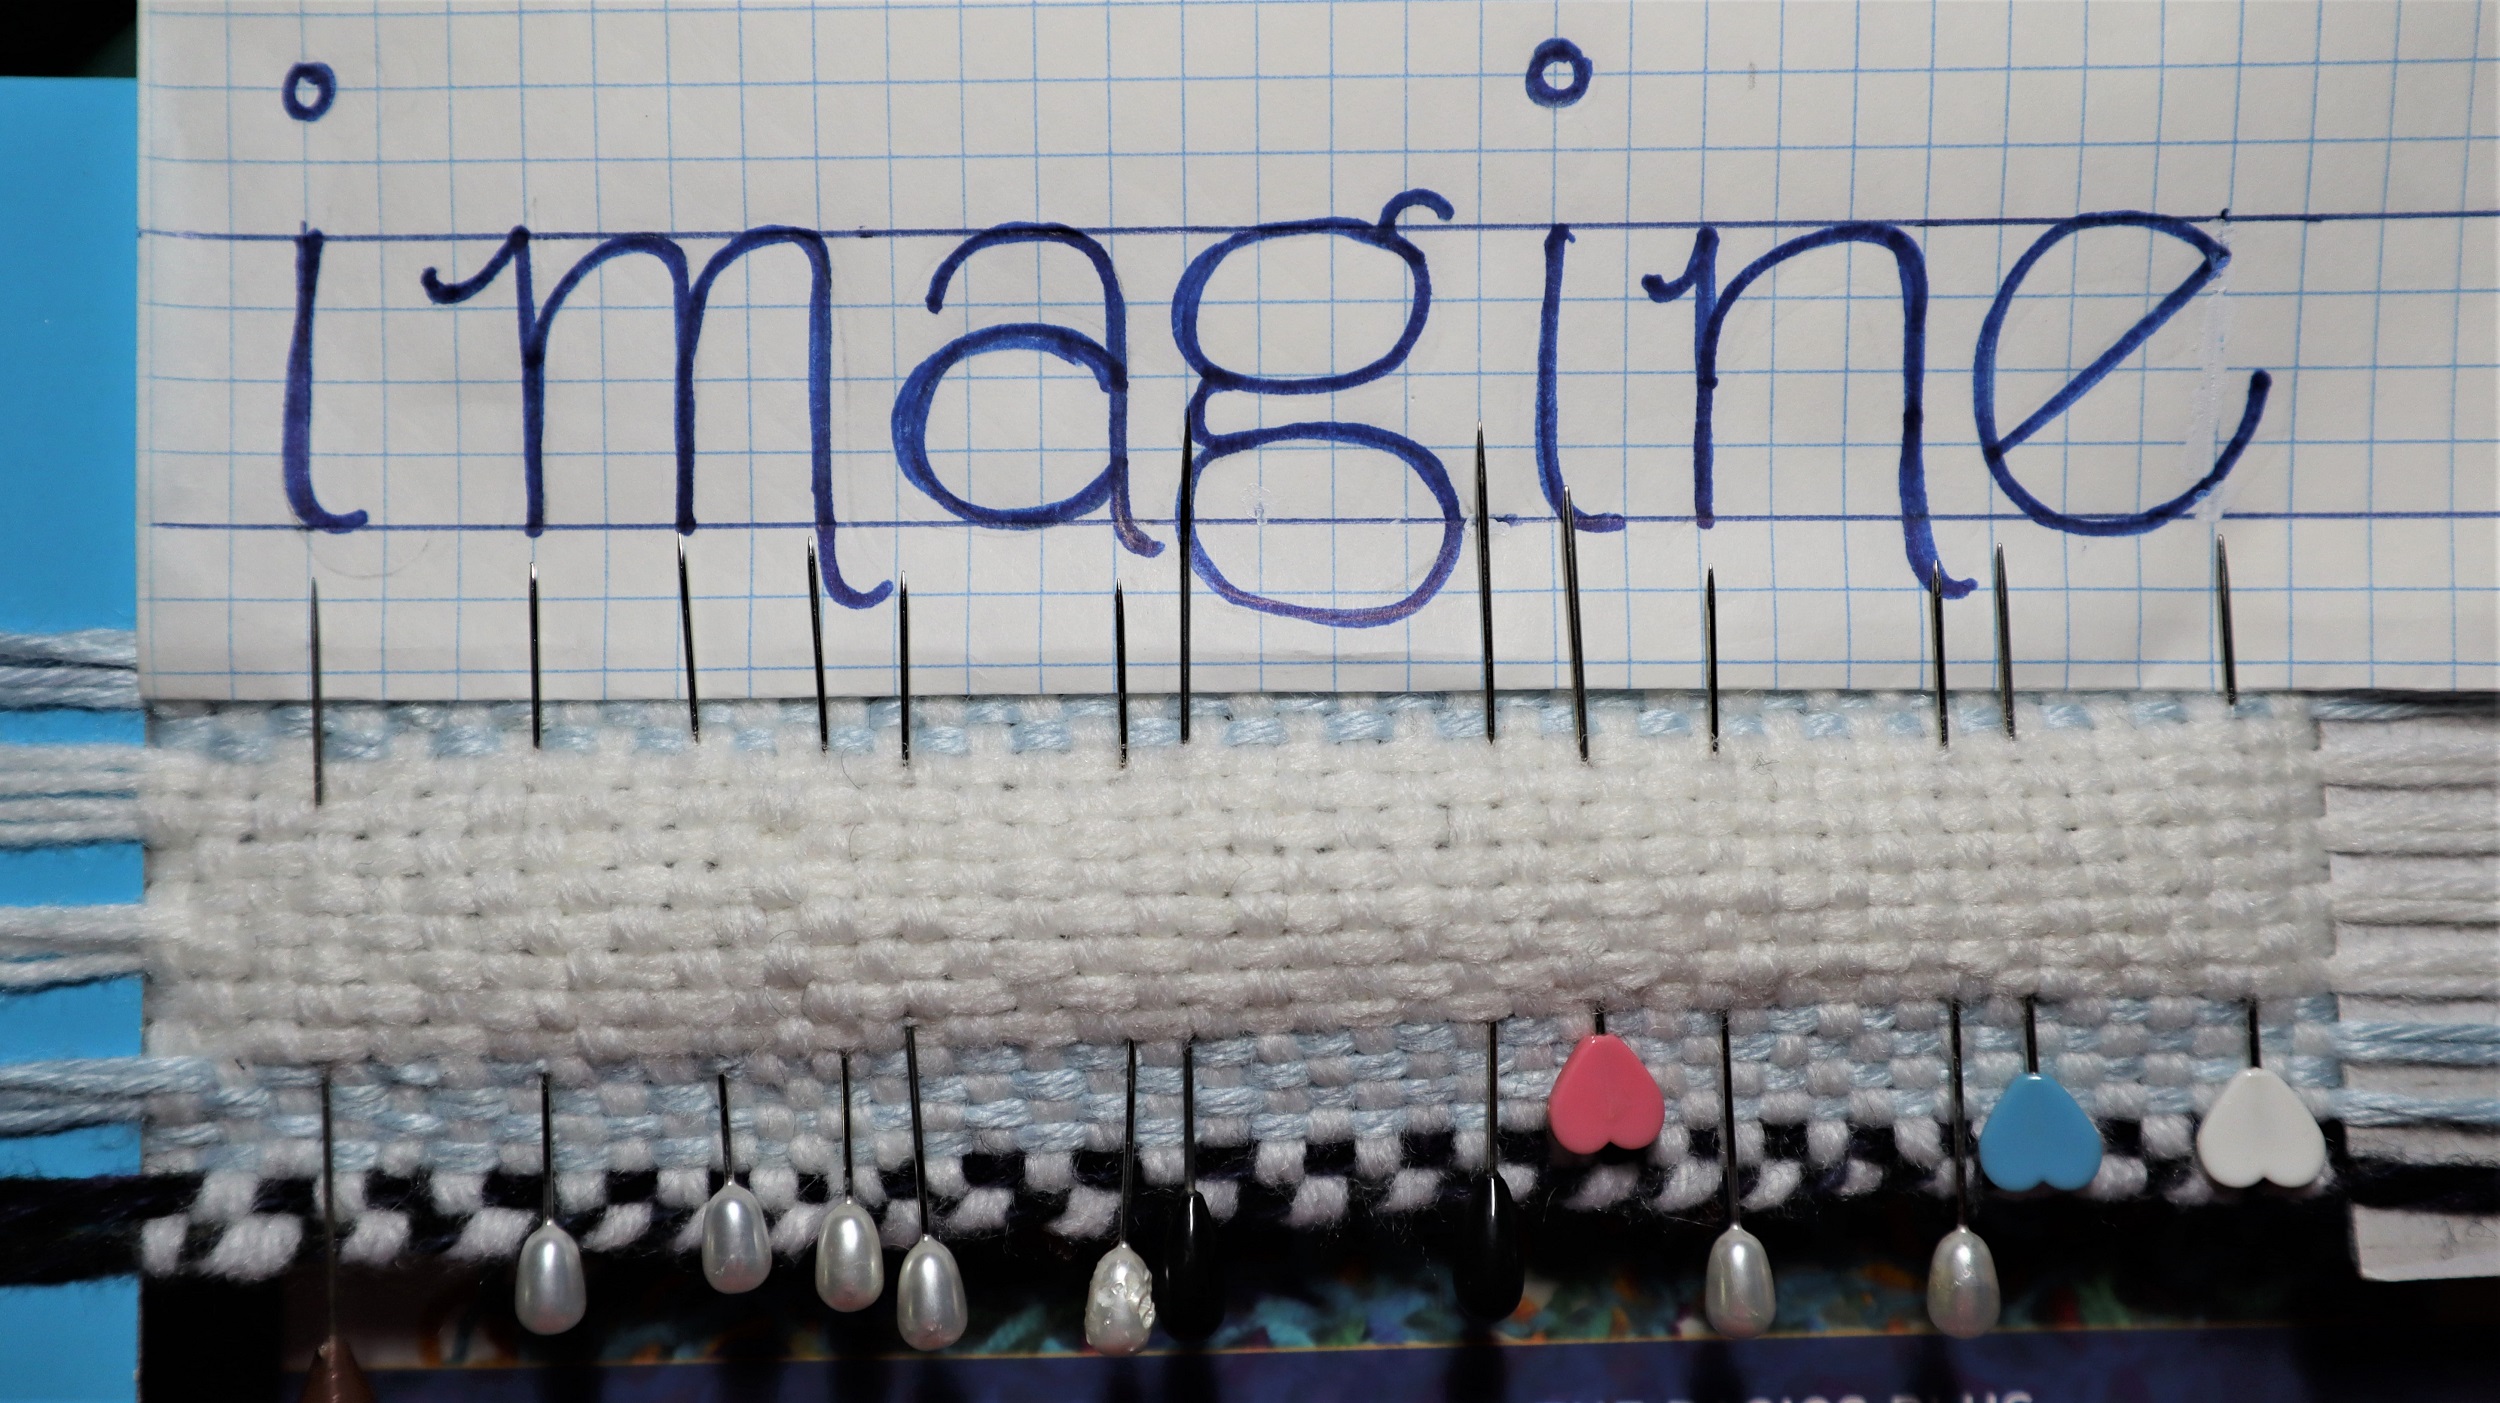
2: Fold the paper so the edge of the letters can be placed right against the 1 inch/2.5 cm high white center section of the weaving.
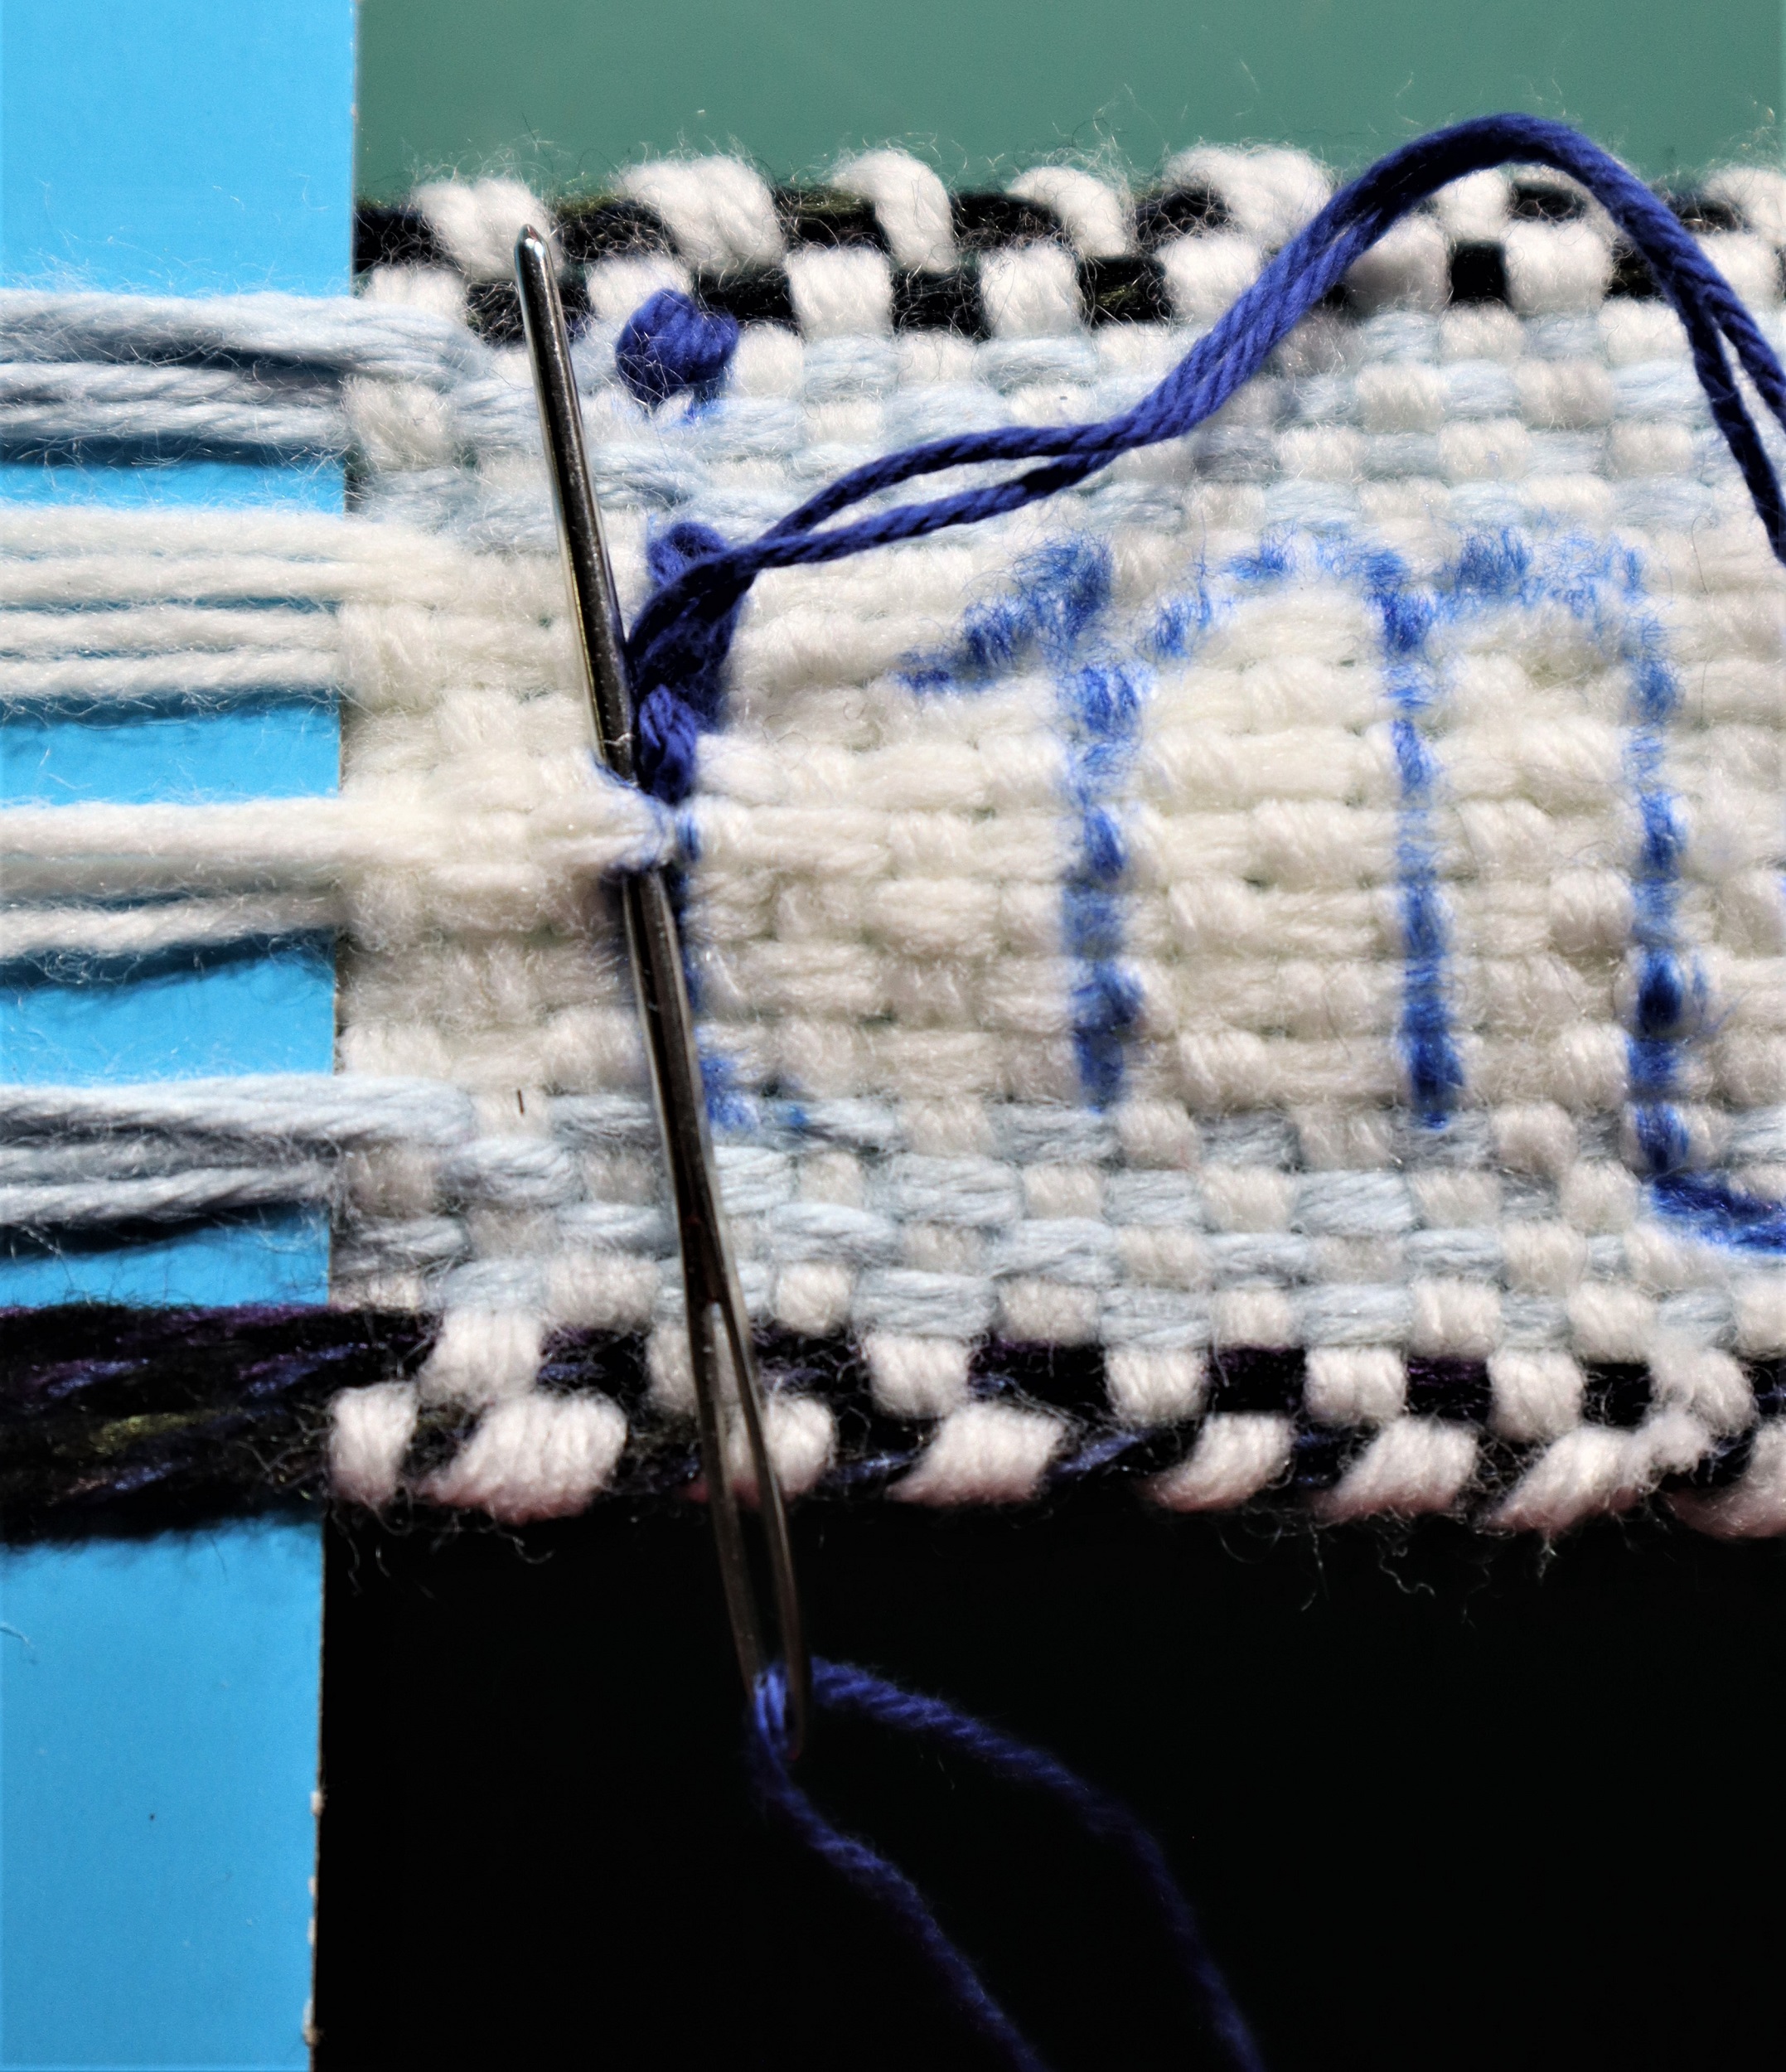
3: Place the straight pins at the upright lines of the letters, ‘I’, ‘m’, ‘n’, and at the outside edges of the chubby ‘a’, ‘g’ and ‘e’.
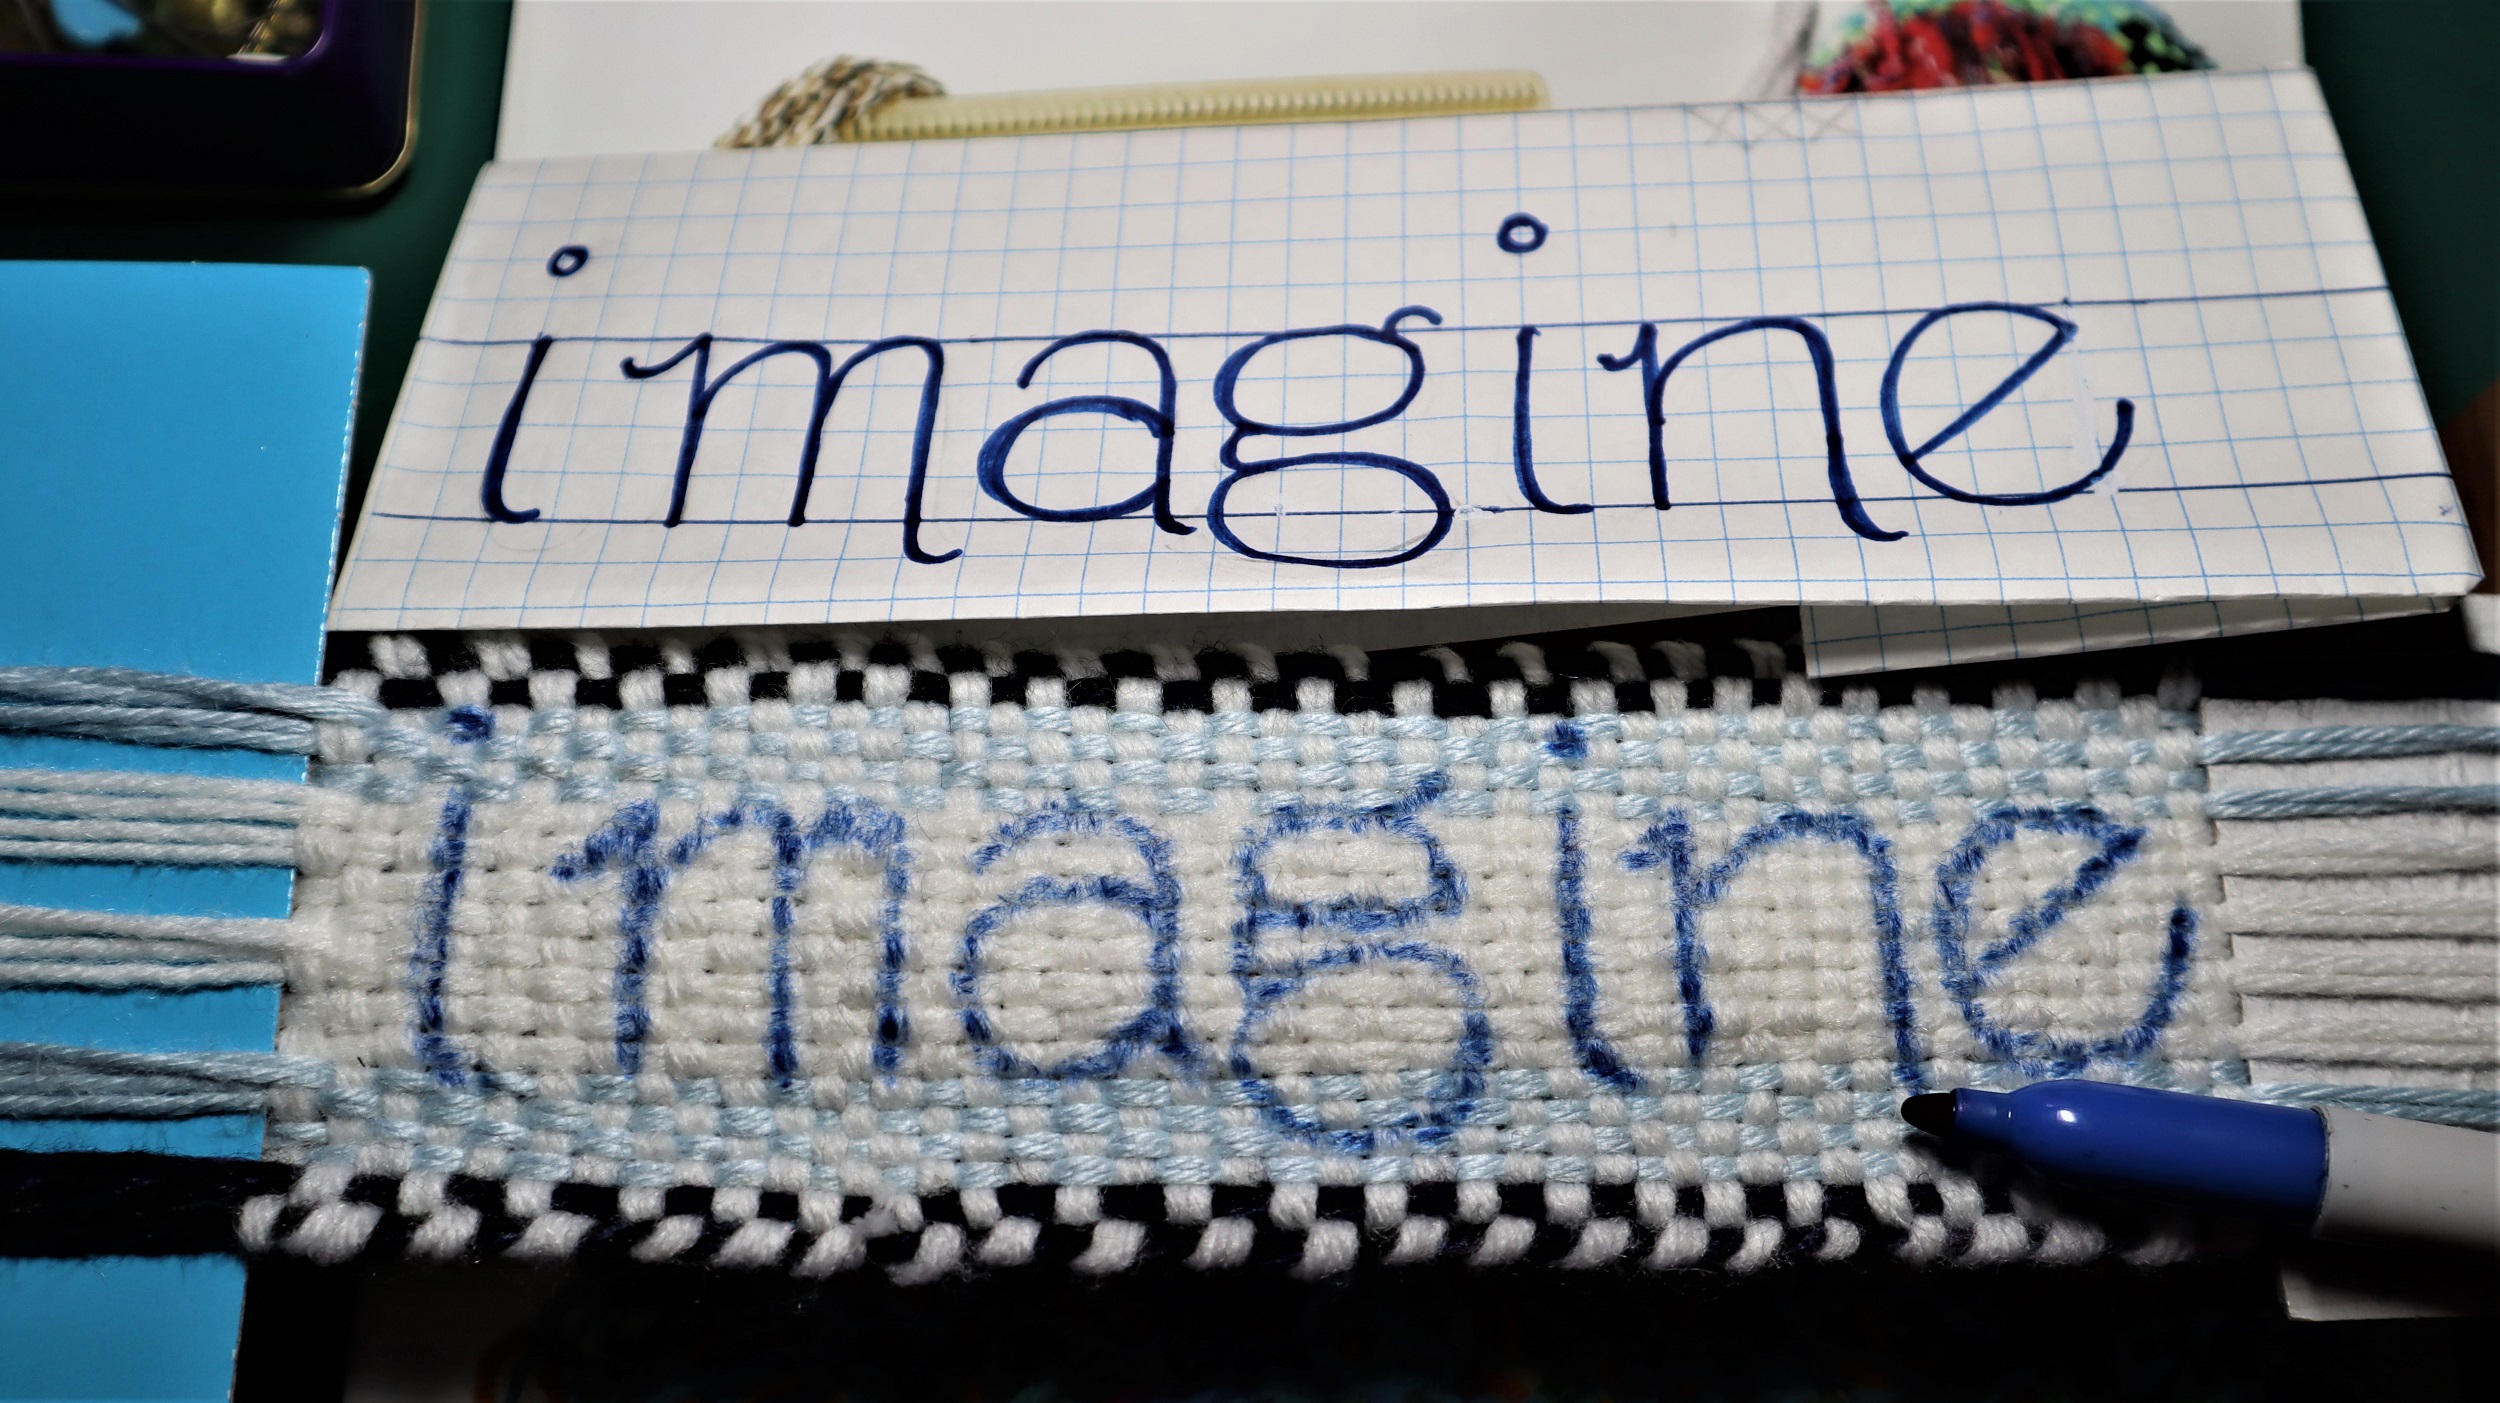
4: Use the pins as guides to draw the letters onto the narrow band using a permanent felt tip marker.
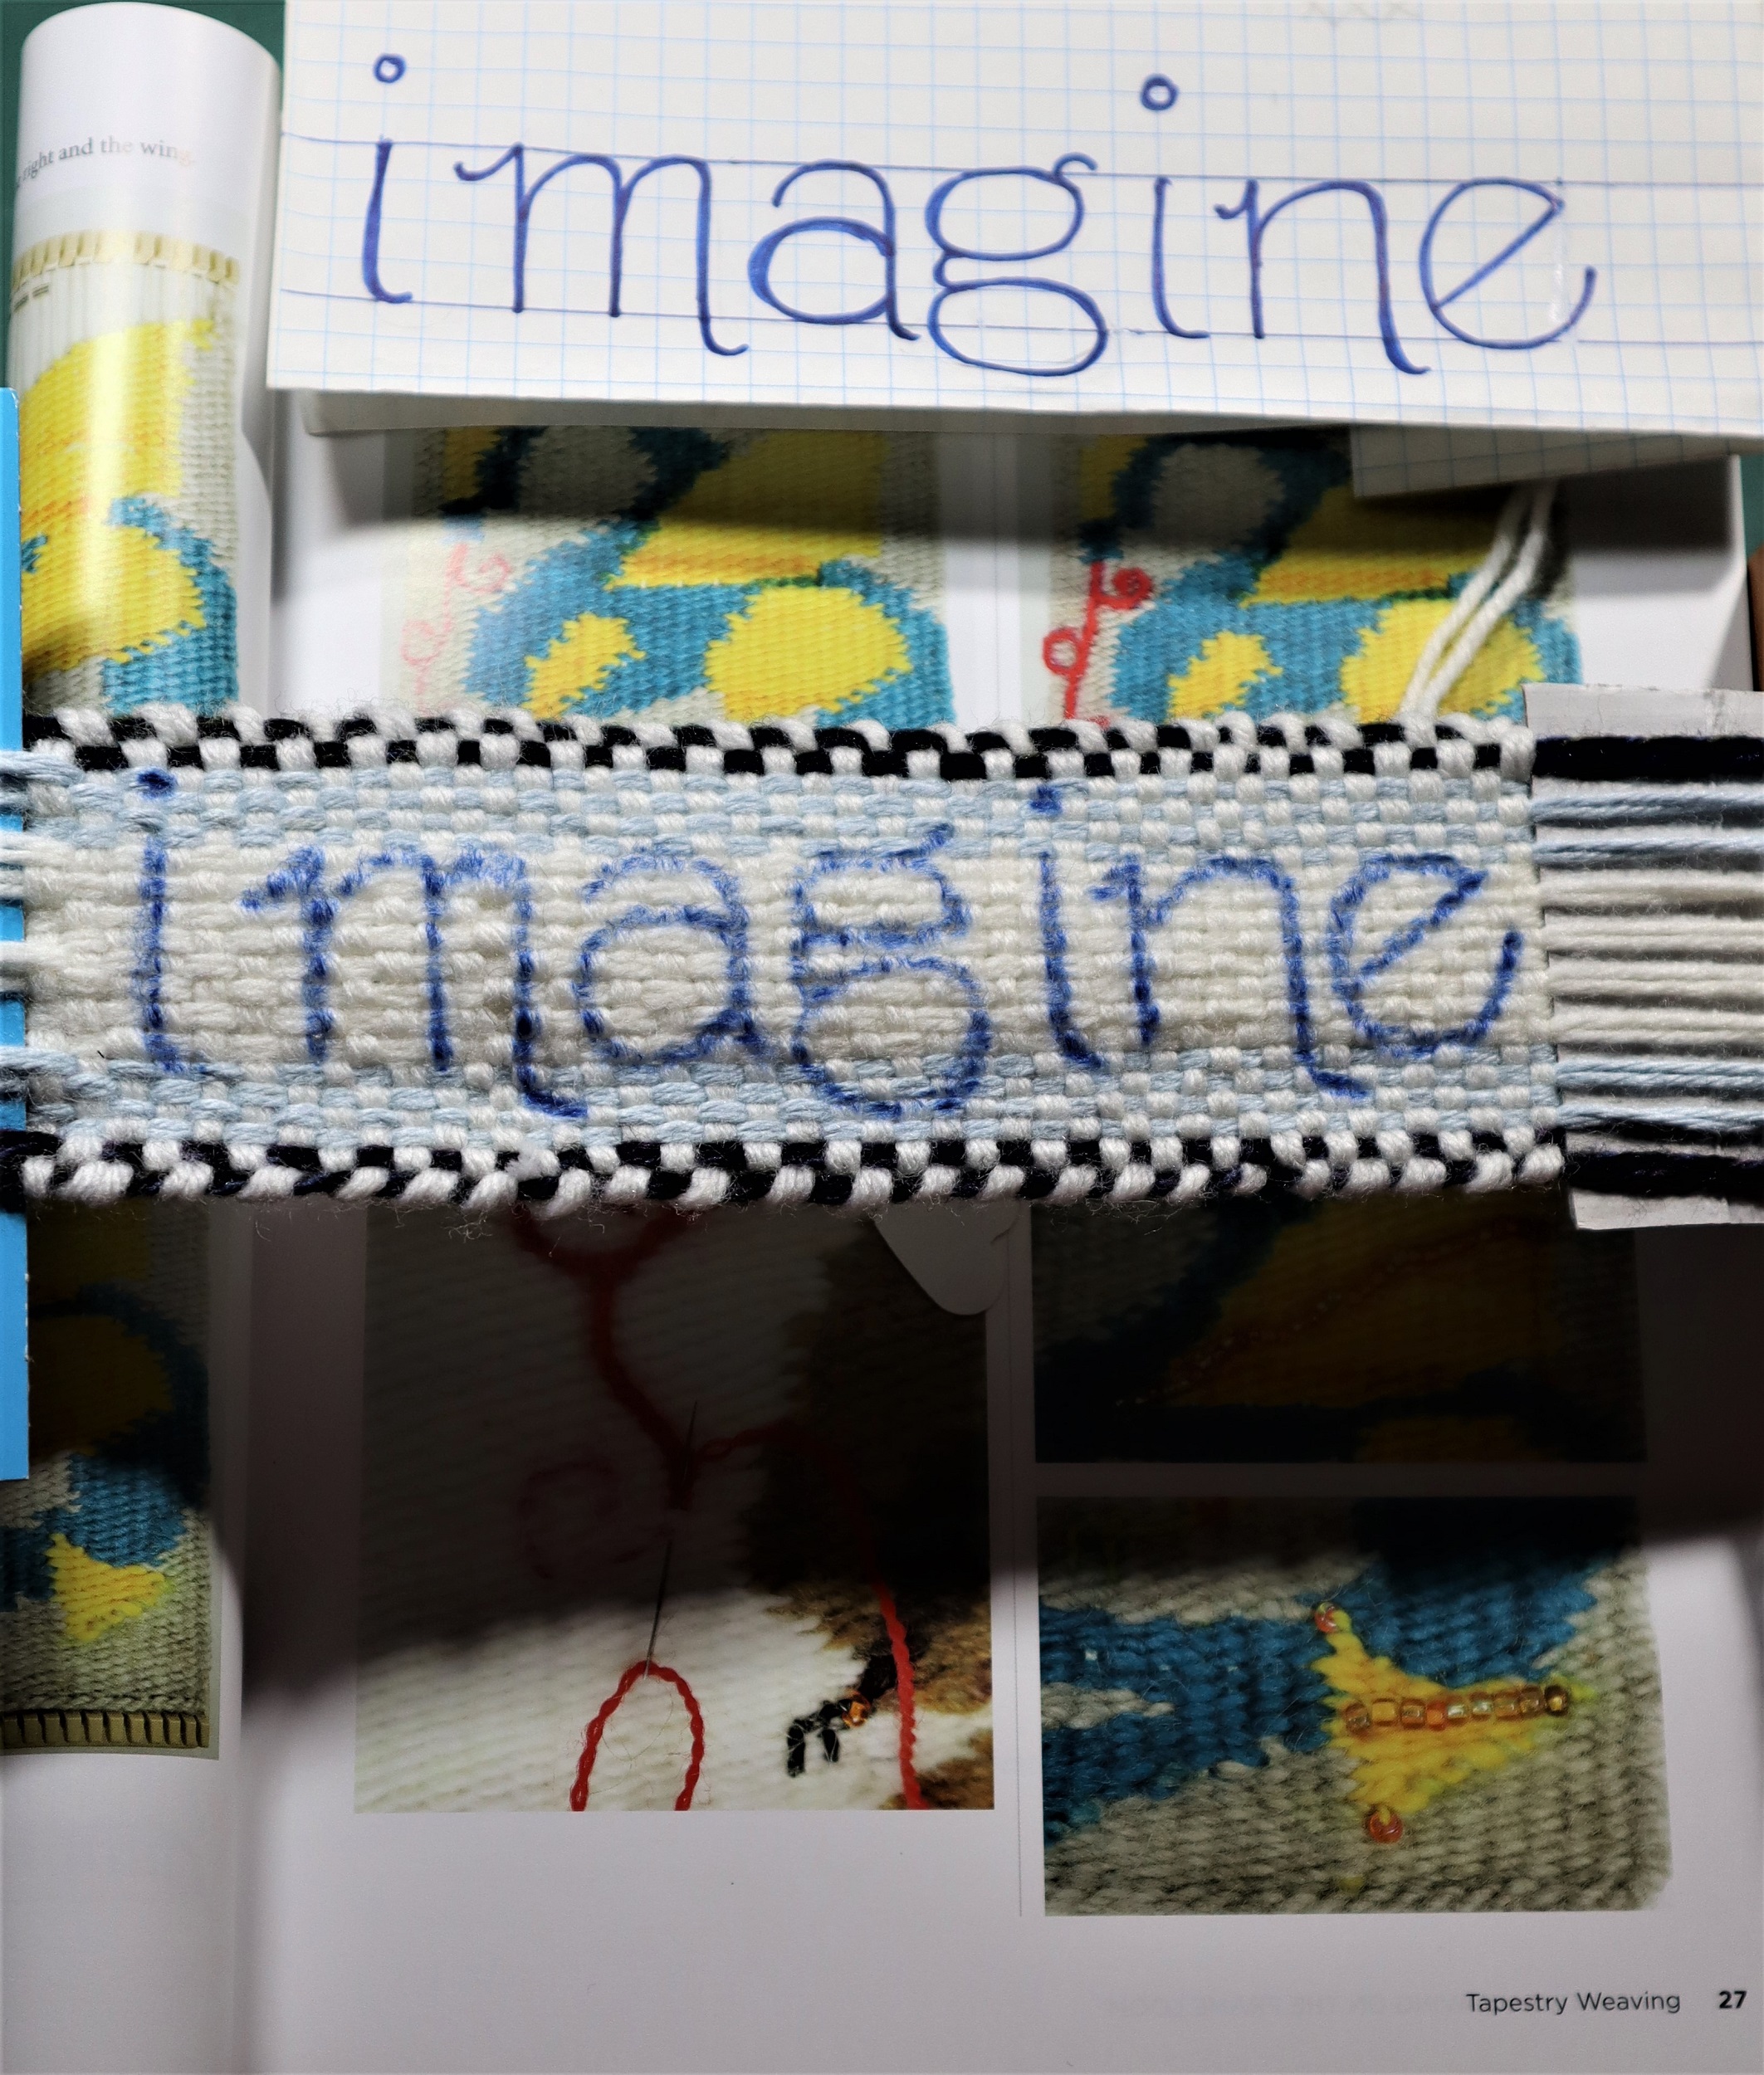
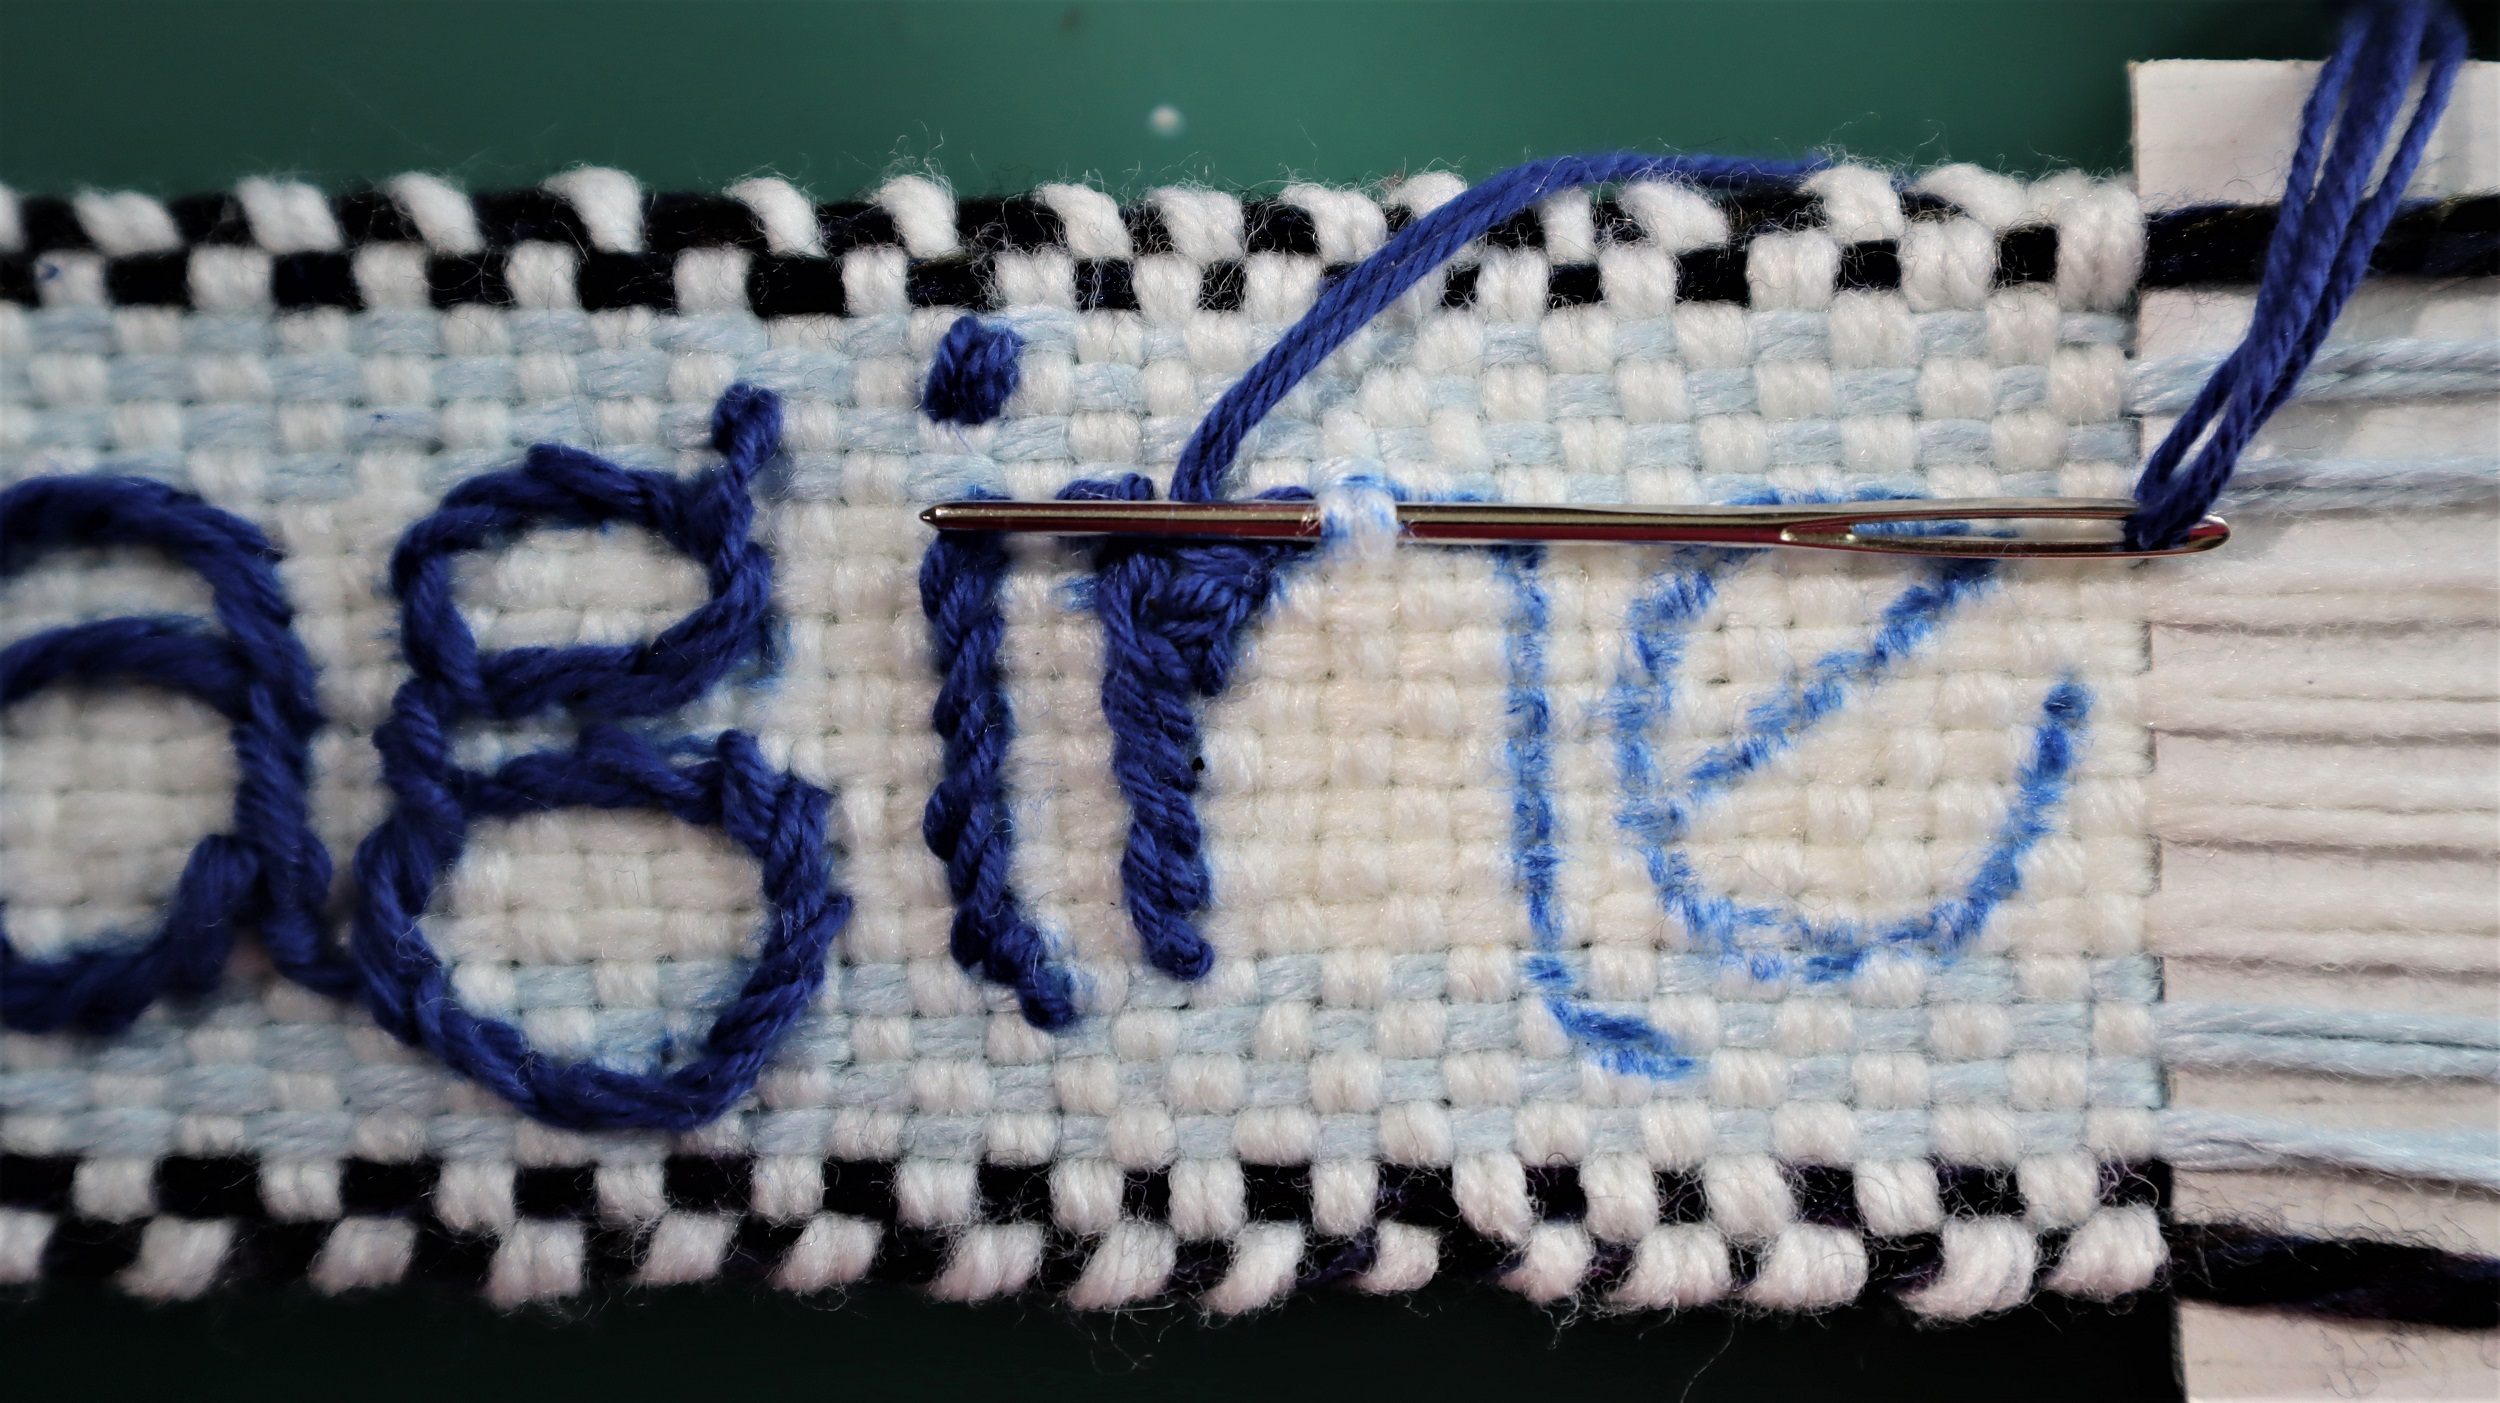
5: Following the instructions on page 27 of “Innovative Weaving on the Frame Loom”, embroider the letters with dark blue embroidery floss.
The photo on the lower left of page 27 shows how the running stitch is done.
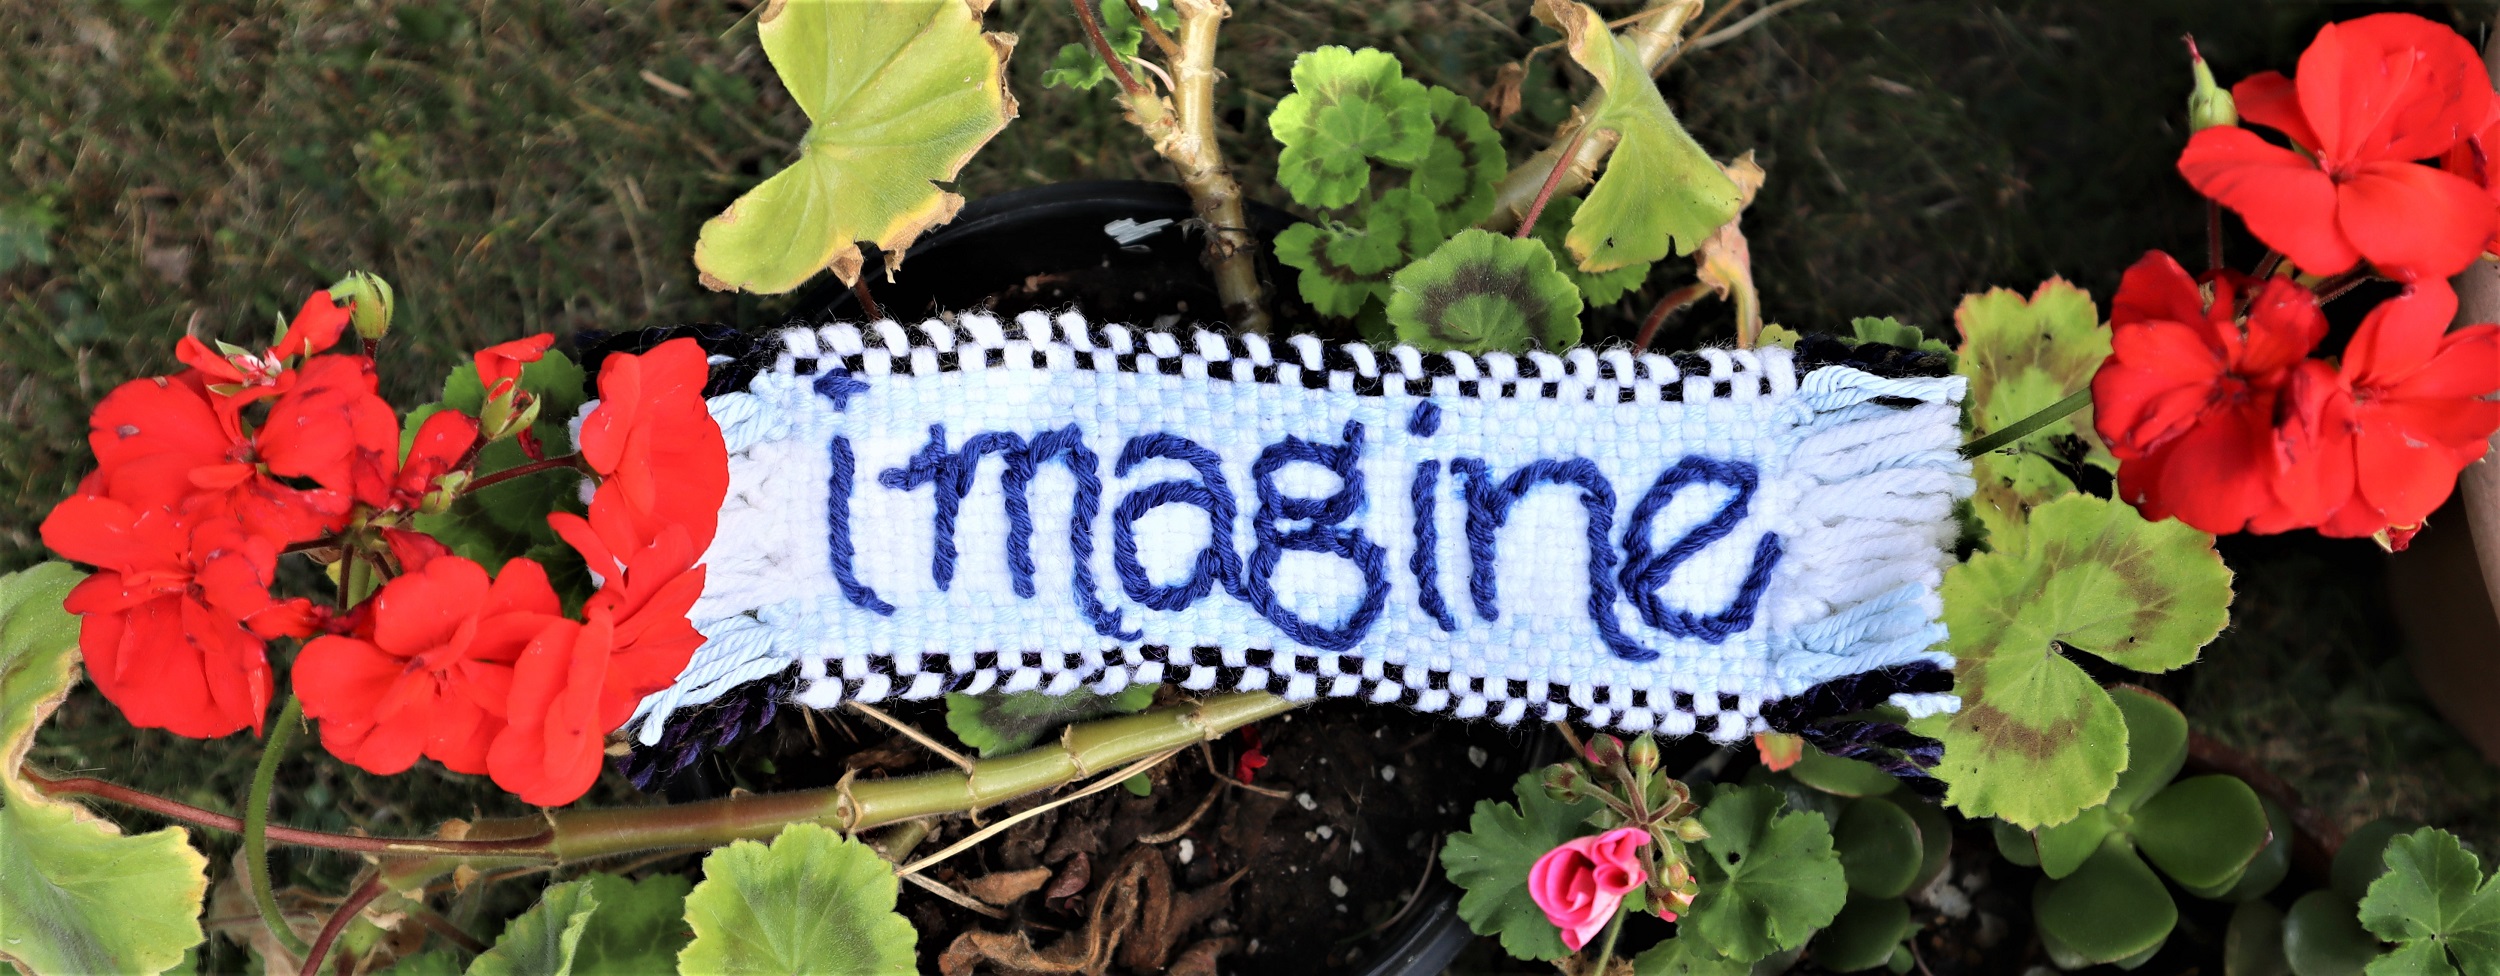
FRINGE:
6: Lift the weaving off the loom and remove the 2 pieces of cardboard.
7: Cut the ends of the loops at the right hand side of the narrow band (it was at the top of the loom) open.
8: Trim the ends that were at the lower edge of the loom, now the left hand side of the band, to the same length as the warp ends at the other end of the narrow band.
9: Tie a knot (left over right and under, right over left and under) with each set of 4 strands of yarn across both ends of the narrow band.
10: FINISHING THE NARROW BAND:
Steam the narrow band on the wrong side with a steam iron, being sure to not touch the iron to the weaving.
Finger press the narrow band to make sure that the fringes behave themselves and line up politely.
Other things that are needed for the ‘Imagine’ banner:
Yarn: Less than an ounce of each of the following colors: white, grey, black, pale blue, brown, beige
Embroidery floss: 1 skein of navy or dark blue
2 small black ‘e’ beads for the eyes and needle and thread to sew them on
Scissors
cardboard
a plastic page protector
a ruler
transparent tape
felting needles,
6 rubber bands
paper
long straight pins
permanent felt tip pen
plastic or metal ring to hang the banner
1 Weaving Needle (5 1/2 inches or 6 inches long with a blunt tip)
1 Shed Stick: a second weaving needle or 6 inch Paddle style bamboo Cocktail Skewer or a short dpn knitting needle
1 craft needle (short metal tapestry needle approximately 2 3/4 inches long)
-1 crochet hook: 4.5 mm crochet hook works just fine
PART ONE:
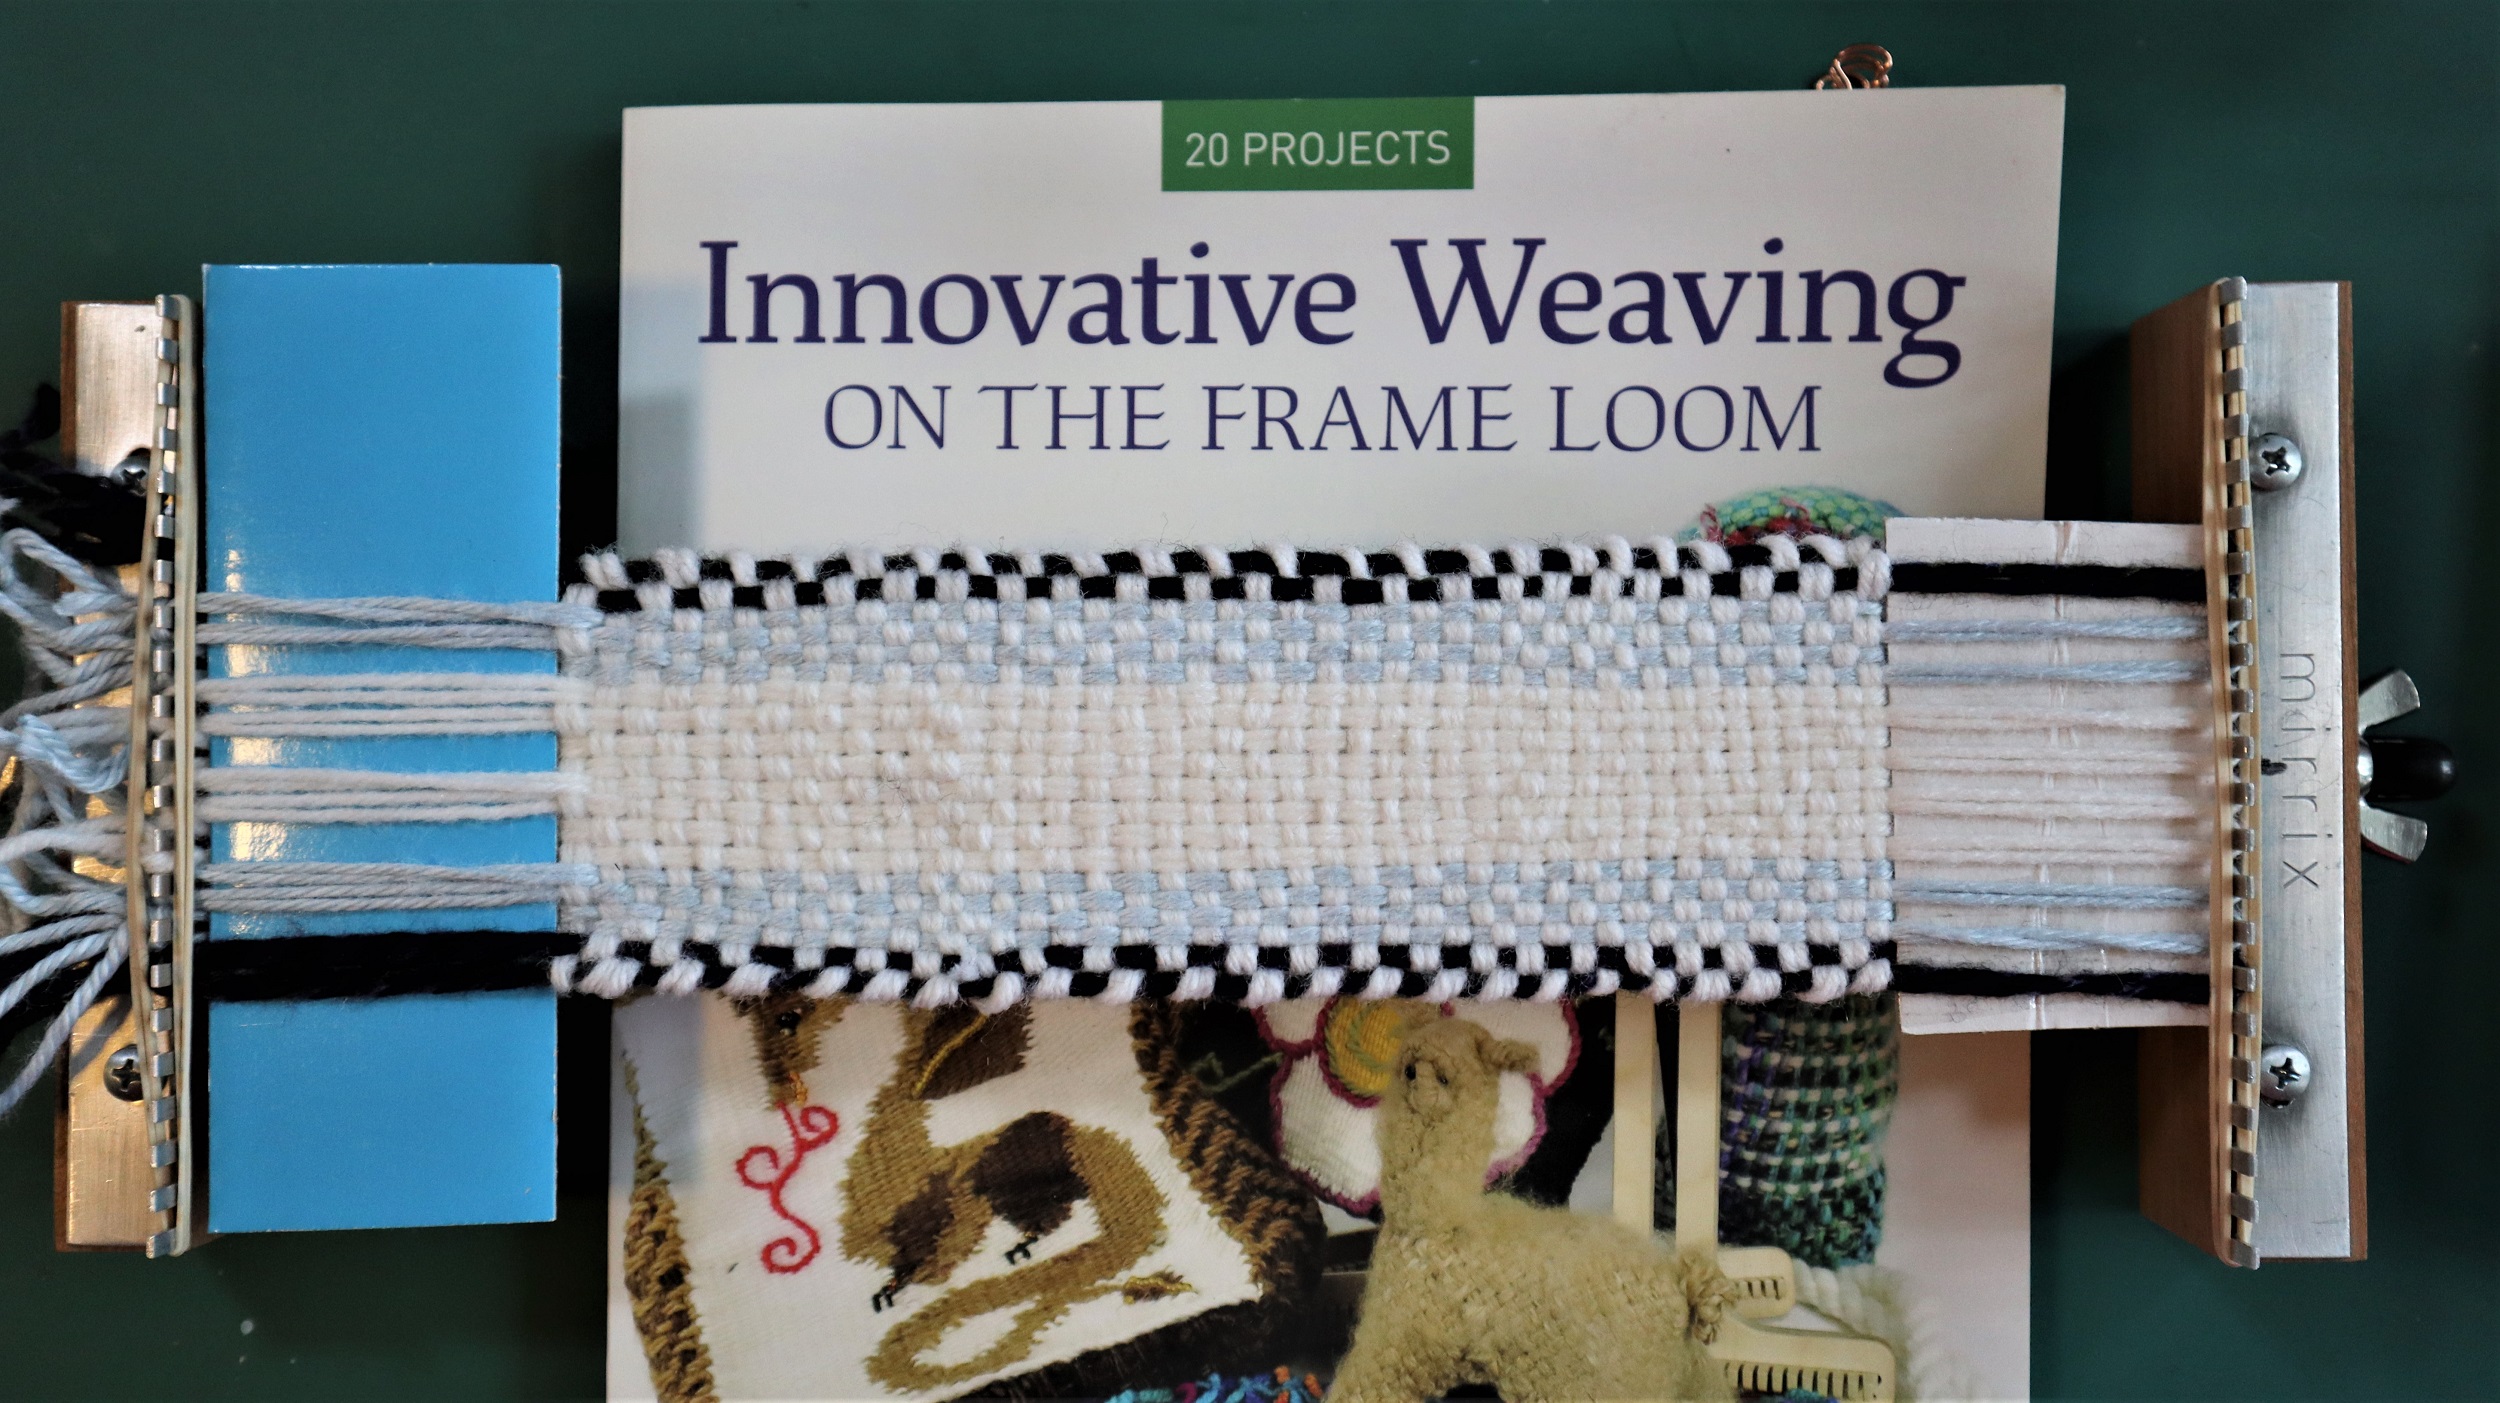
THE WOVEN AND EMBROIDERED NARROW BAND:
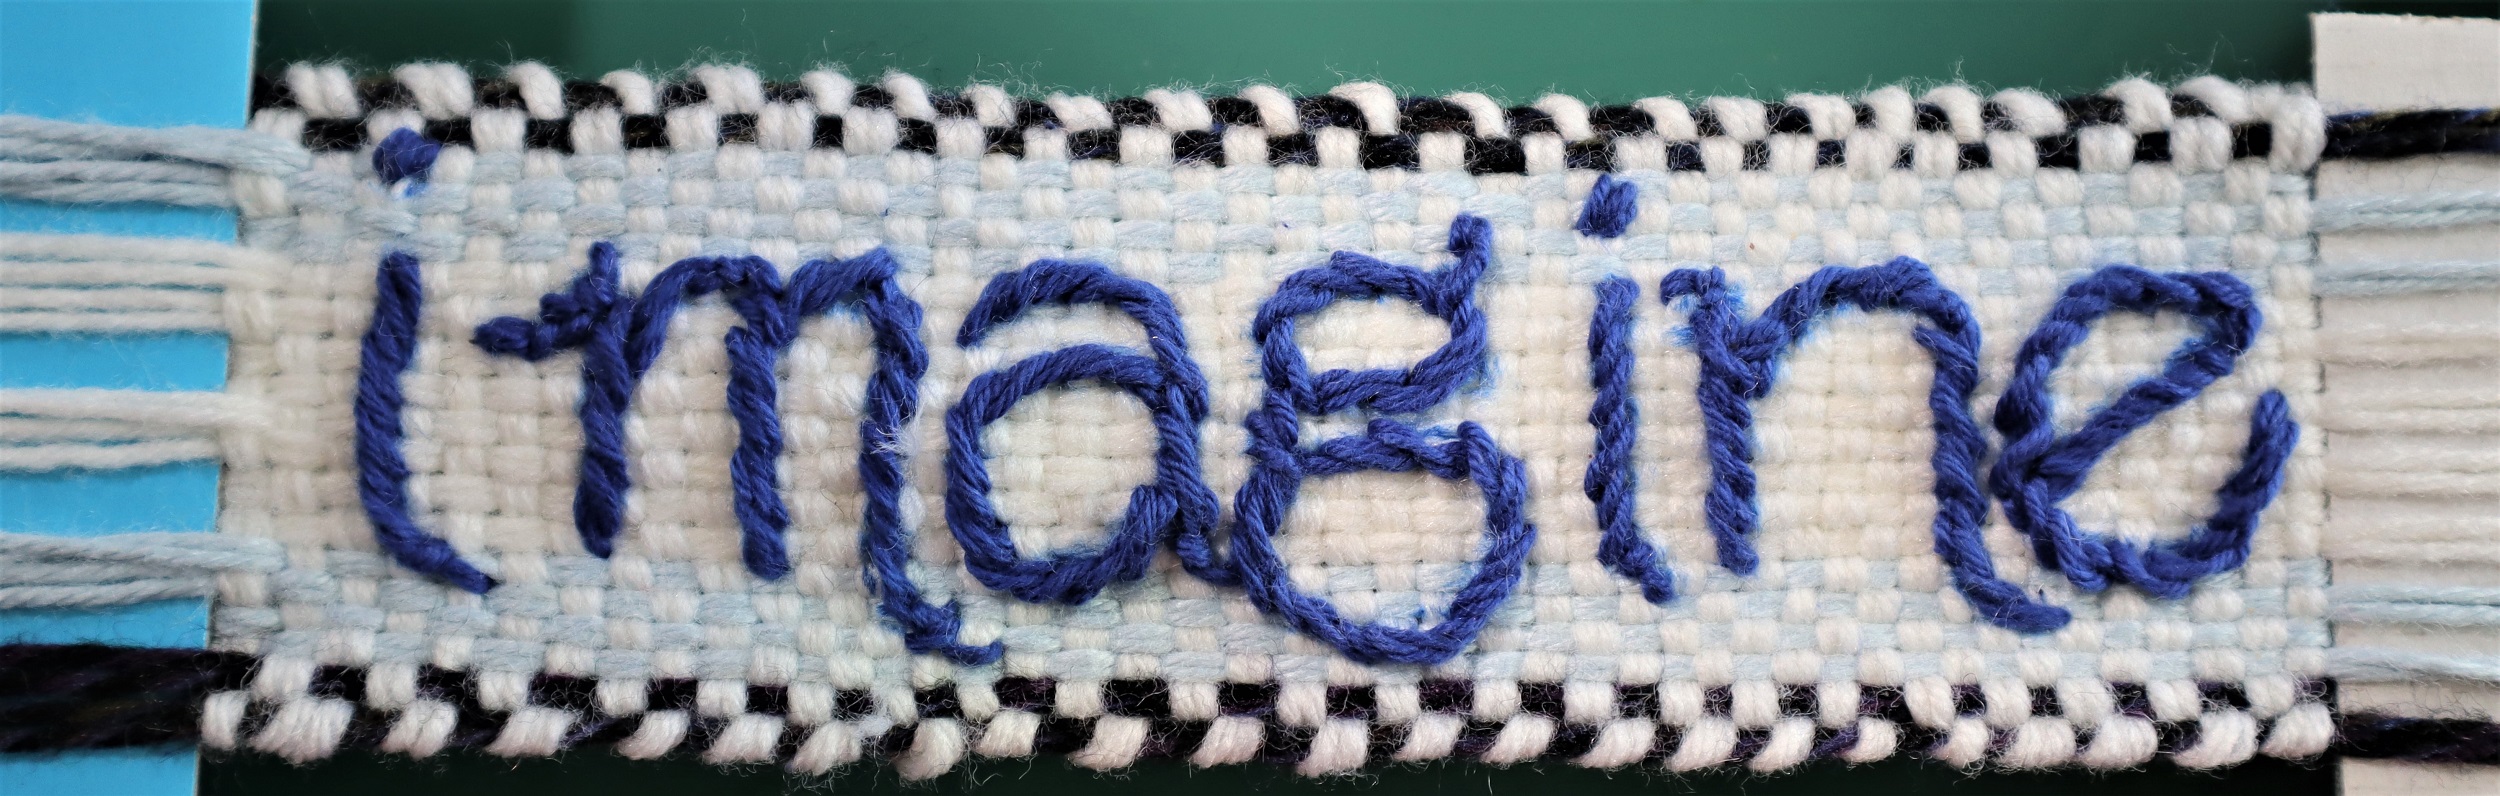
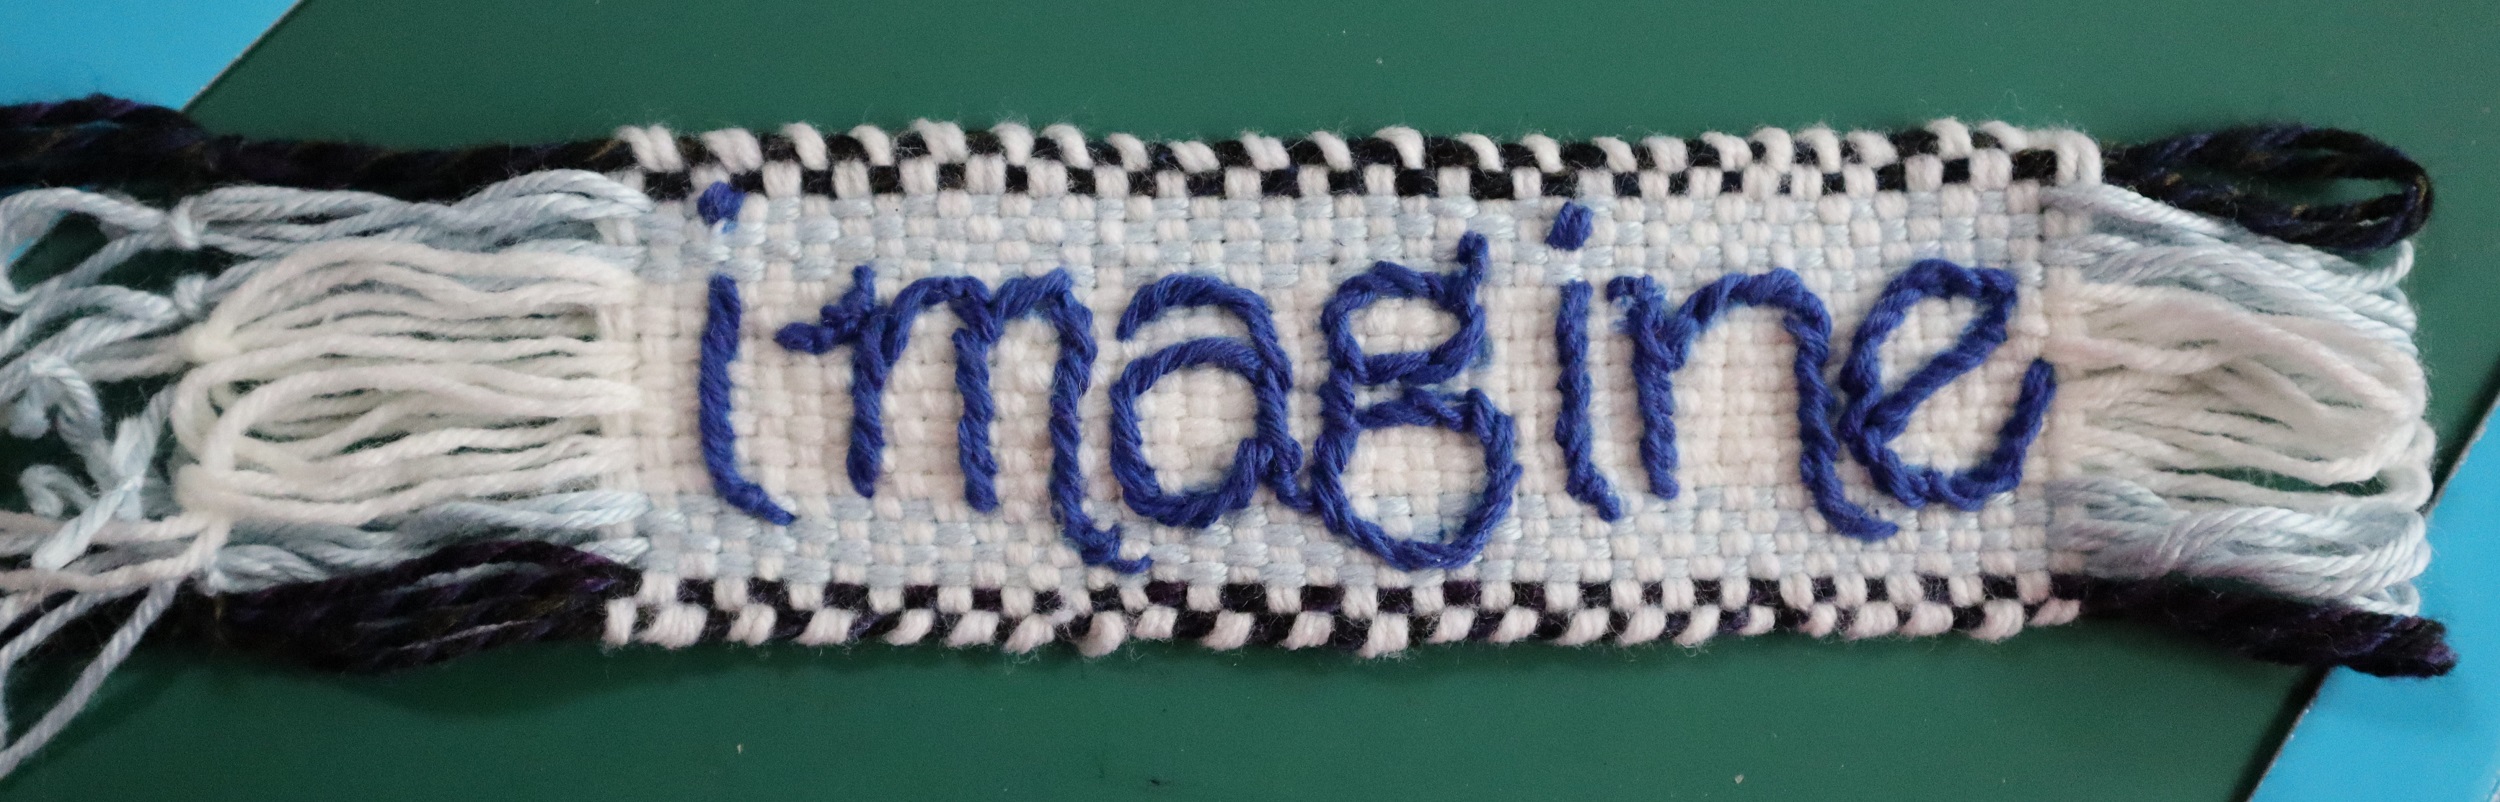
The narrow band in Albert Einstein’s hands is woven (with a couple of small modifications) following the instructions on page 171 of “Innovative Weaving on the Frame Loom” for the Alpaca Blanket. While it’s still on the loom, the word, ‘Imagine’, is embroidered using a simple running stitch.
INSTRUCTIONS:
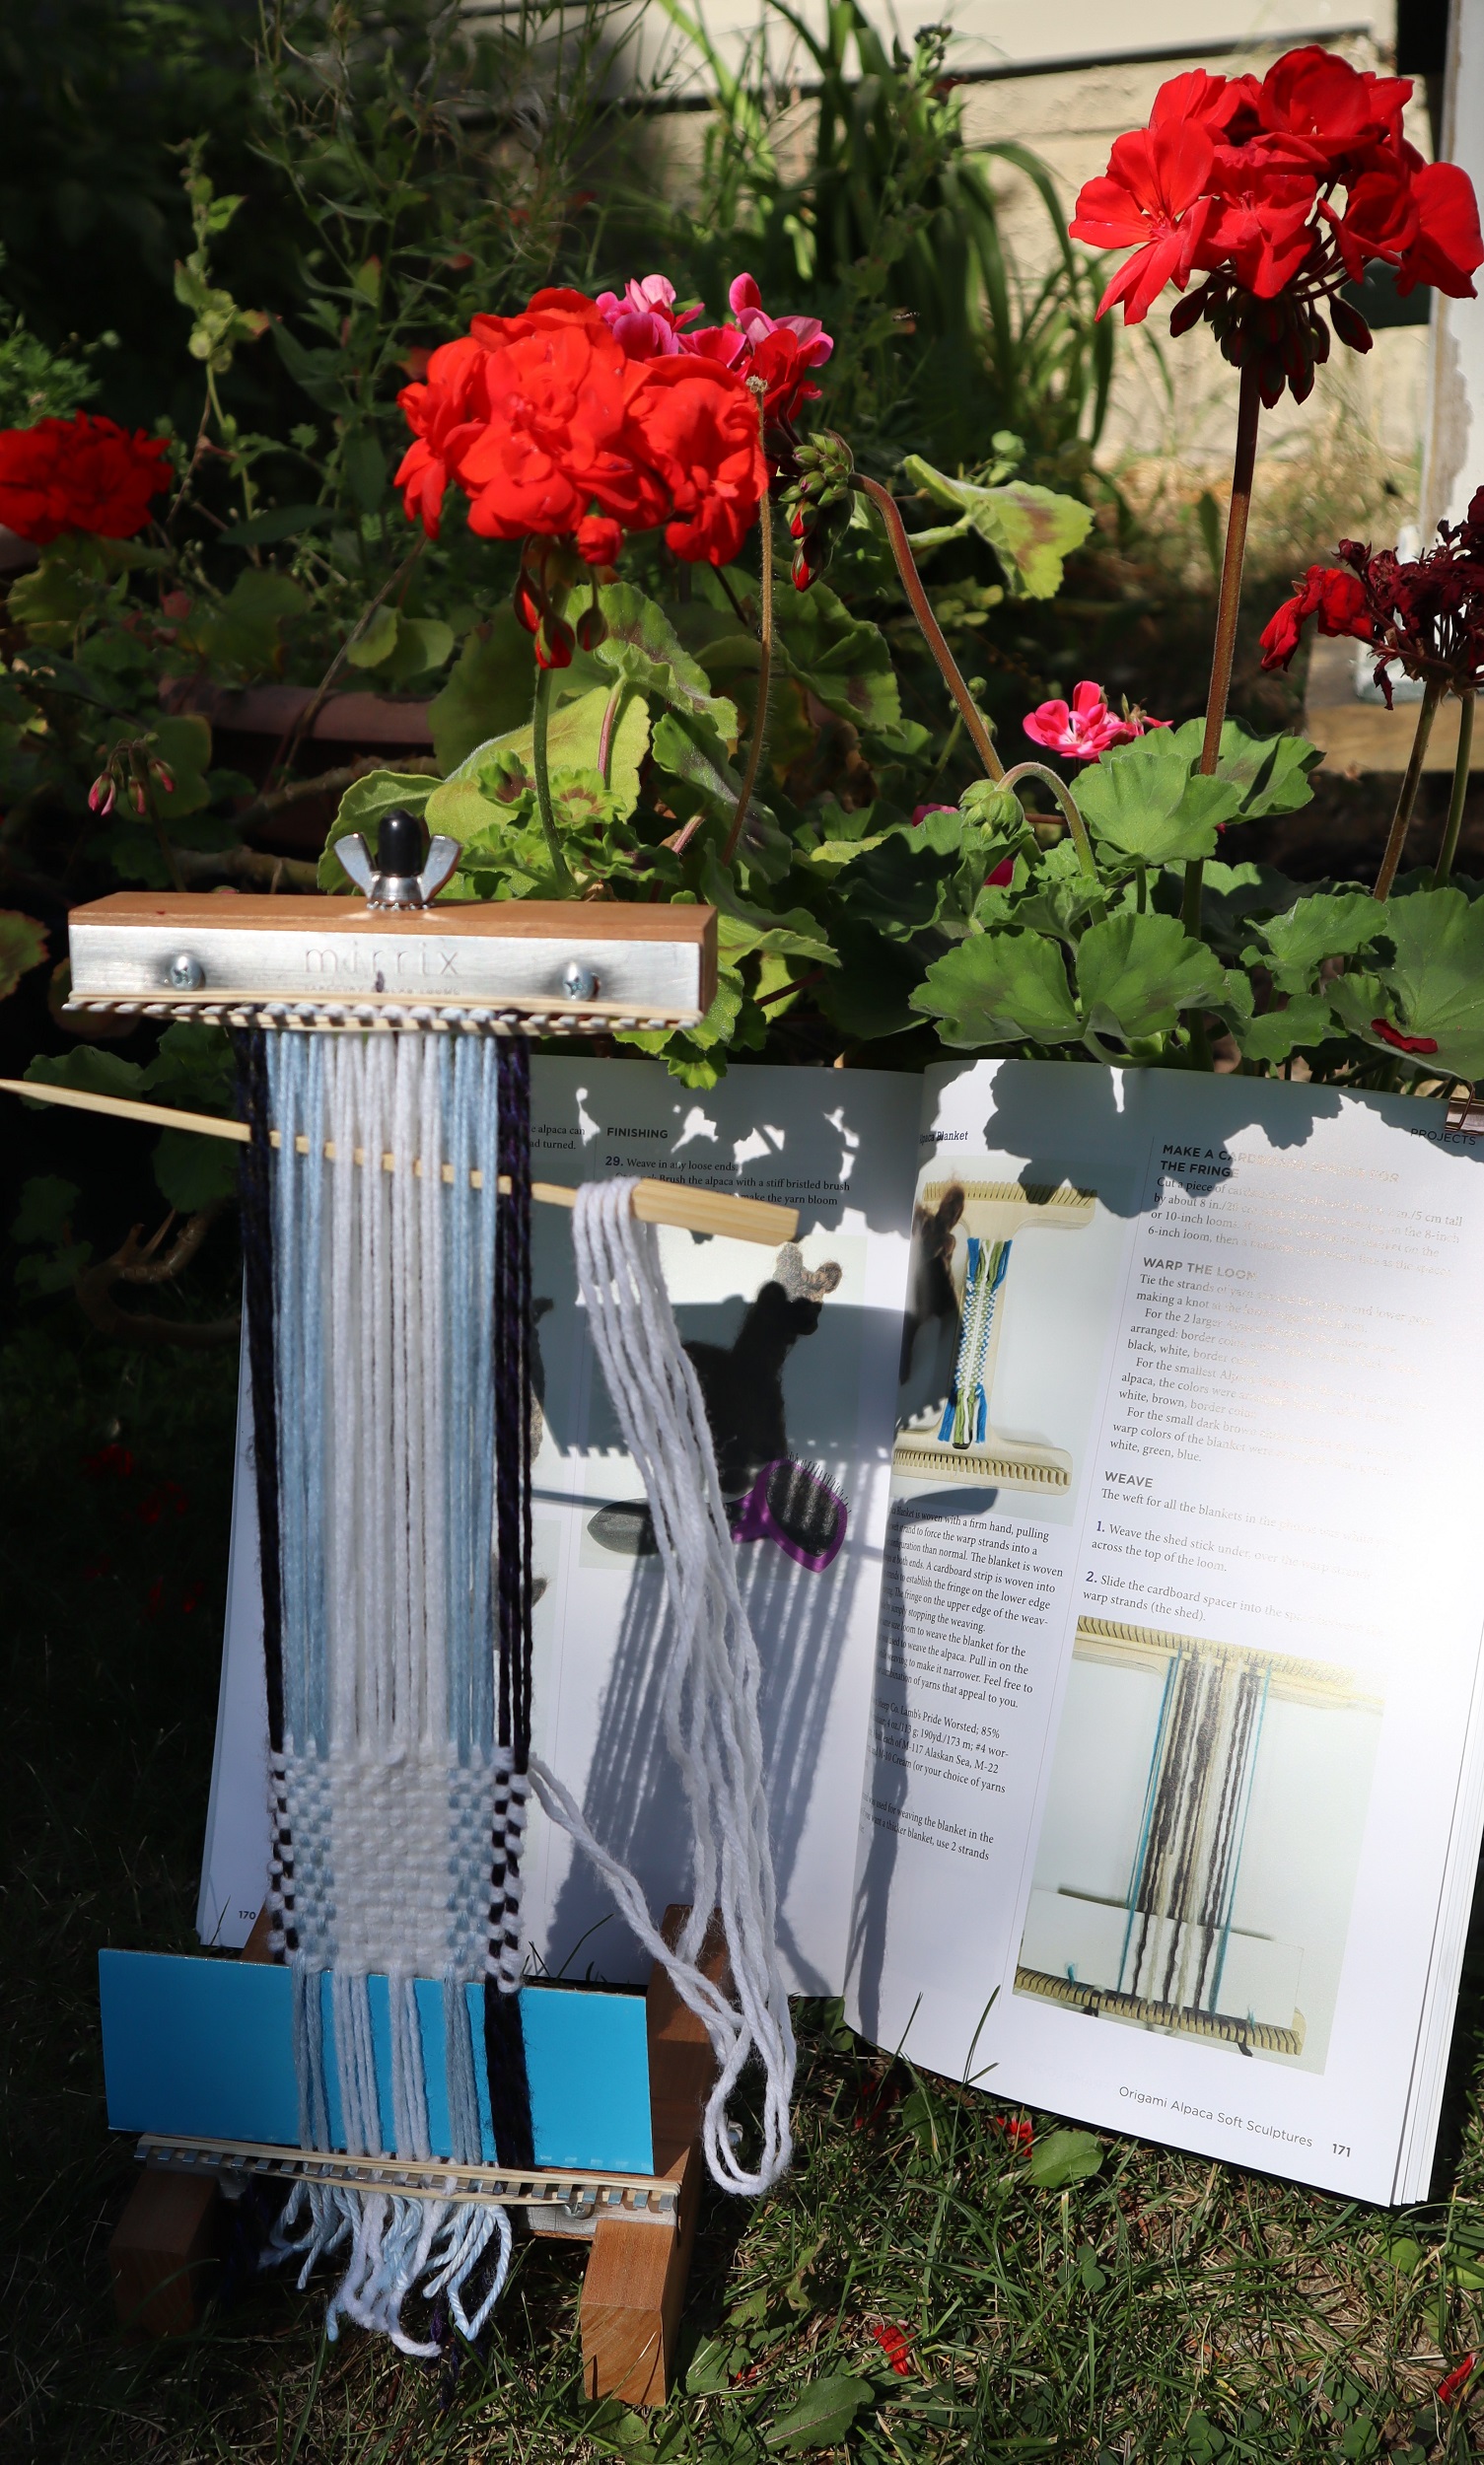
1: SET UP THE LOOM so it is 11 1/2 inches / 29 cm from the lower set of pegs to the upper set. Lock it into the ‘Sandy Stand’.
2: WARP THE LOOM: Following the instructions for the Alpaca Blanket on page 171 of ‘Innovative Weaving on the Frame Loom’, put on 10 sets of warp strands.
Use 2 strands of #4 Medium weight (Worsted or Sport weight) yarn held together as if it is a single strand.
Skip 6 pegs at each side of the loom and warp the following colors, or your choice of colors:
NOTE: A ‘set’ of warp strands in this case means tying around one peg from bottom to top of loom and snipping it after tying the knot at the lower edge. The 2 strands of warp yarn are held together while warping the loom.
1 set of warp strands Black
2 sets Light Blue
4 sets White
2 sets Light Blue
1 set Black
3: Slide 3 rubber bands over the lower set of pegs and 3 rubber bands over the upper set of pegs to help keep the warp strands from jumping off.
4: Cut 2 pieces of cardboard that are 2 inches/5 cm tall. The piece that will go into the lower edge of the warp strands should be 5 1/2 or 6 inches/15 cm wide. The piece that will go into the upper edge of the weaving once it’s done can be just 3 inches/7.5 cm wide.
5: Weave the shed stick under 2/over 2 across the warp strands at the top of the loom.
6: Weave the longer piece of cardboard into the warp strands – slide it into the shed formed by the shed stick and push it down to the lower edge of the loom. This will make the warp fringe at the first end.
7: WEAVING:
NOTE: The instructions in the book say to pull in on the weft strands while weaving. When using the Saffron loom, that is not necessary.
With 2 strands of white yarn and a weaving needle, following the instructions in the book, weave until the weaving is 7 1/2 inches/ 19 cm tall.
Fold the shorter piece of cardboard in half lengthwise and weave it into the warp strands, then open it up. This will keep the weaving taut while you embroider the word, ‘imagine’.
The 2 pieces of cardboard – 1 at each end of the weaving are essential to keep the weaving in place while embroidering the letters.
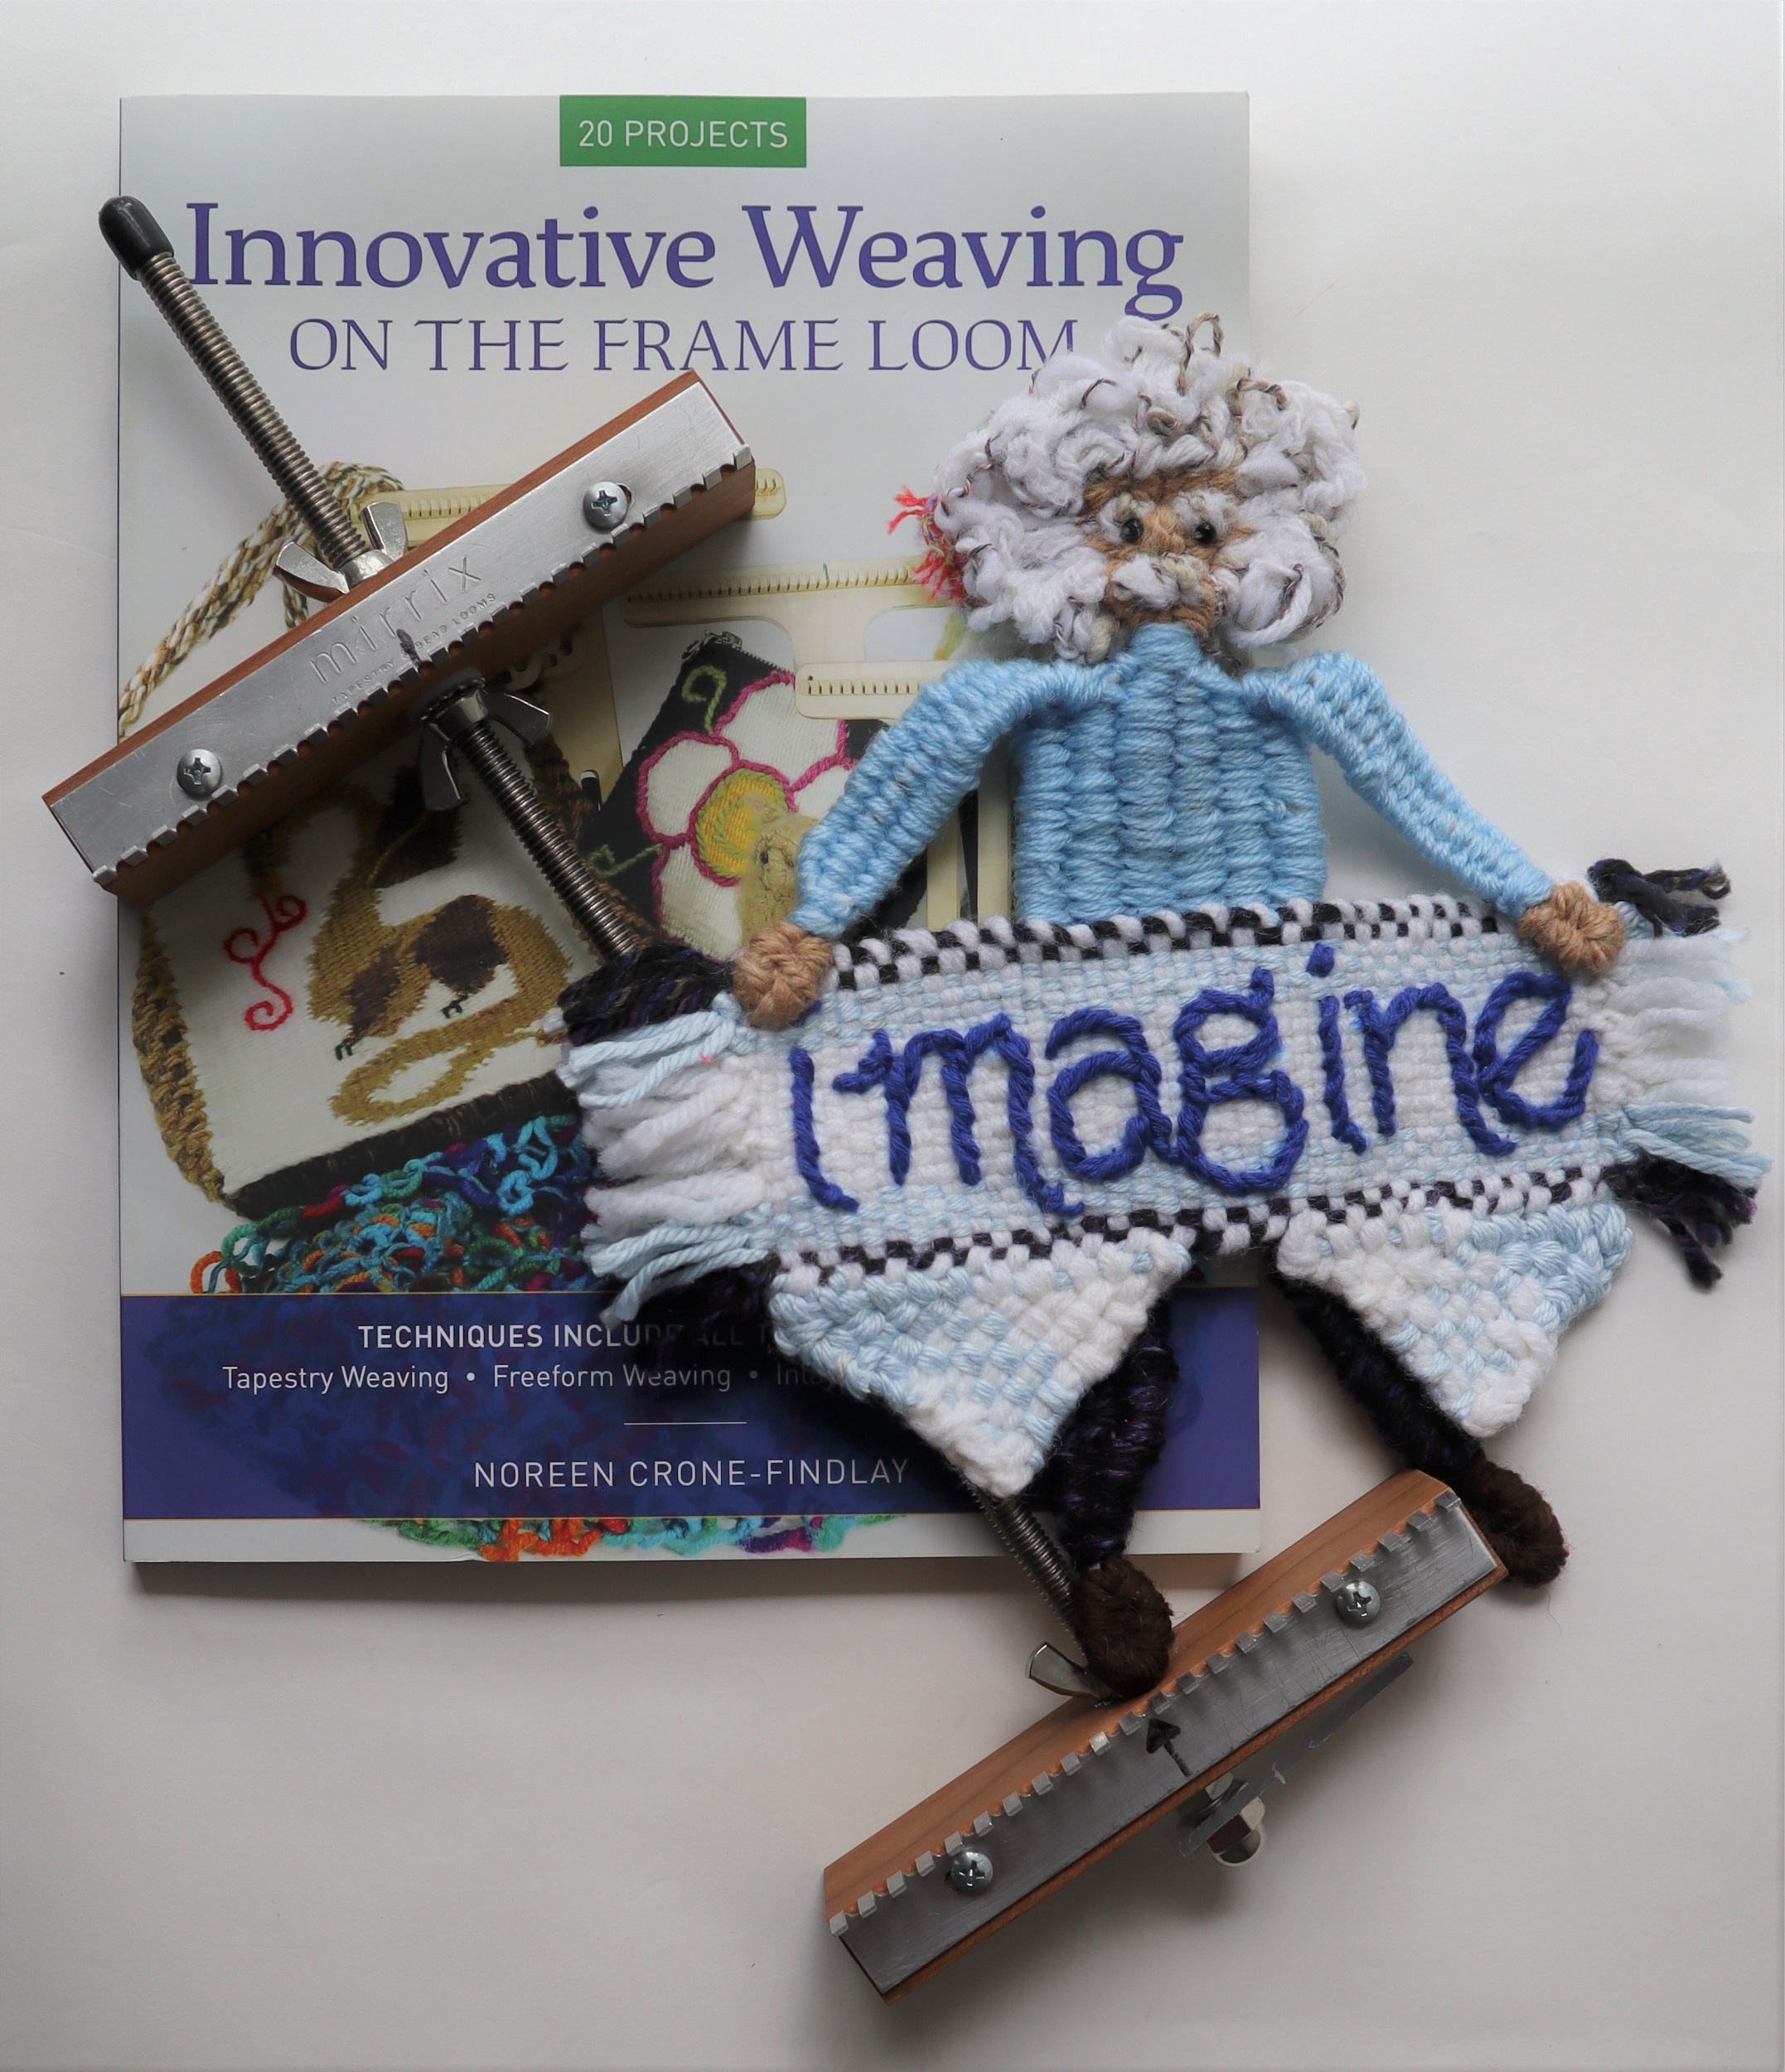
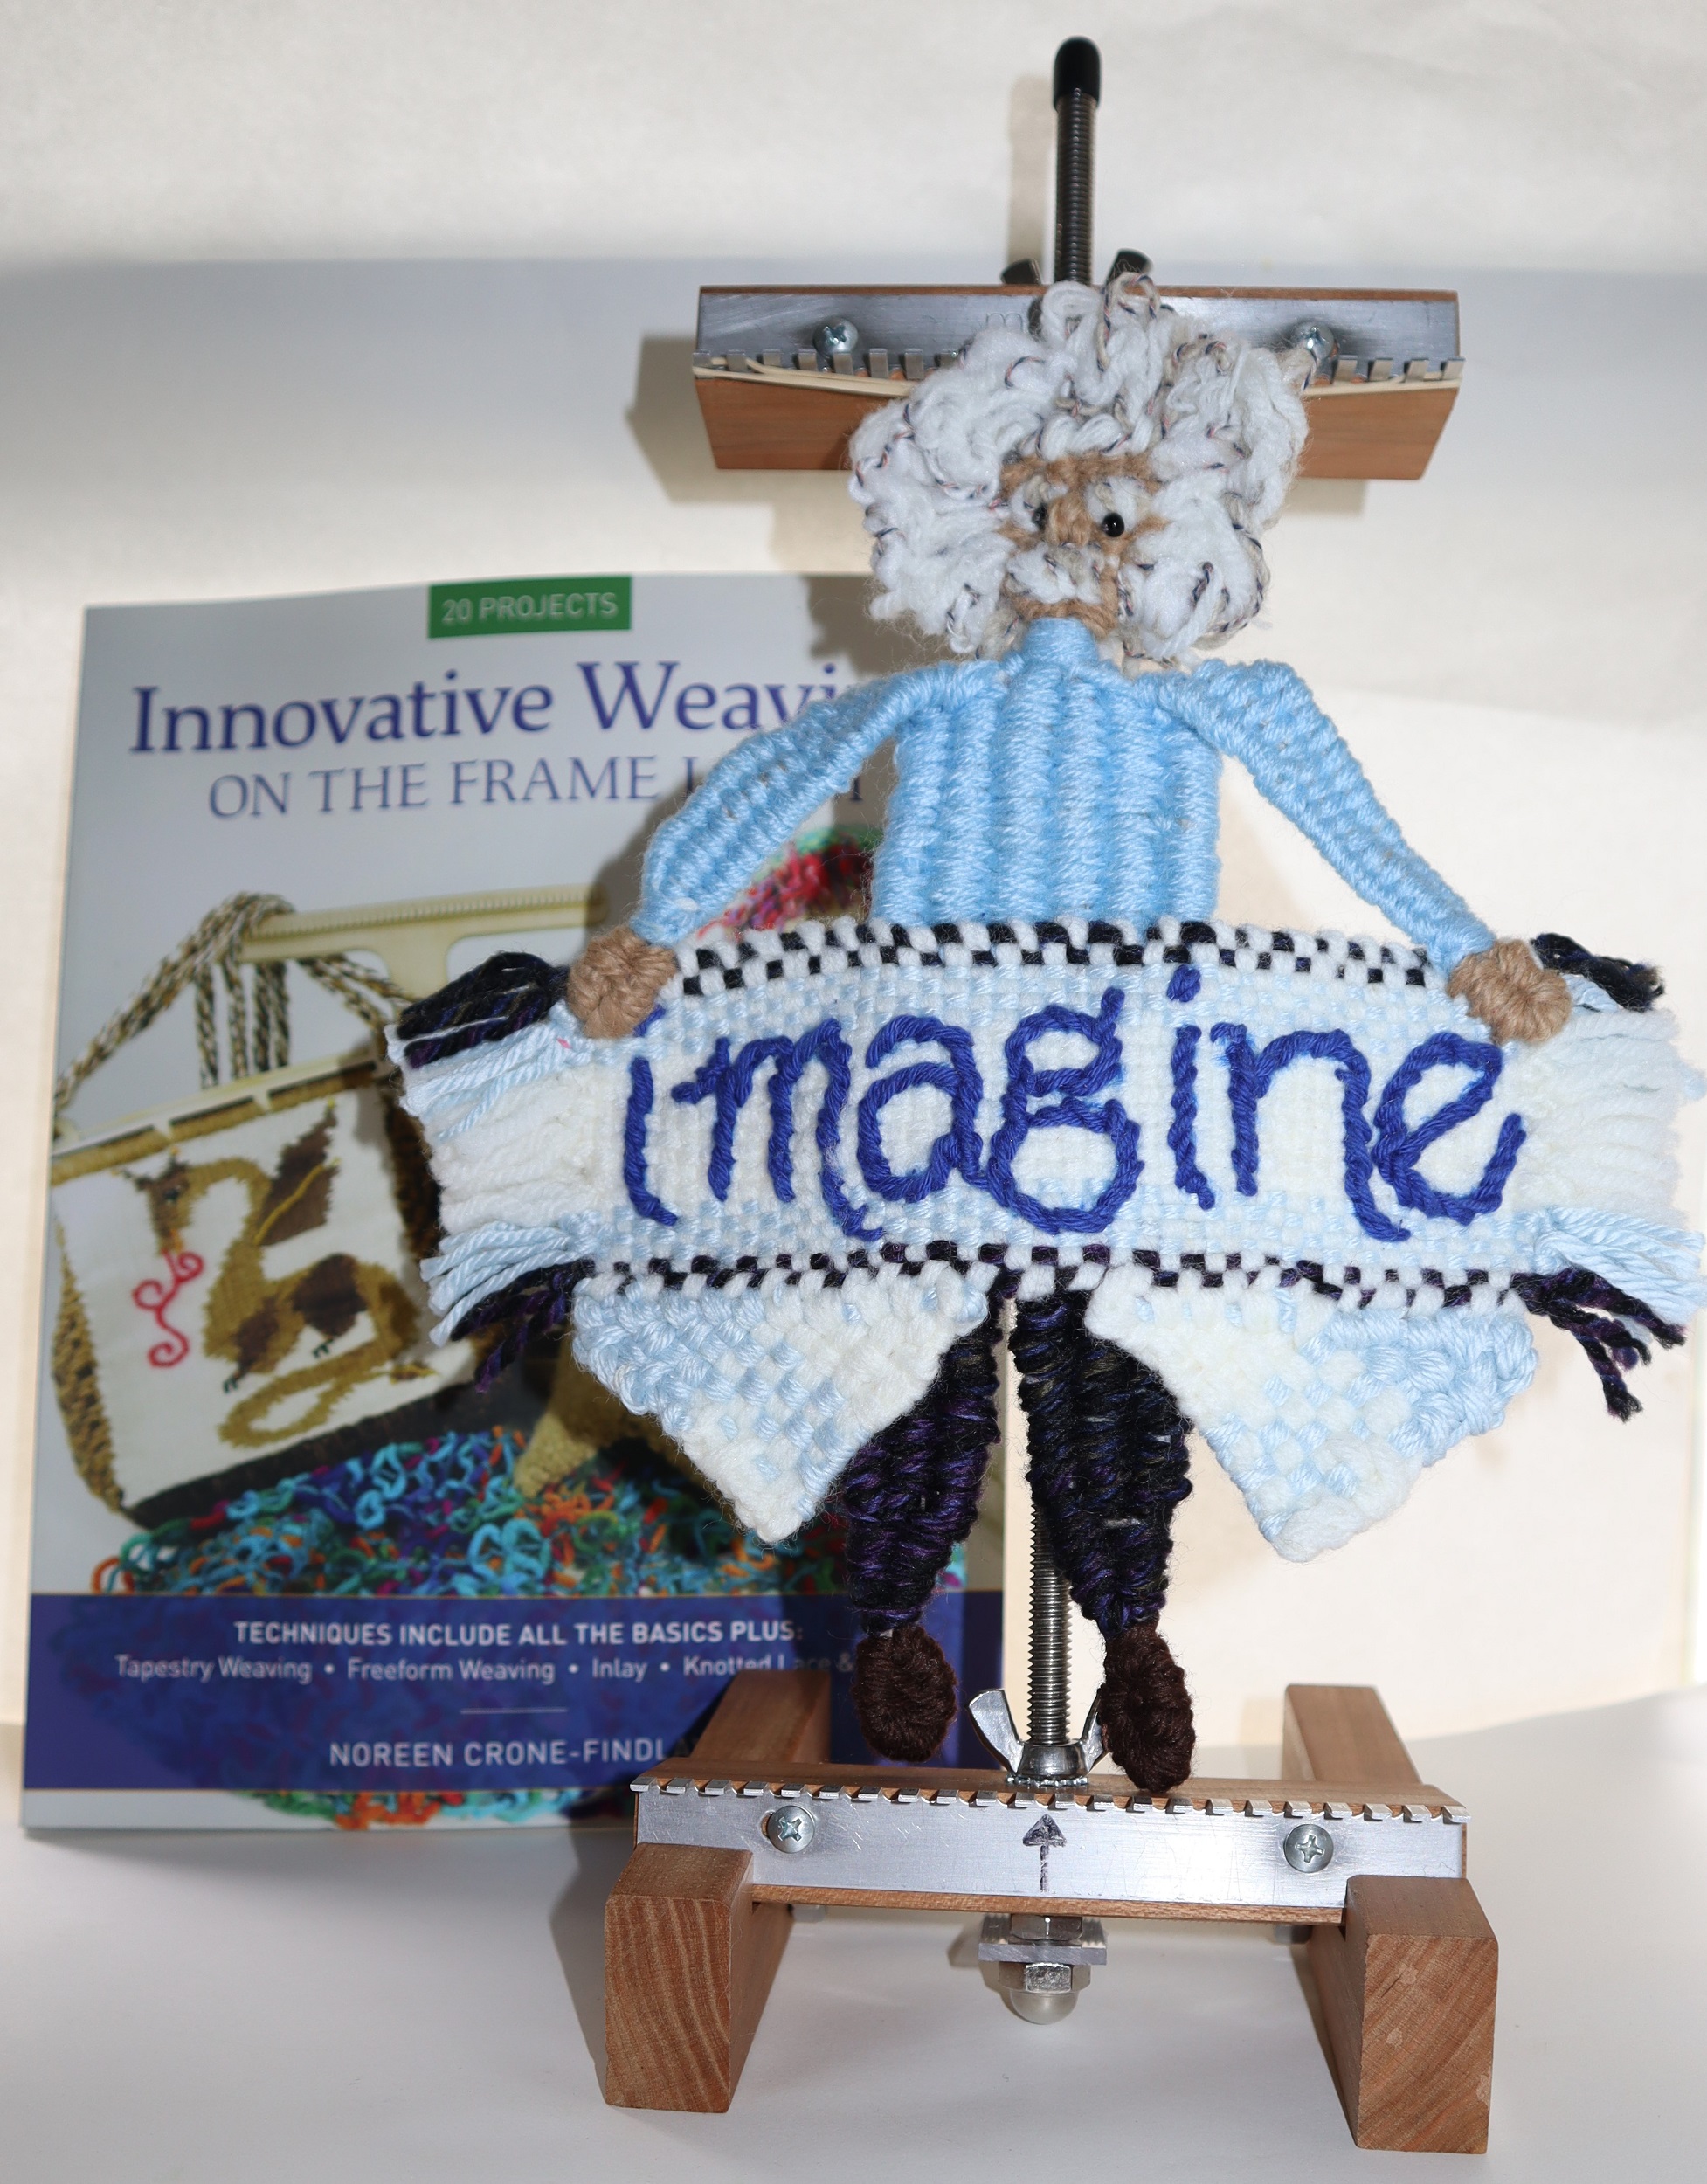
Woven on the Mirrix Saffron loom, using techniques from “Innovative Weaving on the Frame Loom”
A Weave Along by Noreen Crone-Findlay
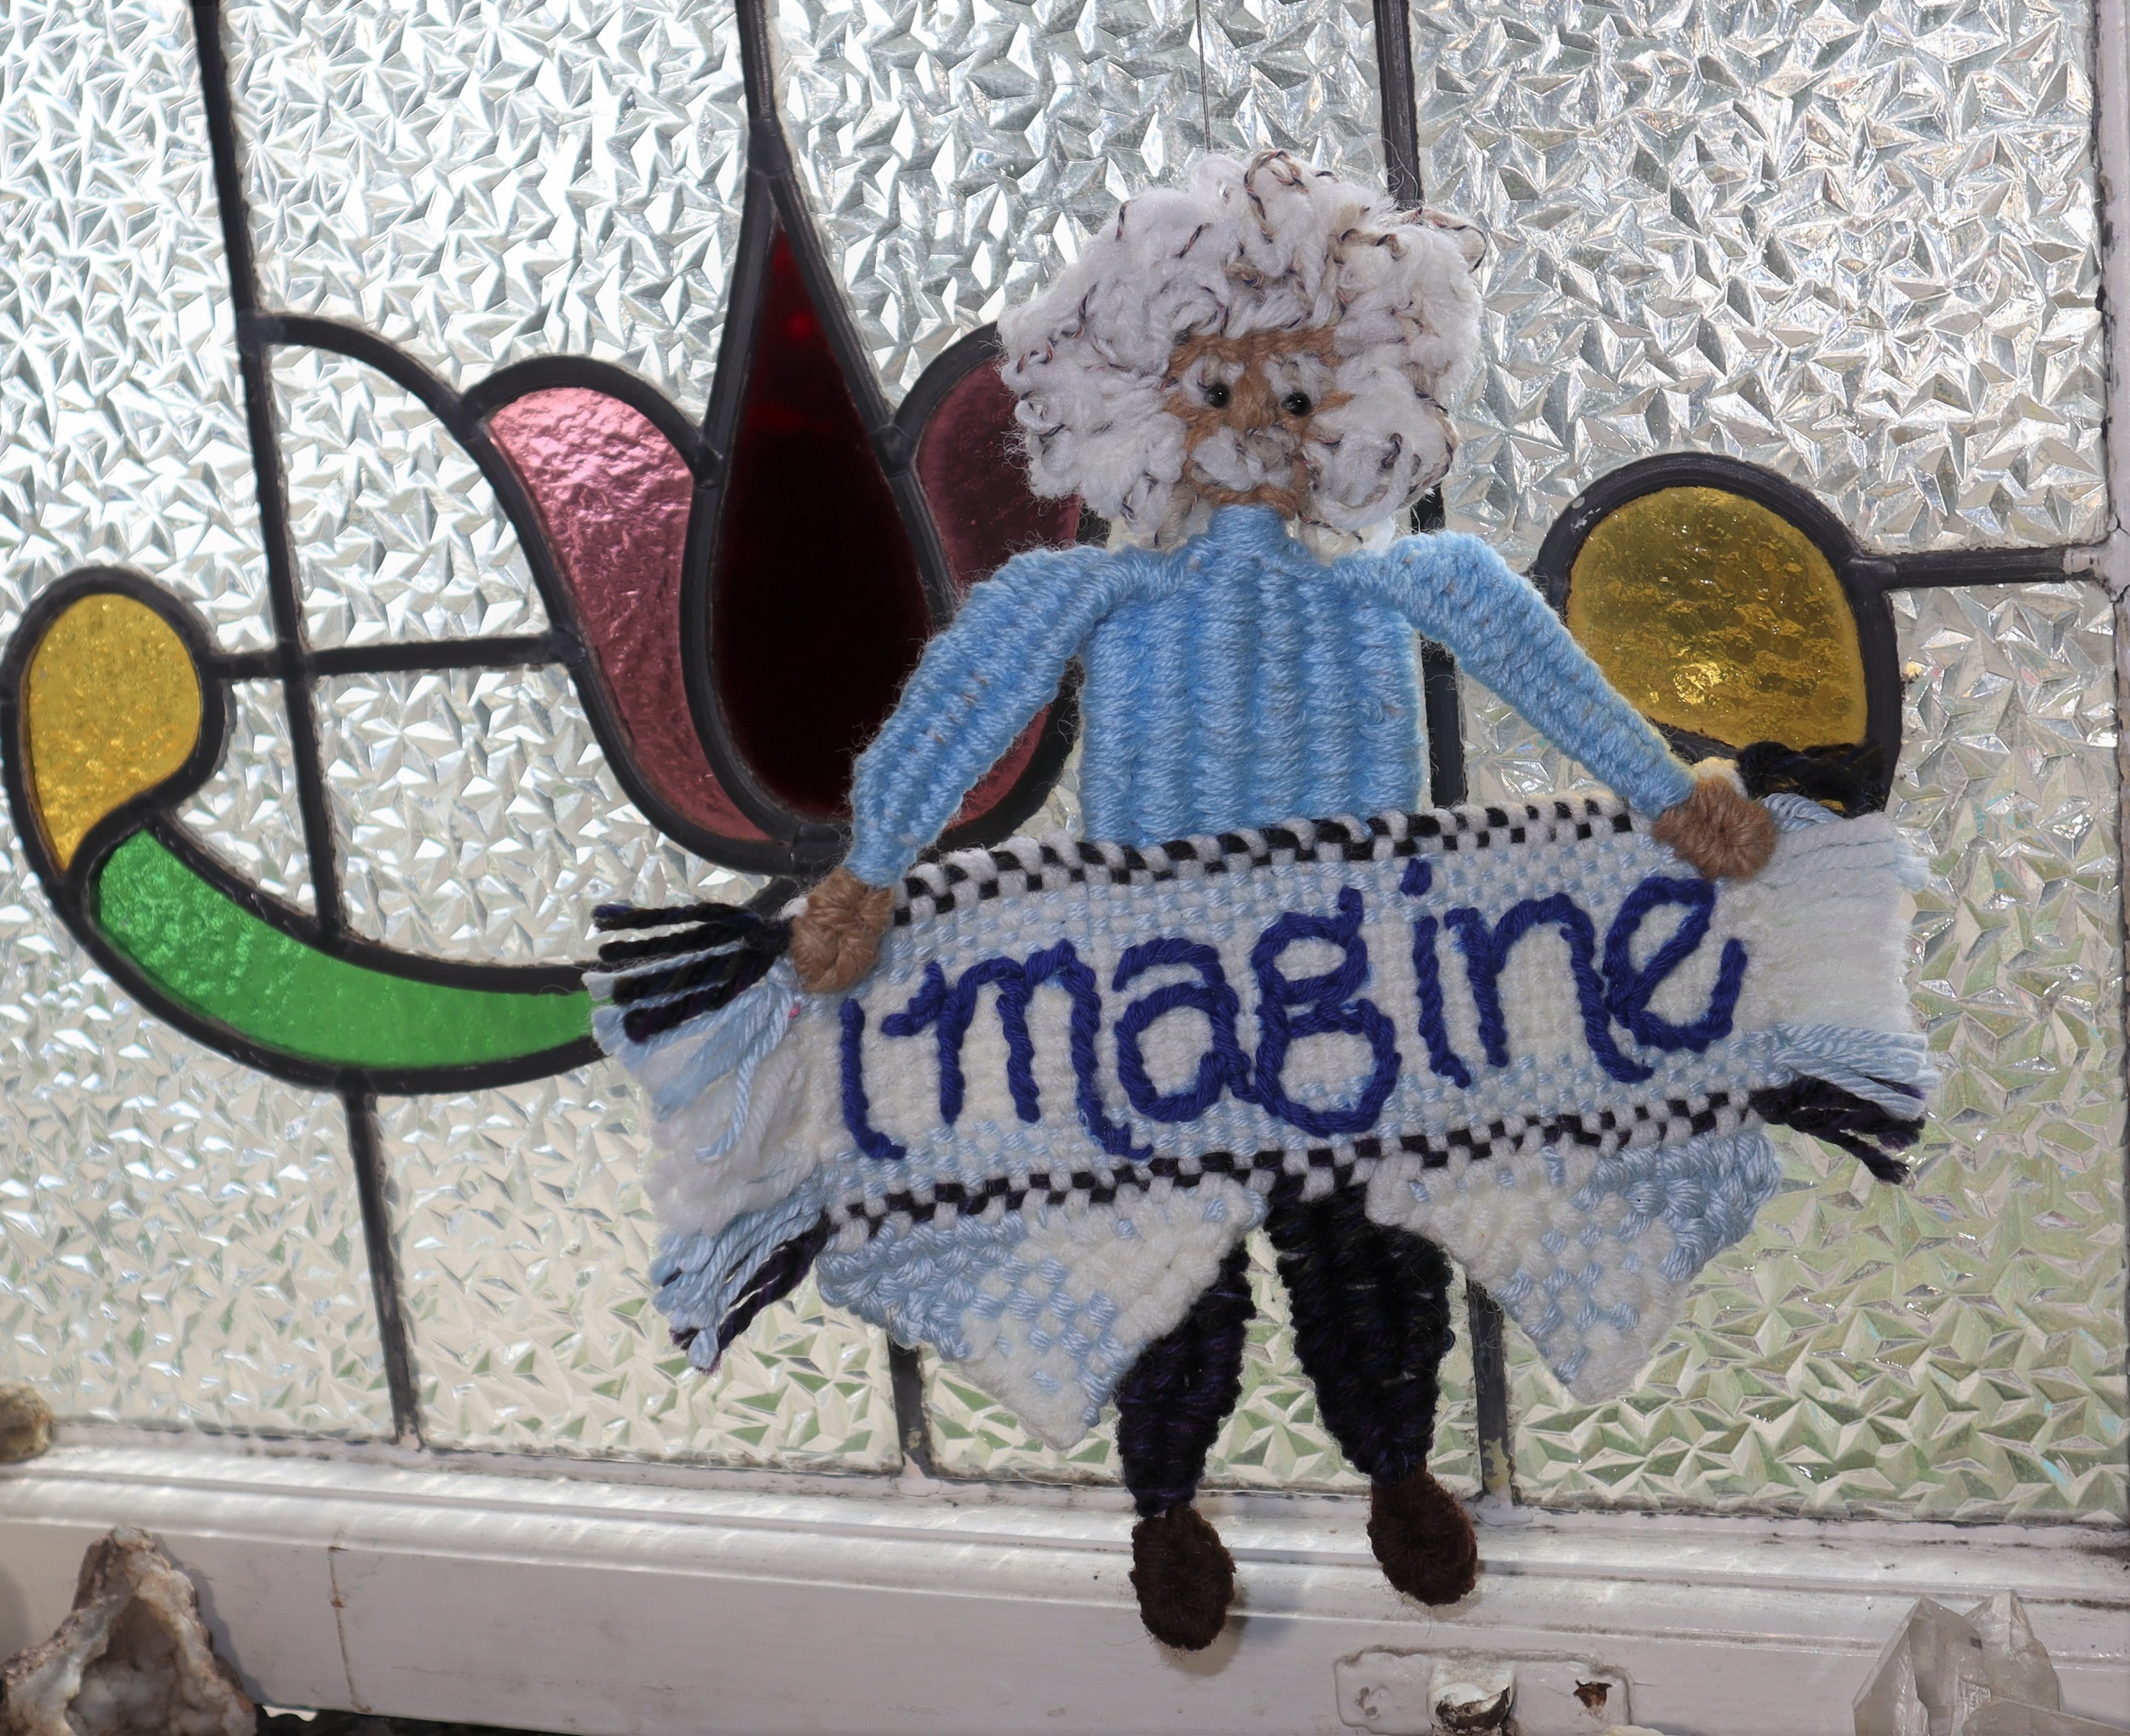
The “Imagine” banner is a reminder about the power of creativity. Noreen Crone-Findlay, author of “Innovative Weaving on the Frame Loom”, has designed this banner as a weave along, featuring the delightful Mirrix Saffron Loom.
Albert Einstein has been credited with saying that he valued imagination over knowledge.
Now is certainly the time for us all to imagine that we can make things better, so hurrah for creativity, resiliency and imagination!
The 3 components of the ‘Imagine’ banner are all based on techniques that are featured in ‘Innovative Weaving on the Frame Loom’, with little tweaks so that you can make a unique and one of a kind celebration of creativity to inspire yourself and other people, too.
You will need the Mirrix Saffron Loom and ‘Innovative Weaving on the Frame Loom’ by Noreen Crone-Findlay (that’s me, of course) to participate in the weave along.
Mirrix is offering a kit that includes both, as well as other tools that are used to create the ‘Imagine’ banner.
Some teas come in cloth tea bags that can’t be composted, so instead of throwing them in the garbage,
here’s a great way to upcycle the bags into yarn that you can weave with (or knit or crochet).
I’ve made a video about how to cut the cloth tea bags into fabric yarn-
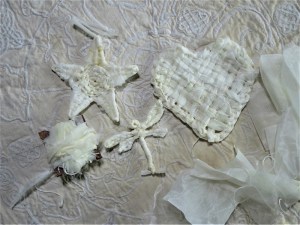
What can you do with upcycled tea bag yarn?
Weave with it as if it’s regular yarn… for instance, here are a Star , a Dragonfly and Heart woven on pin looms that I designed for Dewberry Ridge Looms
Or: Make upcycled brooches- here’s a video showing how:
More videos about weaving with teabag yarn –
How to Weave Using Upcycled Teabag Yarn 2 Nails at a Time on Pin Looms:
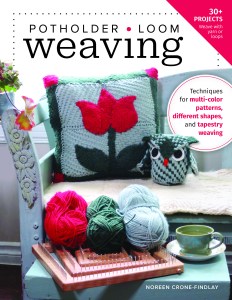
I wrote and designed and wrote and designed sooooooooooooo many patterns and projects for the Potholder Loom Weaving book that the book became too big, and my editor and I had to make some hard decisions. Even so, the book is a lot thicker than the publisher had originally intended, so many thanks to Stackpole Books and especially to my wonderful editor, Candi Derr, for going to bat for the book and letting it grow bigger than it was originally intended.
We pulled this design from the book and now I am offering it to you as a gift.
If you want to make the blanket larger, use a 27 peg (Pro size) 9 inch loom instead of the Traditional 18 peg size potholder loom.
POTHOLDER LOOM GEOMETRIC BLANKET by Noreen Crone-Findlay (copyright)
The Geometric blanket is a cozy wrap to keep you warm no matter what season. The teddy bears and their friends are having a lovely picnic on the Geometric blanket. Won’t you join them?
NOTES: Feel free to change colors and yarns. The blanket in the photos was woven with a single strand of bulky yarn. If you choose to work with thinner yarns, you will need to purchase (or spin) twice as much yarn and use 2 or more strands held together as if they are a single strand.
The twill pattern is on page 59 of Potholder Loom Weaving. The brown and green butterflies in the original blanket didn’t work well, so use the twill pattern or you choice of alternates instead.
FINISHED MEASUREMENTS: 60 inches/150 cm square.
If you would like a larger blanket, then use the large size (27 pegs or nails per side) potholder loom, following the chart and weaving the same number of squares and rectangles. You will need to purchase at least 50% more yarn.
WPI of yarn: 6 wraps per inch
EQUIPMENT AND TOOLS: Potholder loom- 6 inch size (18 pegs or nails per side), Optional: Small size (9 pegs or nails per side) potholder loom; weaving hook; chopstick or knitting needle for shed stick; crochet hook; scissors; tapestry or craft needle.
YARN: Lion Brand Wool-Ease Tonal; Bulky #5 weight yarn; 80% acrylic/ 20% wool; 124 yd/ 113 m; 4 oz/113 gm; 1 strand of yarn is used as warp and weft. 3 balls of each of the following colors: #112 Raspberry; #153 Night Sky; #123 Sand; #126 Coffee; 4 balls of #194 Lime.
INSTRUCTIONS:
WEAVE:
20 squares in #194 Lime Here’s a link that will show you how to weave with yarn on the potholder loom: LINK
16 squares warped with #194 Lime and woven with #126 Coffee
16 squares in #112 Raspberry
1 square in #153 Night Sky
12 squares in #126 Coffee
36 rectangles, warped vertically over 9 pegs or nails, and woven horizontally over 18 pegs or nails in #153 Night Sky, woven using Rectangle technique on https://youtu.be/K2X4nLRBBNs
16 squares in #123 Sand
4 small squares in #194 Lime, woven using instructions for how to weave small squares (9 pegs or nails by 9 pegs or nails) on p.10 of the Potholder Loom Weaving book or instructions that came with the small size potholder loom.
PUTTING IT ALL TOGETHER:
Stitch all the squares and rectangles together, following the chart .
For the last couple of years, I have been working 24/7 on 2 new books as well as a solo show of my mixed media wovenworks.
I am so delighted that both books will be released in 2020 in bookstores worldwide.
My publisher, Stackpole Books/Rowman/Littlefield has made ‘Potholder Loom Weaving’ available online worldwide for pre-ordering.
It will be on bookshelves worldwide in January of 2020. 😀
It’s a BIG book! It is 264 pages of tons and tons and tons of techniques and projects and I am thrilled to bits with it!
You can pre-order the paperback version of it now from all the online book sellers, and here’s a link to the Book Depository, who ships worldwide for free: LINK
The electronic versions of the book will be available in January- I don’t think it can be pre-ordered for Kindle etc yet.
The last couple of years have been really intense as I have been working night and day on two new books as well as new tapestries and woven works.
One of the books is now up online available for pre-order (I’ll post links asap) and one of the series of tapestries is now in the gallery (Harcourt House Gallery in Edmonton), awaiting the opening on October 18.
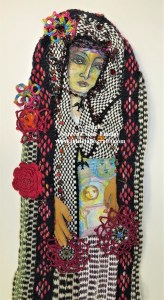
This piece is from my ‘Follow the Thread’ series of mixed media weavings:” Terpsichore- Carmen’s Birds”.
Terpsichore is the muse of the dance.
This piece is definitely influenced by my husband, Jim Findlay‘s commitment to playing flamenco.
I was having trouble resolving the piece, because I knew that she needed something to lift her to completion.
Then, my friend, Carma, who sings and dances with Jim and Susan and Barb in Corazone del Flamenco gave me a beautiful little black necklace with tiny birds, and Voila! Done! The birds were exactly what Terpsichore was needing (demanding!)
HURRAH! In 2020, my publisher (Stackpole books) will be releasing not just one new book from me (I was hard at work for almost all of 2018 on it), but-
WHEEE- while I was working sooooooooo hard on the book that will be released in January of 2020, I was also busting my chops on laying the foundation for the NEXT book that I am writing.
And, the good news is that they will be publishing the NEXT book in the fall of 2020, so most of 2019 will have me hard at work on it.
In fact, I am happily working on it now.
Last summer, my friends, Teresa and Darren Griffith gave me a huge bag of fluffy, fabulous fuzz from 4 of their gorgeous alpacas.
I don’t have a drum carder, so I hand carded and carded and carded it all and spun and spun and spun….
this basket of yummy yarn….
It may not look like much, but there is over a kilogram of yarn in that basket!
I thought that Teresa was brilliant to staple a lock of fleece from each of the alpacas to a card, so I would remember the name of each of the sweet alpacas who donated their loveliness!
And, now, I am joyfully weaving the alpaca yarn and will be including it in the NEXT book.
Hurrah!
and a thousand thanks to Teresa and Darren for their amazing generosity! ❤ and blessings to them both
I use weaving hooks in all kinds of weaving- everything from potholder looms and frame looms to triangle looms, and a fair few looms in between.
Crochet hooks are okay for some weaving, but they can be too short and too round for some weaving.
I have found that making weaving hooks from chopsticks is quick, easy and very satisfying. It’s a great way to upcycle.
Chopstick weaving hooks are longer than crochet hooks (afghan hooks can be hard to find) and are flatter, and work beautifully.
You can customize your weaving hook to be the absolute bees knees by fine tuning it with a little sanding or whittling as you work with it.
Here is a step by step ‘how to’ video tutorial that shows you how you can easily carve or whittle your own perfect weaving hook with just a few simple tools: