My friend, Teresa gave me a bag of gorgeous Alpaca fiber – bliss!
I started spinning it up, but realized that I had misplaced my Niddy Noddy.
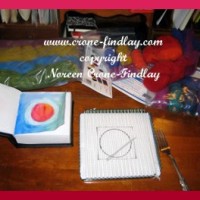
So, I thought… I can make one from cardboard.
One thing lead to another, and I soon ended up with 2 charming little characters who do acrobatics to help me wind a skein of yarn.
They are sturdy, work perfectly and are easy to store.
A totally successful upcycle of re-using cardboard. Yay!
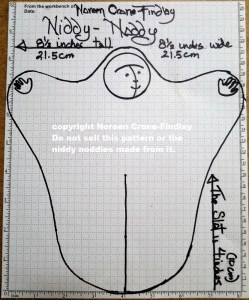
Here’s the pattern that I finally settled on… after a LOT of tweaking and twiddling:
Print it full page: I couldn’t get the thumbnail to open to a larger version, so I have added a larger version at the end of the post that I hope will work for you!
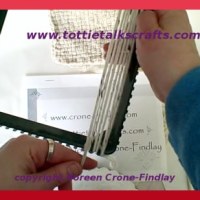
And here’s a video that shows how to use it, as well as the inspiration for Niddy and Noddy’s faces:
Recently, I made a video about cutting up garments to upcycle them by weaving or knitting with the fabric strips.
In early October of 2017, my son in law’s step-dad passed away.
This was, of course, very hard on our grandson.
I talked with him about what it meant to him to have his ‘other’ grampa (not my husband) pass away.
I asked him if he needed something of his grampa’s to hold onto, and he said yes.
So, I asked for a couple of Bill’s shirts so I could make comfort critters with them.
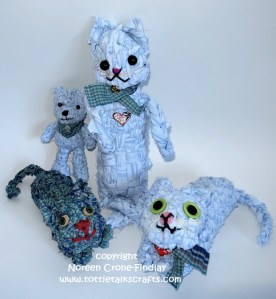
I cut them up and wove them into kittys, as that was what my grandson asked for, so he has one, and other family members have them too. (I didn’t photograph all of them).
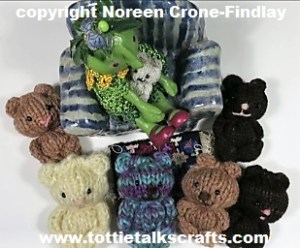
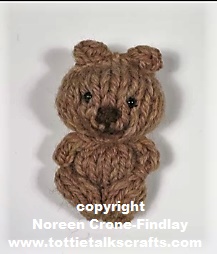
I also knitted a teddy bear for one of our relatives, as he is definitely a teddy bear guy 🙂
The bear and kittys have been well received and they do carry the love that went into every stitch of making them.
I’ve done this before, and have found that ‘compassion critters’ made from upcycled clothing of a dear one is very comforting for people in grief.
Every little thing helps….
Here’s the video:
The woven kitties and knitted bear are made from the following patterns:
I use weaving hooks in all kinds of weaving- everything from potholder looms and frame looms to triangle looms, and a fair few looms in between.
Crochet hooks are okay for some weaving, but they can be too short and too round for some weaving.
I have found that making weaving hooks from chopsticks is quick, easy and very satisfying. It’s a great way to upcycle.
Chopstick weaving hooks are longer than crochet hooks (afghan hooks can be hard to find) and are flatter, and work beautifully.
You can customize your weaving hook to be the absolute bees knees by fine tuning it with a little sanding or whittling as you work with it.
Here is a step by step ‘how to’ video tutorial that shows you how you can easily carve or whittle your own perfect weaving hook with just a few simple tools:
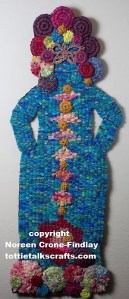
I’ve just finished weaving a new Woven Woman mixed media tapestry. LINK
Woven Woman (Essence) by Noreen Crone-Findlay (c)
I’ve made 3 video tutorials to show how I wove various aspects of her:
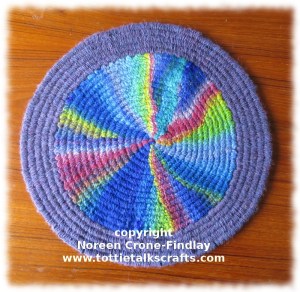
How I wove the ‘Galaxy’ circle at her heart: LINK using the Peg Loom
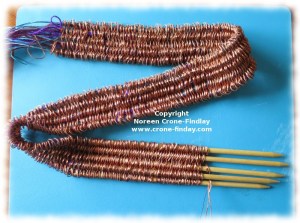
weaving with wire on weaving sticks
How I wove the narrow copper band around her face, using Weaving Sticks: LINK
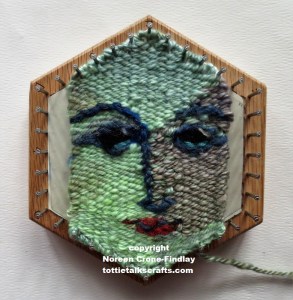
And, the third video shows how I used a Lily Speed o Weave loom to weave a hexagon, using the ‘Flower of Life’ pattern, with spool knitted cord.
I spent several days shooting a video, showing how to weave the Flower of Life with wire, but the wire just doesn’t show up in the video. Sigh.
So back to the drawing board, and several more days, but this time, using spool knitted cord, because it shows up well in the video.
Flower of Life pattern woven on the hexagon loom by Noreen Crone-Findlay
You can use all kinds of things to weave this pattern that is a celebration of geometry- Lucet cords, wire, thread, yarn, art yarn, roving (use thread or embroidery floss or yarn to tie the intersections), t shirt yarn, fabric strips…. no limits!
By the way: In my etsy shop, there’s a great eBook:
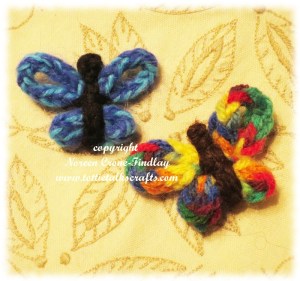
Butterflies are the symbol of transformation, and since everyone I know seems to be experiencing some kind of transformative experience or another, it seems to me to be a good time to make some little butterflies.
They are very quick and easy to make, using a Lucet – although you can also use spool knitted cord, if you prefer.
They can be used to embellish anything that you can think of, or can be stitched to a ribbon for a book mark, or have a pin sewn to the back so they can be worn on a hat, bag, scarf or lapel. They can be attached to a key ring.
They can be used in scrapbooking or card making.
It’s lovely to have one in your pocket to give to a friend who just needs a little comfort…..
Here’s the video for how to make the butterflies:
We are in deep, cold, snowy mid winter in Western Canada, so it’s lovely to have butterflies flittering about the studio, even if I had to make them myself! 🙂
That just reminded me of something that I hadn’t thought of in years….
My mother used to give us ‘Butterfly Kisses’, which were a quick little flutter of her eyelashes on our cheeks.
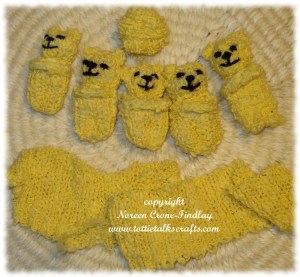
I unraveled the sleeves of the sweater and used the Comfort Bear pattern LINK to pattern
It’s taken awhile, because, I think that I needed to design the Comfort Bears first.
I was so pleased when I had an ‘AHA!’ that I could use the Comfort Bear pattern to make the Memory Bears for Marie’s daughter and her partner, her son and grandson and her grandson’s Mum.
They’ll be able to cuddle a little of their Mum and Grandma whenever they need a small bit of comfort…..
I am finding the Comfort Bears to be very inspiring… They have many aspects, and more keep being revealed.
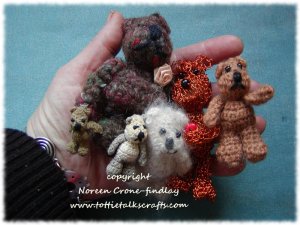
I designed these wee crocheted comfort bears many years ago.
I’ve had requests for a pattern for crocheted comfort bears, and so here is my pattern for crocheters to create wee bears to give to charities and individuals who are in need.
May they bring joy to those who make them and to those who receive them.
❤ Noreen
CROCHETED COMFORT BEAR
Designed by Noreen Crone-Findlay (c) 2001
The size of your hook and weight of your yarn will determine the gauge of the crocheting, and the finished size of your bear. When made with worsted-weight yarn, the Comfort Bear is approximately 3 inches tall. When made with Embroidery Floss, it is approximately l inch tall. In order
to make this bear, you will need to know how to make a chain, slip stitch, single crochet and double
crochet.
MATERIALS:
Larger bears in photo were made with approximately half an ounce of worsted-weight yarn. Smaller bears were made with 1 skein of embroidery floss or lace weight yarn, using one strand. I experimented with copper wire. Oh ugh! I don’t recommend it!
Black embroidery floss for embroidering the features.
Crochet Hook in a size appropriate to your size of yarn
(For larger bear: “H”
For smaller bear: Steel Size 9 (l.15 mm))
Darning needle for sewing seams
Embroidery needle for embroidering features
ABBREVIATIONS:
Ch= chain
Sc= single crochet
Dc= double crochet
Sl St= Slip stitch
Turn= turn the work over and start the next row in the last st of the last row
Y0= yarn over the hook
* to *= you will repeat the instructions that appear between the two”*” signs however many times stated in the pattern. BEGIN WITH THE FIRST LEG:
Ch 5, leaving about 4 inches of yarn at beginning of ch. This tail will be used to sew the legs up later.
Row 1: Sc in 2nd ch from hook and in each ch to end. (4 sc). Ch 1 and turn.
Row 2 & 3: 4 sc, ch l, turn. Cut yarn, and draw end through last ch l.
Repeat Rows 1 – 3 for the second leg, but do not cut the yarn. Ch l and turn. BODY:
Row 4: Work l sc in each of the 4 sc of second leg, then work l sc in each of the 4 sc of the first leg. (8
sc). Ch l and turn.
Row 5 & 6: 8 sc, ch l, turn. HEAD:
Row 7: Sc in lst sc, (ch 2, sc in next sc)7 times. (7 ch 2 spaces formed) ch l, turn.
Row 8: 2 sc in each ch 2 sp (14 sc) ch l, turn.
Row 9: (l sc in first sc, sk next sc)7 times. (7 sc) ch l turn
Row 10: sc in lst 2 sc,(insert hook into next loop, yo, pull through st)3 times, yo, pull yarn through all 4
loops on hook, sc in last 2 sc. (5 sc) ch l turn.
Row ll: 5 sc, ch l. Cut yarn, leaving a tail of about 10 inches, pull yarn end through last ch l. ARMS: Make 2:
Row 1: Ch 4, sc in 2nd ch from hook, sc in each remaining ch. (3 sc) ch l, turn.
Row 2 and 3: 3 sc, ch l, turn. Cut yarn, leaving a tail of about 4 inches, pull yarn end through last ch l. FINISHING: Head: Gather upper edge of head and pull up tightly. Stitch.
-Sew center back seam of head.
-Stuff head. Neck: Wrap yarn end around neck of bear 3 or 4 times, and pull up tightly.
– Stitch over the neck wraps 2 or 3 times to lock in place. Legs: Fold the leg edges together. With the starting yarn end, sew the leg seam up to the center back. Body: Stuff body and sew shut. Arms: Sew arm seam, and sew arm to bear. Repeat for other arm. Ears: Push crochet hook into a stitch in the top of the head, yo, pull up a loop onto hook. Ch 4.
-Cut yarn, pull end through last loop on hook.
-Tie a knot with first yarn end, then thread yarn end into darning needle, and hide yarn ends inside
head.
-Repeat for other ear. Features: -Embroider features by stitching with straight stitches approximately 6 or 7 times for eyes and nose.
– Embroider mouth by making a single straight stitch at each side of the nose.
If you would like some help embroidering the features, please check out: