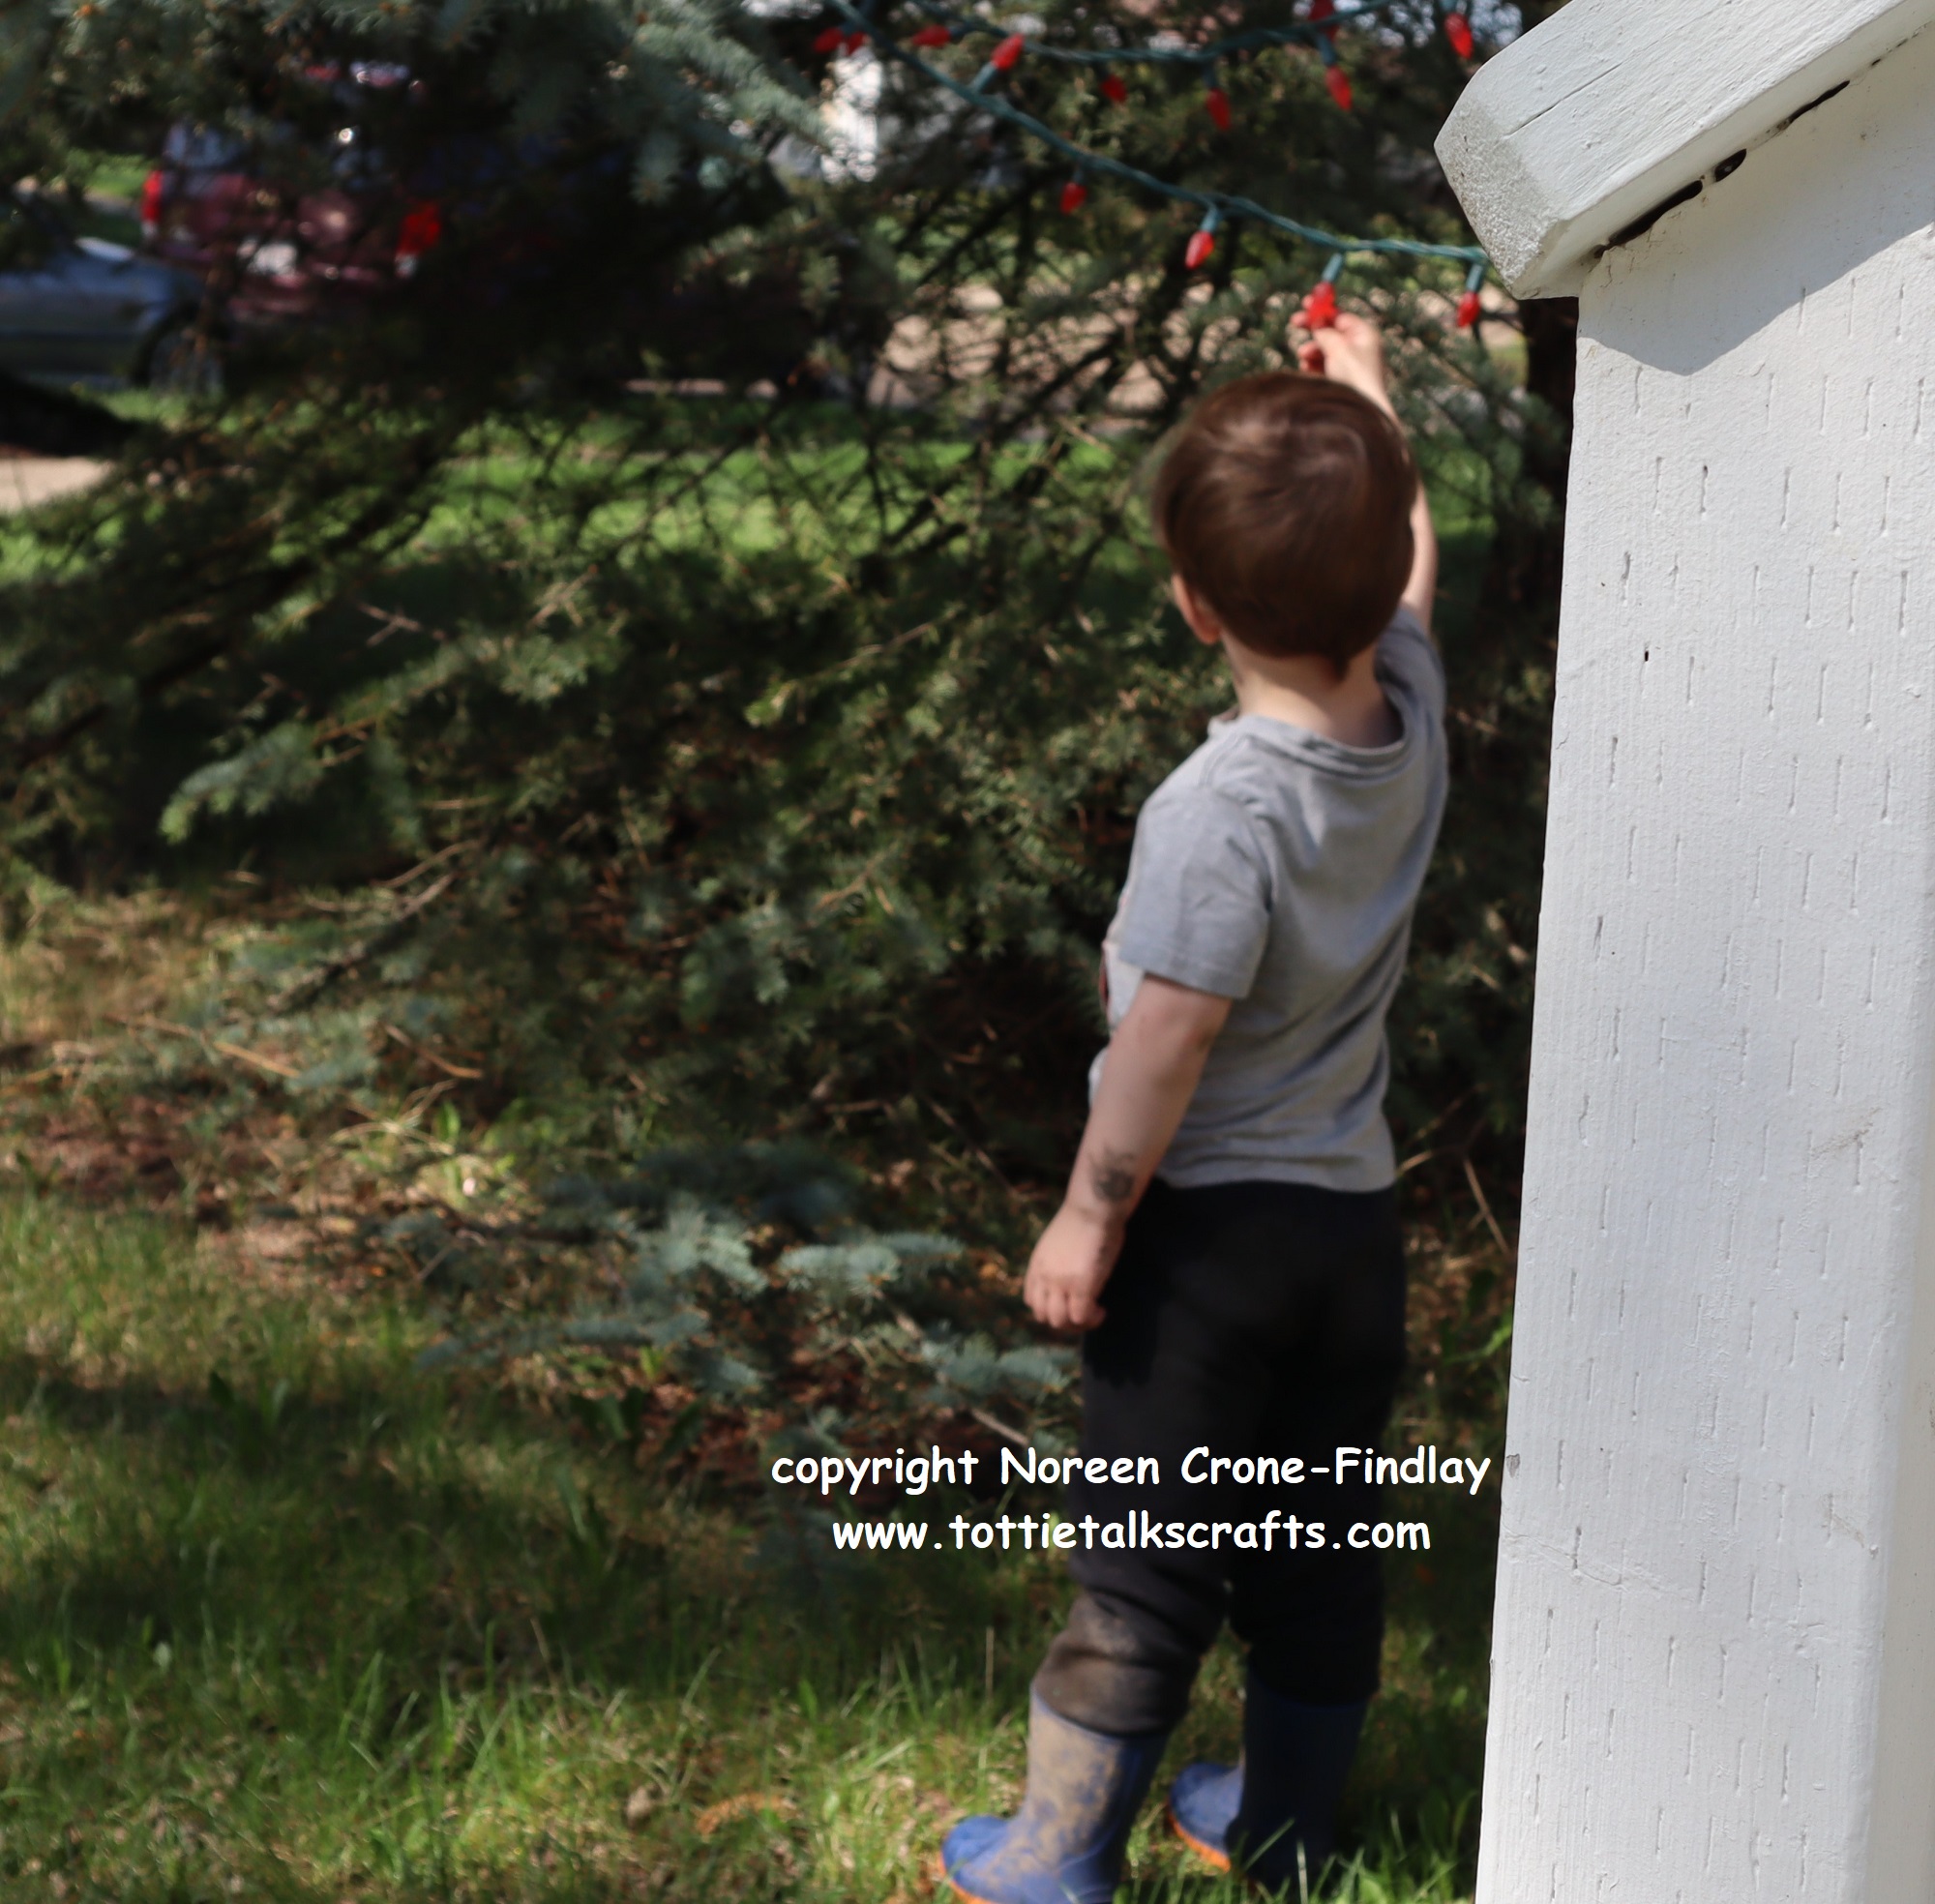
I am very fond of the little kiddo that lives next door. He and his Mamma are good friends of mine.
The doorbell will ring and my little friend will announce that it has been 50 years since we talked, so we will sit together on the porch and have a chat. His Mamma sits on the grass and we all enjoy the moment.
Yesterday, I took paper and pen outside and drew around his hand and he astounded me with his mathematical abilities. Three years old and doing some pretty clever addition! wow….
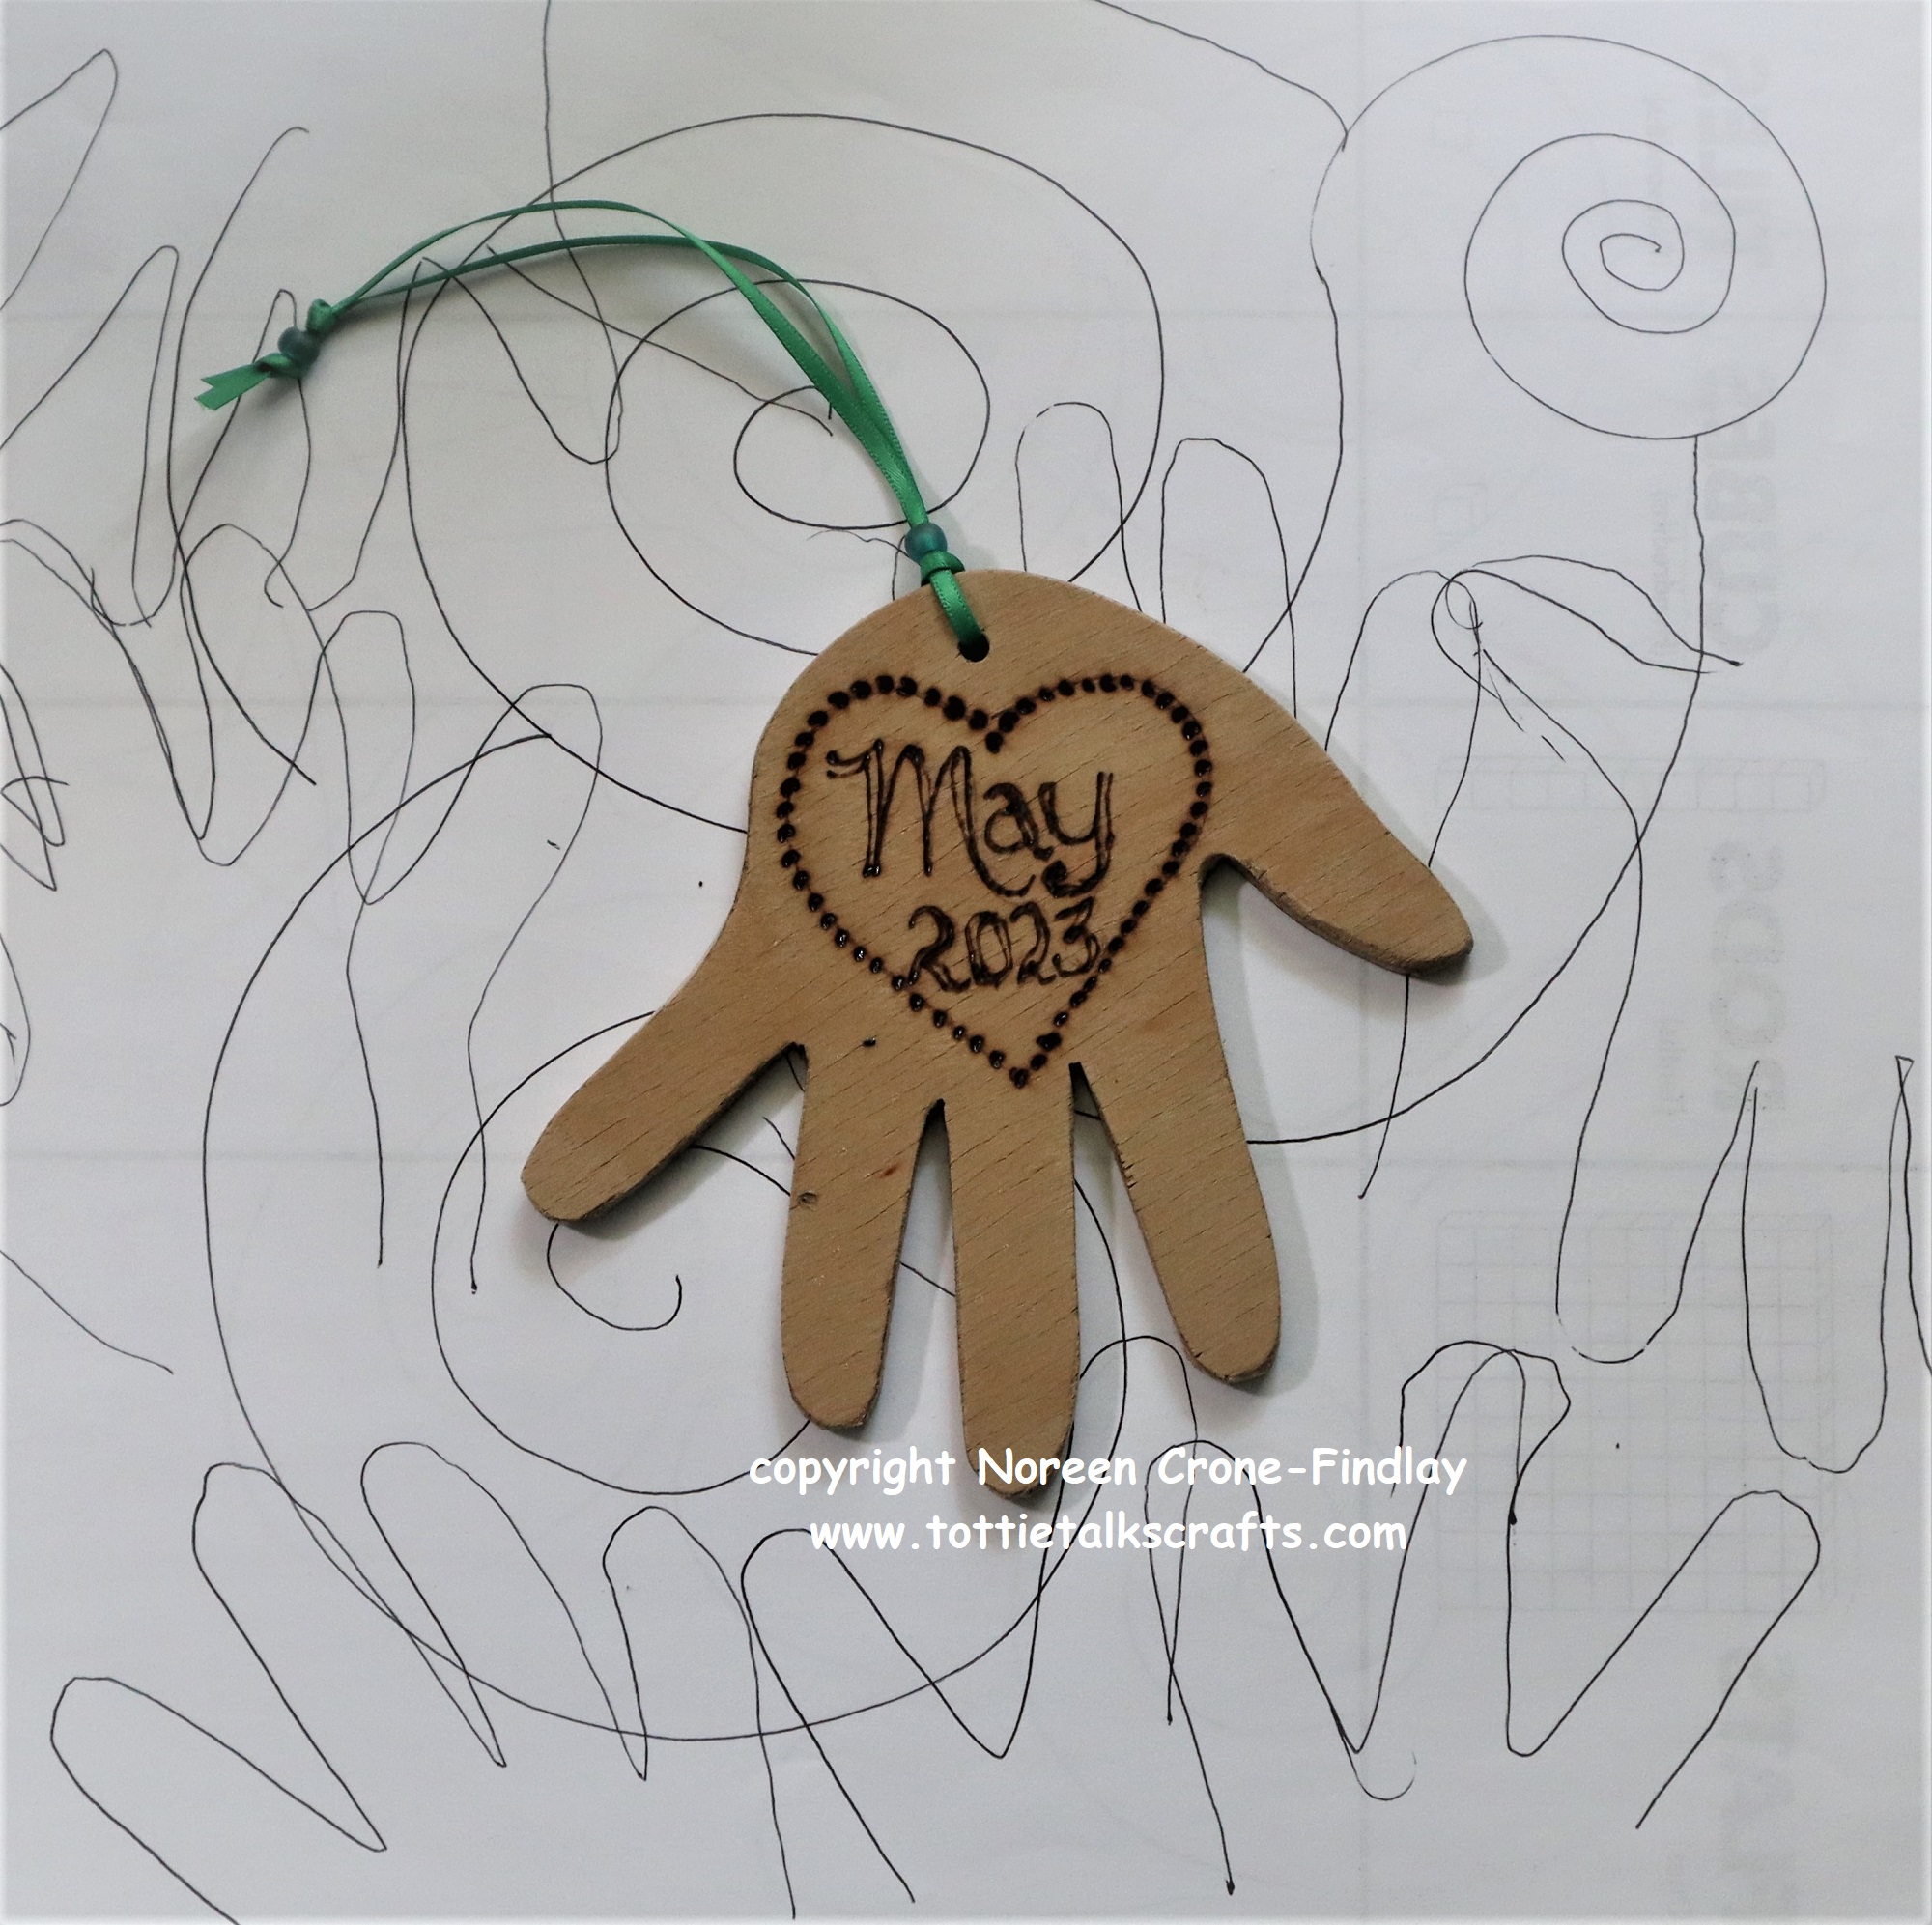
We had a lovely time drawing lots of handprints.
Then I cut one of them out, traced it on wood and cut it out. I burned the date on it and am going to give it to my friend for Mother’s Day.
I haven’t felt up to doing any wood work for more than 6 months, so it felt sweet to say hello to my saw and sander again.
I made wooden handprints of my children’s hands when they were little, and still treasure them.
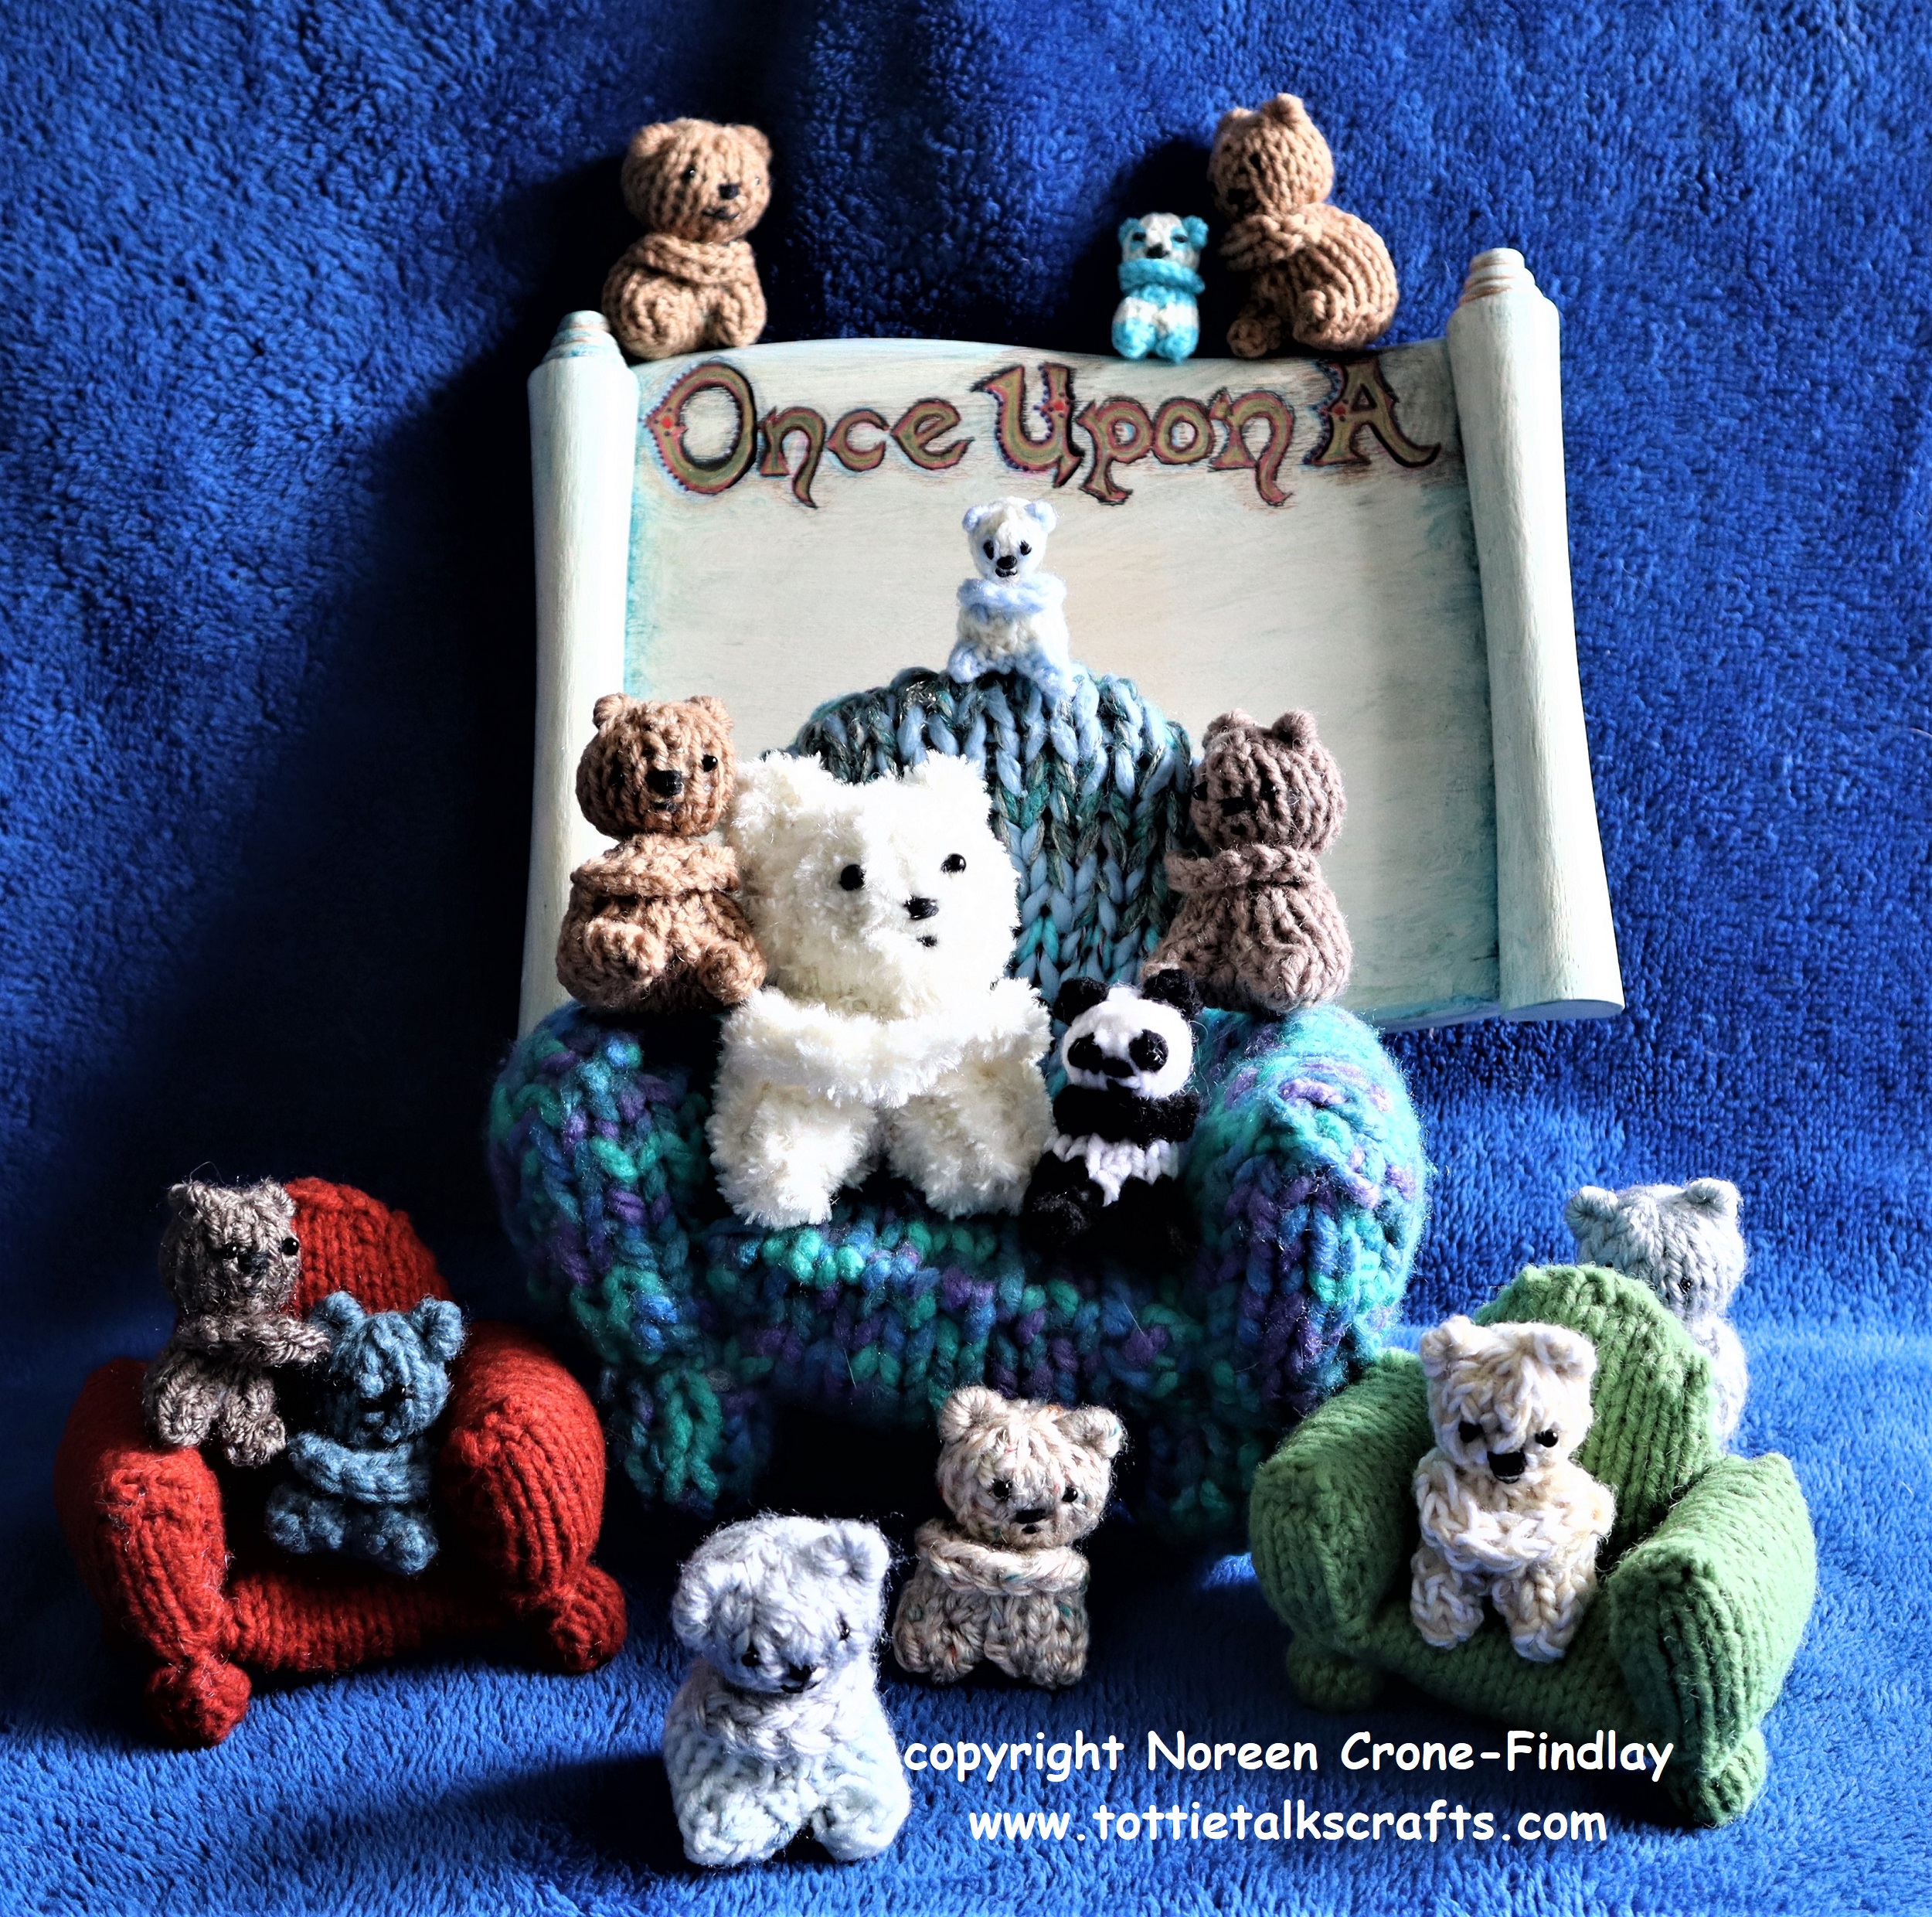
The knitted Clancy Comfort Bear is my latest design for comfort bears.
I designed it in honor of my beloved son in law who died last year.
Clancy was kindness incarnate and always kept several Comfort Bears in his pocket to offer to people who were having a difficult time. So, the Clancy Bear is a living legacy to keep his kindness unfolding in the world. With love in every stitch……
THE ‘HOW TO’ VIDEO FOR THE CLANCY COMFORT BEAR IS AT:
NOTE: The finished size of the Clancy Bear is determined by the thickness of yarn and size of knitting needles that you use.
WHAT YOU NEED:
Knitting Needles in a size that is appropriate for the thickness of your yarn,
Yarn: Less than an ounce for each Clancy Comfort Bear
A crochet hook that is appropriate for the thickness of your yarn.
Black 6/0 glass beads for eyes, Stuffing,
Black sewing thread and a needle that is small enough to sew on the beads, Tapestry or darning needle
Sewing machine thread in a color that matches your yarn (optional)
Felting needle, Tape measure, Row Counter, 4 small safety pins, Scissors or thread snip
INSTRUCTIONS: Beginning at the feet:
Cast on 11 stitches.
Rows 1- 16: Work in st st (knit one row, purl the next)
Place one of the little safety pins at each end of Row 6 and then 1 more pin at each end of Row 10.
At the end of Row 16, cut the yarn, leaving a 42 inch/105 cm long tail
Thread the tail end into a darning or tapestry needle and lift all the stitches off the needle.
Pull up to gather the top of the head.
Take the needle through the stitches one more time to secure them.
HEAD:
Sew the centre front seam using the Baseball stitch to the first set of safety pins. (see video for how to).
Take a couple stitches to secure the head. Remove the 2 safety pins.
Stuff the head.
Wrap the yarn tightly around the neck 2 times then stitch over the wraps to secure them.
EARS:
Take the yarn up to the side of the head at the top of the head and stitch over the knitting needle or crochet hook twice.
Stitch over these loops several times to make the first ear.
Repeat for the 2nd ear.
Take the needle back down and out at the ‘shoulder’ to be used to make the arms.
TUMMY SEAM:
Thread another strand of yarn or the sewing machine thread into a needle and stitch the center front down to the next set of safety pins.
Stuff the body.
LEGS:
Fold the cast on edge in half to find the midpoint.
Take the needle through it and stitch it to the end of the tummy seam.
Stitch in place a couple of times to secure it.
Squeeze and fold the edges of the front to meet the cast on edge, forming the leg with the corner point becoming the toe. It’s a bit like origami.
Stitch the leg inseam together, pulling up tightly.
Stitch the second leg inseam.
Secure at the middle.
Take the needle through the body to the back, and snip.
ARMS:
Take the crochet hook through the stitch at the shoulder where the yarn came out.
Yarn over, pull up a loop through the stitch on the body.
Chain by taking the yarn over the hook and pulling it through the loop on the hook.
Do this 7 to 9 times, depending on the thickness of your yarn.
Take the crochet hook through the shoulder on the other side of the body and pull up a loop.
Thread the yarn end into the tapestry needle and stitch the loop to the body.
Take the hook through the first chain stitch at the shoulder, and make a slip stitch in it by pulling up a loop through the chain stitch.
Repeat this for all the chain stitches, ending at the first shoulder.
Stitch the end into the body and use the felting needle to secure the arms to the shoulders and to bury the yarn end.
NOSE:
Take the black thread through the head, coming out at the center of the face.
Secure it with a couple of tiny stitches.
Make several horizontal stitches for the nose.
MOUTH:
Move down and take a couple of shorter horizontal stitches for the mouth.
EYES:
Take the needle up slightly above and to one side of the nose and sew on the bead for one eye,
then the other.
Secure the stitches by going back down to the nose and taking a couple of tiny stitches at the corner of the nose, then taking the needle back through the head. Snip the ends.
PANDA:
INSTRUCTIONS: Beginning at the feet:
Cast on 11 stitches with black yarn.
Rows 1- 6: Work in st st (knit one row, purl the next)
Place one of the little safety pins at each end of Row 6
Rows 7 & 8: Join white yarn and work in st st
Rows 9 & 10: Drop white yarn and work in black yarn.
Place 1 more pin at each end of Row 10.
Cut the black yarn, leaving a tail of 42 inches/105 cm.
Rows 11- 16: Work in white yarn.
At the end of Row 16, cut the yarn, leaving a 20 inch/50 cm long tail
Thread the white yarn end into a darning or tapestry needle and lift all the stitches off the needle.
Pull up to gather the top of the head.
Take the needle through the stitches one more time to secure them.
Stitch the center front seam of the head with the white yarn.
Stuff the head and wrap and secure the neck.
Take the black tail end out through to the shoulder and leave it there for now.
Work the rest of the Panda body, legs and arms the same way as the Basic Clancy Bear.
EARS:
After working the Arms, take the black yarn up to the top of the head and make the ears.
EYE PATCHES:
Take 3 small vertical stitches for each eye patch.
NOSE:
Take 2 horizontal stitches for the nose.
MOUTH:
Take 1 smaller horizontal stitch for the mouth. Secure the yarn by stitching through to the back of the neck and stitching in place the burying the yarn in the body.
EYES:
Sew the eye beads to the center of the patches. Secure the thread ends in the eye patches.
Normally, we wrap all our presents in bags that I have made over the years. We never buy paper for gift wrapping.
But, this year, my husband and I made some gifts that needed special packaging.
So I set my mind to working on how to do this in an eco friendly way.
(I’ll show the special gifts in my next blog post)
Several years ago, Jim bought a roll of cardboard to build a case for his Oud (Turkish Lute).
It came as a roll that is 12 inches wide by ever so long, and it’s been kind of in the way ever since, but I didn’t want to get rid of it because I have a huge fondness for cardboard.
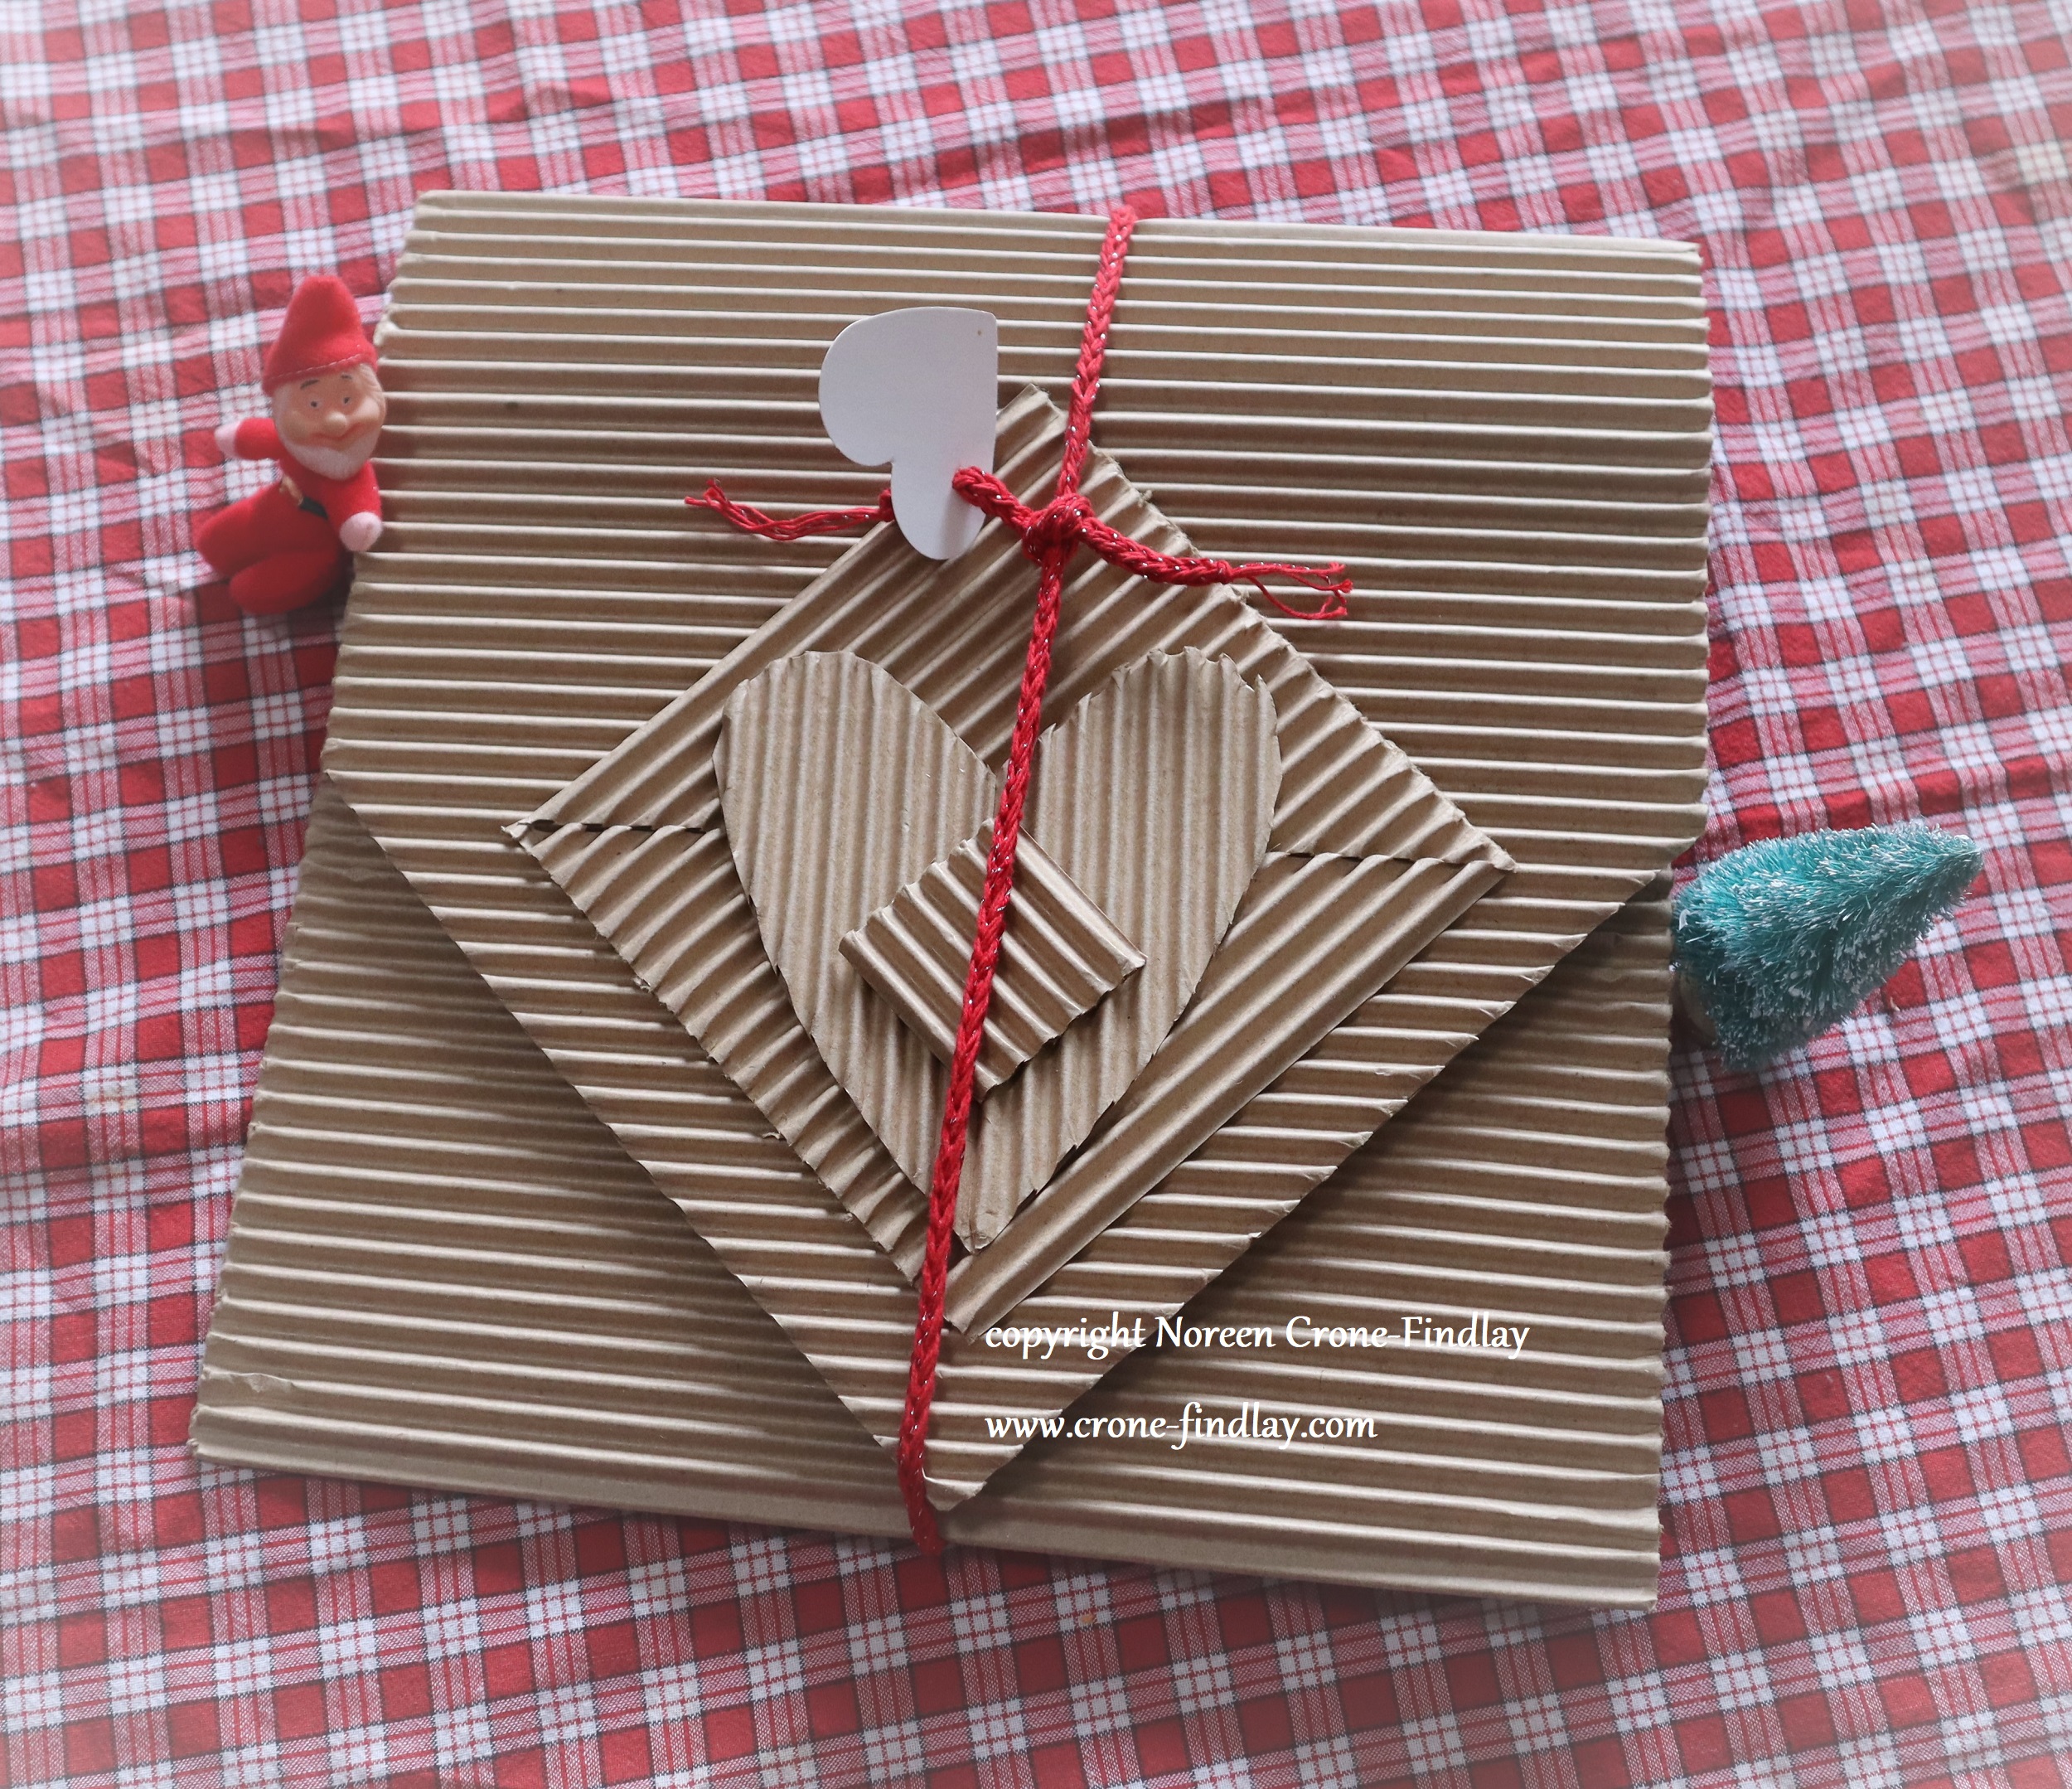
Jim wrapped the first gift in a protective swath of the cardboard, but that seemed rather ‘less than’ to me, so I mulled it over and came up with the folder idea.
I LOVE it.
It’s super simple:
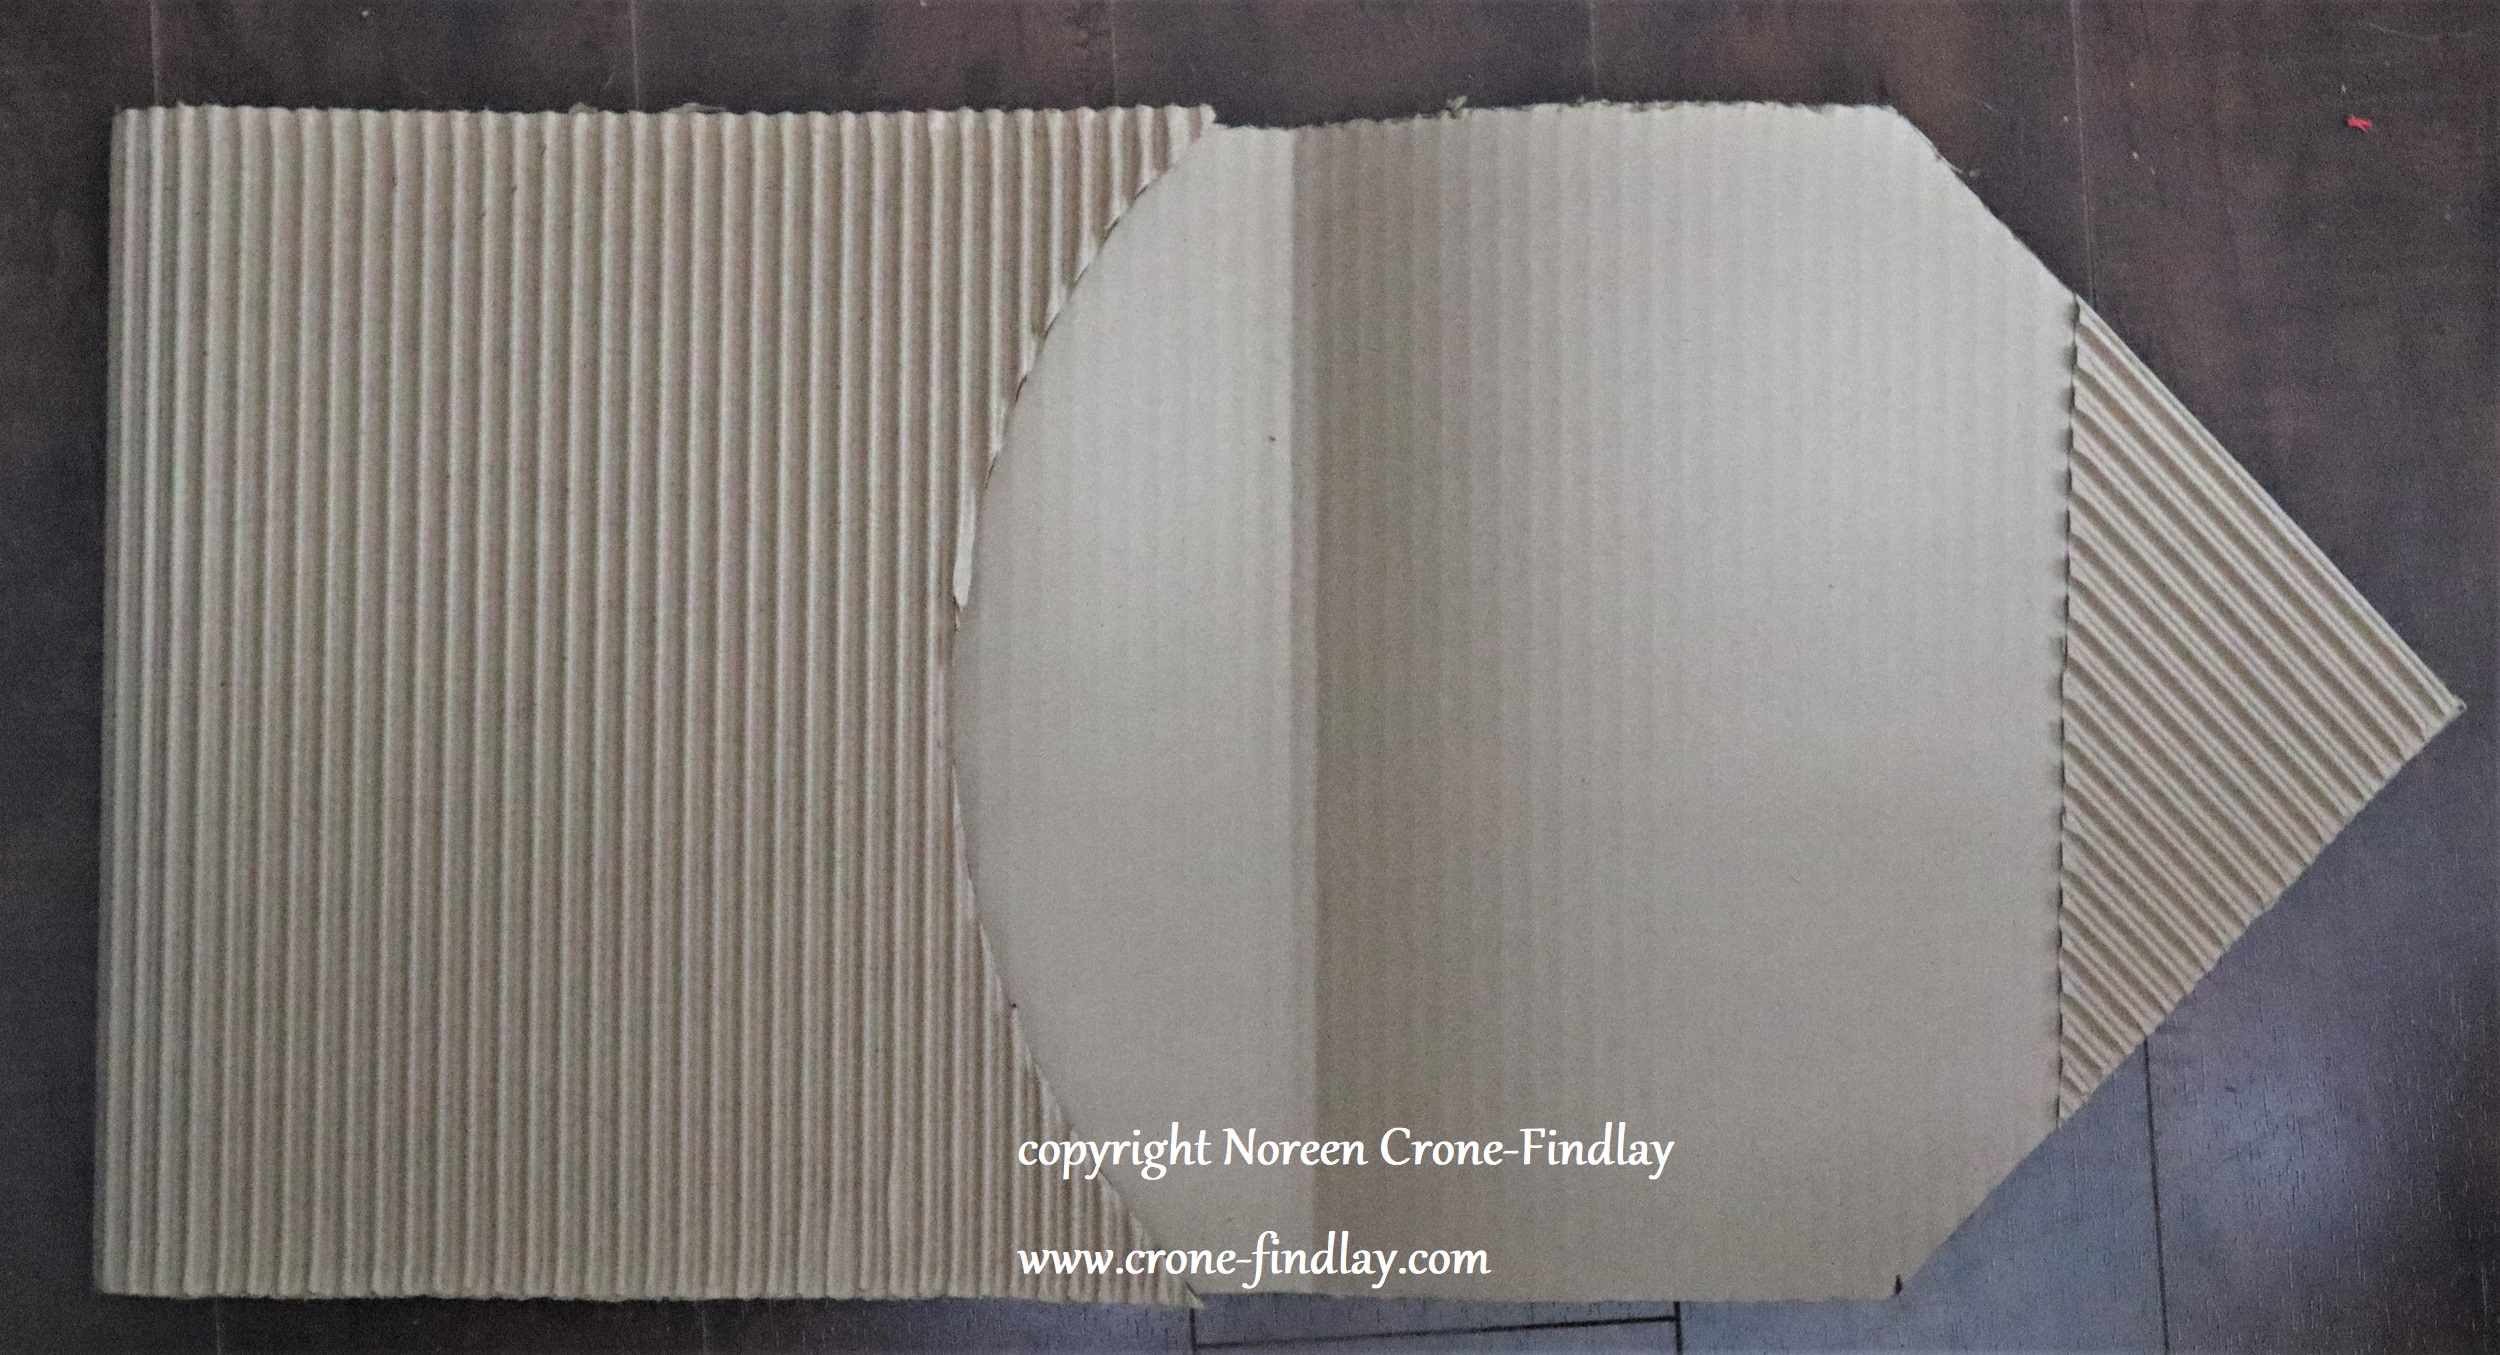
I cut a 36 inch long piece of the cardboard and cut triangles off one end to make the point.
Then glued one triangle to the inside of the point to stabilize it.
I traced a tray to make the curve and then glued the edges.
Next time I will add strips of cardboard along the sides to give more dimension to the folder.
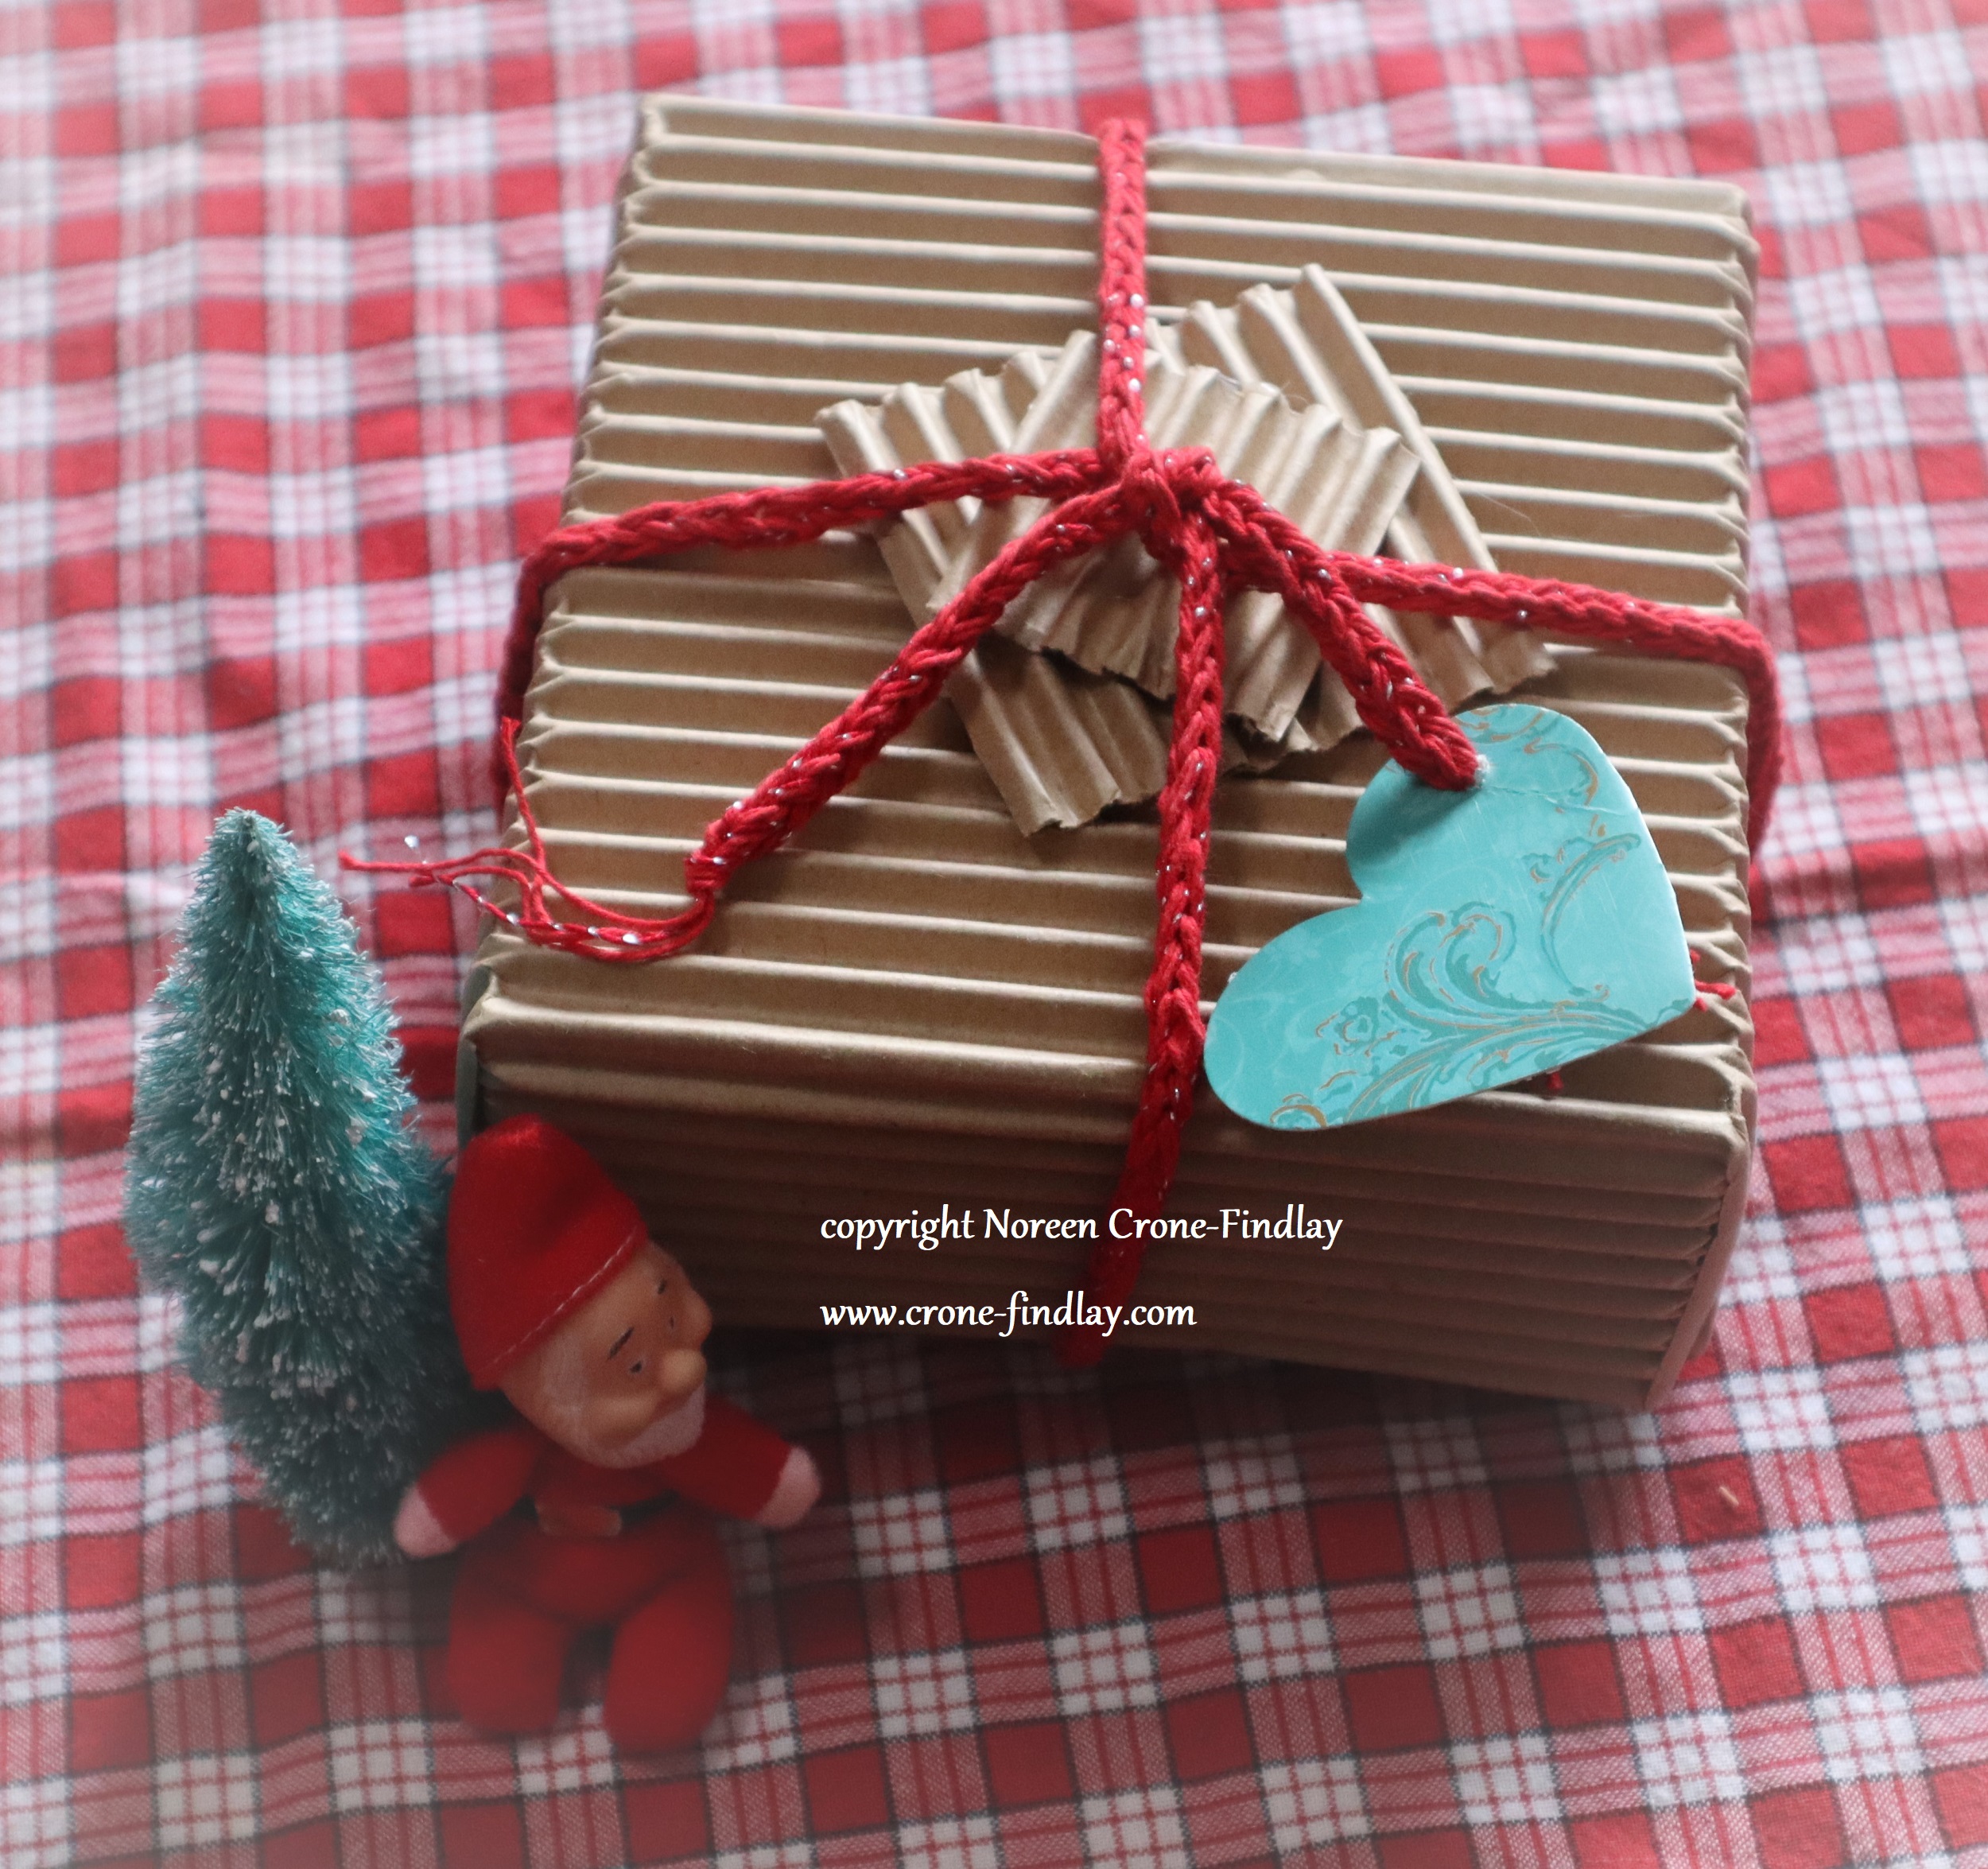
I used the off cuts to decorate the front.
The cord is made from crochet cotton that was given to me last summer (see Tea Towels) and a Lucet (LINK) and I am pleased as can be.
Another cluster of gifts needed special packaging, so I tried to fold origami boxes with the cardboard.
FAIL.
Instead, I came up with trial and erroring in making fitted boxes that were a time consuming pain in the neck to make. I tried using this technique, which works great with ‘normal’ card stock and paper: LINK
I won’t bother doing this again- not with this cardboard.
(Note- even though these were the pits to make, they were still made with love and some mild cussing).
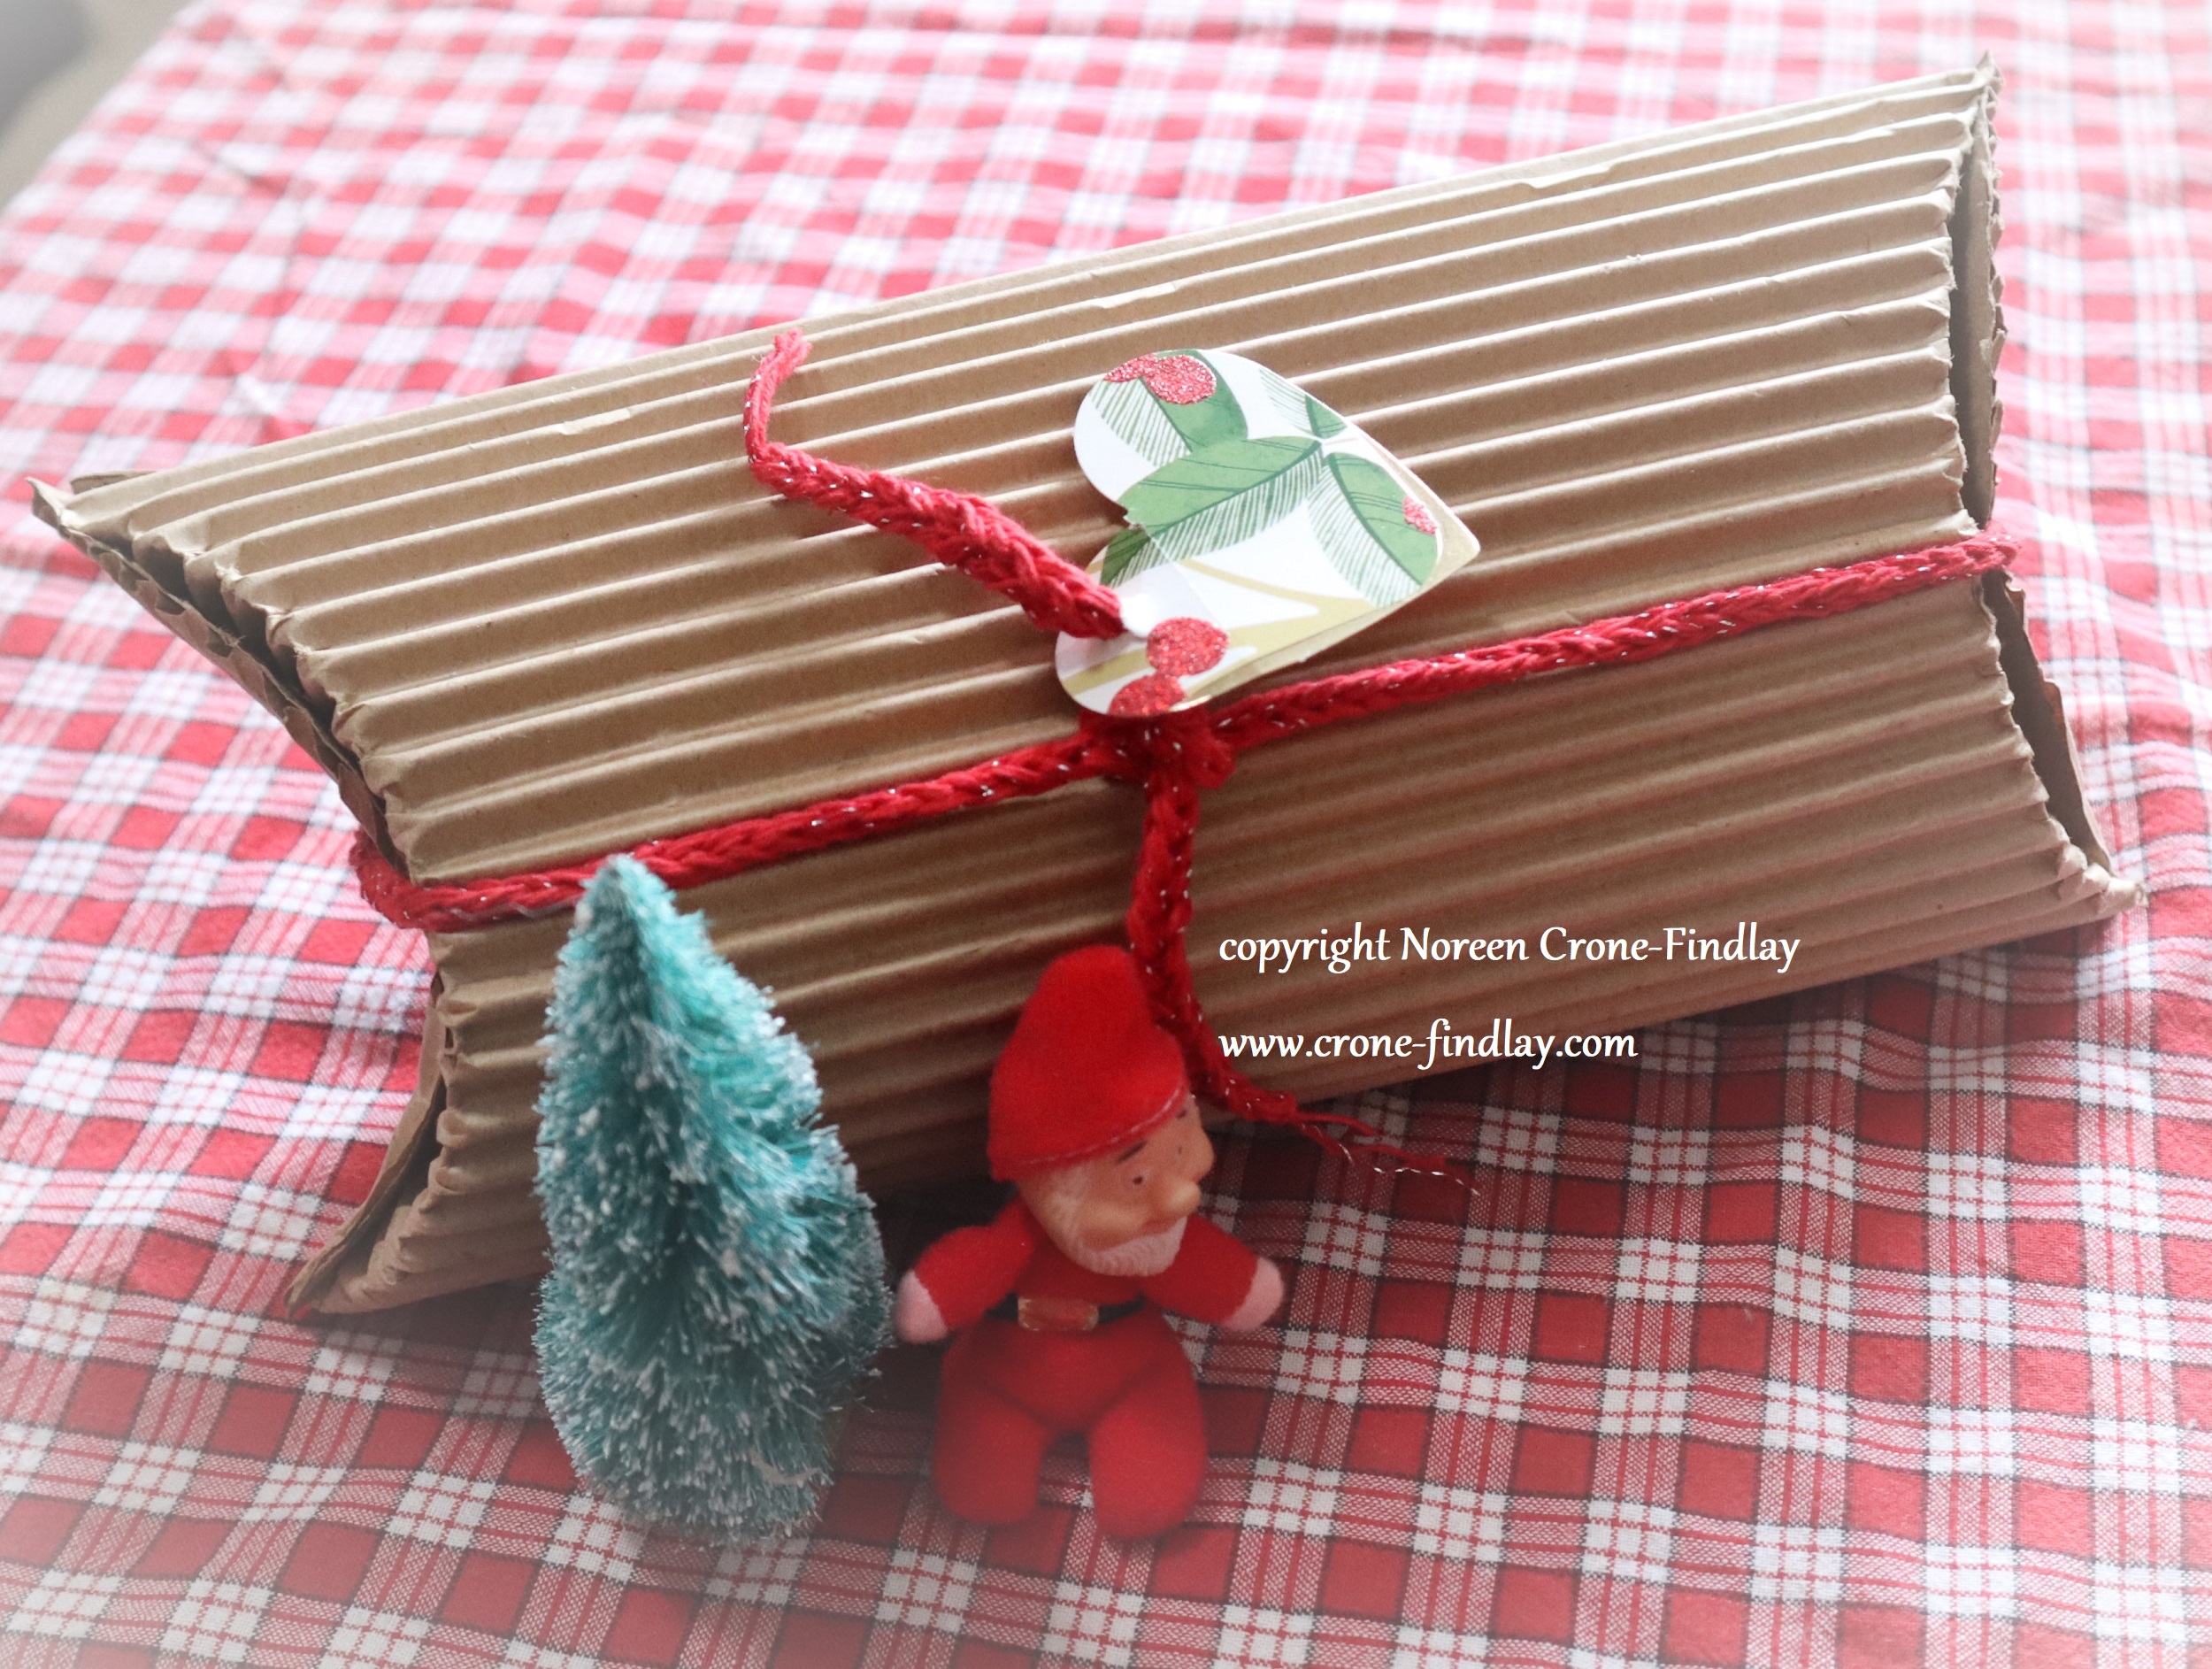
BUT, by now, I was seriously on a roll with this whole box/package designing thing and remembered those nifty containers that are tubes that have semi-circular ends that push in to close them.
Of course, I probably could have looked up a tutorial online and found the simple way to do this, but, oh no, that’s not the way my brain works.
My brain likes ~to figure things out~…..
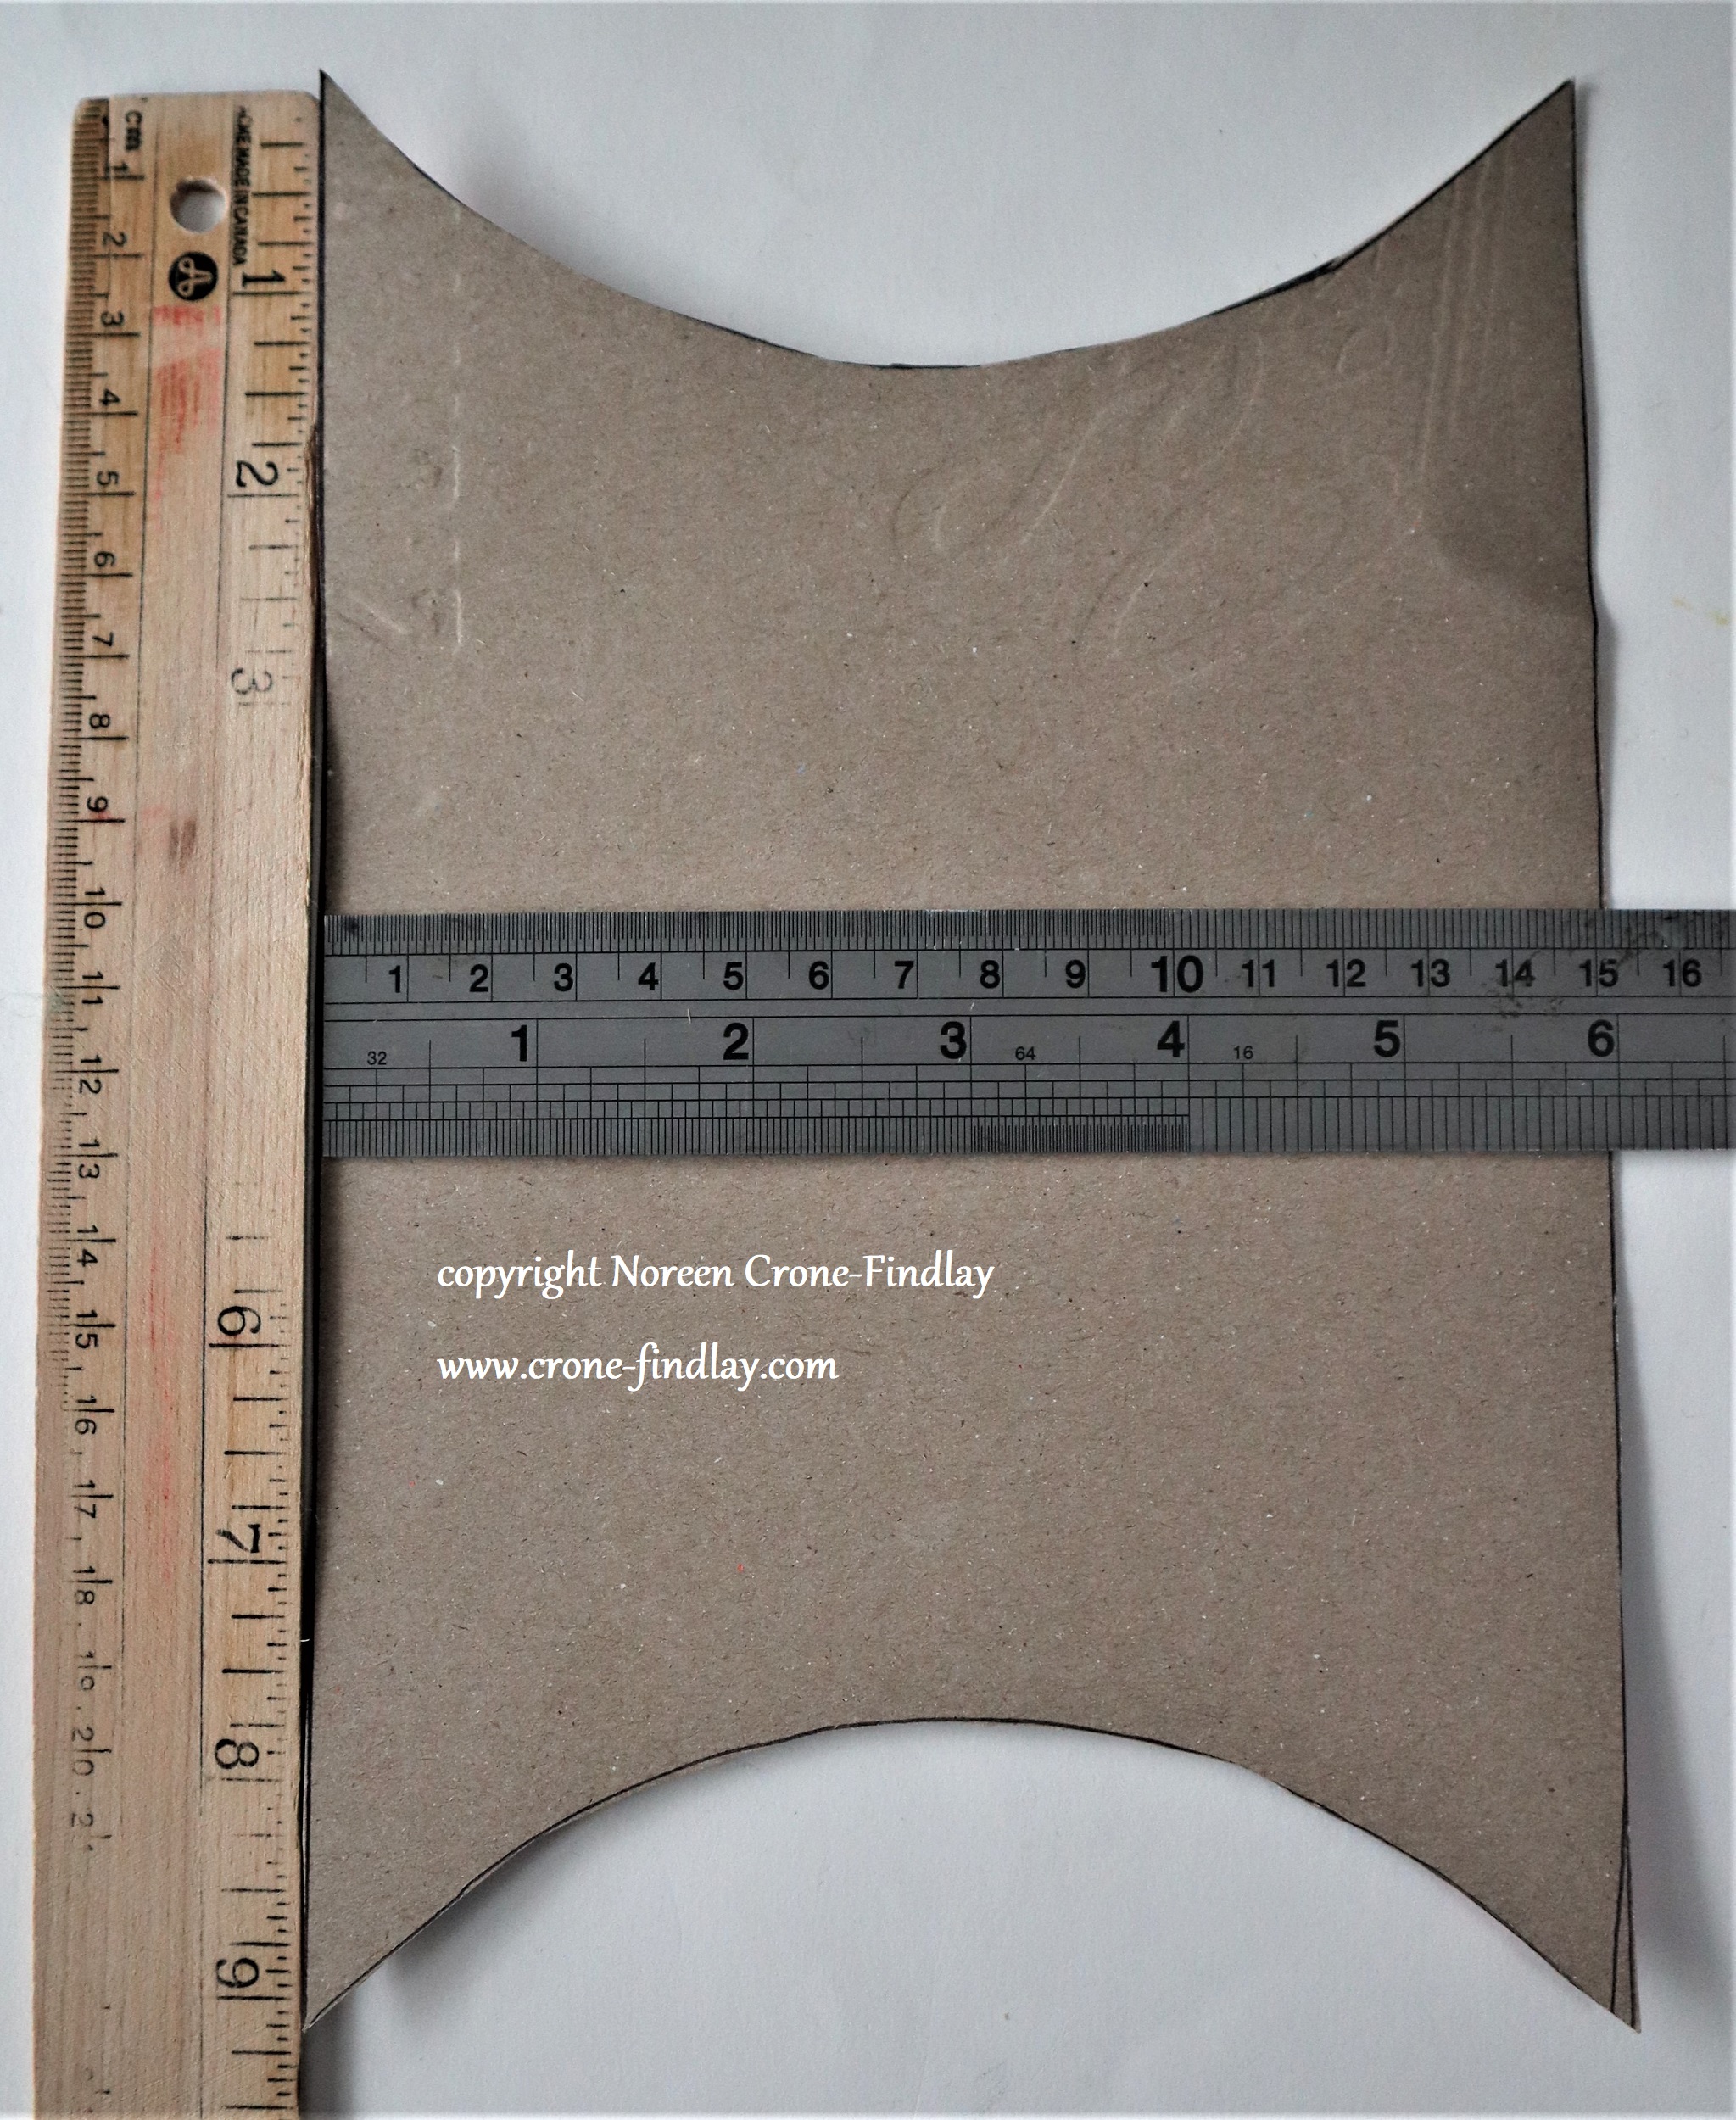
So I pushed cardboard around and flipped and folded it and measured and hummed and finally came up with this ‘Slightly Tube-ish’ container:
I had made several of the ‘Slightly Tube-ish’ ‘ containers when I twigged to the fact that they had a big old mistake, which I then fixed.
I made proper templates for the ‘right’ ‘Slightly Tube-ish’ containers , since I really like these and plan on using the concept again.
But, I wasn’t going to waste the ‘wrong’ ones, so I used them anyhow, with an apology to the recipients of the gifts and an explanation that I have got it right now, and they’ll get a better iteration next time.
Until then, the wrong ‘Slightly Tube-ish’ containers can be re-used and eventually be recycled or used as fire starters.
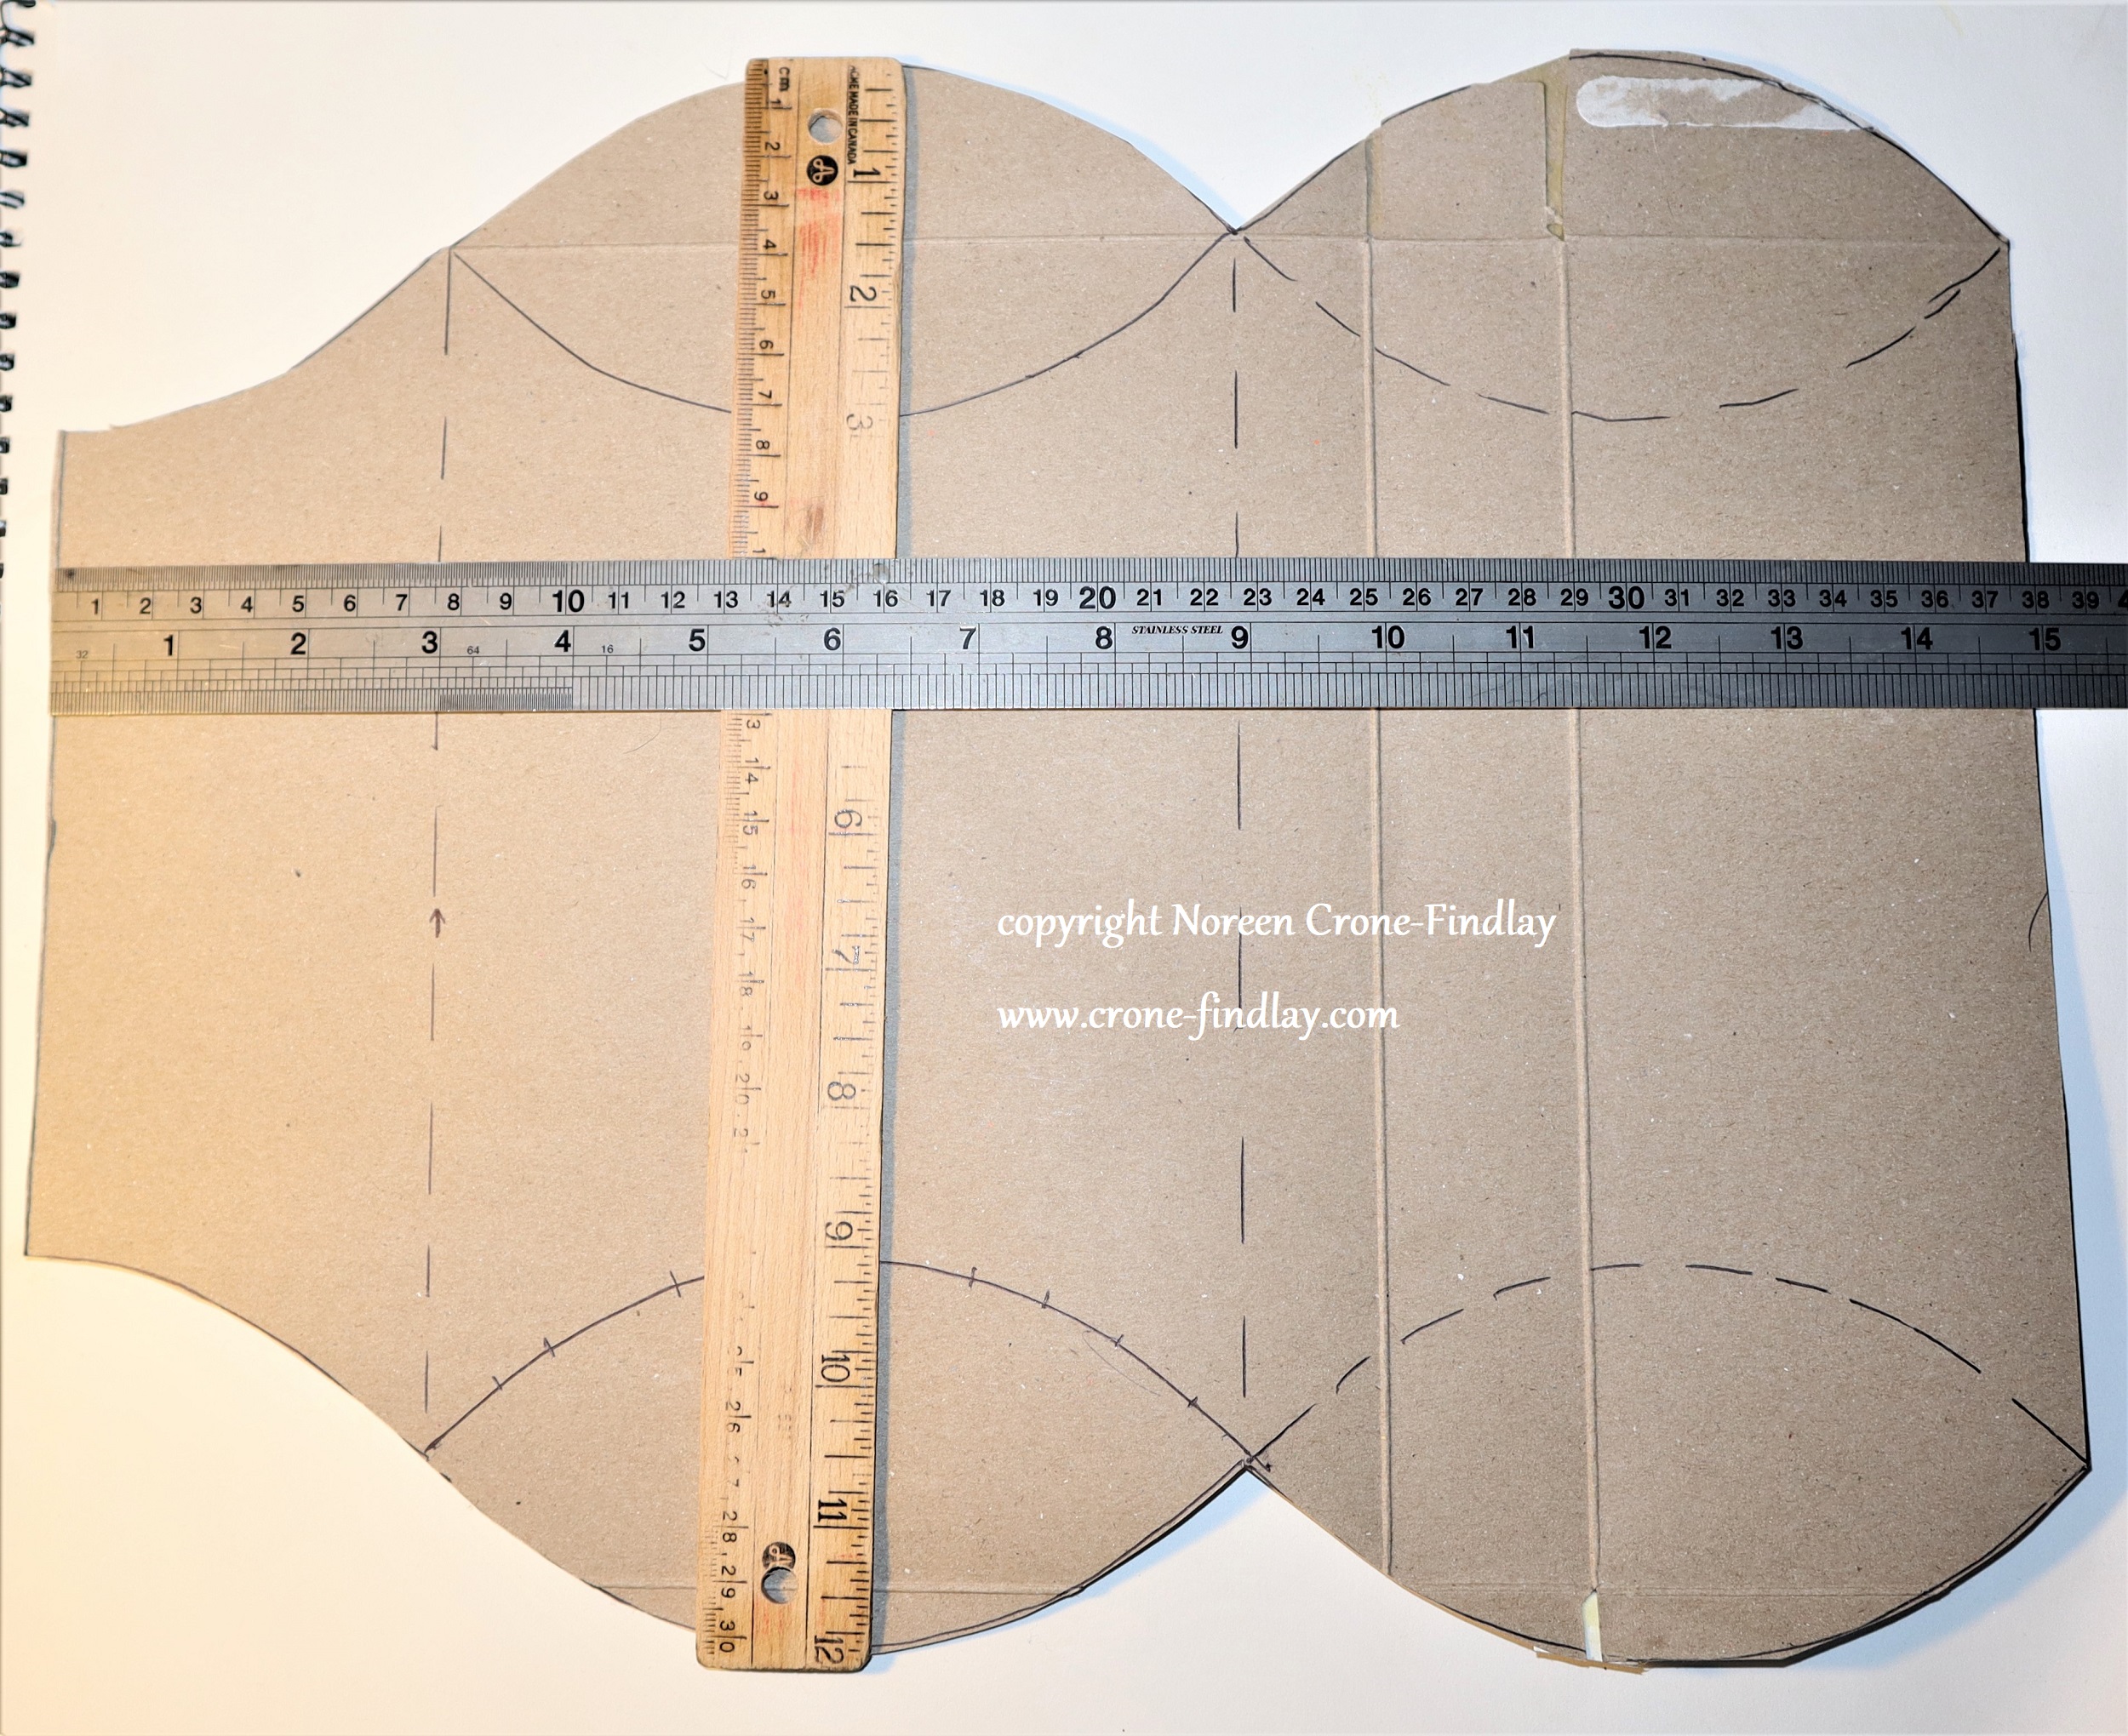
Here are the proper templates:
This one is for cutting out the ‘Slightly Tube-ish’ containerAnd, this one is for scoring the curves on the ends.
All in all, it was a lot of work, but I loved doing it and I hope that my family liked the nifty boxes and folders.
Even though I used cardboard that we had bought years ago for another project, these techniques will work really well on regular upcycled cardboard and cardstock, which pleases me very much!
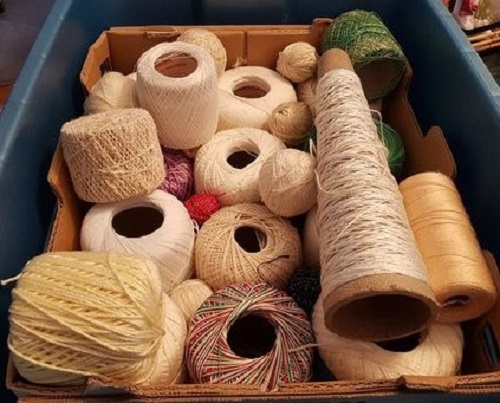
Last summer, loved relatives gave me 2 boxes of crochet cotton that they had adopted from the ReUse Centre in their town.
This is the smaller of the 2 boxes.
I immediately used some of the cotton to tat butterflies, and thought about what to use the generous and unexpected treasure that remained.
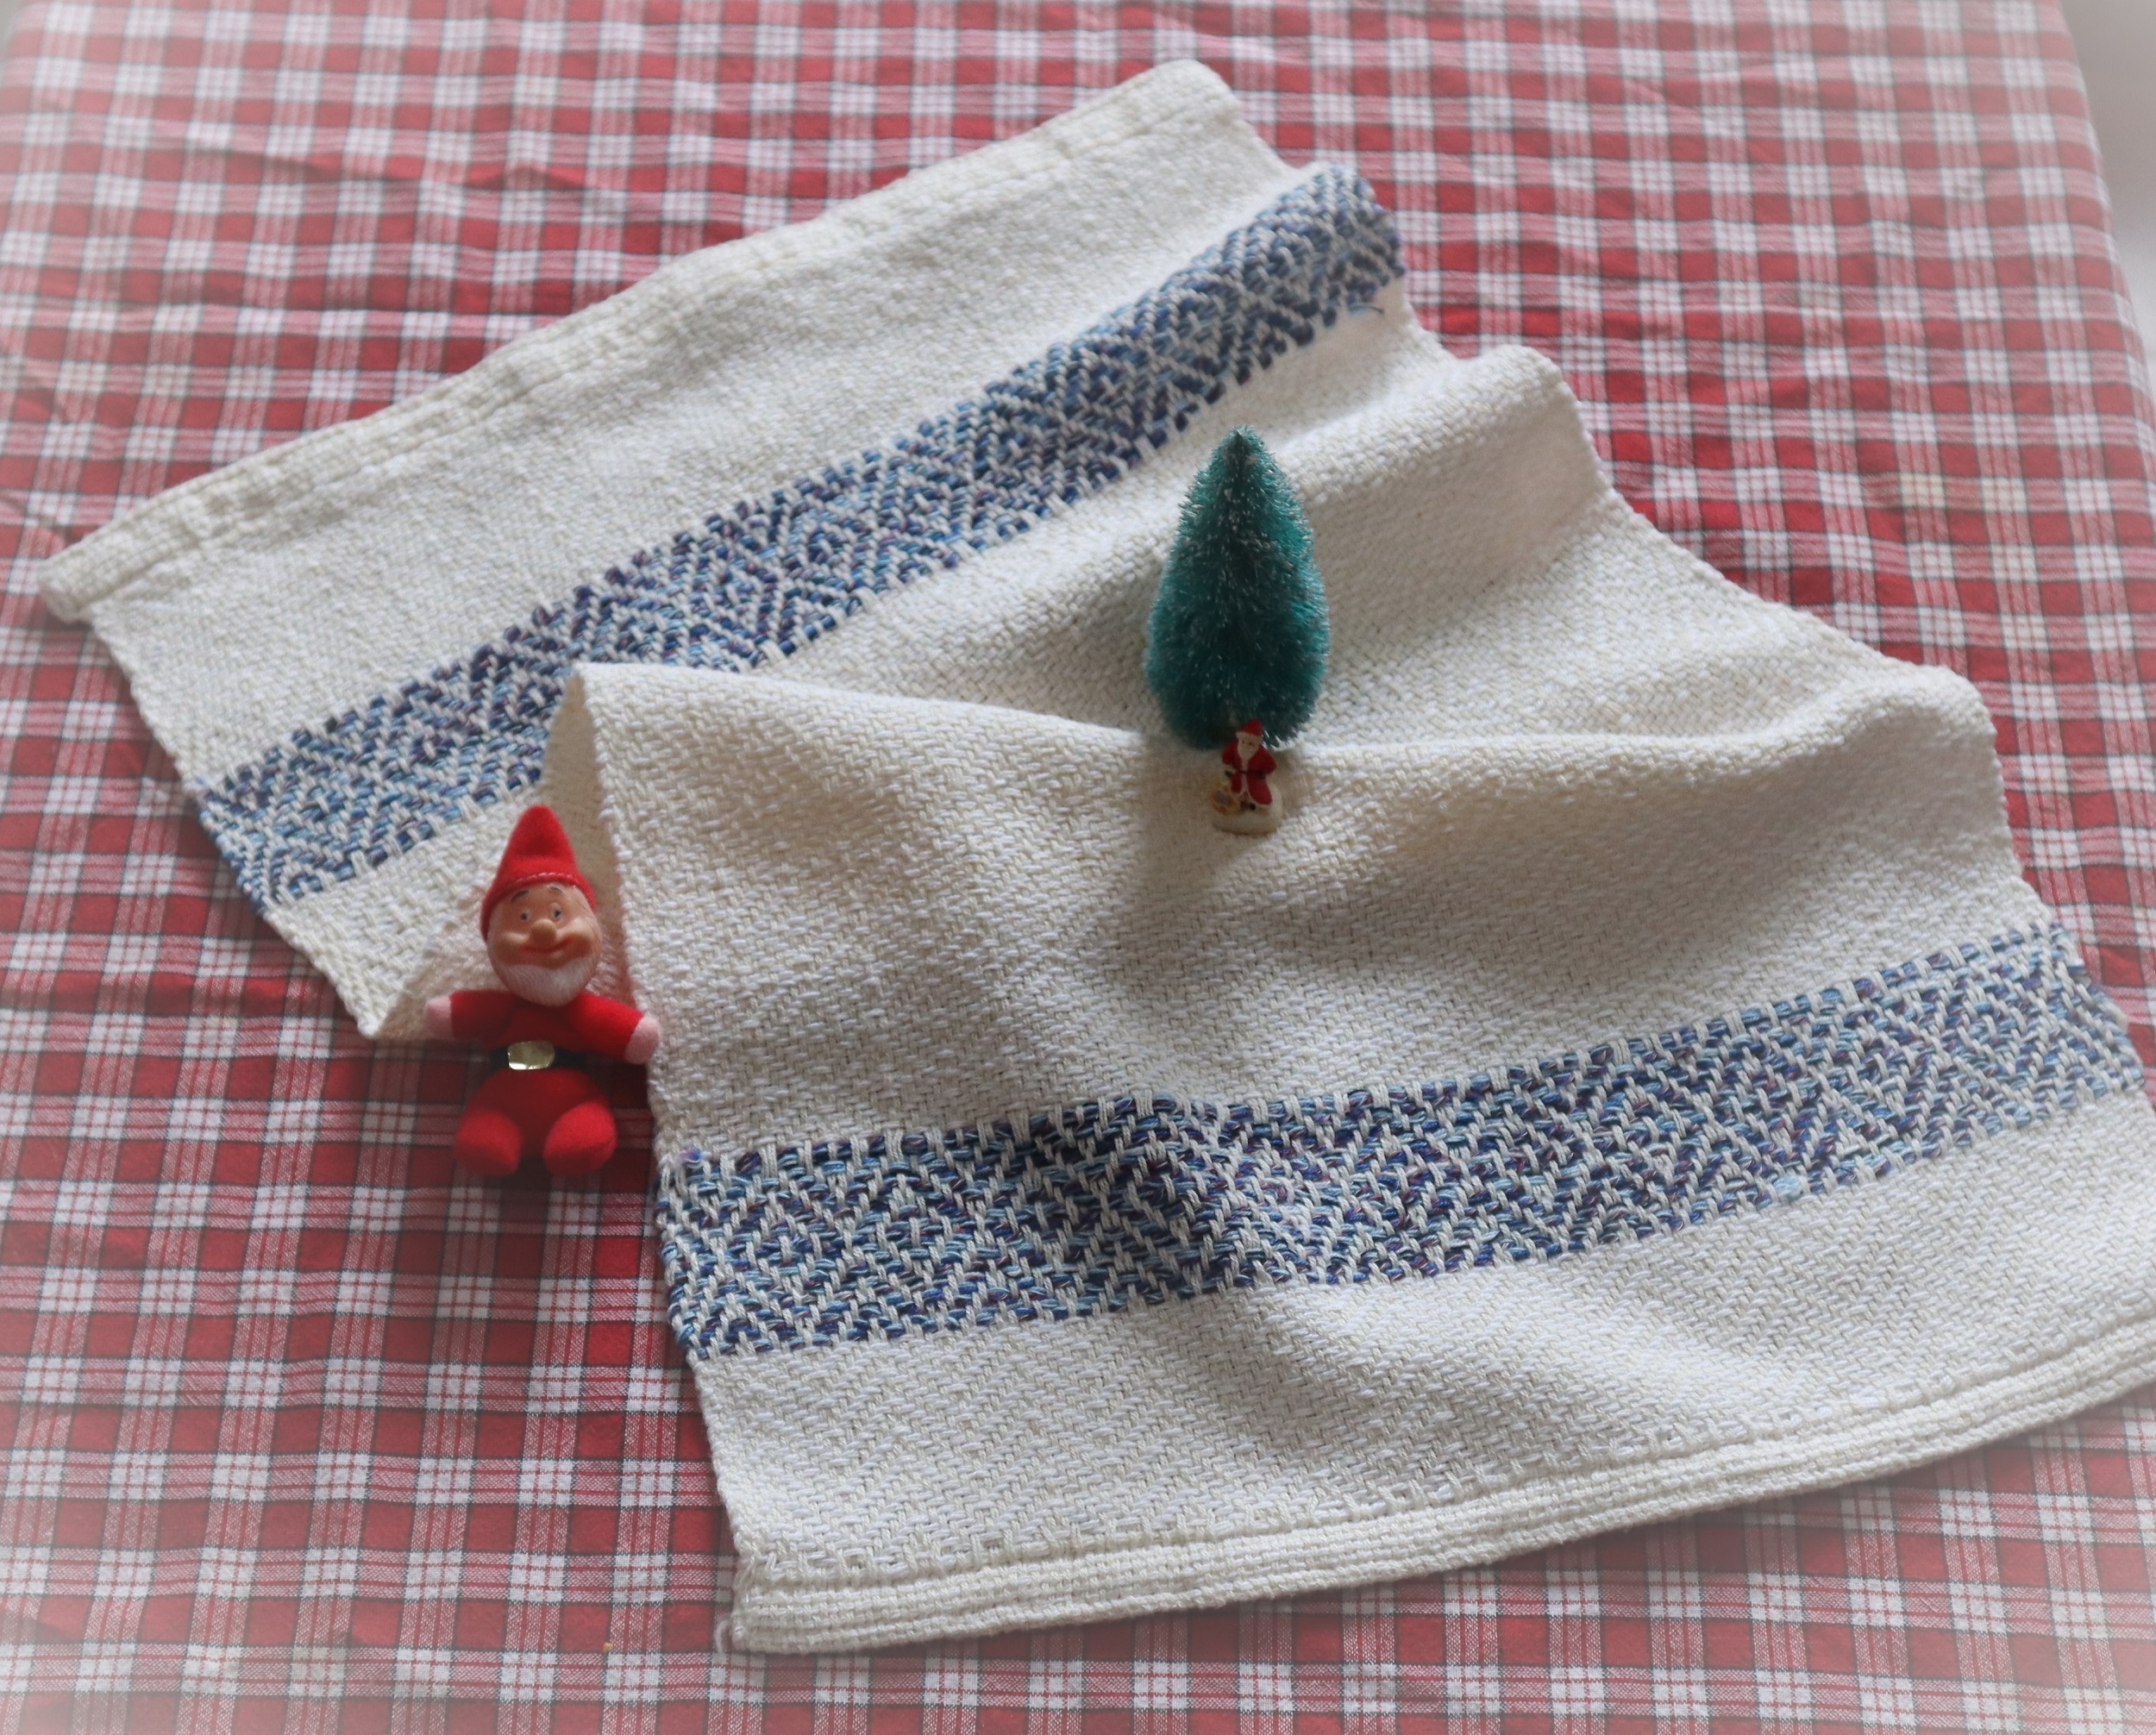
I decided to weave Tea Towels for my family – I wanted the cotton to become something useful, rather than just languishing as ‘stash’.
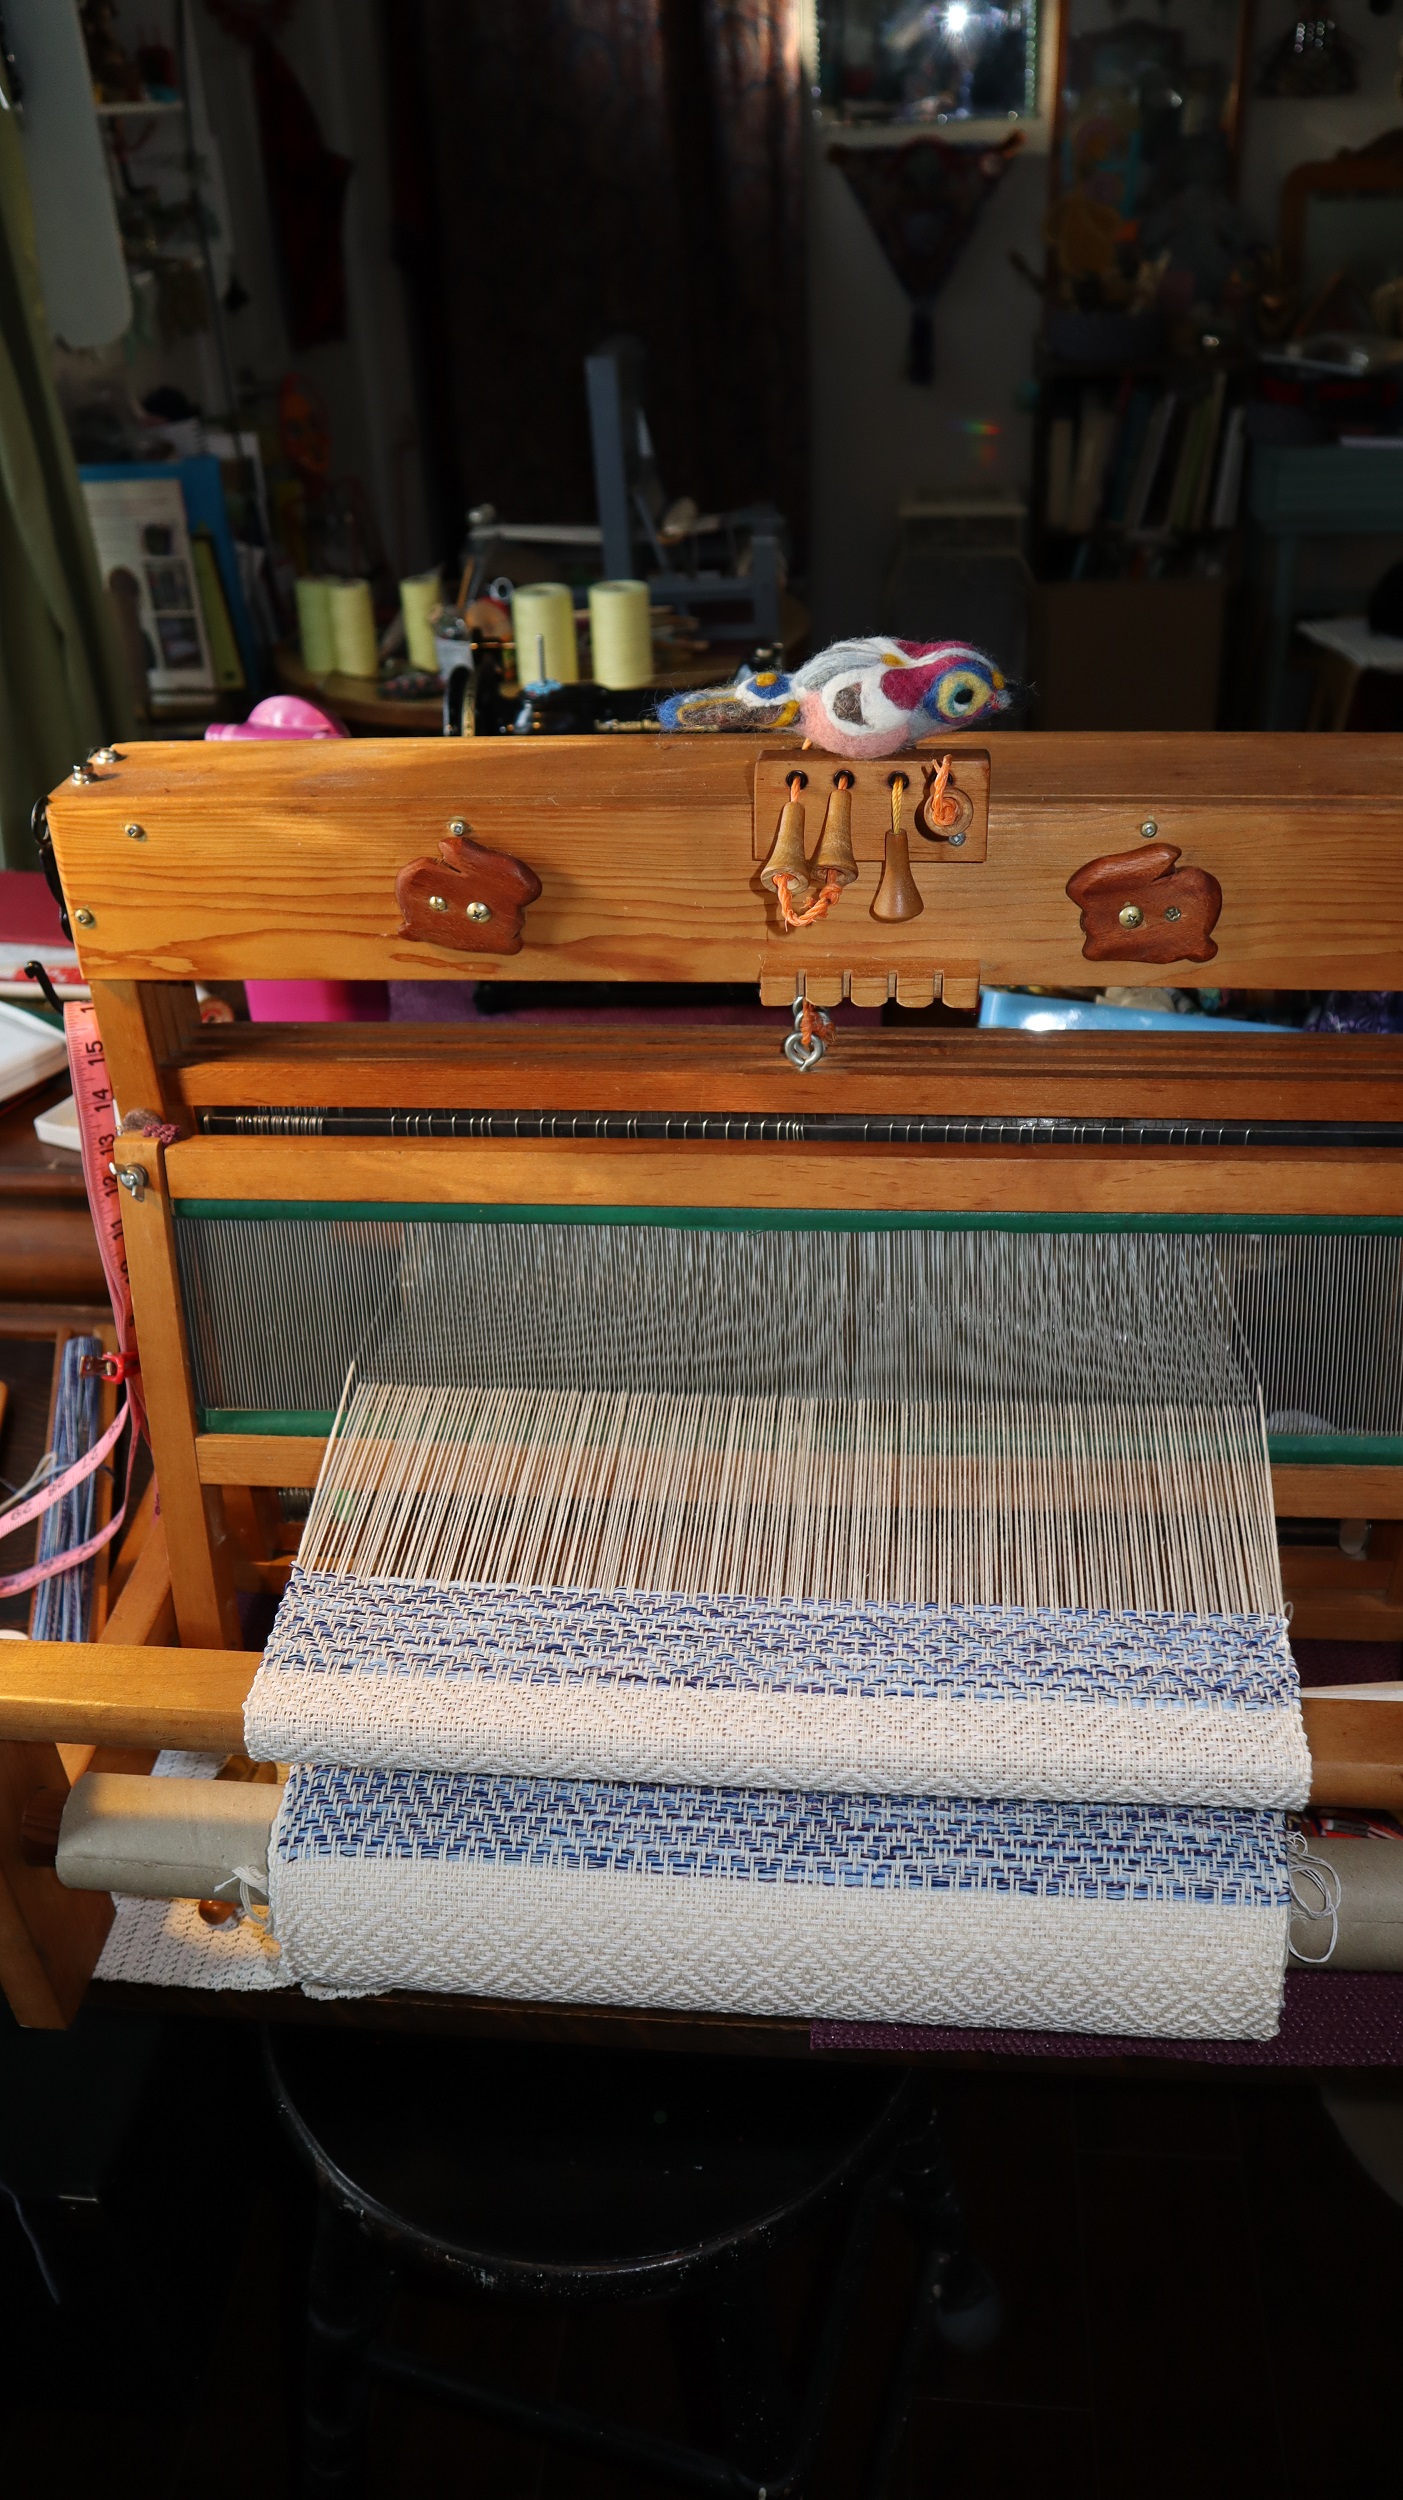
I had no idea, when I began, just how much I would love weaving the Tea Towels!
It was so meditative and contemplative- and watching the play of shadow and light on the various shades of cream and white cotton was deeply pleasing.
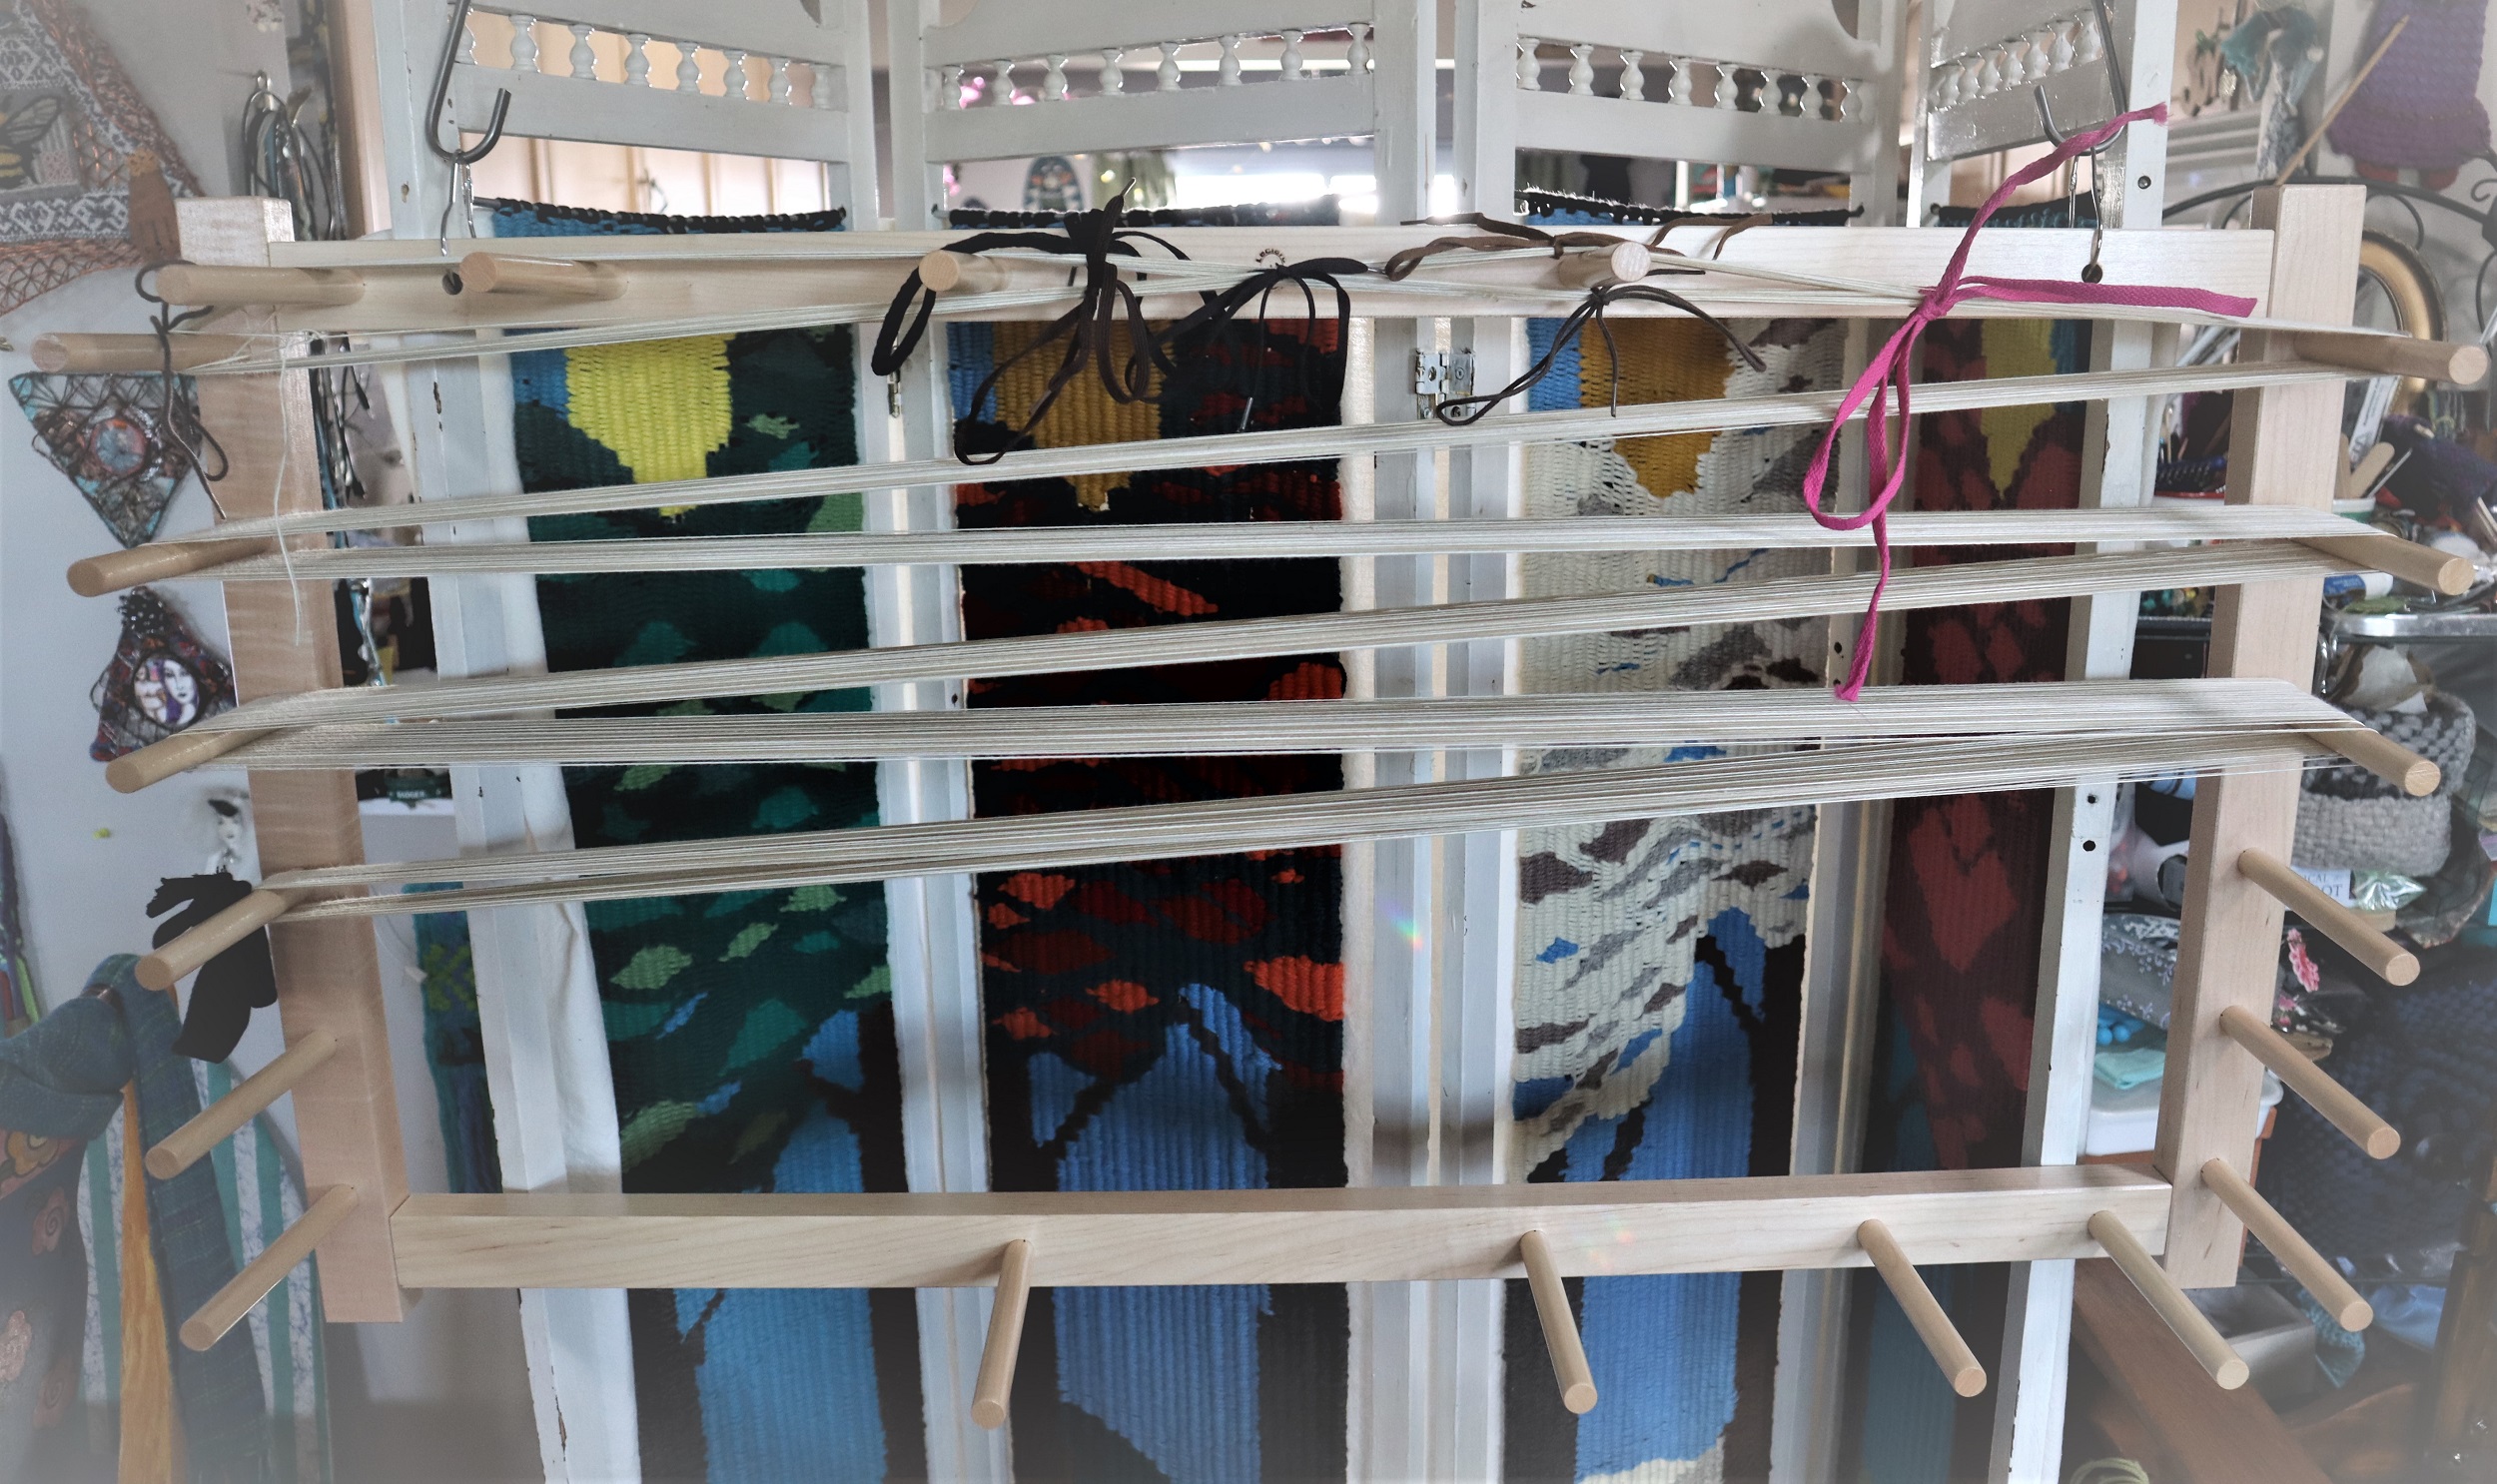
To begin the journey, I warped up several warp chains.
And wove
and wove and wove….
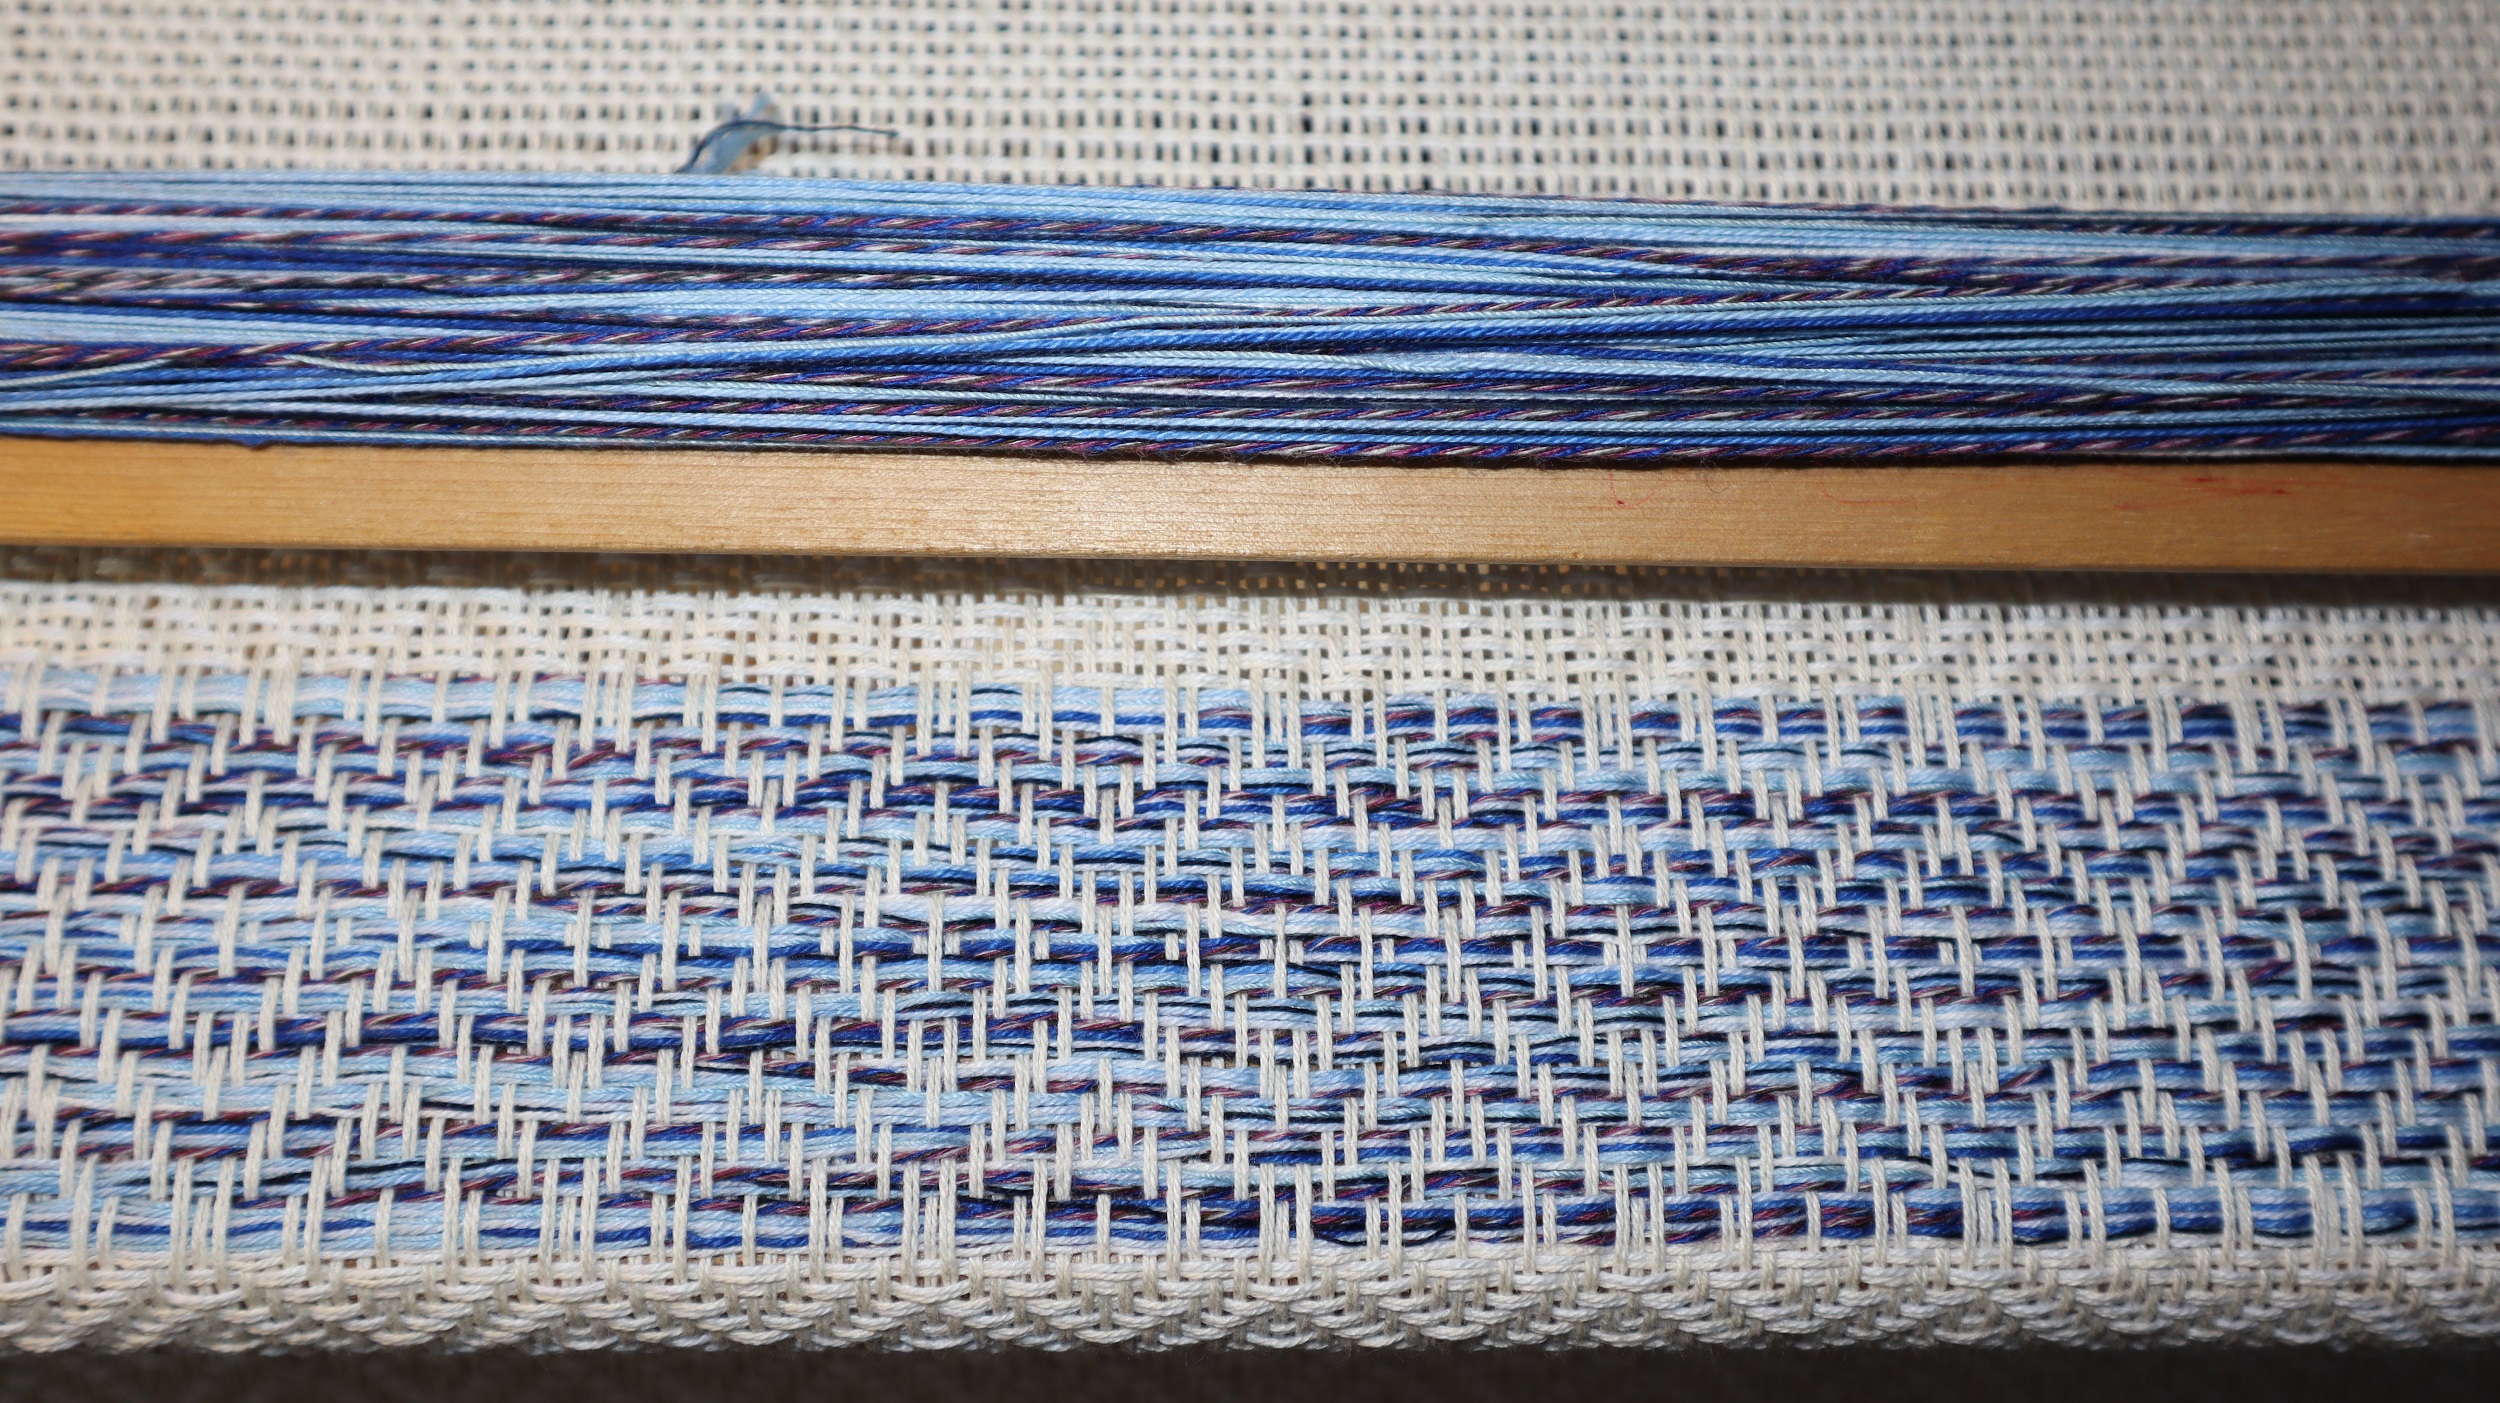
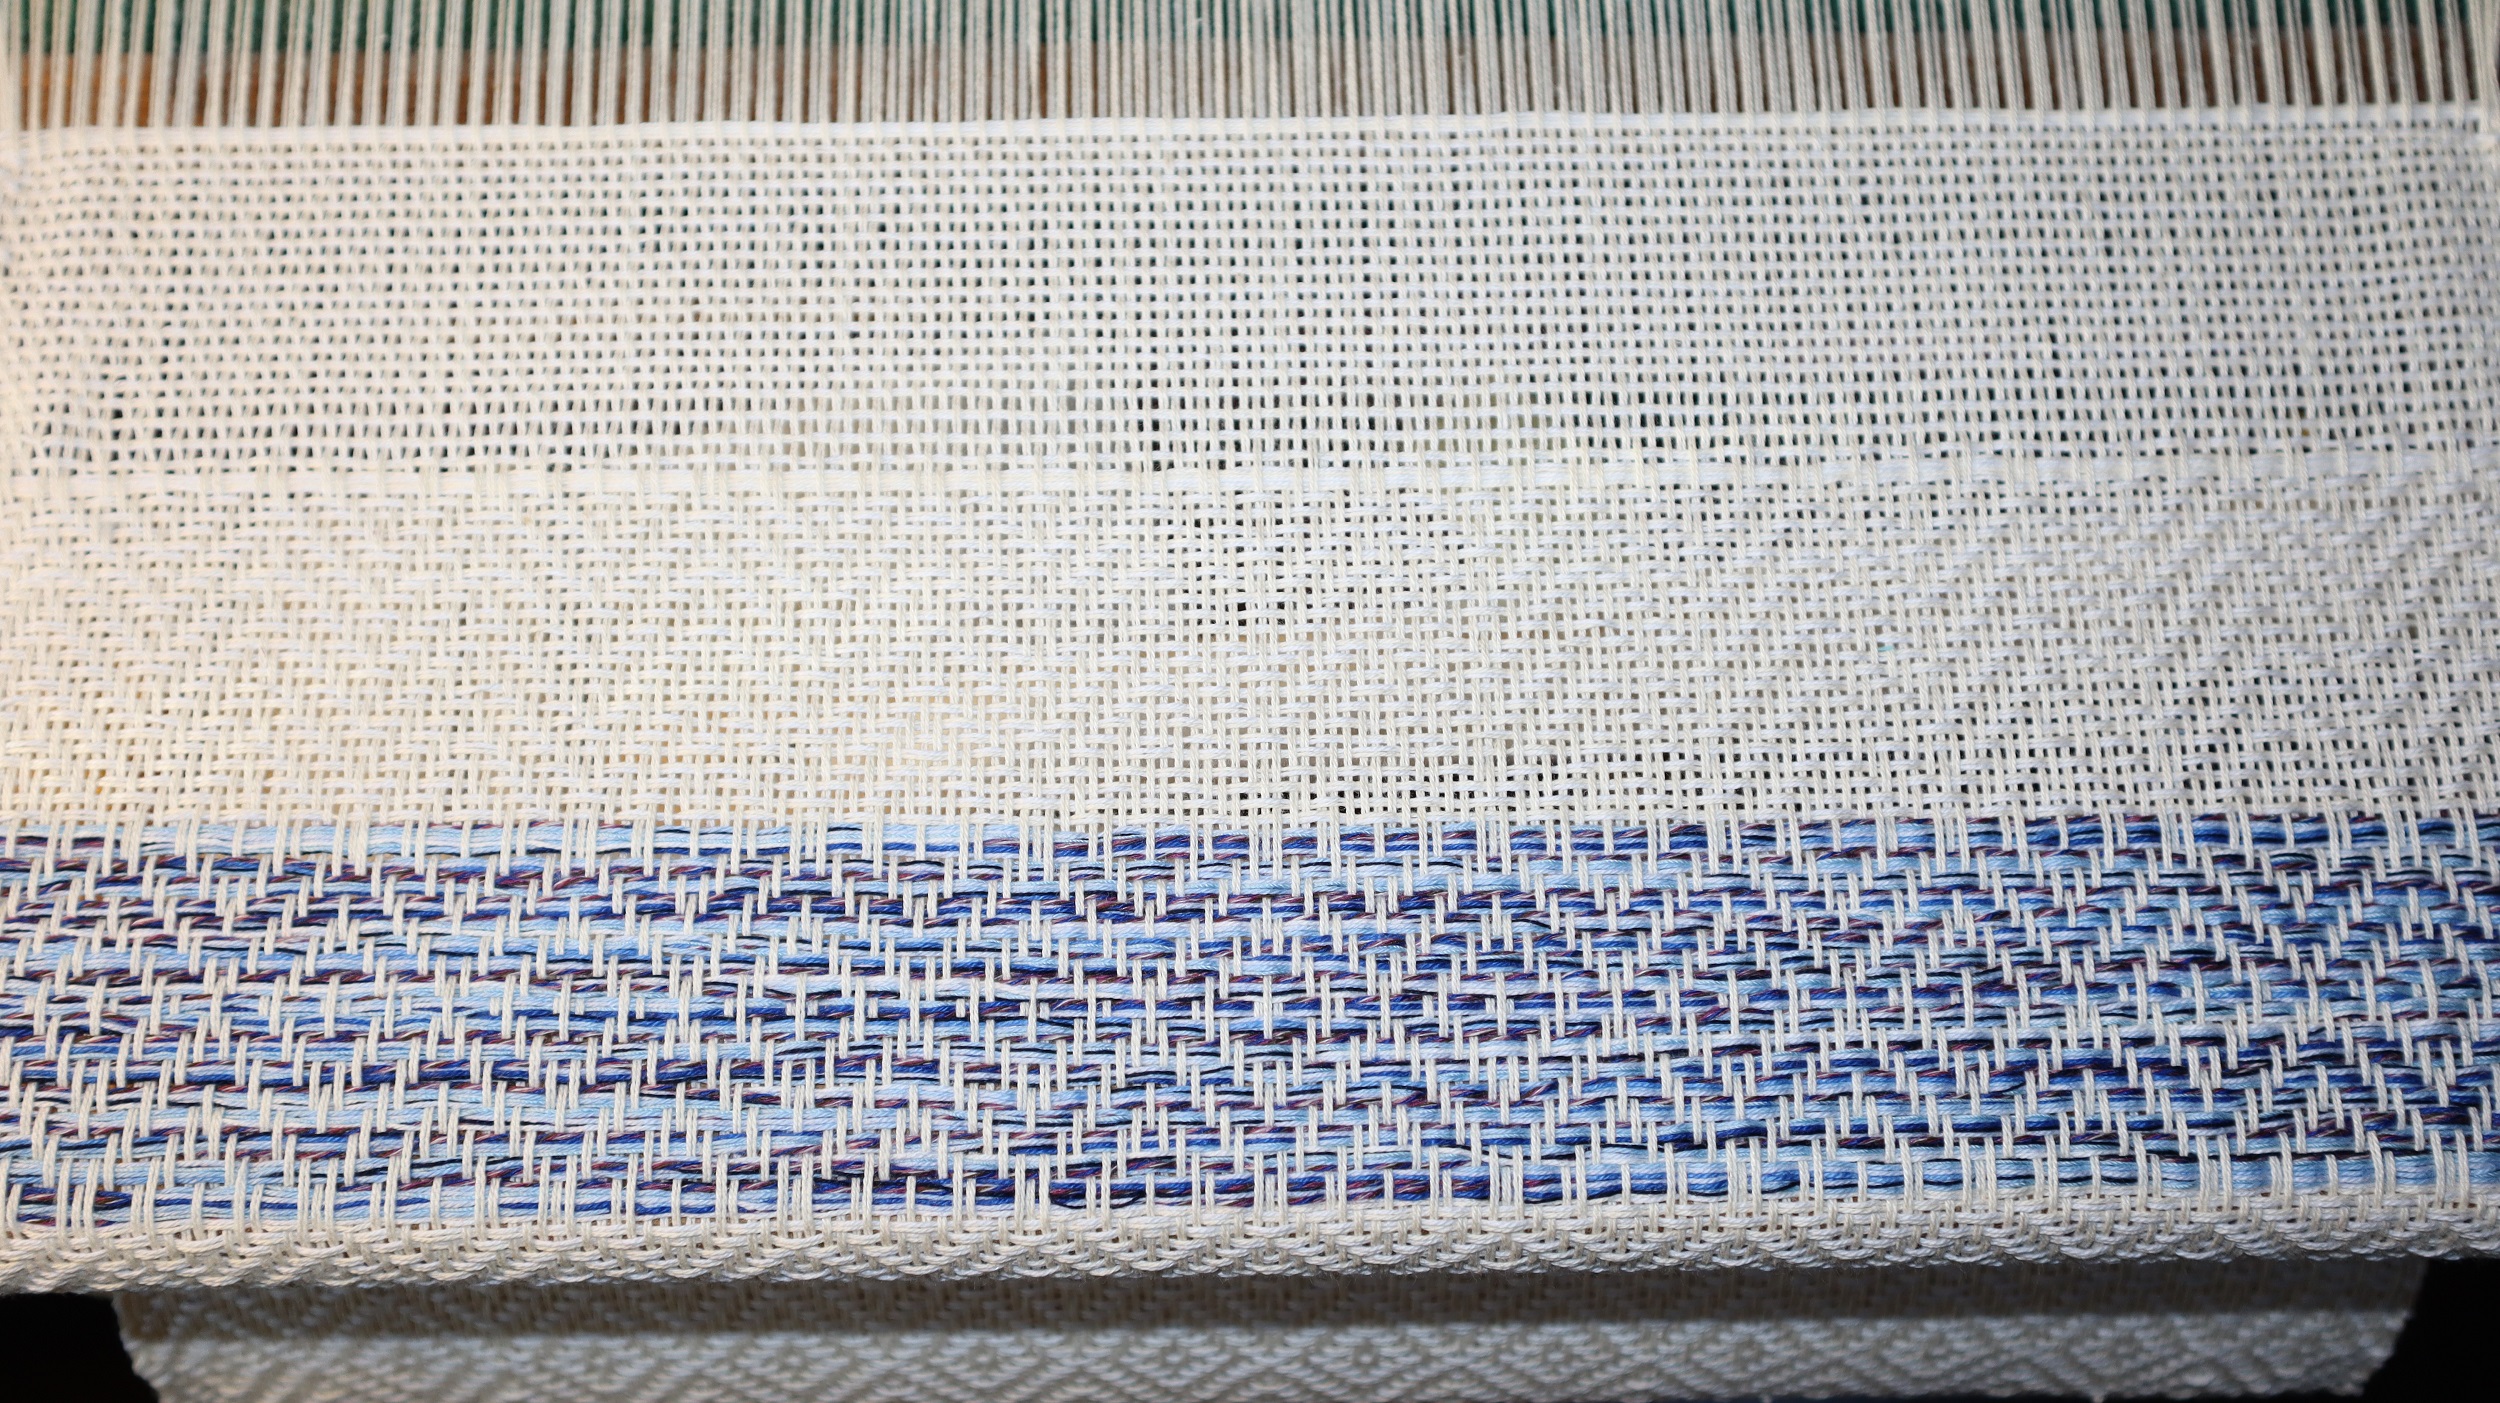
The blue bands look odd, because I used several strands of variegated blue thread held together…
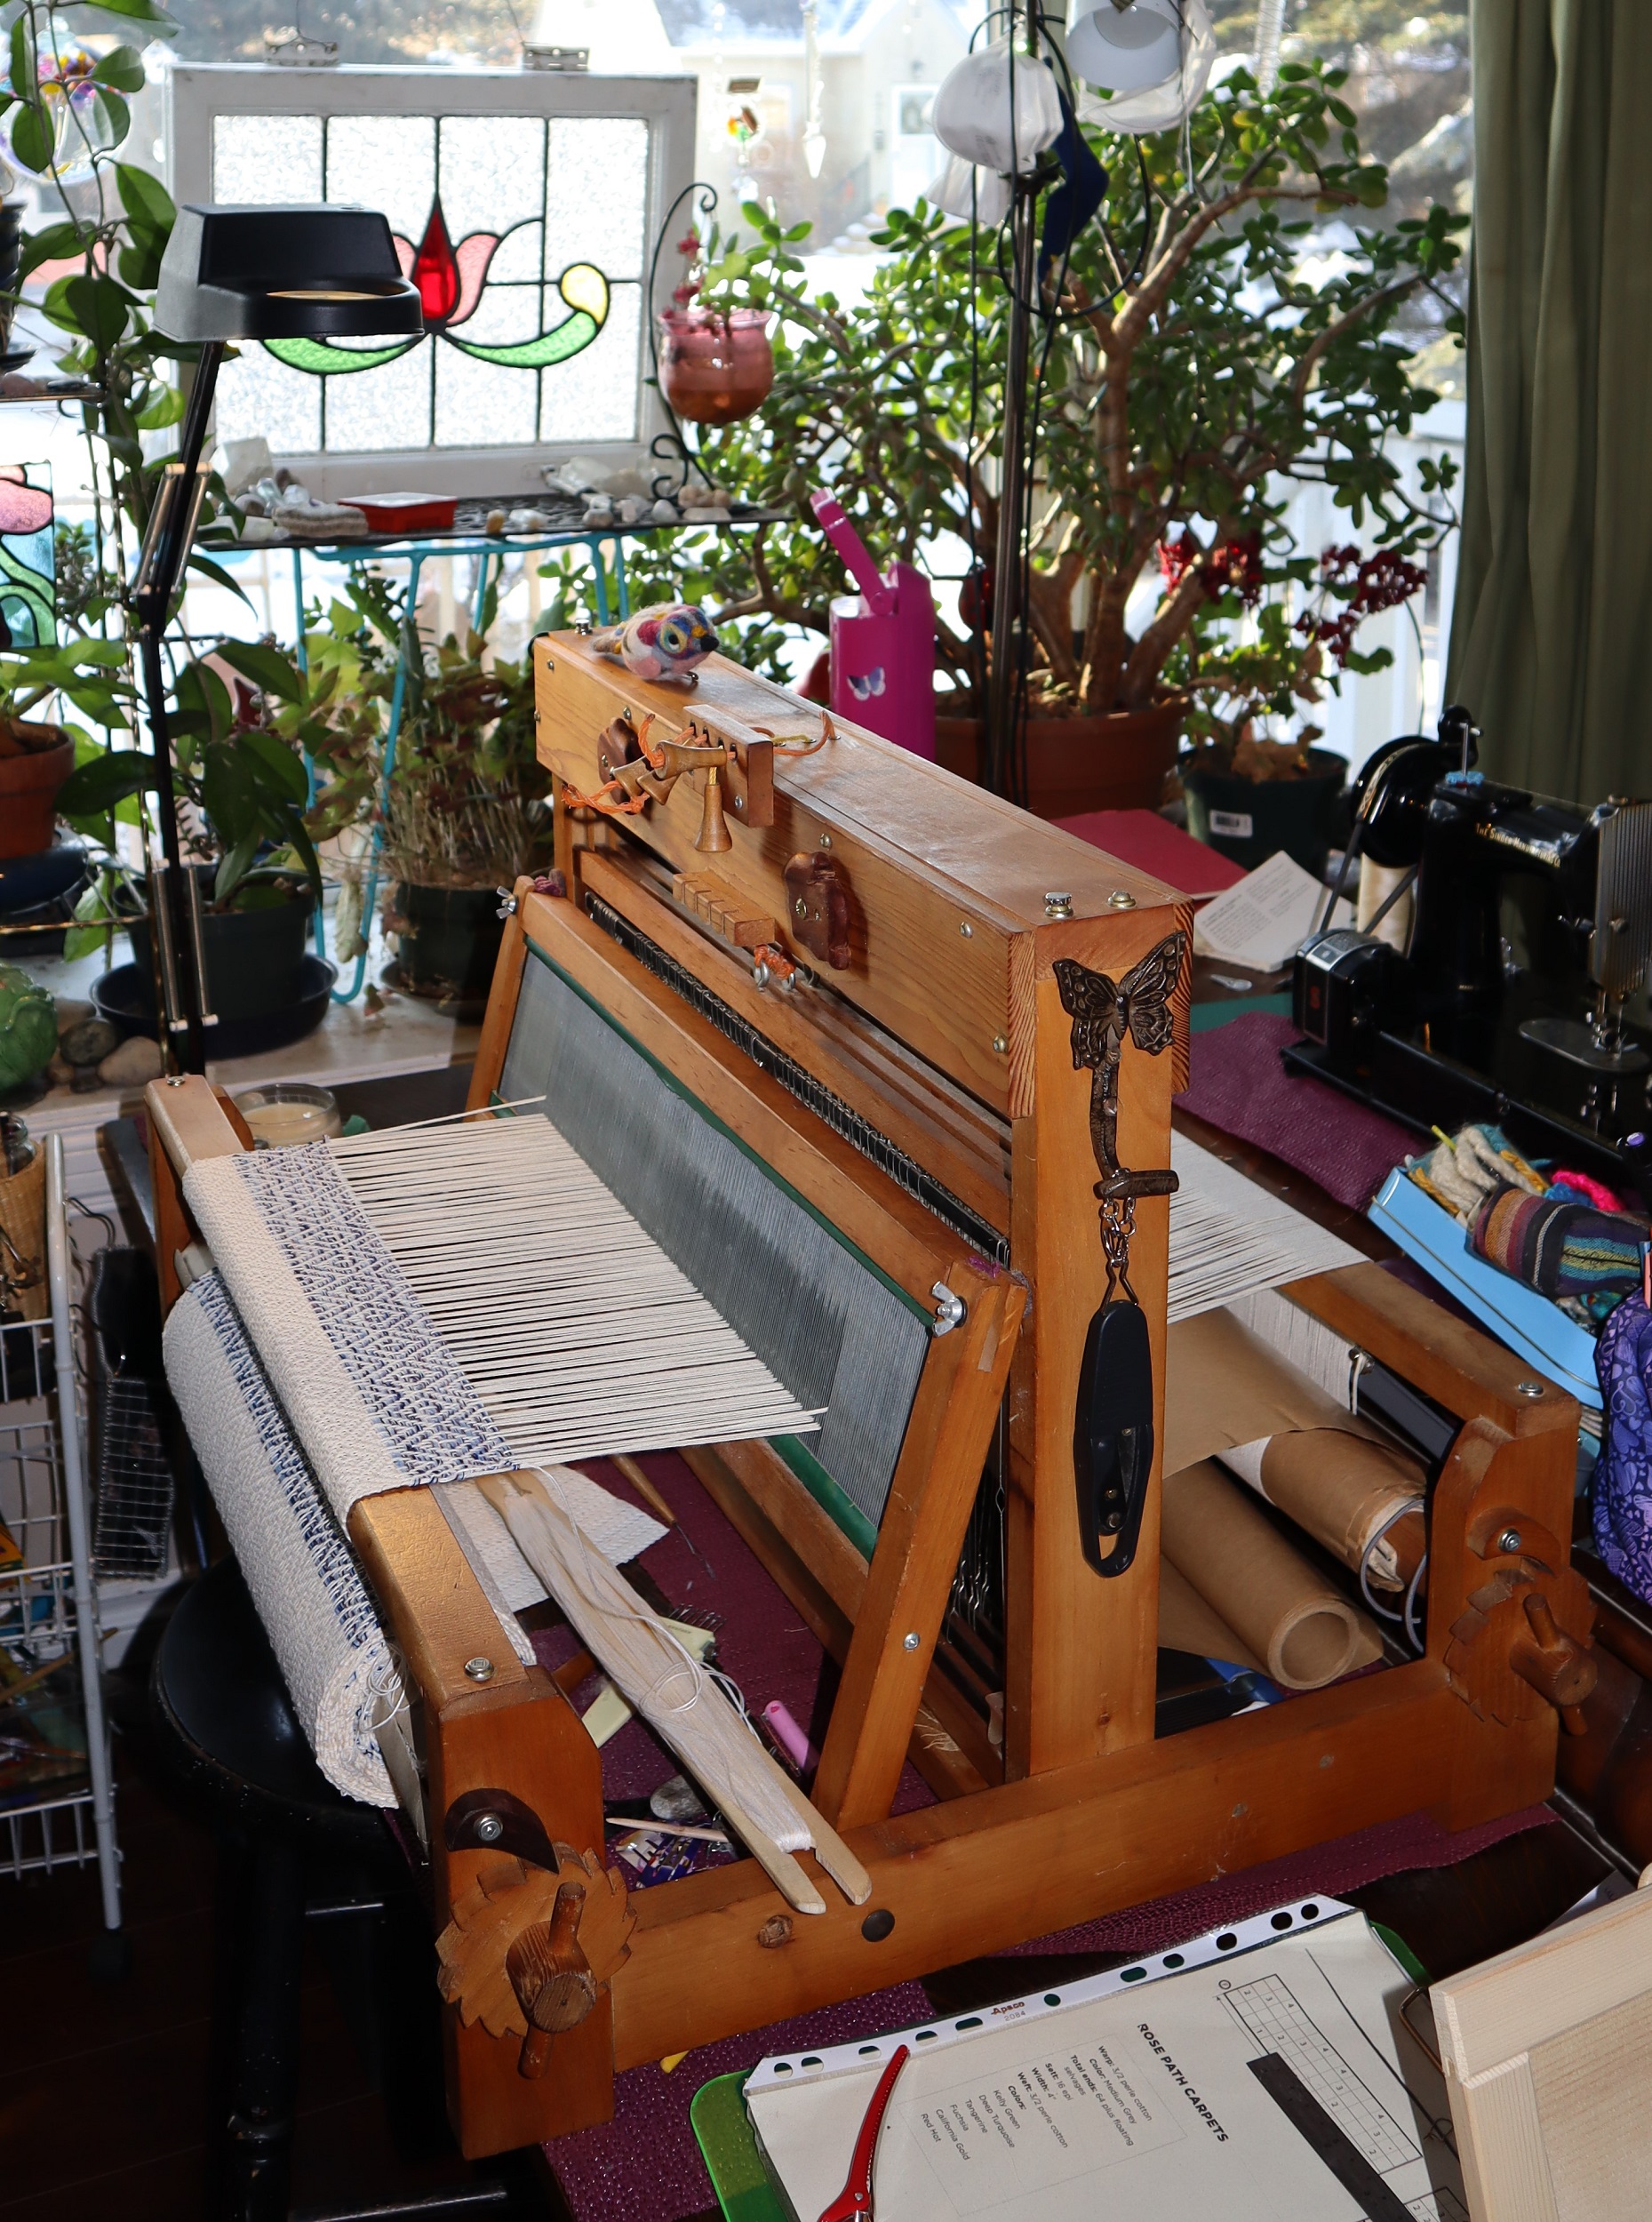
I used one of my favorite weaving drafts, ‘Rosepath’, which gives the diamond effect when woven to the ‘correct’ treadling, but also a pleasing zig zag twill and of course, plain weave tabby.
This was perfect for me, as it allowed me to add definition to the hems, the cream colored borders, the blue bands and the body of the tea towels.
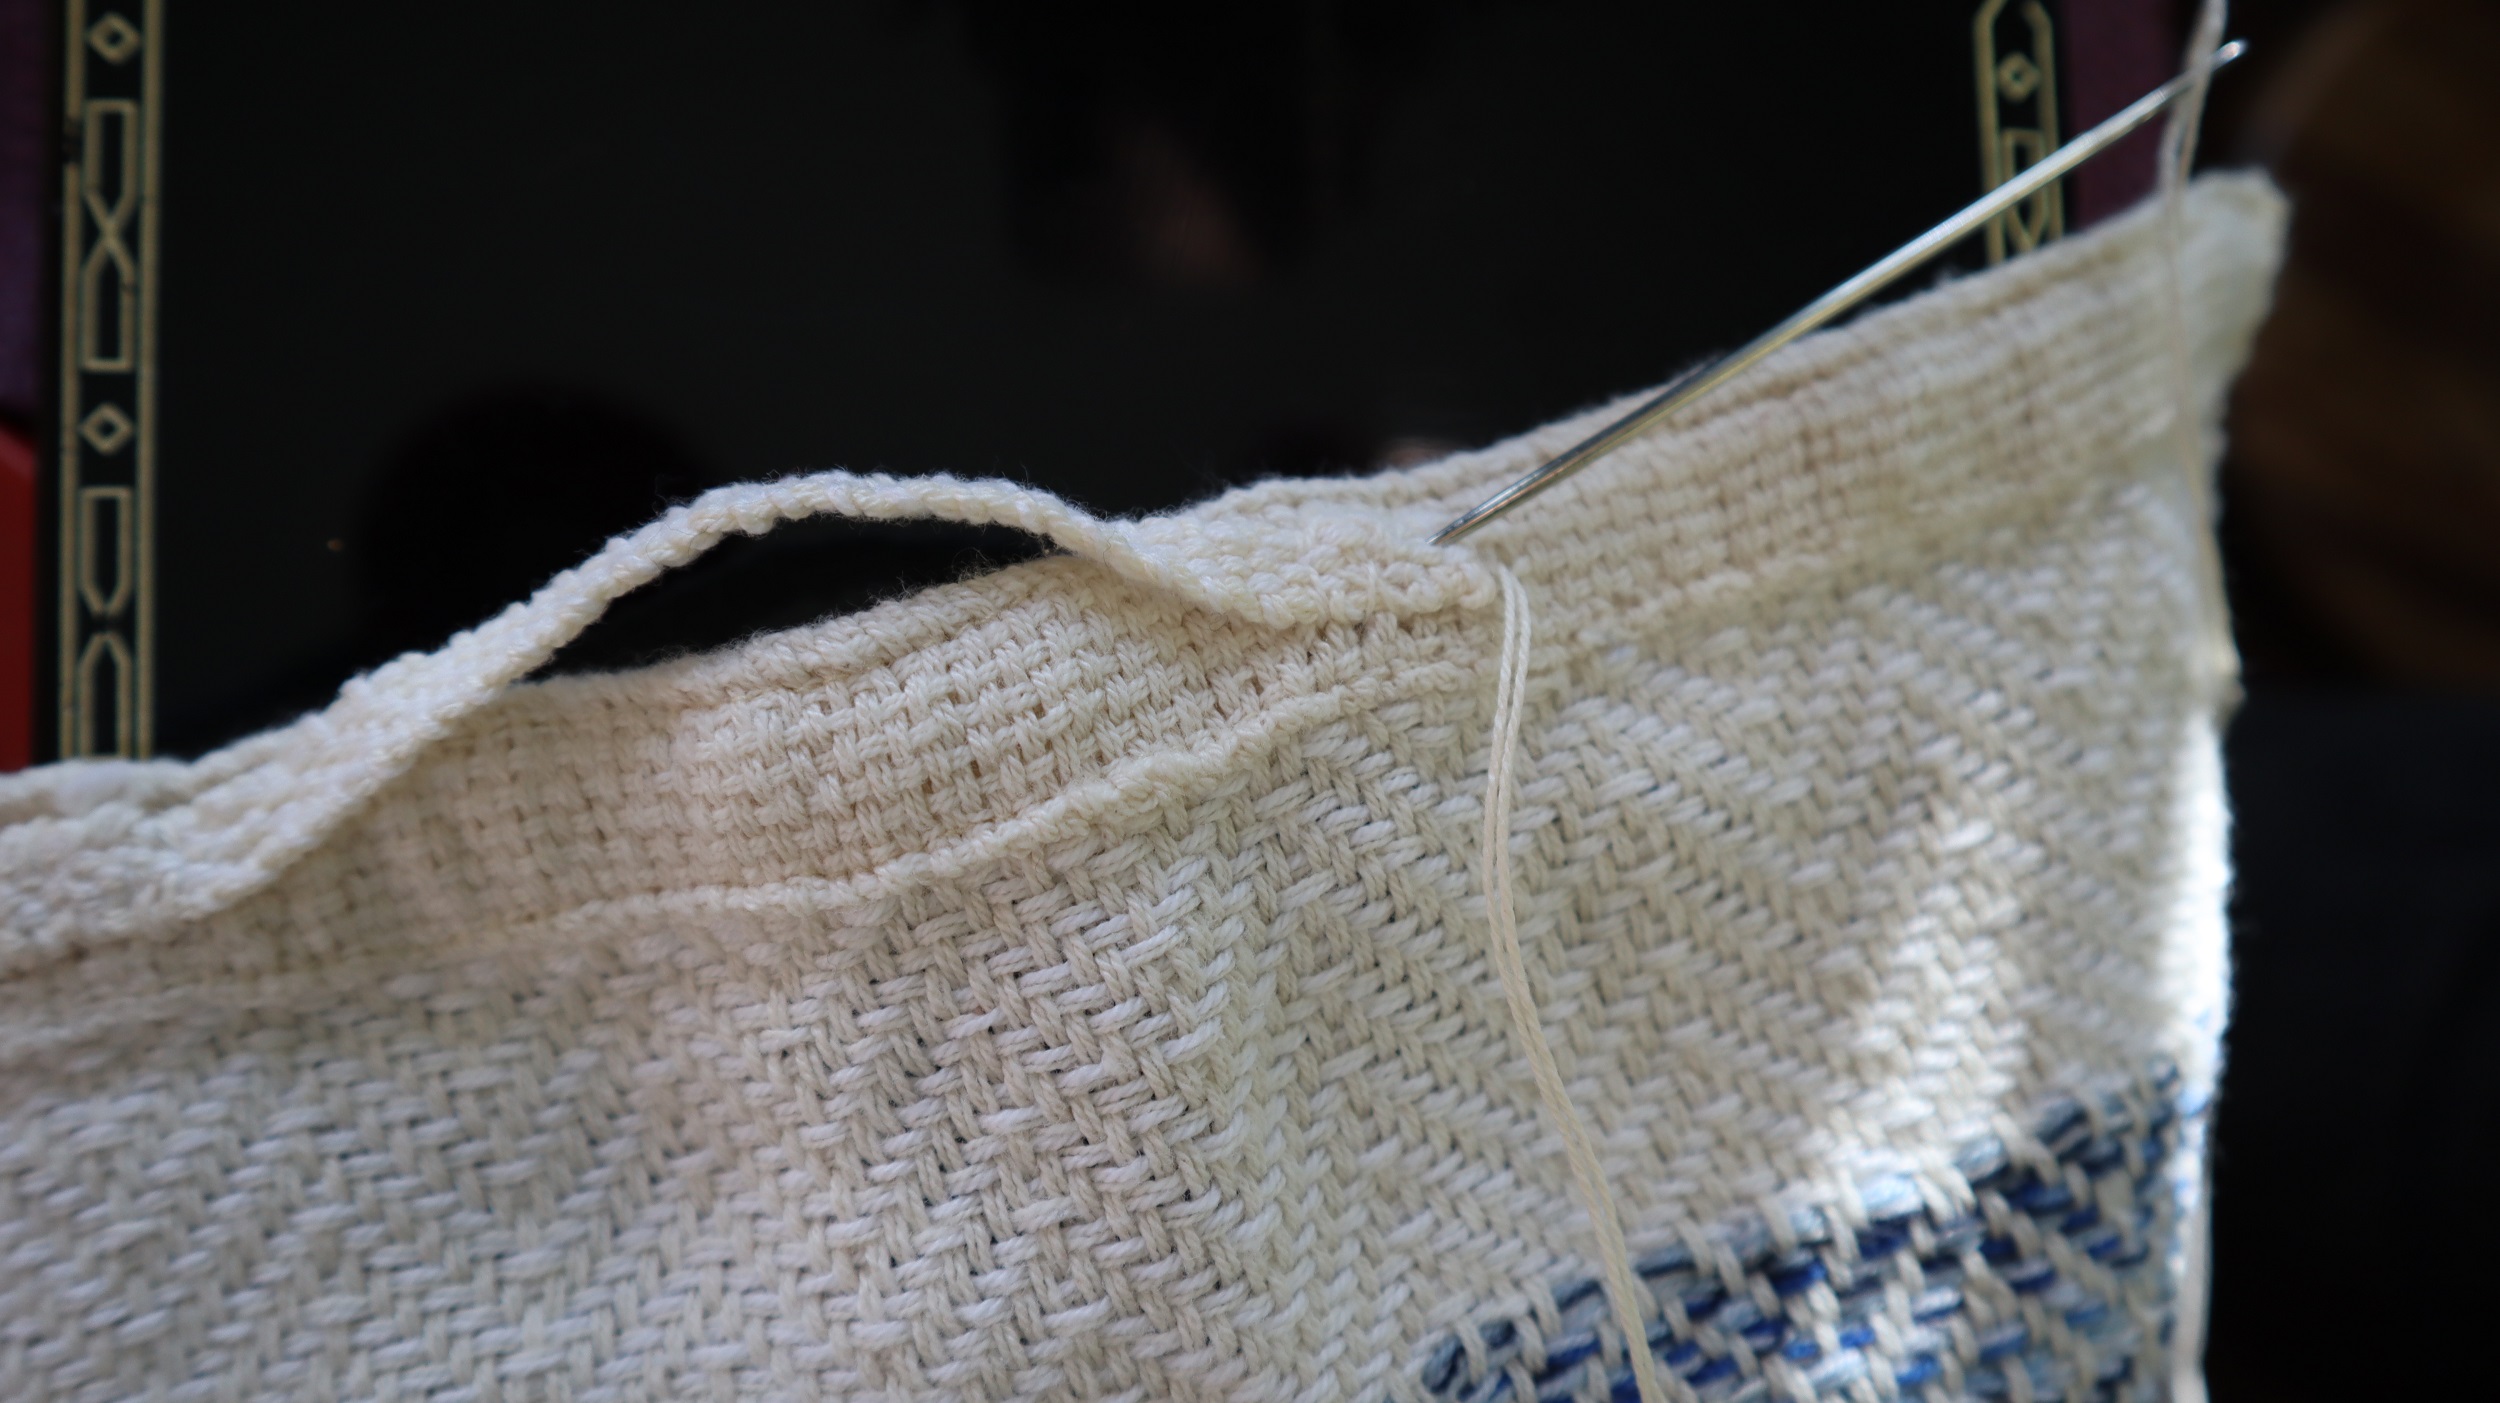
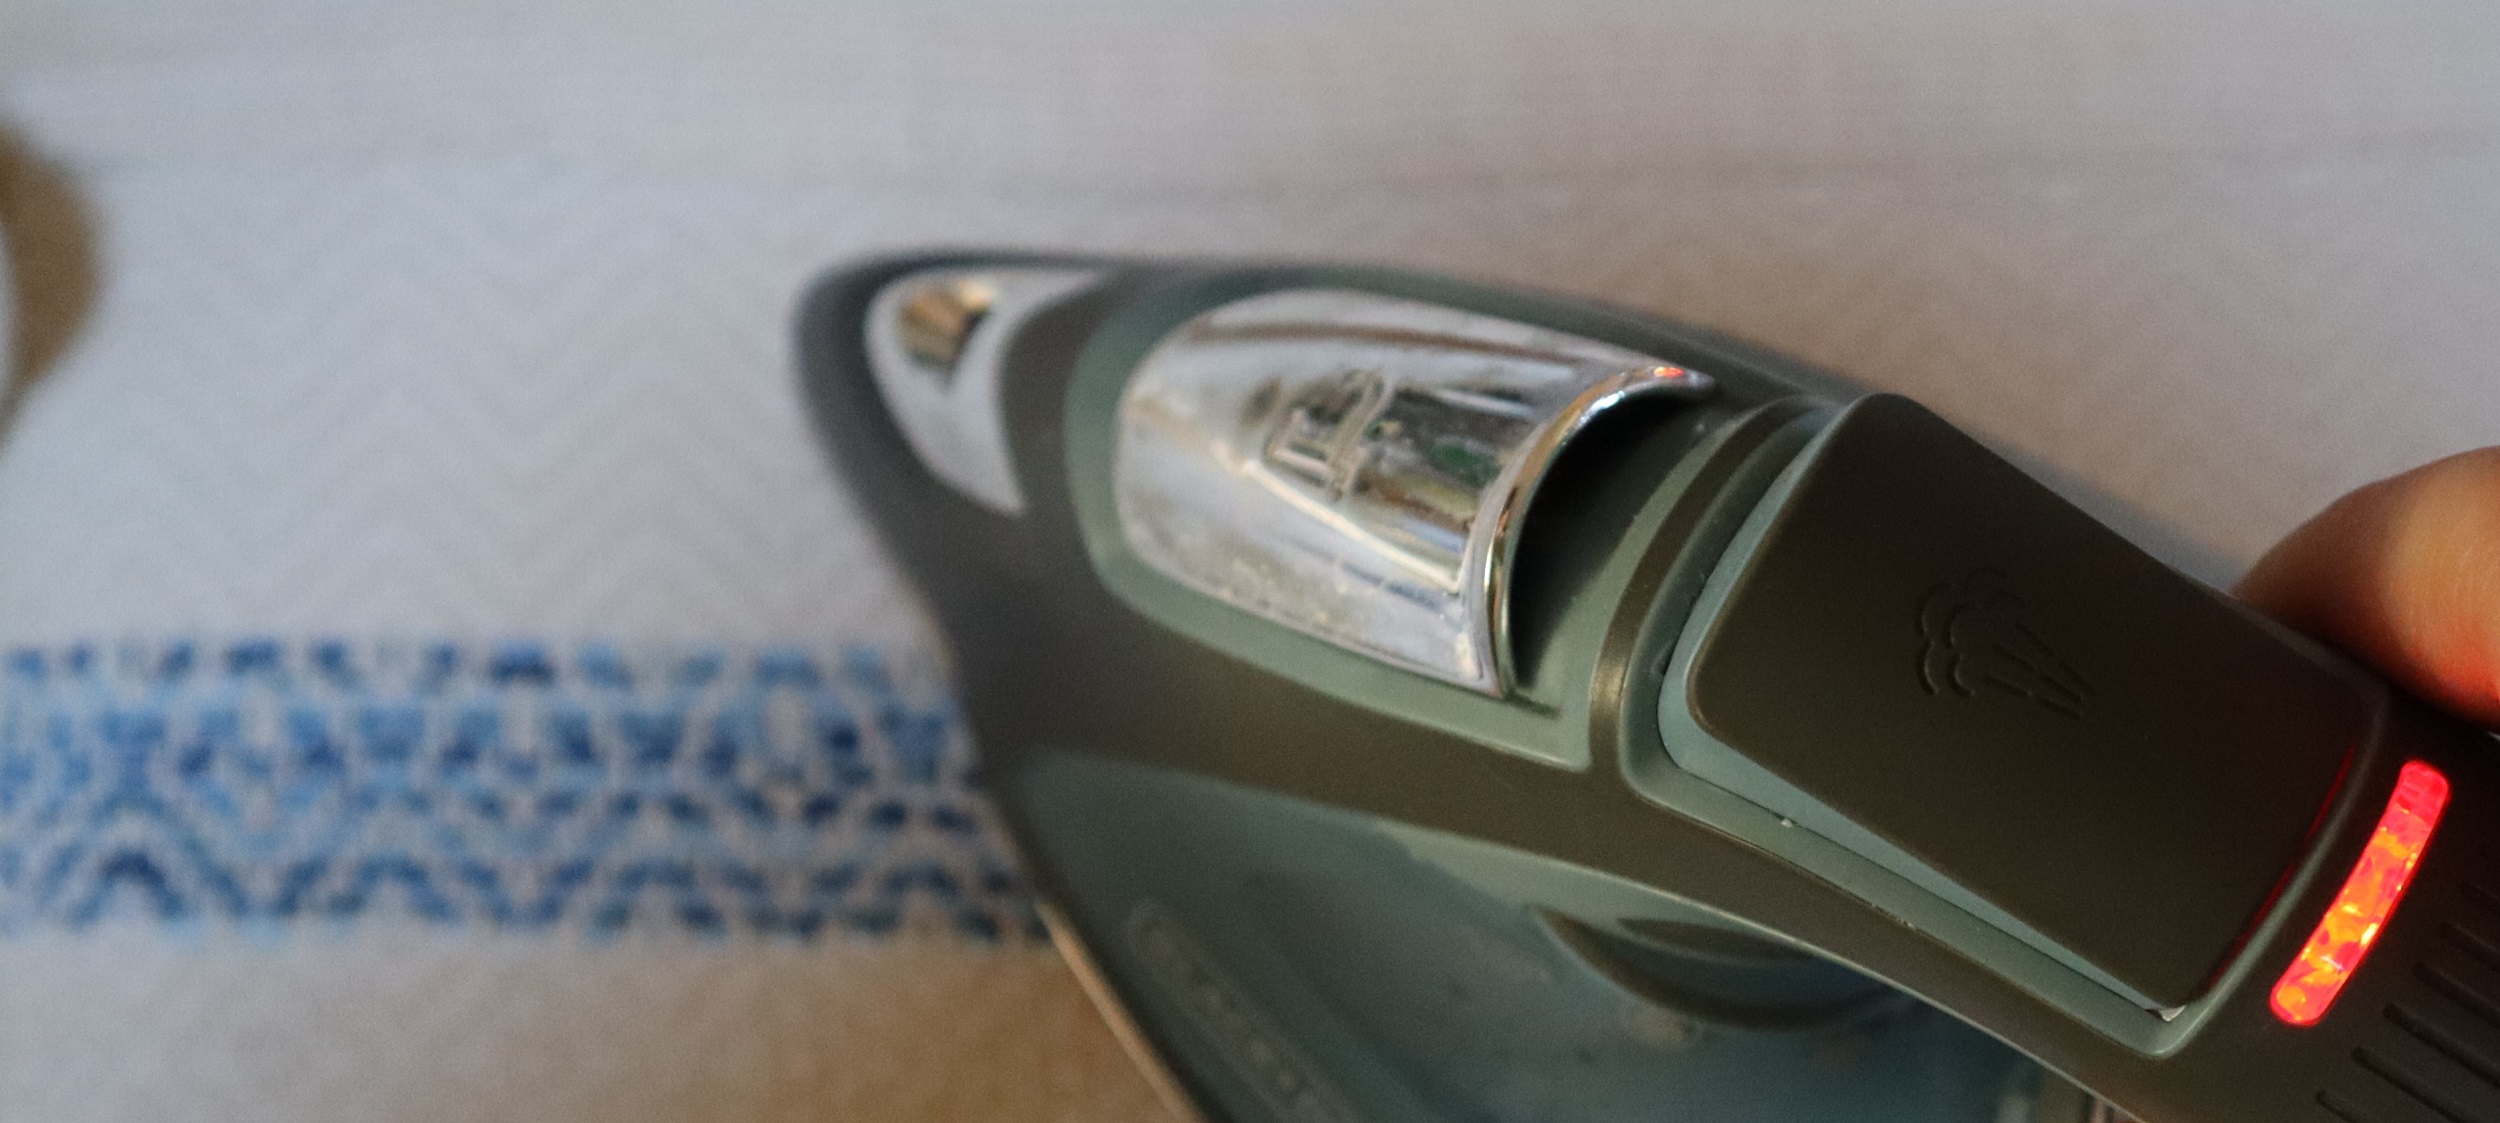
Once the tea towels were all woven, washed them and then ironed them and hemmed them.
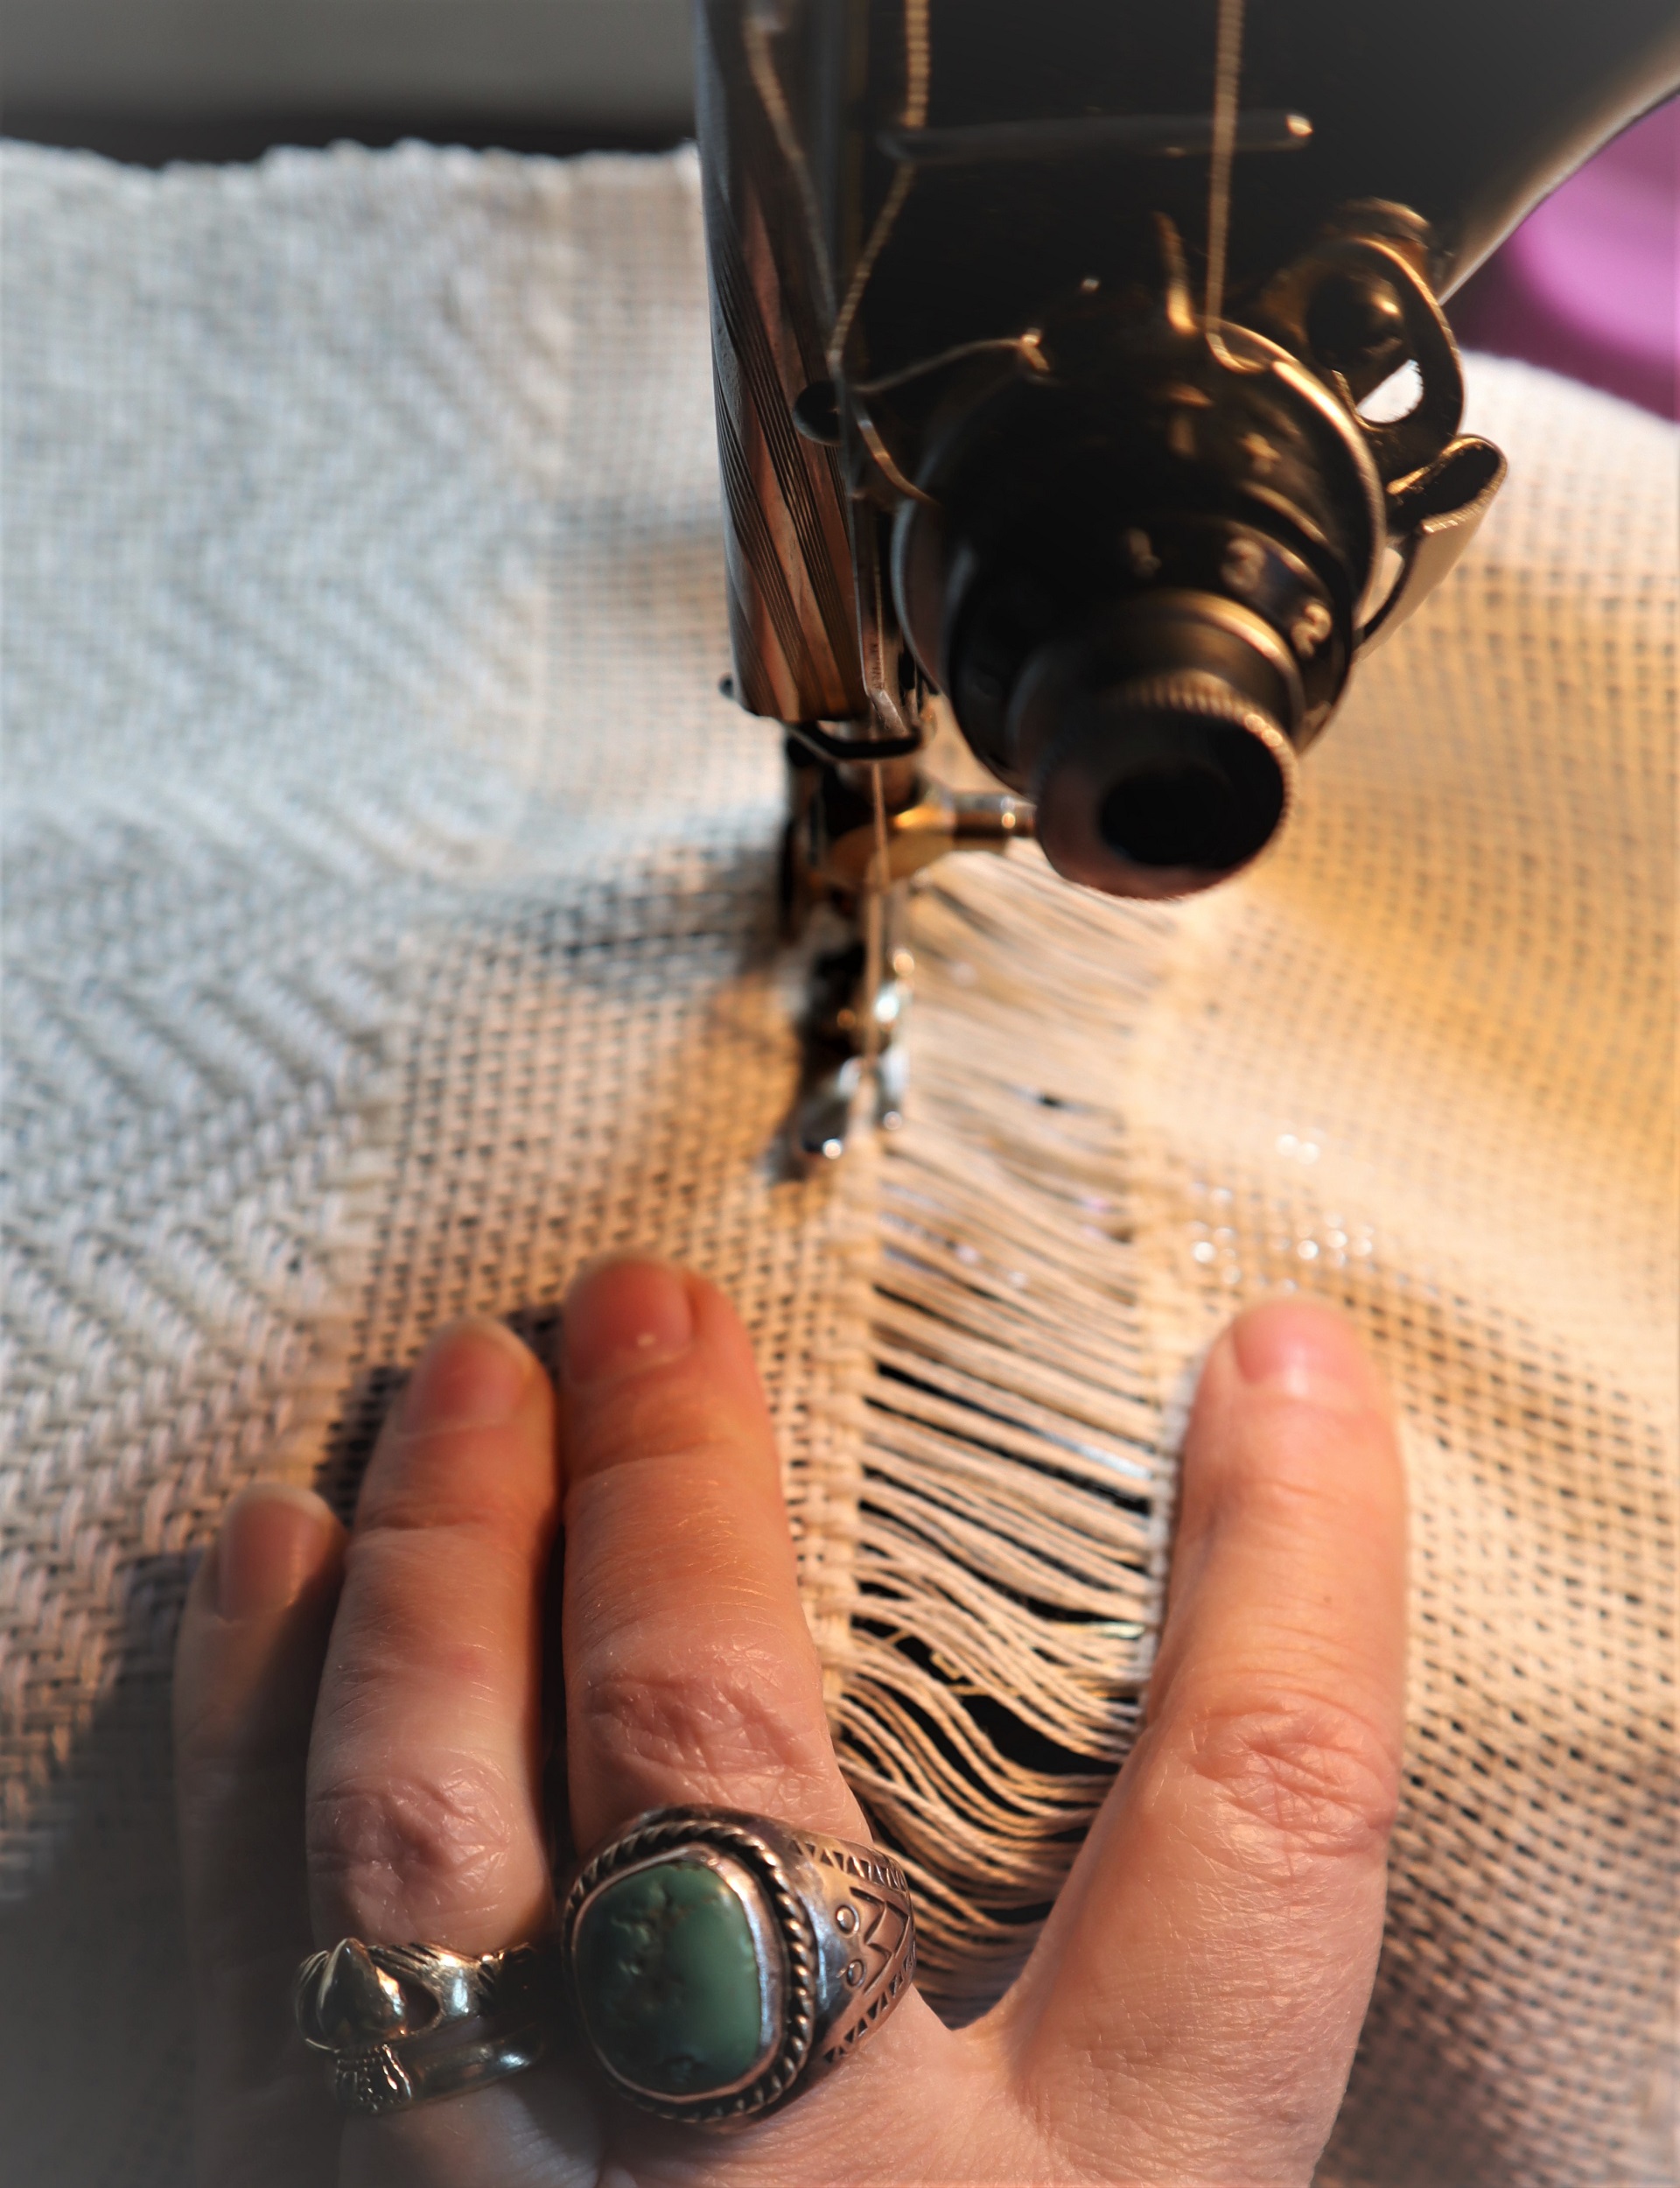
I had hand stitched the hems between each of the towels while they were on the loom, but then stitched the hand stitched edges again by machine before cutting them apart.
I then rolled and pinned the hems and stitched them by machine.
I had hand stitched the hems on some of the prototype tea towels, but wasn’t happy with the way they looked, so opted for the machine.
Ooops… at one point, my grandson, who has been taught how to sew on the machine by his mother, chastized me for sewing over a pin. Oops!
He has the family ability to raise one eyebrow very high and fix you with a baleful gaze.
This is also a family trait. We pass along such interesting legacies, don’t we?
My father could transmit a world of ‘ahem’ with his eyebrow. Ahem.
I didn’t sew over any more pins after I was given ‘the eyebrow’!
Earlier in the process, I wove miles of tape on my narrow band loom.
But, I forgot to take a picture of the weaving process for the tape.
I cut lengths of tape from the miles of narrow band.
Then I sewed the hanging loops with it onto the tea towels by hand.
Then, off to the washing machine for the towels….
It was so exciting to see how washing the towels snugged them up and made them all soft and inviting.
And then ironed the living daylights out of the tea towels again.
Most of them have been designated as gifts.
Generous gifts of boxes of abandoned crochet cotton by our relatives turned out to be such a lovely gift for me.
I loved the process of bringing the cotton to life again and I hope that the towels will be a pleasure in some small, quiet way for years to come.
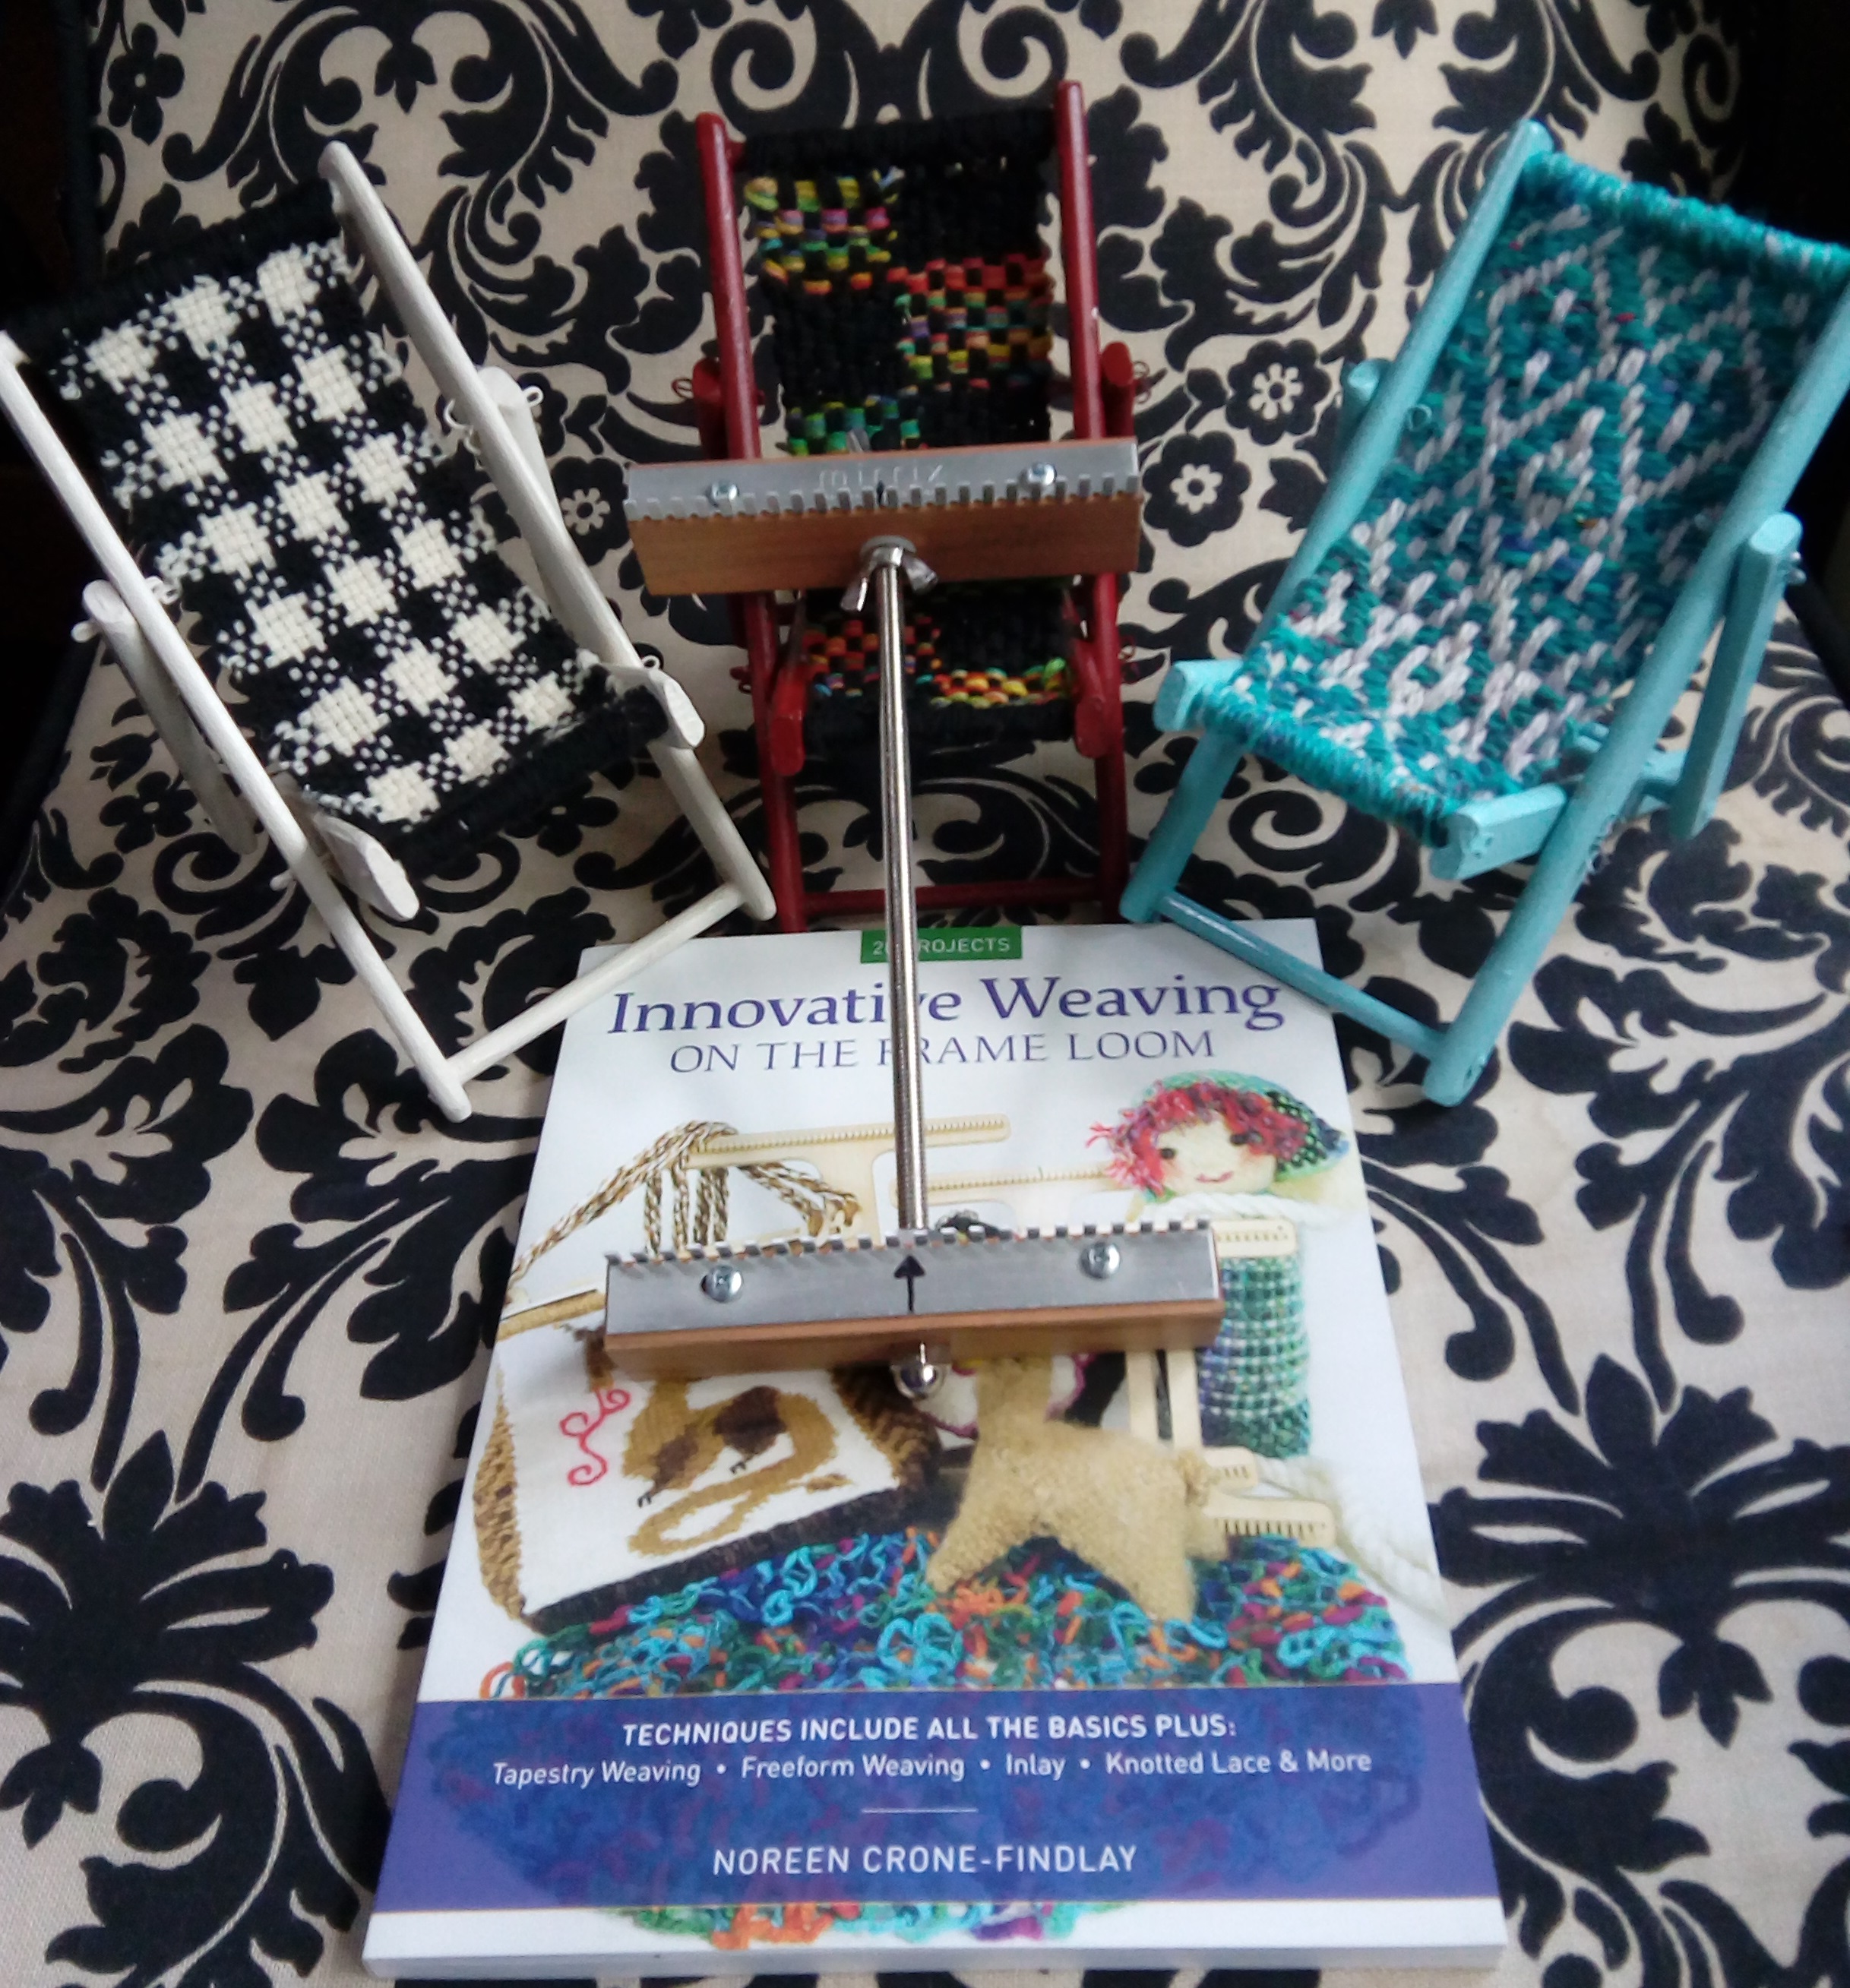
After I carved and wove 3 dolls that didn’t fit the doll furniture that I already had, (see Brown Paper Yarn Dolls) ,
I decided that I had to build them each a chair.
And so I built them each their own little chair with a seat woven on the Mirrix Saffron Loom, using instructions from my book: Innovative Weaving on the Frame Loom.
The Chairs are not in the book, but the weaving patterns are. See pages: 68, 50 and 45.
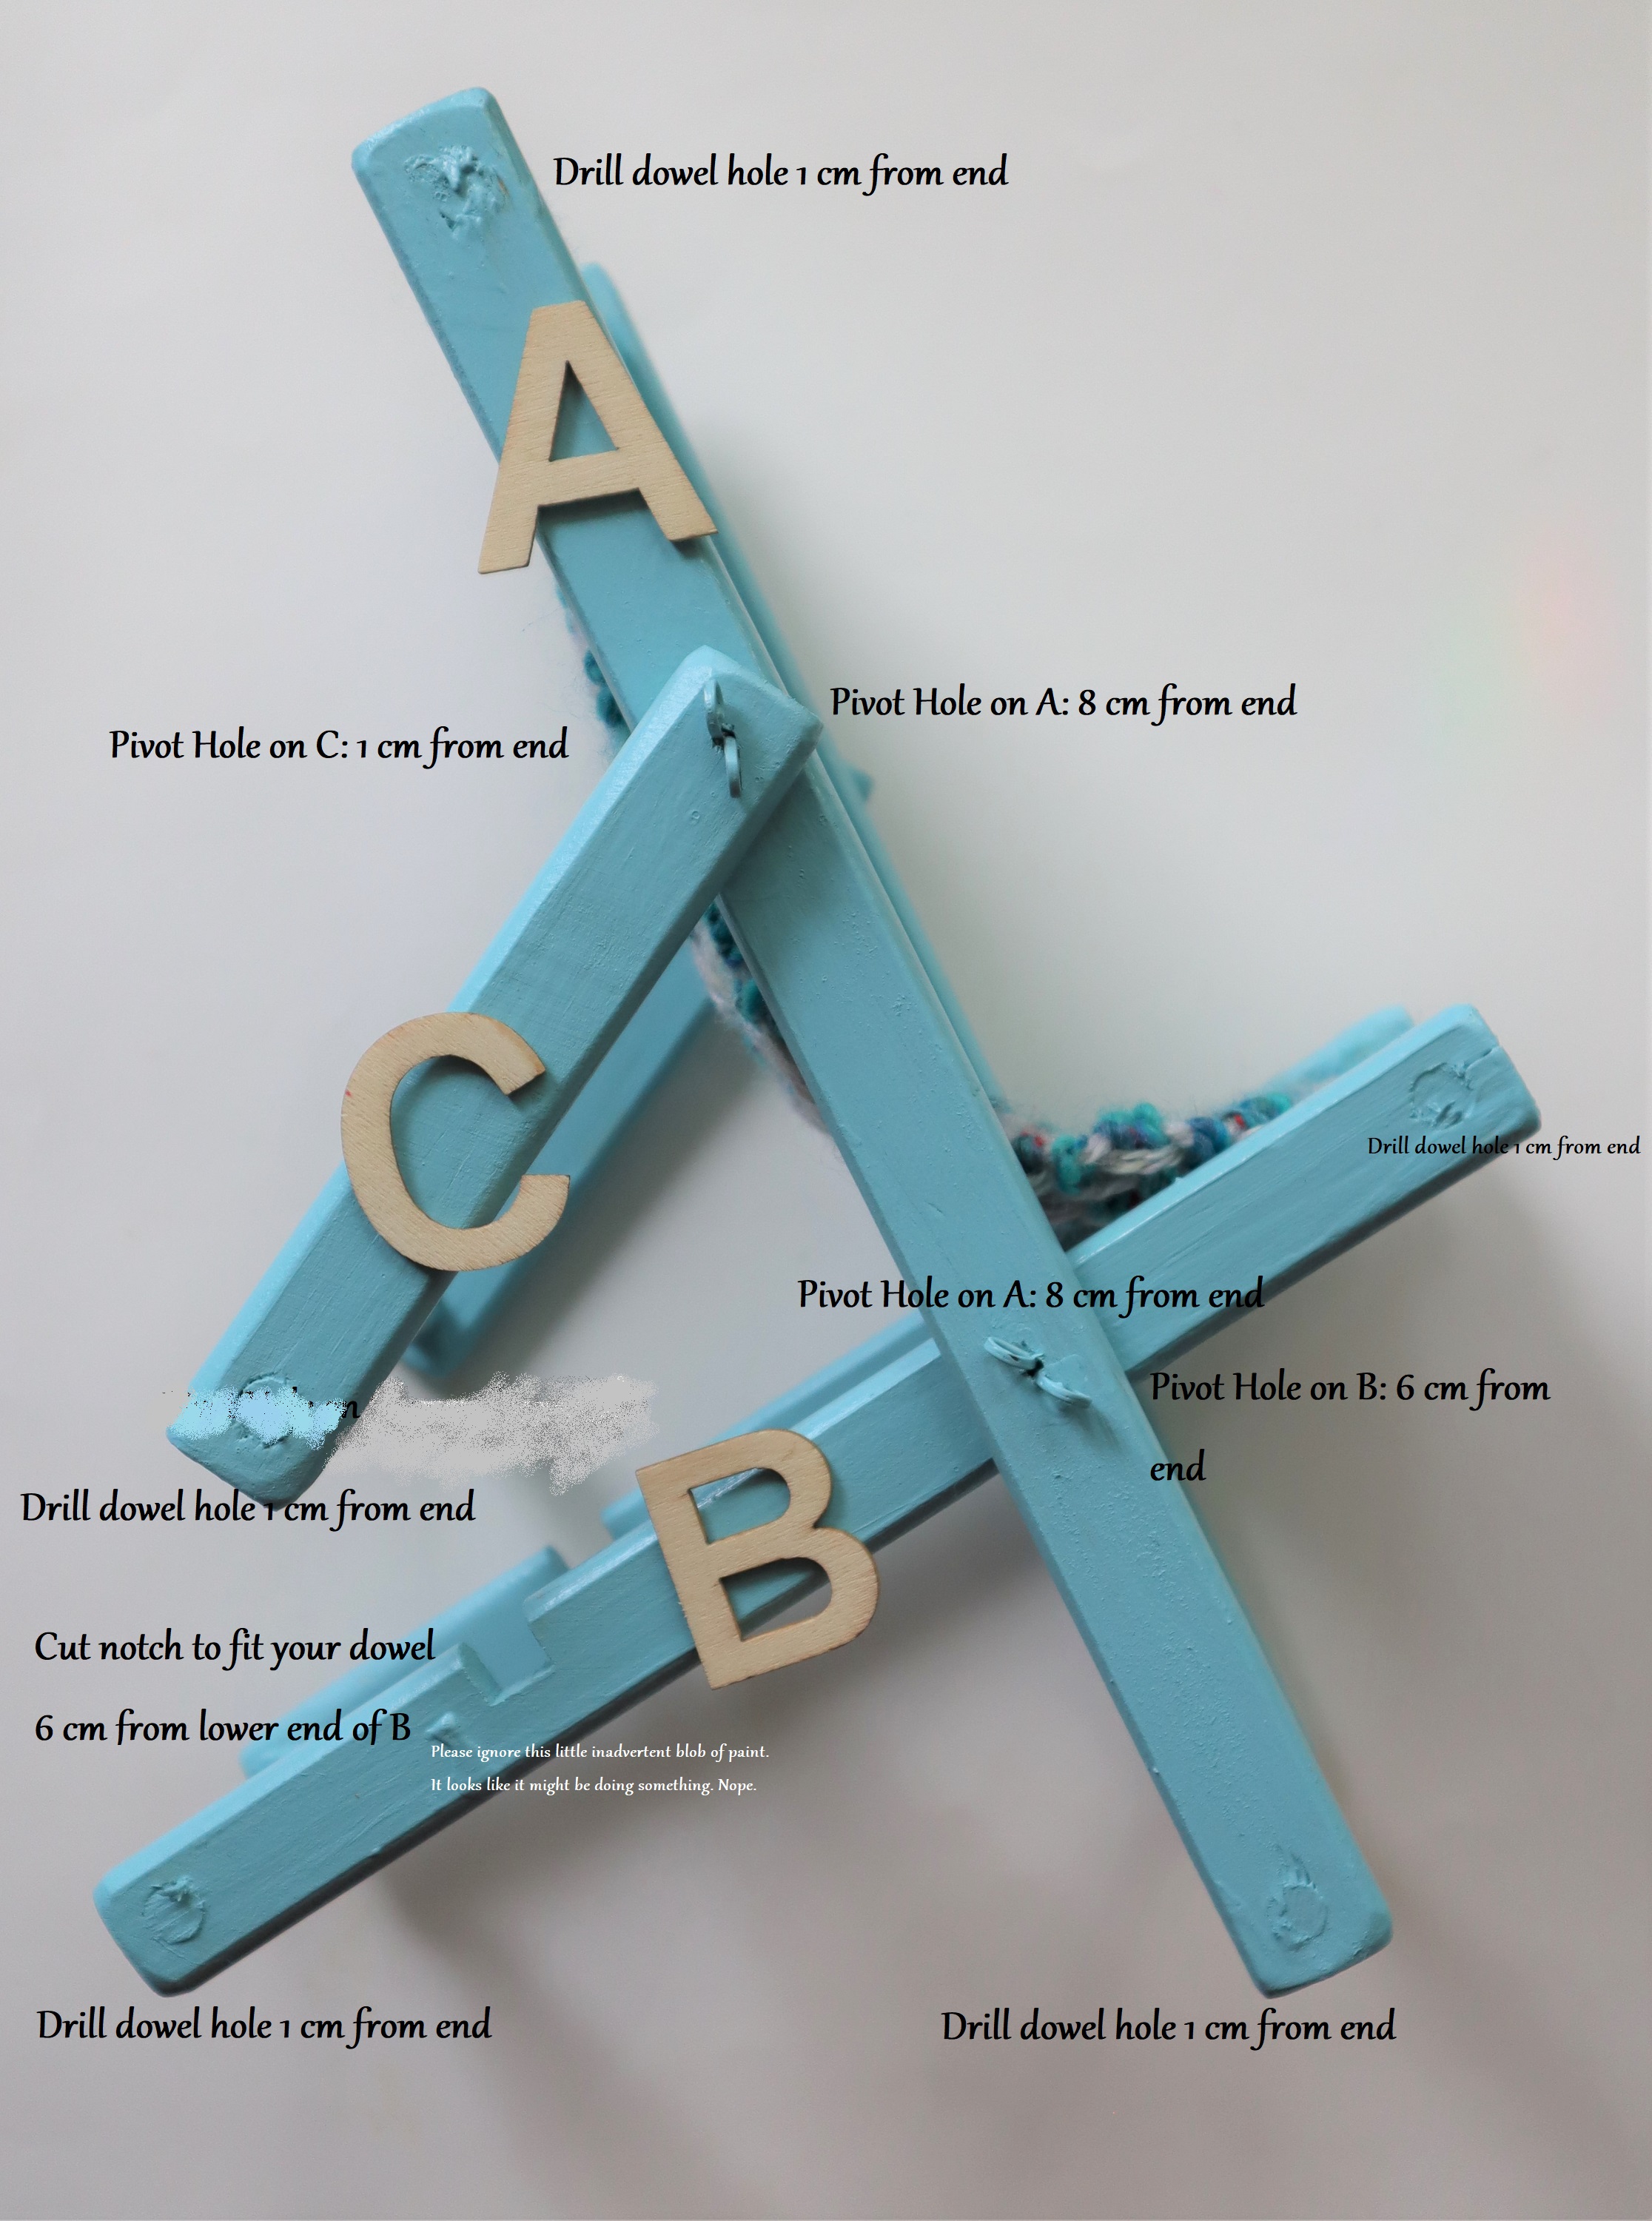
Here are the dimensions for the wooden parts of the chair:
The wooden pieces are all 1 cm thick and 2 cm wide.
Pieces A are 24 cm long (cut 2)
Pieces B are 20 cm long (cut 2)
Pieces C are 11 cm long (cut 2)
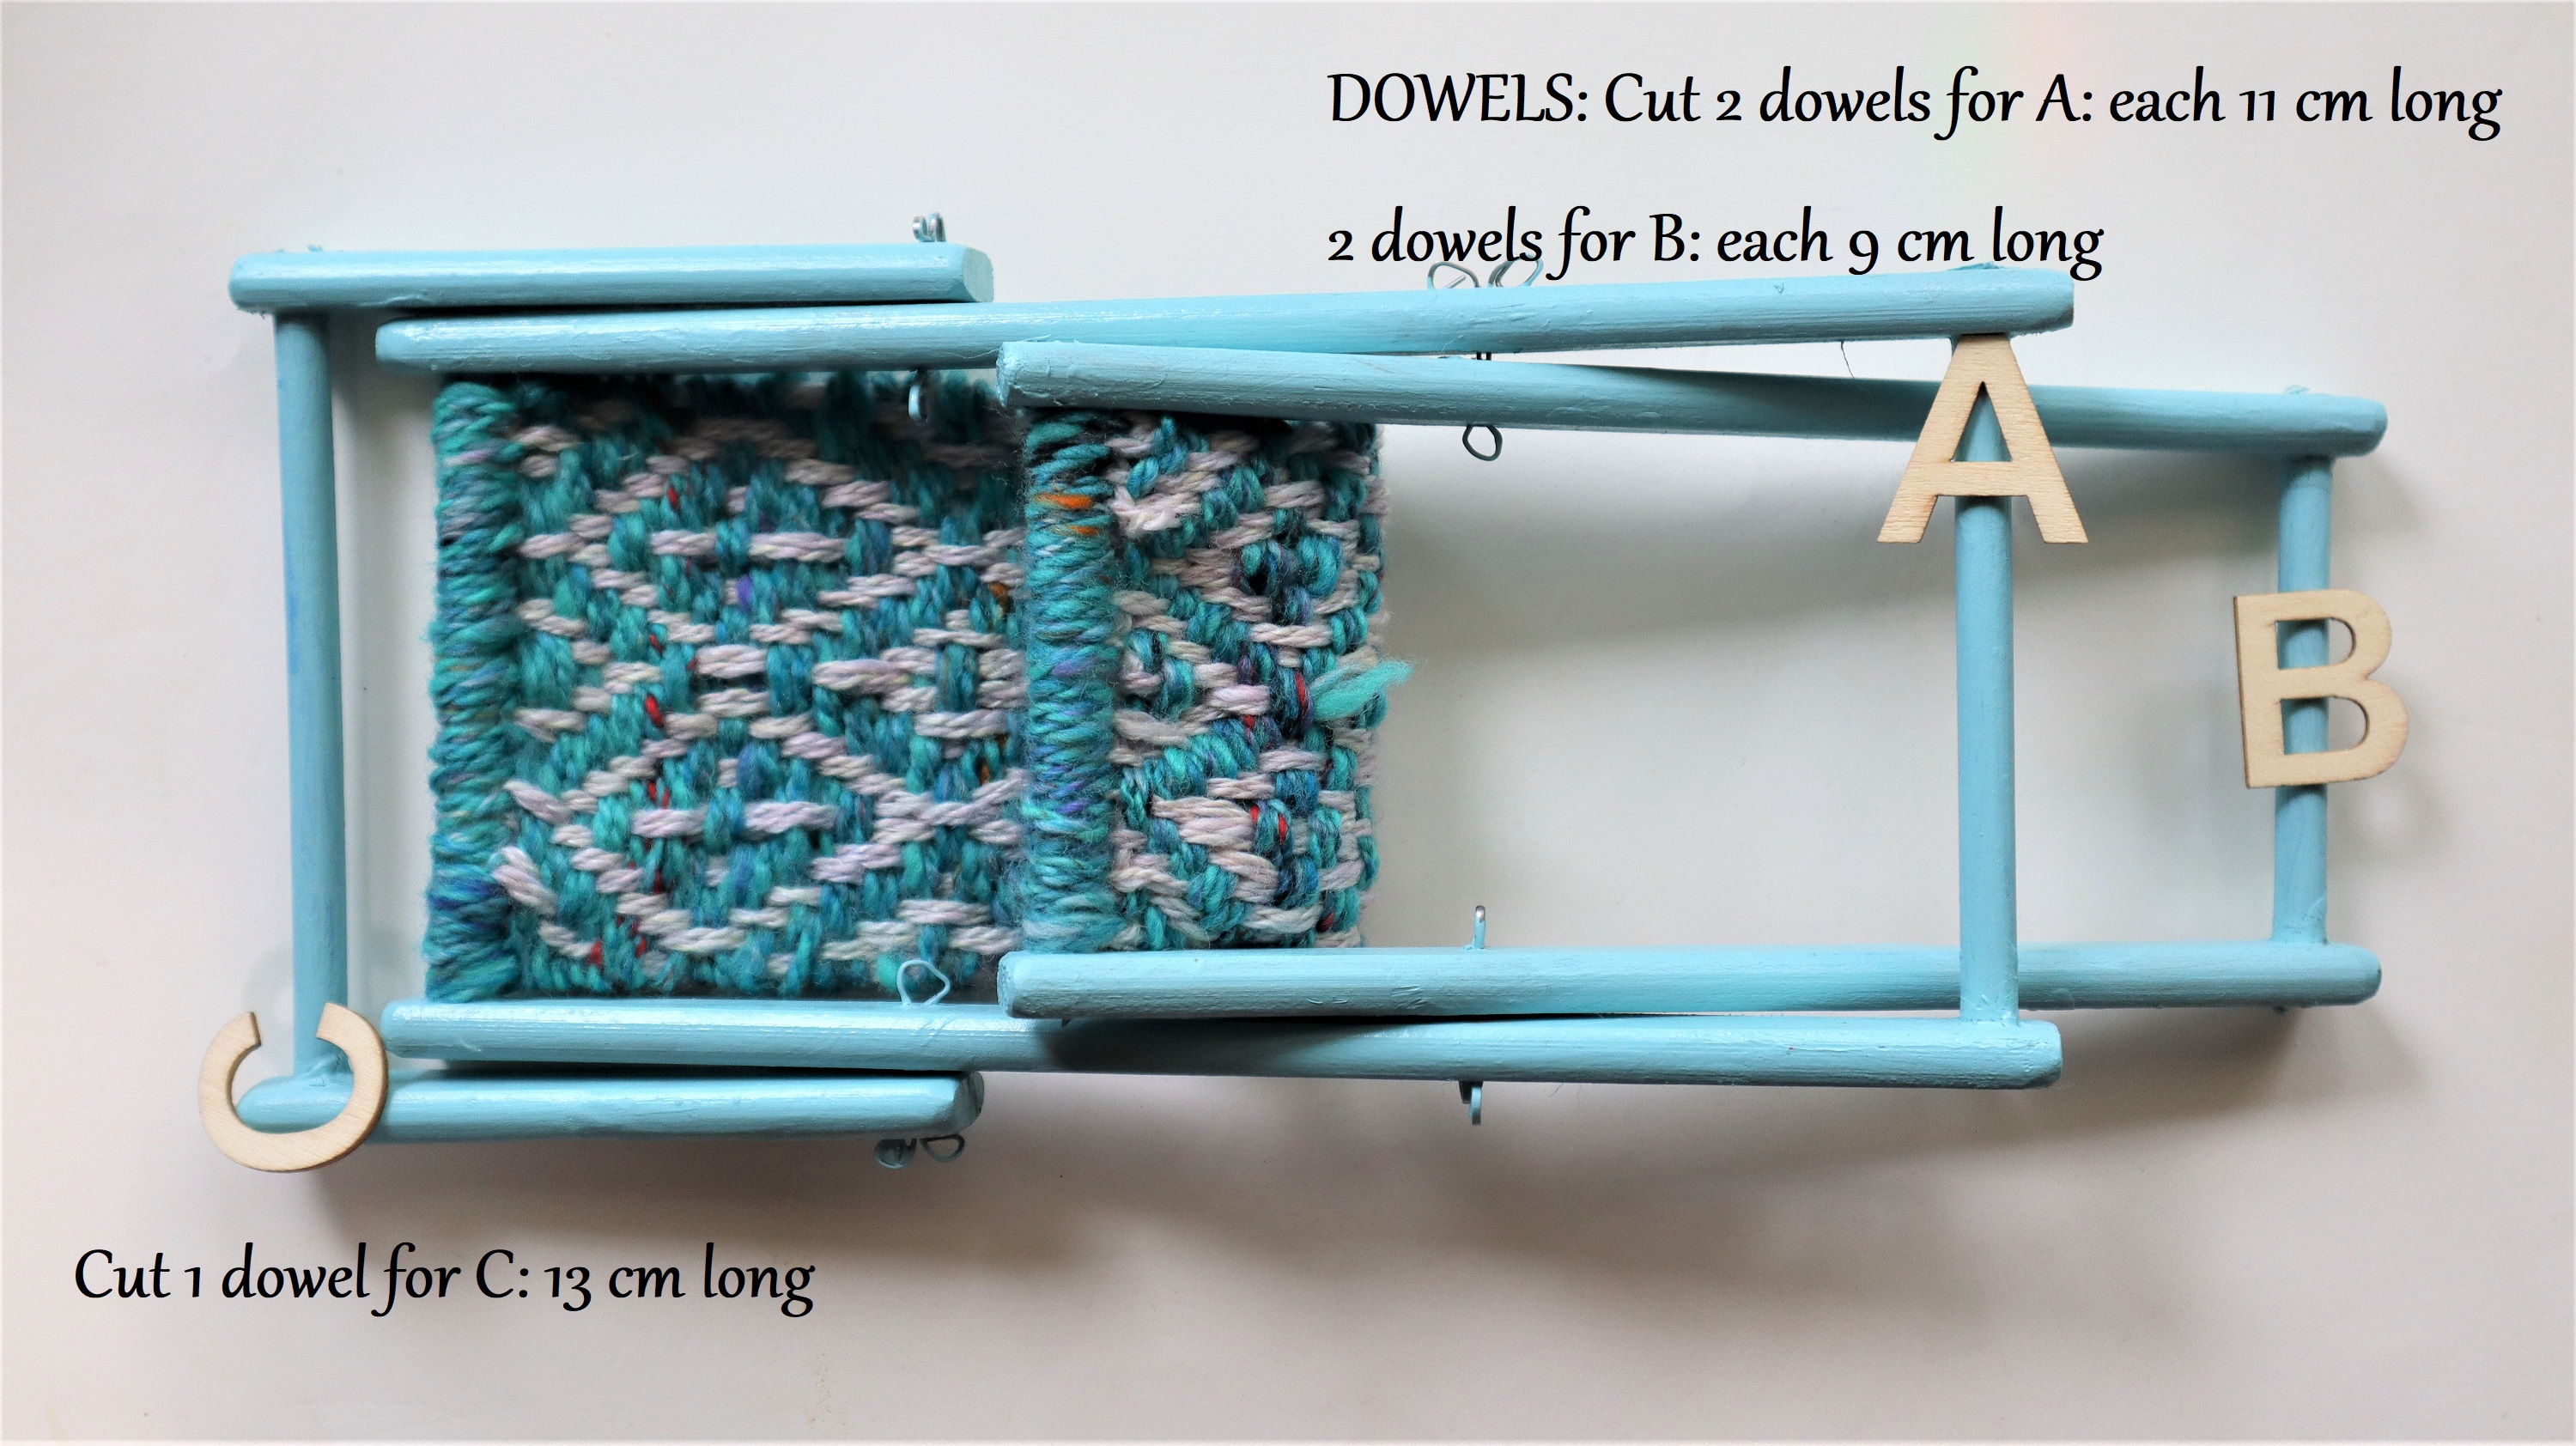
The Dowels are 1/4 inch in diameter:
A: Cut 2 that are 11 cm long
B: Cut 2 that are 9 cm long
C: Cut 1 that is 13 cm long
The Seat: Weave a piece of fabric that is 20 cm long by 7 cm wide and stitch through the end of the warp loops, over the top dowel of A and the front dowel of B.
The finished size of the chair is:
Height: 20 cm (8 inches)
From front to back: 18 cm (almost 7 inches)
Width: 13 cm at widest point (about 5 inches)
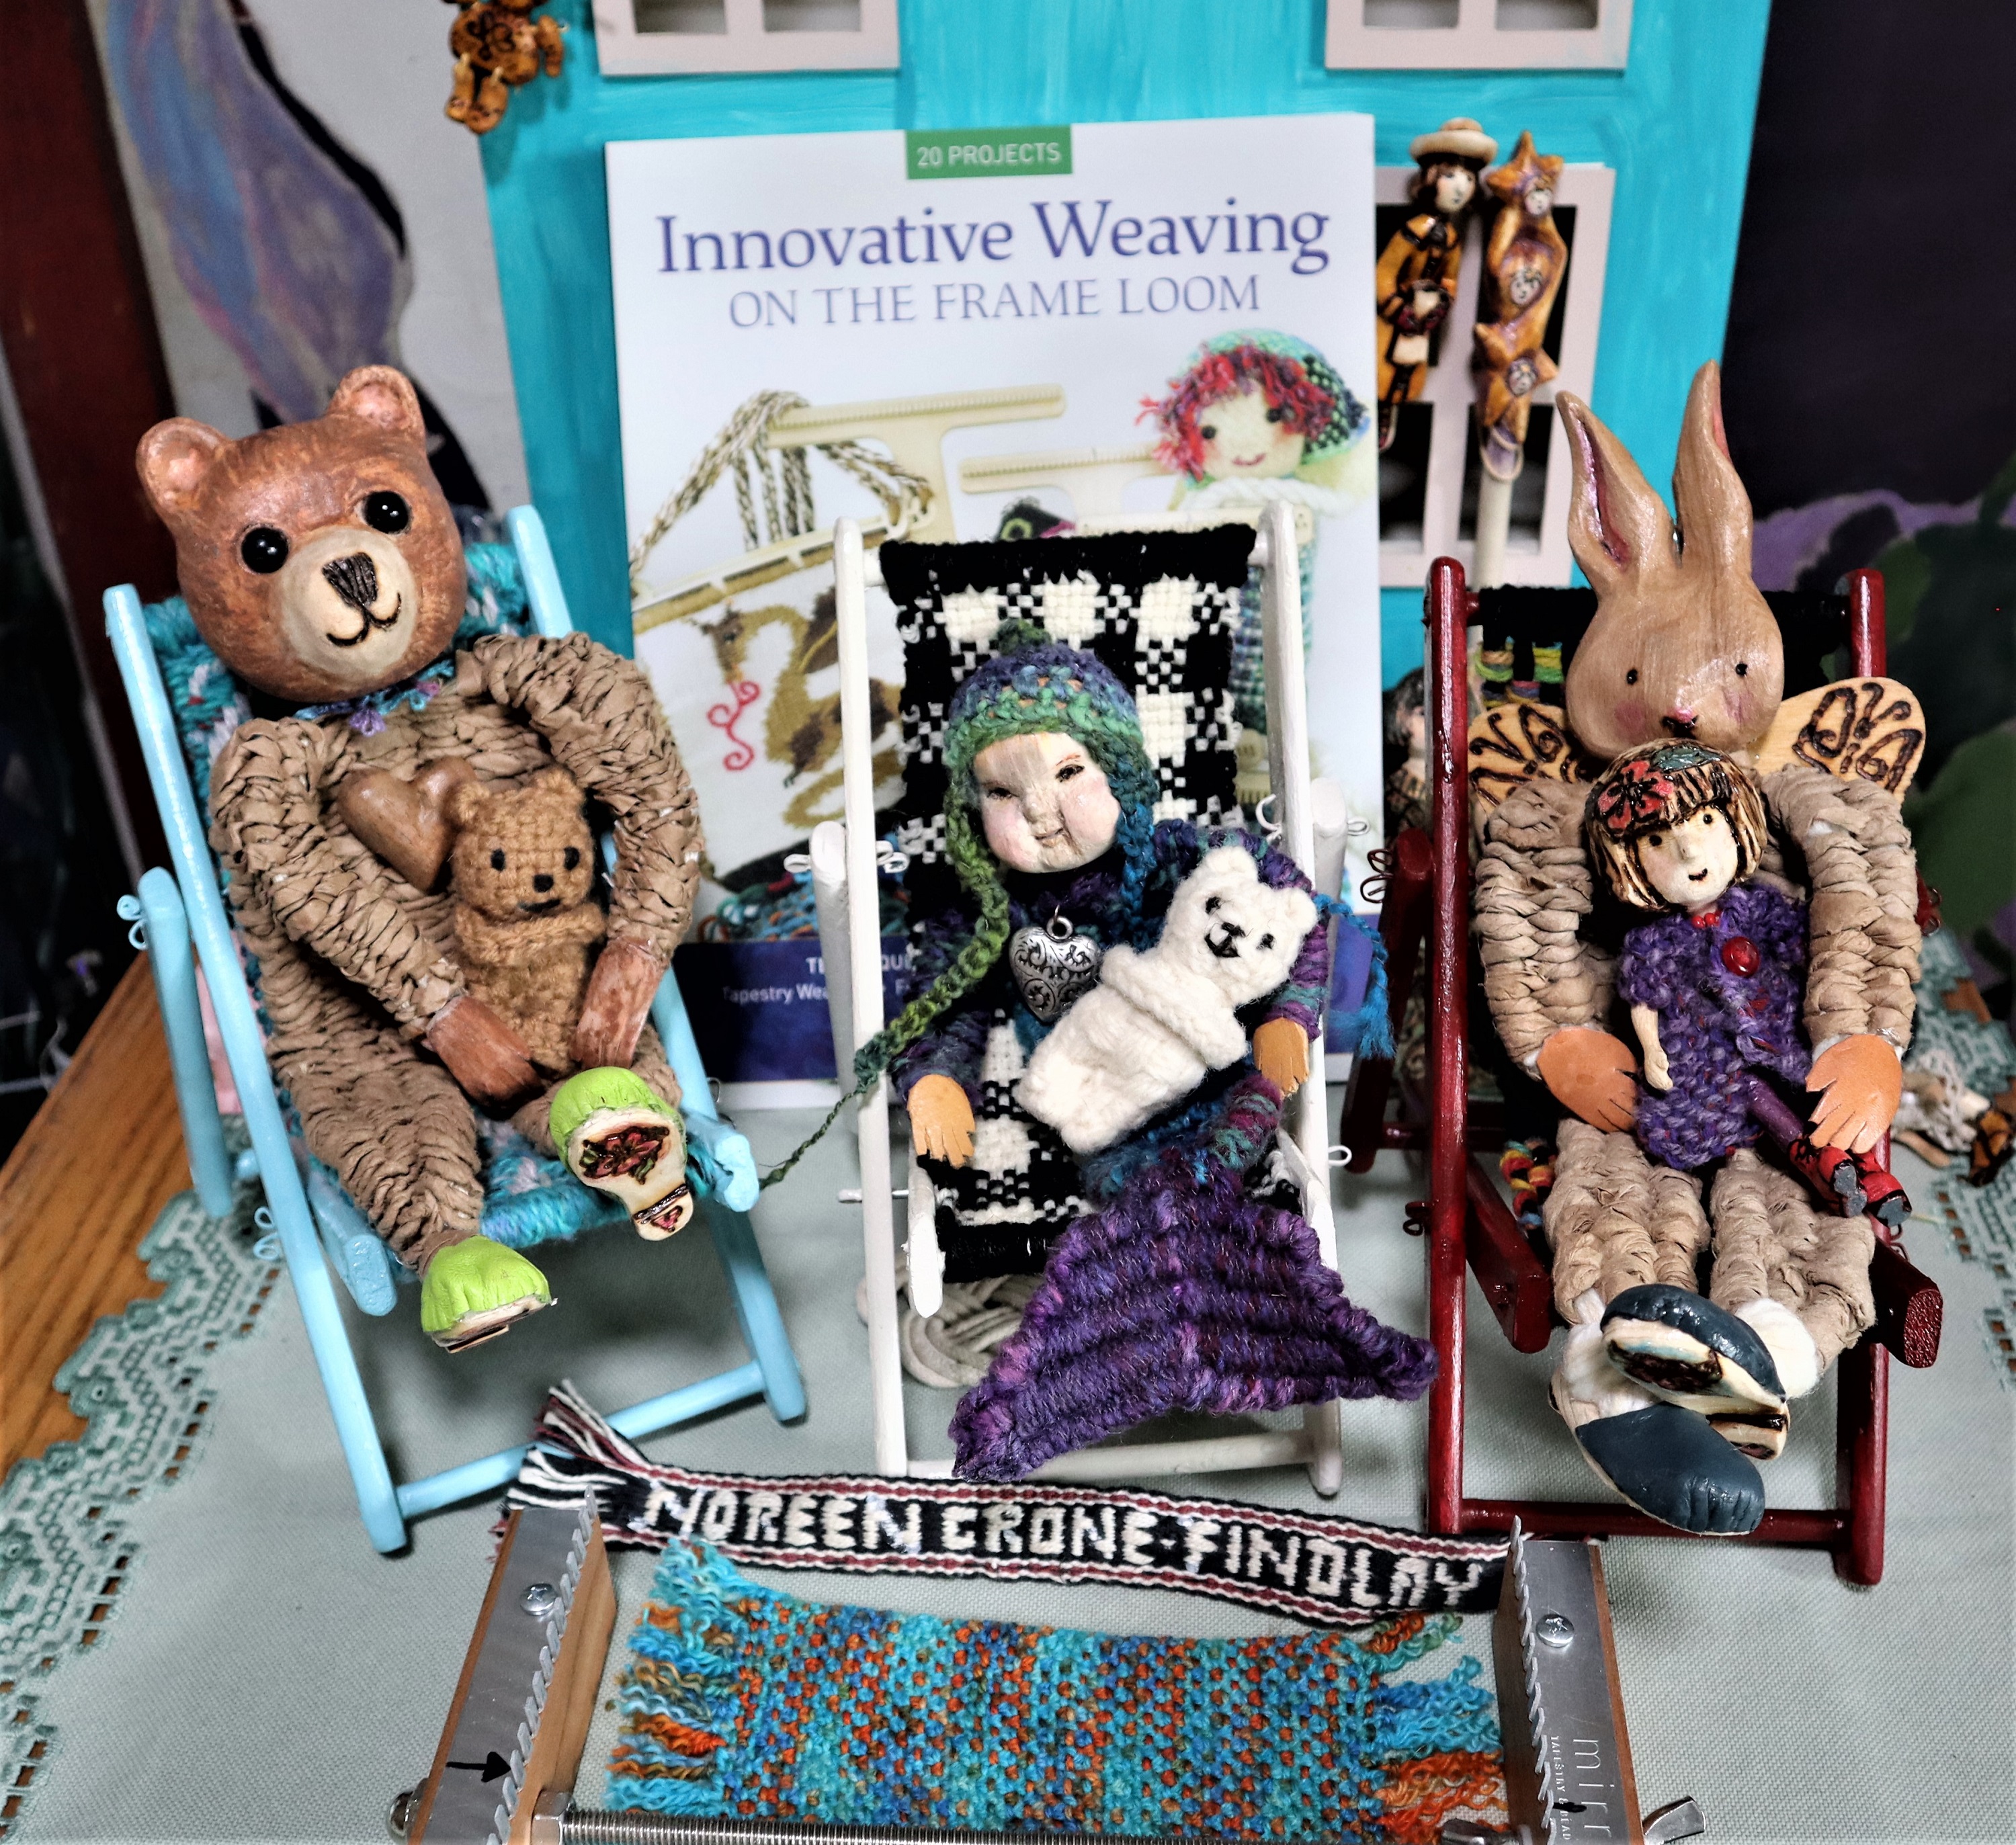
The dolls are very happy in their new chairs!
I have made a video, showing how to build the chairs- but please note that I forgot to show how I sew the weaving to the chair.
Oops.
I simply lifted the weaving off the loom and stitched through the warp loops with 2 strands of yarn, going over the dowel.
I hope that you will have fun making doll chairs for your dolls and teddy bears, too. ❤
One of my favorite eco friendly crafts is spinning yarn from brown paper….
This video shows how:
And, then, I love to weave the brown paper yarn into all kinds of fun things like this bunny and teddy bear.
I carved their heads from wood, and made their little shoes from scraps of garment leather that I glued to wooden soles that I carved. The navy shoes were made from a thrift shop coat that I cut and sewed into a ton of different things- bags and doll shoes and doll clothes.
I made their hands from scraps of heavy weight leather that I was given years ago.
Bunny’s face is lopsided because the scrap of firewood that I carved her from was wonky, but she forgives me for that!
I adapted this pattern from my etsy shop to weave their bodies on weaving sticks, using the brown paper yarn that I had spun: Here’s the link:
I love all the neat things that can be made with brown paper yarn. In our house, brown paper is NEVER thrown away!
It always gets upcycled into nifty new things 😀
This is my contribution to the monthly ‘Scrap Happy’ Blogging group- people who delight in making things from scraps and upcycled bits of this and that post on the 15th of each month.
Here’s the links to the rest of the group. I always enjoy seeing what each of them has done each month:
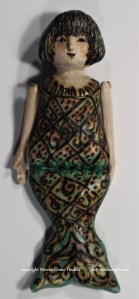
Last month, I posted about Bedelia Mermaid, whom I carved from a very hard old piece of wood that was upcycled from a very old and fallen apart bed. LINK
Her sister, poor thing, languished in the freezer for several weeks, because I needed to force some moisture into the rock hard wood.
Bedelia thought that I was being rather harsh with her poor sister!
I named her ‘Frozen Charlotte’, which is actually a kind of doll that doesn’t have moveable arms and legs, but in this case, it was because she spent so much time in sub-zero temperatures.
Freezing the moistened wood made a world of difference!
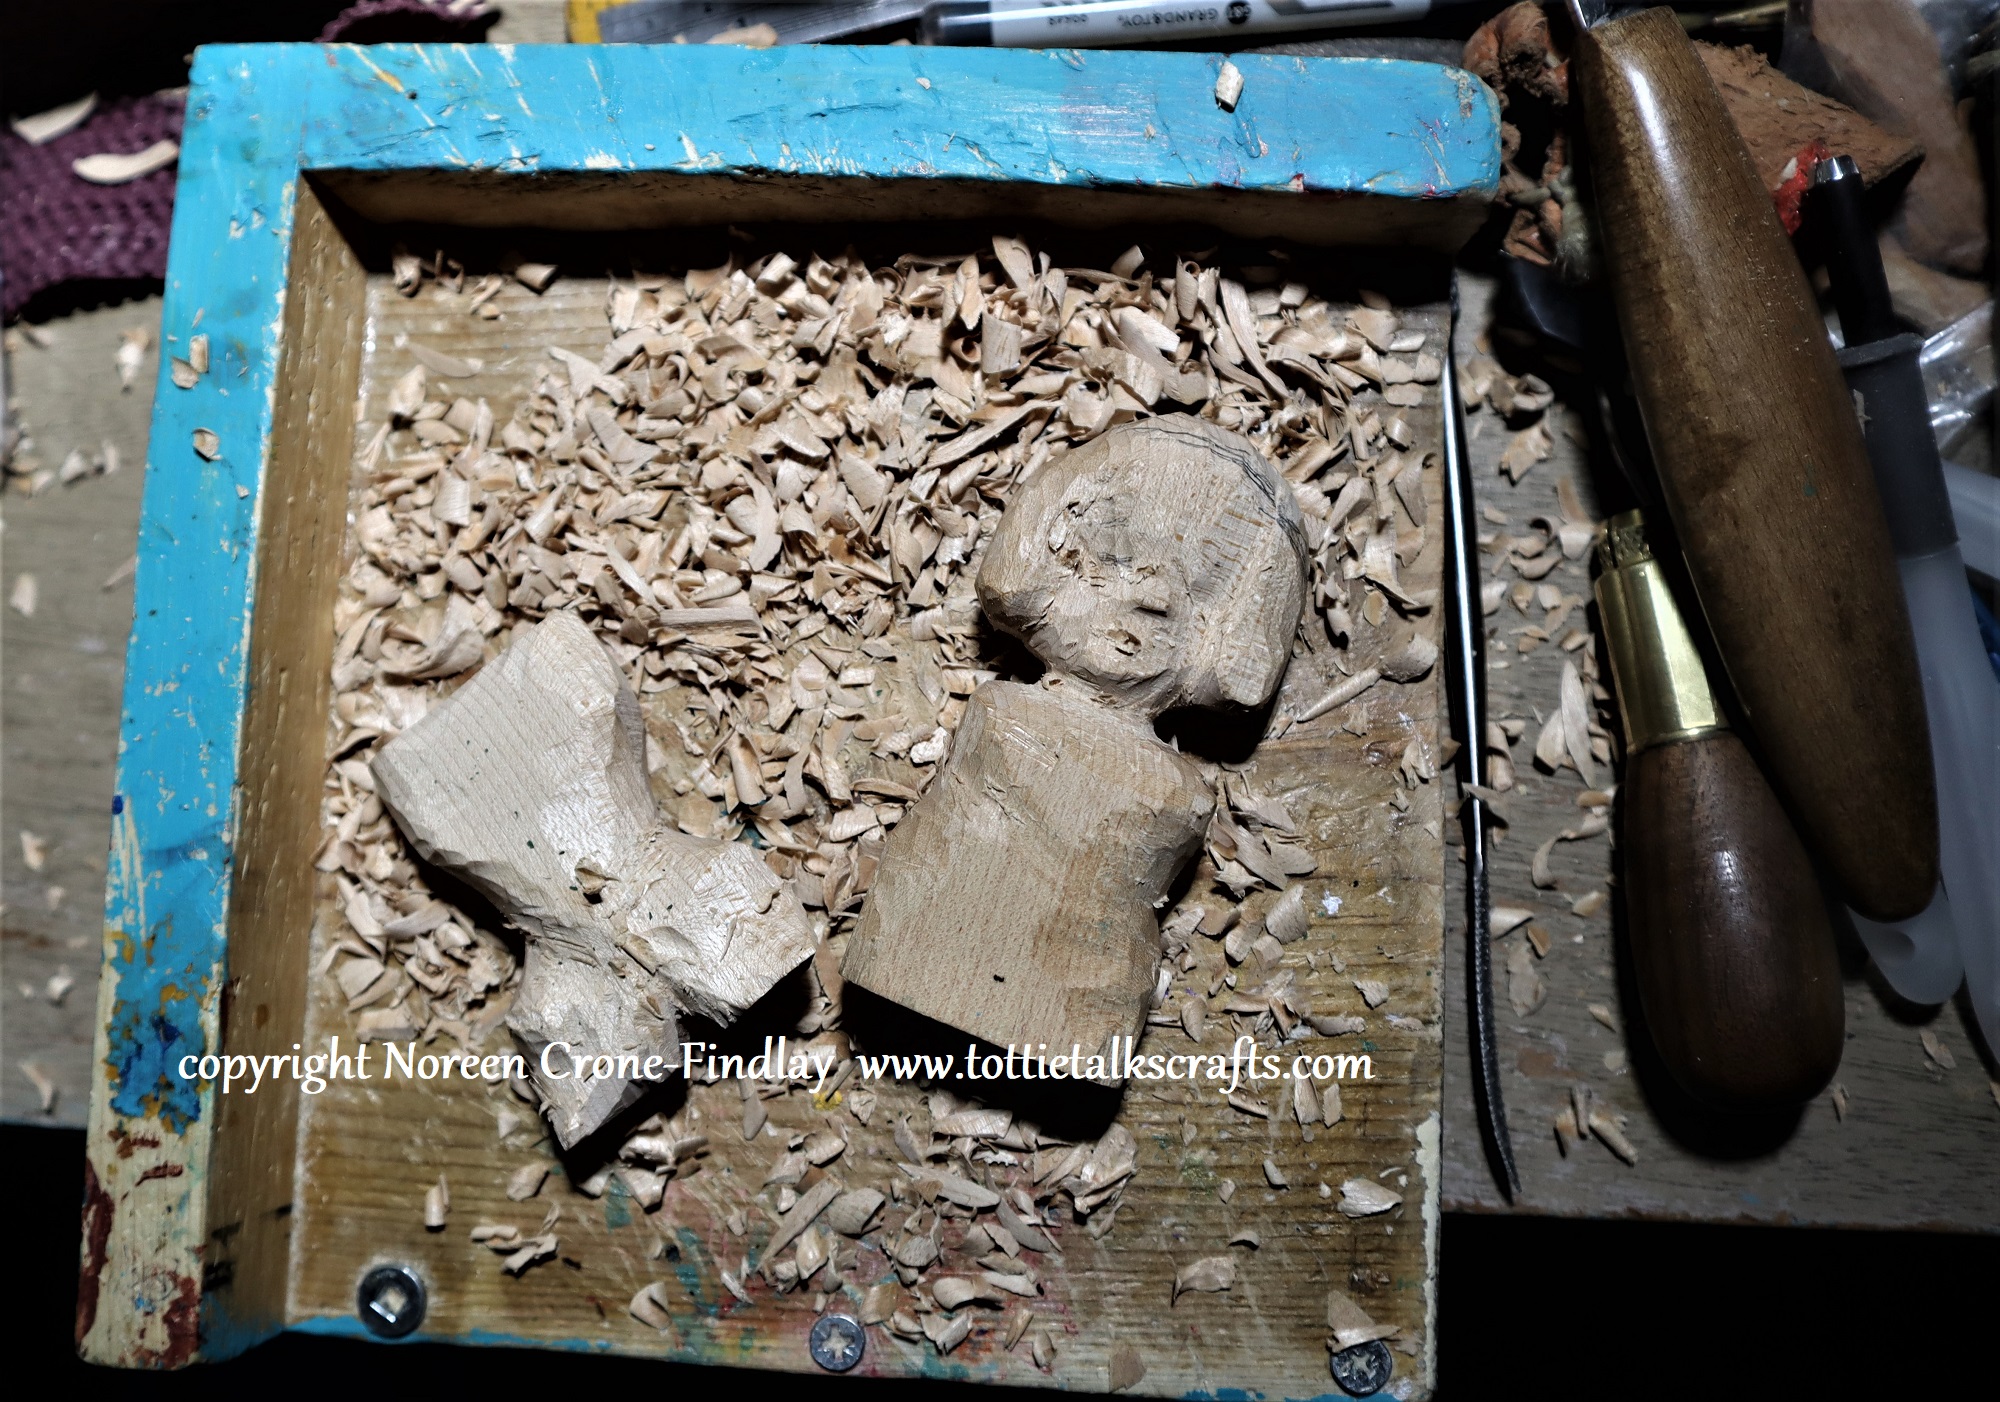
When I tried carving Charlotte’s arm, I was delighted- carving the wood was now possible without my knife going instantly dull.
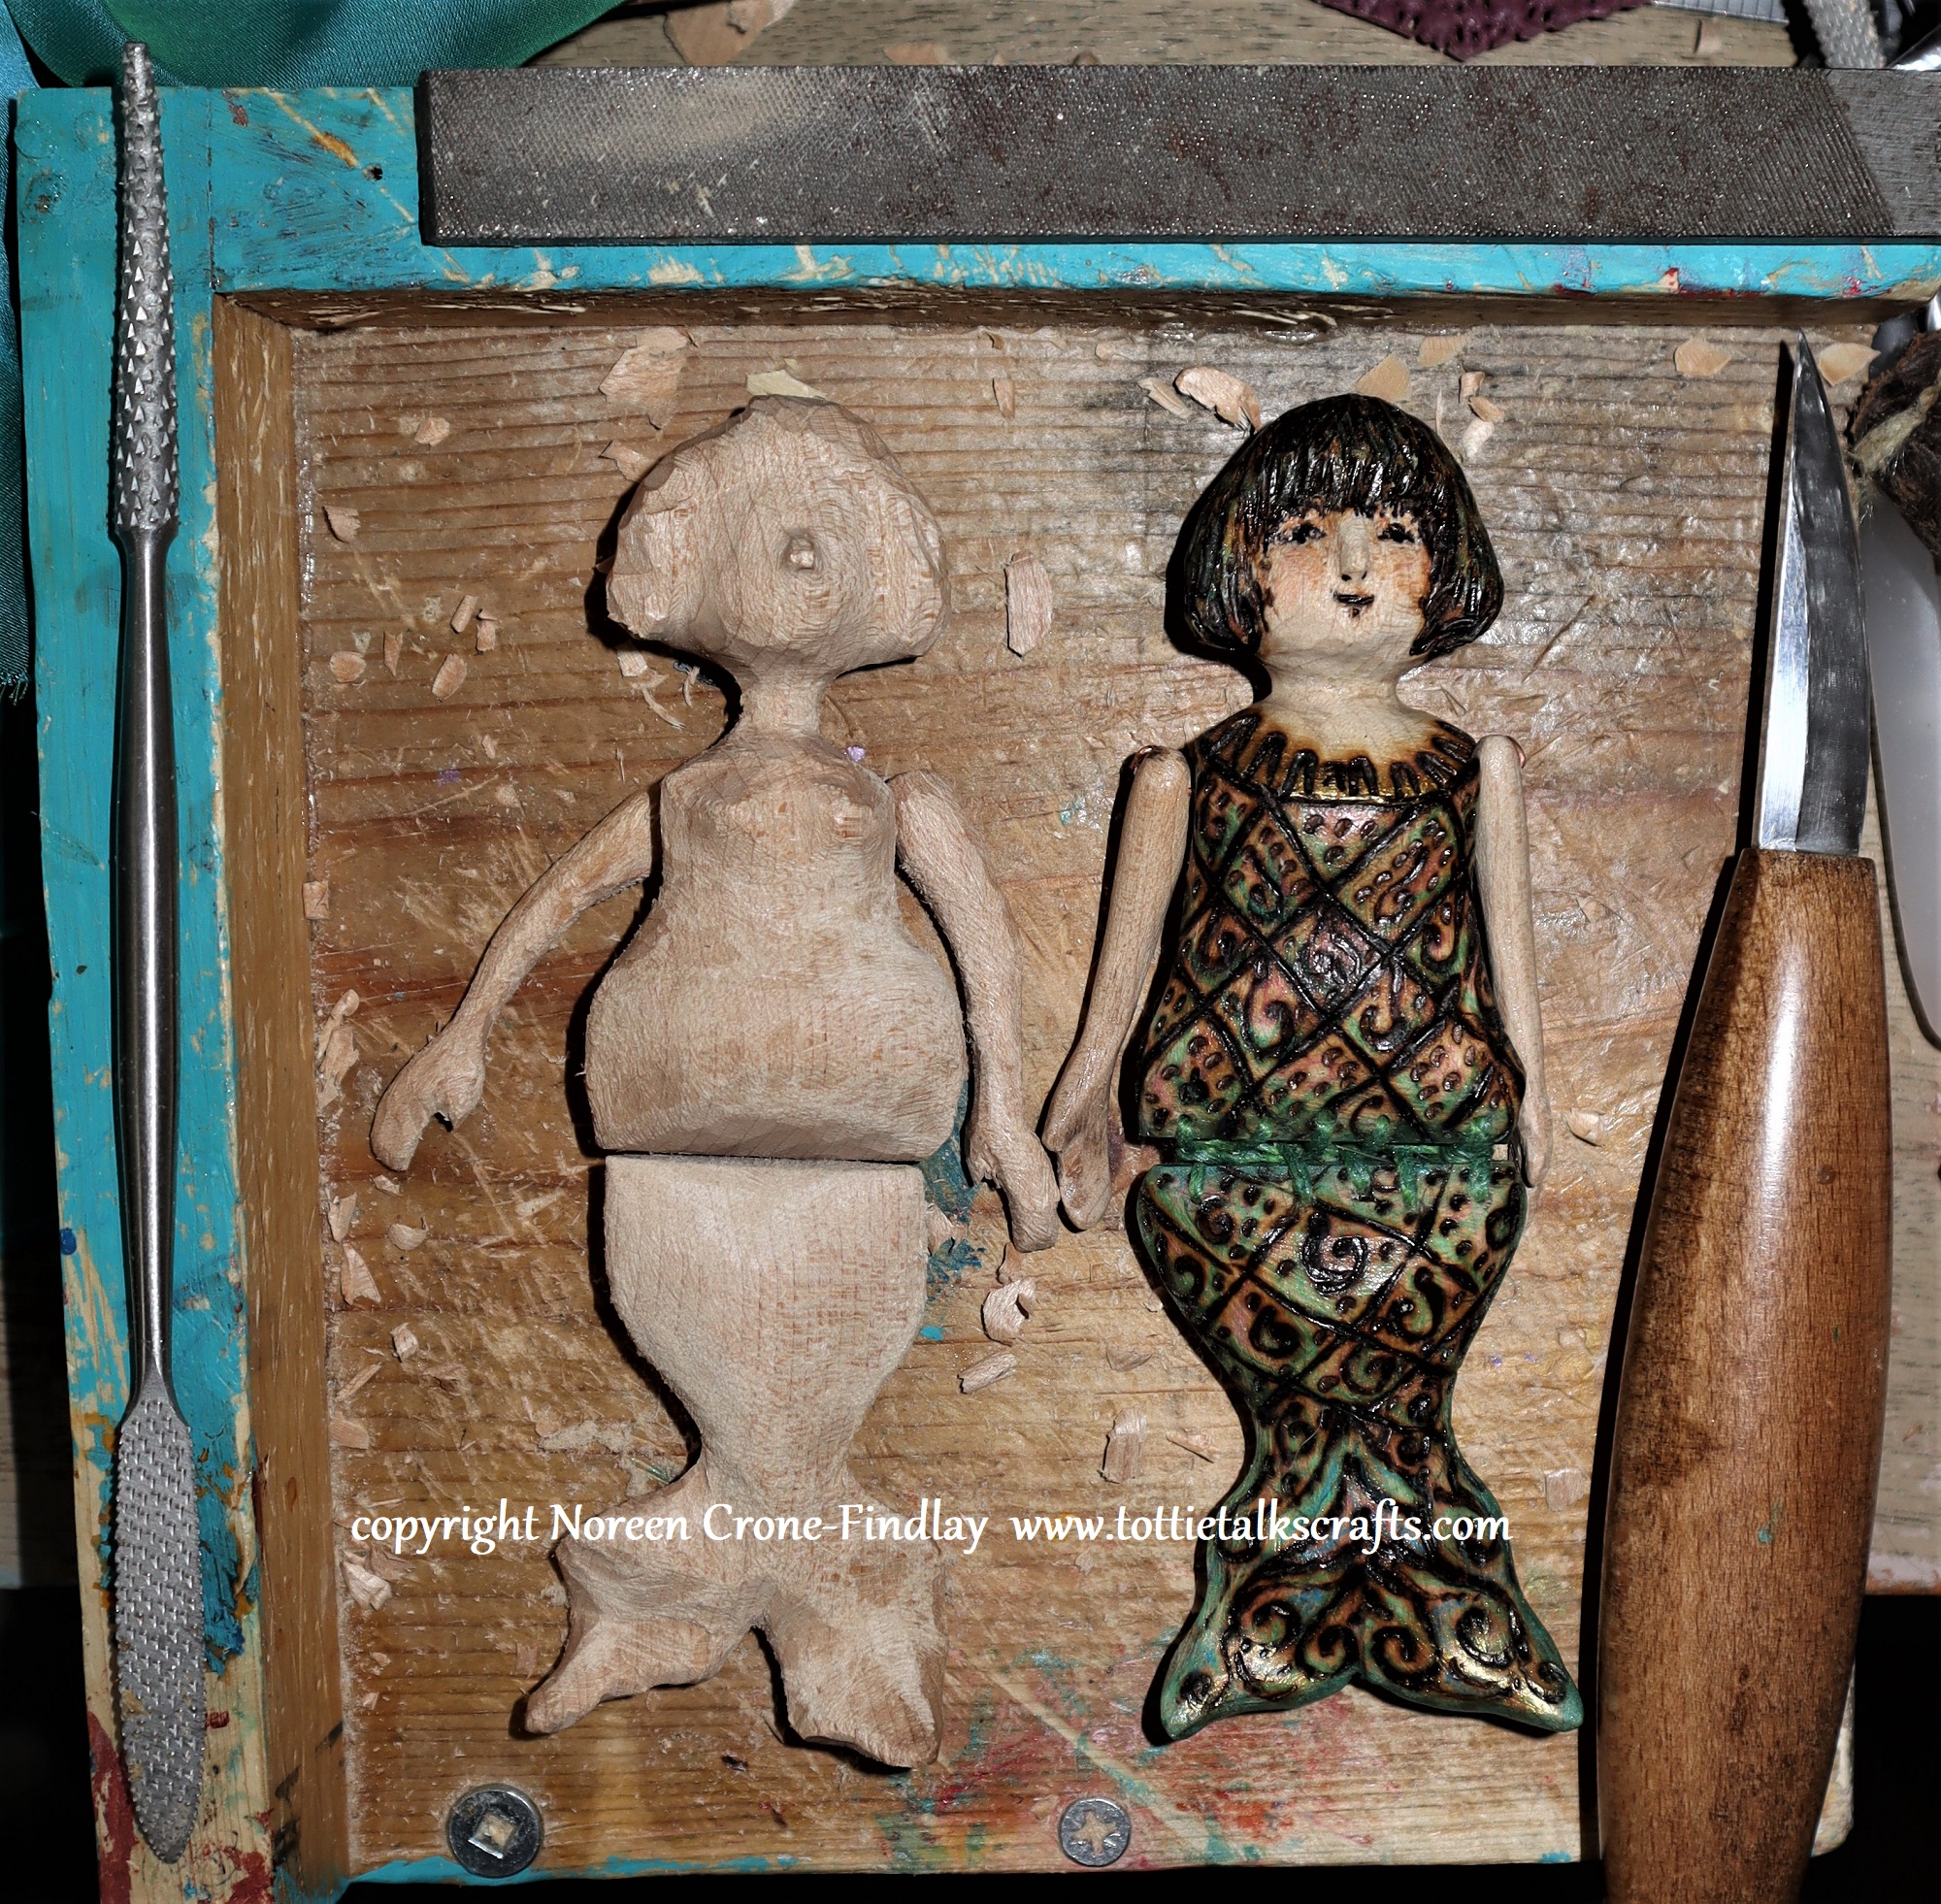
So, I moved on to carving the rest of her:
Bedelia kept her sister company:
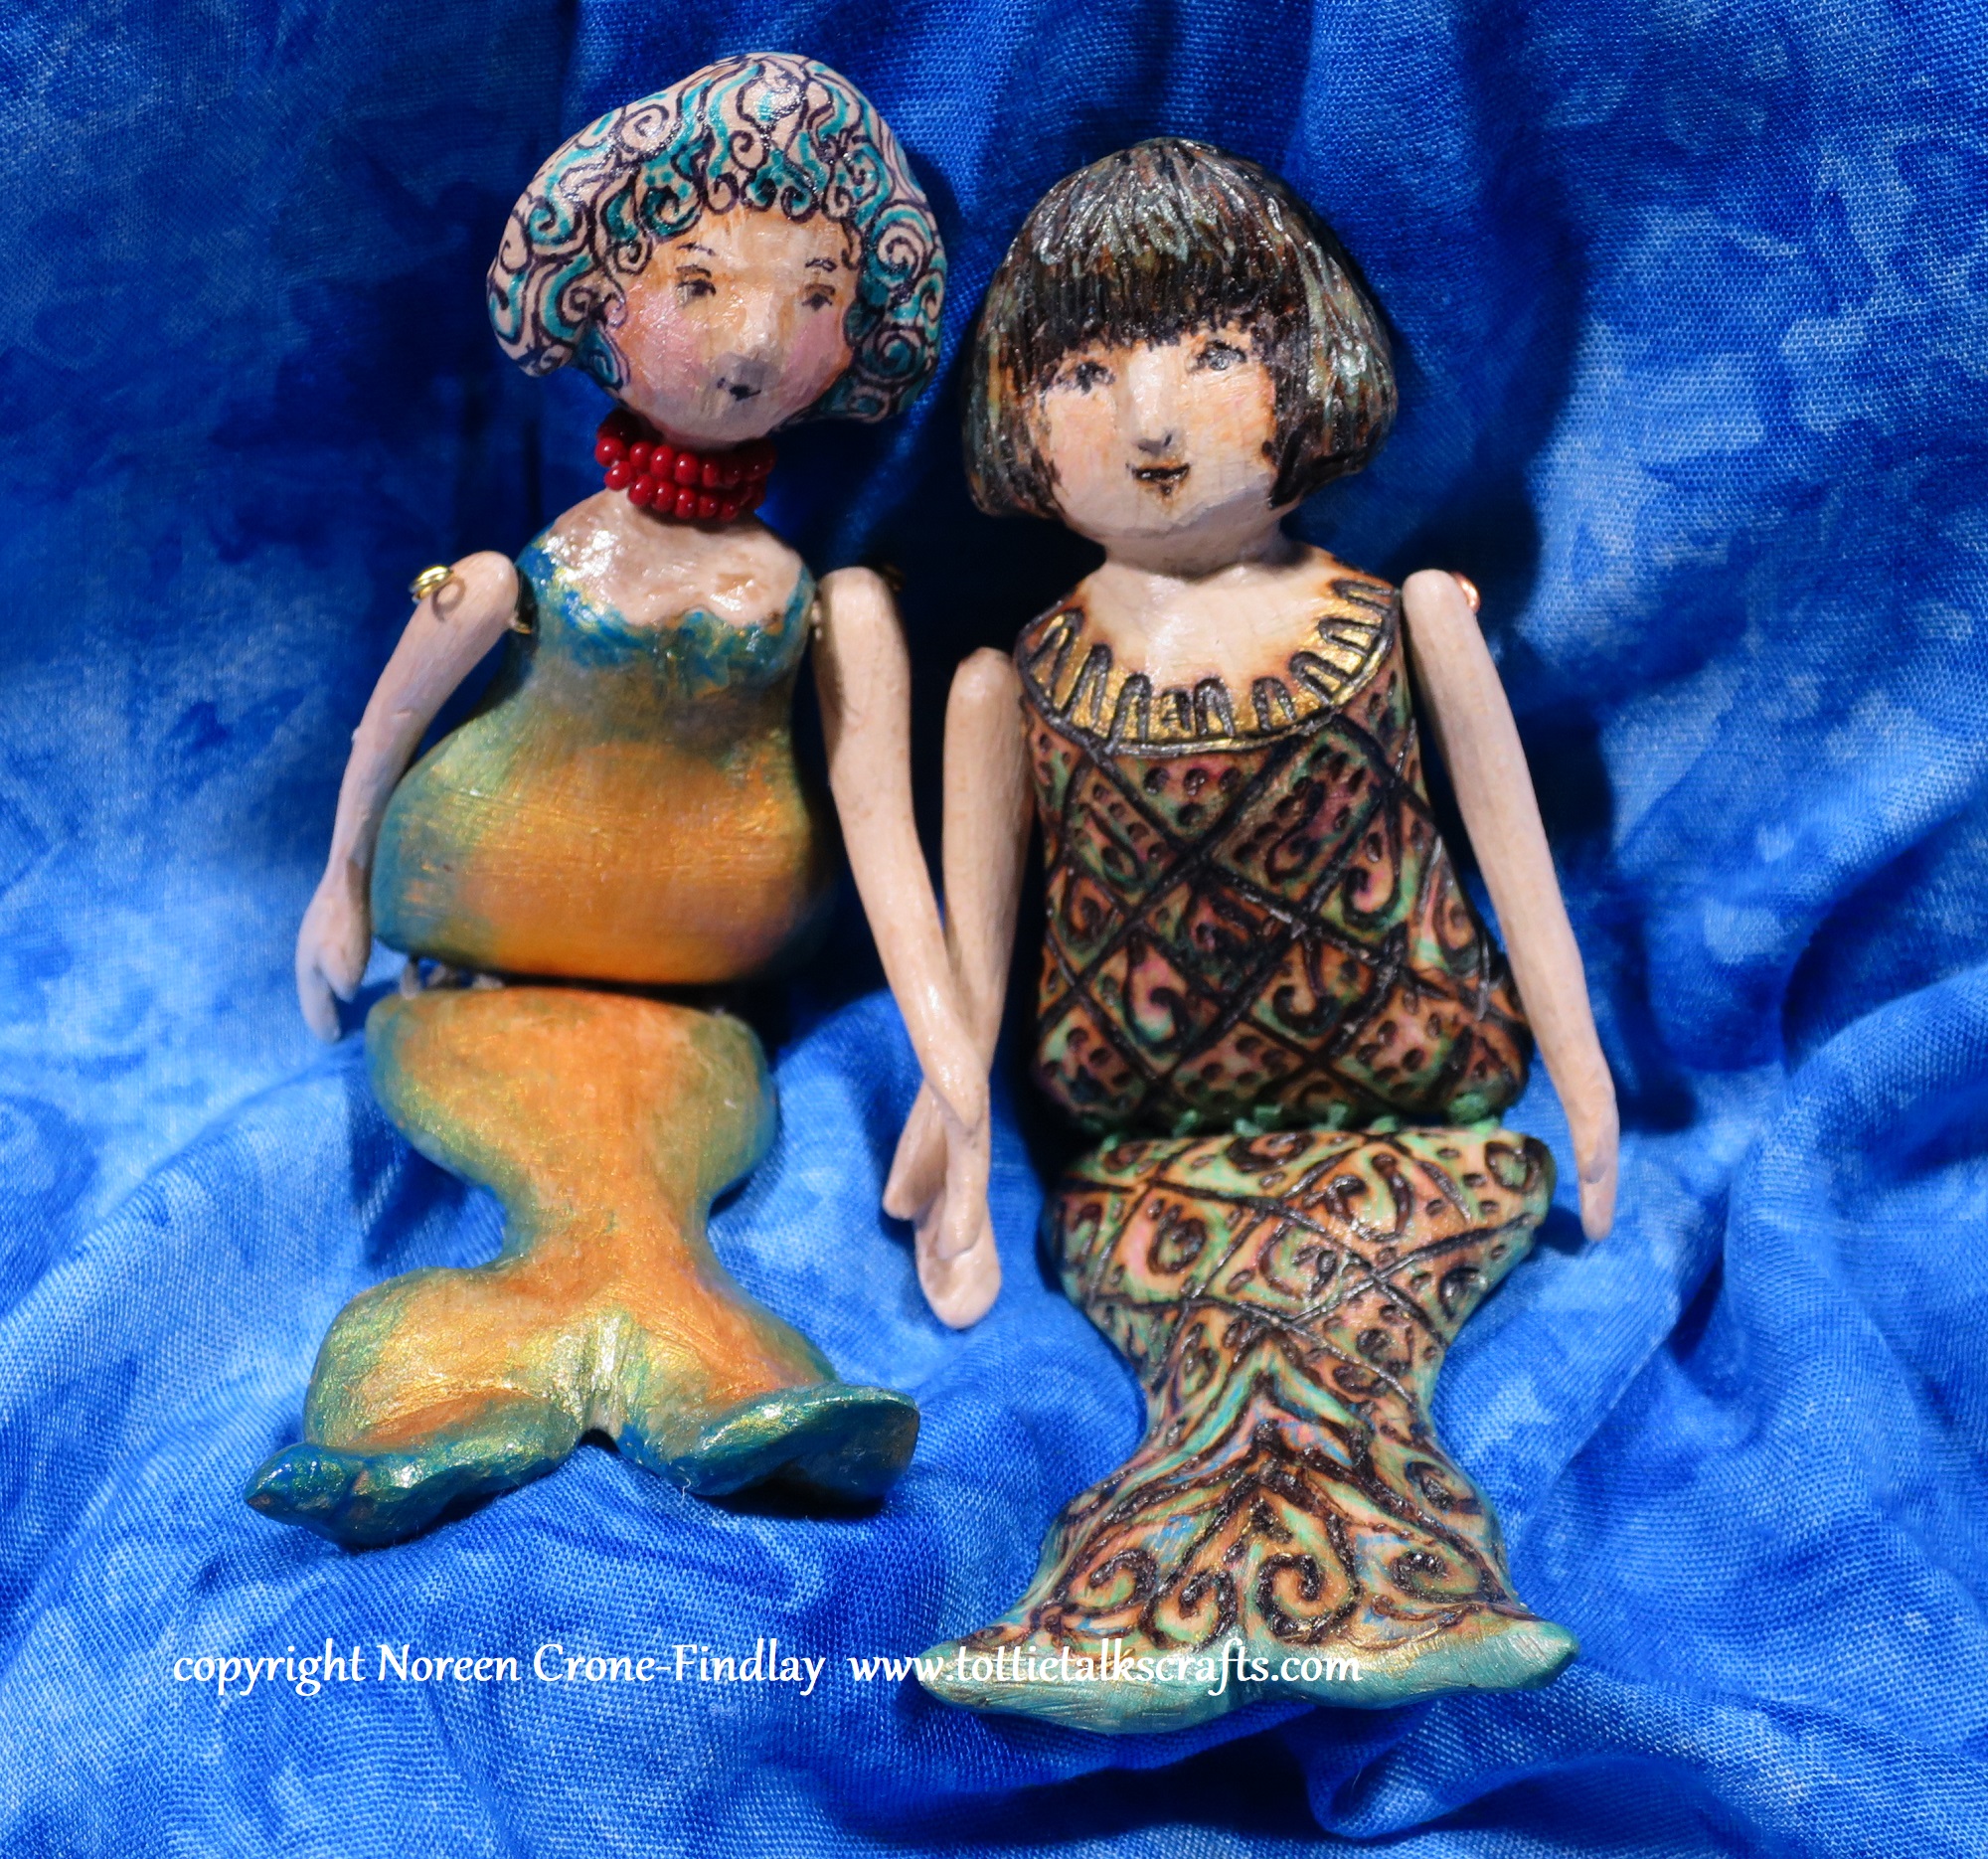
And, when Charlotte was finally done, they sat and enjoyed finally being together after poor Charlotte’s dreadful time in the freezer.
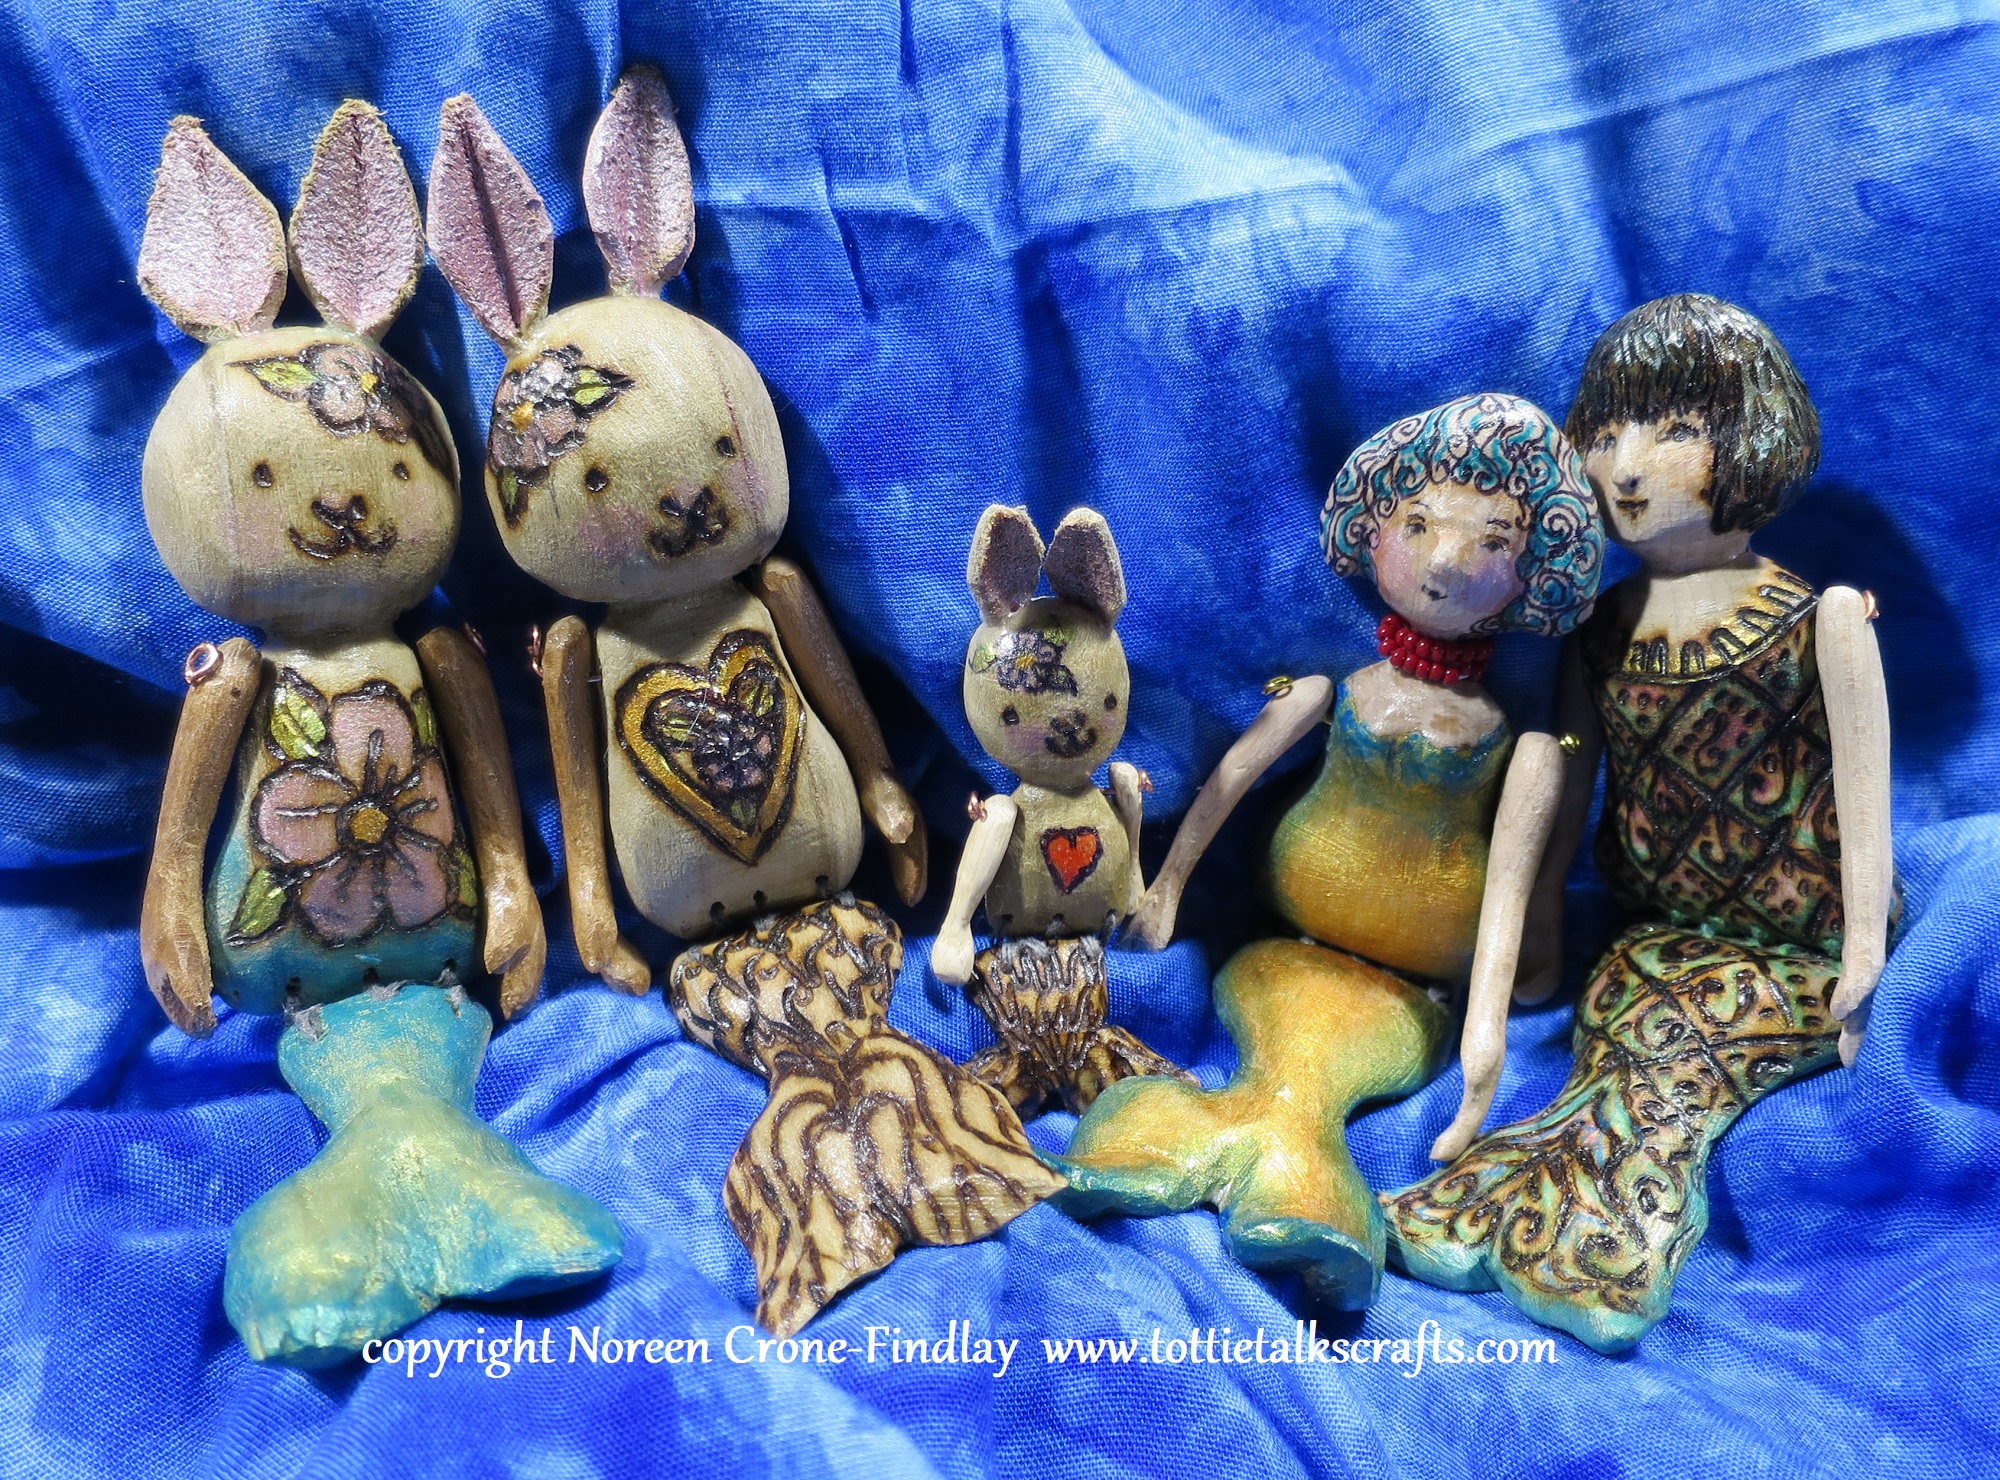
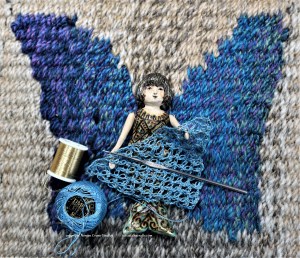
Bedelia told Charlotte about some more sweet mermaids that have joined the flutter of memaids in the studio and wanted to introduce her to them.
Charlotte is rather shy, perhaps because of the time in the freezer – it takes her time to warm up to new people.
But when she met the sweet Bunnymaids, she wasn’t shy at all, and she whispered to Bedelia that she likes them very much.
Baby Bunnymaid held Charlotte’s hand, and they all sang a small song and decided that they were happy to be in such fine company.
Unfortunately, Charlotte is still feeling very cold, so I think that I will have to do something about that!
SCRAP HAPPY- Once a month, a group of bloggers who are into upcycling all post on the 15th of the month, sharing what they have created with upcycled bits of this and that in the past month. Charlotte’s introduction is my contribution to Scrap Happy for this month.
Here are the other Scrap Happy bloggers- I always love seeing what they have been up to!
Once upon a time, there was a very, very old wooden bed frame.
It was so old that parts of it broke, and so it was taken apart and about to be thrown in the trash, when someone thought… wait… we know someone who makes things come to life again….
They gave the broken old bed frame to my son, who offered a piece of it to me:
It was very heavy old wood, which soon revealed itself to be exceedingly HARD… and I mean H.A.R.D wood!
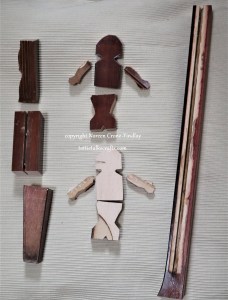
I cut out 2 little mermaids from the former bed frame, wiggling around to try to deal with long notches, deep channels and bored out holes that large screws had once lived in.
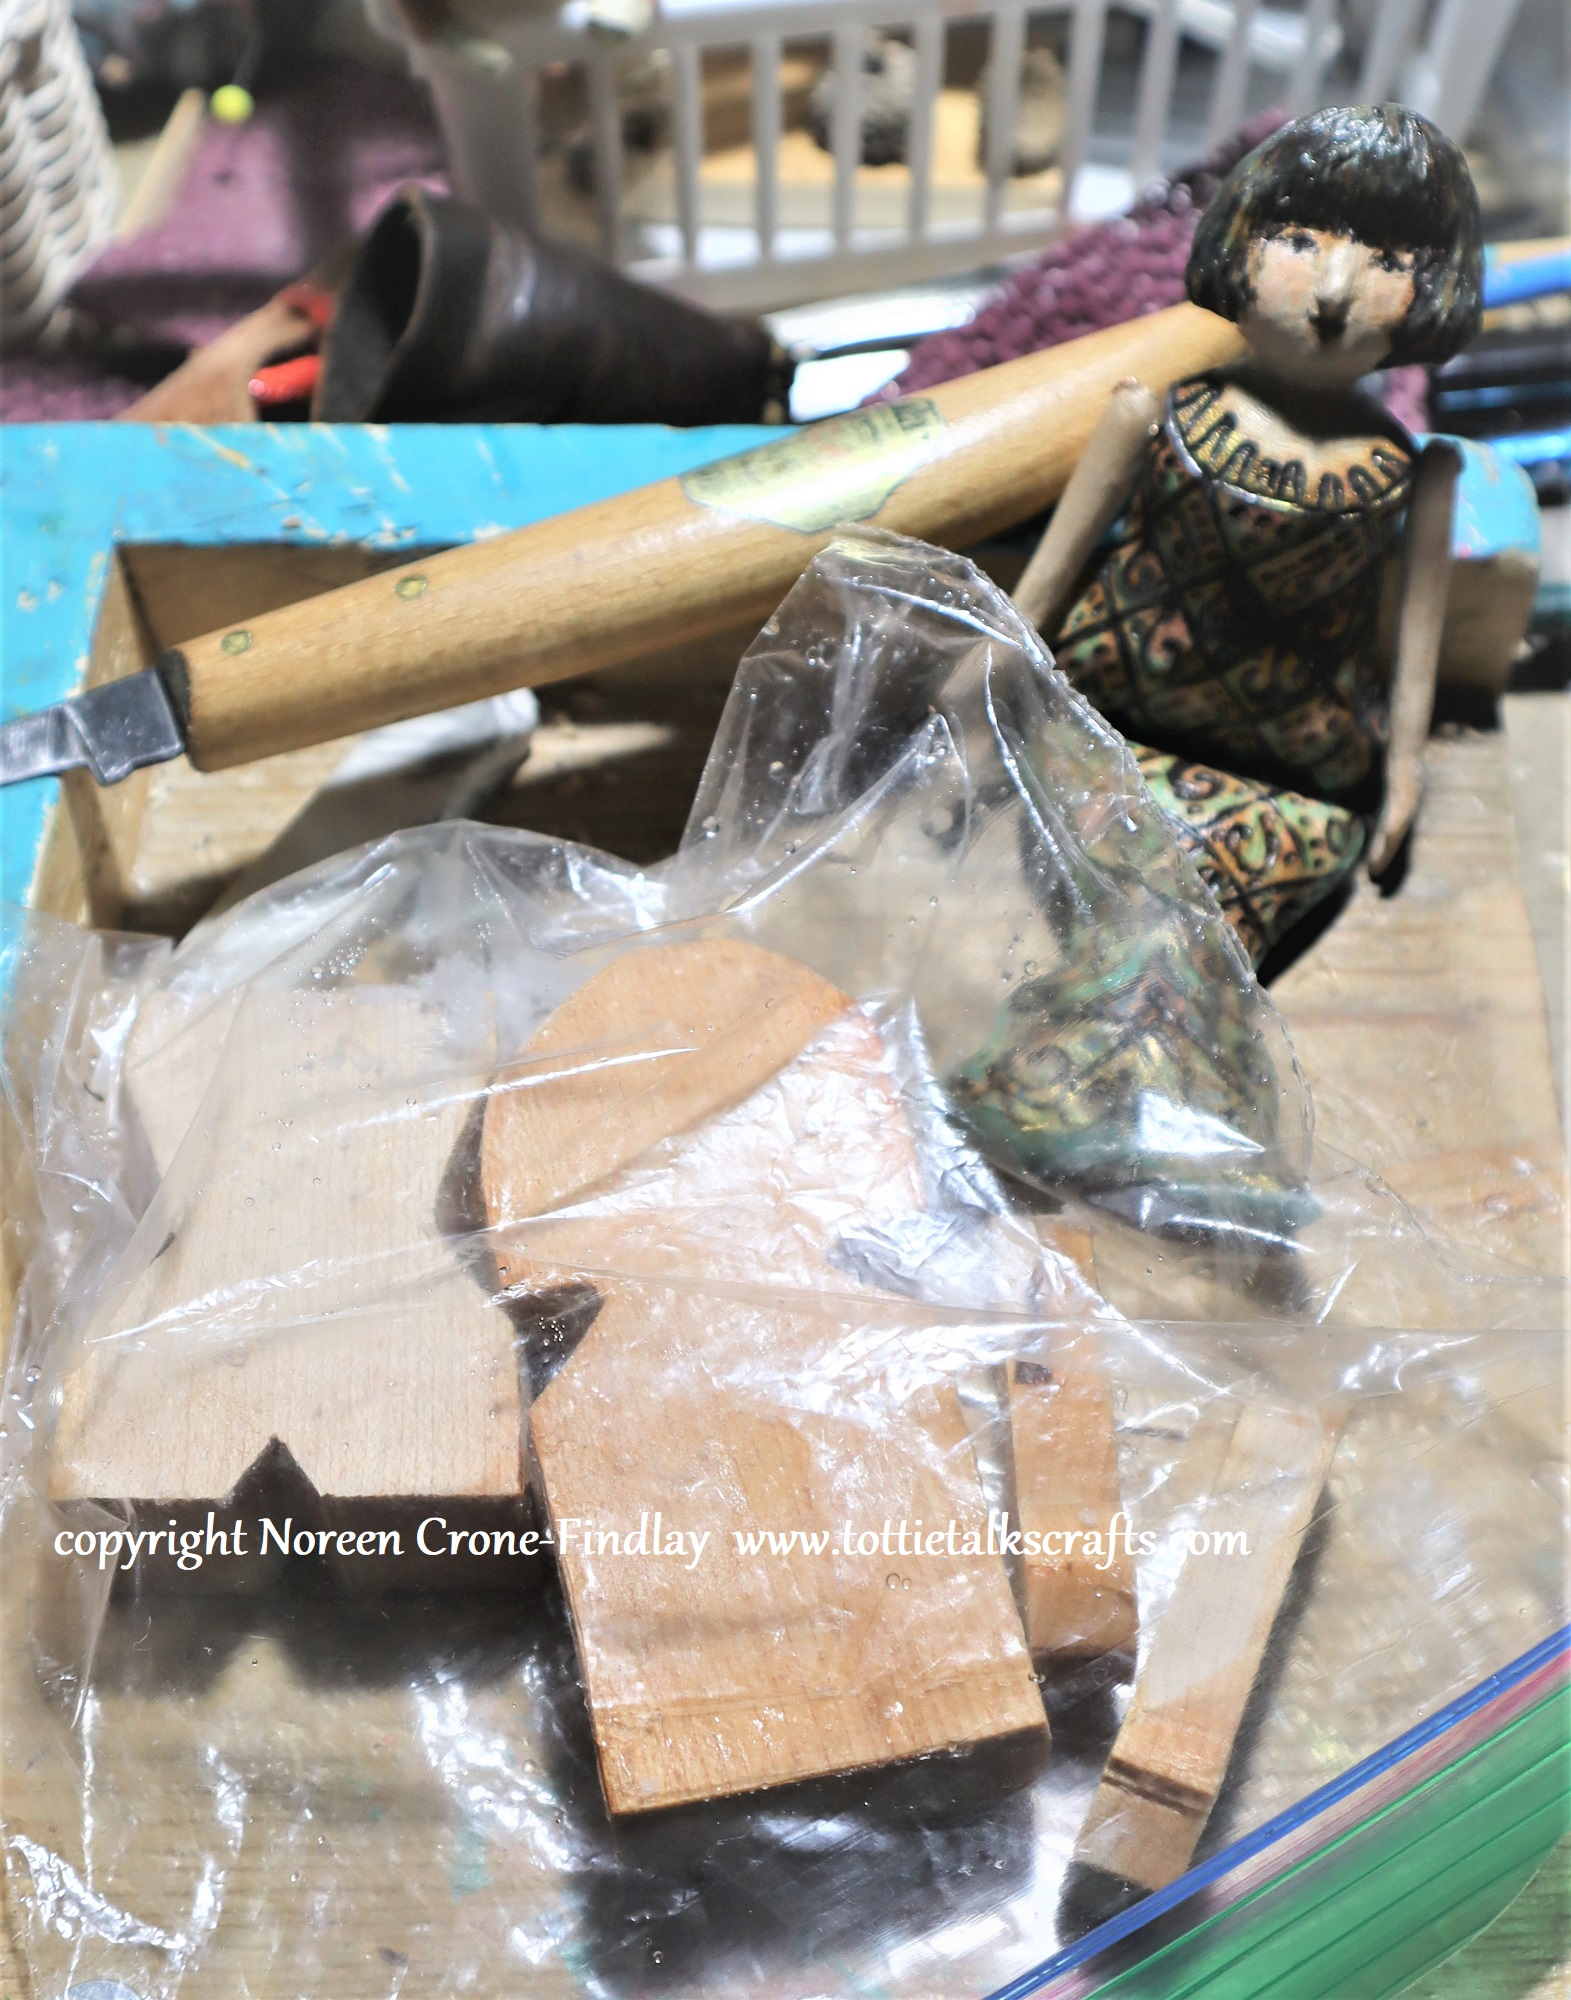
I sanded the varnish off one set of mermaid blanks, and then remembered to take a picture of the ‘under construction’ stage… some of those scraps of wood are not useable for carving because they have hardware embedded.
Oh my word! Carving the old hardwood was incredibly challenging, and there were a couple of nights when I was carving until the wee small hours.
I was so happy to finish carving Bedelia, but the incredible hardness and knife dulling properties of the wood made it oh so NOT fun to carve.
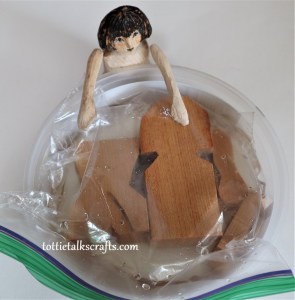
So, I am conducting an experiment:
Bedelia’s sister had a long lovely soak, which I hope will make the wood more carving friendly.
And now, oh, poor little mermaid!
She’s in the freezer, waiting for me to have enough time to carve her!
My fingers are crossed that I haven’t destroyed the wood with the soaking and the freezing,
and that I will be able to release the latent mermaid from her cryogenic state soon and more easily than Bedelia!
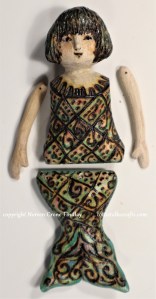
The next stage of bringing Bedelia to life was to burn and paint her Mermaid scales:
And then assemble her, making all her joints function:
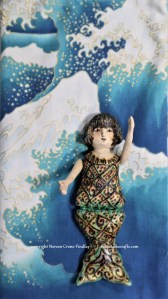
Bedelia wanted to have some Mermaidly fun, so she went for a swim:
Which was a lot of fun, but very tiring, so she came back and relaxed in the studio.
Tottie Tomato went and made Bedelia a lovely cup of tea.
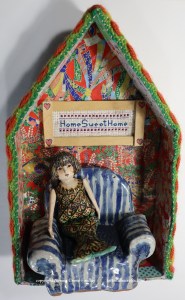
But she was still cold from the wild waves, so I went rummaging through the box of threads that I inherited from my Mother.
And crocheted a lace shawl for Bedelia.
She’s very happy and is looking forward to meeting all the other dolls in the studio.
She is hopeful that I will get to carving her poor icy sister, very soon!
I hope so, too… but the studio has been a busy place lately, the icy mermaid will have to fit in with the other magic that is being stirred up!
I am so pleased to now be part of a lovely blogging group: Scrap Happy, that was begun 6 years ago by Kate Chiconi and her friend, Gun, in Sweden.
The Scrap Happy bloggers all post once a month on the 15th about the wonderful things that they are creating from scraps of this and that, and none of it new….
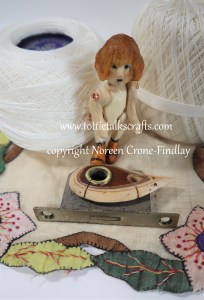
This is the story of how a tiny doll and her special hedgehog friend came to live in my studio….
Long, long ago, there was a seed, well several seeds, really.
They grew up and became majestic trees.
They sang the song of the wind and the sun and the moon and the rain and the stars for probably hundreds of years.
And, then they were cut down.
They became a piano.
And the piano sang songs of love, and sadness and grief and joy.
Eventually, the piano wore out. Completely.
The piano tuner shook his head sadly and declared it to be done.
But he had a friend who made things with wood, so he offered some of the wood from the piano to his friend.
His friend happily accepted the wood from the sad and gone piano, and because he is a generous and kind person,
he offered some pieces of the wood to his Mum.
That’s me.
I was sure I could feel a very, very tiny doll singing little tiny songs inside the wooden scrap….
I cut a little bit of the piano wood and loved how it felt in my hands….
I cut out rough shapes that would be just the right size to carve my favorite size of doll- 2 and a half inches tall.
I carved:
and carved:
and carved and carved and carved some more.
While I was carving, I asked her what her name is,
and she declared: “Elise, of course!”
She said that even though she preferred playing Mozart when she was a piano,
that she had always loved it when her family played ‘Fur Elise’.
(An interesting thing happened when I told my daughter about tiny Elise-
she knew, even before I said Elise’s name that that was the name of this tiny, but
determined little wooden person!)
Elise let me know that she wanted old fashioned boots
and cream colored stockings and camisole
and that lovely amber color from the shellac for her hair.
She also told me that she wanted me to tat her dress,
and while I was at it, to make the tatting shuttle that I would use
to tat her dress.
And, to make the tatting shuttle a hedgehog, and
to use the bit of wood that was around the lock that used to keep the piano closed.
Elise helped me to figure out how to get the lock out of the wood….
She insisted that the lovely round brass keyhole had to become part of her tatting shuttle.
Elise chose some old tatting cotton that I had been given
(from the estate of the friend of a friend who didn’t know what to do with it)
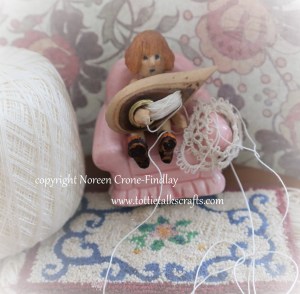
Elise and I started freeform tatting her dress.
Sometimes, it didn’t go well. sigh.
Tatting is the pits to try and unpick, so scissors were the best option:
Elise got a little annoyed at times with all the trying on and taking off of the dress,
but I reminded her that she was the one who demanded it be tatted-
crochet would have been infinitely faster!
She fell on her face and refused to co-operate for awhile, but eventually,
calmed down and we got on with the tatting:
Eventually, Elise’s dress was done.
It’s a bit cattywombus but Elise has forgiven me for that.
She understands that freeforming when making a tatted dress can mean that things are slightly ‘unique’.
Elise is looking forward to having adventures with the other wooden dolls in the studio.
She has placed a few requests for things that she would like to have, thank you very much.
Elise may look young, but you must remember, that she’s a doll with a long, long story!
(and has more to tell, but that is for another day and until then, she and her hedgehog friend will enjoy life in the studio).
I have joined a group of wonderful bloggers from all over the world – The Scrap Happy Bloggers- who work with upcycled materials and post once a month.
Here are the links to all their blogs: Do check them out 🙂
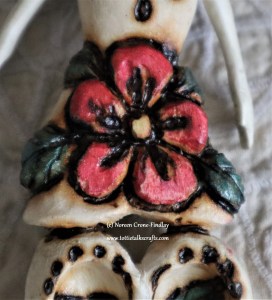
I have fallen in love with carving flowers on my wooden spoon wooden dolls.
Nowadays, I carve the wooden spoon part of my wooden dolly spoons in the shape of a heart, to symbolize gathering and sharing love and kindness.
This Hearts and Flowers Sister is about 6 inches/15 cm tall and is a celebration of the river and the ocean and flowers and butterflies and dragonflies:.
To be honest, she’s also about dreaming of much much gentler weather than we are experiencing right now.
We have had a brutally long ferociously cold spell of winter, and I am so longing for Springtime, and for flowers to be in bloom
instead of blistering icy cold shattering winds!
I miss the ocean, and it’s so cold that I am not even going out to say hello to the river, even though we live close to it.
so I carved flowers as a love song to the flowers and waves for my longing to walk along the ocean’s shore:
It has been such a long time since the dragonflies danced in our neighbourhood
and of course, the butterflies are cozy in their cocoons, dreaming of springtime…
Seriously…. Springtime, I am longing for you!
I carved ‘Springtime’s Sister and the next blog post is all about her. LINK